

Page 1

Owner’s Guide
Bedienungsanleitung
Manuel d’instructions
Manual del Propietario
YAMAHA
FM DIGITAL KEYBOARD WITH MIDI
® YAMAHA
Page 2

CONTENTS
1. Preliminary Steps &
Precautions
2. The Controls & Connectors .... 5
3. Enjoy the Demonstration
4. Selecting Voices & Playing the
Keyboard ................................
5. Using Effects
6. Selecting and UsNng a Rhythm
Accompaniment......................... 15
7. Automatic Accompaniment .... 20
8. The Chord Sequencer
9. MIDI
10. MIDI Data Format
11. Specifications ........................... 37
...............................
...............
............................
.................
......................................
.......................
12
26
30
32
INHALTSVERZEICHNIS
1. Vorbereitung &
2
Vorsichtsmaßnahmen
.........................
2. Bedienungselemente &
7
Anschlüsse
..........................................
3. Eine kleine Demonstration............... 7
9
4. Abrufvon Stimmen & Spielen
des Keyboards
....................................
5. Verwendung von Effekten
6. Wahl und Einsatz von
Schlagzeugbegleitung
.......................
7. Automatische Begleitung.................. 20
8. AkkordnSequenzer ........................... 26
9. MIDI................................................. 30
10. MIDI-Datenformat............................ 32
11. Technische Daten
.............................
...............
TABLE DES MATIERES
1. Etapes préliminaires et
2
2. Commandes et connecteurs .... 5
3. Appréciez la démonstration .... 7
5
4. Sélection des voix et jeu du
9
12
15
5. Utilisation des effects
6. Sélection et utilisation d'un
7. Accompagnement automatique . . 20
8. Le séquenceur d'accords
9. MIDI
10. Format des données MIDI ............. 32
11. Caractéristiques techniques
37
précautions
clavier ..................................... 9
accompagnement rythmique .... 15
...............................
................
.............
.......................................
.........
12
26
30
37
INDICE
1. Pasos preliminares y
2
precauciones
.......................................
2. Controles y conectores
3. Disfrutemos de la demostración . . 7
4. Selección de voces e
interpretación
.....................................
5. Empleo de efectos ............................ 12
6. Selección y empleo del
acompañamiento rítmico
7. Acompañamiento automático ... 20
8. El secuenciador de acordes
9. MIDI.................................................. 30
10. Formato de los datos MIDI
11. Especificaciones
...............................
......................
..................
..............
..............
2
5
9
15
26
32
37
Page 3

Preliminary Steps & Precautions
Vorbereitung & Vorsichtsmaßnahmen
11
Etapes préliminaires et précautions
Pasos preliminares y precauciones
Installing the Batteries
Remove the battery compartment cover on
the back of the instrument by pulling the
tab in the direction indicated by the arrow
on the cover and then pulling the entire
cover outward. Insert six "AA" size bat
teries (Manganese cells: SUM-3 [R6], al
kaline cells; AM3 [LR6] ) with the orienta
tion shown on the inside of the battery
compartment. Alkaline type batteries are
recommended to ensure the longest battery
life. Replace the battery compartment
cover, making sure that it locks firmly in
place.
*When the battery voltage drops too low
for operation, the output sound from the
SHS-10 will become distorted or no sound
will be produced at all. Operation may
also become erratic. If any of these symp
toms occur, replace the batteries imme
diately.
Using a Power Adapter
You can save wear on batteries when play
ing indoors by powering the SHS-10 with
an optional Yamaha PA-1, PA-IB or
PA-4 AC Adapter. Plug the adapter into a
convenient AC wall outlet, then plug the
DC output cable into the SHS-10 DC
(9-12V) IN lack.
Einlegen der Batterien
Nehmen Sie den Batteriefachdeckel auf der
Rückseite ab. Dazu ziehen Sie die Deckel
zunge in Pfeilrichtung und heben den
Deckel nach außen ab. Legen Sie sechs
“AA” -Batterien (Mangan-Batterien: SUM
-3 (R6), Alkali-Batterien: AM3 (LR6)) ein.
Richten Sie dabei die Batteriepole wie in
der Darstellung im Batteriefach aus. Wir
empfehlen die Verwendung von Alkali
batterien, da diese länger halten. Setzen
Sie danach wieder den Batterie fachdeckel
auf und vergewissern Sie sich, daß er
einrastet.
*Wenn die Batterien zu schwach werden,
zeigt sich dies an Klangverzerrungen und
abnehmender Lautstärke des SHS-10.
Außerdem arbeitet das SHS-10 nicht
mehr korrekt. Falls dies ein tritt, sollten
Sie die Batterien sofort austauschen.
Verwendung eines Netzadapters
Um die Batterien zu schonen, können Sie
das SHS-10 über den als Sonderzubehör
erhältlichen YAMAHA PA-1, PA-IB öder
PA4C Netzadapter auch an eine Steckdose
anschließen. Schließen Sie den Adapter
zunächst an die Steckdose an und verbinden
Sie dann das Gleichstromkabel mit der DC
(9-12V) IN-Buchse des SHS-10.
Installation des piles
Retirer le couvercle du compartiment des
piles à l'arrière de l'instrument en tirant la
languette dans la direction indiquée par la
flèche sur le couvercle et en tirant le couver
cle entier vers l'extérieur. Insérer six piles
de taille "AA" (cellules manganèse: SUM-3
(R6), cellules alcalines; AM3 (LR6) selon
l'orientation indiquée dans l'intérieur du
compartiment. Les piles de type alcalines
sont recommandées pour garantir une plus
longue durée de vie. Remettre le couvercle
du compartiment des piles en place, en
s'assurant qu'il se verrouille fermement en
place.
* Quand la tension des piles baisse trop
pour permettre le fonctionnement, le son
de sortie provenant du SHS-10 sera dis
tordu ou aucun son ne sera produit. Le
fonctionnement risque aussi de devenir
irrégulier. Dans le cas d'un de ces symp
tômes, remplacer immédiatement les piles.
Utilisation d'un adaptateur secteur
Vous pouvez économiser les piles lorsque
vous jouez à l'intérieur en alimentant le
SHS-10 avec un adaptateur CA optionnel
Yamaha PA-1, PA-1 B ou PA-4. Brancher
l'adaptateur sur une prise CA murale
pratique puis brancher le câble de sortie
CC sur la prise d'entrée DC (9-12V) IN du
SHS-10.
Colocación de las pilas
Quite la tapa del compartimiento de las
pilas, ubicada en la parte trasera del instru
mento, tirando de la lengüeta en la direc
ción indicada por la flecha grabada en la
tapa y luego de la tapa misma hacia fuera.
Inserte seis pilas tamaño “AA” (pilas de
manganeso: SUM-3 (R6); pilas alcalinas:
AM3 (LR6)) en la posición indicada dentro
del compartimiento. Las pilas tipo alcalino
brindan mayor duración. Vuelva la tapa del
compartimiento de las pÜas a su lugar,
asegurándose de que quede fírme.
* Cuando la tensión de las pilas baje hasta
un nivel insuficiente para el funciona
miento, el sonido del SHS-10 se oirá dis
torsionado o se interrumpirá por com
pleto. El funcionamiento puede también
hacerse errático. Si apareciera cualquiera
de estos síntomas, reemplace las pilas
inmediatamente.
Empleo de un adaptador de alimentación
Cuando toque en interiores, podrá evitar el
desgaste de las pÜas alimentando el SHS-10
con el adaptador opcional de CA Yamaha
PA-1, PA-IB o PA4. Enchufe el adaptador
en una toma de la red de CA, y su cable de
salida de CC en el jack de entrada de CC
(DC (9-12V) IN) del SHS-10.
Page 4
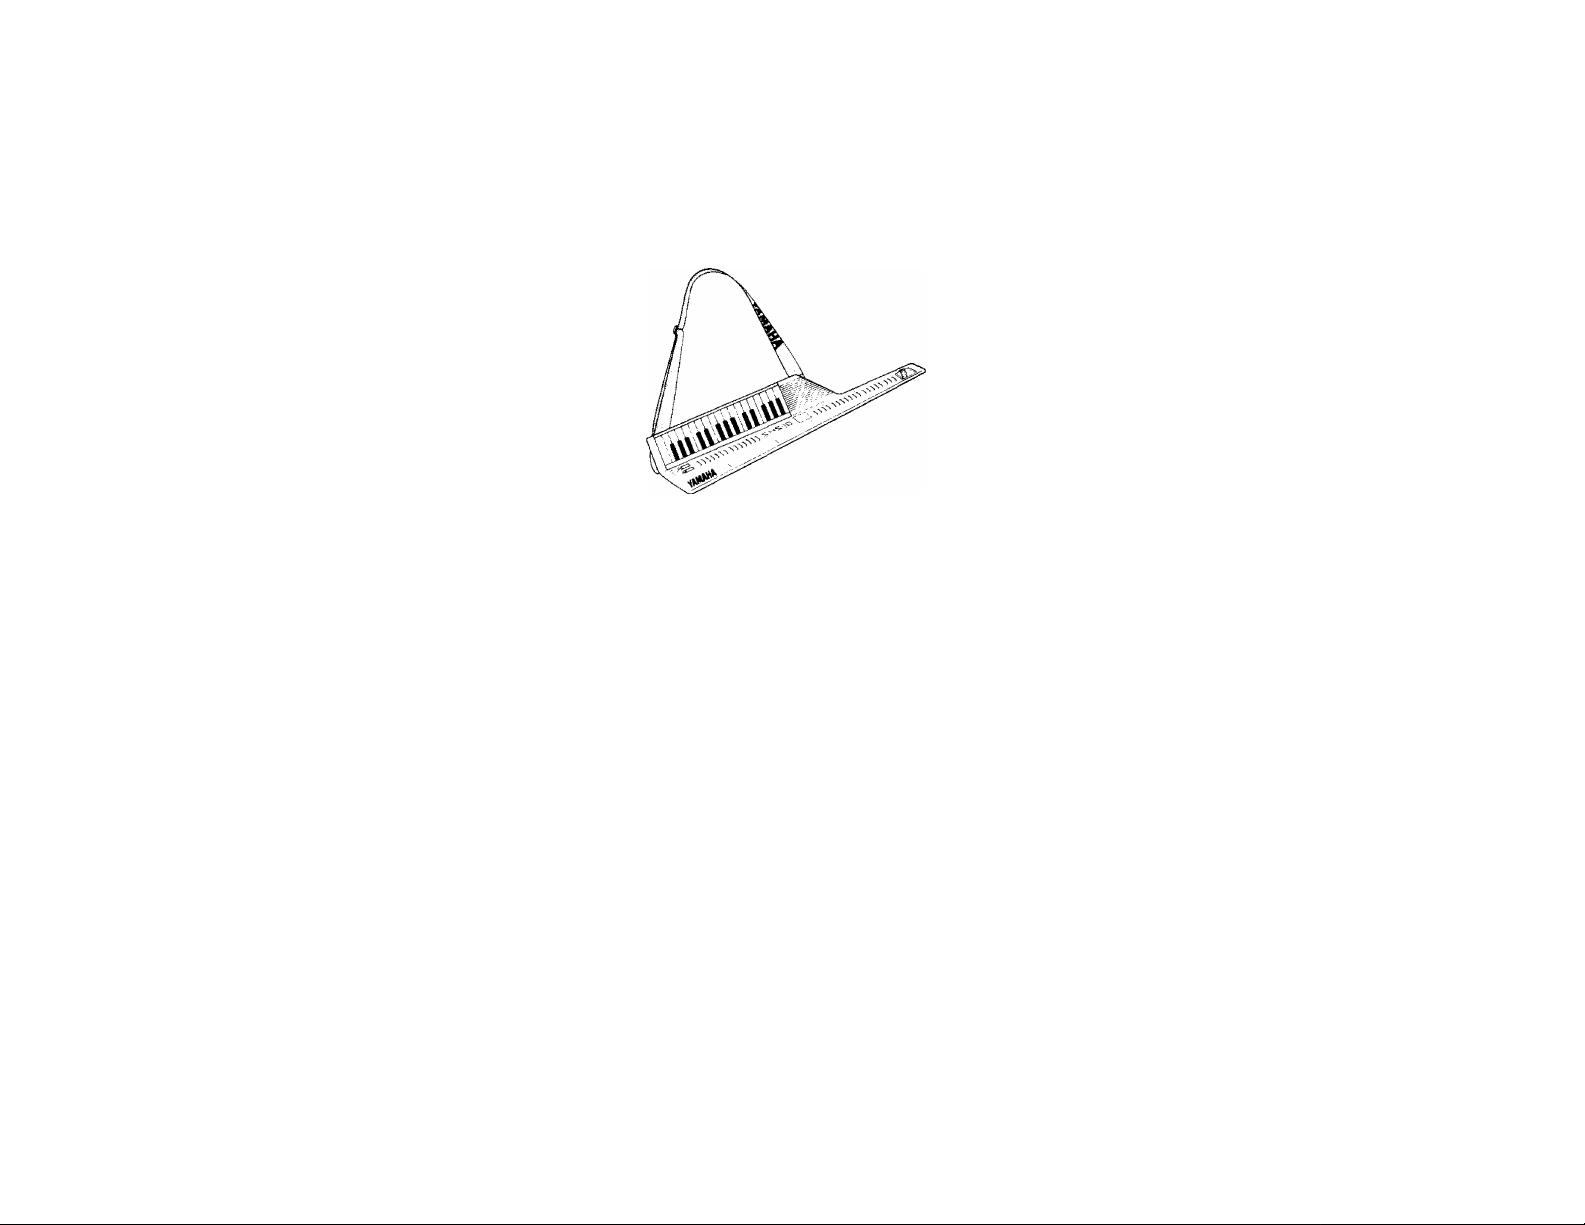
Connecting the Shoulder Strap
The SHS-10 is designed primarily to be
played standing up — "guitar-style."
Attach the shoulder strap as shown in the
illustration, making sure that is not twisted.
Be sure to attach the strap securely. The
length of the strap can be adjusted for the
most comfortable playing position.
Anbringen des Sohulterriemens
Das SHS-10 ist wie eine Gitarre hauptsäch
lich auf Spielen im Stehen ausgelegt.
Bringen Sie dazu den Schulterriemen
entsprechend der Darstellung an. Verdrehen
Sie ihn dabei nicht und achten Sie auf gute
Befestigung. Die Länge des Riemens kann
auf die bequemste Spielposition eingestellt
werden.
Raccordement de la bandoulière
Le SHS-10 est à l'origine conçu pour être
joué debout, dans le style guitare. Fixer la
bandoulière comme indiqué dans l'illustra
tion, en s'assurant qu'elle n'est pas tordue.
Bien l'attacher. La longueur de la bandou
lière peut être ajustée pour une position de
jeu confortable.
Colocación de la correa de hombro
El SHS-10 está diseñado principalmente
para tocarlo de pie como si fuera una
guitarra. Fije la correa de hombro como se
ilustra, asegurándose de que quede fírme y
no torcida. La correa puede ajustarse a la
longitud que le resulte más cómoda para
tocar.
Using Headphones
Although the SHS-10 has a built-in ampli
fier and speaker system, you may want to
use headphones to practice withoutdisturbing others. Simply plug a standard pair of
stereo headphones with a 1/4" phone plug
into the HEADPHONES/AUX OUT jack the SHS-10 delivers a mono signal to the
headphones jack. The internal amplifier
and speaker system is automatically shut
off when a headphone plug is inserted into
the headphone jack.
Using an External Sound System
A standard music instrument connection
cable {phone plug to phone plug) can be
used to connect the SHS-10 to a musical
instrument amplifier or keyboard ampli
fier for a bigger, more dynamic sound.
Plug one end of the cable directly into the
SHS-10 HEADPHONES/AUX OUT jack,
and other into the appropriate input on
the amplifier. Make sure the amplifier's
power is OFF or the volume is turned all
the way down before connecting the
SHS-10.
Verwendung eines Kopfhörers
Obwohl das SHS-10 ein eingebautes Ver-
stärker/Lautsprechersystem aufweist, emp
fiehlt sich die Verwendung eines Kopf
hörers, wenn Sie zu später Stunde spielen
wollen, ohne den Nachbarn aus dem.
Schlummer zu reißen. Dazu können Sie
einen Stereo-Kopfhörer mit 1/4 Zoll Klin
kenstecker an die HEADPHONES/AUX
OUT-Buchse anschließen — das SHS-10
sendet über diese Buchse in Mono. Beim
Anschluß an diese Buchse wird das interne
Verstärker/Lautsprechersystem automa
tisch überbrückt.
Anschluß an einen externen Verstärker
Sie können das SHS-10 über ein StandardKlinkenkabel an einen Musik- oder Key
board-Verstärker anschließen, um einen
volleren, dynamischen Sound zu bekom
men. Verbinden Sie dazu das eine Kabel
ende mit der HEADPHONES/AUX OUTBuchse des SHS-10 und schließen Sie das
andere Kabelende an den entsprechenden
Eingang des Verstärkers an. Schalten Sie
den Verstärker vor dem Anschluß aus oder
senken Sie seine Lautstärke auf Null,
Utilisation d'un casque d'écoute
Bien que le SHS-10 possède un amplifica
teur incorporé et un système de hautparleurs, vous préférerez peut-être utiliser
un casque d'écoute si vous jouez tard te
soir ou ne voulez pas être entendu d'autrui.
Il suffit de brancher un casque stéréo
standard avec une prise téléphone de 1/4
de pouce sur la prise HEADPHONES/AUX
OUT; le SHS-10 envoie un signal mono sur
la prise de casque. L'amplificateur interne
et le système de haut-parleurs seront auto
matiquement coupés quand la fiche du
casque d'écoute est insérée sur la prise de
casque.
Utilisation d'un système sonore externe
Un câble de connexion d'instrument de
musique standard (prise téléphone à prise
téléphone) peut s'utiliser pour raccorder le
SHS-10 à un amplificateur d'instrument de
musique ou à un amplificateur de clavier
pour un son plus puissant et plus dynami
que. Brancher une extrémité du câble
directement sur la prise HEADPHONES/
AUX OUT du SHS-10 et l'autre sur l'entrée
appropriée de l'amplificateur. S'assurer que
l'alimentation de l'amplificateur est à l'arrêt
ou que le volume est sur la position la plus
basse avant de raccorder le SHS-10.
Empleo de audífonos
Si bien el SHS-10 posee un amplificador
incorporado y un altavoz, también puede
utilizar audífonos cuando toque a altas
horas de la noche o no desee ser escuchado.
Simplemente enchufe un par de audífonos
estéreo comunes con plug telefónico de
1/4’’ en el jack de salida de audífonos/
auxiliar (HEADPHONES/AUX OUT). El
SHS-10 envia una señal monoaural a este
jack. El amplificador y altavoz internos
son desactivados automáticamente al inser
tar el plug en el jack de audífonos.
Empleo de un sistema extemo de sonido
El SHS-10 puede conectarse a un amplifica
dor de instrumentos musicales o de teclados
mediante un cable standard para instru
mentos musicales (plugs telefónicos en
ambos extremos), a fin de obtener un
sonido más potente y dinámico. Enchufe
un extremo del cable directamente en el
jack de audífonos/salida auxiliar (HEAD
PHONES/AUX OUT) DEL SHS-10, y el
otro en la entrada apropiada del amplifica
dor. Antes de la conexión, asegúrese de que
el amplificador esté apagado o su volumen
en mínimo.
Page 5

Precautions
1. AVOID EXCESSIVE HEAT,HUMIDI-
TY, DUST AND VIBRATION
Keep the unit away from locations where it
is likely to be exposed to high temperatures
or humidity - such as near radiators,
stoves, etc. Also avoid locations which are
subject to excessive dust accumulation or
vibration which could cause mechanical
damage.
2. AVOID PHYSICAL SHOCKS
Strong physical shocks to the unit can
cause damage. Handle it with care.
3. DO NOT OPEN THE UNIT OR AT
TEMPT REPAIRS OR MODIFICA
TIONS BY YOURSELF
This product contains no user-serviceable
parts. Refer all maintenance to qualified
Yamaha service personnel.
4. CLEAN WITH A SOFT DRY CLOTH
Never use solvents such as benzine or thin
ner to clean the unit. Wipe clean with a
soft, dry cloth.
Vorsichtsmaßnahmen
1. VOR ÜBERMÄSSIGER HITZE,
FEUCHTIGKEIT, STAUB UND VIBRA
TION SCHÜTZEN
Lassen Sie das Instrument nicht an Orten
in der Nähe von Heizkörpern, Öfen usw.,
wo hohe Temperaturen oder Feuchtigkeit
auftreten. Außerdem sollten Sie Plätze
vermeiden, an denen es starken Vibrationen
oder übermäßigem Staub ausgesetzt ist, um
mechanische Schäden zu vermeiden.
2. VOR STOSS UND FALL SCHÜTZEN
Starker Stoß kann Schäden zur Folge
haben. Daher sollten Sie das Instrument
stets umsichtig behandeln.
3. NIEMALS DAS GEHÄUSE ÖFFNEN
ODER EIGENHÄNDIGE RE
PARATUREN VERSUCHEN
Dieses Gerät enthält keine Teile, die vom
Laien repariert werden können. Lassen Sie
alle Reparatur- und Wartungsarbeiten vom
qualifizierten Yamaha-Kundendienst aus
führen.
4. MIT EINEM TROCKENEN, WEICHEN
TUCH REINIGEN
Verwenden Sie zur Reinigung niemals
Lösungsmittel wie Benzin oder Verdünner.
Wischen Sie das Gehäuse mit einem trocke
nen weichen Tuch ab.
Précautions
1. EVITER LA CHALEUR EXCESSIVE,
L'HUMIDITE, LA POUSSIERE ET LES
VIBRATIONS
Garder fappareil éloigné d'endroits où il
risque d'être exposé à des températures ou
à une humidité élevées, par exemple, près
d'un radiateur, d'un poêle, etc. Eviter aussi
des endroits sujets à une accumulation
excessive de poussière ou à des vibrations
qui risqueraient de provoquer un endom
magement mécanique.
2. EVITER LES CHOCS PHYSIQUES
D'importants chocs physiques sur Tapparell
risquent de l'endommager. Le manipuler
avec soin.
3. NE PAS OUVRIR LE COFFRET NI
TENTER D'EFFECTUER VOUSMEME DES REPARATIONS OU DES
MODIFICATIONS
Cet appareil ne contient pas de pièces
réparables par l'utilisateur. En confier l'en
tretien à un personnel Yamaha qualifié.
4. NETTOYER CET APPAREIL AVEC
UN CHIFFON DOUX ET SEC
Ne jamais utiliser de dissolvants comme de
la benzine ou du diluant pour nettoyer
l'appareil. L'essuyer avec un chiffon doux
et sec.
Precauciones
1. EVITE EL CALOR, LA HUMEDAD,
EL POLVO Y LA VIBRACION EXCE
SIVOS
No deje la unidad en un lugar donde puede
verse expuesta a altas temperaturas y
humedades, como ser cerca de un radiador,
estufa, etc. Evite también lugares propensos
a acumulación de polvo o vibración exce
sivas, las que pueden causar daños al
mecanismo.
2. EVITE GOLPEAR LA UNIDAD
Fuertes golpes pueden causar daños a la
unidad. Manipúlela con cuidado.
3. NO ABRA LA CAJA NI INTENTE
REPARAR O MODIFICAR LA UNI
DAD USTED MISMO
Este producto no contiene partes repara
bles por el usuario. Solicite el manteni
miento a personal de servicio calificado
Yamaha.
4. LIMPIE LA UNIDAD CON UN PAÑO
SUAVE Y SECO
Nunca use solventes tales como bencina o
diluyente de pintura para limpiar la unidad.
Emplee un paño suave y seco.
Page 6

The Controls & Connectors
Bedienungselemente & Anschlüsse
Controls
0 Power switch,
d) Volume control.
(D Demonstration start/stop button.
0 Single-finger auto bass chord mode
select button.
CD Auto chord mode select button.
® Auto bass mode select button.
0 Melody on auto bass chord mode
select button.
(D Auto bass chord mode select button.
(D Normal mode select button.
® + and - parameter change buttons.
0 MIDI channel parameter change button.
0 Accompaniment volume button.
0
Tuning parameter change button.
0 Transpose parameter change button.
0
Tempo parameter change button.
0
2-digit LED voice, style, and
parameter display.
0 Chord sequence record button.
0
Chord sequence 1, 2 and 3 play buttons.
0
Voice/style number buttons.
@ Style mode button.
0 Voice mode button.
0 Start/stop button.
© Synchro start/ending button.
0 Intro/fill in buttons.
© Sustain effect button.
© Portamento effect button.
@ Vibrato effect button.
© Pitch bend wheel.
Connectors
© Headphones/AUX output jack.
© DC 9 — 12V input connector for
external power adapter,
© MIDI output connector.
ßedienimgselemente
0
Netzschalter
0 Lautstärkeregler
CD Demo-Start/Stoptaste
0 Einfinger-Baß/Akkordtaste
® Auto-Akkordtaste
(D Auto-Baß/Rhythmustaste
0
Melodiespieltaste für
Auto-Begleitfunktion
(D Auto-Baß/Akkordtaste
(D Normalbetriebstaste
0
+ und — Parametertasten
0 MIDI-Kanaltaste
0
Lautstärkeregler für Begleitung
0
Stimmparametertaste
0 Transponiertaste
0
Tempotaste
0 2-stelliges LED-Display für Stimmen-,
Stil- und Parameteranzeige
0
Akkordfolge-Aufnahmetaste
0
Wiedergabetaste für Akkord Sequenzen
1,2 und 3
0
Stimmen/Stilwahltasten
© Stiltaste
© Stimmentaste
© Begleitungsstart/stoptaste
© Synchronstart/endtaste für Begleitung
© Vor/Zwischenspieltaste
© Ton-Anhalttaste
© Portamentotaste
@ Vibratotaste
© Tonhöhenbeugungsrad
Anschlüsse
© Kopfhörer/AUX-Ausgang
© 9 — 12V Gleichspannungsbuchse für
Netzadapter
© MIDI-Ausgang
Page 7

I Commandes et connecteurs
®®(3) ®
Controles y conectores
Commandes
© Interrupteur d'alimentation
d) Commande de volume
CD Touche de mise en marche/arrêt de la
démonstration
® Touche de sélection de mode d'accords
des basses automatiques à un seul doigt
(D Touche de sélection du mode d'accords
automatiques
® Touche de sélection de mode de basses
automatiques
© Touche de sélection de mode de mélodie
sur les accords des basses automatiques
(D Touche de sélection de mode d'accords
des basses automatique
(D Touche de sélection de mode normal
(Ô> Touche de changement de paramètre
+ et -
(0) Touche de changement de paramètre de
canal MIDI
O Touchede volume de l'accompagnement
© Touche de changement de paramètre
d'accord du son
@ Touche de changement de paramètre
de transposition
© Touche de changement de paramètre
de tempo
(H) Affichage à DEL à 2 unités de voie,
style et paramètre
@ Touche d'enregistrement de suite
d'accords
([| Touches de lecture de suites d'accords
1,2et3
@ Touches de numéro de voix/style
@ Touche de mode de style
Touche de mode de voix
@
@ Touche de mise en marche/arrêt
d'accompagnement
Touche de marche/fin
d'accompagnement synchronisé
Touches d'introduction/remplissage
@ Touche d'effet de soutien
Touche d'effet de portamento
@ Touche d'effet de vibrato
@ Roue de courbure de hauteur
Connecteurs
Prise de casque d'écoute/sortie auxiliaire
Connecteur d'entrée CC 9 — 12V pour
adaptateur d'alimentation externe
® Connecteur de sortie MIDI
Controles
© Interruptor de encendido
CD Control de volumen
(D Botón de comienzo/parada de la
demonstración
@ Botón selector del modo de contrabajo
y acordes automáticos a un solo dedo
(D Botón selector del modo de acordes
automáticos
(D Botón selector del modo de contrabajo
automáticos
© Botón selector del modo de contrabajo
y acordes automáticos con melodía
(D Botón selector del modo de contrabajo
y acordes automáticos
© Botón selector del modo normal
© Botones + y — de ajuste de parámetros
(Q) Botón de cambio de canal MIDI
@
Botón de volumen de acompañamiento
® Botón de afinación
0 Botón de transposición
© Botón de cambio de tempo
® Visualizador de dos dígitos de voz,
estilo y parámetros
© Botón de registro de progresiones
armónicas
© Botones de reproducción de progre
siones armónicas 1,2 y 3
@ Botones selectores de voz/estilo
© Botón de estilo
@ Botón de voz
@ Botón de comienzo/parada del
acompañamiento
© Botón de comienzo/fínal sincronizado
del acompañamiento
© Botones de introducción y relleno
© Botón de sostenimiento
@ Botón de portamento
© Botón de vibrato
© Rueda de alteración momentánea de
tono
Conectores
@ Jack de salida de audífonos/auxiliar
© Conector de entrada de 9 - 12V CC
para adaptador externo de alimentación
® Conector de salida MIDI
Page 8

Enjoy the
Demonstration
Eine kleine Demonstration
Appréciez la
démonstration
Disfrutemos de la demostración
To give you an idea of what the versatile
SHS-10 can do, a demonstration has been
included so you can hear some of the many
exciting sounds it can produce.
1. Switch On
Begin by sliding the POWER switch © to
the ON position. The LED display @ will
tight, displaying "00."
2. Set the Volume
Slide the VOLUME control (D to a posi
tion about three-quarters of the way
towards the maximum (MAX) setting.
3. Press the DEMONSTRATION START/
STOP Button
The demonstration will begin playing as
soon as you press the DEMONSTRATION
START/STOP button (D. The demonstra
tion will continue playing, giving you a
sample of the SHS-lO's fine voices, until
you press the DEMONSTRATION START
/STOP button © a second time. The
demonstration may also be stopped by
pressing the START/STOP @ or SYN
CHRO START/ENDING @ button.
Damit Sie eine Vorstellung von der Viel
seitigkeit des SHS-10 bekommen, haben
wir ein “Demo” gespeichert, das Ihnen
einige der vielen interessanten Klänge des
SHS-10 vorspielt.
1. Schalten Sie das SHS-10 ein.
Stellen Sie den POWER-Schalter © zu
nächst auf ON. Dadurch erscheint “00” auf
dem LED-Display.
OFF\ XON POWER
2. Regeln Sie die Lautstärke
Schieben Sie den VOLUME-Regler (2) auf
etwa ein Viertel unter der MAX-Stellung.
IWXSNWWWMAX VOLUME
3. Drücken Sie die DEMONSTRATION
START/STOP-Taste
Die Demo-Wiedergabe beginnt mit dem
Antippen der DEMONSTRATION START/
STOP-Taste (D . Jetzt können Sie eine
Kostprobe der erstklassigen Stimmen des
SHS-10 hören. Die Demo setzt sich so
lange fort, bis Sie die DEMONSTRATION
START/STOP-Taste CD erneut drücken.
Sie können die Demonstration jedoch auch
durch Antippen von START/STOP @
oder SYNCHRO START/ENDING @
stoppen.
DEMO
Pour vous donner une idée de ce que le
SHS-10 a à vous offrir, nous avons inclus
une démonstration pour que vous puissiez
écouter certains des nombreux sons formi
dables qu'il peut produire.
1. Fournir Talimentation
Commencer par coulisser l'interrupteur
POWER © sur la position ON. L'affichage
DEL s'allumera, indiquant "00".
2. Régler le volume.
Coulisser la commande VOLUME @ sur
une position environ aux trois quarts du
réglage maximum (MAX).
3. Presser la touche DEMONSTRATION
START/STOP.
La démonstration commencera aussitôt
que vous pressez la touche DEMONSTRA
TION START/STOP @ . La démonstration
continuera, vous donnant un exemple des
fines voix du SHS-10, jusqu'à ce que vous
pressiez à nouveau la touche DEMONST-
RATION START/STOP (D. La démonstration peut aussi être arrêtée en pressant la
touche START/STOP @ ou la touche
SYNCHRO START/ENDING de l'accom
pagnement @ .
Para darle una idea de lo que el versátil
SHS-10 es capaz de hacer, se ha incluido
una demostración que le permitirá escu
char algunos de los muchos sonidos que la
unidad puede producir.
1. Encienda la unidad.
Deslice el interruptor de encendido (POW
ER, ©) a la posición ON. Se iluminará el
visualizador LED, mostrando la indicación
“00”.
2. Ajuste el volumen.
Deslice el control de volumen (VOLUME,
(2)) a unos tres cuartos de su recorrido
hacia la posición MAX.
3, Presione el botón de comienzo/parada
de la demostración (DEMONSTRA
TION START/STOP).
La demostración comenzará no bien
presione el botón DEMONSTRATION
START/STOP @. La reproducción conti
nuará, brindándole una muestra de las
voces del SHS-10, hasta presionar el botón
DEMONSTRATION START/STOP (D nue
vamente. La demostración puede también
detenerse presionando el botón de comien
zo/parada del acompañamiento (START/
STOP, (§) ) o el de comienzo/fin sincro
nizado del acompañamiento (SYNCHRO
START/ENDING, @ ).
SYNCHRO START/
START/ STOP
ENDING
Page 9

*The SHS-10 selects and plays a different
lead voice for each phrase of the demon
stration piece. You can change the lead
voice at the beginning of a phrase by fol
lowing the voice selection instructions in
the next section of this manual. The
SHS-10 will then automatically select a
new voice at the beginning of the next
phrase. Sustain, portamento, vibrato and
pitch bend effects may also be applied to
the lead voice by following the instruc
tions in the “Using Effects" section on
page 12.
'Das SHS-10 wählt und spielt in jeder
Phrase des Demostücks mit einer anderen
Solostimme. Sie können entsprechend der
Erklärung im nächsten Abschnitt die
Solostimme am Beginn einer Phrase durch
Abruf einer anderen Stimme ändern. Das
SHS-10 ruft dann am Beginn der neuen
Phrase die gewählte Stimme ab. Außerdem
können Sie Effekte wie Sustain (Anhalten
des Tons), Vibrato und Pitch Bend
entsprechend “Verwendung von Effek
ten’* auf Seite 12 zuschalten.
* Le SHS-10 sélectionne et lit une voix de
direction différente pour chaque phrase
du morceau de démonstration. Vous
pouvez changer la voix de direction au
début d'une phrase en suivant les instruc
tions sur la sélection des voix dans la
section suivante de ce manuel. Le SHS-10
sélectionnera alors automatiquement une
nouvelle voix au début de la phrase sui
vante. Les effets de soutien, portamento,
vibrato et courbure de hauteur peuvent
aussi être appliqués à la voix de direction
en suivant les instructions de la section
"Utilisation des effets”, page 12.
*E1 SHS-10 selecciona y utiliza una vor
diferente para cada frase de la pieza de
demostración. También es posible cambiar
la voz solista al comienzo de cada frase,
según las instrucciones de selección de
voz de la siguiente sección de este manual.
En este caso, el SHS-10 seleccionará
automáticamente una nueva voz al
comienzo de la siguiente frase. Asimismo,
se pueden aplicar efectos de sostenimien
to, portamento, vibrato y alteración
momentánea de tono a la voz solista,
siguiendo las instrucciones de la sección
“Empleo de efectos” en la página 12.
8
Page 10

Selecting Voices &
Playing the Keyt)oard
Abruf von Stimmen &
Spielen des Keyboards
Sélection des voix et
jeu du clavier
Selección de voces e interpretación
The SHS-10 offers a selection of 25 fa
bulous FM voices which can be selected
and played as follows:
1. Power and Volume
Make sure the POWER switch © is turned
ON, and the VOLUME control (£) is set at
an appropriate level.
2. Set the Voice Selection Mode
The five voice/style number buttons ®
are used to select voices. To select a voice,
you must first set the voice selection mode
by pressing the VOICE button @ . The
number of the currently selected voice will
appear on the LED display (i|) .
3. Enter the Number of the Desired Voice
Two digits must be entered to select a
voice. For example, to select voice number
12 (vibraphone — refer to the VOICE LIST
on the SHS-10 panel), first press the num
ber "1" button and then the number "2"
button. The number "12" should appear
on the LED display.
Das SHS-10 stellt 25 großartig klingende
FM-Stimmen zur Wahl, die folgendermaßen
abgerufen und gespielt werden:
1. Netzschalter und Lautstärkeregler
Vergewissern Sie sich, daß der POWER-
Schalter © auf “ON” steht und der VOLUME-Regler CD auf einen angemessenen
Pegel eingestellt ist.
2. Schalten Sie auf Stimmenwahlbetriebsart
Die fünf Stimmen/Stilwahltasten @ dienen
zum Abruf von Rhythmusstil und Stimme.
Um jedoch eine Stimme wählen zu können,
müssen Sie zuerst die Stimmenwahlbetrieb
sart durch Drücken der VOICE-Taste @
aktivieren. Damit taucht die Nummer der
gegenwärtig gewählten Stimme auf dem
LED-Display @ auf.
VdCE/STYLE SELECT
VOICE STYLE
3, Geben Sie die Nummer der gewünschten
Stimme ein
Zum Abrufen einer Stimme müssen Sie
zwei Ziffern eingeben. Um z. B. Stimme
Nr. 12 (Vibraphon — siehe Stimmenliste
auf der Konsole des SHS-10) zu wählen,
drücken Sie zuerst Taste “U' und dann
Taste “2’^ wodurch ‘‘12^’ auf dem LEDDisplay auftauchen sollte.
Le SHS-10 offre une sélection de 25 voix
FM extraordinaires qui peuvent être
sélectionnées et jouées comme indiqué
ci-dessous:
1. Alimentation et volume.
S'assurer que l'interrupteur POWER ® est
sur ON et que la commande VOLUME (D
est réglée sur un niveau approprié.
2, Régler le mode de sélection de voix.
Les cing touches de numéro de voix/style
@ s'utilisent pour sélectionner les styles
de rythme aussi bien que les voix. Pour
sélectionner une voix, vous devez d'abord
régler le mode de sélection de voix en pres
sant la touche VOICE @ . Le numéro de
la voix actuellement sélectionnée apparaît
sur l'affichage DEL ® .
3. Mettre le numéro de la voix désirée en
entrée.
Deux chiffres doivent être mis en entrée
pour sélectionner une voix. Par exemple,
pour sélectionner le numéro de voix 12
(vibraphone; se référer à la liste des voix
(VOICE LIST) sur le panneau du SHS-10),
presser d'abord la touche numéro "1"
puis la touche numéro "2". Le nombre
"12" devrait apparaître sur l'affichage
DEL.
El SHS-10 le ofrece una variedad de 25
fabulosas voces de FM, que pueden ser
seleccionadas y utilizadas del siguiente
modo:
1. Encienda la unidad y ajuste el volumen.
Asegúrese de que el interruptor de encendi
do (POWER, ©) esté en ON, y el control
de volumen (VOLUME, (2)) en un nivel
apropiado.
2, Establezca el modo de selección de voz.
Los cinco botones selectores de voz/estilo
® se emplean para seleccionar estilos de
ritmo así como voces. Para escoger una voz,
deberá establecer primero el modo de
selección de voz presionando el botón de
voz (VOICE, @ ). El número de la voz
actual aparecerá en el visualizador LED
3. Ingrese el número de la voz deseada.
Para seleccionar una voz deben ingresarse
dos dígitos. Por ejemplo, para seleccionar
la voz número 12 (vibráfono; vea la lista de
voces (VOICE LIST) en el panel del
SHS-10), presione primero el botón núme
ro "1" y luego el número “2". Aparecerá
el número "12” en el visualizador LED.
Page 11

4. Play the Keyboard
You can now play the selected voice on the
SHS-10 keyboard. Go back and repeat step
3 to select a different voice.
*lf you hear no sound or a chordal sound
when playing notes on the keyboard, you
may have pressed one of the MODE but
tons by mistake prior to selecting a voice.
If this happens, press the NORMAL mode
select button @, then go back to step 2,
above.
4, Schlagen Sie nun Tasten an
Sie können nun mit der gewählten Stimme
auf dem SHS-10 Keyboard spielen. Um die
Stimme zu wechseln, müssen Sie nur Schritt
3 wiederholen.
* Falls das Keyboard stumm bleibt oder
beim Anschlägen einer Taste Akkorde
erzeugt, haben Sie eventuell vor dem
Wählen der Stimme eine der MODE-Tasten
berührt. In diesem Fall tippen Sie die
NORMAL-Taste (9) an und gehen zum
obigen Schritt 2 zurück.
MODE
4. Jouer du clavier.
Vous pouvez alors jouer la voix sélection
née sur le clavier du SHS-10. Retourner en
arrière et répéter Tétape 3 pour sélection
ner une voix différente.
*Si vous n'entendez aucun son ou qu'un
son d'accord vous parvient lorsque vous
jouez des notes sur le clavier, vous avez
sans doute pressé par mégarde une des
touches MODE avant de sélectionner une
voix. Si ceci se produit, presser la touche
de sélection de mode NORMAL (9) puis
retourner à Tétape 2 ci-dessus.
4. Toque en el teclado.
A continuación, podrá tocar en el teclado
del SHS-10 con la voz seleccionada. Para
cambiar a otra voz diferente, vuelva al paso
3.
*Si al tocar en el teclado no se escuchara
ningún sonido, o se obtuvieran acordes,
debe haber presionado alguno de los
botones de modo (MODE) por error
antes de seleccionar la voz. En este caso,
presione el botón selector del modo
NORMAL ® y vuelva al paso 2.
In the NORMAL mode, you can play up
to six notes simultaneously on the
SHS-10 keyboard.
Tuning
If you play along with other instruments or
recorded music you might need to tune the
SHS-10 to precisely match the pitch of the
other instruments. The pitch of the SHS-10
can be tuned over nearly a ± half-tone
range as follows:
1. Press the TUNING Button
Press the TUNING parameter change but
ton ® to select the tuning function. The
current tuning parameter value will be
shown on the LED display.
*In der NORMAL-Betriebsart können Sie
bis zu sechs Noten gleichzeitig auf dem
SHS-10 Keyboard spielen.
Einstimmen
Wenn Sie zusammen mit anderen Instru
menten oder zu aufgenommenen Stücken
spielen, müssen Sie manchmal das SHS-10
auf die Tonhöhe der anderen Instrumente
einstimmen. Die Tonhöhe des SHS-10 kann
über einen Halbton nach oben oder unten
verändert werden, wie folgt:
1. Drücken Sie die TUNING-Taste
Drücken Sie die TUNING-Taste ® , um
die Stimmfunktion zu aktivieren. Der
gegenwärtige Tonhöhenparameter wird da
durch auf dem LED-Display angezeigt.
PAfUUHETER CHANGE
En mode NORMAL, vous pouvez jouer
jusqu'à six notes simultanément sur le
clavier SHS-10.
Accord du son
Si vous jouez avec d'autres instruments ou
de la musique enregistrée, vous aurez
peut-être besoin d'accorder le SHS-10 pour
qu'il s'harmonise avec précision avec la
hauteur des autres instruments. La hauteur
du SHS-10 peut être accordée sur une
gamme de près de ± un demi-ton comme
indiqué ci-dessous:
1. Presser la touche TUNING.
Presser la touche de changement de para
mètre d'accord du son ® pour sélection
ner cette fonction. La valeur du paramètre
d'accord actuel sera indiquée sur l'affichage
DEL.
*En el modo NORMAL, es posible tocar
hasta 6 notas simultáneamente en el
teclado del SHS-10.
Afinación
Cuando toque junto a otros instrumentos o
a música grabada, deberá afinar el SHS-10
para ajustarlo precisamente al tono de los
demás instrumentos. El SHS-10 puede
afinarse dentro de un margen de aproxima
damente un tono, del siguiente modo:
1, Presione el botón de afinación (TUN
ING).
Presione el botón de afinación (TUNING,
® ) para seleccionar la función de afina
ción. El valor actual del parámetro de
afinación aparecerá en el visualizador LED.
10
Page 12

2. Tune Up or Down
Press the + or — parameter change button
@ to tune up or down, respectively. The
tuning parameter range is from —15 to 15.
'"0" is standard pitch. The maximum set
ting of 15 increases the pitch by nearly a
half-tone, and the minimum setting of —15
decreases the pitch by nearly a half-tone.
Press the + and — buttons simultaneously
to instantly recall the *'0'" setting.
2. Erhöhen oder vermindern Sie die Ton
höhe
Drücken Sie die + oder — Parameter
änderungstaste @ , um die Tonhöhe
anzuheben bzw. zu senken. Der Parameter
bereich zum Stimmen liegt zwischen -15
bis 15. Der Maximalwert von 15 erhöht die
Tonhöhe um fast einen Halbton, während
-15 ein Vermindern der Tonhöhe um
nahezu einen Halbton bewirkt. Um auf “0’’
zurückzuschalten, brauchen Sie nur + und
- gleichzeitig zu drücken.
2. Accorder vers le haut ou le bas.
Presser la touche de changement de para
mètre + ou — @ pour accorder respective
ment vers le haut ou le bas, La gamme du
paramètre d'accord va de —15 à 15. "0" est
la hauteur standard. Le réglage maximum,
15, augmente la hauteur de près d'un
demi-ton et le réglage minimum, —15
diminue la hauteur de près d'un demi-ton.
Presser simultanément les touches + et —
pour rappeler instantanément le réglage
"0".
2. Efectúe la afinación.
Presione el botón de ajuste de parámetros
@ + o - para afinar hacia arriba o abajo,
respectivamente. El parámetro de afinación
toma valores de -15 a 15. “0” representa
el tono normal. En el ajuste máximo 15 ,
el tono es subido por aprox. un semitono,
y en el ajuste mínimo (-15) bajado por la
misma cantidad. Para volver al ajuste “0”
instantáneamente, presione los botones +
y — simultáneamente.
Transposing to a Different Key
The SHS-10 transpose function makes it
simple to transpose to a different key over
a ±1 octave range.
1. Press the TRANSPOSE Button
Press the TRANSPOSE parameter change
button @ to select the transpose function.
The current transpose parameter value will
be shown on the LED display.
2. Transpose Up or Down
Press the + or — parameter change button
CB to transpose up or down, respectively.
The transpose parameter range is from -12
to 12. "0" is standard pitch. Each incre
ment of the transpose parameter increases
or decreases the pitch by a half tone. For
example, a setting of 7 transposes the en
tire keyboard up a 5th, while a setting of
—12 transposes the pitch of the keyboard
down one octave. Press the + and — but
tons simultaneously to instantly recall the
"0" setting.
Transponierung
Die Transponierfunktion des SHS-10 er
laubt eine Transponierung auf eine andere
Tonart über einen Bereich von 1 Oktave.
1. Drücken Sie die TRANSPOSE-Taste
Tippen Sie die TRANSPOSE-Taste (B) an,
um die Transponierfunktion zu aktivieren.
Danach erscheint der gegenwärtige Trans
ponierparameter auf dem LED-Display.
2. Transponierung nach oben oder unten
Geben Sie nun mit der + oder — PARAM
ETER CHANGE-Taste den Transponier
parameter ein. Dessen Bereich liegt zwischen
-12 und 12. “0** ist dabei die StandardTonhöhe, Eine Änderung des Parameters
um 1 bewirkt eine Tonhöhenänderung um
einen Halbton. Z. B. transponiert ein Wert
von 7 das gesamte Manual um eine Quinte
nach oben, während —12 die Tonhöhe des
gesamten Manuals um eine Oktave senkt.
Um auf “0” zurückzuschalten, brauchen
Sie nur + und — gleichzeitig zu drücken.
Transposition sur une clé différente
La fonction de transposition du SHS-10
simplifie la transposition sur une clé dif
férente sur une gamme de ± 1 octave.
1. Presser la touche TRANSPOSE.
Presser la touche de changement de para
mètre TRANSPOSE ® pour sélectionner
la fonction de transposition. La valeur du
paramètre de transposition actuel sera
indiquée sur l'affichage DEL.
2. Transposer vers le haut ou le bas.
Presser la touche de changement de para
mètre -H ou - ®) pour respectivement
transposer vers le haut ou le bas la gamme
du paramètre de transposition va de —12 à
12. "0" est la hauteur standard. Chaque
augmentation du paramètre de transposi
tion élève ou diminue la hauteur d'un
demi-ton. Par exemple, un réglage de 7
transpose le clavier entier sur une Sème
tandis qu'un réglage de —12 transpose la
hauteur du clavier d'une octave plus basse.
Presser simultanément les touches -t- et —
pour rappeler instantanément le réglage
Transposición a otra clave
La función de transposición del SHS-10
permite el fácil cambio a otra clave dentro
de un margen de dos octavas.
1. Presione el botón de transposición.
Presione el botón de transposición
TRANSPOSE, (B ) para seleccionar la
función de transposición. El valor actual
del parámetro de transposición aparecerá
en el visualizador LED.
2, Efectúe la transposición.
Presione el botón de ajuste de parámetros
([§) + o — para transponer hacia arriba o
abajo, respectivamente. El parámetro de
transposición toma valores de —12 a 12.
“0’' representa el tono normal. Cada incre
mento del parámetro de transposición
aumenta o disminuye el tono por un
semitono. Por ejemplo, un ajuste de 7
transpone el teclado entero una quinta
hacia arriba, mientras que un ajuste de -12
hace lo propio una octava hacia abajo.
Para volver al ajuste “0’* instantáneamente,
presione los botones + y — simultánea
mente.
11
Page 13

Using Effects
Verwendung von Effekten
Utiiisation des effets
Empleo de efectos
The SHS-10 offers a selection of effects
that can add life and expression to the
basic voices.
Sustain
The SHS-10 SUSTAIN button @ works
rather like the sustain pedal on a piano,
allowing the notes to linger and fade out
after you've lifted your fingers from the
keys. Simply hold down the SUSTAIN but
ton when you want notes to be sustained,
and release the button when you want the
notes to stop as soon as you lift your
fingers from the keys.
Portamento
The portamento effect produces a smooth
"slide" between notes — it's ideal for creat
ing realistic trombone sounds when using
the SHS-10's trombone voice. Of course,
portamento can be used to add expressive
slides to any of the SHS-lO's voices. Sim
ply hold down the PORTAMENTO button
@ when you want to create slides be
tween notes played on the keyboard.
Das SHS-10 bietet eine Reihe von Effekten,
die den Ausdruck und Charakter der Stim
men lebendiger gestalten.
Sustain (Abklingnachhall)
Die SUSTAIN-Taste @ des SHS-10 wirkt
praktisch wie das Forte-Pedal eines Pianos
und hält den Ton nach Loslassen der
Manualtaste an. Halten Sie die SUSTAINTaste gedrückt, um Noten anzuhalten und
geben Sie sie frei, wenn die Noten mit dem
Loslassen der Manualtaste stoppen sollen.
EFFECT
Portamento
Der Portamento-Effekt erzeugt ein gleich
mäßiges Inein anderüb ergleiten der Noten.
Dieser Effekt ist ideal, um die Posaunen
stimme (TROMBONE) des SHS-10 realis
tisch zu gestalten. Natürlich kann der
Portamento-Effekt auch allen anderen
Stimmen des SHS-10 angefügt werden.
Halten Sie ganz einfach die PORTA
MENTO-Taste @ gedrückt, wenn die
angeschlagenen Noten ineinander überglei
ten sollen.
Le SHS-10 offre une sélection d'effets qui
peuvent ajouter vie et expression aux voix
fondamentales.
Soutien
La touche SUSTAIN @ du SHS-10 fonc
tionne pratiquement comme la pédale de
soutien d'un piano, ce qui permet aux
notes de tramer et de s'affaiblir progressi
vement une fois que vouz avez retiré vos
doigts des touches. Il vous suffit de mainte
nir pressée la touche SUSTAIN quand vous
voulez maintenir les notes et de relâcher la
touche quand vous voulez que les notes
s'arrêtent dès que vous retirez les doigts du
clavier.
Portamento
L'effet de portamento produit un "coulis
sement" doux entre les notes; il est l'idéal
pour créer un son réalistique de trombone
lors de l'utilisation de la voix de trombone
du SHS-10. Bien sûr, le portamento peut
s'utiliser pour ajouter des coulissements
expressifs à n'importe quelle voix du
SHS-10. Il vous suffit de maintenir la
touche PORTAMENTO @ pressée quand
vous voulez créer des coulissements entre
les notes que vous jouez sur le clavier.
El SHS-10 ofrece una variedad de efectos
para agregar vida y expresión a las voces
básicas.
Sostenimiento
El botón de sostenimiento (SUSTAIN, @)
del SHS-10 funciona de modo similar al
pedal de sostenimiento de un piano, hacien
do a las notas persistir después de soltar las
teclas, y apagarse gradualmente luego.
Simplemente mantenga el botón SUSTAIN
oprimido cuando desee sostener las notas,
y suéltelo cuando quiera que las notas se
apaguen inmediatamente al soltar las
teclas.
Portamento
El efecto de portamento produce un ligado
continuo entre las notas, siendo ideal para
crear un convincente sonido de trombón
empleando la voz correspondiente del
SHS-10. Por supuesto, el portamento
puede utilizarse para agregar ligados expre
sivos a cualquiera de las voces del SHS-10.
Simplemente mantenga el botón de POR
TAMENTO @ oprimido cuando desee
crear ligados entre las notas tocadas en el
teclado.
12
Page 14

*The speed of the portamento slide can be
varied over a range of 1 through 5 by
pressing either the or PARAM
ETER CHANGE button ® while hold
ing down the PORTAMENTO button
@ . The value of the portamento time
setting will be shown on the LED display.
Press the "*+** button to increase the
portamento time, or the button to
decrease the portamento time.
Portamento speed data is retained in
memory even if the power switch is turned
OFF.
♦Die Geschwindigkeit des “Gleitens” beim
Portamento-Effekt kann durch gleich
zeitiges Drücken der PORTAMENTOTaste @ und + bxw. — PARAMETER
CHANGE-Taste @ in einem Bereich
zwischen 1 bis 5 variiert werden. Der
Wert des PORTAMENTO-Parameters wird
dabei auf dem LED-Display aufgefuhrt.
Zum Verlängern der Portamentozeit
drücken Sie +, während — diese verkürzt.
Die Portamento-Geschwindigkeit wird auch
nach dem Ausschalten im Speicher des
SHSIO festgehalten.
* La vitesse du coulissement du portamento
peut être variée sur une gamme de 1 à 5
en pressant la touche PARAMETER
CHANGE @ '*+” ou tout en main
tenant pressée la touche PORTAMENTO
@ . La valeur du réglage de la durée de
portamento sera indiquée sur l'affichage
DEL. Presser la touche pour aug
menter la durée du portamento ou la
touche " pour la diminuer.
Les données de vitesse du portamento
restent en mémoire même si Tinterrupteur
d'alimentation est mis sur OFF.
♦La velocidad del portamento puede
ajustarse dentro de un margen de 1 a 5
presionando el botón de ajuste de pará
metros (PARAMETER CHANGE, @ )
+ o — mientras se mantiene oprimido el
botón PORTAMENTO @ . El valor
correspondiente a la duración del porta
mento aparecerá en el visualizador LED.
Presione el botón para aumentar la
duración del portamento, y el ” para
reducirla.
Los datos de velocidad de portamento son
retenidos en la memoria aunque el inter
ruptor de encendido sea colocado en OFF.
Vibrato
Vibrato is basically a slight periodic varia
tion in pitch — the same effect that singers,
violinists and other instrumentalists use to
add warmth and richness to their sound.
To add vibrato to notes played on the key
board hold down the VIBRATO button
Pitch Bend
The PITCH wheel @ lets you bend the
pitch of notes up or down in the same way
a guitarist would “choke" notes by bend
ing the strings. The PITCH wheel is ideally
positioned for operation with the left-hand
index finger when the SHS-10 is worn
over-the-shoulder using the shoulder strap.
Move the wheel in the UP direction to
increase pitch, and in the DOWN direction
to decrease pitch.
Vibrato
Vibrato bewirkt eine geringfügige, peri
odische Veränderung der Tonhöhe, ein
Effekt den Sänger, Violinisten und andere
Instrumentalisten verwenden, um dem
Klang Wärme und Fülle zu geben. Um
angeschlagenen Noten Vibrato hinzuzu
fügen, müssen Sie nur die VIBRATO-Taste
@ gedrückt halten.
Tonhöhenbeuffung
Mit dem PITCH-Rad @ können Sie die
Tonhöhe von Noten stufenlos nach oben
oder unten “beugen”. Dies ist der gleiche
Effekt wie das Ziehen von Saiten bei einer
Gitarre. Das PITCH-Rad ist ideal zum
Steuern mit dem Unken Zeigefinger posi
tioniert, wenn Sie sich das Keyboard umhängen. Zum Erhöhen der Tonhöhe drehen
Sie das Rad in die UP-Richtung und zum
Senken der Tonhöhe in die DOWN-Rich
tung.
Vibrato
Le vibrato est fondamentalement une légère
variation périodique dans la hauteur, le
même effet que les chanteurs, violonistes
et autres instrumentalistes utilisent pour
ajouter chaleur et richesse à leur son. Pour
ajouter du vibrato sur les notes jouées sur
le clavier, maintenir pressée la touche
VIBRATO 0) .
Courbure de hauteur
La roue PITCH @ vous permet de courber
la hauteur des notes vers le haut ou le bas
de la même manière qu'un guitariste
"étranglerait" les notes en courbant les
cordes. La roue PITCH est positionnée
idéalement pour l'actionnement avec l'in
dex de la main gauche, quand le SHS-10
est porté par sa bandoulière. Déplacer la
roue dans la direction UP pour augmenter
la hauteur et dans la direction DOWN pour
la diminuer.
Vibrato
El vibrato es básicamente una ligera varia
ción periodica del tono; el mismo efecto
que los cantantes, violinistas y otros intér
pretes usan para agregar calidez y riqueza
al sonido. Para aplicar vibrato a las notas
tocadas en el teclado, mantenga oprimido
el botón VIBRATO 0) .
Alteración momentánea de tono
La rueda de alteración momentánea de
tono (PITCH, @ ) le permite variar el
tono de las notas del mismo modo que lo
hace un guitarrista estirando las cuerdas.
La rueda PITCH se encuentra ubicada en
una posición ideal para su manejo con el
dedo índice de la mano izquierda cuando
el SHS-10 se lleva colgado al hombro me
diante la correa. Mueva la rueda hacia
arriba (UP) para aumentar el tono, y hacia
abajo (DOWN) para reducirlo.
13
OOWN^
\\ PITCH«
M .T
Page 15

'The amount of pitch bend produced by
the PITCH wheel can be varied over a
range of —12 through 12 by pressing
either the or PARAMETER
CHANGE button ® while holding the
PITCH wheel in either the UP or DOWN
position. The value of the pitch bend
setting will be shown on the LED display.
Press the "+" button to increase the
setting or the button to decrease the
setting. With a positive setting the UP and
DOWN directions of the PITCH wheel
will produce corresponding increases or
decreases in pitch. Minus settings, how
ever, reverse this situation so that moving
the PITCH wheel UP will decrease the
pitch and moving It DOWN will increase
the pitch.
*Der Betrag der Tonhöhenänderung kann
durch Drücken der ‘ ‘+ ” oder ”
PARAMETER CHANGE-Taste @ über
einen Bereich von —12 bis 12 verändert
werden, wenn Sie das PITCH-Rad gleich
zeitig in der UP- oder DOWN-Position
halten, Der gegenwärtige Parameterwert
wird dabei vom LED-Display angezeigt.
Bei einem positiven Parameter bewirken
Bewegungen des PITCH-Rades in UPoder DOWN-Richtung entsprechende Er
höhungen oder Verminderungen der
Tonhöhe. Bei negativen Parmatern wird
der Effekt jedoch umgekehrt und ein
Drehen des PITCH-Rades in UP-Richtung
vermindert die Tonhöhe, während DOWN
sie anhebt.
La quantité de courbure de hauteur pro
duite par la roue PITCH peut être variée
sur une gamme de —12 à 12 en pressant
ou " de la touche PARAMETER
CHANGE ® tout en maintenant la roue
PITCH dans la position UP ou DOWN. La
valeur de la courbure de hauteur sera in
diquée sur l'affichage DEL. Presser la
“+'* pour augmenter le réglage et
touche
la touche pour le diminuer. Avec un
réglage positif, les directions UP et
DOWN de la roue PITCH produiront
l'augmentation ou la diminution corres
pondante en hauteur. Cependant, les
réglages négatifs inversent cette situation
et UP de la roue PITCH diminue la
hauteur tandis que DOWN l'augmente.
* La cantidad de alteración de tono produ
cida por la rueda PITCH puede variarse
dentro de un margen de —12 a 12 pre
sionando el botón de ajuste de parámetros
(PARAMENTER CHANGE, @ ) + o mientras se sostiene la rueda PITCH en la
posición UP o DOWN. El valor de altera
ción de tono aparecerá en el visualizador
LED. Presione el botón para aumen
tar este valor, y el ” para reducirlo. En
caso de escoger un valor positivo, las
direcciones UP y DOWN de la rueda
PITCH producirán aumentos y reduc
ciones de tono, respectivamente. Si en
cambio se elige un valor negativo, el tono
disminuirá al mover la rueda hacia UP y
aumentará al girarla hacia DOWN.
PITCH PARAMETER
TON HÖHE PAR AM ET ER
PAR AM ETRO D E T ON O
-12
-11
-10
-9
-8
-7
-6
-5
-4
-3
-2
-1 Down a half-tone 1 Halbton nach unten
1
2
3
4 Up a 3rd
5
6
7
8
9
10
11
12 Up 1 octave
* Pitch bend range data is retained in memory even if tl
'Ehe Tonhöhenbeugung «taten werden selbst nach Aussdialten
MAXIMUM PITCH WHEEL MOVEMENT
Down 1 octave
Down a major 7th
Down a 7th
Down a 6th
Down an augmented 5th 1 erhöhte Quinte nach unten
Down a Sth
Down a diminished 5th
Down a 4th 1 Quarte nach unten
Down a 3rd 1 Terz nach unten
Down a minor 3rd 1 Moll-Terz nach unten Diminution d'une 3ème mineure
Down a 2tyi 1 Sekunde nach unten Diminution d'une 2ème
Up a half-tone
Up a 2nd 1 Sekunde nach oben Augmentation d’une 2éme
Up a minor 3rd
Up a 4th
Up a diminished 5th
Up a 5th 1 Quinte nach oben Augmentation d'une 5ème
Up an augmented 5th
Up a 6th
Up a 7th
Up a major 7th
MA X. TONH ÖH EN AN DE RU NG ^ER EI CH
UP
1 Oktave nach unten
1 Dur-Septime nach unten
1 Septime nach unten
l Sexte nach unten
1 Quinte nach unten
1 verminderte Quinte nach unten Diminution d’une 5ème diminuée
1 Halbton nach oben
1 Moll-Terz nach oben Augmentation d'une 3éme mineure Una 3*4 menor arriba
1 Terz nach oben
1 Quarte nach oben
1 verminderte Quinte nach oben
1 erhöhte Quinte nach oben Augmentation d’une Sème augmentée Una 5*4 aumentada arriba
1 Sexte nach oben
l Septime nach oben
t Dur-Septime nach oben
1 Oktave nach oben
le power switch is turned OFF.
im Speicher aufrecht erhalten.
Diminution d'1 octave
Diminution d'une majeure 7ême
Diminution d'une 7ème
Diminution d’uns 6éme
Diminution d'une 5ême augmentée Una 5^ aumentada abajo
Diminution d'une 5ême
Diminution d’une 4éms
Diminution d’une 3éme Una 3*4 abajo
Diminution d'un demi-ton
Augmentation d'un demi-ton
Augmentation d'une 3ème Una 3*4 arriba
Augmentation d’une 4éme
Augmentation d’une 5éme diminuée
Augmentation d’une Sème
Augmentation d'une 7ème
Augmentation d'une 7ême rnajeure
Augmentation d'une octave
* Let données de la quantité de courfoute de hauteur restent en mémoire même si l'interrupteur d'alimentation est mis sur off.
*Los datos de alteración de tono son retenidos en 1a memoria aunque el interruptor de encendido sea colocado en OFF.
Una octava abajo
Una mayor abajo
Una Tiii* abajo
Una 6*”® abajo Up a 6th 1 Sexte nach oben
Una 5'^ abajo
Una 5^ disminuida abajo
Una 4^ 4 atrajo
Una 3*4 menor abajo Up a minor 3rd
Una 2**4 abajo
Un semitono abajo
Un semitono arriba
Una 2^4 arriba
Una 4*4 arriba
Una 5*4 disminuida arriba
Una 5*4 arriba
Una 6***4 arriba
Una T***® arriba Down a 7th 1 Septime nach unten
Una T***® mayor arriba
Una octava arriba Down 1 octave 1 Oktave nach unten
MOUVEMENT MAXIMUM DE LA RDUE DE HAUTEUR MO VIMIE NT O M A XIM O DE LA R UEDA PIT CH
DOWN
Up 1 octave
Up a major 7th 1 Dur-Septime nach oben
Up a 7th
Up an augmented 5th 1 erhöhte Quinte nach oben
Up a 5th
Up a diminished 5th 1 verminderte Quinte rtach oben
Up a 4th
Up a 3rd 1 Terz nach oben
Up a 2nd 1 Sekunden nach oben
Up a half-tone 1 Halbton nach oben Augmentation d'un demi-ton Un semitono arriba
Down a half-tone 1 Halbton nach unten
Down a 2nd
Down a minor 3rd
Down a 3rd
Down a 4ih
Down a diminished 5th
Down a 5th
Down art augmanted 5th 1 erhöhte Quinte nach unten
Down a 6th
Down a major 7th
1 Oktave nach oben
I Septime nach oben
1 Quinte nach oben
1 Quarte nach oben
I Moll-Tetz nach oben
t Sekunden nach unten
1 Moll-Terz nach unten
1 Terz nach unten
1 Quarte nach unten
1 verminderte Quinte nach unten Diminution d'une 5ème diminuée
1 Quinte rwch unten
1 Sexte nach unten
1 Dur-Septime nach unten
Augmentalior) d'1 octave
Augmentation d’une majeure 7éme
Augmentation d’une 7ême
Augmentation d'une 6éme
Augmentation d'une 5ème augmentée
Augmentation d’une Sème
Augmentation d’une 5éme diminuée Una 5*4 disminuida arriba
Augmentation d'une 4éme
Augmentation d'une 3éme
Augmentation d’une 3ème mineure
Augmentation d'une 2ème
Diminution d’un demi-ton
Diminution d'une 2ème
Diminution d'une 3éme mirreure Una 3*4 menor abajo
Diminution d'une 3éme
Diminution d'une 4éme
Diminution d'une 5ême augmentée
Diminution d'une 5ème Una 5*4 aumentada abajo
Diminution d'um 6éme
Diminution d'une 7ème Una I*"» abajo
Diminution d’une 7ème majeure
Diminution d'une octave
Una octava arriba
Una 7***4 mayor arriba
Una T***® arriba
Una ó***® aniba
Una 5*4 aumentada arriba
Una 5*4 arriba
Una 4*4 arriba
Una 3*4 arriba
Una 3*4 menor arriba
Una 2**4 arriba
Un semitono abajo
Una 2*^4 abajo
Una 3*4 abajo
Una 4*4 abajo
Una 5*4 disminuida abajo
Una 5*4 abajo
Una 6***4 abajo
Una I***® mayor abajo
Una octava abajo
14
Page 16

Selecting and Using a
Rhythm Accompani
ment
Wahl und Einsatz von Schlagzeugbegleitung
Sélection et utilisation
d’un accompagnement
rythmique
Selección y empleo del
acompañamiento
rítmico
The SHS-10 offers a selection of 25 differ
ent rhythm patterns using internally gener
ated drum and percussion sounds that you
can play along with.
1. Set the Style Selection Mode
The five voice/style number buttons @ are
used to select rhythm styles as well as
voices. To select a rhythm style (pattern),
you must first set the style selection mode
by pressing the STYLE button @ . The
number of the currently selected style will
appear on the LED display.
2. Enter the Number of the Desired Style
Two digits must be entered to select a
style. For example, to select style number
02 (Fusion 1 - refer to the STYLE LIST
on the SHS-10 panel), first press the num
ber "0" button and then the number ”2’*
button. The number ''02" should appear
on the LED display.
Das SHS-10 stellt 25 verschiedene Rhytmusarten zur Wahl, mit denen Sie spielen
können.
1. Schalten Sie auf Stilbetriebsart
Die fünf Stimmen/Stiltasten (i|) dienen
nicht nur zum Abruf von Stimmen, sondern
auch zum Wählen der Rhythmusart. Zum
Wählen eines Rhythmus müssen Sie jedoch
zunächst die STYLE-Taste @ drücken.
Damit schaltet das SHS-10 auf Stilbetriebs
art und der gegenwärtige Rhythmusstil
wird vom LED-Display angegeben.
VOiCE/STVLE SELECT
VOICE STYL£
2. Geben Sie die Nummer des erwünschten
Stilsein
Zum Wählen einer Rhytmusart müssen
zwei Stellen eingegeben werden. Um z. B.
Stilnr. 02 (Fusion 1 — Siehe STYLE LIST
auf der Konsole des SHS-10) abzurufen,
drücken Sie zuerst die "0”- und dann die
“2"-Taste, wodurch “02” auf dem Display
erscheinen sollte.
Le SHS-10 offre une sélection de 25 formes
de rythmes différents utilisant des sons de
tambour et de percussion générés interne
ment sur lesquels vous pouvez jouer.
1. Régler le mode de sélection de style.
Les cing touches de numéro de voix/style
@ s'utilisent pour sélectionner les styles
de rythme ainsi que les voix. Pour sélec
tionner un style de rythme (forme), vous
devez d'abord régler le mode de sélection
de style en pressant la touche STYLE @.
Le numéro du style actuellement sélection
né apparaftra sur l'affichage DEL.
2, Mettre en entrée le numéro du style
voulu.
Deux chiffres doivent être mis en entrée
pour sélectionner un style. Par exemple,
pour sélectionner le numéro de style 02
(fusion 1 — se référer à STYLE LIST sur le
panneau du SHS-10), presser d'abord la
touche "0" puis la touche "2". Le nombre
"02" devrait apparaître sur l'affichage
DEL.
El SHS-10 ofrece 25 figuras rítmicas dife
rentes a elección, empleando sonidos de
batería y percusión generados internamente
para acompañar su interpretación.
1. Establezca el modo de selección de
estilo.
Los cinco botones selectores de voz/estilo
se emplean para seleccionar voces así como
estilos rítmicos. Para escoger un estilo
(figura) rítmico, deberá establecer primero
el modo de selección de estilo presionando
el botón de estilo (STYLE, @ ). El número
del estilo actual aparecerá en el visualizador
LED.
2. Ingrese el número del estilo deseado.
Para seleccionar un estilo deben ingresarse
dos dígitos. Por ejemplo, para escoger el
estilo número 02 (Fusión 1; vea la LISTA
DE ESTILOS en el panel del SHS-10),
presione primero el botón “0” y luego el
“2”. Aparecerá la indicación “02” en el
visualizador LED.
15
Page 17

3. Press the START/STOP Button
Press the START/STOP button @ to be
gin playback of the selected rhythm pat
tern. Press the START/STOP button a
second time to stop rhythm playback.
3. Drücken Sie die START-Taste
Tippen Sie die START/STOP-Taste @ an,
um die Wiedergabe der gewählten Rhy
thmusart auszulösen. Zum Stoppen des
'‘Schlagzeugs’’ drücken Sie die START/
STOP-Taste erneut.
3. Presser la touche START/STOP de
l'accompagnement.
Presser la touche START/STOP de l'ac
compagnement @ pour commencer la
lecture de la forme de rythme sélectionnée.
Presser la touche START/STOP une
seconde fois pour arrêter la lecture du
rythme.
3. Presione el botón de comienzo/parada
del acompañamiento.
Presione el botón de comienzo/para da del
acompañamiento (START/STOP, @ ) para
comenzar la reproducción de la figura
rítmica seleccionada. Presiónelo nuevamen
te cuando desee detener el ritmo.
AM rhythm patterns are composed of two
measures.
Note that while the accompaniment is
playing, two dots above the two digits on
the LED display flash on and off. The
leftmost dot flashes on the first beat of
each measure, and the dot between the
LED digits flashes on each beat to give
you a visual indication of the tempo
setting. Both dots light simultaneously on
the first beat of the 2-measure pattern.
Synchro Start & Ending
The SHS-10's Synchro Start feature causes
the rhythm to begin playback when you
play the first note on the keyboard. First
select the desired rhythm style as described
in steps 1 and 2 above, then instead of
pressing the START/STOP button, press
the SYNCHRO START/ENDING button
@ . The accompaniment will then auto
matically start playing when you play the
first note on the keyboard. The synchro
start rhythm can be stopped by pressing
the START/STOP button, or, if you press
the SYNCHRO START/ENDING button a
second time while the rhythm is playing,
the SHS-10 will play an ending pattern and
then stop.
*AUe Rhythmusmuster bestehen aus zwei
Takten.
* Während dem Spielen der automatischen
Begleitung blinken über den zwei Ziffern
auf dem LED-Display zwei Punkte. Der
linke Punkt blinkt an jedem ersten Takt
schlag eines Taktes auf und der rechte an
den folgenden Schlägen, um eine visuelle
Tempoanzeige zu geben. Beide Anzeigen
leuchten gleichzeitig am ersten
Taktschlag des aus 2 Takten bestehende
Rhytmustirs auf.
Synchronstart & -ende
Wenn Sie die Synchronstartfunktion des
SHS-10 abrufen, beginnt die Wiedergabe
der Begleitung mit den Anschlägen der
ersten Taste auf dem Manual. Wählen Sie
entsprechend Schritt 1 und 2 die Rhy
thmusart und drücken Sie dann statt
START/STOP die SYNCHRO/START
ENDING-Taste @ . Die Begleitung erklingt
damit automatisch mit dem Anschlägen der
ersten Note. Die Synchronfunktion kann
einerseits durch Drücken der START/STOPTaste abrupt beendet werden. Wenn Sie
jedoch die SYNCHRO START/ENDING-
Taste 23 an tippen, spielt die Begleitung
vor dem Stoppen noch einen speziellen
Abschluß.
^Toutes les formes de rythme sont compo
sées de deux mesures-
^Remarquer que pendant que l'accompa
gnement est joué, deux points au-dessus
des deux chiffres de l'affichage DEL
clignotent. Le point le plus à gauche
clignote sur le premier temps de chaque
mesure et le point entre les chiffres DEL
clignote sur chaque temps pour vous
donner une indication visuelle du réglage
du tempo. Les deux points s'allument
simultanément au premier battement du
modèle à 2 mesures.
Mise en marche et fin
synthronisées
La caractéristique de mise en marche
synchro du SHS-10 fait démarrer la lecture
de l'accompagnement quand vous jouez la
première note sur le clavier. Sélectionner
d'abord le style de rythme voulu comme
décrit dans les étapes 1 et 2 ci-dessus puis,
au lieu de presser la touche START/STOP,
presser la touche SYNCHRO START/
STOP d'accompagnement @) . L'accom
pagnement commencera alors automatique
ment la lecture quand vous jouez la pre
mière note sur le clavier. Le rythme à mise
en marche synchronisée peut être arrêté
en pressant la touche START/STOP ou, si
vous pressez la touche SYNCHRO START/
ENDING une seconde fois alors que ('ac
compagnement est joué, le SHS-10 jouera
une forme de fin puis s'arrêtera.
* Todas las figuras rítmicas se componen
de dos compases.
* Advierta que los dos puntos sobre los
dígitos del visualizador LED destellan
intermitentemente mientras el acompaña
miento está tocando. El punto izquierdo
destella en el primer tiempo de cada
compás, y el punto entre los dos dígitos
lo hace en todos los tiempos (excepto el
primer tiempo de un compás cada dos)
para darle una indicación visual del tempo
en empleo. Ambos puntos se iluminan
simultáneamente en el primer tiempo de
la figura de dos compases.
Comienzo y final sincronizados
La función de comienzo y final sincroni
zados del SHS-10 hace arrancar el acom
pañamiento al tocar la primera nota en el
teclado. Primero seleccione el estilo rítmi
co, del modo descrito en los pasos 1 y 2, y
luego presione el botón de comienzo/final
sincronizado del acompañamiento (SYN
CHRO START/ENDING, @ ) en vez del
START/STOP. El acompañamiento comen
zará automáticamente cuando usted toque
la primera nota en el teclado. El ritmo de
comienzo sincronizado puede detenerse
presionando el botón START/STOP. Si se
presiona el botón SYNCHRO START/
ENDING por segunda vez mientras el
acompañamiento está tocando, el SHS-10
ejecutará una figura de finalización y se
detendrá.
16
Page 18

SYNCHRO
START/
ENCHNG
*The SYNCHRO START/ENDING button
can be pressed a second time before you
play on the keyboard to de activate the
synchro-start mode.
*The SYNCHRO START/ENDING button
@ can also be used to add a rhythm
ending to accompaniment started using
the START/STOP button @ .
*lf the STOP button is pressed after the
second beat of a measure, the tempo
lamp will continue to flash until the last
beat of the next measure. If pressed
before the second beat, the tempo lamp
will flash until the last beat of that
measure. If the ENDING button is
pressed the tempo lamp will continue to
flash for three measures after the begin
ning of the ending pattern. If you press
the START button before the tempo
lamp stops flashing, the accompaniment
pattern will be continued, keeping the
same rhythm. This allows you to
breaks in your performance.
*Wenn Sie die SYNCHRO START/END-
ING-Taste vor dem Spielen ein zweites
Mal drücken, wird der Synchronstart
widerrufen und die Rhythmusbegleitung
beginnt sofort.
*Die SYNCHRO START/ENDING-Taste
@ kann jedoch auch zum Anfügen eines
rhythmischen Endes für Be^eitfunktionen verwendet werden, die mit der
START/STOP-Taste @ ausgelöst
wurden.
♦Falls Sie die STOP-Taste nach dem
zweiten Taktschlag eines Takts antippen,
blinkt die Tempoanzeige bis zum letzten
Taktschlag des nächsten Takts. Wenn Sie
die STOP-Taste jedoch vor dem zweiten
Taktschlag drücken, blinkt die Tempoan
zeige nur bis zum letzten Taktschlag des
gegenwärtigen Takts. Beim Drücken der
ENDING-Taste arbeitet die Tempoan
zeige die nächsten drei Takte nach Beginn
des Austakts. Falls Sie die START-
Taste vor dem erlöschen der Tempoan
zeige an tippen, beginnt die Begleitung mit
dem gleichen Rhythmus weiterzuspielen.
Damit können Sie in Ihr Spiel Breaks
einbauen.
*La touche SYNCHRO START/ENDING
peut être pressée une seconde fois avant
que vous jouiez sur le clavier pour désac
tiver le mode de mise en marche synchro
nisée.
*La touche SYNCHRO START/ENDING
@ peut aussi s'utiliser pour ajouter une
fin rythmique à l'accompagnement com
mencé avec la touche START/STOP @ .
*Si la touche STOP est pressée après le
second battement d'une mesure, la lampe
du tempo continuera à clignoter jusqu'au
dernier battement de la mesure suivante.
Si elle est pressée avant le second batte
ment, la lampe du tempo clignotera
jusqu'au dernier battement de cette
mesure. Si la touche ENDING est pressée,
la lampe de tempo continuera à clignoter
pendant trois mesures après le début de la
forme de fin. Si vous pressez la touche
START avant que la lampe de tempo
s'arrête de clignoter, la forme d'accom
pagnement sera continuée, en gardant le
même rythme. Ceci vous permet d'insérer
des pauses dans votre exécution.
*E1 botón de comienzo/fìnal sincronizado
(SYNCHRO START/ENDING) puede
presionarse nuevamente antes de tocar en
el teclado para desactivar el modo de
comienzo sincronizado.
*E1 botón SYNCHRO START/ENDING
@ puede también emplearse para agre
gar un final rítmico al acompañamiento
comenzado mediante el botón START/
STOP @ .
♦Si se presiona el botón de parada (STOP)
después del segundo tiempo de un com
pás, la lámpara de tempo seguirá destel
lando hasta el último tiempo del compás
siguiente. Si se lo oprime antes del
segundo tiempo, dicha lámpara destellará
hasta el último tiempo de ese compás. Si
se presiona el botón de finalización
(ENDING), la lámpara seguirá destellando
por tres compases después del comienzo
de la figura de finalización. La reproduc
ción de acompañamiento normal comen
zará cuando finalice la introducción.
Adjusting the Tempo
An appropriate tempo is automatically
set when you select an accompaniment
style, but you can change the tempo as
follows:
1. Press the TEMPO Parameter Change
Button
Press the TEMPO parameter change button
© to set the tempo mode. The current
tempo parameter setting will be shown on
the LED display.
17
Einstellen des Tempos
Für jede Rhythmusart wird automatisch
ein angemessenes Tempo gewählt, das Sie
jedoch folgendermaßen ändern können:
1. Drucken Sie die TEMPO-Taste
Drücken Sie die TEMPO-Taste @ , um die
Tempofunktion abzurufen. Damit taucht
der gegenwärtige Tempowert auf dem
Display auf.
Ajustement du tempo
Un tempo approprié est automatiquement
sélectionné pour chaque style d'accompag
nement mais vous pouvez changer le tempo
comme suit:
1. Presser la touche de changement de
paramètre TEMPO.
Presser la touche de changement de para
mètre TEMPO © pour régler le mode de
tempo. Le réglage du paramètre de tempo
actuel sera Indiqué sur l'affichage DEL.
Ajuste del tempo
El tempo apropiado para cada estilo de
acompañamiento es seleccionado automá
ticamente, pero también es posible cam
biarlo del siguiente modo:
1. Presione el botón de cambio de tempo.
Presione el botón de cambio de tempo
(TEMPO, © ) para establecer el modo de
tempo. El valor actual del tempo aparecerá
en el visualizador LED.
Page 19

2. Increase or Decrease the Tempo
Press the + or - parameter change button
@ to increase or decrease the tempo,
respectively. The tempo parameter can be
varied between —19 and 19, with —19 be
ing the slowest and 19 the fastest tempo.
A setting of 0 corresponds to a tempo of
120 beats per minute.
*lf you stop the rhythm and switch to a
different style, the internal tempo for
that style will be automatically selected.
If you restart the rhythm using the same
style, however, the tempo you program
med will be maintained.
*lf you switch to a different style while
the rhythm accompaniment is playing,
the tempo of the initial style will be
maintained.
2. Steigern oder Senken des Tempos
Drücken Sie die + oder - PARAMETER
CHANGE-Taste @ , um das Tempo zu
steigern bzw. zu senken. Die Tempopara
meter können zwischen —19 und 19
variiert werden. 19 steht fiir das schnellste
Tempo, während -19 das langsamste
darstellt. Der Wert 0 entspricht 120 Takt
schlägen pro Minute.
*Wenn Sie den Rhythmus stoppen und
einen anderen Rhythmusstil abrufen,
wird normalerweise das vorprogrammierte
Tempo gewählt. Falls Sie jedoch das
Tempo geändert haben und die Wieder
gabe mit dem gleichen Rhythmusstil
fortsetzen, spielt das SHS-10 mit dem
eingegeben Tempo.
* Falls Sie während dem Rhythmusspiel
den Rhythmusstil wechseln, spielt dieser
mit dem Tempo des vorherigen Stils
weiter.
2. Augmenter ou diminuer le tempo.
Presser la touche de changement de para
mètre + ou - @ pour respectivement
augmenter ou diminuer le tempo. Ce para
mètre peut être varié entre —19 et 19,-19
étant le plus lent et 19 le plus rapide. Un
réglage de 0 correspondant à un tempo de
120 temps par minute.
*Si vous arrêtez le rythme et commutez
sur un style différent, le tempo interne
pour ce style sera automatiquement
sélectionné. Si vous reprenez le rythme
en utilisant le même style, cependant, le
tempo que vous avez programmé est
maintenu.
*Si vous commutez sur un style différent
alors que l'accompagnement du rythme
est lu, le tempo et le style d'origine seront
maintenus.
2. Aumente o reduzca el tempo
Presione el botón de ajuste de parámetros
® + o — para aumentar o reducir el
tempo, respectivamente. El parámetro del
tempo puede cambiarse entre —19 y 19,
siendo -19 el tempo más lento y 19 el
más rápido. El valor 0 corresponde a 120
tiempos por minuto.
* Si usted detiene el ritmo y cambia a otro
estilo, la unidad seleccionará automática
mente el tempo interno para el nuevo
estilo. Si en cambio reanuda la interpreta
ción usando el mismo estilo, será mante
nido el tempo seleccionado inicialmente.
*Si usted cambia a otro estilo mientras el
acompañamiento rítmico está tocando,
será mantenido el tempo del estilo inicial.
Adjusting the Accompaniment Volume
This function allows you to adjust the vol
ume of the accompaniment without
affecting the volume of notes played on
the keyboard.
1. Press the ACCOMP. VOLUME Param
eter Change Button
Press the ACCOMP. VOLUME parameter
change button ® to set the accompani
ment volume mode. The current accom
paniment volume parameter setting will be
shown on the LED display.
2. Increase or Decrease the Volume
Press the + or — parameter change button
@ to increase or decrease the volume of
the accompaniment, respectively. The vol
ume parameter can be varied between 0
and 5. A setting of 5 produces the loudest
accompaniment volume, and a setting of 1
produces minimum volume. A setting of 0
effectively turns the accompaniment off.
Einstellen der Lautstärke der
Begleitung
Mit dieser Funktion können Sie die Laut
stärke unabhängig von der der auf dem
Manual angeschlagenen Noten regeln.
1. Drücken Sie die ACCOMP. VOLUMETaste
Tippen Sie die ACCOMP. VOLUME-Taste
® an, um die Lautstärkefunktion für die
Begleitung zu aktivieren. Damit erscheint
der gegenwärtige Lautstärkewert für die
Begleitung auf dem LED-Display.
2. Senken oder Erhöhen der Lautstärke
Drücken Sie die + oder — PARAMETER
CHANGE-Taste @, um die Lautstärke der
Begleitung zu erhöhen bzw. zu senken. Der
Lautstärkewert kann zwischen 0 und 5
variiert werden. Bei 5 ist die Begleitung am
lautesten, während sie bei 0 verstummt.
Ajustement du volume de Taccompagnement
Cette fonction vous permet d'ajuster le
volume de l'accompagnement sans affecter
le volume des notes jouées sur le clavier.
1. Presser la touche de changement de
paramètre ACCOMP, VOLUME.
Presser la touche de changement de para
mètre ACCOMP. VOLUME @ pour régler
le mode de volume de l'accompagnement.
Le réglage du paramètre de volume d'ac
compagnement actuel sera Indiqué sur
l'affichage DEL.
2. Augmenter ou diminuer le volume.
Presser la touche de changement de para
mètre + ou — @ pour respectivement
augmenter ou diminuer le volume de l'ac
compagnement. Le paramètre du volume
peut être varié entre 0 et 5. Le réglage 5
produit le volume d'accompagnement le
plus fort et le réglage 1, le plus faible. Un
réglage 0 coupe l'accomagnement.
Ajuste del volumen de acompaña
miento
Esta función le permite ajustar el volumen
del acompañamiento sin afectar el nivel de
las notas tocadas en el teclado.
1. Presione el botón de volumen de acom
pañamiento (ACCOMP. VOLUME).
Presione el botón ACCOMP. VOLUME ®
para establecer el modo de ajuste de volu
men de acompañamiento. El valor actual
de este parámetro aparecerá en el visualizador LED-
2. Aumente o reduzca el volumen.
Presione el botón de ajuste de parámetros
@ + o — para aumentar o reducir, respec
tivamente , el volumen del acompañamiento.
Este valor puede variarse entre 0 y 5. El
ajuste 5 produce el máximo volumen de
acompañamiento, y el 1 el mínimo. En 0,
el acompañamiento es silenciado por
completo.
18
Page 20

Adding Fill-ins
Pressing any one of the three INTRO/FILL
IN buttons @) adds an intro or variation
(fill in) to the rhythm pattern. The fill-ins
are different for each accompaniment
style, so try them out to get a feel for their
sound. To use one of the variations as an
introduction, press the appropriate INTRO
/FILL IN button while the rhythm is stop
ped, then start the rhythm accompaniment.
Normal accompaniment playback will
begin when the introduction has ended.
Hinzufügen von Fill-ins
Durch Drücken von einer der drei INTRO/
FILL IN-Tasten 24 wird dem Rhythmus
spiel ein Intro (Auftakt) oder ein Fill-in
(Zwischenspiel) gegeben. Jeder der Begleit
stile weist verschiedene Fill-ins auf. Pro
bieren Sie sie deshalb aus, um ein Feeling
für sie zu entwichkeln. Um eine dieser
Rhythmus Variationen als Intro zu verwen
den, drücken Sie die entsprechende INTRO/
FILL IN-Taste während der Rhythmus
gestoppt ist und starten dann die Beglei
tung.
Nach Ende des Vortakts (intro) beginnt die
normale Begleitung.
RHYTHM CONTROL
Addition de remplissages
Une pression sur Tune des trois touches
INTRO FILL/IN @ ajoute une introduc
tion ou une variation (remplissage) à la
forme de rythme. Les remplissages sont
différents pour chaque style d'accompagne
ment, ainsi, le mieux est de les essayer pour
avoir une idée de leur son. Pour utiliser une
des variations comme introduction, presser
la touche INTRO/FILL IN alors que le
rythme est arrêté puis commencer l'accom
pagnement rythmique.
La lecture d'accompagnement normale
commencera quand l'introduction est ter
minée.
Agregado de rellenos
Al presionar cualquiera de los tres botones
de introducción y relleno (INTRO/FILL
IN, @ ), la unidad ejecuta una introduc
ción o variación (relleno) de la figura
rítmica. Los rellenos son diferentes para
cada estilo de acompañamiento. Pruébelos
para darse una idea de cómo suenan. Para
usar una de las variaciones como introduc
ción, presione el botón INTRO/FILL IN
apropiado cuando el ritmo esté detenido, y
active luego el acompañamiento rítmico.
Note: Since style no. 43 (BAROQUE)
does not have a rhythm part, a rhythm-
only start cannot be produced. The same
applies to fill-in intros.
Hinweis: Da der Stil Nr. 43 (Barock) keine
Schlagzeugbegleitung aufweist, kann das
Spiel nicht mit der Begleitung begonnen
werden. Ebenso können weder Auftakt
(intro) noch Zwischenspiel erzeugt werden.
Remarque: Du fait que le style n° 43
(BAROQUE) n'a pas de partie rythmique,
une mise en marche de rythme seulement
ne peut être produite. La même chose
s'applique aux introductions de remplissage.
Nota: Puesto que el estilo número 43
(BARR(XO) no tiene una parte de ritmo,
no permite la ejecución de un comienzo de
ritmo solo. Lo mismo se aplica a introduc
ciones de relleno.
19
Page 21

Automatic Accompa
niment
Automatische Beglei
tung
Accompagnement
automatique
Acompañamiento
automàtico
The SHS-10 offers a number of automatic
accompaniment options that you can play
along with to create the sound of a one-man
band.
Auto Bass Chord
This mode automatically generates rhythm,
bass arid chord accompaniment in the sel
ected style according to a chord progres
sion you play on the SHS-10 keyboard.
1. Select the Desired Accompaniment
Style
Select the style of accompaniment you
wish to use from the 25 choices available in
the same way as described in the "'Selecting
and Using a Rhythm Accompaniment"
section on page 15.
2. Select the Auto Bass Chord Mode
Press the AUTO BASS CHORD mode
select button (8).
Das SHS-10 bietet eine Reihe von automa
tischen Begleitfunktionen, mit deren Hilfe
Sie eine Band simulieren können.
Auto-Baß / Akkordfunktion (AUTO BASS CHORD)
Diese Funktion erzeugt Schlagzeug und
Baßbegleitung entsprechend dem gewählten
Rhythmusstil und spielt die von Ihnen
angeschlagenen Akkorde in diesem Rhyth
mus,
1. Wählen Sie den Rhythmusstil
Wählen Sie entsprechend dem Abschnitt
“Wahl und Einsatz der Schlagzeugbeglei
tung’' auf Seite 15 eine der 25 Rhythmus
arten,
2. Aktivieren Sie die Auto-Bad/Rhythmus-
funktion
Drücken Sie die AUTO BASS CHORDTaste CD .
Le SHS-10 offre de nombreuses options
d'accompagnement automatique sur lequelles vous pouvez jouer pour créer le son
d'un "homme-orchestre".
Accords des basses automatique
Ce mode génère automatiquement l'ac
compagnement rythmique, des basses et
des accords dans le style sélectionné selon
une suite d'accords que vous jouez sur le
SHS-10.
1. Sélectionner le style d'accompagnement
voulu.
Sélectionner le style d'accompagnement
que vous voulez utiliser parmi fes 25 choix
à votre disposition, de la manière décrite
dans la section "Sélection et utilisation d'un
accompagnement rythmique", page 15.
2. Sélectionner le mode d'accords des
basses automatiques
Presser la touche de sélection de mode
AUTO BASS CHORD ®.
El SHS-10 ofrece un número de opciones
de acompañamiento que le permitirán crear
el sonido de un completo grupo musical.
Contrabajo y acordes automáticos
Este modo genera automáticamente un
acompañamiento de ritmo, contrabajo y
acordes, en el estilo seleccionado y de
acuerdo a la progresión armónica tocada
en el teclado del SHS-10.
1. Seleccione el estilo de acompañamiento.
Seleccione el estilo de acompañamiento
deseado entre los 25 disponibles, del modo
descrito en la sección “Selección y empleo
del acompañamiento rítmico" en la pagina
15.
2. Seleccione el modo de contrabajo y
acordes automáticos
Presione el botón selector del modo de
contrabajo y acordes automáticos (AUTO
BASS CHORD, ®).
3. Start or Synchro Start the Accompani
ment
If you press the START/STOP button @ ,
the rhythm (drums/percussion) portion of
the accompaniment will begin playing with
out bass and chords. If you press the
SYNCHRO START/ENDING button (g) ,
no sound will be produced until you play
on the keyboard.
3. Starten Sie die Begleitung
Falls Sie die Begleitung mit der START/
STOP-Taste @ auslösen, beginnen Schlag
zeug und Percussion ohne Baß und Akkorde
zu spielen. Wenn Sie die SYNCHRO
START/ENDING-Taste @ zum Starten
antippen, be^nnt die Begleitung erst nach
Anschlägen eines Akkords auf dem Manual.
AUTO
BASS
CHORD
3. Débuter l'accompagnement de ta manière
ordinaire ou avec la synchronisation.
Si vous pressez la touche START/STOP
d'accompagnement @ , la portion de
rythme (tambours/percussions) de l'accom
pagnement commencera à être jouée dans
les basses et les accords. Si vous pressez
ta touche d'accompagnement SYNCHRO
START/ENDING @ , aucun son ne sera
produit jusqu'à ce que vous jouiez sur le
clavier.
3. Comience el acompañamiento.
Si presiona el botón comienzo/para da del
acompañamiento (START/STOP, @ ) la
porción de ritmo (batería/percusion) del
acompañamiento arrancará sin contrabajo
ni acordes. Si en cambio presiona el botón
de comienzo/final sincronizado de acompa
ñamiento (SYNCHRO START/ENDING,
@ ) no será emitido ningún sonido hasta
que comience a tocar.
20
Page 22

4. Play a Chord
The SHS-10 Auto Bass Chord accompani
ment system requires you to play a threenote or four-note chord in order to com
pute and play an appropriate accompani
ment pattern. The SHS IO recognizes and
will create accompaniment based on the
following chord types in the Auto Bass
Chord mode:
Major
1 -3-5
Minor
1 - 3b - 5
Seventh
1 _3_5_7bor 1 - 3-7b
Minor seventh
1 _3b_5-7bor 1 -3b-7b
Major seventh
1-3-5-7 or 1-3-7
Minor seventh flat-five
1 - 3b - 5b - 7b or 1 - 3b - 5b
Seventh sustained fourth
1 _4_5_7b
Augmented
1 - 3 - 6b
Diminished
1 - 3b - 5b - 6
Minor major seventh
1 _3b_5-7
In the case of augmented and diminished
chords, the root {Ist degree) of the chord
must be the lowest note played on the
keyboard. Combinations of notes other
than those listed above will be ignored.
As soon as you play a chord the Auto Bass
Chord system will begin playing an accom
paniment based on that chord and the
selected accompaniment style. Simply play
different chords at the appropriate times to
create any desired chord progression.
5. Stop or Add an Ending to the Accom
paniment
Press the START/STOP button @ to
simply stop the accompaniment, or the
SYNCHRO START/ENDING button @
to add an ending. This applies to all auto
matic accompaniment modes.
4. Schlagen Sie einen Akkord an
Bei der Auto-Baß/Rhythmusfunktion des
SHS-10 müssen Sie einen Akkord aus 3
oder 4 Noten anschlagen, damit das ent
sprechende Begleitmuster ermittelt und
gespielt werden kann. Das SHS-10 erkennt
die folgenden Akkorde und kann auf
deren Basis mit der AUTO BASS CHORDFunktion eine gesamte Rhythmusgruppen
kreieren:
Dur
1-3-5
Moll
1 - 3b - 5
Septimenakkord
1 - 3 _ 5 _ 7b oder 1 _ 3 - 7b
Moll -Septimenakkord
1 - 3b - 5 - 7b oder 1 - 3b - 7b
Dominant-Septimenakkord
1 _
3
_ 5 _ 7 oder 1-3-7
Moll7/b5
1 - 3b - 5b - 7b oder 1 - 3b - 5b
Septime mit ausgehaltener Quarte
1 _ 4 _ 5 _ 7b
Erhöht
1 - 3 - 6b
Vermindert
1 - 3b - 5b - 6
Dominant-Septimenakkord für Moll
1 ^ 3b - 5 - 7
Im Falle von verminderten oder erhöhten
Akkorden muß deren Grundton die tiefste
angeschlagene Note darstellen. Kombina
tionen von anderen Noten, als angegeben,
werden ignoriert.
Sobald Sie einen Akkord anschlagen, wird
dieser zusammen mit Baß und Rhythmus
begleitung im gleichen Rhythmus gespielt.
Schlagen Sie einfach an bestimmten Takt
schlägen einen neuen Akkord an, um eine
Akkordfolge mit voller Begleitung zu
bekommen.
5. Stoppen Sie die Begleitung oder fügen
Sie eine Schlußsequenz an
Drücken Sie die START/STOP-Taste @ ,
um die Begleitung direkt zu stoppen, oder
aber fügen Sie durch Antippen SYNCHRO
START/STOP-Taste @ einen “AbschlußschnörkeT’ an. Dies trifft auf alle automa
tischen Begleitfunktionen zu.
4. Jouer un accord.
Le système d'accompagnement des accords
de basses automatiques du SHS-10 requiert
que vous jouiez un accord de trois ou
quatre notes pour analyser et jouer une
forme d'accompagnement adéquate. Le
SHS-10 reconnaît et créera un accompagne
ment basé sur les types d'accords suivants,
dans le mode des accords des basses;
Majeur
1-3-5
Mineur
1 - 3b - 5
Septième
1 - 3-5-7bou 1 - 3-7b
Septième mineure
1 - 3b - 5 - 7b ou 1 - 3b - 7b
Septième majeure
1_3_5_7 ou 1-3-7
Septième mineure/cinquième bémol
1 - 3b - 5b - 7b ou 1 - 3b - 5b
Septième/quatrième soutenue
1 - 4 - 5 - 7b
Augmenté
1 - 3 - 6b
Diminué
1 - 3b - 5b - 6
Septième majeure mineure
1 _ 3b - 5 - 7
Dans le cas des accords augmentés et
diminués, la source (1er degré) de l'accord
doit être la note la plus basse jouée sur le
clavier. Les combinaisons des notes qui ne
sont pas dans la liste oi-dessus seront
ignorées.
Aussitôt que vous jouez un accord, le
système d'accords des basses automatiques
commencera à jouer un accompagnement
basé sur cet accord et le style d'accompag
nement sélectionné. Il suffit de jouer des
accords différents à des moments appro
priés pour créer une progression d'accords
voulue.
5. Arrêter ou ajourter une fin d'accompa
gnement.
Presser la touche START/STOP d'accom
pagnement @ pour arrêter simplement
l'accompagnement ou la touche SYNCH RO
START/ENDING @ pour ajouter une fin.
Ceci s'applique à tous les modes d'accom
pagnement automatique.
4. Toque un acorde.
El sistema de acompañamiento de contra
bajo y acordes automáticos del SHS-10 le
requiere tocar un acorde de tres o cuatro
notas a fin de computar y tocar una figura
de acompañamiento apropiada. El SHS-10
reconocerá los siguientes tipos de acorde,
creando el acompañamiento correspon
diente ;
Mayor
1-3-5
Menor
1 - 3b - 5
Séptima
l_3„5_7bol-3-7b
Menor séptima
1 _ 3b - 5 - 7b o 1 - 3b - 7b
Séptima mayor
1_3_5„7o1-3-7
Menor séptima quinta disminuida
1 -3b-5b-7bol -3b-5b
Séptima cuarta aumentada
1 - 4 - 5 - 7b
Aumentado
1 - 3 - 6b
Disminuido
1 _ 3b - 5b - 6
Menor séptima maypr
1 ^ 3b _ 5 - 7
En el caso de acordes aumentados y dis
minuidos, la base (primera nota) del acorde
debe ser la nota más grave tocada en el
teclado. Otras combinaciones de notas no
incluidas en la lista de arriba serán ignora
das.
No bien usted toque un acorde, el sistema
de contrabajo y acordes automáticos
comenzará el acompañamiento basado en
ese acorde y en el estilo de acompañamien
to seleccionado. Simplemente toque dife
rentes acordes en los momentos apropiados
para crear cualquier progresión armónica
deseada.
5. Detenga el acompañamiento o agregue
un final.
Presione el botón de comienzo/parada del
acompañamiento (START/STOP, @ )
para detener simplemente el acompaña
miento, o el botón de comienzo/final
sincronizado de acompañamiento (SYNCHRO START/ENDING, @ ) para
agregar un final. Esto se aplica a todos los
modos de acompañamiento automático.
21
Page 23

Use the INTRO/FILL IN buttons @) to
add different variations to the accompani
ment.
The tempo of the accompaniment can be
changed as described in the ""Adjusting
the Tempo"' section on page 17.
The volume of the accompaniment can be
changed as described in the '"Adjusting
the Accompaniment Volume" section on
page 18.
The entire accompaniment may be tuned
or transposed as described in the "Tun
ing" and 'Transposing to a Different
Key" sections on page 11.
*Mit den RHYTHM CONTROL INTRO/
FILL IN-Tasten @ können Sie die
Begleitung variieren.
* Das Tempo der Begleitung kann wie unter
“Einstellung des Tempos” auf Seite 17
beschrieben, geändert werden,
*Die Lautstärke der Begleitung kann ent
sprechend “Einstellung der Lautstärke
der Begleitung” auf Seite 18 verändert
werden.
* Die gesamte Begleitung kann entsprechend
den Erklärungen unter “Einstimmen”
und “Transponiemng” auf Seite 11 unter
schiedlich gestimmt oder transponiert
werden.
Utiliser les touches RHYTHM CONTROL
INTRO/FILL IN @) pour ajouter diver
ses variations à l'accompagnement.
Le tempo de l'accompagnement peut être
changé comme indiqué dans la section
"Ajustement du tempo", page 17.
Le volume de l'accompagnement peut
être changé comme indiqué dans la sec
tion "Ajustement du volume de l'accom
pagnement", page 18.
L'accompagnement entier peut être ac
cordé ou transposé comme déorit dans les
sections "Accord du son" et "Transposi
tion sur une clé différente", page 11.
*Use los botones de introducción y relleno
(RHYTHM CONTROL INTRO/FILL IN,
@ ) para agregar diferentes variaciones
al acompañamiento.
* El tempo del acompañamiento puede
cambiarse del modo descrito en la sección
“Ajuste del tempo” en la página 17.
*E1 volumen del acompañamiento puede
cambiarse del modo descrito en la sección
“Ajuste del volumen de acompañamiento”
en la página 18.
* El acompañamiento puede afinarse o
transponerse en su totalidad del modo
descrito en las secciones “Afinación” y
“Transposición a otra clave” en la página
li.
Auto Bass Chord with Melody
Operation of the MELODY ON A. B. C.
mode is virtually identical to the AUTO
BASS CHORD mode except that it allows
you to play a melody line on the keyboard
while the automatic accompaniment is
playing. Begin by pressing the MELODY
ON A. B. C. mode selector ® instead of
the AUTO BASS CHORD mode selector,
then continue from step 3 outlined for
Auto Bass Chord operation, above. You
can play a single-note melody or lead line
over the Auto Bass Chord accompaniment,
and change accompaniment chords by
playing a three or four-note chord in the
same way as for the Auto Bass Chord
mode. The accompaniment chord will
change as soon as you play an appropriate
chord on the keyboard, but the actual
notes played on the keyboard will not
sound. Any voice can be selected for the
melody line using the voice selection pro
cedure described on page 9.
Melodiespiel mit automatischer Begleitung (MELODYONA.B.C.)
Die MELODY ON A. B. C.-Funktion ist
praktisch mit der AUTO BASS CHORDFunktion identisch. Allerdings spielen Sie
hierbei die Melodie zu einer wiedergege
benen Begleitung aus Akkorden, Schlag
zeug und Baß. Drücken Sie zunächst MEL
ODY A. B. C. ® anstatt der AUTO BASS
CHORD-Taste und gehen Sie dann zu
Schritt 3 von “Auto-Baß/Akkordspiel”
über. Sie können nun eine 1 -notige Melodie
oder Solophrase zur automatischen Baß/
Akkordbegleitung spielen. Wenn Sie den
Begleitakkord wechseln wollen, schlagen
Sie wie beim Auto-Baß/Akkordspiel einen
drei- oder viernotigen Akkord an, wodurch
sich der Begleitaldcord ändert. Allerdings
wird Ihr Anschlägen des Akkords nicht
direkt wiedergegeben. Für Ihre Melodie
können Sie mit dem auf Seite 9 be
schriebenen Abrufverfahren eine beliebige
Stimme wählen.
Accords des basses automatiques avec mélodie
Le fonctionnement du mode MELODY ON
A. B. C. est pratiquement identique à celui
du mode AUTO BASS CHORD sauf qu'il
vous permet de jouer une ligne mélodique
sur le clavier alors que l'accompagnement
automatique est joué. Commencer par
presser le sélecteur de mode MELODY ON
A. B. C. @ au lieu du sélecteur de mode
AUTO BASS CHORD, puis continuer à
partir de l'étape 3 décrite ci-dessus dans le
fonctionnement des accords des basses
automatiques. Vous pouvez jouer une
mélodie à une note ou une ligne maîtresse
sur l'accompagnement des accords de
basses automatiques et changer les accords
d'accompagnement en jouant un accord à
trois ou quatre notes de la même manière
que pour le mode d'accord des basses auto
matiques. L'accord d'accompagnement sera
changé aussitôt que vous jouez un accord
approprié sur le clavier mais les notes
réelles jouées sur le clavier ne s'entendront
pas. Toute voix peut être sélectionnée pour
la ligne de mélodie en utilisant le processus
de sélection de voix décrit page 9.
Contrabajo y acordes automáticos
con melodía
El modo de melodía es prácticamente igual
al de contrabajo y acordes automáticos,
salvo que le permite ejecutar una melodía
en el teclado mientras el acompañamiento
automático está tocando. Primero presione
el selector de modo de contrabajo y
acordes automáticos con melodía (MEL
ODY A, B, C, ®) en vez del selector
AUTO BASS CHORD, y luego continúe a
partir del paso 3 de las instrucciones para
el modo de contrabajo y acordes automá
ticos. Podrá tocar una melodía de una sola
nota sobre el acompañamiento, y cambiar
de acorde tocando un acorde de tres o
cuatro notas de la misma manera que en
el modo usual de contrabajo y acordes
automáticos. El acorde de acompañamien
to cambiará no bien toque el nuevo acorde
en el teclado, pero las notas tocadas no
sonarán. Para la melodía puede escogerse
cualquier voz, utilizando el procedimiento
de selección de voz descrito en la página
9.
MELODY
ON
A. B C
22
Page 24

Auto Bass
If you want the SHS-10 to produce only a
rhythm pattern and bass line for accom
paniment — letting you play the chords
yourself — begin by pressing the AUTO
BASS mode select button © , then carry
on from step 3 of the procedure described
for Auto Bass Chord. You play the chords,
and the SHS-10 will accompany you with a
perfect bass line and rhythm pattern. In
this mode you can play up to five notes
simultaneously on the SHS-10 keyboard.
Any voice can be selected for playing
chords using the voice selection procedure
described on page 9.
Auto-Baß/Rhythmusfunktion
(AUTO BASS)
Falls das SHS-10 nur eine automatische
Baß- und Schlagzeugbegleitung spielen soll
und Sie die Akkorde selbst spielen wollen,
müssen Sie zunächst die AUTO BASSTaste © drücken. Gehen Sie dann zu
Schritt 3 unter “Auto-Baß/Akkordfunk
tion'’ über. Sie spielen nun die Akkorde,
während das SHS-10 Ihnen eine perfekte
Baß- und Schiagzeugbegleitung liefert. In
dieser Betriebsart können bis zu 5 Noten
gleichzeitig ertönen. Natürlich können Sie
für Ihr Akkordspiel entsprechend der auf
Seite 9 beschriebenen Stimmenwahl eine
beliebige Stimme abmfen.
Basses automatiques
Si vous voulez que le SHS-10 ne produise
qu'une forme de rythme et une ligne de
basses pour l'accompagnement, ce qui vous
permet de jouer les accords vous-même,
commencer par presser la touche de sélec
tion de mode AUTO BASS ®, puis procé
der à partir de l'étape 3 décrite pour les
accords de basses automatiques. Vous jouez
les accords et le SHS-10 vous accompagnera
avec une forme parfaite de ligne de basses
et de rythme. Dans ce mode, vous pouvez
jouer jusqu'à cinq notes simultanément
sur le clavier du SHS-10. Toute voix peut
être sélectionnée pour jouer les accords en
utilisant le procédé de sélection de voix
décrit page 9.
Contrabajo automático
Si desea que el SHS-10 produzca solamente
una figura rítmica y una línea de contra
bajo como acompañamiento, permitiéndole
tocar los acordes usted mismo, presione el
botón selector del modo de contrabajo
automático (AUTO BASS, © ) y luego
continúe a partir del paso 3 del procedi
miento descrito para el modo de contrabajo
y acordes automáticos. Usted toca los
acordes, y el SHS-10 le acompaña con una
perfecta línea de contrabajo y ritmo. En
este modo es posible tocar hasta cinco
notas simultáneamente en el teclado del
SHS-10. Para los acordes puede escogerse
cualquier voz, mediante el procedimiento
de selección de voz descrito en la página
9.
Auto Chord
This mode offers yet another accompani
ment option: chords and rhythm pattern
only with no bass line. Begin by pressing
the AUTO CHORD mode select button ®,
then carry on from step 3 of the procedure
described for Auto Bass Chord. The root of
the chord is produced the instant you play
an appropriate chord on the keyboard,
in the Auto Chord mode you can play
single notes using any selected voice on
the keyboard — so you can supply your own
original bass line.
Auto - Akkordfunktion (AUTO CHORD)
Mit dieser Funktion können Sie Ihre
eigenen Baßlinien zu einer automatischen
Schlagzeug/Akkordbegleitung spielen.
Drücken Sie zuerst die AUTO CHORDTaste © und gehen Sie dann zu Schritt 3
unter “Auto-Baß/Akkordfiinktion” über.
Durch Anschlägen einer Taste erzeugen Sie
den Grundton, anhand dessen das SHSIO
automatisch den entsprechenden Akkord
erzeugt. Sie können dazu selbstverständlich
eine beliebige Stimme des SHS-10 verwen
den, um Ihre eigene Baßlinie mit automa
tischer Akkordbegleitung zu spielen.
Accords automatiques
Ce mode offre encore une autre option
d'accompagnement: une forme d'accords
et de rythme uniquement, sans ligne de
basses. Commencer par presser la touche
de sélection de mode AUTO CHORD ©
puis procéder à partir de l'étape 3 du pro
cessus décrit pour les accords de basses
automatiques. La base de l'accord est
produite dès l'instant que vous jouez un
accord approprié sur le clavier. En mode
d'accords automatiques, vous pouvez jouer
des notes simples en utilisant toute voix
sélectionnée sur le clavier, ainsi vous
pouvez fournir votre propre ligne de basses
originales.
Acordes automáticos
Este modo le ofrece otra opción más de
acompañamiento: Acordes y ritmo sola
mente, sin línea de contrabajo. Presione el
botón selector del modo de acordes auto
máticos (AUTO CHORD, ©), y continúe a
partir del paso 3 del procedimiento descri
to para el modo de contrabajo y acordes
automáticos. En el instante en que toque
un acorde apropiado en el teclado, será
generada la base del mismo. En el modo de
acordes automáticos, es posible tocar notas
separadas empleando cualquier voz del
teclado, permitiéndole tocar la línea de
contrabajo usted mismo.
23
Page 25

Single-finger Auto Bass Chord
This super-easy auto-accompaniment fea
ture lets you produce chord accompani
ment without actually having to play
chords, A single finger lets you create any
major chord, while two or three fingers are
used to create minor, seventh and minorseventh chords — but you don't need to
use the actual chord fingerings.
1. Select the desired accompaniment style.
2. Press the SINGLE FINGER A. B. C.
mode select button ®.
Automatische Einfinger-Akkord/ Baßbegleitung (SINGLE FINGER A. B. C.)
Diese Funktion ist hauptsächlich für An
fänger. Sie können mit einem Finger Dur
akkorde erzeugen, während Sie mit zwei
oder drei Fingern Moll-, Septimen- und
Moll- Septimenakkorde spielen können,
ohne die tatsächlichen Noten anschlagen
zu müssen.
1. Wählen Sie einen Rhythmusstil.
2. Drücken Sie dann die SINGLE FINGER
A. B.C.-Taste®.
Accords des basses automatiques
à un seul doigt
Cette caractéristique d'accompagnement
automatique super facile vous permet de
produire un accompagnement d'accords
sans avoir à les jouer. Un seul doigt vous
permet de créer tout accord majeur et deux
ou trois doigts suffisent pour créer des
accords mineurs, septième et septième
mineurs, mais vous n'avez pas besoin d'uti
liser le doigté réel de l'accord.
1. Sélectionner le style d'accompagnement
voulu.
2. Presser la touche de sélection de mode
SINGLE FINGER A. B. C. ® .
SINGLE
FINGER
A 8. C.
Contrabajo y acordes automáticos
a un solo dedo
Esta función extremadamente fácil de usar
le permite producir un acompañamiento
completo sin tener que tocar acordes. Con
un solo dedo puede crear cualquier acorde
mayor. Acordes menores, séptima y menor
séptima requieren dos o tres dedos, pero
sin tener que emplear la digitación correcta.
1. Seleccione el estilo de acompañanüento.
2. Presione el botón selector del modo de
contrabajo y acordes automáticos con
un solo dedo (SINGLE FINGER A, B,
C;@).
3. Press either the START/STOP @ or
SYNCHRO START/ENDING @ but
ton.
4. Play the desired chords as described
below:
For a с major chord:
C-Durakkord:
Accord de do majeur:
Para un acorde de Do mayor:
For a C minor chord:
C-MoUakkord:
Accord de do mineur:
Para un acorde de Do menor:
3. Tippen Sie dann entwerder die START/
STOP @ Oder die SYNCHRO START/
ENDING-Taste © an.
4. Spielen Sie nun die Akkorde, wie unten
erklärt.
3. Presser soit la touche d'accompagnement
START/STOP © soit SYNCHRO
START/ENDING © .
4. Jouer les accords voulus comme décrit
ci-dessous:
Simply press the C key.
C-Taste anschlagen.
Presser simplement la touche de do.
Simplemente presione la tecla Do.
Press the C key and any black key to the left of it.
C-Taste und eine beliebige schwarze Taste links davon ansch
lagen.
Presser la touche de do et toute touche noire se trouvant sur sa
gauche.
Presione la tecla Do y cualquier tecla negra a su izquierda.
3. Presione el botón de comienzo/parada
del acompañamiento (START/STOP.
@ ) o el de comienzo/final sincroniza
do del acompañamiento (SYNCHRO
START/ENDING,
©).
4. Toque los acordes deseados, del siguien
te modo:
24
Page 26

For a C seventh chord:
C-Septimenakkord:
Accord de do septidme:
Para un acorde de Do séptima;
Press the C key and any white key to the left of it.
C-Taste und eine beliebige weiße Taste links davon anschlagen.
Presser la touche de do et toute touche blanche se trouvant sur
sa gauche.
Presione la tecla Do y cualquier tecla blanca a su izquierda.
For a C minor seventh chord;
Cm -Septimenakkord :
Accord de do septième mineur;
Para un acorde de Do menor séptima;
Press the C key as well as one white key and one black key to
the left of it.
C-Taste und eine beliebige schwarze sowie weiße Taste links
davon anschlagen.
Presser la touche de do et une touche blanche ainsi qu'une
touche noire se trouvant sur sa gauche.
Presione la tecla Do junto con una tecla blanca y una negra a su
izquierda.
25
Page 27

The Chord Sequencer
Akkord-Sequenzer
Le séquenceur d’ac
cords
E1 secuenciador de
acordes
The SHS-10 is the ultimate in automatic
accompaniment. It automatically plays a
full chord progression in the selected style,
over which you can play a lead line in any
selected voice. You can even program your
own chord progressions.
The chord sequencer has three '"banks"
which can be played by pressing the chord
sequencer 1, 2 or 3 PLAY buttons @ .
The three banks are initially programmed
with the following chord progression:
IFILLIN tl (FILL IN 31
PLAY1:||;C, | F, | C, | F, H
PALY 2: ||: C, | F, | C, I C, |
I F, I F, I C, I C, I
(FILL IN II
I G, I F, I C7 I G,:!!
PLAY3: ||: C | C | Am | Ami
(Dm7 I Dm7 | G7 | G7-j|
Playing a Recorded Chord Sequence
1. Select the Desired Accompaniment
Style
Select the style of accompaniment you
wish to use from the 25 choices available in
the same way as described in the "Selecting
and Using a Rhythm Accompaniment"
section on page 15.
2. Start Chord Sequence Playback
Press either the PLAY 1, PLAY 2 or PLAY
3 button @ to begin playback of the
chord sequence.
Das SHS-10 bietet auch eine vollautoma
tische Begleitung. Es spielt automatisch
eine ganze Akkordfolge im gewählten
Rhythmusstil, während Sie das Solo mit
einer beliebigen Stimme spielen. Sie kön
nen sogar Ihre eigenen Akkordfolgen
eingeben.
Der Akkord-Sequenzer weist drei ‘‘Spei
cherbanken’' auf, deren Inhalte jeweils
durch Drücken von PLAY
1,2, oder 3 @
wiedergegeben werden. Die drei Banken
sind mit den nachstehenden Akkordfolgen
vorprogrammiert:
PLAYl: 11 C7 1 F7
(FILL IN 1)
PLAY 2: II C7 I F7
I F7 i F7
I G7 I F7
PLAYS: II: C I C
IDm? |Dm7
C7
C7
C7
C7
1 Am ! Ami
1 G7 I G,:!!
F7:|I
C7 I
C7I
.L INI)
G,:!!
Spielen einer aufgezeichneten
Akkordfolge
1. Wählen Sie den Rhythmusstil
Wählen Sie entsprechend dem Abschnitt
“Wahl und Einsatz der Schlagzeugbeglei
tung” auf Seite 15 eine der 25 Rhy
thmusarten.
2. Starten Sie die Wiedergabe der Akkord
folge
Drücken Sie dazu entweder PLAY 1, PLAY
2 oder PLAY 3 @ , wonach die Akkord
folge wiedergegeben wird.
Le SHS-10 est l'instrument ultime en
accompagnement automatique. Il joue
automatiquement une progression complète
d'accords dans le style sélectionné, sur
laquelle vous pouvez jouer une ligne
maîtresse dans toute voix sélectionnée.
Vous pouvez même programmer vos pro
pres progressions d'accords.
Le séquenceur d'accords a trois "banques"
qui peuvent être jouées en pressant les
touches 1, 2 ou 3 PLAY @ . Les trois
banques sont à l'origine programmées avec
les progressions d'accords suivantes:
(REMPLISSAGE 1)
PLAY 1: Ido 7 1 fa 7 1 do 7 1
PLAY 2; Ido 7 1 fa 7 1 do 71
1
fa 7 1 fa 7 1
1 sol 7 1 fa 7 1
PLAY 3: Ido | do 1 la m 1
1 r6 m 7 I r6 m 7
(REMPLISSAGE 31
do 71
(REMPLISSAGE 1)
do 71 sol 7 1
1 sol 7
fa? 1 (RELLENO I )
do? 1
do? 1
la m 1
1 sol 74
Jeu d’une suite d’accords enregistrés
1. Sélectionner le style d'accompagnement
voulu.
Sélectionner le style d'accompagnement
que vous voulez utiliser parmi les 25 à votre
disposition, de la manière décrite dans la
section "Sélection et utilisation d'un ac
compagnement rythmique", page 15.
2. Commencer la lecture de la suite d'ac
cords.
Presser l'une des touches PLAY 1, PLAY 2
ou PLAY 3 @ pour débuter la lecture de
la suite d'accords.
El SHS-10 es lo máximo en acompañamien
to automático. Es capaz de tocar una pro
gresión armónica completa en el estilo
seleccionado, sobre la cual usted puede
tocar una línea melódica en cualquier voz
escogida. Hasta le permite programar sus
propias progresiones armónicas.
El secuenciador de acordes tiene tres
“bancos” que pueden ejecutarse presionan
do los botones de reproducción de progre
siones melódicas (PLAY, (3) ) 1, 2 o 3,
Inicialmente, los tres bancos están pro
gramados con las siguientes progresiones:
PLAYl: |:
PLAY 2: t
PLAY3: 1
C7 i
C7 1
F7 1 F7 1
1
G7 1
1
C 1
Dm? 1
1
F7 1
F7 1
F7 t
c
1
Dm7 1
(RELLENO 3)
C7
1 F, 11
C7 1 C, 1
C7
1 C, 1
(RELLENO I)
C7
1 G, Il
Am
1 Am 1
G7
1 G,:|l
Reproducción de una progresión
armónica registrada
1. Seleccione el estilo de acompañamiento.
Seleccione el estilo deseado entre los 25
disponibles, del modo descrito en la sección
“Selección y empleo del acompañamiento
rítmico” en la página 15.
2. Comience la reproducción de la progre
sión armónica.
Presione el botón PLAY 1, PLAY 2 o
PLAY 3 O para comenzar la reproducción
de la progresión armónica.
CHORO SEQUENCER
26 :
Page 28

3. Play Along on the Keyboard
You can select any of the SHS-10's 25
voices to play a lead line on the keyboard
while the chord sequence is playing.
4. Stop or Add an Ending to the Chord
Sequence
The initially programmed chord sequences
will play back continually until stopped.
Press the START/STOP button @ to sim
ply stop the chord sequence or the SYN
CHRO START/ENDING button @ to
add an ending.
*Use the INTRO/FILL IN buttons (g) to
add different variations to the chord
sequence.
*The tempo of the chord sequence can be
changed as described in the "Adjusting
the Tempo" section on page 17.
*The volume of the chord sequence can be
changed as described in the "Adjusting
the Accompaniment Volume" section on
page 18.
*The entire accompaniment and lead tine
may be tuned or transposed as described
in the "Tuning" and "Transposing to a
Different Key" sections on pages 10 and
11.
* A different chord sequence can be direct
ly selected during playback by simply
pressing a different chord sequence PLAY
button. The newly selected sequence will
begin playing from the first beat of the
next measure,
* During chord sequence playback you can
select the AUTO BASS or AUTO CHORD
mode to produce a bass and rhythm or
chord and rhythm sequence.
3. Spielen Sie nun das Solo dazu
Um das Solo zur Akkordfolge zu spielen,
können Sie eine beliebige der 25 Stimmen
des SHS-10 ab rufen.
4. Stoppen Sie die Akkordfolge oder füsen
Sie einen Abschlußschnörkel an
Die Wiedergabe der vorprogrammierten Ak
kordfolge setzt sich fort, bis Sie sie stoppen.
Drücken Sie dazu entweder die START/
STOP-Taste @ , um die Akkordbegleitung
direkt zu stoppen, oder aber tippen Sie
SYNCHRO START/ENDING an, um
einen rhythmischen Abschluß zu bekom
men.
♦Variieren Sie durch Drücken der INTRO/
FILL IN-Tasten @ die Begleitung.
♦Das Tempo der Akkordfolge kann ent
sprechend “Einstellung des Tempos" auf
Seite 17 verändert werden.
♦Sie können die Lautstärke der Begleitung
entsprechend dem Abschnitt “Einstellung
der Lautstärke der Begleitung" auf Seite
18 regeln.
♦Die gesamte Begleitung kann, wie unter
“Einstimmen" oder “Transponierung" auf
Seite 10 uno 11 beschrieben, feinges
timmt oder transponiert werden.
♦ Durch Drücken einer anderen PLAY-
Taste können Sie die Akkordfolge wäh
rend der Wiedergabe wechseln. Die neue
Akkordfolge beginnt am ersten Takt
schlag des nächsten Taktes.
♦Während der Sequenzer-Wiedergabe der
Akkorde, können Sie AUTO BASS oder
AUTO CHORD drücken, um eine Baß/
Rhythmus-bzw. Akkord/Rhythmussequenz zu erzeugen.
3. Jouer sur le clavier.
Vous pouvez sélectionner n'importe laquel
le des 25 voix du SHS-10 pour jouer une
ligne maîtresse sur le clavier alors que la
suite d'accords est lue.
4. Arrêter ou ajouter une fin à la suite
d'accords.
Les suites d'accords programmées initiale
ment seront lues continuellement jusqu'à
ce qu'elles soient arrêtées. Presser la touche
START/STOP @ pour arrêter simplement
la suite d'accords ou la touche d'accompa
gnement SYNCHRO START/ENDING @
pour ajouter une fin.
* Utiliser les touches INTRO/FILL @ pour
ajouter des variations différentes sur la
suite d'accords.
* Le tempo de la suite d'accords peut être
changé comme décrit dans la section
"Ajustement du tempo", page 17.
* Le volume de la suite d'accords peut être
changé comme décrit dans la section
"Ajustement du volume d'accompagne
ment", page 18.
* L'accompagnement entier peut être ac
cordé ou transposé comme décrit dans les
sections "Accord du son" et "Transposi
tion sur une touche différente", pages 10
et 11.
*Une suite d'accords différents peut être
sélectionnée directement pendant la lec
ture en pressant simplement une touche
PLAY de suite d'accords différents. La
suite nouvellement sélectionnée commen
cera à être lue à partir du premier temps
de ta mesure suivante.
* Pendant la lecture de la suite d'accords,
vous pouvez sélectionner le mode AUTO
BASS ou AUTO CHORD pour produire
une suite basses et rythme ou accords et
rythme.
3. Toque en el teclado.
Podrá seleccionar cualquiera de las 25
voces del SHS-10 para ejecutar una línea
melódica en el teclado mientras la progre
sión armónica está tocando.
4. Detenga la progresión annónica, o agre
gue un fínal.
Las progresiones armónicas programadas
inicialmente serán reproducidas continua
mente hasta que sean detenidas. Presione
el botón de comienzo/parada de acompaña
miento (START/STOP, ® ) para detener
simplemente la progresión armónica, o el
botón de comienzo/final sincronizado de
acompañamiento (SYNCHRO START/
ENDING, @ ) para agregar un final.
♦Emplee los botones de introducción y
relleno @ para agregar variaciones a la
progresión armónica.
♦ El tempo de la progresión armónica
puede cambiarse del modo descrito en la
sección “Ajuste del tempo" en la página
17.
♦El volumen de la progresión armónica
puede cambiarse del modo descrito en la
sección “Ajuste del volumen de acompa
ñamiento" en la página 18.
♦El acompañamiento puede ser afinado o
transpuesto en su totalidad del modo
descrito en las secciones “Afinación" y
“Transposición a otra clave" en las
páginas 10 y 11.
♦ Es posible seleccionar otra progresión
armónica durante la reproducción, simple
mente presionando otro botón PLAY. La
nueva progresión comenzará a tocar a
partir del primer tiempo del siguiente
compás.
♦Durante la reproducción de una progre
sión armónica, es posible seleccionar el
modo de contrabajo automático o de
acordes automáticos para producir una
progresión armónica incluyendo contra
bajo y ritmo o acordes y ritmo, respecti
vamente.
27
Page 29

Recording an Original Chord Sequence
You can record any chord progression you
like in any of the chord sequencer banks,
including fill ins and an ending if desired.
About 150 chords may be recorded in each
bank.
1. Select the Desired Accompaniment
Style
Select the style of accompaniment you
wish to use from the 25 choices available
in the same way as described in the "Sel
ecting and Using a Rhythm Accompani
ment" section on page 15,
2. Set the Chord Sequence Record Mode
for the Desired Bank
Press the chord sequence RECORD button
@ at the same time as the PLAY button
@ of the bank you wish to record. The
SHS-10 is now set to synchro-start record
ing when you play the first chord.
Aufzeichnen einer Akkordfolge
Wie mit jedem Sequenzer können Sie auch
hier Ihre eigenen Akkordfolgen einschließ
lich Fill-ins und Abschluß in einer be
liebigen Speicherbank aufzeichnen. Sie
können mit jeder Bank ca. 150 Akkorde
aufnehmen.
1. Wählen Sie den Rhythmusstil
Wählen Sie entsprechend dem Abschnitt
“Wahl und Einsatz der Schlagzeugbeglei
tung” auf Seite 15 einen der 25 Rhythmus
arten.
2. Schalten Sie die betreffende Bank auf
Aufnahme
Drücken Sie die RECORD-Taste @ zusam
men mit der PLAY-Taste @ für die Bank,
mit der Sie aufnehmen wollen. Damit ist
das SHS-10 auf Synchronaufnahme geschal
tet, die mit dem Anschlägen des ersten
Akkords beginnt.
CHORO SEQUENCER
Enregistrement cTune suite d’accords originaie
Vous pouvez enregistrer toute progression
d'accords de votre choix dans les banques
du séquenceur d'accords, y compris des
remplissages et une fin au besoin. Environ
150 accords sont enregistrables dans
chaque banque.
1. Sélectionner le style d'accompagnement
voulu.
Sélectionner le style de l'accompagnement
que vous voulez utiliser parmi les 25 à
votre disposition comme décrit dans la
section "Sélection et utilisation d'un ac
compagnement rythmique", page 15.
2. Régler le mode d'enregistrement de suite
d'accords pour la banque voulue.
Presser la touche RECORD de suite d'ac
cords @ en même temps que la touche
PLAY ® de la banque dans laquelle vous
voulez enregistrer. Le SHS-10 est alors
réglé en enregistrement à mise en marche
synchronisée quand vous jouez le premier
accord.
Registro de una progresión
armónica original
Es posible registrar cualquier progresión
armónica en cualquiera de los bancos del
secuenciador de acordes, incluyendo relle
nos y un final si así lo desea. Cada banco
permite el registro de aproximadamente
150 acordes.
1. Seleccione el estilo de acompañamiento.
Seleccione el estilo deseado entre los 25
disponibles, del modo descrito en la sección
“Selección y empleo del acompañamiento
rítmico” en la página 15.
2. Establezca el modo de registro de pro
gresión armónica para el banco deseado.
Presione el botón de registro de progre
siones armónicas (RECORD) simultánea
mente con el botón de reproducción
PLAY, @ ) del banco a emplear para el
registro. El SHS-10 quedará dispuesto para
comenzar el registro en forma sincronizada
cuando usted toque el primer acorde.
3. Play a Chord
If you started in the NORMAL, ABC or
MELODY ON ABC mode the SHS-10 will
now function as if it is in the Auto Bass
Chord Mode. If you start in the AUTO
BASS, AUTO CHORD or SINGLE FIN
GER mode, the SHS-10 will function ac
cordingly. Recording begins automatically
when you play the first key on the key
board. Play the chord sequence in the same
way as for the Auto Bass Chord Mode
(refer to the "Auto Bass Chord" section on
page 20 for details) or the Single Finger
mode (see previous section for details),
adding fill-ins using the INTRO/FILL IN
@) as required. Note that only chord
sequences — not melody — can be recorded.
3. Spielen Sie einen Akkord
Falls Sie mit der NORMAL-, AUTO BASS
CHORD oder MELODY ON ABC-Funktion begonnen haben, arbeitet das SHS-10
wie bei aktivierter Auto-Baß/Akkordfunk
tion. Falls Sie jedoch von der AUTO
BASS-, AUTO CHORD- oder SINGLE
FINGER-Funktion aus auf Aufnahme
geschaltet haben, funktioniert das Key
board entsprechend dieser Funktion. Die
Aufnahme startet mit dem Anschlägen des
ersten Akkords, Spielen Sie die Äkordfolge wie bei der Auto-Baß/Akkordfunktion (Siehe “Auto-Baß/Akkordfunktion”
auf Seite 20) und fügen Sie mit INTRO/
FILL IN @ Zwischenspiel hinzu, wenn
gewünscht. Beachten Sie jedoch bitte, daß
nur Akkordfolgen aufgezeichnet werden
können — Einzelne Melodienoten werden
ignoriert.
3. Jouer un accord
Si vous commencez en mode NORMAL,
ABC ou MELODY ON ABC, le SHS-10
fonctionnera comme s'il était en mode
d'accords des basses automatiques. Si vous
commencez en mode AUTO BASS, AUTO
CHORD ou SINGLE FINGER, le SHS-10
réagira en fonction. L'enregistrement com
mence automatiquement quand vous jouez
le premier accord sur le clavier. Jouer la
suite d'accords de la même manière que
pour le mode des accords des basses auto
matiques (se référer à la section "Accords
des basses automatiques", page 20. pour
plus de détails) ou te mode un doigt (voir la
section précédente pour plus de détails), en
ajoutant des remplissages selon le besoin en
utilisant INTRO/FILL IN @ . Noter que
seules les suites d'accords, et non la
mélodie, peuvent être enregistrées.
3, Toque un acorde.
Si hubiera comenzado en el modo normal
o de contrabajo y acordes automáticos con
o sin melodía, el SHS-10 funcionará como
si estuviera en el modo de contrabajo y
acordes automáticos. Si comenzara en el
modo de contrabajo automático, acordes
automáticos o un solo dedo, el SHS-10
funcionará en el modo correspondiente. El
registro comienza automáticamente al
tocar el primer acorde en el teclado. Repro
duzca la progresión armónica del modo
descrito para el modo de contrabajo y
acordes automáticos (para más detalles, vea
la sección “Contrabajo y acordes automá
ticos” en la página 20) o de un solo dedo
(vea la sección previa), agregando rellenos
mediante el botón INTRO/FILL @
cuando así lo desse. Advierta que sólo
pueden registrarse progresiones armónicas,
no melodías.
28
Page 30

* For a piece with anA — B — C—A — C
structure, for example, you could record
part A in the PLAY 1 bank, part B in the
PLAY 2 bank and part C in the PLAY 3
bank. Then all you have to do is press the
PLAY buttons in the proper order (PLAY
1 — 2 — 3 — 1 - 3) at the appropriate
times.
4. Stop or Add an Ending to the Chord
Sequence Recording
Press the START/STOP button @ to
simply stop the chord sequence recording.
If you stop the recording in this way the
chord sequence will repeat continuously
when played back. Press the SYNCHRO
START/ENDING button @ to add an
ending to the chord sequence. If you stop
the recording using the SYNCRO START/
ENDING button the sequence will stop
automatically when the ending is reached
during playback.
* Chord sequence data is retained in mem
ory even if the power switch is turned
OFF.
*You can "reset" the SHS-10 and auto
matically re-program the initial chord
sequences by first turning the power OFF,
then turn the power back ON while hold
ing down both the NORMAL and AUTO
BASS CHORD mode selectors ((D &(D).
Other parameters reset by this procedure
are MIDI channel {channel = 1), porta
mento time (time = 1) and pitch bend
range (range =1).
*Bei einem Stück mit der Struktur A, B, C,
A, C könnten Sie Teil A mit PLAY 1
aufnehmen, Teil mit Speicherbank PLAY
2 aufzeichnen und Teil C mit PLAY 3
festhalten. Dann müssen Sie nur noch die
PLAY-Tasten zu den betreffenden Zeit
punkten in der korrekten Reienfolge
(PLAY 1 - 2 - 3 - 1 - 3) drücken.
4, Stoppen Sie die Aufnahme oder fügen
Sie einen Abschlußschnörkel an
Die Aufnahme der Akkordfolge setzt sich
fort, bis Sie sie stoppen. Dazu können Sie
die START/STOP-Taste @ drücken, um
die Aufzeichnung direkt zu stoppen. Die so
gestoppte Akkordaufnahme setzt sich bei
der Wiedergabe kontinuierlich fort. Wenn
Sie aber SYNCHRO START/ENDING @
antippen, um einen rhythmischen Abschluß
zu bekommen, stoppt die Aufnahme bei
der Wiedergabe mit Erreichen dieses
“Ab Schlußschnörkels”.
*Die Akkordfolgedaten bleiben auch nach
Ausschalten des SHS-10 im Speicher
erhalten.
*Sie können das SHS-10 wieder auf die
werksprogrammierten Akkordfolgen rück
stellen, indem Sie das Keyboard zunächst
auschalten und bei gleichzeitig gedrückter
NORMAL- und AUTO BASS CHORDTaste (9) & (D wieder einschalten.
Andere Parameter, die durch diesen
Vorgang rückgestellt werden, schließen
Mipi-Kanal (Kanalnr. = 1), Portamentozeit
(Zeit = 1) und Tonhöhenbeugungsbereich
(Bereich = 1) ein.
* Pour un morceau avec une structure A —
B - C - A — C, par exemple, vous
pouvez enregistrer la partie A dans la
banque PLAY 1, la partie B dans la ban
que PLAY 2 et la partie C dans la banque
PLAY 3. Ainsi, tout ce que vous avez à
faire est d'appuyer sur les touches de
lecture (PLAY) dans le bon ordre (PLAY
1—2 — 3 — 1— 3) au bon moment.
4, Arrêter ou ajouter une fin à l'enregistre
ment des suites d'accords.
Presser la touche d'accompagnement
START/STOP @ pour arrêter simplement
l'enregistrement de la suite d'accords. Si
vous arrêtez l'enregistrement de cette
manière, la suite d'accords sera répétée
continuellement lors de la lecture. Presser
la touche d'accompagnement SYNCHRO
START/ENDING @) pour ajouter une fin
à la suite d'accords. Si vous arrêtez l'en
registrement en utilisant la touche SYNC RO
START/ENDING, la suite s'arrêtera auto
matiquement quand la fin est atteinte
pendant la lecture.
* Les données des suites d'accord sont
maintenues en mémoire même si l'inter
rupteur d'alimentation eot mis sur OFF.
*^Vous pouvez réinitialiser le SHS-10 et
reprogrammer automatiquement les suites
d'accords initiales en coupant tout d'abord
l'alimentation puis en la redonnant tout
en maintenant les sélecteurs de mode
NORMAL et AUTO BASS CHORD pres
sés (d)et(D).
Les autres paramètres remis à zéro par ce
processus sont le canal MIDI (canal = 1), la
durée de portamento (durée = 1) et la
gamme de courbure de hauteur (gamme =
1).
♦Para una pieza cuya estructura sea A — B
— C — A — C, por ejemplo, puede re
gistrar la parte A en el banco PLAY 1, la
parte B en el PLAY 2 y la parte C en el
PLAY 3. Después, todo lo que tiene que
hacer es presionar los botones PLAY en el
orden debido (PLAY 1 - 2- 3—1-3)
y en los momentos apropiados.
4. Detenga el registro de progresión armó
nica, o agregue un final
Presione el botón de comienzo/parada de
acompañamiento (START/STOP, @) para
detener simplemente el registro de progre
sión armónica. Si detiene el registro de esta
manera, la progresión armónica será repe
tida continuamente al ser reproducida. Para
agregar un final a la progresión, presione
el botón de comienzo/fínal sincronizado
de acompañamiento (SYNCHRO START/
ENDING, ). En este caso, la progresión
se detendrá automáticamente al llegar al
final durante la reproducción.
♦Los datos de progresión armónica son
retenidos en la memoria aungue se apague
el interruptor de encendido.
♦Es posible “reposicionar” el SHS-10 y
reprogramar automáticamente las progre
siones armónicas iniciales, apagando la
unidad y volviéndola a encender mientras
se mantienen oprimidos los botones
selectores de modo NORMAL (D y de
contrabajo y acordes automáticos (AUTO
BASS CHORD, ®).
Otros parámetros reajustados mediante
este procedimiento son el canal MIDI
(canal = 1), el tiempo de portamento
(tiempo = 1) y el margen de alteración de
tono (margen = 1).
29
Page 31

MIDI
MIDI
MIDI
MIDI
MIDI, the Musical Instrument Digital Inter
face, is an advanced digital interface that
allows digital musical instruments like the
SHS-10 to "communicate" with one anoth
er. The SHS-10 has a MIDI OUT terminal
that can be connected to a MIDI tone gen
erator system, causing the external tone
generator system to play anything that is
played on or by the SHS-10. This gives the
SHS-10 a whole new range of exciting
voices!
The MIDI system transmits and receives
data on up to 16 different channels. The
SHS-10 is set up to transmit its four ac
companiment parts and one rhythm (drum)
part on specific MIDI channels:
ACCOMPANIMENT VOICE 1:
MIDI CHANNEL 12
ACCOMPANIMENT VOICE 2:
MIDI CHANNEL 13
ACCOMPANIMENT VOICE 3:
MIDI CHANNEL 14
ACCOMPANIMENT VOICE 4:
MIDI CHANNEL 15
DRUMS: MIDI CHANNEL 16
Your MIDI tone generator system must
therefore have voices set up to receive on
these channels if you want the accompani
ment and drum parts to be played by the
external tone generator.
Notes played on the SHS-10 keyboard,
however, can be transmitted on any MIDI
channel between 1 and 16 as follows:
MIDI steht für Musical Instrument Digital
Interface und stellt ein revolutionäres
Kommunikationssystem für digitale Instru
mente dar. Dank dem MIDI OUT-Anschluß
kann das SHS-10 an einen MIDI-Tongenerator angeschlossen werden und diesen
steuern. Dieser spielt dann alles, was auf
dem SHS-10 gespielt wird. Damit bekommt
das SHS-10 Zugriff auf weitere Stimmen!
SHS-10
Da MIDI-System überträgt und empfängt
Daten über 16 Kanäle. Das SHS-10 ist auf
Übertragung seiner vier Begleitstimmen
sowie seines Schlagzeugs über vier bestimm
te MIDI-Kanäle ausgelegt:
BEGLEITSTIMME 1
BEGLEITSTIMME 2
BEGLEITSTIMME 3
BEGLEITSTIMME 4
SCHLAGZEUG:
MIDI-KANAL 12
MIDI-KANAL 13
MIDI-KANAL 14
MIDI-KANAL 15
MIDI-KANAL 16
Daher muß Ihr MIDI-Tongenerator auf
diesen Kanälen empfangen. Jedem dieser
Kanäle muß eine Stimme zugewiesen sein,
damit die Begleitung und das Schlagzeug von
dem Tongenerator gespielt werden kann.
Noten, die auf dem Manual des SHS-10
angeschlagen werden, können folgender
maßen auf einem beliebigen der 16 MIDIKanäle übertragen werden:
MIDI, l'interface d'instrument de musique,
est une interface numérique avancée qui
permet la "communication" d'instruments
musicaux numériques comme le SHS-10.
Ce dernier possède une borne MIDI OUT
qui peut être raccordée à un système de
générateur de tonalité MIDI pour que
celui-ci lise tout ce qui est joué sur ou par
le SHS-10. Ceci pourvoie le SHS-10 d'une
nouvelle gamme complète de voix nouvel
les!
MIDI keyboard, tone generator, etc.
Le système MIDI transmet et reçoit les
données de jusqu'à 16 canaux différents.
Le SHS-10 est réglé pour transmettre ses
quatre parties d'accompagnement et une
partie rythmique (tambour) sur les canaux
MIDI spécifiques:
ACCOMPANIMENT VOICE 1:
MIDI CHANNEL 12
ACCOMPANIMENT VOICE 2:
MIDI CHANNEL 13
ACCOMPANIMENT VOICE 3:
MIDI CHANNEL 14
ACCOMPANIMENT VOICE 4:
MIDI CHANNEL 15
TAMBOURS: MIDI CHANNEL 16
Votre système de générateur de tonalité
MIDI doit par conséquent posséder des
voix réglées pour recevoir sur ces canaux si
vous voulez que les parties d'accompagne
ment et de tambours soient lues par le
générateur de tonalité externe.
Les notes lues sur le clavier SHS-10, cepen
dant, peuvent être transmises sur tout canal
MIDI entre 1 et 16, comme suit:
MIDI es una avanzada interfase digital que
permite a instrumentos musicales digitales
taies como el SHS-10 “comunicarse” entre
SI. El SHS-10 posee un terminal de salida
MIDI (MIDI OUT) que puede conectarse a
un sistema generador de tonos MIDI,
haciéndole tocar a éste todo lo ejecutado
en el teclado del SHS-10. Esto brinda al
SHS-10 una enorme variedad adicional de
voces.
El sistema MIDI transmite y recibe datos
por hasta 16 canales diferentes. El SHS-10
está diseñado para transmitir sus cuatro
partes de acompañamiento y una parte de
ritmo (batería) por los siguientes canales
MIDI específicos:
VOZ DE ACOMPAÑAMIENTO 1 :
CANAL MIDI 12
VOZ DE ACOMPAÑAMIENTO 2:
CANAL MIDI 13
VOZ DE ACOMPAÑAMIENTO 3:
CANAL MIDI 14
VOZ DE ACOMPAÑAMIENTO 4:
CANAL MIDI 15
BATERIA: CANAL MIDI 16
Por lo tanto, si desea que las partes de
acompañamiento y batería sean tocadas
por el sistema extemo MIDI generador de
tonos, éste deberá tener voces dispuestas en
estos canales.
Las notas tocadas en el teclado del SHS-10
pueden también transmitirse por otros
canales MIDI cualesquiera entre 1 y 16, del
siguiente modo:
30
Page 32

1. Press the MIDI channel parameter
change button (M) . The currently
selected MIDI channel will be shown on
the LED display.
1. Drücken Sie die MIDI-Taste (Q) . Damit
wird der gegenwärtige MIDI-Kanal auf
dem LED-Display angezeigt.
1. Presser la touche de changement de
paramètre de canal MIDI (Q) . Le canal
MIDI actuellement sélectionné sera
indiqué sur l'affichage DEL.
1. Presione el botón de cambio de canal
MIDI (Q) . El canal actual aparecerá en
el visualizador LED.
2. Press the + or — parameter change
button to select the desired MIDI chan
nel. The + button increases the channel
number, and the — button decreases
the channel number.
The MIDI tone generator must be set to
receive on the same channel that the SHS-
10 is set to transmit on.
*MIDI channel data is retained in memory
even if the power switch is turned OFF.
* Connection from the SHS-10 to the
MIDI tone generator system must be
made using a proper MIDI cable — avail
able at your Yamaha dealer or music
store.
* Refer to the owner's manual for your
MIDI tone generator system for details.
2. Drücken Sie nun die + oder — PARAM
ETER CHANGE-Taste, um den ge
wünschten MIDI-Kanal einzustellen. +
erhöht die Kanalnummer, während — sie
senkt.
DerMIDI-Tongeneratormuß auf dem Kanal
empfangen, auf dem das SHS-10 sendet.
*Die MIDI-Kanaldaten bleiben auch nach
dem Ausschalten des SHS-10 im Speicher
erhalten.
*Zum Anschluß an den MIDI-Tongenerator
wird ein MIDI-Kabel benötigt, daß Sie bei
Ihrem Yamaha- oder Musikalienhändler
bekommen.
* Schlagen Sie die Einzelheiten in der
Bedienungsanleitung Ihres MIDI-Tongene
rators nach.
2. Presser la touche de changement de
paramètre + ou — pour sélectionner le
canal MIDI voulu. La touche + aug
mente le numéro de canal et la touche —
le diminue.
Le générateur de tonalité MIDI doit être
réglé pour recevoir sur le même canal que
celui sur lequel le SHS-10 est réglé pour
transmettre.
*Les données du canal MIDI sont main
tenues en mémoire même si l'interrupteur
d'alimentation eot mis sur OFF.
*La connexion entre le SHS-10 et le géné
rateur de tonalité MIDI doit être faite en
utilisant un câble MIDI adéquat, en vente
chez votre concessionnaire Yamaha ou
dans un magasin d'instruments de musi
que.
* Se référer au manuel de votre système de
tonalité MIDI pour plus de détails.
2. Presione el botón de ajuste de paráme
tros -1- O - para seleccionar el canal
MIDI deseado. El botón -i- aumenta el
número de canal, y el — lo reduce.
El generador MIDI de tonos debe disponer
se para recibir por el mismo canal utüizado
por el SHS-10 para transmitir.
*Los datos de canal MIDI son retenidos en
la memoria aungue se apague el interrup
tor de encendido.
*La conexión entre el SHS-10 y el genera
dor MIDI de tonos debe efectuarse
mediante un cable MIDI apropiado (dis
ponible en su proveedor Yamaha o tienda
de música).
*Para más detalles acerca del sistema MIDI
generador de tonos, vea su manual del
usuario.
31
Page 33

MIDI-Data Format
MIDI- Datenf ormat
n®
Format des données MIDI
Formato de los datos MIDI
1. Transmission Conditions
1. Übertragungsbedingungen
ACTIVE SENSING
TIMING CLOCK
START
STOP
Manual performance
NOTE ON/OFF
VIBRATO SWITCH
SUSTAIN SWITCH
PORTAMENTO SWITCH
PROGRAM CHANGE
PITCH BENDER
Auto rhythm
NOTE ON/OFF
PROGRAM CHANGE
Accomp 1
NOTE ON/OFF 9BH
PROGRAM CHANGE
Accomp 2
NOTE ON/OFF 9CH
PROGRAM CHANGE
FEH
-------
F8H
-------
FAH
--------
FCH
-------
9nH ------BnH, 01H
BnH,40H
BnH,41H
CnH
-------
EnH
-------
9FH
-------
CFH
-------
-------
CBH
-------
-------
CCH
-------
1. Conditions de transmission
ph=lC
ch=12:
1. Condiciones de transmisión
MIDI OUT
Accomp 3
NOTE ON/OFF
PROGRAM CHANGE
Accomp 4
NOTE ON/OFF
PROGRAM CHANGE
9DH
CDH
9EH
CEH
-------
-------
-------
-------
3
----
3
----
32
Page 34

2.Transmission Data
2—1 Channel Information
Channel Voice Message
© Note On/Off
Manual performance
Status
Note No.
Velocity 01000000(64)
Auto rhythm
Status
Note No,
Velocity
Accomp 1
Status
Note No.
Velocity 01000000(64) "Note on"
Accomp 2
Status
Note No.
Velocity 01000000(64) "Note on"
Accomp 3
Status
Note No.
Velocity 01000000(64) "Note on"
Accomp 4
Status
Note No.
Velocity 01000000(64) "Note on"
lOOInnnnOnH)
Okkkkkkk
00000000(00)
1001111K9FH)
Okkkkkkk
Ovvvvvvv
00000000(00)
1001101K9BH)
Okkkkkkk
00000000(00)
lOomooocH)
Olclcl(kkkk
00000000(00)
loomoiODH)
Okkkkkkk
00000000(00)
10011110(9EH)
Okkkkkkk
00000000(00)
n= 0 (channel no. 1) —
15 (channel no. 16)
k=41 (Fi)-96 iCe)
"Note on"
"Note off"
Refer to table 3 on page
36
"Note on"
v= 56,64,127
"Note off"
k= 28(Eo) -91 (Gs)
"Note off"
"Note off"
"Note off"
k= 11 (B_2) -86 (Ds)
"Note off"
2. übertragungsdaten 2. Données de transmission
® Control Change
Manual performance
Status lOllnnnn(BnH) n= 0 (channel no. 1) —
15 (channel no. 16)
Control No. Occccccc
Control
Value Ovvvvvvv
Program Change
Manual performance
Status IIOOnnnn(CnH) n= 0 (channel no. 1) —
Program No. Oppppppp p~ 0 (voice "00") —
Auto rhythm
Status 1100111KCFH)
Program No. Oppppppp p= 0 (style "00") -
k= 29(Fo)-94(A^)
Accomp 1
Status 1100101KCBH)
Program No. Oppppppp p: Refer to table 2 and 1
k= 29(Fo)-100(E6)
Accomp 2
Status IIOOIIOO(CCH)
Program No. Oppppppp p; Refer to table 2 and 1
Accomp 3
Status 11001101 (CDH)
Program No. Oppppppp p: Refer to table 2 and 1
c= 1 Vibrato switch
c= 64 Sustain switch
c= 65 Portamento switch
v=0 Off v=l27 0n
15 (channel no. 16)
24 (voice "44")
Refer to table 1 on page
36
24 (style "44")
Refer to table 2 on page
36
on page 36
on page 36
on page 36
2. Datos transmitidos
® Pitch Bender
Manual performance
Status 11 lOnnnn(EnH) n= 0 (channel no. 1) —
Pitch Bender
Value (LSB) Ovvvvvvv
Pitch Bender
Value (MSB) Ovvvvvvv
MSB
00000000(00) 00000000(00) minimum value
01000000(40) 00000000(00) center value
0111111K7F) 01111110(7E) maximum value
2—2System Information
• System Real-time Message
® Timing Clock
Status ni11000(F8H)
(2) Start
Status
(D Stop
Status
® Active Sensing
Status IIIIIIIO(FEH)
LSB
IIIIIOIO(FAH)
IIIIIIOO(FCH)
15 (channel no. 16)
33
Accomp 4
Status IIOOIIIO(CEH)
Program No. Oppppppp p: Refer to table 2 and 1
on page 36
Page 35

C PortableKeyboard ] Date: 5/13, 19 8 7
Model SHS—10 MIDI Implementation Chart Version : 1,0
transmitted
Function ...
Manua1 performance
Auto rhythm
Basic Default
Channel Changed 1-1 6
Default
Mode Messages X
A 1 t e r e d
Note 41-96 *1 ♦ 3
Number : True voice
Velocity Note ON X 9nH v=64
Note OFF X 9nH v=0
After Ke y’ s X
Touch Ch’s
Pitch Bender
64
6 5
Control
1
Mo d e 3
X
0 7bit resolution X
1
0 VIBRATO SW X
0 SUSTAIN SW
0 PORTAMENTO SW X
1 6
X
Mo d e 3
X
0 9FH v = 56, 64, 1 2 7
X 9FH v=0
X
X
X
Change
Prog
Change : True #
System Exclusive
System : Song Pos
: Song S e1
C ommo n : Tune
System .‘Clock
Real Time :Commands
Aux ILocal 0 N/0 F F
: A 1 1 Notes OFF
Mes— :Active Sense
sagesIReset
0 0 - 24 >K2
************************
X
X
X
X
0
0
X
X
0
X
0 0 - 24 *4
CO
A
Notes: *1 = Includes transposed note.
*2 = Altered
♦3 = see tabi e 3
♦4 = Altered
by voice select. (See tabh
by style select. (See table 2)
e 1 )
Page 36

co
Cil
C Portable Keyboard }
Model MIDI Implementation Chart
F u n c t
ion ...
Ac comp 1
Transmitted
A c c omp 2
Date : 5/13,1987
Version ; 1.0
A c c omp 3
A c c omp 4
Basic
C h a n n 1
Mode
Note 28-91 *1
Number :
Velocity
After
Touch Ch’ s X
Pitch Bender
Control
Default 1 2
Changed
D e f a u 1 t
Messages X
A 1 t e r e d
True voice
Note ON X 9BH v=64
Note OFF
Key’ s
X
Mo d e 4
Hcsf:*:)«******
********** **********
X 9BH v=0
X
X
X
1 3
X
Mo d e 4
X
**********
29 - 94 *1
X 9CH v=64 X 9DH v=64
X 9CH v=0
X X
X X
X
X
1 4 1 5
X
Mo d e 4 Mo d e 4
X
** ****** *
29 -100*1
X 9DH v^O X 9EH v=0
X
X
X
X
**********
11 -86*1
**********
X 9EH v=64
X
X
X
X
Change
Prog
Change : True #
System Exclusive X
System : Song P 0 s
Song S e1
Common :
System
Real Time :Comma n d s
Aux :Local 0 N/OFF X
: A 1 1
Mes— : A c t
sages ; Reset X
Tune X
; C 1 0 c k
Notes OFF
i V e Sense
0-15 *5
s|c^:Î!4c5tîî|c:4:*)t:î(e
X
X
0
0
X
0
0-15 *5
0-1 5 * 5
**********
0-15 *5
**********
Notes; * 5 = Altered
by auto accompaniment voices, (see table
2 & 1)
Page 37

table 1
Voice name
SYNTHESIZER
JAZZ ORGAN
PIPE ORGAN
PIANO
HARPSICHORD
ELECTRIC PIANO
CELESTA
VIBRAPHONE
MARIMBA
STEEL DRUM
VIOLIN OAH
20
21
CELLO
22 JAZZ GUITAR
23 ROCK GUITAR
24
WOOD BASS OEH
30 TRUMPET
31 TROMBONE
32
HORN 11H
33 SAXOPHONE
34
CLARINET
40
FLUTE 14H
41
OBOE
42
HARMONICA
43
WHISTLE
44
MUSIC BOX 18H
Program change
00 H
OlH
02 H
03 H
04H
05 H
06 H
07 H
08 H
09 H
OBH
OCH
ODH
OFH
10H
12H
13H
15H
16H
17H
table 2
Style name
RHYTHM & BLUES 1 00 H
00
01 RHYTHM & BLUES 2
FUSION 1
02
FUSION 2
03
04 SLOW ROCK
SWING GUITAR 05H
10
11 BIG BAND
DEXIE BANJO
12
BOOGIE WOOGIE 08 H
13
14 JAZZ WALTZ
ROCK'N* ROLL 1 OAH OCH
20
21 ROCK'N'ROLL 2
22 ROCK-A-BALLAD
HARD ROCK ODH
23
REGGAE
24
BASSA NOVA
30
31 SAMBA
32 TANGO
COUNTRY 12H OCH
33
34
BLUEGPASS
MARCH 1
40
41 MARCH 2
LULLABY 16H
42
43
BAROQUE
FANFARE 18H
44
CH16 CH12 CH13 CH14
01 H OCH
02 H OCH
03 H
04 H
06H
07 H
09 H
OBH
OCH
OEH
OFH
10H OCH
11H 03 H
13H OEH
14H OFH
15H
17H
Program change
OOH
00 H
OCH
14H
14H
14H
03 H
03 H
OCH
OCH
OFH
OFH
04H
04H
03 H
OFH
03 H
03 H
OCH
OCH
OCH
03 H
03 H
OCH
OCH
OCH
OCH
OCH
OCH
OCH
02 H
OCH
04H
OFH
OFH OFH
07 H
07 H
04H
OFH OFH
14H
OCH
OCH
14H
14H
03 H
OCH
OFH
04H
OFH
03 H
OCH
OCH
03 H
OCH
OCH
OCH
OCH
02H
OCH
OAH
13H
13H
07 H
14H
OFH
CH15
OEH
OEH
OEH
OEH
OEH
OEH
OEH
OFH
OEH
OEH
OEH
OEH
OEH
OEH
OEH
OEH
OEH
OEH
OEH
OEH
11H
11H
OEH
04H
OFH
tables MIDI Auto Rhythm Data (CH16)
Instrument
HH-CLOSED
CYMBAL
TOM
SD
BD
Key note
A2 I39H}
D3 (3EH)
C2 Í30H}
E2 (34H)
A1 (2EH)
36
Page 38

Specifications
Technische Daten
ílt
Caractéristiques tech
niques
Especificaciones
KEYBOARD
32 keysÌF^-Cs)
VOICE ("00" - "44")
SYNTHESIZER, JAZZ ORGAN, PIPE
ORGAN, PIANO, HARPSICHORD,
ELECTRIC PIANO, CELESTA, VIBRA
PHONE, MARIMBA, STEEL DRUM,
VIOLINE, CELLO, JAZZ GUITAR,
ROCK GUITAR. WOOD BASS, TRUM
PET, TROMBONE, HORN, SAXO
PHONE, CLARINET, FLUTE, OBOE,
HARMONICA, WHISTLE, MUSIC BOX
STYLE ("00" - "44")
RHYTHM & BLUES 1, RHYTHM &
BLUES 2, FUSION 1, FUSION 2, SLOW
ROCK, SWING GUITAR, BIG BAND.
DIXIE BANJO, BOOGIE-WOOGIE,
JAZZ WALTZ, ROCK'N' ROLL 1,
ROCK'N' ROLL 2, ROCK-A-BALLAD,
HARD ROCK, REGGAE,BOSSA NOVA,
SAMBA, TANGO, COUNTRY. BLUEGRASS, MARCH 1. MARCH 2, LUL
LABY, BAROQUE, FANFARE
MODE
NORMAL, AUTO BASS CHORD, MELO
DY ON A. B. C.. AUTO BASS, AUTO
CHORD, SINGLE FINGER A. B. C.
EFFECT
PITCH, VIBRATO, PORTAMENTO,
SUSTAIN
RHYTHM CONTROL
INTRO/FILL IN 1, INTRO/FILL IN 2,
INTRO/ FILL IN 3,SYNCHRO START/
ENDING. START/ STOP
CHORD SEQUENCER
PLAY 1, PLAY 2, PLAY 3, RECORD
PARAMETER CHANGE
TEMPO, TRANSPOSE, TUNING,
ACCOMP. VOLUME, MIDI CHANNEL,
- +
OTHER CONTROLS AND DISPLAY
POWER SWITCH, VOLUME, 2-DIGIT
LEO DISPLAY
AUXILIARY JACK
HEADPHONES/ AUX OUT, DC (9-12V)
IN, MIDI OUT
MAIN AMPLIFIER
2W
MANUAL
32 Tasten (F2 - C5)
SUMMEN (“00*’ - “44“)
SYNTHESIZER, JAZZ-ORGEL,
PFEIFENORGEL, PIANO,
CEMBALO, E-PIANO, CELESTA,
VIBRAPHON, MARIMBA, STEEL
DRUM, VIOLINE, CELLO, JAZZ
GITARRE, ROCK-GITARRE,
KONTRABASS, TROMPETE,
POSAUNE, HORN, SAXOPHON,
KLARINETTE, QUERFLÖTE, OBOE,
HARMONIKA, PFEIFE, SPIELDOSE
STIL (“00“ - “44“)
RHYTHM & BLUES 1, RHYTHM &
BLUES 2, FUSION 1, FUSION 2,
SLOW ROCK, SWING GITARRE, BIG
BAND, DIXIE BANJO, BOOGIE
WOOGIE, JAZZ-WALZER, ROCK’N*
ROLL 1, ROCK’N* ROLL 2, ROCK
BALLADE, HARD ROCK, REGGAE,
BOSSA NOVA, SAMBA, TANGO,
COUNTRY, BLUEGRASS, MARSCH 1,
MARSCH 2, LULLABY, BAROCK,
FANFARE
FUNKTIONEN
NORMAL, AUTO-BASS/AKKORD,
MELODIE MIT AUTO-BASS/AKKORD,
AUTO-BASS, AUTO AKKORD,
EINZELFINGER-BASS/AKKORD
EFFEKTE
TONHÖHENBEUGUNG, VIBRATO,
PORTAMENTO, SUSTAIN
RHYTHMUSSTEUERUNG
INTRO/FILL IN 1, INTRO/FILL IN 2,
INTRO/FILL IN 3, SYNCHRO
START/ENDING, START/STOP
AKKORD SEQUENZER
PLAY 1, PLAY 2, PLAY 3, PLAY
RECORD
PARAMETER
TEMPO, TRANSPONIERUNG, FEIN
STIMMEN, BEGLEITUNGSLAUT
STÄRKE, MIDI-KANAL, -, +
ANDERE REGLER UND DISPLAY
NETZSCHALTER, LAUTSTÄRKE,
2^TELLIGES LED-DISPLAY
CLAVIER
32 touches (fa 2—do 6)
VOIX ("00" - "44")
SYNTHETISEUR, ORGUE DE JAZZ,
ORGUE A TUYAUX, PIANO,
CLAVECIN, PIANO ELECTRIQUE,
CELESTA, VIBRAPHONE, MARIMBA,
TAMBOUR METALLIQUE, VIOLON,
VIOLONCELLE, GUITARE DE JAZZ,
GUITARE ROCK, BASSE DE BOIS,
TROMPETTE. TROMBONE, COR,
SAXOPHONE, CLARINETTE, FLUTE,
HAUTBOIS, HARMONICA,SIFFLET,
BOITE A MUSIQUE
STYPE ("00" - "44")
RYTHME ET BLUES 1, RYTHME ET
BLUES 2, FUSION 1, FUSION 2,
ROCK LENT, GUITARE SWING,
GRAND ORCHESTRE, BANJO DIXIE,
BOOGIE-WOOGIE, VALSE DE JAZZ,
ROCK'N* ROLL 1, ROCK'N' ROLL 2,
ROCK BALLADE, ROCK DUR,
REGAAE, BOSSA NOVA, SAMBA,
TANGO, COUNTRY, BLUEGRASS,
MARCHE 1, MARCHE 2, BERCEUSE,
BAROQUE, FANFARE
MODE
NORMAL, ACCORDS DE BASSES
AUTOMATIQUES, MELODIE EN
MARCHE A. B. C., BASSES
AUTOMATIQUES, ACCORDS
AUTOMATIQUES, UN DOIGT A. B. C.
EFFET
HAUTEUR, VIBRATO,
PORTAMENTO, MAINTIEN
CONTROLE DU RYTHME
INTRODUCTION/REMPLISSAGE 1,
INTRODUCTION/REMPLISSAGE 2,
INTRODUCTION/REMPLISSAGE 3,
MARCHE/FIN SYNCHRONISES,
MARCHE/ARRET
SEQUENCEUR D'ACCORDS
LECTURE 1, LECTURE 2. LECTURE
3, ENREGISTREMENT
CHANGEMENT DE PARAMETRE
TEMPO, TRANSPOSITION, ACCORD
DU SON.ACCOMPAGNEMENT,
VOLUME, CANAL MIDI, -, +
TECLADO
32 teclas (Fa2 - D05)
VOCES (“00“ - “44“)
SINTETIZADOR, ORGANO DE JAZZ,
ORGANO DE TUBOS, PIANO,
CLAVICORDIO, PIANO ELECTRICO,
CELESTA, VIBRAFONO, MARIMBA,
TAMBOR DE ACERO, VIOLIN,
VIOLONCELO, GUITARRA DE JAZZ,
GUITARRA DE ROCK, CONTRA
BAJO ACUSTICO, TROMPETA,
TROMBON, CORNO, SAXOFON,
CLARINETE, FLAUTA, OBOE,
ARMONICA, SILBIDO, CAJA DE
MUSICA
ESTILOS (“00“ - “44“)
RHYTHM & BLUES 1, RHYTHM &
BLUES 2, FUSION 1, FUSION 2,
ROCK LENTO, GUITARRA SWING,
GRANDES BANDAS, BANJO
DIXIELAND, BOOGIE-WOOGIE,
JAZZ VALSEADO, ROCK & ROLL 1,
ROCK & ROLL 2, BALADA ROCK,
ROCK PESADO, REGGAE, BOSSA
NOVA, SAMBA, TANGO, COUNTRY,
BLUEGRASS, MARCHA 1, MARCHA
2, CANCION DE CUNA, BARROCO,
FANFARRIA
MODOS
NORMAL, CONTRABAJO Y
ACORDES AUTOMATICOS, CONTRA
BAJO Y ACORDES AUTOMATICOS
CON MELODIA, CONTRABAJO
AUTOMATICO, ACORDES AUTO
MATICOS, CONTRABAJO Y
ACORDES AUTOMATICOS A UN
SOLO DEDO
EFECTOS
ALTERACION MOMENTANEA DE
TONO, VIBRATO, PORTAMENTO,
SOSTENIMIENTO
CONTROL DEL RITMO
INTRODUCCION/RELLENO 1,
INTRODUCCION/RELLENO 2,
INTRODUCCION/RELLENO 3,
COMIENZO/FINAL SINCRONIZADOS,
COMIENZO/PARADA
SECUENCUDOR DE ACORDES
REPRODUCCION 1, REPRODUCCION
2, REPRODUCCION 3, REGISTRO
37
Page 39

SPEAKER
7.7cm (3”)
RATED VOLTAGE
DC 9V (Six SUM-3 (AM3), "AA” size,
R6 (LR6| or equivalent batteries), AC
Power Adapter (PA-1/PA-1 B/PA-4) or
Car Battery Adapter (CA-1)
APPROXIMATE BATTERY LIFE:
Alkaline batteries — approx. 9 hours.
Manganese batteries — approx. 3 hours.
DIMENSIONS (Wx Dx H)
751mm x 178 x 57mm
(29-5/8" X 7" X 2-1/4")
WEIGHT
1.1 kg (2.4 lbs) excluding batteries
ACCESSORY
Strap
All specifications are subject to change
without notice.
ZUSATZBUCHSEN
HEADPHONES/AUX OUT, DC
(9 - 12V) IN, MIDI OUT
HAUPTVERSTÄRKER
2W
LAUTSPRECHER
7,7 cm
BETRIEBSSPANNUNG
9V Gleichspannung (Sechs SUM-3
Batterien der Größe AAA, R6 oder
entsprechende), Netzadapter (PA-1/
PA-1B/PA4) oder Autobatterie-Adapter
(CA-1)
UNGEFÄHRE LEBENSDAUER DER
BATTERIE:
Alkalibatterien - ca. 9 Std.
Mangangbatterien - ca. 3 Std.
ABMESSUNGEN (B x T x H)
751mm x 178mm x 57mm
GEWICHT
1,1 kg ohne Batterien
ZUBEHÖR
Schultergurt
Das Recht zu Änderungen ohne Voran
kündigung bleibt Vorbehalten.
AUTRES COMMANDES ET AFFICHAGE
INTERRUPTEUR D'ALIMENTATION,
VOLUME, AFFICHAGE DEL A 2
CHIFFRES
PRISE AUXILIAIRE
CASQUE D'ECOUTE/SORTIE
AUXILIAIRE, ENTREE CC (9-12V),
SORTIE MIDI
AMPLIFICATEUR PRINCIPAL
2W
HAUT-PARLEUR
7,7cm
TENSION NOMINALE
CC 9V (six piles SUM-3, "AAA" R6 ou
équivalent), adaptateur d'alimentation
CA (PA-1/PA-1 B/PA-4) ou adaptateur
pour batterie automobile (CA-1)
DURÉE APPROXIMATIVE DE LA VIE
DES PILES:
Piles alcalines — environ 9 heures
Piles manganèse — environ 3 heures
DIMENSIONS (LxHxP)
751mm x 178mm x 57mm
POIDS
1,1 kg sans les piles
ACCESSOIRE
Bandoulière
Toutes les caractéristiques techniques sont
sujettes à des changements sans préavis.
CAMBIO DE PARAMENTROS
TEMPO, TRANSPOSICION, AFINA
CION, ACOMPAÑAMIENTO,
VOLUME, CANAL MIDI, -, +
OTROS CONTROLES, VISUALIZADOR
INTERRUPTOR DE ENCENDIDO,
VOLUMEN, VISUALIZADOR LED DE
2 DIGITOS
JACKS AUXILIARES
SALIDA DE AUDIFONOS/AUX,
ENTRADA DE 9 ^ 12V CC, SALIDA
MIDI
AMPLIFICADOR PRINCIPAL
2W
ALTAVOZ
7,7cm
ALIMENTACION
9V CC (seis pilas tamaño "AAA”,
SUM-3, R6 o equivalentes), adaptador
de alimentación de CA (PA-1, PA-IB,
PA4) o adaptador de batería de automóvü (CA-1)
DURACIÓN DE LAS PILAS:
Pilas alcalinas: aprox. 9 horas
Pilas de manganeso: aprox, 3 horas
DIMENSIONES (An x Pr x Al)
751 X 178 X 57mm
PESO
1,1 kg, sin incluir las püas
ACCESORIO
Correa
Attention users in the U.S.A.
prepared in accordance with FCC rules.
The SHS-10 uses frequencies that appear in the radio frequency range,
and if installed in the immediate proximity (within three meters) of
some types of audio or video devices interference may occur.
The SHS-10 has been type tested and found to comply with the
specifications set for a Class B computing device in accordance with
those specifications listed in Subpart J of Part 15 of the FCC rules.
These rules are designed to provide a reasonable measure of protec
tion against such interference. However, this does not guarantee that
interference wilt not occur. If your should be suspected of causing
interference with other electronic devices, verification can be made by
turning your SHS-10 off and on. If the interference continues when
your SHS-10 is off, the SHS-10 is not the source of the interference. If
your SHS-10 does appear to be the source of the interference, you
should try to correct the situation by using one or more of the
following measures:
Relocate either the SHS-10 or the electronic device that is being
affected by the interference.
Utilize power outlets for the PortaSound SHS-10 and the device
being affected that are on different branch (circuit breaker or fuse)
circuits, or install A/C line filters.
In the case of radio-TV interference, relocate the antenna or, if the
antenna lead-in is a 300 ohm ribbon lead, change the lead-in to a co
axial type cable.
If these corrective measures do not produce satisfactory results,
please contact your Yamaha Consumer Products retailer for sugges
tions and/or corrective measures. If you cannot locate a your Yamaha
Consumer Products retailer in your general area, contact the
Electronic Service Division, Yamaha Music Corp., 6600 Orangethorpe
Ave., Buena Park, CA 90620.
If for any reason you should need additional information relating to
radio or TV interference, you may find a booklet prepared by the
Federal Communications Commission helpful: "How to identify and
Resolve Radio-TV Interference Problems". This booklet is available
from the U.S, Government Printing Office, Washington D.C.
20402-Stock #004-000-345-4.
Las especificaciones están sujetas a cambios
sin previo aviso.
This applies only to products
distributed by Yamaha Music
Corp. U.S.A.
Dies bezieht sich nur auf die
von der YAMAHA MUSIC
COR. U.S.A. vertriebenen
Produkte.
Ceci ne s'applique qu'aux
produits distribués par Yamaha
Music Corp. U.S.A.
Esto se aplica solamente a
productos distribuidos por
Yamaha Music Corp. U.S.A.
38
Page 40

Wichtiger Hinweis für die Benutzung in der Bundesrepublik Deutschland.
Bescheinigung des Herstellers/Importeurs
Hiermit wird bescheinigt, daß der/die/das
Elektronische Orgel Typ SHS-10
This applies only
to products distributed
by YAMAHA Europe
GmbH.
Dies bezieht sich nur
auf die von der YAMAHA
EUROPA GmbH
vertriebenen Produkte.
in Übereinstimmung mit den Bestimmungen der
VERFÜGUNG 1046/84
(Amtsblattverfügung)
funk-entstört ist.
Der Deutschen Bundespost wurde das Inverkehrbringen dieses Gerätes
angezeigt und die Berechtigung zur Überprüfung der Serie auf Einhaltung
der Bestimmungen eingeräumt.
Yamaha Europa GmbH
Name des Importeurs
The serial number of this product may be
found on the bottom of the unit. You
should note this serial number in the space
provided below and retain this manual as
a permanent record of your purchase to aid
identification in the event of theft.
Model No. SHS-10
Serial No.
Concerning Warranty
This product was made for international
distribution, and since the warranty for
this type of product varies from marketing
area to marketing area, please contact the
selling agency for information concerning
the applicable warranty and/or service
policies.
Die Seriennummer befindet sich an der
Unterseite des Instrumentes. Wir emp
fehlen, diese Nummer sicherheitshalber an
der unten vorgesehenen Stelle einzutragen,
um sie auch im Falle eines Diebstahls
jederzeit zur Hand zu haben.
Modell-Nr. SHS-10
Serien-Nr.
Hinweis zur Garantie
Dieses Produkt wird international ver
trieben, und die Garantiebedingungen sind
von Vertriebsland zu Vertriebsland verschie
den. Ihr Händler gibt Ihnen gerne genauere
Informationen zu den in Ihrem Land
ffliltigen Garantie- und/order ServiceDedingungen.
Ceci ne s'applique qu'aux
produits distribués par
Yamaha Europe GmbH.
Esto se aplica solamente
a productos distribuidos
por Yamaha Europa
GmbH.
Le numéro de série de ce produit figure
sur le socle. Il conviendra de noter ce
numéro de série dans l'espace réservé
ci-dessous et de conserver ce manuel ;
celui-ci constitue le document permanent
de votre achat et permet l'identification
en cas de vol.
Modèle No. SHS-10
No. de série;
Remarque relative à la garantie
Ce modèle est destiné à être distribué à
l'échelle internationale. Etant donné que
les conditions de garantie pour ce type de
produit varient en fonction des zones de
commercialisation, prière de prendre
contact avec l'agence chargée des ventes
pour tous renseignements relatifs aux
conditions de garantie et de service
après-vente.
E1 número de serie de este producto se
encuentra en la parte inferior de la unidad.
Sirvase anotar este número de serie en el
espacio proporcionado debajo y guarde este
manual como comprobante de compra para
ayudar a la identificación en caso de robo.
№ de modelo SHS-10
№ de serie
Concerniente a la garantía
Este producto ha sido fabricado para ser
distribuido internacionalmente y, como la
garantía para este tipo de producto varia en
relación a su área de comercialización,
sírvase consultar con el agente de ventas
sobre la información en torno a la garantía
aplicable y/o políticas de servicio.
€) Y A MA H A
HAMAMATSU. JAPAN
(3!Í^^6208 Printed in Japan
 Loading...