

Page 1
Page 2
SPECIAL MESSAGE SECTION
This product utilizes batteries or an external power supply
(adapter). DO NOT connect this product to any power supply or
adapter other than one described in the manual, on the name
plate, or specifically recommended by Yamaha.
WARNING: Do not place this product in a position where anyone could walk on, trip over, or roll anything over power or connecting cords of any kind. The use of an extension cord is not
recommended! If you must use an extension cord, the minimum
wire size for a 25' cord (or less ) is 18 AWG. NOTE: The smaller
the AWG number, the larger the current handling capacity. For
longer extension cords, consult a local electrician.
This Product should be used only with the components supplied
or; a cart, rack, or stand that is recommended by Yamaha. If a
cart, etc., is used, please observe all safety markings and instructions that accompany the accessory product.
SPECIFICATIONS SUBJECT TO CHANGE: The information contained in this manual is believed to be correct at the time
of printing. However, Yamaha reserves the right to change or
modify any of the specifications without notice or obligation to
update existing units.
This product, either alone or in combination with an amplifier
and headphones or speaker/s, may be capable of producing
sound levels that could cause permanent hearing loss. DO NOT
operate for long periods of time at a high volume level or at a
level that is uncomfortable. If you experience any hearing loss or
ringing in the ears, you should consult an audiologist. IMPOR-
TANT: The louder the sound, the shorter the time period before
damage occurs.
Some Yamaha products may have benches and/or accessory
mounting fixtures that are either supplied with the product or as
optional accessories. Some of these items are designed to be
dealer assembled or installed. Please make sure that benches are
stable and any optional fixtures (where applicable) are well
secured BEFORE using. Benches supplied by Yamaha are
designed for seating only. No other uses are recommended.
Battery Notice: This product MAY contain a small nonrechargeable battery which (if applicable) is soldered in place.
The average life span of this type of battery is approximately five
years. When replacement becomes necessary, contact a qualified
service representative to perform the replacement.
This Product may also use “household” type batteries. Some of
these may be rechargeable. Make sure that the battery being
charged is a rechargeable type and that the charger is intended
for the battery being charged.
When installing batteries, do not mix old batteries with new, or
with batteries of a different type. Batteries MUST be installed
correctly. Mismatches or incorrect installation may result in
overheating and battery case rupture.
Warning: Do not attempt to disassemble, or incinerate any battery. Keep all batteries away from children. Dispose of used batteries promptly and as regulated by the laws in your area.
Note: Check with any retailer of household type batteries in your
area for battery disposal information.
Disposal Notice: Should this Product become damaged beyond
repair, or for some reason its useful life is considered to be at an
end, please observe all local, state, and federal regulations that
relate to the disposal of products that contain lead, batteries,
plastics, etc. If your dealer is unable to assist you, Please contact
Yamaha directly.
NAME PLATE LOCATION: The name Plate is located on the
bottom of the product. The model number, serial number, power
requirements, etc., are located on this plate. You should record
the model number, serial number, and the date of purchase in the
spaces provided below and retain this manual as a permanent
record of your purchase.
INOUT MIDI OUTPUT PHONES DC IN POWER
ON OFFR L/MONO
NOTICE: Service charges incurred due to lack of knowledge
relating to how a function or effect works (when the unit is operating as designed) are not covered by the manufacturer’s warranty, and are therefore the owners responsibility. Please study
this manual carefully and consult your dealer before requesting
service.
ENVIRONMENTAL ISSUES: Yamaha strives to produce
products that are both user safe and environmentally friendly. We
sincerely believe that our products and the production methods
used to produce them, meet these goals. In keeping with both the
letter and the spirit of the law, we want you to be aware of the
following:
PLEASE KEEP THIS MANUAL
92-BP
Model
Serial No.
Purchase Date
Page 3
FCC INFORMATION (U.S.A.)
1. IMPORTANT NOTICE: DO NOT MODIFY THIS UNIT!
This product, when installed as indicated in the instructions contained in this manual, meets FCC requirements. Modifications not expressly approved by Yamaha
may void your authority, granted by the FCC, to use the product.
2. IMPORTANT: When connecting this product to accessories and/or another product use only high quality shielded cables. Cable/s supplied
with this product MUST be used. Follow all installation instructions. Failure to follow instructions could void your FCC authorization to use
this product in the USA.
3. NOTE: This product has been tested and found to comply with the requirements listed in FCC Regulations, Part 15 for Class “B” digital
devices. Compliance with these requirements provides a reasonable level of assurance that your use of this product in a residential environment
will not result in harmful interference with other electronic devices. This equipment generates/uses radio frequencies and, if not installed and
used according to the instructions found in the users manual, may cause interference harmful to the operation of other electronic devices. Compliance with FCC regulations does not guarantee that interference will not occur in all installations. If this product is found to be the source of
interference, which can be determined by turning the unit “OFF” and “ON”, please try to eliminate the problem by using one of the following
measures:
Relocate either this product or the device that is being affected by the interference
Utilize power outlets that are on different branch (circuit breaker of fuse) circuits or install AC line filter/s.
In the case of radio or TV interference, relocate/reorient the antenna. If the antenna lead-in is 300 ohm ribbon lead, change the lead-in to co-axial type cable.
If these corrective measures do not produce satisfactory results, please contact the local retailer authorized to distribute this type of product. If you can not locate
the appropriate retailer, please contact Yamaha Corporation of America, Electronic Service Division, 6600 Orangethorpe Ave, Buena Park, CA 90620
*This applies only to products distributed by YAMAHA CORPORATION OF AMERICA
CANADA
THIS DIGITAL APPARATUS DOES NOT EXCEED THE “CLASS B”
LIMITS FOR RADIO NOISE EMISSIONS
FROM DIGITAL APPARATUS SET OUT IN THE RADIO INTERFERENDE REGULATION OF THE CANADIAN DEPARTMENT OF COMMUNICATIONS.
LE PRESENT APPAREIL NUMERIQUE N’EMET PAS DE BRUITS
RADIOELECTRIQUES DEPASSANT LES LIMITES APPLICABLES
AUX APPAREILS NUMERIQUES DE LA “CLASSE B” PRESCRITES
DANS LE REGLEMENT SUR LE BROUILLAGE RADIOELECTRIQUE EDICTE PAR LE MINISTERE DES COMMUNICATIONS DU
CANADA.
∗ This applies only to products distributed by YAMAHA CANADA
MUSIC LTD.
Bescheinigung des Importeurs
Hiermit wird bescheinigt, daß der/die/das
Gerät: Rhythm Programmer Typ : RY20
(Gerät, Typ, Bezeichnung)
in Übereinstimmung mit den Bestimmungen der
VERFÜGUNG 1046/84
(Amtsblattverfügung)
funkentstört ist.
Der Deutschen Bundespost wurde das Inverkehrbringen dieses
Gerätes angezeigt und die Berechtigung zur Überprüfung der Serie
auf Einhaltung der Bestimmungen eingeräumt.
Yamaha Europa GmbH
Name des Importeurs
ADVARSEL!
Lithiumbatteri—Eksplosionsfare ved fejlagtig håndtering. Udskiftning
må kun ske med batteri af samme fabrikat og type. Levér det brugte
batteri tilbage til leverandoren.
VARNING
Explosionsfara vid felaktigt batteribyte . Använd samma batterityp eller
en ekvivalent typ som rekommenderas av apparattillverkaren.
Kassera använt batteri enligt fabrikantens instruktion.
VAROITUS
Paristo voi räjähtää, jos se on virheellisesti asennettu. Vaihda paristo
ainoastaan laitevalmistajan suosittelemaan tyyppiin. Hävitä käytetty
paristo valmistajan ohjeiden mukaisesti.
Dette apparat overholder det gaeldende EF-direktiv vedrørende
radiostøj.
Cet appareil est conforme aux prescriptions de la directive communautaire 87/308/CEE.
Diese Geräte entsprechen der EG-Richtlinie 82/499/EWG und/oder
87/308/EWG.
This product complies with the radio frequency interference requirements of the Council Directive 82/499/EEC and/or 87/308/EEC.
Questo apparecchio è conforme al D.M.13 aprile 1989 (Direttiva
CEE/87/308) sulla soppressione dei radiodisturbi.
Este producto está de acuerdo con los requisitos sobre interferencias
de radio frequencia fijados por el Consejo Directivo 87/308/CEE.
YAMAHA CORPORATION
∗ Dies bezieht sich nur auf die von der Yamaha Europa GmbH vertriebenen
Produkte.
Page 4

Precautions
Your RY20 will give you years of reliable service if you follow the simple rules given below:
■ Location
Do not expose the instrument to the following conditions, to avoid deformation,
discoloration, or more serious damage.
• Direct sunlight, such as near a window.
• High temperatures, for example, near a heat source, outdoors, or in a car during the
daytime.
• Excessive humidity.
• Excessive dust.
• Strong vibrations.
■ Power Supply
Always use the supplied Yamaha AC Adaptor to power your RY20. Other adaptors may cause
damage to the RY20. Also, make sure that the adaptor you have is appropriate for the AC
mains supply voltage in the area where you intend to use the RY20.
NOTE
The correct INPUT voltage is marked on the top of the adaptor.
Turn the power OFF and unplug the AC adaptor when the instrument is not in use.
Unplug the AC adaptor during electrical storms.
Avoid plugging the AC adaptor used with the RY20 into the same AC mains outlet as
appliances with high power consumption, such as electric heaters or ovens. Also avoid using
multi-plug adaptors since these can result in reduced sound quality and possibly damage.
Turn off the power before making or breaking connections.
To avoid damage to the instrument and other devices to which it is connected (a sound
system, for example), always turn the power switches of all related devices OFF before
connecting or disconnecting audio and MIDI cables.
■ Handling and Transport
Never apply excessive force to the controls, connectors, or other parts of the instrument.
Always plug and unplug any cables by gripping the connector, not the cord itself. Disconnect
all cables before moving the instrument.
Dropping the RY20 or otherwise subjecting it to strong physical shocks can damage it. Handle
it with care.
i
Page 5

■ Cleaning
Clean the cabinet and panel with a soft dry cloth. A slightly damp cloth may be used to
remove stubborn grime and dirt.
Do not use solvents such alcohol, benzine, or thinner to clean the cabinet or panel.
Avoid placing vinyl objects on top of the instrument. Vinyl can stick to and discolor the
surface.
■ Electrical Interference
The RY20 contains digital circuitry and may cause interference or noise if placed too close to
TV sets, radios, or similar equipment. If such a problem does occur, move the RY20 further
away from the affected equipment.
■ Memory Back-up
The RY20 contains a special long-life battery that retains the contents of its internal RAM
memory even when the power is turned OFF. The back-up battery should last for several
years. When the back-up battery needs to be replaced, the message “BATT LOW” will
momentarily appear on the display when you turn the power ON. When this happens, have
the back-up battery replaced by qualified Yamaha service personnel.
WARNING
DO NOT ATTEMPT TO REPLACE THE BACK-UP BATTERY YOURSELF.
Transfer important data from your RY20 to a MIDI data recorder such as the Yamaha MDF2
MIDI Data Filer for safe long-term storage. Yamaha cannot be held responsible for data loss
caused by battery failure or improper operation of the RY20.
■ Service and Modification
The RY20 contains no user-serviceable parts. Opening the case and/or tampering with the
internal circuitry can lead to irreparable damage and will void the warranty. Refer all
maintenance to qualified Yamaha service personnel.
■ Third-party Software
Yamaha cannot take any responsibility for software produced for this product by third-party
manufacturers. Please direct any comments about such software to the manufacturer or their
agents.
YAMAHA is not responsible for damage caused by improper handling
or operation.
ii
Page 6

Introduction
With its wide collection of voices and easy-to-use controls, the Yamaha RY20 is the perfect musical
partner for guitarists, bassists, keyboard players, and many other instrumentalists. It offers the
features and capability required for recording applications, rehearsals and practice sessions, and live
performance.
The RY20 uses Yamaha’s AWM (Advanced Wave Memory) tone generator system to create 300
realistic tunable voices including drums, effected drums, percussion of all kinds, and basses. You can
add effects to the voices, either reverb or delay, using the built-in DSP (Digital Signal Processor).
Using one of the 20 user drum kits, you can assign any voice to one of the pads.
The RY20 has 50 professionally-programmed preset patterns. You can also create and store 50 user
patterns of your own, and combine tracks from different patterns and store them for an additional 50
“combination” patterns. Each pattern has six sections (“INTRO”, “MAIN A”, “MAIN B”, “FILL AB”,
“FILL BA”, and “ENDING”) and each section has four tracks (bass drum, snare drum, hi-hat and other
instruments).
Patterns can be combined to create complete songs. The RY20 can store 50 songs in its user song
memory.
It features easy-to-use controls with a large, useful LCD display. Change values quickly using the
Shuttle dial, then fine-tune them using the Jog dial. Create patterns in real-time or step record mode
using the velocity-sensitive pads. Make up “kits” of commonly-used drum and bass sounds. Make your
patterns reflect your musical ideas and escape from the “mechanical feel” common to conventional
rhythm machines by using the built-in swing and groove functions.
The RY20 includes full MIDI capabilities (including General MIDI compatible drum mapping) to
allow full communication with the rest of your MIDI set-up.
Please read this owner’s manual carefully in order to familiarize yourself with the RY20 and its
features – and keep the manual in a safe place for later reference.
iii
Page 7
SONG MODE (50 songs)
SONG 49
SONG 00
PATTERN MODE (150 patterns)
• Preset Patterns (000–049) • User Patterns (050–099) • Combination Patterns (100–149)
PATTERN 149
PATTERN 000
6 SECTIONS
INTRO
MAIN A
MAIN B
FILL AB
FILL BA
ENDING
4 TRACKS
BD
SD
HH
OTHERS
DRUM KIT MODE (40 Drums)
• Preset Drum Kits (00–19) • User Drum Kits (20–39)
DRUM KIT 39
DRUM KIT 00
PAD BANK
PAD BANK A
PAD BANK B
PAD BANK C
PAD BANK D
PAD BANK E
PAD BANK BASS
EFFECT MODE
• 6 Reverb Settings • 4 Delay Settings
EFFECT
iv
Page 8

v
Page 9

Contents
Contents
1
1 The Controls and Connections............... 2
Front Panel............................................. 2
Rear Panel .............................................. 8
Making Connections............................... 9
Turn on the RY20 ................................. 11
2 Playing the Demo Song.......................... 12
3 Playing the Preset Patterns.................. 14
Changing Pattern Numbers During
Playback................................................ 16
Selecting the Sections .......................... 16
Setting the Tempo ................................ 19
Muting a Track..................................... 20
4 Playing the Pads...................................... 21
Selecting a Drum Kit ........................... 22
Selecting a Pad Bank ........................... 23
Playing the Bass Voices ....................... 24
5 Recording a User Pattern ..................... 28
Recording Modes .................................. 28
Step Record Mode................................. 29
Real-time Record Mode ........................ 35
Combination Patterns .......................... 38
Editing Patterns ................................... 39
Quantization......................................... 44
Gate Time ............................................. 45
Changing the Meter .............................46
Adjusting the Click............................... 47
6 Other Pattern Functions ....................... 49
Swing..................................................... 49
Groove ................................................... 50
Velocity Modify ..................................... 54
Clearing a Pattern................................ 55
Copying a Pattern ................................ 57
Setting the Pattern Name.................... 60
7 Recording a Song .................................... 62
Step Record Mode................................. 62
Real-Time Record Mode ....................... 67
Setting the Tempo ................................ 69
Deleting a Part ..................................... 69
Inserting a Part .................................... 70
Adjusting the Click............................... 72
8 Playing the Songs.................................... 73
Playing a Song...................................... 73
Chain and Repeat................................. 75
Clearing a Song .................................... 77
Copying a Song......................................79
Name that Song ....................................81
9 Modifying the Drum Kits .......................82
Assigning Voices to Each Pad ..............83
Volume Level.........................................86
Stereo Pan .............................................87
Pitch.......................................................88
Decay .....................................................89
Sensitivities...........................................90
Voice Polyphony ....................................95
Alternate Group ....................................96
Note/Trigger Driven..............................97
Pad Sensitivity ......................................98
Chase .....................................................99
Copy .....................................................100
Name....................................................101
0 Changing the Effects.............................102
Enabling Effects..................................102
Select the Effect Type .........................103
Send Level ...........................................104
Return Level........................................105
Reverb Time ........................................106
Feedback Gain.....................................107
Delay Time ..........................................108
A MIDI Functions ......................................110
MIDI Sync ...........................................110
Drum Instruments MIDI Channel.....111
Bass Instrument MIDI Channel ........112
Program Change MIDI Channel ........113
MIDI Note Assignment.......................114
Volume and Expression ......................116
Bulk Dump ..........................................118
Receiving Bulk Data ...........................118
Appendix..................................................120
Total Reset Procedure.........................120
Pattern List .........................................121
Drum Kit List......................................122
Voice List.............................................124
Troubleshooting ..................................126
LCD Messages.....................................127
Specifications ......................................128
MIDI Data Format..............................129
MIDI Implementation Chart..............130
Index .........................................................131
2
3
4
5
6
7
8
9
10
11
1
Page 10
The Controls and Connections
The Controls and
1
Connections
■ Front Panel
POWER
1
4
TRACK
SELECT/
MUTE
OTHERS
PATTERN
SONG
MIDI
PAGE –
5
DRUM KIT
PAGE +
HH
SD
BD
RHYTHM
PROGRAMMER
TEMPO
6 7
EFFECT
PAD BANK
VOLUME
+
2 3
MIN MAX
–
ENTER
–1 +1
DELETE
CLEAR
0
INSERT
COPY
AUDITION
SECTION
TOM 1
6
BD
INTRO MAIN A MAIN B FILL AB FILL BA ENDING
1 LCD Panel
This large multi-function LCD panel shows all the prompts and
parameters needed to operate the RY20 with ease and efficiency.
Each screen full of information is known as a display “page.” The various
display pages in each mode are accessed using the [ PAGE– ] and [ PAGE+ ]
buttons described below.
Within a display page, there are various “focus” areas. A focus area is a
parameter you can adjust, identified by a flashing prompt. Use the [ < ]
and [ > ] cursor buttons to change the focus area.
2 Volume Control
The volume control adjusts the volume of sound output from the
rear-panel PHONES jack or the OUTPUT (R and L/MONO) jacks.
1
7
TOM 2
2
8
SD
TOM 3
SIDE
STICK
3
9
TOM 4
PEDAL
4
10
HH
CLOSED
OPEN
5
HH
HH
RIDE
11
CRASH
2
Page 11

CAUTION
The Controls and Connections
Set the volume control to
headphone for the first time. Gradually raise the volume level until a comfortable
listening level is reached.
This simple precaution can prevent unexpectedly high volume levels from
damaging your sound system, headphones, or most important, your ears.
MIN when connecting the RY20 to a sound system or
3 Jog and Shuttle Dials
The Jog and Shuttle Dials allow rapid control over the various features of
the RY20.
The Jog Dial is a continuously rotating control. By rotating it you can
quickly change the current value. You use it to select patterns or songs, to
change the tempo, or to modify any of a number of other parameters.
The Shuttle Dial is a center detented, spring-loaded control. It allows you
even more rapid access to the current value. The further you rotate the
Shuttle Dial from its center detent, the faster the parameter will scroll.
For fine single-step adjustments, you may want to use the [ +1 ] and [ –1 ]
buttons, described below.
4 Track Select/Mute Buttons
These buttons allow you to mute tracks. The buttons are [OTHERS], [ HH ],
[ SD ], and [ BD ]. When you press one of these buttons, the corresponding
mute indicator lights up next to the track name on the LCD.
When you are copying or clearing pattern data from the RY20, these
buttons allow you to select the track or tracks you wish to copy or clear.
5 Pattern Button
The [PATTERN] button switches the RY20 to Pattern Mode. In this mode you
can select a pattern to play, record, or modify.
6 Song Button
The [ SONG ] button switches the RY20 to Song Mode. This mode allows
you to select a song which you can then play, record, or modify.
7 Tempo Button
The [ TEMPO ] button switches to the tempo function. You can change the
tempo with the Jog dial or the [ +1 ] and [ –1 ] buttons.
TRACK
SELECT/
MUTE
PATTERN
SONG
TEMPO
OTHERS
HH
SD
BD
3
Page 12
The Controls and Connections
MIDI
POWER
TRACK
SELECT/
MUTE
DELETE
INSERT
OTHERS
AUDITION
SECTION
HH
SD
BD
CLEAR
COPY
PATTERN
MIDI
PAGE –
0
TOM 1
6
INTRO MAIN A MAIN B FILL AB FILL BA ENDING
8 MIDI Button
The [ MIDI ] button switches the RY20 to MIDI Mode. In this mode you can
set or modify the MIDI control functions.
8
A
DRUM KIT
PAGE +
BD
SONG
9 0
1
7
RHYTHM
PROGRAMMER
TEMPO
EFFECT
PAD BANK
B
TOM 2
SD
2
8
ENTER
–1 +1
TOM 3
SIDE
STICK
VOLUME
MIN MAX
C
D
E
3
TOM 4
9
HH
PEDAL
+
–
F HG
4
OPEN
10
CLOSED
5
HH
HH
RIDE
11
CRASH
DRUM KIT
EFFECT
PAGE – PAGE +
PAD BANK
The RY20 can both receive and transmit MIDI data.
9 Drum Kit Button
The [DRUM KIT] button switches the RY20 to Drum Kit Mode. In this mode
you can select another drum kit or modify the parameters of the current
drum kit.
0 Effect Button
The [EFFECT] button switches the RY20 to Effect Mode. In this mode you
can change the current effect or modify the effect parameters.
A Page+ and Page– Buttons
The [ PAGE+ ] and [ PAGE– ] buttons select the display pages within the
various modes.
B Pad Bank Button
The [PAD BANK] button is used to select “DRUM” or “BASS” mode. In drum
mode, it is used to select one of the five banks in each drum kit. In bass
mode, it is used to select one of the five octaves of the bass bank.
4
Page 13

The Controls and Connections
C Enter Button
The [ENTER] button is used to confirm special operations that will change
data in the internal memory, for example, clearing a pattern or song.
D +1 and –1 Buttons
The [ +1 ] (increment) and [ -1 ] (decrement) buttons are used along with
the Jog Dial or the Shuttle Dial to select patterns or songs, to change
tempo values, or to modify other parameters.
Use these buttons when you require a fine degree of control rather than
the speed and convenience of the Jog Dial or the Shuttle Dial.
E Cursor Buttons
The [ < ] and [ > ] cursor buttons change the focus within a display page,
selecting the various parameters that are available for editing.
NOTE
The focus is always indicated by the flashing prompt or symbol.
ENTER
–1 +1
F Record Button and Record LED
The [RECORD] button switches the RY20 into Record Mode in either Pattern
Mode or Song Mode. The red Record LED lights up and the Rhythm
Programmer is ready for you to begin creating.
NOTE
The default Record Mode for either a pattern or a song is Step Record Mode. Press
the
[ PLAY ] button for Real-time Record Mode.
Press the [RECORD] button again to cancel Record Mode. The red Record
LED switches off and the RY20 returns to either Pattern Mode or Song
Mode.
G Stop Button
The [ STOP ] button stops playback or turns off Real-time Record Mode.
H Play Button and Play LED
The [ PLAY ] button starts playback of a pattern or song. You also use it to
begin real-time recording of a pattern or song.
The green Play LED will flash in time with the current tempo setting.
5
Page 14
The Controls and Connections
POWER
TRACK
SELECT/
MUTE
DELETE
INSERT
OTHERS
AUDITION
SECTION
HH
SD
BD
CLEAR
COPY
L
M
N
O
PATTERN
MIDI
PAGE –
0
6
I Top Button
The [ TOP ] button resets the current position to the beginning of the
pattern or song. This button performs the same function in Record Mode.
RHYTHM
PROGRAMMER
VOLUME
MIN MAX
+
–
SONG
DRUM KIT
PAGE +
TEMPO
EFFECT
PAD BANK
ENTER
–1 +1
I J K
1
TOM 1
7
BD
INTRO MAIN A MAIN B FILL AB FILL BA ENDING
TOM 2
2
8
SD
TOM 3
SIDE
STICK
3
9
TOM 4
PEDAL
4
10
HH
CLOSED
OPEN
5
HH
11
HH
CRASH
P
RIDE
J Backward Button
The [BACKWARD] button steps backwards through a song or pattern.
K Forward Button
The [FORWARD] button steps forwards through a song or pattern.
CLEARDELETE
COPYINSERT
L Clear/Delete Button
The [CLEAR] button is used to clear all the data in the selected pattern or
song in Pattern or Song Mode. In Record Mode, it is used to delete
individual parts, such as an incorrect or unwanted note in a pattern, or an
unwanted part in a song.
M Copy/Insert Button
The [ COPY ] button is used to copy the current song or pattern to another
location. In Song Record Mode, it is used to insert new data into a song.
6
Page 15
The Controls and Connections
N Audition Button
The [AUDITION] button allows you to listen to a voice without actually
recording it when the RY20 is in Pattern Record Mode.
O Section Button
The [SECTION] button is used with one of the lower row Drum Pads to select
another section in a pattern.
P Drum Pads
The RY20 has 12 velocity-sensitive drum pads that you play to record
pattern data.
0
TOM 1
6
BD
INTRO MAIN A MAIN B FILL AB FILL BA ENDING
1
TOM 2
7
SD
AUDITION
SECTION
2
TOM 3
8
SIDE
STICK
3
TOM 4
9
HH
PEDAL
4
10
HH
OPEN
HH
CLOSED
5
RIDE
11
CRASH
NOTE
The voices of the RY20 are fully programmable and can be assigned to any pad.
The drum pads are labeled
[ 0 ] through [ 11 ] and also have a drum name printed
on them. The voice assigned to the pad may not correspond to the name printed on
the pad. See page 83 for further details.
The lower row Drum Pads are used to select the pattern sections. Each
pad has a section label printed below it.
7
Page 16
The Controls and Connections
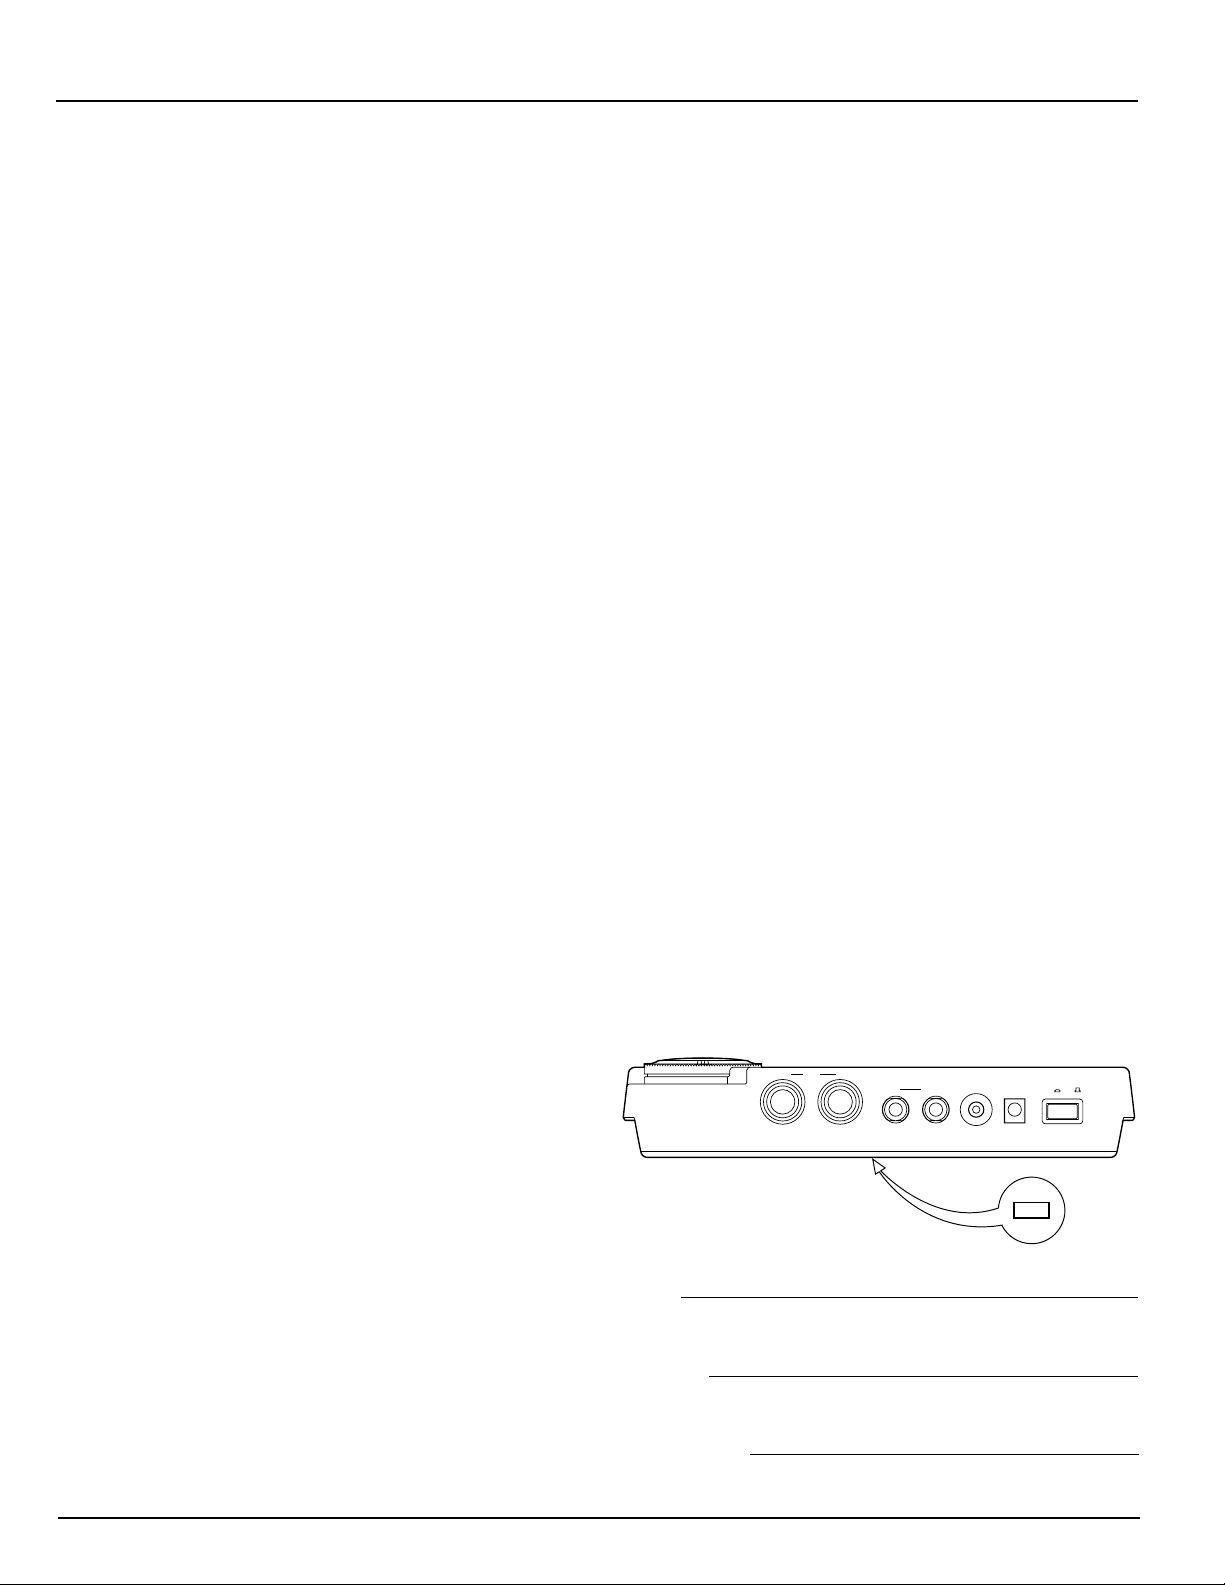
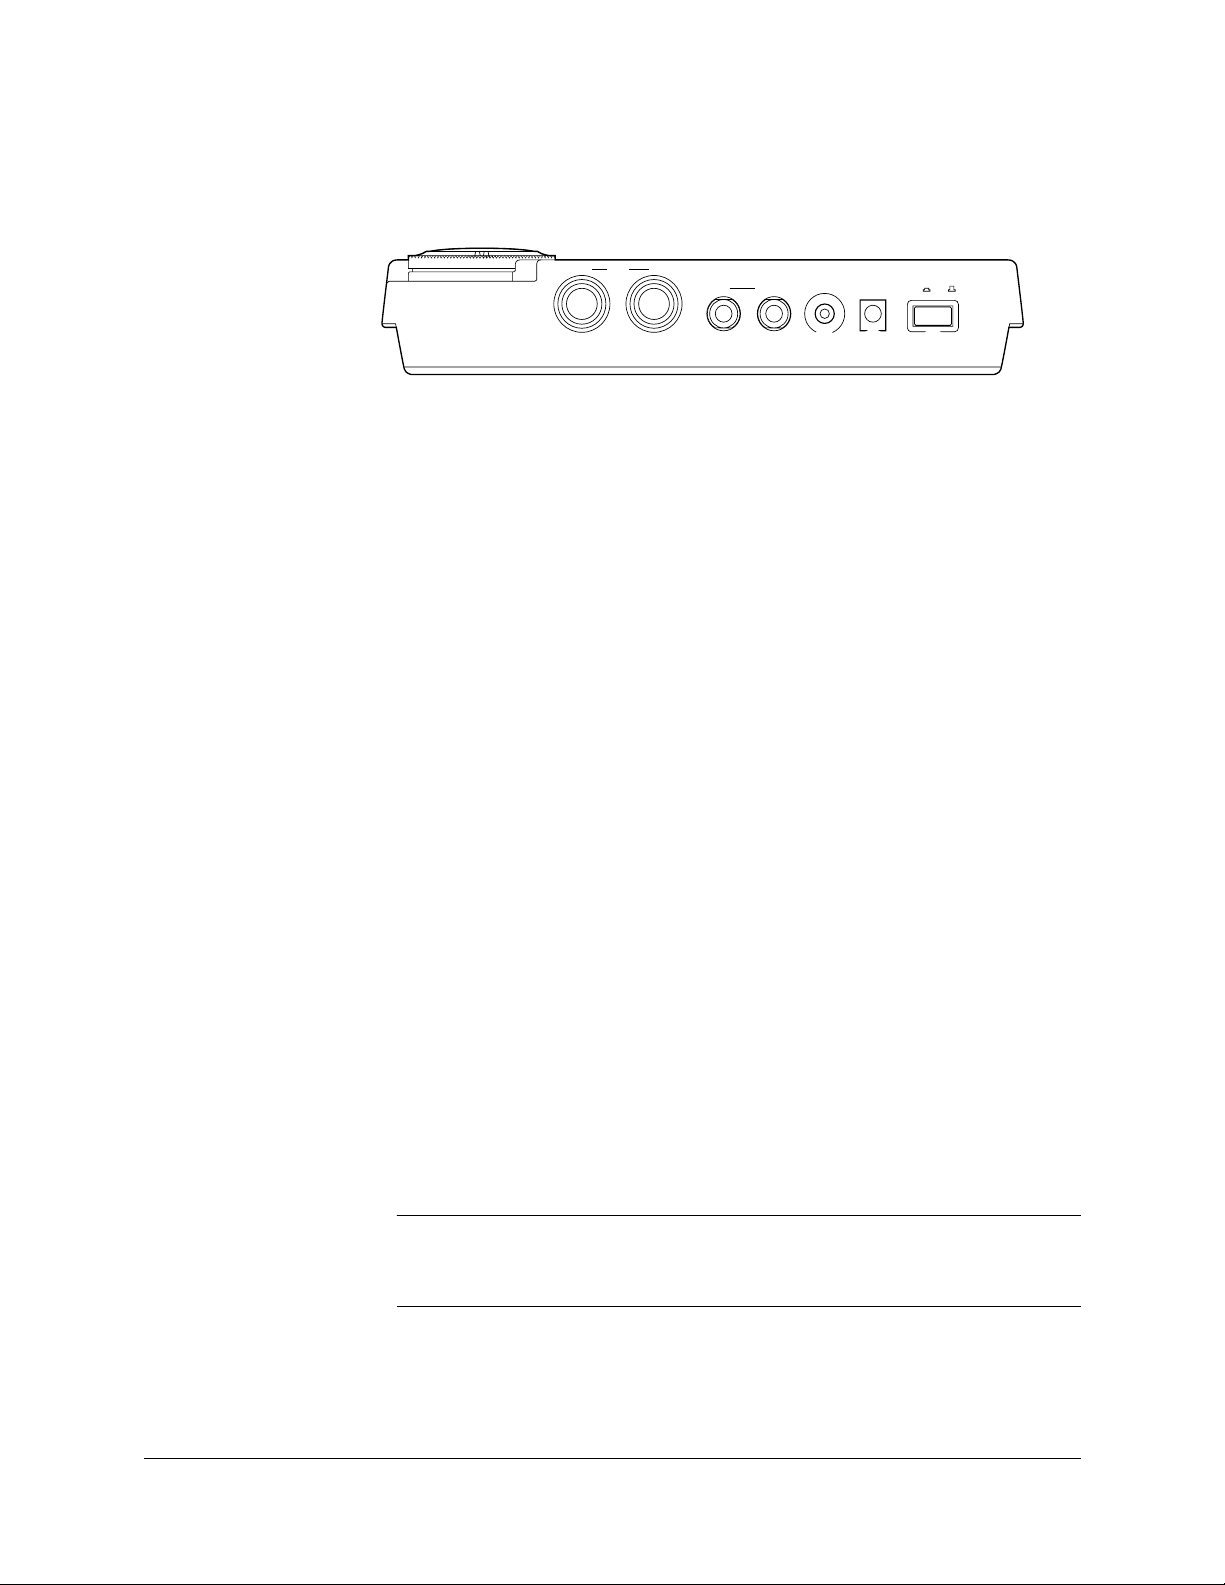
■ Rear Panel
INOUT MIDI OUTPUT PHONES DC IN POWER
Q
R S T U
Q MIDI IN and OUT Connectors
The MIDI IN connector receives data from a sequencer or other MIDI
device used to control the RY20.
The MIDI OUT connector transmits MIDI data to other MIDI devices. The
RY20 can control other instruments with note and timing messages. It
also uses MIDI to transmit the contents of its internal memory. See
page 110 for further details.
R OUTPUT L/MONO and R Jacks
These phone jacks are the main stereo outputs from the RY20. If a plug is
inserted into the L/MONO jack only, the left and right-channel signals are
combined and delivered via this jack (which can be used for connecting to
a mono sound system).
ON OFFR L/MONO
The Volume control adjusts the level of the signal sent to these jacks.
S PHONES Jack
Accepts a pair of stereo headphones with a miniature stereo phone plug
for headphone monitoring of the RY20.
T DC IN Jack
The DC output cable from the supplied AC Adaptor should be connected
here.
CAUTION
Always use the supplied Yamaha AC Adaptor to power your RY20. The use of an
incompatible adaptor may cause irreparable damage to the RY20, and might pose a
serious shock hazard.
U Power Switch
Press this switch to turn the RY20 power ON or OFF.
8
Page 17
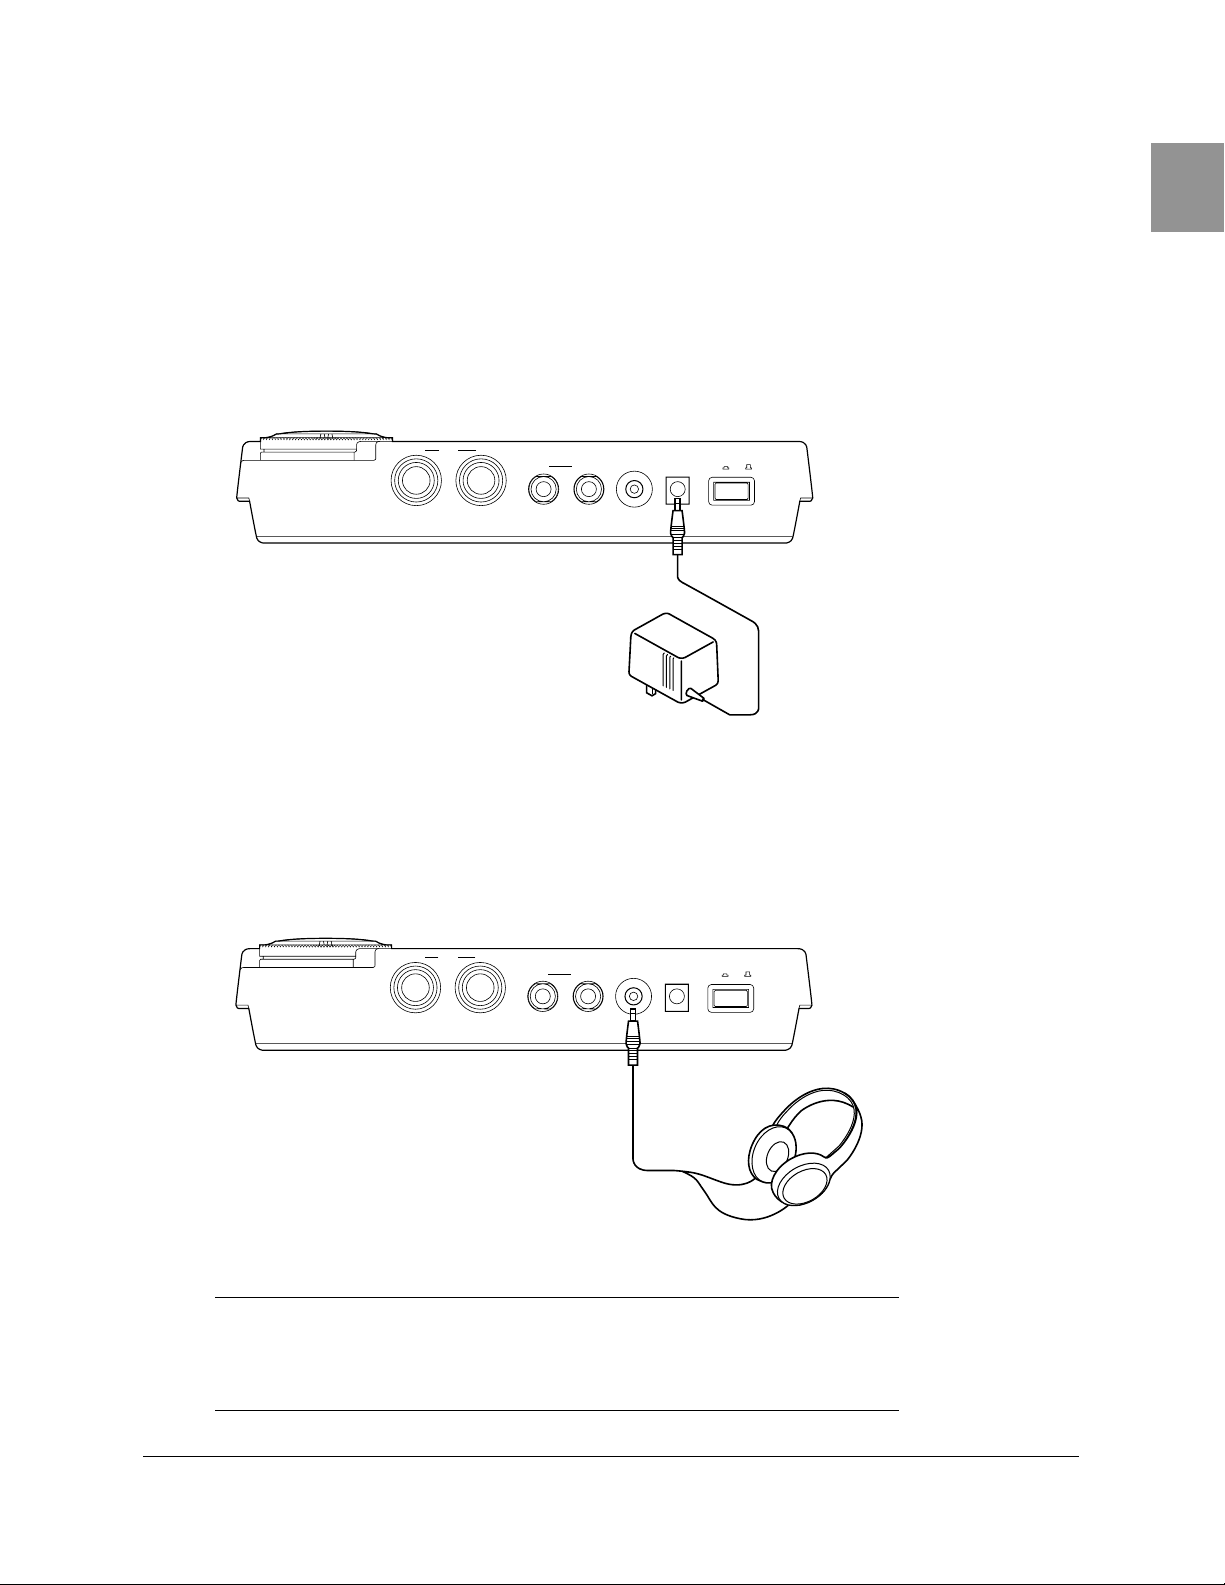
■ Making Connections
Using the Supplied Power Adaptor
When connecting the power supply, make sure the RY20 Power switch is
in the OFF position (extended), then plug the AC Adaptor cable into the
DC IN Jack, and finally the adaptor’s AC plug into a convenient AC mains
outlet.
The Controls and Connections
INOUT MIDI OUTPUT PHONES DC IN POWER
ON OFFR L/MONO
Audio Connections
The simplest way to monitor your RY20 is through a set of stereo
headphones (miniature stereo phone plug type). Connect them to the
PHONES jack on the rear panel of the instrument.
INOUT MIDI OUTPUT PHONES DC IN POWER
ON OFFR L/MONO
CAUTION
It is possible to produce sounds with the RY20 that are loud enough to cause
hearing damage. Set the volume control to
headphones for the first time. Gradually raise the volume level until a comfortable
listening level is reached.
MIN when connecting the RY20 to
9
Page 18
The Controls and Connections
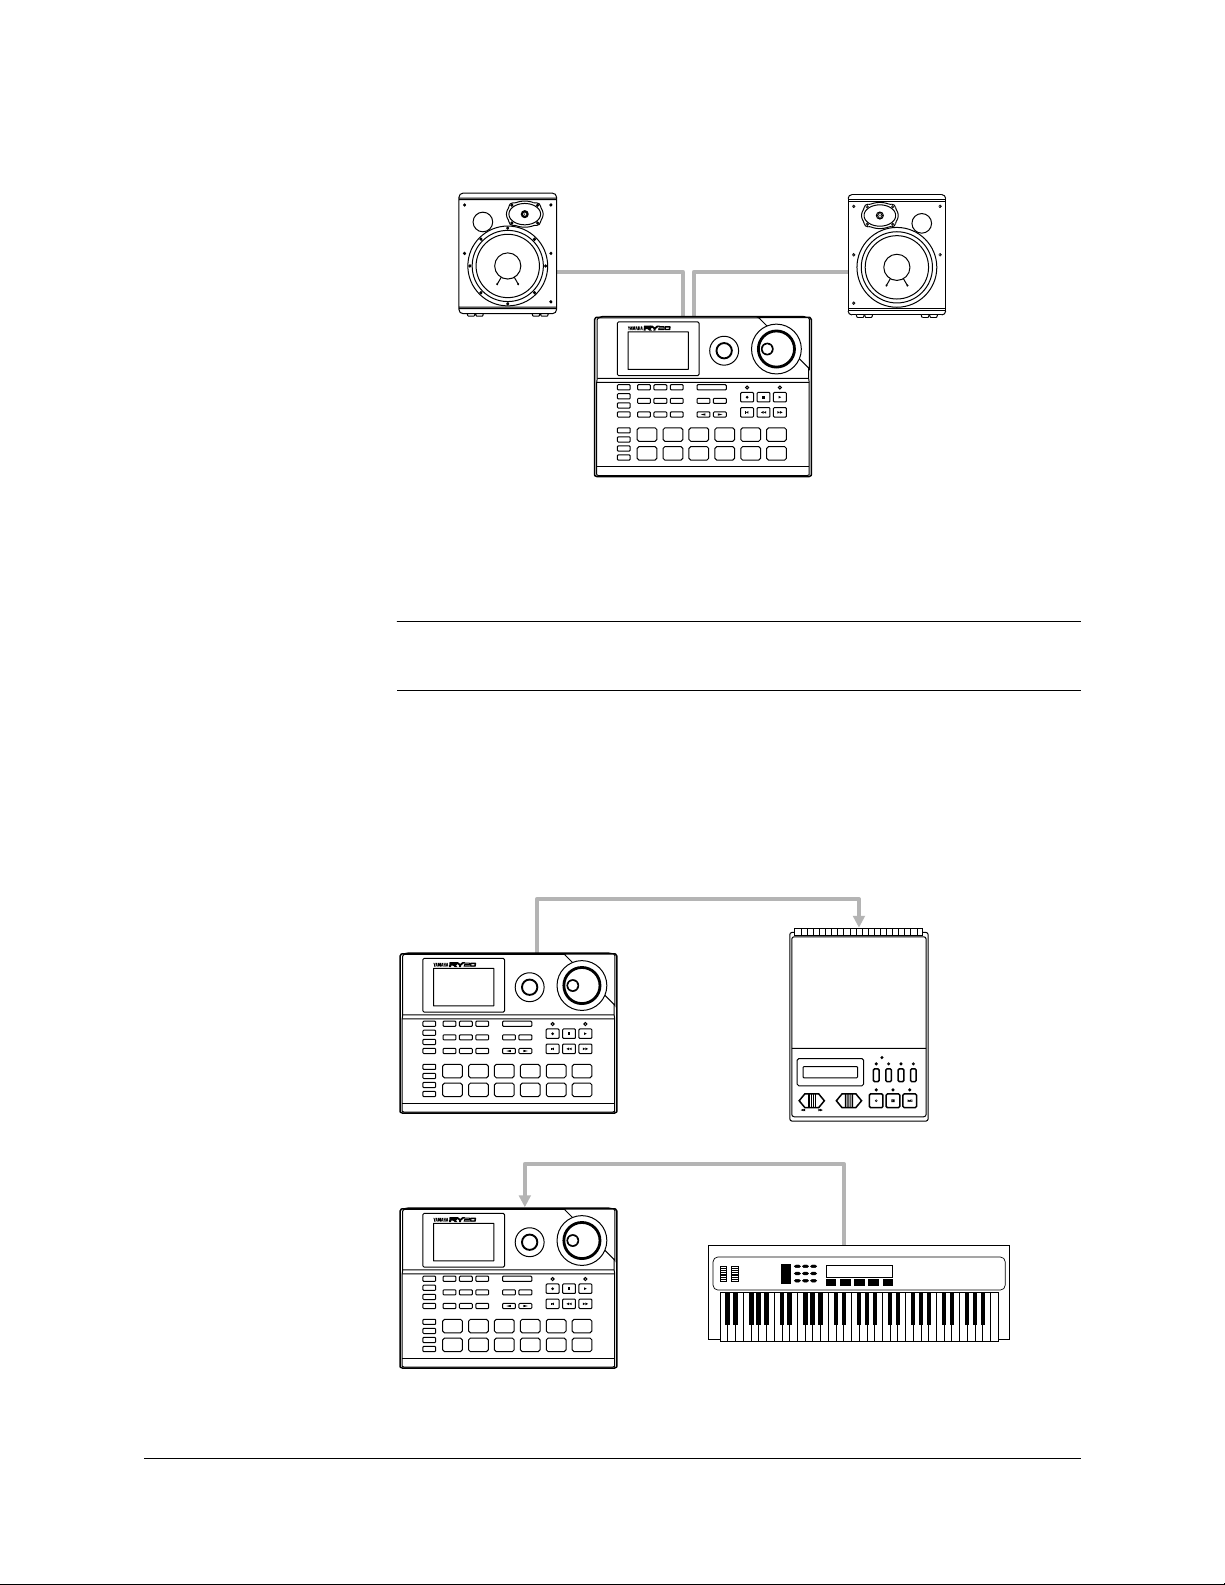
Use the OUTPUT L/MONO and R jacks to connect the audio outputs of
the RY20 to an external stereo sound system, as shown below.
RHYTHM
PROGRAMMER
R
L/MONO
RY20
If your sound system is monophonic, connect only the L/MONO jack.
CAUTION
Make sure that both the RY20 and your sound system are turned OFF when
making connections. Failure to do so may result in damage to the sound system.
MIDI Connections
If you intend to use other MIDI instruments with your RY20, you must
connect them properly.
The following diagram shows a simple connection.
MIDI IN
MIDI OUT
RHYTHM
PROGRAMMER
10
RY20
RY20
MIDI IN
RHYTHM
PROGRAMMER
MDF2
MIDI OUT
For further details on MIDI and MIDI connections, see page 110.
Page 19
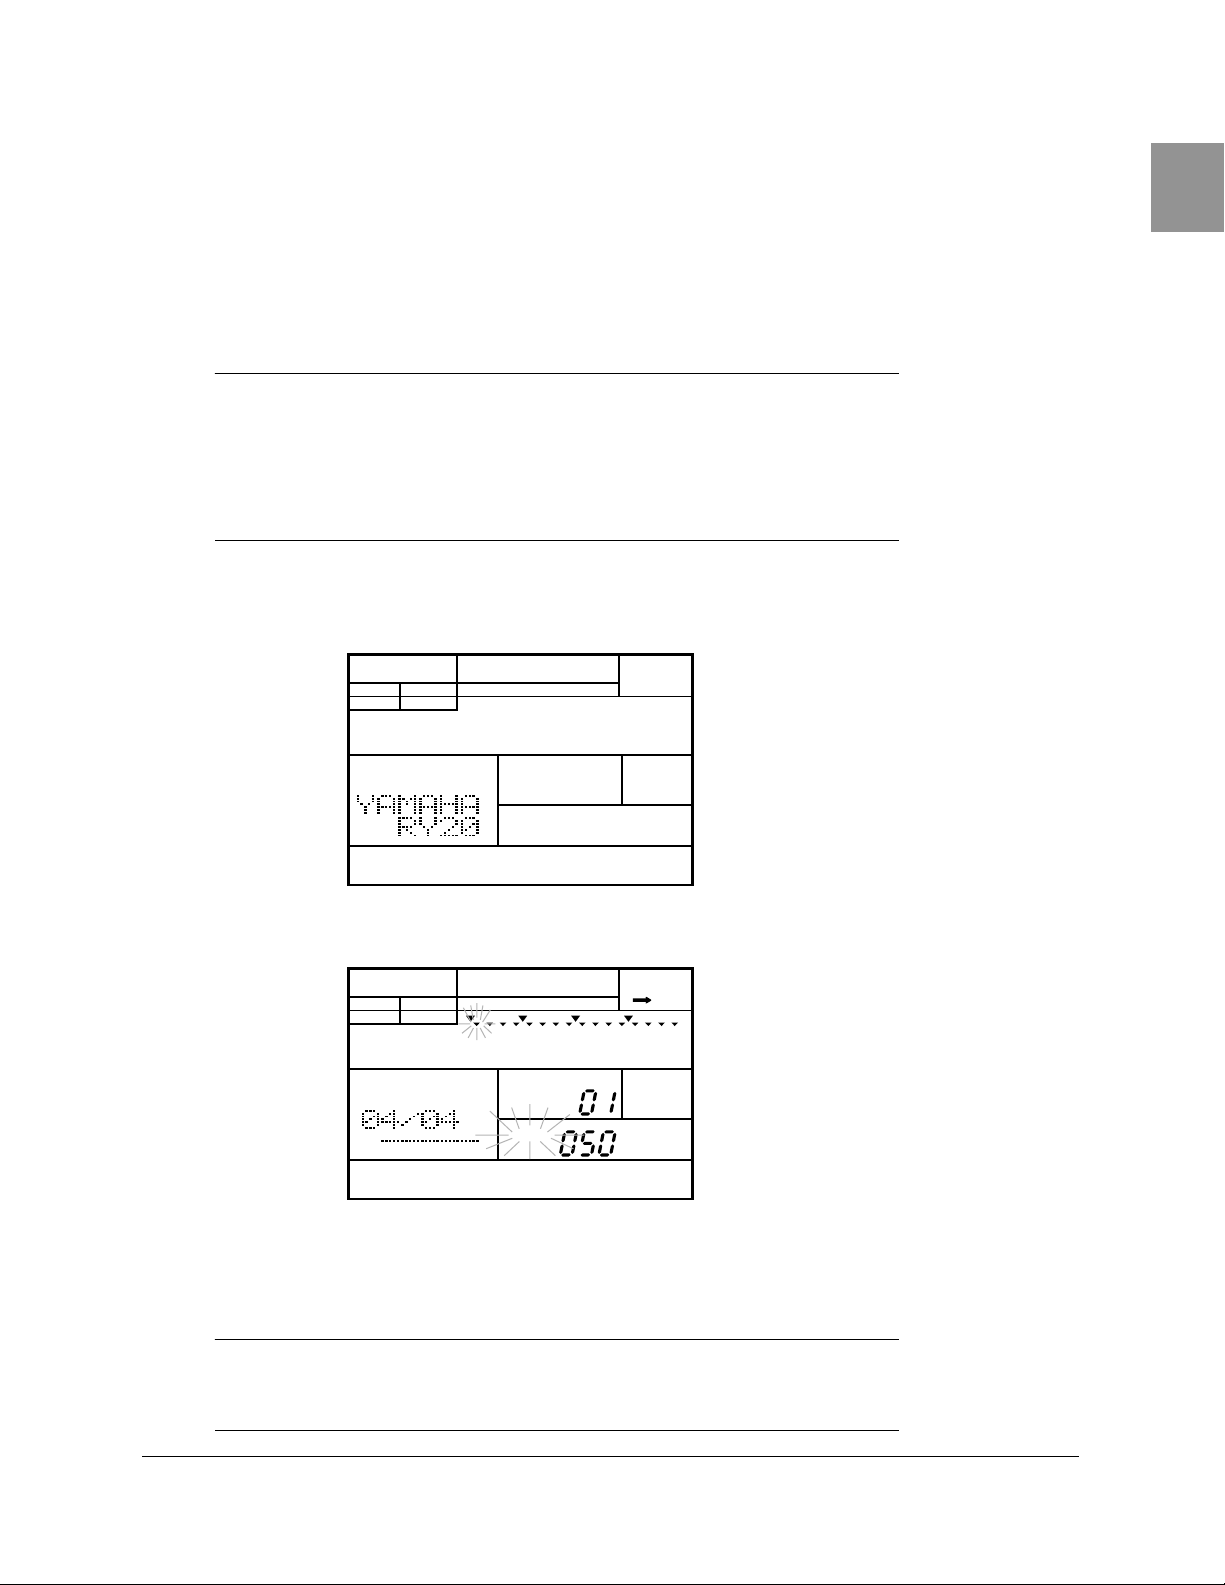
■ Turn on the RY20
To turn on the RY20, first make all the required connections. When
connecting the power supply, make sure the RY20 Power switch is in the
OFF position (extended), then plug the AC Adaptor cable into the DC IN
Jack, and finally the adaptor’s AC plug into a convenient AC mains outlet.
CAUTION
Always use the Yamaha PA-3 AC Adaptor to power your RY20. The use of an
incompatible adaptor may cause irreparable damage to the RY20, and might pose a
serious shock hazard.
Be sure to unplug the AC Adaptor from the AC mains outlet when the RY20 is not
in use.
Once you have completed the connections, turn the RY20 on by pressing in
the Power switch. The following display will momentarily appear:
The Controls and Connections
PAD BANK
OTHERS
HH
SD
BD
The RY20 will then switch to Pattern Mode.
PATTERN
OTHERS
HH
SD
BD
MAIN A
PAD BANK
A CHASE
MEASURE
PATTERN
EMPTY
See page 14 for details of the RY20 patterns and instructions for playing
the preset patterns.
NOTE
The pattern numbers “
050” through “149” are user and combination patterns, and
currently have no data. For information about recording and playing these
patterns, read the information starting on page 28.
11
Page 20
Playing the Demo Song
2
SONG
Playing the Demo Song
The RY20 is programmed with a demonstration song that will give
you an example of the various capabilities of your Rhythm
Programmer.
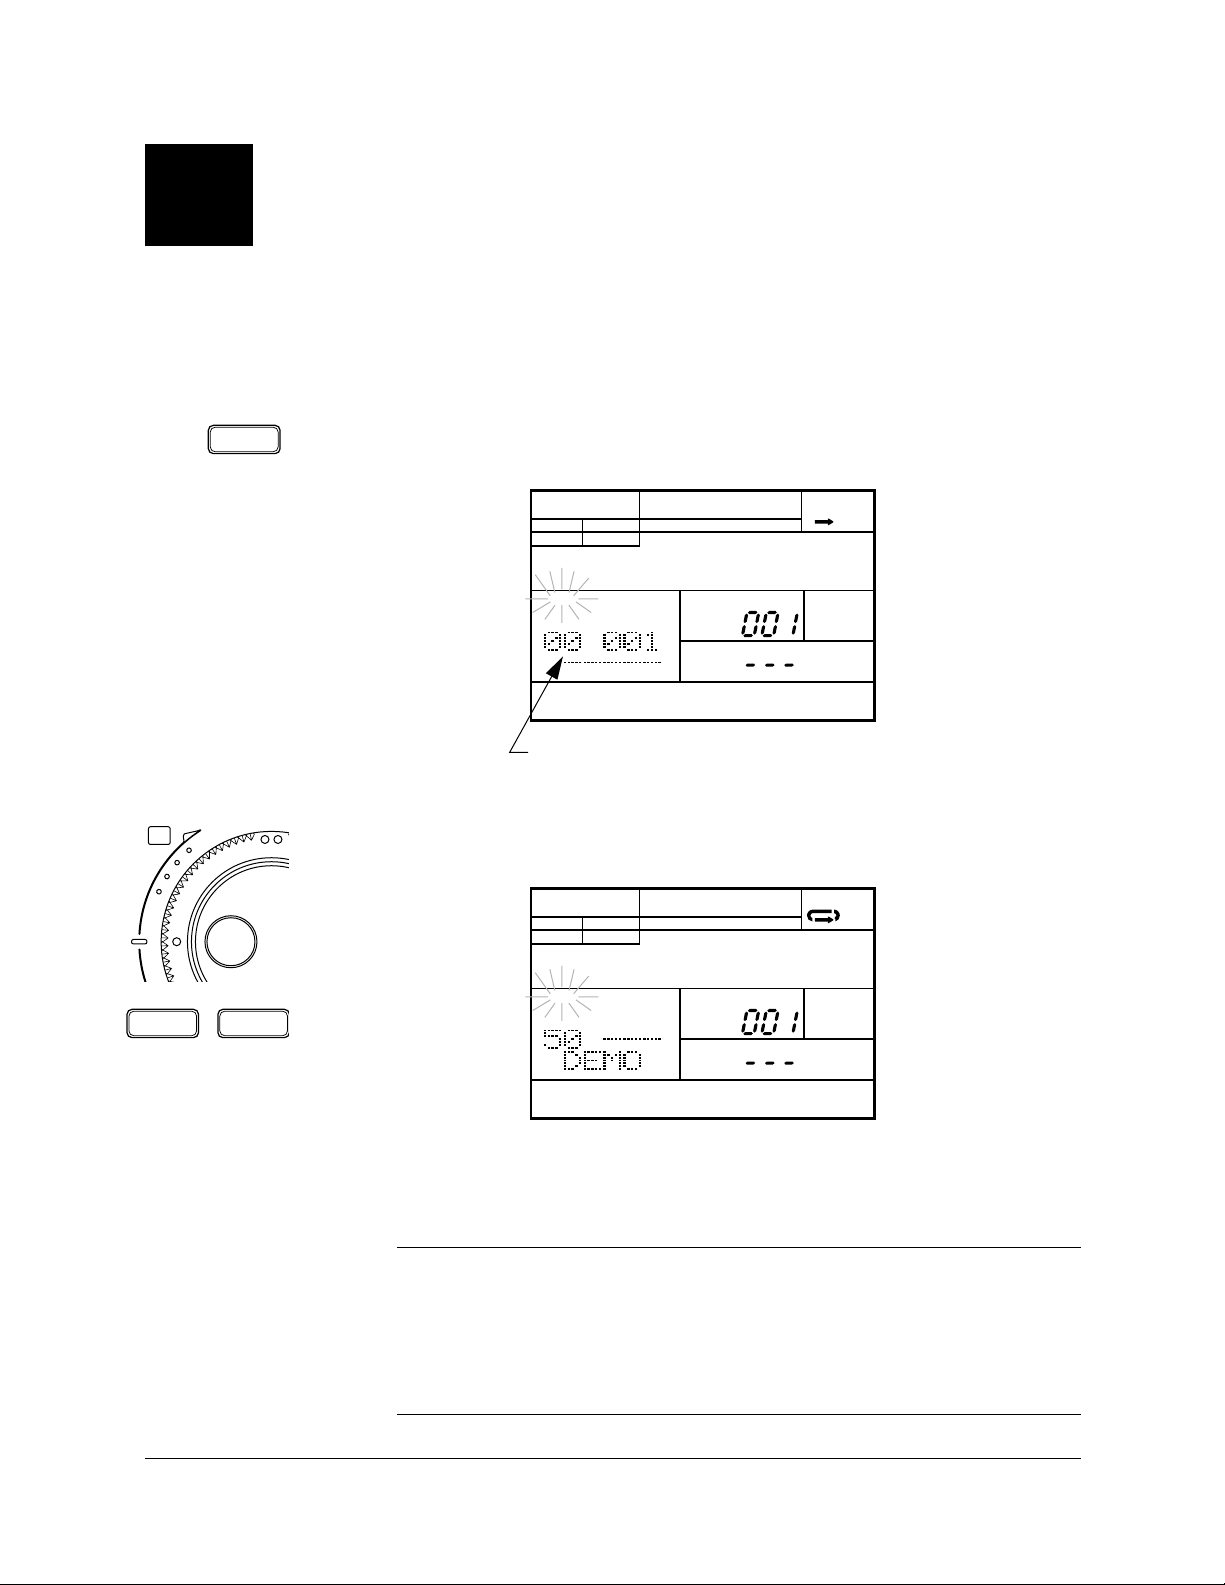
Press the [ SONG ] button to place the unit in Song Mode. Notice that the
1
“SONG” indicator is flashing above the current Song Number.
SONG
OTHERS
HH
SD
BD
SONG
Song Number
PART
PAD BANK
A CHASE
MEASURE
PATTERN
+
–1 +1
Select the demonstration song by rotating the Jog Dial or by using the
2
[ +1 ] and [ –1 ] buttons.
OTHERS
SONG
SONG
HH
SD
BD
PART
PAD BANK
A CHASE
MEASURE
PATTERN
The demonstration song is number 50 - “DEMO”.
HINT
A quick way to select an item at either end of a range of settings is to use the Shuttle
Dial.
For example, to select the demonstration song, rotate the Shuttle Dial clockwise.
The Shuttle Dial increases the song number much more rapidly than the
button or even the Jog Dial.
[ +1 ]
12
Page 21
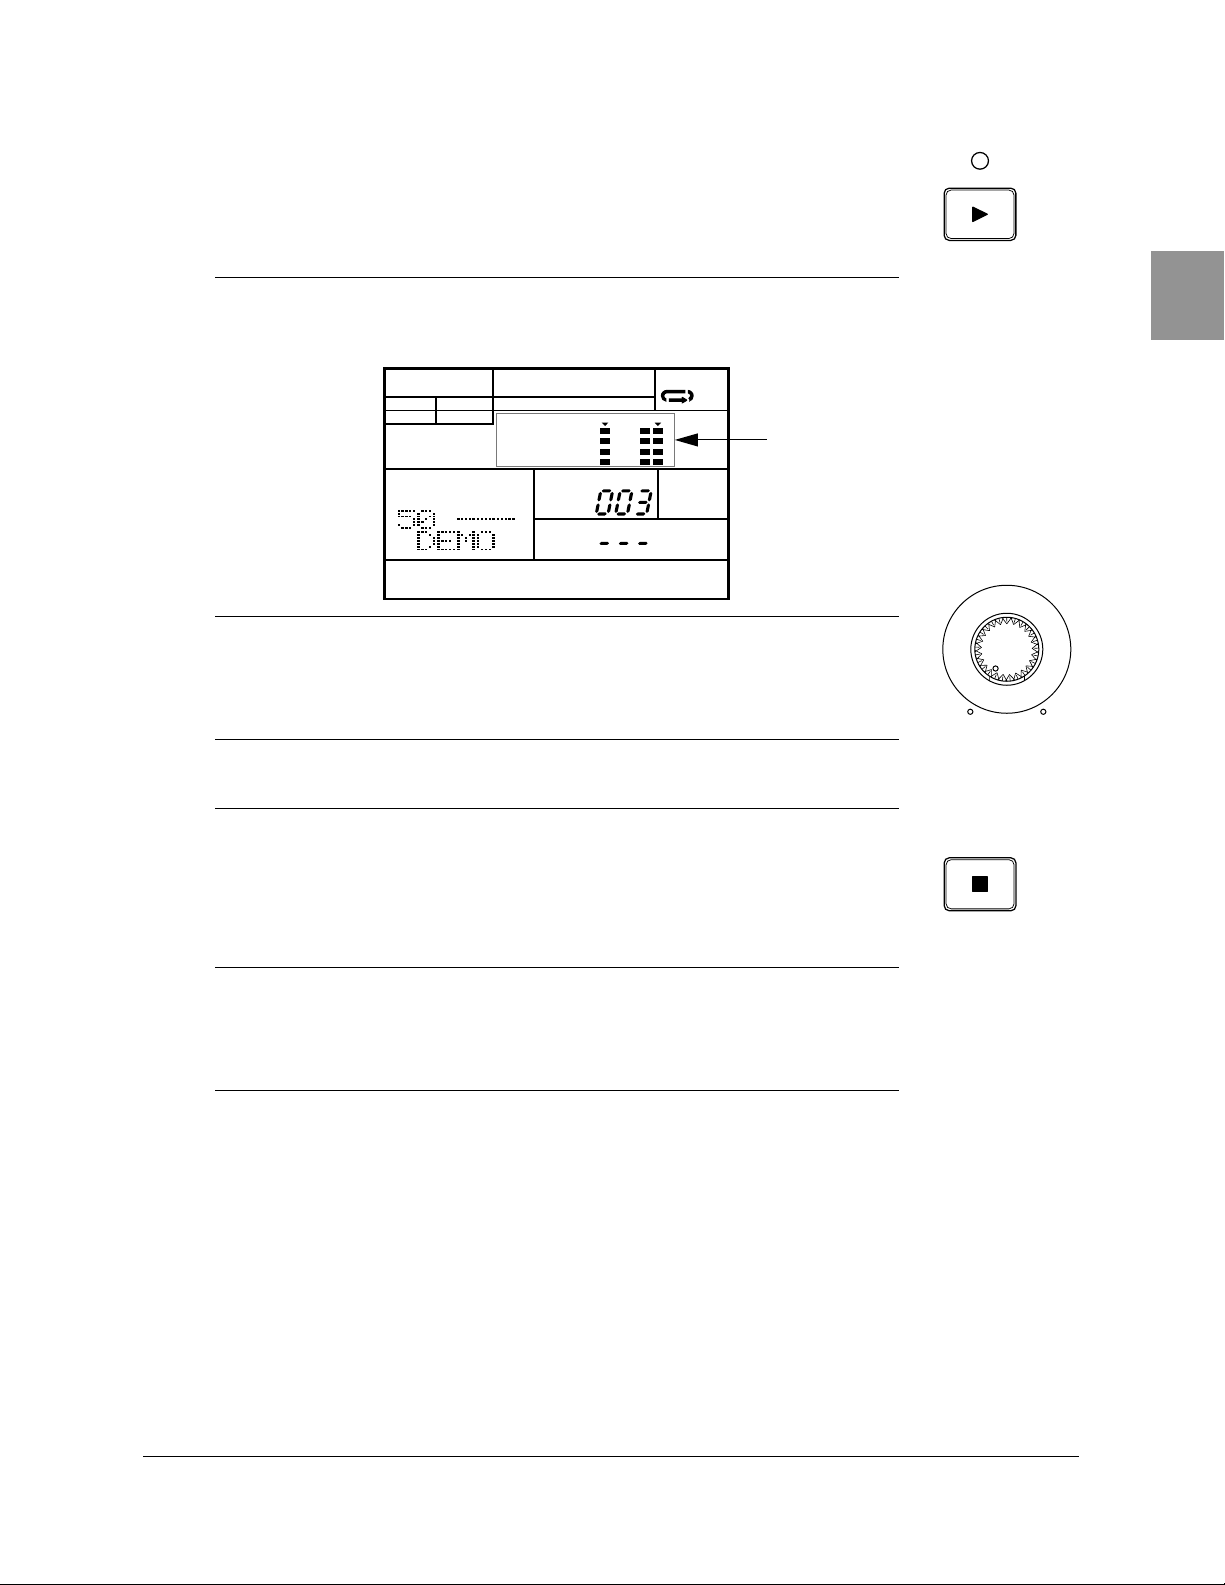
Press the [ PLAY ] button to start the demonstration song. The green Play
3
LED will flash in time with the programmed tempo setting and the song
will begin playback.
NOTE
As the song plays, the Voice Level Indicator for the active drum pad lights up on the
LCD. The display behaviour is similar to that of a VU meter.
Playing the Demo Song
OTHERS
HH
SD
BD
SONG
SONG
PART
PAD BANK
A CHASE
Voice Level
Indicator
MEASURE
PATTERN
Adjust the volume of the playback by rotating the VOLUME control.
NOTE
You cannot adjust the tempo of the demonstration song. You also cannot copy,
clear, or edit the demonstration song.
Press the [ STOP ] button to stop the demonstration song. The green Play
4
LED stops flashing.
NOTE
VOLUME
MIN MAX
The demonstration song sets the Repeat function. For further details see page 75.
The demonstration song repeats until you stop the RY20 by pressing the
button.
Press the [ PLAY ] button again to start the song from the point at which it
5
was stopped.
[ STOP ]
13
Page 22

Playing the Preset Patterns
Playing the Preset
3
Patterns
The RY20 is programmed with 50 preset patterns covering a wide
variety of musical styles which you can use to construct combination
patterns or songs.
PATTERN
+
Press the [PATTERN] button to place the unit in Pattern Mode. Notice that
1
the “PATTERN” indicator is flashing beside the current Pattern Number.
PATTERN
OTHERS
HH
SD
BD
MAIN A
Select a pattern by rotating the Jog Dial or by using the [ +1 ] and [ –1 ]
2
buttons.
PAD BANK
A CHASE
MEASURE
PATTERN
EMPTY
Measure Number
Pattern Number
–1 +1
VOLUME
MIN MAX
The preset patterns are from number “000” to number “049”. Refer to the
list of preset patterns provided on page 121.
NOTE
The RY20 is shipped with no data recorded in patterns “
Press the [ PLAY ] button to start the pattern. The green Play LED will
3
flash in time with the current tempo setting and the pattern will begin
playback.
Adjust the volume of the playback by rotating the VOLUME control.
050” to “149”.
4
14
Page 23

Playing the Preset Patterns
As the pattern plays, the Voice Level Indicator for the active drum pad
lights up on the LCD.
PATTERN
OTHERS
HH
SD
BD
MAIN A
PAD BANK
A CHASE
MEASURE
PATTERN
Voice Level Indicators
Each drum pad is associated with a Voice Level Indicator. As each voice
sounds, the Voice Level Indicator lights up depending on how loud the
voice was recorded.
01234567891011
0
TOM 1
6
BD
INTRO MAIN A MAIN B FILL AB FILL BA ENDING
1
TOM 2
7
SD
2
TOM 3
8
SIDE
STICK
3
TOM 4
9
HH
PEDAL
4
10
HH
OPEN
HH
CLOSED
5
11
Press the [ STOP ] button to stop playing the pattern. The green Play LED
5
stops flashing.
Press the [ PLAY ] button again to start the pattern from the point at which
6
it was stopped.
NOTE
If you want to play the pattern from the beginning again, press the
reset the position. Then press the
[ PLAY ] button to play the pattern again.
[ TOP ] button to
RIDE
CRASH
15
Page 24

Playing the Preset Patterns
■ Changing Pattern Numbers During Playback
A new pattern can be selected while another pattern is already
playing on the RY20.
Select the next pattern by rotating the Jog Dial or by using the [ +1 ] and
[ –1 ] buttons.
PATTERN
NEXT
The “NEXT” indicator lights up until the current pattern has finished. The
name then changes on the display and the new pattern starts to play.
If the pattern you have selected is empty, the “EMPTY” indicator will also
light up.
PATTERN
NEXT
EMPTY
■ Selecting the Sections
A pattern on the RY20 consists of six sections. Each section can be
programmed for a specific purpose. The preset patterns have all six
sections programmed.
16
The sections are:
• INTRO - This section is used for the introduction to the pattern.
When it has finished playing the introduction, the RY20
automatically switches to the “MAIN A” section.
• MAIN A - This is the default section. It can be used for the basic
verse and chorus structure of a pattern.
• MAIN B - This the alternative section. It can be used for the
bridge structure of a pattern.
There are two transition sections, both play immediately when
selected:
• FILL AB - This section is used to make the transition between the
verse/chorus section and the bridge section. When it is complete,
the unit starts to play section “MAIN B”.
Page 25

Playing the Preset Patterns
• FILL BA - This section is used to make the transition back to the
verse/chorus section from the bridge section. When it has
completed playing, it switches to “MAIN A”.
There is also a finale section:
• ENDING - As its name implies, this section ends the pattern play
when it is complete.
NOTE
When the “
back to “
ENDING” section has completed, it stops the playback and sets the RY20
MAIN A” to prepare for playing the next pattern.
You can select a section before you start playing a pattern. For example,
select the “INTRO” section of the pattern. After you have started the
pattern playing, you can select other sections.
NOTE
When you select a section other than the two transition sections, the newly selected
section will begin playing after the current section has finished playing.
Press and hold the [SECTION] button, then press the Drum Pad button for
1
the section you want to play. The appropriate Section indicator lights up,
for example, the “INTRO” indicator.
There are labels below the lower row of drum pads indicating the different
sections.
6
BD
INTRO MAIN A MAIN B FILL AB FILL BA ENDING
7
SD
8
SIDE
STICK
9
HH
PEDAL
10
HH
CLOSED
SECTION
6
BD
INTRO
11
CRASH
Start playing the pattern by pressing the [ PLAY ] button. The green Play
2
LED will flash to the current tempo setting and the pattern will begin
playback.
The “INTRO” section plays, automatically followed by the “MAIN A” section.
Select another section. For example, select the “MAIN B” section. Press and
3
hold the [SECTION] button. Then press the [8 - SIDE STICK] drum pad button,
which corresponds to the “MAIN B” section.
SECTION
8
SIDE
STICK
MAIN B
17
Page 26

Playing the Preset Patterns
The “MAIN B” section indicator and the “NEXT” indicator both light.
PATTERN
OTHERS
HH
SD
BD
PAD BANK
MAIN B
A CHASE
MEASURE
PATTERN
NEXT
If the section is empty, the “EMPTY” indicator will also light up.
Selecting a Measure
Each section consists of one or more measures.
While the RY20 is stopped, you can select one of the measures of the
current pattern.
The [FORWARD] button steps forwards through the measures of the
pattern. Each time you press the button, the RY20 moves to the next
measure.
PATTERN
OTHERS
HH
SD
BD
MAIN A
PAD BANK
A CHASE
MEASURE
PATTERN
Press the [ PLAY ] button to start playback at the selected measure.
The [BACKWARD] button steps backwards through the measures of the
pattern.
Alternatively, press the [ < ] cursor button to change the focus to the
“MEASURE” prompt. The “MEASURE” prompt starts to flash. Select another
measure by rotating the Jog Dial or by using the [ +1 ] or [ –1 ] buttons.
Press the [ > ] cursor button to return to “PATTERN” selection.
18
Page 27

■ Setting the Tempo
The preset patterns on the RY20 are programmed with an initial
tempo. As long as the machine is stopped when you select a pattern,
its initial tempo is loaded. If you select another pattern while the
RY20 is playing, the new pattern will inherit the current tempo
setting.
Playing the Preset Patterns
Modify the current tempo setting by pressing the [TEMPO] button to place
1
the unit in Tempo Mode. Notice the “TEMPO” indicator flashing beside the
current Tempo value.
PATTERN
OTHERS
HH
SD
BD
MAIN A
PAD BANK
A CHASE
TEMPO
Current Tempo
PATTERN
The tempo can be adjusted either when the RY20 is stopped or while it is
playing a pattern or a song.
NOTE
You can also change the tempo while you are recording a pattern or a song.
Adjust the tempo by rotating the Jog Dial or by using the [ +1 ] and [ –1 ]
2
buttons.
TEMPO
The playback tempo can be set to any value from 40 to 250 beats per
minute.
NOTE
Each pattern has been recorded with a specific tempo. Pressing the
buttons simultaneously resets the tempo to its default value.
Press the [PATTERN] button to return to Pattern Mode.
3
NOTE
Pressing the
the previously selected main mode.
[TEMPO] button again is another method of switching the RY20 back to
[ +1 ] and [ –1 ]
19
Page 28

Playing the Preset Patterns
■ Muting a Track
OTHERS
TRACK
SELECT/
MUTE
HH
SD
BD
The RY20 records its patterns into four tracks. The tracks are Bass
Drum, Snare Drum, High Hat, and Others.
To mute a track, press the appropriate Track Select/Mute button. For
1
example, to mute the percussion instruments or a bass part, press the
[OTHERS] button.
The “MUTE” indicator lights up next to the word “OTHERS”.
Mute Indicator
PATTERN
OTHERS
HH
SD
BD
MUTE
PAD BANK
A CHASE
MEASURE
PATTERN
MAIN A
Press the key again to turn muting off.
2
20
Page 29

Playing the Pads
4
Playing the Pads
The RY20 has 300 Advanced Wave Memory voices including standard
drums and percussion, a range of electronic percussion sounds, and
bass. You can assign its voices to individual drum kits. These kits can
be selected and played using the 12 drum pads, or you can use a MIDI
instrument connected to the MIDI IN connector.
Internal Layout
There are 20 preset drum kits and 20 user drum kits, each containing
five drum banks and a bass bank.
20 PRESET DRUM KITS (
20 USER DRUM KITS (
00 - 19)
20 - 39)
39 DRUM KIT
0
1
TOM 1
6
BD
INTRO MAIN A MAIN B FILL AB FILL BA ENDING
2
TOM 2
TOM 3
0 - 11
8
7
SIDE
STICK
SD
4
3
TOM 4
9
HH
PEDAL
5
HH
OPEN
RIDE
10
11
HH
CLOSED
CRASH
PAD BANK A
12 - 23
24 - 35
36 - 47
48 - 59
60 - 119
PAD BANK C
PAD BANK D
PAD BANK E
PAD BANK BASS
See page 24 for further details about the bass bank.
00 DRUM KIT
PAD BANK B
21
Page 30

Playing the Pads
To play a voice, tap the appropriate drum pad.
The RY20 has 12 drum pads.
0
TOM 1
6
BD
INTRO MAIN A MAIN B FILL AB FILL BA ENDING
1
TOM 2
7
SD
2
TOM 3
8
SIDE
STICK
3
TOM 4
9
HH
PEDAL
4
10
HH
OPEN
HH
CLOSED
5
RIDE
11
CRASH
NOTE
The voices of the RY20 are fully programmable and can be assigned to any pad.
The drum pads are labeled
[ 0 ] through [ 11 ] and also have a drum name printed
on each. The voice assigned to the pad may not correspond to the name printed on
the pad. See page 83 for further details.
The drum pads are velocity sensitive. The harder you tap a pad, the louder
the voice will play.
NOTE
The velocity sensitivity level (“
settings determine the way in which the velocity sensitive feature works. See
page 90 and page 98 for further details.
SENS LVL”) and the pad sensitivity (“PADSNS”)
22
DRUM KIT
■ Selecting a Drum Kit
Place the unit in Drum Kit Mode by pressing the [DRUM KIT] button. The
1
“DRUM KIT” indicator flashes beside the current drum kit number.
PATTERN DRUM KIT
OTHERS
HH
SD
BD
Drum Kit Name
PAD BANK
MAIN A
A CHASE
DRUM KIT
Drum Kit Number
Page 31

Select another drum kit by rotating the Jog Dial or by using the [ +1 ] and
2
[ –1 ] buttons.
There are 20 preset drum kits, numbered “00” to “19”, and 20 user drum
kits, numbered “20” to “39”, in the RY20. Refer to the Drum Kit list
provided on page 124.
NOTE
Playing the Pads
Pressing the
[DRUM KIT] button again will switch the RY20 back to the previously
selected main mode, such as Pattern or Song Play mode.
■ Selecting a Pad Bank
Place the unit in Pad Bank Mode by pressing the [PAD BANK] button.
1
PATTERN
OTHERS
HH
SD
BD
PAD BANK
MAIN A
PAD BANK
A CHASE
NOTE
Pressing the
[PAD BANK] button again will switch the RY20 back to the previously
selected main mode, such as Pattern or Song Play mode.
Select another pad bank by rotating the Jog Dial or by using the [ +1 ] and
2
[ –1 ] buttons. Notice the change in the Pad Bank indicator.
PATTERN
OTHERS
HH
SD
BD
PAD BANK
MAIN A
C CHASE
23
Page 32

Playing the Pads
The RY20 has five pad banks labeled “A” to “E”. Each pad bank contains 12
drum pads. This indicates that a drum kit can accommodate 60 drum or
percussion voices (pad numbers “00” to “59”). See page 83 for more
information.
The Drum Kit list on page 124 shows the pad bank assignments for each
voice in the preset drum kits.
NOTE
Changing the voice assignment of the drum kits will affect the voices of each
pattern. This is because only the pad numbers are recorded in a pattern.
■ Playing the Bass Voices
When the RY20 is in bass mode, the drum pads function as a
keyboard, with each key playing the bass voice at a different pitch.
The following diagram shows how the drum pads correspond to the layout
of a standard keyboard.
#
C
D
#
F
#
G#A
#
CDEFGAB
0
TOM 1
1
#
C
TOM 2
2
TOM 3
3
#
D
TOM 4
4
HH
OPEN
5
FCDE
RIDE
24
6
#
F
BD
INTRO MAIN A MAIN B FILL AB FILL BA ENDING
7
GA
SD
8
#
G
SIDE
STICK
9
HH
PEDAL
10
#
A
HH
CLOSED
11
B
CRASH
Page 33

Bass Voice Layout
Each drum kit contains one bass bank. The bass bank is subdivided into
five octaves (pad numbers “60” to “119”):
Playing the Pads
20 PRESET DRUM KITS (
20 USER DRUM KITS (
0 - 11
12 - 23
24 - 35
36 - 47
48 - 59
0
1
2
3
4
TOM 1
TOM 2
TOM 3
TOM 4
6
7
BD
INTRO MAIN A MAIN B FILL AB FILL BA ENDING
60 - 119
8
9
SIDE
SD
STICK
PEDAL
HH
OPEN
10
HH
HH
CLOSED
00 - 19)
20 - 39)
5
RIDE
11
CRASH
39 DRUM KIT
00 DRUM KIT
PAD BANK A
PAD BANK B
PAD BANK C
PAD BANK D
PAD BANK E
PAD BANK BASS
OCT-2
OCT-1
OCT 0
OCT+1
OCT+2
60 - 71 72 - 83 84 - 95 96 - 107 108 - 11960 - 71 72 - 83 84 - 95 96 - 107 108 - 119
25
Page 34

Playing the Pads
PAGE – PAGE +
With the unit in Pad Bank Mode, press the [PAGE+] button to access the
1
Type display page. This function allows you to switch between drum
voices and bass voices.
PATTERN
OTHERS
HH
SD
BD
MAIN A
PAD BANK
A CHASE
Change the type from “DRUM” to “BASS” by rotating the Jog Dial or by
2
using the [ +1 ] and [ –1 ] buttons. Notice the Pad Bank indicator is now set
to “BASS”.
PATTERN
OTHERS
HH
SD
BD
PAD BANK
BASS CHASE
MAIN A
To return to Pad Bank Mode, press the [PAGE–] button. The display shows
3
the current octave range.
When the RY20 is in bass mode, the five pad banks become five octave
ranges from “OCT-2” to “OCT+2”.
PATTERN
OTHERS
HH
SD
BD
PAD BANK
MAIN A
BASS CHASE
26
Page 35

Select an octave range by rotating the Jog Dial or by using the [ +1 ] and
4
[ –1 ] buttons.
You can assign any voice to the Bass pad bank. See page 83 for more
information.
Place the unit in Drum Kit Mode by pressing the [DRUM KIT] button. The
5
“DRUM KIT” indicator flashes beside the current kit number.
Select a kit by rotating the Jog Dial or by using the [ +1 ] and [ –1 ] buttons.
6
To play a voice, tap the appropriate drum pad.
Playing the Pads
27
Page 36

Recording a User Pattern
Recording a User
5
Pattern
The RY20 can record 50 original patterns in its internal memory. The
internal memory saves your pattern data even if the power is shut off.
There are two pattern record modes: Step Record Mode and Real-time
Record Mode. You can also create a further 50 patterns by
“combining” the preset and user patterns.
■ Recording Modes
Each method has its own advantages and uses. Step Record Mode is good
for precision and for entering percussion sounds whose note placement
has been determined, such as a bass drum that plays every beat of a
measure. Real-time Record Mode is best for capturing the “feel” of a
rhythm, because it allows you to actually play the pattern as you are
creating it.
The method you choose depends partly on the type of rhythm you intend
to create and partly on your own preference. You can even switch between
the two while editing to create a single rhythm pattern using both
methods. For example, you could program the basic beats of a rhythm
with Step Record Mode, then use Real-time Record Mode to add
percussion accents and embellishments.
IMPORTANT
If you attempt to record over or change the parameters of the preset patterns,
numbered “
display. You cannot record over a preset drum kit and there are also many
parameters that you cannot change.
000” to “049”, the message “PRESET” will momentarily appear on the
28
Page 37

■ Step Record Mode
In this mode you enter one note at a time, rather than playing along
with the click sounds. You can create very complex patterns that
would be difficult to record using Real-time Record Mode.
Recording a User Pattern
Press the [PATTERN] button to place the unit in Pattern Mode. Notice that
1
the “PATTERN” indicator is flashing beside the current Pattern Number.
The current position “ ” indicator is also flashing.
PATTERN
OTHERS
HH
SD
BD
MAIN A
Pattern Name
Current Time Signature
NOTE
See page 40 for a description of the indicators on the LCD.
PAD BANK
A CHASE
MEASURE
PATTERN
EMPTY
Measure Number
Pattern Number
Select a pattern from “050” to “099” to record into by rotating the Jog Dial
2
or by using the [ +1 ] and [ –1 ] buttons. You should select an empty pattern
to record into.
PATTERN
+
Patterns “000” to “049” are preset patterns and cannot be modified.
Patterns “100” to “149” are combination patterns and are recorded in a
different manner. See page 38 for an explanation of how to record
combination patterns.
WARNING
Be careful not to overwrite a pattern accidentally. The “
for patterns that contain no data. If the pattern you have selected already contains
data, you may want to clear it before you start to record a new pattern. See page 55
for further details.
EMPTY” indicator will light
Select a section of the pattern you want to create. Press and hold the
3
[SECTION] button, then press the Drum Pad button for the section you want
to record. The appropriate Section indicator lights up, for example, the
“INTRO” indicator.
–1 +1
SECTION
6
BD
INTRO
29
Page 38

Recording a User Pattern
Selecting a Drum Kit
HINT
You can select another section while you are recording. This allows you, for
example, to record the intro of a pattern and then work on the verse/chorus section.
You can also change both the Drum Kit and the current Pad Bank as you record
your pattern.
After you select a pattern, you should find and select a suitable Drum
Kit. The Drum Kit should contain the drum and percussion voices
you want to use to create your pattern.
DRUM KIT
PAD BANK
Place the unit in Drum Kit Mode by pressing the [DRUM KIT] button. The
“DRUM KIT” indicator flashes. Select another drum kit by rotating the Jog
Dial or by using the [ +1 ] and [ –1 ] buttons.
If a suitable kit cannot be found, you should create one with one of the
user drum kits. See page 83 for instructions.
Selecting a Pad Bank
Place the unit in Pad Bank Mode by pressing the [PAD BANK] button.
Select another pad bank by rotating the Jog Dial or by using the [ +1 ] and
[ –1 ] buttons.
These two steps are entirely optional.
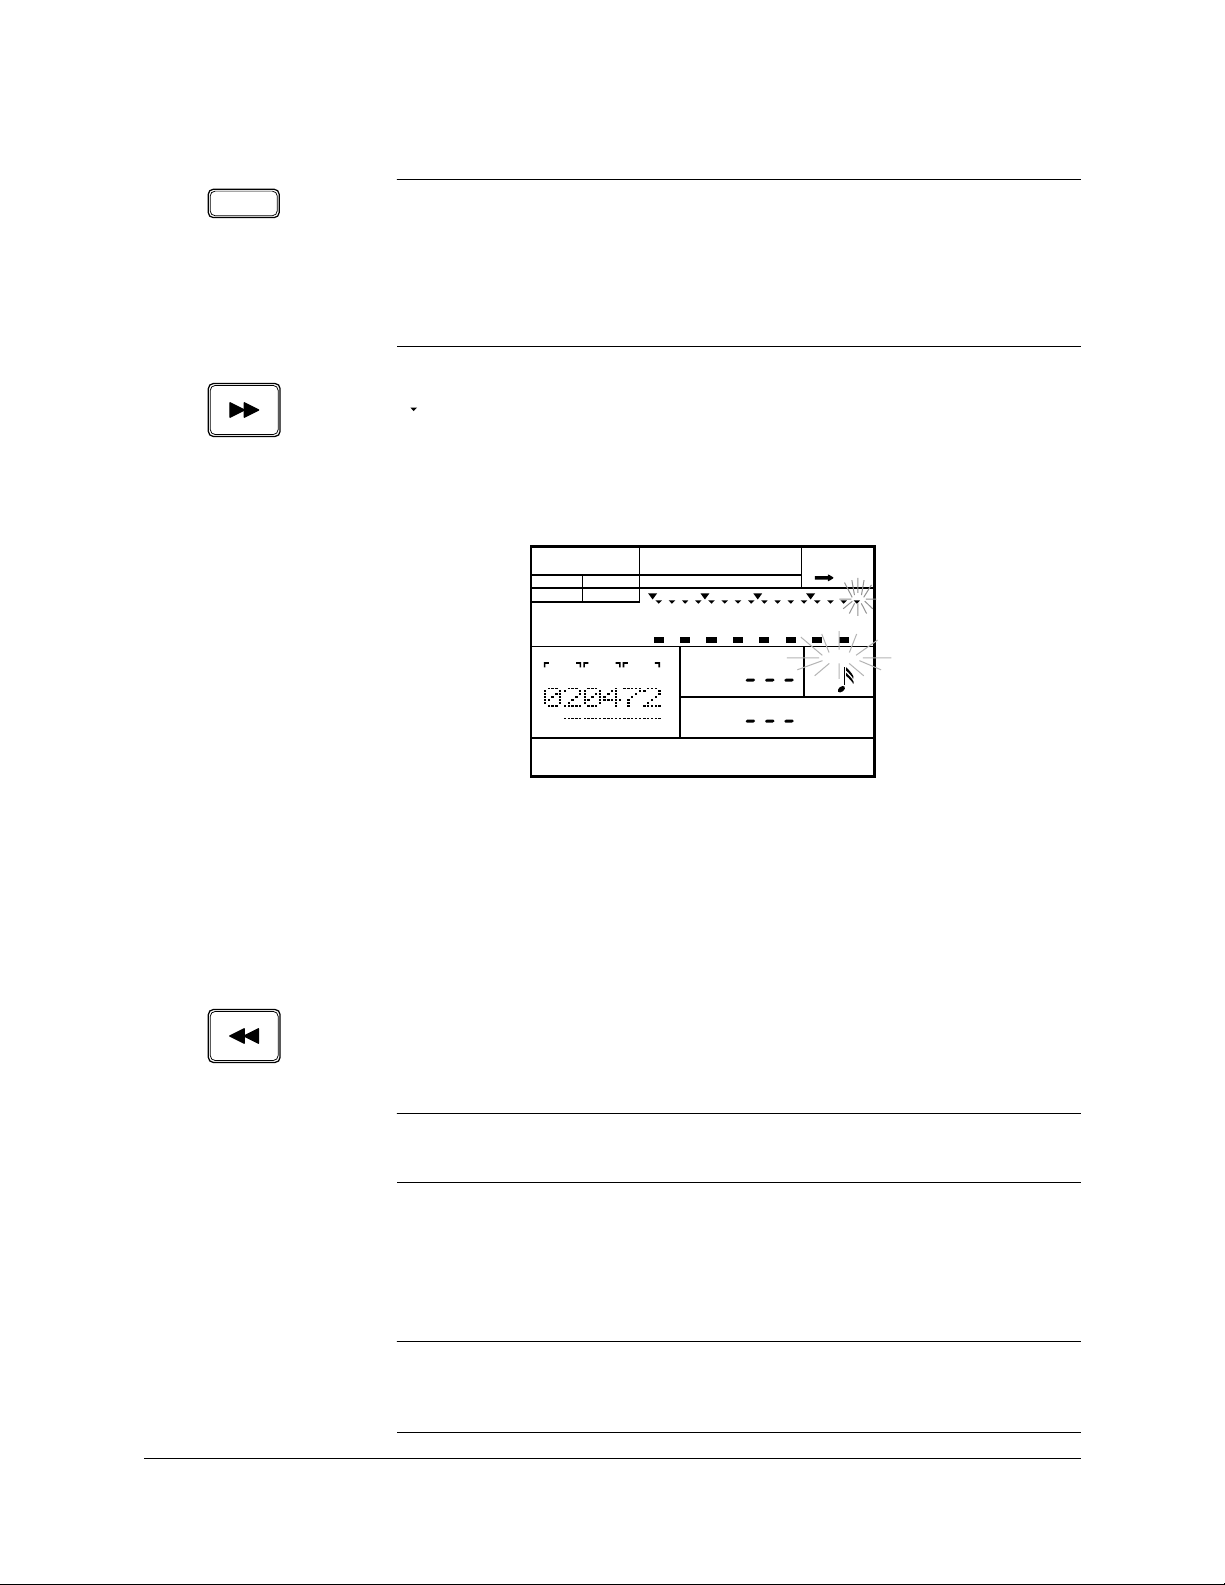
Start recording by pressing the [RECORD] button. The red Record LED
4
lights, and the “QUANTIZE” indicator and the current position “ ”
indicator both flash.
PATTERN
OTHERS
HH
SD
BD
MEAS
BEAT
CLOCK
PAD BANK
A CHASE
LEVEL
QUANTIZE
30
INTRO
PAD
Page 39

NOTE
The default quantization value is to resolve to 16th notes. You can change the
quantization value at any time during the recording of a pattern. See page 44 for
further details.
The default time signature is 4/4 and the default pattern length is two measures.
Both of these values are easily changed, however you can only change them before
you record anything into the pattern. Refer to page 46.
Use the drum pads to record your pattern.
5
Recording a User Pattern
0
TOM 1
6
BD
INTRO MAIN A MAIN B FILL AB FILL BA ENDING
1
TOM 2
7
SD
2
TOM 3
8
SIDE
STICK
3
TOM 4
9
HH
PEDAL
4
10
HH
OPEN
HH
CLOSED
5
RIDE
11
CRASH
NOTE
Each pad has a voice associated with it. The voice depends on which Drum Kit and
which Pad Bank you have selected. Each voice is associated with a track. For
example, all the bass drum voices are associated with the “
drum voices are all assigned to the “
SD” track.
BD” track and the snare
The tracks cannot be muted in Pattern Record Mode.
Each time you tap a pad, the voice is recorded, the note “ ” indicator
also lights up for the appropriate track, and the RY20 moves to the next
beat. The measure, beat, and clock numbers are updated and the flashing
current point “ ” indicator moves as well, giving you a visual prompt to
your present position in the pattern.
NOTE
Details about the items displayed on the LCD in Pattern Record Mode are
explained starting on page 39.
The harder you tap a pad, the louder the associated voice will sound.
31
Page 40
Recording a User Pattern
HINT
AUDITION
The RY20 provides the
[AUDITION] button to allow you to play a drum pad while
pattern record is active, without actually recording the voice associated with the
pad.
Press and hold the
[AUDITION] button, then tap any drum pad. The voice will sound,
but will not be recorded.
To skip a beat, press the [FORWARD] button. The flashing current position
“ ” indicator will move to the next beat. Each time you press the
[FORWARD] button, the RY20 moves forward to the next beat.
Through a combination of tapping the drum pads and pressing the
[FORWARD] button, you will soon cover the two default measures.
PATTERN
OTHERS
HH
SD
BD
MEAS
INTRO
BEAT
CLOCK
PAD BANK
A CHASE
LEVEL
PAD
QUANTIZE
When you have completed the two measures, the RY20 loops back to the
beginning of the pattern.
This feature allows you to layer your pattern. For example, start by
recording the bass drum part. After you have recorded two measures of
bass drum parts, record the snare drum part.
If you missed a beat, or accidently skipped a beat, you can step back with
the [BACKWARD] button.
NOTE
The behavior of the
[FORWARD] and [BACKWARD] buttons is explained in more detail
starting on page 41.
Stop recording by pressing the [RECORD] button again. The red Record LED
6
turns off and the RY20 returns to Pattern Mode.
NOTE
If you have recorded a long and complex pattern, the RY20 may need a short time to
arrange the data in its memory. In this case the prompt “
momentarily appear on the display,
PLEASE WAIT” may
32
Page 41

IMPORTANT
Depending on the amount of data you have recorded, it may not be possible to fully
record all the available user patterns. If you run out of memory during recording,
the error message “
the Clear Pattern function described on page 55 to clear unwanted pattern data.
You may also want to use a MIDI data storage device such as the Yamaha MDF2
MIDI Data Filer to save your important data to floppy disk for later loading and
use.
WARNING
Turning the power off while Pattern Record Mode is active may cause irretrievable
loss of ALL the user data.
MEMORY FULL” will appear on the display. If this happens, use
Play the Pattern
You can review your pattern at any time.
Recording a User Pattern
Press the [ PLAY ] button to start the pattern. The green Play LED will
1
flash in time with the current tempo setting and the pattern will begin
playback.
NOTE
You can change the tempo as the pattern plays. See page 19 for further details. Also
see page 44 about recording an initial tempo into your pattern.
The RY20 always remembers the last tempo you entered for a user pattern.
Press the [ STOP ] button to stop playing the pattern. The green Play LED
2
stops flashing.
An Example Pattern
Start the recording by pressing the [RECORD] button. The RY20 defaults to
the first beat of the pattern.
33
Page 42
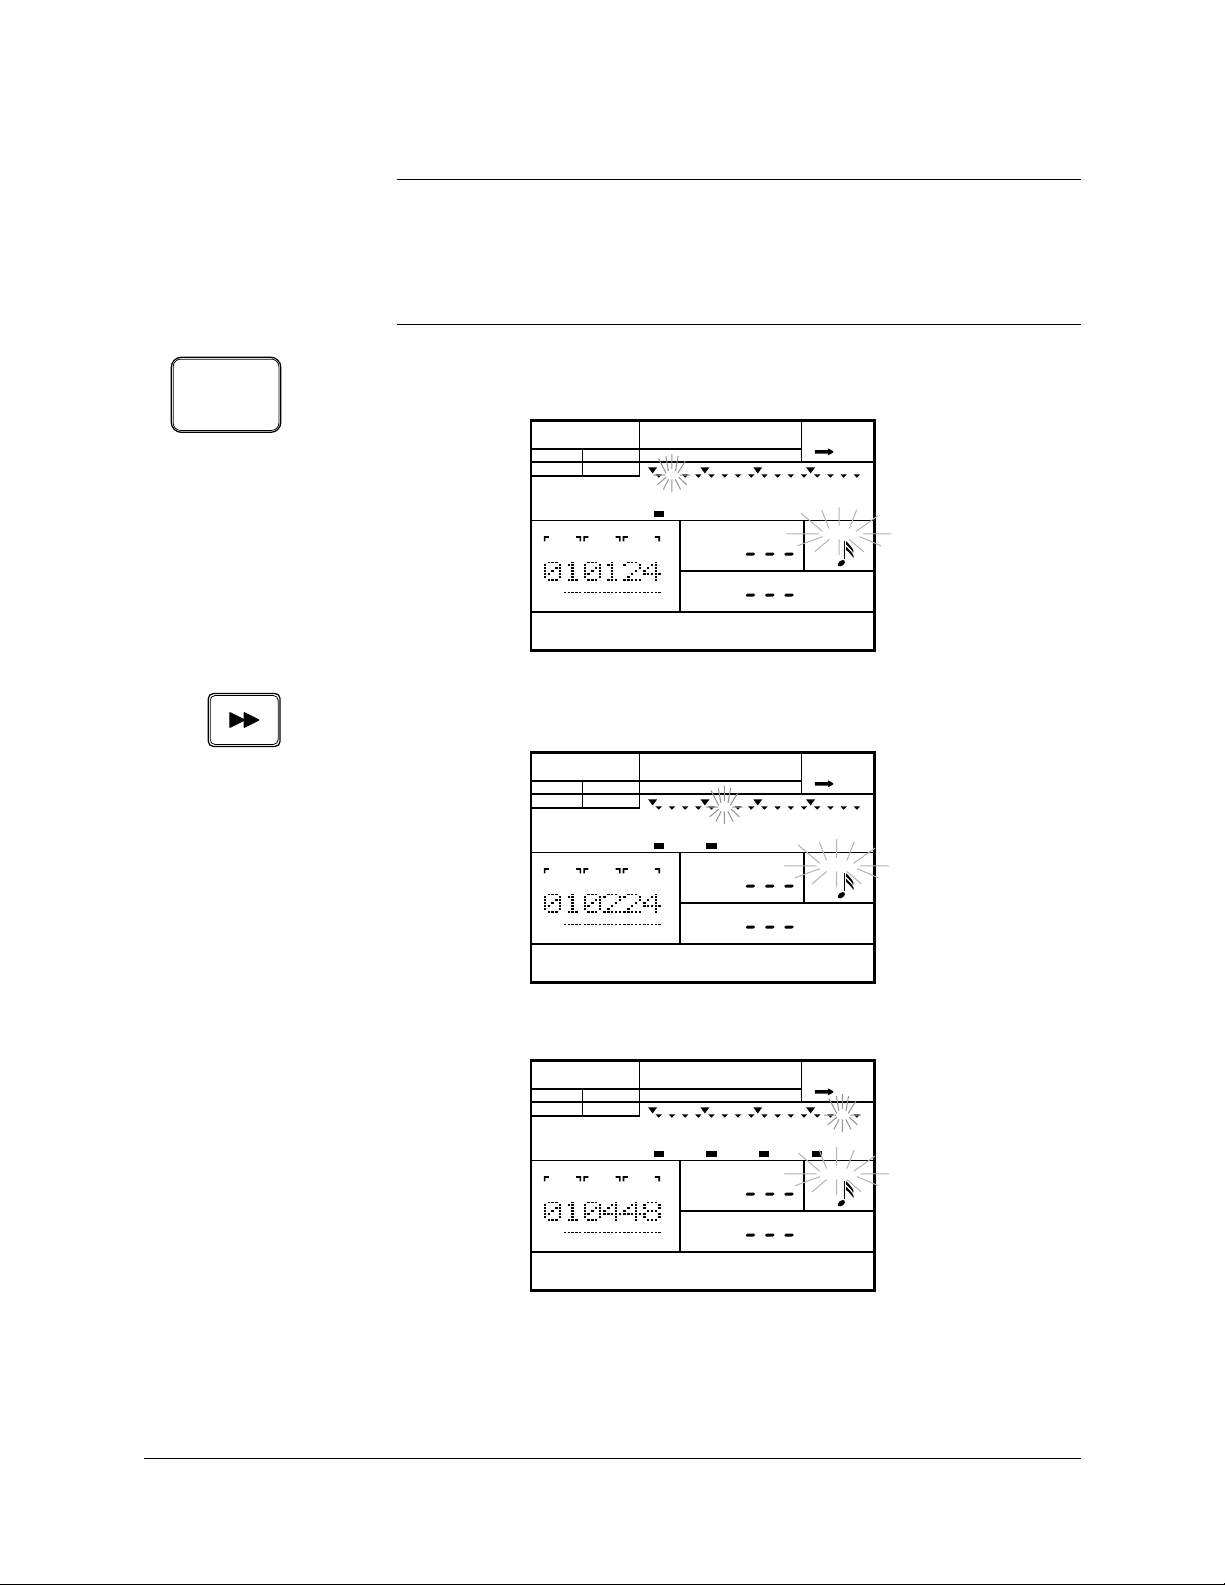
Recording a User Pattern
NOTE
This example will record a bass drum on every 1/4 note. These instructions assume
the defaults: a “
04/04” pattern and 16th note quantization.
See page 46 for information about changing the meter and page 44 for quantization
details.
6
INTRO
BD
Tap the [6 - BD] drum pad. The note is recorded, the clock is updated to
“24”, and the note indicator lights up.
PATTERN
OTHERS
HH
SD
BD
MEAS
INTRO
BEAT
CLOCK
PAD BANK
A CHASE
LEVEL
PAD
QUANTIZE
Skip the next three beats by pressing the [FORWARD] button three times.
Then tap the [6 - BD] drum pad again to enter the second bass drum beat.
PATTERN
OTHERS
HH
SD
BD
MEAS
INTRO
BEAT
CLOCK
PAD BANK
A CHASE
LEVEL
PAD
QUANTIZE
34
Repeat for the remaining two bass drum beats of the measure.
PATTERN
OTHERS
HH
SD
BD
MEAS
INTRO
BEAT
CLOCK
PAD BANK
A CHASE
LEVEL
PAD
QUANTIZE
Complete the second measure by repeating the above procedure. Once the
RY20 has looped back to the beginning of the first measure, you can record
the snare drum, hi-hat, or other parts.
Page 43
If you make a mistake, you can delete the unwanted note very easily. The
procedure is shown starting on page 42.
HINT
The pattern Copy function described on page 57 can make the process of creating
patterns faster and more efficient.
■ Real-time Record Mode
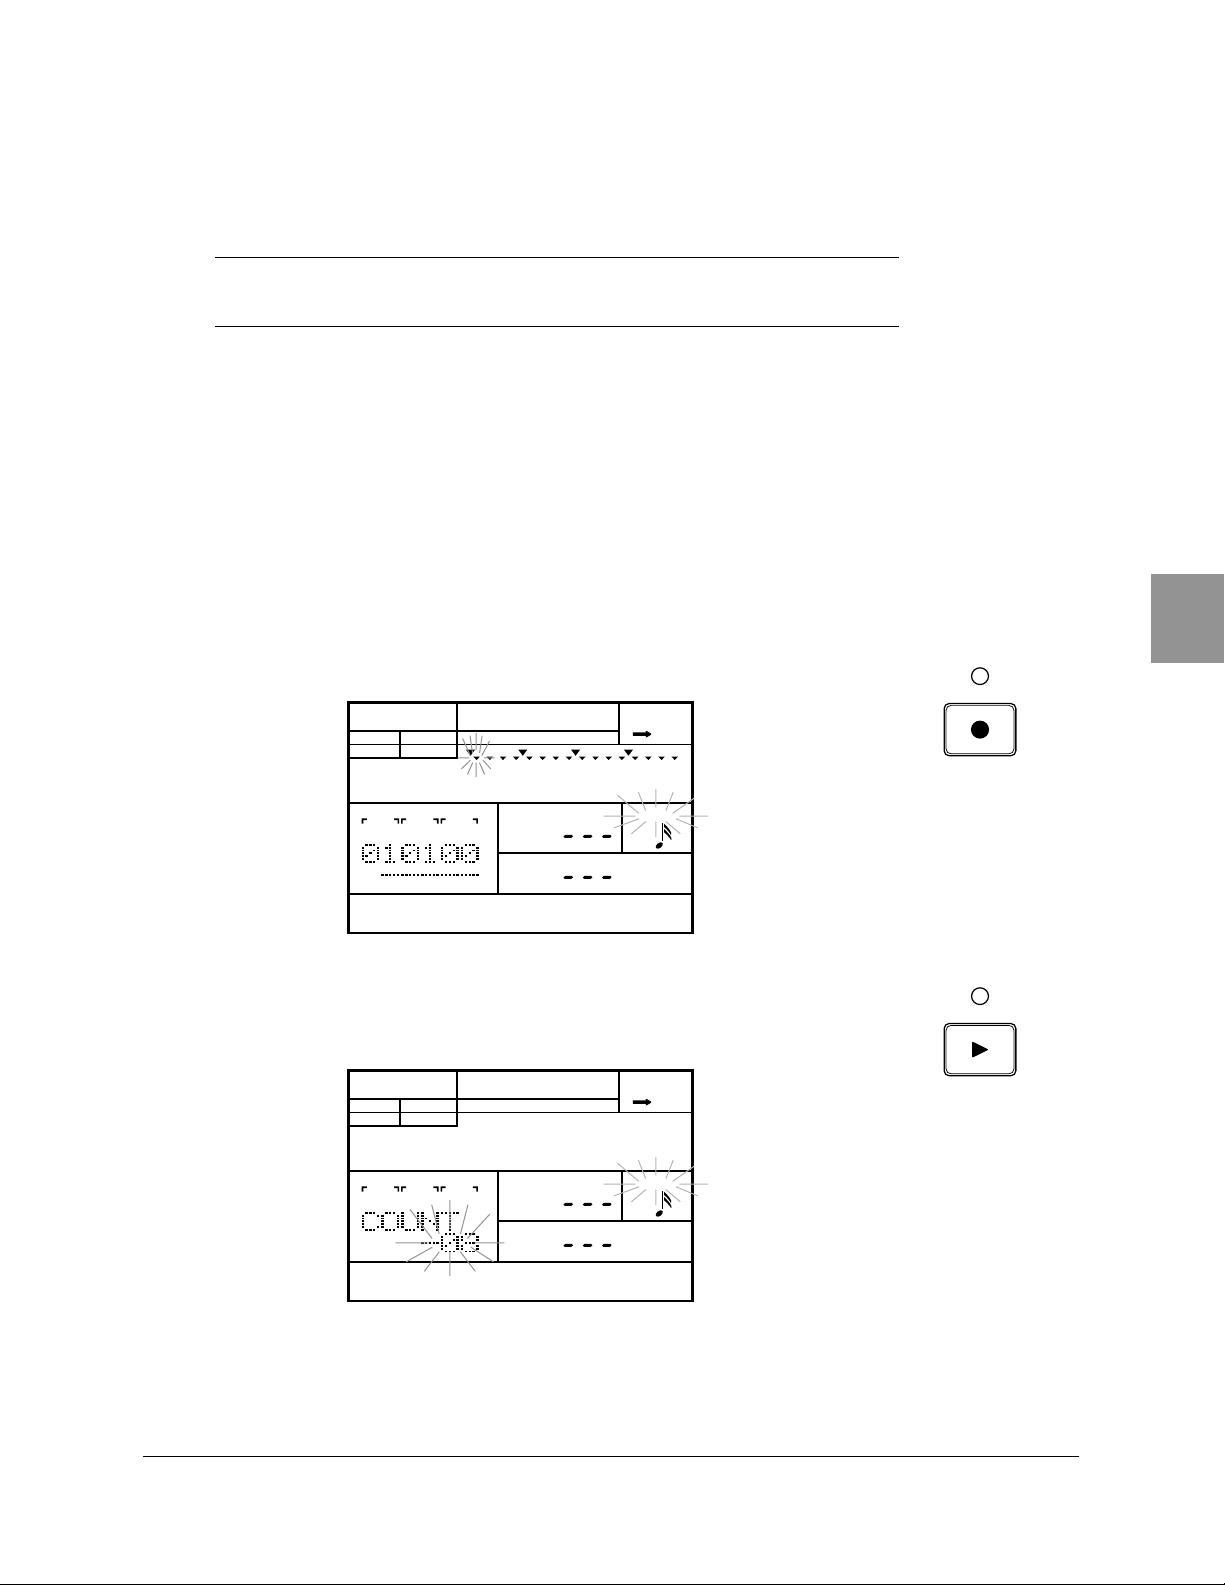
Real-time recording allows you to record a pattern as you play the
drum pads in real time. You can switch to and from real-time mode at
anytime during the recording of your pattern.
Recording a User Pattern
Select a pattern and start the recording by pressing the [RECORD] button.
1
PATTERN
OTHERS
HH
SD
BD
MEAS
INTRO
Press the [ PLAY ] button to start recording in real-time. The green Play
2
LED will flash in time with the current tempo setting, you will hear the
click sound, and the RY20 will countdown two measures before you begin.
PATTERN
OTHERS
HH
SD
BD
MEAS
BEAT
BEAT
CLOCK
CLOCK
PAD BANK
PAD BANK
A CHASE
LEVEL
PAD
A CHASE
LEVEL
QUANTIZE
QUANTIZE
MAIN A
PAD
35
Page 44
Recording a User Pattern
3
NOTE
You can adjust both the volume level and the quantization of the click sound. Refer
to page 47.
Play the drum pads to record your pattern.
0
TOM 1
6
BD
INTRO MAIN A MAIN B FILL AB FILL BA ENDING
1
TOM 2
7
SD
2
TOM 3
8
SIDE
STICK
3
TOM 4
9
HH
PEDAL
4
10
HH
OPEN
HH
CLOSED
5
RIDE
11
CRASH
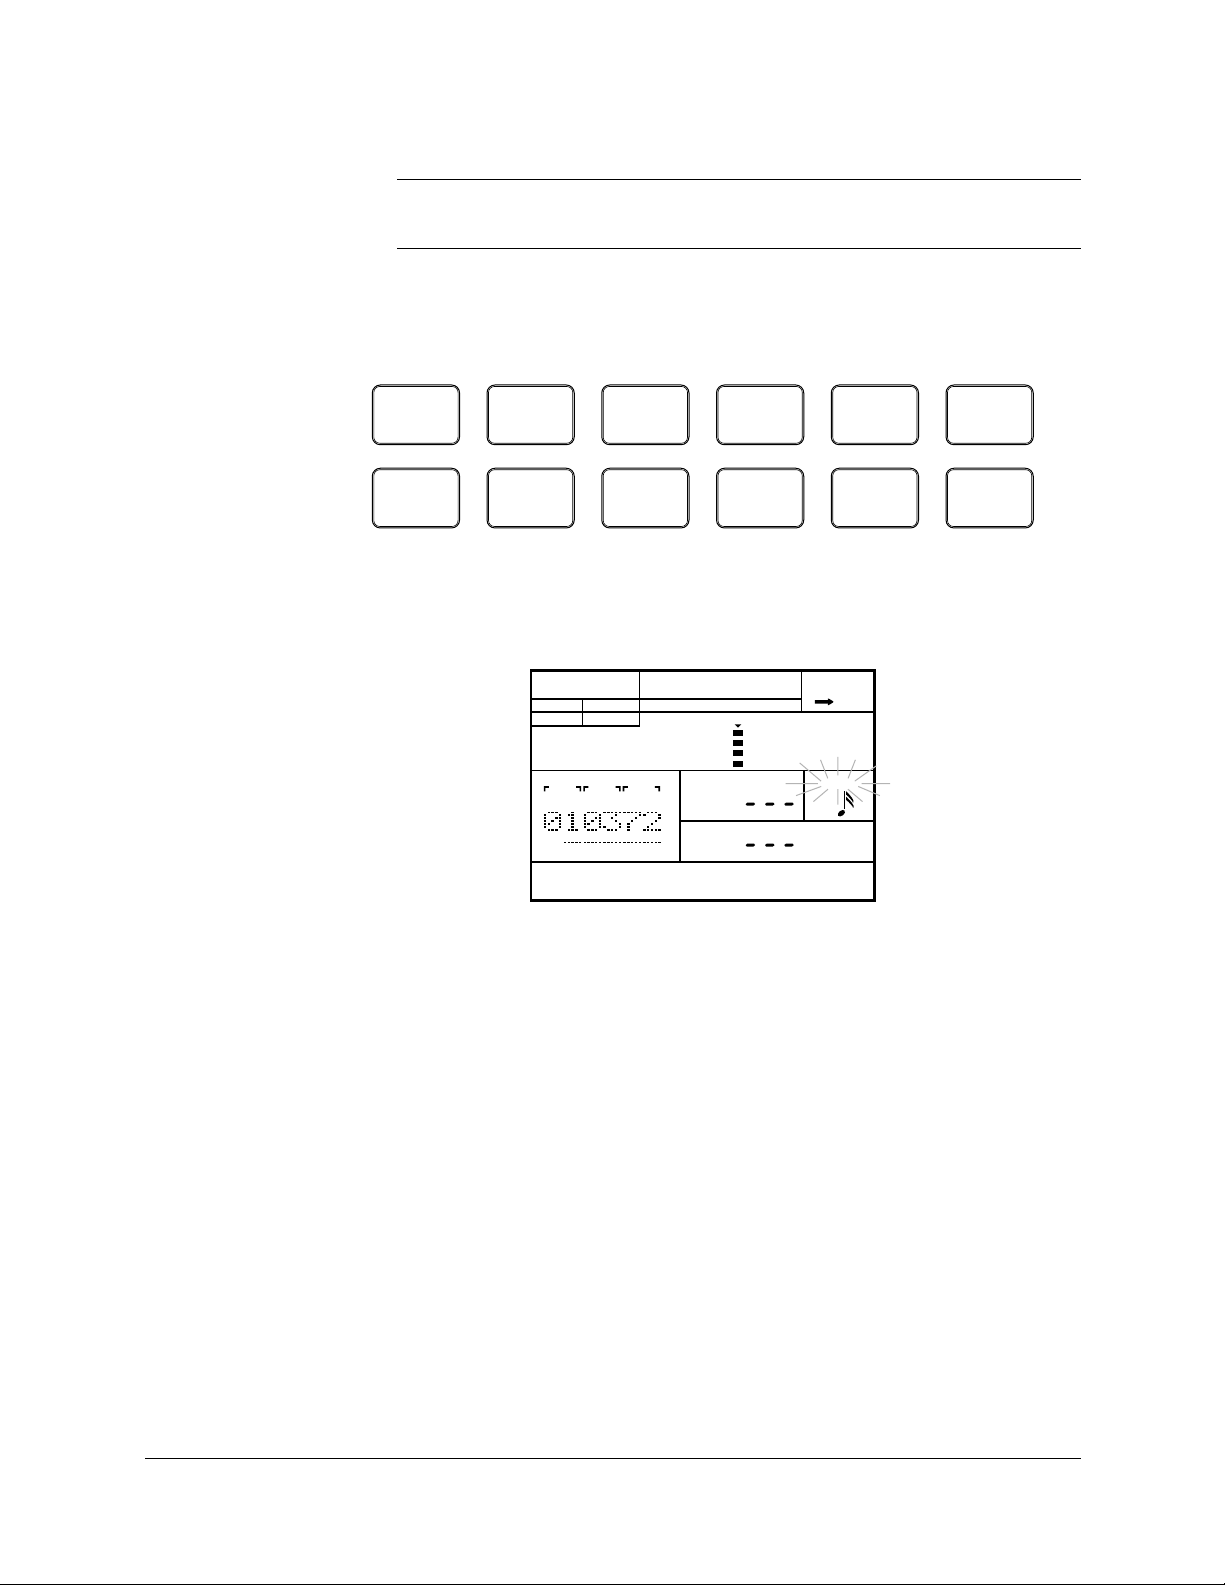
When you tap a pad, the appropriate Voice Level indicator lights up on the
LCD. As on a VU meter, more indicators light up the harder you tap the
pad.
PATTERN
OTHERS
HH
SD
BD
MEAS
BEAT
MAIN A
CLOCK
PAD BANK
A CHASE
LEVEL
PAD
QUANTIZE
36
Page 45

Voice Level Indicators
Recording a User Pattern
Each drum pad is associated with a Voice Level indicator. In this
example, the [ 6 - BD ] pad is being tapped.
01234567891011 Drum Pad Bank A
12 13 14 15 16 17 18 19 20 21 22 23 Drum Pad Bank B
24 25 26 27 28 29 30 31 32 33 34 35 Drum Pad Bank C
36 37 38 39 40 41 42 43 44 45 46 47 Drum Pad Bank D
48 49 50 51 52 53 54 55 56 57 58 59 Drum Pad Bank E
60 61 62 63 64 65 66 67 68 69 70 71 Bass Pad Bank Oct -2
72 73 74 75 76 77 78 79 80 81 82 83 Bass Pad Bank Oct -1
84 85 86 87 88 89 90 91 92 93 94 95 Bass Pad Bank Oct 0
96 97 98 99 100 101 102 103 104 105 106 107 Bass Pad Bank Oct +1
108 109 110 111 112 113 114 115 116 117 118 119 Bass Pad Bank Oct +2
0
TOM 1
6
BD
1
TOM 2
7
SD
2
TOM 3
8
SIDE
STICK
3
TOM 4
9
HH
PEDAL
4
10
HH
OPEN
HH
CLOSED
5
RIDE
11
CRASH
6
BD
INTRO
As the RY20 loops through your pattern, you will also hear the previously
recorded instruments. They will also cause the Voice Level indicators to
light up.
Press the [ STOP ] button to stop the real-time record. The green Play LED
4
stops flashing. However, the RY20 is still in record mode, allowing you to
continue adding to your pattern.
37
Page 46

Recording a User Pattern
■ Combination Patterns
A unique feature of the RY20 is its ability to create “combination”
patterns. A combination pattern is constructed by selecting tracks
from the preset and user patterns.
SECTION
6
INTRO
BD
Select a section of the pattern. Press and hold the [SECTION] button, then
1
press the Drum Pad button for the section you want to record. The
appropriate Section indicator lights up, for example, the “INTRO”
indicator.
NOTE
As you record your combination pattern, you can select other sections as you need.
Select a pattern from “100” to “149” to record into by rotating the Jog Dial
2
or by using the [ +1 ] and [ –1 ] buttons. Start recording by pressing the
[RECORD] button.
PATTERN
OTHERS
HH
SD
BD
INTRO
PAD BANK
A CHASE
PATTERN
EMPTY
TRACK
SELECT/
MUTE
38
OTHERS
HH
SD
BD
The initial track selected is the “BD” - bass drum - track. Notice the track
“ ” indicator is lit. You can change tracks by pressing the appropriate
Track Select/Mute button.
NOTE
Although you are using other patterns, the combination pattern controls the time
signature and the number of measures. You can use patterns with different time
signatures (“
out by a number of repititions of itself and a longer pattern will be truncated. This
will not change the data in the original pattern.
You can also apply swing and groove to the combination pattern without affecting
the data in the original pattern. See page 46 for further details.
METER”) and/or measure numbers. A shorter pattern will be padded
Select the bass drum track of another pattern by rotating the Jog Dial or
3
by using the [ +1 ] and [ –1 ] buttons. Notice that the pattern number
changes under the “COMB” prompt.
Page 47

The range of patterns available is “000” to “099” or “OFF”. “000” to “049”
are the preset patterns, “050” to “099” are the user patterns.
Select another track to record by pressing the appropriate Track
4
Select/Mute button. For example, select the snare drum track by pressing
the [ SD ] button. Then select the snare drum track of another pattern by
rotating the Jog Dial or by using the [ +1 ] and [ –1 ] buttons.
Continue selecting tracks and locating the desired patterns until you are
5
satisfied with your pattern.
Stop the recording by pressing the [RECORD] button again.
6
A Note on Instrument Polyphony
The RY20 has 28-note polyphony. This simply means it can reproduce a
maximum of 28 individual sounds at the same time. You can easily
record notes in excess of the maximum polyphony. The RY20 will record
these notes without difficulty. However on playback, some of the notes
will be truncated and will therefore not sound.
Recording a User Pattern
Some of the voices use more than one element. Each element uses one
note of the instrument’s polyphony. When notes with multiple elements
are recorded in your pattern, the maximum polyphony actually becomes
less than 28 notes. Please refer to the number of elements listed in the
table on page 124.
Back-up Your Data
The RY20 is a powerful and reliable instrument. Its internal memory
saves your pattern data even if the power is shut off. However, accidents
are possible. To protect yourself against loss, you should use a MIDI data
storage device such as the Yamaha MDF2 MIDI Data Filer to save your
valuable data to floppy disk.
The procedure for MIDI back-up is shown starting on page 118.
■ Editing Patterns
The RY20 has extensive features to support the creation and editing of
pattern data.
39
Page 48

Recording a User Pattern
PATTERN
Press the [PATTERN] button to place the unit in Pattern Mode.
1
Select a pattern by rotating the Jog Dial or by using the [ +1 ] and [ –1 ]
buttons.
Start recording by pressing the [RECORD] button. The red Record LED
2
lights and the “QUANTIZE” indicator and the current position “ ” indicator
both flash.
LCD Panel
The following illustration points out some key indicators on the LCD
panel when the RY20 is in Pattern Record Mode.
Entry Location
Level Prompt
PATTERN
OTHERS
HH
SD
BD
MEAS
BEAT
PAD BANK
CLOCK
Pattern Display
A CHASE
LEVEL
Quantize Prompt
QUANTIZE
MAIN A
Section Indicator
Voice Name
PAD
Quantization Icon
Pad Number Prompt
The Entry Location shows, from left to right, the measure, beat, and
clock number of the pattern section. These parameters show you which
location you are currently at.
In real-time record, this is the only visual indication you have of the
location of the current position.
The Level Prompt shows the recorded level of the pad at the current
insert location. If there is no event recorded at this location, the display
shows “---”. You can edit the level of each recorded note at any time
during Pattern Record Mode.
The Pattern Display is the section of the LCD panel that shows the
pattern data and status. See below.
The Quantize Prompt and Quantization Icon show the current
quantization level. See page 44 for further details.
40
Page 49

The Voice Name is the preset five character name for the voice assigned
to the current pad. If there is no voice recorded at this location, the display
shows “-----”.
The Section Indicator shows which pattern section you are working on.
The Pad Number Prompt shows which pad was recorded at the current
insert location. If there is no event recorded at this location, the display
shows “---”. You can select another pad for each recorded note at any
time during Pattern Record Mode.
Pattern Display
A more detailed view of the portion of the LCD panel that shows the
pattern data and status.
Beat Indicator
Position Indicator (flashing indicates current point)
Note Indicator
Recording a User Pattern
The Beat Indicator shows the quarter note divisions of the measure
and changes depending on the quantization.
The Position Indicator shows the possible note locations for the
current quantization level. The flashing position indicator shows the
current point in the pattern.
The Note Indicator shows that an instrument has been recorded on
one of the four tracks at this position.
Editing Buttons
The [FORWARD], [BACKWARD], and [ TOP ] buttons are designed to allow
you to move quickly through the pattern and efficiently edit your
pattern data.
Use the [FORWARD] button to move forward through your pattern. It stops
at each available note position. The maximum number of note positions to
a beat is 96. The number of available positions in a beat is determined by
the quantization setting. See page 44 for details about quantization.
41
Page 50

Recording a User Pattern
If an instrument event has been recorded, the display is updated as
follows:
PATTERN
OTHERS
HH
SD
BD
MEAS
BEAT
MAIN A
CLOCK
PAD BANK
A CHASE
LEVEL
PAD
QUANTIZE
If there is more than one note recorded at a position, the RY20 steps
through each event, in the recorded order, as you press the [FORWARD]
button.
Use the [BACKWARD] button to go back to a previous note. It functions in a
similar fashion to the [FORWARD] button.
NOTE
Instead of the
[FORWARD] or [BACKWARD] buttons, you can use the Jog Dial or the
[ +1 ] and [ –1 ] buttons to easily change the current location.
Use the [ < ] or [ > ] cursor buttons to change the focus to the “MEAS|BEAT|CLOCK”
indicators. Select another location within the pattern by rotating the Jog Dial or
pressing the
[ +1 ] and [ –1 ] buttons.
Use the [ TOP ] button to return to the beginning of the pattern.
Deleting Voices
A single note can be deleted from your pattern.
CLEARDELETE
Use the [FORWARD] and [BACKWARD] buttons to move the position pointer to
the event you want to delete. Press and hold the DELETE [CLEAR] button.
The “DEL” indicator lights up.
PATTERN
DEL A CHASE
OTHERS
HH
SD
BD
MEAS
BEAT
MAIN A
CLOCK
PAD BANK
LEVEL
PAD
QUANTIZE
42
Page 51

Recording a User Pattern
Press the appropriate drum pad, for example, the [ 6 - BD ] pad. The note
indicator for the event turns off.
IMPORTANT
If you decide that you DO NOT want to delete a note from the pattern, you can
cancel this operation by simply releasing the
DELETE [CLEAR] button.
NOTE
An alternate method is to press and hold the
the
[ ENTER ] button while the position pointer is at the note you want to delete. In
DELETE [CLEAR] button and then press
this case, only the selected note will be deleted.
Modifying the Level or Pad
You can change the level or pad of an event.
Use the [FORWARD] and [BACKWARD] buttons to locate the note event. Press
the [ < ] cursor button to change the focus to the “LEVEL” prompt.
6
BD
INTRO
ENTER
PATTERN
OTHERS
HH
SD
BD
MEAS
BEAT
MAIN A
CLOCK
PAD BANK
A CHASE
LEVEL
PAD
QUANTIZE
Change the level by rotating the Jog Dial or by using the [ +1 ] and [ –1 ]
buttons.
NOTE
The level value changes in increments of 4. For example, increasing the level “
(shown above) by one step changes it to “
091”.
087”
Press the [ < ] cursor button again to change the focus to the “PAD” prompt.
Select another pad by rotating the Jog Dial or by using the [ +1 ] and [ –1 ]
buttons.
NOTE
As you change the pad number, notice that the Note indicator changes from track to
track. Also, see the note on page 42 for an alternative way of accessing a note event.
43
Page 52

Recording a User Pattern
Setting the Tempo
Set the tempo for your new pattern.
TEMPO
Press the [TEMPO] button to place the unit in Tempo Mode. Adjust the
1
tempo by rotating the Jog Dial or by using the [ +1 ] and [ –1 ] buttons.
The tempo can be set to any value from 40 to 250 beats per minute.
NOTE
Pressing the
pattern to 120 beats per minute.
[ +1 ] and [ –1 ] buttons simultaneously resets the tempo of the user
Press the [PATTERN] button to return back to Pattern Record Mode.
2
NOTE
Pressing the
Pattern Record Mode.
■ Quantization
[TEMPO] button again is another method of switching the RY20 back to
44
Quantization helps to produce a “tight” recording by automatically
aligning notes to the nearest specified beat as you record. You can
change the quantization value at any time during the recording of a
pattern.
When you press the Record button, the “QUANTIZE” indicator flashes,
1
indicating that this is the current focus of the display (the current position
“ ” indicator also flashes)
PATTERN
OTHERS
HH
SD
BD
MEAS
INTRO
BEAT
CLOCK
PAD BANK
A CHASE
LEVEL
PAD
QUANTIZE
Page 53

Set a new quantization value by rotating the Jog Dial or by using the [ +1 ]
2
and [ –1 ] buttons.
The RY20 has seven levels of quantization. The coarsest level of
quantization is resolution to eighth notes and the finest level is no
quantization, “OFF”, which resolves to a 96th note.
The quantization values are:
• = eighth note.
Recording a User Pattern
• = eighth note triplet.
3
• = 16th note.
• = 16th note triplet.
3
• = 32nd note.
• = 32nd note triplet.
3
•“OFF” = 96th note.
A recommended approach is to use eighth note or eighth note triplet
quantization to record the basic portions of your pattern, such as the bass
drum. As you add to your pattern you can use a finer quantization value to
increase its complexity.
■ Gate Time
Gate time is used to adjust the duration of a note. It is most effective
when used with Note Driven voices (see page 97).
Select the Gate display page by pressing the [ PAGE+ ] button. The display
1
indicates “GATE” and the current value flashes.
PATTERN
OTHERS
HH
SD
BD
MAIN A
PAD BANK
A CHASE
PAGE – PAGE +
45
Page 54

Recording a User Pattern
2
■ Changing the Meter
Change the value by rotating the Jog Dial or using the [ +1 ] and [ –1 ]
buttons.
The range is from “004” to “508”.
The gate value applies only to the current position within the pattern.
Select another position in the pattern. Press the [ PAGE– ] button to return
to Pattern Record Mode. Use the [FORWARD] or [BACKWARD] button to select a
new position. Then repeat the preceding two steps.
NOTE
You can only change the gate value for a pattern position that has data in it. If
there is no data at a position in the pattern, the gate value is “
---”.
PAGE – PAGE +
Before you record data into a pattern, you can adjust the time
signature and the number of measures.
Select the Meter display page by pressing the [ PAGE+ ] button. The display
1
indicates “METER” and the current time signature flashes.
PATTERN
OTHERS
HH
SD
BD
MAIN A
PAD BANK
A CHASE
MEASURE
Set the time signature by rotating the Jog Dial or using the [ +1 ] and [ –1 ]
2
buttons.
The default time signature is “4/4”. The range of time signatures is from
“1/4” to “8/4”, “1/8” to “16/8”, and “1/16” to “32/16”.
46
Page 55

Set the number of measures by using the [ > ] cursor button to change the
3
focus to the “MEASURE” prompt. Change the number of measures by
rotating the Jog Dial or using the [ +1 ] and [ –1 ] buttons.
The default length is “02” measures. The range is “01” measure to “16”
measures.
NOTE
The meter and number of measures in a pattern that contains data cannot be
changed. If you try to change these values, the message “
momentarily appear on the display.
■ Adjusting the Click
Recording a User Pattern
NOT EMPTY” will
The RY20 has a built-in click sound which sounds on each beat of the
measure to serve as a rhythmic guide when you record in Real-time
Mode. You can change both the volume and the quantization of the
click sound.
Select the Click display page by pressing the [ PAGE+ ] button until the
1
display indicates “CLICK”.
PATTERN
OTHERS
HH
SD
BD
MAIN A
PAD BANK
A CHASE
LEVEL
QUANTIZE
Set the volume by rotating the Jog Dial or using the [ +1 ] and [ –1 ]
2
buttons.
The default volume level is “15”. The range is from “00” to “15”.
PAGE – PAGE +
NOTE
Pressing the
[ +1 ] and [ –1 ] buttons simultaneously resets the level to “00”.
47
Page 56

Recording a User Pattern
3
Set the quantization by using the [ > ] cursor button to change the focus to
the “QUANTIZE” prompt. Change the value by rotating the Jog Dial or
using the [ +1 ] and [ –1 ] buttons.
The default quantization is quarter note. The quantization values are:
• = quarter note.
• = eighth note.
• = eighth note triplet.
• = 16th note.
• = 16th note triplet.
NOTE
Changing the click level or quantization in Pattern Record Mode also changes it in
Song Record Mode.
3
3
48
Page 57

Other Pattern Functions
6
Other Pattern Functions
There are additional functions in Pattern Play Mode, helping you to
precisely complete your own patterns.
■ Swing
Swing gives your patterns a looser, “swing” feel by slightly delaying
the even-numbered eighth or 16th notes. Each pattern can be
programmed with a different swing setting. You can modify the swing
at anytime, while the RY20 is stopped or during playback.
Press the [PATTERN] button to put the RY20 into Pattern Mode. Select a
1
pattern by rotating the Jog Dial or using the [ +1 ] and [ –1 ] buttons.
PATTERN
Select the Swing display page by pressing the [ PAGE+ ] button. The display
2
indicates “SWING” and the current value (“OFF”) flashes.
PATTERN
OTHERS
HH
SD
BD
MAIN A
Set the swing by rotating the Jog Dial or using the [ +1 ] and [ –1 ] buttons.
PAD BANK
A CHASE
QUANTIZE
3
PAGE – PAGE +
49
Page 58

Other Pattern Functions
NOTE
The “
SWING” indicator will appear on the top of the LCD when any swing
parameter other than “
long as a swing function is active.
OFF” is selected. It will remain lit for the selected pattern as
PATTERN
SWING
OTHERS
HH
SD
BD
MAIN A
PAD BANK
A CHASE
QUANTIZE
The range is from “51%” to “99%” or “OFF”.
The default quantization is eighth notes. To change the quantization press
4
the [ > ] cursor button to change the focus to the “QUANTIZE” prompt.
Change the value by rotating the Jog Dial or using the [ +1 ] and [ –1 ]
buttons.
The values are = eighth notes or = 16th notes.
NOTE
Pressing the
Quantize values to their default.
[ +1 ] and [ –1 ] buttons simultaneously resets both the Swing and
50
■ Groove
Groove adds a human rhythm feel by changing the velocity, timing, or
quantization values of a pattern. Each pattern can be programmed
with a different groove setting. You can modify the groove at anytime,
while the RY20 is stopped or during playback.
Press the [PATTERN] button to put the RY20 into Pattern Mode. Select a
1
pattern by rotating the Jog Dial or using the [ +1 ] and [ –1 ] buttons.
Page 59

Other Pattern Functions
Select the Groove display page by pressing the [ PAGE+ ] button until the
2
display indicates “GROOVE” and the current value (“OFF”) flashes.
PATTERN
OTHERS
HH
SD
BD
MAIN A
PAD BANK
A CHASE
LEVEL
TIMING
QUANTIZE
Select the groove by rotating the Jog Dial or using the [ +1 ] and [ –1 ]
3
buttons.
NOTE
The “
GROOVE” indicator will appear on the top of the LCD when any groove
parameter other than “
long as a groove function is active.
OFF” is selected. It will remain lit for the current pattern as
PATTERN
OTHERS
HH
SD
BD
GROOVE
PAD BANK
A CHASE
LEVEL
TIMING
QUANTIZE
PAGE – PAGE +
MAIN A
The default is “OFF”. There are 14 groove types, each modifies your
pattern in different ways:
HevyE Increase the velocity of notes that fall on the beat and
Heavy Even
decrease the velocity of all other notes. Delay the
even-numbered beats.
Hevy2 Increase the velocity of notes that fall on the beat and
Heavy 2nd
decrease the velocity of all other notes. Delay the
second beat of each measure.
Hevy4 Increase the velocity of notes that fall on the beat and
Heavy 4th
decrease the velocity of all other notes. Delay the
fourth beat of each measure.
SnapE If there is a snare on the even-numbered beats, repeat
Snap Even
it after a delay of an eighth note, a dotted eighth note,
or a sixth note. Any note on an even-numbered beat is
shifted forward in time.
51
Page 60

Other Pattern Functions
Snap2 If there is a snare on the second beat of the measure,
Snap 2nd
Snap4 If there is a snare on the fourth beat of the measure,
Snap 4th
Snp2V Increase the velocity of the first note of a group of
Snap 2nd and
Velocity Change
OfBtE Decrease the velocity of the first note of a group of
Off Beat and Even
Delay
repeat it after a delay of an eighth note, a dotted
eighth note, or a sixth note. Any note on the second
beat of each measure is shifted forward in time.
repeat it after a delay of an eighth note, a dotted
eighth note, or a sixth note. Any note on the fourth
beat of each measure is shifted forward in time.
eighth note, eighth note triplet, or 16th note hi-hat,
ride, cup, and percussion beats. Decrease the velocity
of the last note of the group. If there is a snare on the
second beat, repeat it after a delay of an eighth note,
a dotted eighth note, or a sixth note.
eighth note, eighth note triplet, or 16th note hi-hat,
ride, cup, and percussion beats. Increase the velocity
of the last note of the group. Delay the even-numbered
beats.
OfBt2 Decrease the velocity of the first note of a group of
Off Beat and 2nd
Delay
OfBt4 Decrease the velocity of the first note of a group of
Off Beat and 4th
Delay
TrplD Increase the velocity of the first note of a eighth note
Triplet Delay
TrplA Increase the velocity of the first note of a eighth note
Triplet Advance
Loose If there is more than one note being played on a beat,
Loose
eighth note, eighth note triplet, or 16th note hi-hat,
ride, cup, and percussion beats. Increase the velocity
of the last note of the group. Delay the second beat of
each measure.
eighth note, eighth note triplet, or 16th note hi-hat,
ride, cup, and percussion beats. Increase the velocity
of the last note of the group. Delay the fourth beat of
each measure.
triplet hi-hat, ride, cup, and percussion beat and
decrease the velocity of the last. Delay the last note of
the triplet.
triplet hi-hat, ride, cup, and percussion beat and
decrease the velocity of the last. Shift the last note of
the triplet forward.
delay each note by an equal amount, causing a smear
of the rhythm.
52
Squez Advance the timing of the notes in the first half of the
Squeeze
Groove has “LEVEL”, “TIMING”, and “QUANTIZE” settings. Available
settings for each groove are shown on the display.
quarter note and delay the notes in the last half.
Page 61

All three settings can be reset to their default values by pressing the [ +1 ]
and [ –1 ] buttons simultaneously.
Change the focus to the “LEVEL” prompt using the [ > ] cursor button.
4
Modify the value by rotating the Jog Dial or using the [ +1 ] and [ –1 ]
5
buttons.
The range is from “01” to “16” (full effect).
NOTE
If the “
LEVEL” setting is inactive, it is indicated with a value of “---” on the
display. Press the
Change the focus to the “TIMING” prompt using the [ > ] cursor button.
[ > ] cursor button again to skip the inactive setting.
6
Other Pattern Functions
Modify the value by rotating the Jog Dial or using the [ +1 ] and [ –1 ]
7
buttons.
The range is from “01” (slight delay) to “16” (extreme delay).
NOTE
If the “
TIMING” setting is inactive, it is indicated with a value of “---” on the
display.
Change the focus to the “QUANTIZE” prompt using the [ > ] cursor button.
8
Modify the value by rotating the Jog Dial or using the [ +1 ] and [ –1 ]
9
buttons.
The repeat values are:
• eighth note.
• eighth note triplet.
• 16th note.
3
NOTE
If the “
QUANTIZE” setting is inactive, the note icon at the right-center of the display
will be off.
53
Page 62

Other Pattern Functions
PATTERN
A CHASEPAD BANK
OTHERS
HH
SD
BD
■ Velocity Modify
1
You can modify the velocity settings for an entire track. This function
allows you to change the rate of velocity and the offset from the
recorded values.
Press the [PATTERN] button to put the RY20 into Pattern Mode. Select a
pattern by rotating the Jog Dial or using the [ +1 ] and [ –1 ] buttons.
PAGE – PAGE +
OTHERS
TRACK
SELECT/
MUTE
HH
SD
BD
Select Velocity display page by pressing the [PAGE+] button until the
2
display indicates “VELCTY” and the current rate flashes. Also notice that
one of the track “ ” indicators is lit.
PATTERN
OTHERS
HH
SD
BD
MAIN A
PAD BANK
A CHASE
LEVEL
Select the track you wish to modify with the Track Select/Mute buttons.
3
When you press a button, the track “ ” indicator for the current track
switches off as the indicator corresponding to the selected track lights up.
54
Alter the velocity rate by rotating the Jog Dial or using the [ +1 ] and [ –1 ]
4
buttons.
The default rate is “100%” which is the normal setting. The range is from
“000%” to “200%”. As you lower the rate below “100%”, all of the velocity
settings are correspondingly reduced. When you raise the rate above
“100%”, the velocity settings are correspondingly increased.
Change the focus to the “LEVEL” prompt using the [ > ] cursor button.
5
Page 63

Modify the value by rotating the Jog Dial or using the [ +1 ] and [ –1 ]
6
buttons.
The default level is “00”. The range is from “–99” to “99”. The level value
controls how much the volume will be changed from its recorded value. As
the level is reduced, the volume of all the notes on the track is
correspondingly lowered. When you raise the level, the volumes are
correspondingly increased.
Select the next track you wish to modify with the Track Select/Mute
7
buttons.
PATTERN
OTHERS
HH
SD
BD
A CHASEPAD BANK
Repeat the above steps.
NOTE
Other Pattern Functions
You can reset each parameter to its default setting by pressing the
buttons simultaneously.
■ Clearing a Pattern
Clearing data from a user/combination pattern is a flexible operation.
You can clear individual tracks or an entire section.
Press the [PATTERN] button to put the RY20 into Pattern Mode. Select a
1
pattern by rotating the Jog Dial or using the [ +1 ] and [ –1 ] buttons.
Select the Clear display page by pressing the DELETE [ CLEAR ] button. The
2
display indicates “CLEAR SURE?”.
PATTERN
OTHERS
HH
SD
BD
PAD BANK
[ +1 ] and [ –1 ]
CLEARDELETE
A CHASE
MAIN A
PATTERN
55
Page 64

Other Pattern Functions
NOTE
PAGE – PAGE +
OTHERS
TRACK
SELECT/
MUTE
HH
SD
BD
You can also select the Clear display page by pressing the
buttons.
[ PAGE+ ] or [ PAGE– ]
Select the section of the pattern you want to clear. Press and hold the
3
[SECTION] button, then press the appropriate Drum Pad button. The
appropriate Section indicator lights up, for example, the “INTRO”
indicator.
Select the tracks you wish to clear with the Track Select/Mute buttons.
4
Notice as you press a button, the track “ ” indicator for the corresponding
track lights up.
PATTERN
OTHERS
HH
SD
BD
A CHASEPAD BANK
If you select a track by accident, just press the button again to switch it
off.
IMPORTANT
If you decide that you DO NOT want to clear the pattern, you can cancel this
operation by simply selecting another function. There are several ways to do this:
ENTER
Press the
Press the [ PAGE+ ] or [ PAGE– ] buttons to select another display page.
[PATTERN] button to return to Pattern Mode.
Clear the selected tracks in the current section by pressing the [ ENTER ]
5
button. The “END” prompt will momentarily appear on the LCD.
NOTE
If the selected pattern contains a lot of data, you may see the prompt
“
PLEASE WAIT” as the RY20 clears the data from the pattern.
When you see the “END” prompt, the RY20 has finished clearing the
selected tracks.
56
Page 65

WARNING
Other Pattern Functions
When you press the
possible to recover data that you have lost by clearing the pattern.
PLEASE BE CERTAIN THAT THIS IS WHAT YOU INTEND TO DO.
NOTE
If you forget to select any tracks, the RY20 will prompt you with the error message
“
SELECT TRACK”.
Select another section to clear by pressing the appropriate Drum Pad
6
button while holding the [SECTION] button.
NOTE
The preset patterns “
selection and the tempo, swing, groove, and velocity settings of a user pattern
cannot be cleared.
WARNING
Turning the power off during the execution of the clear function may cause the
irretrievable loss of ALL user data.
[ ENTER ] button the clear operation will be performed. It is not
000” to “049” cannot be cleared. Also note that the pad bank
■ Copying a Pattern
You can copy the data of any pattern to a user pattern numbered
“050” to “099”. This allows you, for example, to copy a preset pattern
into a user pattern where you can then modify it.
Press the [PATTERN] button to put the RY20 into Pattern Mode. Select a
1
pattern to copy from by rotating the Jog Dial or using the [ +1 ] and [ –1 ]
buttons.
You can select any pattern from “000” to “149”. The pattern you just
selected is the Source Pattern.
57
Page 66

Other Pattern Functions
COPYINSERT
2
display reads “COPY SURE?”.
PATTERN
OTHERS
HH
SD
BD
INTRO
PAD BANK
A CHASE
PATTERN
NOTE
You can also select the Copy display page by pressing the
buttons.
[ PAGE+ ] or [ PAGE– ]
Select the pattern to copy to by rotating the Jog Dial or using the [ +1 ] and
Select the Copy display page by pressing the INSERT [ COPY ] button. The
3
[ –1 ] buttons.
The pattern you just selected is the Destination Pattern. You must select
a pattern from “050” to “099” as your destination pattern.
TRACK
SELECT/
MUTE
SECTION
7
MAIN A
OTHERS
HH
SD
BD
SD
Select the section of the pattern you want to copy by pressing the
4
appropriate Drum Pad button while holding the [SECTION] button.
WARNING
Be careful not to overwrite a pattern accidentally. The “
EMPTY” indicator will light
for pattern sections that have no data. If the destination pattern you have selected
already contains data, the copy function will overwrite that data on the selected
tracks.
Select the tracks you wish to copy with the Track Select/Mute buttons.
5
Notice as you press a button, the track “ ” indicator for the corresponding
track lights up.
PATTERN
OTHERS
HH
SD
BD
A CHASEPAD BANK
If you select a track by accident, just press the button again to switch it
off.
58
Page 67

Copy the selected tracks of the current section by pressing the [ ENTER ]
6
button. The prompt “END” will momentarily appear on the LCD.
NOTE
Other Pattern Functions
If the source pattern contains a lot of data, you may see the prompt “
as the RY20 copies the data to the destination pattern.
PLEASE WAIT”
When you see the “END” prompt, the RY20 has completed copying the
selected tracks from the source pattern to the destination pattern.
IMPORTANT
If you decide that you DO NOT want to copy a pattern, you can cancel this
operation by simply selecting another function. There are several ways to do this:
Press the
Press the [ PAGE+ ] or [ PAGE– ] buttons to select another display page.
WARNING
When you press the
possible to recover data that you have lost by overwriting the pattern.
PLEASE BE CERTAIN THAT THIS IS WHAT YOU INTEND TO DO.
[PATTERN] button to return to Pattern Mode.
[ ENTER ] button, the copy operation will be performed. It is not
NOTE
If you forget to select any tracks, the RY20 will prompt you with the error message
“
SELECT TRACK”.
Select another section to copy by pressing the appropriate Drum Pad
7
button while holding the [SECTION] button.
The pad bank selection and the tempo, swing, groove, and velocity settings
of the source pattern are copied to the destination pattern.
NOTE
If you attempt to copy a track from the source pattern to a destination pattern that
already contains data and the destination pattern has a different time signature
from the source pattern, the message “
the display. This means the time signatures do not match. Select an empty
destination pattern or one with the same time signature as the source pattern.
TS NOT MATCH” will momentarily appear on
SECTION
8
SIDE
STICK
MAIN B
59
Page 68

Other Pattern Functions
IMPORTANT
The error message “
page 33 for details.
WARNING
Turning the power off during the execution of the copy function may cause the
irretrievable loss of ALL user data.
MEMORY FULL” may appear. See the important message on
■ Setting the Pattern Name
This mode allows you to assign a name of up to five characters to a
user/combination pattern.
Press the [PATTERN] button to put the RY20 into Pattern Mode. Select a
1
pattern by rotating the Jog Dial or using the [ +1 ] and [ –1 ] buttons.
Select Name display page by pressing the [PAGE+] button until the display
2
indicates “NAME” and the name of the current pattern. Notice that the first
character is flashing.
PATTERN
OTHERS
HH
SD
BD
INTRO
PAD BANK
A CHASE
PATTERN
The default name for all user patterns is “-----”.
Select the first character of the name by rotating the Jog Dial or by using
3
the [ +1 ] and [ –1 ] buttons.
60
Page 69

NOTE
The RY20 contains the following character set, allowing you to use numbers, upper
and lower case letters and symbols for your name.
(Space)
!”#$%&’()*+,-./0123456789:;<=>?@ABCDEFGHIJKLMNOPQRSTUVWX
YZ[¥]^_‘abcdefghijklmnopqrstuvwxyz{|}→←
To move to the next character, press the [ > ] button. The second character
4
will flash. Change that character by rotating the Jog Dial or by using the
[ +1 ] and [ –1 ] buttons.
Repeat the previous step until you have finished creating the name for
5
your pattern.
Other Pattern Functions
61
Page 70

Recording a Song
7
SONG
Recording a Song
The RY20 can record 50 original songs, each consisting of as many
patterns as you want, in its internal memory. The internal memory
saves your pattern and song data even if the power is shut off. There
are two song record modes: Step Record Mode and Real-time Record
Mode.
■ Step Record Mode
In this mode you select patterns one at a time to create your song.
Press the [ SONG ] button to put the unit in Song Mode. Notice that the
1
“SONG” indicator is flashing above the current Song Number.
+
–1 +1
SONG
OTHERS
HH
SD
BD
SONG
Select a song from “00” to “49” to record into by rotating the Jog Dial or by
2
using the [ +1 ] and [ –1 ] buttons.
Song “50” is the demonstration song and cannot be edited. See page 12 for
demonstration song playback.
WARNING
Be careful not to overwrite a song accidentally. If a song is empty, the “
number is marked “
song position you want to use already has pattern data in it, you may want to clear
the existing data before you start to record your new song. See page 77.
PART
---” indicating that there is no pattern data recorded. If the
PAD BANK
A CHASE
MEASURE
PATTERN
PATTERN”
62
 Loading...