

Page 1
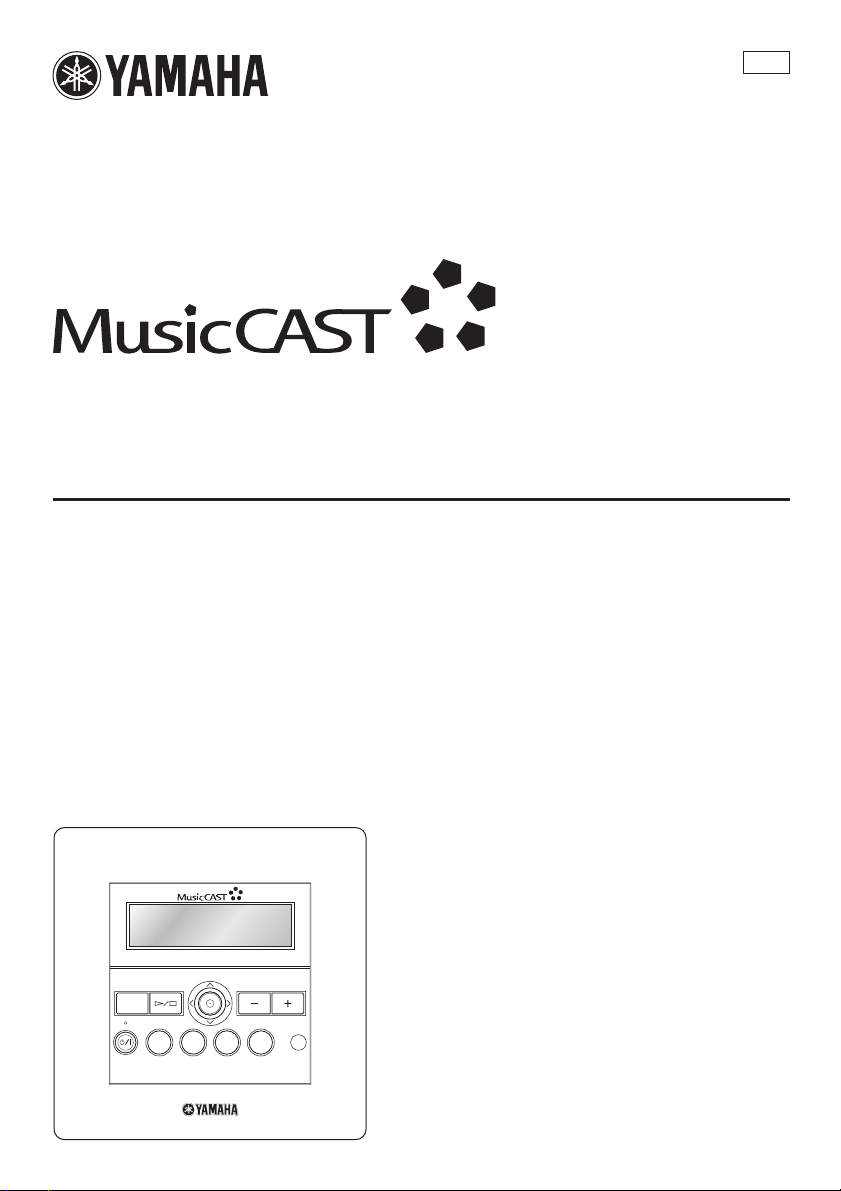
MCX-C15
Distributed Audio Controller
UBCAG
MENU
MCX-C15
VOL
2341
FAVORITES
OWNER’S MANUAL
Page 2

CONTENTS
INTRODUCTION
INTRODUCTION
FEATURES .............................................2
MusicCAST SYSTEM OVERVIEW.....3
The server ................................................. 4
The client .................................................. 4
The amplifier ............................................ 4
SUPPLIED ACCESSORIES..................5
Before using the remote control ............... 6
Replacing the battery in the
remote control ...................................... 6
CONTROLS AND FUNCTIONS ..........7
Front panel................................................ 7
Rear panel................................................. 8
Bottom panel ............................................ 9
Remote control ....................................... 10
Front panel displays................................ 12
LISTENING TO MUSIC
TURNING ON THE POWER .............14
BASIC FUNCTIONS ............................15
Using the remote control ........................ 15
Using the front panel controller.............. 15
Listening to songs stored on the server .. 16
Adjusting the volume ............................. 18
Adjusting the tone................................... 19
Switching the time display mode ........... 20
Repeat playback mode............................ 20
Random playback mode ......................... 21
Group playback mode............................. 22
HANDY FUNCTIONS..........................23
FAVORITES function............................ 23
Song statistics function........................... 29
Using playlists ........................................ 30
Recall Play function ............................... 31
Bookmark function ................................. 33
OFF Timer function................................ 36
ON Timer function ................................. 37
Broadcast function.................................. 39
LISTENING TO EXTERNAL
COMPONENTS ................................41
Listening to components connected
to the MCX-CA15.............................. 41
Listening to YAMAHA AV receiver
radio station presets............................ 42
Using YAMAHA AV link technology... 43
Listening to components connected
to the server ........................................ 46
ADVANCED OPERATIONS
SYSTEM OPTIONS .............................47
Auto Play function .................................. 47
Auto Level Control function................... 47
Selecting the output ................................ 48
Sleep mode.............................................. 49
DISPLAY SETTINGS..........................50
Adjusting the display contrast ................ 50
Screen Saver function ............................. 51
SYSTEM SETTINGS ........................... 52
Checking system information ................. 52
Resetting to the factory presets............... 53
CHECKING NETWORK
SETTINGS ........................................55
ADDITIONAL INFORMATION
TROUBLESHOOTING .......................56
QUICK MENU REFERENCE ............59
GLOSSARY .......................................... 60
Playback.................................................. 60
Recording................................................ 60
Network connections .............................. 61
Hardware................................................. 61
Software.................................................. 62
SPECIFICATIONS ..............................63
LISTENING TO
MUSIC
OPERATIONS
ADVANCED
INFORMATION
ADDITIONAL
1
Page 3

FEATURES
The MusicCAST MCX-C15 Distributed Audio Controller (hereafter, “the client”) is designed to work in
conjunction with the MusicCAST MCX-1000 Digital Audio Server (hereafter, “the server”) to allow you to
store and listen to your entire music collection. With multiple clients, you and others can simultaneously
access and enjoy your music collection from up to seven different locations. The client is designed to bring
you the following features:
◆ Instant access to all music data stored on an
MCX-1000 server
◆ Simultaneous playback from multiple locations
(when using multiple clients)
◆ Modern in-wall design with paintable face plate
to match every interior
◆ Easy-to-read LCD (128 x 32 dots)
◆ IR wireless remote control
About this manual
• y indicates a tip for your operation.
• For details regarding client installation and network configuration, refer to the Install Manual provided.
• This manual explains how to use the various functions of the client using the remote control. While many
functions are accessible from the client’s front panel, some functions are only accessible from the remote
control.
• This manual is printed prior to production. Design and specifications are subject to change in part as a result
of improvements, etc. In case of differences between the manual and the product, the product has priority.
Printing this manual
You can print out a copy of this manual for handy reference from the Owner’s Manual CD-ROM. Before
printing, check that the page settings are correct for your printer. The size of this manual can be adjusted for
printout on A4 and Letter size paper for easier reading.
◆ Repeat, Random, Bookmark and Auto Play
functions
◆ Four assignable FAVORITES buttons for direct
playback of your favorite music
◆ Playback and sleep timers
◆ Output selection mode for volume and tone
settings
◆ AV link functionality for integrated control of
YAM A HA AV r ec e iv e rs
This unit must be installed by a qualified technician as indicated in the Install Manual provided. Do not
attempt to install this unit yourself.
2
Page 4
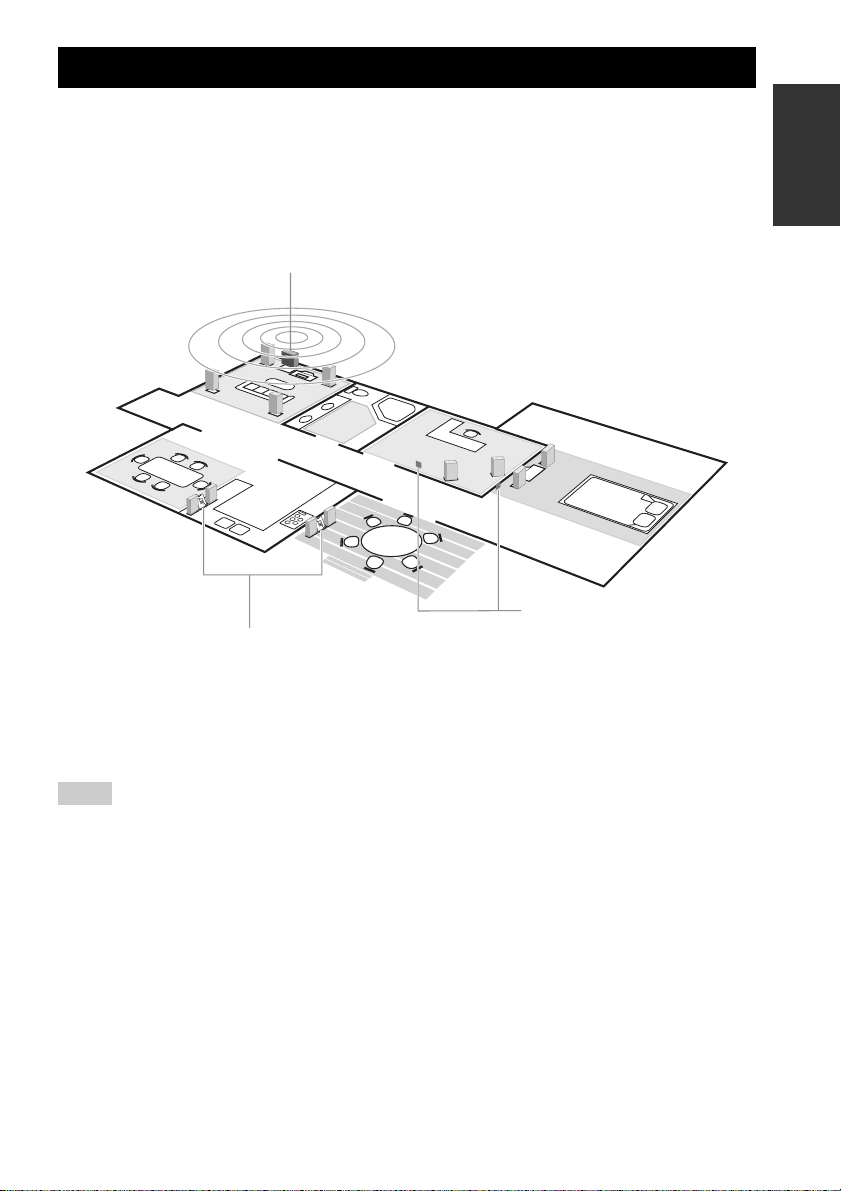
MusicCAST SYSTEM OVERVIEW
With a variety of network configuration methods possible using a Local Area Network (LAN), the
MusicCAST system allows everyone in the family to store their music collection in one central location for
playback from other locations around your home. Once music data is stored, you can have fun creating
playlists, bookmark songs, and even register your favorite music for instant access at the press of a button.
The advanced MusicCAST system is comprised of a server and its connected clients, and the MCX-CA15
optional amplifier can be connected to provide power to speakers and external components.
Server (MCX-1000)
Client (MCX-C15)
Client (MCX-A10)
INTRODUCTION
y
• You can combine up to seven wired and wireless connections as long as you use no more than five wireless
connections.
• Compared with wireless networks, wired networks can carry data over greater distances and to more clients.
The server supports simultaneous playback for seven clients over a wired network.
Notes
• The actual number of CDs the server can store depends on the format in which you choose to store songs.
Typically, the server can store approximately 1,000 CDs on its 80 GB hard disk drive if you choose to store
the songs in MP3 format only, or approximately 100 CDs in PCM format.
• The server can supply different songs to multiple clients simultaneously for up to seven clients via a
combination of wired and wireless connections. Depending on a number of factors, such as the playback
format you are using and the strength of the network signal available, it may be advisable to reduce the
number of clients to which the server is distributing music simultaneously if you encounter problems with
playback.
• To ensure smooth playback, select a low MP3 bitrate when storing songs. See “Set the MusicCAST server
data storage format” in the MCX-1000 Owner’s Manual, page 121.
3
Page 5
MusicCAST SYSTEM OVERVIEW
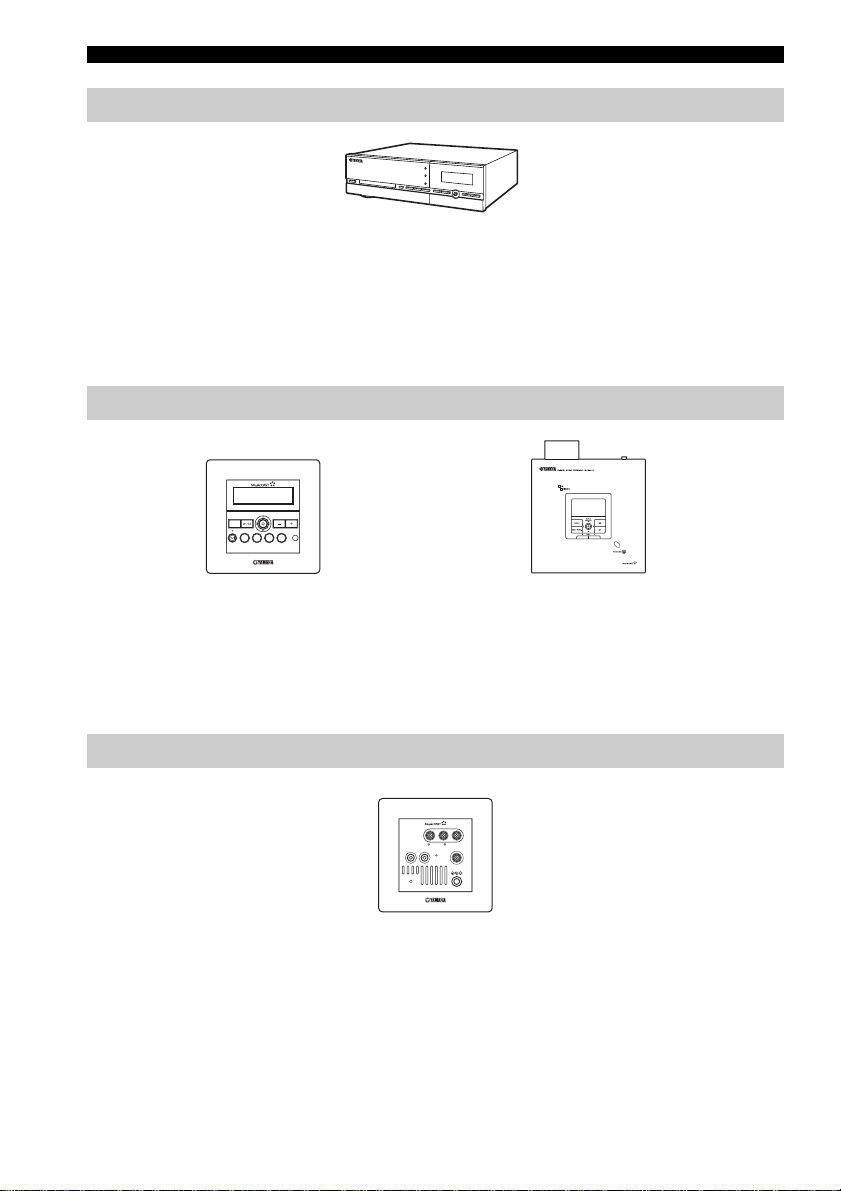
The server
MCX-1000 Digital Audio Server
The server can store approximately 1,000 music CDs in MP3 format or 100 music CDs in PCM format on its
internal hard disk drive for playback from the server or its connected clients. The server automatically stores
song, artist and album names as well as genre information for each CD during the recording process, allowing
easy access to your music without the need to enter any data manually. Once stored, songs can be selected,
sorted and played in a variety of quick and simple ways. The server can supply different songs to multiple
clients simultaneously, as well as supply songs in linear PCM format to one client at a time.
The client
MCX-C15
MENU
VOL
2341
FAVORITES
MCX-C15 Distributed Audio Controller
(wired type)
MCX-A10 Digital Audio Terminal
(wireless or wired type)
Clients themselves do not store or record any music data. Instead, they connect to the server to retrieve stored
music. This allows you to install a server in your living room, and clients in your bedroom and children’s
rooms, and listen to music stored on the server from each of these locations. The client also allows you to
select, sort and play songs in a variety of the ways, just like the server.
The amplifier
MCX-CA15
AUDIO OUT SW OUT
IR/CTRL
AUDIO IN
VIDEO OUT
DC IN 12V
STATUS
MCX-CA15 Distributed Audio
The MCX-CA15 Distributed Audio Amplifier can work as a stand alone amplifier for integration with your
existing audio system or paired with your client to complete the MusicCAST system. As a companion to your
MCX-C15, the MCX-CA15 functions as a power amplifier and DC power distributor. It provides power to all
connected speakers, and can display your MCX-C15’s on-screen display (OSD) on a TV or monitor
connected to the MCX-C15. The MCX-CA15 is fully controllable from your MCX-C15.
4
Amplifier
Page 6
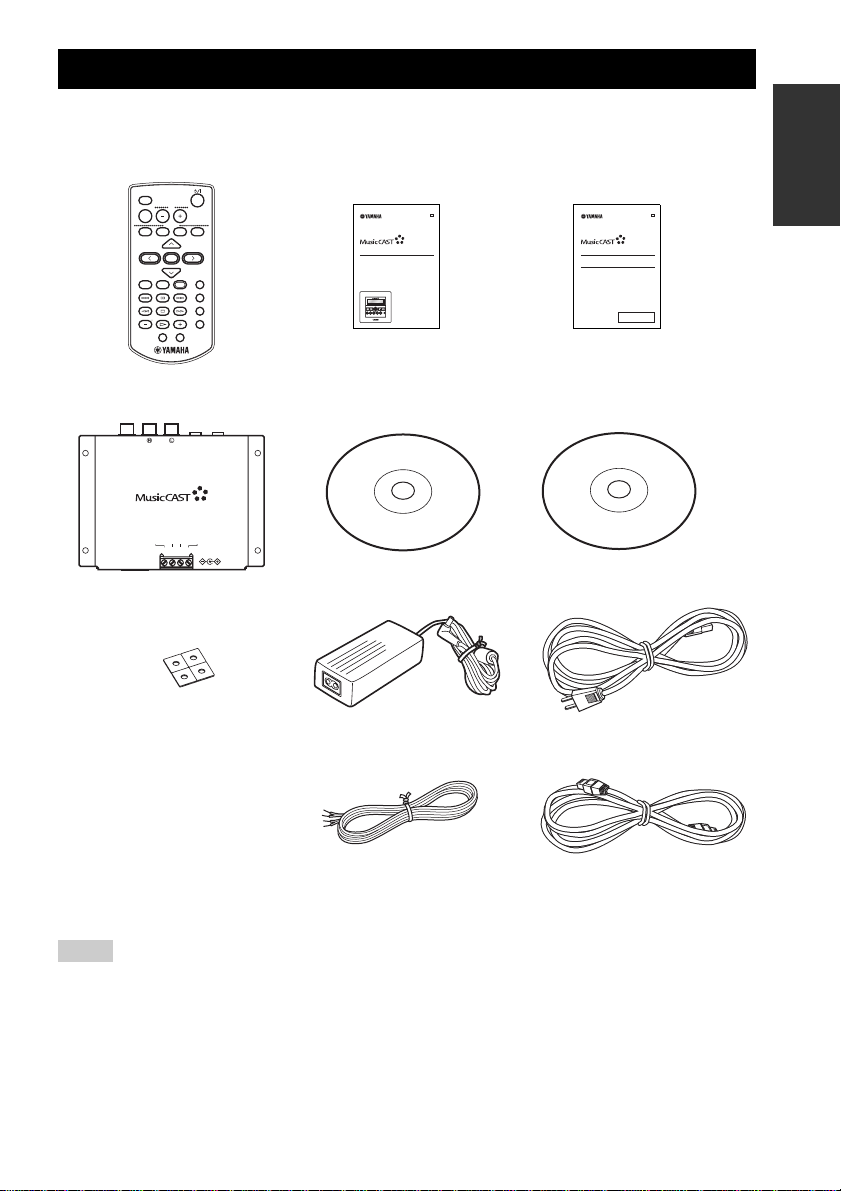
SUPPLIED ACCESSORIES
After unpacking, check that you received all of the following parts.
Remote control
LIBRARY
VOL
MUTE
FAVORITES
1234
SELECT
BOOKMARK
PLAY
MENU INPUT
INFO.
PAUSE
RANDOM
123
STOP
REPEAT
456
GROUP GROUPPLAY
RECALL
7S
OFF TIMER ON TIMER
I/O box (MCX-IB15)
VIDEO OUT IR OUT
AUDIO OUT
AV IN
MCX-IB15
DC OUT
+12V +12VGND GND
+12V 20mA MAX
DC IN 12V
CONTROL OUT
Spacers x 4
Quick Manual
UB
MCX-C15
Distributed Audio Controller
MCX-C15
MENU
VOL
2341
FAVORITES
QUICK MANUAL
Upgrade CD-ROM
(MusicCAST Software
Version Up Disc Vol. 2.1
Including MCX-C15
Connectivity)
AC adaptor (LSE0215C1240)
Install Manual
UB
MCX-C15
Distributed Audio Controller
MCX-CA15
Distributed Audio Amplifier
INSTALL MANUAL
ATTENTION:
These units must be installed by a qualified
technician. Do not attempt to install these
units yourself.
Owner’s Manual CD-ROM
(this manual)
Power cable (1.6 m)
INTRODUCTION
DC power cable (2 m) x 2
CAT-5 cable (straight, 2 m)
Notes
• Depending on the wiring configuration method used during installation, additional parts may be required.
• The Owner’s Manual CD-ROM contains both the MCX-C15 Owner’s Manual (C15_Manual_E.pdf) and
Version Upgrade Manual Vol. 2 (English version) (VersionUp_Manual_E.pdf) PDF files. Refer to the
MCX-C15 Owner’s Manual PDF for details about MCX-C15 functions. Refer to the Version Upgrade
Manual Vol. 2 PDF for details about upgraded functions of the MCX-1000 Digital Audio Server and
MCX-A10 Digital Audio Terminal.
5
Page 7
SUPPLIED ACCESSORIES
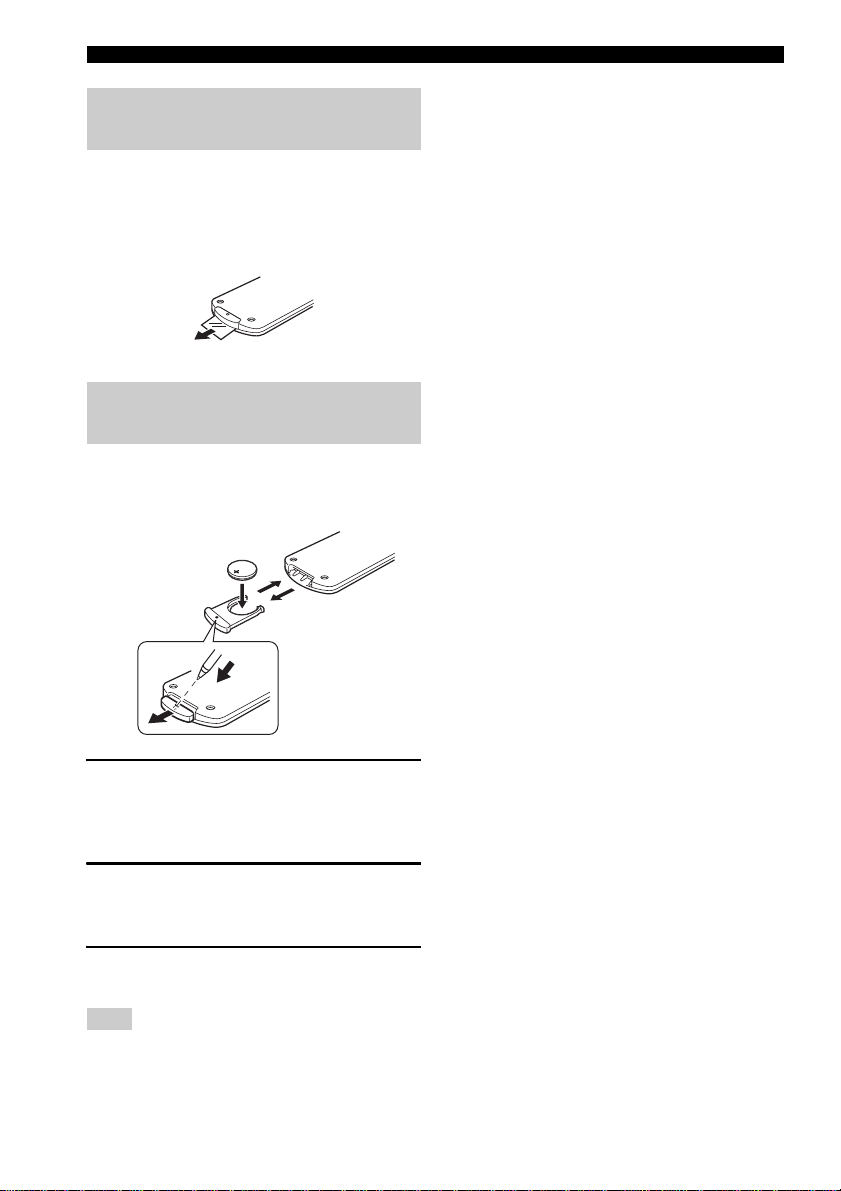
Before using the remote control
When the remote control is shipped, a thin piece of
plastic film is placed between the battery and remote
control circuitry to prevent operation during
shipping. You must remove this film before using
the remote control for the first time.
Replacing the battery in the remote control
If you find that the remote control needs to be used
closer to the front panel than usual, the battery is
weak. Replace the battery with a new one.
■ Notes on the lithium battery
Please take care when using the lithium battery as it
may explode if mistreated.
• Please use a CR2025 lithium battery.
• Do not recharge the battery.
• Never abuse or disassemble the battery.
• When replacing the battery, make sure the
polarity is correct. If inserted incorrectly, it may
cause a fire or explosion.
• Avoid placing the lithium battery or the remote
control with the battery installed in places of
high temperature, such as in direct sunlight.
• Keep the battery out of reach of children. If
swallowed, seek medical help immediately.
• If the battery leaks, dispose of it immediately.
Avoid touching the leaked material or letting it
come into contact with clothing, etc. Skin
contact may result in burns. If this occurs, wash
the affected area with water promptly and seek
medical attention.
• When disposing of the battery, insulate it with
tape, etc. Never dispose of it in a fire. Further,
dispose of the battery according to local
regulations.
1 Slide the battery holder out of the
remote control by pushing a pointed
object (such as a ball-point pen) into the
hole in the holder.
2 Remove the used battery and insert the
new one in the holder so that the “+”
(positive) mark faces upward.
3 Slide the holder back into the remote
control.
Note
The casing of the remote control is very stiff, and
may require significant pressure to remove the
battery holder.
6
Page 8
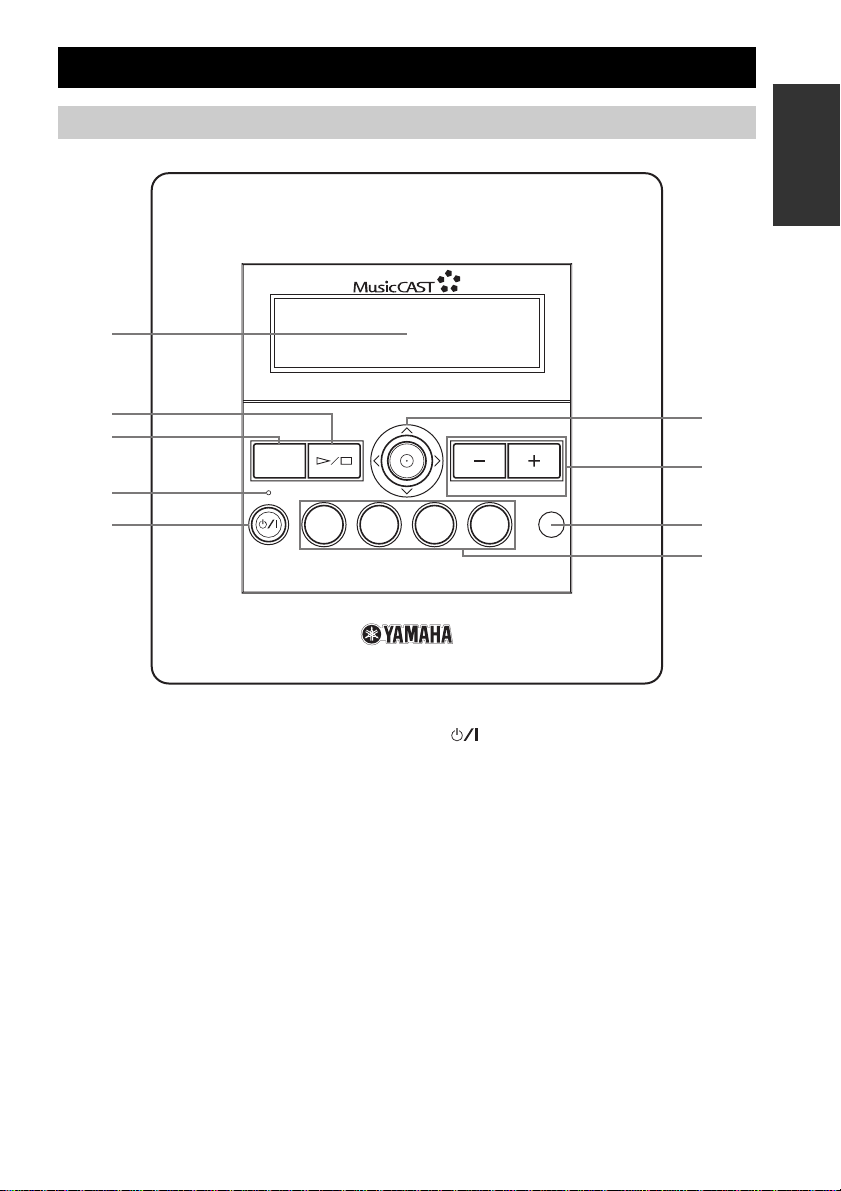
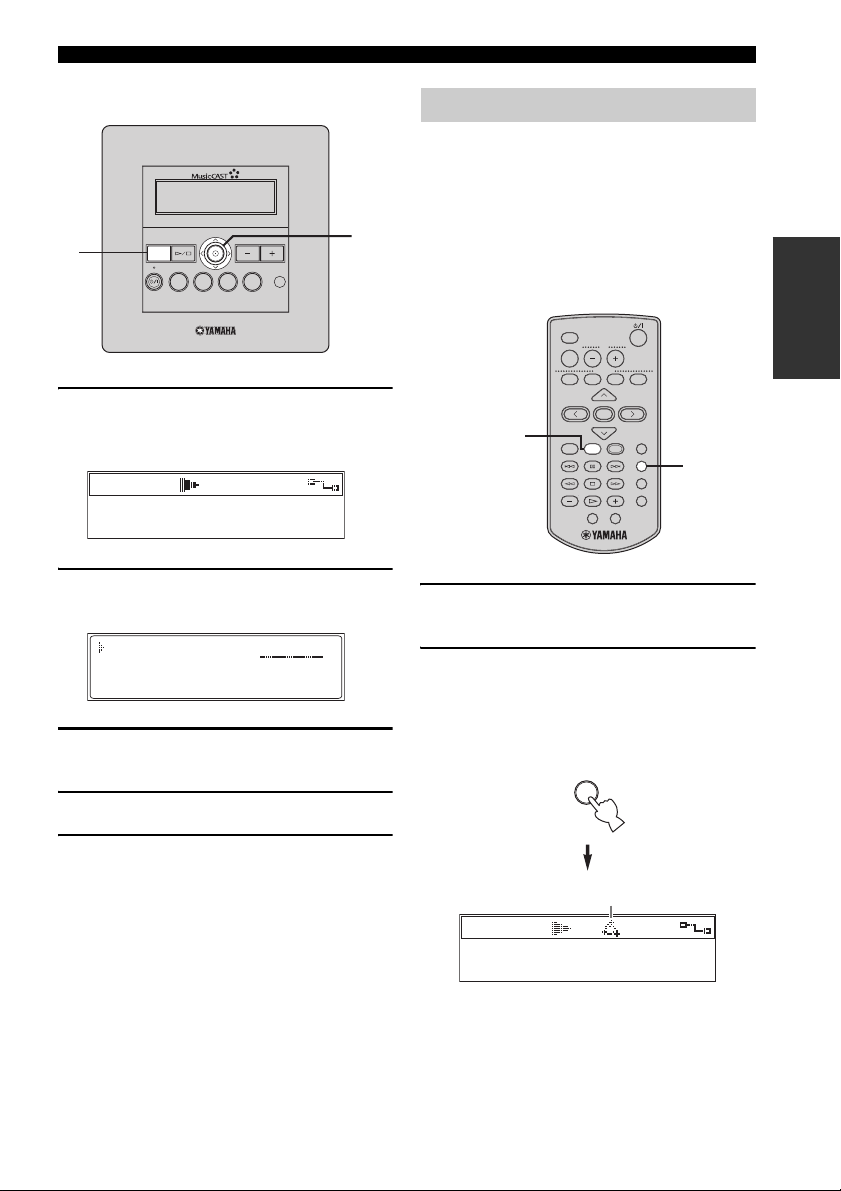
Front panel
1
2
3
4
5
CONTROLS AND FUNCTIONS
MCX-C15
MENU
VOL
2341
FAVORITES
INTRODUCTION
6
7
8
9
1 Front panel display
Displays information on client settings and songs.
2 p / s (play/stop)
Starts and stops playback of the selected song.
3 MENU
Switches the on-screen display between the Menu
and Play Info screens each time this button is
pressed (see page 12).
Displays the clock in the front panel display when
this button is pressed twice in succession.
Displays the Top Menu screen when this button is
pressed and held for an extended period of time.
4 TIMER indicator
Lights up when the ON Timer or OFF Timer
function is activated (see pages 36 and 37).
5 button
Switches the client between the sleep and power on
modes.
Press and hold for 10 seconds to reset your system.
6 Controller
Moves the on-screen cursor and selects chosen
items in the on-screen display.
7 VOL – / VOL +
Increases or decreases the volume level of client
playback.
8 Remote control signal receiver
Receives infrared signals from the client remote
control.
9 FAVORITES (1 through 4)
Use to access your favorite music for instant
playback (see page 23).
7
Page 9
CONTROLS AND FUNCTIONS
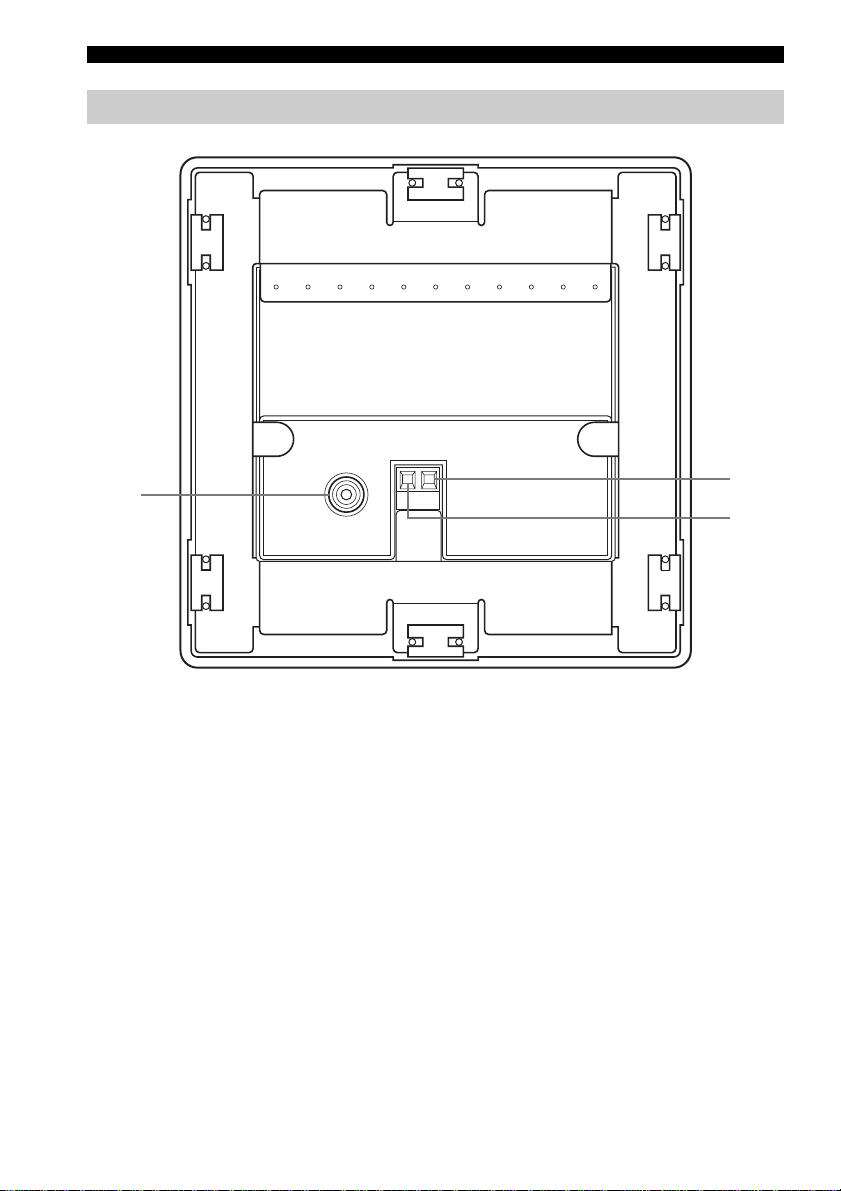
Rear panel
1
VIDEO OUT
DC IN
GND +12V
2
3
1 VIDEO OUT jack
Connect to the video input on your TV or monitor to
view the content of the client’s front panel display.
2 +12V terminal
The supplied DC power cable must be connected to
this terminal by a qualified technician during
installation.
3 GND terminal
This terminal must be properly grounded by a
qualified technician during installation.
8
Page 10
CONTROLS AND FUNCTIONS
INTRODUCTION
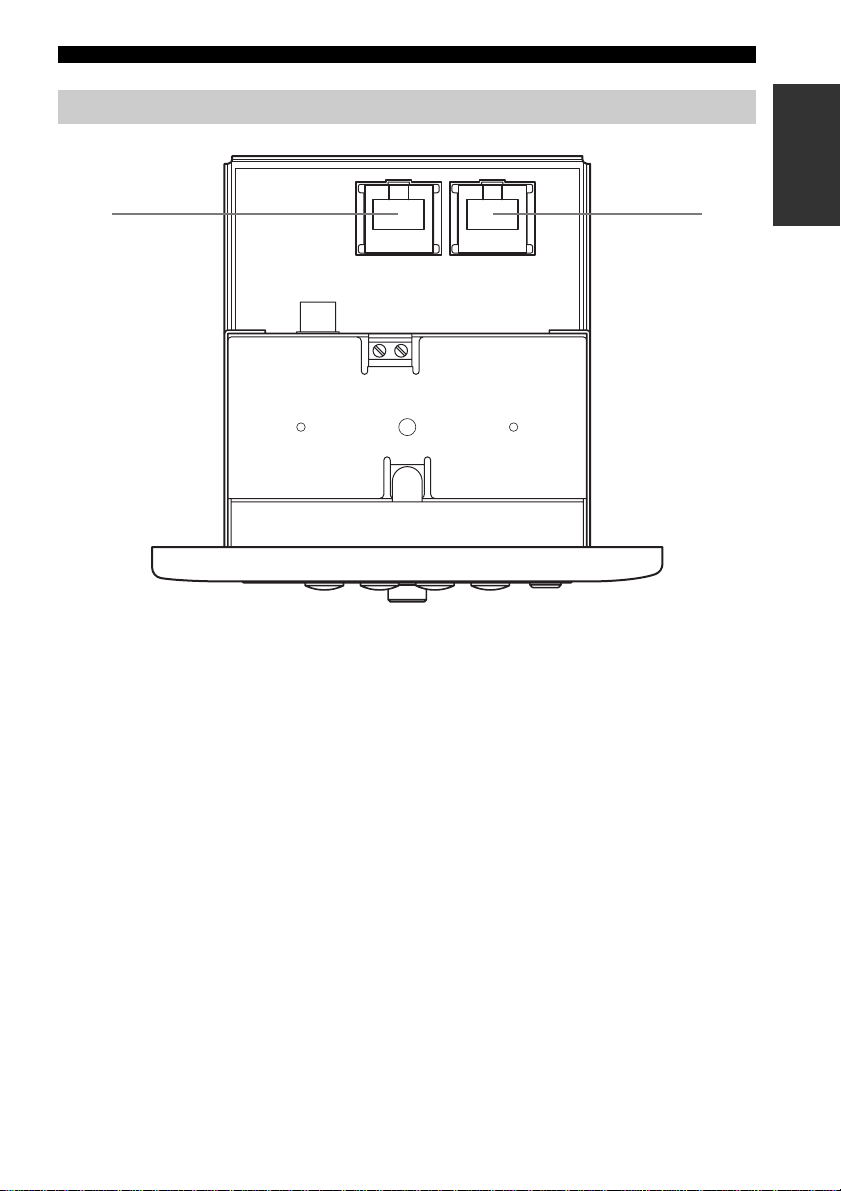
Bottom panel
12
LANAV OUT
1 AV OUT terminal
Connect to the I/O box or MCX-CA15 using the
supplied CAT-5 cable (straight).
2 LAN terminal
Connect to a network using a commercially
available CAT-5 cable (straight).
9
Page 11
CONTROLS AND FUNCTIONS
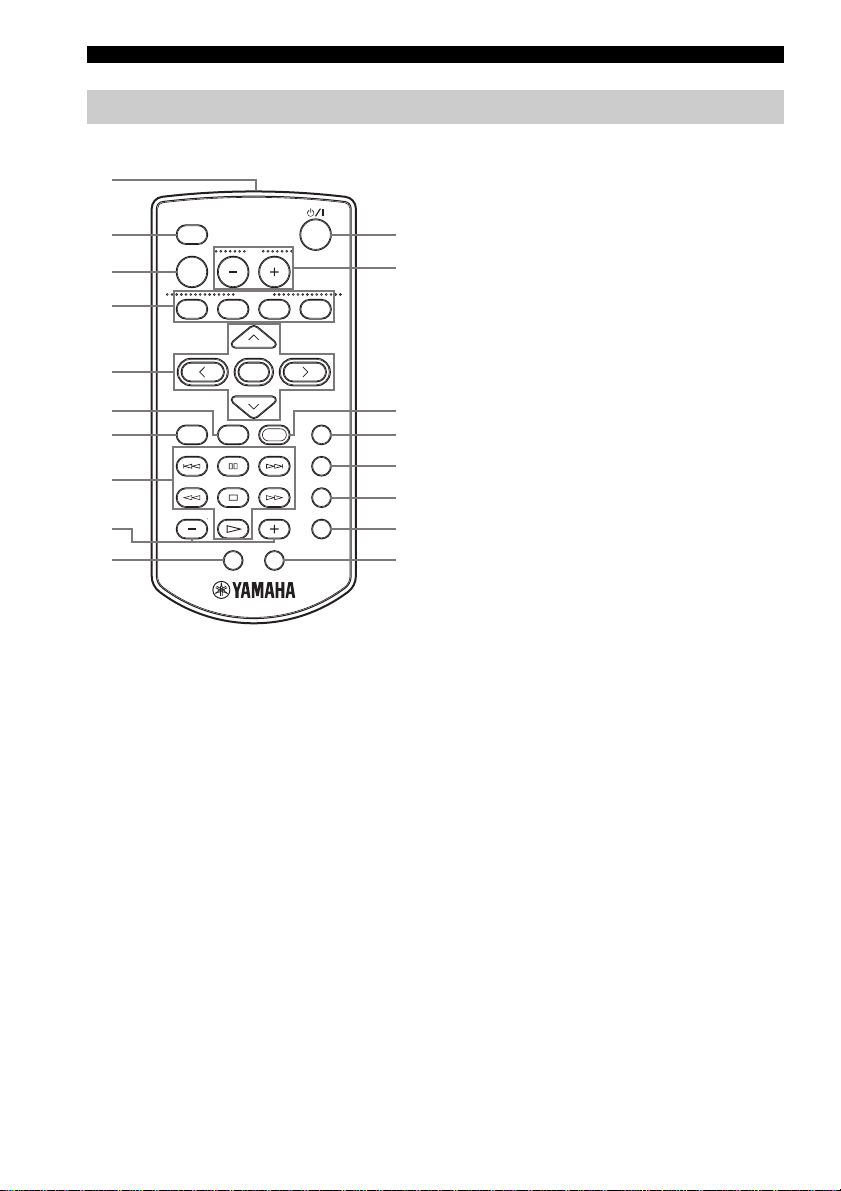
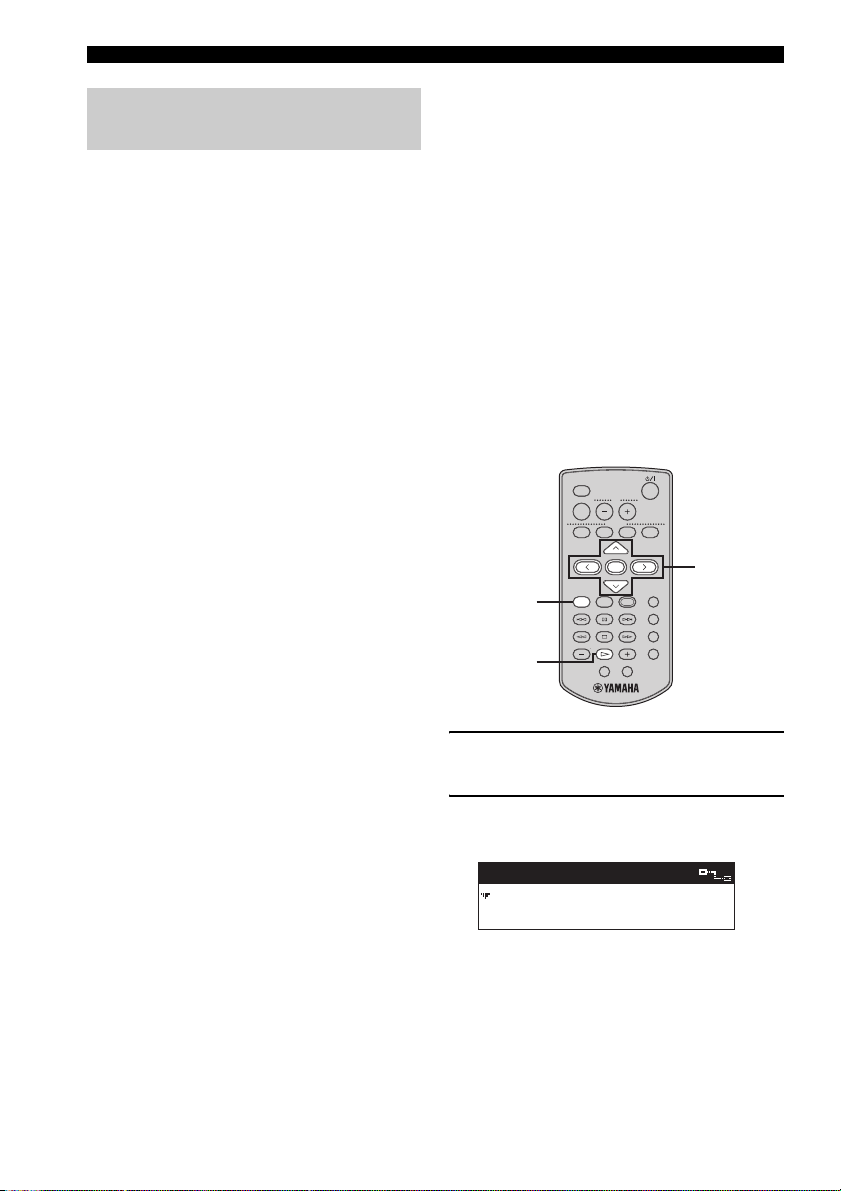
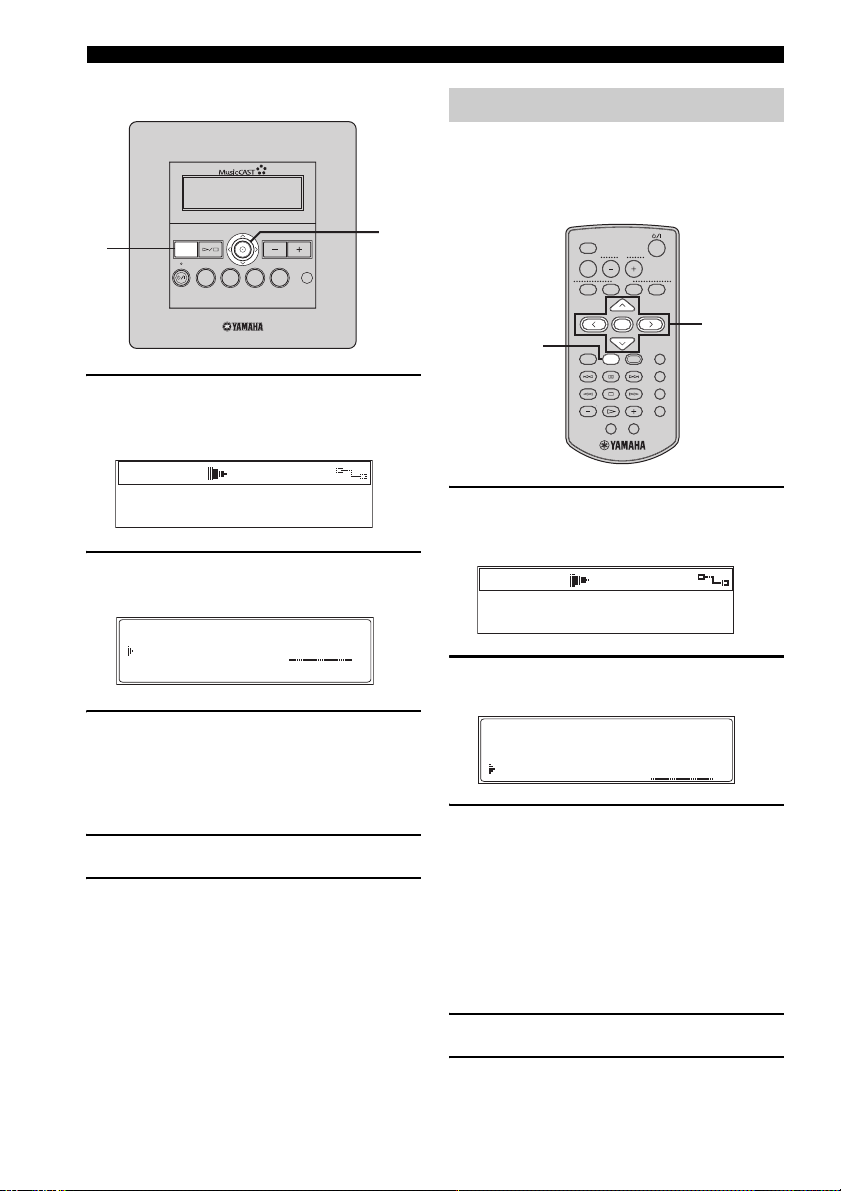
Remote control
1
MCX-3 WD01440
2
3
4
5
6
7
8
9
0
1 Infrared window
Outputs infrared control signals to the client. Aim
this window at the client you want to operate.
2 LIBRARY
Use to access the music stored on the server by
artist, album, genre, etc.
3 MUTE
Mutes the sound output by the client.
4 FAVORITES (1 through 4)
Use to access your favorite music for instant
playback (see page 23).
LIBRARY
VOL
MUTE
FAVORI TE S
1234
SELECT
PLAY
MENU INPUT
INFO.
PAUSE
123
STOP
456
GROUP GROUPPLAY
7S
OFF TIMER ON TIMER
BOOKMARK
RANDOM
REPEAT
RECALL
5 Cursor buttons u / d / j / i / SELECT
Moves the on-screen cursor and selects chosen
items in the on-screen display.
6 PLAY INFO.
Displays the Play Info screen on the on-screen
A
display (see page 12).
B
7 MENU
Switches the on-screen display to the Menu screen
when the Play Info screen is displayed (see
page 12).
Displays the clock in the front panel display when
this button is pressed twice in succession.
Displays the Top Menu screen when this button is
C
pressed and held for an extended period of time.
D
8 Playback control buttons
E
F
G
H
b / a
Access the previous/next song in the playback
group you are listening to.
e (PAUSE)
Pauses playback on the client.
w / f
Search backward/forward through the song you
are currently listening to.
s (STOP)
Stops playback on the client.
p (PLAY)
Starts playback of the selected item.
9 – (GROUP) / + (GROUP)
Access the previous/next playback group.
0 OFF TIMER
Activates the OFF Timer function (see page 36).
Press this button repeatedly to cycle through the
available timer settings.
10
Page 12

A button
Switches the client between the sleep and power on
modes.
B VOL – / VOL +
Increases or decreases the volume level of client
playback.
C INPUT
Switches the client’s input source when using the
AV link function.
D BOOKMARK
Attaches or removes a bookmark from a song (see
page 33).
E RANDOM
Turns the Random playback mode on and off (see
page 21).
F REPEAT
Turns the Repeat playback mode on and off (see
page 20).
G RECALL
Use to start the Recall playback function (see
page 31).
H ON TIMER
Activates the ON Timer function (see page 37).
CONTROLS AND FUNCTIONS
INTRODUCTION
11
Page 13
CONTROLS AND FUNCTIONS
Front panel displays
You can access all of the client’s functions and
parameters using the front panel display.
y
You can also output information appearing in the
client’s front panel display to your TV or monitor
using the VIDEO OUT jack (see page 8).
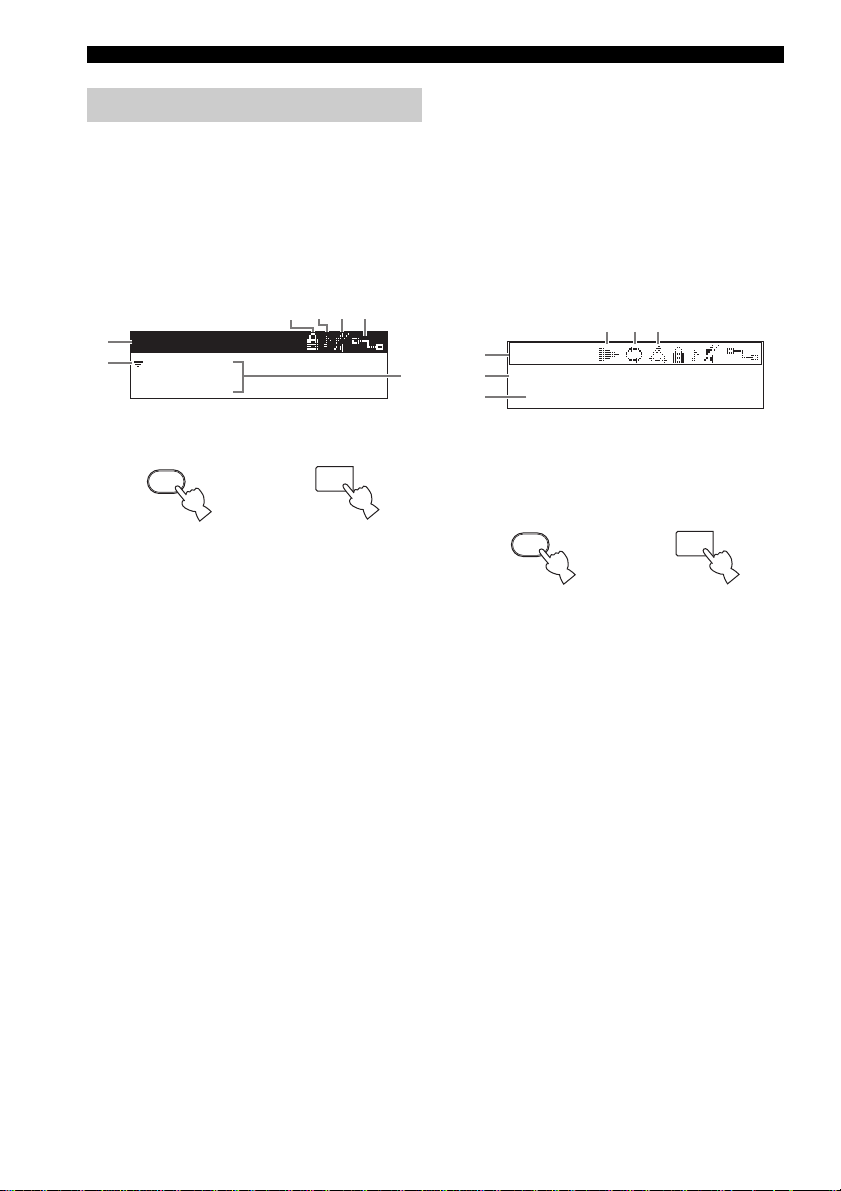
■ Menu screen
6345
1
Library
2
Artists
Albums
Press MENU on the remote control or front panel to
display information about menus.
MENU
Remote control
or
1 Top bar
Displays the name of the menu currently being
accessed.
2 Cursor
Indicates the currently selected menu.
3 Lock icon
You can lock clients from the server so that only the
volume and mute functions are controllable from the
client. When locked, the client displays the lock
icon in the top bar of the display. You can also
unlock clients from the server (see the MCX-1000
Owner’s Manual, page 94).
4 Playback icon
Indicates that a playback signal is being received
from an external source connected to the server
(including the tuner).
MENU
Front panel
7
5 Mute icon
Indicates that the client is muted.
6 Network connection icon
Indicates that the client is currently connected to the
server.
7 Menu display area
Displays the contents of the menu currently being
accessed.
■ Play Info screen
4 5 6
1
-00:00
2
Album / Artist
3
Song
Press PLAY INFO. on the remote control or MENU
on the front panel to display information on the song
your client is currently playing, or the last song
played if one is not currently being played.
PLAY
INFO.
Remote control
or
MENU
Front panel
1 Time counter
Displays the amount of time that has elapsed since
playback of the song began or the time remaining
until playback is complete (see page 20).
2 Album/artist name
Displays the name of the album or artist for the song
currently being played back.
3 Song name
Displays the name of the song currently being
played back.
12
Page 14

4 Current action mode icon
Indicates the current action being taken by the
client.
s : Playback is stopped.
p : A song is being played back.
e : Playback is paused.
5 Repeat playback icon
Indicates that the client is in Repeat playback mode
(see page 20).
6 Random playback icon
Indicates that the client is in Random playback
mode (see page 21).
CONTROLS AND FUNCTIONS
INTRODUCTION
13
Page 15
TURNING ON THE POWER
Before using your client for the first time, you must
upgrade the MusicCAST system and make the
appropriate network settings. For details on network
settings, refer to “BEFORE USING THE
MusicCAST SYSTEM” and “CONFIGURING
THE CLIENT” in the Install Manual provided.
When your client is ready for operation, turn on the
power.
The client has two operation modes:
On The client is connected to a power
source and is in operation mode.
Sleep The client is connected to a power
source and activates only when the
unit is operated or it receives an
infrared signal from the remote
control.
MCX-3 WD01440
LIBRARY
VOL
MUTE
FAVORITE S
1234
SELECT
PLAY
MENU INPUT
INFO.
PAUSE
123
STOP
456
GROUP GROUPPLAY
7S
OFF TIMER ON TIMER
1
BOOKMARK
RANDOM
REPEAT
RECALL
Before proceeding, make sure the power to
the MCX-1000 server is turned on.
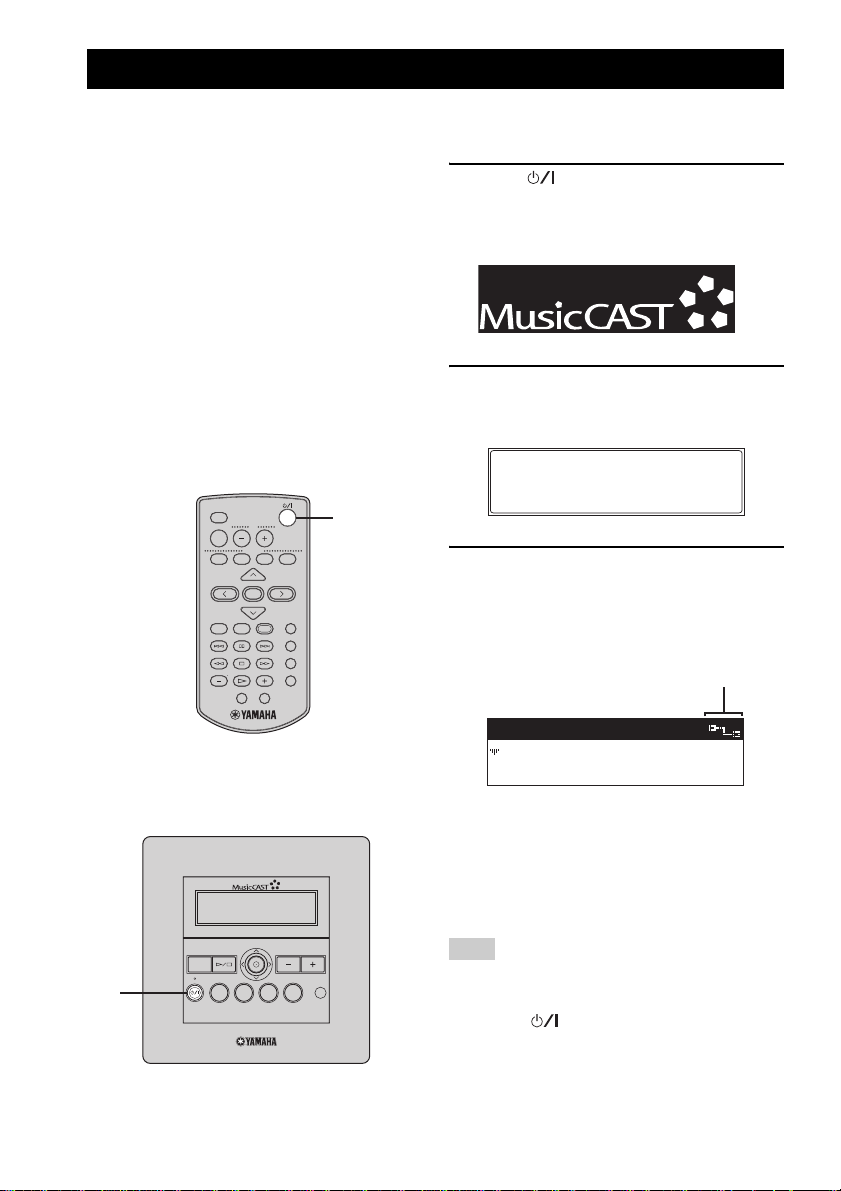
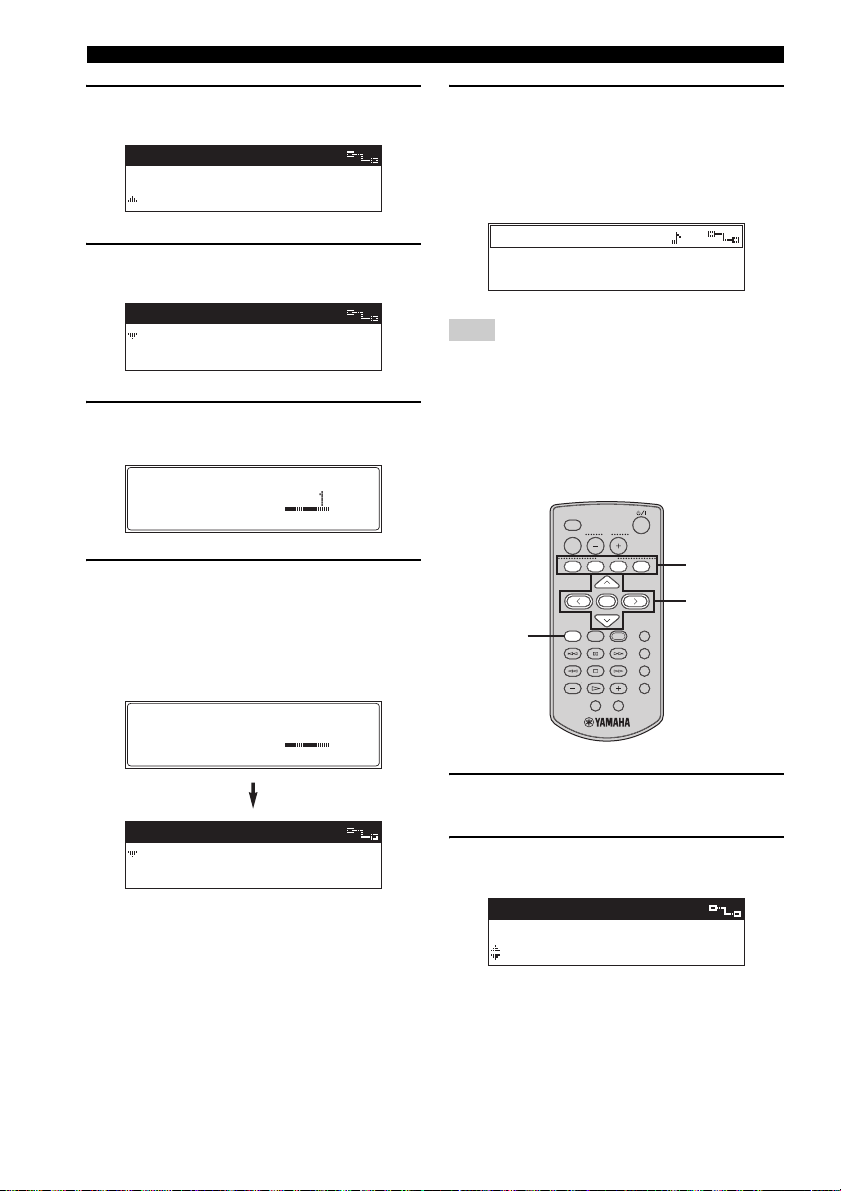
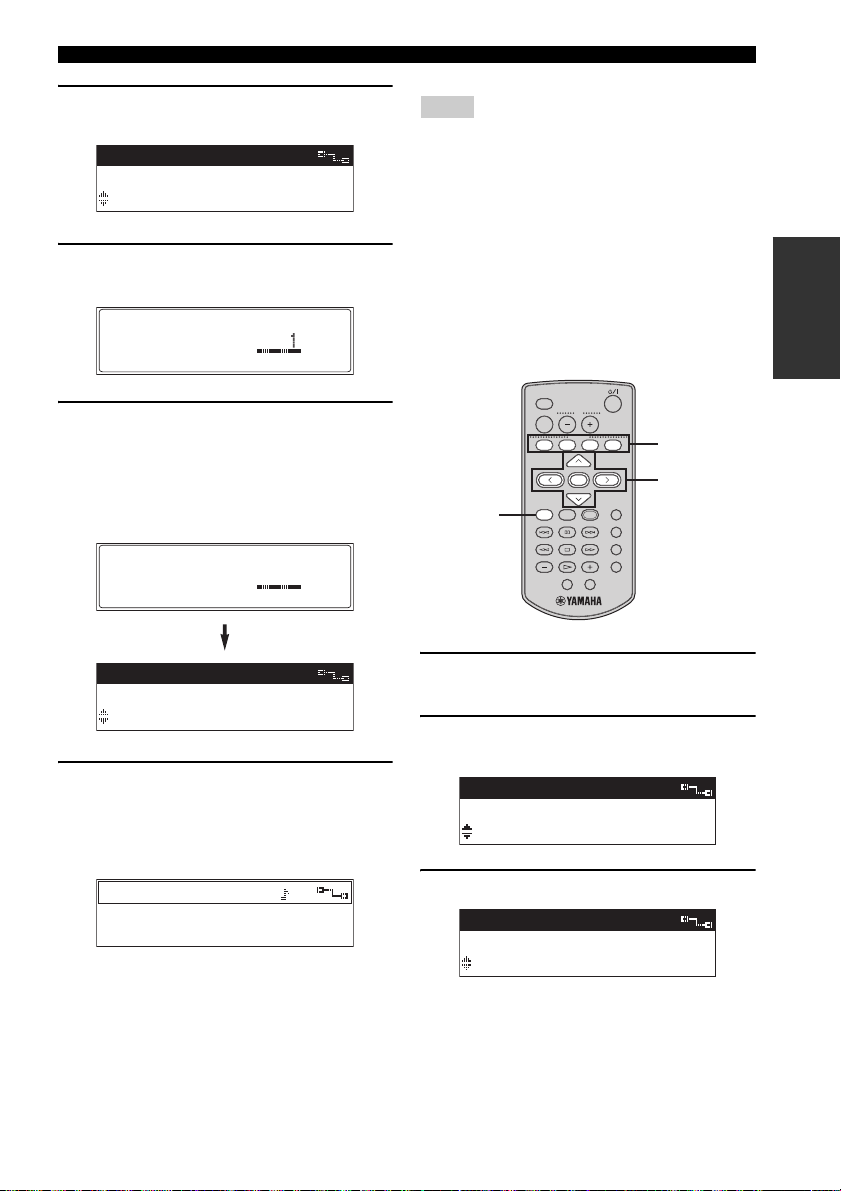
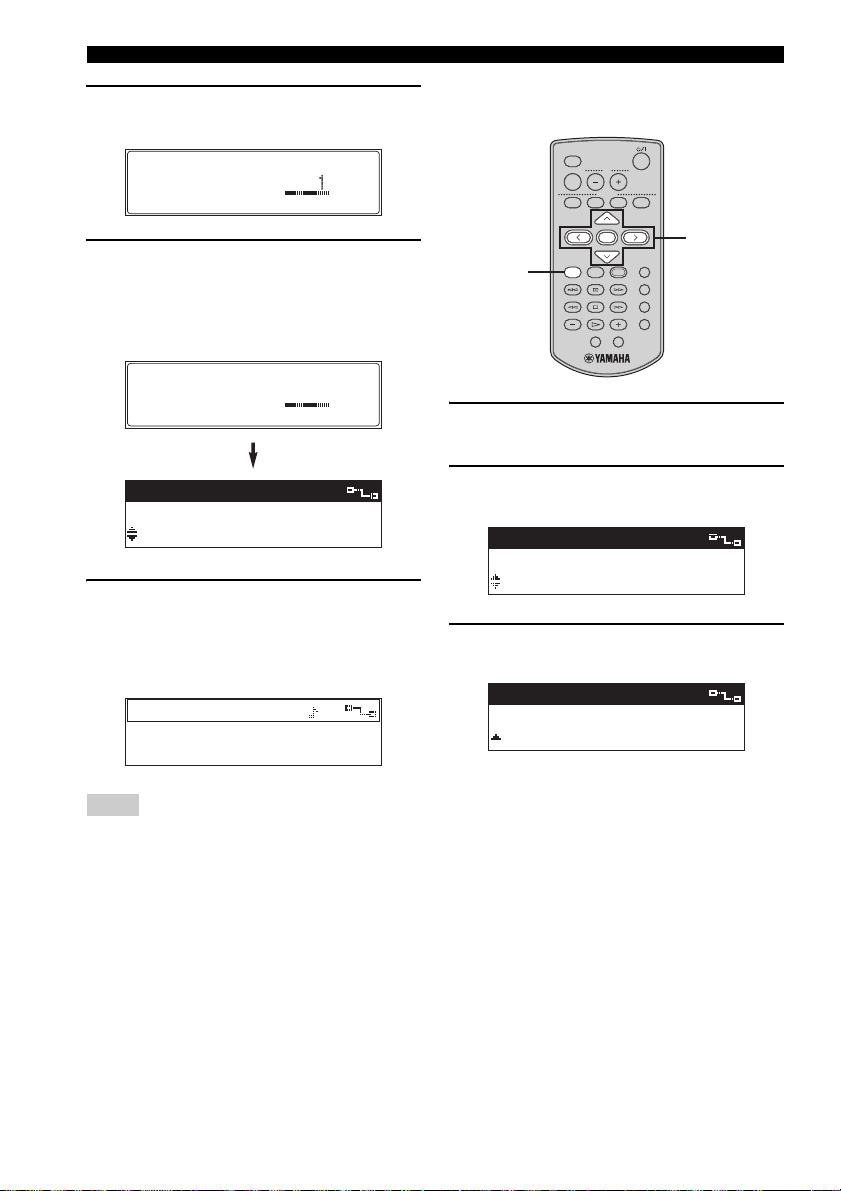
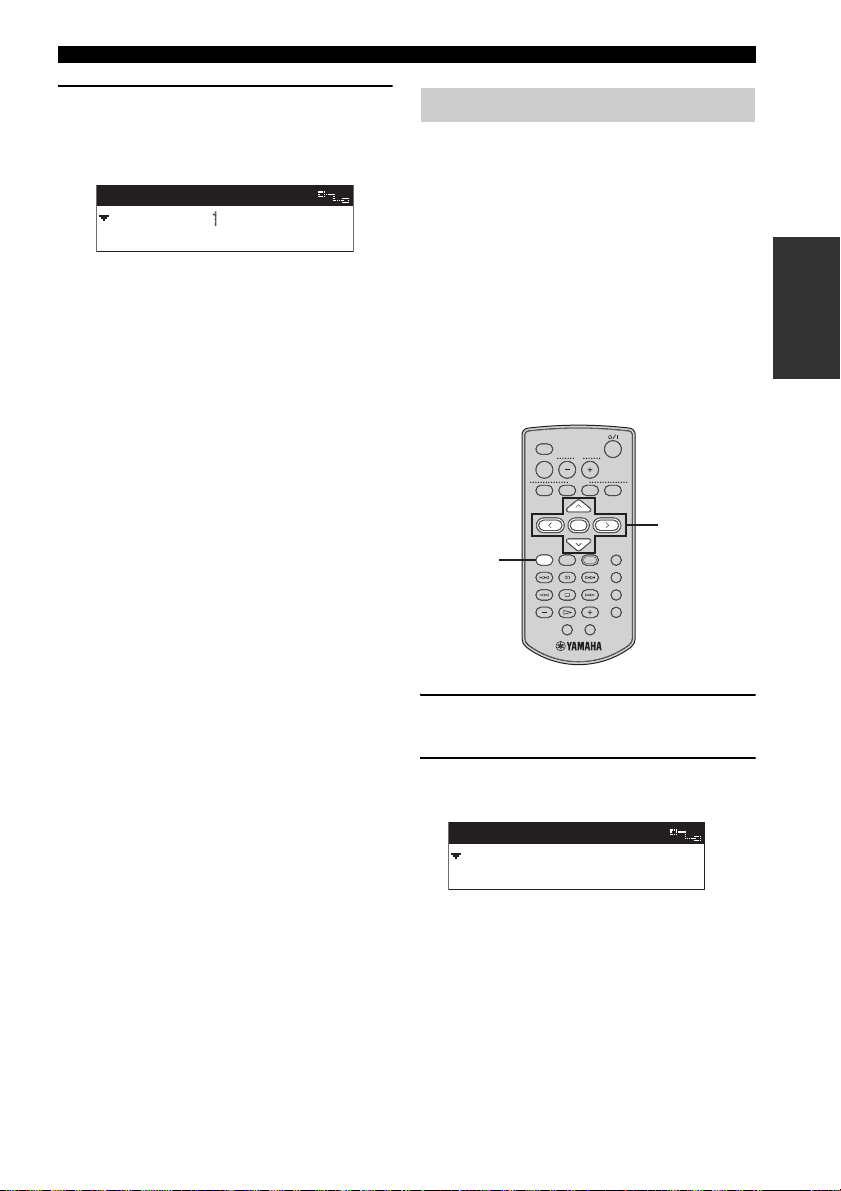
1 Press on either the remote control
or front panel.
The client turns on and the MusicCAST Startup
screen is displayed.
2 The client attempts to connect to the
server, and the following screen is
displayed.
Connecting...
3 If the client is able to make a
connection, the Top Menu screen
appears and the network connection
icon appears in the top right corner of
the display.
Network
connection icon
14
Top Menu
Library
or
MCX-C15
MENU
1
2341
FAVORITES
VOL
Recall Play
If the client is unable to connect to the server, it
continues displaying the “Connecting...”
message. Press any button on the client to
cancel the connection process, then check that
your client network connection settings are
correct (see page 55).
Note
If no operation is performed for 30 minutes, the
client automatically switches to sleep mode. Press
SELECT or to reactivate the client.
Page 16
BASIC FUNCTIONS
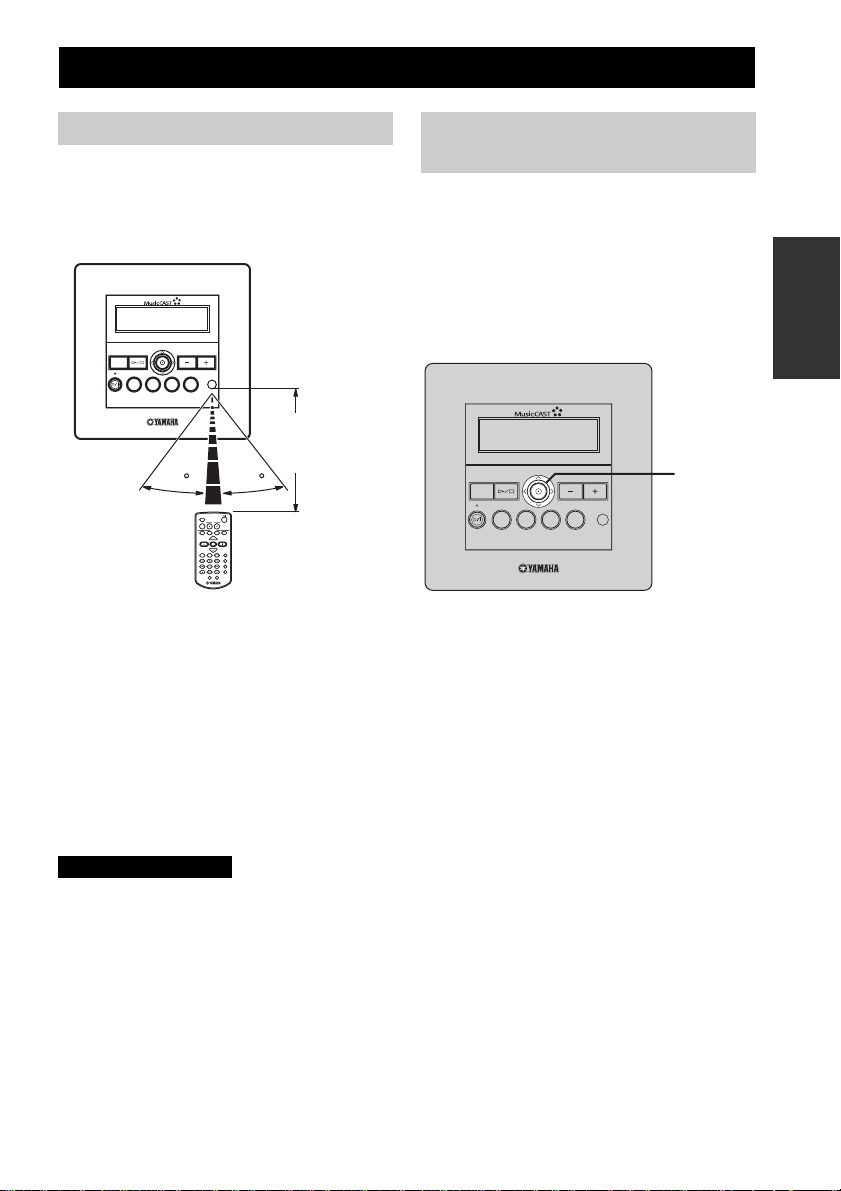
Using the remote control
The remote control transmits a directional infrared
beam. Be sure to aim the remote control directly at
the remote control signal receiver on the front panel
during operation.
MCX-C15
MENU
■ Handling the remote control
• Do not spill water or other liquids on the remote
control.
• Do not drop the remote control.
• Do not leave or store the remote control in the
following types of conditions:
– high humidity, such as near a bath
– high temperature, such as near a heater or
stove
– extremely low temperatures
– dusty places
CAUTIONS
• If remote control operation of this unit causes
abnormal operation of any other component,
change the placement of that component.
• Make sure the remote control signal receiver is
not exposed to direct sunlight or strong light.
Such exposure may inhibit the remote control’s
functionality.
2341
FAVORITE S
30
VOL
LIBRARY
MUTE
1234
MENU INPUT
123
456
GROUP GROUPPLAY
7S
Within 7 m (23 ft)
of the remote
control signal
receiver
30
VOL
FAVORITES
SELECT
BOOKMARK
PLAY
INFO.
PAUSE
RANDOM
STOP
REPEAT
RECALL
OFF TIMERON TIMER
Using the front panel controller
Moving the controller in the directions indicated on
the front panel of the client performs the same
action as pressing the equivalent cursor key on the
remote control. For example, pushing the client
controller upwards produces the same result as
pressing u on the remote control. Pushing the
controller directly into the front panel has the same
effect as pressing SELECT on the remote control.
MCX-C15
MENU
2341
FAVORITES
VOL
Controller
LISTENING TO
MUSIC
15
Page 17
BASIC FUNCTIONS
Listening to songs stored on the server
Two kinds of files are available for playback from
your client: MP3 (MPEG-1 Audio Layer 3) and
PCM (Pulse Code Modulation).
MP3 files do not take up a large amount of space,
enabling you to store approximately 1,000 CDs on
the server.
PCM files provide better sound quality during
playback, they require large amounts of space. You
can store approximately 100 CDs in PCM format.
The client displays an “*” (asterisk) next to the
names of songs stored in this format. If the server is
set to distribute PCM files, you can play back PCM
files on one client at a time. For details, see the
MCX-1000 Owner’s Manual, page 125.
■ Playback groups
The client retrieves and plays back music files
stored on the server. You can play back songs
grouped by artist, album or genre, as well as play
back songs at random, from pre-chosen lists or in
playback groups. Playback groups are defined by
your playback selection. For example, selecting an
album from the “Albums” menu for playback sets
albums as the playback group. Further, you can
choose to play back groups repeatedly (page 20),
play back songs at random from within a playback
group (page 21), or play back all of the songs in the
currently selected group (page 22).
The steps below describe how to access a song
directly from the “Artists” library, but can also be
used to choose songs from the following libraries:
Artists To search for songs by artist.
Albums To search for songs by album.
Genres To search for songs by genre.
All Songs To display a list of all
registered songs in
alphabetical order.
Playlists To view all registered playlists.
Song Statistics To view statistics on songs that
have been played.
Bookmarks To view bookmarked songs.
External Inputs To select an optical, coaxial or
analog input source connected
to the server or an AV receiver
connected to the server.
MCX-3 WD01440
LIBRARY
VOL
MUTE
FAVORITE S
1234
4-6
SELECT
PLAY
MENU INPUT
1
INFO.
PAUSE
123
STOP
456
GROUP GROUPPLAY
7S
OFF TIMER ON TIMER
2-7
BOOKMARK
RANDOM
REPEAT
RECALL
1 Press and hold MENU until the Top
Menu screen is displayed.
16
2 Press u / d to choose “Library” and
press SELECT.
Top Menu
Library
Recall Play
Page 18

BASIC FUNCTIONS
3 Press u / d to choose “Artists” and
press SELECT.
Library
Artists
Albums
4 Press u / d to choose an artist.
Press SELECT to display all of the albums
assigned to the artist.
Press p to begin playback of all songs by the
selected artist in alphabetical order.
Artists
Bon Jovi
Bruce Springsteen
5 Press u / d to choose the name of the
album you want to listen to.
Press SELECT to display all of the songs on the
album.
Press p to begin playback of the entire album.
Artists-Albums
Born To Run
Darkness On The Edge O
6 Press u / d to choose a specific song
and press SELECT or p to begin
playback.
Artists-Songs
Thunder Road
Tenth Avenue Freeze Ou
7 Press j if you want to return to the List
screen.
y
When playback is finished, the client begins
playback of the next song stored in the selected
library.
■ To stop playback
Press s .
STOP
5
Remote control Front panel
■ To pause playback
Press e . Press e again to resume playback.
■ To search within a song
Press f to search forward during playback. To
search backward, press w . You cannot search
any farther than the beginning or end of a song using
these buttons.
While f or w is pressed, no sound is output
by the client. However, this is not a malfunction.
4
Remote control
or
PAUS E
2
Remote control
and
Remote control
6
LISTENING TO
MUSIC
00:06
Born To Run / Bruce Spr
Tenth Avenue Freeze O
17
Page 19
BASIC FUNCTIONS
■ To skip songs
Playback skips to the next song each time you press
a . To skip to the beginning of the song currently
being played, press b once. To skip to the
beginning of the previous song, press b twice.
You cannot skip through songs when playback is
paused or stopped.
1 3
Remote control
and
Remote control
■ To skip playback groups
Press + (GROUP) to skip to the next item in the
playback group (see “Playback groups”, page 16).
Press – (GROUP) to skip to the previous item. If
only one item is registered in a playback group,
pressing – (GROUP) / + (GROUP) does not have
any effect.
GROUP
7
Remote control
and
GROUP
S
Remote control
■ To display song information
Press PLAY INFO. during playback to switch to the
Play Info screen.
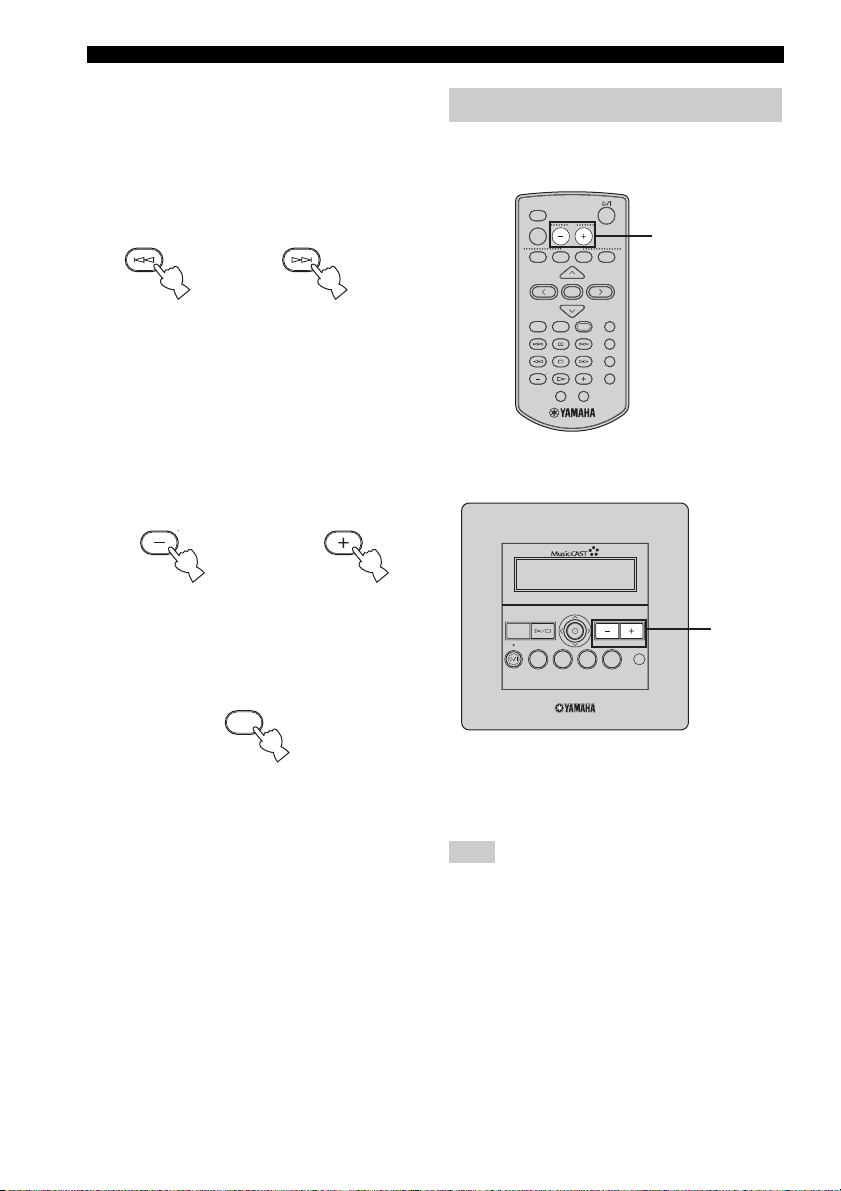
Adjusting the volume
Use the following procedure to increase or decrease
the volume level of the output from the client.
MCX-3 WD01440
LIBRARY
VOL
MUTE
1234
MENU INPUT
123
456
GROUP GROUPPLAY
7S
MENU
FAVORITE S
SELECT
PLAY
INFO.
PAUSE
STOP
OFF TIMER ON TIMER
or
2341
FAVORITES
BOOKMARK
RANDOM
REPEAT
RECALL
MCX-C15
VOL
VOL – / VOL +
buttons
VOL – /
VOL +
buttons
18
PLAY
INFO.
Remote control
Press VOL + or VOL – to increase or
decrease the volume level.
The volume level changes accordingly.
Note
You can control the volume output level of
registered YAMAHA AV amplifiers via an IR
flasher using the client’s remote control. For details,
see page 43.
Page 20
BASIC FUNCTIONS
Adjusting the tone
You can adjust the nature of the sound output by the
client. You can change these settings to create sound
with strong deep bass, or to emphasize the treble.
MCX-3 WD01440
LIBRARY
VOL
MUTE
FAVORITE S
1234
SELECT
PLAY
MENU INPUT
1
INFO.
PAUSE
123
STOP
456
GROUP GROUPPLAY
7S
OFF TIMER ON TIMER
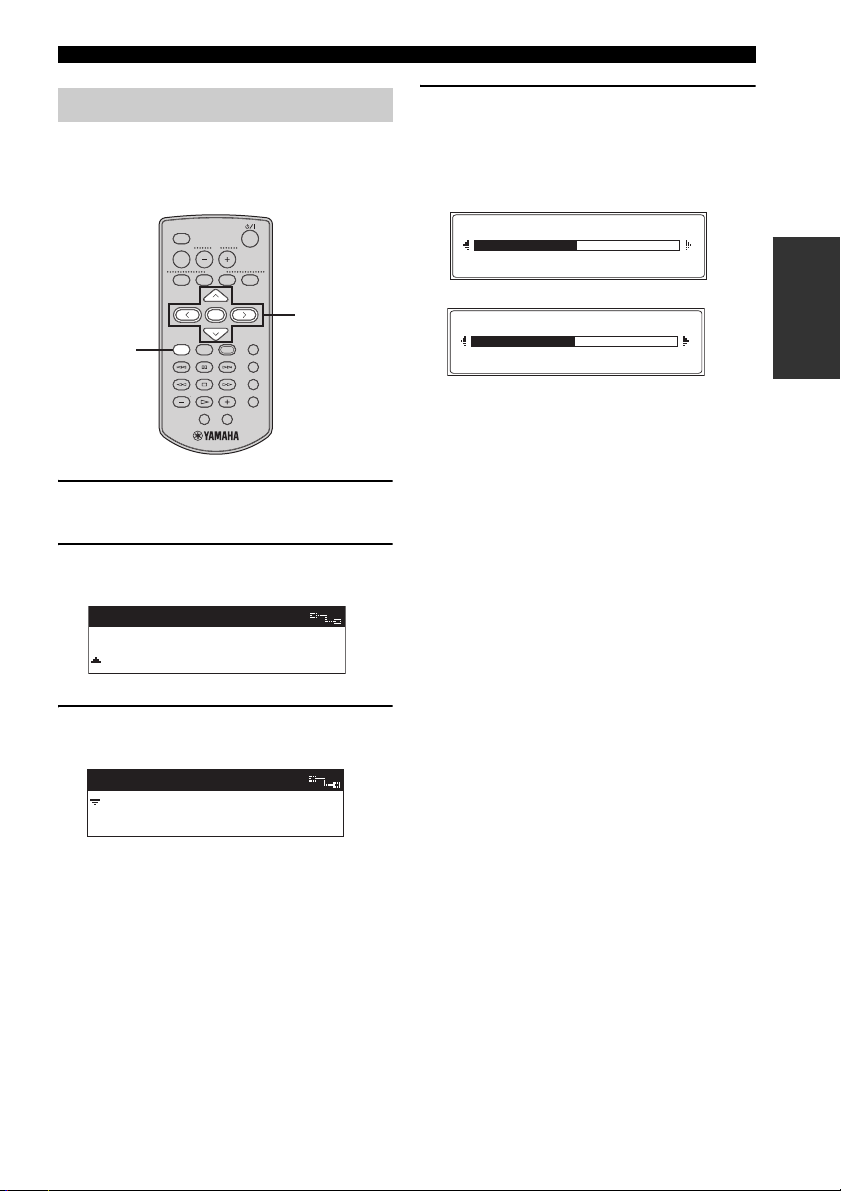
1 Press and hold MENU until the Top
Menu screen is displayed.
2 Press u / d to choose “Tone” and press
SELECT.
Top Menu
Input
Tone
2-4
BOOKMARK
RANDOM
REPEAT
RECALL
4 Press i to increase the value of the
setting, and press j to decrease the
value.
Press SELECT or MENU to confirm the value
you have set and return to the Tone screen.
Treble
0.0dB
Bass
0.0dB
LISTENING TO
MUSIC
3 Press u / d to choose “Treble” or
“Bass” and press SELECT.
Tone
Treble
Bass
Tre ble Adjusts the treble for sound output by
the client.
Bass Adjusts the bass for sound output by
the client.
19
Page 21
BASIC FUNCTIONS
Switching the time display mode
You can change the time display on the Play Info
screen so that it displays either the time elapsed
since playback began for the song currently being
played, or the time remaining until playback of the
song is complete.
MCX-3 WD01440
LIBRARY
VOL
MUTE
FAVORITE S
1234
SELECT
1
PLAY
MENU INPUT
INFO.
PAUSE
123
STOP
456
GROUP GROUPPLAY
7S
OFF TIMER ON TIMER
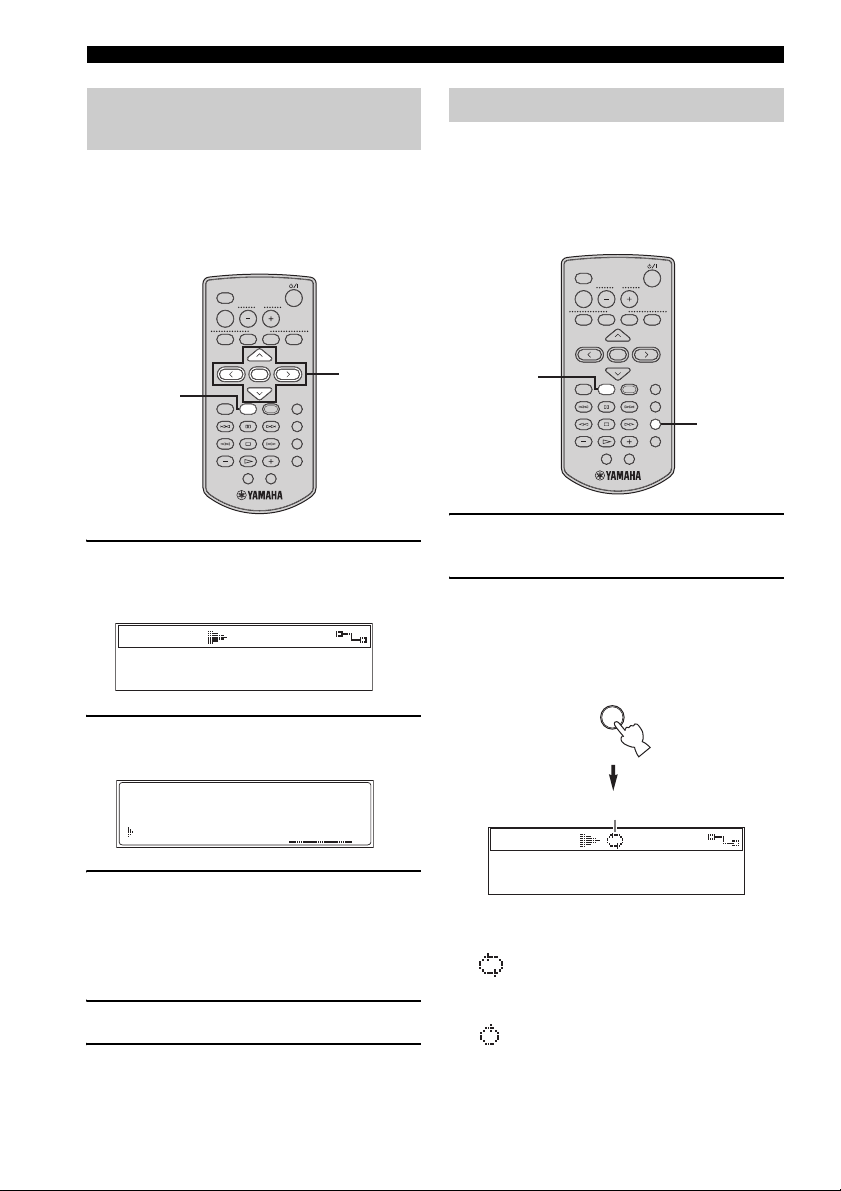
1 Press PLAY INFO. to display the Play
Info screen during playback, then press
i .
00:06
Born To Run / Bruce Spr
Tenth Avenue Freeze O
2 Press u / d to choose “Time” and
press SELECT.
1-5
BOOKMARK
RANDOM
REPEAT
RECALL
Repeat playback mode
You can use this function for repeated playback of a
single song or all of the songs in a playback group.
For a detailed description on playback groups, see
page 16.
■ Remote control operation
MCX-3 WD01440
LIBRARY
VOL
MUTE
FAVORITE S
1234
SELECT
1
MENU INPUT
GROUP GROUPPLAY
1 Press PLAY INFO. to display the Play
Info screen during playback.
2 Press REPEAT repeatedly to switch
between the Repeat playback modes.
When the Repeat playback mode is activated,
the repeat playback mode indicator appears in
the top bar of the front panel display.
BOOKMARK
PLAY
INFO.
PAUSE
RANDOM
123
STOP
REPEAT
456
RECALL
7S
OFF TIMER ON TIMER
REPEAT
2
Group
Bookmark
Time
SINGLE
OFF
ELAP
3 Press u / d to choose a time mode.
ELAP Displays the time elapsed since the
REM Displays the time remaining until the
beginning of the song.
end of the song.
4 Press SELECT to confirm.
5 Press j to return to the Play Info screen.
20
Repeat playback mode indicator
00:06
Born To Run / Bruce Spr
Tenth Avenue Freeze O
Each time you press REPEAT, the Repeat
playback mode indicator changes as follows:
/ ALL Repeatedy plays back all
songs in the currently selected
group.
/ SINGLE Repeatedly plays back the
currently selected song.
(no icon) / Turns off Repeat playback
OFF mode.
Page 22
BASIC FUNCTIONS
■ Front panel operation
MCX-C15
1
MENU
2341
FAVORITES
VOL
1-5
1 Press MENU to display the Play Info
screen during playback, then move the
controller towards i .
00:06
Born To Run / Bruce Spr
Tenth Avenue Freeze O
2 Move the controller towards u or d to
choose “Repeat” and press SELECT.
Repeat
Random
Group
OFF
OFF
ALL
3 Move the controller towards u or d to
choose “ALL”, “SINGLE” or “OFF”.
Random playback mode
You can use this function for random playback of
songs within the selected playback group.
y
To choose a playback group, press p in step 4 or 5
in “Listening to songs stored on the server”
(page 16).
■ Remote control operation
MCX-3 WD01440
LIBRARY
VOL
MUTE
FAVORITE S
1234
SELECT
1
MENU INPUT
GROUP GROUPPLAY
1 Press PLAY INFO. to display the Play
Info screen during playback.
2 Press RANDOM repeatedly to switch the
mode on and off.
If you activated the Random playback mode,
the Random playback mode indicator lights in
the top bar of the front panel display.
RANDOM
BOOKMARK
PLAY
INFO.
PAUSE
RANDOM
123
STOP
REPEAT
456
RECALL
7S
OFF TIMER ON TIMER
2
LISTENING TO
MUSIC
4 Press SELECT to confirm.
5 Move the controller towards j to return
to the Play Info screen.
Random playback mode indicator
00:06
Born To Run / Bruce Spr
Tenth Avenue Freeze O
21
Page 23
BASIC FUNCTIONS
■ Front panel operation
MCX-C15
1
MENU
2341
FAVORITES
VOL
1-5
1 Press MENU to display the Play Info
screen during playback, then move the
controller towards i .
00:06
Born To Run / Bruce Spr
Tenth Avenue Freeze O
2 Move the controller towards u or d to
choose “Random” and press SELECT.
Repeat
Random
Group
OFF
OFF
ALL
Group playback mode
You can use this function to define the range of
songs for playback when using the normal playback
mode, Repeat playback mode (page 20) and
Random playback mode (page 21).
MCX-3 WD01440
LIBRARY
VOL
MUTE
FAVORITE S
1234
SELECT
1
PLAY
MENU INPUT
INFO.
PAUSE
123
STOP
456
GROUP GROUPPLAY
7S
OFF TIMER ON TIMER
1 Press PLAY INFO. to display the Play
Info screen during playback, then press
i .
00:06
Born To Run / Bruce Spr
Tenth Avenue Freeze O
2 Press u / d to choose “Group” and
press SELECT.
1-5
BOOKMARK
RANDOM
REPEAT
RECALL
3 Move the controller towards u or d to
choose “ON” or “OFF”.
ON Enables Random playback mode
OFF Disables Random playback mode
4 Press SELECT to confirm.
5 Move the controller towards j to return
to the Play Info screen.
22
Repeat
Random
Group
OFF
OFF
SINGLE
3 Press u / d to choose “SINGLE” or
“ALL”.
SINGLE Plays all of the songs in the
currently selected group (album,
artist or genre).
ALL Plays all of the songs in the
currently selected group (album,
artist or genre), then advances to the
next group.
4 Press SELECT to confirm.
5 Press j to return to the Play Info screen.
Page 24

HANDY FUNCTIONS
FAVORITES function
The FAVORITES buttons (1 through 4) enable you
to access your favorite music for instant playback at
the touch of a button. Each FAVORITES button can
be used in one of five ways:
Method 1:
To assign playback of songs stored in a server
library (page 23).
Method 2:
To switch playback to a radio station broadcast
being received on a YAMAHA AV receiver
connected to the server (page 24).
Method 3:
To switch playback to the audio signal being input
from an external component connected to the server
(page 25).
Method 4:
To switch playback to the audio signal being input
from an AV-linked YAMAHA AV receiver
(page 26).
Method 5:
To switch playback to the audio signal being input
from an external stereo source connected to the
AUDIO IN jack on the MCX-CA15 (page 27).
Before you can use a FAVORITES button, the item
you want to play back must be assigned to that
button.
Notes
• If a FAVORITES button that has not yet been
assigned is pressed, the message “Not assigned”
appears briefly in the front panel display.
• If a FAVORITES button is pressed while the client
is in sleep mode, the client turns on and starts
playback automatically.
• When using an external component, always make
sure it is connected properly and the power is
turned on. Playback may not start automatically
when you press the appropriate FAVORITES
button with some external components. In this
case, you must start playback manually from the
external component.
■ To assign songs stored in a server
library
MCX-3 WD01440
LIBRARY
VOL
MUTE
FAVORITE S
1234
SELECT
PLAY
MENU INPUT
1
INFO.
PAUSE
123
STOP
456
GROUP GROUPPLAY
7S
OFF TIMER ON TIMER
7
2-6
BOOKMARK
RANDOM
REPEAT
RECALL
1 Press and hold MENU until the Top
Menu screen is displayed.
2 Press u / d to choose “Library” and
press SELECT.
Top Menu
Library
Recall Play
3 Press u / d to choose “Artists” and
press SELECT.
Library
Artists
Albums
4 Press u / d to choose an artist.
Artists
Avril Lavigne
Bob Dylan
LISTENING TO
MUSIC
23
Page 25
HANDY FUNCTIONS
5 Press i to display the Favorites
registration screen.
Set "Favorites"
Assign to FAV
6 Press u / d to choose a FAVORITES
button (1 through 4) and press SELECT.
The display returns to the previous screen, and
the number of the FAVORITES button you
registered appears to the left of the name of the
artist.
Set "Favorites"
Assign to FAV
Artists
1
Avril Lavigne
Bob Dylan
7 Press the FAVORITES button you
selected in step 6 to start playback of
the songs stored on the server.
The Play Info screen appears and playback
starts.
00:10
Let Go / Avril Lavigne
Anything But Ordinary
Note
If another item was previously assigned to the
FAVORITES button you selected here, that
assignment is automatically cancelled when you
press SELECT in step 6 above.
■ To assign radio stations preset on
YAMAHA AV receivers
MCX-3 WD01440
LIBRARY
VOL
MUTE
FAVORITE S
1
1234
SELECT
PLAY
MENU INPUT
INFO.
PAUSE
123
STOP
456
GROUP GROUPPLAY
7S
OFF TIMER ON TIMER
9
2-8
BOOKMARK
RANDOM
REPEAT
RECALL
1 Press and hold MENU until the Top
Menu screen is displayed.
2 Press u / d to choose “Library” and
press SELECT.
Top Menu
Library
Recall Play
3 Press u / d to choose “External Inputs”
and press SELECT.
Library
Bookmarks
External Inputs
4 Press u / d to choose “AV Receiver”
and press SELECT.
External Inputs
Analog
AV Receiver
24
Page 26
HANDY FUNCTIONS
5 Press u / d to choose a preset group
and press SELECT.
External Inputs
Preset A
Preset B
6 Press u / d to choose the station you
want to access.
External Inputs
Station 1
Station 2
7 Press i to display the Favorites
registration screen.
Set "Favorites"
Assign to FAV
8 Press u / d to choose a FAVORITES
button (1 through 4) and press SELECT.
The display returns to the previous screen and
the number of the FAVORITES button you
registered appears to the left of the name of the
AV amplifier.
Set "Favorites"
Assign to FAV2
9 Press the FAVORITES button you
selected in step 7 to start radio
broadcast playback on your AV receiver.
The Play Info screen appears and playback
starts.
Play Info
External Inputs
[A2] Station 2
Notes
• If another item was previously assigned to the
FAVORITES button you selected here, that
assignment is automatically cancelled when you
press SELECT in step 8 above.
• If no YAMAHA AV receiver is connected to the
server, the message “Receiver unavailable” is
displayed briefly in the front panel display.
■ To assign external components
connected to the server
MCX-3 WD01440
LIBRARY
VOL
MUTE
FAVORITE S
1234
SELECT
PLAY
MENU INPUT
1
INFO.
PAUSE
123
STOP
456
GROUP GROUPPLAY
7S
OFF TIMER ON TIMER
7
2-6
BOOKMARK
RANDOM
REPEAT
RECALL
LISTENING TO
MUSIC
External Inputs
Station 1
2
Station 2
1 Press and hold MENU until the Top
Menu screen is displayed.
2 Press u / d to choose “Library” and
press SELECT.
Top Menu
Library
Recall Play
25
Page 27
HANDY FUNCTIONS
3 Press u / d to choose “External Inputs”
and press SELECT.
Library
Bookmarks
External Inputs
4 Press u / d to choose “Optical”,
“Coaxial” or “Analog”.
External Inputs
Optical
Coaxial
5 Press i to display the Favorites
registration screen.
Set "Favorites"
Assign to FAV
6 Press u / d to choose a FAVORITES
button (1 through 4) and press SELECT.
The display returns to the previous screen, and
the number of the FAVORITES button you
registered appears to the left of external input
source.
Set "Favorites"
Assign to FAV3
7 Press the FAVORITES button you
selected in step 6 to start audio
playback from the connected
component.
The Play Info screen appears and playback
starts.
Play Info
External Inputs
Optical
Note
If another item was previously assigned to the
FAVORITES button you selected here, that
assignment is automatically cancelled when you
press SELECT in step 6 above.
■ To assign input from an AV-linked
YAMAHA AV receiver
MCX-3 WD01440
LIBRARY
VOL
MUTE
FAVORITE S
1
1234
SELECT
PLAY
MENU INPUT
INFO.
PAUSE
123
STOP
456
GROUP GROUPPLAY
7S
OFF TIMER ON TIMER
6
2-5
BOOKMARK
RANDOM
REPEAT
RECALL
External Inputs
3
Optical
Coaxial
26
1 Press and hold MENU until the Top
Menu screen is displayed.
2 Press u / d to choose “Input” and
press SELECT.
Top Menu
Setup
Input
Page 28
HANDY FUNCTIONS
3 Press u / d to choose the input on the
registered receiver.
Input
CBL/SAT
DVD
4 Press i to display the Favorites
registration screen.
Set "Favorites"
Assign to FAV
5 Press u / d to choose a FAVORITES
button (1 through 4) and press SELECT.
The display returns to the previous screen, and
the number of the FAVORITES button you
registered appears to the left of the name of the
input source.
Set "Favorites"
Assign to FAV4
Input
CBL/SAT
4
DVD
6 Press the FAVORITES button you
selected in step 5 to switch the input to
the registered receiver.
The Play Info screen appears and playback
starts.
Play Info
Input
DVD
Notes
• If another item was previously assigned to the
FAVORITES button you selected here, that
assignment is automatically cancelled when you
press SELECT in step 5 above.
• You must select a YAMAHA AV receiver in the
“Amplifier” menu (page 43) before the
receiver’s input can be assigned to a
FAVORITES button.
■ To assign input from an external
stereo source connected to the
AUDIO IN jack of the MCX-CA15
MCX-3 WD01440
LIBRARY
VOL
MUTE
FAVORITE S
1234
SELECT
PLAY
MENU INPUT
1
INFO.
PAUSE
123
STOP
456
GROUP GROUPPLAY
7S
OFF TIMER ON TIMER
7
2-6
BOOKMARK
RANDOM
REPEAT
RECALL
1 Press and hold MENU until the Top
Menu screen is displayed.
2 Press u / d to choose “Input” and
press SELECT.
Top Menu
Setup
Input
3 Press u / d to choose “AUDIO IN”.
Input
Server
AUDIO IN
LISTENING TO
MUSIC
27
Page 29
HANDY FUNCTIONS
4 Press i to display the Favorites
registration screen.
Set "Favorites"
Assign to FAV
5 Press u / d to choose a FAVORITES
button (1 through 4) and press SELECT.
The display returns to the previous screen, and
the number of the FAVORITES button you
registered appears to the left of “AUDIO IN”.
Set "Favorites"
Assign to FAV4
Input
Server
4
AUDIO IN
6 Press the FAVORITES button you
selected in step 5 to switch the input to
“AUDIO IN”.
The Play Info screen appears and playback
starts.
Play Info
Input
AUDIO IN
■ To clear FAVORITES button
assignments
MCX-3 WD01440
LIBRARY
VOL
MUTE
FAVORITE S
1234
SELECT
PLAY
MENU INPUT
1
INFO.
PAUSE
123
STOP
456
GROUP GROUPPLAY
7S
OFF TIMER ON TIMER
2-4
BOOKMARK
RANDOM
REPEAT
RECALL
1 Press and hold MENU until the Top
Menu screen is displayed.
2 Press u / d to choose “Setup” and
press SELECT.
Top Menu
Edit Bookmark
Setup
3 Press u / d to choose “Favorites” and
press SELECT.
Setup
Screen Saver
Favorites
Notes
• If another item was previously assigned to the
FAVORITES button you selected here, that
assignment is automatically cancelled when you
press SELECT in step 5 above.
• You must select “MCX-CA15” in the
“Amplifier” menu (page 43) before the
MCX-CA15’s input can be assigned to a
FAVORITES button.
28
Page 30
HANDY FUNCTIONS
4 Press u / d to choose “Clear FAV1”,
“Clear FAV2”, “Clear FAV3”, “Clear
FAV4” or “Clear All” and press SELECT.
The appropriate assignment is cleared.
Favorites
Clear FAV
Clear FAV2
Clear FAV1 Clears the assignment for
FAVORITES button 1.
Clear FAV2 Clears the assignment for
FAVORITES button 2.
Clear FAV3 Clears the assignment for
FAVORITES button 3.
Clear FAV4 Clears the assignment for
FAVORITES button 4.
Clear All Clears the assignments for all
FAVORITES buttons.
Song statistics function
You can display statistical data about the songs and
albums stored on the server.
The following statistical data is available:
Times played:
Displays songs in order of the number of times they
have been played.
Recently played songs:
Displays songs in order starting with the most
recently played.
Recently stored albums:
Displays albums in order starting with the most
recently stored on the server.
MCX-3 WD01440
LIBRARY
VOL
MUTE
FAVORITE S
1234
SELECT
PLAY
MENU INPUT
1
INFO.
PAUSE
123
STOP
456
GROUP GROUPPLAY
7S
OFF TIMER ON TIMER
2-5
BOOKMARK
RANDOM
REPEAT
RECALL
LISTENING TO
MUSIC
1 Press and hold MENU until the Top
Menu screen is displayed.
2 Press u / d to choose “Library” and
press SELECT.
Top Menu
Library
Recall Play
29
Page 31

HANDY FUNCTIONS
3 Press u / d to choose “Song Statistics”
and press SELECT.
Library
Playlist
Song Statistics
4 Press u / d to choose the statistic you
want to view and press SELECT.
Song Statisti...
Times played
Recently played songs
5 Press u / d to choose a song or album
and press SELECT.
Playback of the song or album begins.
Times played
She's the One
Born to Run
y
If you selected “Recently stored albums” in step 4,
choose a song and press SELECT to start playback.
Using playlists
You can make up to 1,007 lists (playlists) of your
favorite songs from the server (see the MCX-1000
Owner’s Manual, page 75). The server classifies
these playlists and divides them into groups. The
server can store up to ten different groups,
commonly referred to as “collections”, which you
can access from the client.
Note
You cannot alter playlists from the client.
MCX-3 WD01440
LIBRARY
VOL
MUTE
FAVORITE S
1234
SELECT
PLAY
MENU INPUT
1
INFO.
PAUSE
123
STOP
456
GROUP GROUPPLAY
7S
OFF TIMER ON TIMER
1 Press and hold MENU until the Top
Menu screen is displayed.
2-6
BOOKMARK
RANDOM
REPEAT
RECALL
30
2 Press u / d to choose “Library” and
press SELECT.
Top Menu
Library
Recall Play
3 Press u / d to choose “Playlists” and
press SELECT.
Library
All Songs
Playlists
Page 32

HANDY FUNCTIONS
4 Press u / d to choose a collection of
playlists and press SELECT.
The playlists registered in the collection are
displayed.
Playlists
Collections 1
Collections 2
5 Press u / d to choose a playlist and
press SELECT.
Playlists-List...
Playlist (1)
Playlist (2)
The display changes to show the songs
registered to the playlist. An “L” is displayed
next to albums, an “A” next to artists, and a “G”
next to genres that are linked to the playlist.
6 Press u / d to choose a song and press
SELECT.
Playback of the song you selected begins.
Press j to return to the list of songs.
y
• When playback of the song you select is finished,
playback of the next song in the playlist begins.
• If you want to play back all of the songs in a
playlist, press
• You can copy the contents of your client’s
bookmark list to create a playlist (page 34).
p at the end of step 5.
Recall Play function
You can use this function to continue listening to the
song currently being played back from the client or
the server on another client. This is handy if you
need to move from room to room.
Notes
• Only those clients registered on the server are
available for use with the Recall Play function. For
details, see the MCX-1000 Owner’s Manual (page
106).
• If no song is currently being played back on the
source component, the destination component
recalls playback information from the point at
which playback was last stopped on the source
component.
• You cannot recall playback information from the
server when it is playing back a CD, MP3 CD or a
song recorded from an external device.
• The destination component can recall playback
modes such as Random, Repeat, and Broadcast
from the source device.
• Operating the source component after you activate
the Recall Play function does not affect playback
on the destination component.
■ To recall playback from another
client
MCX-3 WD01440
LIBRARY
VOL
MUTE
FAVORITE S
1234
SELECT
PLAY
MENU INPUT
1
INFO.
PAUSE
123
STOP
456
GROUP GROUPPLAY
7S
OFF TIMER ON TIMER
2,3
BOOKMARK
RANDOM
REPEAT
RECALL
LISTENING TO
MUSIC
1 Press and hold MENU until the Top
Menu screen is displayed.
31
Page 33

HANDY FUNCTIONS
2 Press u / d to choose “Recall Play” and
press SELECT.
Top Menu
Library
Recall Play
3 Press u / d to choose the client from
which you want to recall playback and
press SELECT.
Recall Play
Server
Client 1
To cancel Recall Play, press j to return to the
previous screen.
y
You can edit the names of the clients listed in the
Recall Play screen. For details, see the MCX-1000
Owner’s Manual, page 96.
■ To recall playback from the server
MCX-3 WD01440
LIBRARY
VOL
MUTE
FAVORITE S
1234
2 Press u / d to choose “Recall Play” and
press SELECT.
Top Menu
Library
Recall Play
3 Press u / d to choose “Server” and
press SELECT.
Recall Play
Server
Client 1
To cancel Recall Play, press j to return to the
previous screen.
■ Using shortcut keys to start recall
playback
You can use the keys on the client’s remote control
to start recall playback without using the menus in
the front panel display.
1 Press and hold RECALL.
RECALL
SELECT
PLAY
MENU INPUT
1
INFO.
PAUSE
123
STOP
456
GROUP GROUPPLAY
7S
OFF TIMER ON TIMER
2-3
BOOKMARK
RANDOM
REPEAT
RECALL
1 Press and hold MENU until the Top
Menu screen is displayed.
32
2 Press one of the following:
Shortcut
key
+ (S) Server
b (1) Client 1
e (2) Client 2
a (3) Client 3
w (4) Client 4
s (5) Client 5
f (6) Client 6
– (7) Client 7
Source
component
Page 34

HANDY FUNCTIONS
Bookmark function
When you bookmark your favorite songs, they are
stored in a temporary list for easy access. The list
can hold up to 999 bookmarked songs and can be
copied to create a playlist at any time. This enables
you to preserve multiple lists of your favorite songs.
A checkmark is displayed next to all bookmarked
songs for easy identification.
■ Setting a bookmark
You can set a bookmark whenever the Play Info
screen or a menu list is displayed.
MCX-3 WD01440
LIBRARY
VOL
MUTE
FAVORITE S
1234
SELECT
BOOKMARK
PLAY
MENU INPUT
INFO.
PAUSE
123
STOP
456
GROUP GROUPPLAY
7S
OFF TIMER ON TIMER
Press BOOKMARK to bookmark the song.
A check mark (✔) appears next to the song name.
To remove the bookmark, press BOOKMARK once
more.
00:06
Born To Run / Bruce Spr
Tenth Avenue Freeze O
A bookmarked song in the Play Info screen
Artist-Songs
Thunder Road
Tenth Avenue Freeze O
A bookmarked song in the Menu screen
y
You can press BOOKMARK with an album selected
to bookmark the entire album. However, you cannot
remove bookmarks in the same way. Bookmarks
must be removed for each song individually.
RANDOM
REPEAT
RECALL
BOOKMARK
button
■ To play bookmarked songs
MCX-3 WD01440
LIBRARY
VOL
MUTE
FAVORITE S
1234
SELECT
PLAY
MENU INPUT
1
INFO.
PAUSE
123
STOP
456
GROUP GROUPPLAY
7S
OFF TIMER ON TIMER
2-5
BOOKMARK
RANDOM
REPEAT
RECALL
1 Press and hold MENU until the Top
Menu screen is displayed.
2 Press u / d to choose “Library” and
press SELECT.
Top Menu
Library
Recall Play
3 Press u / d to choose “Bookmarks”
and press SELECT.
Library
Song Statistics
Bookmarks
4 Press u / d to choose a song and press
SELECT.
Playback of the selected song begins.
Bookmarks
Tenth Avenue Freeze O
Like A Rolling Stone
5 Press j to return to the list of songs.
LISTENING TO
MUSIC
33
Page 35

HANDY FUNCTIONS
■ To copy the bookmark list to a
playlist
You can copy the entire content of your client
bookmark list to a playlist. This makes your
bookmark list readily available for playback from all
other clients in your MusicCAST system as well as
from the server.
MCX-3 WD01440
LIBRARY
VOL
MUTE
FAVORITE S
1234
SELECT
PLAY
MENU INPUT
1
4
INFO.
PAUSE
123
STOP
456
GROUP GROUPPLAY
7S
OFF TIMER ON TIMER
2,3
BOOKMARK
RANDOM
REPEAT
RECALL
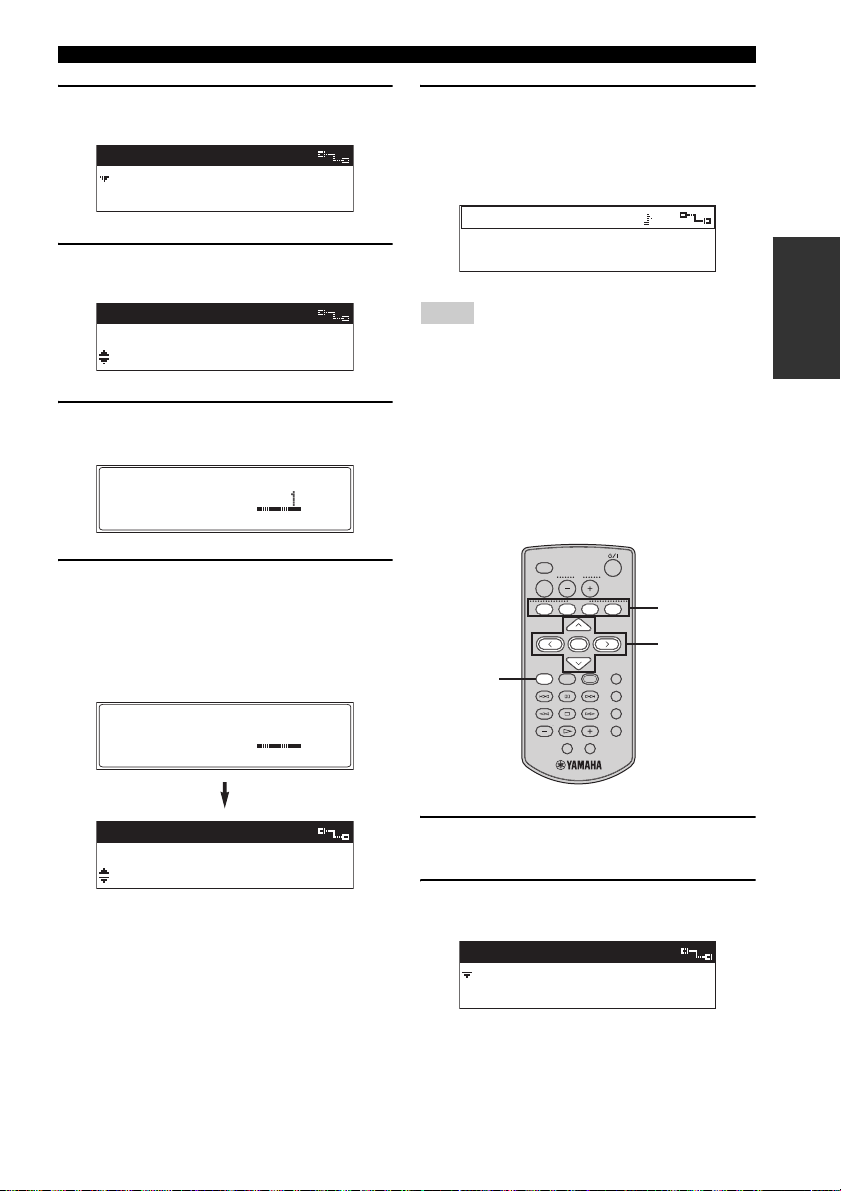
1 Press and hold MENU until the Top
Menu screen is displayed.
2 Press u / d to choose “Edit Bookmark”
and press SELECT.
Top Menu
Recall Play
Edit Bookmark
4 Press p to create the playlist.
The client creates a new playlist in the default
collection (“Collection 1”) on the server, and
the display returns to the Edit Bookmark
screen.
Press PLAY to copy,
< to cancel.
Edit Bookmark
Please wait.
Playlist Name:
'04/ 3/24 11:53
To cancel without copying the bookmark list,
press j .
3 Press u / d to choose “Copy to
Playlist” and press SELECT.
Edit Bookmark
Copy to Playlist
Clear All
34
Page 36

HANDY FUNCTIONS
■ To clear all bookmarks
MCX-3 WD01440
LIBRARY
VOL
MUTE
FAVORITE S
1234
SELECT
PLAY
MENU INPUT
1
4
INFO.
PAUSE
123
STOP
456
GROUP GROUPPLAY
7S
OFF TIMER ON TIMER
2,3
BOOKMARK
RANDOM
REPEAT
RECALL
1 Press and hold MENU until the Top
Menu screen is displayed.
2 Press u / d to choose “Edit Bookmark”
and press SELECT.
Top Menu
Recall Play
Edit Bookmark
3 Press u / d to choose “Clear All” and
press SELECT.
4 Press p to erase the bookmark list.
The following screens appear in order.
Press PLAY to clear,
< to cancel.
Press PLAY to clear,
Please wait.
Edit Bookmark
Copy to Playlist
Clear All
To cancel without erasing the bookmark list,
press j .
y
Erasing the list of bookmarks after copying it to a
playlist allows you to start creating a new bookmark
list.
LISTENING TO
MUSIC
Edit Bookmark
Copy to Playlist
Clear All
35
Page 37

HANDY FUNCTIONS
OFF Timer function
You can activate this function so that the client
switches off automatically after the specified period
of time. For example, this function is handy if you
want to listen to music while going to sleep.
y
The ON Timer and OFF Timer functions can be
used simultaneously.
■ To activate the OFF Timer function
MCX-3 WD01440
LIBRARY
VOL
MUTE
FAVORITE S
1234
SELECT
PLAY
MENU INPUT
1
INFO.
PAUSE
123
STOP
456
GROUP GROUPPLAY
7S
OFF TIMER ON TIMER
1 Press and hold MENU until the Top
Menu screen is displayed.
2 Press u / d to choose “Setup” and
press SELECT.
2-5
BOOKMARK
RANDOM
REPEAT
RECALL
4 Press u / d to choose the desired
number of minutes before the client
automatically switches to sleep mode.
You can choose from the following settings:
OFF, 30min, 60min, 90min, 120min.
OFF Timer
OFF
30min
5 Press SELECT to confirm the setting.
OFF Timer
OFF
30min
After a small delay, the display returns to the
Setup screen and the TIMER indicator lights.
Top Menu
Edit Bookmark
Setup
3 Press u / d to choose “OFF Timer” and
press SELECT.
Setup
OFF Timer
ON Timer
36
Page 38

HANDY FUNCTIONS
■ To switch the OFF Timer function
on and off
MCX-3 WD01440
LIBRARY
VOL
MUTE
FAVORITE S
1234
SELECT
BOOKMARK
PLAY
MENU INPUT
INFO.
PAUSE
RANDOM
123
STOP
REPEAT
456
RECALL
7S
OFF TIMER ON TIMER
OFF TIMER
button
GROUP GROUPPLAY
Press OFF TIMER repeatedly.
The OFF Timer screen appears briefly in the front
panel display. Each time OFF TIMER is pressed, the
screen scrolls to the next setting.
You can choose from the following settings:
OFF, 30min, 60min, 90min, 120min.
OFF TIMER
Edit Bookmark
OFF Timer: OFF
ON Timer function
You can use this function to set the client to
automatically switch on and begin playback at a
specified time. For example, this function is handy if
you want to wake up to music.
y
The ON Timer and OFF Timer functions can be
used simultaneously.
Note
When using this function, Auto Play must be set to
“ON” (see page 47) to enable playback to begin
automatically after the client switches itself on.
■ To activate the ON Timer function
MCX-3 WD01440
LIBRARY
VOL
MUTE
FAVORITE S
1234
SELECT
PLAY
MENU INPUT
1
INFO.
PAUSE
123
STOP
456
GROUP GROUPPLAY
7S
OFF TIMER ON TIMER
8
2-7
BOOKMARK
RANDOM
REPEAT
RECALL
LISTENING TO
MUSIC
1 Press and hold MENU until the Top
Menu screen is displayed.
2 Press u / d to choose “Setup” and
press SELECT.
Top Menu
Edit Bookmark
Setup
37
Page 39

HANDY FUNCTIONS
3 Press u / d to choose “ON Timer” and
press SELECT.
Setup
OFF Timer
ON Timer
4 Press SELECT once more.
The cursor enters the ON Timer setting field.
ON Timer
[OFF ]
Save
ON Timer
[OFF ]
Save
5 Press u / d to choose “ON” and press
i .
ON Timer
[ON 0:00 AM ]
Save
6 Enter the time you want the client to
automatically turn on and press
SELECT.
Press u / d to cycle through the displayed
characters, and press j / i to move the cursor
left and right.
7 Press u / d to choose “Save” and press
SELECT.
ON Timer
[ON 6:00 AM ]
Save
ON Timer
ON 6:00 AM
To cancel the ON Timer setting, press u / d to
choose “Cancel”.
8 Press to place the client in sleep
mode.
The TIMER indicator lights in the front panel.
■ To switch the ON Timer function on
and off
MCX-3 WD01440
LIBRARY
VOL
MUTE
FAVORITE S
1234
SELECT
BOOKMARK
PLAY
MENU INPUT
INFO.
RANDOM
PAUSE
123
STOP
REPEAT
456
GROUP GROUPPLAY
RECALL
7S
OFF TIMER ON TIMER
ON TIMER
button
ON Timer
[ON 6:00 AM ]
Save
38
Press ON TIMER repeatedly.
The ON Timer screen appears briefly in the front
panel display. Each time ON TIMER is pressed, this
setting switches between “ON” and “OFF”.
ON Timer
ON 00:00
Page 40

HANDY FUNCTIONS
Notes
• Make sure the server is set to ON or LAN standby
mode when using the ON Timer function to start
playback from a client. For details, see the
MCX-1000 Owner’s Manual, page 18.
• You can choose from two different time display
settings (12-hour and 24-hour) on the server. This
setting can be changed as follows:
Press u / d to choose “System Setup” - “Date/
Time” - “Time Display”, then choose “24 hours”
or “12 hours (AM/PM)”, and press SELECT.
Press u / d / j / i to choose “OK” and press
SELECT.
Broadcast function
You can use this function to enjoy the same song
from different locations around your home.
When the server is set to Broadcast mode, the song
being played back on the server is distributed
simultaneously to all clients set up to receive
Broadcast playback.
Make sure the server is in Broadcast mode before
carrying out the following procedure on your client.
Notes
• One or more clients must be set up on the server
before Broadcast playback will begin.
• Starting Broadcast playback on a client or the
server turns off the OFF Timer and ON Timer
functions. Further, the Timer functions do not
return to their previous state when Broadcast
playback stops. Reset these functions as required.
• You may experience a difference of up to 0.2
seconds in playback synchrony between clients.
■ To add clients into Broadcast
playback
MCX-3 WD01440
LIBRARY
VOL
MUTE
FAVORITE S
1234
LISTENING TO
MUSIC
SELECT
PLAY
MENU INPUT
1
INFO.
PAUSE
123
STOP
456
GROUP GROUPPLAY
7S
OFF TIMER ON TIMER
2-3
BOOKMARK
RANDOM
REPEAT
RECALL
1 Press and hold MENU until the Top
Menu screen is displayed.
39
Page 41

HANDY FUNCTIONS
2 Press u / d to choose “Recall Play” and
press SELECT.
Top Menu
Library
Recall Play
3 Press u / d to choose a MusicCAST
component currently in Broadcast mode
and press SELECT.
The Play Info screen appears and Broadcast
playback begins on the client you are operating.
Recall Play
Server
Client 1
00:06
Born To Run / Bruce Spr
Tenth Avenue Freeze O
To cancel without adding the client to
Broadcast playback, press j .
■ To remove clients from Broadcast
playback
MCX-3 WD01440
LIBRARY
VOL
MUTE
FAVORITE S
1234
SELECT
BOOKMARK
PLAY
MENU INPUT
INFO.
PAUSE
RANDOM
123
STOP
STOP
button
GROUP GROUPPLAY
REPEAT
456
RECALL
7S
OFF TIMER ON TIMER
Press s .
Broadcast playback stops on the client you are
operating, and the Play Info screen appears in the
front panel display.
STOP
5
00:06
Born To Run / Bruce Spr
Tenth Avenue Freeze O
40
Page 42

LISTENING TO EXTERNAL COMPONENTS
Listening to components connected to the MCX-CA15
You can use your client to enjoy audio from an
external component, such as a CD player or control
amplifier connected to the AUDIO IN jack on the
MCX-CA15.
Before you can play back audio signals from an
external component, you must choose “MCXCA15” in “Setup” - “Amplifier”. For details, see
“To register YAMAHA AV receivers” on page 43.
Notes
• While a song stored on the server is being played
back from the client, no sound is output from the
external component connected to the MCX-CA15.
Sound will only be output after playback stops.
• When an audio signal from an external component
is being played back and a FAVORITES button
registered to a different component is pressed,
playback stops and then begins on the component
assigned to the FAVORITES button.
MCX-3 WD01440
LIBRARY
VOL
MUTE
FAVORITE S
1234
SELECT
PLAY
MENU INPUT
1
INFO.
PAUSE
123
STOP
456
GROUP GROUPPLAY
7S
OFF TIMER ON TIMER
1 Press and hold MENU until the Top
Menu screen is displayed.
2,3
BOOKMARK
RANDOM
REPEAT
RECALL
2 Press u / d to choose “Input” and
press SELECT.
Top Menu
Setup
Input
3 Press u / d to choose “AUDIO IN” and
press SELECT.
Playback of the song you are currently listening
to stops, and the client outputs the audio signal
from the external component connected to the
MCX-CA15.
Input
Server
AUDIO IN
Server Outputs the audio signal from the
server.
AUDIO IN Outputs the audio signal from the
connected external component.
Auto Automatically switches the audio
input source between the server
and connected external component
to output the audio signal
currently being received.
y
If an audio signal from an external component is
being played back and a song stored on the server is
selected for playback, this setting automatically
returns to “Server”.
■ To return to playback from the
server
Choose “Server” in step 3 above.
LISTENING TO
MUSIC
41
Page 43

LISTENING TO EXTERNAL COMPONENTS
Listening to YAMAHA AV receiver radio station presets
You can use your client to enjoy radio stations preset
on a YAMAHA AV receiver if one is connected to
the server. All stations preset on your YAMAHA AV
receiver are available for selection.
Make sure that both the server and connected
YAMAHA AV receiver are turned on before
carrying out the following procedure.
Notes
• This function is only available if your server is
connected to a correctly configured tunerequipped YAMAHA AV receiver via a cross type
RS-232C cable. Further, the REC OUT jack on
your YAMAHA AV receiver must be connected to
the server’s ANALOG IN jack. See the
MCX-1000 Owner’s Manual (page 13).
• The server can only distribute one radio preset
source signal at a time to clients. Switching the
preset radio station on one client changes the
preset radio station for all clients connected to
your server. In this case, the server automatically
switches to external analog input.
• The server cannot distribute signals from external
components or AV receivers in PCM format
quality. Signals are distributed in MP3 format
quality, regardless of the PCM settings on the
server.
MCX-3 WD01440
LIBRARY
VOL
MUTE
FAVORITE S
1234
SELECT
PLAY
MENU INPUT
1
INFO.
PAUSE
123
STOP
456
GROUP GROUPPLAY
7S
OFF TIMER ON TIMER
2-6
BOOKMARK
RANDOM
REPEAT
RECALL
1 Press and hold MENU until the Top
Menu screen is displayed.
2 Press u / d to choose “Library” and
press SELECT.
Top Menu
Library
Recall Play
3 Press u / d to choose “External Inputs”
and press SELECT.
Library
Bookmarks
External Inputs
4 Press u / d to choose “AV Receiver”
and press SELECT.
External Inputs
Analog
AV Receiver
5 Press u / d to choose a preset group
and press SELECT.
External Inpu...
Preset A
Preset B
6 Press u / d to choose the station you
want to access and press SELECT.
Playback of the selected radio station begins.
External Inpu...
Station 1
Station 2
42
Page 44

LISTENING TO EXTERNAL COMPONENTS
Using YAMAHA AV link technology
YAMAHA AV link technology enables you to
control YAMAHA AV receivers connected to the
MCX-CA15 or I/O box from your client.
AV link technology can be used to:
• Adjust or mute the volume output level of the
connected YAMAHA AV receiver connected to
the client.
• Switch preset groups and stations when the input
on the connected YAMAHA AV receiver is set
to TUNER.
• Switch the input of the connected YAMAHA AV
receiver to play back songs selected from the
client.
YAMAHA AV link technology requires the use of
an IR flasher (or infrared emitter), which issues AV
link control commands to your YAMAHA AV
receiver connected to the MCX-CA15 or I/O box.
Notes
• Only YAMAHA AV receivers displayed in the
“Amplifier” menu currently support the AV link
function.
• If the AV receiver you are using does not appear in
the “Amplifier” menu, select “MCX-CA15” or
“MCX-IB15” in the “Amplifier” menu. However,
selecting “MCX-CA15” or “MCX-IB15” in this
case does not enable you to use YAMAHA AV
link technology.
• Zone selection is only available with some
YAMAHA AV receivers. For details, refer to the
owner’s manual for the receiver you are using.
■ AV link connections
If you want to enjoy YAMAHA AV link technology,
a YAMAHA AV receiver that supports AV link must
be connected to the AUDIO OUT jacks on the
MCX-CA15 or I/O box. Further, an IR flasher must
be connected to the IR/CTRL jack on the
MCX-CA15 or the IR OUT jack on the I/O box.
MCX-C15
CAT-5 cable
AV I N
MCX-CA15
AUDIO IN
STATUS
IR/CTRL
or
IR OUT
IR flasher
IR flasher
IR/CTRL
AUDIO OUT SW OUT
MCX-CA15
or I/O box
VIDEO OUT
VIDEO OUT
DC IN 12V
AUDIO
OUT
AUDIO IN
AV O UT
VIDEO IN
YAMAHA AV
receiver/amplifier
MCX-C15
MENU
VOL
2341
FAVORITES
VOL
LIBRARY
VOL
MUTE
FAVORITES
1234
SELECT
PLAY
MENU INPUT
INFO.
PAUSE
123
STOP
456
GROUP GROUPPLAY
7S
OFF TIMERON TIMER
Note
The IR flasher must be positioned so that it is in
direct line with the IR receiver of the connected
YAMAHA AV receiver you are using.
■ To register YAMAHA AV receivers
To control a YAMAHA AV receiver using
YAMAHA AV link technology, register your
YAMAHA AV receiver using the following
procedure.
MCX-3 WD01440
LIBRARY
VOL
MUTE
FAVORITE S
1234
SELECT
PLAY
MENU INPUT
1
7
INFO.
PAUSE
123
STOP
456
GROUP GROUPPLAY
7S
OFF TIMER ON TIMER
2-6
BOOKMARK
RANDOM
REPEAT
RECALL
LISTENING TO
MUSIC
BOOKMARK
RANDOM
REPEAT
RECALL
1 Press and hold MENU until the Top
Menu screen is displayed.
43
Page 45

LISTENING TO EXTERNAL COMPONENTS
2 Press u / d to choose “Setup” and
press SELECT.
Top Menu
Edit Bookmark
Setup
3 Press u / d to choose “Amplifier” and
press SELECT.
Setup
Output
Amplifier
4 Press u / d to choose the name of the
receiver connected to the client and
press SELECT.
Amplifier
RX-V1400/DSP-AX1400
RX-V2400/DSP-AX2400
5 If a zone setting is available, press
u / d to choose the zone you want to
use and press SELECT.
7 Press p to confirm your selection.
Information about the component you selected
appears briefly.
Press PLAY to update,
press < to cancel.
Amp:RX-V2400/DSP...
Zone:Main
Input:CD
Notes
• “MCX-CA15” is set as the default YAMAHA
AV a mp li f ie r.
• When “MCX-IB15” is set in the “Amplifier”
menu and the MCX-CA15 is connected to your
client, no sound is output from the speakers
connected to the MCX-CA15.
Amp Zone
Main
Zone2
6 Press u / d to choose the input on your
YAMAHA AV receiver connected to the
MCX-CA15 or I/O box and press
SELECT.
Amp Input
CD-R
CD
44
Page 46

LISTENING TO EXTERNAL COMPONENTS
■ Using AV link
MCX-3 WD01440
LIBRARY
MUTE
button
b / a
buttons
– (GROUP) /
+ (GROUP)
VOL
MUTE
FAVORITE S
1234
SELECT
PLAY
MENU INPUT
INFO.
PAUSE
123
STOP
456
GROUP GROUPPLAY
7S
OFF TIMER ON TIMER
buttons
To change the volume output level of the connected
YAM A HA AV r ec e iv e r:
Press VOL – / VOL + .
To mute the volume output level of the connected
YAM A HA AV r ec e iv e r:
Press MUTE.
To switch the preset group for playback on the
connected YAMAHA AV receiver:
Press – (GROUP) / + (GROUP).
To switch the preset station for playback on the
connected YAMAHA AV receiver:
Press b / a .
To switch the input of the connected YAMAHA AV
receiver to play back songs selected from the client:
Press INPUT.
BOOKMARK
RANDOM
REPEAT
RECALL
VOL – /
VOL +
buttons
INPUT
button
Notes
• Depending on the YAMAHA AV receiver you
are using, pressing MUTE may not have any
affect.
• You can only use – (GROUP) / + (GROUP) and
b / a when the input of your connected
YAMAHA AV receiver is set to TUNER.
• When a YAMAHA AV receiver is selected in the
“Amplifier” menu, you can cycle through the
available inputs for that receiver by pressing
INPUT on the client’s remote control. However
the input you specified for the connection of the
client in the “Amp Input” menu does not appear
in that cycle. To select the input you specified for
the client, press INPUT repeatedly and select
“Server”.
• When RX-396RDS or RX-496RDS is selected
in the “Amplifier” menu, the YAMAHA AV link
does not support TAPE2 input.
LISTENING TO
MUSIC
45
Page 47

LISTENING TO EXTERNAL COMPONENTS
Listening to components connected to the server
You can use your client to enjoy audio from an
external component connected to either the
OPTICAL IN, COAXIAL IN, or ANALOG IN jack
on the server.
Notes
• Changing the external source selection on a client
changes the external source selection for all clients
connected to your server.
• You cannot use this function when the server is in
Broadcast mode because the server can only
distribute one source signal at a time to clients.
• The server cannot distribute signals from external
components or AV receivers in PCM format.
Signals are distributed in MP3 format quality,
regardless of the PCM settings on the server.
MCX-3 WD01440
LIBRARY
VOL
MUTE
FAVORITE S
1234
SELECT
PLAY
MENU INPUT
1
INFO.
PAUSE
123
STOP
456
GROUP GROUPPLAY
7S
OFF TIMER ON TIMER
2-5
BOOKMARK
RANDOM
REPEAT
RECALL
3 Press u / d to choose “External Inputs”
and press SELECT.
Library
Bookmarks
External Inputs
4 Press u / d to choose “Optical”,
“Coaxial” or “Analog” and press
SELECT.
External Inputs
Optical
Coaxial
5 The client outputs the audio signal
being received from the appropriate
external component.
To return to playback from the server
Choose an item other than “External Inputs” in step
3 above.
1 Press and hold MENU until the Top
Menu screen is displayed.
2 Press u / d to choose “Library” and
press SELECT.
Top Menu
Library
Recall Play
46
Page 48

SYSTEM OPTIONS
Auto Play function
You can use this function to automatically resume
playback of the last song the client played before the
client was placed in sleep mode.
MCX-3 WD01440
LIBRARY
VOL
MUTE
FAVORITE S
1234
SELECT
PLAY
MENU INPUT
1
INFO.
PAUSE
123
STOP
456
GROUP GROUPPLAY
7S
OFF TIMER ON TIMER
1 Press and hold MENU until the Top
Menu screen is displayed.
2 Press u / d to choose “Setup” and
press SELECT.
Top Menu
Edit Bookmark
Setup
2-4
BOOKMARK
RANDOM
REPEAT
RECALL
Auto Level Control function
The server stores songs at the same volume level as
their original source. This function allows you to
control the variation in volume level that may arise
when consecutively playing back songs whose
original sound levels differ. Auto Level Control
automatically reduces or increases the base volume
level of each song to a theoretical average during
playback.
Note
This function may not produce the best results if you
are listening sequentially to different genres with
widely varying base volume levels. If you notice
that the quality of your listening experience
decreases when you turn on this function, please
turn it off.
MCX-3 WD01440
LIBRARY
VOL
MUTE
FAVORITE S
1234
SELECT
PLAY
MENU INPUT
1
INFO.
PAUSE
123
STOP
456
GROUP GROUPPLAY
7S
OFF TIMER ON TIMER
2-4
BOOKMARK
RANDOM
REPEAT
RECALL
OPERATIONS
ADVANCED
3 Press u / d to choose “Auto Play” and
press SELECT.
Setup
ON Timer
Auto Play
4 Press u / d to choose “ON” or “OFF”
and press SELECT.
Auto Play
OFF
ON
ON Enables the Auto Play mode.
OFF Disables the Auto Play mode.
1 Press and hold MENU until the Top
Menu screen is displayed.
2 Press u / d to choose “Setup” and
press SELECT.
Top Menu
Edit Bookmark
Setup
47
Page 49

SYSTEM OPTIONS
3 Press u / d to choose “Auto Level
Control” and press SELECT.
Setup
Auto Play
Auto Level Control
4 Press u / d to choose “ON” or “OFF”
and press SELECT.
Auto Level Co...
OFF
ON
ON Enables the Auto Level Control
mode.
OFF Disables the Auto Level Control
mode.
Selecting the output
You can use this function to select the output control
method of the client. In most cases, such as when
using the MCX-CA15, choose “Variable”.
y
When the client is first installed, “Variable” is
automatically set as the default.
MCX-3 WD01440
LIBRARY
VOL
MUTE
FAVORITE S
1234
SELECT
PLAY
MENU INPUT
1
INFO.
PAUSE
123
STOP
456
GROUP GROUPPLAY
7S
OFF TIMER ON TIMER
1 Press and hold MENU until the Top
Menu screen is displayed.
2 Press u / d to choose “Setup” and
press SELECT.
Top Menu
Edit Bookmark
Setup
2-4
BOOKMARK
RANDOM
REPEAT
RECALL
48
3 Press u / d to choose “AUDIO OUT”
and press SELECT.
Setup
Auto Level Control
AUDIO OUT
Page 50

SYSTEM OPTIONS
4 Press u / d to choose “Variable” or
“Fixed” and press SELECT.
AUDIO OUT
Variable
Fixed
Variable Controls the playback volume and
tone using the client settings.
Fixed Controls the playback volume and
tone using the external component
settings. In this case, you cannot
control the playback volume and
tone using the client.
Notes
• If “Fixed” is selected in step 4, the volume output
level of your client is set to maximum. In this case,
adjust the volume level on the connected
component before starting playback.
• The “AUDIO OUT” menu is only available when
“MCX-CA15” or “MCX-IB15” is set in the
“Amplifier” menu, or the I/O box is connected to
your client. If you try to access the “AUDIO
OUT” menu at any other time, the message
“Prohibited” appears in the display.
Sleep mode
If you will not be using your client for an extended
period, you can place it in sleep mode. Power
consumption is reduced in sleep mode, but the client
still consumes a small amount of power to keep the
display and remote control signal receiver in
operation.
MCX-3 WD01440
LIBRARY
VOL
MUTE
FAVORITE S
1234
SELECT
BOOKMARK
PLAY
MENU INPUT
INFO.
PAUSE
RANDOM
123
STOP
REPEAT
456
GROUP GROUPPLAY
RECALL
7S
OFF TIMER ON TIMER
Press .
The message “Please wait.” is displayed and the
client switches to sleep mode.
The current time appears in the display.
Please wait.
button
OPERATIONS
ADVANCED
PM
y
To display the time correctly, check the server
connections, or change the time display setting on
the server as follows:
Press u / d to choose “System Setup” - “Date/
Time” - “Time Display”, then choose “24 hours” or
“12 hours (AM/PM)”, and press SELECT. Press
u / d / j / i to choose “OK” and press SELECT.
Note
The client automatically switches to sleep mode if
no operation is performed for 30 minutes.
49
Page 51

DISPLAY SETTINGS
Adjusting the display contrast
Depending on the location of your client, you may
want to alter the contrast of the display for easier
viewing. Darker settings make for easier viewing at
night, while brighter settings make for easier
viewing during the daytime.
MCX-3 WD01440
LIBRARY
VOL
MUTE
FAVORITE S
1234
SELECT
PLAY
MENU INPUT
1
INFO.
PAUSE
123
STOP
456
GROUP GROUPPLAY
7S
OFF TIMER ON TIMER
1 Press and hold MENU until the Top
Menu screen is displayed.
2 Press u / d to choose “Setup” and
press SELECT.
Top Menu
Edit Bookmark
Setup
2-5
BOOKMARK
RANDOM
REPEAT
RECALL
4 Press i or u to increase the contrast
and j or d to decrease it.
Contrast
5 Press SELECT to confirm.
3 Press u / d to choose “Contrast” and
press SELECT.
Setup
Amplifier
Contrast
50
Page 52

DISPLAY SETTINGS
Screen Saver function
The client features an on-screen display Screen
Saver function, which when enabled, runs
automatically if no action is performed for 2
minutes or longer. Using the Screen Saver function
prevents damage to your TV or monitor screen
caused when the same screen is displayed for an
extended period.
MCX-3 WD01440
LIBRARY
VOL
MUTE
FAVORITE S
1234
SELECT
PLAY
MENU INPUT
1
INFO.
PAUSE
123
STOP
456
GROUP GROUPPLAY
7S
OFF TIMER ON TIMER
1 Press and hold MENU until the Top
Menu screen is displayed.
2 Press u / d to choose “Setup” and
press SELECT.
2-4
BOOKMARK
RANDOM
REPEAT
RECALL
4 Press u / d to choose “ON” or “OFF”
and press SELECT.
Screen Saver
OFF
ON
ON Enables the Screen Saver function.
OFF Disables the Screen Saver function.
OPERATIONS
ADVANCED
Top Menu
Edit Bookmark
Setup
3 Press u / d to choose “Screen Saver”
and press SELECT.
Setup
System
Screen Saver
51
Page 53

SYSTEM SETTINGS
Checking system information
You can check the system information for your
client, such as the firmware version currently being
used, by performing the following procedure.
MCX-3 WD01440
LIBRARY
VOL
MUTE
FAVORITE S
1234
SELECT
PLAY
MENU INPUT
1
INFO.
PAUSE
123
STOP
456
GROUP GROUPPLAY
7S
OFF TIMER ON TIMER
1 Press and hold MENU until the Top
Menu screen is displayed.
2 Press u / d to choose “Setup” and
press SELECT.
Top Menu
Edit Bookmark
Setup
2-5
BOOKMARK
RANDOM
REPEAT
RECALL
4 Press u / d to choose “Information”
and press SELECT.
Information about the current firmware version
is displayed.
System
Information
System Update
Information
Version:0.3.65 [011]
2004/04/15 09:10:52
5 When finished, press j to return to the
Top Menu screen.
3 Press u / d to choose “System” and
press SELECT.
Setup
Network
System
52
Page 54

SYSTEM SETTINGS
Resetting to the factory presets
If you want to reset all of your client’s parameters
for any reason, do the following. This procedure
resets ALL parameters, including the FAVORITES
buttons, etc. This procedure should be performed in
the following situations only:
• When your client appears to be functioning
incorrectly for no apparent reason, and reference
to “TROUBLESHOOTING” (page 56) is of no
assistance.
• When you have made multiple mistakes in
setting the parameters on your client and wish to
start again.
• When you wish to reset the client completely for
use in a different MusicCAST network.
CAUTIONS
• Resetting the client to its default settings
will not reverse any updates to the
firmware, or erase any data stored on
your MusicCAST network.
• Because this procedure resets all of the
client’s parameters to their initial
settings, you need to set them again after
performing the reset procedure.
• Note that when resetting all parameters,
the client also resets its network
parameters, and disconnects itself from
your MusicCAST network.
1 Press and hold MENU until the Top
Menu screen is displayed.
2 Press u / d to choose “Setup” and
press SELECT.
Top Menu
Edit Bookmark
Setup
3 Press u / d to choose “System” and
press SELECT.
Setup
Network
System
4 Press u / d to choose “System Reset”
and press SELECT.
System
System Update
System Reset
5 Press p to begin the resetting process.
Press PLAY to restore
to factory setting.
OPERATIONS
ADVANCED
MCX-3 WD01440
LIBRARY
VOL
MUTE
FAVORITE S
1234
To cancel without resetting, press j .
6 The client automatically switches itself
off and then on again.
SELECT
PLAY
MENU INPUT
1
5
INFO.
PAUSE
123
STOP
456
GROUP GROUPPLAY
7S
OFF TIMER ON TIMER
2-4
BOOKMARK
RANDOM
REPEAT
RECALL
The resetting process is complete.
Note
You cannot reset the client to the factory presets if it
is locked from the server. See “To unlock a client
from the server” (page 54).
53
Page 55

SYSTEM SETTINGS
■ To unlock a client from the server
1 Choose “Top Menu” - “System Setup” -
“Lock function” on the server.
The password entry screen appears.
2 Press u / d / j / i and SELECT to enter
the password, then choose “OK” and
press SELECT.
The menu selection screen appears.
4 Press u / d to choose the function you
want to unlock and press SELECT.
The Lock ON/OFF screen appears.
5 Press SELECT to remove the check
from the checkbox, then press
u / d / j / i to choose “OK” and press
SELECT.
The lock function is disabled and the display
returns to the function selection screen.
3 Press u / d to choose a menu (System
Setup, Edit function, Recording or
Others) and press SELECT.
The function selection screen appears.
54
Page 56

CHECKING NETWORK SETTINGS
You can check your client’s current network settings
using the following procedure.
If they are incorrect (for example, you cannot access
the server), see the Install Manual, page 25 for
details on how to manually configure the network
settings for your client.
Note
These settings cannot be changed if the client is
locked from the server. To remove the lock, see “To
unlock a client from the server” (page 54).
MCX-3 WD01440
LIBRARY
VOL
MUTE
FAVORITE S
1234
SELECT
PLAY
MENU INPUT
1
INFO.
PAUSE
123
STOP
456
GROUP GROUPPLAY
7S
OFF TIMER ON TIMER
2-6
BOOKMARK
RANDOM
REPEAT
RECALL
1 Press and hold MENU until the Top
Menu screen is displayed.
2 Press u / d to choose “Setup” and
press SELECT.
Top Menu
Edit Bookmark
Setup
4 Press u / d to choose “Status” and
press SELECT.
Network
Status
Auto Configuration
5 Press u / d to choose “IP Address” and
press SELECT.
Status
IP Address
Your client’s network settings are displayed.
IP Address
ID: [ ]
IP: [ 0. 0. 0. 0]
ID The unique ID used to identify your
client on the network.
IP The IP address used by your client.
Press d to display the following:
Msk The subnet mask your client is
operating under.
MAC The MAC address of your client. This
is a unique identification code used by
your client within the MusicCAST
network.
6 When finished, press j to return to the
Top Menu screen.
OPERATIONS
ADVANCED
3 Press u / d to choose “Network” and
press SELECT.
Setup
Contrast
Network
55
Page 57

TROUBLESHOOTING
Refer to the chart below when this unit does not function properly. If the problem you are experiencing is not
listed below or if the instruction below does not help, stop using this unit and disconnect the power cord, then
contact the nearest authorized YAMAHA dealer or service center.
Problem Cause Remedy Refer to
The client does
not output any
sound.
You cannot
start playback
on the client.
Playback from
the client skips.
Playback on the
client skips or
pauses.
The client does
not play back
some songs
displayed in the
song selection
menus.
You cannot
select an
external input
on the server
from the client.
The volume setting of the
client is low.
The speakers are not connected
correctly to the MCX-CA15.
The server is turned off. Turn on the server. —
The server’s hard disk drive
does not contain any songs that
have been completely encoded
to MP3 format.
The song stored on the server
has not yet been converted to
MP3 format.
The network is extremely
congested.
You are using close to the
maximum number of clients
and simultaneously playing,
storing, or editing on the
server.
The server is currently
recording the song selected for
playback.
The server is recording from an
external source.
Increase the volume setting.
Check the connections between
the MCX-CA15 and the speakers.
Wait until the server completes
encoding songs to MP3. Register
songs stored from external
components to the library, or wait
for the MP3 encoding process to
complete.
Wait until the song has been
converted to MP3 format (until
the asterisk (“*”) disappears from
next to the song name).
Place your clients under an
independent subnet mask, or
upgrade your network hardware.
Reduce the number of clients to
which the server is distributing
music simultaneously, or stop any
operation you are performing on
the server.
Wait until the server finishes
encoding the song to MP3. MCX-1000
Wait until the server finishes
recording.
page
18
—
MCX-1000
Owner’s
Manual,
page 21
MCX-1000
Owner’s
Manual,
page 21
—
—
Owner’s
Manual,
page 21
MCX-1000
Owner’s
Manual,
page 26
56
Page 58

TROUBLESHOOTING
Problem Cause Remedy Refer to
None of the
controls other
than the volume
control have
any effect on
the client.
Starting
playback on the
client produces
interference
noise on nearby
radios.
There is a
significant
pause between
playback of
songs on the
client.
You cannot
access a preset
radio station on
a YAMAHA AV
receiver
connected to
your
MusicCAST
system.
Playback cuts
off or switches
to another input
when listening
to a tuner
preset on the
client.
The client is locked from the
server.
The client and the radio are too
close to each other.
This is normal when listening
with the client.
The ANALOG REC LEVEL
on the front panel of the server
is set too low.
The parameters for the AV
receiver connected to the
server are incorrect.
The AV receiver connected to
the server is not turned on.
The AV receiver is not
correctly connected to the
server.
The AV receiver is not
receiving a strong radio signal.
Another MusicCAST
component is changing the
tuner preset or external input
on the server.
Use the server to remove the lock.
Place the client and the radio at
least one meter apart.
Increase the ANALOG REC
LEVEL.
Configure the AV receiver
parameters correctly.
Turn on the AV receiver.
Correctly connect the AV receiver
to the server.
Refer to the owner’s manual of
your AV receiver.
Stop the other MusicCAST
component from changing input
sources.
page
MCX-1000
Owner’s
Manual,
page 94
—
—
MCX-1000
Owner’s
Manual,
page 29
MCX-1000
Owner’s
Manual,
page 122
—
MCX-1000
Owner’s
Manual,
page 13
—
—
INFORMATION
ADDITIONAL
57
Page 59

TROUBLESHOOTING
Problem Cause Remedy Refer to
The STATUS
indicator of the
MCX-CA15 is
flashing rapidly.
The protection circuitry on the
MCX-CA15 has been activated
due to a short circuit, etc.
Check that the speaker wires are
not touching each other.
After checking that all
connections are correct, reset the
client by pressing and holding
on the client for 10 seconds.
page
—
58
Page 60

QUICK MENU REFERENCE
The following chart is a convenient reference guide for finding menus and parameters when you want to
perform an operation on the client in a hurry.
Library
Recall Play
(page 31)
Edit
Bookmark
Setup
Input
(page 41)
Artists
(page 16)
Albums
(page 16)
Genres
(page 16)
All Songs
(page 16)
Playlists
(page 30)
Song Statistics
(page 29)
Bookmarks
(page 33)
External Inputs
(page 46)
Server
Client 1
Client 2
Client 3
Client 4
Client 5
Client 6
Client 7
Copy to Playlist
(page 34)
Clear All
(page 35)
Server
AUDIO IN
Auto
OFF Timer
(page 36)
ON Timer
(page 37)
Auto Play
(page 47)
Auto Level Control
(page 47)
AUDIO OUT
(page 48)
Amplifier
(page 43)
Contrast
(page 50)
Network
(page 55)
System
(pages 52 and 53)
Screen Saver
(page 51)
OFF
30min
60min
90min
120min
OFF/ON
Save
Cancel
OFF
ON
OFF
ON
Variable
Fixed
MCX-IB15
MCX-CA15
RX-V396RDS type
etc.
Status
Auto Configuration
(Install Manual, p24)
Manual Setup
(Install Manual, p25)
Information
System Update
System Reset
OFF
ON
INFORMATION
ADDITIONAL
1
Tone
(page 19)
Treble
Bass
* Client default settings are underlined.
Favorites
(page 28)
Clear FAV1
Clear FAV2
Clear FAV3
Clear FAV4
Clear All
59
Page 61

GLOSSARY
This manual uses a number of terms that, though not specific to the MusicCAST system, are not in general
everyday use. In addition, some terms are used in a slightly unusual context. These words are listed
alphabetically and in context below, along with an explanation of their meaning.
Playback Recording
Album
A collection of songs in the MusicCAST database
assigned to a particular artist, and given a name.
Each album is assigned to an artist. By default, each
CD you store in the server is stored as an Album.
Artist
The item in the MusicCAST database to which
albums are assigned. The artist of any CD you store
in the MusicCAST is stored as the artist to the
corresponding album (see “Album” above).
Bookmark list
A list of songs that have been bookmarked for easy
access. The list can hold up to 999 songs.
Genre
The music type to which the albums stored in the
server are assigned. Examples include Jazz, Rock,
and Classical.
Group
The category which you are operating your
MusicCAST component in. For example, if you
playback an album without selecting a song, then
you are operating within the “Album” category. If
you playback a genre without selecting a song, you
are operating within the “Genre” category.
Library
A group of songs stored on the server by artist,
album, genre etc.
Playlist
A list of your favorite songs that can be accessed by
its grouping. You can store up to ten different groups
and a total of 1,007 playlists.
Song
A single continuous track, equivalent to a single
track from a CD, cassette, or other source, stored on
the server.
MP3 Format
A data format used to store music on the Hard Disk
Drive in the server. MP3 files take roughly one tenth
of the space that PCM files need to store the same
song. However, sound quality is not as good as that
of PCM files, and the server cannot record MP3 files
to a CD-R.
PCM format
A data format used to store music on the hard disk
drive in the server. PCM files provide CD-quality
audio playback but require a lot of space on the hard
disk drive.
60
Page 62

Network connections Hardware
CAT-5 cable
A cable for connecting two components on a Local
Area Network (LAN).
Connections
The links between the components in your
MusicCAST system which allows them to exchange
information. MusicCAST components can make
both wired and wireless connections.
DHCP
A system of automatically assigning IP addresses to
components in a LAN. A server component running
a DHCP service assigns an IP address to
components when they are switched on.
IP address
Four 3 digit numbers that together make up a unique
identity number used by a component connected to a
network.
Network
A network is a collection of electronic components
which share data and resources with one another.
Subnet mask
A number identifying the group within a network to
which a particular component belongs.
TCP/IP
An abbreviation of Transmission Control Protocol/
Internet Protocol, a system of coding information
that allows it to be shared efficiently on a network.
Wired LAN
A network utilizing LAN cables to share data
between components.
CD
An abbreviation of Compact Disc. A small plastic
disc 12 cm (5”) in diameter encoded with prestored
data.
CD-R
An abbreviation of Compact Disc Recordable. A
small plastic disc identical to a CD in appearance,
onto which a device such as the server can record
data. The server can only use Audio type CD-R
media.
CD-RW
An abbreviation of Compact Disc Re-writable.
Client
A MusicCAST system component that retrieves
songs stored on the server for playback.
Controller
The device on the front panel of the server and client
used for entering data and navigating through the
menus contained in these two components.
Front panel
The panel on the server and client on which
operational data is displayed.
Hard disk drive
The component within your server that allows it to
store the audio material from your CDs as data.
Hard disk drive capacity is expressed in megabytes,
with a larger number denoting more storage
capacity.
IR flasher
An emitter that uses infrared signal transmission to
control other components. Connect this device to
either the I/O box or MCX-CA15.
Remote control
A handheld device for operating your MusicCAST
components at a distance.
Server
A MusicCAST system component used to store and
play back songs from CD. Other components in the
MusicCAST system obtain songs stored on the
server.
GLOSSARY
INFORMATION
ADDITIONAL
61
Page 63

GLOSSARY
Software
Menu
A display consisting of a multiple choice style list of
options that you can choose from. Menus are
displayed on the on-screen display of the client and
server.
On-screen display
The LCD display on the client or the display output
to a TV or monitor connected to the server.
YAMAHA AV link
YAMAHA technology that allows you to control the
volume, input selection and tuner preset selection of
a YAMAHA AV receiver using the MCX-C15
remote control.
62
Page 64

SPECIFICATIONS
AUDIO PERFORMANCE
• Frequency response (EIAJ) ..............................................................................................................20 Hz to 20 kHz, ±0.5 dB
• Total harmonic distortion + noise (EIAJ)......................................................................................................................0.008%
• Signal to noise ratio (EIAJ) ........................................................................................................................................... 100 dB
• Dynamic range (EIAJ)..................................................................................................................................................... 98 dB
• Output level (EIAJ) .................................................................................................................................................... 2.0 Vrms
GENERAL
• Playback data format ............................................................................................................................... MP3 and linear PCM
• Power supply ..............................................................................................................................AC 100 V to 240 V, 50/60 Hz
• Power consumption ............................................................................................................................................................ 5 W
• Operation temperature ....................................................................................................................................... +5°C to +35°C
• Dimensions (W x H x D) ..............................................................................120 x 120 x 106 mm (4-3/4” x 4-3/4” x 4-3/16”)
• Weight (without AC adaptor) ........................................................................................................................ 0.6 kg (1 lb 5 oz)
*
The above specifications are subject to change without notice.
*
Values in the “AUDIO PERFORMANCE” section are measured with the I/O box connected.
INFORMATION
ADDITIONAL
63
Page 65

YAMAHA ELECTRONICS CORPORATION, USA 6660 ORANGETHORPE AVE., BUENA PARK, CALIF. 90620, U.S.A.
©
YAMAHA CANADA MUSIC LTD. 135 MILNER AVE., SCARBOROUGH, ONTARIO M1S 3R1, CANADA
YAMAHA ELECTRONIK EUROPA G.m.b.H. SIEMENSSTR. 22-34, 25462 RELLINGEN BEI HAMBURG, F.R. OF GERMANY
YAMAHA ELECTRONIQUE FRANCE S.A. RUE AMBROISE CROIZAT BP70 CROISSY-BEAUBOURG 77312 MARN E-LA-VALLEE CEDEX02, FRANCE
YAMAHA ELECTRONICS (UK) LTD. YAMAHA HOUSE, 200 RICKMANSWORTH ROAD WATFORD, HERTS WD18 7GQ, ENGLAND
YAMAHA SCANDINAVIA A.B. J A WETTERGRENS GATA 1, BOX 30053, 400 43 VÄSTRA FRÖLUNDA, SWEDEN
YAMAHA MUSIC AUSTRALIA PTY, LTD. 17-33 MARKET ST., SOUTH MELBOURNE, 3205 VIC., AUSTRALIA
2004 All rights reserved.
WD28500
Page 66

MCX-C15
Distributed Audio Controller
Unité De Contrôle Audio
CAG
MENU
MCX-C15
VOL
2341
FAVORITES
MODE D’EMPLOI
Page 67

TABLE DES MATIÈRES
INTRODUCTION
INTRODUCTION
PARTICULARITÉS ...............................2
VUE D’ENSEMBLE DU SYSTÈME
MusicCAST..........................................3
Le serveur ................................................. 4
Le client .................................................... 4
L’amplificateur ......................................... 4
ACCESSOIRES FOURNIS....................5
Avant d’utiliser le boîtier de
télécommande....................................... 6
Remplacement de la pile du boîtier de
télécommande....................................... 6
COMMANDES ET FONCTIONS.........7
Face avant................................................. 7
Panneau arrière ......................................... 8
Fond.......................................................... 9
Boîtier de télécommande........................ 10
Afficheur de la face avant....................... 12
ÉCOUTE DES ŒUVRES MUSICALES
MISE EN SERVICE .............................14
FONCTIONS DE BASE .......................15
Utilisation du boîtier de
télécommande..................................... 15
Utilisation du contrôleur de la face
avant ................................................... 15
Écoute d’une œuvre musicale stockée
sur le serveur ...................................... 16
Réglage du niveau sonore....................... 18
Réglage des tonalités .............................. 19
Sélection des indications de temps
affichées ............................................. 20
Lecture répétée ....................................... 20
Lecture au hasard.................................... 21
Lecture d’un groupe ............................... 22
FONCTIONS COMMODES................23
Fonction FAVORITES ........................... 23
Statistiques relatives aux œuvres
musicales ............................................ 29
Utilisation des listes de lecture............... 30
Maintien de lecture ................................. 31
Marquage d’un signet ............................. 33
Programmateur de mise hors service
(Fonction OFF Timer)........................ 36
Programmateur de mise en service
(Fonction ON Timer) ......................... 37
Diffusion générale .................................. 39
ÉCOUTE D’UN APPAREIL
EXTÉRIEUR.....................................41
Écoute d’un appareil relié au
MCX-CA15 ........................................ 41
Écoute d’une station de radio
présélectionnée sur un récepteur
audiovisuel YAMAHA....................... 42
Utilisation de la technique de liaison
YAMAHA AV ................................... 43
Écoute d’un appareil relié au serveur ..... 46
OPÉRATIONS DÉTAILLÉES
OPTIONS DU SYSTÈME....................47
Reprise automatique de la lecture........... 47
Réglage automatique du niveau
sonore ................................................. 47
Choix de la sortie .................................... 48
Veille....................................................... 49
RÉGLAGES D’AFFICHAGE ............. 50
Réglage du contraste de l’afficheur ........50
Économiseur d’écran .............................. 51
RÉGLAGES DU SYSTÈME ............... 52
Vérification des informations relatives
au système .......................................... 52
Rétablissement des valeurs usine............ 53
VÉRIFICATION DES RÉGLAGES
DE RÉSEAU...................................... 55
INFORMATIONS
COMPLÉMENTAIRIES
GUIDE DE DÉPANNAGE .................. 56
STRUCTURE DES MENUS................59
GLOSSAIRE ......................................... 60
Lecture .................................................... 60
Enregistrement ........................................ 60
Connexions au réseau ............................. 61
Matériel................................................... 61
Logiciel ................................................... 62
CARACTÉRISTIQUES
TECHNIQUES..................................63
ÉCOUTE DES
ŒUVRES
OPÉRATIONS
DÉTAILLÉES
COMPLÉMENTAIRIES
INFORMATIONS
1
Page 68

PARTICULARITÉS
Le MusicCAST MCX-C15 Unité De Contrôle Audio (ci-après, “le client”) est conçu pour fonctionner en
association avec le MusicCAST MCX-1000 Serveur Numérique Audio (ci-après, “le serveur”) pour vous
permettre de sauvegarder votre collection d’œuvres musicales puis les écouter. À l’aide de plusieurs clients,
vous et d’autres personnes peuvent avoir accès à la collection d’œuvres musicales à partir de sept endroits
différents de la maison. Le client a été conçu pour vous apporter les possibilités suivantes:
◆ Accès immédiat à toutes les données musicales
sauvegardées sur un serveur MCX-1000
◆ Lecture simultanée à partir d’emplacements
différents (sous réserve d’utiliser plusieurs
clients)
◆ Présentation contemporaine encastrée avec face
avant pouvant être peinte en harmonie avec le
décor intérieur
◆ Écran à cristaux liquides, facile à lire (128 x 32
points)
Quelques mots sur ce mode d’emploi
•Le symbole y appelle votre attention sur un conseil d’utilisation.
• Pour de plus amples détails concernant l’installation du client et la configuration du réseau, reportez-vous
au manuel d’installation fourni.
• Ce mode d’emploi traite de l’usage du boîtier de télécommande pour accéder aux diverses fonctions du
client. Bien que de nombreuses fonctions soient accessibles à partir de la face avant du client, d’autres ne le
sont qu’à partir du boîtier de télécommande.
• Ce mode d’emploi a été imprimé avant la fabrication de l’appareil. Les caractéristiques et la présentation
ont pu être modifiés à fin d’amélioration, etc. En cas de divergence entre le mode d’emploi et l’appareil, ce
dernier prime.
Impression de ce mode d’emploi
Vous pouvez imprimer une copie de ce mode d’emploi à partir du CD-ROM. Avant d’imprimer, assurez-vous
que la définition de la page correspond à celle de l’imprimante. Le format d’impression peut être A4 ou
Lettre, deux formats assurant une lecture facile du texte.
◆ Boîtier de télécommande infrarouge sans fil
◆ Fonctions de répétition, de lecture au hasard, de
marquage par signets et de lecture automatique
◆ Quatre touches FAVORITES auxquelles peuvent
être attribuées vos pièces musicales favorites
◆ Programmateurs de lecture et de mise hors
service
◆ Mode de sélection de sortie pour le niveau
sonore et les tonalités
◆ Liaison audio-vidéo pour la commande intégrée
de récepteurs YAMAHA AV
Cet appareil doit être installé par un technicien compétent, de la manière indiquée dans le manuel
d’installation fourni. Ne tentez pas d’effectuer vous-même l’installation de cet appareil.
2
Page 69

VUE D’ENSEMBLE DU SYSTÈME MusicCAST
Étant donné la diversité des configurations de réseaux locaux (LAN) possibles, chaque membre de la famille
peut aisément stocker, en un lieu central, sa collection d’œuvres musicales à l’aide du système MusicCAST
pour en demander ensuite la lecture dans divers endroits de la maison. Après avoir stocké les données, vous
pouvez prendre plaisir à créer des listes de lecture, à marquer les œuvres de signet, ou à attribuer vos pièces
favorites à quelques touches. Le système MusicCAST comporte un serveur et ses clients, tandis que
l’amplificateur MCX-CA15 en option peut y être relié pour assurer l’alimentation des enceintes et des
appareils extérieurs au système.
Serveur (MCX-1000)
Client (MCX-C15)
Client (MCX-A10)
INTRODUCTION
y
• Vous pouvez combiner un total de sept liaisons câblées et liaisons non câblées, sous réserve que le nombre
de liaison non câblées ne dépasse pas cinq.
• Les réseaux câblés ont l’avantage sur les réseaux non câblés de permettre la transmission de données sur
des distances plus long et à un plus grand nombre de clients. Lorsque le réseau est câblé, le serveur autorise
le fonctionnement simultané en lecture de sept clients.
Remarques
• Le nombre actuel de CD que le serveur peut stocker dépend du format de stockage des œuvres musicales.
Grosso modo, le serveur peut stocker 1.000 CD sur son disque dur de 80 Go si vous choisissez le format
MP3 uniquement, et environ 100 CD si vous optez pour le format PCM.
• Le serveur peut fournir différentes œuvres musicales à plusieurs clients en même temps; le nombre de
clients peut atteindre sept et ils peuvent être reliés par des liaisons câblées et des liaisons non câblées. Si
vous rencontrez des difficultés dans la lecture et en fonction de divers facteurs entrant en jeu tels que le
format de lecture et la puissance du signal du réseau, il peut être nécessaire de réduire le nombre de clients.
• Pour faciliter la lecture, choisissez un taux binaire MP3 faible au moment où vous effectuez le stockage des
œuvres musicales. Reportez-vous à la page 121 du mode d’emploi du MCX-1000, “Choix du format de
stockage des données sur le serveur MusicCAST”.
3
Page 70

VUE D’ENSEMBLE DU SYSTÈME MusicCAST
Le serveur
MCX-1000 Serveur Numérique Audio
Sur son disque dur, le serveur peut stocker les données d’environ 1.000 CD au format MP3 ou de 100 CD au
format PCM; ses données peuvent ensuite être lues par le serveur ou les clients reliés. Pour chaque CD, le
serveur stocke automatiquement le nom de l’œuvre, celui de l’interprète et celui de l’album, ainsi que des
informations sur le genre musical, ce qui facilite l’accès ultérieur à l’œuvre sans qu’il soit nécessaire de saisir
manuellement des données. Après avoir été stockées, les œuvres musicales peuvent être sélectionnées,
classées et lues de différentes manières simples et rapides. Le serveur peut fournir différents œuvres
musicales à plusieurs clients en même temps, ainsi que fournir à un client unique des œuvres musicales au
format PCM linéaire.
Le client
MCX-C15
MENU
VOL
2341
FAVORITES
MCX-C15 Unité De Contrôle Audio
(modèle câblé)
MCX-A10 Récepteur Numérique Audio
(modèle non câblé ou câblé)
Les clients ne stockent pas, ni n’enregistrent, les données musicales. Ils assurent la connexion au serveur pour
la récupération des données musicales stockées. Cela autorise donc d’installer un serveur dans le salon et des
clients dans votre chambre et celles de vos enfants, et d’écouter les œuvres musicales stockées sur le serveur
à partir de chacun de ces emplacements. Le client assure la sélection, le classement et la la lecture des œuvres
musicales de différentes manières, tout comme le serveur.
L’amplificateur
MCX-CA15
AUDIO OUT SW OUT
IR/CTRL
AUDIO IN
VIDEO OUT
DC IN 12V
STATUS
MCX-CA15 Unité D’Amplification
Le MCX-CA15 Unité D’Amplification peut fonctionner comme un amplificateur indépendant faisant partie
de la chaîne audio existante, ou bien être associé au client pour compléter le système MusicCAST. Lorsqu’il
est associé à un MCX-C15, le MCX-CA15 fonctionne comme un amplificateur de puissance et une source de
courant continu. Il alimente les enceintes reliées et permet l’affichage sur l’écran du téléviseur ou du
moniteur (OSD) connectés au MCX-C15 des informations fournis par ce dernier. Le MCX-CA15 peut être
entièrement commandé à partir du MCX-C15.
4
Page 71

ACCESSOIRES FOURNIS
Après déballage du matériel, veuillez vous assurer que vous possédez bien les postes suivants.
Boîtier de
télécommande
LIBRARY
VOL
MUTE
FAVORITES
1234
SELECT
BOOKMARK
PLAY
MENU INPUT
INFO.
PAUSE
RANDOM
123
STOP
REPEAT
456
GROUP GROUPPLAY
RECALL
7S
OFF TIMER ON TIMER
Boîte d’entrée/sortie
(MCX-IB15)
VIDEO OUT IR OUT
AUDIO OUT
AV IN
MCX-IB15
DC OUT
+12V +12VGND GND
+12V 20mA MAX
DC IN 12V
CONTROL OUT
Entretoise x 4
Manuel de référence
UB
MCX-C15
Distributed Audio Controller
MCX-C15
MENU
VOL
2341
FAVORITES
QUICK MANUAL
CD-ROM de mise à jour
(MusicCAST Software
Version Up Disc Vol. 2.1
Including MCX-C15
Connectivity)
Adaptateur secteur
(LSE0215C1240)
Manuel d’installation
MCX-C15
Distributed Audio Controller
MCX-CA15
Distributed Audio Amplifier
INSTALL MANUAL
ATTENTION:
These units must be installed by a qualified
technician. Do not attempt to install these
units yourself.
CD-ROM du mode d’emploi
(ce document)
Cordon d’alimentation (1,6 m)
INTRODUCTION
UB
Cordon d’alimentation
continue (2 m) x 2
Câble CAT-5 (droit, 2 m)
Remarques
• Des pièces complémentaires peuvent être nécessaires selon la méthode d’installation retenue.
• Le CD-ROM du mode d’emploi contient, au format .pdf, le mode d’emploi du MCX-C15
(C15_Manual_F.pdf) et le document Version Upgrade Manual Vol. 2 (version anglaise)
(VersionUp_Manual_E.pdf). Pour de plus amples détails concernant les fonctions du MCX-C15, reportezvous au mode d’emploi PDF du MCX-C15. Pour de plus amples détails concernant les fonctions mises à
jour des MCX-1000 Serveur Numérique Audio et MCX-A10 Récepteur Numérique Audio, reportez-vous
au document PDF Version Upgrade Manual Vol. 2.
5
Page 72

ACCESSOIRES FOURNIS
Avant d’utiliser le boîtier de télécommande
Au moment de sa sortie d’usine, une mince feuille de
plastique est intercalée entre la pile et les circuits du
boîtier de télécommande pour empêcher son
fonctionnement. Vous devez retirer cette feuille pour
que le boîtier de télécommande puisse être utiliser.
Remplacement de la pile du boîtier de télécommande
Lorsque vous constatez que le boîtier de télécommande
doit être approché de la face avant pour qu’une action
soit possible, cela signifie que la pile est usagée.
Remplacez alors la pile par une pile neuve.
■ Remarques sur les piles au lithium
Veuillez respecter les instructions suivantes pour
éviter de faire exploser la pile au lithium.
• Utilisez une pile CR2025.
• Ne rechargez pas la pile.
• Ne démontez pas la pile; utilisez-la comme il
convient.
• Respectez soigneusement les polarités au
moment du remplacement. L’inversion des
polarités peut provoquer un incendie ou une
explosion.
• Évitez de conserver une pile au lithium, et le
boîtier de télécommande contenant sa pile au
lithium, dans un endroit très chaud, par exemple
dans la lumière directe du soleil.
• Conservez la pile hors de portée des enfants. En
cas d’ingestion de la pile, consultez
immédiatement un médecin.
• Si la pile fuit, mettez-la immédiatement au rebut.
Évitez de toucher l’électrolyte et de le mettre en
contact avec un vêtement, etc. Son contact avec
la peau peut provoquer des brûlures. En cas de
contact, lavez soigneusement la partie touchée à
l’eau courante et consultez un médecin.
• Entourez la pile d’un ruban, etc., avant de la
mettre au rebut. Ne la jetez pas dans une flamme
vive. Mettez la pile au rebut conformément à la
réglementation locale.
1 Faites glisser le porte-pile hors du
boîtier en vous aidant d’un objet pointu
(par exemple un stylo à bille) introduit
dans le perçage.
2 Retirez la pile usagée et introduisez la
pile neuve en veillant à ce que le pôle
positif “+” soit tourné vers le haut.
3 Replacez le porte-pile dans le boîtier de
télécommande.
Remarque
Le boîtier est très rigide et une force assez importante
peut être requise pour dégager le porte-pile.
6
Page 73

Face avant
1
2
3
4
5
COMMANDES ET FONCTIONS
MCX-C15
MENU
VOL
2341
FAVORITES
INTRODUCTION
6
7
8
9
1 Afficheur de la face avant
Il fournit des informations sur les réglages du client
et sur les œuvres musicales.
2 p / s (lecture/arrêt)
Ces touches commandent la lecture et l’arrêt de la
lecture de œuvre musicale choisie.
3 MENU
Chaque pression sur cette touche affiche
alternativement la page de Menu ou la plage Play
Info (reportez-vous à la page 12).
Deux pressions successives sur cette touche
affichent l’horloge sur la face avant.
Une pression prolongée sur cette touche affiche la
page Top Menu.
4 Témoin TIMER
Ce témoin s’éclaire lorsque le programmateur de
mise en service ou hors service est actif (reportezvous aux pages 36 et 37).
5 Touch e
Elle met le client en service ou en veille.
Maintenez la pression d’un doigt sur cette touche
pendant 10 secondes pour réinitialiser le système.
6 Contrôleur
Elles déplacent le curseur sur l’écran et valident une
sélection effectuée sur la page affichée.
7 VOL – / VOL +
Ces touches diminuent ou augmentent le niveau
sonore émis par le client.
8 Capteur des signaux de télécommande
Il reçoit les signaux infrarouges émis par le boîtier
de télécommande.
9 FAVORITES (1 à 4)
Utilisez ces 4 touches pour accéder immédiatement
aux œuvres favorites (reportez-vous à la page 23).
7
Page 74

COMMANDES ET FONCTIONS
Panneau arrière
1
VIDEO OUT
DC IN
GND +12V
2
3
1 Prise VIDEO OUT
Reliez cette prise à la prise d’entrée vidéo du
téléviseur ou du moniteur pour y faire apparaître les
informations existant sur l’afficheur de la face avant
du client.
2 Prise +12V
Le cordon d’alimentation continue doit être relié à
cette prise au cours de l’installation réalisée par un
technicien compétent.
3 Prise GND
Cette prise doit être reliée à la terre au cours de
l’installation réalisée par un technicien compétent.
8
Page 75

COMMANDES ET FONCTIONS
INTRODUCTION
Fond
12
LANAV OUT
1 Prise AV OUT
Reliez cette prise à la boîte d’entrée/sortie ou au
MCX-CA15 au moyen du câble (droit) CAT-5
fourni.
2 Prise LAN
Reliez cette prise au réseau au moyen d’un câble
(droit) CAT-5 disponible dans le commerce.
9
Page 76

COMMANDES ET FONCTIONS
Boîtier de télécommande
1
MCX-3 WD01440
2
3
4
5
6
7
8
9
0
1 Émetteur infrarouge
Il émet les signaux infrarouges à destination du
client. Dirigez cet émetteur vers le client à régler.
2 LIBRARY
Utilisez cette touche pour accéder aux œuvres
musicales stockées sur le serveur en faisant
référence à l’interprète, à l’album, au genre musical,
etc.
3 MUTE
Cette touche coupe les sons émis par le client.
4 FAVORITES (1 à 4)
Utilisez ces 4 touches pour accéder immédiatement
aux œuvres favorites (reportez-vous à la page 23).
LIBRARY
VOL
MUTE
FAVORI TE S
1234
SELECT
PLAY
MENU INPUT
INFO.
PAUSE
123
STOP
456
GROUP GROUPPLAY
7S
OFF TIMER ON TIMER
BOOKMARK
RANDOM
REPEAT
RECALL
A
B
C
D
E
F
G
H
5 Touches de déplacement du curseur
u / d / j / i / SELECT
Elles déplacent le curseur sur l’écran et valident une
sélection effectuée sur la page affichée.
6 PLAY INFO.
Cette touche affiche la page Play Info sur l’écran
(reportez-vous à la page 12).
7 MENU
Cette touche affiche la page Menu lorsque la page
Play Info est affichée (reportez-vous à la page 12).
Deux pressions successives sur cette touche
affichent l’horloge sur la face avant.
Une pression prolongée sur cette touche affiche la
page Top Menu.
8 Touches de commande de lecture
b / a
Ces touches donnent accès à l’œuvre musicale
précédente ou suivante du groupe d’œuvres
musicales concerné.
e (PAUSE)
Cette touche arrête momentanément la lecture
au niveau du client.
w / f
Ces touches permettent la recherche d’un
passage, vers le début ou vers la fin de l’œuvre
musicale que vous écoutez.
s (STOP)
Cette touche arrête la lecture au niveau du
client.
p (PLAY)
Cette touche commande la lecture de l’œuvre
musicale sélectionnée.
9 – (GROUP) / + (GROUP)
Ces touches donnent accès au groupe d’œuvres
musicales précédent ou suivant.
0 OFF TIMER
Cette touche met en service le programmateur de
mise hors service (reportez-vous à la page 36).
Appuyez de manière répétée sur cette touche pour
accéder aux divers réglages du programmateur.
10
Page 77

A Touche
Elle met le client en service ou en veille.
B VOL – / VOL +
Ces touches diminuent ou augmentent le niveau
sonore émis par le client.
C INPUT
Cette touche sélectionne la source pour le client
lorsque la fonction de liaison audio-vidéo est
utilisée.
D BOOKMARK
Cette touche attribue un signet à une œuvre
musicale, ou le lui retire (reportez-vous à la
page 33).
E RANDOM
Cette touche met en service ou hors service la
lecture au hasard (reportez-vous à la page 21).
F REPEAT
Cette touche met en service ou hors service la
lecture répétée (reportez-vous à la page 20).
G RECALL
Cette touche commande le rappel de lecture
(reportez-vous à la page 31).
H ON TIMER
Cette touche met en service le programmateur de
mise hors service (reportez-vous à la page 37).
COMMANDES ET FONCTIONS
INTRODUCTION
11
Page 78

COMMANDES ET FONCTIONS
Afficheur de la face avant
L’afficheur de la face avant vous donne accès à
toutes les fonctions et à tous les paramètres du
client.
y
Vous pouvez également dirigez les informations qui
apparaissent sur l’afficheur de la face avant du client
vers le téléviseur ou le moniteur en reliant l’un ou
l’autre à la prise VIDEO OUT (reportez-vous à la
page 8).
■ Écran Menu
6345
1
Library
2
Artists
Albums
Appuyez sur MENU, sur le boîtier de
télécommande ou sur la face avant, pour afficher les
éléments des menus.
MENU
Boîtier de
télécommande
ou
1 Ligne supérieure
Le nom du menu auquel vous avez accédé, s’affiche
ici.
2 Curseur
Il repère le menu actuellement sélectionné.
3 Icône de verrouillage
Vous avez la possibilité, à partir du serveur, de
verrouiller les clients de manière que seuls le niveau
sonore et le silencieux demeurent accessibles à leur
niveau. Lorsque le client est verrouillé, l’icône de
verrouillage s’affiche sur la ligne supérieure. Vous
pouvez déverrouiller un client à partir du serveur
(reportez-vous à la page 94 du mode d’emploi du
MCX-1000).
4 Icône de lecture
Elle indique qu’un signal de lecture est reçu en
provenance d’une source extérieure (qui peut être le
syntoniseur) reliée au serveur.
MENU
Face avant
7
5 Icône du silencieux
Il signale que le client est muet.
6 Icône de connexion au réseau
Elle indique que le client est actuellement connecté
au serveur.
7 Zone d’affichage des éléments de menu
Le contenu du menu auquel vous avez accédé,
s’affiche ici.
■ Écran Play Info
4 5 6
1
-00:00
2
Album / Artist
3
Song
Appuyez sur PLAY INFO., sur le boîtier de
télécommande, ou sur MENU, sur la face avant,
pour afficher les informations concernant l’œuvre
musicale que le client restitue actuellement, ou
celles concernant la dernière œuvre musicale si le
client ne restitue aucune œuvre actuellement.
PLAY
INFO.
Boîtier de
télécommande
ou
MENU
Face avant
1 Compteur de temps
Il affiche le temps écoulé depuis le début de la
lecture de l’œuvre musicale, ou le temps restant
avant la fin de la lecture (reportez-vous à la
page 20).
2 Nom de l’album ou de l’interprète
Le nom de l’album ou de l’interprète de l’œuvre en
cours de lecture, s’affiche ici.
3 Nom de l’œuvre
Le nom de l’œuvre musicale en cours de lecture
s’affiche ici.
12
Page 79

4 Icône d’action présente
Elle indique l’action exécutée actuellement par le
client.
s : La lecture est arrêtée.
p : Une œuvre musicale est en cours de lecture.
e : La lecture est interrompue.
5 Icône de lecture répétée
Elle indique que le client est en mode de lecture
répétée (reportez-vous à la page 20).
6 Icône de lecture au hasard
Elle indique que le client est en mode de lecture au
hasard (reportez-vous à la page 21).
COMMANDES ET FONCTIONS
INTRODUCTION
13
Page 80

MISE EN SERVICE
Avant de pouvoir utiliser le client pour la première
fois, vous devez effectuer la mise à jour du système
MusicCAST et procéder aux réglages convenables
du réseau. Pour de plus amples détails concernant
les réglages du réseau, reportez-vous aux sections
“AVANT D’UTILISER LE SYSTÈME
MusicCAST” et “CONFIGURATION DU
CLIENT” du manuel d’installation fourni.
Lorsque le client est prêt à fonctionner, mettez-le en
service.
Le client possède deux modes de fonctionnement:
On Le client est relié à une alimentation
et il est en fonctionnement.
Sleep Le client est relié à une alimentation
mais ne fonctionne qu’au moment
où vous le lui demandez et au
moment où il reçoit un signal
infrarouge émis par le boîtier de
télécommande.
MCX-3 WD01440
LIBRARY
VOL
MUTE
FAVORITE S
1234
SELECT
PLAY
MENU INPUT
INFO.
PAUSE
123
STOP
456
GROUP GROUPPLAY
7S
OFF TIMER ON TIMER
1
BOOKMARK
RANDOM
REPEAT
RECALL
Avant d’aller plus loin assurez-vous que le
serveur MCX-1000 est en service.
1 Appuyez sur , sur le boîtier de
télécommande ou sur la face avant.
Le client se met en service et la page
MusicCAST Startup s’affiche.
2 Le client tente de se connecter au
serveur et la page suivante s’affiche.
Connecting...
3 Si le client peut effectuer une
connexion, la page Top Menu s’affiche
et l’icône de connexion au réseau
apparaît dans le coin supérieur droite de
l’afficheur.
Top Menu
Library
Recall Play
Icône de connexion
au réseau
14
Si le client est incapable de se connecter au
ou
réseau, il affiche le message “Connecting...” de
manière permanente. Appuyez alors sur une
touche quelconque du client pour abandonner la
connexion et assurez-vous que les réglages de
connexion au réseau du client sont corrects
(reportez-vous à la page 55).
MCX-C15
MENU
1
2341
FAVORITES
VOL
Remarque
Si aucune opération n’est réalisée pendant 30
minutes, le client passe automatiquement en veille.
Appuyez sur SELECT ou sur pour remettre en
service le client.
Page 81

FONCTIONS DE BASE
Utilisation du boîtier de télécommande
Le boîtier de télécommande émet un faisceau
infrarouge étroit. Veillez à pointez le boîtier de
télécommande vers le capteur de signaux de
télécommande placé sur la face avant.
MCX-C15
MENU
■ Manipulation du boîtier de
télécommande
• Ne renversez aucun liquide sur le boîtier de
télécommande.
• Ne laissez pas tomber le boîtier de
télécommande.
• Ne conservez pas, ne rangez pas le boîtier de
télécommande dans les endroits suivants:
– très humides, par exemple près d’un bain
– très chauds, par exemple près d’un appareil
de chauffage ou d’un poêle
– extrêmement froids
– poussiéreux
PRÉCAUTIONS
• Si le boîtier de télécommande provoque le
fonctionnement d’un autre appareil, changez
l’emplacement de cet autre appareil.
•
Veillez à ce que le capteur de signaux de
télécommande ne soit pas exposé à la lumière
directe du soleil, ou d’un éclairage puissant.
Dans cette situation, le fonctionnement du boîtier
de télécommande peut être fortement perturbé.
2341
FAVORITE S
30
VOL
LIBRARY
MUTE
1234
MENU INPUT
123
456
GROUP GROUPPLAY
7S
À moins de 7 m du
capteur de signaux
de télécommande
30
VOL
FAVORITES
SELECT
BOOKMARK
PLAY
INFO.
PAUSE
RANDOM
STOP
REPEAT
RECALL
OFF TIMERON TIMER
Utilisation du contrôleur de la face avant
Déplacer le contrôleur dans les directions indiquées
sur la face avant du client, provoque les mêmes
effets qu’appuyer sur les touches correspondantes
du boîtier de télécommande. À titre d’exemple,
pousser le contrôleur vers le haut produit le même
résultat qu’appuyer sur la touche u du boîtier de
télécommande. Appuyer tout droit sur le contrôleur,
a le même effet qu’appuyer sur la touche SELECT
du boîtier de télécommande.
MCX-C15
MENU
2341
FAVORITES
VOL
ÉCOUTE DES
ŒUVRES
Contrôleur
15
Page 82

FONCTIONS DE BASE
Écoute d’une œuvre musicale stockée sur le serveur
Deux types de fichier peuvent être restitués par le
client: MP3 (MPEG-1 Audio Layer 3) et PCM
(Pulse Code Modulation).
Les fichiers MP3 occupent peu de place, ce qui
permet de stocker environ 1 000 CD sur le serveur.
Les fichiers PCM produisent des sons de meilleure
qualité mais occupent plus de place. En utilisant le
format PCM, vous pouvez stocker environ 100 CD.
Le client affiche un astérisque “*” en regard des
œuvres musicales stockées dans ce format. Lorsque
le serveur distribue des fichiers PCM, vous ne
pouvez restituer des fichiers PCM qu’au moyen
d’un seul serveur à la fois. Pour de plus amples
détails concernant cette question, reportez-vous à la
page 125 du mode d’emploi du MCX-1000.
■ Groupes de lecture
Le client recherche les œuvres musicales stockées
sur le serveur et les restitue. Vous pouvez lui
demander de reproduire les œuvres d’un même
interprète, d’un même album, ou appartenant au
même genre; ou bien, de jouer les œuvres au hasard,
ou seulement celles qui appartiennent à une liste ou
un groupe préalablement définis. Les groupes de
lecture dépendent de vos sélections. À titre
d’exemple, le fait de choisir un album sur le menu
“Albums”, entraîne que les albums deviennent les
groupes de lecture. Par ailleurs, vous pouvez
demander à ce que les groupes soient joués sans
interruption (page 20), ou à ce que les œuvres
musicales d’un groupe de lecture soient jouées au
hasard (page 21), ou encore à ce que soient jouées
toutes les œuvres du groupe sélectionné (page 22).
Les opérations ci-dessous montrent comment
accéder à une œuvre classée dans la catégorie
“Artists”, mais peuvent être employées pour les
catégories suivantes:
Artists Recherche d’une œuvre par
l’interprète.
Albums Recherche d’une œuvre par
l’album.
Genres Recherche d’une œuvre par le
genre musical.
All Songs Affichage de toutes les œuvres
stockées, par ordre
alphabétique.
Playlists Affichage de toutes les listes
de lecture en mémoire.
Song Statistics Affichage des statistiques
relatives aux œuvres musicales
qui ont été jouées.
Bookmarks
Affichage des œuvres musicales
marquées par un signet.
External Inputs
Sélection d’une source optique,
coaxiale ou analogique reliée
au serveur ou d’un récepteur
audiovisuel relié au serveur.
MCX-3 WD01440
LIBRARY
VOL
MUTE
FAVORITE S
1234
4-6
SELECT
PLAY
MENU INPUT
1
INFO.
PAUSE
123
STOP
456
GROUP GROUPPLAY
7S
OFF TIMER ON TIMER
2-7
BOOKMARK
RANDOM
REPEAT
RECALL
16
1 Maintenez la pression d’un doigt sur
MENU jusqu’à ce que la page Top Menu
s’affiche.
2 Appuyez sur u / d pour sélectionner
“Library” puis appuyez sur SELECT.
Top Menu
Library
Recall Play
Page 83

FONCTIONS DE BASE
3 Appuyez sur u / d pour sélectionner
“Artists” puis appuyez sur SELECT.
Library
Artists
Albums
4 Appuyez sur u / d pour sélectionner un
interprète.
Appuyez sur SELECT pour afficher tous les
albums de l’interprète.
Appuyez sur p pour commencer la lecture,
dans l’ordre alphabétique, de toutes les œuvres
musicales de l’interprète sélectionné.
Artists
Bon Jovi
Bruce Springsteen
5 Appuyez sur u / d pour sélectionner le
nom de l’album que vous désirez
écouter.
Appuyez sur SELECT pour afficher la liste des
œuvres que contient l’album.
Appuyez sur p pour commencer la lecture de
la totalité de l’album.
Artists-Albums
Born To Run
Darkness On The Edge O
6 Appuyez sur u / d pour sélectionner
une œuvre musicale donnée puis
appuyez sur SELECT ou sur p pour en
commencer la lecture.
Artists-Songs
Thunder Road
Tenth Avenue Freeze Ou
7 Appuyez sur j pour revenir à la page
List.
y
Lorsque la lecture est terminée, le client passe à
l’œuvre musicale suivante stockée dans la catégorie
sélectionnée.
■ Pour arrêter la lecture
Appuyez sur s.
STOP
5
Boîtier de
télécommande
■ Pour interrompre la lecture
Appuyez sur e. Appuyez une nouvelle fois sur e
pour reprendre la lecture.
■ Pour rechercher un passage au sein
d’une œuvre musicale
Appuyez sur f pour effectuer la recherche vers
la fin de l’œuvre tandis qu’elle est en cours de
lecture. Pour effectuer la recherche vers le début,
appuyez sur w. Ces touches ne permettent pas
d’effectuer une recherche au-delà du début ou de la
fin de l’œuvre musicale.
Le client n’émet aucun son tandis que vous appuyez
sur f ou sur w. Cela est normal.
4
Boîtier de
télécommande
ou
PAUS E
2
Boîtier de
télécommande
et
télécommande
Face avant
6
Boîtier de
ÉCOUTE DES
ŒUVRES
00:06
Born To Run / Bruce Spr
Tenth Avenue Freeze O
17
Page 84

FONCTIONS DE BASE
■ Pour accéder aux œuvres
musicales
La lecture reprend au début de l’œuvre musicale
suivante chaque fois que vous appuyez sur a.
Pour revenir au début de l’œuvre musicale en cours
de lecture, appuyez une fois sur b. Pour
atteindre le début le l’œuvre musicale précédente,
appuyez deux fois sur b. Vous ne pouvez pas
passer à d’autres œuvres musicales lorsque la
lecture est interrompue ou arrêtée.
1 3
Boîtier de
télécommande
et
Boîtier de
télécommande
■ Pour accéder aux groupes de
lecture
Appuyez sur + (GROUP) pour accéder à l’œuvre
musicale suivante du groupe de lecture (reportezvous à “Groupes de lecture”, page 16). Appuyez sur
– (GROUP) pour accéder à l’œuvre musicale
précédente. Si un groupe de lecture ne contient
qu’un élément, une pression sur – (GROUP) /
+ (GROUP) n’a aucun effet.
GROUP
7
et
GROUP
S
Réglage du niveau sonore
Utilisez la méthode suivante pour augmenter ou
diminuer le niveau sonore de sortie du client.
MCX-3 WD01440
LIBRARY
VOL
MUTE
1234
MENU INPUT
GROUP GROUPPLAY
MENU
FAVORITE S
SELECT
BOOKMARK
PLAY
INFO.
PAUSE
123
STOP
456
7S
OFF TIMER ON TIMER
ou
2341
FAVORITES
RANDOM
REPEAT
RECALL
MCX-C15
VOL
Touches
VOL – / VOL +
Touches
VOL – /
VOL +
Boîtier de
télécommande
Boîtier de
télécommande
■ Pour afficher les informations sur
les œuvres musicales
Appuyez sur PLAY INFO. pendant la lecture pour
afficher la page Play Info.
PLAY
INFO.
Boîtier de
télécommande
18
Appuyez sur VOL + ou sur VOL – pour
augmenter ou diminuer le niveau sonore.
Le niveau sonore est modifié.
Remarque
Vous pouvez agir sur le niveau de sortie des
amplificateurs audiovisuels YAMAHA répertoriés,
via un dispositif infrarouge, au moyen du boîtier de
télécommande du client. Pour de plus amples
détails, reportez-vous à la page 43.
Page 85

FONCTIONS DE BASE
Réglage des tonalités
Vous pouvez régler les tonalités des sons émis par le
client. Vous pouvez modifier les réglages pour
accentuer les graves ou les aigus.
MCX-3 WD01440
LIBRARY
VOL
MUTE
FAVORITE S
1234
SELECT
PLAY
MENU INPUT
1
INFO.
PAUSE
123
STOP
456
GROUP GROUPPLAY
7S
OFF TIMER ON TIMER
1 Maintenez la pression d’un doigt sur
MENU jusqu’à ce que la page Top Menu
s’affiche.
2 Appuyez sur u / d pour sélectionner
“Tone” puis appuyez sur SELECT.
Top Menu
Input
Tone
2-4
BOOKMARK
RANDOM
REPEAT
RECALL
4 Appuyez sur i pour augmenter la valeur,
et appuyez sur j pour diminuer la valeur.
Appuyez sur SELECT ou MENU pour valider
la valeur adoptée et revenir à la page Tone.
Treble
0.0dB
Bass
0.0dB
ÉCOUTE DES
ŒUVRES
3 Appuyez sur u / d pour sélectionner
“Treble” ou “Bass” puis appuyez sur
SELECT.
Tone
Treble
Bass
Tre ble Pour régler les aigus émis par le
client.
Bass Pour régler les graves émis par le
client.
19
Page 86

FONCTIONS DE BASE
Sélection des indications de temps affichées
Vous pouvez afficher sur la page Play Info le temps
écoulé depuis le début de l’œuvre musicale en cours
de lecture, ou le temps restant avant la fin de
l’œuvre.
MCX-3 WD01440
LIBRARY
VOL
MUTE
FAVORITE S
1234
SELECT
1
PLAY
MENU INPUT
INFO.
PAUSE
123
STOP
456
GROUP GROUPPLAY
7S
OFF TIMER ON TIMER
1 Pendant la lecture, appuyez sur PLAY
INFO. pour afficher la page Play Info
puis appuyez sur i .
00:06
Born To Run / Bruce Spr
Tenth Avenue Freeze O
2 Appuyez sur u / d pour sélectionner
“Time” puis appuyez sur SELECT.
1-5
BOOKMARK
RANDOM
REPEAT
RECALL
Lecture répétée
La lecture répétée peut concerner une œuvre
musicale ou toutes les œuvres musicales d’un groupe
de lecture. Pour de plus amples détails concernant les
groupes de lecture, reportez-vous à la page 16.
■
Utilisation du boîtier de télécommande
MCX-3 WD01440
LIBRARY
VOL
MUTE
FAVORITE S
1234
SELECT
1
MENU INPUT
GROUP GROUPPLAY
1 Pendant la lecture, appuyez sur PLAY
INFO. pour afficher la page Play Info.
2
Appuyez de manière répétée sur REPEAT pour
accéder aux différentes lectures répétées.
Lorsque vous adoptez la lecture répétée, le
témoin de lecture répétée apparaît sur la ligne
supérieure de l’afficheur de la face avant.
BOOKMARK
PLAY
INFO.
PAUSE
RANDOM
123
STOP
REPEAT
456
RECALL
7S
OFF TIMER ON TIMER
REPEAT
2
Group
Bookmark
Time
SINGLE
OFF
ELAP
3 Appuyez sur u / d pour sélectionner le
temps à afficher.
ELAP Pour afficher le temps écoulé depuis
le début de l’œuvre musicale.
REM Pour afficher le temps restant avant la
fin de l’œuvre musicale.
4 Appuyez sur SELECT pour valider.
5 Appuyez sur j pour revenir à la page
Play Info.
20
Témoin de lecture répétée
00:06
Born To Run / Bruce Spr
Tenth Avenue Freeze O
Chaque pression sur REPEAT, modifie comme
suit le témoin de lecture répétée:
/ ALL Lecture répétée de toutes les
œuvres musicales du groupe
actuellement sélectionné.
/ SINGLE
(pas d’icône) / Arrêt de la lecture répétée.
OFF
Lecture répétée de l’œuvre
musicale actuellement sélectionnée.
Page 87

FONCTIONS DE BASE
■ Utilisation des commandes de la
face avant
MCX-C15
1
MENU
2341
FAVORITES
VOL
1-5
1 Pendant la lecture, appuyez sur MENU
pour afficher la page Play Info puis
déplacez le contrôleur vers i .
00:06
Born To Run / Bruce Spr
Tenth Avenue Freeze O
2 Déplacez le contrôleur vers u ou d
pour sélectionner “Repeat” puis
appuyez sur SELECT.
Repeat
Random
Group
OFF
OFF
ALL
3 Déplacez le contrôleur vers u ou d
pour sélectionner “ALL”, “SINGLE” ou
“OFF”.
Lecture au hasard
La lecture au hasard concerne les œuvres musicales
du groupe de lecture sélectionné.
y
Pour sélectionner un groupe de lecture, appuyez sur
p au cours de l’opération 4 ou 5 du paragraphe
“Écoute d’une œuvre musicale stockée sur le
serveur” (page 16).
■ Utilisation du boîtier de
télécommande
MCX-3 WD01440
LIBRARY
VOL
MUTE
FAVORITE S
1234
SELECT
1
MENU INPUT
GROUP GROUPPLAY
1 Pendant la lecture, appuyez sur PLAY
INFO. pour afficher la page Play Info.
2 Appuyez de manière répétée sur
RANDOM pour choisir, ou non, la
lecture au hasard.
Lorsque vous adoptez la lecture au hasard, le
témoin de lecture au hasard apparaît sur la ligne
supérieure de l’afficheur de la face avant.
RANDOM
BOOKMARK
PLAY
INFO.
RANDOM
PAUSE
123
STOP
REPEAT
456
RECALL
7S
OFF TIMER ON TIMER
2
ÉCOUTE DES
ŒUVRES
4 Appuyez sur SELECT pour valider.
5 Déplacez le contrôleur vers j pour
revenir à la page Play Info.
Témoin de lecture au hasard
00:06
Born To Run / Bruce Spr
Tenth Avenue Freeze O
21
Page 88

FONCTIONS DE BASE
■ Utilisation des commandes de la
face avant
MCX-C15
1
MENU
2341
FAVORITES
VOL
1-5
1 Pendant la lecture, appuyez sur MENU
pour afficher la page Play Info puis
déplacez le contrôleur vers i .
00:06
Born To Run / Bruce Spr
Tenth Avenue Freeze O
2 Déplacez le contrôleur vers u ou d
pour sélectionner “Random” puis
appuyez sur SELECT.
Repeat
Random
Group
OFF
OFF
ALL
3 Déplacez le contrôleur vers u ou d
pour sélectionner “ON” ou “OFF”.
ON La lecture au hasard est adoptée
OFF La lecture au hasard n’est plus
adoptée
4 Appuyez sur SELECT pour valider.
5 Déplacez le contrôleur vers j pour
revenir à la page Play Info.
Lecture d’un groupe
Après avoir opté pour la lecture normale, la lecture répétée
(page 20) ou la lecture au hasard (page 21), vous pouvez
définir l’étendue des œuvres musicales concernées.
MCX-3 WD01440
LIBRARY
VOL
MUTE
FAVORITE S
1234
SELECT
1
PLAY
MENU INPUT
INFO.
PAUSE
123
STOP
456
GROUP GROUPPLAY
7S
OFF TIMER ON TIMER
1 Pendant la lecture, appuyez sur PLAY
INFO. pour afficher la page Play Info
puis appuyez sur i .
00:06
Born To Run / Bruce Spr
Tenth Avenue Freeze O
2 Appuyez sur u / d pour sélectionner
“Group” puis appuyez sur SELECT.
Repeat
Random
Group
3 Appuyez sur u / d pour sélectionner
“SINGLE” ou “ALL”.
SINGLE Toutes les œuvres musicales du
groupe (album, interprète ou genre
musical) actuellement sélectionné
sont jouées.
ALL
Toutes les œuvres musicales du groupe
(album, interprète ou genre musical)
actuellement sélectionné sont jouées
puis c’est au tour du groupe suivant.
1-5
BOOKMARK
RANDOM
REPEAT
RECALL
OFF
OFF
SINGLE
22
4 Appuyez sur SELECT pour valider.
5 Appuyez sur j pour revenir à la page
Play Info.
Page 89

FONCTIONS COMMODES
Fonction FAVORITES
Les touches FAVORITES (1 à 4) vous donnent le
moyen d’accéder instantanément à la lecture de vos
œuvres préférées. Chaque touche FAVORITES peut
être employée d’une des cinq manières suivantes:
Méthode 1:
Pour attribuer la lecture des œuvres musicales
stockées dans la catégorie du serveur (page 23).
Méthode 2:
Pour sélectionner comme source l’émission de radio
captée par le récepteur audiovisuel YAMAHA relié
au serveur (page 24).
Méthode 3:
Pour sélectionner comme source le signal audio qui
est appliqué au serveur et provient d’un appareil
extérieur (page 25).
Méthode 4:
Pour sélectionner comme source le signal audio qui
provient du récepteur audiovisuel YAMAHA relié
(page 26).
Méthode 5:
Pour sélectionner comme source le signal audio
provenant d’une source extérieure stéréophonique
reliée à la prise AUDIO IN du MCX-CA15
(page 27).
Avant de pouvoir utiliser une touche FAVORITES,
la source concernée doit être attribuée à cette
touche.
■ Pour attribuer des œuvres
musicales stockées dans une
catégorie du serveur
MCX-3 WD01440
LIBRARY
VOL
MUTE
FAVORITE S
1234
SELECT
PLAY
MENU INPUT
1
INFO.
PAUSE
123
STOP
456
GROUP GROUPPLAY
7S
OFF TIMER ON TIMER
7
2-6
BOOKMARK
RANDOM
REPEAT
RECALL
1 Maintenez la pression d’un doigt sur
MENU jusqu’à ce que la page Top Menu
s’affiche.
2 Appuyez sur u / d pour sélectionner
“Library” puis appuyez sur SELECT.
Top Menu
Library
Recall Play
3 Appuyez sur u / d pour sélectionner
“Artists” puis appuyez sur SELECT.
ÉCOUTE DES
ŒUVRES
Remarques
• Si vous appuyez sur une touche FAVORITES à
laquelle rien n’a été attribué, le message “Not
assigned” apparaît brièvement sur l’afficheur de la
face avant.
• Si vous appuyez sur une touche FAVORITES alors
que le client est en veille, il se met en service et la
lecture commence automatiquement.
• Dans le cas d’un appareil extérieur, assurez-vous
préalablement qu’il est convenablement relié et
qu’il est en service. Dans le cas de certains
appareils extérieurs, la lecture ne commence pas
automatiquement dès que vous appuyez sur une
des touches FAVORITES. Lorsque cela se produit,
vous devez démarrer la lecture manuellement à
partir de l’appareil concerné.
Library
Artists
Albums
4 Appuyez sur u / d pour sélectionner un
interprète.
Artists
Avril Lavigne
Bob Dylan
23
Page 90

FONCTIONS COMMODES
5 Appuyez sur i pour afficher la page
d’attribution Favorites.
Set "Favorites"
Assign to FAV
6 Appuyez sur u / d pour sélectionner
une touche FAVORITES (1 à 4) puis
appuyez sur SELECT.
La page précédente est rétablie et le numéro de
la touche FAVORITES choisie s’affiche à
gauche du nom de l’interprète.
Set "Favorites"
Assign to FAV
Artists
1
Avril Lavigne
Bob Dylan
7 Appuyez sur la touche FAVORITES
sélectionnée au cours de l’opération 6
pour commencer la lecture des œuvres
musicales stockées sur le serveur.
La page Play Info s’affiche et l’écoute
commence.
00:10
Let Go / Avril Lavigne
Anything But Ordinary
■ Pour attribuer une station de radio
présélectionnée sur un récepteur
audiovisuel YAMAHA
MCX-3 WD01440
LIBRARY
VOL
MUTE
FAVORITE S
1
1234
SELECT
PLAY
MENU INPUT
INFO.
PAUSE
123
STOP
456
GROUP GROUPPLAY
7S
OFF TIMER ON TIMER
9
2-8
BOOKMARK
RANDOM
REPEAT
RECALL
1 Maintenez la pression d’un doigt sur
MENU jusqu’à ce que la page Top Menu
s’affiche.
2 Appuyez sur u / d pour sélectionner
“Library” puis appuyez sur SELECT.
Top Menu
Library
Recall Play
3 Appuyez sur u / d pour sélectionner
“External Inputs” puis appuyez sur
SELECT.
Library
Bookmarks
External Inputs
Remarque
Si autre chose avait été attribuée à la même touche
FAVORITES, cette attribution est automatiquement
annulée au moment où vous appuyez sur la touche
SELECT au cours de l’opération 6 ci-dessus.
24
4 Appuyez sur u / d pour sélectionner
“AV Receiver” puis appuyez sur
SELECT.
External Inputs
Analog
AV Receiver
Page 91

FONCTIONS COMMODES
5 Appuyez sur u / d pour sélectionner le
groupe des présélections puis appuyez
sur SELECT.
External Inputs
Preset A
Preset B
6 Appuyez sur u / d pour sélectionner la
station de radio qui vous intéresse.
External Inputs
Station 1
Station 2
7 Appuyez sur i pour afficher la page
d’attribution Favorites.
Set "Favorites"
Assign to FAV
8 Appuyez sur u / d pour sélectionner
une touche FAVORITES (1 à 4) puis
appuyez sur SELECT.
La page précédente est rétablie et le numéro de
la touche FAVORITES choisie s’affiche à
gauche du nom de l’amplificateur audiovisuel.
Set "Favorites"
Assign to FAV2
9 Appuyez sur la touche FAVORITES
choisie au cours de l’opération 7 pour
commander l’écoute de la station de
radio captée par le récepteur
audiovisuel.
La page Play Info s’affiche et l’écoute
commence.
Play Info
External Inputs
[A2] Station 2
Remarques
• Si autre chose avait été attribuée à la même
touche FAVORITES, cette attribution est
automatiquement annulée au moment où vous
appuyez sur la touche SELECT au cours de
l’opération 8 ci-dessus.
• Si aucun récepteur audiovisuel YAMAHA n’est
relié au serveur, le message “Receiver
unavailable” apparaît brièvement sur l’afficheur
de la face avant.
■ Pour attribuer un appareil extérieur
relié au serveur
MCX-3 WD01440
LIBRARY
VOL
MUTE
FAVORITE S
1234
SELECT
PLAY
MENU INPUT
1
INFO.
PAUSE
123
STOP
456
GROUP GROUPPLAY
7S
OFF TIMER ON TIMER
7
2-6
BOOKMARK
RANDOM
REPEAT
RECALL
ÉCOUTE DES
ŒUVRES
External Inputs
Station 1
2
Station 2
1 Maintenez la pression d’un doigt sur
MENU jusqu’à ce que la page Top Menu
s’affiche.
2 Appuyez sur u / d pour sélectionner
“Library” puis appuyez sur SELECT.
Top Menu
Library
Recall Play
25
Page 92

FONCTIONS COMMODES
3 Appuyez sur u / d pour sélectionner
“External Inputs” puis appuyez sur
SELECT.
Library
Bookmarks
External Inputs
4 Appuyez sur u / d pour sélectionner
“Optical”, “Coaxial” ou “Analog”.
External Inputs
Optical
Coaxial
5 Appuyez sur i pour afficher la page
d’attribution Favorites.
Set "Favorites"
Assign to FAV
6 Appuyez sur u / d pour sélectionner
une touche FAVORITES (1 à 4) puis
appuyez sur SELECT.
La page précédente est rétablie et le numéro de
la touche FAVORITES choisie s’affiche à
gauche du nom de l’appareil extérieur.
7 Appuyez sur la touche FAVORITES
choisie au cours de l’opération 6 pour
commander l’écoute de l’appareil relié.
La page Play Info s’affiche et l’écoute
commence.
Play Info
External Inputs
Optical
Remarque
Si autre chose avait été attribuée à la même touche
FAVORITES, cette attribution est automatiquement
annulée au moment où vous appuyez sur la touche
SELECT au cours de l’opération 6 ci-dessus.
■ Pour attribuer l’entrée d’un
récepteur audiovisuel YAMAHA
relié
MCX-3 WD01440
LIBRARY
VOL
MUTE
FAVORITE S
1
1234
SELECT
PLAY
MENU INPUT
INFO.
PAUSE
123
STOP
456
GROUP GROUPPLAY
7S
OFF TIMER ON TIMER
6
2-5
BOOKMARK
RANDOM
REPEAT
RECALL
Set "Favorites"
Assign to FAV3
External Inputs
3
Optical
Coaxial
26
1 Maintenez la pression d’un doigt sur
MENU jusqu’à ce que la page Top Menu
s’affiche.
2 Appuyez sur u / d pour sélectionner
“Input” puis appuyez sur SELECT.
Top Menu
Setup
Input
Page 93

FONCTIONS COMMODES
3 Appuyez sur u / d pour sélectionner
l’entrée sur le récepteur répertorié.
Input
CBL/SAT
DVD
4 Appuyez sur i pour afficher la page
d’attribution Favorites.
Set "Favorites"
Assign to FAV
5 Appuyez sur u / d pour sélectionner
une touche FAVORITES (1 à 4) puis
appuyez sur SELECT.
La page précédente est rétablie et le numéro de
la touche FAVORITES choisie s’affiche à
gauche du nom de la source.
Set "Favorites"
Assign to FAV4
Input
CBL/SAT
4
DVD
6 Appuyez sur la touche FAVORITES
choisie au cours de l’opération 5 pour
sélectionner le récepteur répertorié
comme entrée.
La page Play Info s’affiche et l’écoute
commence.
Play Info
Input
DVD
Remarques
• Si autre chose avait été attribuée à la même
touche FAVORITES, cette attribution est
automatiquement annulée au moment où vous
appuyez sur la touche SELECT au cours de
l’opération 5 ci-dessus.
• Vous devez sélectionner un récepteur
audiovisuel YAMAHA sur le menu “Amplifier”
(page 43) pour que l’entrée du récepteur puisse
être attribuée à une touche FAVORITES.
■ Pour attribuer une entrée provenant
d’une source stéréophonique
extérieure reliée à la prise AUDIO IN
du MCX-CA15
MCX-3 WD01440
LIBRARY
VOL
MUTE
FAVORITE S
1234
SELECT
PLAY
MENU INPUT
1
INFO.
PAUSE
123
STOP
456
GROUP GROUPPLAY
7S
OFF TIMER ON TIMER
7
2-6
BOOKMARK
RANDOM
REPEAT
RECALL
1 Maintenez la pression d’un doigt sur
MENU jusqu’à ce que la page Top Menu
s’affiche.
2 Appuyez sur u / d pour sélectionner
“Input” puis appuyez sur SELECT.
Top Menu
Setup
Input
3 Appuyez sur u / d pour sélectionner
“AUDIO IN”.
ÉCOUTE DES
ŒUVRES
Input
Server
AUDIO IN
27
Page 94

FONCTIONS COMMODES
4 Appuyez sur i pour afficher la page
d’attribution Favorites.
Set "Favorites"
Assign to FAV
5 Appuyez sur u / d pour sélectionner
une touche FAVORITES (1 à 4) puis
appuyez sur SELECT.
La page précédente est rétablie et le numéro de
la touche FAVORITES choisie s’affiche à
gauche de “AUDIO IN”.
Set "Favorites"
Assign to FAV4
Input
Server
4
AUDIO IN
6 Appuyez sur la touche FAVORITES
choisie au cours de l’opération 5 pour
sélectionner “AUDIO IN” comme entrée.
La page Play Info s’affiche et l’écoute
commence.
Play Info
Input
AUDIO IN
■ Pour effacer les attributions aux
touches FAVORITES
MCX-3 WD01440
LIBRARY
VOL
MUTE
FAVORITE S
1234
SELECT
PLAY
MENU INPUT
1
INFO.
PAUSE
123
STOP
456
GROUP GROUPPLAY
7S
OFF TIMER ON TIMER
2-4
BOOKMARK
RANDOM
REPEAT
RECALL
1 Maintenez la pression d’un doigt sur
MENU jusqu’à ce que la page Top Menu
s’affiche.
2 Appuyez sur u / d pour sélectionner
“Setup” puis appuyez sur SELECT.
Top Menu
Edit Bookmark
Setup
3 Appuyez sur u / d pour sélectionner
“Favorites” puis appuyez sur SELECT.
Setup
Screen Saver
Favorites
Remarques
• Si autre chose avait été attribuée à la même
touche FAVORITES, cette attribution est
automatiquement annulée au moment où vous
appuyez sur la touche SELECT au cours de
l’opération 5 ci-dessus.
• Vous devez sélectionner “MCX-CA15” sur le
menu “Amplifier” (page 43) pour que l’entrée du
MCX-CA15 puisse être attribuée à une touche
FAVORIT ES.
28
Page 95

FONCTIONS COMMODES
4 Appuyez sur u / d pour sélectionner
“Clear FAV1”, “Clear FAV2”, “Clear
FAV3”, “Clear FAV4” ou “Clear All” puis
appuyez sur SELECT.
L’attribution concernée est effacée.
Favorites
Clear FAV
Clear FAV2
Clear FAV1 Efface l’attribution de la touche
FAVORITES 1 .
Clear FAV2 Efface l’attribution de la touche
FAVORITES 2 .
Clear FAV3 Efface l’attribution de la touche
FAVORITES 3 .
Clear FAV4 Efface l’attribution de la touche
FAVORITES 4 .
Clear All Efface les attributions de toutes
les touches FAVORITES.
Statistiques relatives aux œuvres musicales
Vous pouvez afficher des données statistiques sur les
œuvres musicales et les albums stockés sur le
serveur.
Les données suivantes sont disponibles:
Nombre de lectures:
Affiche les œuvres dans l’ordre du nombre de leur
lecture.
Œuvres récemment jouées:
Affiche les œuvres, dans l’ordre, en commençant
par la plus récemment jouée.
Albums récemment stockés:
Affiche les albums, dans l’ordre, en commençant
par le plus récemment stocké sur le serveur.
MCX-3 WD01440
LIBRARY
VOL
MUTE
FAVORITE S
1234
SELECT
PLAY
MENU INPUT
1
INFO.
PAUSE
123
STOP
456
GROUP GROUPPLAY
7S
OFF TIMER ON TIMER
2-5
BOOKMARK
RANDOM
REPEAT
RECALL
ÉCOUTE DES
ŒUVRES
1 Maintenez la pression d’un doigt sur
MENU jusqu’à ce que la page Top Menu
s’affiche.
2 Appuyez sur u / d pour sélectionner
“Library” puis appuyez sur SELECT.
Top Menu
Library
Recall Play
29
Page 96

FONCTIONS COMMODES
3 Appuyez sur u / d pour sélectionner
“Song Statistics” puis appuyez sur
SELECT.
Library
Playlist
Song Statistics
4 Appuyez sur u / d pour sélectionner
les données statistiques qui vous
intéressent puis appuyez sur SELECT.
Song Statisti...
Times played
Recently played songs
5 Appuyez sur u / d pour sélectionner
une œuvre musicale ou un album puis
appuyez sur SELECT.
La lecture de l’œuvre musicale ou de l’album
commence.
Times played
She's the One
Born to Run
Utilisation des listes de lecture
Vous pouvez créer 1 007 listes (listes de lecture)
des œuvres musicales stockées sur le serveur
(reportez-vous à la page 75 du mode d’emploi du
MCX-1000). Le serveur classe ces listes de lecture
et les divise en groupes. Le serveur peut stocker 10
groupes différents, que nous appelons des
“collections”, et auxquels vous avez accès à partir
du client.
Remarque
Vous ne pouvez pas modifier les listes de lecture à
partir du client.
MCX-3 WD01440
LIBRARY
VOL
MUTE
FAVORITE S
1234
SELECT
PLAY
MENU INPUT
1
INFO.
PAUSE
123
STOP
456
GROUP GROUPPLAY
7S
OFF TIMER ON TIMER
2-6
BOOKMARK
RANDOM
REPEAT
RECALL
y
Si vous avez choisi “Recently stored albums” au
cours de l’opération 4, sélectionnez une œuvre
musicale puis appuyez sur SELECT pour
commander sa lecture.
30
1 Maintenez la pression d’un doigt sur
MENU jusqu’à ce que la page Top Menu
s’affiche.
2 Appuyez sur u / d pour sélectionner
“Library” puis appuyez sur SELECT.
Top Menu
Library
Recall Play
3 Appuyez sur u / d pour sélectionner
“Playlists” puis appuyez sur SELECT.
Library
All Songs
Playlists
Page 97

FONCTIONS COMMODES
4 Appuyez sur u / d pour sélectionner
une collection de listes de lecture puis
appuyez sur SELECT.
Les listes de lecture que contient la collection,
s’affichent.
Playlists
Collections 1
Collections 2
5 Appuyez sur u / d pour sélectionner
une liste de lecture puis appuyez sur
SELECT.
Playlists-List...
Playlist (1)
Playlist (2)
Les œuvres musicales appartenant à la liste de
lecture s’affichent. Un “L” est en regard des
albums, un “A” en regard des interprètes et un
“G” en regard des genres musicaux associés à la
liste de lecture.
6 Appuyez sur u / d pour sélectionner
une œuvre musicale puis appuyez sur
SELECT.
La lecture de l’œuvre choisie commence.
Appuyez sur j pour revenir à la liste des œuvres
musicales.
y
• Lorsque la fin de l’œuvre est atteinte, la lecture de
l’œuvre suivante de la liste de lecture, commence.
• Si vous désirez écouter toutes les œuvres de la
liste de lecture, appuyez sur
l’opération 5.
• Vous pouvez copier le contenu de la liste des
signets pour créer une liste de lecture (page 34).
p à la fin de
Maintien de lecture
Cette fonction permet de poursuivre l’écoute de
l’œuvre en cours de lecture en utilisant le même
client ou un autre client du serveur. Elle est très
commode lorsque vous êtes tenu de vous déplacer
d’une pièce à l’autre.
Remarques
• Seuls les clients répertoriés sur le serveur sont
disponibles pour le maintien de la lecture. Pour de
plus amples détails concernant cette question,
reportez-vous à la mode d’emploi du MCX-1000
(page 106).
• Si l’appareil source n’est pas présentement en
cours de lecture, l’appareil cible utilise les
informations de lecture connues au moment où
l’appareil source a été arrêté.
• Vous ne pouvez pas obtenir du serveur des
informations de lecture quand il est en train de
jouer un CD, un fichier MP3 ou une œuvre
musicale enregistrée sur un appareil extérieur.
• L’appareil cible peut dupliquer le mode de lecture
qui est utilisé par l’appareil source à savoir, lecture
au hasard, lecture répétée pour diffusion générale.
• Le fait d’agir sur l’appareil source après avoir
choisi la fonction de maintien de lecture, ne
change en rien la lecture sur l’appareil cible.
■ Pour maintenir la lecture à partir
d’un autre client
MCX-3 WD01440
LIBRARY
VOL
MUTE
FAVORITE S
1234
SELECT
PLAY
MENU INPUT
1
INFO.
PAUSE
123
STOP
456
GROUP GROUPPLAY
7S
OFF TIMER ON TIMER
2,3
BOOKMARK
RANDOM
REPEAT
RECALL
ÉCOUTE DES
ŒUVRES
1 Maintenez la pression d’un doigt sur
MENU jusqu’à ce que la page Top Menu
s’affiche.
31
Page 98

FONCTIONS COMMODES
2 Appuyez sur u / d pour sélectionner
“Recall Play” puis appuyez sur SELECT.
Top Menu
Library
Recall Play
3 Appuyez sur u / d pour sélectionner le
client qui doit maintenir la lecture puis
appuyez sur SELECT.
Recall Play
Server
Client 1
Pour abandonner le maintien de la lecture,
appuyez sur j de manière à rétablir la page
précédente.
y
Vous pouvez modifier les noms des clients
mentionnés sur la page Recall Play. Pour de plus
amples détails concernant cette question, reportezvous à la page 96 du mode d’emploi du MCX-1000.
■ Pour maintenir la lecture à partir du
serveur
MCX-3 WD01440
LIBRARY
VOL
MUTE
FAVORITE S
1234
2 Appuyez sur u / d pour sélectionner
“Recall Play” puis appuyez sur SELECT.
Top Menu
Library
Recall Play
3 Appuyez sur u / d pour sélectionner
“Server” puis appuyez sur SELECT.
Recall Play
Server
Client 1
Pour abandonner le maintien de la lecture,
appuyez sur j de manière à rétablir la page
précédente.
■ Utilisation de raccourci pour
commander le maintien de la
lecture
Vous pouvez utiliser les touches du boîtier de
télécommande du client pour commander le
maintien de la lecture sans passer par les menus qui
apparaissent sur l’afficheur de la face avant.
1 Maintenez la pression d’un doigt sur
RECALL.
RECALL
SELECT
PLAY
MENU INPUT
1
INFO.
PAUSE
123
STOP
456
GROUP GROUPPLAY
7S
OFF TIMER ON TIMER
2-3
BOOKMARK
RANDOM
REPEAT
RECALL
1 Maintenez la pression d’un doigt sur
MENU jusqu’à ce que la page Top Menu
s’affiche.
32
2 Appuyez sur l’une des touches
suivantes:
Raccourci
+ (S) Server
b (1) Client 1
e (2) Client 2
a (3) Client 3
w (4) Client 4
s (5) Client 5
f (6) Client 6
– (7) Client 7
Appareil
source
Page 99

FONCTIONS COMMODES
Marquage d’un signet
Lorsque vous marquez d’un signet vos œuvres favorites,
elles sont stockées dans une liste temporaire pour vous en
faciliter l’accès. Cette liste peut contenir 999 œuvres
musicales marquées d’un signet et peut être copiée, à tout
moment, pour créer une liste de lecture. Cela vous donne le
moyen de disposer de plusieurs listes d’œuvres favorites.
Pour faciliter leur identification, une coche est placée
en regard des œuvres musicales marquées d’un signet.
■ Marquage d’un signet
Vous pouvez marquer d’un signet lorsque la page
Play Info ou un menu sont affichés.
MCX-3 WD01440
LIBRARY
VOL
MUTE
FAVORITE S
1234
SELECT
BOOKMARK
PLAY
MENU INPUT
INFO.
PAUSE
123
STOP
456
GROUP GROUPPLAY
7S
OFF TIMER ON TIMER
Appuyez sur BOOKMARK pour marquer
l’œuvre d’un signet.
Une coche (✔) s’inscrit en regard du nom de l’œuvre.
Pour supprimer le signet, appuyez une fois sur BOOKMARK.
00:06
Born To Run / Bruce Spr
Tenth Avenue Freeze O
Une œuvre musicale marquée d’un signet telle
qu’elle apparaît sur la page Play Info
Artist-Songs
Thunder Road
Tenth Avenue Freeze O
Une œuvre musicale marquée d’un signet telle
qu’elle apparaît sur la page Menu
y
Pour marquer d’un signet tout un album, appuyez
sur BOOKMARK après avoir sélectionné cet
album. Toutefois, ce signet ne se supprime pas de la
même manière. Le signet de chaque œuvre musicale
doit être supprimé individuellement.
RANDOM
REPEAT
RECALL
Touche
BOOKMARK
■ Pour écouter les œuvres marquées
d’un signet
MCX-3 WD01440
LIBRARY
VOL
MUTE
FAVORITE S
1234
SELECT
PLAY
MENU INPUT
1
INFO.
PAUSE
123
STOP
456
GROUP GROUPPLAY
7S
OFF TIMER ON TIMER
2-5
BOOKMARK
RANDOM
REPEAT
RECALL
1 Maintenez la pression d’un doigt sur
MENU jusqu’à ce que la page Top Menu
s’affiche.
2 Appuyez sur u / d pour sélectionner
“Library” puis appuyez sur SELECT.
Top Menu
Library
Recall Play
3 Appuyez sur u / d pour sélectionner
“Bookmarks” puis appuyez sur
SELECT.
Library
Song Statistics
Bookmarks
4 Appuyez sur u / d pour sélectionner
une œuvre musicale puis appuyez sur
SELECT.
La lecture de l’œuvre choisie commence.
Bookmarks
Tenth Avenue Freeze O
Like A Rolling Stone
5 Appuyez sur j pour revenir à la liste des
œuvres musicales.
ÉCOUTE DES
ŒUVRES
33
Page 100

FONCTIONS COMMODES
■ Pour créer une liste de lecture à
partir de la liste des signets
Vous pouvez copier la totalité liste des signets du
client pour créer une liste de lecture. De cette façon,
la liste des signets devient disponible comme liste
de lecture pour les autres clients du système
MusicCAST et pour le serveur.
MCX-3 WD01440
LIBRARY
VOL
MUTE
FAVORITE S
1234
SELECT
PLAY
MENU INPUT
1
4
INFO.
PAUSE
123
STOP
456
GROUP GROUPPLAY
7S
OFF TIMER ON TIMER
2,3
BOOKMARK
RANDOM
REPEAT
RECALL
1 Maintenez la pression d’un doigt sur
MENU jusqu’à ce que la page Top Menu
s’affiche.
2 Appuyez sur u / d pour sélectionner
“Edit Bookmark” puis appuyez sur
SELECT.
4 Appuyez sur p pour créer la liste de
lecture.
Le client crée une nouvelle liste de lecture dans
la collection par défaut (“Collection 1”) sur le
serveur, et la page Edit Bookmark est rétablie.
Press PLAY to copy,
< to cancel.
Edit Bookmark
Please wait.
Playlist Name:
'04/ 3/24 11:53
Pour abandonner l’opération sans copier la liste
des signets, appuyez sur j .
Top Menu
Recall Play
Edit Bookmark
3 Appuyez sur u / d pour sélectionner
“Copy to Playlist” puis appuyez sur
SELECT.
Edit Bookmark
Copy to Playlist
Clear All
34
 Loading...