

Page 1

ABLV
INTEGRATED AUDIO SYSTEM
ISX-B820
OWNER’S MANUAL
MANUAL DE INSTRUCCIONES
Page 2

CAUTION: READ THIS BEFORE OPERATING YOUR UNIT.
1 To assure the finest performance, please read this manual
carefully. Keep it in a safe place for future reference.
2 Install this unit in a well ventilated, cool, dry, clean place
– away from direct sunlight, heat sources, vibration, dust,
moisture and cold. For proper ventilation, allow the
following minimum clearances.
Top: 15 cm (6 in)
Rear: 2.5 cm (1 in)
Sides: 10 cm (4 in)
3 Locate this unit away from other electrical appliances,
motors, or transformers to avoid humming sounds.
4 Do not expose this unit to sudden temperature changes
from cold to hot (or vice versa), and do not locate this
unit in an environment with high humidity (i.e., a room
with a humidifier) to prevent condensation inside this
unit, which may cause an electrical shock, fire, damage to
this unit, and/or personal injury.
5 Avoid installing this unit where foreign object may fall
onto this unit and/or this unit may be exposed to liquid
dripping or splashing. On the top of this unit, do not
place:
– Other components, as they may cause damage and/or
discoloration on the surface of this unit.
– Burning objects (i.e., candles), as they may cause fire,
damage to this unit, and/or personal injury.
– Containers with liquid in them, as they may fall and
liquid may cause electrical shock to the user and/or
damage to this unit.
6 Do not cover this unit with a newspaper, tablecloth,
curtain, etc. in order not to obstruct heat radiation. If the
temperature inside this unit rises, it may cause fire,
damage to this unit, and/or personal injury.
7 Do not plug in this unit to a wall outlet until all
connections are complete.
8 Do not operate this unit upside-down. It may overheat,
possibly causing damage.
9 Do not use force on switches, knobs and/or cords.
10 When disconnecting the power cable from the wall outlet,
grasp the plug; do not pull the cable.
11 Do not clean this unit with chemical solvents; this might
damage the finish. Use a clean, dry cloth.
12 Only voltage specified on this unit must be used. Using
this unit with a higher voltage than specified is dangerous
and may cause fire, damage to this unit, and/or personal
injury. Yamaha will not be held responsible for any
damage resulting from use of this unit with a voltage
other than specified.
13 To prevent damage by lightning, keep the power cable
and outdoor antennas disconnected from a wall outlet or
this unit during a lightning storm.
14 Do not attempt to modify or fix this unit. Contact
qualified Yamaha service personnel when any service is
needed. The cabinet should never be opened for any
reasons.
15 When not planning to use this unit for long periods of
time (i.e., vacation), disconnect the AC power plug from
the wall outlet.
16 Be sure to read the “TROUBLESHOOTING” section on
common operating errors before concluding that this unit
is faulty.
17 Before moving this unit, press to set the system to off,
and disconnect the AC power plug from the wall outlet.
18 Condensation will form when the surrounding
temperature changes suddenly. Disconnect the power
cable from the outlet, then leave this unit alone.
19 When using this unit for a long time, this unit may
become warm. Turn the system off, then leave this unit
alone for cooling.
20 Install this unit near the wall outlet and where the AC
power plug can be reached easily.
21 The batteries shall not be exposed to excessive heat such
as sunshine, fire or the like.
– Keep the batteries in a location out of reach of
children. Batteries can be dangerous if a child were to
put in his or her mouth.
– If the batteries grow old, the effective operation range
of the remote control decreases considerably. If this
happens, replace the batteries with two new ones as
s possible.
soon a
– Do not use old batteries together with new ones.
– Do not use different types of batteries (such as
alkaline and manganese batteries) together. Read the
packaging carefully as these different types of
batteries may have the same shape and color.
– Exhausted batteries may leak. If the batteries have
leaked, dispose of them immediately. Avoid touching
the leaked material or letting it come into contact with
clothing, etc. Clean the battery compartment
thoroughly before installing new batteries.
– If you plan not to use the unit for a long period of
time, remove the batteries from the unit. Otherwise,
the batteries will wear out, possibly resulting in a
leakage of battery liquid that may damage the unit.
– Do not throw away batteries with general house
waste. Dispose of them correctly in accordance with
your local regulations.
This unit is not disconnected from the AC power source as
long as it is connected to the wall outlet, even if this unit
itself is turned off by . In this state, this unit is designed
to consume a very small quantity of power.
WARNING
TO REDUCE THE RISK OF FIRE OR ELECTRIC SHOCK,
DO NOT EXPOSE THIS UNIT TO RAIN OR MOISTURE.
CAUTION
Danger of explosion if battery is incorrectly replaced.
Replace only with the same or equivalent type.
There is a chance that placing this unit too close to a CRTbased (Braun tube) TV set might impair picture color.
Should this happen, move this unit away from the TV set.
CAUTION
Use of controls or adjustments or performance of procedures other
than those specified herein may result in hazardous radiation
exposure.
i En
Page 3

CONTENTS
Note
y
ISX-B820
Power cable Remote control Dock cover
USB cap
FM antenna
Bracket
Pole
Base
Support
Cable clamp
Screw set
Note
Use these items to assemble the
stand. Read the separate
Assembly Guide for information
on how to assemble the stand.
Note
Keep the USB cap out of
reach of children so as to
ensure that it is not
mistakenly swallowed.
Batteries x 2
(AA, LR6, UM-3)
Owner’s Manual
(this manual)
Assembly Guide
6 m (20')
NAMES OF PARTS AND THEIR FUNCTIONS.........................2
ADJUSTING THE CLOCK.........................................................5
LISTENING TO iPod..................................................................6
LISTENING TO CD AND USB DEVICES..................................7
LISTENING TO MUSIC
FROM YOUR Bluetooth COMPONENT .................................10
LISTENING TO FM STATIONS...............................................12
LISTENING TO EXTERNAL SOURCES .................................13
USING THE ALARM FUNCTION ............................................14
USING THE SLEEP TIMER.....................................................17
TONE CONTROL.....................................................................17
ADJUST BRIGHTNESS OF FRONT PANEL DISPLAY .........17
TROUBLESHOOTING .............................................................18
NOTES ON DISCS AND USB DEVICES.................................21
SPECIFICATIONS ...................................................................22
Features
• Play back music on external devices such as iPod/iPhone models, audio/data CDs and USB devices, and tune in to the FM radio.
•By the Bluetooth technology, you can enjoy clear sound without wired connections.
• Use your favorite music or set of beeps as an alarm. The music you select is played at a volume of your own choice at the set alarm time,
giving you the best possible start to the day (IntelliAlarm function) (☞ P. 1 4 ).
• Store/call up to five of your favorite FM stations easily.
• The 3-band equalizer (bass, middle, treble) can be set so that music sounds exactly how you want it.
• Two types of clocks (with hour hands) that match the design of the unit can be shown.
About this manual
• The phrase “iPod” used throughout this manual also includes the “iPhone”.
• If both the unit and remote control buttons can be used to operate a feature, the manual will describe steps using the buttons on the unit.
• indicates precautions for use of the unit and its feature limitations.
• indicates supplementary explanations for better use.
Supplied accessories
English Français Deutsch Svenska Italiano Español Nederlands Русский
How to use the remote control
Insert the batteries into the remote control in the correct direction
(+ and –).
Point the remote control at the remote control signal receiver (on
the front panel) and use within the range shown below.
1 En
Page 4

Top panel
AUTO SET BEEP
SOURCE + BEEP
SOURCE
DIMMER
CLOCK
ALARM TYPE
212
1
VOLUME
USB LABEL SIDE
SOURCE PRESETALARM SNOOZE
SLEEP
12345678 jlk9
y
• An iPod will be recharged while it is connected to the dock. The iPod will not be recharged
when the unit is in power save mode.
• Be sure to use a dock adaptor that is compatible with your iPod. If you do not use the adaptor
or the adaptor is not compatible, the connection could be loose or poor, which could cause
damage to the connector. For details on dock adaptor information, please visit official Apple’s
website.
• If an iPod in protective case is connected by force, the connector may be damaged. Remove
the protective case before connection.
• When the iPod is not in use, set the iPod dock cover to protect the connector.
Dock adaptor
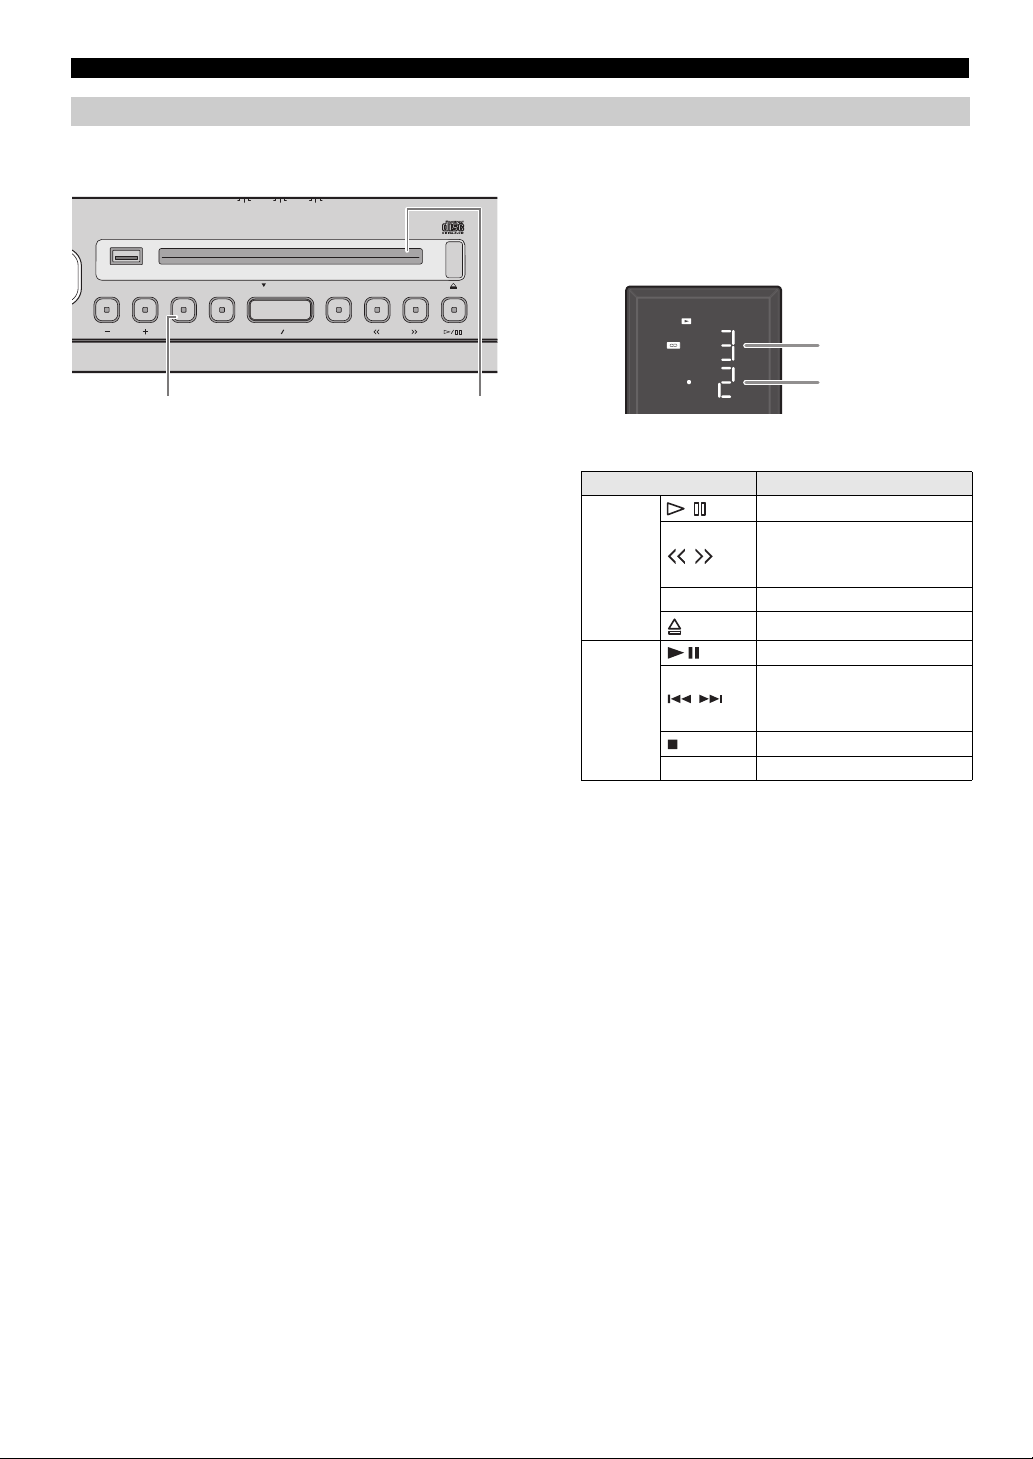
NAMES OF PARTS AND THEIR FUNCTIONS
a (Power)
Press to turn the system on/off. Time is displayed on the front
panel even when the system is off.
y
• Press and hold on the top of the unit for more than 3 seconds to set
the system to power save mode. No information on the front panel is
displayed in power save mode. This can reduce power consumption.
To cancel power save mode, press again.
• Even in system off/power save mode, the alarm function is available.
b iPod dock
Connect an iPod.
c USB port
Connect a USB device (P. 9).
d VOLUME –/ +
Adjust the volume.
e SOURCE
Switch the source to be played.
f ALARM
Turns the alarm on/off, and allows various alarm settings to be
adjusted (P. 15, 16).
Connecting an iPod to the iPod dock
g SNOOZE/SLEEP
Set the sleep timer or switch the alarm to snooze mode
(P. 16, 17).
h PRESET
Store/call up FM stations, or switch the playback folder (when
playing music on data CDs or USB devices).
i /
Skip the playback track/file, or tune the radio.
Holding the button down while playing a track/file will search
backward/forward the track/file.
j /
Play/pause the track being played.
k
Eject the CD.
l Disc slot
Insert a CD.
2 En
Page 5

Notes
Front panel display
2
56
3
4
8
7
1
9
162 3
5
4
Supplied
FM antenna
NAMES OF PARTS AND THEIR FUNCTIONS
1 Play/shuffle/repeat indicator
Displays the playback mode (P. 6, 9).
b Remote control signal receiver
c Clock indicator
Shows the clock hour hand (P. 5).
d Source indicator
Shows selected source.
e Bluetooth indicator
Turns on if this unit is connecting via Bluetooth (P. 10, 11).
f Sleep indicator
Turns on if the sleep timer has been set (P. 17).
g Alarm indicator
Turns on if the alarm has been set (P. 14).
h Multi-function indicator
Displays various information, including the clock time, track
number being played or FM station.
i Illumination sensor
Detects ambient lighting. Do not cover this sensor.
English
Rear panel
a ALARM TYPE
Switches the alarm type (P. 15).
b CLOCK
Switches the type of clock display or allows the time to be set
(P. 5).
c DIMMER
Adjusts the brightness of the front panel display (P. 17).
d AUX
Connects an external device.
e FM antenna terminal
Connects the supplied FM antenna or an outdoor antenna.
• The antenna should be stretched out. If radio reception is poor, change
the height, direction, or placement of the antenna.
• If you use a commercially available outdoor antenna instead of the
supplied FM antenna, reception may be better.
f Terminal cover
Remove the terminal cover before connecting external devices
to AUX, and/or connecting the FM antenna to antenna
terminal.
If you pass the outdoor antenna cable and/or external device cable through the pole of the stand, read the separate Assembly Guide.
3 En
Page 6

NAMES OF PARTS AND THEIR FUNCTIONS
iPod control buttons
Remote control
1
2
3
4
Bluetooth
5
6
7
8
9
j
k
l
m
p
o
n
a Remote control signal transmitter
b (Power)
Press to turn the system on/off.
c ALARM
Switches the alarm on/off.
d SNOOZE/SLEEP
Set the sleep timer or switch the alarm to snooze mode
(P. 16, 17).
e Source button
Switch the source to be played.
f FOLDER
Switch the playback folder when playing music on data CDs or
USB devices.
g /
Skip the playback track/file.
Holding the button down while playing a track/file will search
backward/forward the track/file.
h
Play/pause.
i
Stop playback.
j (Repeat)/ (Shuffle)
Play music on an iPod, audio/data CD or USB device in repeat/
shuffle (P. 6, 9).
k EQ LOW/MID/HIGH
Adjust the bass, middle or treble sound quality (P. 17).
l PRESET /
Select a preset FM station.
m MEMORY
Store the FM station (P. 12).
n TUNING /
Tune the radio.
o VOLUME + / –
Adjust the volume.
p MUTE
Mute/resume the sound.
4 En
Page 7

Note
Setting the time
AUTO SET BEEP
SOURCE + BEEP
SOURCE
DIMMER
CLOCK
ALARM TYPE
212
1
VOLUME
USB LABEL SIDE
SOURCE PRESETALARM SNOOZE
SLEEP
2
Top panel
SET
Rear panel
Set time (flashing)
CLOCK 2
CLOCK 1
Rear panel
Eg: 10:50
Analog clock
hour hand
(hour)
Minute
Eg: 10:50
Minute
Hour
ADJUSTING THE CLOCK
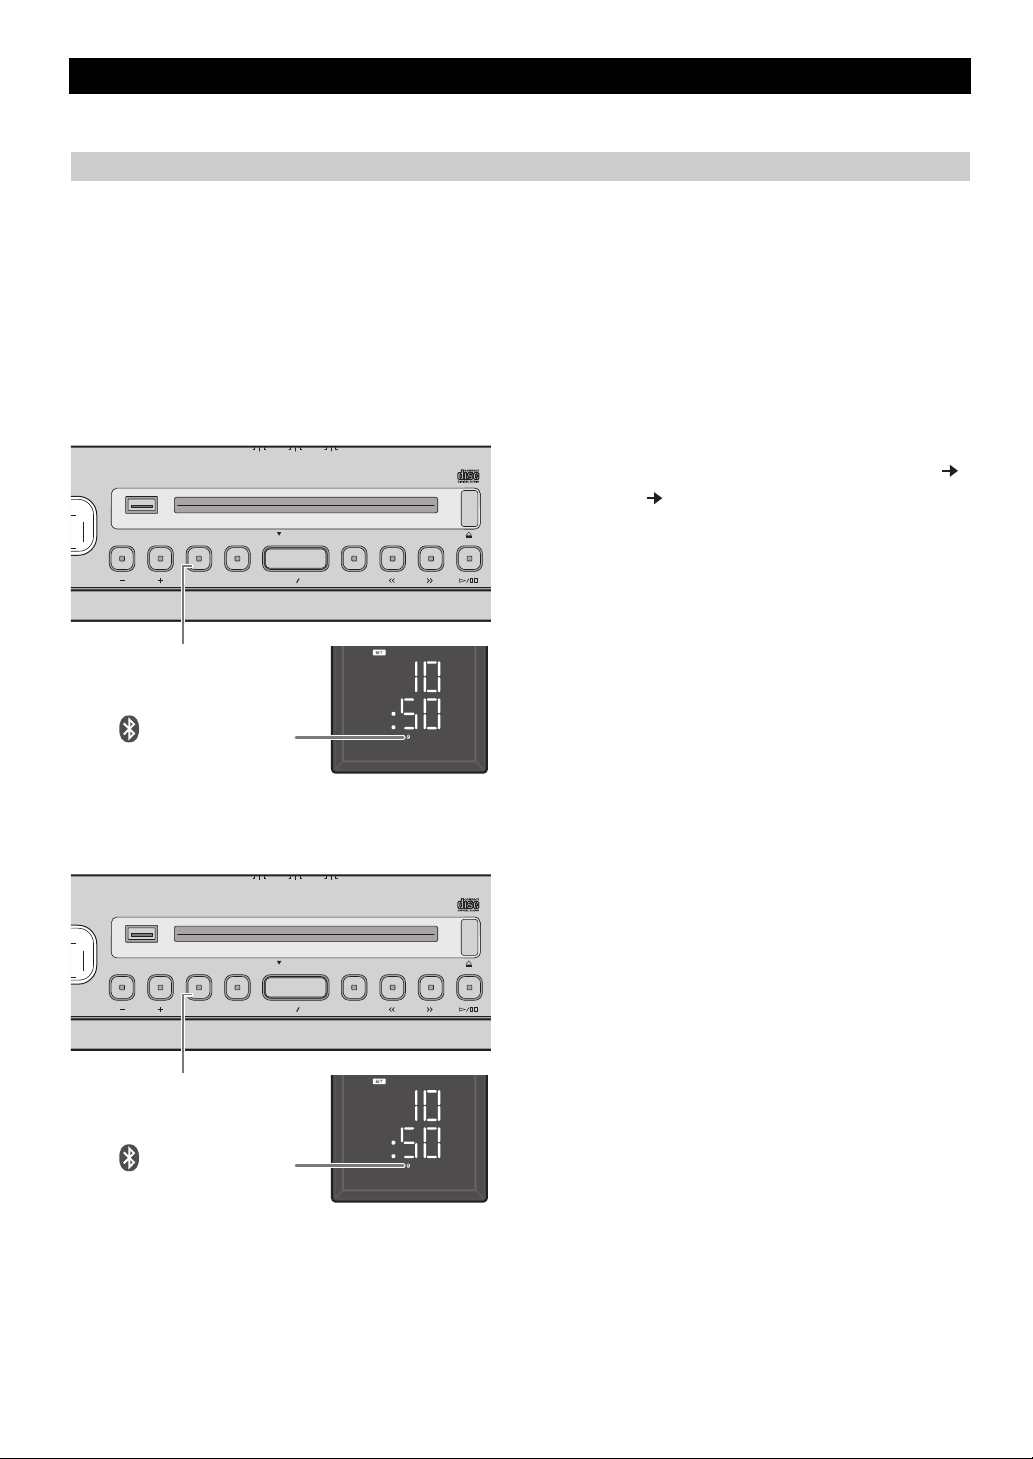
1 Move the CLOCK switch on the rear panel to SET.
2 Set the time with / .
3 Move the CLOCK switch on the rear panel to
CLOCK1 or CLOCK2.
y
• Connecting an iPod to the iPod dock in step 2 will copy the time on the
iPod to the unit. If the iPod is already connected to the iPod dock when
CLOCK is set to SET, the time in the iPod will not be copied.
• Pressing SNOOZE/SLEEP in step
24 hour clock display.
• The “PM” indicator will be shown only when you select the 12 hour clock
display.
English
2 will switch between the 12 and
Switching the clock type
Move the CLOCK switch on the rear panel to switch the clock type.
The time settings will be reset if the unit is not powered for more than one
week.
Clock display mode 1 (CLOCK 1)
Clock display mode 2 (CLOCK 2)
5 En
Page 8

Notes
LISTENING TO iPod
AUTO SET BEEP
SOURCE + BEEP
SOURCE
DIMMER
CLOCK
ALARM TYPE
212
1
VOLUME
USB LABEL SIDE
SOURCE PRESETALARM SNOOZE
SLEEP
23
Top panel
Remote control
REPEAT
SHUFFLE
Remote control
Playing the iPod
For details on compatible iPod models, refer to “SPECIFICATIONS” (P. 22).
1 Connect an iPod to the iPod dock.
2 Press SOURCE and set iPod as the playback
3 Play the iPod by pressing / .
y
• You can remove the iPod during playback.
• If the system is turned off, it will turn on automatically when music/video
• If iPod is selected as the playback source, the system will automatically
source.
Playback can be controlled with either the remote control,
iPod or the top panel on this unit.
Button Function
/
Top
Panel
Remote
/
/
control
FOLDER/
MENU/
ENTER
on the iPod is played.
turn off when 60 minutes have elapsed without a device being connected to
the iPod dock nor any operation performed.
Play/Pause
Skip
Search backward/forward
(press and hold down)
Play/Pause
Skip
Search backward/forward
(press and hold down)
iPod menu control
Repeat/shuffle playback
The playback mode can be checked with the play/shuffle/repeat indicator on the front panel display.
• Repeat/shuffle may not operate correctly depending on the type of iPod
used.
• The repeat/shuffle playback order may differ depending on the type of
iPod used.
Repeat playback
Press REPEAT on the remote control to select a playback mode
from the following.
:One
:All
No display: Off
Shuffle playback
Press SHUFFLE on the remote control to select a playback mode
from the following.
: Songs
:Albums
No display: Off
6 En
Page 9

Note
LISTENING TO CD AND USB DEVICES
Top panel
CD
Track number
The unit will operate as follows when playing back tracks/files on CD/USB devices.
• If the CD/USB device being played back is stopped, the track that was being played back will start playing from the beginning of the
track the next time playback begins.
• If you press on the remote control while playback is stopped, the next time playback begins, the unit will play tracks as follows:
– For audio CD : from the first track of the CD.
– For data CD/USB device: from the first track of the folder that contains the track that was played last.
• This system turns off automatically if no operation has been performed for 60 minutes after CD/USB device playback is stopped.
y
For details on playable discs and files, refer to “NOTES ON DISCS AND USB DEVICES” (P. 21).
Listening to an audio CD
1 Press SOURCE to set CD as the playback source.
English
AUTO SET BEEP
212
1
CLOCK
DIMMER
ALARM TYPE
SOURCE + BEEP
SOURCE
2 Insert the audio CD into the Disc slot with the
label side facing toward the front of the unit.
Playback starts automatically. The track number is shown for a
while when starting playback or skipping tracks.
USB LABEL SIDE
VOLUME
SOURCE PRESETALARM SNOOZE
SLEEP
12
Use the following buttons to control the unit while playing
back tracks on audio CDs.
Button Function
Top
Panel
Remote
control
/
Play/Pause
Skip
/
Search backward/forward
(press and hold down)
Eject the CD
Play/Pause
Skip
/
Search backward/forward
(press and hold down)
Stop
CDs cannot be inserted or ejected when the system is in power save
mode (☞ P. 2 ).
7 En
Page 10
LISTENING TO CD AND USB DEVICES
AUTO SET BEEP
SOURCE + BEEP
SOURCE
DIMMER
CLOCK
ALARM TYPE
212
1
VOLUME
USB LABEL SIDE
SOURCE PRESETALARM SNOOZE
SLEEP
12
Top panel
Folder number
File number
Listening to a data CD
1 Press SOURCE to set CD as the playback source.
2 Insert the data CD into the Disc slot with the
label side facing toward the front of the unit.
Playback starts automatically. The folder/file number is shown
for a while when starting playback or skipping tracks.
Use the following buttons to control the unit while playing
back tracks on data CDs.
Button Function
Play/Pause
Skip
Search backward/forward
(press and hold down)
Eject the CD
Play/Pause
Skip
Search backward/forward
(press and hold down)
Stop
Top
Panel
Remote
control
/
/
PRESET Change the playback folder
/
FOLDER Change the playback folder
8 En
Page 11

Listening to a USB device
Note
AUTO SET BEEP
SOURCE + BEEP
SOURCE
DIMMER
CLOCK
ALARM TYPE
212
1
VOLUME
USB LABEL SIDE
SOURCE PRESETALARM SNOOZE
SLEEP
21
Top panel
Folder number
File number
REPEAT
SHUFFLE
Remote control
LISTENING TO CD AND USB DEVICES
When a USB device is connected, tracks are played back in the
following order:
– Folder playback order:
folders are played in alphabetical order of the first 3 characters
of the folder name. Folder containing characters other than the
alphabet are played after alphabet character folders.
– File playback order:
files will be played back in order from files with the oldest wrote
date.
1 Press SOURCE and set USB as the playback
source.
2 Connect a USB device to the USB port.
Playback starts automatically. The folder/file number is shown
for a while
Use the following buttons to control the unit while playing
back tracks on USB devices.
y
Stop playback before removing the USB device.
when starting playback or skipping tracks.
Button Function
Play/Pause
Skip
Search backward/forward
(press and hold down)
Top
Panel
/
/
PRESET Change the playback folder
Play/Pause
Skip
Remote
control
/
Search backward/forward
(press and hold down)
Stop
FOLDER Change the playback folder
English
Repeat/shuffle playback
The playback mode can be checked with the play/shuffle/repeat indicator on the front panel display.
Repeat playback
Press REPEAT on the remote control to select a playback mode
from the following.
:
No display: Repeat mode off
y
If the selected source contains folders, each folder will be played in repeat/
shuffle mode.
Shuffle playback
Press SHUFFLE on the remote control to select a playback mode
from the following.
:
No display: Shuffle mode off
All tracks within the folder (data CD/USB device only)
: All tracks
: 1 track
All tracks within the folder (data CD/USB device only)
: All tracks
9 En
Page 12
LISTENING TO MUSIC FROM YOUR Bluetooth COMPONENT
AUTO SET BEEP
SOURCE + BEEP
SOURCE
DIMMER
CLOCK
ALARM TYPE
212
1
VOLUME
USB LABEL SIDE
SOURCE PRESETALARM SNOOZE
SLEEP
1
Top panel
Bluetooth indicator
AUTO SET BEEP
SOURCE + BEEP
SOURCE
DIMMER
CLOCK
ALARM TYPE
212
1
VOLUME
USB LABEL SIDE
SOURCE PRESETALARM SNOOZE
SLEEP
1
Top panel
Bluetooth indicator
This unit provides Bluetooth functionality. You can enjoy wireless music playback from your Bluetooth component (mobile phone, digital
audio player, etc.). Please also refer to the owner’s manual of your Bluetooth component.
Pairing this unit with your Bluetooth component
Pairing is an operation that registers the communicating component (subsequently called “the other component”) with this unit. You’ll need
to perform the pairing operation the first time you use your Bluetooth component with this unit, or if the pairing settings have been deleted.
Once pairing has been completed, subsequent reconnection will be easy even after the Bluetooth connection is disconnected. If pairing is not
successful, refer to the item “Bluetooth” in “TROUBLESHOOTING” (P. 20).
y
• This unit can be paired with up to eight other components. When pairing with the ninth component has succeeded, pairing data for the component with the
oldest connection date will be deleted.
• If this unit is connected via Blu etooth to another component, hold down SOURCE button on this unit or Bluetooth on the remote control to disconnect the
Bluetooth connection before you perform the pairing operation.
If using an iPod touch/iPhone/iPad
1 Press the SOURCE button to switch the playback
source to Bluetooth.
2 On your iPod touch/iPhone/iPad, turn [Settings]
[General] [Bluetooth] on.
The Bluetooth connection list will appear in [Devices].
(This procedure or display may differ depending on the type of
your iPod touch/iPhone/iPad.)
3 From the Bluetooth connection list of the other
component, choose this unit (ISX-B820 Yamaha).
When pairing has been completed, your iPod touch/iPhone/
iPad will indicate “Connected”.
The Bluetooth indicator on the front panel display of this unit
will light.
If using other than an iPod touch/iPhone/iPad
1 Press the SOURCE button to switch the playback
source to Bluetooth.
2 Perform Bluetooth pairing on the other component.
For details refer to the owner’s manual of the other
component.
3 From the Bluetooth connection list of the other
component, choose this unit (ISX-B820 Yamaha).
When pairing has been completed, the Bluetooth indicator on
the front panel display of this unit will light for about 1
second.
y
If you are asked to enter a password, enter the numerals “0000”.
10 En
Page 13
Note
Note
Note
Listening to a Bluetooth component
AUTO SET BEEP
SOURCE + BEEP
SOURCE
DIMMER
CLOCK
ALARM TYPE
212
1
VOLUME
USB LABEL SIDE
SOURCE PRESETALARM SNOOZE
SLEEP
1
Top panel
AUTO SET BEEP
SOURCE + BEEP
SOURCE
DIMMER
CLOCK
ALARM TYPE
212
1
VOLUME
USB LABEL SIDE
SOURCE PRESETALARM SNOOZE
SLEEP
1
Top panel
Bluetooth indicator
LISTENING TO MUSIC FROM YOUR Bluetooth COMPONENT
1 Press the SOURCE button to switch the playback
source to Bluetooth.
2 Connect this unit and your other component via
Bluetooth.
3
Play back music from your
Take care that the volume setting of this unit is not too high. We
recommend that you adjust the volume on the other component.
y
• If you connect via Bluetooth from your other component and play
back music while this unit is turned off the system, this unit will
automatically turn on the system.
• If you disconnect the Bluetooth connection from your other
component while the playback source is set to Bluetooth, this unit
will automatically turn off the system.
•If Bluetooth is selected as the playback source, this unit will
automatically turn off the system when 60 minutes have elapsed
without any Bluetooth connection nor any operation performed.
Connecting an already-paired component via Bluetooth
Once pairing has been completed, connecting a Bluetooth will be easy the next time.
Connecting from this unit
1 Press the SOURCE button to switch the playback
source to Bluetooth.
The Bluetooth indicator will blink on the front panel display;
this unit will search for the other component that was most
recently connected via Bluetooth, and will then establish a
connection (You must first turn on the Bluetooth setting of the
other component).
When the Bluetooth connection has been established, the
Bluetooth indicator will light.
Bluetooth
English
component.
Yamaha does not guarantee all connections between this unit and
Bluetooth component.
Connecting from the other component
1 In the Bluetooth settings of the other component, turn Bluetooth on.
2 From the Bluetooth connection list of the other component, choose this unit (ISX-B820 Yamaha).
The Bluetooth connection will be established, and the Bluetooth indicator on the front panel display of this unit will light.
Bluetooth connections cannot be established from the other component when this unit is in power save mode. Turn the system on.
Disconnecting a Bluetooth connection
If any of the following operations are performed while a Bluetooth connection is being used, the Bluetooth connection will be disconnected.
• Hold down SOURCE button on this unit or Bluetooth on the remote control.
• Turn the system off.
• Turn off the Bluetooth setting of the other component.
y
When you connect an iPod touch/iPhone/iPad via Bluetooth, the Bluetooth connection may be disconnected if you switch the playback source to iPod while
another iPod is connected to the iPod dock.
11 En
Page 14

Note
LISTENING TO FM STATIONS
AUTO SET BEEP
SOURCE + BEEP
SOURCE
DIMMER
CLOCK
ALARM TYPE
212
1
VOLUME
USB LABEL SIDE
SOURCE PRESETALARM SNOOZE
SLEEP
12
Top panel
Reception
frequency
AUTO SET BEEP
SOURCE + BEEP
SOURCE
DIMMER
CLOCK
ALARM TYPE
212
1
VOLUME
USB LABEL SIDE
SOURCE PRESETALARM SNOOZE
SLEEP
234 1
Top panel
FM
Preset
number
Selecting the FM station
If you tune to an FM station manually, the sound will be in monaural.
Storing FM stations (preset)
Use the preset function to store your favorite 5 stations.
1 Press SOURCE and set FM as the playback source.
FM
2 Press / to tune the FM station.
Tuning type Operation
Press and hold down
or .
Press or repeatedly.
Press and hold down
TUNING or .
Press TUNING or
repeatedly.
Top
panel
Remote
control
Automatic
tuning
Manual
tuning
Automatic
tuning
Manual
tuning
1 Press / to tune into your favorite FM station.
2 Press and hold down PRESET.
Using the remote control
Press and hold down MEMORY.
3 Press PRESET and select the preset number to
store the FM station.
Using the remote control
Press PRESET /.
4 Press and hold down PRESET to store the preset
station.
This stores the FM station.
Using the remote control
Press MEMORY.
12 En
Page 15

Note
Selecting a preset FM station
AUTO SET BEEP
SOURCE + BEEP
SOURCE
DIMMER
CLOCK
ALARM TYPE
212
1
VOLUME
USB LABEL SIDE
SOURCE PRESETALARM SNOOZE
SLEEP
1 2
Top panel
AUTO SET
DIMMER
CL
2
1
VOLUME
USB LAB
SOURCE ALARM SNOOZ
23
Top panel
AUX
75 Ω
FM ANT
AUX
LISTENING TO EXTERNAL SOURCES
1 Press SOURCE and set FM as the playback source.
2 Press PRESET repeatedly to select the preset FM
station.
Using the remote control
Press PRESET /.
LISTENING TO EXTERNAL SOURCES
Turn the system off before connecting audio cables. Remove the
terminal cover before connecting external devices.
1 Connect external audio device to AUX on the rear
panel using a commercially available 3.5 mm (1/8 in)
stereo mini plug cable.
English
Turn down the volume of the unit and your external audio device before
connection.
2 Press to turn the system on.
3 Press SOURCE and set AUX as the playback
source.
4 Start playback on the connected external audio
device.
13 En
Page 16

USING THE ALARM FUNCTION
The unit includes an alarm function (IntelliAlarm) that plays back music sources or set of beeps at the set time in a variety of different
methods. The alarm function has following features.
3 types of alarms
Select from 3 alarm types, combining music and beep sounds.
The selected audio source and beep sound are played at the set time. This mode is recommended for
the best possible start to the day.
SOURCE + BEEP
3 minutes before the set time: the source music begins to fade in and the volume gradually increases
as the alarm time approaches.
Alarm time: a beeping sound also begins playing.
SOURCE
BEEP Only beep sound is played back at the set time.
The selected audio source is played at the set time. The volume fades in gradually and increases to
the set volume.
Various music sources
The iPod, audio CD, data CD, USB device and radio can be selected. The following can also be selected depending on the audio source:
Source Playback method Function
The unit resumes play from the last track you played.
If you’ve created a playlist* with the name “ALARM Yamaha DTA” in
iPod Resume
Selected track The selected track is played repeatedly.
Audio CD
Resume The track you listened to last time is played back.
Folder The selected folder is played repeatedly.
Data CD/USB
Resume The track you listened to last time is played back.
Preset station The selected preset FM station is played.
FM
Resume The FM station you listened to last time is played back.
advance, the playlist stored on the iPod can be played back
repeatedly.
When entering the playlist name, use single-byte spaces to separate
words, and enter single-byte characters, taking care that uppercase/
lowercase letters are used correctly.
* For information on creating a playlist, refer to the instructions for your iPod or iTunes.
Snooze
The snooze function can be enabled to replay the alarm after 5 minutes.
14 En
Page 17

Note
Notes
Set the alarm time and alarm type
AUTO SET BEEP
SOURCE + BEEP
SOURCE
DIMMER
CLOCK
ALARM TYPE
212
1
VOLUME
USB LABEL SIDE
SOURCE PRESETALARM SNOOZE
SLEEP
17
2465
Top panel
Alarm indicator
Alarm time
BEEP
SOURCE+
BEEP
SOURCE
Rear panel
Alarm volume
USING THE ALARM FUNCTION
The alarm setting will be erased if the system is turned off without properly
completing it.
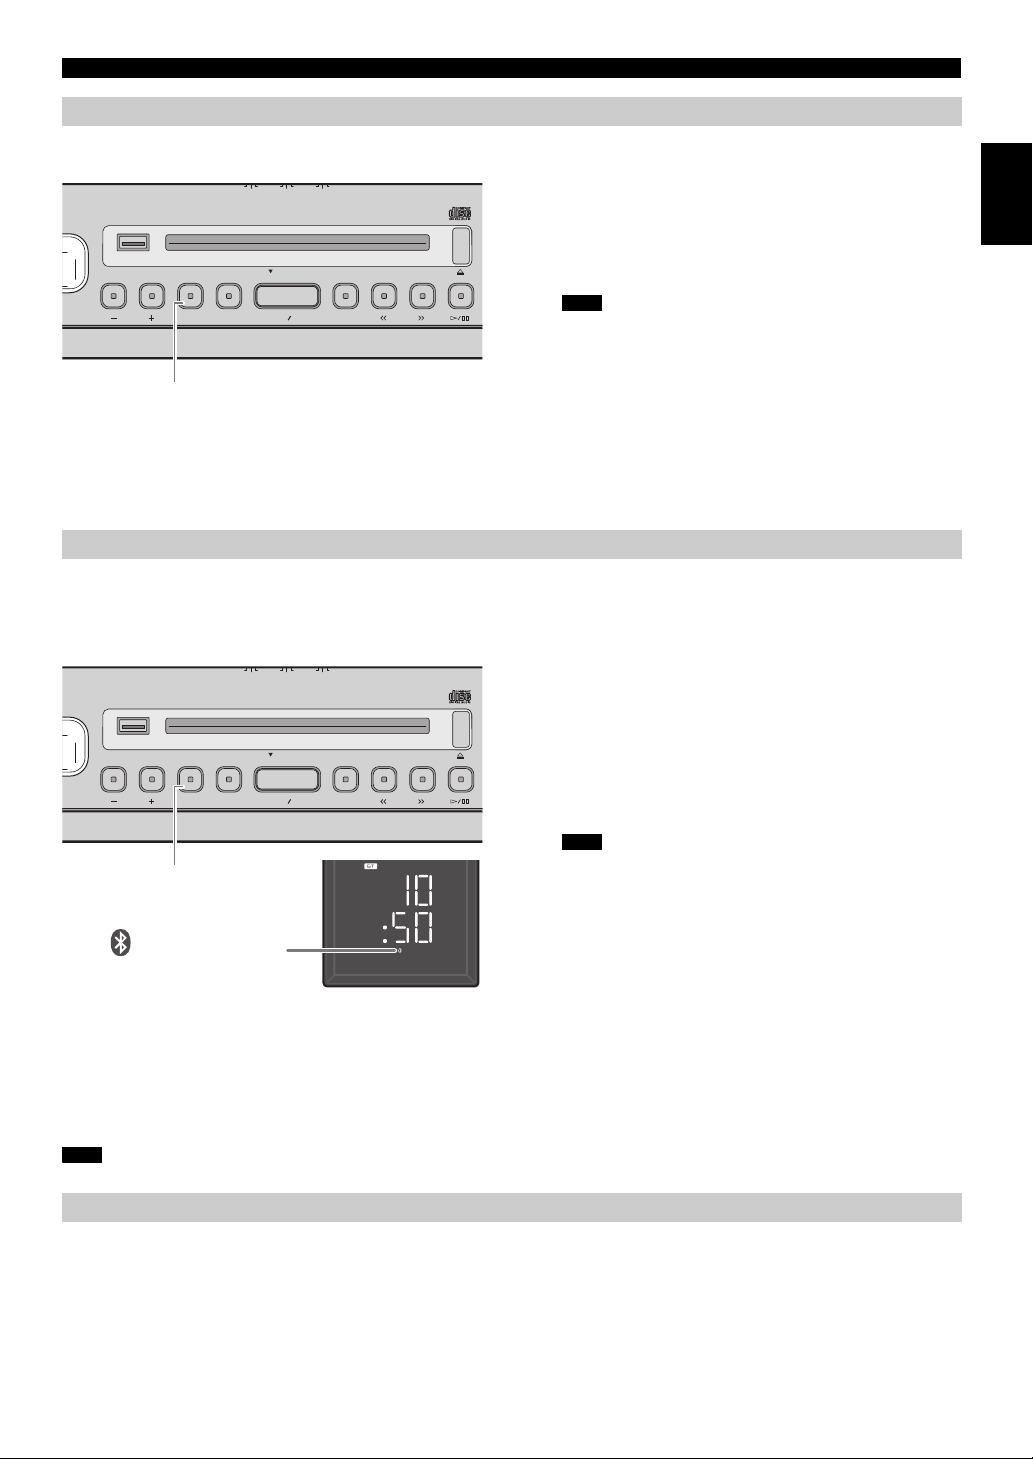
1 Press and hold ALARM.
The alarm indicator ( ) and set alarm time will flash.
2 Press / to set the alarm time.
Using the remote control
Press / .
3 Select the alarm type with the ALARM TYPE
switch on the rear panel.
For details on alarm types, refer to P. 14.
5 (when alarm types other than BEEP are selected)
Specify the track, folder or FM station to be played.
If iPod is set as the source:
No settings required.
If CD/USB/FM is selected as the source:
Press PRESET to select the track (audio CD), folder (data
CD/USB devise) or FM station to be played.
Using the remote control
Press PRESET /.
y
• When iPod is set as the source, the unit plays back the “ALARM
Yamaha DTA” playlist at the set alarm time. If this playlist cannot be
found within the iPod, the unit resumes play from the last track you
played (resume).
• When CD/USB/FM is selected as the source and “0” is set, the
playback resumes from the track/FM station you listened to last time
(resume).
6 Set the alarm volume by pressing VOLUME –/+
7 Press ALARM to complete setting the alarm.
The alarm will be set, and the alarm indicator ( ) will
light up.
English
.
4 (when alarm types other than BEEP are selected)
Press SOURCE to select music source.
Sources other than AUX and Bluetooth can be selected.
Using the remote control
Press Source button to select music source.
• If iPod/CD/USB has been selected, connect/insert the audio source
(iPod, audio/data CD, USB device) to the unit.
• If source cannot be played back at the time set for the alarm (eg. iPod
is not connected), the beep sound is played back.
15 En
Page 18

USING THE ALARM FUNCTION
AUTO SET BEEP
SOUR
DIMMER
CLOCK
ALARM
212
1
VOLUME
USB LABEL SIDE
SOURCE ALARM SNOOZE
SLEEP
1
Top panel
AUTO SET BEEP
SOUR
DIMMER
CLOCK
ALARM
212
1
VOLUME
USB LABEL SIDE
SOURCE ALARM SNOOZE
SLEEP
2
2
1
Top panel
Turning the alarm on/off
1 Press ALARM.
When the alarm is on, the alarm indicator ( ) is shown,
and the alarm time is shown for a while. If you press ALARM
again, the alarm indicator ( ) and the alarm will turn off.
y
The set alarm time will be saved even if the alarm is turned off. If the
alarm is turned on again by pressing ALARM, the alarm will sound
with the previously alarm settings.
Operations while playing back alarm sound
At the set time, the alarm sound is played back. During playback, the following operations are available.
1 (if you want to stop the alarm for a short time) Press
SNOOZE/SLEEP.
SNOOZE will stop the alarm and resume again in 5 minutes.
y
• When SOURCE + BEEP is set, press SNOOZE/SLEEP once to
stop the beep sound, and twice to stop the audio source. 5 minutes
after the audio source is stopped, it will start fading in again and the
beep sound will resume.
• The alarm indicator will flash when the snooze function is activated.
2 (if you want to turn the alarm off) Press ALARM or
.
y
The alarm stops automatically after 60 minutes unless you stop the
alarm.
16 En
Page 19

Note
USING THE SLEEP TIMER
AUTO SET BEEP
SOURC
DIMMER
CLOCK
ALARM T
212
1
VOLUME
USB LABEL SIDE
SOURCE ALARM SNOOZE
SLEEP
1
Top panel
1
2
3
Remote control
:HIGH
:MID
:LOW
Tone
Setting
Ton e
AUTO21
Rear panel
You can set the time to turn off the system automatically.
TONE CONTROL
1 Press SNOOZE/SLEEP a number of times to set
the time until the system turns off.
The sleep timer can be set to 30, 60, 90 and 120 minutes.
When the time is set, the sleep indicator ( ) is shown on the
front panel display.
y
If you press SNOOZE/SLEEP while the sleep timer is activated, the
sleep timer setting will be canceled.
1 Press one of the LOW/MID/HIGH EQ buttons on
the remote control while playing back.
Select the tone to be adjusted (LOW, MID, HIGH).
English
2 Press / to adjust the tone.
Each tone can be adjusted from –5 to +5.
3 Press ENTER to complete settings.
You can also press the EQ button that you pressed in Step 1
to complete the settings.
To change the tone of other frequency band, return to step 1
and press the EQ button to adjust the desired frequency.
ADJUST BRIGHTNESS OF FRONT PANEL DISPLAY
1 Adjust the brightness with the DIMMER switch on
the rear panel.
AUTO: adjusts the brightness automatically to match the
surroundings.
1: brighter.
2: darker.
When AUTO is set, the brightness of the front panel display is adjusted
automatically with the illumination sensor (P. 3). Ensure that the sensor
is not covered.
17 En
Page 20

TROUBLESHOOTING
If there is a problem with the unit, check the following list first. If you cannot resolve the problem with the suggested solutions or if the
problem is not listed below, turn off and unplug the system, and consult the nearest authorized Yamaha dealer or service center.
General
Problem Cause Solution
Can’t turn on the unit.
The speakers make no sound.
Sound suddenly turns off.
Sound is cracked/distorted or there is
abnormal noise.
The unit does not operate properly.
The system turns on but immediately
shuts off.
A digital or high-frequency equipment
produces noises.
The clock setting has been cleared.
iPod does not play back at the alarm time
even if SOURCE is set to iPod.
Clock flashes and the unit cannot be
operated.
The power cable is not connect firmly. Reconnect the power cable into the wall outlet and
The volume may be set to the minimum level. Adjust the volume level.
The source may be incorrect. Select the correct source.
The sleep (☞ P. 17) may be set. Turn on the system and play the source again.
Input source volume is excessive, or volume of this
unit is excessive (especially Bass).
The unit may have received a strong electrical
shock such as lightning or excessive static
electricity, or power supply may have dropped.
The unit may be placed too close to the digital or
high-frequency equipment.
The unit is left more than one week after you
disconnect the power cable from the wall outlet.
The iPod is not connect in the iPod dock firmly. Remove an iPod from the unit, and then connect it
ALARM TYPE switch is set to BEEP. Set ALARM TYPE to SOURCE + BEEP or
CLOCK switch on the rear panel is set to SET, and
this unit is in clock setting mode.
the unit firmly.
Adjust volume with VOLUME, or adjust Bass with
EQ (☞ P. 1 7).
Turn the system off, and disconnect the power
cable. Wait about 30 seconds, reconnect the power
cable, and turn the system on.
Place the unit further away from the equipment.
Plug the power cable into the wall outlet firmly, and
set the clock again (☞ P. 5).
in the iPod dock again (☞ P. 2 ).
SOURCE (☞ P. 15).
Set CLOCK switch to CLOCK1 or CLOCK2
(☞ P. 5).
iPod
Problem Cause Solution
No sound.
The iPod does not charge up.
The iPod indicator flashes twice, and
repeated 3 times, after connecting the
iPod.
The iPod is not connect in the iPod dock firmly. Remove an iPod from the unit, and then connect it
The iPod software version has not been updated. Download the latest iTunes version from the Apple
The iPod is not connect in the iPod dock firmly. Remove an iPod from the unit, and then connect it
The system is set to power save mode (☞ P. 2).
The iPod being used is not supported by the unit. Use a supported iPod (☞ P. 2 2) .
in the iPod dock again (☞ P. 2 ).
website, and update the iPod software to the latest
version.
in the iPod dock again (☞ P. 2 ).
Press to cancel the power save mode.
18 En
Page 21

CD playback
TROUBLESHOOTING
Problem Cause Solution
Disc cannot be inserted.
Some button operations do not work.
Playback does not start immediately after
pressing / .
The CD indicator flashes twice, and
repeated 3 times, and the disc is ejected.
“Err” is displayed in the front panel
display after loading a disc.
USB device playback
Problem Cause Solution
MP3/WMA file on the USB device does
not play.
The USB indicator flashes twice, and
repeated 3 times, after connecting a USB
device.
“Err” is displayed in the front panel
display after connecting a USB device.
The system is set to power save mode.
The disc loaded into the unit may not be
compatible.
The disc may be dirty. Wipe the disc clean.
The disc loaded into the unit may not be
compatible.
If the unit was moved from a cold to warm place,
condensation may have formed on the disc reading
lens.
The disc loaded into the unit may not be
compatible.
The disc may be dirty. Wipe the disc clean.
The disc does not contain playable files. Use a disc contains playable files (☞ P. 21, 22).
The disc is loaded back to front. Insert a disc facing the label side to near side.
An error occurs in the unit.
The USB device is not recognized. Turn off the system and reconnect the USB device
An incompatible USB device is connected to the
unit.
The USB device does not contain playable files. Use a USB device contains playable files
An incompatible USB device is connected to the
unit.
An overcurrent is detected.
Press to cancel the power save mode (☞ P. 2).
Use a disc supported by the unit (☞ P. 21).
Use a disc supported by the unit (☞ P. 21).
Wait for an hour or two until the unit adjusts to the
room temperature, and try again.
Use a disc supported by the unit (☞ P. 21).
Eject the disc with .
to the unit.
Connect an AC adapter if supplied with the device.
If the solutions above do not resolve the problem,
the USB device is not playable on the unit.
Turn off the system and reconnect the USB device
to the unit. If it does not resolve the problem, the
USB device is not playable on the unit.
(☞ P. 21, 22).
Turn off the system and reconnect the USB device
to the unit. If it does not resolve the problem, the
USB device is not playable on the unit.
English
19 En
Page 22

TROUBLESHOOTING
Bluetooth
Problem Cause Solution
Cannot make this unit paired with the
other component.
Can’t establish a Bluetooth connection.
No sound is produced or the sound is
interrupted during playback.
The other component does not support A2DP. Perform pairing operations with a component
A Bluetooth adaptor, etc. that you want to pair with
this unit has a password other than “0000”.
This unit and the other component are too far apart. Move the other component closer to this unit.
There is a device (microwave oven, wireless LAN,
etc.) outputs signals in the 2.4 GHz frequency band
nearby.
This unit is not registered on the other component’s
Bluetooth connection list.
The Bluetooth connection of this unit with the other
component is disconnected.
This unit and the other component are too far apart. Move the other component closer to this unit.
There is a device (microwave oven, wireless LAN,
etc.) outputs signals in the 2.4 GHz frequency band
nearby.
The other component’s Bluetooth function is off. Turn on the Bluetooth function of the other
The other component is not set to send Bluetooth
audio signals to this unit.
The pairing setting of the other component is not
set to this unit.
The other component’s volume is set to the
minimum.
which supports A2DP.
Use a Bluetooth adaptor, etc. whose password is
“0000”.
Move this unit away from the device that is
emitting radio-frequency signals.
Perform pairing operations again (☞ P. 10).
Perform Bluetooth connection operations again
(☞ P. 1 1).
Move this unit away from the device that is
emitting radio-frequency signals.
component.
Check that the Bluetooth function of the other
component is set properly.
Set the pairing setting of the other component to
this unit.
Increase the volume level.
FM radio reception
Problem Cause Solution
Too much noise.
Too much noise during stereo broadcast.
Even with an outdoor antenna, radio
wave reception is weak. (Sound is
distorted.)
Remote control
Problem Cause Solution
The remote control does not work
properly.
The antenna may be connected improperly. Make sure the antenna is connected properly
The radio station you selected may be far from your
area, or the radio wave reception is weak in your
area.
Multipath reflection or other radio interferences
may have occurred.
The remote control may be operated outside its
operation range.
The remote control signal receiver on the unit
(☞ P. 3) may be exposed to direct sunlight or
lighting (inverted fluorescent lamps).
The battery may be worn out. Replace the batteries with two new ones.
There are obstacles between the remote control
signal receiver on the unit and the remote control.
(☞ P. 3) or use a commercially available outdoor
antenna.
Try manual tuning to improve the signal quality
(☞ P. 12) or use a commercially available outdoor
antenna.
Change the height, direction, or placement of the
antenna.
For information on the remote control operation
range, refer to “How to use the remote control”
(P. 1).
Change the lighting or orientation of the unit.
Remove the obstacles.
20 En
Page 23

Notes
Notes
Notes
NOTES ON DISCS AND USB DEVICES
Caution
CD information
This unit is designed for use with audio CD, CD-R*, and CD-RW*
with the logos followings.
* ISO 9660 format CD-R/RW
y
This unit can play back discs bearing any of the logo marks above. A disc
logo mark is printed on the disc and the disc jacket.
• Do not load any other type of disc into this unit. Doing so may damage this
unit.
• CD-R/RW cannot be played back unless finalized.
• Some discs cannot be played back depending on the disc characteristics or
recording conditions.
• Do not use any non-standard shaped discs such as a heart-shaped disc.
• Do not use discs with many scratches on their surface.
• Do not load a cracked, warped, or glued disc.
• Do not use 8-cm discs.
Handling a disc
• Do not touch the surface of the disc.
Hold a disc by its edge (and the center
hole).
• Do not use a pencil or pointed marker
to write on the disc.
• Do not put a tape, seal, glue, etc., on a disc.
• Do not use a protective cover to prevent scratches.
• Do not load more than one disc into this unit at one time. This
can cause damage to both this unit and the discs.
• Do not insert any foreign objects into the disc slot.
• Do not expose a disc to direct
sunlight, high temperature, high
humidity, or a lot of dust.
USB device information
This unit supports USB mass storage class devices (e.g., flash
memories or portable audio players) using FAT16 or FAT32
format.
• Some devices may not work properly even if they meet the requirements.
• Do not connect devices other than USB mass storage class devices (such as
USB chargers or USB hubs), PCs, card readers, an external HDD, etc.
• Yamaha will not be held responsible for any damage to or data loss on the
USB device occurring while the device is connected to this unit.
• Playability of and power supply to all kind of USB devices are not
guaranteed.
• USB devices with encryption cannot be used.
About MP3 or WMA files
• The unit can play back:
File Bitrate (kbps)
MP3 8 - 320** 16 - 48
WMA 16 - 320** 22.05 - 48
** Both constant and variable bitrates are supported.
• The maximum numbers of files/folders that can be played on the unit are
as follows.
Data CD USB
Maximum total number of file 512 9999
Maximum folder number 255 128
Maximum file number per folder 511 255
• Copyright-protected files cannot be played back.
Sampling
frequency (kHz)
English
• If a disc becomes dirty, wipe it with
a clean, dry cloth from the center
out to the edge. Do not use record
cleaner or paint thinner.
• To avoid malfunction, do not use a
commercially available lens
cleaner.
21 En
Page 24

SPECIFICATIONS
Φ
295 mm
(11-5/8 in)
997 mm
(39-1/4 in)
410 mm
(16-1/8 in)
410 mm
(16-1/8 in)
Weight: 12.0 kg
(26.5 lbs.)
587 mm
(23-1/8 in)
PLAYER SECTION
iPod (Digital connection) [As of October, 2012]
• Compatible iPod models ....iPod touch (1st, 2nd, 3rd and 4th generations)
• Compatible iPhone models
................................ iPhone 4S, iPhone 4, iPhone 3GS, iPhone 3G, iPhone
An iPod may not be detected by the unit or some features may not be
compatible, depending on the model or software version of the iPod.
iPod nano (2nd, 3rd, 4th, 5th and 6th generations)
iPod classic
CD
• Media ...................................................................................CD, CD-R/RW
• Audio format .........................................................Audio CD, MP3, WMA
Laser
• Type .................................................... Semiconductor laser GaAs/GaAlAs
• Wave length ..................................................................................... 790 nm
• Output power ...................................................................................... 7 mW
USB
• Audio format ........................................................................... MP3, WMA
AUX
• Input connector ................................... 3.5 mm (1/8 in) STEREO mini jack
Bluetooth SECTION
• Bluetooth version ...................................................................Ver. 2.1+EDR
• Supported protocols ............................................................. A2DP, AVRCP
• Supported codecs ....................................................................... SBC, AAC
• Wireless output ................................................................ Bluetooth Class 2
• Maximum communication distance ................10 m (without obstructions)
TUNER
• Tuning range
FM ..........................................................................87.50 to 108.00 MHz
GENERAL
• Power supply
U.K. model ....................................................................AC 230 V, 50 Hz
Australia model .............................................................AC 240 V, 50 Hz
Asia model .................................................... AC 220 to 240 V, 50/60 Hz
Taiwan model .................................................... AC 110 to 120 V, 60 Hz
• Power consumption.............................................................................. 20 W
• System off consumption ..................................................................... 1.5 W
• Power save consumption.......................................................... 0.5 W or less
• Dimensions
Bluetooth
• Bluetooth is a technology for wireless communication between
devices within an area of about 10 meters (33 ft) employing the
2.4 GHz frequency band, a band which can be used without a
license.
• Bluetooth is a registered trademark of the Bluetooth SIG and is
used by Yamaha in accordance with a license agreement.
Handling Bluetooth communications
• The 2.4 GHz band used by Bluetooth compatible devices is a
radio band shared by many types of equipment. While Bluetooth
compatible devices use a technology minimizing the influence of
other components using the same radio band, such influence may
reduce the speed or distance of communications and in some
cases interrupt communications.
• The speed of signal transfer and the distance at which
communication is possible differs according to the distance
between the communicating devices, the presence of obstacles,
radio wave conditions and the type of equipment.
• Yamaha does not guarantee all wireless connections between this
unit and devices compatible with Bluetooth function.
Specifications are subject to change without notice.
iPod, iPhone
“Made for iPod” and “Made for iPhone” mean that an electronic
accessory has been designed to connect specifically to iPod or
iPhone, respectively, and has been certified by the developer to
meet Apple performance standards.
Apple is not responsible for the operation of this device or its
compliance with safety and regulatory standards. Please note that
the use of this accessory with iPod or iPhone may affect wireless
performance.
iPad, iPhone, iPod, iPod touch, iPod classic, iPod nano and iTunes
are trademarks of Apple Inc., registered in the U.S. and other
countries.
22 En
Page 25

Information for Users on Collection and Disposal
of Old Equipment and Used Batteries
These symbols on the products, packaging, and/or
accompanying documents mean that used electrical and
electronic products and batteries should not be mixed
with general household waste.
For proper treatment, recovery and recycling of old
products and used batteries, please take them to
applicable collection points, in accordance with your
national legislation and the Directives 2002/96/EC and
2006/66/EC.
By disposing of these products and batteries correctly,
you will help to save valuable resources and prevent any
potential negative effects on human health and the
environment which could otherwise arise from
inappropriate waste handling.
For more information about collection and recycling of
old products and batteries, please contact your local
municipality, your waste disposal service or the point of
sale where you purchased the items.
[Information on Disposal in other Countries
outside the European Union]
These symbols are only valid in the European Union. If
you wish to discard these items, please contact your
local authorities or dealer and ask for the correct method
of disposal.
Note for the battery symbol (bottom two
symbol examples):
This symbol might be used in combination with a chemical
symbol. In this case it complies with the requirement set
by the Directive for the chemical involved.
LASER SAFETY
This unit employs a laser. Due to possible eye injury, only a
qualified service person should remove the cover or attempt to
service this device.
DANGER
This unit emits visible laser radiation when open. Avoid direct eye
exposure to beam. When this unit is plugged into the wall outlet,
do not look inside the unit through the disc slot and other openings.
The laser component in this product is capable of emitting
radiation exceeding the limit for Class 1.
If there should be color blotching or noise when used near a TV,
move this unit away from the TV when using it.
Do not use this unit within 22 cm (9 inches) of persons with a
heart pacemaker implant or defibrillator implant.
Radio waves may affect electro-medical devices.
Do not use this unit near medical devices or inside medical
facilities.
The user shall not reverse engineer, decompile, alter, translate
or disassemble the software used in this unit, whether in part or
in whole. For corporate users, employees of the corporation
itself as well as its business partners shall observe the
contractual bans stipulated within this clause. If the stipulations
of this clause and this contract cannot be observed, the user
shall immediately discontinue using the software.
English
We, Yamaha Music Europe GmbH hereby declare that this unit
is in compliance with the essential requirements and other
relevant provisions of Directive 1999/5/EC.
Yamaha Music Europe GmbH
Siemensstr. 22-34 25462 Rellingen, Germany
Tel: +49-4101-303-0
23 En
Page 26

PRECAUCIÓN: LEA LAS INDICACIONES SIGUIENTES ANTES DE
UTILIZAR ESTE APARATO.
1 Para asegurar el mejor rendimiento de este aparato, lea
atentamente este manual. Y luego guárdelo en un lugar
seguro para poder consultarlo en el futuro en caso de ser
necesario.
2 Instale esta unidad en un lugar bien ventilado, fresco,
seco y limpio, alejado de la luz directa del sol, fuentes de
calor, vibración, polvo, humedad y frío. Para una
adecuada ventilación, permita que el equipo tenga el
siguiente espacio libre mínimo:
Arriba: 15 cm
Atrás: 2,5 cm
A los lados: 10 cm
3 Coloque este aparato lejos de otros aparatos eléctricos,
motores o transformadores, para evitar así los ruidos de
zumbido.
No exponga este aparato a cambios bruscos de
4
temperaturas, del frío al calor, ni lo coloque en lugares
muy húmedos (una habitación con deshumidificador, por
ejemplo), para impedir así que se forme condensación en
su interior, lo que podría causar una descarga eléctrica, un
incendio, daños en el aparato y/o lesiones a las personas.
5 Evite instalar este aparato en un lugar donde puedan
caerle encima objetos extraños y/o donde quede expuesto
al goteo o a la salpicadura de líquidos. Encima de este
aparato no ponga:
– Otros componentes, porque pueden causar daños y/o
decoloración en la superficie de este aparato.
– Objetos con fuego (velas, por ejemplo), porque
pueden causar un incendio, daños en el aparato y/o
lesiones a las personas.
– Recipientes con líquidos, porque pueden caerse y
derramar el líquido, causando descargas eléctricas al
usuario y/o dañando el aparato.
No tape este aparato con un periódico, mantel, cortina, etc.
6
para no impedir el escape del calor. Si aumenta la
temperatura en el interior del aparato, esto puede causar un
incendio, daños en el aparato y/o lesiones a las personas.
7 No enchufe este aparato a una toma de corriente hasta
después de haber terminado todas las conexiones.
8 No ponga el aparato al revés. Podría recalentarse y
posiblemente causar daños.
9 No utilice una fuerza excesiva con los conmutadores, los
controles y/o los cables.
10 Cuando desconecte el cable de alimentación de la toma
de corriente, sujete la clavija y tire de ella; no tire del
propio cable.
11 No limpie este aparato con disolventes químicos porque
podría estropear el acabado. Utilice un paño limpio y
seco para limpiar el aparato.
Utilice solamente la tensión especificada en este aparato.
12
Utilizar el aparato con una tensión superior a la especificada
resulta peligroso y puede producir un incendio, daños en el
aparato y/o lesiones a las personas. Yamaha no se hará
responsable de ningún daño debido al uso de este aparato
con una tensión diferente de la especificada.
13 Para impedir daños debidos a relámpagos, desconecte el
cable de alimentación y antenas externas de la toma de
corriente durante una tormenta eléctrica.
14 No intente modificar ni arreglar este aparato. Póngase en
contacto con el personal de servicio Yamaha cualificado
cuando necesite realizar alguna reparación. La caja no
deberá abrirse nunca por ninguna razón.
15 Cuando no piense utilizar este aparato durante mucho
tiempo (cuando se ausente de casa por vacaciones, por
ejemplo) desconecte el cable de alimentación de la toma
de corriente.
i Es
16 Asegúrese de leer la sección “SOLUCIÓN DE
PROBLEMAS” antes de dar por concluido que su
aparato está averiado.
17 Antes de trasladar este aparato, pulse para activar el
sistema y, a continuación, desconecte el cable de
alimentación CA de la toma de corriente.
La condensación se formará cuando cambie de repente la
18
temperatura ambiental. Desconecte en este caso el cable de
alimentación de la toma de corriente y no utilice el aparato.
19 El aparato se calentará cuando la utilice durante mucho
tiempo. Desactive el sistema y, a continuación, no utilice
la unidad para dejar que se enfríe.
20 Instale este aparato cerca de la toma de CA y donde se
pueda alcanzar fácilmente la clavija de alimentación.
21 Las baterías no deberán exponerse a un calor excesivo
como, por ejemplo, el que producen los rayos del sol, el
fuego y similares.
– Mantenga las baterías en un lugar fuera del alcance de
los niños. Las baterías pueden ser peligrosas y los
niños se las llevan a la boca.
– Si las pilas se agotan, el alcance operativo eficaz del
mando a distancia se reduce considerablemente. Si
esto sucediese, cambie las pilas por dos nuevas tan
pronto como sea posible.
– No utilice pilas viejas y nuevas juntas.
– No utilice juntas pilas de tipos diferentes (alcalinas de
manganeso, por ejemplo). Lea atentamente las
instrucciones de la caja ya que hay distintos tipos de
pilas con la misma forma y color.
Las pilas gastadas pueden tener derrames. Si se
–
produce algún derrame en las pilas, deséchelas
inmediatamente. Evite tocar el líquido derramado o que
entre en contacto con la ropa, etc. Ante de instalar pilas
nuevas, limpie bien el compartimento de las pilas.
– Si no piensa utilizar la unidad durante un largo
periodo de tiempo, extraiga las baterías de la unidad.
De lo contrario, las baterías se gastarán y podrían
filtrar líquido y dañar la unidad.
– No arroje las pilas al cubo de la basura. Deséchelas de
acuerdo con la normativa local aplicables.
Este aparato no se desconecta de la fuente de alimentación de
CA si está conectada a una toma de corriente, aunque la propia
aparato esté apagada con . En este estado, este aparato ha sido
diseñada para que consuma un cantidad de corriente muy
pequeña.
ADVERTENCIA
PARA REDUCIR EL RIESGO DE INCENDIO O
DESCARGA ELÉCTRICA, NO EXPONGA ESTE APARATO
A LA LLUVIA NI A LA HUMEDAD.
PRECAUCIÓN
Peligro de explosión si la pila se sustituye incorrectamente.
Sustitúyala por otra del mismo tipo o de un tipo equivalente.
Si se instala la unidad demasiado cerca de un televisor con tubo
de rayos catódicos, la calidad del color podría verse perjudicada.
En este caso, aleje el sistema del televisor.
PRECAUCIÓN
El uso de los controles, los ajustes o los procedimientos que
no se especifican enste manual pueden causar una exposición
peligrosa a la radiación.
Page 27

CONTENIDO
Nota
y
ISX-B820
Cable de
alimentación
Mando a distancia Tapa para base
Tapón para USB
Antena FM
Ménsula
Barra
Base
Soporte
Abrazadera de cable
Conjunto de tornillos
Nota
Use estos elementos
para montar la peana.
Lea la Guía de montaje
aparte para aprender a
montar la peana.
Nota
Mantenga el tapón para
USB fuera del alcance de
los niños, para evitar que
se lo traguen por
accidente.
2 baterías
(AA, LR6, UM-3)
Manual de
instrucciones
(este manual)
Guía de montaje
6 m
NOMBRES DE LAS PARTES Y SUS FUNCIONES .................2
AJUSTE DEL RELOJ ................................................................5
ESCUCHAR EL iPod.................................................................6
ESCUCHAR UN CD Y UN DISPOSITIVO USB.........................7
ESCUCHAR MÚSICA
DESDE EL COMPONENTE Bluetooth...................................10
PARA ESCUCHAR EMISORAS DE RADIO ...........................12
ESCUCHAR UNA FUENTE EXTERNA...................................13
USAR LA FUNCIÓN DE ALARMA..........................................14
USO DEL TEMPORIZADOR PARA DORMIR.........................17
CONTROL DEL TONO ............................................................17
AJUSTAR EL BRILLO DE LA PANTALLA DEL PANEL
FRONTAL ................................................................................17
SOLUCIÓN DE PROBLEMAS.................................................18
NOTAS SOBRE LOS DISCOS Y LOS DISPOSITIVOS USB....21
ESPECIFICACIONES ..............................................................22
Características
• Reproduzca música en dispositivos externos como modelos de iPod/iPhone, de CD de audio/datos y dispositivos USB y sintonice la radio
FM.
• Gracias a la tecnología Bluetooth, puede disfrutar de un sonido nítido sin conexiones por cable.
• Use su música favorita o conjunto de sonidos como alarma. La música que seleccione se reproduce al volumen que elija en la hora de la
alarma, iniciando el día de la mejor forma posible (función IntelliAlarm) (☞ P. 1 4 ) .
• Almacena fácilmente hasta cinco de sus emisoras FM favoritas.
• El ecualizador de 3 bandas (bajos, medio, agudos) puede configurarse para escuchar la música justo como desee.
• Puede ver dos tipos de relojes (con manecillas) a juego con el diseño de la unidad.
Acerca de este manual
• La frase “iPod” utilizada en este manual también incluye el “iPhone”.
• Si se pueden utilizar los botones de la unidad y del mando a distancia para una función, el manual describirá los pasos para utilizar los
botones de la unidad.
• indica precauciones de uso de la unidad y las limitaciones de funciones.
• indica explicaciones complementarias para mejorar el uso.
Accesorios incluidos
Français Español
Uso del mando a distancia
Inserte las baterías en el mando a distancia en la dirección correcta
(+ y –).
Apunte el mando a distancia al receptor de señales del mando a
distancia (del panel frontal) y utilícelo con el alcance mostrado abajo.
1 Es
Page 28

Panel superior
AUTO SET BEEP
SOURCE + BEEP
SOURCE
DIMMER
CLOCK
ALARM TYPE
212
1
VOLUME
USB LABEL SIDE
SOURCE PRESETALARM SNOOZE
SLEEP
12345678 jlk9
y
• Puede recargar un iPod mientras está conectado a la base. El iPod no se recargará cuando la
unidad esté en el modo de ahorro de energía.
• Es importante que utilice un adaptador de la base que sea compatible con el iPod. Si no usa un
adaptador o el adaptador no es compatible, la conexión será débil o de mala calidad, lo que
puede traducirse en un deterioro del conector. Para ver información del adaptador de base,
visite el sitio web oficial de Apple.
• Si conecta un iPod en su funda protectora utilizando la fuerza, puede provocar daños en el
conector. Retire la funda protectora antes de realizar la conexión.
• Cuando no utilice el iPod, coloque la tapa de la base del iPod para proteger el conector.
Adaptador
de la base
NOMBRES DE LAS PARTES Y SUS FUNCIONES
a (Alimentación)
Pulse este botón para encender o apagar el sistema. Cuando el
sistema está apagado, aparece indicada la hora en el panel
frontal.
y
• Mantenga pulsado en la parte superior de la unidad durante más de
3 segundos para poner el sistema en el modo de ahorro de energía. En
este modo, no se muestra información del panel frontal. Esto puede
reducir el consumo de energía. Para cancelar el modo de ahorro de
energía, pulse de nuevo.
• La función de alarma también está disponible tanto en inactividad del
sistema como en el modo de ahorro de energía.
b Base de iPod
Conecte un iPod.
c Puerto USB
Conecte un dispositivo USB (P. 9).
d VOLUME –/ +
Ajuste el volumen.
e SOURCE
Cambie la fuente que va a reproducir.
Conexión de un iPod a la base para iPod
f ALARM
Activa o desactiva la alarma y permite ajustar varias
configuraciones de alarmas (P. 15, 16).
g SNOOZE/SLEEP
Configure el temporizador para dormir o cambie la alarma al
modo de repetición (P. 16, 17).
h PRESET
Almacene emisoras FM o cambie la carpeta de reproducción
(al reproducir música de dispositivos de CD o USB de datos).
i /
Salte el archivo o la pista de reproducción o sintonice la radio.
Si mantiene pulsado el botón mientras reproduce una pista o
archivo, buscará la pista o el archivo hacia atrás/adelante.
j /
Reproduce o pausa la pista que se está reproduciendo.
k
Expulsa el CD.
l Ranura para el disco
Introduzca un CD.
2 Es
Page 29

Notas
Pantalla del panel frontal
2
56
3
4
8
7
1
9
162 3
5
4
Antena FM
incluida
NOMBRES DE LAS PARTES Y SUS FUNCIONES
1 Indicador de reproducción/reproducción
aleatoria/repetición
Muestra el modo de reproducción (P. 6, 9).
b Receptor de señales del mando a distancia
c Indicador de reloj
Muestra la manecilla de hora del reloj (P. 5).
d Indicador de fuente
Muestra la fuente seleccionada.
e Indicador Bluetooth
Se activa si esta unidad realiza la conexión por Bluetooth
(P. 10, 11).
f Indicador de temporización de apagado
Se activa si se ha configurado el temporizador para dormir
(P. 17).
g Indicador de alarma
Se activa si se ha configurado la alarma (P. 14).
h Indicador multifunción
Muestra información variada, como la hora del reloj, el número
de pista que se está reproduciendo o la emisora de FM.
i Sensor de iluminación
Detecta luz ambiental. No cubra este sensor.
Français Español
Panel posterior
c DIMMER
Puede ajustar el brillo de la pantalla del panel frontal (P. 17).
d AUX
Conecta un dispositivo externo.
e Terminal de antena FM
Conecta la antena FM suministrada o una antena externa.
• La antena debe estirarse. Si la recepción de radio es mala, cambie la
a ALARM TYPE
Cambia el tipo de alarma (P. 15).
b CLOCK
Cambia el tipo de visualización de reloj o permite configurar la
hora (P. 5).
Si pasa la cable de antena exterior y/o el cable de dispositivo externo por la barra de la peana, consulte la Guía de montaje aparte.
altura, la dirección o el lugar de la antena.
• Si utiliza una antena exterior de venta en tiendas en lugar de la antena
FM incluida, la recepción puede ser mejor.
f Cubierta del terminal
Extraiga la cubierta del terminal antes de conectar dispositivos
externos a AUX, o de conectar la antena de FM al terminal de
antena.
3 Es
Page 30

NOMBRES DE LAS PARTES Y SUS FUNCIONES
Botones de control de iPod
Mando a distancia
1
2
3
4
Bluetooth
5
6
7
8
9
j
k
l
m
p
o
n
a Transmisor de señales del mando a distancia
b (Alimentación)
Pulse este botón para encender o apagar el sistema.
c ALARM
Activa o desactiva la alarma.
d SNOOZE/SLEEP
Configure el temporizador para dormir o cambie la alarma al
modo de repetición (P. 16, 17).
e Botón de fuente
Cambie la fuente que va a reproducir.
f FOLDER
Cambie la carpeta de reproducción al reproducir música de
dispositivos de CD de datos o dispositivos USB.
g /
Salte el archivo o la pista de reproducción.
Si mantiene pulsado el botón mientras reproduce una pista o
archivo, buscará la pista o el archivo hacia atrás/adelante.
h
Permite reproducir o poner en pausa.
i
Detiene la reproducción.
j (Repetición)/ (Reproducción Aleatoria)
Reproduzca música en un iPod, o CD de audio/datos o
dispositivo USB en repetición/reproducción aleatoria (P. 6, 9).
k EQ LOW/MID/HIGH
Ajuste la calidad de sonido de bajos, medios o agudos (P. 17).
l PRESET /
Seleccione una emisora de FM presintonizada.
m MEMORY
Guarde la emisora de FM (P. 12).
n TUNING /
Ajuste la radio.
o VOLUME + / –
Ajuste el volumen.
p MUTE
Permite silenciar el sonido o reanudar la reproducción.
4 Es
Page 31

Nota
Configuración de la hora
AUTO SET BEEP
SOURCE + BEEP
SOURCE
DIMMER
CLOCK
ALARM TYPE
212
1
VOLUME
USB LABEL SIDE
SOURCE PRESETALARM SNOOZE
SLEEP
2
Panel superior
SET
Panel posterior
Programar la hora
(parpadeando)
CLOCK 2
CLOCK 1
Panel posterior
Ej.: 10:50
Manecilla de
hora del reloj
analógico
(hora)
Minuto
Ej.: 10:50
Minuto
Hora
AJUSTE DEL RELOJ
1 Mueva el conmutador CLOCK del panel posterior
a SET.
2 Programe la hora con / .
3 Mueva el conmutador CLOCK del panel posterior
a CLOCK 1 o CLOCK2.
y
• Si conecta un iPod a la base del iPod en el paso 2, copiará la hora del
iPod en la unidad. Si el iPod ya está conectado a la base del iPod cuando se
programa CLOCK a SET, no se copiará la hora del iPod.
• Pulse SNOOZE/SLEEP del paso
al de 24 horas y al revés.
• El indicador “PM” solo aparecerá al seleccionar el formato de 12 horas.
Français Español
2 para pasar del formato de 12 horas
Cambio del tipo de reloj
Mueva el conmutador CLOCK del panel posterior para cambiar el tipo de reloj.
Los ajustes de hora se reiniciarán si la unidad no se enciende durante más de
una semana.
Modo de visualización de reloj 1
(CLOCK 1)
Modo de visualización de reloj 2
(CLOCK 2)
5 Es
Page 32

Notas
ESCUCHAR EL iPod
AUTO SET BEEP
SOURCE + BEEP
SOURCE
DIMMER
CLOCK
ALARM TYPE
212
1
VOLUME
USB LABEL SIDE
SOURCE PRESETALARM SNOOZE
SLEEP
23
Panel superior
Mando a distancia
REPEAT
SHUFFLE
Mando a distancia
Reproducir el iPod
Para obtener información sobre los modelos de iPod compatibles, consulte “ESPECIFICACIONES” (P. 22).
1 Conecte un iPod a la base para iPod.
2 Pulse SOURCE y configure iPod como la fuente de
reproducción.
3 Reproduzca el iPod pulsando / .
La reproducción puede controlarse con el mando a distancia,
iPod o el panel superior de esta unidad.
Botón Función
/
Panel
superior
Mando a
distancia
y
• Puede retirar el iPod durante la reproducción.
• Si el sistema está apagado, se encenderá automáticamente cuando se
reproduzca música o vídeo del iPod.
• Si se selecciona iPod como la fuente de reproducción, el sistema se
apagará automáticamente cuando hayan transcurrido 60 minutos sin
conectar un dispositivo a la base para iPod y sin que se haya realizado
ninguna operación.
/
/
FOLDER/
MENU/
ENTER
Reproducir o poner en
pausa
Saltar
Buscar hacia atrás o hacia
delante (mantenga pulsado)
Reproducir o poner en
pausa
Saltar
Buscar hacia atrás o hacia
delante (mantenga pulsado)
Ajustar el menú del iPod
Repetición/reproducción aleatoria
El modo de reproducción puede comprobarse con el indicador de reproducción/reproducción aleatoria/repetición en la pantalla del panel
frontal.
6 Es
• Repetición/reproducción aleatoria quizá no funcione correctamente, en
función del tipo de iPod utilizado.
• El orden de repetición/reproducción aleatoria quizá difiera, en función del
tipo de iPod utilizado.
Repetición de la reproducción
Pulse REPEAT en el mando a distancia para seleccionar uno de
los siguientes modos de reproducción.
:Una
:Todas
Ausencia de indicador: Desactivado
Reproducción aleatoria
Pulse SHUFFLE en el mando a distancia para seleccionar uno de
los siguientes modos de reproducción.
: Canciones
:Álbumes
Ausencia de indicador: Desactivado
Page 33

Nota
ESCUCHAR UN CD Y UN DISPOSITIVO USB
Panel superior
CD
Número de pista
La unidad funcionará del siguiente modo al reproducir pistas o archivos de CD/dispositivos de USB.
• Si se detiene el CD/dispositivo de USB que se está reproduciendo, la pista que se estaba reproduciendo empezará a reproducirse desde el
principio de la pista la próxima vez que empiece la reproducción.
• Si pulsa en el mando a distancia mientras la reproducción está detenida, la próxima vez que empiece la reproducción la unidad no
reproducirá las pistas de este modo:
– CD de audio: desde la primera pista del CD.
– Para un CD de datos/dispositivo USB: desde la primera pista de la carpeta que contenga la pista que se reprodujo la última vez.
• Este sistema se apaga automáticamente si no se ha realizado ninguna operación durante 60 minutos después de detener la reproducción
del CD/dispositivo USB.
y
Para obtener más información sobre los discos y los archivos que pueden reproducirse, consulte “NOTAS SOBRE LOS DISCOS Y LOS DISPOSITIVOS
USB” (P. 21).
Cómo escuchar un CD de audio
1 Pulse SOURCE y configure CD como la fuente de
reproducción.
AUTO SET BEEP
212
DIMMER
USB LABEL SIDE
VOLUME
SOURCE PRESETALARM SNOOZE
SOURCE + BEEP
1
SOURCE
CLOCK
ALARM TYPE
2 Introduzca el CD de audio en la ranura del
disco con la cara de la etiqueta mirando hacia la
parte frontal de la unidad.
La reproducción empezará automáticamente. El número de
pista aparece durante unos segundos al empezar a reproducir o
SLEEP
saltar pistas.
Français Español
12
Use los siguientes botones para controlar la unidad mientras
reproduce pistas en CD de audio.
Botón Función
/
Panel
superior
Mando a
distancia
Los CD no pueden introducirse ni expulsarse cuando el sistema está en
el modo de ahorro de energía (☞ P. 2).
/
/
Reproducir o poner en
pausa
Saltar
Buscar hacia atrás o hacia
delante (mantenga pulsado)
Expulsar el CD
Reproducir o poner en
pausa
Saltar
Buscar hacia atrás o hacia
delante (mantenga pulsado)
Detener
7 Es
Page 34

ESCUCHAR UN CD Y UN DISPOSITIVO USB
AUTO SET BEEP
SOURCE + BEEP
SOURCE
DIMMER
CLOCK
ALARM TYPE
212
1
VOLUME
USB LABEL SIDE
SOURCE PRESETALARM SNOOZE
SLEEP
12
Panel superior
Número de carpeta
Número de archivo
Cómo escuchar un CD de datos
1 Pulse SOURCE y configure CD como la fuente de
reproducción.
2 Introduzca el CD de datos en la ranura del
disco con la cara de la etiqueta mirando hacia la
parte frontal de la unidad.
La reproducción empezará automáticamente. El número de
carpeta o archivo aparece durante unos segundos al empezar a
reproducir o saltar pistas.
Use los siguientes botones para controlar la unidad mientras
reproduce pistas en CD de datos.
Botón Función
Reproducir o poner en
pausa
Saltar
Buscar hacia atrás o hacia
delante (mantenga pulsado)
Cambiar la carpeta de
reproducción
Expulsar el CD
Reproducir o poner en
pausa
Saltar
/
Buscar hacia atrás o hacia
delante (mantenga pulsado)
Detener
Cambiar la carpeta de
reproducción
Panel
superior
Mando a
distancia
/
/
PRESET
FOLDER
8 Es
Page 35

Escuchar un dispositivo USB
Nota
AUTO SET BEEP
SOURCE + BEEP
SOURCE
DIMMER
CLOCK
ALARM TYPE
212
1
VOLUME
USB LABEL SIDE
SOURCE PRESETALARM SNOOZE
SLEEP
21
Panel superior
Número de carpeta
Número de archivo
REPEAT
SHUFFLE
Mando a distancia
ESCUCHAR UN CD Y UN DISPOSITIVO USB
Cuando se conecta un dispositivo USB, las pistas se reproducen en el
siguiente orden:
– Orden de reproducción de carpetas:
las carpetas se reproducen en orden alfabético, tomando como
referencia los 3 primeros caracteres del nombre de la carpeta.
Las carpetas que contengan caracteres distintos del alfabeto se
reproducirán tras las carpetas de caracteres alfabéticos.
– Orden de reproducción de archivos:
los archivos se reproducirán por orden a partir de los archivos
con la fecha de escritura más antigua.
1 Pulse SOURCE y configure USB como la fuente de
reproducción.
2 Conecte un dispositivo USB al puerto USB.
La reproducción empezará automáticamente. El número de
carpeta o archivo aparece durante unos segundos al empezar a
reproducir o saltar pistas.
Use los siguientes botones para controlar la unidad mientras
reproduce pistas en dispositivos USB.
Botón Función
/
Panel
superior
/
PRESET
Mando a
distancia
FOLDER
y
Detenga la reproducción antes de extraer el dispositivo USB.
Reproducir o poner en pausa
Saltar
Buscar hacia atrás o hacia
delante (mantenga pulsado)
Cambiar la carpeta de
reproducción
Reproducir o poner en pausa
Saltar
/
Buscar hacia atrás o hacia
delante (mantenga pulsado)
Detener
Cambiar la carpeta de
reproducción
Français Español
Repetición/reproducción aleatoria
El modo de reproducción puede comprobarse con el indicador de reproducción/reproducción aleatoria/repetición en la pantalla del panel
frontal.
Repetición de la reproducción
Pulse REPEAT en el mando a distancia para seleccionar uno de
los siguientes modos de reproducción.
: Todas las pistas de la carpeta (solo CD de
datos/dispositivo USB)
: Todas las pistas
:1 pista
Ausencia de indicador: Modo de repetición desactivado
y
Si la fuente seleccionada contiene carpetas, cada una se reproducirá en el
modo de repetición/reproducción aleatoria.
Reproducción aleatoria
Pulse SHUFFLE en el mando a distancia para seleccionar uno de
los siguientes modos de reproducción.
: Todas las pistas de la carpeta (solo CD de
datos/dispositivo USB)
: Todas las pistas
Ausencia de indicador: Modo de reproducción aleatoria
desactivado
9 Es
Page 36

ESCUCHAR MÚSICA DESDE EL COMPONENTE Bluetooth
AUTO SET BEEP
SOURCE + BEEP
SOURCE
DIMMER
CLOCK
ALARM TYPE
212
1
VOLUME
USB LABEL SIDE
SOURCE PRESETALARM SNOOZE
SLEEP
1
Panel superior
Indicador Bluetooth
AUTO SET BEEP
SOURCE + BEEP
SOURCE
DIMMER
CLOCK
ALARM TYPE
212
1
VOLUME
USB LABEL SIDE
SOURCE PRESETALARM SNOOZE
SLEEP
1
Panel superior
Indicador Bluetooth
Esta unidad proporciona funcionalidad de Bluetooth. Puede disfrutar de reproducción de música inalámbrica desde su componente Bluetooth
(teléfono móvil, reproductor de audio digital, etc.). Consulte también el manual de instrucciones de su componente Bluetooth.
Vinculación de esta unidad con su componente Bluetooth
La vinculación es una operación que registra el componente de comunicación (en adelante llamado “el otro componente”) con esta unidad.
Deberá realizar la operación de vinculación la primera vez que utilice su componente Bluetooth con esta unidad, o bien si se han eliminado
los ajustes de vinculación. Una vez finalizada la vinculación, volver a realizar la conexión posteriormente será sencillo aún después de
haberse desconectado la conexión a Bluetooth. Si la vinculación no se realiza correctamente, consulte el elemento “Bluetooth” en
“SOLUCIÓN DE PROBLEMAS” (P. 20).
y
• Esta unidad se puede vincular con un máximo de ocho componentes. Una vez realizada correctamente la vinculación con el noveno componente, los datos de
vinculación del componente con la fecha de conexión más antigua se eliminarán.
• Si esta unidad se conecta por Bluetooth a otro componente, mantenga pulsado el botón SOURCE de esta unidad o Bluetooth del mando a distancia para
desconectar la conexión a Bluetooth antes de realizar la operación de vinculación.
Si se utiliza un iPod touch/iPhone/iPad
1 Pulse el botón SOURCE para cambiar la fuente de
reproducción a Bluetooth.
2 En el iPod touch/iPhone/iPad, active [Ajustes]
[General] [Bluetooth].
La lista de conexiones a Bluetooth aparecerá en [Dispositivos].
(Este procedimiento o pantalla pueden variar en función del
tipo de iPod touch/iPhone/iPad.)
3 En la lista de conexiones a Bluetooth del otro
componente, elija esta unidad (ISX-B820 Yamaha).
Una vez finalizada la vinculación, el iPod touch/iPhone/iPad
indicará “Conectado”.
El indicador Bluetooth en la pantalla del panel frontal de esta
unidad se iluminará.
Si se utiliza un dispositivo que no sea iPod touch/iPhone/iPad
10 Es
1 Pulse el botón SOURCE para cambiar la fuente de
reproducción a Bluetooth.
2 Realice la vinculación a Bluetooth en el otro
componente.
Para ver más información, consulte el manual de instrucciones
del otro componente.
3 En la lista de conexiones a Bluetooth del otro
componente, elija esta unidad (ISX-B820 Yamaha).
Una vez finalizada la vinculación, el indicador Bluetooth en la
pantalla del panel frontal de esta unidad se iluminará durante
aproximadamente 1 segundo.
y
Si se le pide que introduzca una contraseña, escriba los números
“0000”.
Page 37

Nota
Nota
Nota
Escuchar un componente Bluetooth
AUTO SET BEEP
SOURCE + BEEP
SOURCE
DIMMER
CLOCK
ALARM TYPE
212
1
VOLUME
USB LABEL SIDE
SOURCE PRESETALARM SNOOZE
SLEEP
1
Panel superior
AUTO SET BEEP
SOURCE + BEEP
SOURCE
DIMMER
CLOCK
ALARM TYPE
212
1
VOLUME
USB LABEL SIDE
SOURCE PRESETALARM SNOOZE
SLEEP
1
Panel superior
Indicador Bluetooth
ESCUCHAR MÚSICA DESDE EL COMPONENTE Bluetooth
1 Pulse el botón SOURCE para cambiar la fuente de
reproducción a Bluetooth.
2 Conecte esta unidad y el otro componente por
Bluetooth.
3 Reproduzca música desde su componente Bluetooth.
Asegúrese de que el ajuste de volumen de esta unidad no sea demasiado
elevado. Le recomendamos que ajuste el volumen en el otro componente.
y
• Si realiza la conexión por B luetooth desde el otro componente y
reproduce música cuando esta unidad ha desactivado el sistema, la
unidad activará automáticamente el sistema.
• Si desconecta la conexión a Bluetooth desde el otro componente con
la fuente de reproducción establecida en Bluetooth, el unidad apagará
el sistema automáticamente.
• Si se selecciona Bluetooth como la fuente de reproducción, esta
unidad apagará el sistema automáticamente cuando hayan
transcurrido 60 minutos sin realizar ninguna conexión a Bluetooth o
sin que se haya realizado ninguna operación.
Conexión de un componente ya vinculado por Bluetooth
Una vez finalizada la vinculación, la conexión de un componente Bluetooth resultará sencilla en ocasiones posteriores.
Conexión desde esta unidad
1 Pulse el botón SOURCE para cambiar la fuente de
reproducción a Bluetooth.
El indicador de Bluetooth parpadeará en la pantalla del panel
frontal; esta unidad buscará el otro componente que se haya
conectado más recientemente por Bluetooth y establecerá una
conexión (primero debe activar el ajuste de Bluetooth del otro
componente).
Una vez establecida la conexión a Bluetooth, el indicador
Bluetooth se iluminará.
Français Español
Yamaha no garantiza todas las conexiones entre esta unidad y el
componente Bluetooth.
Conexión desde el otro componente
1 En los ajustes de Bluetooth del otro componente, active Bluetooth.
2 En la lista de conexiones a Bluetooth del otro componente, elija esta unidad (ISX-B820 Yamaha).
La conexión a Bluetooth se establecerá y el indicador Bluetooth en la pantalla del panel frontal de esta unidad se iluminará.
Las conexiones a Bluetooth no se pueden establecer desde el otro componente si esta unidad está en modo de ahorro de energía. Encienda el sistema.
Desconexión de una conexión a Bluetooth
Si se realiza cualquiera de las operaciones siguientes mientras se utiliza una conexión a Bluetooth, la conexión a Bluetooth se desconectará.
• Mantenga pulsado el botón SOURCE de esta unidad o Bluetooth del mando a distancia.
• Apagar el sistema.
• Desactivar el ajuste de Bluetooth del otro componente.
y
Al conectar un iPod touch/iPhone/iPad por Bluetooth, es posible que la conexión a Bluet ooth se desconecte si cambia la fuente de reproducción a iPod con otro
iPod conectado a la base para iPod.
11 Es
Page 38

Nota
PARA ESCUCHAR EMISORAS DE RADIO
AUTO SET BEEP
SOURCE + BEEP
SOURCE
DIMMER
CLOCK
ALARM TYPE
212
1
VOLUME
USB LABEL SIDE
SOURCE PRESETALARM SNOOZE
SLEEP
12
Panel superior
FM
Frecuencia de
recepción
AUTO SET BEEP
SOURCE + BEEP
SOURCE
DIMMER
CLOCK
ALARM TYPE
212
1
VOLUME
USB LABEL SIDE
SOURCE PRESETALARM SNOOZE
SLEEP
234 1
Panel superior
Número
presintonizado
Selección de la emisora FM
Si sintoniza una emisora FM manualmente, el sonido es monoaural (mono).
Selección de emisoras FM (presintonizadas)
Use la función de presintonización para guardar sus 5 emisoras favoritas.
1 Pulse SOURCE y configure FM como la fuente de
reproducción.
2 Pulse / para sintonizar la emisora FM.
Tipo de sintonización Operación
Mantenga pulsado
o .
Pulse o varias
veces.
Mantenga pulsado
TUNING o .
Pulse TUNING o
varias veces.
Panel
superior
Mando a
distancia
Sintonización
automática
Sintonización
manual
Sintonización
automática
Sintonización
manual
1 Pulse / para sintonizar su emisora FM
favorita.
2 Mantenga pulsado PRESET.
FM
Uso del mando a distancia
Mantenga pulsado MEMORY.
3 Pulse PRESET y seleccione el número
presintonizado para guardar la emisora de FM.
Uso del mando a distancia
Pulse PRESET /.
4 Mantenga pulsado PRESET para guardar la
emisora presintonizada.
Así guarda la emisora de FM.
Uso del mando a distancia
Pulse MEMORY.
12 Es
Page 39

Nota
Selección de una emisora de FM presintonizada
AUTO SET BEEP
SOURCE + BEEP
SOURCE
DIMMER
CLOCK
ALARM TYPE
212
1
VOLUME
USB LABEL SIDE
SOURCE PRESETALARM SNOOZE
SLEEP
1 2
Panel superior
AUTO SET
DIMMER
CL
2
1
VOLUME
USB LAB
SOURCE ALARM SNOOZ
23
Panel superior
AUX
75 Ω
FM ANT
AUX
ESCUCHAR UNA FUENTE EXTERNA
1 Pulse SOURCE y configure FM como la fuente de
reproducción.
2 Pulse PRESET varias veces para seleccionar la
emisora FM presintonizada.
Uso del mando a distancia
Pulse PRESET /.
ESCUCHAR UNA FUENTE EXTERNA
Apague el sistema antes de conectar cables de audio. Extraiga la
cubierta del terminal antes de conectar dispositivos externos.
1 Conecte el dispositivo de audio externo al terminal
AUX del panel posterior mediante un cable mini
estéreo de 3,5 mm de venta en tiendas.
Français Español
Baje el volumen de la unidad y el del dispositivo de audio externo antes
de realizar la conexión.
2 Pulse para activar el sistema.
3 Pulse SOURCE y configure AUX como la fuente de
reproducción.
4 Inicie la reproducción en el dispositivo de audio
externo conectado.
13 Es
Page 40

USAR LA FUNCIÓN DE ALARMA
La unidad incluye una función de alarma (IntelliAlarm) que reproduce fuentes de música o conjunto de sonidos a la hora establecida con
distintos métodos. La función de alarma incluye las siguientes prestaciones.
3 tipos de alarmas
Seleccione entre 3 tipos de alarma, que combinan la música con el sonido de pitido.
La fuente de audio seleccionada y el sonido de pitido se reproducen a la hora programada. Este
modo se recomienda para empezar el día lo mejor posible.
SOURCE + BEEP
3 minutos antes de la hora establecida: la fuente de música empieza a subir progresivamente y el
volumen aumenta gradualmente a medida que se acerca la
hora de la alarma.
Hora de alarma: también se empieza a reproducir un pitido.
SOURCE
BEEP Se reproduce únicamente el sonido de pitido a la hora programada.
La fuente de audio seleccionada se reproduce a la hora programada. El volumen va subiendo
progresivamente hasta alcanzar el volumen definido.
Varias fuentes de música
Puede seleccionar iPod, CD de audio, CD de datos, dispositivo USB y radio. Según la fuente de audio, también puede seleccionar lo
siguiente:
Fuente Método de reproducción Función
La unidad reanudará la reproducción desde la última pista que
reprodujo.
Si ha creado de antemano una lista de reproducción* con el nombre
iPod Reanudar
Pista seleccionada La pista seleccionada se reproduce una y otra vez.
CD de audio
Reanudar Se reproduce la pista que escuchó la última vez.
Carpeta La carpeta seleccionada se reproduce una y otra vez.
CD de datos/USB
Reanudar Se reproduce la pista que escuchó la última vez.
Emisora presintonizada Se reproduce la emisora FM presintonizada seleccionada.
FM
Reanudar Se reproduce la emisora FM que escuchó la última vez.
“ALARM Yamaha DTA”, se puede reproducir repetidamente la lista
de reproducción guardada en el iPod.
Al introducir el nombre de la lista de reproducción, utilice espacios de
un solo bit para separar palabras e introduzca caracteres de un solo
bit; además, asegúrese de que las letras mayúsculas/minúsculas se
usan correctamente.
* Para obtener información acerca de crear una lista de reproducción, consulte las instrucciones de su iPod o iTunes.
Repetición
La función de repetición puede activarse para repetir la alarma después de 5 minutos.
14 Es
Page 41

Nota
Notas
Ajuste de la hora y del tipo de alarma
AUTO SET BEEP
SOURCE + BEEP
SOURCE
DIMMER
CLOCK
ALARM TYPE
212
1
VOLUME
USB LABEL SIDE
SOURCE PRESETALARM SNOOZE
SLEEP
17
2465
Panel superior
Indicador de alarma
Hora de alarma
BEEP
SOURCE+
BEEP
SOURCE
Panel posterior
Volumen de alarma
USAR LA FUNCIÓN DE ALARMA
La programación de la alarma se borrará si se apaga el sistema sin terminarla
correctamente.
1 Mantenga pulsado ALARM.
El indicador de alarma ( ) y la hora programada de
alarma parpadearán.
2 Pulse / para ajustar la hora de la alarma.
Uso del mando a distancia
Pulse / .
3 Seleccione el tipo de alarma con el conmutador
ALARM TYPE del panel posterior.
Para obtener información sobre los tipos de alarmas, consulte
P. 1 4 .
4 (cuando se seleccionan tipos de alarmas distintos de
BEEP) Pulse SOURCE para seleccionar la fuente
de música.
Puede seleccionar cualquier fuente distinta de AUX y
Uso del mando a distancia
Pulse Botón de fuente para seleccionar la fuente de
música.
• Si se ha seleccionado iPod/CD/USB, conecte o introduzca la fuente
de audio (iPod, CD de audio/datos, dispositivo USB) en la unidad.
• Si no es posible reproducir la fuente a la hora programada para la
alarma (por ejemplo, porque el iPod no está conectado), se
reproducirá el sonido de pitido.
Bluetooth
5 (cuando se seleccionan tipos de alarmas distintos de
BEEP) Especifique la pista, carpeta o emisora FM
que reproducirá.
Si configura iPod como la fuente:
No requiere configuración.
Si selecciona CD/USB/FM como la fuente:
Pulse PRESET para seleccionar la pista (CD de audio),
carpeta (CD de datos/dispositivo USB) o emisora FM que se
reproducirá.
Uso del mando a distancia
Pulse PRESET /.
y
• Si elige el iPod como fuente, la unidad reproduce la lista de
reproducción “ALARM Yamaha DTA” a la hora de alarma
programada. Si esta lista de reproducción no puede encontrarse en el
iPod, la unidad reanudará la reproducción desde la última pista que
reprodujo (reanudar).
• Si selecciona CD/USB/FM como la fuente y se establece “0”, se
reanudará la reproducción de la pista/emisora FM que escuchó la
última vez (reanudar).
6 Ajuste el volumen de la alarma pulsando
VOLUME –/+.
Français Español
.
7 Pulse ALARM para terminar de programar la
alarma.
La alarma está programada y el indicador de alarma ( ) se
ilumina.
15 Es
Page 42

USAR LA FUNCIÓN DE ALARMA
AUTO SET BEEP
SOUR
DIMMER
CLOCK
ALARM
212
1
VOLUME
USB LABEL SIDE
SOURCE ALARM SNOOZE
SLEEP
1
Panel superior
AUTO SET BEEP
SOUR
DIMMER
CLOCK
ALARM
212
1
VOLUME
USB LABEL SIDE
SOURCE ALARM SNOOZE
SLEEP
2
2
1
Panel superior
Activación/desactivación de la alarma
1 Pulse ALARM.
Cuando la alarma está activada, el indicador de alarma ( )
se ilumina y la hora de alarma se muestra por un instante. Si
pulsa ALARM de nuevo, se desactivarán el indicador de
alarma ( ) y la alarma.
y
La hora de alarma programada se guardará aunque se apague la alarma.
Si se activa la alarma de nuevo pulsando ALARM, la alarma sonará con
los ajustes de alarma previos.
Operaciones durante la reproducción del sonido de la alarma
A la hora ajustada, se reproduce el sonido de la alarma. Durante la reproducción, las siguientes operaciones son posibles.
1 (si desea detener la alarma unos instantes) Pulse
SNOOZE/SLEEP.
SNOOZE detendrá la alarma y la reanudará tras 5 minutos.
y
• Si ha seleccionado la opción SOURCE + BEEP, pulse SNOOZE/
SLEEP una vez para detener el sonido de pitido, y dos veces para
detener la fuente de audio. 5 minutos después de parar la fuente de
audio, se reanudará la reproducción del sonido de pitido, con un
aumento gradual del volumen.
• Al activar la función de repetición, parpadea el indicador de alarma.
2 (si desea desactivar la alarma) Pulse ALARM o .
y
A menos que usted detenga la alarma, esta se detiene automáticamente
después de 60 minutos.
16 Es
Page 43

Nota
USO DEL TEMPORIZADOR PARA DORMIR
AUTO SET BEEP
SOURC
DIMMER
CLOCK
ALARM T
212
1
VOLUME
USB LABEL SIDE
SOURCE ALARM SNOOZE
SLEEP
1
Panel superior
1
2
3
Mando a distancia
Ton o
Ajuste
Tono
AUTO21
Panel posterior
Puede establecer la hora a la que desea apagar el sistema automáticamente.
CONTROL DEL TONO
1 Pulse SNOOZE/SLEEP varias veces para
programar el tiempo de desactivación del sistema.
Usted puede programar el temporizador para dormir en 30, 60,
90 ó 120 minutos. Al programar el tiempo, se muestra el
indicador de temporización de apagado ( ) en la pantalla del
panel frontal.
y
Si pulsa SNOOZE/SLEEP mientras está activado el temporizador
para dormir, el ajuste de este se cancelará.
1 Pulse uno de los botones EQ LOW/MID/HIGH en
el mando a distancia durante la reproducción.
Seleccione el tono que desee (LOW, MID, HIGH).
:HIGH
:MID
:LOW
Français Español
AJUSTAR EL BRILLO DE LA PANTALLA DEL PANEL FRONTAL
2 Pulse / para ajustar el tono.
Cada tono puede ajustarse de –5 a +5.
3 Pulse ENTER para finalizar la configuración.
También puede pulsar el botón EQ que pulsó en el paso 1
para finalizar la configuración.
Para cambiar el tono de otra banda de frecuencia, vuelva al
paso 1 y pulse el botón EQ para ajustar la frecuencia deseada.
1 Ajuste el brillo con el conmutador DIMMER del
panel posterior.
AUTO: ajusta el brillo automáticamente para adaptarse a
1: más brillo.
2: más oscuro.
Cuando está programado el AUTO, el brillo de la pantalla del panel
frontal se ajusta automáticamente con el sensor de iluminación (P. 3).
El sensor no debe estar cubierto.
las condiciones circundantes.
17 Es
Page 44

SOLUCIÓN DE PROBLEMAS
Si tiene algún problema con la unidad, compruebe primero la siguiente lista. Si no puede solucionar su problema con las siguientes
soluciones o si el problema no está en la lista, apague y desenchufe la unidad y a continuación, consulte al concesionario o centro de servicio
Yamaha autorizado más cercano.
General
Problema Causa Solución
La unidad no se puede encender.
Los altavoces no suenan.
El sonido se apaga de repente.
Suenan chasquidos, suena distorsionado o
hay un sonido anormal.
La unidad no funciona correctamente.
El sistema se enciende pero
inmediatamente se apaga.
Un equipo de alta frecuencia o digital
produce ruido.
Se ha borrado el ajuste del reloj.
iPod no se reproduce a la hora de la
alarma aún cuando SOURCE está
ajustado en el iPod.
El reloj parpadea y la unidad no puede ser
operada.
El cable de alimentación no está bien conectado. Enchufe de nuevo el cable de alimentación en la
Es posible que el volumen esté ajustado al mínimo. Ajuste el nivel del volumen.
Es posible que la fuente no sea la correcta. Seleccione la fuente correcta.
El modo de apagado (☞ P. 17) podría estar
activado.
El volumen de la fuente de entrada es excesivo o el
volumen de esta unidad es excesivo (especialmente
el Bajo).
Es posible que la unidad haya recibido una fuerte
descarga eléctrica, como por ejemplo, de un rayo o
excesiva electricidad estática, o es posible que se
haya caído el suministro eléctrico.
Es posible que la unidad esté situada demasiado
cerca del equipo de alta frecuencia o digital.
Se ha dejado la unidad más de una semana sin
conexión al cable de alimentación del enchufe de
pared.
El iPod no está bien colocado en la base para iPod. Quite el iPod de la unidad y, a continuación, vuelva
El conmutador ALARM TYPE está ajustado en
BEEP.
El conmutador CLOCK en el panel posterior está
ajustado en SET, y esta unidad está en modo de
ajuste del reloj.
toma de corriente de la pared y en la unidad.
Encienda el sistema y reproduzca la fuente de
nuevo.
Ajuste el volumen con VOLUME o ajuste el bajo
con EQ (☞ P. 17).
Apague el sistema y desconecte el cable de
alimentación. Espere unos 30 segundos, vuelva a
conectar el cable de alimentación y encienda el
sistema.
Aleje la unidad del equipo.
Conecte el cable de alimentación a la toma de
corriente de pared con firmeza y programe de
nuevo el reloj (☞ P. 5).
a ajustarlo en la base iPod (☞ P. 2 ).
Ajuste ALARM TYPE en SOURCE + BEEP o
SOURCE (☞ P. 15).
Ajuste el conmutador CLOCK en CLOCK1 o en
CLOCK2 (☞ P. 5).
iPod
Problema Causa Solución
No hay sonido.
El iPod no se carga.
El doble parpadeo del indicador del iPod
se repite tres veces tras conectar el iPod.
El iPod no está bien colocado en la base para iPod. Quite el iPod de la unidad y, a continuación, vuelva
No se ha actualizado la versión de software del
iPod.
El iPod no está bien colocado en la base para iPod. Quite el iPod de la unidad y, a continuación, vuelva
El sistema se encuentra en el modo de ahorro de
energía (☞ P. 2).
El iPod que se está utilizando no es compatible con
la unidad.
a ajustarlo en la base iPod (☞ P. 2 ).
Descargue la última versión de iTunes del sitio web
de Apple y actualice el software del iPod a la
última versión.
a ajustarlo en la base iPod (☞ P. 2 ).
Pulse para cancelar el modo de ahorro de
energía.
Utilice un iPod compatible (☞ P. 2 2).
18 Es
Page 45

Reproducción de CD
SOLUCIÓN DE PROBLEMAS
Problema Causa Solución
No se puede introducir el disco.
Algunas operaciones que se realizan con
los botones no funcionan.
La reproducción no empieza
inmediatamente tras pulsar / .
El doble parpadeo del indicador del CD se
repite tres veces, y el disco es expulsado.
Aparece “Err” en la pantalla del panel
El sistema se encuentra en el modo de ahorro de
energía.
Es posible que el disco cargado en la unidad no sea
compatible.
Es posible que el disco esté sucio. Limpie el disco.
Es posible que el disco cargado en la unidad no sea
compatible.
Si la unidad se ha movido de un lugar frío a uno
cálido, puede haberse formado condensación en las
lentes de lectura de discos.
Es posible que el disco cargado en la unidad no sea
compatible.
Es posible que el disco esté sucio. Limpie el disco.
El disco no contiene archivos reproducibles. Utilice un disco que contenga archivos
El disco está introducido al revés. Introduzca un disco con la cara de la etiqueta
Se ha producido un error en la unidad.
frontal tras introducir un disco.
Reproducción de un dispositivo USB
Problema Causa Solución
No se reproduce un archivo MP3/WMA
del dispositivo USB.
El doble parpadeo del indicador USB se
repite tres veces tras conectar el
dispositivo USB.
Aparece “Err” en la pantalla del panel
frontal tras conectar un dispositivo USB.
La unidad no reconoce el dispositivo USB. Apague el sistema y vuelva a conectar el
El dispositivo USB conectado a la unidad no es
compatible.
El dispositivo USB no contiene archivos
reproducibles.
El dispositivo USB conectado a la unidad no es
compatible.
Se ha detectado una sobretensión.
Pulse para cancelar el modo de ahorro de
energía (☞ P. 2).
Utilice un disco compatible con la unidad
(☞ P. 21).
Utilice un disco compatible con la unidad
(☞ P. 21).
Espere una hora o dos hasta que la unidad se
aclimate a la temperatura de la habitación y vuelva
a intentarlo.
Utilice un disco compatible con la unidad
(☞ P. 21).
reproducibles (☞ P. 21, 22).
mirando hacia la parte frontal.
Expulse el disco pulsando .
dispositivo USB a la unidad.
Conecte un adaptador de CA si se incluye con el
dispositivo.
Si no logra resolver el problema con estas
soluciones, la unidad no puede reproducir el
dispositivo USB.
Apague el sistema y vuelva a conectar el
dispositivo USB a la unidad. Si no logra resolver el
problema con esta solución, la unidad no puede
reproducir el dispositivo USB.
Utilice un dispositivo USB que contenga archivos
reproducibles (☞ P. 21, 22).
Apague el sistema y vuelva a conectar el
dispositivo USB a la unidad. Si no logra resolver el
problema con esta solución, la unidad no puede
reproducir el dispositivo USB.
Français Español
19 Es
Page 46

SOLUCIÓN DE PROBLEMAS
Bluetooth
Problema Causa Solución
Esta unidad no puede vincularse con el
otro componente.
No se puede establecer una conexión a
Bluetooth.
Durante la reproducción no se produce
sonido o éste se interrumpe.
El otro componente no es compatible con A2DP. Realice las operaciones de vinculación con un
El adaptador de Bluetooth, etc. que desea vincular
con esta unidad tiene una contraseña que no es
“0000”.
Esta unidad y el otro componente están demasiado
alejados.
Existe cerca un dispositivo (horno microondas, red
LAN inalámbrica, etc.) que emite señales en la
banda de frecuencia de 2,4 GHz.
Esta unidad no está registrada en la lista de
conexiones a Bluetooth del otro componente.
La conexión a Bluetooth de esta unidad con el otro
componente está desconectada.
Esta unidad y el otro componente están demasiado
alejados.
Existe cerca un dispositivo (horno microondas, red
LAN inalámbrica, etc.) que emite señales en la
banda de frecuencia de 2,4 GHz.
La función Bluetooth del otro componente está
desactivada.
El otro componente no está configurado para
enviar señales de audio Bluetooth a esta unidad.
El ajuste de vinculación del otro componente no
está establecido para esta unidad.
El volumen del otro componente está al mínimo. Aumente el nivel del volumen.
componente compatible con A2DP.
Utilice un adaptador de Bluetooth, etc. cuya
contraseña sea “0000”.
Acerque el otro componente a esta unidad.
Aleje esta unidad del dispositivo que emite las
señales de radiofrecuencia.
Vuelva a realizar las operaciones de vinculación
(☞ P. 10).
Vuelva a realizar las operaciones de conexión a
Bluetooth (☞ P. 11).
Acerque el otro componente a esta unidad.
Aleje esta unidad del dispositivo que emite las
señales de radiofrecuencia.
Active la función Bluetooth del otro componente.
Compruebe que la función Bluetooth del otro
componente está configurada correctamente.
Establezca el ajuste de vinculación del otro
componente para esta unidad.
Recepción de la radio FM
Problema Causa Solución
Demasiado ruido.
Hay demasiado ruido durante la emisión
estéreo.
Incluso con una antena exterior, es posible
que la recepción de ondas de radio sea
débil (El sonido está distorsionado).
Mando a distancia
Problema Causa Solución
El mando a distancia no funciona bien.
Es posible que la antena esté conectada de forma
incorrecta.
Es posible que la emisora de radio que ha
seleccionado se encuentre alejada de su zona, o que
la recepción de ondas de radio sea muy débil en su
zona.
Pueden haberse producido reflejos multirruta u
otras interferencias de radio.
Es posible que el mando a distancia se esté
utilizando fuera de su radio de funcionamiento.
El receptor de señales del mando a distancia de la
unidad (☞ P. 3) es posible que esté expuesto a
iluminación o luz solar directa (lámparas
fluorescentes invertidas).
Es posible que la pila esté agotada. Cambie las pilas por otras dos nuevas.
Hay obstáculos entre el receptor de señales del
mando a distancia de la unidad y el mando a
distancia.
Asegúrese de que la antena se ha conectado
correctamente (☞ P. 3) o utilice una antena
exterior de venta en tiendas.
Intente sintonizarla de forma manual para mejorar
la calidad de señal (☞ P. 12) o utilice una antena
exterior de venta en tiendas.
Cambie la altura, dirección o ubicación de la
antena.
Para obtener información acerca del radio de
funcionamiento del mando a distancia, consulte
“Uso del mando a distancia” (P. 1).
Cambie la iluminación o la orientación de la
unidad.
Elimine los obstáculos.
20 Es
Page 47

Notas
Notas
Notas
NOTAS SOBRE LOS DISCOS Y LOS DISPOSITIVOS USB
Precaución
Información del disco compacto
Esta unidad está diseñada para CD, CD-R* y CD-RW* de audio
con los siguientes logotipos.
* CD-R/RW formato ISO 9660
y
Esta unidad puede reproducir discos que lleven cualquiera de las marcas de
logotipos anteriores. La marca del logotipo del disco se imprime en el disco
y en la carátula.
• No cargue ningún otro tipo de disco en esta unidad. Podría dañarla.
• CD-R/RW no puede reproducirse hasta que no finalice.
• Algunos discos no se pueden reproducir debido a las características del
disco o a las condiciones de grabación.
• No utilice discos con formas extrañas, como por ejemplo, en forma de
corazón.
• No utilice discos que tengan la superficie muy rayada.
• No inserte un disco agrietado, combado o con pegamento.
• No utilice discos de 8 cm.
Manejo de un disco
• No toque la superficie del disco.
Manipule el disco por el borde (y el
agujero central).
• No utilice un lápiz ni un rotulador para
escribir en el disco.
• No coloque cinta, adhesivo, pegamento, etc. en el disco.
• No utilice una cubierta protectora para evitar rayones.
• No inserte más de un disco en la ranura al mismo tiempo. Podría
producir daños tanto en la unidad como en los discos.
• No inserte objetos extraños en la ranura del disco.
• No exponga el disco a la luz solar
directa, altas temperaturas,
humedad o gran cantidad de polvo.
Información sobre los dispositivos USB
Esta unidad es compatible con dispositivos de almacenamiento
masivos USB (por ejemplo, memorias flash o reproductores de
audio portátiles) que utilizan el formato FAT16 o FAT32.
• Es posible que algunos dispositivos no funcionen correctamente aunque
cumplan los requisitos.
• No conecte dispositivos que no sean dispositivos USB de almacenamiento
masivos (tales como cargadores USB o concentradores USB), PC, lectores
de tarjetas, una unidad de disco duro externa, etc.
• Yamaha no se responsabilizará de los daños causados o las pérdidas de
datos en el dispositivo USB que tengan lugar cuando el dispositivo esté
conectado a esta unidad.
• No se garantiza el sonido ni el suministro eléctrico en todos los tipos de
dispositivos USB.
• No es posible utilizar dispositivos USB con cifrado.
Acerca de los archivos MP3 o WMA
• La unidad puede reproducir:
Archivo
MP3 8 - 320** 16 - 48
WMA 16 - 320** 22,05 - 48
** Se admiten tanto las velocidades de bits constantes como variables.
• A continuación, indicamos el número máximo de archivos y carpetas que
puede reproducirse en la unidad.
Velocidad de bits
(kbps)
CD de datos USB
Número máximo de archivos 512 9999
Número máximo de carpetas 255 128
Número máximo de archivos por
carpeta
• Los archivos protegidos por copyright no pueden reproducirse.
511 255
Frecuencia de
muestreo (kHz)
Français Español
• Si un disco se ensucia, límpielo con
un paño limpio y seco desde el
centro hasta el borde. No utilice ni
limpiadores para discos ni
disolventes.
• Para evitar un funcionamiento
incorrecto, no utilice un limpiador
de lentes disponible en el mercado.
21 Es
Page 48

ESPECIFICACIONES
Φ 295 mm
997 mm
410 mm
410 mm
Peso: 12,0 kg
587 mm
SECCIÓN DEL REPRODUCTOR
iPod (conexión digital) [Hasta octubre de 2012]
• Modelos de iPod compatibles .......... iPod touch (1ª, 2ª, 3ª y 4ª generación)
• Modelos de iPhone compatibles
................................ iPhone 4S, iPhone 4, iPhone 3GS, iPhone 3G, iPhone
Algunas funciones pueden no ser compatibles, dependiendo del modelo o
la versión de software de iPod, o del modelo de dock de iPod.
iPod nano (2ª, 3ª, 4ª, 5ª y 6ª generación)
iPod classic
CD
• Multimedia ...........................................................................CD, CD-R/RW
• Formato de audio.................................................... Audio CD, MP3, WMA
Láser
• Tipo......................................................Láser semiconductor GaAs/GaAlAs
• Longitud de onda ............................................................................. 790 nm
• Potencia de salida ............................................................................... 7 mW
USB
• Formato de audio...................................................................... MP3, WMA
AUX
• Conector de entrada............................ Miniconector ESTÉREO de 3,5 mm
SECCIÓN Bluetooth
• Versión de Bluetooth .............................................................Ver. 2.1+EDR
• Protocolos compatibles......................................................... A2DP, AVRCP
• Códecs compatibles .................................................................... SBC, AAC
• Salida inalámbrica ............................................................Bluetooth Clase 2
• Distancia de comunicación máxima........................... 10 m (sin obstáculos)
TUNER
• Margen de sintonía
FM.......................................................................De 87,50 a 108,00 MHz
GENERALIDADES
• Alimentación
Modelo para Reino Unido ............................................. CA 230 V, 50 Hz
Modelo para Australia ................................................... CA 240 V, 50 Hz
Modelo para Asia ......................................... De 220 a 240 CA, 50/60 Hz
Modelo para Taiwán.......................................... De 110 a 120 CA, 60 Hz
• Consumo .............................................................................................. 20 W
• Consumo del sistema apagado............................................................ 1,5 W
• Consumo en el modo de ahorro de energía........................... 0,5 W o menos
• Dimensiones
Las especificaciones están sujetas a cambio sin previo aviso.
Bluetooth
• Bluetooth es una tecnología para la comunicación inalámbrica
entre dispositivos situados en un área de unos 10 metros que
emplean la banda de frecuencia de 2,4 GHz, una banda que
puede usarse sin licencia.
• Bluetooth es una marca comercial registrada de Bluetooth SIG y
Yamaha la usa según un acuerdo de licencia.
Gestión de las comunicaciones Bluetooth
• La banda de 2,4 GHz usada por dispositivos compatibles con
Bluetooth es una banda de radio compartida por muchos equipos
diferentes. Aunque los dispositivos compatibles con Bluetooth
usan una tecnología que minimiza la influencia de otros
componentes que usan la misma banda de radio, tal influencia
puede reducir la velocidad o la distancia de comunicación y, en
algunos casos, puede incluso interrumpir las comunicaciones.
• La velocidad de transferencia de las señales y la distancia a la
que se puede realizar la comunicación cambia según la distancia
entre los dispositivos de comunicación, la presencia de
obstáculos, las condiciones de las ondas de radio y el tipo del
equipo.
• Yamaha no garantiza todas las conexiones inalámbricas entre
esta unidad y dispositivos compatibles con la función Bluetooth.
iPod, iPhone
“Made for iPod” (Fabricado para iPod) y “Made for iPhone”
(Fabricado para iPhone) significa que un accesorio electrónico se
ha diseñado específicamente para conectarse a un iPod o un
iPhone, respectivamente y que el desarrollador ha certificado que
cumple con los estándares de rendimiento de Apple.
Apple no se hace responsable del funcionamiento de este
dispositivo ni de su cumplimiento con los estándares normativos y
de seguridad. Tenga en cuenta que el uso de este accesorio con un
iPod o un iPhone puede afectar al rendimiento inalámbrico.
iPad, iPhone, iPod, iPod touch, iPod classic, iPod nano, y iTunes
son marcas comerciales de Apple Inc., registradas en Estados
Unidos y en otros países.
22 Es
Page 49

Información para usuarios sobre recolección y
disposición de equipamiento viejo y baterías
usadas
Estos símbolos en los productos, embalaje, y/o documentación
que se acompañe significan que los productos electrónicos y
eléctricos usados y las baterías usadas no deben ser mezclados
con desechos domésticos corrientes.
Para el tratamiento, recuperación y reciclado apropiado de los
productos viejos y las baterías usadas, por favor llévelos a
puntos de recolección aplicables, de acuerdo a su legislación
nacional y las directivas 2002/96/EC y 2006/66/EC.
Al disponer de estos productos y baterías correctamente,
ayudará a ahorrar recursos valiosos y a prevenir cualquier
potencial efecto negativo sobre la salud humana y el medio
ambiente, el cual podría surgir de un inapropiado manejo de
los desechos.
Para más información sobre recolección y reciclado de
productos viejos y baterías, por favor contacte a su municipio
local, su servicio de gestión de residuos o el punto de venta en
el cual usted adquirió los artículos.
[Información sobre la disposición en otros países
fuera de la Unión Europea]
Estos símbolos sólo son válidos en la Unión Europea. Si desea
deshacerse de estos artículos, por favor contacte a sus
autoridades locales y pregunte por el método correcto de
disposición.
Nota sobre el símbolo de la batería (ejemplos de
dos símbolos de la parte inferior):
Este símbolo podría ser utilizado en combinación con un
símbolo químico. En este caso el mismo obedece a un
requerimiento dispuesto por la Directiva para el elemento
químico involucrado.
SEGURIDAD CONTRA LA RADIACIÓN LÁSER
Esta unidad utiliza rayos láser. Debido a la posibilidad de que se
produzcan daños en los ojos, la extracción de la cubierta de la
unidad o las reparaciones solamente deberán ser realizadas por un
técnico cualificado.
PELIGRO
Esta unidad emite radiación láser visible cuando se abre. Evite la
exposición directa a los rayos láser. Cuando se conecte esta unidad
a una toma de corriente, no acerque sus ojos a la abertura de la
bandeja del disco ni a otras aberturas para mirar al interior.
El componente láser de este producto es capaz de emitir
radiación que sobrepasa el límite establecido para la clase 1.
Si se producen manchas de color o ruido cuando se utiliza cerca
de un televisor, aleje esta unidad del televisor cuando la utilice.
No utilice esta unidad a menos de 22 cm de personas que tengan
implantado un marcapasos o un desfibrilador.
Las ondas de radio pueden afectar a los dispositivos médicos
electrónicos.
No utilice esta unidad cerca de dispositivos médicos o en el
interior de instalaciones médicas.
El usuario no deberá invertir la ingeniería, alterar, traducir ni
descompilar el software utilizado en esta unidad, ya sea en parte
o totalmente. Los usuarios corporativos, los empleados de la
propia corporación, así como sus socios comerciales deberán
cumplir las prohibiciones contractuales estipuladas en esta
cláusula. Si las estipulaciones de esta cláusula y de este contrato
no se pueden cumplir, el usuario deberá suspender
inmediatamente la utilización del software.
Français Español
Nosotros, Yamaha Music Europe GmbH, declaramos por la
presente que esta unidad cumple con los requisitos esenciales y
otras disposiciones pertinentes de la Directiva 1999/5/CE.
Yamaha Music Europe GmbH
Siemensstr. 22-34 25462 Rellingen, Germany
Tel: +49-4101-303-0
23 Es
Page 50

VAROITUS
Note
Muiden kuin tässä esitettyjen toimintojen säädön tai asetusten muutto
saattaa altistaa vaaralliselle säteilylle tai muille vaarallisille
toiminnoille.
DK
Advarsel: Usynlig laserstråling ved åbning når sikkerhedsafbrydere er
ude af funktion. Undgå utsættelse for stråling.
Bemærk: Netafbryderen SYSTEM OFF/Standby er sekundært
indkoblet og ofbryder ikke strømmen fra nettet. Den indbyggede netdel
er derfor tilsluttet til lysnettet så længe netstikket sidder i stikkontakten.
N
Observer: Nettbryteren SYSTEM OFF/Standby er sekundert innkoplet.
Den innebygdenetdelen er derfor ikke frakoplet nettet så lenge
apparatet er tilsluttet nettkontakten.
S
Klass 1 laseraparat
Varning! Om apparaten används på annat sättþän i denna
bruksanvisning specificerats, kan användaren utsättas för osynlig
laserstrålning, som överskrider gränsen för laserklass 1.
Observera! Strömbrytaren SYSTEM OFF/Standby är sekundärt
kopplad och inte bryter inte strömmen från nätet. Den inbyggda
nätdelen är därför ansluten till elnätet så länge stickproppen sitter i
vägguttaget.
SF
Luokan 1 laserlaite
Varoitus! Laitteen käyttäminen muulla kuin tässä käyttöohjeessa
mainitulla tavalla saattaa altistaa käyttäjän turvallisuusluokan 1
ylittävälle näkymättömälle lasersäteilylle.
Oikeus muutoksiin varataan. Laite ei saa olla alttiina tippu-ja
roiskevedelle.
Huom. Toiminnanvalitsin SYSTEM OFF/Standby on kytketty
toisiopuolelle, eikä se kytke laitetta irti sähköverkosta.
Sisäänrakennettu verkko-osa on kytkettynä sähköverkkoon aina silloin,
kun pistoke on pistorasiassa.
◆ For U.K. customers
If the socket outlets in the home are not suitable for the plug supplied
with this appliance, it should be cut off and an appropriate 3 pin plug
fitted. For details, refer to the instructions described below.
The plug severed from the mains lead must be destroyed, as a plug with
bared flexible cord is hazardous if engaged in a live socket outlet.
◆ Special Instructions for U.K. Model
IMPORTANT
THE WIRES IN MAINS LEAD ARE COLOURED IN
ACCORDANCE WITH THE FOLLOWING CODE:
Blue: NEUTRAL
Brown: LIVE
As the colours of the wires in the mains lead of this apparatus
may not correspond with the coloured markings identifying the
terminals in your plug, proceed as follows:
The wire which is coloured BLUE must be connected to the
terminal which is marked with the letter N or coloured BLACK.
The wire which is coloured BROWN must be connected to the
terminal which is marked with the letter L or coloured RED.
Make sure that neither core is connected to the earth terminal of
the three pin plug.
VARO!
AVATTAESSA JA SUOJALUKITUS OHITETTAESSA OLET
ALTTIINA NÄKYMÄTTÖMÄLLE LASERSÄTEILYLLE.
ÄLÄ KATSO SÄ TEESEEN.
VARNING!
OSYNLIG LASERSTRÅLNING NÄR DENNA DEL ÄR
ÖPPNAD OCH SPÄRREN ÄR URKOPPLAD. BETRAKTA EJ
STRÅLEN.
i
Page 51

© 2012 Yamaha Corporation
Printed in China
ZF20180
 Loading...