

Yamaha DVD-S661 Owners Manual
DVD PLAYER
LECTEUR DE DVD
DVD-S661
U

IMPORTANT SAFETY INSTRUCTIONS
12 Grounding or Polarization — This product may be equipped
CAUTION
RISK OF ELECTRIC SHOCK
CAUTION: TO REDUCE THE RISK OF
ELECTRIC SHOCK, DO NOT REMOVE
COVER (OR BACK). NO USER-SERVICEABLE
PARTS INSIDE. REFER SERVICING TO
• Explanation of Graphical Symbols
1 Read Instructions — All the safety and operating
2 Retain Instructions — The safety and operating instructions
3 Heed Warnings — All warnings on the product and in the
4 Follow Instructions — All operating and use instructions
5 Cleaning — Unplug this product from the wall outlet before
6 Attachments — Do not use attachments not recommended
7 Water and Moisture — Do not use this product near water
8 Accessories — Do not place this product on an unstable
9 A product and cart combination should be
10
11 Power Sources — This product should be operated only
The lightning flash with arrowhead symbol, within an
equilateral triangle, is intended to alert you to the
presence of uninsulated “dangerous voltage” within the
product’s enclosure that may be of sufficient magnitude
to constitute a risk of electric shock to persons.
The exclamation point within an equilateral triangle
is intended to alert you to the presence of important
operating and maintenance (servicing) instructions
in the literature accompanying the appliance.
instructions should be read before the product is operated.
should be retained for future reference.
operating instructions should be adhered to.
should be followed.
cleaning. Do not use liquid cleaners or aerosol cleaners. Use
a damp cloth for cleaning.
by the product manufacturer as they may cause hazards.
— for example, near a bath tub, wash bowl, kitchen sink, or
laundry tub; in a wet basement; or near a swimming pool;
and the like.
cart, stand, tripod, bracket, or table. The product may fall,
causing serious injury to a child or adult, and serious
damage to the product. Use only with a cart, stand, tripod,
bracket, or table recommended by the manufacturer, or sold
with the product.
Any mounting of the product should follow the
manufacturer’s instructions, and should use a mounting
accessory recommended by the manufacturer.
moved with care. Quick stops, excessive
force, and uneven surfaces may cause the
product and cart combination to overturn.
Ventilation — Slots and openings in the
cabinet are provided for ventilation and to
ensure reliable operation of the product and to protect it from
overheating, and these openings must not be blocked or
covered. The openings should never be blocked by placing
the product on a bed, sofa, rug, or other similar surface.
This product should not be placed in a built-in installation
such as a bookcase or rack unless proper ventilation is
provided or the manufacturer’s instructions have been
adhered to.
from the type of power source indicated on the marking
label. If you are not sure of the type of power supply to your
home, consult your product dealer or local power company.
For products intended to operate from battery power, or
other sources, refer to the operating instructions.
i
DO NOT OPEN
QUALIFIED SERVICE PERSONNEL.
with a polarized alternating current line plug (a plug having
one blade wider than the other). This plug will fit into the
power outlet only one way. This is a safety feature. If you
are unable to insert the plug fully into the outlet, try
reversing the plug. If the plug should still fail to fit, contact
your electrician to replace your obsolete outlet. Do not
defeat the safety purpose of the polarized plug.
13 Power-Cord Protection — Power-supply cords should be
routed so that they are not likely to be walked on or pinched
by items placed upon or against them, paying particular
attention to cords at plugs, convenience receptacles, and the
point where they exit from the product.
14
Lightning — For added protection for this product during a
lightning storm, or when it is left unattended and unused for
long periods of time, unplug it from the wall outlet and
disconnect the antenna or cable system. This will prevent
damage to the product due to lightning and power-line surges.
15
Power Lines — An outside antenna system should not be
located in the vicinity of overhead power lines or other electric
light or power circuits, or where it can fall into such power
lines or circuits. When installing an outside antenna system,
extreme care should be taken to keep from touching such
power lines or circuits as contact with them might be fatal.
16 Overloading — Do not overload wall outlets, extension
cords, or integral convenience receptacles as this can result
in a risk of fire or electric shock.
17 Object and Liquid Entry — Never push objects of any kind
into this product through openings as they may touch
dangerous voltage points or short-out parts that could result
in a fire or electric shock. Never spill liquid of any kind on
the product.
18
Servicing — Do not attempt to service this product yourself
as opening or removing covers may expose you to dangerous
voltage or other hazards. Refer all servicing to qualified
service personnel.
19 Damage Requiring Service — Unplug this product from the
wall outlet and refer servicing to qualified service personnel
under the following conditions:
a) When the power-supply cord or plug is damaged,
b) If liquid has been spilled, or objects have fallen into the
product,
c) If the product has been exposed to rain or water,
d) If the product does not operate normally by following
the operating instructions. Adjust only those controls
that are covered by the operating instructions as an
improper adjustment of other controls may result in
damage and will often require extensive work by a
qualified technician to restore the product to its normal
operation,
e) If the product has been dropped or damaged in any way,
and
f) When the product exhibits a distinct change in
performance - this indicates a need for service.
20
Replacement Parts — When replacement parts are required,
be sure the service technician has used replacement parts
specified by the manufacturer or have the same characteristics
as the original part. Unauthorized substitutions may result in
fire, electric shock, or other hazards.
21
Safety Check — Upon completion of any service or repairs to
this product, ask the service technician to perform safety checks
to determine that the product is in proper operating condition.
22 Wall or Ceiling Mounting — The unit should be mounted to
a wall or ceiling only as recommended by the manufacturer.
23 Heat — The product should be situated away from heat
sources such as radiators, heat registers, stoves, or other
products (including amplifiers) that produce heat.
FCC INFORMATION (for US customers)
1. IMPORTANT NOTICE: DO NOT MODIFY THIS UNIT!
This product, when installed as indicated in the instructions contained in this manual, meets FCC requirements. Modifications
not expressly approved by Yamaha may void your authority, granted by the FCC, to use the product.
2. IMPORTANT: When connecting this product to accessories and/or another product use only high quality shielded cables.
Cable/s supplied with this product MUST be used. Follow all installation instructions. Failure to follow instructions could void
your FCC authorization to use this product in the USA.
3. NOTE: This product has been tested and found to comply with the requirements listed in FCC Regulations, Part 15 for Class
“B” digital devices.
Compliance with these requirements provides a reasonable level of assurance that your use of this product in a residential
environment will not result in harmful interference with other electronic devices. This equipment generates/uses radio
frequencies and, if not installed and used according to the instructions found in the users manual, may cause interference
harmful to the operation of other electronic devices. Compliance with FCC regulations does not guarantee that interference
will not occur in all installations. If this product is found to be the source of interference, which can be determined by turning
the product “OFF” and “ON”, please try to eliminate the problem by using one of the following measures:
Relocate either this product or the device that is being affected by the interference.
Utilize power outlets that are on different branch (circuit breaker or fuse) circuits or install AC line filter/s.
In the case of radio or TV interference, relocate/reorient the antenna. If the antenna lead-in is 300 ohm ribbon lead, change the
lead-in to coaxial type cable.
If these corrective measures do not produce satisfactory results, please contact the local retailer authorized to distribute this
type of product. If you can not locate the appropriate retailer, please contact Yamaha Electronics Corp., 6660 Orangethorpe
Ave. Buena Park, CA90622.
The above statements apply ONLY to those products distributed by Yamaha Corporation of America or its subsidiaries.
We Want You Listening For A Lifetime
Yamaha and the Electronic Industries Association’s Consumer Electronics Group want you to get the most out of
your equipment by playing it at a safe level. One that lets the sound come through loud and clear without annoying
blaring or distortion - and, most importantly, without affecting your sensitive hearing.
Since hearing damage from loud sounds is often undetectable until it is too late, Yamaha and the Electronic Industries
Association’s Consumer Electronics Group recommend you to avoid prolonged exposure from excessive volume
levels.
For Customer Use:
Read carefully the information located at the rear
panel of this unit and enter below the Serial No.
Retain this information for future reference.
Model No.
Serial No. __________________________
CAUTION
Use of controls or adjustments or performance of
procedures other than those specified herein may
result in hazardous radiation exposure.
AVERTISSEMENT
L’utilisation de commandes et l’emploi de réglages
ou de méthodes autres que ceux décrits ci-dessous,
peuvent entraîner une exposition à un rayonnement
dangereux.
PRECAUCIÓN
El uso de los controles, los ajustes o los
procedimientos que no se especifican enste manual
pueden causar una exposición peligrosa a la
radiación.
DANGER:
CAUTION:
AVOID DIRECT EXPOSURE TO THE BEAM
INVISIBLE LASER RADIATION WHEN OPEN
DO NOT STARE INTO BEAM
INVISIBLE LASER RADIATION WHEN OPEN
ii
CAUTION: READ THIS BEFORE OPERATING THIS UNIT.
1 To assure the finest performance, please read this
manual carefully. Keep it in a safe place for future
reference.
2 Install this unit in a well ventilated, cool, dry, clean
place — away from direct sunlight, heat sources,
vibration, dust, moisture, or cold. In a cabinet, allow
about 2.5 cm (1 inch) of free space all around this
unit for adequate ventilation.
3 Locate this unit away from other electrical
appliances, motors, or transformers to avoid
humming sounds.
4 Do not expose this unit to sudden temperature
changes from cold to hot, nor locate this unit in an
environment with high humidity (i.e., a room with a
humidifier) to prevent condensation inside this unit,
which may cause an electrical shock, fire, damage
to this unit, and/or personal injury.
5 Avoid installing this unit in a location where foreign
objects may fall onto this unit or where this unit
may be exposed to liquid dripping or splashing. On
the top of this unit, do not place:
– Other components, as they may cause damage
and/or discoloration on the surface of this unit.
– Burning objects (i.e., candles), as they may
cause fire, damage to this unit, and/or
personal injury.
– Containers with liquid in them, as they may
fall, spilling the liquid and causing an electrical
shock to the user and/or damage to this unit.
6 Do not cover this unit with a newspaper, tablecloth,
curtain, etc. in order not to obstruct heat radiation. If
the temperature inside this unit rises, it may cause
fire, damage to this unit, and/or personal injury.
7 Do not plug in this unit to a wall outlet until all
connections are complete.
8 Do not operate this unit upside-down. It may
overheat, possibly causing damage.
9 Do not use excessive force on switches, knobs and/
or cords.
10 When disconnecting the power cord from the wall
outlet, grasp the plug; do not pull the cord.
11 Do not clean this unit with chemical solvents; this
might damage the finish. Use a clean, dry cloth.
12 Use only the voltage specified on this unit. Using
this unit with a higher voltage than specified is
dangerous and may cause fire, damage to this unit,
and/or personal injury. Yamaha will not be held
responsible for any damage resulting from use of
this unit with a voltage other than as specified.
13 Do not attempt to modify or fix this unit. Contact
qualified Yamaha service personnel when any
service is needed. The cabinet should never be
opened for any reason.
14 When not planning to use this unit for long periods
of time (i.e., vacation), disconnect the AC power
plug from the wall outlet.
15 Be sure to read the “Troubleshooting” section on
common operating errors before concluding that
this unit is faulty.
16 Before moving this unit, press STANDBY/ON to
set the unit in standby mode, then disconnect the
AC power plug from the wall outlet.
17 Install this unit near the AC outlet and where the AC
power plug can be reached easily.
18 The batteries shall not be exposed to excessive heat
such as sunshine, fire or the like.
The unit is not disconnected from the AC power
source as long as it is connected to the wall outlet,
even if this unit itself is turned off. This state is called
the standby mode. In this state, this unit is designed
to consume a very small quantity of power.
FOR CANADIAN CUSTOMERS
To prevent electric shock, match wide blade of plug
to wide slot and fully insert.
This Class B digital apparatus complies with
Canadian ICES-003.
WARNING
TO REDUCE THE RISK OF FIRE OR ELECTRIC
SHOCK, DO NOT EXPOSE THIS UNIT TO RAIN
OR MOISTURE.
LASER SAFETY
This unit employs a laser. Due to possible eye injury,
only a qualified service person should remove the cover
or attempt to service this device.
DANGER
This unit emits visible laser radiation when open. Avoid
direct eye exposure to beam.
When this unit is plugged into a wall outlet, do not
place your eyes close to the opening of the disc tray and
other openings or look inside.
iii

Contents
Contents
Introduction ..................................3
Supplied accessories .................................3
Region codes ..............................................3
Playable disc formats .................................3
Cleaning discs ............................................. 4
Patent information ......................................4
Functional Overview ....................5
Front panel ..................................................5
Rear panel .................................................... 6
Remote control ............................................ 7
Connections ..................................8
General notes on connections ..................8
Audio connections ......................................8
Digital connection ..............................................8
Analog connection ..............................................8
Video connections ......................................9
Component video jacks <A> ..............................9
S-video jack <B> ................................................9
Composite video jack <C> .................................9
HDMI connection ....................................... 10
HDMI jack ........................................................10
Other connections ....................................11
USB port ...........................................................11
Remote control jacks ........................................11
Getting Started ...........................12
Step 1: Inserting batteries into
the remote control ....................................12
Using the remote control ..................................12
Step 2: Turning on the power ..................12
Step 3: Setting a TV type/display and
language .................................................... 13
Setting a color system for your TV ..................13
Setting an aspect ratio for your TV ..................13
Setting the OSD language ................................14
Setting the audio, subtitle and disc menu
languages (DVD-Video only) ..........................14
Playback Operation ................... 15
English
Basic operation ......................................... 15
Selecting a track/chapter ..................................15
Searching backward/forward ...........................15
Repeat/Shuffle functions ......................... 15
Repeat/Shuffle playback ..................................15
Repeating a section within a chapter/track ......16
Operations for video playback
(DVD/VCD/SVCD) ...................................... 16
Using the disc menu .........................................16
Playback in slow motion ..................................16
Zooming pictures in/out ...................................16
Resuming playback from the last
stopped point .................................................... 16
Using the on-screen display (OSD) .................17
Special DVD features ............................... 18
Playing by title ................................................. 18
Selecting an audio language/format
and subtitle language ........................................18
Special VCD/SVCD features ..................... 18
Using the playback control (PBC) menu .........18
Playing data discs (MP3/WMA/
JPEG/DivX) ................................................ 18
Selecting a folder and track/file .......................19
Special picture disc features ................... 19
Using the preview function ..............................19
Zooming pictures in/out ...................................19
Playback with multi-angles ..............................20
Playing MP3 music and JPEG picture
simultaneously .................................................20
Special DivX features ............................... 20
Using the interactive menu ..............................20
Selecting an audio/subtitle language ................20
Using a USB device .................................. 21
Supported USB devices ................................... 21
Playing data files ..............................................21
1 En

Contents
Setup Menu .................................22
General setup menu .................................22
Locking/Unlocking the disc for viewing ..........22
Dimming the front panel display ......................22
Programming disc tracks (except MP3/
WMA/JPEG/DivX) ..........................................22
OSD language ..................................................23
Setting the screen saver ....................................23
Setting the sleep timer ......................................24
Setting the auto standby function .....................24
Displaying the DivX
registration code ...............................................24
Audio setup menu .....................................25
Setting the analog output ..................................25
Setting the digital output ..................................25
Turning the HDMI audio on/off .......................26
Turning the night mode on/off .........................26
Setting the lip synchronization .........................27
Video setup menu .....................................27
TV type .............................................................27
Setting the TV display ......................................27
Turning the progressive scan function on/off
Adjusting picture settings .................................29
Turning the black level on/off ...........................29
Turning the closed caption on/off .....................30
Setting the HDMI video ...................................30
Preference setup menu ............................31
Audio, subtitle and disc menu ..........................31
Restricting playback with parental control .......31
Selecting playback of VR format .....................32
Selecting the MP3/JPEG menu ........................32
Displaying DivX external subtitle files ............33
Selecting the PBC (playback control)
function .............................................................33
Changing the password ....................................34
Resetting the system .........................................34
®
VOD
...28
Language Codes ........................ 35
Troubleshooting ......................... 36
Glossary ...................................... 39
Specifications ............................. 41
2 En
Introduction
Introduction
Thank you for purchasing this unit. This
owner’s manual explains the basic operation
of this unit.
This manual is printed prior to production.
Design and specifications are subject to
change in part as a result of improvements,
etc. In case of differences between the manual
and the product, the product has priority.
Supplied accessories
• Remote control
• Two batteries (AAA, R03, UM-4) for the
remote control
• Audio/Video pin cable
• Owner’s manual
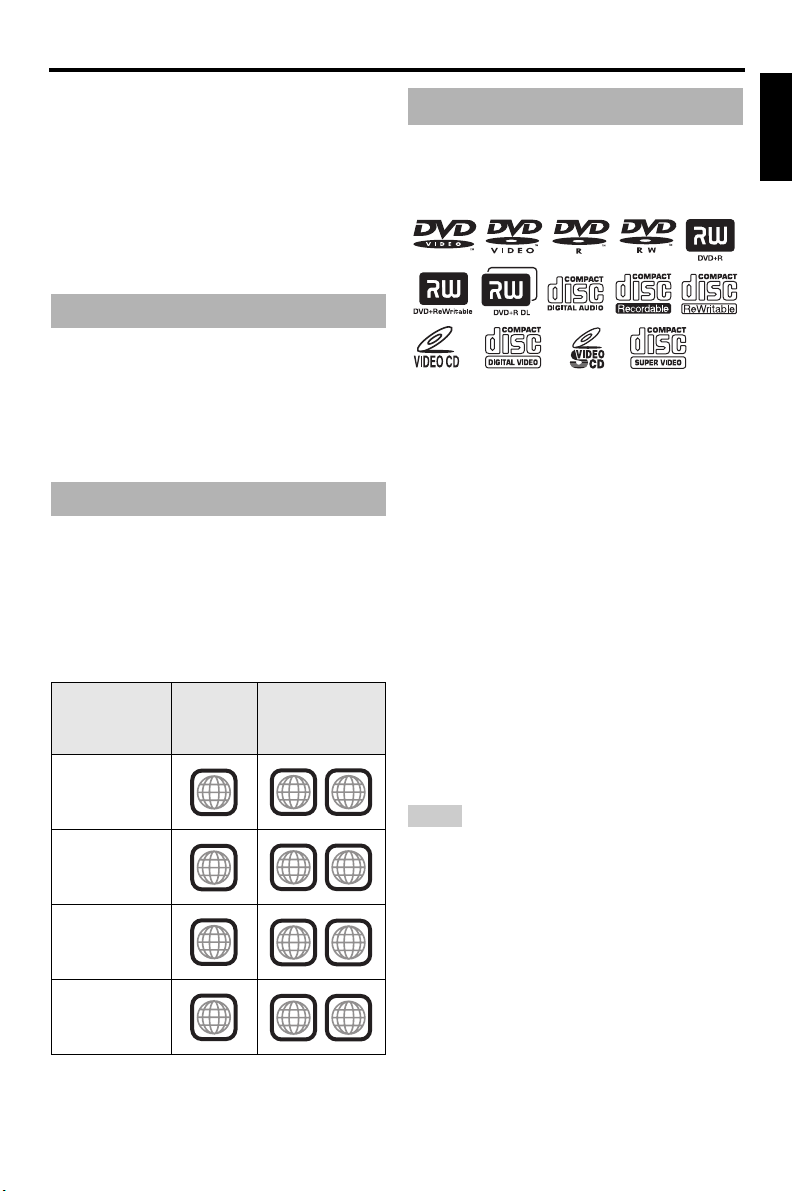
Region codes
This unit is designed to support the region
management system. Check the regional code
number on the DVD disc package. If the
number does not match the region code of this
unit (see the table below or the back of this
unit), this unit may be unable to play the disc.
Destination
U.S.A.,
Canada
U.K.,
Europe
Asia,
Korea
Australia,
Central and
South America
Region
code of
this unit
1
2
3
4
Playable
discs
ALL
1
ALL
2
ALL
3
ALL
4
This unit can play the disc types associated
Playable disc formats
This unit is designed for use with discs having
the logos shown below. Do not attempt to load
any other type of disc into this unit.
This unit can play:
• DVD-R/RW/R DL and DVD+R/RW/R DL
discs recorded in DVD-Video compatible
format
• DVD-RW discs recorded in VR format
(compatible with CPRM)
• MP3, WMA and JPEG files recorded on
CD-R/RW, DVD-R/RW, DVD+R/RW and
USB
• KODAK picture CDs, FUJICOLOR CDs
• ISO 9660 Level1/Level2 for CD-R/RW
Up to 298 folders per disc/USB device and up
•
to 648 files per folder with up to 8 hierarchies
•DivX® files recorded on CD-R/RW,
DVD-R/RW, DVD+R/RW and USB
– Official DivX® Ultra Certified product
– Plays all versions of DivX
®
6) with enhanced playback of DivX®
DivX
media files and the DivX
Notes
• CD-R/RW, DVD-R/RW
cannot be played unless finalized.
R DL
• Progressive JPEG and copyright-protected WMA
files cannot be played with this unit.
• Only the first session of DVD-R/RW
DVD+R
/R DL
can be played.
• Some discs cannot be played depending on disc
characteristics or recording conditions.
• Do not use any non-standard shaped discs
(heart-shaped, etc.).
• Do not use discs with tape, seals, paste or many
scratches on their surface.
• For details about playable formats, see
“Specifications” on page 41.
®
video (including
®
Media Format
/R DL
and DVD+R/RW
/R DL and
English
/
3 En
Introduction
Cleaning discs
• When a disc becomes dirty, clean it with a cleaning cloth. Wipe the disc from the center out.
Do not wipe in a circular motion.
• Do not use solvents such as benzine, thinner, commercially available cleaners, or antistatic
spray intended for analog records.
Patent information
Manufactured under license from Dolby Laboratories. “Dolby”, “Pro Logic” and the double-D symbol are
trademarks of Dolby Laboratories.
“DTS” and “DTS Digital Out” are registered trademarks of DTS, Inc.
DivX, DivX Ultra Certified, and associated logos are trademarks of DivX, Inc. and are used under license.
HDMI, the HDMI logo and High Definition Multimedia Interface are trademarks or registered trademarks of
HDMI Licensing LLC.
This product incorporates copyright protection technology that is protected by method claims of certain
U.S. patents and other intellectual property rights owned by Macrovision Corporation and other rights
owners. Use of this copyright protection technology must be authorized by Macrovision Corporation, and
is intended for home and other limited viewing uses only unless otherwise authorized by Macrovision
Corporation. Reverse engineering or disassembly is prohibited.
4 En
Functional Overview
1 2354 6 7 8 9 0
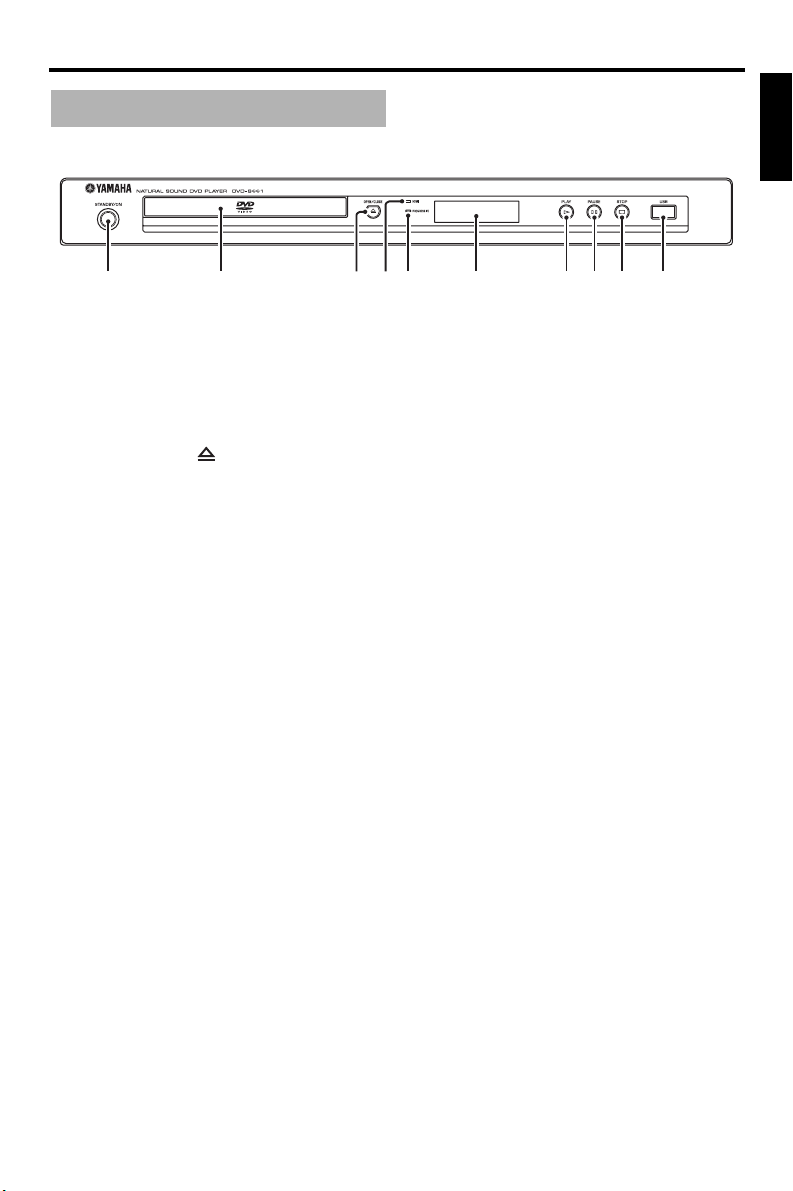
Front panel
Functional Overview
English
1 STANDBY/ON
Turns on this unit or sets it to the standby mode.
2 Disc tray
Loads a disc in the disc tray.
3 OPEN/CLOSE ( )
Opens or closes the disc tray.
4 HDMI indicator
Lights up when an HDMI component is
connected, and signals output via the HDMI
jack of this unit.
5 PROGRESSIVE indicator
Lights up when this unit enters the progressive
mode.
6 Front panel display
Shows the current status of this unit.
7 PLAY ( p )
Starts playback.
8 PAUSE ( )
Pauses playback.
9 STOP ( s )
Stops playback.
0 USB port
Connect to the USB port of your USB device
(see page 11).
5 En
Functional Overview
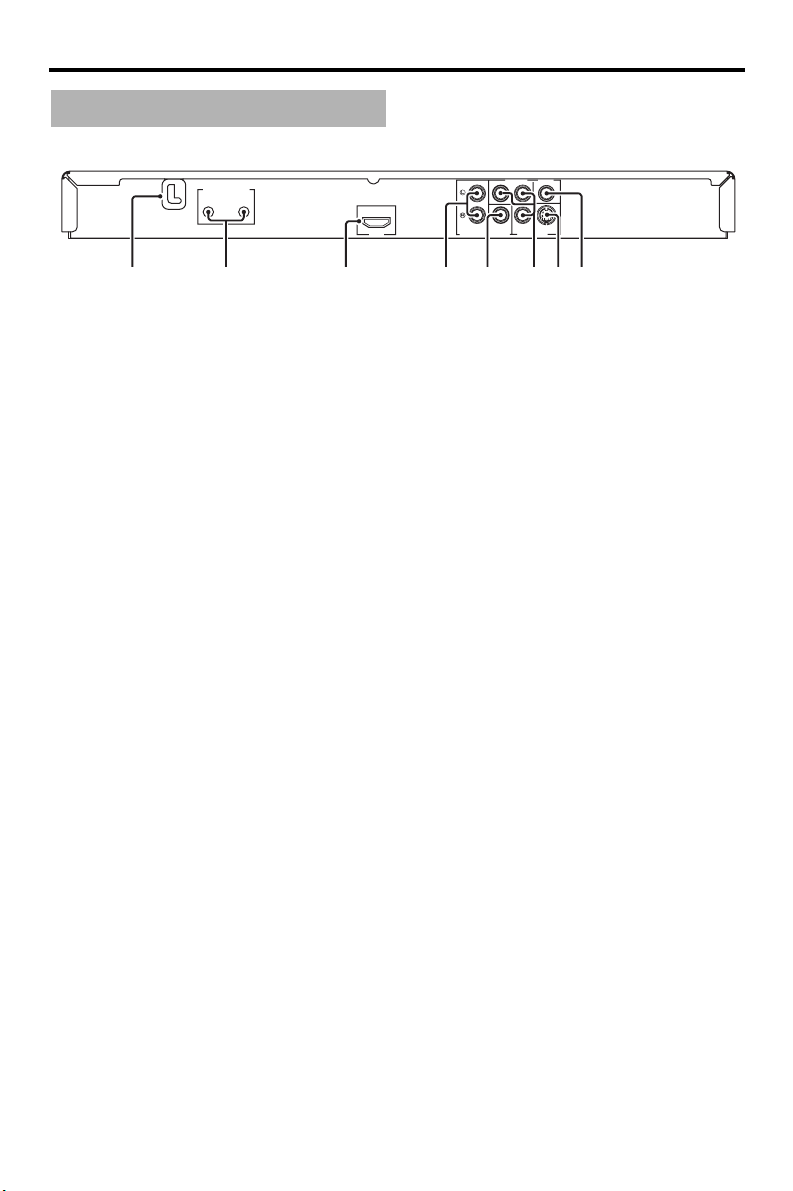
Rear panel
REMOTE CONTROL
OUT
IN
14567832
COMPONENT VIDEO
R
Y
P
PB
HDMI
AUDIO OUT
S VIDEOCOAXIAL
VIDEO OUTDIGITAL OUT
1 AC power cable
Plug the power cable into the AC wall outlet.
2 REMOTE CONTROL (IN, OUT) jacks
Connect the REMOTE CONTROL (IN) jack of
this unit to the remote control output jack of
your Yamaha AV receiver.
Connect the REMOTE CONTROL (OUT) jack
of this unit to the remote control input jack of
your Yamaha component (see page 11).
3 HDMI jack
Connect to the HDMI input jack of your HDMI
component (see page 10).
4 AUDIO OUT (L, R) jacks
5 DIGITAL OUT - COAXIAL jack
Connect to the coaxial input jack of your AV
receiver (see page 8).
6 VIDEO OUT - COMPONENT (Y, PB, PR)
jacks
Connect to the component input jacks of your
AV receiver (see page 9).
7 VIDEO OUT - S VIDEO jack
Connect to the S-video input jack of your AV
receiver (see page 9).
8 VIDEO OUT - VIDEO jack
Connect to the composite video input jack of
your AV receiver (see page 9).
Connect to the audio input jacks of your AV
receiver or stereo system (see page 8).
Caution: Do not touch the inner pins of the jacks on the rear panel of this unit.
Electrostatic discharge may cause permanent damage to this unit.
6 En
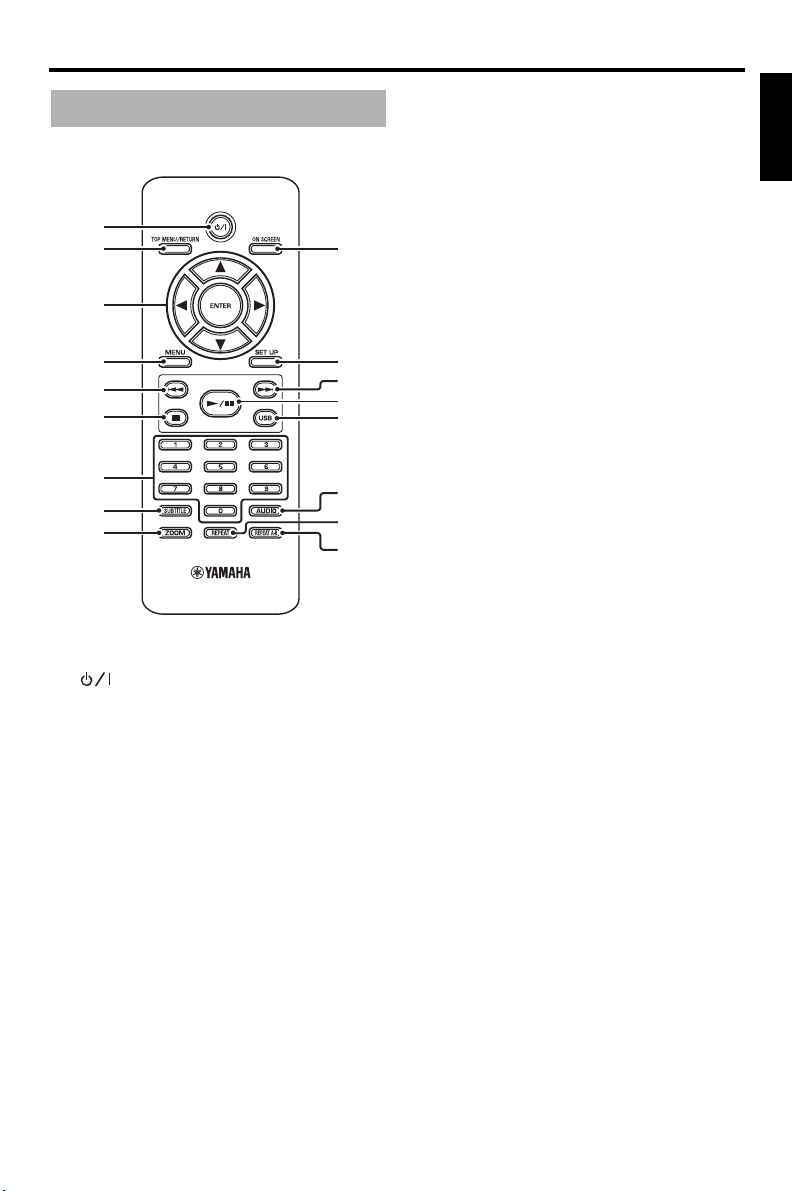
Remote control
1
2
3
4
5
6
0
q
w
e
r
Functional Overview
5 l22
Moves to the previous chapter or track.
Searches backward.*
6
7
Stops playback.
Opens the disc tray.*
7 Numeric buttons (0-9)
Selects numbered items in the currently
displayed menu.
8 SUBTITLE
Selects the subtitle language (see pages 18 and
20).
9 ZOOM
Enlarges the video image (see pages 16 and 19).
English
7
8
9
1
Turns on this unit or sets it to the standby mode.
2 TOP MENU/RETURN
Displays the top-level disc menu (DVD).
Moves back to the previous menu (DVD*/VCD)
(see page 18).
3 2 / 3 /5 /a
Selects an item in the currently displayed menu.
Search or slow playback.
ENTER
Confirms the menu selection.
4 MENU
Displays the menu of a disc (DVD/JPEG)
(see pages 16, 18, 19 and 20).
Switches PBC on or off (VCD) (see page 18).
t
y
u
0 ON SCREEN
Accesses or exits from the on-screen display
(OSD) menu of this unit (see page 17).
q SET UP
Accesses or exits from the setup menu of this
unit (see pages 13 and 22).
w 33l
Moves to the next chapter or track.
Searches forward.*
e 3 / 8
Starts or pauses playback.
r USB
Accesses the contents of the connected USB
device or exits from the USB mode (see
page 21).
t AUDIO
Selects the audio language or format (see
pages 18 and 20).
y REPEAT
Accesses or exits from the repeat/shuffle mode
(see page 15).
u REPEAT A-B
Repeats a specific segment (see page 16).
* Press and hold the button for about two seconds.
7 En
Connections
Connections
General notes on connections
Be sure to turn off this unit and unplug the
power cable before you make or change
connections.
• Depending on the component you want to
connect, there are various ways to make
connections. Possible connections are
described below.
• Refer to the manuals supplied with your
other components as necessary to make the
best connections.
• Do not connect this unit via your VCR. The
video quality could be distorted by the copy
protection system.
• Do not connect the audio out jack of this unit
to the phono in jack of your audio system.
Audio connections
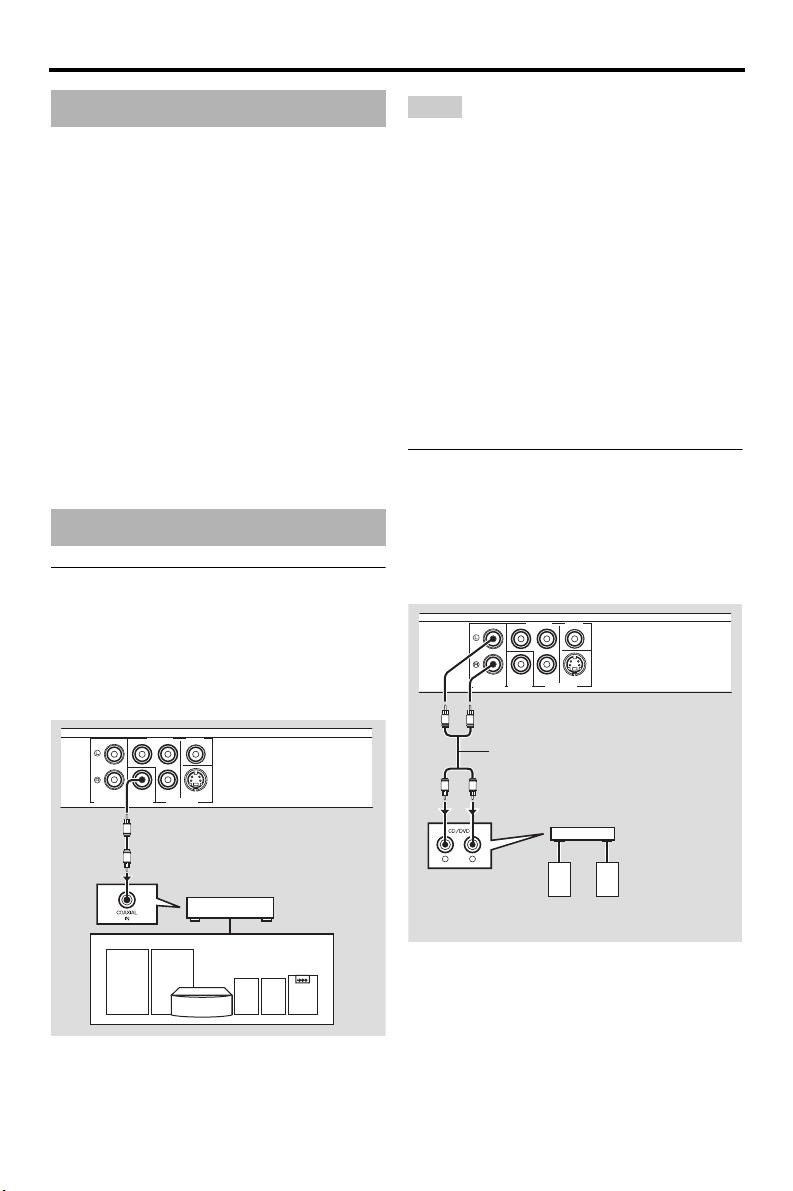
Digital connection
This unit has a digital coaxial output jack.
Connect the DIGITAL OUT - COAXIAL jack
of this unit to your AV receiver equipped with
a Dolby Digital, DTS, or MPEG decoder
using a commercially available coaxial cable.
COMPONENT VIDEO
P
R
Y
S VIDEOCOAXIAL
AUDIO OUT
PB
VIDEO OUTDIGITAL OUT
C
C
AV receiver
This unit
Notes
• You need to set [DIGITAL OUTPUT] to [ALL]
(see “DIGITAL OUTPUT” on page 25).
• If the audio format of the digital output does not
match the capabilities of your receiver, the
receiver produces a distorted sound or no sound
at all. Make sure to select the appropriate audio
format from the menu screen on the disc.
Pressing AUDIO on the remote control once or
more may change not only the audio languages
but also the audio format. The selected format
appears in the front panel display for several
seconds.
• If you want to enjoy Dolby Digital, DTS and
MPEG formats, you must connect this unit to an
AV receiver that supports these formats.
Analog connection
This unit has 2-ch analog output jacks.
Connect the AUDIO OUT (L, R) jacks of this
unit to the corresponding input jacks of your
audio component (such as a stereo amplifier)
using the supplied audio pin cable.
COMPONENT VIDEO
P
R
Y
S VIDEOCOAXIAL
AUDIO OUT
L
R
R
L
L
R
PB
VIDEO OUTDIGITAL OUT
Audio pin cable
(supplied)
Stereo
amplifier
Speakers
This unit
8 En
Speakers
Connections
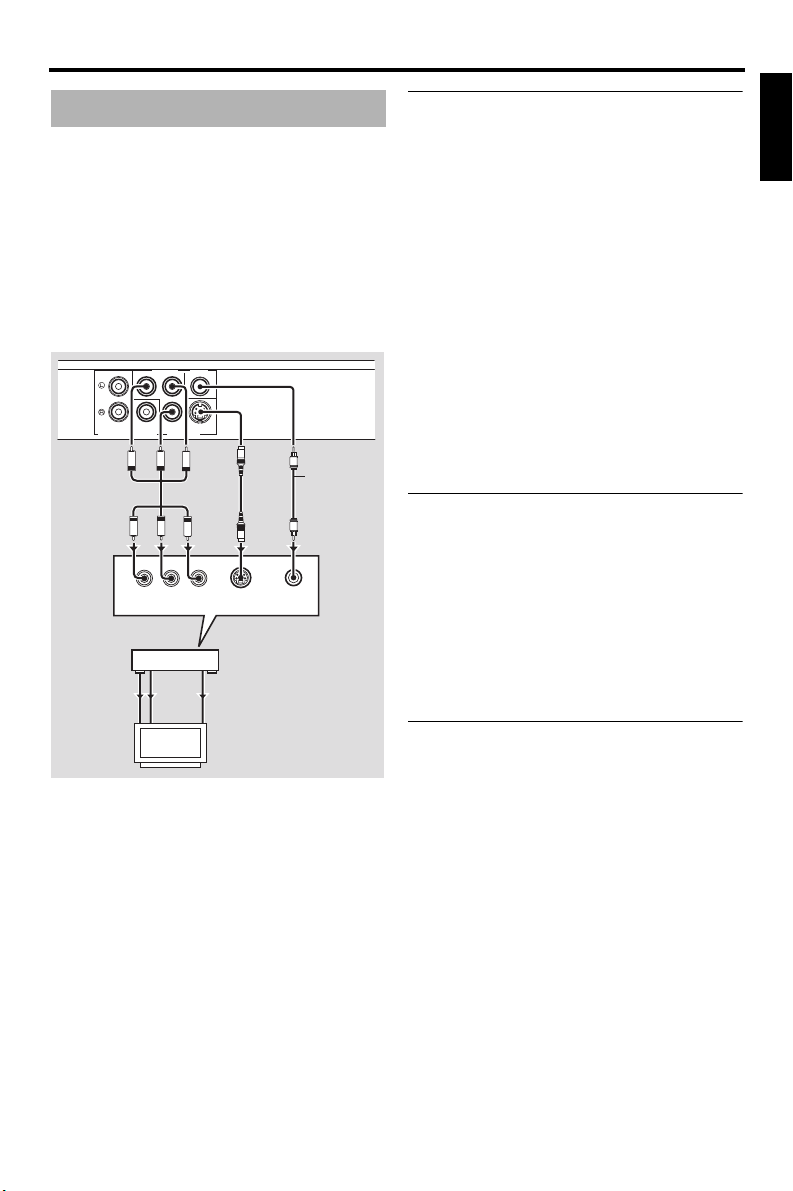
Video connections
If your AV receiver has video output jacks,
connect your receiver and then your TV so
that you can use one TV for several different
video sources (LD, VCR, etc.) by simply
switching the input source selector of your
receiver.
This unit has several types of video output
jacks. Use the one that corresponds to the
input jacks of the component to be connected.
VIDEO
COMPONENT
P
R
Y
S VIDEOCOAXIAL
This unit
AUDIO OUT
PR
PR
COMPONENT
AV receiver
VIDEO
OUT
VIDEO
IN
VIDEO OUTDIGITAL OUT
PB
PB
R
VIDEO IN
COMPONENT
VIDEO OUT
COMPONENT
VIDEO IN
TV
PB
S
Y
Y
YPBP
S VIDEO
INPUT
S VIDEO
OUT
S VIDEO
IN
V
Video pin
cable
(supplied)
<C><B><A>
V
S
VIDEO
INPUT
Component video jacks <A>
Component video connections achieve higher
fidelity color reproduction than S-video
connections by transmitting video signals on
separate wires for luminance (Y: green) and
chrominance (P
B: blue, PR: red).
Connect the VIDEO OUT - COMPONENT
B, PR) jacks of this unit to component
(Y, P
input jacks of your AV receiver and then to
those of your TV using a commercially
available component cable. Observe the color
of each jack when you make connections.
If your receiver does not have component
output jacks, you can achieve a better video
image by connecting the component output
jacks of this unit directly to the component
input jacks of your TV.
S-video jack <B>
S-video connections achieve a clearer picture
than composite video connections by
transmitting video signals on separate wires
for luminance (Y) and chrominance (C).
Connect the VIDEO OUT - S VIDEO jack of
this unit to an S-video input jack of your AV
receiver and then to that of your TV using a
commercially available S-video cable.
Composite video jack <C>
Connect the VIDEO OUT - VIDEO jack of
this unit to a video input jack of your AV
receiver and then to that of your TV using the
supplied video pin cable.
English
9 En
Connections
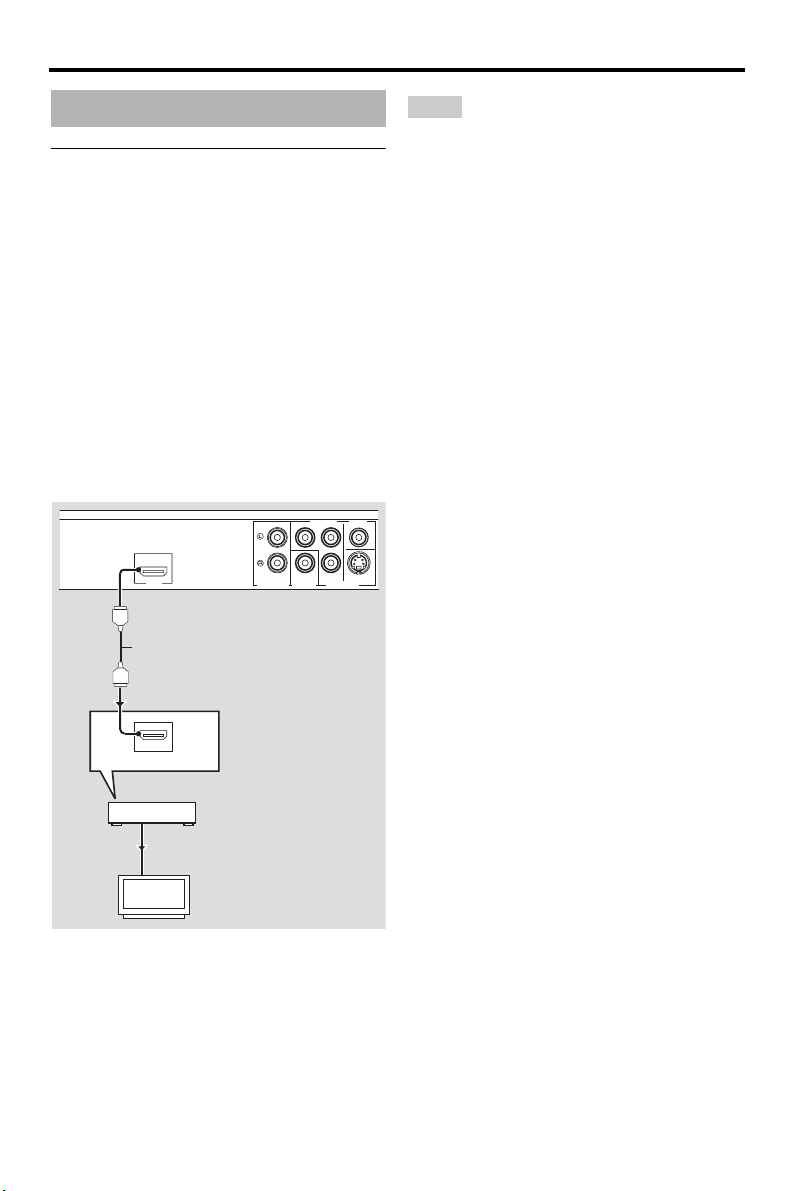
HDMI connection
HDMI jack
HDMI provides high quality digital audio and
video on a single connection.
Connect the HDMI jack of this unit to an
HDMI input jack of your AV receiver, and
then to that of your TV using a commercially
available HDMI cable.
If your receiver does not have an HDMI input
jack, you can achieve a better video image by
connecting the HDMI jack of this unit directly
to the HDMI input jack of your TV.
This unit can display High-Definition JPEG
images (720p or 1080i) when you connect this
unit to an HDTV via the HDMI jack. For
details, see “HD JPEG” on page 31.
COMPONENT VIDEO
R
Y
P
PB
HDMI
HDMI cable
AUDIO OUT
DIGITAL OUT
S VIDEOCOAXIAL
VIDEO OUT
This unit
Notes
• You need to set [HDMI AUDIO] (see page 26)
and [HDMI VIDEO] (see page 30).
• You need to make an appropriate audio
connections if the connected component does not
output audio signals (see “Audio connections” on
page 8).
• This unit is not compatible with HDCPincompatible HDMI or DVI components.
• You need a commercially available HDMI/DVI
conversion cable when you connect this unit to
other DVI components. In this case, the HDMI
jack of this unit does not output any audio
signals.
• Depending on the connected DVI component,
black and white in the image may not be distinct.
In that case, adjust the picture setting of the
connected DVI component.
• Do not disconnect or turn off the power of the
HDMI/DVI component connected to the HDMI
jack of this unit while data is being transferred.
Doing so may disrupt playback or cause noise.
• When connecting an HDMI component, refer to
the manual supplied with your component.
10 En
HDMI IN
AV receiver
HDMI OUT
HDMI IN
TV
Connections
Other connections
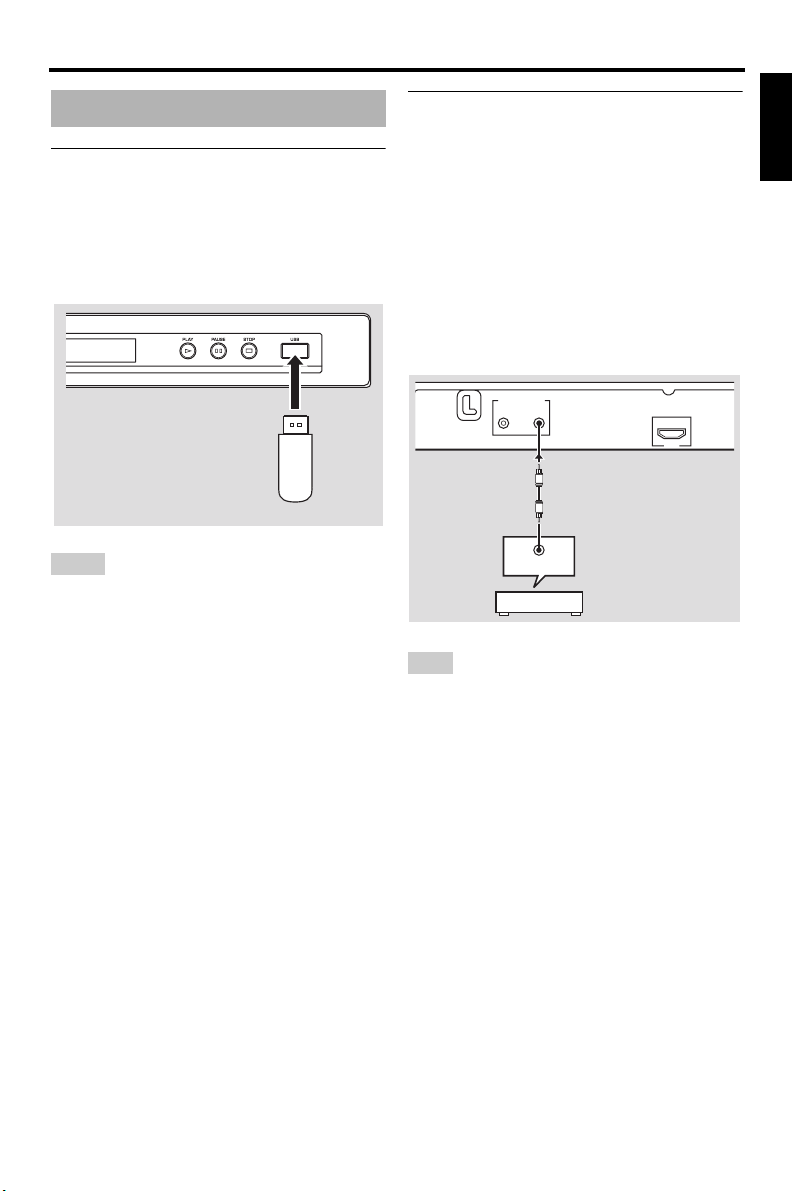
USB port
This unit has a USB port and can access MP3,
WMA, DivX and JPEG files saved on your
USB device.
Connect the USB port on the front panel of
this unit to a USB port of your USB device.
This unit
USB
device
Notes
• This unit may not recognize some USB devices.
• For details about the USB features, see “Using a
USB device” on page 21.
Remote control jacks
This unit has remote control input/output
jacks. If your AV receiver is a Yamaha product
and has the capability to transmit of SCENE
control signals, you can use the SCENE
function.
Connect the REMOTE CONTROL (IN) jack
of this unit to a remote control output jack of
your receiver using a commercially available
monaural mini-jack cable so that this unit
starts playback automatically by simply
pressing a button of your receiver.
REMOTE CONTROL
OUT
IN
HDMI
This unit
REMOTE OUT
AV receiver
Note
For details about the SCENE function, refer to the
owner’s manual supplied with your Yamaha AV
receiver.
English
11 En
Getting Started
Getting Started
Step 1: Inserting batteries into the remote control
3
1
2
2
1 Open the battery compartment.
2 Insert the two supplied batteries (AAA,
R03, UM-4) following the indications
(+/–) inside the compartment.
3 Close the cover.
Notes
• Insert batteries correctly according to the polarity
markings (+/–). Batteries inserted in the opposite
orientation may leak.
• Replace the exhausted batteries immediately with
new ones to prevent leakage.
• Remove the batteries from the compartment if the
remote control is not used for more than a month.
• If the batteries have leaked, dispose of them
immediately. Avoid touching the leaked material
or letting it come into contact with clothing, etc.
Clean the battery compartment thoroughly before
installing new batteries.
• Do not use old batteries together with new ones.
• Do not use different types of batteries (such as
alkaline and manganese batteries) together. Read
the packaging carefully as these different types of
batteries may have the same shape and color.
• Dispose of the batteries correctly in accordance
with your local regulations.
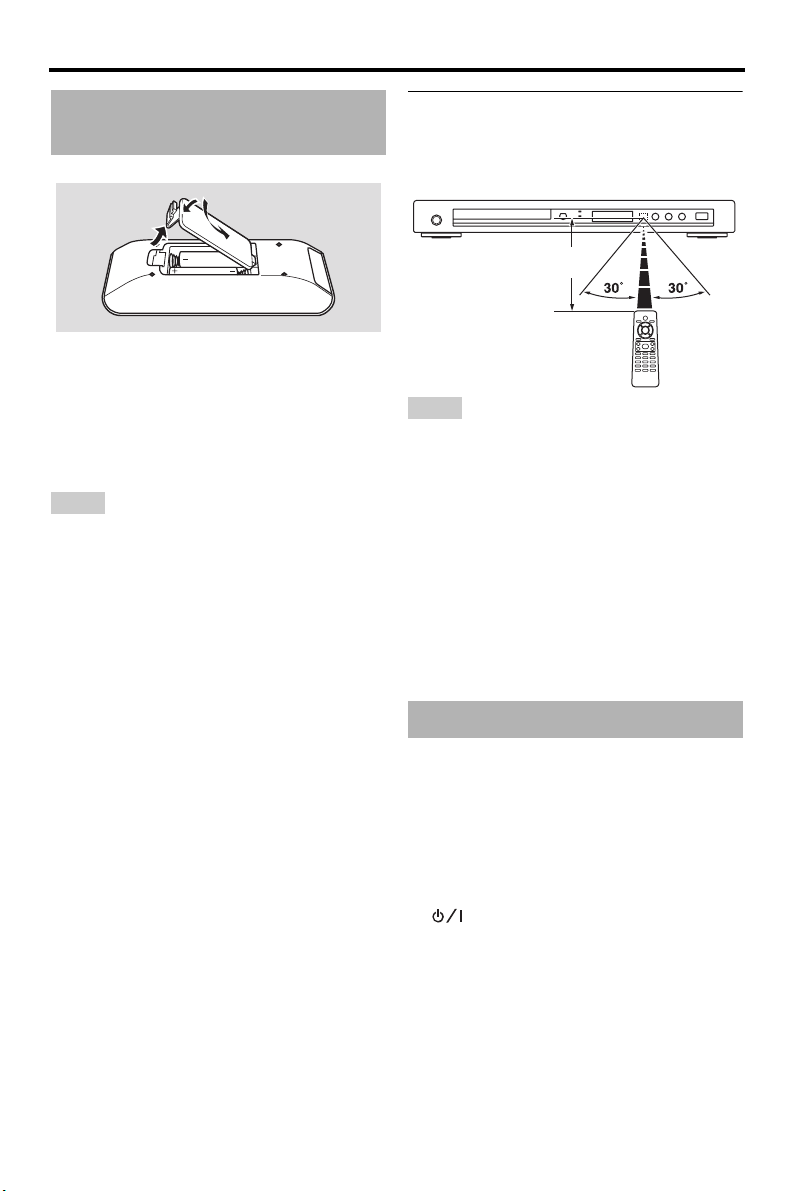
Using the remote control
Use the remote control within 6 m
(approximately 20 ft) of this unit and point it
toward the remote control sensor.
Within 6 m
(approximately 20 ft)
Notes
• Do not spill water or other liquids on the remote
control.
• Do not drop the remote control.
• Do not leave or store the remote control in the
following types of conditions:
– places of high humidity, such as near a bath
– places of high temperature, such as near a
heater or stove
– places of extremely low temperature
– dusty places
• When the remote control works unstably, point it
at an angle upward to the sensor.
Step 2: Turning on the power
1 Plug the power cable into the AC outlet.
2 Turn on your TV and AV receiver.
3 Select the appropriate input source of the
AV receiver (refer to the manual supplied
with your AV receiver).
4 Press STANDBY/ON on the front panel or
on the remote control to turn on this
unit.
➜ The front panel display lights up.
5 Set the TV to the correct video input (refer
to the manual supplied with your TV).
➜ The default screen appears on the TV.
12 En
Getting Started
Step 3: Setting a TV type/display and language
You can customize this unit using the setup
menu displayed on the TV screen.
Notes
• Unless stated otherwise, all operations described
here are carried out using the supplied remote
control.
• To return to the previous menu, press 2 .
• To exit from the menu, press SET UP.
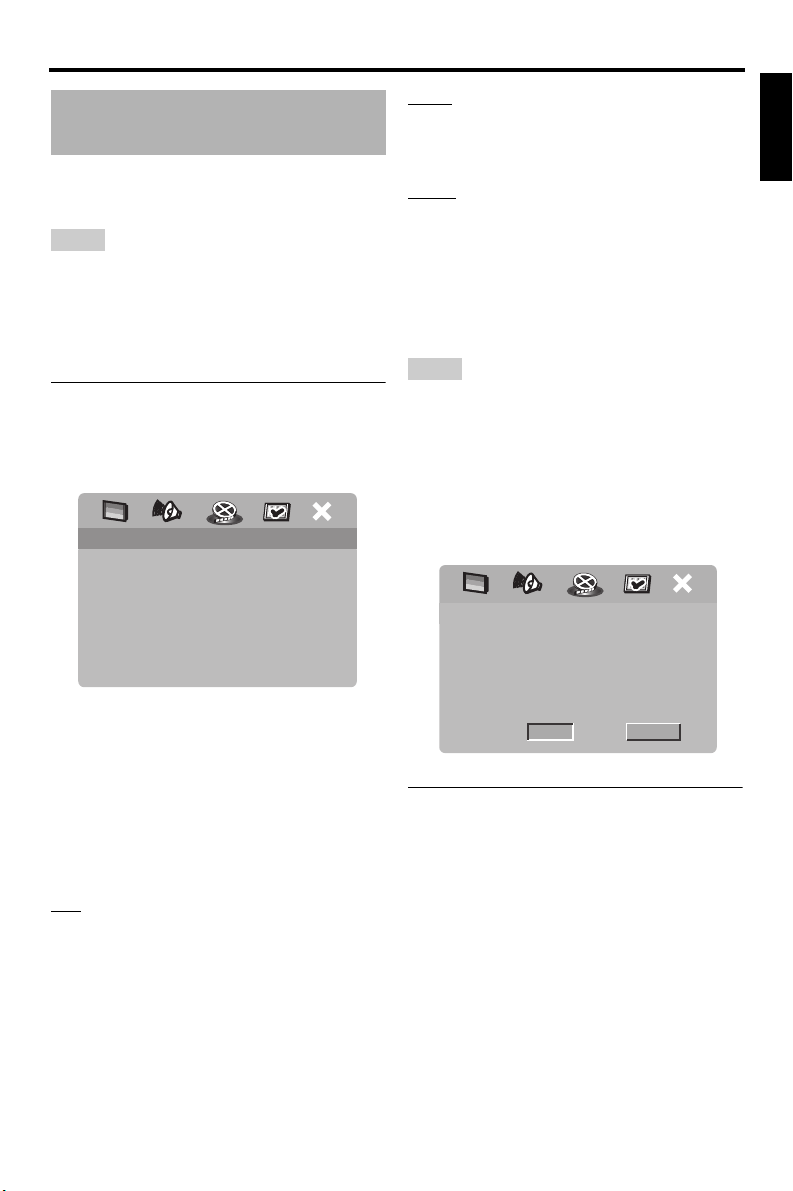
Setting a color system for your TV
This unit is compatible with both NTSC and
PAL video formats. Select the color system
that matches your TV.
VIDEO SETUP PAGE
TV TYPE PAL
TV DISPLAY NTSC
PROGRESSIVE MULTI
PICTURE SETTING
BLACK LEVEL
CLOSED CAPTION
HDMI SETUP
1 Press SET UP.
2 Press 3 repeatedly to select “VIDEO
SETUP PAGE”.
3 Press 5 /a to highlight [TV TYPE], and
then press 3.
4 Press 5 /a to highlight one of the
following options.
PAL
Select this if the connected TV is a PAL
system TV. It will change the video signals of
NTSC discs and output them in PAL format.
NTSC
Select this if the connected TV is an NTSC
system TV. It will change the video signals of
PAL discs and output them in NTSC format.
MULTI
Select this if the connected TV is compatible
with both NTSC and PAL formats (such as a
multi-system TV).
The output format will be in accordance with
the video signals of the disc.
5 Select an item, and then press ENTER.
Notes
• Before changing the current TV standard setting,
ensure that your TV supports the selected TV
type.
• If the picture is not displayed properly on your
TV, wait for 15 seconds for this unit to activate
automatic recovery.
• When making HDMI connections, you cannot
change or select [TV TYPE].
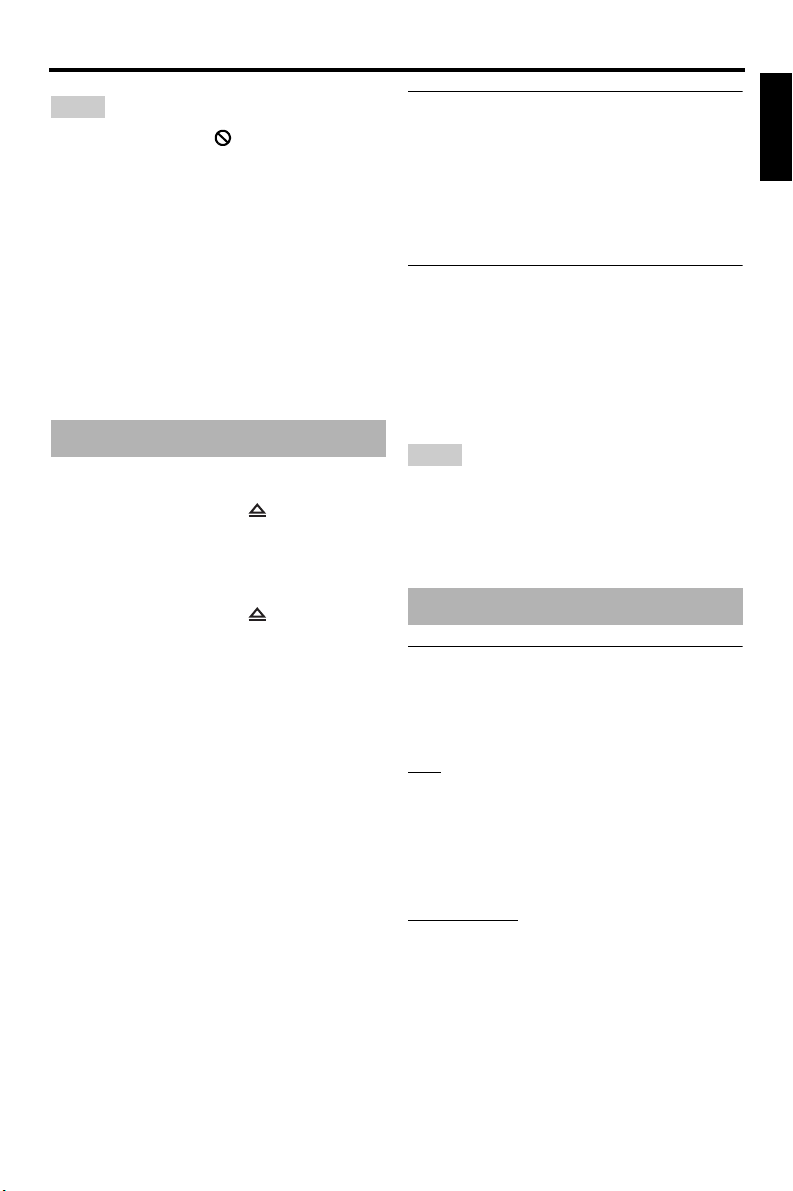
CHANGING NTSC TO PAL :
1. ENSURE THAT YOUR TV SUPPORTS
PAL STANDARD.
2. IF THERE IS A DISTORTED PICTURE
DISPLAYED ON THE TV, WAIT 15
SECONDS FOR AUTO RECOVER.
OK CANCEL
Setting an aspect ratio for your TV
You can set the aspect ratio of this unit to
match your TV. If the aspect ratio of your TV
is 4:3, you do not need to change this setting.
If you have a widescreen TV, change this
setting according to the procedure below.
For details, see “Setting the TV display” on
page 27.
English
13 En

Getting Started
VIDEO SETUP PAGE
TV TYPE
TV DISPLAY 4:3 PAN SCAN
PROGRESSIVE 4:3 LETTER BOX
PICTURE SETTING 16:9
BLACK LEVEL
CLOSED CAPTION
HDMI SETUP
1 Press SET UP.
2 Press 3 repeatedly to select “VIDEO
SETUP PAGE”.
3 Press 5 /a to highlight [TV DISPLAY],
and then press 3.
4 Press 5 /a to highlight [16:9], and then
press ENTER.
Setting the OSD Language
You can select your own preferred language
for the setup menu. This setting remains once
selected.
GENERAL SETUP PAGE
DISC LOCK
DISPLAY DIM
PROGRAM
OSD LANGUAGE ENGLISH
SCREEN SAVER ESPAÑOL
SLEEP FRANÇAIS
AUTO STANDBY
DIVX(R) VOD CODE
1 Press SET UP.
2 Press 2 / 3 to select “GENERAL SETUP
PAGE”.
3 Press 5 /a to highlight [OSD
LANGUAGE], and then press 3 .
4 Press 5 /a to select a language, and then
press ENTER.
Setting the audio, subtitle and disc menu languages (DVD-Video only)
You can select your own preferred language
for the audio, subtitle and disc menu. This unit
automatically switches to the selected
language whenever you load a disc. If the
selected language is not available on the disc,
the default language of the disc will be used
instead.
PREFERENCE PAGE
AUDIO ENGLISH
SUBTITLE CHINESE (SIMP)
DISC MENU FRENCH
PARENTAL SPANISH
VR LIST PORTUGUESE
MP3/JPEG NAV POLISH
DIVX SUBTITLE ITALIAN
PBC TURKISH
1 Press
7
twice, and then press SET UP.
2 Press 3 repeatedly to select
“PREFERENCE PAGE”.
3 Press 5 /a to highlight one of the options
below, and then press 3 .
• AUDIO (audio language)
• SUBTITLE (subtitle language)
• DISC MENU (disc menu language)
4 Press 5 /a to select a language, and then
press ENTER.
5 Repeat steps 3-4 for other language
settings.
■ To select a language not in the list
1 Select [OTHERS] in [AUDIO] or
[SUBTITLE] or [DISC MENU].
2 Use the numeric buttons (0-9) to enter
the 4-digit language code (see “Language
Codes” on page 35), and then press
ENTER.
14 En
Playback Operation
Playback Operation
Notes
• If the prohibited icon ( ) appears on the TV
screen when a button is pressed, the function for
that button is not available on the current disc or
at the current time.
• Unless stated otherwise, all operations described
here are carried out using the supplied remote
control.
• Depending on the disc, some operations may
operate differently or be restricted. Refer to the
instruction supplied with the disc.
• Do not push on the disc tray or put any objects
other than discs on the disc tray. Doing so may
cause this unit to malfunction.
Basic operation
1 Make sure this unit is turned on.
2 Press OPEN/CLOSE ( ) on the front
panel to open the disc tray.
3 Place the disc in the disc tray with the
printed side up.
4 Press OPEN/CLOSE ( ) again to close
the disc tray.
➜ After recognizing the disc, this unit
starts playback automatically.
• If you press 3
open, the disc tray closes and playback
starts automatically.
5 To pause playback, press 3 / 8 during
playback.
➜ Playback is paused and the sound is
muted.
• Frame-by-frame playback can be done
by pressing PAUSE (
panel repeatedly.
6 To resume normal playback, press 3 / 8
again.
7 To stop playback, press
/ 8 when the disc tray is
) on the front
7
.
Selecting a track/chapter
1
Press l22 / 33l or use the numeric
buttons (0-9) to select a track/chapter
number.
2 During repeated playback, press l22 /
l to replay the same track/chapter.
33
Searching backward/forward
1
Press and hold l22 / 33l or press 2 / 3 .
2 While searching, press l22 / 33l or
2 / 3 repeatedly to select the desired
speed.
3 To resume normal playback, press 3 / 8 .
Notes
•The 2 / 3 key may not be available with some
discs.
• For MP3 and WMA, the search function allows
you to search the track currently being played.
Repeat/Shuffle functions
Repeat/Shuffle playback
Each time you press REPEAT during
playback, the front panel display changes
as follows:
DVD
➜ RPT ONE (repeat chapter)
➜ RPT TT (repeat title)
➜ RPT ALL (repeat all)
➜ SHUFFLE (shuffle)
➜ RPT SHF (shuffle repeat)
➜ RPT OFF (repeat off)
VCD/SVCD/CD
➜ RPT ONE (repeat track)
➜ RPT ALL (repeat all)
➜ SHUFFLE (shuffle)
➜ RPT SHF (shuffle repeat)
➜ RPT OFF (repeat off)
English
15 En

Playback Operation
MP3/WMA/DivX
➜ RPT ONE (repeat track)
➜ RPT FLD (repeat folder)
➜ SHUFFLE (shuffle)
➜ RPT OFF (repeat off)
Note
For VCD, repeat playback is not available when the
PBC mode is on.
Repeating a section within a chapter/track
While playing a disc, press REPEAT A-B
1
at the desired starting point.
➜ “SET A” appears in the front panel
display.
2 Press REPEAT A-B again at the desired
end point.
• A and B can only be set within the same
chapter/track.
➜ “RPT AB” appears in the front panel
display and the selected section repeats
continuously.
3 To exit from the sequence, press REPEAT
A-B.
Playback in slow motion
You can play back video in slow motion.
1 Press 5 for reverse slow motion or a for
forward slow motion.
2 During slow motion, press 5/a repeatedly
to select the desired speed.
3 To resume normal playback, press 3 / 8 or
ENTER.
Note
For VCD and SVCD, reverse slow motion is not
available.
Zooming pictures in/out
You can enlarge or shrink the picture on the
TV screen and pan through the enlarged
picture.
1 During playback, press ZOOM repeatedly
to display the picture at different scales.
•Use 2 / 3 /5 /a to pan through the
enlarged picture.
➜ Playback continues.
2 Press ZOOM repeatedly to return to the
original size.
Operations for video playback (DVD/VCD/SVCD)
Using the disc menu
Depending on the disc, a menu may appear on
the TV screen once you load the disc.
■ To select a playback feature or item
Use 2 / 3 /5 /a or the numeric
buttons (0-9), and then press ENTER to
start playback.
■ To access or exit from the menu
Press MENU.
16 En
Resuming playback from the last stopped point
You can resume playback of the last ten discs,
even if the discs were ejected or the power of
this unit was turned off.
1 Load one of the last ten discs.
➜ “LOADING” appears on the TV
screen.
2 Press 3 / 8 while “LOADING” is
displayed on the TV screen.
➜ “RESUME PLAY” appears on the TV
screen and the disc is played back from
the last point.
■ To cancel the resume mode
When playback is stopped, press 7 again.
Playback Operation
Using the on-screen display (OSD)
The OSD menu shows disc playback
information (e.g., the title or chapter number,
elapsed playing time or audio/subtitle
language). A number of operations are
possible without interrupting disc playback.
1 During playback, press ON SCREEN.
➜ A list of available disc information
appears on the TV screen.
DVD
MENU
TITLE 02/14
CHAPTER 02/14
AUDIO 5.1CH
SUBTITLE ENG
BITRATE 16 TITLE ELAPSED 0:02:25
VCD/SVCD
MENU
TRACK 02/14
DISC TIME 0:49:17
TRACK TIME 0:03:43
REPEAT OFF
BITRATE 16 TOTAL ELAPSED 0:02:25
2 Press 5 /a to scroll the information, and
then press ENTER to access the selected
item.
3 Use the numeric buttons (0-9) to input
the number/time or press 5/a to make a
selection, and then press ENTER.
➜ Playback changes to the selected time
or to the selected title/chapter/track.
■ Title/Chapter/Track selection
(DVD/VCD)
1 Press 5 /a to select [TITLE] or
[CHAPTER] (DVD) or [TRACK] (VCD).
2 Press ENTER.
3 Select a title, chapter or track number using
the numeric buttons (0-9).
■ Time search (DVD/VCD)
1 Press 5 /a to select [TT TIME] / [CH
TIME] (DVD) or [TRACK TIME] / [DISC
TIME] (VCD).
• [TT TIME] refers to the total time of
the current title, and [CH TIME] refers
to the total time of the current chapter.
2 Press ENTER.
3 Enter hours, minutes and seconds from left
to right using the numeric buttons (0-9)
(e.g. 0:34:27).
■ Audio/Subtitle/Angle selection
(DVD)
You can change [AUDIO], [SUBTITLE] or
[ANGLE] if these functions are available on
the disc you are playing.
1 Press 5 /a to select [AUDIO],
[SUBTITLE] or [ANGLE].
2 Press ENTER.
3 For Audio and Subtitle:
Press 5/a to highlight your selection, and
then press ENTER.
OR
For Angle:
Select an angle using the numeric
buttons (0-9).
English
17 En
Playback Operation
■ Repeat/Time Display (DVD/VCD)
1 Press 5 /a to select [REPEAT] or [TIME
DISP.].
2 Press ENTER.
3 Press 5/a to highlight your selection, and
then press ENTER.
■ Time display (CD)
Each time you press ON SCREEN, the
time display changes as follows:
TOTAL ELAPSED TOTAL REMAIN
SINGLE REMAIN SINGLE ELAPSED
Special DVD features
Playing by title
1
Press MENU.
➜ The disc title menu appears on the TV
screen.
2 Use 2 / 3 /5 /a or the numeric
buttons (0-9) to select a playback option.
3 Press ENTER.
Selecting an audio language/ format and subtitle language
■ To select an audio language/format
Press AUDIO repeatedly to select an audio
language and/or format.
■ To select a subtitle language
Press SUBTITLE repeatedly to select a
subtitle language.
Special VCD/SVCD features
Using the playback control (PBC) menu
For a VCD with a playback control (PBC)
feature (version 2.0 only)
1 Press MENU to toggle between “PBC ON”
and “PBC OFF”.
➜ If you select “PBC ON”, the disc menu
appears (if available) on the TV screen.
2 Use the numeric buttons (0-9) to select
a playback option.
• Press l22 / 33l to move to the
previous/next page (if available).
3 During playback, press TOP MENU/
RETURN to return to the menu screen.
■ To skip the index menu and play
back a disc from the beginning
Press MENU to turn off the PBC function.
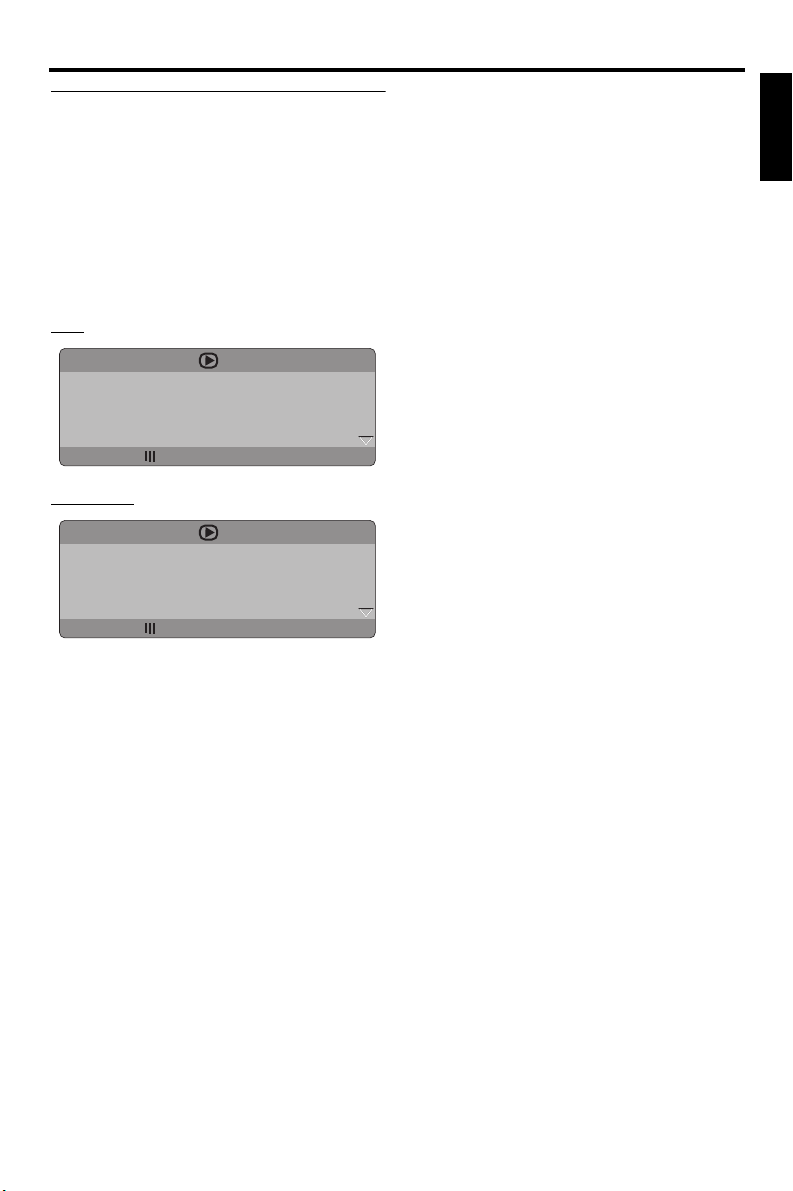
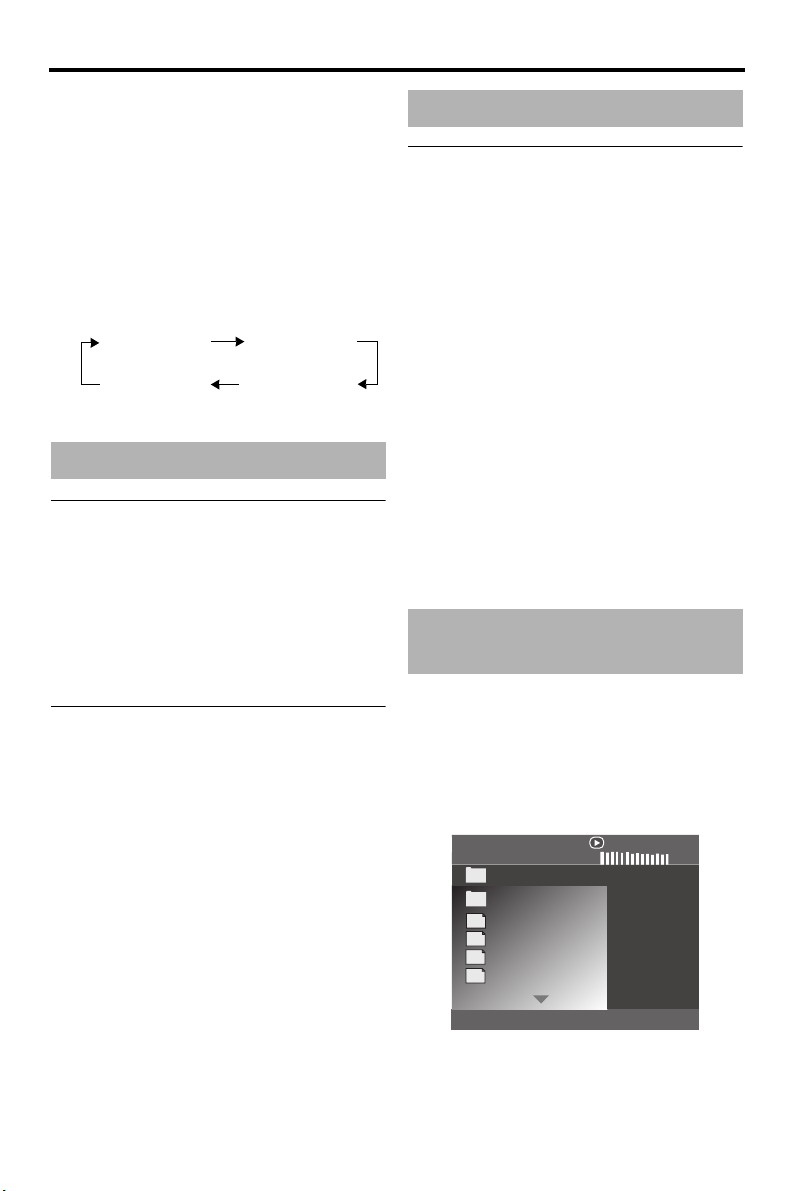
Playing data discs (MP3/WMA/JPEG/DivX)
1 Load a data disc.
• The disc reading time may exceed 30
seconds due to the complexity of the
directory/file configuration.
➜ The data disc menu appears on the TV
screen.
00:00 00:00
001/020
Favorite
MP3
Piano
Cello
MP3
MP3
Jazz
MP3
Live
18 En
Playback Operation
2 Playback starts automatically. If not, press
3
/ 8 .
3 Press l22 / 33l to select another track/file
in the current folder.
Notes
• It may not be possible to play certain MP3/
WMA/JPEG/DivX discs due to the configuration
and characteristics of the discs or the recording
conditions.
• HD JPEG images may not be displayed correctly
when the first image is displayed or the disc is
ejected. For details about HD JPEG, see “HD
JPEG” on page 31.
• Depending on the picture size, HD JPEG images
may appear smaller in size.
Selecting a folder and track/file
1
Press 5 /a to select a folder, and then
press ENTER to open the folder.
2 Press 5 /a to select a track/file.
3 Press ENTER.
➜ Playback starts from the selected file to
the end of the folder.
Special picture disc features
1 Load a picture disc (JPEG, Kodak Picture
CD or Fujicolor CD).
➜ For JPEG, the picture menu appears on
the TV screen.
➜ For Kodak Picture CD and Fujicolor
CD, the slideshow begins.
■ For JPEG
2 Press 3 / 8 to start the slideshow.
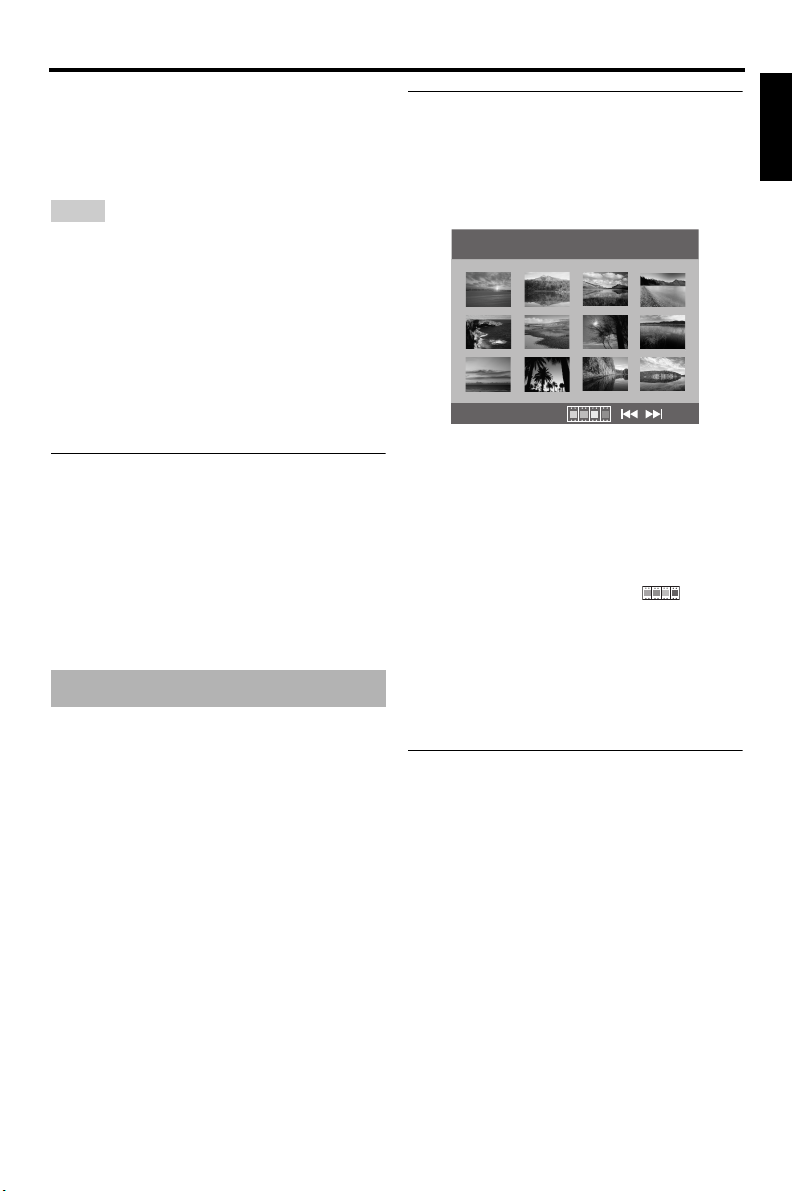
Using the preview function
This function displays the content of the
current folder or the entire disc.
1 Press
7
during playback.
➜ 12 thumbnails appear on the TV screen.
2 Press l22 / 33l to display the other
thumbnails on the previous/next page.
3 Use 2 / 3 /5 /a to highlight one of the
thumbnails, and then press ENTER to start
playback.
OR
Move the cursor to highlight on the
bottom of the page to start playback from
the first thumbnail on the current page.
■ For JPEG
4 Press MENU to return to the JPEG disc
menu.
Zooming pictures in/out
1 During playback, press ZOOM repeatedly
to display the picture at different scales.
2 Use 2 / 3 /5 /a to pan through the
enlarged picture.
English
19 En

Playback Operation
Playback with multi-angles
During playback, press 2 / 3 /5 /a to
rotate the picture on the TV screen.
2:
rotates the picture counter-clockwise
3 : rotates the picture clockwise
5 : flips the picture vertically
a : flips the picture horizontally
Note
For HD JPEG, the 5 /a key is not available.
Playing MP3 music and JPEG pictures simultaneously
1 Load a disc that contains both MP3 music
and JPEG picture data.
➜ The disc menu appears on the TV
screen.
2 Select an MP3 music track.
3 During MP3 music playback, select a
JPEG picture file from the TV screen, and
then press 3
/ 8 .
➜ The picture files are played back one
after another until the end of the folder.
4 To quit simultaneous playback, press
7
MENU, and then press
Notes
• Some files cannot be played correctly depending
on disc characteristics or recording conditions.
• This function is not available when [HD JPEG] is
set to [ON] (see page 31).
.
Special DivX features
DivX files including DMF (DivX Media
Format) features only
Using the interactive menu
1 Load a disc.
➜ The interactive menu appears on the
TV screen.
2 Use 2 / 3 /5 /a to select a chapter.
3 Press ENTER or 3 / 8 to start playback of
the selected chapter.
■ To access the interactive menu
During playback, press MENU.
■ To return to the data disc menu
screen
When the interactive menu is displayed,
press
7
.
Selecting an audio/subtitle language
■ To select an audio language
During playback, press AUDIO to switch
the audio language recorded on the
contents.
■ To select a subtitle language
During playback, press SUBTITLE to
switch or turn on/off the subtitle language
recorded on the contents.
Note
For information about external subtitle files, see
“Displaying DivX external subtitle files” on
page 33.
20 En

Playback Operation
Using a USB device
You can play back MP3, WMA, JPEG and
DivX files saved on your supported USB
device.
Supported USB devices
This unit supports USB mass storage class
devices (e.g., flash memories, card readers,
portable audio players) using FAT16 or FAT32
format.
Notes
• Some devices may not work properly even if they
meet the requirements.
• If “Device not supported” appears on the TV
screen when you connect the USB device, follow
the procedure below.
– Set this unit to the standby mode, and then turn
it on again.
– Disconnect the device when this unit is in the
standby mode, then connect it again and turn
on this unit.
– Connect the AC adapter if the adapter is
supplied with the device.
If “Device not supported” appears even after you
perform this procedure, the device is not playable
with this unit.
• If “USB current protection active. Device not
supported” appears on the TV screen, the device
is not playable with this unit because the power
consumption of the device is too high.
• This unit cannot read more than two card reader
slots at once, though it can recognize up to six
slots. The first slot has priority.
• For an external hard disk drive, this unit is
compatible with size of 80 GB or less.
• Do not connect devices other than USB mass
storage class devices: USB chargers, USB hubs,
PCs, etc.
Playing data files
Yamaha and suppliers accepts no liability for
the loss of data saved on the USB devices
connected to this unit. As a precaution, it is
recommended that the files are tested after
they have been saved on.
1 Connect your USB device to the USB port
of this unit (see “USB port” on page 11).
➜ “Press USB mode key to switch device”
appears on the TV screen.
2 Press USB.
• The reading time may exceed 30 seconds
due to the number of files/folders.
➜
The file menu appears on the TV screen.
3
Follow the procedure in “Playing data discs
(MP3/WMA/JPEG/DivX)” on page 18.
■ To exit from the USB mode
Press 7 to stop playback, and then press
USB.
Notes
• You cannot access the USB mode while
“LOADING” is displayed on the TV screen.
• If you disconnect the USB device or open the disc
tray of this unit, the playback mode is
automatically switched to the disc mode.
• For DivX, this unit is compatible with a bit rate
range of 3 Mbps or less.
• Some files may not work properly depending on
the USB device specification.
– For DivX, the video may freeze shortly or the
sound may break in the segments.
For MP3, the sound may break in the segments
during MP3/JPEG simultaneous playback.
In this case, record the file at a lower bit rate
and/or smaller size so that the file may work
properly.
• Copyright-protected files cannot be played.
• This unit can display up to 648 files. However,
less than 648 files may be displayed if some files
are not playable with this unit.
• If the USB device is partitioned, only the first
partition is displayed.
• This unit can play back files of 4 GB in size or
less.
English
21 En
Setup Menu
Setup Menu
Setup is carried out on the TV screen, enabling
you to customize this unit to suit your own
particular requirements.
Notes
• Unless stated otherwise, all operations described
here are carried out using the supplied remote
control.
• To return to the previous menu, press 2 .
• To exit from the menu, press SET UP.
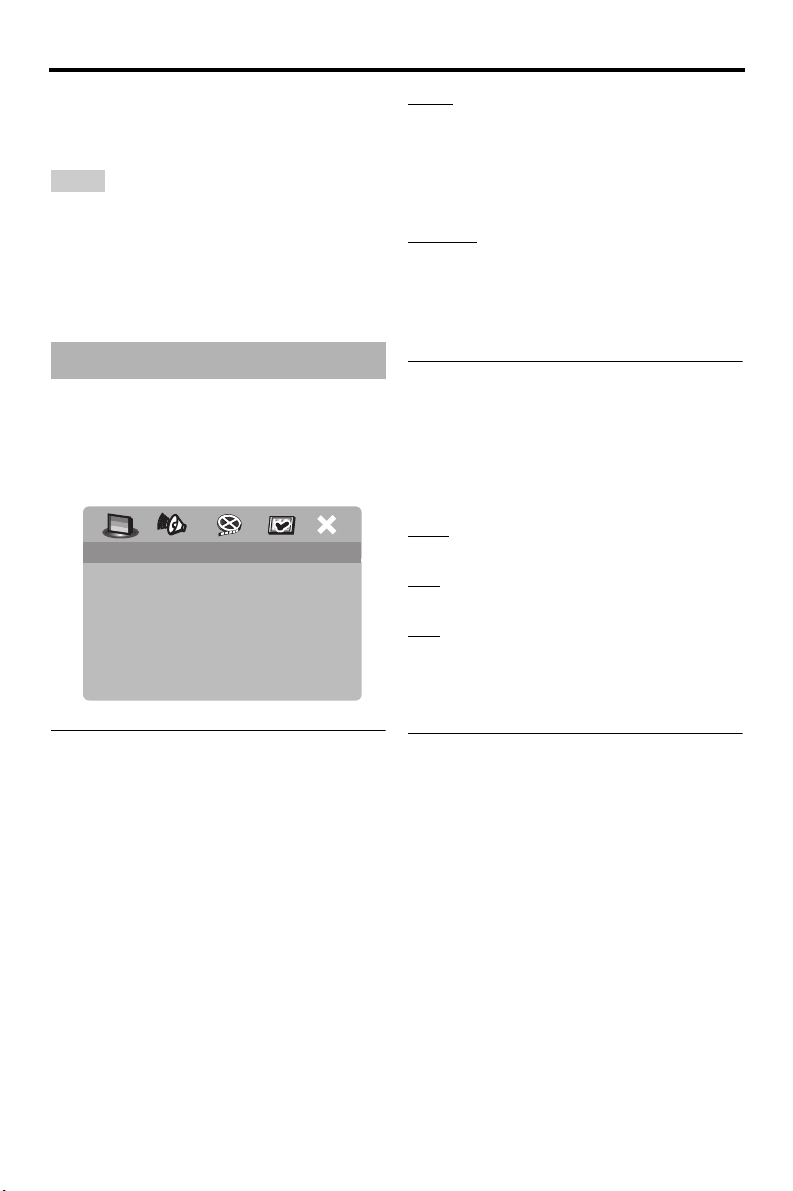
General setup menu
1 Press SET UP.
2 Press 2 / 3 to select “GENERAL SETUP
PAGE”.
3 Press ENTER.
GENERAL SETUP PAGE
DISC LOCK
DISPLAY DIM
PROGRAM
OSD LANGUAGE
SCREEN SAVER
SLEEP
AUTO STANDBY
DIVX(R) VOD CODE
LOCK
Select this to lock playback of the current disc.
Subsequent access to a locked disc requires a
six-digit password.
The default password is “000 000” (see
“Changing the password” on page 34).
UNLOCK
Select this to unlock the disc and allow future
playback.
2 Press 5 /a to select a setting, and then
press ENTER.
Dimming the front panel display
You can select different levels of brightness
for the front panel display.
1 In “GENERAL SETUP PAGE”, press
5 /a to highlight [DISPLAY DIM], and
then press 3 .
100%
Select this for full brightness.
70%
Select this for medium brightness.
40%
Select this for dimming display.
2 Press 5 /a to select a setting, and then
press ENTER.
Locking/Unlocking the disc for viewing
Not all discs are rated or coded by the
manufacturer of the disc. You can prevent
playback of a specific disc by locking the disc.
You can lock up to 40 discs on this unit.
1 In “GENERAL SETUP PAGE”, press
5 /a to highlight [DISC LOCK], and then
press 3 .
22 En
Programming disc tracks (except MP3/WMA/JPEG/DivX)
You can play back the contents of a disc in the
desired order by programming the tracks to be
played. You can store up to 20 tracks per disc
with a maximum of ten discs.
1 In “GENERAL SETUP PAGE”, press
5 /a to highlight [PROGRAM], and then
press 3 to select [INPUT MENU].
Setup Menu
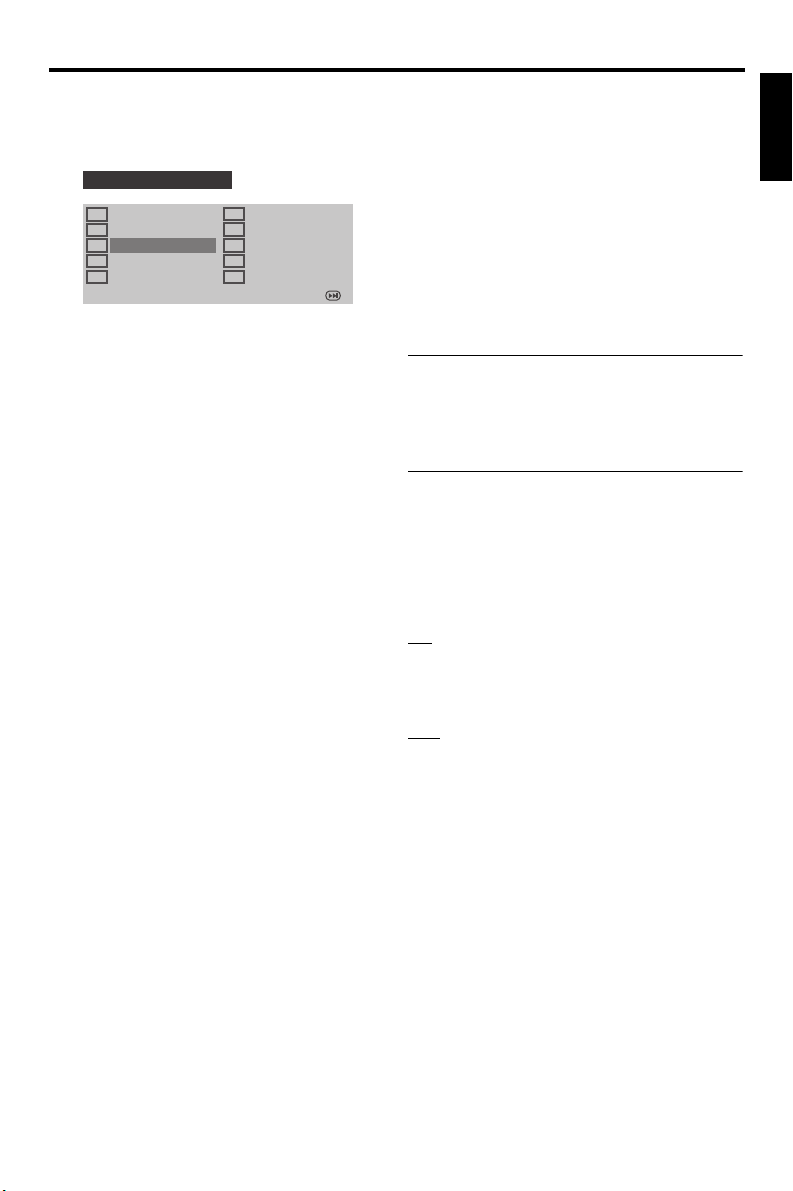
2 Press ENTER.
➜ The input menu appears on the TV
screen.
PROGRAM: TRACK (01-17)
1 04
2 10
3 _ _
4 _ _
5 _ _
EXIT START NEXT
6 _ _
7 _ _
8 _ _
9 _ _
10 _ _
■ To input your favorite tracks/
chapters
3 Use the numeric buttons (0-9) to enter a
valid track/chapter number.
4 Use 2 / 3/5 /a to move the cursor to the
next position.
• If the track/chapter number is more
than ten, press 33l to move to the next
page, and then proceed with
programming.
OR
•Use 2 / 3 /5 /a to highlight [NEXT]
on the program menu, and then press
ENTER.
5 Repeat steps 3-4 to input another track/
chapter number.
■ To remove a track
6 Use 2 / 3 /5 /a to move the cursor to the
track you want to remove.
7 Press ENTER to remove this track from
the program menu.
■ To start program playback
8 Use 2 / 3 /5 /a to highlight [START] on
the program menu, and then press
ENTER.
➜ Playback starts for the selected tracks in
the programmed sequence.
■ To exit from program playback
9 Use 2 / 3 /5 /a to highlight [EXIT] on
the program menu, and then press
ENTER.
OSD language
This menu contains various options for the onscreen display (OSD) language. For details,
see “Setting the OSD Language” on page 14.
Setting the screen saver
This function is used to turn on or off the
screen saver.
1 In “GENERAL SETUP PAGE”, press
5 /a to highlight [SCREEN SAVER], and
then press 3 .
ON
Select this to turn off the TV screen when disc
playback is stopped or paused for more than
15 minutes.
OFF
Select this to disable the screen saver function.
2 Press 5 /a to select a setting, and then
press ENTER.
English
23 En

Setup Menu
Setting the sleep timer
This feature automatically sets this unit to the
standby mode after a certain elapsed period.
1 In “GENERAL SETUP PAGE”, press
5 /a to highlight [SLEEP], and then
press 3.
2 Press 5 /a to select a setting.
• You can select from 30, 60, 90, 120 and
150 minutes. Select [OFF] to cancel the
sleep timer function.
3 Press ENTER.
Setting the auto standby function
This function is used to turn the auto standby
mode on or off when disc playback is stopped
for more than 30 minutes.
1 In “GENERAL SETUP PAGE”, press
5 /a to highlight [AUTO STANDBY],
and then press 3.
ON
Select this to set this unit to the standby mode
automatically when disc playback is stopped
or paused for more than 30 minutes.
OFF
Select this to disable the auto standby
function.
2 Press 5 /a to select a setting, and then
press ENTER.
Displaying the DivX® VOD registration code
Yamaha provides you with a DivX® VOD
(Video On Demand) registration code that
allows you to rent and purchase videos using
®
the DivX
VOD service.
For more information, visit https://
vod.divx.com/.
1 In “GENERAL SETUP PAGE”, press
5 /a to highlight [DIVX(R) VOD CODE],
and then press 3 .
➜ The registration code appears.
2 Press ENTER to exit.
Notes
• To purchase or rent the videos from DivX® VOD
service at https://vod.divx.com/, use the
registration code and download the video onto a
CD-R for playback on this unit.
• All of the downloaded videos from DivX
can only be played back on this unit.
• For DivX, the time search feature is not available.
®
VOD
24 En

Setup Menu
Audio setup menu
1 Press SET UP.
2 Press 2 / 3 to select “AUDIO SETUP
PAG E ”.
3 Press ENTER.
AUDIO SETUP PAGE
ANALOG OUTPUT
DIGITAL AUDIO
HDMI AUDIO
NIGHT MODE
LIP SYNC
Setting the analog output
Set the analog output to match the playback
capability of this unit.
1 In “AUDIO SETUP PAGE”, press 5 /a to
highlight [ANALOG OUTPUT], and then
press 3 .
STEREO
Select this to change channel output to stereo,
which only delivers sound from the two front
speakers.
LT/ RT
Select this if this unit is connected to a Dolby
Pro Logic decoder.
2 Press 5 /a to select a setting, and then
press ENTER.
Setting the digital output
English
The [DIGITAL AUDIO] options are:
[DIGITAL OUTPUT] and [LPCM OUTPUT].
1 In “AUDIO SETUP PAGE”, press 5 /a to
highlight [DIGITAL AUDIO], and then
press 3 .
2 Press 5 /a to highlight an option.
3 Press 3 to open a submenu.
DIGITAL OUTPUT
Set the digital output according to your
optional audio component connections.
OFF
Select this to turn off the digital output.
ALL
Select this if you have connected the digital
audio output jack to a multi-channel decoder/
receiver.
MPEG ➜ PCM
Select this if your receiver is not capable of
decoding MPEG audio signals.
PCM ONLY
Select this only if your receiver is not capable
of decoding multi-channel audio signals.
LPCM OUTPUT
Select this if you have connected this unit to a
PCM-compatible receiver via a digital
terminal, such as the coaxial terminal. In this
case, you may need to adjust [LPCM
OUTPUT].
Discs are recorded at a certain sampling rate.
The higher the sampling rate, the better the
sound quality.
25 En

Setup Menu
48KHz
Select this to play back discs recorded at the
sampling rate of 48 kHz. All 96 kHz PCM data
streams (if available) are converted to the
sampling rate of 48 kHz.
96KHz
Select this to play back discs recorded at the
sampling rate of 96 kHz. If the 96 kHz disc is
copy protected, the digital output is
automatically converted to the sampling rate of
48 kHz.
4 Press 5 /a to select a setting, and then
press ENTER.
Turning the HDMI audio on/off
When you connect this unit to an HDMI
compatible component via the HDMI jack,
select to turn on or off the HDMI audio output.
1 In “AUDIO SETUP PAGE”, press 5 /a to
highlight [HDMI AUDIO], and then
press 3 .
ON
Select this to turn on the HDMI audio output.
OFF
Select this to turn off the HDMI audio output.
Notes
• If you are not using the HDMI audio output, set
this to [OFF].
• If the monitor/receiver connected to this unit
using HDMI does not support HDMI audio signal
input, set this to [OFF].
• This unit can output the following audio signals
using HDMI: 32/44.1/48 kHz, 2ch linear PCM
signals and bitstream signals (Dolby Digital, DTS
and MPEG).
• When audio signals are being output by HDMIcompatible components, digital output signals are
muted.
• When [DIGITAL OUTPUT] is set to [OFF] on
this unit, HDMI audio is muted even if [HDMI
AUDIO] is set to [ON] and an HDMI connection
is established between the monitor and receiver.
• When [DIGITAL OUTPUT] is set to [ALL] on
this unit, PCM signals are still output if the
monitor and receiver only support the PCM
format. However, the audio output is muted when
audio format plays back the DTS source.
Turning the night mode on/off
In the night mode, high volume output is
softened and low volume output is brought
upward to an audible level. It is useful when
you want to watch your favorite action movie
without disturbing others at night.
1 In “AUDIO SETUP PAGE”, press 5 /a
to highlight [NIGHT MODE], and then
press 3 .
ON
Select this to level out the volume. This
feature is only available for movies with the
Dolby Digital mode.
OFF
Select this when you want to enjoy the full
dynamic range of surround sound.
2 Press 5 /a to select a setting, and then
press ENTER.
26 En
 Loading...