

Page 1
DVD PLAYER
LECTEUR DE DVD
DVD-S559
OWNER'S MANUAL
MODE D'EMPLOI
G
Page 2

Important notes for users
in the U.K.
Mains plug
This apparatus is fitted with an approved 13
Amp plug. To change a fuse in this type of plug
proceed as follows:
1
Remove fuse cover and fuse.
2
Fix new fuse which should be a BS1362 5 Amp,
A.S.T.A. or BSI approved type.
3
Refit the fuse cover.
If the fitted plug is not suitable for your jack
outlets, it should be cut off and an appropriate
plug fitted in its place.
If the mains plug contains a fuse, this should
have a value of 5 Amp. If a plug without a fuse
is used, the fuse at the distribution board should
not be greater than 5 Amp.
Note: The severed plug must be disposed to
avoid a possible shock hazard should it be
inserted into a 13 Amp jack elsewhere.
How to connect a plug
The wires in the mains lead are coloured with
the following code: blue = neutral (N),
brown = live (L).
As these colours may not correspond with the
colour markings identifying the terminals in your
plug, proceed as follows:
– Connect the blue wire to the terminal marked N or
coloured black.
– Connect the brown wire to the terminal marked L
or coloured red.
– Do not connect either wire to the earth terminal in
the plug, marked E (or e) or coloured green (or
green and yellow).
Before replacing the plug cover, make certain
that the cord grip is clamped over the sheath of
the lead - not simply over the two wires.
Copyright in the U.K.
Recording and playback of material may require
consent. See Copyright Act 1956 and The
Performer’s Protection Acts 1958 to 1972.
VAROITUS
Muiden kuin tässä esitettyjen toimintojen säädön tai
asetusten muutto saattaa altistaa vaaralliselle säteilylle
tai muille vaarallisille toiminnoille.
DK
Advarsel: Usynlig laserstråling ved åbning når
sikkerhedsafbrydere er ude af funktion. Undgå
utsættelse for stråling.
Bemærk: Netafbryderen STANDBY/ON er
sekundært indkoblet og ofbryder ikke strømmen fra
nettet. Den indbyggede netdel er derfor tilsluttet til
lysnettet så længe netstikket sidder i stikkontakten.
N
Observer: Nettbryteren STANDBY/ON er sekundert
innkoplet. Den innebygdenetdelen er derfor ikke
frakoplet nettet så lenge apparatet er tilsluttet
nettkontakten.
S
Klass 1 laseraparat
Varning! Om apparaten används på annat sätt än i
denna bruksanvisning specificerats, kan användaren
utsättas för osynlig laserstrålning, som överskrider
gränsen för laserklass 1.
Observera! Strömbrytaren STANDBY/ON är
sekundärt kopplad och inte bryter inte strömmen från
nätet. Den inbyggda nätdelen är därför ansluten till
elnätet så länge stickproppen sitter i vägguttaget.
SF
Luokan 1 laserlaite
Varoitus! Laitteen käyttäminen muulla kuin tässä
käyttöohjeessa mainitulla tavalla saattaa altistaa
käyttäjän turvallisuusluokan 1 ylittävälle
näkymättömälle lasersäteilylle.
Oikeus muutoksiin varataan. Laite ei saa olla alttiina
tippu-ja roiskevedelle.
Toiminnanvalitsin STANDBY/ON on kytketty
toisiopuolelle, eikä se kytke laitetta irti sähköverkosta.
Sisäänrakennettu verkko-osa on kytkettynä
sähköverkkoon aina silloin, kun pistoke on
pistorasiassa.
VARO!
AVATTAESSA JA SUOJALUKITUS OHITETTAESSA
OLET ALTTIINA NÄKYMÄTTÖMÄLLE
LASERSÄTEILYLLE. ÄLÄ KATSO SÄ TEESEEN.
VARNING!
OSYNLIG LASERSTRÅLNING NÄR DENNA DEL
ÄR ÖPPNAD OCH SPÄRREN ÄR URKOPPLAD.
BETRAKTA EJ STRÅLEN.
i
Page 3
CAUTION
Use of controls or adjustments or performance
of procedures other than those specified herein
may result in hazardous radiation exposure.
ATTENTION
L’emploi de commandes, de réglages ou un
choix de procédures différents des
spécifications de cette brochure peut entraîner
une exposition à d’éventuelles radiations
pouvant être dangereses.
ACHTUNG
Die Verwendung von Bedienungselementen
oder Einstellungen oder die Durchführung von
Bedienungsvorgängen, die nicht in dieser
Anleitung aufgeführt sind, kann zu einem
Kontakt mit gefährlichen Laserstrahlen führen.
OBSERVERA
Användning av kontroller och justeringar eller
genomförande av procedurer andra än de som
specificeras i denna bok kan resultera i att du
utsätter dig för farlig strålning.
ATTENZIONE
Uso di controlli o regolazioni o procedure non
specificamente descritte può causare
l’esposizione a radiazioni di livello pericoloso.
PRECAUCIÓN
El uso de los controles o los procedimientos de
ajuste o utilización diferentes de los
especificados en este manual pueden causar
una exposición peligrosa a la radiación.
VOORZICHTIG
Gebruik van bedieningsorganen of instellingen,
of uitvoeren van handelingen anders dan staan
beschreven in deze handleiding kunnen leiden
tot blootstelling aan gevaarlijke stralen.
ПРЕДУПРЕЖДЕНИЕ
Использование органов управления или
настроек или выполнение процедур, отличных
от описанных в данном руководстве, могут
привести к опасному облучению.
The unit is not disconnected from the AC power source
as long as it is connected to the wall outlet, even if this
unit itself is turned off. This state is called the standby
mode. In this state, this unit is designed to consume a
very small quantity of power.
L’appareil n’est pas isolé de la source d’alimentation aussi
longtemps qu’il reste branché sur une prise murale,
même lorsqu’il est éteint. Il est alors dit en mode «Veille».
Dans ce mode, l’appareil consomme très peu de courant.
Das Gerät ist nicht vom Netz getrennt, solange der
Netzstecker noch mit der Wandsteckdose verbunden
ist, selbst wenn das Gerät ausgeschaltet wurde. Dieser
Betriebszustand wird als Bereitschaftsmodus bezeichnet.
In diesem Zustand nimmt das Gerät eine sehr geringe
Menge Strom auf.
Enheten är inte urkopplad från nätet så länge som den är
ansluten till vägguttaget även om enheten i sig självt är
avstängd. Detta kallas för beredskapsläge och i detta
tillstånd konsumerar apparaten minimalt med ström.
L’unità non è scollegata dall’impianto elettrico di casa
sintanto che rimane collegata ad una presa di corrente
anche se è spenta. Questo modo viene chiamato “modo
di attesa”. In esso, l’unità consuma una quantità molto
bassa di energia per mantenere in memoria le
impostazioni da voi fatte.
Aunque el propio aparato se encuentre apagado, éste no
se desconectará de la fuente de CA siempre que se
mantenga enchufado a la toma de corriente. Este estado
recibe el nombre de “modo de espera”. En este estado,
este aparato ha sido diseñado para consumir una
cantidad muy pequeña de energía.
De stroomtoevoer naar het toestel is niet afgesloten
zolang de stekker nog in het stopcontact zit, zelfs niet als
het toestel zelf uitgeschakeld is. Deze toestand wordt
“standby” (waak- of paraatstand) genoemd. Het toestel
is ontworpen om in deze toestand.
Данное устройство не отсоединено от
источника переменного напряжения до тех
пор, пока оно подключено к настенной
розетке, даже если само данное устройство
выключено. Это состояние называется
режимом готовности. В этом состоянии данное
устройство потребляет очень малое
количество электроэнергии.
CAUTION
VORSICHT
ADVARSEL
VARNING
VA RO !
CUIDADO
:
VISIBLE AND INVISIBLE LASER RADIATION WHEN
:
SICHTBARE UND UNSICHTBARE LASERSTRAHLUNG
:
SYNLIG OG USYNLIG LASERSTRÅLING VED ÅBNING
:
SYNLIG OCH OSYNLIG LASERSTRÅLNING NÄR
:
AVATTAESSA OLET ALTTIINA NÄKYVÄLLE JA
:
RADIACIÓN LÁSER VISIBLE E INVISIBLE AL ESTAR ABIERTO. EVITAR EXPOSICIÓN AL RAYO.
OPEN. AVOID EXPOSURE TO BEAM
WENN ABDECKUNG GEÖFFNET NICHT DEM STRAHL AUSSETSEN
UNDGÅ UDSÆTTELSE FOR STRÅLING
DENNA DEL ÄR ÖPPNAD BETRAKTA EJ STRÅLEN
NÄKYMÄTTÖMÄLLE LASER SÄTEILYLLE, ÄLÄ KATSO SÄTEESEEN
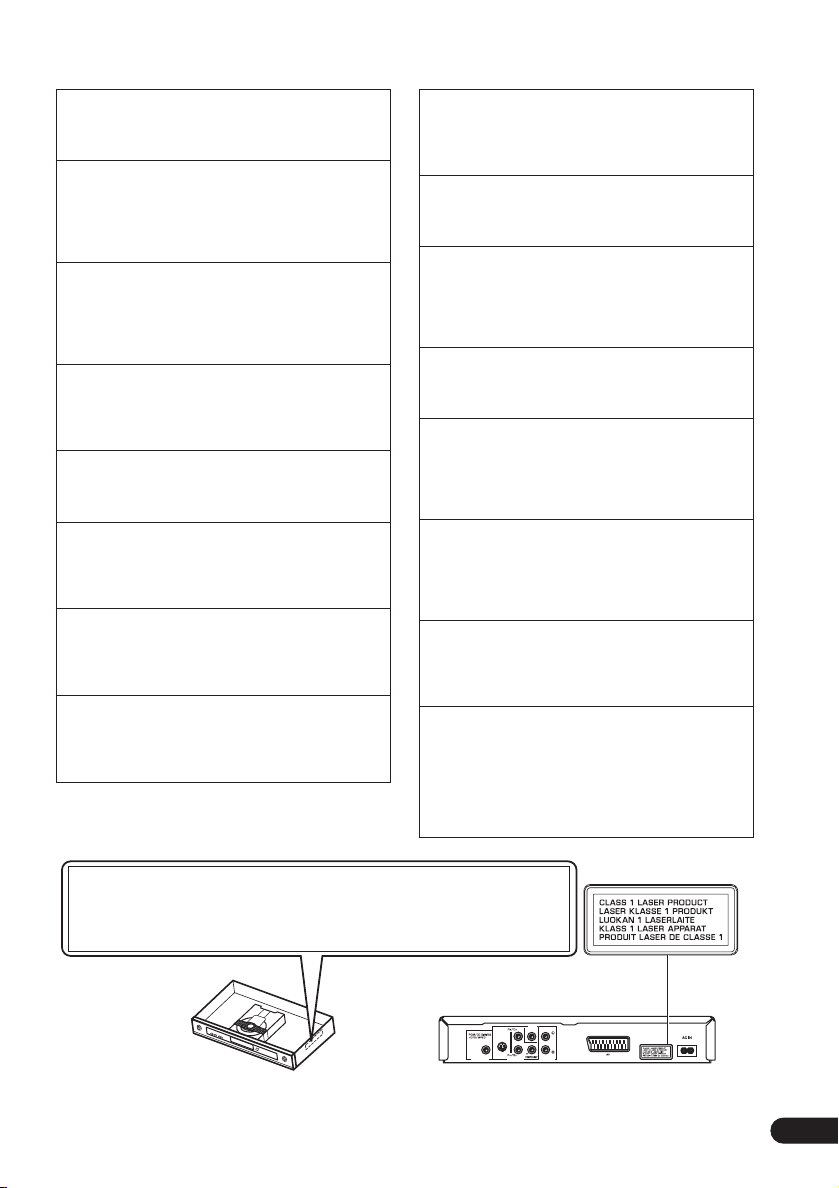
VIDEO
COAXIAL
S VIDEO
VIDEO OUT
AUDIO OUT
DIGITAL OUT
ii
Page 4

CAUTION: READ THIS BEFORE OPERATING YOUR UNIT.
1
To assure the finest performance, please read this
manual carefully. Keep it in a safe place for future
reference.
2
Install this sound system in a well ventilated, cool,
dry, clean place — away from direct sunlight, heat
sources, vibration, dust, moisture, or cold. In a
cabinet, allow about 2.5 cm (1 inch) of free space
all around this unit for adequate ventilation.
3
Locate this unit away from other electrical
appliances, motors, or transformers to avoid
humming sounds.
4
Do not expose this unit to sudden temperature
changes from cold to hot, nor locate this unit in
an environment with high humidity (i.e., a room
with a humidifier) to prevent condensation inside
this unit, which may cause an electrical shock, fire,
damage to this unit, and/or personal injury.
5
Avoid installing this unit in a location where
foreign objects may fall onto this unit or where
this unit may be exposed to liquid dripping or
splashing. On the top of this unit, do not place:
– Other components, as they may cause damage
and/or discoloration on the surface of this unit.
– Burning objects (i.e., candles), as they may
cause fire, damage to this unit, and/or personal
injury.
– Containers with liquid in them, as they may fall,
spilling the liquid and causing an electrical
shock to the user and/or damage to this unit.
6
Do not cover this unit with a newspaper,
tablecloth, curtain, etc. in order not to obstruct
heat radiation. If the temperature inside this unit
rises, it may cause fire, damage to this unit, and/or
personal injury.
7
Do not plug in this unit to a wall outlet until all
connections are complete.
8
Do not operate this unit upside-down. It may
overheat, possibly causing damage.
9
Do not use excessive force on switches, knobs
and/or cords.
10
When disconnecting the power cord from the
wall outlet, grasp the plug; do not pull the cord.
11
Do not clean this unit with chemical solvents; this
might damage the finish. Use a clean, dry cloth.
12
Use only the voltage specified on this unit. Using
this unit with a higher voltage than specified is
dangerous and may cause fire, damage to this
unit, and/or personal injury. YAMAHA will not be
held responsible for any damage resulting from
use of this unit with a voltage other than as
specified.
13
To prevent damage by lightning, keep the power
cord out and outdoor antennas disconnected
from a wall outlet or the unit during a lightning
storm.
14
Do not attempt to modify or fix this unit. Contact
qualified YAMAHA service personnel when any
service is needed. The cabinet should never be
opened for any reason.
15
When not planning to use this unit for long
periods of time (i.e., vacation), disconnect the AC
power plug from the wall outlet.
16
Be sure to read the “Troubleshooting” section on
common operating errors before concluding that
this unit is faulty.
17
Before moving this unit, press STANDBY/ON to
set the unit in standby mode, then disconnect the
AC power plug from the wall outlet.
18
Install this unit near the AC outlet and where the
AC power plug can be reached easily.
WARNING
TO REDUCE THE RISK OF FIRE OR ELECTRIC
SHOCK, DO NOT EXPOSE THIS UNIT TO
RAIN OR MOISTURE.
LASER SAFETY
This unit employs a laser. Due to possible eye injury,
only a qualified service person should remove the
cover or attempt to service this device.
DANGER
This unit emits visible laser radiation when open.
Avoid direct eye exposure to beam.
When this unit is plugged into a wall outlet, do not
place your eyes close to the opening of the disc tray
and other openings or look inside.
1
En
Page 5

Contents
Thank you for purchasing this YAMAHA product.
Please read through this owner’s manual so that you will know how to operate your model
properly. After you have finished reading the instructions, put them in a safe place for future
reference
.
Contents
01
English
01 Before you start
Features
What’s in the box
Hints on installation
Disc/content format playback compatibility
. . . . . . . . . . . . . . . . . . . . . . . . . . . 4
. . . . . . . . . . . . . . . . . . . . 4
. . . . . . . . . . . . . . . . . . 5
02 Connecting up
Easy connections
Connecting using a SCART AV cable
Connecting using the S-video output
Connecting using the component video
. . . . . . . . . . . . . . . . . . . . . . . . . . . 10
output
Connecting to an AV receiver
. . . . . . . . . . . . . . . . . . . . 8
. . . . . 9
. . . . . 9
. . . . . . . . . . 11
03 Controls and displays
Front panel
Remote control
. . . . . . . . . . . . . . . . . . . . . . . . 12
. . . . . . . . . . . . . . . . . . . . 13
04 Getting started
Switching on
Using the on-screen displays
Setting up the player for your TV
Setting the language of this player’s
on-screen displays
Playing discs
. . . . . . . . . . . . . . . . . . . . . . 14
. . . . . . . . . . 14
. . . . . . . . 15
. . . . . . . . . . . . . . . . . . 15
. . . . . . . . . . . . . . . . . . . . . . 16
05 Playing discs
Scanning discs
Playing in slow motion
Frame advance/frame reverse
5
Viewing a JPEG slideshow
Browsing DVD or Video CD/Super VCD disc
with the Disc Navigator
Browsing WMA, MP3, DivX video and
JPEG files with the Disc Navigator
Looping a section of a disc
Using repeat play
Using random play
Creating a program list
Searching a disc
Switching subtitles
Switching audio language/channels
Zooming the screen
Switching camera angles
Displaying disc information
. . . . . . . . . . . . . . . . . . . . .20
. . . . . . . . . . . . . . . .20
. . . . . . . . . .21
. . . . . . . . . . . . .21
. . . . . . . . . . . . . . .21
. . . . . . .22
. . . . . . . . . . . .23
. . . . . . . . . . . . . . . . . . . .23
. . . . . . . . . . . . . . . . . .24
. . . . . . . . . . . . . . .25
. . . . . . . . . . . . . . . . . . . .26
. . . . . . . . . . . . . . . . . .26
. . . . .27
. . . . . . . . . . . . . . . . . .27
. . . . . . . . . . . . .27
. . . . . . . . . . . .27
06 Audio Settings and Video Adjust
menus
Audio Settings menu
Video Adjust menu
. . . . . . . . . . . . . . . . .28
. . . . . . . . . . . . . . . . . .29
En
2
Page 6

Contents01
07 Initial Settings menu
Using the Initial Settings menu . . . . . . . . .30
Digital Audio Out settings . . . . . . . . . . . . .30
Video Output settings . . . . . . . . . . . . . . . .31
Language settings . . . . . . . . . . . . . . . . . . .31
Display settings . . . . . . . . . . . . . . . . . . . . .32
Options settings . . . . . . . . . . . . . . . . . . . .32
Parental Lock. . . . . . . . . . . . . . . . . . . . . . .33
08 Additional information
Taking care of your player and discs . . . . .35
Screen sizes and disc formats . . . . . . . . . .36
Setting the TV system . . . . . . . . . . . . . . . .37
Resetting the player. . . . . . . . . . . . . . . . . .37
DVD-Video regions. . . . . . . . . . . . . . . . . . .37
Selecting languages using the language
code list. . . . . . . . . . . . . . . . . . . . . . . . . . .37
Language code list. . . . . . . . . . . . . . . . . . .38
Country/Area code list . . . . . . . . . . . . . . . .38
Glossary. . . . . . . . . . . . . . . . . . . . . . . . . . .39
Specifications . . . . . . . . . . . . . . . . . . . . . .40
This product incorporates copyright protection
technology that is protected by method claims of
certain U.S. patents and other intellectual property
rights owned by Macrovision Corporation and other
rights owners. Use of this copyright protection
technology must be authorized by Macrovision
Corporation, and is intended for home and other
limited viewing uses only unless otherwise authorized
by Macrovision Corporation. Reverse engineering or
disassembly is prohibited.
3
En
Page 7
Before you start
Chapter 1
01
Before you start
Features
• 24-bit/192kHz compatible DAC
The on-board 24-bit/192kHz DAC means that
this player is fully compatible with high
sampling-rate discs, capable of delivering
exceptional sound quality in terms of dynamic
range, low-level resolution and high-frequency
detail.
• Excellent audio performance surround
sound entertainment with Dolby Digital
and DTS
Logos:
When connected to a suitable AV amplifier or
receiver, this player gives great surround
sound with Dolby Digital and DTS discs.
• PureCinema Progressive Scan video
When connected to a progressive scancompatible TV or monitor using the
component video outputs, you can enjoy
extremely stable, flicker free images, with the
same frame refresh rate as the original movie.
• New Disc Navigator with moving
pictures
The new Disc Navigator enables you play the
first few seconds of each title or chapter in a
thumbnail image on screen.
• DSP effects for enhanced playback
See Audio Settings and Video Adjust menus on
page 28.
• Picture zoom
See Zooming the screen on page 27.
• MP3 and WMA compatibility
See Compressed audio compatibility on page 6.
• JPEG compatibility
See JPEG file compatibility on page 7.
*2
software
• DivX video compatibility
See DivX video compatibility on page 7.
• Energy saving design
An auto power-off function switches the player
into standby if not used for about 30 minutes.
*1
Laboratories. “Dolby” and the double-D symbol
are trademarks of Dolby Laboratories.
*1
*2
trademarks of Digital Theater Systems Inc.
What’s in the box
Please confirm that the following accessories
are in the box when you open it.
• Remote control
• AA/R6 dry cell batteries x2
• Audio/video cable (red/white/yellow plugs)
• Power cable
• Owner’s Manual
Putting the batteries in the remote
• Open the battery compartment cover
and insert the batteries as shown.
Use two AA/R6 batteries and follow the
indications (, ) inside the compartment.
Close the cover when you’re finished.
English
Manufactured under license from Dolby
“DTS” and “DTS Digital Out” are registered
En
4
Page 8
Before you start01
Important
Incorrect use of batteries can result in hazards
such as leakage and bursting. Please observe
the following:
• Don’t mix new and old batteries together.
• Don’t use different kinds of battery
together—although they may look similar,
different batteries may have different
voltages.
• Make sure that the plus and minus ends of
each battery match the indications in the
battery compartment.
• Remove batteries from equipment that
isn’t going to be used for a month or more.
• When disposing of used batteries, please
comply with governmental regulations or
environmental public instruction’s rules
that apply in your country or area.
Hints on installation
We want you to enjoy using this product for
years to come, so please use the following
guidelines when choosing a suitable location:
Do...
• Use in a well-ventilated room.
• Place on a solid, flat, level surface, such as
a table, shelf or stereo rack.
Don’t...
• Use in a place exposed to high
temperatures or humidity, including near
radiators and other heat-generating
appliances.
• Place on a window sill or a place where the
player will be exposed to direct sunlight.
• Use in an excessively dusty or damp
environment.
• Place directly on top of an amplifier, or
other component in your stereo system
that becomes hot in use.
• Use near a television or monitor as you may
experience interference—especially if the
television uses an indoor antenna.
• Use in a kitchen or other room where the
player may be exposed to smoke or steam.
• Use on a thick rug or carpet, or cover with
cloth—this may prevent proper cooling of
the unit.
• Place on an unstable surface, or one that is
not large enough to support all four of the
unit’s feet.
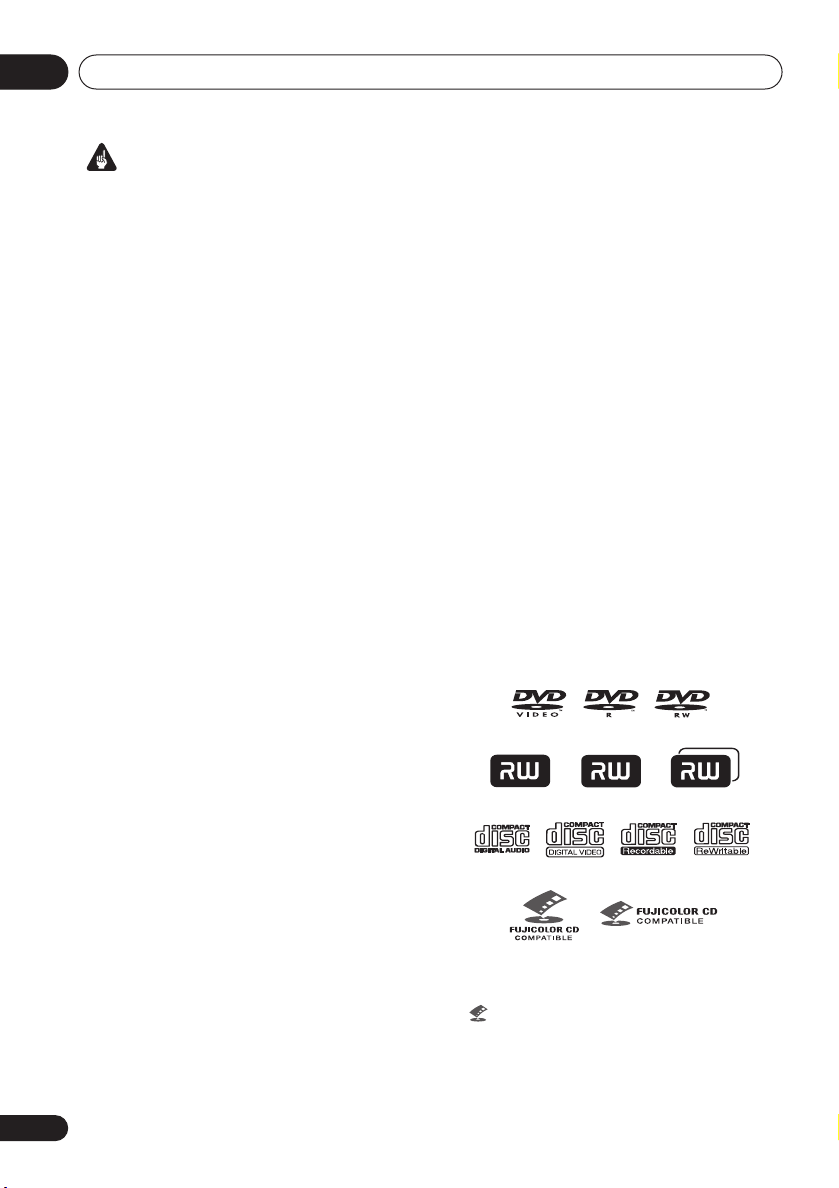
Disc/content format playback compatibility
This player is compatible with a wide range of
disc types (media) and formats. Playable discs
will generally feature one of the following logos
on the disc and/or disc packaging. Note
however that some disc types, such as
recordable CD and DVD, may be in an
unplayable format—see below for further
compatibility information.
Please also note that recordable discs cannot be
recorded using this player.
DVD-Video DVD-R DVD-RW
DVD+ReWritable
DVD+Rewritable DVD+R DVD+RDL
Audio CD CD-R CD-RW
• is a trademark of Fuji Photo Film Co. Ltd.
• Also compatible with KODAK Picture CD
Video CD
Fujicolor CD
DVD+R
DVD+R DL
5
En
Page 9

Before you start
01
This player supports the IEC’s Super VCD standard. Compared to the Video CD standard,
Super VCD offers superior picture quality, and
allows two stereo soundtracks to be recorded.
Super VCD also supports the widescreen size.
Super VCD
CD-R/RW compatibility
• Compatible formats: CD-Audio, Video CD/
Super VCD, ISO 9660 CD-ROM* containing
MP3, WMA, JPEG or DivX video files
* ISO 9660 Level 1 or 2 compliant. CD
physical format: Mode1, Mode2 XA Form1.
Romeo and Joliet file systems are both
compatible with this player.
• Multi-session playback: No
• Unfinalized disc playback: No
• File structure (may differ): Up to 299 folders
on a disc; up to 648 folders and files
(combined) within each folder
DVD+R/RW, DVD-R/RWcompatibility
• Compatible formats: DVD-Video, Video
Recording (VR)*
* DVD-RW only. Edit points may not play
exactly as edited; screen may go
momentarily blank at edited points.
• Unfinalized playback: No
• WMA/MP3/JPEG file playback on DVD+R/
RW, DVD-R/RW: No
Compressed audio compatibility
• Compatible formats: MPEG-1 Audio Layer 3
(MP3), Windows Media Audio (WMA)
• Sampling rates: 32, 44.1 or 48kHz
• Bit-rates: Any (128Kbps or higher
recommended)
• VBR (variable bit rate) MP3 playback: No
• VBR WMA playback: No
• WMA lossless encoding compatible: No
• DRM (Digital Rights Management)
compatible: Yes (DRM-protected audio
files will not play in this player—see also
DRM in the Glossary on page 39)
• File extensions: .mp3, .wma (these must be
used for the player to recognize MP3 and
WMA files – do not use for other file types)
About WMA
The Windows Media® logo indicates that this
player can playback Windows Media Audio
content.
WMA is an acronym for Windows Media Audio
and refers to an audio compression technology
developed by Microsoft Corporation. WMA
content can be encoded by using Windows
®
Media
Player version 7, 7.1, Windows Media®
Player for Windows
Player 9 Series.
Microsoft, Windows Media, and the Windows
logo are trademarks, or registered trademarks of
Microsoft Corporation in the United States and/
or other countries.
®
XP, or Windows Media®
About DivX
DivX is a compressed digital video format
created by the DivX
DivXNetworks, Inc. This player can play DivX
video files burned on CD-R/RW/ROM discs.
Keeping the same terminology as DVD-Video,
individual DivX video files are called "Titles".
When naming files/titles on a CD-R/RW disc
prior to burning, keep in mind that by default
they will be played in alphabetical order.
®
video codec from
English
6
En
Page 10

Before you start01
Displaying DivX subtitle files
The font sets listed below are available for DivX
external subtitle files. You can see the proper
font set on-screen by setting the Subtitle
Language (in Language settings on page 31)
to match the subtitle file.
This player supports the following language
groups:
Group 1: Albanian (sq), Basque (eu), Catalan (ca),
Danish (da), Dutch (nl), English (en), Faroese (fo),
Finnish (fi), French (fr), German (de), Icelandic (is), Irish
(ga), Italian (it), Norwegian (no), Portuguese (pt), RhaetoRomanic (rm), Scottish (gd), Spanish (es), Swedish (sv)
Group 2: Albanian (sq), Croatian (hr), Czech (cs),
Hungarian (hu), Polish (pl), Romanian (ro), Slovak (sk),
Slovenian (sl)
Group 3: Bulgarian (bg), Byelorussian (be), Macedonian
(mk), Russian (ru), Serbian (sr), Ukrainian (uk)
Group 4: Hebrew (iw), Yiddish (ji)
Group 5: Turkish (tr)
DivX, DivX Certified, and associated logos are
trademarks of DivXNetworks, Inc. and are used
under license.
• Some external subtitle files may be
displayed incorrectly or not at all.
• For external subtitle files the following
subtitle format filename extensions are
supported (please note that these files are
not shown within the disc navigation
menu): .srt, .sub, .ssa, .smi
• The filename of the movie file has to be
repeated at the beginning of the filename
for the external subtitle file.
• The number of external subtitle files which
can be switched for the same movie file is
limited to a maximum of 10.
DivX video compatibility
®
• Plays DivX
5, DivX® 4, DivX® 3 and DivX®
VOD video content (in compliance with
®
Certified technical requirements).
DivX
• File extensions: .avi and .divx (these must
be used for the player to recognize DivX
video files). Note that all files with the .avi
extension are recognized as MPEG4, but not
all of these are necessarily DivX video files
and therefore may not be playable on this
player.
DivX, DivX Certified, and associated logos are
trademarks of DivXNetworks, Inc. and are used
under license.
JPEG file compatibility
• Compatible formats: Baseline JPEG and
EXIF 2.2* still image files up to a resolution
of 3072 x 2048.
*File format used by digital still cameras
• Progressive JPEG compatible: No
• File extensions: .jpg (must be used for the
player to recognize JPEG files – do not use
for other file types)
PC-created disc compatibility
Discs recorded using a personal computer
may not be playable in this unit due to the
setting of the application software used to
create the disc. In these particular instances,
check with the software publisher for more
detailed information.
Discs recorded in packet write mode (UDF
format) are not compatible with this player.
Check the DVD+R/RW, DVD-R/RW or CD-R/
RW software disc boxes for additional
compatibility information.
• Official DivX® Certified product.
7
En
Page 11
Connecting up
Chapter 2
02
Connecting up
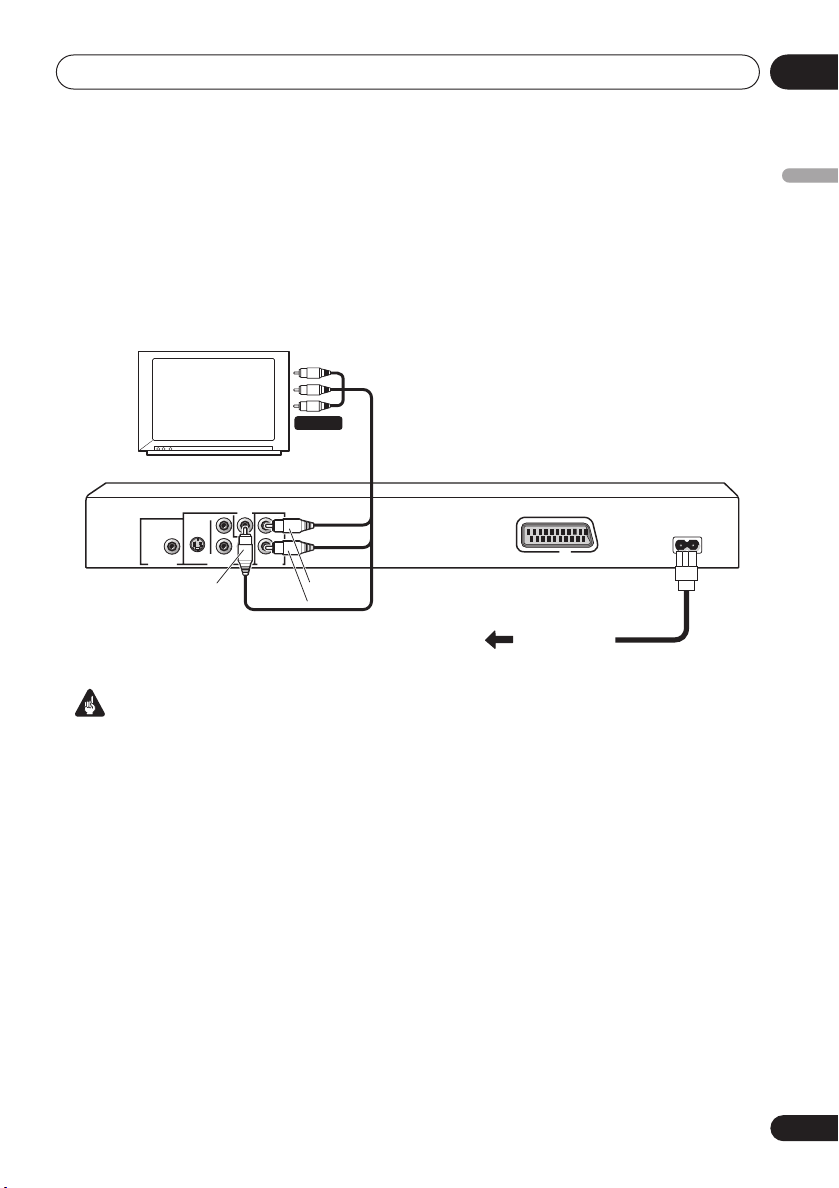
Easy connections
The setup described here is a basic setup that allows you to play discs using just the cables
supplied with the player. In this setup, stereo audio is played through the speakers in your TV.
A/V IN
TV
VIDEO
B/CB
PCM/q DIGITAL
/DTS/MPEG
COAXIAL
P
P
R/CR
S VIDEO
DIGITAL OUT VIDEO OUT
Yel low
Important
• This player is equipped with copy protection technology. Do not connect this player to your TV
via a VCR using audio/video or S-video cables, as the picture from this player will not appear
properly on your TV. (This player may also not be compatible with some combination TV/VCRs
for the same reason; refer to the manufacturer for more information.)
Y
COMPONENT
AUDIO OUT
L
R
White
Red
AV
AC IN
To power
outlet
English
En
8
Page 12
Connecting up02
1 Connect the VIDEO OUT and AUDIO
OUT L/R jacks to a set of A/V inputs on your
TV.
Use the supplied audio/video cable,
connecting the red and white plugs to the
audio outputs and the yellow plug to the video
output. Make sure you match up the left and
right audio outputs with their corresponding
inputs for correct stereo sound.
See below if you want to use a component or
S-video cable for the video connection.
2 Connect the supplied AC power cable to
the AC IN inlet, then plug into a power
outlet.
Note
• Before unplugging the player from the
power outlet, make sure you first switch it
into standby using either the front panel
STANDBY/ON button, or the remote
control, and wait of the -OFF- message to
disappear from the player’s display.
• For the above reasons, do not plug this
player into a switched power supply found
on some amplifiers and AV receivers.
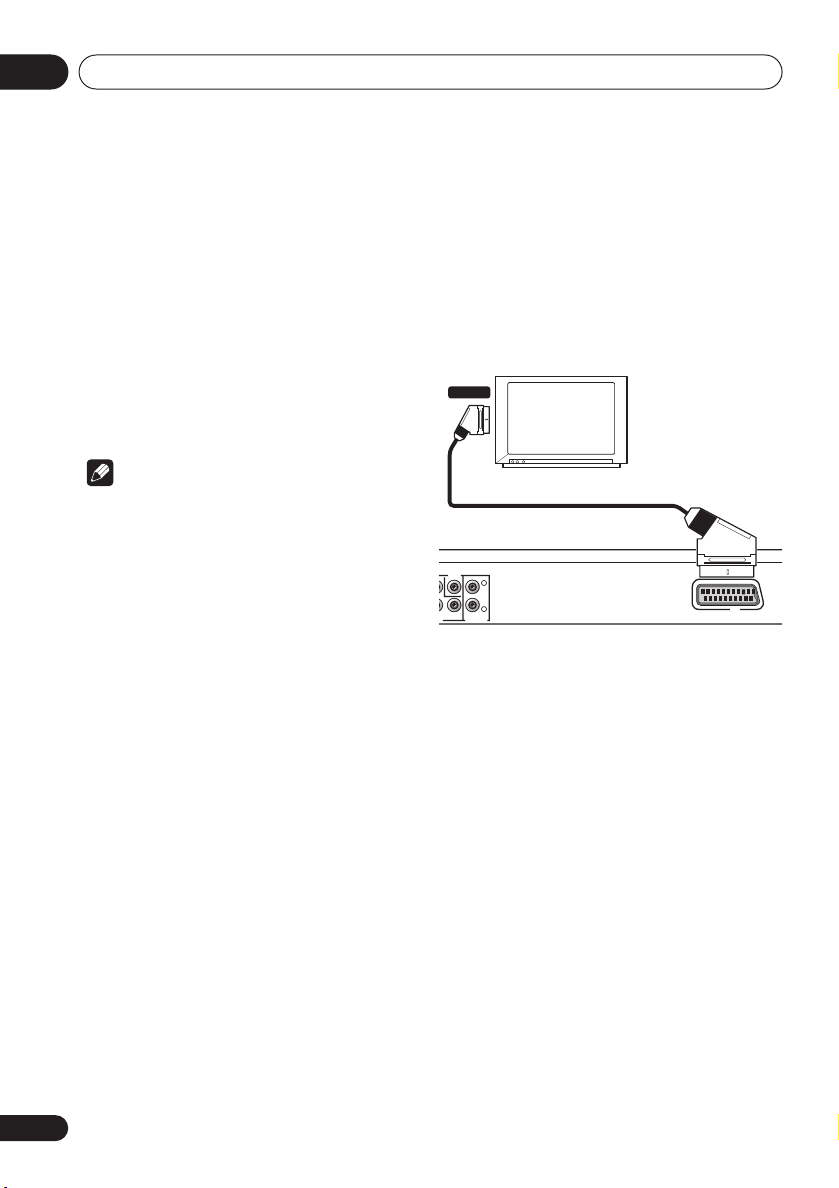
Connecting using a SCART AV cable
A SCART-type AV connector is provided for
connection to a TV or AV receiver. The video
output is switchable between ordinary
composite and RGB. See AV Connector Out on
page 31 for how to set it.
The SCART AV connector also outputs analog
audio, so there is no need to also connect the
AUDIO OUT L/R jacks.
SCART
TV
VIDEO
L
R
Y
COMPONENT
AUDIO OUT
T
1 Use a SCART cable (not supplied) to
connect the AV CONNECTOR (RGB) output
to a SCART AV input on your TV (or AV
receiver).
AV
9
En
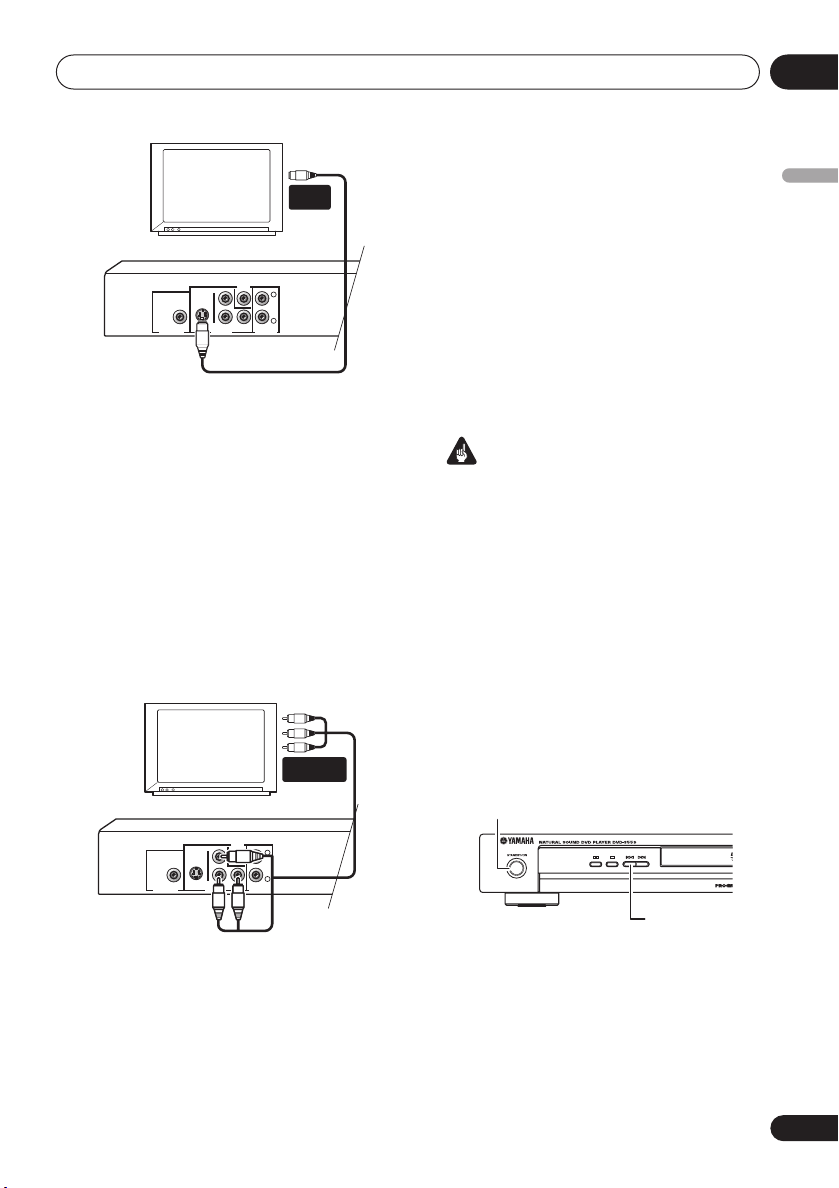
Connecting using the S-video output
If your TV (or other equipment) has an S-video
(S1) input, you can use the S-video output on
this player instead of the standard (composite)
output for a better quality picture.
• Use an S-video cable (not supplied) to
connect the S-VIDEO OUT to an S-video
input on your TV (or monitor or AV
receiver).
Line up the small triangle above the jack with
the same mark on the plug before plugging in.
Page 13
Connecting up
DIGITAL OUT VIDEO OUT
S VIDEO
P
R/CR
Y
P
B/CB
COAXIAL
PCM/q DIGITAL
/DTS/MPEG
COMPONENT
VIDEO
AUDIO OUT
L
R
DIGITAL OUT VIDEO OUT
S VIDEO
P
R/CR
Y
P
B/CB
COAXIAL
PCM/q DIGITAL
/DTS/MPEG
COMPONENT
VIDEO
AUDIO OUT
L
R
S-VIDEO
IN
TV
Connecting using the component video output
You can use the component video output
instead of the standard video out jack to
connect this player to your TV (or other
equipment). This should give you the best
quality picture from the three types of video
output available.
• Use a component video cable (not
supplied) to connect the COMPONENT
VIDEO OUT jacks to a component video
input on your TV, monitor or AV receiver.
COMPONENT
VIDEO IN
TV
02
Watching progressive scan video from the component video outputs
This player can output progressive scan video
from the component video output. Compared
to interlace video, progressive scan video
effectively doubles the scanning rate of the
picture, resulting in a very stable, flicker-free
image.
To set up the player for use with a progressive
scan TV, see Video Output settings on page 31.
When the player is set to output progressive
scan video, the PRGSVE indicator lights in the
front panel display.
Important
• If you connect a TV that is not compatible
with a progressive scan signal and switch
the player to progressive, you will not be
able to see any picture at all. In this case,
switch everything off and reconnect using
the supplied video cable (see Easy
connections on page 8), then switch back
to Interlace (see below).
Switching the video output to interlace
using the front panel controls
Switch the player to standby then, using the
front panel controls, press STANDBY/ON
while pressing to switch the player back to
Interlace.
STANDBY/ON
English
DVD-S559
10
En
Page 14
Connecting up02
DIGITAL OUT VIDEO OUT
S VIDEO
P
R/CR
Y
P
B/CB
COAXIAL
PCM/q DIGITAL
/DTS/MPEG
COMPONENT
VIDEO
AUDIO OUT
L
R
DIGITAL OUT VIDEO OUT
S VIDEO
P
R/CR
Y
P
B/CB
COAXIAL
PCM/q DIGITAL
/DTS/MPEG
COMPONENT
VIDEO
AUDIO OUT
L
R
Compatibility of this player with
progressive-scan and high-definition TVs
This player is compatible with progressive
video Macro Vision System Copy Guard.
Consumers should note that not all highdefinition television sets are fully compatible
with this product and may cause artifacts to be
displayed in the picture. In case of 525/625
progressive scan picture problems, it is
recommended that the user switch the
connection to the ‘standard definition’ output
(Interlace). If there are questions regarding our
TV set compatibility with this model, please
contact our customer service center.
This player is fully compatible with the
complete line of YAMAHA products, including
the projectors DPX-1200, LPX-510 and the
plasma monitor PDM-4220.
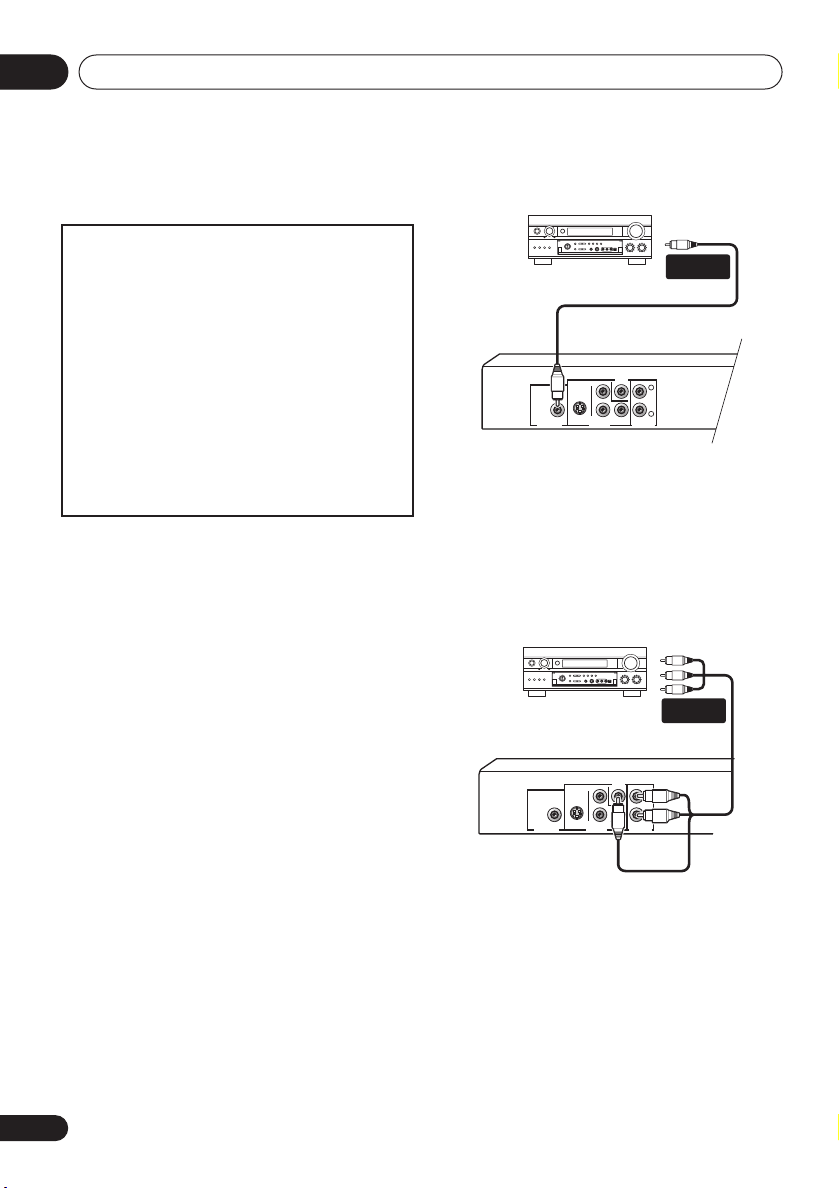
Connecting to an AV receiver
To enjoy multichannel surround sound you
need to connect this player to an AV receiver
using the digital audio output.
In addition to a digital connection, we
recommend also connecting using the stereo
analog connection.
You’ll probably also want to connect a video
output to your AV receiver. You can use any of
the video outputs available on this player (the
illustration shows a standard (composite)
connection).
1 Connect the DIGITAL AUDIO OUT
COAXIAL jack on this player to a coaxial
digital input on your AV receiver.
DIGITAL IN
AV receiver
(COAXIAL)
Use a coaxial cable (similar to the supplied
video cable) to connect the COAXIAL DIGITAL
AUDIO OUT jack to a coaxial input on your AV
receiver.
2 Connect the analog AUDIO OUT L/R and
VIDEO OUT jacks on this player to a set of
analog audio and video inputs on your AV
receiver.
AV receiver
AUDIO/
VIDEO IN
11
En
• You can use the SCART AV connector, or
the S-video or component video jacks to
connect to the AV receiver if you prefer.
Page 15

Controls and displays
Chapter 3
03
Controls and displays
Front panel
1
3 4
DVD-S559
1 STANDBY/ON (page 14)
2 Disc tray
3 (page 17)
4 (page 17)
5 and (page 17)
6 (page 16)
7 Display
8 (page 17)
5
2
6 7
English
8
12
En
Page 16

Controls and displays03
STANDBY/ON
CLEAR
OPEN/CLOSE
ENTER
PLAY MODE
SURROUND
ON SCREEN
MENU
TOP MENU
SUBTITLE
HOME
MENU
RETURN
ANGLE
ZOOM
AUDIO
SKIP
SLOW/SEARCH
STOP
PAUSE
PLAY
ENTER
Remote control
ANGLE
STOP
21
6
0
ENTER
374
CLEAR
ZOOM
SLOW/SEARCH
PAUSE
OPEN/CLOSE
8
ENTER
ON SCREEN
MENU
RETURN
AUDIO
PLAY
STANDBY/ON
1
2
3
4
5
9
PLAY MODE
TOP MEN
SURROUND
5
6
HOME
MENU
7
SUBTITLE
8
9
SKIP
10
11
1(STANDBY/ON) (page 14)
2 Number buttons (page 17)
3 PLAY MODE (page 23)
4 SURROUND (page 28)
5 TOP MENU (page 18)
6 ENTER & cursor buttons (page 14)
7 HOME MENU (page 14)
8 SUBTITLE (page 26)
9 ANGLE (page 27)
10 and (SKIP) (page 17)
11 (STOP) (page 17)
12 OPEN/CLOSE (page 16)
12
13
15
16
17
18
21
14
19
20
22
13 ENTER (page 14)
14 CLEAR (page 25)
15 ON SCREEN (page 27)
16 MENU (page 18)
17 RETURN (page 14)
18 AUDIO (page 27)
19 ZOOM (page 27)
20 and (SLOW/SEARCH)
(page 17, 20
21 (PLAY) (page 17)
22 (PAUSE) (page 17)
Using the remote control
Keep in mind the following when using the
remote control:
• Make sure that there are no obstacles
between the remote and the remote sensor
on the unit.
• The remote has a range of about 7m.
• Remote operation may become unreliable
if strong sunlight or fluorescent light is
shining on the unit’s remote sensor.
• Remote controllers for different devices
can interfere with each other. Avoid using
remotes for other equipment located close
to this unit.
• Replace the batteries when you notice a
fall off in the operating range of the remote.
)
13
En
Page 17

Getting started
STANDBY/ON
CLEAR
OPEN/CLOSE
ENTER
PLAY MODE
SURROUND
ON SCREEN
MENU
TOP MENU
SUBTITLE
HOME
MENU
RETURN
ANGLE
ZOOM
AUDIO
ENTER
Chapter 4
04
Getting started
Switching on
After making sure that everything is connected
properly and that the player is plugged in,
press STANDBY/ON on the front panel or
remote control to switch the player on.
Also, switch on your TV and make sure that it is
set to the input you connected the DVD player
to.
STANDBY/ON
DVD-S559
FAQ
• My DVD player switches on but there is
nothing displayed on my TV.
Make sure that the TV is set to the correct
video input (not a TV channel). For
example, if you connected this player to the
VIDEO 1 inputs on your TV, switch your TV
to VIDEO 1.
Note
• This player features a screen saver and an
auto power off function. If the player is
stopped and no button is pressed for
around five minutes, the screen saver
starts. If the disc tray is closed but no disc
is playing and no control is pressed for
about 30 minutes, the player automatically
goes into standby.
Using the on-screen displays
For ease of use, this player makes extensive
use of graphical on-screen displays (OSDs).
All the screens are navigated in basically the
same way, using the cursor buttons
() to change the highlighted item and
pressing ENTER to select it.
6
5
78
CLEAR
ENTER
0
9
PLAY MODE
SURROUND
ON SCREEN
TOP MEN
HOME
MENU
SUBTITLE
Button What it does
HOME
Display/exit the on-screen display.
MENU
Changes the highlighted menu
item.
ENTER
Selects the highlighted menu
item (both
remote work in exactly the same
way).
RETURN Returns to the main menu
without saving changes.
Note
• From here on in this manual, the word
‘select’ generally means use the cursor
buttons to highlight an item on-screen,
then press ENTER.
MENU
ENTER
RETURN
ANGLE
ZOOM
AUDIO
ENTER buttons on the
English
14
En
Page 18

Getting started04
Setting up the player for your TV
If you have a widescreen (16:9) TV, you should
setup the player so that the picture will be
presented correctly. If you have a conventional
(4:3) TV, you can leave the player on the default
setting and move on to the next section.
1 Press HOME MENU and select ‘Initial
Settings’.
Initial Settings
2 Select ‘TV Screen’ from the ‘Video
Output’ settings.
Initial Settings
Digital Audio Out
Video Outpu
Language
Display
Options
TV Screen
Component Out
t
AV Connector Out
3 If you have a widescreen (16:9) TV,
select ‘16:9 (Wide)’.
If you have a conventional (4:3) TV, you can
change the setting from 4:3 (Letter Box) to 4:3
(Pan & Scan) if you prefer. See Video Output
settings on page 31 for more details.
4 Press HOME MENU to exit the menu
screen.
4:3 (Letter Box)
4:3 (Pan&Scan)
16:9 (Wide)
Setting the language of this player’s on-screen displays
This sets the language of the player’s onscreen displays.
1 Press HOME MENU and select ‘Initial
Settings’.
Initial Settings
2 Select ‘OSD Language’ from the
‘Display’ settings.
Initial Settings
Digital Audio Out
Video Output
Language
Display
Options
OSD Language
Angle Indicator
3 Select a language.
The on-screen language will change according
to your selection.
4 Press HOME MENU to exit the menu
screen.
English
français
Deutsch
Italiano
Español
15
En
Page 19

Getting started
STANDBY/ON
CLEAR
OPEN/CLOSE
ENTER
PLAY MODE
SURROUND
ON SCREEN
MENU
TOP MENU
SUBTITLE
HOME
MENU
RETURN
ANGLE
ZOOM
AUDIO
SKIP
SLOW/SEARCH
STOP
PAUSE
PLAY
ENTER
04
Playing discs
The basic playback controls for playing DVD,
CD, Video CD/Super VCD, DivX video and MP3/
WMA discs are covered here. Further functions
are detailed in the next chapter.
For details on playing JPEG picture discs, see
Viewing a JPEG slideshow on page 21.
Important
• Throughout this manual, the term ‘DVD’
means DVD-Video, DVD+R/RW and DVDR/RW. If a function is specific to a
particular kind of DVD disc, it is specified.
21
6
0
SURROUND
ANGLE
STOP
ENTER
374
CLEAR
ZOOM
SLOW/SEARCH
PAUSE
OPEN/CLOSE
8
ENTER
ON SCREEN
MENU
RETURN
AUDIO
PLAY
STANDBY/ON
5
9
PLAY MODE
TOP MEN
HOME
MENU
SUBTITLE
SKIP
1 If the player isn’t already on, press
(STANDBY/ON) to switch it on.
If you’re playing a DVD, disc containing DivX
video files or Video CD/Super VCD, also turn on
your TV and make sure that it is set to the
correct video input.
2 Press OPEN/CLOSE () to open the disc
tray.
3 Load a disc.
Load a disc with the label side facing up, using
the disc tray guide to align the disc (if you’re
loading a double-sided DVD disc, load it with
the side you want to play face down).
4 Press (play) to start playback.
If you’re playing a DVD or Video CD/Super VCD,
an on-screen menu may appear. See DVD-
Video disc menus on page 18 and Video CD/
Super VCD PBC menus on page 18 for more on
how to navigate these.
• If you’re playing a containing DivX video
files or MP3/WMA audio files, it may take a
few seconds before playback starts, etc.
This is normal.
Note
• You may find with some DVD discs that
some playback controls don’t work in
certain parts of the disc. This is not a
malfunction.
• If a disc contains a mixture of DivX video
and other media file types (MP3, for
example), first select whether to play the
DivX video files (DivX)or the other media
file types (MP3 / WMA / JPEG) from the
on-screen display.
English
16
En
Page 20

Getting started04
Basic playback controls
The table below shows the basic controls on
the remote for playing discs. The following
chapter covers other playback features in more
detail.
Button What it does
Starts playback.
If the display shows RESUME or
LAST MEM playback starts from the
resume or last memory point (see
also Resume and Last Memory
below.)
Pauses a disc that’s playing, or
restarts a paused disc.
Stops playback.
See also Resume and Last Memory
below.
(remote
only)
(remote
only)
Skips to the start of the current
Skips to the next track, title or
Numbers
(remote
only)
Press to start fast reverse scanning.
(play) to resume normal
Press
playback.
Press to start fast forward scanning.
Press (play) to resume normal
playback.
track, title or chapter, then to
previous tracks/titles/chapters.
chapter.
Use to enter a title/chapter/track
number. Press
• If the disc is stopped, playback
starts from the selected title (for
DVD) or track (for CD/Video CD
Super VCD
• If the disc is playing, playback
jumps to the start of the selected
title (VR mode DVD-RW), chapter
(DVD-Video) or track (CD/Video CD/
Super VCD).
ENTER to select.
/
).
Resume and Last Memory
When you stop playback of a DVD, CD, Video
CD/Super VCD or DivX video discs, RESUME is
shown in the display indicating that you can
resume playback again from that point.
If the disc tray is not opened, the next time you
start playback the display shows RESUME and
playback resumes from the resume point. (If
you want to clear the resume point, press
(stop) while RESUME is displayed.)
With DVDs and Video CD/ Super VCDs, if you
take the disc out of the player after stopping
playback, the last play position is stored in
memory. If the next disc you load is the same
one, the display shows LAST MEM and
playback will resume. For DVD-Video discs, the
player stores the play position of the last five
discs. When one of these discs is next loaded,
you can resume playback.
Note
• The Last Memory function doesn’t work
with VR format DVD-RW discs.
• If you don’t need the Last Memory function
when you stop a disc, you can press OPEN/
CLOSE () to stop playback and open the
disc tray.
17
En
Page 21

Getting started
STANDBY/ON
CLEAR
OPEN/CLOSE
ENTER
PLAY MODE
SURROUND
ON SCREEN
MENU
TOP MENU
SUBTITLE
HOME
MENU
RETURN
ANGLE
ZOOM
AUDIO
ENTER
STANDBY/ON
CLEARCLEAR
OPEN/CLOSE
ENTERENTER
PLAY MODEPLAY MODE SURROUNDSURROUND ON SCREENON SCREEN
MENUMENU
TOP MENTOP MENU
SUBTITLESUBTITLE
HOMEHOME
MENUMENU
RETURNRETURN
ANGLEANGLE ZOOMZOOM AUDIOAUDIO
SKIPSKIP SLOW/SEARCHSLOW/SEARCH
STOPSTOP PAUSEPAUSE PLAYPLAY
ENTERENTER
21
5
9
374
8
6
0
04
DVD-Video disc menus
Many DVD-Video discs feature menus from
which you can select what you want to watch.
They may also give access to additional
features, such as subtitle and audio language
selection, or special features such as
slideshows. See the disc packaging for details.
Sometimes DVD-Video menus are displayed
automatically when you start playback; others
only appear when you press MENU or TOP
MENU.
374
21
6
5
9
PLAY MODE
TOP MEN
HOME
MENU
SUBTITLE
Button What it does
TOP MENU Displays the ‘top menu’ of a DVD
disc—this varies with the disc.
MENU Displays a DVD disc menu—this
varies with the disc and may be
the same as the ‘top menu’.
Moves the cursor around the
screen.
ENTER Selects the current menu option.
RETURN Returns to the previously dis-
played menu screen.
Numbers
(remote
only)
Highlights a numbered menu
option (some discs only). Press
ENTER to select.
0
SURROUND
ANGLE
ENTER
CLEAR
ZOOM
8
ENTER
ON SCREEN
MENU
RETURN
AUDIO
Video CD/Super VCD PBC menus
Some Video CD/Super VCDs have menus from
which you can choose what you want to watch.
These are called PBC (Playback control)
menus.
You can play a PBC Video CD/Super VCD
without having to navigate the PBC menu by
starting playback using a number button to
select a track, rather than the (play) button.
Button What it does
RETURN Displays the PBC menu.
Numbers
(remote
only)
Displays the previous menu page
Displays the next menu page (if
Use to enter a numbered menu
option. Press
ENTER to select.
(if there is one).
there is one).
English
18
En
Page 22

Getting started04
FAQ
• After I load a DVD disc, it ejects
automatically after a few seconds!
Most likely, the disc is the wrong region for
your player. The region number should be
printed on the disc; check it against the
region number of the player (which you can
find on the rear panel). See also DVD-Video
regions on page 37.
If the region number is OK, it may be that
the disc is damaged or dirty. Clean the disc
and look for signs of damage. See also
Taking care of your player and discs on
page 35.
• Why won’t the disc I loaded play?
First check that you loaded the disc the
right way up (label side up), and that it’s
clean and undamaged. See Taking care of
your player and discs on page 35 for
information on cleaning discs.
If a disc loaded correctly won’t play, it’s
probably an incompatible format or disc
type, such as DVD-Audio or DVD-ROM. See
Disc/content format playback compatibility
on page 5 for more on disc compatibility.
•I have a widescreen TV so why are there
black bars at the top and bottom of the
screen when I play some discs?
Some movie formats are such that even
when played on a widescreen TV, black
bars are necessary at the top and bottom of
the screen. This is not a malfunction.
•I have a standard (4:3) TV and set the player
to show widescreen DVDs in pan & scan
format, so why do I still get black bars top
and bottom with some discs?
Some discs override the display
preferences of the player, so even if you
have 4:3 (Pan & Scan) selected, those
discs will still be shown in letter box format.
This is not a malfunction.
19
En
Page 23

Playing discs
Chapter 5
05
Playing discs
Note
• Many of the functions covered in this
chapter apply to DVD discs, Video CDs/
Super VCDs, CDs, DivX video and WMA/
MP3 JPEG discs, although the exact
operation of some varies slightly with the
kind of disc loaded.
• Some DVDs restrict the use of some
functions (random or repeat, for example)
in some or all parts of the disc. This is not a
malfunction.
• When playing Video CD/Super VCDs, some
of the functions are not available during
PBC playback. If you want to use them,
start the disc playing using a number
button to select a track.
Scanning discs
You can fast-scan discs forward or backward at
four different speeds (DivX video only one
speed).
1 During playback, press or to
start scanning.
• There is no sound while scanning DVDs,
DivX video and Video CD/Super VCDs.
2 Press repeatedly to increase the
scanning speed.
• The scanning speed is shown on-screen
except when playing a WMA/MP3 track
using
the Disc Navigator.
3 To resume normal playback, press
(play).
• When scanning a Video CD/Super VCD
playing in PBC mode or a WMA/MP3 track,
playback automatically resumes at the end
or beginning of the track.
• Depending on the disc, normal playback
may automatically resume when a new
chapter is reached on a DVD disc.
English
Playing in slow motion
You can play DVDs at four different slow
motion speeds, forwards and backwards.
Video CD/Super VCDs and DivX video can be
played at four different forward slow motion
speeds.
1 During playback, press (pause).
2 Press and hold or until slow
motion playback starts.
• The slow motion speed is shown onscreen.
• There is no sound during slow motion
playback.
3 Press repeatedly to change the slow
motion speed.
4 To resume normal playback, press
(play).
• Depending on the disc, normal playback
may automatically resume when a new
chapter is reached.
20
En
Page 24

Playing discs05
Disc Navigator
Frame advance/frame reverse
You can advance or back up DVD discs frameby-frame. With Video CD/Super VCDs and DivX
video file you can only use frame advance.
1 During playback, press (pause).
2 Press or to reverse or advance
a frame at a time.
3 To resume normal playback, press
(play).
• Depending on the disc, normal playback
may automatically resume when a new
chapter is reached.
Viewing a JPEG slideshow
After loading a CD/CD-R/RW containing JPEG
picture files, press (play) to start a slideshow
from the first folder/picture on the disc. The
player displays the pictures in each folder in
alphabetical order.
Pictures are automatically adjusted so that
they fill as much of the screen as possible (if
the aspect ratio of the picture is different to
your TV screen you may notice black bars at the
sides, or at the top and bottom of the screen).
While the slideshow is running:
Button What it does
Pauses the slideshow; press again to
restart.
Displays the previous picture.
Displays the next picture.
Pauses the slideshow and rotates the
displayed picture 90º (counter)
clockwise. (Press (play) to restart
slideshow).
Pauses the slideshow and flips the
displayed picture horizontally or
vertically. (Press (play) to restart
slideshow).
Button What it does
ZOOM Pauses the slideshow and zooms the
picture. Press again to toggle
between 1x, 2x and 4x zoom. (Press
(play) to restart slideshow).
MENU Displays the Disc Navigator screen
(see below).
Note
• The time it takes for the player to load a file
increases with large file sizes.
Browsing DVD or Video CD/ Super VCD disc with the Disc Navigator
Use the Disc Navigator to browse through the
contents of a DVD or Video CD/Super VCD disc
to find the part you want to play.
Important
• You can’t use the Disc Navigator with
Video CD/Super VCDs in PBC mode.
1 During playback, press HOME MENU
and select ‘Disc Navigator’ from the onscreen menu.
2 Select a view option.
Disc Navigator
Title
Chapter
21
En
Page 25

Playing discs
05
The options available depend on the kind of
disc loaded and whether the disc is playing or
not, but include:
• Title – Titles from a DVD-Video disc.
• Chapter – Chapters from the current title
of a DVD-Video disc.
• Track – Tracks from a Video CD/Super VCD
disc.
• Time – Thumbnails from a Video CD/Super
VCD disc at 10 minute intervals.
• Original: Title – Original titles from a VR
mode DVD-RW disc.
• Playlist: Title – Playlist titles from a VR
mode DVD-RW disc.
• Original: Time – Thumbnails from the
Original content at 10 minute intervals.
• Playlist: Time – Thumbnails from the
Playlist at 10 minute intervals.
The screen shows up to six moving thumbnail
images displayed one after another. To display
the previous/next six thumbnails, press /
(you don’t have to wait for all the
thumbnails to finish playing to display the
previous/next page).
3 Select the thumbnail image for what
you want to play.
01
04
Disc Navigator: Title
01- 49: - -
02
05
03
06
You can use either the cursor buttons
() and ENTER to select a thumbnail,
or the number buttons.
To select using the number buttons, enter a
two-digit number then press ENTER.
Tip
• Another way to find a particular place on a
disc is to use one of the search modes. See
Searching a disc on page 26.
Browsing WMA, MP3, DivX video and JPEG files with the Disc Navigator
Use the Disc Navigator to find a particular file
or folder by filename. Note that if there are
other types of files on the same disc, these will
not be displayed in the Disc Navigator.
1 Press HOME MENU and select ‘Disc
Navigator’ from the on-screen menu.
00:00/ 00:00 0kbps
Folder1
Folder2
Folder3
Folder4
2 Use the cursor buttons ( ) and
ENTER to navigate.
Use the cursor up/down buttons ( ) to
move up and down the folder/file list.
Use the cursor left button ( ) to return to the
parent folder.
Use ENTER or cursor right ( ) to open a
highlighted folder.
• You can also return to the parent folder by
going to the top of the list to the ‘..’ folder,
then pressing ENTER.
English
22
En
Page 26

Playing discs05
• When a JPEG file is highlighted, a
thumbnail image is displayed on the right.
00:00/ 00:00 0kbps
Folder2
File1
File2
File3
File4
File5
3 To play the highlighted track or DivX
video file or display the highlighted JPEG
file, press ENTER.
• When a WMA/MP3 or DivX video file is
selected, playback begins, starting with the
selected file, and continues until the end of
the folder.
• When a JPEG file is selected, a slideshow
begins, starting with that file, and
continues to the end of the folder. When
the slideshow comes to the end of the
foloder, it automatically continues to the
begining of the foloder.
Tip
• To play the contents of the whole disc
rather than just the current folder, exit the
Disc Navigator and start playback using
the (play) button.
Looping a section of a disc
The A-B Repeat function allows you to specify
two points (A and B) within a track (CD, Video
CD/Super VCD) or title (DVD) that form a loop
which is played over and over.
• You can’t use A-B Repeat with Video CD/
Super VCDs in PBC mode, or WMA/MP3/
DivX video files.
1 During playback, press PLAY MODE and
select ‘A-B Repeat’ from the list of
functions on the left.
Play Mode
A-B Repeat
Repeat
Random
Program
Search Mode
A(Start Point)
B(End Point)
Off
2 Press ENTER on ‘A(Start Point)’ to set
the loop start point.
3 Press ENTER on ‘B(End Point)’ to set the
loop end point.
After pressing ENTER, playback jumps back to
the start point and plays the loop.
4 To resume normal playback, select ‘Off’
from the menu.
Using repeat play
There are various repeat play options,
depending on the kind of disc loaded. It’s also
possible to use repeat play together with
program play to repeat the tracks/chapters in
the program list (see Creating a program list on
page 25).
Important
• You can’t use Repeat play with Video CD/
Super VCDs in PBC mode, or with WMA/
MP3 discs.
• You can’t use repeat and random play at
the same time.
23
En
Page 27

Playing discs
05
1 During playback, press PLAY MODE and
select ‘Repeat’ from the list of functions on
the left.
Play Mode
A-B Repeat
Repeat
Random
Program
Search Mode
Title Repeat
Chapter Repeat
Repeat Off
2 Select a repeat play option.
If program play is active, select
Repeat
to repeat the program list, or
Off
to cancel.
Program
Repeat
The repeat options available depend on the
kind of disc loaded. For example, for DVD
discs, you can select
Repeat
(or
Repeat Off
Play Mode
A-B Repeat
Repeat
Random
Program
Search Mode
Title Repeat
).
Title Repeat
Chapter Repeat
Repeat Off
or
Chapter
• For CDs and Video CD/Super VCDs, select
Disc Repeat
Off
).
• For DivX video discs, select
(or
Repeat Off
or
Track Repeat
).
(or
Repeat
Title Repeat
Using random play
Use the random play function to play titles or
chapters (DVD-Video), or tracks (CD, Video CD/
Super VCD) at random. (Note that the same
track/title/chapter may play more than once.)
You can set the random play option when a
disc is playing or stopped.
Important
• Random play remains in effect until you
select
Random Off
from the random play
menu options.
• You can’t use random play with VR format
DVD-RW discs, Video CD/Super VCDs
playing in PBC mode, WMA/MP3 discs,
DivX video discs, or while a DVD disc menu
is being displayed.
• You can't use random play together with
program or repeat play.
1 Press PLAY MODE and select ‘Random’
from the list of functions on the left.
Play Mode
A-B Repeat
Repeat
Random
Program
Search Mode
Random Title
Random Chapter
Random Off
2 Select a random play option.
The random play options available depend on
the kind of disc loaded. For example, for DVD
discs, you can select
Random Chapter
A-B Repeat
Repeat
Random
Program
Search Mode
Play Mode
Random Title
(or
Random Off
Random Title
Random Chapter
Random Off
• For CDs and Video CD/Super VCDs, select
On
or
Off
to switch random play on or off.
English
or
).
24
En
Page 28

Playing discs05
Tip
• Use the following controls during random
play:
Button What it does
Selects a new track/title/chapter
at random.
Returns to the beginning of the
current track/title/chapter.
Creating a program list
This feature lets you program the play order of
titles/chapters/tracks on a disc.
Important
• You can’t use Program play with VR format
DVD-RW discs, Video CD/Super VCDs
playing in PBC mode, WMA/MP3 discs,
DivX video discs, or while a DVD disc menu
is being displayed.
1 Press PLAY MODE and select ‘Program’
from the list of functions on the left.
Play Mode
A-B Repeat
Repeat
Random
Program
Search Mode
2 Select ‘Create/Edit’ from the list of
program options.
Create/Edit
Playback Start
Playback Stop
Program Delete
3 Use the cursor buttons and ENTER to
select a title, chapter or track for the
current step in the program list.
For a DVD disc, you can add a title or a chapter
to the program list.
Program
Program Step
01. 01
02.
03.
04.
05.
06.
07.
08.
Title 1~38
Title 01
Title 02
Title 03
Title 04
Title 05
Title 06
Title 07
Title 08
Chapter 1~004
Chapter 001
Chapter 002
Chapter 003
Chapter 004
• For a CD or Video CD/Super VCD, select a
track to add to the program list.
After pressing ENTER to select the title/
chapter/track, the step number automatically
moves down one.
4 Repeat step 3 to build up a program list.
A program list can contain up to 24 titles/
chapters/tracks.
• You can insert steps into the middle of a
program list by just highlighting the
position where you want the new step to
appear and entering a title/chapter/track
number.
• To delete a step, highlight it and press
CLEAR.
5 To play the program list, press (play).
Program play remains active until you turn off
program play (see below), erase the program
list (see below), eject the disc or switch off the
player.
25
En
Page 29

Playing discs
05
Tip
• Use the following controls during program
play:
Button What it does
PLAY
MODE
Skip to the next step in the
Save the program list and exit
the program edit screen without
starting playback (HOME MENU
does the same).
program list.
Other functions available from the program menu
There are a number of other options in the
program menu in addition to Create/Edit.
• Playback Start – Starts playback of a
saved program list
• Playback Stop – Turns off program play,
but does not erase the program list
• Program Delete – Erases the program list
and turns off program play
Searching a disc
You can search DVD discs by title or chapter
number, or by time; CDs and Video CD/Super
VCDs by track number or time; DivX video discs
by time.
3 Use the number buttons to enter a title,
chapter or track number, or a time.
Play Mode
A-B Repeat
Repeat
Random
Program
Search Mode
Title Search
Chapter Search
Time Search
Input Chapter
0 0 1
• For a time search, enter the number of
minutes and seconds into the currently
playing title (DVD/ DivX video) or track (CD/
Video CD/Super VCD) you want playback to
resume from. For example, press 4, 5, 0, 0
to have playback start from 45 minutes into
the disc. For 1 hour, 20 minutes and 30
seconds, press 8, 0, 3, 0.
4 Press ENTER to start playback.
Switching subtitles
Some DVD and DivX video discs have subtitles
in one or more languages; the disc box will
usually tell you which subtitle languages are
available. You can switch subtitle language
during playback.
1 Press SUBTITLE repeatedly to select a
subtitle option.
Current / Total
Subtitle English1/2
English
Important
• Search functions are not available with
Video CD/Super VCDs in PBC mode, or
with WMA/MP3 discs.
1 Press PLAY MODE and select ‘Search
Mode’ from the list of functions on the left.
2 Select a search mode.
The search options available depend on the
kind of disc loaded.
• The disc must be playing in order to use
time search.
Note
• Some discs only allow you to change
subtitle language from the disc menu.
Press TOP MENU or MENU to access.
• To set subtitle preferences, see Subtitle
Language on page 31.
• See Displaying DivX subtitle files on page 7
for more on DivX subtitles.
26
En
Page 30

Playing discs05
Switching audio language/ channels
When playing a DVD and DivX video disc
recorded with dialog in two or more languages,
you can switch audio language during
playback.
When playing a VR format DVD-RW disc
recorded with dual-mono audio, you can
switch between the main, sub, and mixed
channels during playback.
When playing a Video CD/Super VCD, you can
switch between stereo, just the left channel or
just the right channel.
1 Press AUDIO repeatedly to select an
audio language/channel option.
The language/channel information is shown
on-screen.
Note
• Some DVD discs only allow you to change
audio language from the disc menu. Press
TOP MENU or MENU to access.
• To set DVD audio language preferences,
see Language settings on page 31.
Zooming the screen
Using the zoom feature you can magnify a part
of the screen by a factor of 2 or 4, while
watching a DVD, DivX video title or Video CD/
Super VCD or playing a JPEG disc.
1 During playback, use the ZOOM button
to select the zoom factor (Normal, 2x or
4x).
• Since DVD, Video CD/Super VCD, DivX
video title and JPEG pictures have a fixed
resolution, picture quality will deteriorate,
especially at 4x zoom. This is not a
malfunction.
2 Use the cursor buttons to change the
zoomed area.
You can change the zoom factor and the
zoomed area freely during playback.
• If the navigation square at the top of the
screen disappears, press ZOOM again to
display it.
Switching camera angles
Some DVD discs feature scenes shot from two
or more angles—check the disc box for details.
When a multi-angle scene is playing, a
icon appears on screen to let you know that
other angles are available (this can be
switched off if you prefer—see Display settings
on page 32).
1 During playback (or when paused),
press ANGLE to switch angle.
Displaying disc information
Various track, chapter and title information,
such as the elapsed and remaining playing
time can be displayed on-screen while a disc is
playing.
1 To show/switch/hide the information
displayed, press ON SCREEN repeatedly.
• When a disc is playing, the information
appears at the top of the screen. Keep
pressing ON SCREEN to change the
displayed information.
27
En
Page 31

Audio Settings and Video Adjust menus
Chapter 6
06
Audio Settings and Video
Adjust menus
Audio Settings menu
The Audio Settings menu offers features for
adjusting the way discs sound.
1 Press HOME MENU and select ‘Audio
Settings’ from the on-screen display.
Audio Settings
2 Select and change settings using the
cursor buttons ( ), and ENTER.
Audio Settings
Equalizer
Virtual Surround
Audio DRC
Dialog
Audio DRC
• Settings: High, Medium, Low, Off
(default)
When watching Dolby Digital DVDs at low
volume, it’s easy to lose the quieter sounds
completely—including some of the dialog.
Switching Audio DRC (Dynamic Range
Control) to on can help by bringing up the
quieter sounds, while controlling loud peaks.
How much of a difference you hear depends on
the material you’re listening to. If the material
doesn’t have wide variations in volume, you
may not notice much change.
Note
• Audio DRC is only effective with Dolby
Digital audio sources.
On
Off
• Audio DRC is only effective through the
digital output when Digital Out is set to
On, and Dolby Digital Out is set to Dolby
Digital > PCM (see Digital Audio Out
settings on page 30).
• The effect of Audio DRC also depends on
your speakers and AV receiver settings.
Virtual Surround
• Settings: On, Off (default)
Switch on Virtual Surround to enjoy realistic
surround sound effects from just two speakers.
Tip
• You can also use the SURROUND button
on the remote control to switch Virtual
Surround on.
Note
• Virtual Surround doesn’t work with DTS,
through either the analog or digital
outputs.
• 96kHz linear PCM audio is automatically
downsampled to 48kHz if Virtual Surround
is switched on.
• If the player is outputting Dolby Digital,
DTS or MPEG bitstream audio (in other
words, no conversion to PCM), Virtual
Surround has no effect on the audio from
the digital output. See Digital Audio Out
settings on page 30 for how to set up the
digital output formats.
• How good the surround effect is varies with
the disc.
English
28
En
Page 32

Audio Settings and Video Adjust menus06
Dialog
• Settings: High, Medium, Low, Off
(default)
The Dialog feature is designed to make the
dialog stand out from other background
sounds in the soundtrack.
Equalizer
• Settings: Rock, Pop, Live, Dance, Techno,
Classic, Soft, Off (default)
The various preset EQ curves are designed to
suit various styles of music.
Note
• 96kHz linear PCM audio is automatically
downsampled to 48kHz if the Equalizer is
switched on.
Video Adjust menu
From the Video Adjust screen you can adjust
various settings that affect how the picture is
presented.
1 Press HOME MENU and select ‘Video
Adjust’ from the on-screen display.
Video Adjust
• Contrast – Adjusts the contrast between
light and dark (–16 to +16).
• Gamma – Adjusts the ‘warmth’ of the
picture (High, Medium, Low, Off
(default)).
• Hue – Adjusts the red/green balance
(Green 9 to Red 9).
• Chroma Level – Adjusts how saturated
colors appear (–9 to +9).
Adjust the Brightness, Contrast, Hue and
Chroma Level settings using the cursor left/
right ( ) buttons.
Brightness min max
0
3 Press ENTER to return to the Video
Adjust screen, or HOME MENU to exit.
2 Make settings using the cursor buttons
( ), and ENTER.
Video Adjust
Sharpness
Brightness
Contrast
Gamma
Hue
Chroma Level
Standard
0
0
Off
0
0
You can adjust the following picture quality
settings:
• Sharpness – Adjusts the sharpness of
edges in the picture (Fine, Standard
(default), Soft).
• Brightness – Adjusts the overall
brightness (–20 to +20).
29
En
Page 33

Initial Settings menu
Chapter 7
07
Initial Settings menu
Using the Initial Settings menu
The Initial Settings menu provides audio and
video output settings, parental lock settings,
and display settings, among others.
If an option is grayed out it means that it
cannot be changed at the current time. This is
usually because a disc is playing. Stop the
disc, then change the setting.
1 Press HOME MENU and select ‘Initial
Settings’.
Initial Settings
2 Use the cursor buttons and ENTER to
select the setting and option you want to
set.
All the settings and options are explained on
the following pages.
Digital Audio Out settings
Setting Option What it means
Digital Out On
Off
Dolby Digital Out Dolby Digital
Dolby Digital > PCM
DTS Out DTS
Off
96 kHz PCM Out 96kHz > 48kHz
96kHz
Digital audio is output from the digital outputs.
No digital audio output.
Dolby Digital encoded digital audio is output when playing a
Dolby Digital DVD disc.
Dolby Digital audio is converted to PCM audio before being
output.
DTS encoded digital audio is output when playing a DTS disc.
(Noise will be output if your amplifier/receiver is not compatible
with DTS audio.)
No digital audio is output when playing a DTS disc.
96kHz digital audio is converted to 48kHz for digital output.
96kHz digital audio is output as is at 96kHz.
Note
• In the table below, the default setting is
shown in bold: other settings are shown in
italics.
• The Digital Audio Out settings only need to
be set if you have connected the digital
output of this player to an AV receiver, or
other equipment.
• Check the owner’s manual supplied with
your other equipment to see which digital
audio formats it’s compatible with.
• Some settings, such as TV Screen, Audio
Language and Subtitle Language may be
overridden by the DVD disc. Often these
settings can also be made from the DVD
disc menu.
English
30
En
Page 34

Initial Settings menu07
Setting Option What it means
MPEG Out MPEG > PCM
MPEG
MPEG encoded digital audio is converted to PCM audio for
digital output.
MPEG encoded digital audio is output as is.
Video Output settings
Setting Option What it means
TV Screen
(See also Screen sizes
and disc formats on
page 36.)
4:3 (Letter Box)
4:3 (Pan & Scan)
16:9 (Wide)
Component Out Interlace
Progressive
AV Connector Out Video
RGB
Set if you have a conventional 4:3 TV. Widescreen movies are
shown with black bars top and bottom.
Set if you have a conventional 4:3 TV. Widescreen movies are
shown with the sides cropped so that the image fills the screen.
Set if you have a widescreen TV.
Set if your TV is not compatible with progressive scan video.
Set if your TV is compatible with progressive scan video (see
your TV’s instruction manual for details). See also Switching
the video output to interlace using the front panel controls on
page 10.
Note that progressive scan video is only output from the
component video jacks.
Ordinary (composite) video output, compatible with all TVs.
If your TV is compatible, this setting gives the best picture
quality.
Note that there is no output from the component jacks when
this setting selected.
Language settings
Setting Option What it means
Audio Language English
Subtitle Language
(See also Displaying
DivX subtitle files on
page 7.)
31
En
Languages as displayed
Other Language
English
Languages as displayed
Other Language
If there is an English soundtrack on the disc then it will be
played.
If there is the language selected on the disc, then it will be
played.
Select to choose a language other than the ones displayed (see
page 37).
If there are English subtitles on the disc then they will be
displayed.
If there is the subtitle language selected on the disc, then it will
be displayed.
Select to choose a language other than the ones displayed (see
page 37).
Page 35

Initial Settings menu
Setting Option What it means
DVD Menu Lang. w/Subtitle Lang.
Languages as displayed
Other Language
Subtitle Display On
Off
DVD disc menus will be displayed in the same language as
your selected subtitle language, if possible.
DVD disc menus will be displayed in the selected language, if
possible.
Select to choose a language other than the ones displayed (see
page 37).
Subtitles are displayed according to your selected subtitle
language (see above).
Subtitles are always off by default when you play a DVD disc
(note that some discs override this setting).
Display settings
Setting Option What it means
OSD Language English
Languages as displayed
Angle Indicator On
Off
On-screen displays of the player are in English.
On-screen displays are shown in the language selected.
A camera icon is displayed on-screen during multi-angle
scenes on a DVD disc.
No multi-angle indication is shown.
07
English
Options settings
Setting Option What it means
Parental Lock –
DivX VOD Display
See Parental Lock on page 33.
See About DivX® VOD content on page 34.
32
En
Page 36

Initial Settings menu07
Parental Lock
• Default level: Off; Default password: none;
Default Country/Area code: us (2119)
To give you some control over what your
children watch on your DVD player, some DVDVideo discs feature a Parental Lock level. If
your player is set to a lower level than the disc,
the disc won’t play.
Some discs also support the Country/Area
Code feature. The player does not play certain
scenes on these discs, depending on the
Country/Area Code you set.
Note
• Not all discs use Parental Lock, and will
play without requiring the password first.
• If you forget your password, you’ll need to
reset the player to register a new password.
(see Resetting the player on page 37)
Registering a new password
You must register a password before you can
change the Parental Lock level or enter a
Country code.
1 Select ‘Options’, then ‘Password’.
Initial Settings
Digital Audio Out
Video Output
Language
Display
Options
2 Use the number buttons to enter a 4digit password.
The numbers you enter show up as asterisks
(*) on-screen.
3 Press ENTER to register the password.
You will return to the Options menu screen.
Changing your password
To change your password, confirm your
existing password then enter a new one.
Parental Lock
DivX VOD
Password
Level Change
Country Code
1 Select ‘Password Change’.
2 Use the number buttons to enter your
existing password, then press ENTER.
3 Enter a new password and press ENTER.
This registers the new password and you will
return to the Options menu screen.
Setting/changing the Parental Lock
1 Select ‘Level Change’.
2 Use number buttons to enter your
password, then press ENTER.
3 Select a new level and press ENTER.
• Press the cursor left ( ) repeatedly to lock
more levels (more discs will require the
password); press the cursor right ( ) to
unlock levels. You can’t lock level 1.
This sets the new level and you will return to the
Options menu screen.
Setting/changing the Country/Area code
You can find the Country/Area code list on
page 38.
1 Select ‘Country Code’.
2 Use number buttons to enter your
password, then press ENTER.
3 Select a Country/Area code and press
ENTER.
There are two ways you can do this:
• Select by code letter: Use the cursor up/
down ( ) to change the Country/Area
code.
• Select by code number: Press the cursor
right ( ) then use the number buttons to
enter the 4-digit Country/Area code.
The new Country/Area code is set and you will
return to the Options menu screen. Note that
the new Country/Area code doesn’t take effect
until the next disc is loaded (or the current disc
is reloaded).
33
En
Page 37

Initial Settings menu
07
About DivX® VOD content
In order to play DivX VOD (video on demand)
content on this player, you first need to register
the player with your DivX VOD content
provider. You do this by generating a DivX VOD
registration code, which you submit to your
provider.
Important
• DivX VOD content is protected by a DRM
(Digital Rights Management) system. This
restricts playback of content to specific,
registered devices.
• If you load a disc that contains DivX VOD
content not authorized for your player, the
message Authorization Error is displayed
and the content will not play.
• Resetting the player (page 37) will not
cause you to lose your registration code.
Displaying your DivX VOD registration code
1 Press HOME MENU and select ‘Initial
Settings’.
2 Select ‘Options’, then ‘DivX VOD’.
Initial Settings
Digital Audio Out
Video Output
Language
Display
Options
Parental Lock
DivX VOD
Display
3 Select ‘Display’.
Your 8-digit registration code is displayed.
Initial Settings
Digital Audio Out
Video Output
Language
Display
Options
DivX VOD Registration Code
0 1 2 3 4 5 6 7
Make a note of the code as you will need it
when you register with a DivX VOD provider.
Playing DivX® VOD content
Some DivX VOD content may only be playable
a fixed number of times. When you load a disc
containing this type of DivX VOD content, the
remaining number of plays is shown on-screen
and you then have the option of playing the
disc (thereby using up one of the remaining
plays), or stopping. If you load a disc that
contains expired DivX VOD content (for
example, content that has zero remaining
plays), the message Rental Expired is
displayed.
If your DivX VOD content allows an unlimited
number of plays, then you may load the disc
into your player and play the content as often
as you like, and no message will be displayed.
English
34
En
Page 38

Additional information08
Chapter 8
Additional information
Taking care of your player and discs
General
Hold discs by the edge or by the center hole
and edge.
When you're not using a disc, return it to its
case and store upright. Avoid leaving discs in
excessively cold, humid, or hot environments
(including under direct sunlight).
Don't glue paper or put stickers on to discs. Do
not use a pencil, ball-point pen or other sharptipped writing instrument to write on the disc.
Don’t use self-adhesive disc labels on discs as
these can cause the disc to warp slightly
during playback causing distortion in the
picture and/or sound.
Damaged and shaped discs
Do not use cracked, chipped, warped, or
otherwise damaged discs as they may damage
the player.
Cleaning discs
Fingerprints and dust on discs can affect
playback performance. Clean using a soft, dry
cloth, wiping the disc lightly from the center to
the outside edge as shown below.
If necessary, use a cloth soaked in alcohol, or a
commercially available CD/DVD cleaning kit to
clean a disc more thoroughly. Never use
benzine, thinner or other cleaning agents,
including products designed for cleaning vinyl
records.
Cleaning the unit’s exterior
Unplug the unit before cleaning.
Use a dry cloth to wipe off dust and dirt. If the
surfaces are very dirty, wipe with a soft cloth
dipped in some neutral cleanser diluted five or
six times with water and wrung out well, then
wipe again with a dry cloth.
Do not use furniture wax or cleaners. Never
use thinners, benzine or insecticide sprays or
other chemicals on or near this unit.
If you use a chemical-impregnated cleaning
cloth, read the instructions carefully before
use. These cloths may leave smear marks on
half-mirror finish surfaces; if this happens,
finish with a dry cloth.
This player is designed to be used only with
conventional, fully circular discs. Do not use
shaped discs. YAMAHA disclaims all liability
arising in connection with the use of shaped
discs.
35
En
Page 39

Additional information
08
Cleaning the pickup lens
The DVD player’s lens should not become dirty
in normal use, but if for some reason it should
malfunction due to dust or dirt, consult your
nearest YAMAHA authorized service center.
We do not recommend using commercially
available lens cleaners for CD players.
Condensation
Condensation may form inside the player if it is
brought into a warm room from outside, or if
the temperature of the room rises quickly.
Although the condensation won’t damage the
player, it may temporarily impair its
performance. Leave it to adjust to the warmer
temperature for about an hour before
switching on.
Moving the player
If you need to move the player, first press
STANDBY/ON on the front panel to turn the
player off. Wait for -OFF- to disappear from the
display, then unplug the power cable. Never lift
or move the unit during playback—discs rotate
at a high speed and may be damaged.
Screen sizes and disc formats
DVD-Video discs come in several different
screen aspect ratios, ranging from TV
programs, which are generally 4:3, to
CinemaScope widescreen movies, with an
aspect ratio of up to about 7:3.
Televisions, too, come in different aspect
ratios; ‘standard’ 4:3 and widescreen 16:9.
Widescreen TV users
If you have a widescreen TV, the TV Screen
setting (page 31) of this player should be set to
16:9 (Wide).
When you watch discs recorded in 4:3 format,
you can use the TV controls to select how the
picture is presented. Your TV may offer various
zoom and stretch options; see the instructions
that came with your TV for details.
Please note that some movie aspect ratios are
wider than 16:9, so even though you have a
widescreen TV, these discs will still play in a
‘letter box’ style with black bars at the top and
bottom of the screen.
Standard TV users
If you have a standard TV, the TV Screen
setting (page 31) of this player should be set to
4:3 (Letter Box) or 4:3 (Pan&Scan),
depending on which you prefer.
Set to 4:3 (Letter Box), widescreen discs are
shown with black bars top and bottom.
Set to 4:3 (Pan&Scan), widescreen discs are
shown with the left and right sides cropped.
Although the picture looks larger, you don’t
actually see the whole picture.
Please note that many widescreen discs
override the player’s settings so that the disc is
shown in letter box format regardless of the
setting.
Note
• Using the 16:9 (Wide) setting with a
standard 4:3 TV, or either of the 4:3 settings
with a widescreen TV, will result in a
distorted picture.
English
36
En
Page 40

Additional information08
Setting the TV system
The default setting of this player is AUTO, and
unless you notice that the picture is distorted
when playing some discs, you should leave it
set to AUTO. If you experience picture distortion with some discs, set the TV system to
match your country or region’s system. Doing
this, however, may restrict the kinds of disc you
can watch. The table below shows what kinds
of disc are compatible with each setting
(AUTO, PAL and NTSC).
1 If the player is on, press STANDBY/ON
to switch it to standby.
2 Using the front panel controls, hold
down then press STANDBY/ON to
switch the TV system.
The TV system changes as follows:
• AUTO NTSC
• NTSC PAL
• PAL AUTO
Note
• You have to switch the player into standby
(press STANDBY/ON) before each
change.
Disc Player setting
Type Format NTSC PAL AUTO
DVD/Super VCD/
Video CD/DivX
Video
CD/MP3/WMA/
JPEG
no disc
NTSC PAL NTSC
NTSC
NTSC PAL PAL
PAL
— NTSC PAL NTSC or
PAL
Resetting the player
Use this procedure to reset all the player’s
settings to the factory default.
1 Switch the player into standby.
2 Using the front panel buttons, hold
down the (stop) button and press
STANDBY/ON to switch the player back on.
All the player’s settings are now reset.
DVD-Video regions
All DVD-Video discs carry a region mark on the
case somewhere that indicates which
region(s) of the world the disc is compatible
with. Your DVD player also has a region mark,
which you can find on the rear panel. Discs
from incompatible regions will not play in this
player. Discs marked ALL will play in any
player.
The diagram below shows the various DVD
regions of the world.
1
2
4
2
5
1
6
2
3
5
4
Selecting languages using the language code list
Some of the language options (such as ‘DVD
Language’ in the Setup Navigator) allow you to
set your preferred language from any of the 136
languages listed in the language code list on
page 38.
1 Select ‘Other Language’.
2 Use the cursor left/right ( ) buttons
to select either a code letter or a code
number.
3 Use the cursor up/down ( ) buttons
to select a code letter or a code number.
See Language code list on page 38 for a
complete list of languages and codes.
37
En
Page 41

Additional information
Language code list
Language (Language code letter), Language code
Japanese (ja), 1001
English (en), 0514
French (fr), 0618
German (de), 0405
Italian (it), 0920
Spanish (es), 0519
Chinese (zh), 2608
Dutch (nl), 1412
Portuguese (pt), 1620
Swedish (sv), 1922
Russian (ru), 1821
Korean (ko), 1115
Greek (el), 0512
Afar (aa), 0101
Abkhazian (ab), 0102
Afrikaans (af), 0106
Amharic (am), 0113
Arabic (ar), 0118
Assamese (as), 0119
Aymara (ay), 0125
Azerbaijani (az), 0126
Bashkir (ba), 0201
Byelorussian (be), 0205
Bulgarian (bg), 0207
Bihari (bh), 0208
Bislama (bi), 0209
Bengali (bn), 0214
Tibetan (bo), 0215
Breton (br), 0218
Catalan (ca), 0301
Corsican (co), 0315
Czech (cs), 0319
Welsh (cy), 0325
Danish (da), 0401
Bhutani (dz), 0426
Esperanto (eo), 0515
Estonian (et), 0520
Basque (eu), 0521
Persian (fa), 0601
Finnish (fi), 0609
Fiji (fj), 0610
Faroese (fo), 0615
Frisian (fy), 0625
Irish (ga), 0701
Scots-Gaelic (gd), 0704
Galician (gl), 0712
Guarani (gn), 0714
Gujarati (gu), 0721
Hausa (ha), 0801
Hindi (hi), 0809
Croatian (hr), 0818
Hungarian (hu), 0821
Armenian (hy), 0825
Interlingua (ia), 0901
Interlingue (ie), 0905
Inupiak (ik), 0911
Indonesian (in), 0914
Icelandic (is), 0919
Hebrew (iw), 0923
Yiddish (ji), 1009
Javanese (jw), 1023
Georgian (ka), 1101
Kazakh (kk), 1111
Greenlandic (kl), 1112
Cambodian (km), 1113
Kannada (kn), 1114
Kashmiri (ks), 1119
Kurdish (ku), 1121
Kirghiz (ky), 1125
Latin (la), 1201
Lingala (ln), 1214
Laothian (lo), 1215
Lithuanian (lt), 1220
Latvian (lv), 1222
Malagasy (mg), 1307
Maori (mi), 1309
Macedonian (mk), 1311
Malayalam (ml), 1312
Mongolian (mn), 1314
Moldavian (mo), 1315
Marathi (mr), 1318
Malay (ms), 1319
Maltese (mt), 1320
Burmese (my), 1325
Nauru (na), 1401
Nepali (ne), 1405
Norwegian (no), 1415
Occitan (oc), 1503
Oromo (om), 1513
Oriya (or), 1518
Panjabi (pa), 1601
Polish (pl), 1612
Pashto, Pushto (ps), 1619
Quechua (qu), 1721
Rhaeto-Romance (rm), 1813
Kirundi (rn), 1814
Romanian (ro), 1815
Kinyarwanda (rw), 1823
Sanskrit (sa), 1901
Sindhi (sd), 1904
Sangho (sg), 1907
Serbo-Croatian (sh), 1908
Sinhalese (si), 1909
Slovak (sk), 1911
Slovenian (sl), 1912
Samoan (sm), 1913
Shona (sn), 1914
Somali (so), 1915
Albanian (sq), 1917
Serbian (sr), 1918
Siswati (ss), 1919
Sesotho (st), 1920
Sundanese (su), 1921
Swahili (sw), 1923
Tamil (ta), 2001
Telugu (te), 2005
Tajik (tg), 2007
Thai (th), 2008
Tigrinya (ti), 2009
Turkmen (tk), 2011
Tagalog (tl), 2012
Setswana (tn), 2014
Tonga (to), 2015
Turkish (tr), 2018
Tsonga (ts), 2019
Tatar (tt), 2020
Twi (tw), 2023
Ukrainian (uk), 2111
Urdu (ur), 2118
Uzbek (uz), 2126
Vietnamese (vi), 2209
Volapük (vo), 2215
Wolof (wo), 2315
Xhosa (xh), 2408
Yoruba (yo), 2515
Zulu (zu), 2621
08
English
Country/Area code list
Country/Area, Country/Area code, Country/Area code letter
Argentina, 0118, ar
Australia, 0121, au
Austria, 0120, at
Belgium, 0205, be
Brazil, 0218, br
Canada, 0301, ca
Chile, 0312, cl
China, 0314, cn
Denmark, 0411, dk
Finland, 0609, fi
France, 0618, fr
Germany, 0405, de
Hong Kong, 0811, hk
India, 0914, in
Indonesia, 0904, id
Italy, 0920, it
Japan, 1016, jp
Korea, Republic of, 1118, kr
Malaysia, 1325, my
Mexico, 1324, mx
Netherlands, 1412, nl
New Zealand, 1426, nz
Norway, 1415, no
Pakistan, 1611, pk
Philippines, 1608, ph
Portugal, 1620, pt
Russian Federation, 1821, ru
Singapore, 1907, sg
Spain, 0519, es
Sweden, 1905, se
Switzerland, 0308, ch
Taiwan, 2023, tw
Thailand, 2008, th
United Kingdom, 0702, gb
USA, 2119, us
38
En
Page 42

Additional information08
Glossary
Analog audio Direct representation of sound by an
Aspect ratio The width of a TV screen relative to its
Digital audio Indirect representation of sound using
Dolby
Digital
DRM
*2
DTS
EXIF
(Exchangeable
Image File)
File extension A tag added to the end of a filename to
ISO 9660
format
JPEG
electrical signal. See also Digital audio.
height. Conventional TVs are 4:3;
widescreen models are 16:9.
numbers. See also Sampling frequency
and Analog audio.
A multi-channel audio encoding system
*1
developed by Dolby Laboratories that
enables far more audio to be stored on a
disc than PCM encoding. See also PCM
(Pulse Code Modulation).
DRM (Digital Rights Management) copy
WMA)
protection is a technology designed to
prevent unauthorized copying by
restricting playback, etc. of material on
devices other the PC (or other WMA
recording equipment) used to record it.
For detailed information, please see the
instruction manuals or help files that
came with your PC (or other WMA
recording equipment) and/or software.
A multi-channel audio encoding system
developed by Digital Theater Systems
that enables far more audio to be stored
on a disc than PCM encoding. See also
PCM (Pulse Code Modulation) .
A file format developed by Fuji Photo
Film for digital still cameras. Digital
cameras from various manufacturers
use this compressed file format which
carries date, time and thumbnail
information, as well as the picture data.
indicate the type of file. For example,
“.mp3” indicates an MP3 file.
International standard for the volume
and file structure of CD-ROM discs.
A standard file format used for still
images. JPEG files are identified by the
file extension “.jpg”.
MP3
MPEG audio An audio format used on Video CD/
PBC
(PlayBack
Control)
PCM
(Pulse Code
Modulation)
Progressive
scan video
Regions
Sampling
frequency
WMA
*1
Manufactured under license from Dolby
MP3 (MPEG1 audio layer 3) is a
compressed stereo audio file format.
Files are recognized by their file
extension “.mp3”.
Super VCDs and some DVD discs.
A system of navigating a Video CD/
Super VCD through on-screen menus
recorded onto the disc.
Digital audio encoding system found on
CDs. Good quality, but requires a lot of
data compared to Dolby Digital, DTS
and MPEG encoded audio. See also
Digital audio .
All the lines that make up a video picture
are updated in one pass (compared to
interlace which takes two passes to
update the whole picture).
These associate DVD-Video discs and
players with particular areas of the
world. See DVD-Video regions on
page 37 for more information.
The rate at which sound is measured to
be turned into digital audio data. The
higher the rate, the better the sound
quality. CD is 44.1 kHz; DVD can be up
to 96 kHz. See also Digital audio .
WMA is short for Windows Media Audio
and refers to an audio compression
technology developed by Microsoft
Corporation. Files are recognized by
their file extension “.wma”.
Microsoft, Windows Media, and the
Windows logo are trademarks, or
registered trademarks of Microsoft
Corporation in the United States and/or
other countries.
Laboratories. “Dolby” and the double-D symbol
are trademarks of Dolby Laboratories.
*2
“DTS” and “DTS Digital Out” are registered
trademarks of Digital Theater Systems, Inc.
39
En
Page 43

Additional information
08
Specifications
General
System . . . . . . . . . . . . . . . . . . . . . . . . DVD player
Power requirements . . .AC 220–240 V, 50/60 Hz
Power consumption . . . . . . . . . . . . . . . . . . . 7 W
Power consumption (standby) . . . . . . . . .0.7 W
Weight . . . . . . . . . . . . . . . . . . . . . . . . . . . . .1.8 kg
Dimensions . . . . 435 (W) x 61 (H) x 213 (D) mm
Operating temperature . . . . . . . .+5°C to +35°C
RGB (SCART) output
Output level . . . . . . . . . . . . . . . . . 0.7 Vp-p (75
Connection. . . . . . . . . . . . . . . . . . Euroconnector
Component video output
Y (luminance) - Output level
. . . . . . . . . . . . . . . . . . . . . . . .1 Vp-p (75
b/Cb
(color) - Output level
P
. . . . . . . . . . . . . . . . . . . . . . . 0.7 Vp-p (75
(color) - Output level
P
r/Cr
. . . . . . . . . . . . . . . . . . . . . . . . 0.7 Vp-p (75
Connection. . . . . . . . . . . . . . . . . . . . . . . . . . . RCA
S-video output
Y (luminance) - Output level . . . . . . 1 Vp-p (75
C (color) - Output level . . . . . . 286 mVp-p (75 Ω)
Connection. . . . . . . . .S-video (Mini, DIN, 4 pins)
Ω
)(Green)
Ω
)(Blue)
Ω
)(Red)
Ω
Ω
Video output
Output level . . . . . . . . . . . . . . . . . . 1 Vp-p (75
Connection . . . . . . . . . . . . . . . . . . . . . . . . . . .RCA
Audio output (1 stereo pair)
Output level. . . . . . . . . . . . . During audio output
Number of channels . . . . . . . . . . . . . . . . . . . . . 2
Connection . . . . . . . . . . . . . . . . . . . . . . . . . . .RCA
200 mVrms (1 kHz, –20 dB)
Digital audio characteristics
Frequency response . . . . . . . . . . 4 Hz to 44 kHz
)
S/N ratio . . . . . . . . . . . . . . . . . . . . . . . . . . .115 dB
Dynamic range . . . . . . . . . . . . . . . . . . . . . .101 dB
Total harmonic distortion. . . . . . . . . . . . 0.0023 %
(DVD fs: 96 kHz)
Digital output
Coaxial digital output . . . . . . . . . . . . . . . . . . .RCA
IEC60958 for CDDA/LPCM
IEC61937 for MPEG 1/2,
Dolby Digital and DTS
Accessories
Audio/video cable. . . . . . . . . . . . . . . . . . . . . . . . 1
)
Power cable. . . . . . . . . . . . . . . . . . . . . . . . . . . . . 1
Remote control . . . . . . . . . . . . . . . . . . . . . . . . . . 1
AA/R6 dry cell batteries . . . . . . . . . . . . . . . . . . 2
Owner’s manual
Ω
)
English
The specifications and design of this product are subject to
change without notice, due to improvement.
40
En
Page 44

J2G53921B SH 06/03
YAMAHA ELECTRONICS CORPORATION, USA
YAMAHA CANADA MUSIC LTD.
YAMAHA ELECTRONIK EUROPA G.m.b.H.
YAMAHA ELECTRONIQUE FRANCE S.A.
YAMAHA ELECTRONICS (UK) LTD.
YAMAHA SCANDINAVIA A.B.
YAMAHA MUSIC AUSTRALIA PTY, LTD.
U
135 MILNER AVE., SCARBOROUGH, ONTARIO M1S 3R1, CANADA
SIEMENSSTR. 22-34, 25462 RELLINGEN BEI HAMBURG, GERMANY
RUE AMBROISE CROIZAT BP70 CROISSY-BEAUBOURG 77312 MARNE-LA-VALLEE CEDEX02, FRANCE
YAMAHA HOUSE, 200 RICKMANSWORTH ROAD WATFORD, HERTS WD18 7GQ, ENGLA ND
J A WETTERGRENS GATA 1, BOX 30053, 400 43 VÄSTRA FRÖLUNDA, SWEDEN
17-33 MARKET ST., SOUTH MELBOURNE, 3205 VIC., AUSTRALIA
6660 ORANGETHORPE AVE., BUENA PARK, CALIF. 90620, U.S.A.
2005 All rights reserved.
Printed in Thailand J2G53921B
(WG69400-1)
 Loading...