

Page 1

DVD-C9
HBBil
^^M»B
Ij^MM
i)M)Aii)i()/Mi)i:ocir
III
im
^—M
............
—
* YAMAHA
№
PP
111 11 Eil I i
H
Hi
da.'
pmU^fQlffBE DCPil
a Maa^mwHHNM .»aiiijii*
©
o o o O
O O O
OWNER’S MANUAL
Page 2
IMPORTANT SAFETY INSTRUCTIONS
CAUTION
RISK OF ELECTRIC SHOCK
00 NOT OPEN
CAUTION: TO REDUCE THE RISK OF
ELECTRIC SHOCK, DO NOT REMOVE
COVER (OR BACK). NO USER-SERVICEABLE
PARTS INSIDE. REFER SERVICING TO
OUALIFIED SERVICE PERSONNEL.
Explanation of Graphical Symbols
The lightning fiash with arrowhead symboi,
within an equilateral triangle, is intended to
aiert you to the presence of uninsuiated
“dangerous voltage” within the product’s
enciosure that may be of sufficient magnitude
to constitute a risk of eiectric shock to persons.
The exclamation point within an equilaterai
triangie is intended to alert you to the presence
of important operating and maintenance
(servicing) instructions in the iiterature
accompanying the appiiance.
WARNING
TO REDUCE THE RISK OF FIRE OR ELECTRIC
SHOCK, DO NOT EXPOSE THIS UNIT TO RAIN OR
MOISTURE.
IMPORTANT
Please record the serial number of this unit In the space
below.
MODEL:
Serial No.:
The serial number Is located on the rear of the unit.
Retain this Owner’s Manual In a safe place for future
reference.
WARNING
TO REDUCE THE RISK OF FIRE OR ELECTRIC
SHOCK, DO NOT EXPOSE THIS UNIT TO RAIN OR
MOISTURE.
1 Read these Instructions.
2 Keep these Instructions.
3 Heed all warnings.
4 Follow all Instructions.
5 Do not use this apparatus near water.
6 Clean only with dry cloth.
7 Do not block any ventilation openings. Install In accor
dance with the manufacturer’s Instructions.
8 Do not Install near any heat sources such as radiators,
heat registers, stoves, or other apparatus (Including
amplifiers) that produce heat.
9 Do not defeat the safety purpose of the polarized or
grounding-type plug. A polarized plug has two blades with
one wider than the other. A grounding type plug has two
blades and a third grounding prong. The wide blade or the
third prong are provided for your safety. If the provided
plug does not fit Into your outlet, consult an electrician for
replacement of the obsolete outlet.
10 Protect the power cord from being walked on or pinched
particularly at plugs, convenience receptacles, and the
point where they exit from the apparatus.
11 Only use attachments/accessories specified by the
manufacturer.
12 Use only with the cart, stand, tripod,
bracket, or table specified by the manufac
turer, or sold with the apparatus. When a
cart is used, use caution when moving the
cart/apparatus combination to avoid injury "
from tip-over.
13 Unplug this apparatus during lightning storms or when
unused for long periods of time.
14 Refer all servicing to qualified service personnel.
Servicing is required when the apparatus has been
damaged in any way, such as power-supply cord or plug
is damaged, liquid has been spilled or objects have fallen
into the apparatus, the apparatus has been exposed to
rain or moisture, does not operate normally, or has been
dropped.
CAUTION
Page 3
IMPORTANT SAFETY INSTRUCTIONS
FCC INFORMATION (for US customers only)
IMPORTANT NOTICE : DO NOT MODIFY THIS UNIT!
This product, when installed as indicated in the
instructions contained in this manual, meets FCC
requirements. Modifications not expressly approved by
Yamaha may void your authority, granted by the FCC, to
use the product.
IMPORTANT : When connecting this product to
accessories and/or another product use only high
quality shielded cables. Cable/s supplied with this
product MUST be used. Follow all installation instruc
tions. Failure to follow instructions could void your FCC
authorization to use this product in the USA.
NOTE : This product has been tested and found to
comply with the requirements listed in FCC Regula
tions, Part 15 for Class “B” digital devices. Compliance
with these requirements provides a reasonable level of
assurance that your use of this product in a residential
environment will not result in harmful interference with
other electronic devices.
This equipment generates/uses radio frequencies and,
if not installed and used according to the instructions
found in the users manual, may cause interference
harmful to the operation of other electronic devices.
Compliance with FCC regulations does not guarantee
that interference will not occur in all installations. If
this product is found to be the source of interference,
which can be defermined by fuming the unit “OFF”
and “ON”, please try to eliminate the problem by using
one of the following measures:
Relocate either this product or the device that is being
affected by the interference.
Utilize power outlets that are on different branch
(circuit breaker or fuse) circuits or install AC line filter/
s.
In the case of radio or TV interference, relocate/
reorient the antenna. If the antenna lead-in is 300
ohm ribbon lead, change the lead-in to coaxial type
cable.
If these corrective measures do not produce satisfac
tory results, please contact the local retailer autho
rized to distribute this type of product. If you can not
locate the appropriate retailer, please contact Yamaha
Electronics Corp., U.S.A. 6660 Orangethorpe Ave,
Buena Park, CA 90620.
The above statements apply ONLY to those products
distributed by Yamaha Corporation of America or its
subsidiaries.
We Want You Listening For A Lifetime
YAMAHA and the Electronic Industries Association’s
Consumer Electronics Group want you to get the most out of
your equipment by playing it at a safe level. One that lets the
sound come through loud and clear without annoying blaring
or distortion - and, most importantly, without affecting your
sensitive hearing.
Since hearing damage from loud sounds is often
undetectable until it is too late, YAMAHA and the
Electronic Industries Association’s Consumer
Electronics Group recommend you to avoid
prolonged exposure from excessive volume
levels.
~i r
(Australia model)
CAUTION
Page 4

CAUTION: READ THIS BEFORE OPERATING YOUR UNIT.
1 To assure the finest performance, please read this
manual carefully. Keep it in a safe place for future
reference.
2 Install this unit in a well ventilated, cool, dry, and clean
place with at least 5 cm above, behind and on the both
sides of this unit - away from direct sunlight, heat
sources, vibration, dust, moisture, and/or cold.
3 Position this unit away from other electrical appliances,
motors and transformers to avoid humming sounds, do
not place this unit where it may get exposed to rain or
any kind of liquid to prevent fire or electrical shock.
4 Avoid extreme temperature swings or excessive use of
humidifier in the room where this unit is installed to
prevent condensation inside this unit, which may cause
an electrical shock, fire damage to this unit, and/or
personal injury.
5 Do not cover this unit with a newspaper, a tablecloth, a
curtain, etc. in order not to obstruct heat radiation. If the
temperature inside this unit rises, it may cause fire,
damage to this unit and/or personal injury.
6 Avoid installing this unit in a place where foreign objects
and liquid might fall. It might cause a fire, damage to this
unit and/or personal injury. Do not place the following
objecfs on this unit:
• Other components, as they may cause damage and/or
discoloration on the surface of this unit.
• Burning objects (i.e., candles), as they may cause fire,
damage to this unit and/or personal injury.
• Containers with liquid in them, as they may cause an
electrical shock to the user and/or damage to this unit.
7 Do not operate this unit upside-down. It may overheat,
possibly causing damage.
8 Do not use force on switches, controls or connection
cables. Never pull the cables when disconnecting them.
9 Only voltage specified on this unit must be used. Using
this unit with a higher voltage than specified is dangerous
and may result in fire or other accidents. YAMAHA will not
be held responsible for any damage resulting from the
use of this unit with a voltage other than that specified.
10 Do not attempt to clean this unit with chemical solvents;
this might damage the finish. Use a clean, dry clofh.
11 Disconnecf the power cord from the wall outlet when not
planning to use this unit for a long period of time, or
during an electrical storm, as they may cause damage by
lightning.
12 Do not attempt to modify or fix this unit. Contact the
qualified YAMAHA service personnel when any service is
needed. Cabinet should never be opened for any
reasons.
13 Be sure to read ‘TROUBLESHOOTING’ section
regarding common operating errors before concluding
that this unit is faulty.
CAUTION
Use of controls or adjustments or performance of procedures
ofher than those specified herein may result in hazardous
radiation exposure.
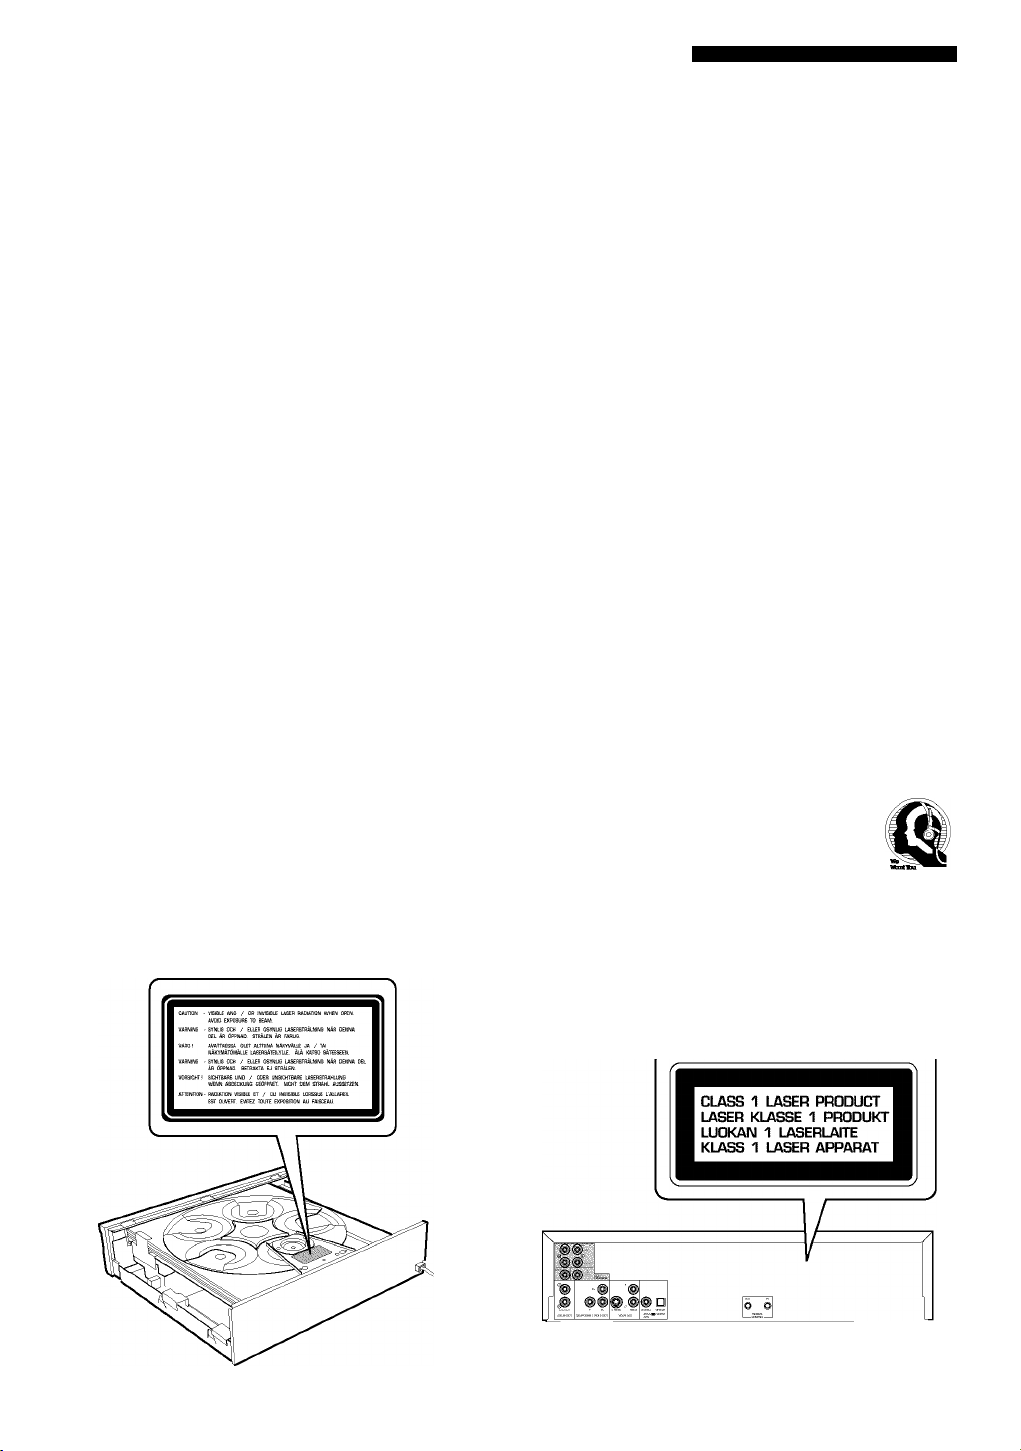
DANGER
Visible laser radiation when open. Avoid direct exposure to
beam.
When this unit is plugged to the wall outlet, do not place your
eyes close to the opening of the disc tray and other openings
to look into inside.
Laser component in this product is capable of emitting
radiation exceeding the limit for Class 1.
This unit is designed for home use only. Do nof use this unit
for business purposes.
Be sure to place this unit on a ievei surface. If nof so, this
unit will fail to work normally at the PLAYXCHANGE
operation and cause damage to the disc(s) and this unit itself.
Caution for moving this unit
• When moving this unit, first remove all discs from the disc
table and close the table by pressing the OPEN/CLOSE
button, and then switch off the power after you confirm that
the front panel display indicates as follows.
Never switch off the power if the front panel display is not
pictured as above, otherwise the unit will break down
during moving because the internal mechanism is not
locked.
When moving this unit, be sure to first disconnect the
power cord from the AC outlet and disconnect all cords
connecting this unit to other equipment.
FOR CANADIAN CUSTOMERS
To prevent electric shock, match wide blade of plug to
wide slot and fully insert.
This Class B digital apparatus complies with Canadian
ICES-003.
CAUTION
Page 5

FEATURES
5-Disc Auto-changer for playing DVD-Audio, DVDVideo, audio CD and Video CD
CD-R and CD-RW play compatibility
MP3 format supported
PLAYXCHANGE; Disc changing capability while
playing another
1 OPTICAL and 1 COAXIAL digital outputs for Dolby
Digital, DTS, MPEG and PCM
96 kHz, 24 bit audio DAC for high sound quality
CONTENTS
INTRODUCTION
FEATURES........................................................1
GETTING STARTED
Checking the package contents
Disc information..........................................2
CONTROL REEERENCE GUIDE
Front panel/remote control
Display.........................................................6
PREPARATION
REMOTE CONTROL
Installing batteries in the remote control
Using the remote control
CONNECTIONS
Audio connections
Video connections
Remote control in/out terminals
Power supply cord
BASIC OPERATION......................................11
Before starting play
Playing a disc
Multi-speed play........................................13
Using a disc’s menu...................................14
Enhancing video quality
DVD-Audio features
Enhancing audio quality
Switching audio tracks, subtitles and angles
...............................................................16
SPECIEYING THE PLAY SEQUENCE... 17
Repeat play
Repeat A-B
Random play..............................................18
Programmed play.......................................19
Bookmarks.................................................20
................................................
................................................
......................................
...................
................
..........................
......................................
......
.............................
...............................................
.......................................
.......................................
................
.....................................
...................................
.............................................
............................
.................................
............................
2
2
4
4
7
7
8
8
9
10
10
11
11
14
15
15
17
18
Dolby Digital and DTS decoders
Compatible with almost all features of DVD discs
(Multi-angle, Multi-language, Parental control, etc.)
Easy operation through on-screen menu
Multi-speed playback capability
Progressive video output capability (U.S.A. and Canada
models)
Component Video and S-Video outputs for high picture
quality
TJ
33
m
5
ON-SCREEN MENU
......................................
Operating menu bar...................................21
21
3)
>
Icons for disc menu....................................22
Shuttle screen.............................................22
Icons for player menu................................23
SETUP MENU
SEl l l‘ MFM ....................................................25
Operating the setup menu
Summary of settings
Language selection and language code list
7
..............................................................
Ratings.......................................................28
PCM down conversion
Speaker settings
mm
TROUBLESHOOTING..................................30
SPECIEICATIONS
Note
• The illustrations of the player and the remote control used in this
manual show U.S.A. and Canada model. Australia model is not
equipped with the ‘progressive’ feature, and the related controls
and printings on the illustrations are not applicable.
.........................................
__________
.........................
.........................
..................................
..............................
Back cover
25
26
27
28
28
I
tn
m
H
c
T3
S
m
z
c
Page 6
GETTING STARTED
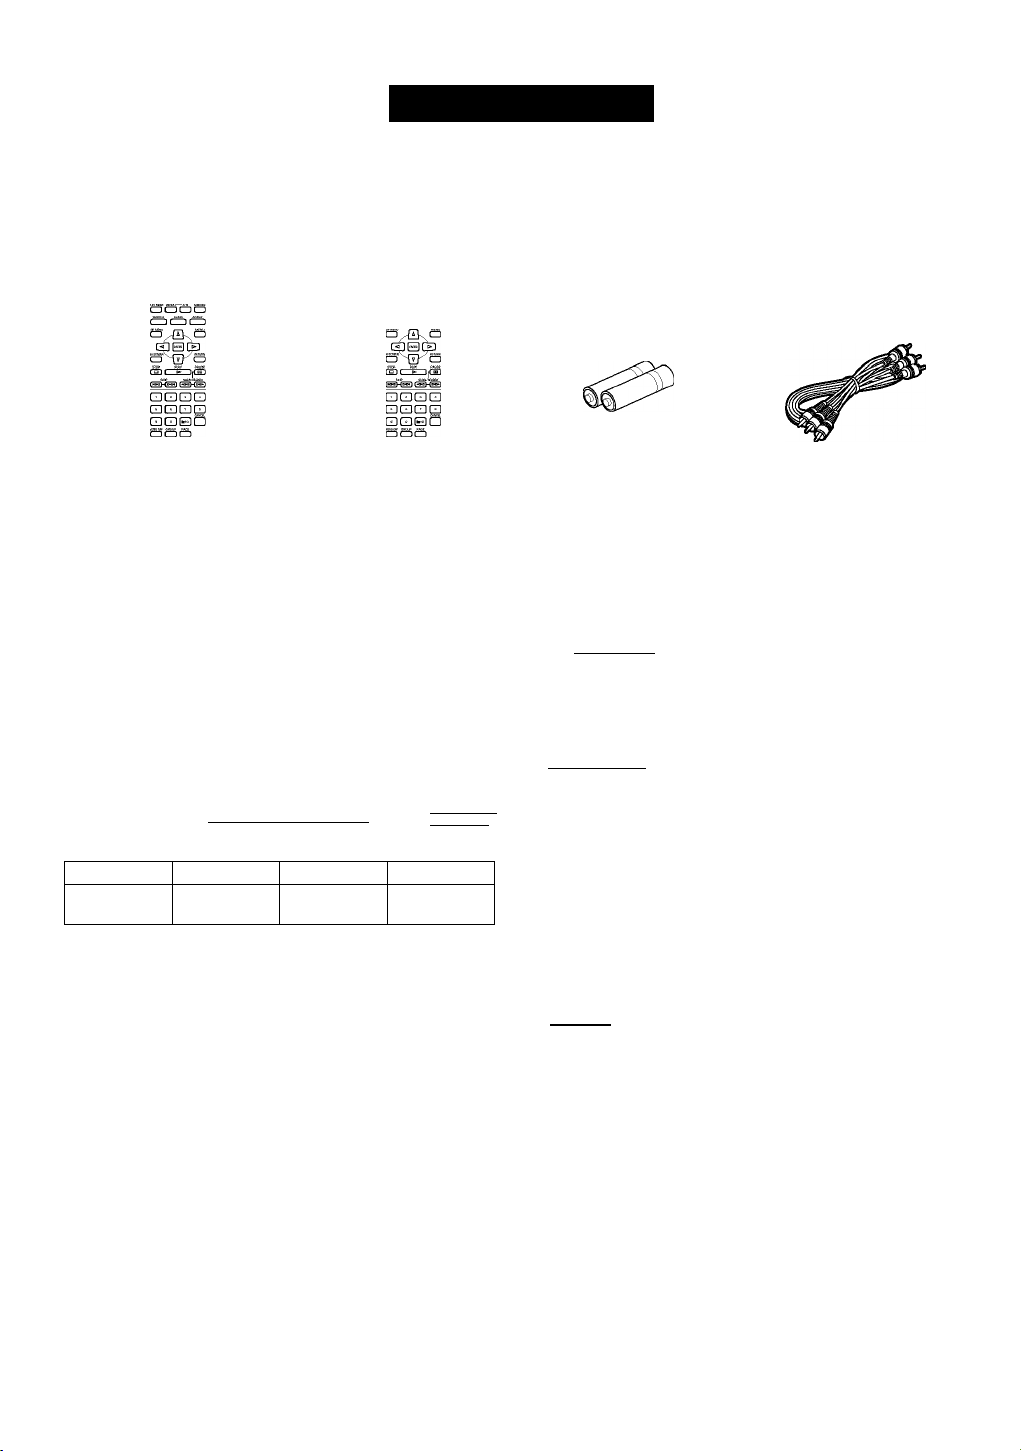
Checking the package contents
Check that the following items are included in your package.
Remote control
ocDoa
atEDOi^
QooS
V
_ _
J
(U.S.A. and Canada models)
@@0
OOEsJO
V
_ _
(Australia model)
J
Disc information
This DVD changer is designed for use with following types
of disc only. Never attempt to load any other type of disc
into this unit because it may damage this unit.
ncoMnurr
VIDEO CD [digital VIOEO]
In this manual, the type of discs are indicated as below.
DVD-Video DVD-Audio Video CD Audio CD
DVD-V DVD-A
Notes
• Tills unit is not compatible with Photo-CD, CD-ROM, DVDROM, DVD-RAM, SVCD, CDV, etc. (some DVD-R, DVD-RW
and DVD+RW can be played).
• Be sure to use only CD-R and CD-RW discs made by reliable
manufacturers. Some discs cannot be played depending on the
disc characteristics or recording conditions.
• Do not use any non standard shaped discs (heart, etc.).
• Do not use disc with tape, seals, or paste on it, damage to the unit
may result.
• Some DVD and VCD features described in this manual may not
be available or may operate in a different way because they are
subject to software producer’s design. Check each disc’s
instruction.
Example:
section.
(lD@i
appears when you press the skip buttons to move to the next
DIGITAL AUDIO
DIOITAL AUDIO DIOnAL AUDIO
DIOnAL AUDIO
IRoWritabl^
Igil
Batteries (AA, R06, UM-3) RCA pin cable (audio/video)
□□ I DOLBY I
DIGITAL
Manufactured under license from Dolby Laboratories.
“Dolby” and the double-D symbol are trademarks of
Dolby Laboratories.
DIGITAL
cits
SURROUND
Manufactured under license from Digital Theater
Systems, Inc. US Pat. No.5,451,942, 5,956,674,
5,974,380, 5,978,762 and other world-wide patents
issued and pending. “DTS” and “DTS Digital Surround”
are registered trademarks of Digital Theater Systems,
Inc. Copyright 1996,2000 Digital Theater Systems, Inc.
All Rights Reserved.
PCPi
byFAROUDJA
“DCDi” is a trademark of Faroudia, a division of Sage
Inc.
This product incorporates copyright protection technol
ogy that is protected by method claims of certain U.S.
patents and other intellectual property rights owned by
Macrovision Corporation and other rights owners. Use of
this copyright protection technology must be authorized
by Macrovision Corporation, and is intended for home
and other limited viewing uses only unless otherwise
authorized by Macrovision Corporation. Reverse
engineering or disassembly is prohibited.
Page 7
GETTING STARTED
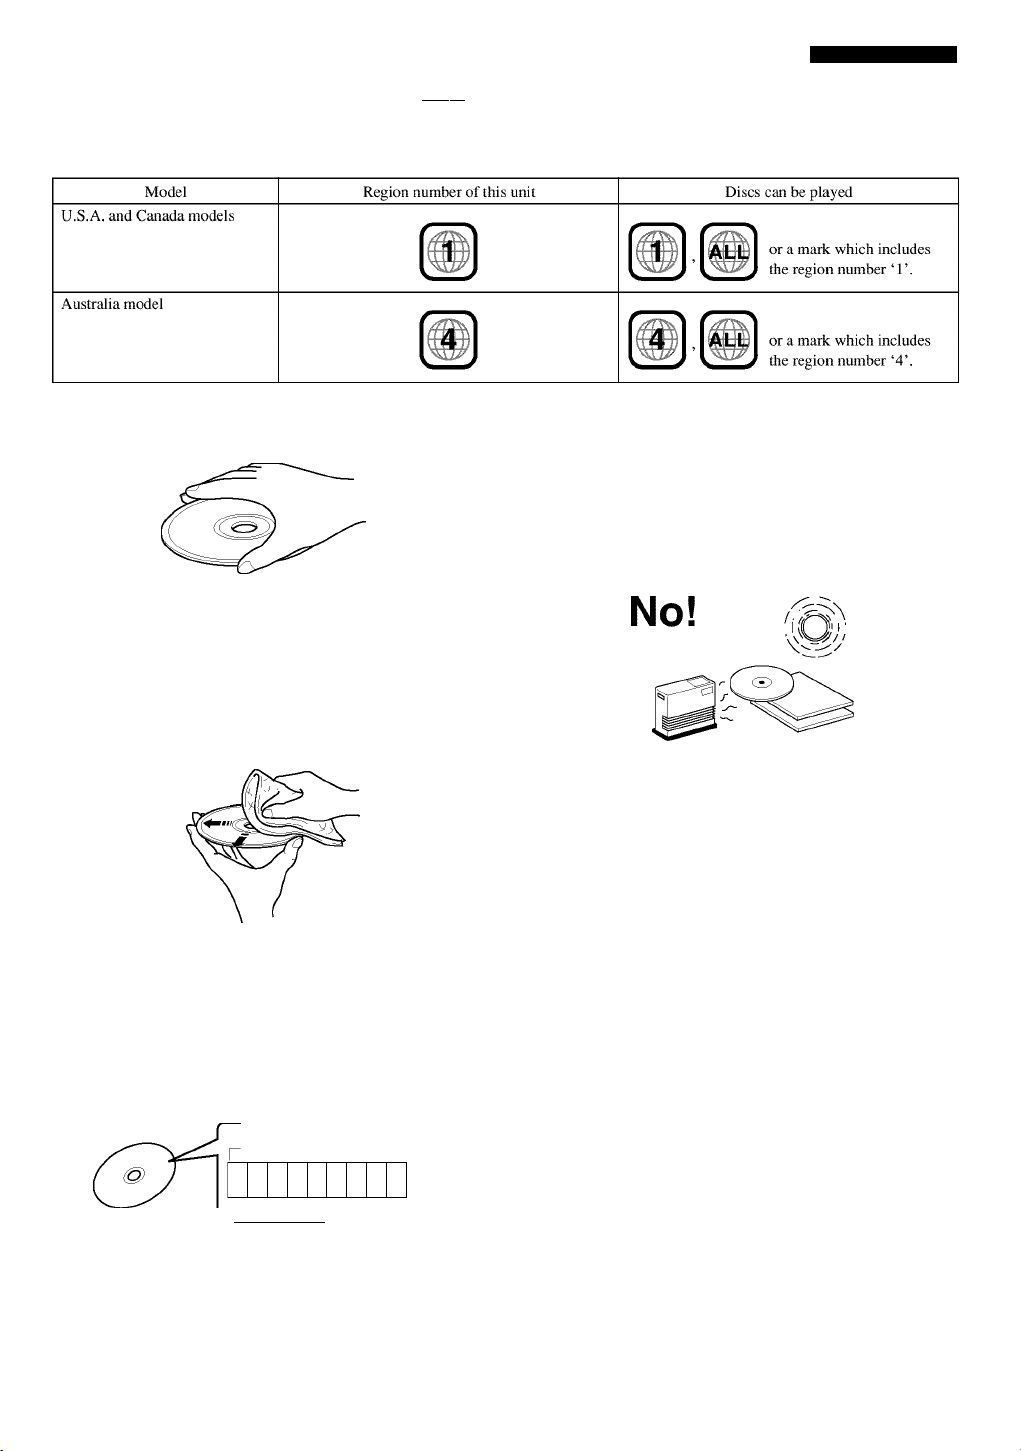
■ Region management information dvd-v
This DVD player is designed to meet DVD standard that supports region management system. Check the regional code
number marked on the disc packages. If the number does not match this unit’s region number (see the below table or the back
of this unit), this unit refuses to play that disc.
Notes about handiing discs
Hold discs by touching only the edges or center hole.
When a disc is not currently being loaded on the disc
tray, store it in an appropriate case.
Playback of discs is generally not affected by small
particles of dust or fingerprints on their playing surface.
Even so, they should be kept clean. Wipe by using a
clean, dry cloth. Do not wipe with a circular motion;
wipe straight outward from the center.
Do not try to clean the disc’s surface by using any type
of disc cleaner, record spray, anti-static spray or liquid,
or any other chemical-based liquid, because such
substances might irreparably damage the disc’s surface.
Do not expose discs to direct sunlight, high temperature
or high humidity for a long period of time, because these
might warp or otherwise damage the disc.
■ MP3 playback
This unit can play MP3 format audio recorded for personal use with a computer etc. onto CD-R or CD-RW. Play may not be
possible in some cases due to the condition of the recording.
Discs recorded using MP3 differ to CDs in the following ways.
• Structure of the disc (example)
Since the MP3 format can store several albums on a disc,
an album is assigned to a ‘Title’, and a track is assigned
to a ‘Chapter’.
Title
(Alburn)^ [
1 234
Chapter (Track)
Title
(Album)
5 678 9
Starting play from a selected chapter
Select a chapter using the numeric buttons (see ‘To select
a specific track’ in p.l3) and press ENTER.
Repeat play
You can use chapter repeat or title repeat.
Programmed play, random play
You cannot use programmed play and random play.
On-screen icons for disc information during play
Total chapter number
lei
Current chapter
Elapsed play time (display only, you
cannot use ‘time index’ feature.)
Page 8
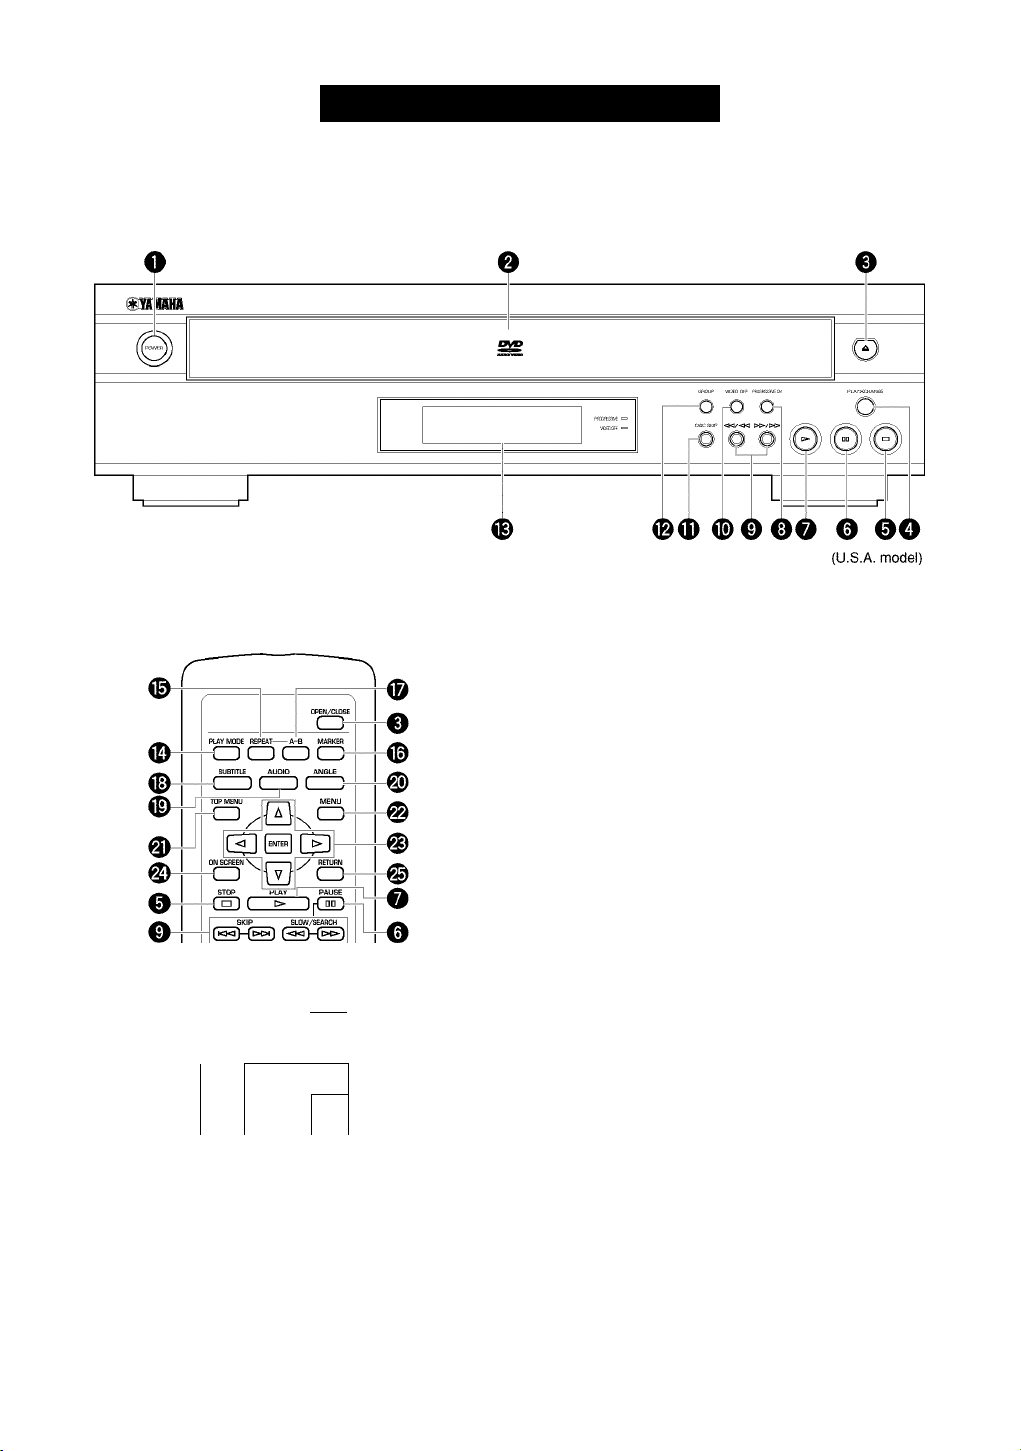
Front panel/remote control
Front Panel
Remote Control
CONTROL REFERENCE GUIDE
O POWER
Press to turn the power on and off.
E] E] ED E]”
E3 ED CEI ED
_____ _______ _______
CE CE ED CEr
Vliæo Wf GROUP PAGE
QCPCZh
PROG№SS№
[pisct ) ( Disca ) ( DISC3 )
-CD
SET UP
(DISC4] [discs]
-CD
®YAMAHA
UAMJhL ‘
DISC SKIP
CDf
___
^0
e Disc tray
Up to 5 discs can be loaded on this tray.
e ^ (OPEN/CLOSE)
Press to open and close the disc tray.
O PLAYXCHANGE (p.12)
0 □ (STOP)
Press to stop playback.
0
DQ (PAUSE)
Press to pause.
0
> (PLAY)
Press to start playback.
0
PROGRESSIVE ON: front panel
PROGRESSIVE: remote control
[U.S.A. and Canada models only]... (p.14)
0
KK]/<KI, l»/t>[>l
(SKIP, SLOW/SEARCH): front panel
KKI, l»l (SKIP),
<KI, 1» (SLOW/SEARCH): remote control
...(p.13)
©VIDEO OFF (p.15)
(U.S.A. model)
0 DISC SKIP
Press to select another disc.
Page 9

CONTROL REFERENCE GUIDE
Ф GROUP (p.15)
Ф Display panel
Ф PLAY MODE
Press to switch among random play, program play, and
normal play.
© REPEAT (p.17)
© MARKER (p.20)
© A-B (p.18)
©SUBTITLE (p.16)
©AUDIO (p.16)
©ANGLE (p.16)
©TOP MENU
Press to go to the initial screen when operating in the menu
screen.
©MENU(p.14)
Press to call up menu screen contained in the disc.
© Cursor buttons, ENTER
Use to select and determine an item on menu screen, etc.
©ON SCREEN (p.21)
Press to turn the on-screen icons on and off on the video
monitor.
©RETURN (p.14, 21,25)
Press to go back to the previous screen when operating in
the menu screen.
© Numeric buttons
Use to select a title, chapter, track, etc.
© CANCEL
Press to cancel a specific mode or a setting.
©PAGE (p.15)
©DISC 1,2, 3, 4,5
Press to play the disc loaded on the guide of the correspond
ing number.
© SET UP (p.25)
Press to call up the setup menu screen.
Page 10

CONTROL REFERENCE GUIDE
Display
0
2X1X1X1XDI>DD
prog RND iiPllDliCAJMPEG PCM VSS dts
M P a n G R O T TITLE TRACK CHAP I ANGLE pMIX PPCM MLTCH □□□
VCD
DVD
AUDID
VIDED
© 0 ,0 , <D
■ ■■■■■■■ ■ ■ ■ ■ ■
■■■ ■■■
OSXiXlXSXi)
One of these numbers lights up to show the currently
selected disc, which is loaded on the guide of the corre
sponding number.
0 >
Lights up during playback.
0 DD
Lights up while playback is paused.
Oprog
Lights up during program play.
©RND
Lights up during random-sequence play.
© Repeat mode indicators
• REP and A-B light up when repeating between the two
points you have specified.
• REP and 1 DISC light up when repeating the currently
selected disc.
• REP and 5 DISC light up when repeating all the discs
loaded on the disc tray.
0
Audio type indicators
dtt», ODD (=dolby digital), MPEG, PCM (=linear PCM),
PPCM (=packed PCM):
Indicates the audio format of a disc. When a disc
contains several different formats, the currently
selected format lights up.
MLTCH: Lights up when a multi-channel audio track is
playing.
DMIX: Lights up to show that the currently playing
multi-channel audio track can be mixed down into
2 channels - does not mean that the track is
actually down-mixed. With some DVD-Audio
discs, 2 channels down-mix is prohibited and the
indicator does not light up while playing the disc.
VSS: Lights up when the virtual surround feature is
turned on.
■■■ ■■■
■ ■ ■ ■ ■ ■!
0
Disc type indicators
Indicates the type of disc. For example, DVD and AUDIO
lights up when playing a DVD-Audio disc.
© GROUP DVD-A
The current (or programmed) group number appears below
the indicator.
® TiTLE, CHAP moAf]
The current (or programmed) title number and chapter
number appears below each indicator. TITLE (or CHAP)
also lights up with REP indicator when repeating a title (or a
chapter).
(D TRACK DVD-A ED
The current (or programmed) track number appears below
the indicator. It also lights up with REP indicator when
repeating a track.
0 Muiti-information dispiay
Shows various information such as title, chapter or track
number, elapsed playing time etc.
®ANGLE
Lights up when the scene currently played contains different
angle(s).
Page 11
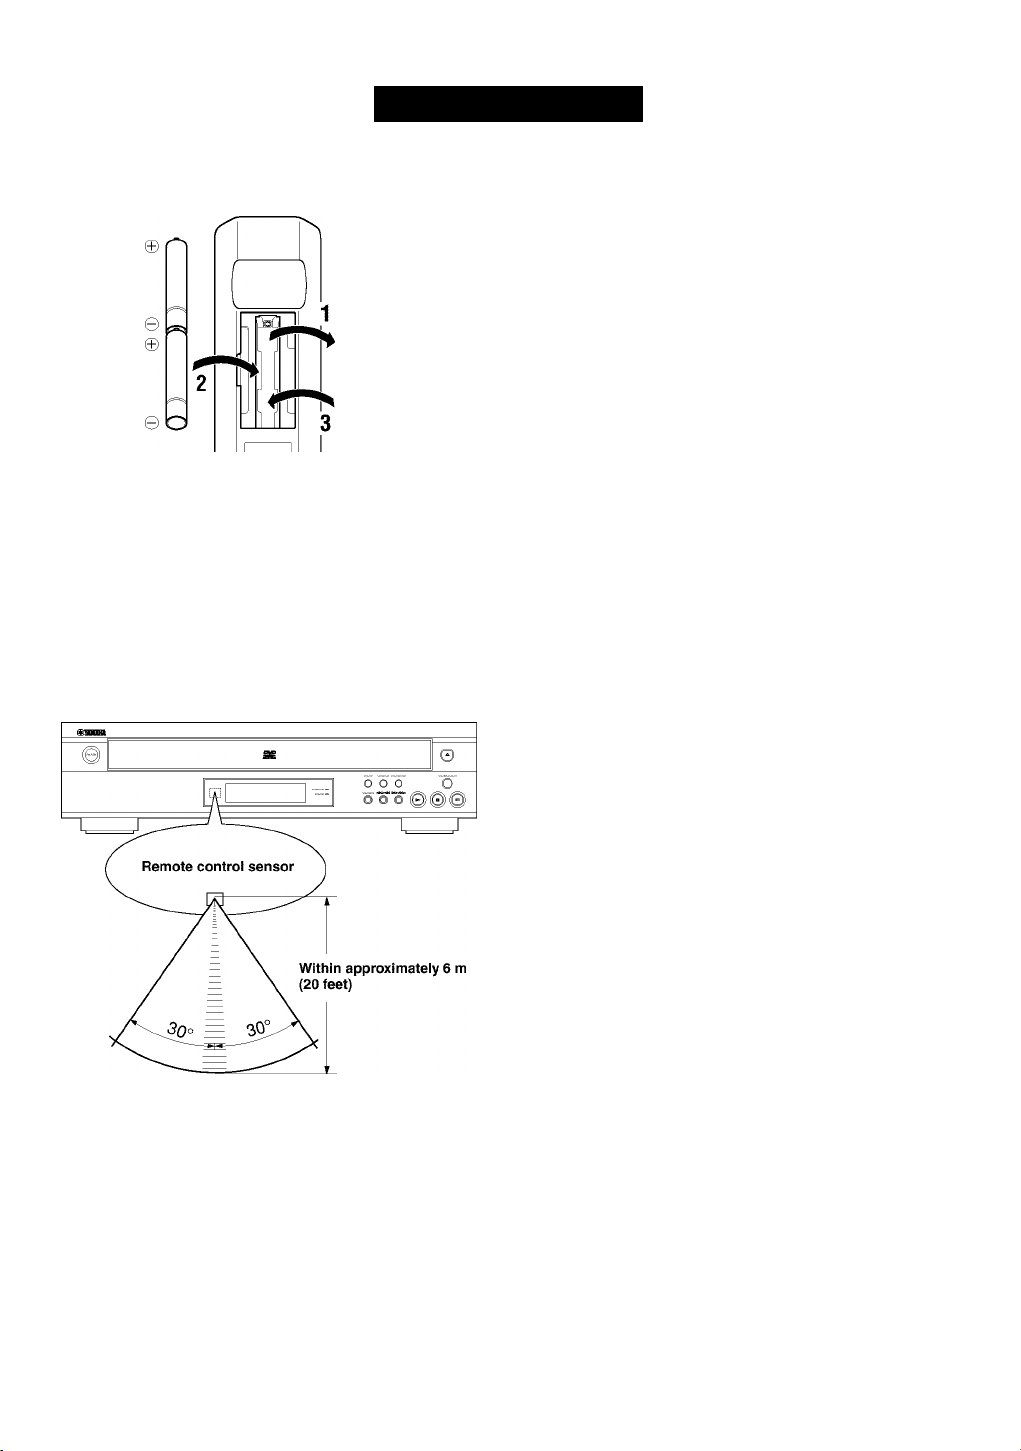
REMOTE CONTROL
Installing batteries in the remote control
El Turn the remote control over and slide the
battery compartment cover in the direction of
the arrow.
insert the batteries (AA, R06, UM-3 type) according the poiarity markings on the inside of the battery compartment.
El Cióse the battery compartment cover.
If the remote control operates only when it is close to the unit, the batteries are weak. Replace all the batteries with new ones.
Notes
• Use only AA, R06 or UM-3 batteries for replacement.
• Be sure the battery polarity is correct. (See the illustration inside the battery compartment.)
• Remove the batteries if the remote control will not be used for an extended period of time.
• If the batteries have leaked, dispose of them immediately. Avoid touching the leaked material or letting it come into contact with
clothing, etc. Clean the battery compartment thoroughly before installing new batteries.
Using the remote controt
TJ
33
m
5
3)
>
k_j
The remote control transmits a directional infrared beam. Be
sure to aim the remote control directly at the infrared sensor
during operation. When the sensor is covered or there is a
large object between the remote control and the sensor, the
sensor cannot receive signals. The sensor may not be able to
receive signals properly when it is exposed to direct sunlight
or a strong artificial light (such as a fluorescent or strobe
light). In this case, change the direction of the light or
reposition the unit to avoid direct lighting.
Notes
• Handle the remote control with care.
• Do not spill water, tea or other liquids on the remote control.
• Do not drop the remote control.
• Do not leave or store the remote control in the following
conditions:
— high humidity or temperature such as near a heater, stove or
bath;
— dusty places; or
— extremely low temperature.
Page 12

CONNECTIONS
CAUTION
Never connect this unit and other equipment to power supply until all connections have been completed.
Be sure all connections are made correctly, observing the color-coding of terminals of both this unit and the equipment to be
connected. Also refer to the instructions of the equipment to be connected.
Audio connections
■ Digital outputs
This unit has COAXIAL and OPTICAL digital output
terminals. Connect one of them to your AV amplifier
equipped with Dolby digital, DTS, or MPEG decoder using
each specific cable (separate purchase).
Required Audio settings (See p.25,26 and 27):
• Digital Audio Output On
• PCM Down Conversion, Dolby Digital, DTS Digital
Surround, MPEG Verify your AV amplifier’s capabil
ity.
Notes on digital recording
You can record the source from this unit through your AV
center (AV amplifier, etc.) or connecting these terminals
directly to your CD recorder, etc.
• With CD, wait for the total play time to appear before
turning on your recording unit’s synchro recording
feature. The beginning may be cut off if you turn it while
‘READING’ is displayed.
• With DVDs, recording may be interrupted when a new
chapter begins. If it persists, use analog recording by
Left rear
speaker
Right rear
speaker
making analog connections. These phenomena occur
because DVD player must first determine the audio
format and sampling frequency before switching digital
output.
■ Analog outputs
®6CH DISCRETE terminals
This unit incorporates multi-channel decoder and can be
connected to your AV amplifier as an external decoder. With
this connection, you can enjoy a 96 kHz or more sampling
frequency multi-channel audio track on a DVD-Audio disc,
etc. even if the disc is copyright-protected. However, your
AV amplifier’s digital sound processing features have no
effect on the audio signals output from these terminals.
Required Audio settings (See p.25,26 and 29):
• Speaker settings ^ Multi-channel*
• Digital Audio Output Off
* Also make output mode, delay time and speaker
® à
i
ri
B. (5)
i (9) (2)
1 ®(§)@ ®@ □
balance adjustments.
(©AUDIO OUT (MIXED 2CH) terminals
You can connect this unit to any component that has analog
2 channel input terminals using the RCA audio cable
supplied with this unit.
8
Page 13

Video connections
CONNECTIONS
U.S.A. mod
If your AV amplifier has video terminals, connect your
amplifier (and then to your video monitor) so that you can
use one video monitor for several different video sources
(LD, VCR etc.) by simply switching the input source
selector of your amplifier.
This unit has three types of video output terminals. Use one
of them in accordance with the input terminals of the
equipment to be connected.
Note
• Do not connect this unit to a video monitor through a video
cassette recorder. If you do so, the picture may not be played back
properly due to the copyright protection technology incorporated
in this unit.
©Component Video terminal
Component video connection achieves high fidelity in
reproducing colors (better performance than S-video
connection), separating video signal into luminance (Y,
terminal color-coded as green), and color difference (Pb,
blue/PR, red). Use commercially available coaxial cables.
Amplifier (and Video monitor) with component input is
required. Observe the color of each terminal when connect
ing. If your amplifier does not have component output
terminals, connecting this unit’s component output directly
to your video monitor’s component input can reproduce
better video image.
Note
• Do not connect this unit’s COMPONENT VIDEO OUT terminals
to component video input terminals special for HD (High
Definition) TV.
(Ds-Video terminal
S (separate) video connection achieves a clearer picture than
composite video connection by separating color and
luminance when transmitting signals. Use commercially
available S-video cable. Amplifier (and Video monitor) with
S-video input is required.
©Composite Video terminal (1,2)
Use RCA video cable supplied with this unit when connecting this unit to a video monitor.
VIDEO 1, 2 terminals of VIDEO OUT output the same
signal. You can connect one to your amplifier’s input using
supplied RCA cable, and the other to another amplifier or a
video monitor.
TJ
33
m
5
3)
>
Page 14

CONNECTIONS
Remote control in/out terminals
Power supply cord
These terminals are used for custom installation system that
transmits remote control signals via cables. Connect this
unit’s REMOTE CONTROL IN to the Remote control
output of the control unit of your system.
By connecting this unit’s REMOTE CONTROL OUT to
another piece of equipment’s Remote control input terminal,
you can also operate that equipment with the system remote
control.
After completing all connections, connect the AC power
cord to an AC power outlet.
4
To AC outlet
10
Page 15

BASIC OPERATION
Before starting play
To play a disc properly, you need to adjust the formats of audio and video signals output from this unit in accordance with the
equipment connected to this unit. See p.25 to 27.
CAUTION
If your AV amplifier does not incorporate DTS decoder and you have connected this unit and the amplifier through
digital terminals, please make sure that the ‘DTS Digital Surround’ at ‘Audio’ SETUP MENU is set to PCM (factory
setting). Otherwise, unprocessed digital signals will be output and its noise could damage your ears and your speakers.
Playing a disc
■ Preparation
Select DVD as the input source on your AV amplifier.
II Press POWER to turn the power on.
Press ^ (or OPEN/CLOSE) to open the disc
tray.
El Load discs.
Use the disc guides (numbered, 1 to 5) to align the
discs correctly.
□ Press > (PLAY).
The disc tray closes and playback starts. This unit plays
all discs on the tray in sequence.
\«/
• If necessary, select a desired disc using DISC SKIP or one of the
DISC 1, 2, 3, 4 or 5 buttons.
• When a menu screen appears IDVD-A11DVD-VI :
See ‘Using a Disc’s Menu’ in p.l4.
Notes
• When this unit finishes playing a DVD, this unit stops playback or
shows the menu screen and does not start playing the next disc.
• This unit cannot play a CD-R or CD-RW disc unless the disc has
been finalized. Please make sure to finalize the disc on the CD
recorder before playing it on this unit.
□ QEDQ
GDHQGD
CDEDBD
1=5'Bo
“o' o o o
oooa
4 (PLAY)
11
Page 16

BASIC OPERATION
POWER DISC SKIP PLAYXCHANGE
PLAY STOP
PLAY
STOP
DISCI—5
DISC SKIP
■ To stop playback
Press n (STOP).
Resume function
This unit memorizes where n (STOP) was pressed as long
as this unit is turned on (► indicator flashes on the display).
When you press > (PLAY) in this status, playback resumes
from where it was stopped.
To clear the memory, press n (STOP) once more so that the
► indicator goes off.
Notes
• Selecting another disc cancels the resume function.
• This function may not work with some discs or on some part of
a disc.
Chapter review function [DVD-V]
This function plays the first few seconds of each chapter
from the beginning of the title up to the memorized point so
that you can review previous chapters.
Press t> (PLAY) while the message for chapter review is
displayed on the screen.
Notes
• This function may not work with some DVDs.
• Canceling resume function will also clear the chapter review
function.
■ To select a specific disc
Press DISC 1,2, 3,4 or 5.
• You can select another disc by pressing DISC SKIP.
Piayxchange
By pressing PLAYXCHANGE, you can open the disc tray
and load or replace discs without interrupting play.
However, never load a disc on the guide half hidden
inside the unit because the disc currently being played is
to be placed there.
■ After operation
When this unit is not in use, remove discs and press
POWER.
12
Page 17

Multi-speed play
BASIC OPERATION
■ To select a specific track ISjil
Enter a desired track number using numeric buttons.
To select a two-digit number, press 110 and then enter the
upper figure and the last figure successively.
Example (to select track 17):
1 Press 110.
2 Press 1.
3 Press 7.
SKIP/SLOW/SEARCH
O
0‘O CD CD
czD(f!b(ffb
CD CD
cSi I " i|<^
SKIP
□ □□□
nEDDQ
Cursor buttons
- (^.
PLAY
PAUSE
SLOW/SEARCH
- Numeric buttons
naEDD
qc5o
' CD" ED CD CD
H ED ED '¿D'
■ Skip
Press SKIP i>i>i (or KM) on the remote control to skip
forward (or backward).
or
Press i>t>/>t>i (or MM/«) on the front panel to skip
forward (or backward).
Press once for each chapter (track) to be skipped.
Note
• When playing a VCD with playback control, skip operation may
not function as described above.
■ Search
Press SLOW/SEARCH i>i> (or <m) on the remote control
to search forward (or backward).
or
Press and hold c>t>/t>t>i (or mm/«) on the front panel to
search forward (or backward).
\i/
• To increase the speed, press SLOW/SEARCH on the remote
control repeatedly or keep pressing p=o/dh>:, kki/«i on the front
panel.
■ Pause
Press nn (PAUSE).
• To resume play, press > (PLAY).
■ Frame advance/reverse
DVD-A IDVD-V
1 Press nn (PAUSE) during playback.
2 Press the cursor buttons (m, >).
Each press advances (or reverses) still picture by one frame.
• To return to normal play, press > (PLAY).
Note
• With Video CD, you cannot move backward.
■ Slow DVD-A DVD-V
1 Press nn (PAUSE) during playback.
2 Press SLOW/SEARCH ot> (or mm) on the remote
control.
or
Press and hold oo/ooi (or mm/mm) on the front panel.
• To return to normal play, press > (PLAY).
\i/
• To increase the speed, press SLOW/SEARCH on the remote
control repeatedly or keep pressing p=o/dh>:, kki/«i on the front
panel.
Note
• With Video CD, you cannot move backward.
13
Page 18

BASIC OPERATION
Using a disc’s menu
Discs may contain multiple audio tracks, subtitles, index and bonus materials such as movie trailers and cast information, etc.
And many of them have menu screens that enable you to control these features. This section gives you general instruction
about how to operate these screens. However, the operation methods may differ depending on the disc.
IT
Press TOP MENU or MENU during playback to show menu screen.
• With some discs, menu screen appears automatically
when you start playback.
Press the cursor buttons (A,v,
o) to select
the desired item.
Press ENTER to go to the screen of the
selected item or to start playing the selected
item.
• You may also use the numeric buttons to operate
steps 2 and 3.
■ Video CD’s playback control
If ‘PBC’ appears on the display while playing a Video CD,
this unit is in playback control mode and a menu screen
appears on the video monitor. You can operate menu screens
using the following buttons.
Numeric buttons: Press to select the desired item.
RETURN: Press to go back to the previous screen
> (PLAY): Press to play the selected item
c=i>i: Press to show the next screen
KM; Press to show the previous screen
n (STOP): Press while a menu screen appears on the video
monitor to cancel the playback control.
Note
• Playback control is automatically canceled during program play
or random-sequence play.
TOP MENU
Cursor buttons,ENTER
□ (STOP)
KKI, (SKIP)
OCDOS
C=DCfDC=b
CHDEDCB
a I s.' ijfSi
□ GDDE]
□ □□n
CDDEDD
□ Bo
‘OGDOGD
B Œ) CD
V
o
MENU
RETURN
> (PLAY)
- Numeric buttons
Enhancing video guaiity [U.S.A. and Canada models only]
This unit’s component video outputs are capabie of output
progressive signals. You can enjoy even higher quality
picture if you have connected this unit to a monitor that can
receive progressive signals.
Press PROGRESSIVE (or PROGRESSIVE ON on the front
panel).
The PROGRESSIVE indicator lights up.
• To cancel this feature, press PROGRESSIVE again.
PROGRESSIVE indicator
PROGRESSIVE
14
Note
• If the screen shifts off center when using progressive output, see
‘Adjusting the screen position’ on p.24.
• When playing 4:3 aspect software with a 16:9 aspect wide-screen
monitor using progressive output, the picture may appear
horizontally stretched to fill the screen. In that case, change the
aspect to the correct one at your monitor. If the monitor cannot
change the aspect, it is recommended to turn the progressive
feature off.
Page 19

BASIC OPERATION
DVD-Audio features
This section explains about some features particular to DVD-Audio. Though most of the content selection can be controlled
using a disc’s menu like DVD-Video, there exists in a DVD-Audio the unit called ‘group’ that is something equivalent to
DVD-Video’s ‘title’.
■ To play a track on a specific group
El Press GROUP.
The group and track icons appears on the video
monitor.
H Press the cursor buttons (A,v) to select a
group number and press ENTER.
El Press the cursor buttons (A,v) to select a track
number and press ENTER.
The selected track starts to play.
• You can also use the numeric buttons to select a group
and a track.
■ To play a bonus group
Some discs contain bonus groups. If it requires 4 digit
password, consult the disc jacket, etc. and enter the
password using the numeric buttons and then press ENTER.
■ To change pages
DVD-Audio may contain some information screens called
‘pages’ that show photo galleries, artist biographies and
lyrics, etc. When it appears, you can move to another page
by pressing PAGE (page number appears on the display
when you change pages.).
• Some discs may navigate you to press the cursor buttons
(<i, c>) to turn pages.
Cursor buttons,
ENTER
GROUP
o'
'o o o o
cococfo
O^Q^O
(311E3 CEl
o"'Q^a
(^C D|0
DDDE]
CDDOm
CDDEDQ
■oifDO
o a o I—I
oooo
- Numeric buttons
PAGE
Enhancing audio quality
VIDEO OFF indicator
You can enjoy even higher quality sound by turning off the
video signal output.
Press VIDEO OFF.
Picture is turned off and the VIDEO OFF indicator lights
up.
• To cancel this feature, press VIDEO OFF again.
• While you pause or search play, this unit outputs the
video signal and the picture is shown on the video
monitor.
15
Page 20

BASIC OPERATION
Switching audio tracks, subtittes and angies
Currently playing audio track
number
SUBTITLE
Some discs are encoded with several audio tracks, multilin
gual subtitles or multiple camera angles. Refer to disc jacket
etc. to see which feature is supported.
■ Audio tracks
Different audio track languages and/or formats can be
selected if available on the disc.
Press AUDIO during play.
The Audio track icon appears on the video monitor.
• Pressing the button repeatedly toggles through all audio
tracks recorded on the disc. You can also use the cursor
buttons (A,V) or the numeric buttons to change tracks.
• You can also use the button to turn the vocals on and off
on karaoke discs. See the instruction of each disc.
Notes
• Play restarts from the beginning of the current track if you change
audio track while playing DVD-Audio, other than video section.
• With DVD-Audio, track number 2 may appear even if the disc
does not support multiple audio tracks.
■ Subtitles
Press SUBTITLE during play.
The subtitle icon appears on the video monitor.
• Pressing the button repeatedly toggles through all
subtitles recorded on the disc. You can also use the cursor
buttons (A,V) or the numeric buttons to change subtitles.
To turn on/off the subtitles:
il Press SUBTITLE.
H Press the cursor button (i>).
El Press the cursor buttons (A,v) to select ON
and OFF.
Notes
• appears if the disc does not have a subtitle.
• Subtitles may not change immediately after you press the button.
Subtitle language number being played
Angle number being played
16
■ Angles
Some DVDs have scenes encoded with multiple camera
angles so that different viewpoint can be selected during
playback. ANGLE lights up on the front panel display while
a scene encoded with multiple angles is being played.
Press ANGLE while ANGLE on the front panel display
lights up.
The angle icon appears on the video monitor.
• Pressing the button repeatedly toggles through all angles
recorded on the disc. You can also use the cursor buttons
(A,V) or the numeric buttons to change angles.
■ To turn the Icon off
Press RETURN.
Note
• With some discs, you cannot change audio tracks, subtitles or
angles in the way described above. In that case, go to the disc
menu and change them.
Page 21

SPECIFYING THE PLAY SEQUENCE
Repeat play
REPEAT
@ B6P B6P
U H H b I b k k b b b ■1 1 1 k H b K k b b b H 1
(b)
I ]. I L- b h! b P b P I L-* i. b L.- P b P b H I
(C) B6P sorac BEP
‘REP’ goes off.
Program repeat
_______
(T) PRDG BEP
♦
H L- L- P b P b H I □ P U U P P b P b H I
P b P b H I U r r H L- L- P b P b H 1
^
1 !: ■ 1 t. H h ! t. H t. fl
©■
fl L L h! t P t fl 1
{jP BEPi 0«C
or
(b) BEP 50.sc
♦
©■
k b b b fl 1 u b b
‘REP’ goes off.
Random-sequence repeat
1 k fl u K k b b b fl 1
fl b b k b b b fl 1
This function allows you to play your desired chapter, track
or disc repeatedly.
■ Press REPEAT during playback.
Each time this button is pressed, repeat mode changes
as follows. The name of the selected repeat mode
scrolls once on the multi-information display and the
corresponding indicators light up.
DVD-V
(a) CHAPTER REPEAT: The current chapter is played
repeatedly.
® TITLE REPEAT: The current title is played repeatedly.
© ALL REPEAT: All the discs loaded on the tray are
played repeatedly.
® REPEAT OFF: Repeat play mode is canceled.
DVD-A ED
© TRACK REPEAT: The current track is played repeat
edly.
® DISC REPEAT (Video CD, CD): The current disc is
played repeatedly,
or
GROUP REPEAT (DVD Audio): The current group is
played repeatedly.
@ ALL REPEAT: All the discs loaded on the tray are
played repeatedly.
® REPEAT OFF: Repeat play mode is canceled.
Pressing REPEAT while playback is stopped switches ‘ALL
REPEAT’ to ‘REPEAT OFF’ or vice versa.
■ Program repeat dvd-a ED
If REPEAT is pressed during programmed play (p.l9),
repeat mode changes as follows.
® 1 STEP REPEAT: Repeating the track being played
® ALL REPEAT: Repeating all the programmed tracks
® REPEAT OFF: Canceling repeat mode (go back to
normal program play)
€)■
k b k b fl 1 u b b
k b k b fl 1 u b b
■ Random-sequence repeat
DVD-A Eil
If REPEAT is pressed during random play (p.l8), repeat
mode changes as follows.
® TRACK REPEAT: Repeating the track being played
@ ALL REPEAT: Playing all the tracks repeatedly, each
time in different random-sequence.
© REPEAT OFF: Canceling repeat mode (go back to
normal random play)
Notes
• Repeat play may not work properly with some DVD-Video.
• Repeat play does not work with an interactive DVD-Video or
during menu play of a VCD with playback control.
17
Page 22

SPECIFYING THE PLAY SEQUENCE
Repeat A-B
This function allows you to specify two points and play
between them repeatedly.
II Press A-B during play at the point where you
want to start A-B repeat.
‘REP’ and ‘A-’ light up and ‘B’ flashes on the display.
H Press A-B at the point where you want to end
A-B repeat.
‘REP’ and ‘A-B’ appear on the display and repeat play
of the section between point A and B starts.
■ To cancel A-B repeat
Press A-B repeatedly until A-B indicator on the display goes
off.
Notes
• This function may not available with some DVD-Video.
• This function works only within a title (DVD-Video) or a track
(VCD, CD).
REP A-B
Lights up
Random play [DVD-A] [VCD] [CD]
When you select this mode, this unit plays all tracks on all
discs loaded on the disc tray in random sequence.
il Press n (STOP) to stop play.
Press PLAY MODE repeatedly until ‘RND’ lights
up on the display.
El Press > (PLAY) to start random play.
■ To cancel random mode
1 Press n (STOP) twice during play.
Random play is suspended.
2 Press PLAY MODE once.
RND indicator goes off.
If you press » (PLAY) successively, normal playback starts
from the beginning of the disc having been played before
canceling random mode.
Opening the disc tray also cancels this mode.
Note
When this unit is in random mode while a Video CD (ver.2.0) is
loaded, playback control is canceled during random play.
18
Page 23

Programmed play [DVD-A] [VCD] [CD]
-Cursor buttons
W o)
-O- (PLAY)
-Numeric buttons
CANCEL
DISC 1—5
SPECIFYING THE PLAY SEQUENCE
You can enjoy listening to your favorite tracks selected from
one or more discs in any desired order by programming
tracks.
II Press n (STOP) to stop play.
Press PLAY MODE repeatedly until PROG
lights up on the display.
The display shows the step information.
El Press DISC 1—5 to select the disc.
• When programming DVD-Audio, press GROUP to
specify the group.
EJ Press numeric buttons to select the track.
• Repeat steps 3 and 4 to program other tracks in your
desired order.
• See p. 13 about how to enter the track with numeric
buttons.
• To program a whole disc (or all tracks of the
selected group of DVD-Audio), press ENTER
(‘ALL’ appears on the display).
• Pressing n (STOP) cancels all tracks programmed
so far.
You can program up to 32 tracks to be played in desired
order. ‘PULL’ appears on the display when the number of
tracks exceeds 32.
Id Press > (PLAY) to start play.
Group No. Track No.
Program No.
■ To cancel the programmed tracks
1 Press the cursor buttons (<, c>) to select the track you
want to cancel.
2 Press CANCEL.
Note
When you program a track of a Video CD (ver.2.0), playback
control is canceled during programmed play.
■ To exit programming mode
Press PLAY MODE twice or open the disc tray.
19
Page 24

SPECIFYING THE PLAY SEQUENCE
Bookmarks
a o cfD o
t=DC=bcib
[<]EDC>]
oMiKO
oc D[®
□ □GDE] EDGDEDED GDGDEDC
ass
‘SSg53(E3
S E3 E3 S
‘cS
MARKER
Cursor buttons (<, >),
ENTER
CANCEL
This feature allows you to mark up to 5 points so that you
can quickly return to those points later.
El Press MARKER.
The marker icon appears on the screen.
) to select oneH Press the cursor buttons (
of five asterisks.
The selected asterisk is highlighted.
El Press ENTER.
The selected asterisk turns to be the bookmark number.
■ To recall a bookmarked scene
Press the cursor buttons (<, c>) to select a bookmark
number and press ENTER.
■ To clear a bookmark
Press the cursor buttons (<, c>) to select a bookmark
number and press CANCEL.
Note
When you open the tray or turn this unit off, all bookmarks are
cleared.
*** *
I*
*** *
HI
Bookmark number
20
Page 25

ON-SCREEN MENU
You can control various items using on-screen menu bar.
Operating menu bar
TT.e
(b
© I
________
*
ELI BWiiTi
i
■ Off
.
El Press ON SCREEN.
Each time ON SCREEN is pressed, the menu bar
changes as below.
J
@ Icons for disc menu
® Icons for player menu
© Shuttle screen
i
Off
Icons for player menu
0*
ELI iwiia ^
t
@* ■
t
©r ET, P
kiiiiuKiau
t
®r
L_
^ H
■uEI
(3ZIE3 CEl
ON SCREEN
(Wh >’
CDDEDO
cbSS
'o’o GD ED
o ED ED 'cb
O O CD O
cibcibciD
O^Q-^cb
aaoE]
CDHom
»jVAMAHA
o
Cursor buttons,
ENTER
RETURN
Numeric buttons
Press the cursor buttons (<, >) to select the item you wish to adjust.
The selected item is highlighted.
• Icons for player menu has 4 different menu bars as
below. To switch the menu bar, select the leftmost
icon and then press the cursor buttons (A,V).
(9) Play menu
}
@ Display menu
}
® Audio menu
}
® Video menu
El Press the cursor buttons (A,v) to change
setting.
• With some items, you need to press ENTER or c>
(PLAY) to determine the setting.
• You can also use the numeric buttons when entering
numbers to select a chapter, etc.
• You can also use RETURN to turn the screen off.
• A and V around the icon means that the item can be
changed using the cursor buttons (A,V).
Note
• Some items cannot be accessed when the play is stopped.
■ To change the menu bar position
When the menu bar does not appear properly, you can adjust
its position.
El Select the rightmost icon (g).
H Press the cursor buttons (A,v) to move the
menu bar.
21
Page 26

ON-SCREEN MENU
Icons for disc menu
example: DVD-Video
F«B
DVD-V
Title number
DVD-A ED
Track number
DVD-V
Chapter number
DVD-A
Group number
DVD-A DVD-V
Angle number
Playback control
Indicates whether playback control is on
or off.
DVD-A
Page number
DD Digital
1 ENG ii 3/2.1 ch
0X2) ®
@ Q)
DVD-A rPVD^
Time index (hour:minute:second)
You can start play from the desired point
by specifying the elapsed time.
DVD-A
Changing the time display
Track elapsed time
)
Track remaining time
)
^ Disc remaining time
Audio mode
LR « L « R
t
__________
f
DVD-A rPVD^
CD
Audio track number
@ Audio track Language:
See 0 for language abbreviations.
(|) Audio signal type: See H] for details.
DVD-A rPVD^
Karaoke vocal on/off
(Karaoke DVD only)
Solo: OFF or ON
Duet: OFF, V1+V2, VI or V2
DVD-A DVD-V
® Subtitle on/off
@ Subtitle language
□ Language
ENG: English SVE: Swedish
ERA: Erench NOR: Norwegian KOR: Korean
DEU: German DAN: Danish MAL: Malay
ITA: Italian
ESP: Spanish RUS: Russian THA: Thai
NLD: Dutch
FOR: Portuguese VIE: Vietnamese
JPN: Japanese
CHI: Chinese
*: Others
Signal type/data
LPCM/PPCM/nnOigital/DTS/MPEG: Signal type
k (kHz): Sampling frequency
b (bit): Number of bits
ch (channel): Number of channels
Example:
3/2 Ach
1: Subwoofer
(not displayed if there is no subwoofer signal)
0: Rear channel not available on the disc
1: Rear channel (monaural)
2: Rear channels (left/right)
1: Main channel (monaural)
2: Main channels (left/right)
3: Main channels (left/right) + Center
Notes
• Display may differ in accordance with the disc’s specification.
• Time remaining on the disc does not appears during program or
random-sequence play.
Shuttle screen
Slow-motlon play
-il: Backward I DVD-A DVD-V
Search Play
Note
• Slow-motion only works on the video parts of DVD-Audio.
22
Backward
Pause
Slow-motion play
!►: Forward DVD-A DVD-V
Search
Forward
Page 27

Icons for player menu
ON-SCREEN MENU
■ Play mode menu
example; DVD-Video
, EHimiiB
A-B repeat p.18)
-
[ENTER] (start point) [ENTER] (finish point)
To cancel
[ENTER]
Bookmarks (-^ p.20)
mffTjm
You can mark up to 5 points.
To mark a point
^1 [ENTER] (at the desired point)
To recall a bookmark
[<i, >] - [ENTER]
To erase a bookmark
[<l, >] - [CANCEL]
■ Display menu
example; DVD-Video
, №ad 1 liliisnn §
DVD-V
IPB display
Displays the picture type (I/P/B)* of a still
picture (when paused).
ON OEE
Display dimmer
|:l:iWill
Changes the brightness of the front panel display
BRIGHT - - DIM - - AUTO*
1____________________t
* The display dims and any indicators that were
on turn oif during play. The display brightens
and the indicators light up temporarily when
you perform an operation.
■ Audio menu
example: DVD-Video
KJiilaa giTU ^
Virtual surround mode
Allows you to enjoy surround-like effect without
surround speakers when playing a disc encoded
with multi-channel audio track (may not effective
with some discs). You can also enjoy the feature
connecting headphones to your AV amplifier.
SP (with main speakers):
Dolby Digital, DTS, MPEG, LPCM multi
channel source
HP (with headphones):
Dolby Digital, MPEG, LPCM multi-channel
source
SP/HP OFF: Virtual surround-off
SP/HP 1: Virtual surround-on
SP/HP 2: Virtual surround-enhanced
IDVD-VI
Cinema dialog
Increases the volume level of the dialog part
(center channel).
Notes
• Audio output from this unit is 2-channels when the virtual
surround is turned on.
• Turn off the sound effect of the AV amplifier, etc. connected to
this unit when turning on the virtual surround.
• Turn the virtual surround off if it causes sound distortion.
• T’ (intra coded picture) indicates that the picture is the original
one and has greater amount of information than that of ‘P’ or ‘B’
‘P’ (predictive coded picture) is made from T’ and ‘B’
(bidirectionally-predictive coded picture) is to fill in the space
between T’ and ‘P’. It is recommended to use T’ picture for
adjusting video image.
23
Page 28

ON-SCREEN MENU
I Video menu
ran
DVD-A rPyOV
Digital picture mode
To select the picture mode: [A,V]
N: Normal
C: Cinema image (suited for movie viewing)
U: User mode
To change the user mode
P
Select User mode and press
Press (<i, c>) to select the item you wish to
change.
Press (A,V) to change the setting.
The following items are also displayed when
you select ‘U’.
Contrast (-7 to +7)
Adjusts the contrast between light and dark
part of the picture.
Brightness (0 to +15)
Adjusts the brightness of the picture.
Sharpness (-6 to +6) (Australia model)
Adjusts the horizontal resolution of the
picture.
Color (-7 to +7)
Adjusts the shade of the picture’s color.
When PROGRESSIVE Is on (U.S.A. and Canada models)
‘ I . F.1
, mm -i E
DVD-A DVD-V
Digital picture mode
To select the picture mode: [A,V]
N: Normal
C: Cinema image (suited for movie viewing)
Transfer MODE
Selects the method of conversion for progressive
output to suit the type of material being played.
Auto (normal): for viewing film material
Video: for video material
■ Adjusting the screen position (when using progressive output)
(U.S.A. and Canada models)
With some video monitors, the screen may shift off center with progressive signals output from this unit. To adjust the
position, follow the below method.
1 Press nn (PAUSE) to pause play.
2 Follow the steps 1 and 2 on ‘Operating menu bar’ on p.21 to show the video menu.
3 Press » to select the rightmost icon (^).
4 Adjust the position.
To move to the left, press the numeric button 1.
To move to the right, press the numeric button 3.
To set the screen back to the original position, press the numeric button 2.
Example:
1 —
■ Press rn to move to the
right.
You can check whether the picture is in the center or not by switching to normal output (press PROGRESSIVE so the
indicator turns off).
Save the adjusted position.
First press n (STOP) and then press SET UP to show setup menu. Then press SET UP once again (or RETURN) and now
the position is saved. Even if you skip this procedure, the position is saved until you turn the power off.
' ,
24
Page 29

SETUP MENU
With the setup menu, you can change this unit’s system defaults to suit your preference and your home theater system. Some
items must be adjusted to play a disc properly.
Operating the setup menu
This section shows common procedures (some items require
additional steps). Use the remote control to operate the
setup menu.
II Press SET UP while playback is stopped.
The menu screen appears on the video monitor.
Ei Press the cursor buttons (<, >) to select a
menu group.
There are five menu groups. The screen shows the
items that belong to the menu group of the selected tab.
Disc menu ®
Video menu (2)
I ^
Audio menu (3)
Display menu ®
Others menu ®
Cursor buttons,
ENTER
SETUP
'O
"QcdoS
CZiciDCZZI
(3Z1Q CEl
0^0
'" a
BBlZD,®
(shb (Sa
□ EDEDE]
EDGDEDGD
EDGDSD
aaa
'oedogis
BgdesB
RETURN
SET UP Disc
@
SET UP Video
@
SET UP Audio
SET UP Display
SET UP Others
Audio English
.......
TV Aspect 4:3 Pnn&Scan
....
Speaker Setting Multi-channel
El Press the cursor buttons (A,v) to select the
desired item and press ENTER.
EJ Press the cursor buttons (A,v) to change the
setting and press ENTER.
■ To go back to the previous screen
Press RETURN.
■ To get out from the setup menu mode
Press SET UP.
(/>
m
H
c
T3
m
z
c
25
Page 30

SETUP MENU
Summary of settings
The below chart shows the menu groups and each items. In the ‘Options’ column, the factory settings are underlined.
Menu
groups Items Options
Disc
See Select the preferred audio track language.
p.27 and
28 for (Australia model)
details. English French German Italian
Video TV Aspect
Audio
Audio DVD-A DVD-V (U.S.A. and Canada models)
English French Spanish Original
Other****
Spanish Original Other****
Subtitle DVD-A DVD-V
Select the preferred subtitle language.
Menus DVD-A DVD-V
Select the preferred disc menu language.
Ratings DVD-V
Set a ratings level to limit DVD-Video play. See p.28 for details.
(U.S.A. and Canada models)
Automatic English French Spanish
Other****
(Australia model)
Automatic English French German
Italian Spanish Other****
(U.S.A. and Canada models)
English French Spanish
(Australia model)
English French German
Spanish Other****
Setting ratings (When level 8 is selected)
8 No Limit 1 to 7 0 Lock All
Changing ratings
(When level 0—7 is selected)
Unlock Player Change Level
Change Password Temporary Unlock
If you connect to a 4:3 conventional-type monitor, select ‘4:3
Pan&Scan’ (left and right sides trimmed when playing 16:9 software) or
‘4:3 Letterbox’ (black areas appear at the top and bottom when playing
16:9 software). Select ‘16:9’ if you connect to a widescreen monitor.
Still Mode
Specify the type of picture shown when paused. First select ‘Automatic’
If a still picture jitters, select ‘Field’. If details don’t appear clearly
enough, select ‘Frame’.
Black Level Control (U.S.A. and Canada models)
Change the black level of the picture. Select ‘Lighter’ when you connect
to the monitor using VIDEO or S VIDEO terminal. Select ‘Darker’
when using COMPONENT terminals.
NTSC Disc Output (Australia model)
Select video signal format (PAL 60 or NTSC) to be output when playing
NTSC disc.
Speaker Setting
Adjust the settings to suit your audio system and your listening
environment when you connect to your AV amplifier using 6CH
DISCRETE terminals. See p.29 for details.
PCM Down Conversion DVD-A DVD-V
Select how to output the high sampling-frequency audio signals on a
disc that is not copyright-protected. See p.28 for details.
4:3 Pan&Scan 4:3 Letterbox 16:9
Automatic Field Frame
Lighter Darker
PAL 60 NTSC
Multi-channel:
Select this when connected to multi-channel
system. There are three sub-items as below.
• Speaker presence and size
• Delay time
• Channel balance
2-channel:
Select this when connected to 2-channel system.
No
Yes
Other****
Italian
26
Page 31

Menu
groups Items Options
Audio
Dolby Dioital DVD-A DVD-V
Bitstream PCM
Decide the signal type that output from this unit’s digital outputs. Select
‘Bitstream’ when connected device has Dolby Digital decoder. Select
‘PCM’ when not.
DTS Digital Surround DVD-A DVD-V
PCM Bitstream
Decide the signal type that output from this unit’s digital outputs. Select
‘Bitstream’ when connected device has DTS decoder. Select ‘PCM’
when not.
MPEG 1 DVD-A 11 DVD-V 1 (Australia modelt
PCM Bitstream
Decide the signal type that output from this unit’s digital outputs. Select
‘Bitstream’ when connected device has MPEG decoder. Select ‘PCM’
when not.
D. Range Compression DVD-A DVD-V
Off On
(Dolby Digital only)
Change the dynamic range for late night viewing. Select ‘On’ to make it
easier to hear dialog etc. even at low volume level.
Audio during Search DVD-A DVD-V
On Off
Select whether to have sound during search. Select ‘Off’ if sound
distorted when searching with Dolby Digital or DTS material. With
DVD-Audio, the sound may be heard even if you select ‘Off’.
Display Menu Language
Select the preferred language for on-screen messages and setup menu.
(U.S.A. and Canada models)
English Français Esnañol
(Australia model)
English Français Deutsch Italiano
Español
On-Screen Messages
On Off
Select whether to show on-screen messages or not.
Others DVD-Video Mode
Off On
Decide whether to play a DVD Audio disc with DVD Video contents as
a DVD Video disc or not.
Demo
Off On
A demonstration of the unit’s on-screen displays starts when you select
‘On’. The demonstration stops when you press a button and the setting
reverts to ‘Off’.
SETUP MENU
Language selection and language code list
If you set to ‘Original’ at Audio, Subtitle or Menus, the original language of each disc is selected. If you set to ‘Other’, you
need to select a four-digit number of the desired language from the list below and enter with numeric buttons.
Language code list
6565: Afar 6890: Bhutan! 7285: Hungarian 7679: Laotian 8084: Portuguese 8469:Telugu
6566: Abkhazian 6976: Greek 7289: Armenian 7684: Lithuanian
6570: Afrikaans 6978: English
6577: Ameharic
6582: Arabic
6583: Assamese 6984: Estonian 7384: Italian 7775: Macedonian 8285: Russian
6588: Aymara
6590: Azerbaijani 7065: Persian 7465:Japanese 7778: Mongolian
6665: Bashkir 7073: Finnish 7473: Yiddish 7779: Moldavian 8372: Serbo-Croatian 8484: Tatar
6669: Byelorussian 7074: Fiji
6671: Bulgarian
6672: Bihari 7082: French 7575: Kazakh
6678: Bengali; Bangla
6679: Tibetan 7165: Irish 7577: Cambodian 7865: Nauru
6682: Breton 7168: Scots Gaelic
6765: Catalan 7176: Galician
6779: Corsican 7178: Guarani 7583: Kashmiri 7879: Norwegian 8382: Serbian
6783: Czech 7185: Gujarati 7585: Kurdish 7982: Oriya 8385: Sundanese
6789: Welsh 7265: Hausa
6865: Danish 7273: Hindi 7665; Latin
6869: German
6979: Esperanto
6983: Spanish 7383: Icelandic 7773: Maori 8279: Romanian 8475: Turkmen
6985: Basque
7079: Faroese
7089: Frisian
7282: Croatian 7678: Fingala
7365: Interlingua
7378: Indonesian 7771: Malagasy
7387: Hebrew 7776: Malayalam 8365: Sanskrit
7487:Javanese
7565: Georgian
7576: Groenlandie
7578: Kannada 7869: Nepali 8379: Somali
7579: Korean 7876: Dutch
7589: Kirghiz
7686: Latvian, Lettish
7782: Marathi 8373: Singhalese 8487:Twi
7783: Malay
7784: Maltese
7789: Burmese 8377: Samoan
8065: Punjabi
8076: Polish
8083: Pashto, Pushto
8185: Quechua
8277:Rhaeto- 8472: Thai
Romance 8473:Tigrinya
8368: Sindhi
8375: Slovak 8575: Ukrainian
8376: Slovenian 8582: Urdu
8378:Shona
8381: Albanian
8386: Swedish 9072: Chinese
8387: Swahili 9085: Zulu
8465: Tamil
Note
Selecting audio, subtitle or disc menu language is a disc-dependent matter. The language selected at the setup menu is not effective if a disc
does not have it.
8471: Tajik
8476: Tagalog
8479:Tonga
8482: Turkish
8590: Uzbek
8673: Vietnamese
8679: Volapük
8779: Wolof
8872: Xhosa
8979: Yoruba
(/>
m
H
c
T3
m
z
c
27
Page 32

SETUP MENU
Ratings [DVD-V]
Depending on software capability, you can prevent discs or scenes with objection
able material from being played according to your desired rating. You can select
the level and lock it by designating password.
Level 8
Level 7 to 1
Level 0
All DVDs can be played.
Level of restriction becomes severer as the
number gets smaller.
All DVDs cannot be played.
■ Setting method
11
Follow steps 1 to 4 of ‘Operating the Setup Menu’ (see p.25) to
select the desired level.
H Enter 4-digit number with numeric buttons and press ENTER.
• Press CANCEL if you want to re-enter other number.
The screen that confirms your password appears. Do not forget your
password.
El Press ENTER.
When you select a disc that exceeds the rating you have set, a message appears on
the monitor. If you want to play the disc, select ‘Yes’ and enter your password.
The unit unlocks the setting. It will be locked again by selecting another disc,
opening the disc tray or turning the unit off.
SETUP
p.
Rntings
Unlock Player
Change Password
Change Level
Temporary Unlock
■ To change settings
You must enter your designated password when you unlock the player (level is set
to 8), change the level, change the password, or unlock the playback of currently
selected disc.
Select ‘Ratings’ and then follow each procedure appears on the screen.
PCM down conversion [DVD-A] [DVD-V]
Decide whether to output high-quality digital signals (sampling frequency of 88.2 kHz and 96 kHz) or not, in accordance
with the capability of the connected component.
• If your AV amplifier etc. is capable of handling high-rate sampling frequency digital signals, select ‘No’.
• If not, select ‘Yes’ so that digital output signals are converted to 48 kHz or 44.1 kHz.
Note
• If a disc is copy-right protected or has a sampling frequency of 176.4 kHz or more, signals are automatically converted to either 48 kHz or
44.1 kHz.
Speaker settings
If you wish to enjoy multi-channel sound reproduction connecting this unit’s 6CH
DISCRETE output terminals to your amplifier etc., you need to select ‘Multi
channel’ and make following adjustments. Also, set your amplifier’s input mode to
analog.
28
ENTER
Page 33

SETUP MENU
(D
(L)©(L)(D(D (R)@”Rf©
Main (L) Center Main (R)
®
Exit
SETUP
gnroirarrgira
L ms c dB R
Test signal
X
©
Subwoofer
(D ©
■ Output mode ®
Change the settings of each speaker in accordance with your speaker system.
il Press the cursor buttons (<, >, A,v) to select a speaker and press
ENTER.
ti Press the cursor buttons (A,v) to select the setting and press
ENTER.
Example: Left surround (rear) speaker
(A) when the speaker is not used
(B) when using a large speaker capable of low-frequency (under 100 Hz)
output.
© when using a small speaker that is not capable of low-frequency output.
The L and R (left and right main speakers) settings are automatically decided by
the SW (subwoofer) setting.
■ Delay time (D
To obtain the maximum effect of Dolby Digital 5.1 channel source, all speakers
should be located at the same distance from the listening position. However, in
many cases they are not the center speaker is placed in line with the main
speakers, etc. You can virtually increase the distance of the center and rear
speakers by adjusting the delay time.
II Press the cursor buttons (<, >, A,v) to select a ‘ms’ box and
press ENTER.
ti Press the cursor buttons (A,v) to adjust the delay time and press
ENTER.
Center speaker
Difference
Approx. 50 cm (1 1/2 feet)
Approx. 100 cm (3 feet)
Approx. 150 cm (5 feet) 3.9 ms
Approx. 200 cm (6 feet)
Setting
1.3 ms
2.6 ms
5.3 ms
Rear speakers
Difference
Approx. 200 cm (6 feet)
Approx. 400 cm (12 feet)
Approx. 600 cm (18 feet)
Setting
5.3 ms
10.6 ms
15.9 ms
■ Speaker balance (D
You can adjust the output level of each effect speakers (center, surround L/R)
using the test tone.
El Press the cursor buttons (<, >, A,v) to select ‘Test’ and press
ENTER.
The test tone is one speaker at a time in below order, starting with the left
main speaker.
L^C^R^RS^LS
t_ _ _ _ _ _ _ _ _ _ _ _ _ _ _ _ _ _ I
Listening to the test tone, press the cursor buttons (A,v) to adjust m
the volume of effect speakers and press ENTER.
The value in the ‘dB’ box changes.
Note
The subwoofer cannot output the test tone. Play something and return to this screen to adjust
the output level of the subwoofer.
■ To exit the speaker setting mode
Press the cursor buttons (<, >, A,V) to select ‘EXIT’ and press ENTER.
Notes
• I nese aajustments are not effective on digital signal output from this unit. Make
adjustments at your amplifier.
• These adjustments may not be effective when the disc’s original sound design is protected.
PPCM indicator lights up or DMIX indicator turns off in that case.
(/>
m
H
c
T3
z
c
29
Page 34

TROUBLESHOOTING
If this unit fails to operate normally, check the following points to determine whether the fault can be corrected, or if the fault
is not listed in the PROBLEM column, disconnect the power code and contact your authorized YAMAHA dealer or service
center.
PROBLEM POSSiBLE CAUSE
This unit faiis to turn
on when the POWER
The power cord is not connected or the plug
is not completely inserted.
switch is pressed.
This unit does not work
normaiiy.
Piayback does not
This unit is affected by an external shock
(lightning, excessive static electricity,
incorrect operation, etc.)
The disc is damaged.
start.
There is moisture on the laser pickup.
The disc has been loaded upside down. Reload the disc with the label side facing up. —
The disc is dirty. Clean the disc. 3
No picture.
Picture appears
Incorrect video connections. Connect this unit and other equipment
Input selection at your AV amplifier or your
video monitor is not the one connected to this
unit.
VIDEO OFF is functioning.
(U.S.A. and Canada models)
If you play PAL system DVD-Audio, ‘This
disc is PAL system. The output is sound only’
may appear on the monitor. Picture is not
available because the disc’s video signal
system is different.
Incorrect ‘TV aspect’ setting. Select the right position. However, it may be
incorrectiy.
A VCR is connected between this unit and
the video monitor.
(U.S.A. and Canada models)
PROGRESSIVE is turned on even though the
connected monitor cannot receive the
progressive signals.
(U.S.A. and Canada models)
Due to the editing method or material used on
a DVD, ghosting may occur with progressive
output.
Piay is deiayed, or
The disc may be scratched or damaged.
starts at the wrong
piace.
This unit does not
The disc(s) is not placed properly. Place the disc(s) correctly along the guide(s).
recognize discs (‘No
disc’ appears on the
dispiay, or the dispiay
shows the status when
no disc is ioaded).
No sound.
Incorrect cable connections.
Incorrect amplifier operation. Set the amplifier controls to the correct input
WHAT TO DO
Firmly connect the power cord.
Turn the power off and disconnect the power
cord. After about 30 seconds have passed,
connect the power and operate the unit again.
Check the disc carefully; replace it if
necessary.
Wait 1 to 2 hours after switching the unit on
before trying to play a disc.
properly.
Set the input to the right position.
Press VIDEO OFF to cancel the feature. 15
difficult to adjust many DVD-Videos’
widescreen format to fit perfectly in your 4:3
video monitor.
Connect this unit’s video outputs directly to
your video monitor or to your AV amplifier
and then to a video monitor.
Turn off the PROGRESSIVE feature. 14
Turn off the PROGRESSIVE feature. 14
Connect the cables properly. If the problem
persists, the cables may be defective.
selection.
Refer to
Page
—
—
9
26
9
8
—
30
Page 35

TROUBLESHOOTING
PROBLEM POSSIBLE CAUSE
No sound when playing
a disc encoded with
DTS.
No sound from some
speakers.
Incorrect setting(s) at the audio section of
‘Setup menu’ on this unit or at ‘input mode’
on your amplifier.
With some DVD-Audio, output channels are
specified by the disc.
Incorrect ‘Speaker settings’, (when 6CH
DISCRETE outputs are connected to your
amplifier)
Audio output form this unit becomes two
channels when the virtual surround feature is
on.
Sound distorted. Virtual surround effect is emphasized too
much.
Sound ‘skips’.
Sound ‘hums’.
Noise from a nearby
This unit is being subjected to vibrations or
impacts.
The disc is dirty. Clean the disc. 3
Incorrect cable connections.
The tuner is too close to the unit.
tuner.
Noise from inside of
The disc maybe warped. Replace the disc.
the unit.
The remote control
does not work.
Audio track and/or
subtitle language is not
The batteries are weak. Replace all batteries with new ones.
Direct sunlight or lighting (from an inverter
type of fluorescent lamp, etc.) is striking the
remote control sensor of this unit.
The disc does not contain the language you
have selected.
the selected one.
No subtitles.
Angle cannot be
changed.
The disc does not have subtitles.
Subtitle is turned off.
The disc or the scene being played does not
support multi-angle.
The password for
setting parental level
has been forgotten.
WHAT TO DO
Select proper settings.
^ ...............................................
Change the settings to suit your speaker
system.
Turn virtual surround mode off. 23
Turn virtual surround mode off. 23
Relocate the unit.
Securely connect the audio cables. If the
problem persists, the cables may be defective.
Place the tuner and the unit farther apart.
Relocate the unit. 7
Show subtitles by pressing SUBTITLE or
using on-screen menu.
Clear all settings on the setup menu. See
‘Returning setup menu to the factory-setting’
below this table.
.............^.........
Refer to
Page
26, 27
—
29
—
8
—
—
7
—
16
—
■ Returning setup menu to the factory-setting
While playback is stopped, press and hold nn (PAUSE), and then DISC SKIP and PLAYXCHANGE on the front panel until
‘Initialized’ appears on the video monitor. All settings on the setup menu return to the factory settings.
31
Page 36

SPECIFICATIONS
■ Audio section
Frequency response
DVD (48 kHz sampling):
DVD (96 kHz sampling):
DVD Audio (192 kHz sampling):
CD, Video CD:
.............................................
........................
........................
............
2 Hz to 22 kHz
2 Hz to 44 kHz
2 Hz to 88 kHz
2 Hz to 20 kHz
Harmonic distortion + noise (1 kHz):.......................0.002 %
S/N ratio:
................................................
115 dB (Weighted)
Dynamic range
DVD (48 kHz, 24 bit):.......................................... 103 dB
CD, Video CD: ......................................................99 dB
Output level (1 kHz, 0 dB):
■ Video section
VIDEO output:
...............................................
......................................
1 Vp-p (75 Q)
2±0.3 V
S VIDEO output
Y output:.................................................... 1 Vp-p (75 Q )
C output:
NTSC
..................................................
PAL ................................................................0.3 Vp-p (75 Q)
0.286 Vp-p (75 Q)
COMPONENT VIDEO output
Y output:
Pb output:.......................................................0.7 Vp-p (75 D)
Pr output:.......................................................0.7 Vp-p (75 D)
.........................................................
1 Vp-p (75 Q )
■ Generai
Power supply:
[U.S.A. and Canada models]....................... 120 V, 60 Hz
[Australia model]
........................................
240 V, 50 Hz
Power consumption:....................................................21 W
Laser pickup:
Wave length..........................................................665 nm
Laser power
Laser output
......................................................
..........................
Max. 1.0 mW (Continuous)
CLASS II
Output value determined by 21 CFR CHAPTER 1,
SUBCHAPTER J
Dimensions:
.....................
435 (W) x 116 (H) x 404 (D) mm
(17-1/8" X 4-1/2" X 15-7/8")
Weight: .......................................................................6.2 kg
(13 lbs 10 oz)
Accessories:.............................RCA pin cable (audio/video)
Remote control
Batteries (AA, R6, UM-3)
SYAMAHA
YAMAHA ELECTRONICS CORPORATION, USA 6660 ORANGETHORPE AVE., BUENA PARK, CALIF. 90620, U.S.A.
YAMAHA CANADA MUSIC LTD. 135 MILNER AVE., SCARBOROUGH, ONTARIO MIS 3R1, CANADA
YAMAHA ELECTRONIK EUROPA G.m.b.H. SIEMENSSTR. 22-34, 25462 RELLINGEN BEI HAMBURG, F.R. OF GERMANY
YAMAHA ELECTRONIQUE FRANCE S.A. RUE AMBROISE CROIZAT BP70 CROISSY-BEAUBOURG 77312 MARNE-LA-VALLEE CEDEX02, FRANCE
YAMAHA ELECTRONICS (UK) LTD. YAMAHA HOUSE, 200 RiCKMANSV\/ORTH ROAD V\/ATFORD, HERTS WD1 7JS, ENGLAND
YAMAHA SCANDINAVIA A.B. J A WETTERGRENS GATA 1, BOX 30053, 400 43 VASTRA FROLUNDA, SWEDEN . , •
YAMAHA MUSIC AUSTRALIA PTY, LTD. 17-33 MARKET ST, SOUTH MELBOURNE, 3205 vio., AUSTRALIA Printed in Malaysia
YAMAHA CORPORATION
VDEO V816670
 Loading...