

Page 1

DMA-1000
Digital Media Adaptor
Quick Start Guide
Version 1.00
3/2007
Edition 1
CONTENTS
ENGLISH 2
DEUTSCH 16
ESPAÑOL 32
FRANÇAIS 48
ITALIANO 64
РУССКИЙ 80
Copyright © 2007. All rights reserved.
Page 2

ENGLISH
ENGLISH
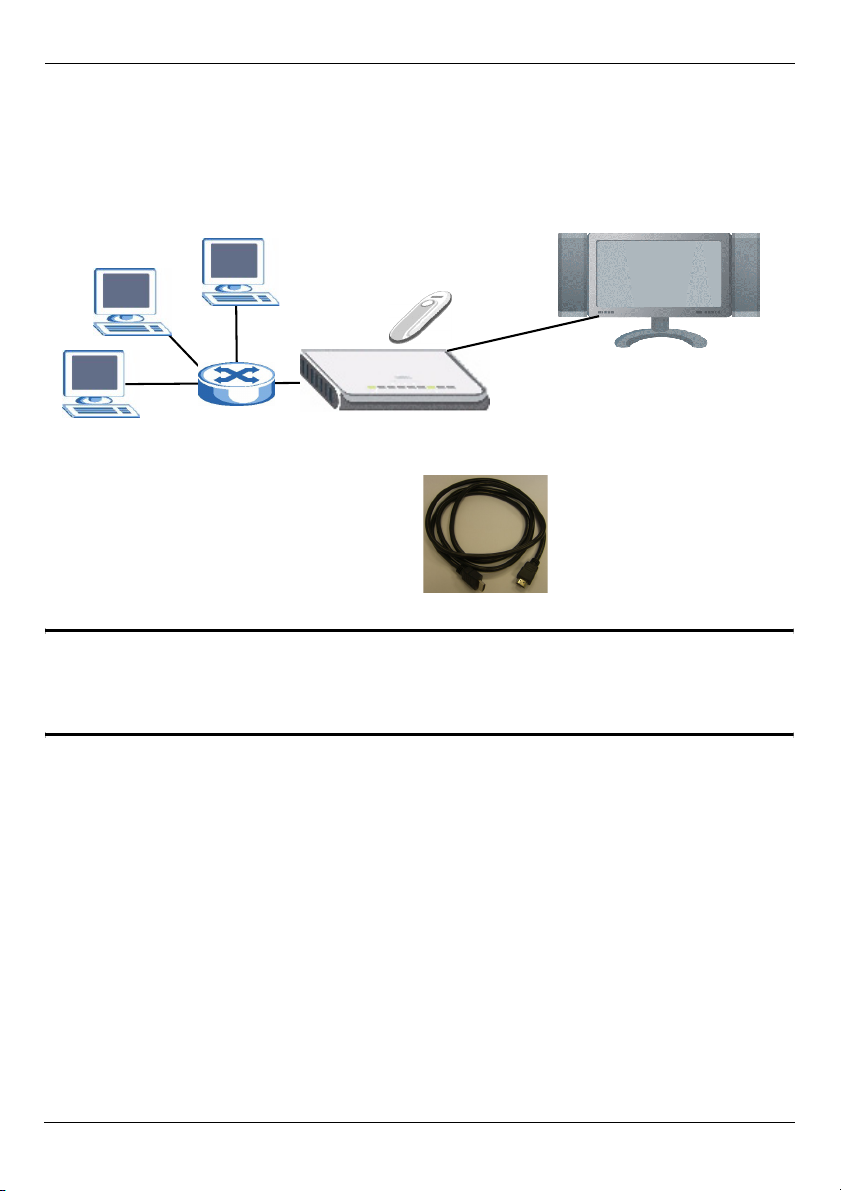
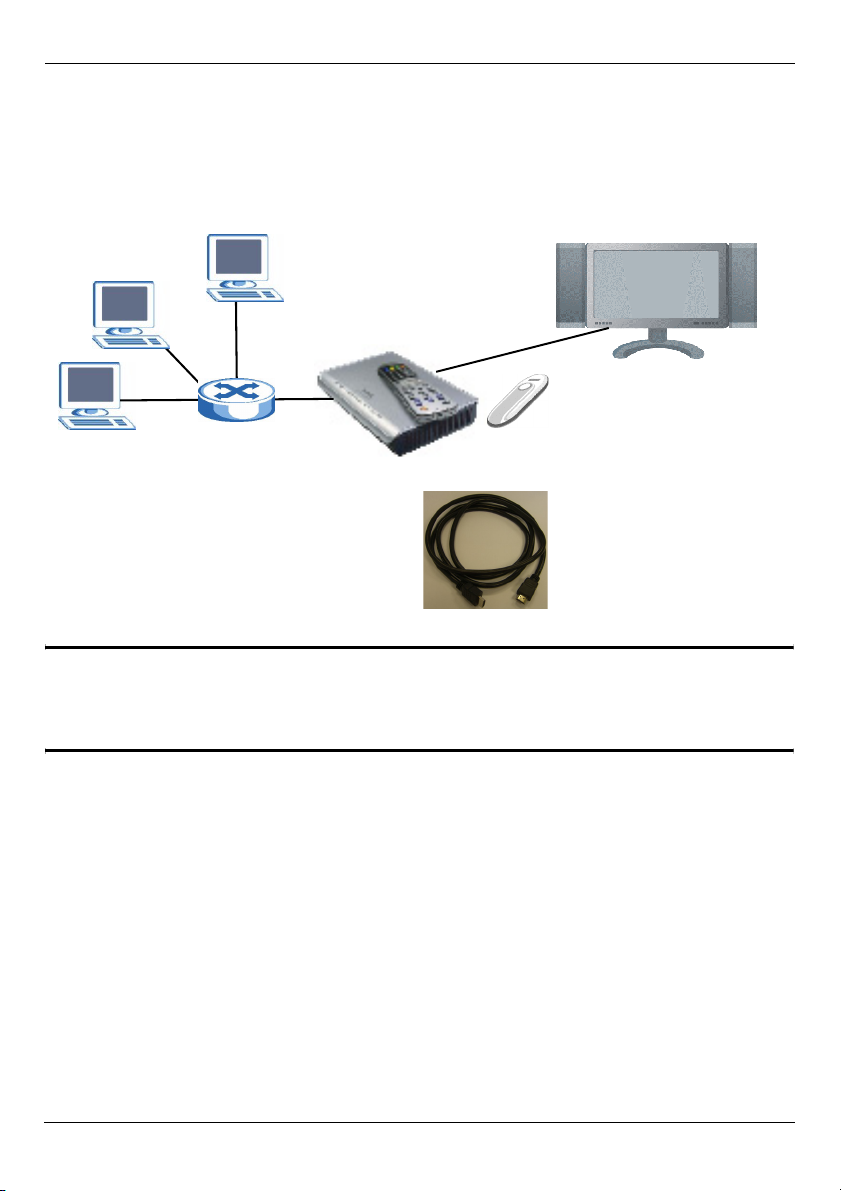
Use your DMA-1000 to play audio, video and photo files on your TV instead of your
computer monitor. The files can be on computers or a USB memory stick or hard drive.
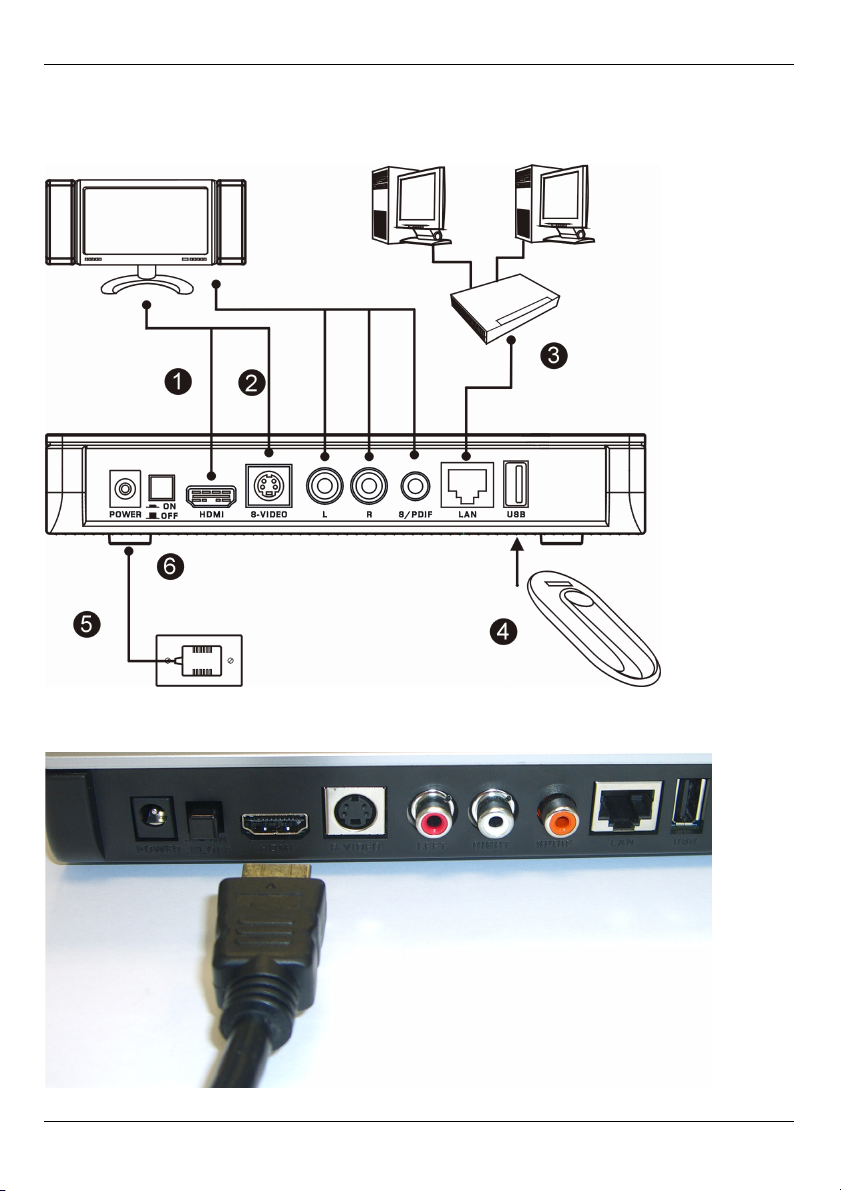
The following figure shows the DMA-1000 connected to an Ethernet switch (S) and a TV.
Computers A~C are connected to the Ethernet switch.
C
B
A
You need an HDMI cable if you will connect
the DMA-1000 to a HDMI connector on your
TV.
S
USB
TV
DMA-1000
" If you are using Windows Vista, see the Windows Vista Media Server
appendix in the Users Guide (on the included CD) to let the DMA-1000 play
files stored on your computer.
Install the included media server software to let the DMA-1000 play files stored on your
computer. This software requires Windows XP. If you do not have Windows XP or do not
want to install software, you can put your files on a USB stick. The USB stick connects
directly to the DMA-1000 without need of the media server software or a computer.
2
Page 3

ENGLISH
Use the following sections in this guide (in the listed order) to view files on computers or on
a USB stick.
Viewing Files on Computers
1 Install the Media Server Software
2 Connect Your DMA-1000
3 Share Your Files
4 Play Your Files
Viewing Files on a USB Stick
2 Connect Your DMA-1000
4 Play Your Files
1 Install the Media Server Software
You must install the media server software on each computer that you will use to share
files with the DMA-1000.
" You can only install the media server software on a Windows XP computer.
See Requirements for more details.
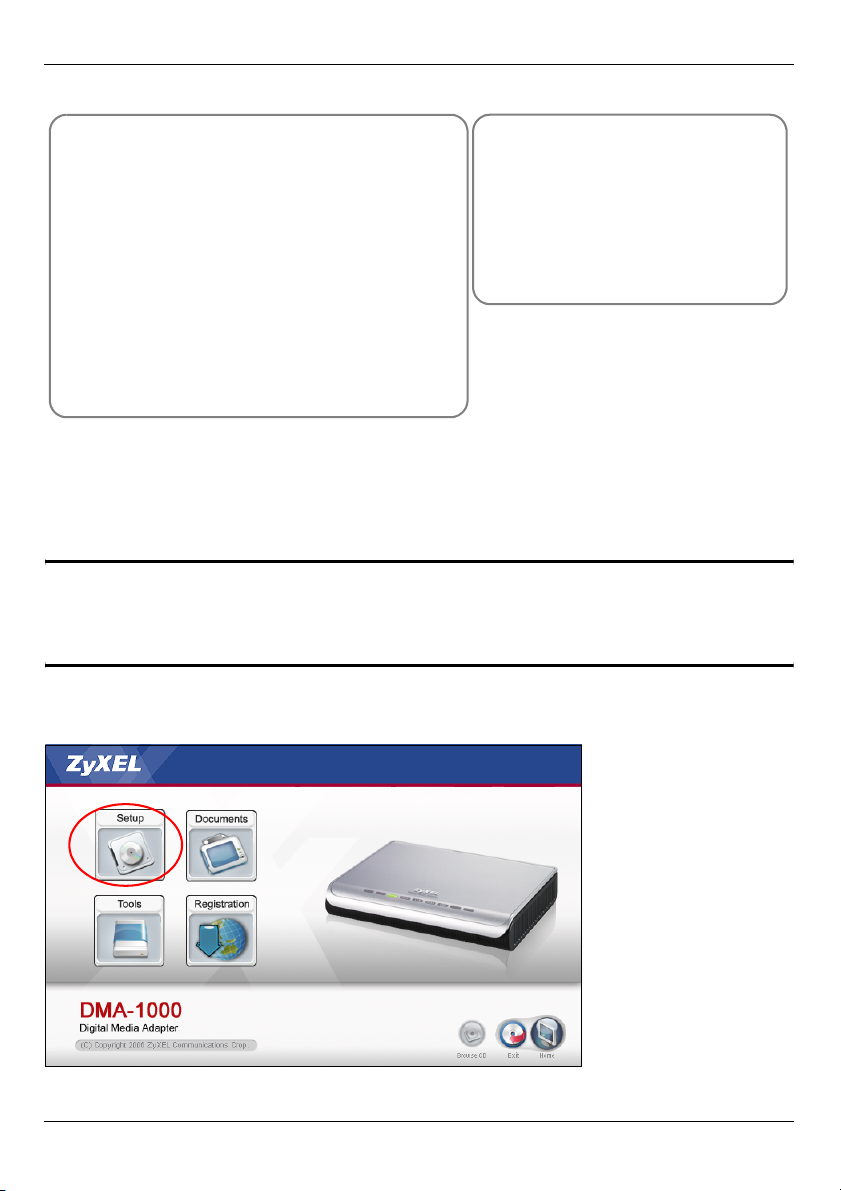
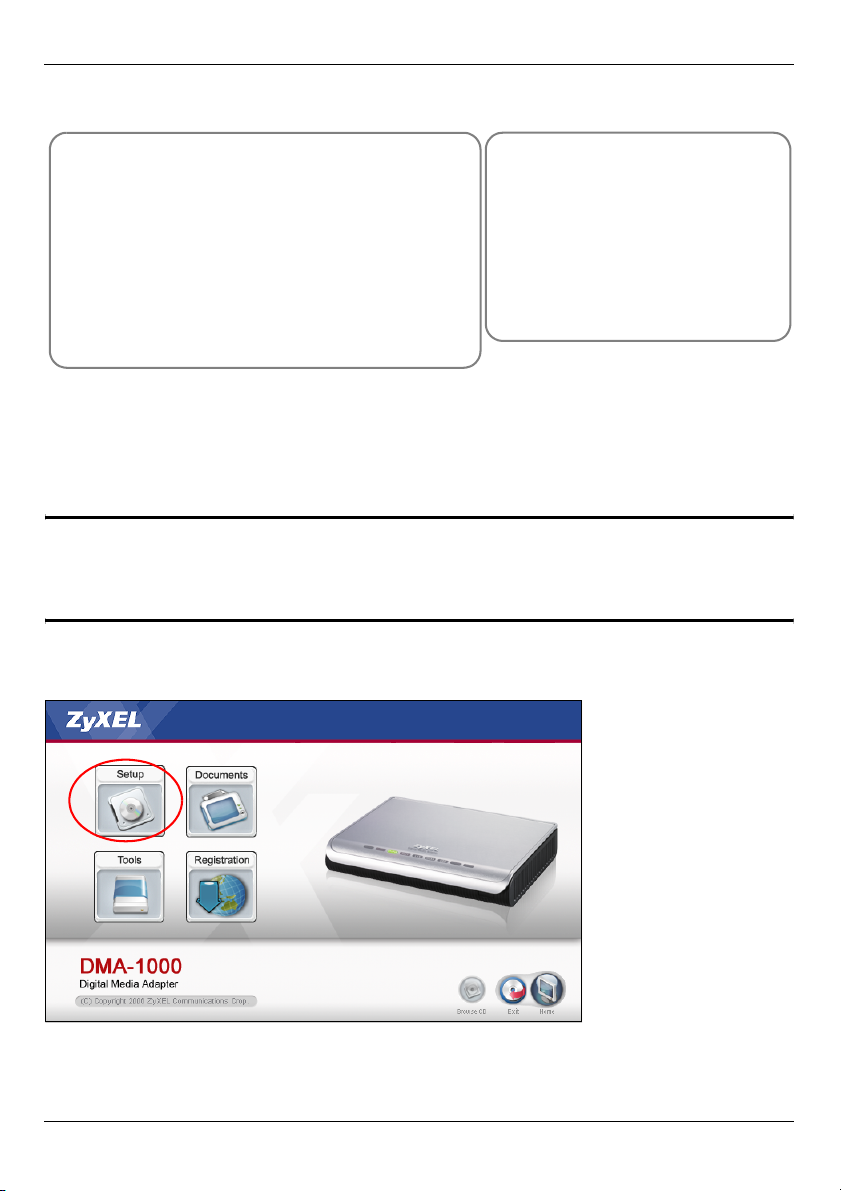
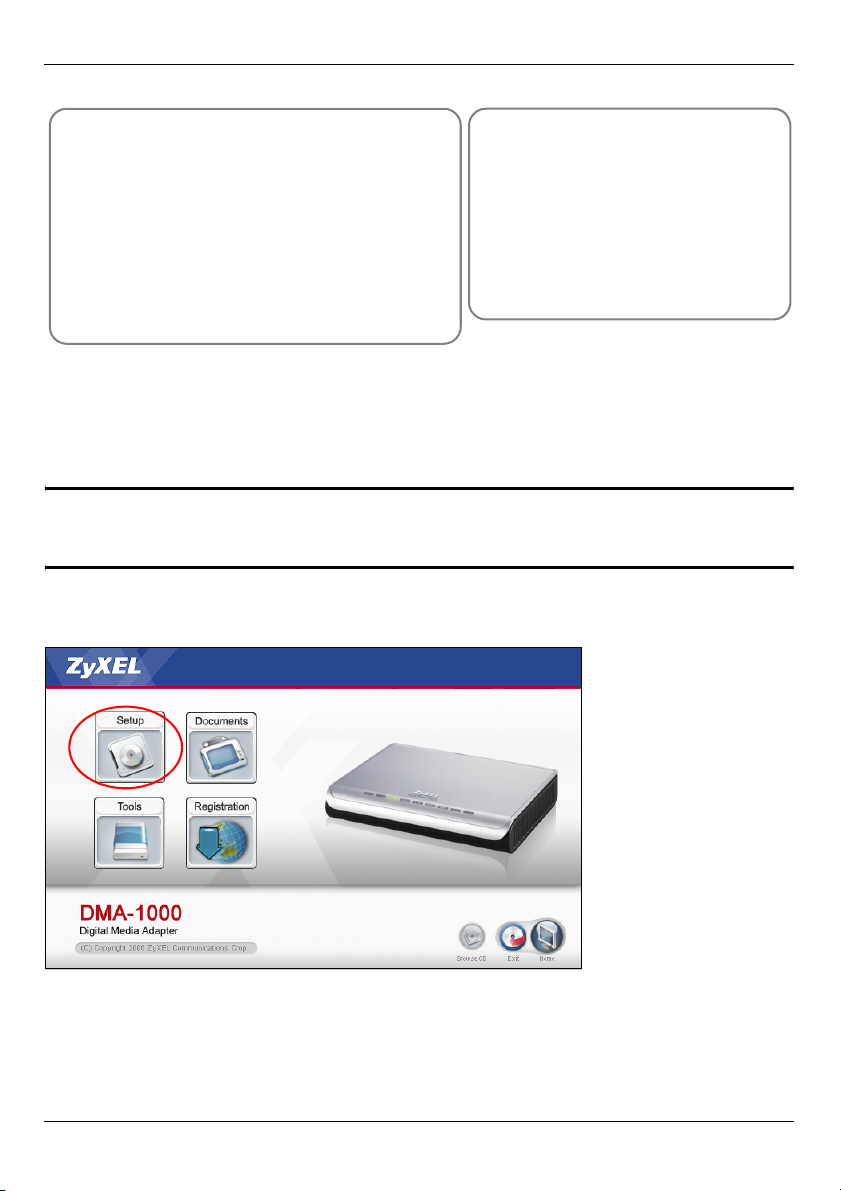
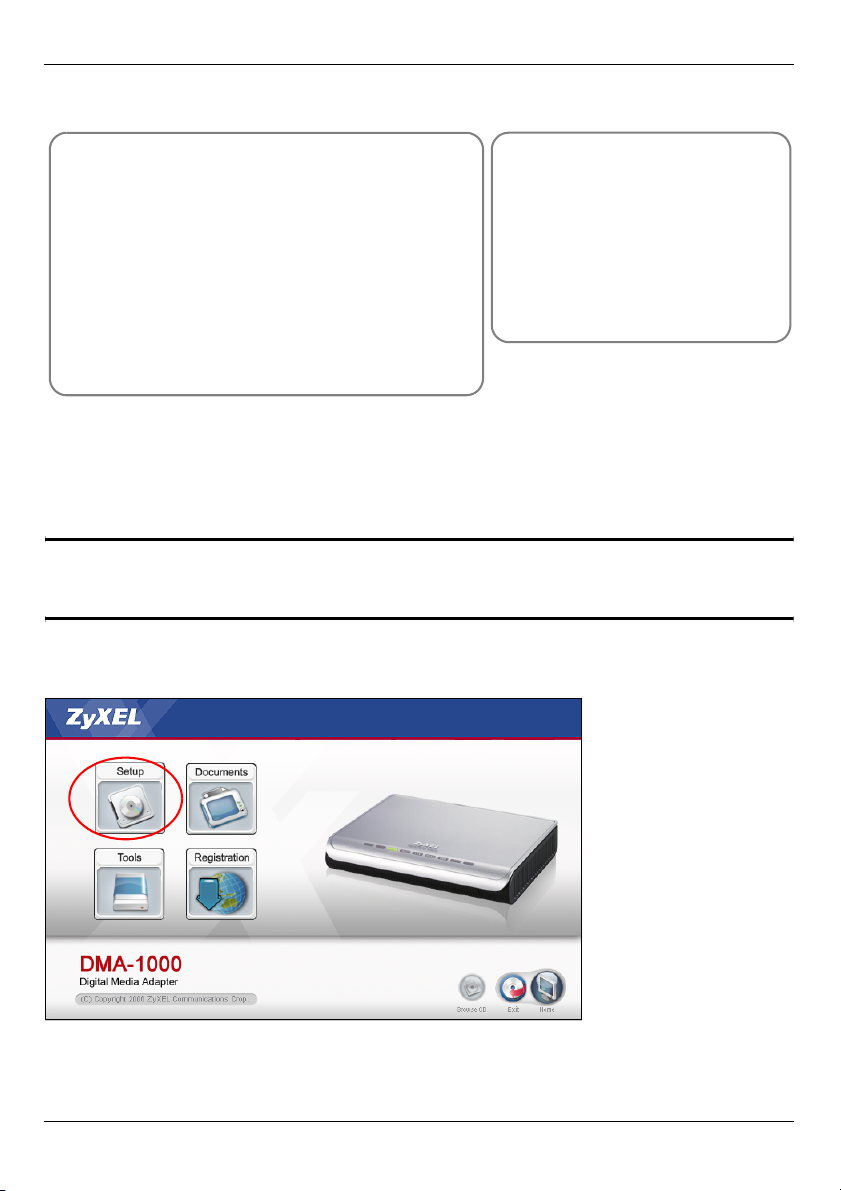
1 Put the CD into your CD-ROM. Click Setup in the following screen.
V If this screen does not display, locate and double-click setup.exe.
3
Page 4

ENGLISH
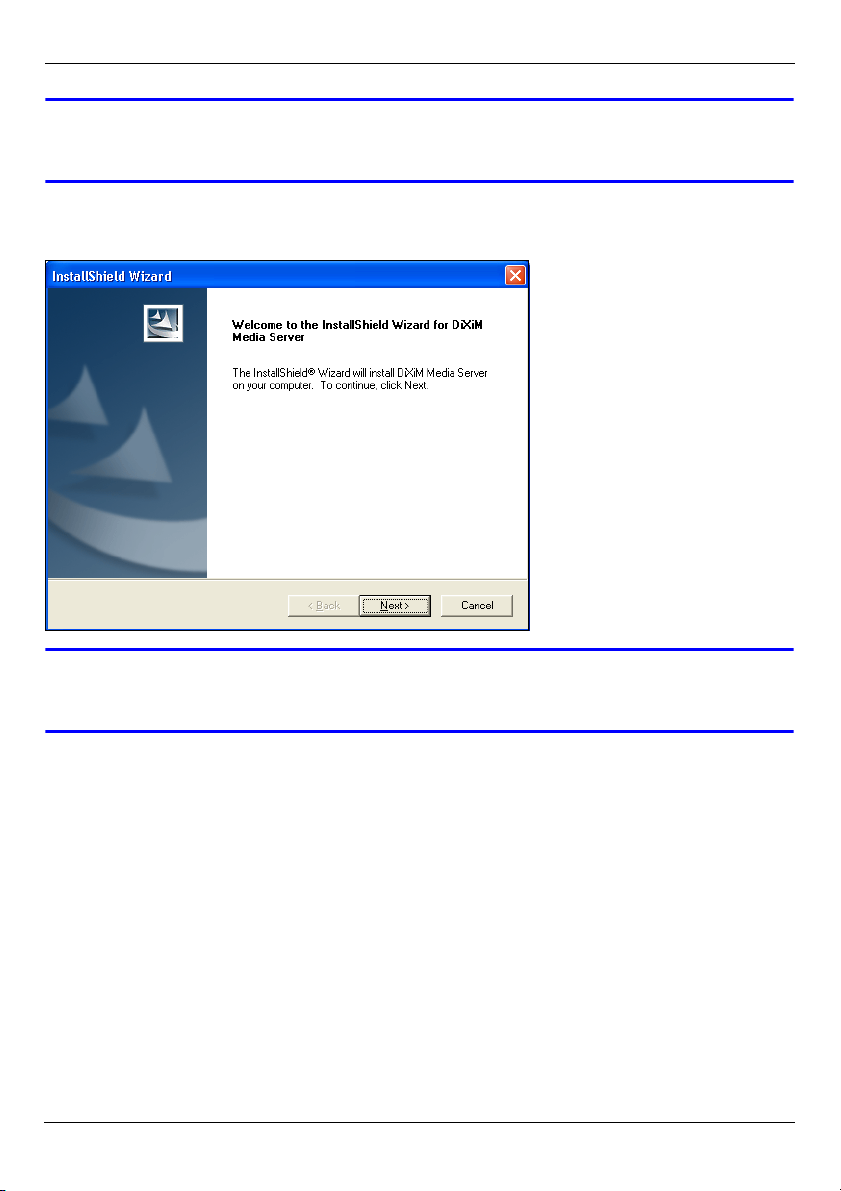
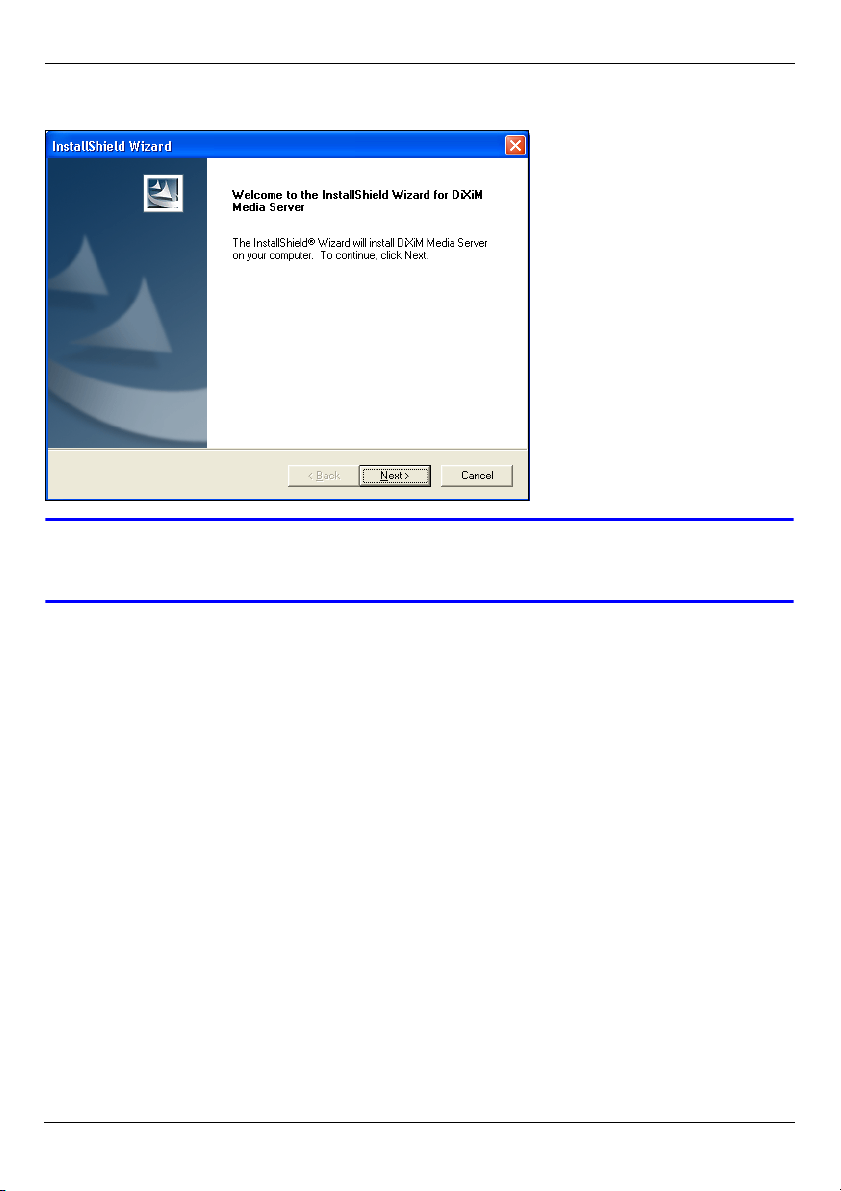
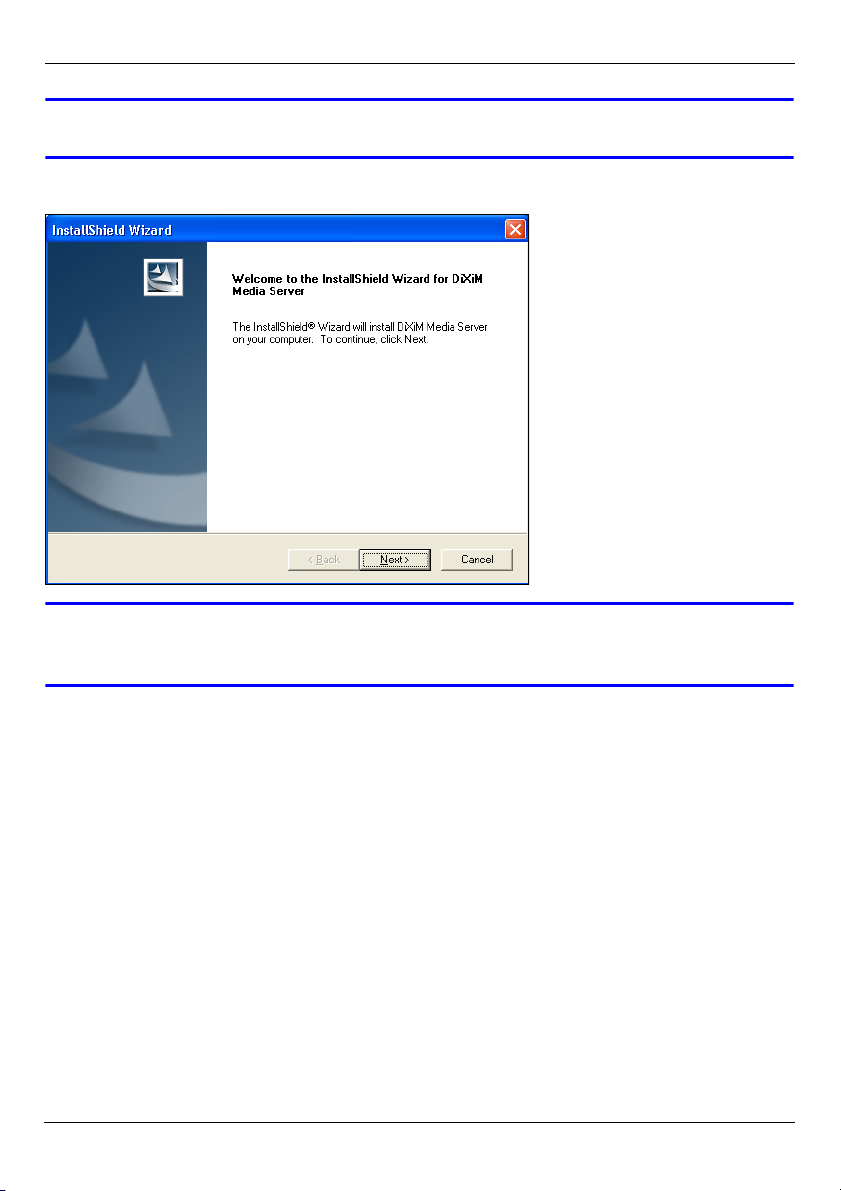
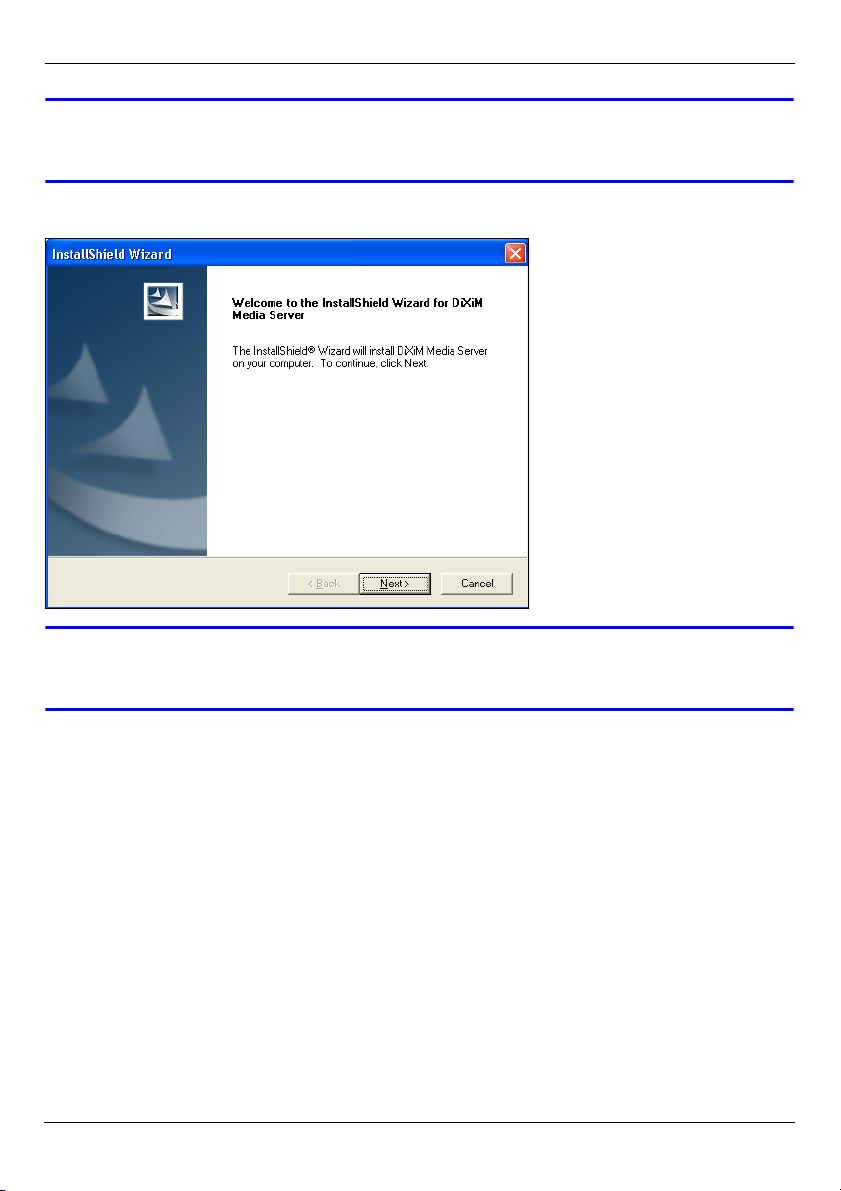
2 The installation wizard
appears. Follow the
directions to install the
software.
V See the
requirements
section if you have
trouble installing or
using the media
server.
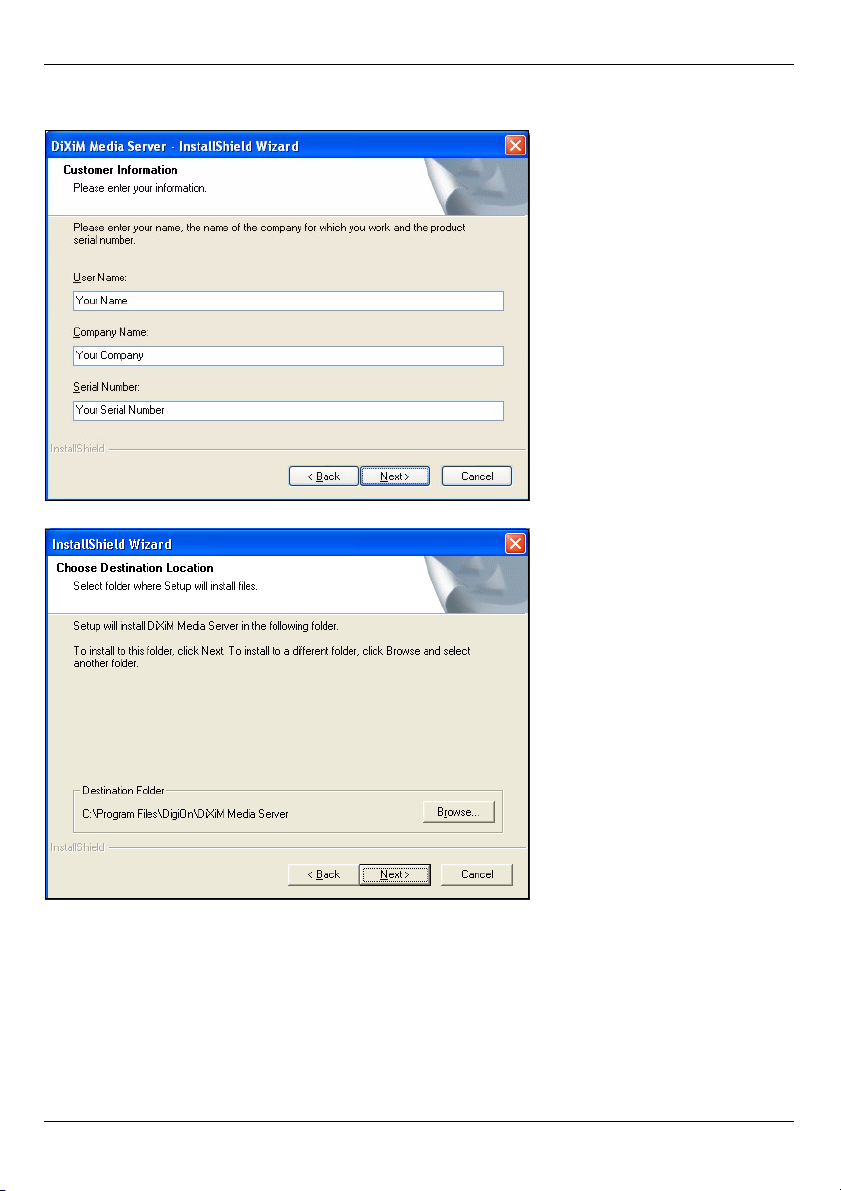
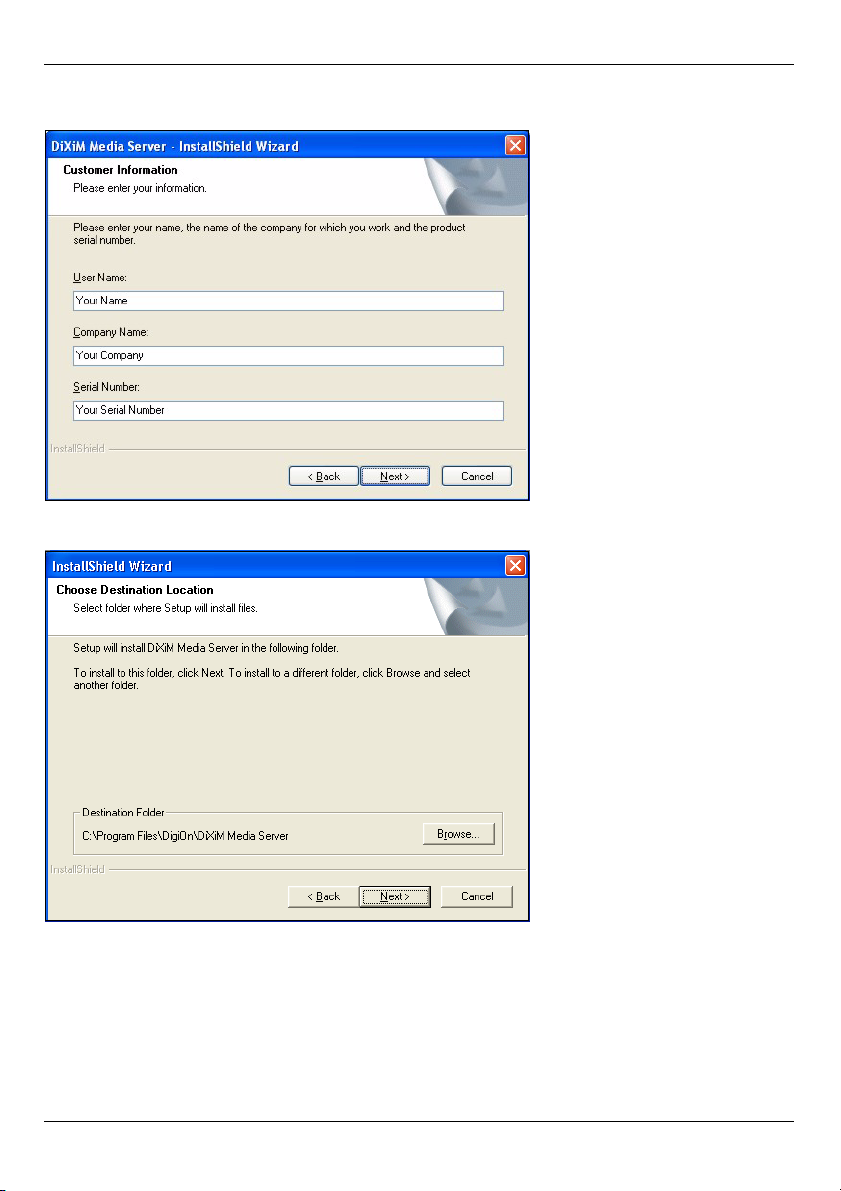
3 Enter your information in
this screen. Enter a user
name (up to 64 ASCII
characters recommended). The company name is optional (up to 64 ASCII characters
recommended). Click Registration in the screen that opened when you inserted the
CD-ROM (see page 3). Then click Media Server Serial Number to open a text file with
a serial number. Copy and paste the serial number into the Serial Number field in the
screen shown here.
4
Page 5

ENGLISH
4 Select a destination for the software (or just leave the default).
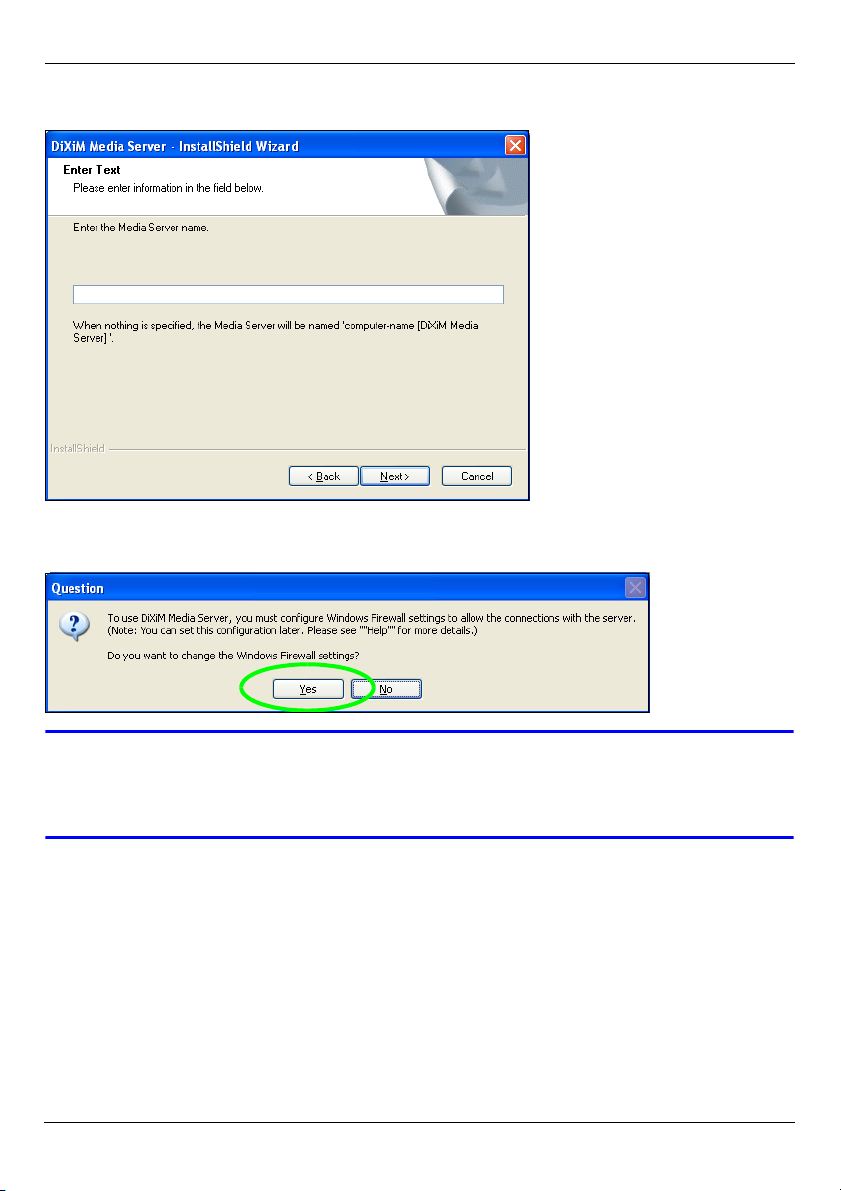
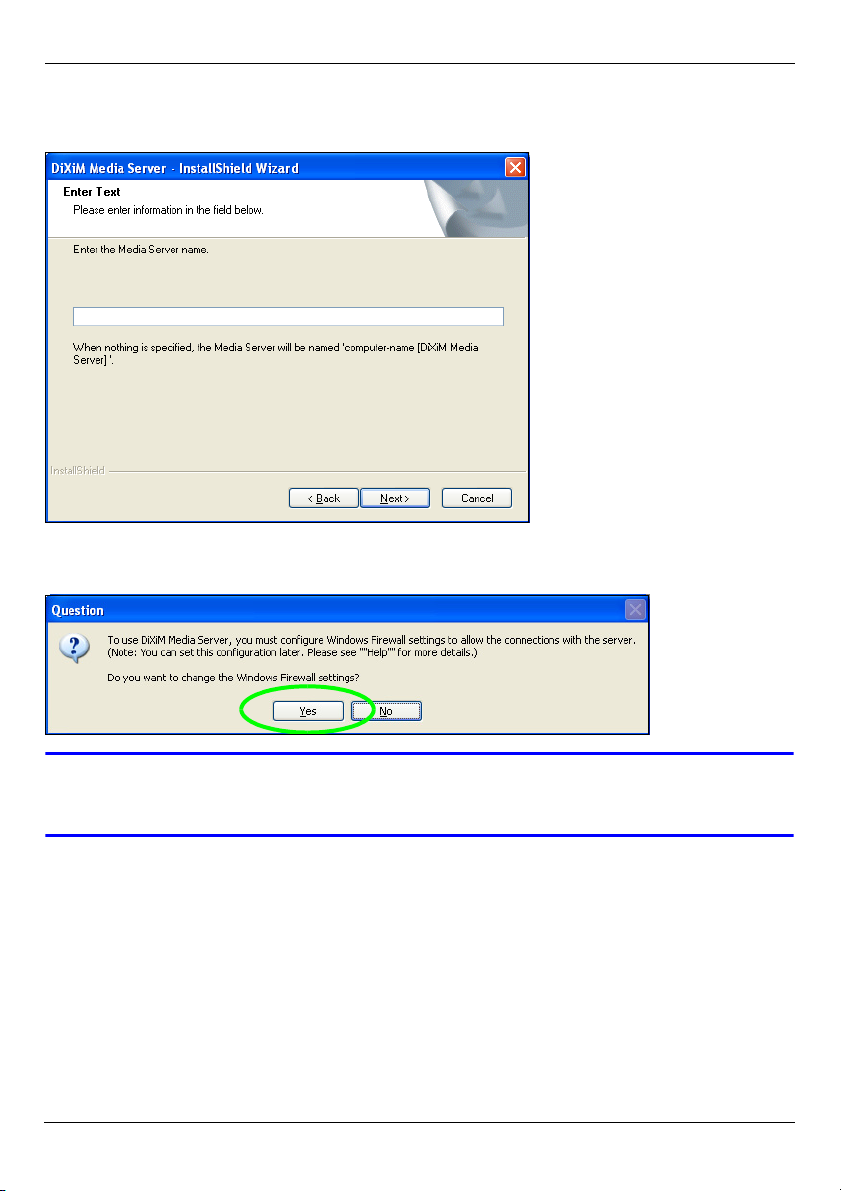
5 You can specify a name for the media server that the DMA-1000 displays on your TV. It
is helpful to use unique names if you install the media server on multiple computers. Up
to 34 ASCII characters recommended.
5
Page 6
ENGLISH
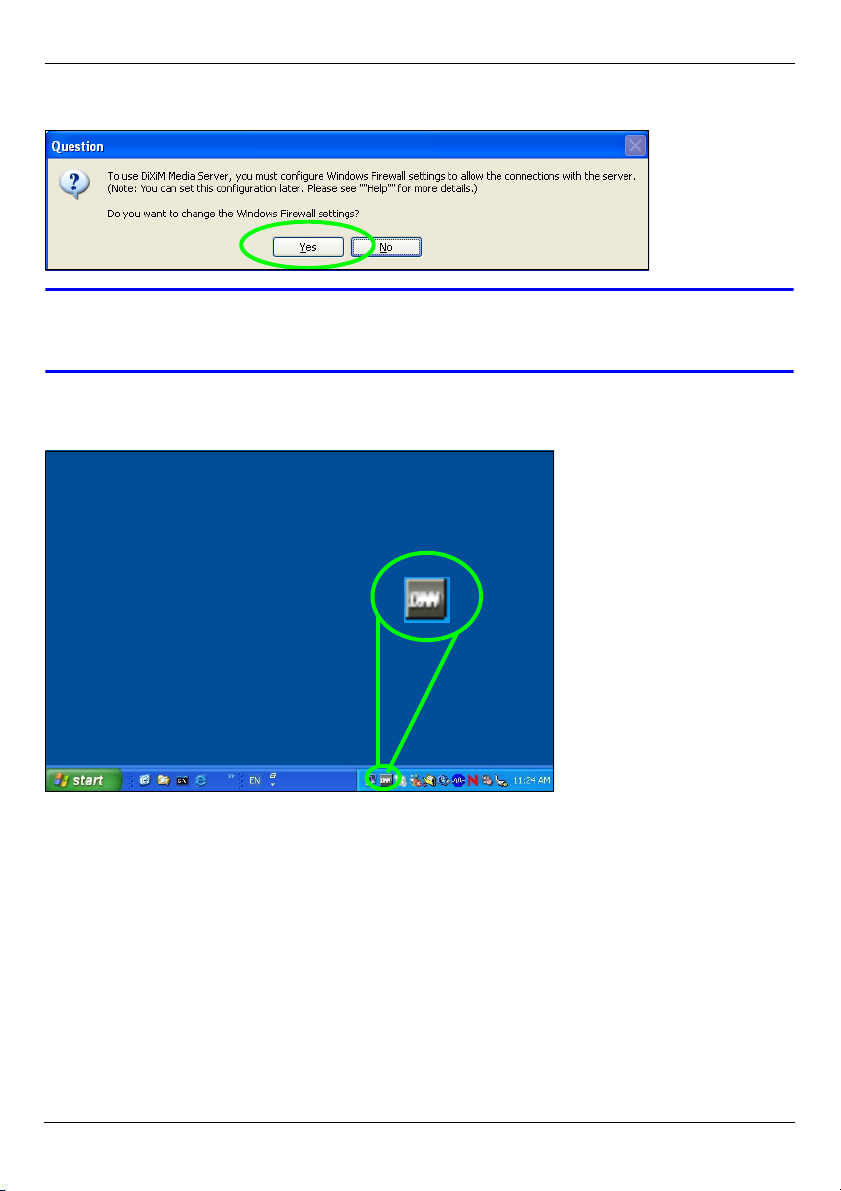
6 If you see a screen asking about configuring the Windows XP firewall, click Yes. This
allows the DMA-1000 to access the files on your computer that you share.
V Refer to the User’s Guide if your computer has another software firewall
(like ZoneAlarm for example) that you need to configure.
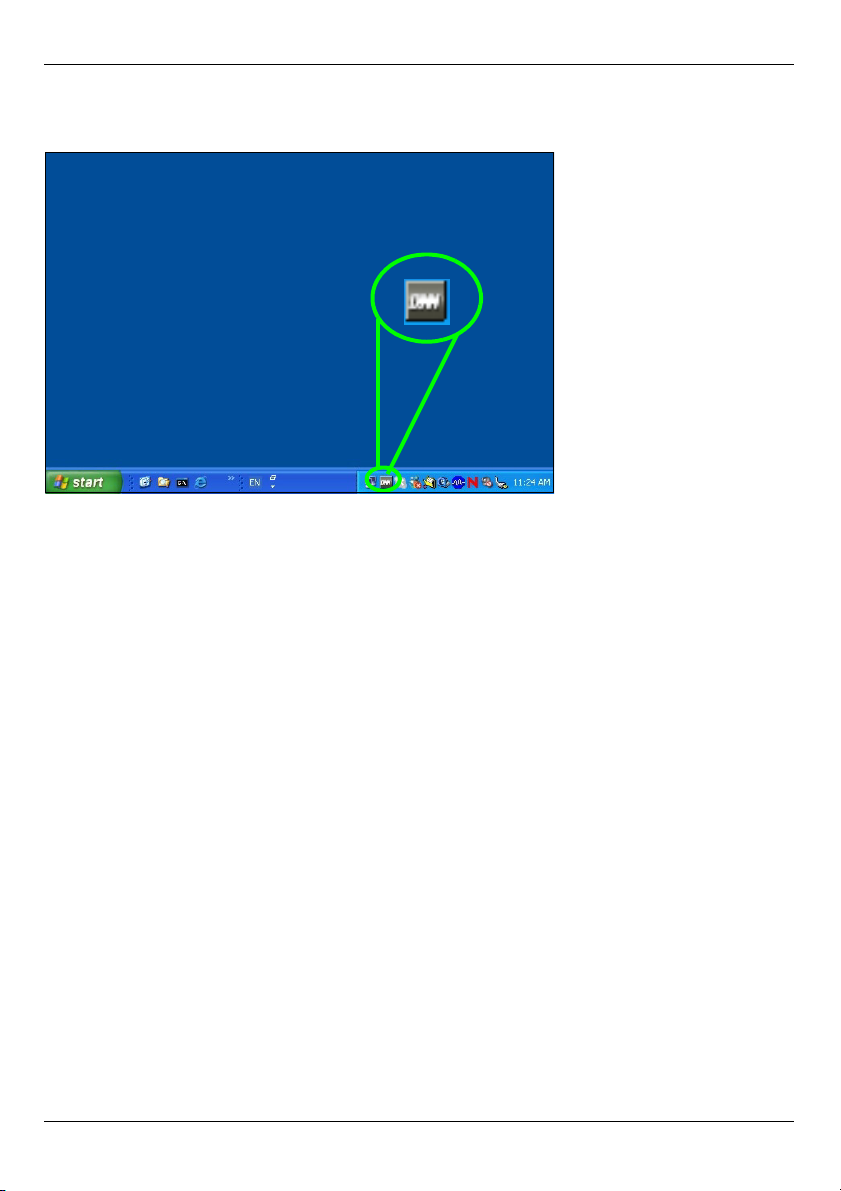
7 This icon displays in the system tray (usually in the bottom right corner) after the
installation is done. Double-click the icon to open the server configuration screens.
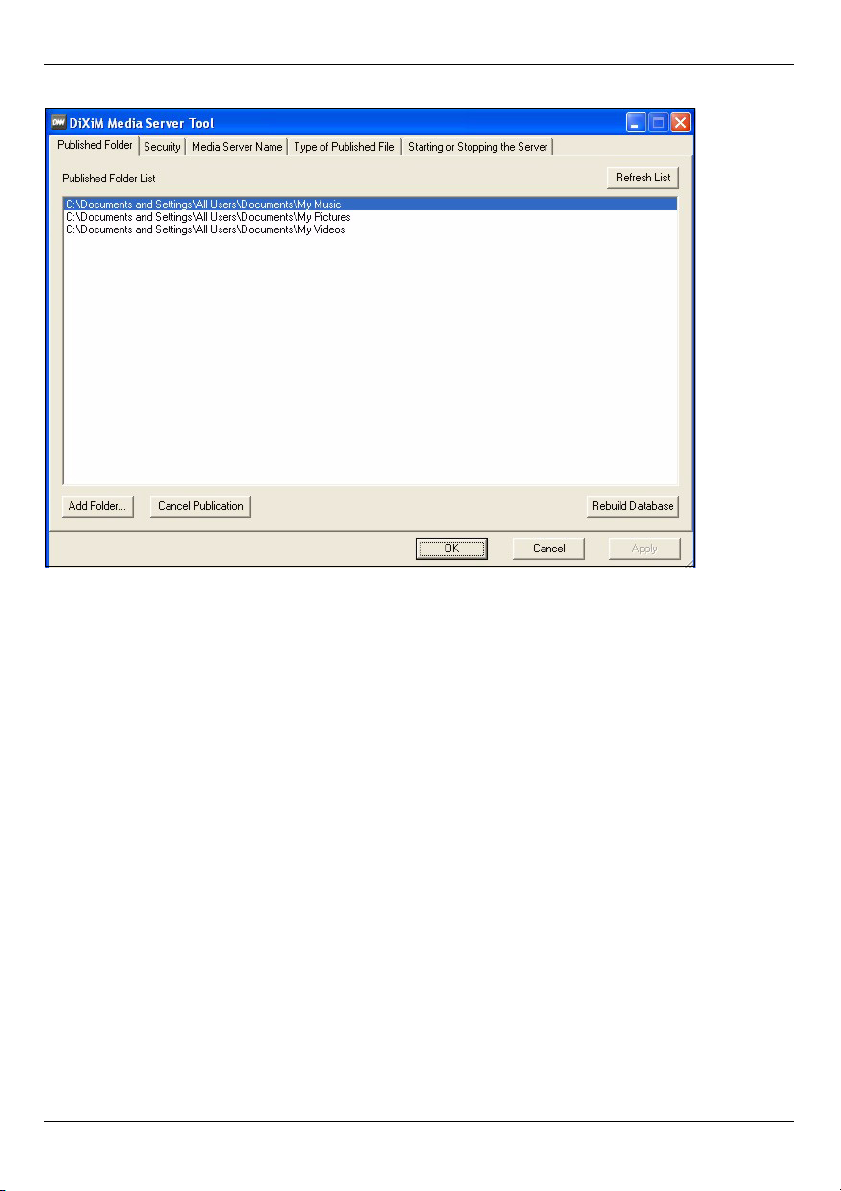
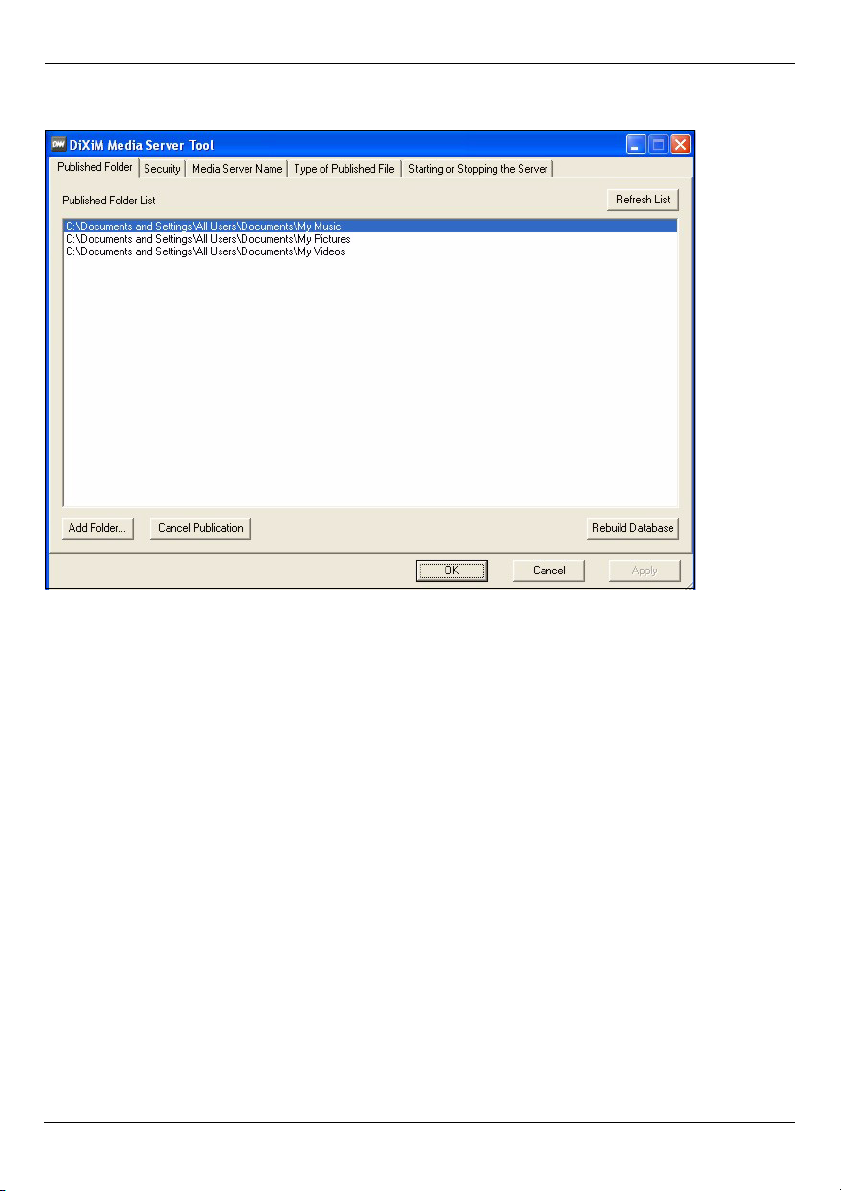
8 The Published Folder List lists folders of files that your computer will share with the
DMA-1000.
•Your My Music, My Pictures and My Videos folders are included by default.
• To share other files, click the Add Folder button and browse to select a folder that
you want to share.
6
Page 7
ENGLISH
• To remove a folder from the list, click it and then click Cancel Publication.
7
Page 8

ENGLISH
2 Connect Your DMA-1000
Turn off your TV before you connect the DMA-1000.
1 If your TV has a HDMI connector, use an HDMI cable to connect the DMA-1000’s HDMI
connector (shown) to the TV.
8
Page 9

ENGLISH
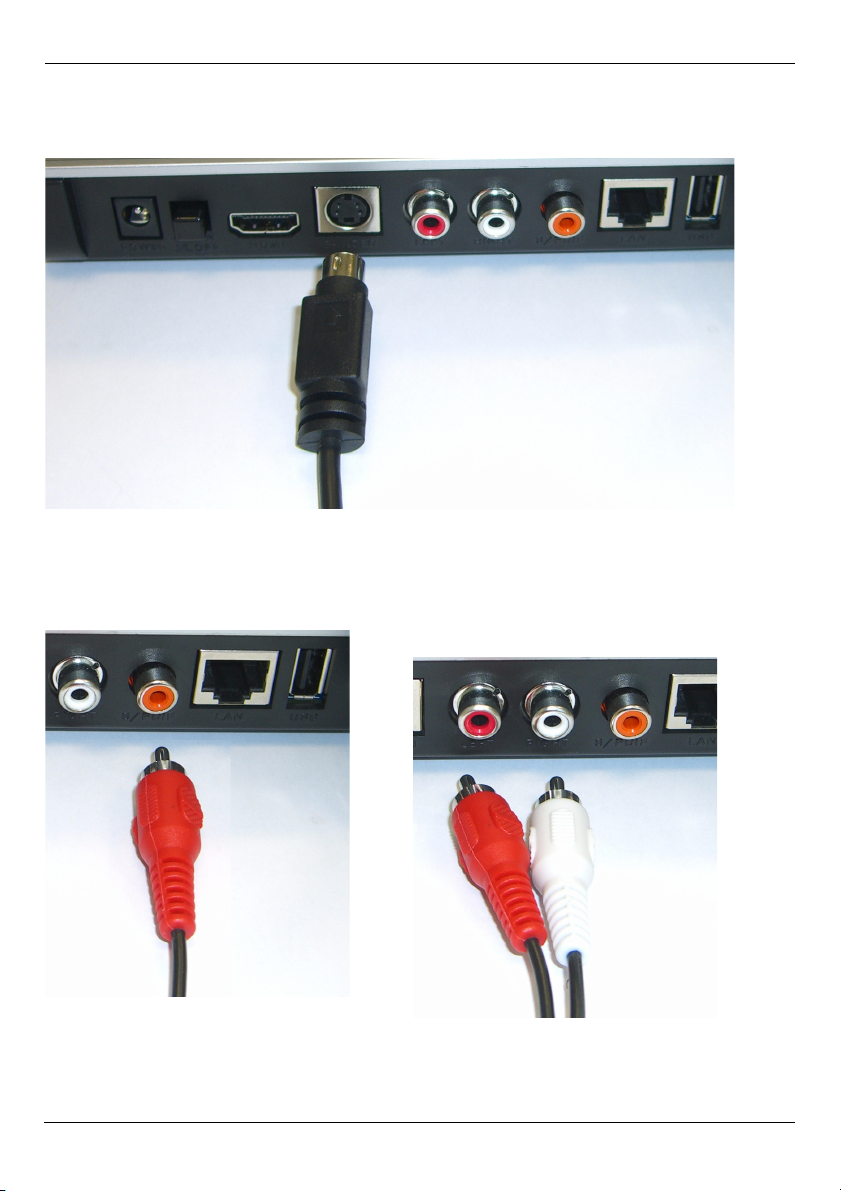
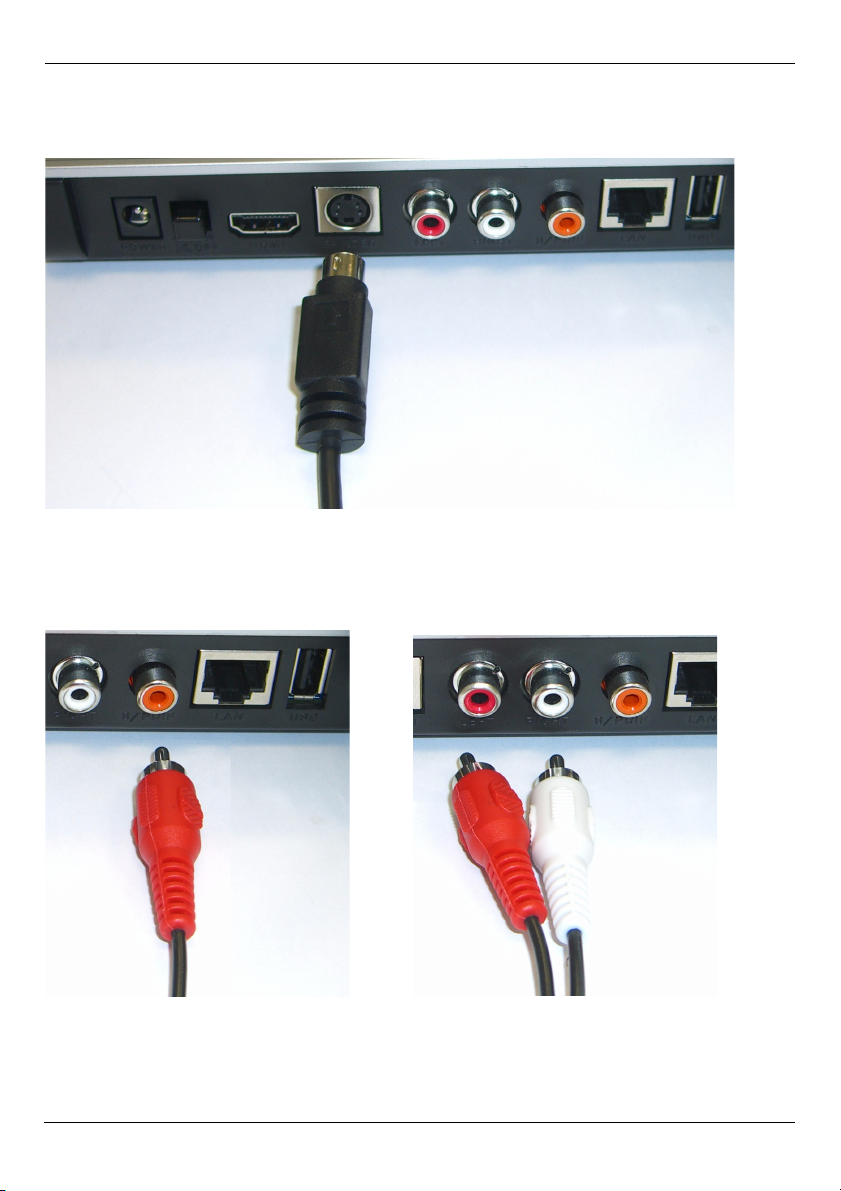
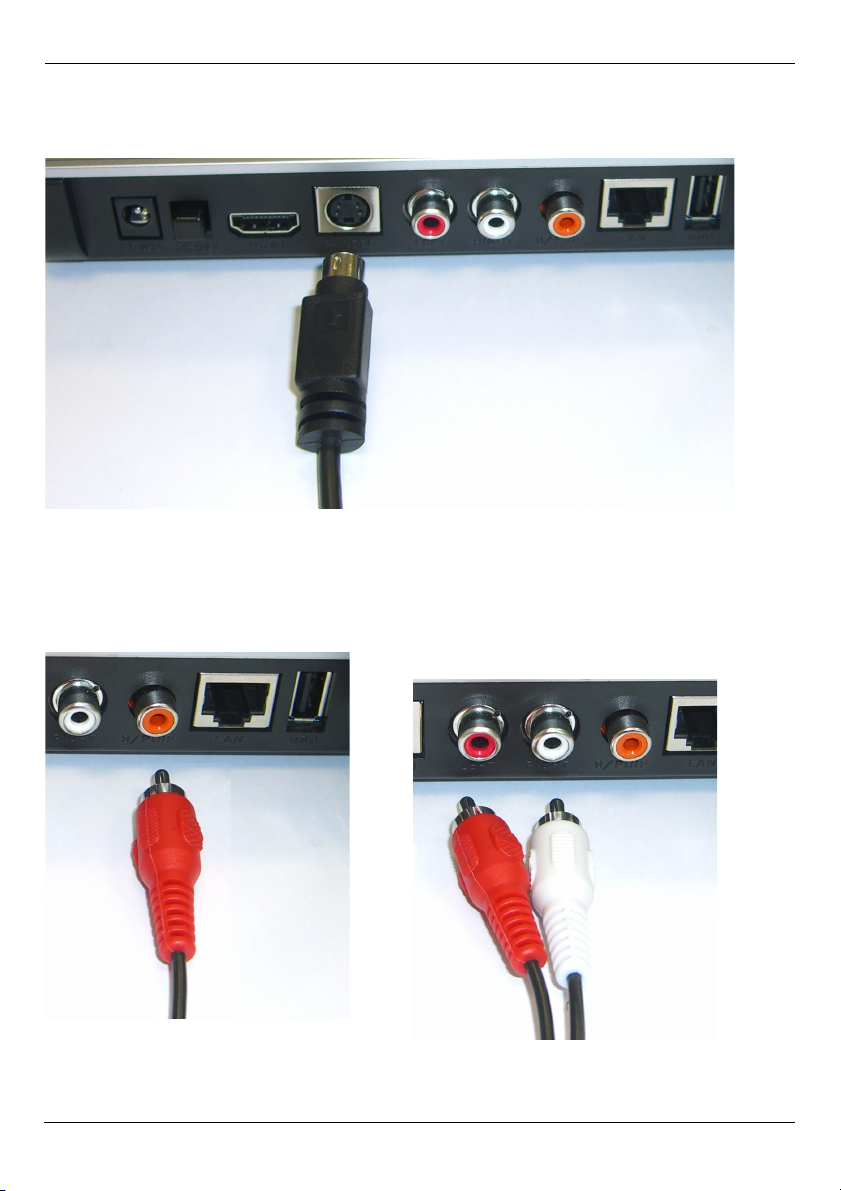
2 If your TV does not have an HDMI connector:
A Use an S-video cable to connect the DMA-1000’s S-VIDEO connector (shown) to
the TV.
B If your TV or audio system has a
coaxial S/PDIF jack, use an RCA
cable to connect it to the DMA1000’s S/PDIF jack (shown).
C If your TV or audio system does not
have a coaxial S/PDIF jack, use RCA
cables to connect it to the DMA-1000’s
LEFT and RIGHT jacks (shown).
9
Page 10
ENGLISH
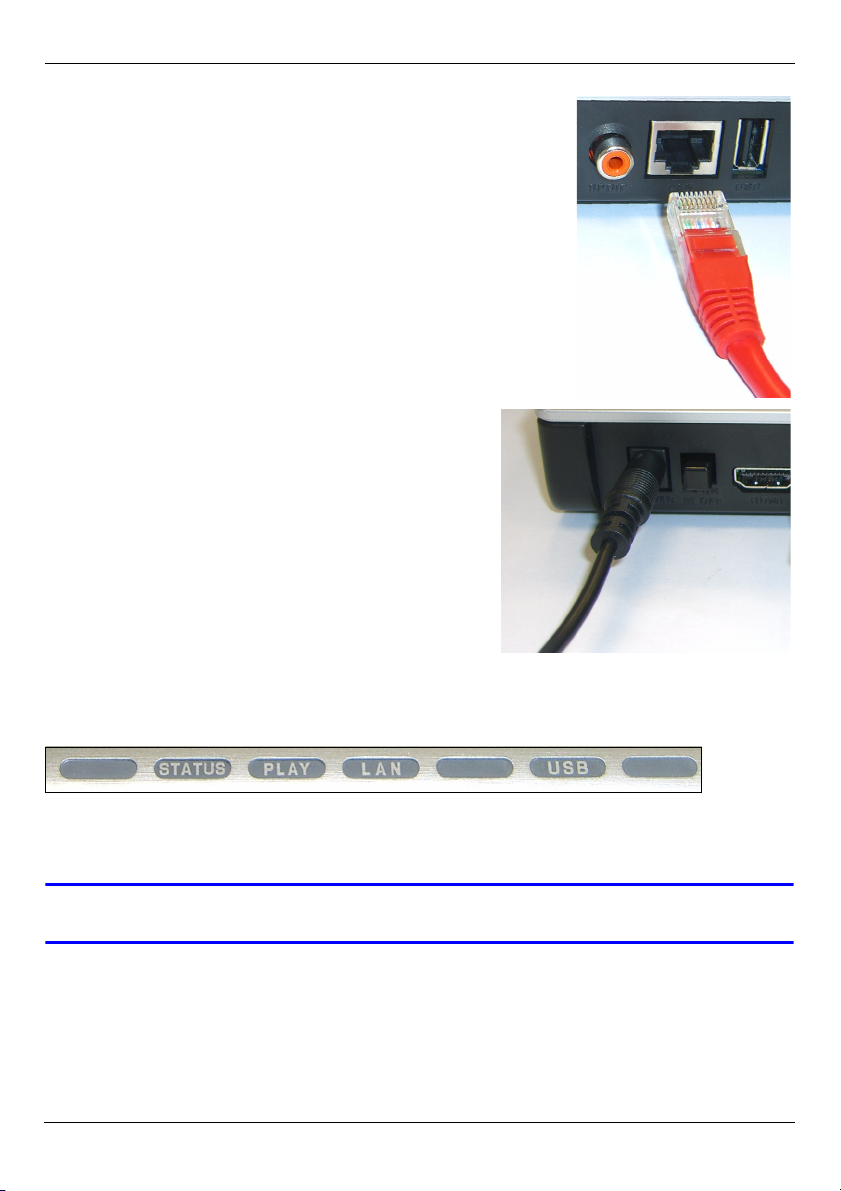
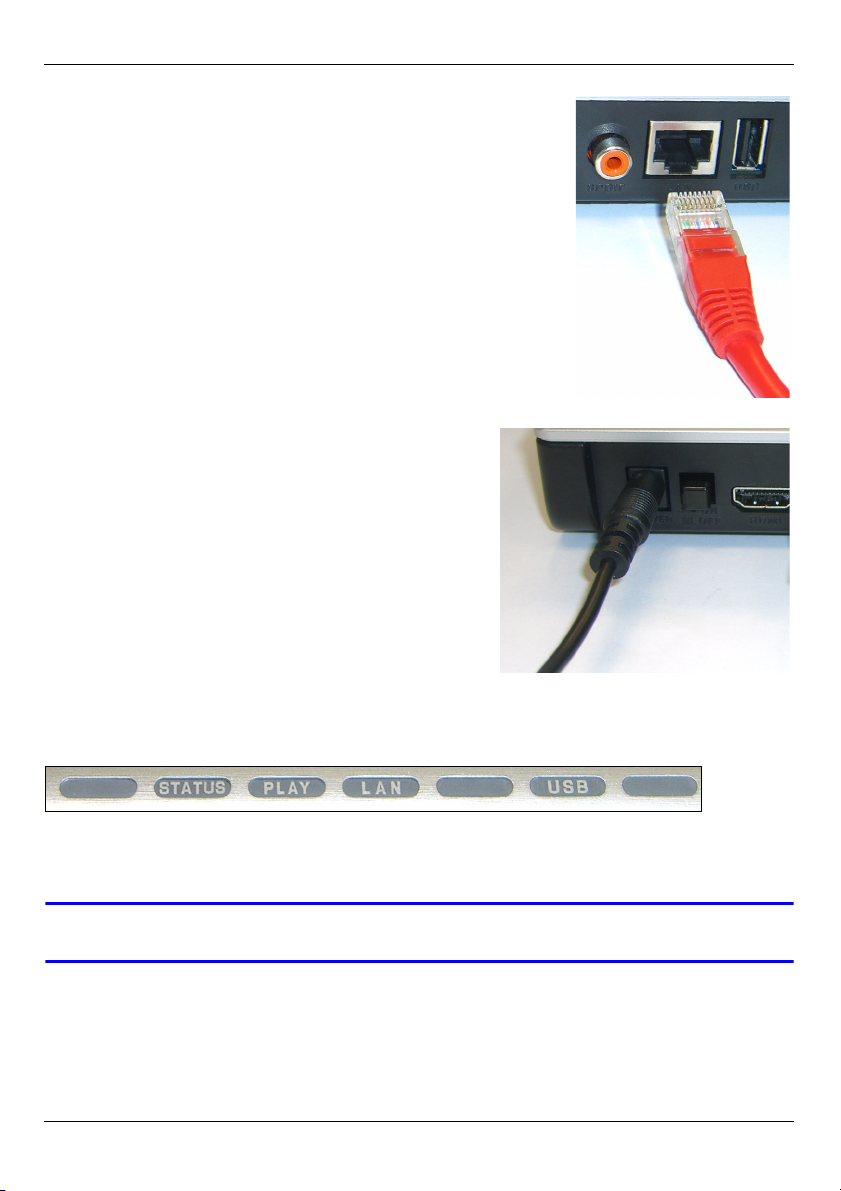
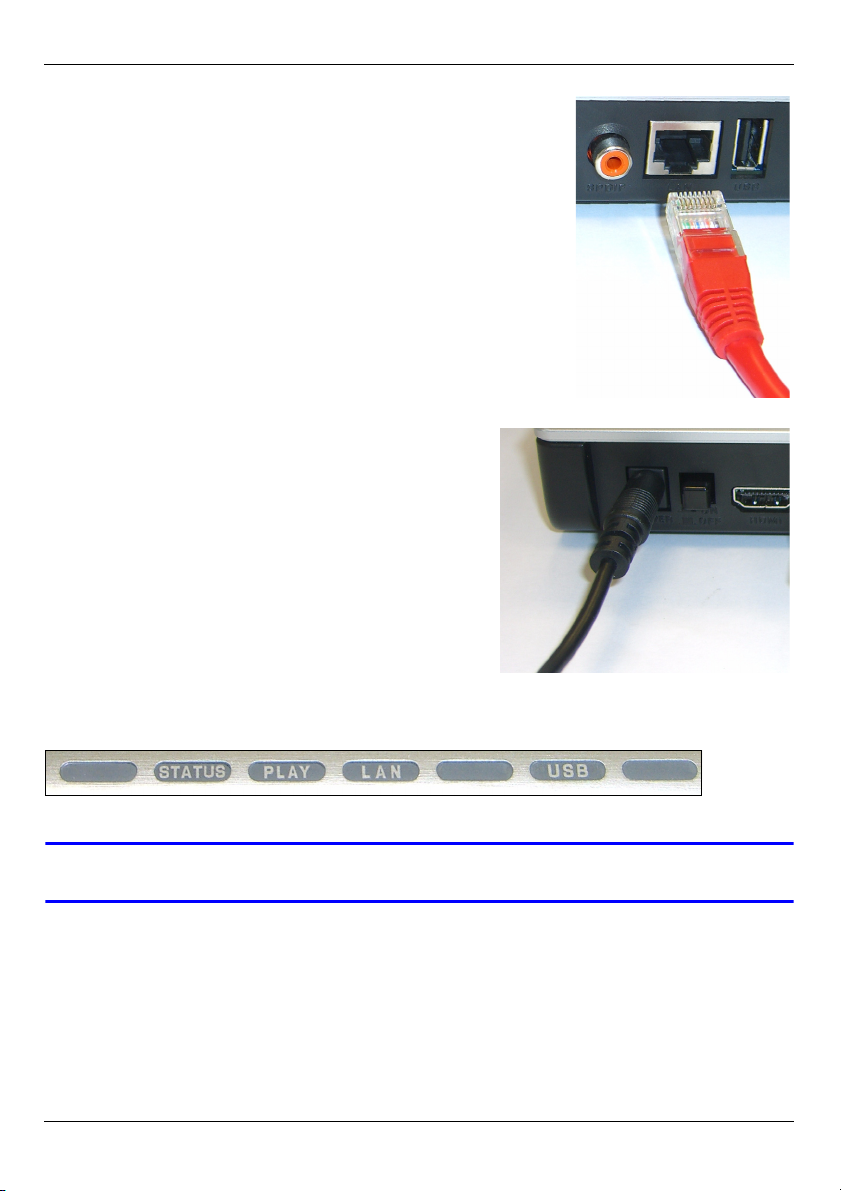
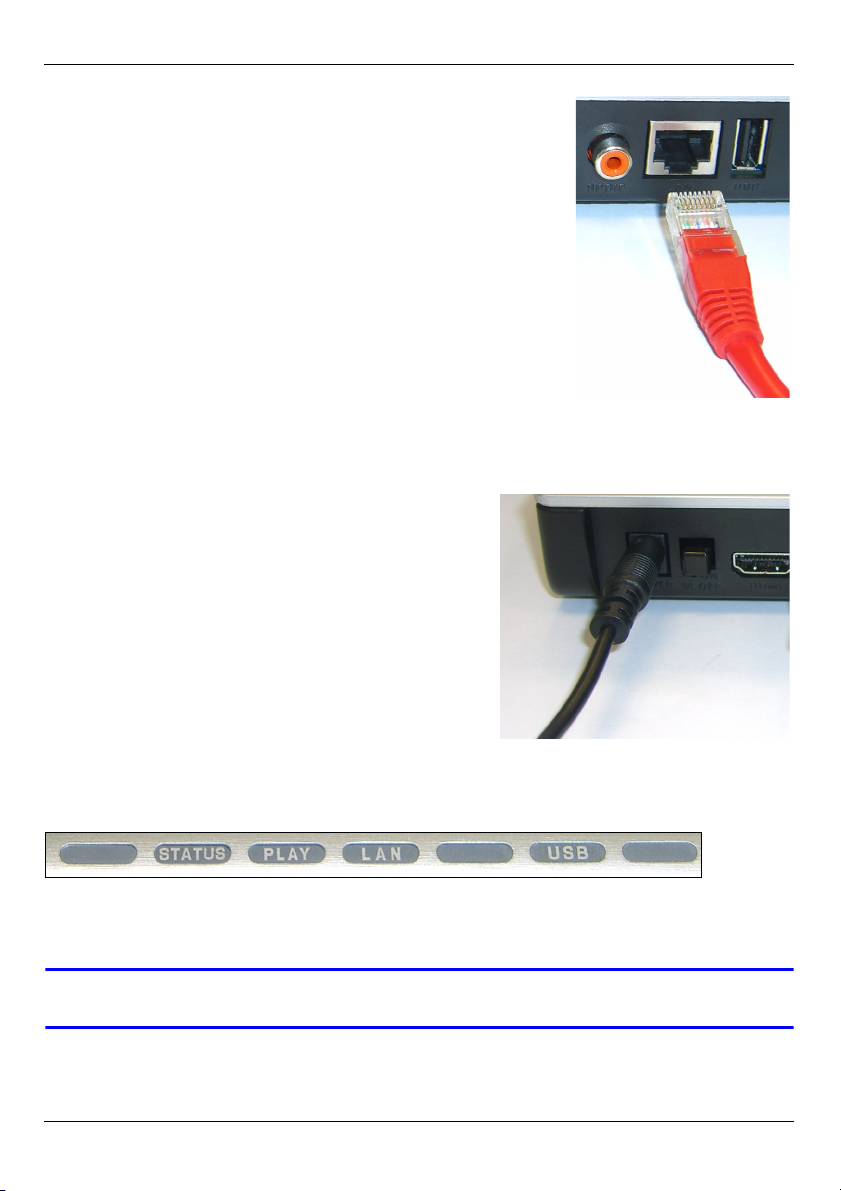
3 Connect the DMA-1000’s LAN port if your content files are
on your computer. The media server software should
already be installed. Skip to the next step if you will only
play files from a USB stick.
• Use the straight-through Ethernet cable (gray at the
time of writing) to connect to an Ethernet switch, router
or hub.
• Use the cross-over Ethernet cable (red at the time of
writing) to connect directly to your computer.
4 If you want to play files from a USB memory stick, connect
it to the DMA-1000’s USB port. (This is optional if you
connected the LAN port.)
5 Connect the POWER socket to a power source
using only the included power adaptor.
6 Your computer should already be turned on. Turn
on the TV and the DMA-1000.
2.1 Check the LEDs (Lights)
Look at the front of the device.
1 The STATUS LED comes on.
2 The LAN light and/or the USB light turn on.
V Check your connections if the lights do not come on.
10
Page 11

ENGLISH
3 Share Your Files
1 Look at your computer screen. Wait for
the media server to detect the DMA1000 and open a pop-up window with
the DMA-1000’s IP address. If the
DMA-1000 does not get an IP address
automatically, it uses Auto-IP to assign
itself an IP address. If your computer is also set to get an IP address automatically, the
computer and the DMA-1000 will be able to communicate. See the User’s Guide if you
need to configure the DMA-1000 with a static IP address. Click anywhere in this
window.
V You may need to wait for two or three minutes. If the window still does not
display, check the DMA-1000’s LEDs and connections and use the power
button to restart the DMA-1000.
2 Select Allow Connection and click
OK.
3 Click Yes to allow the
DMA-1000 to access your
published (shared) files.
4 Play Your Files
" Set your TV’s
input to the DMA1000’s
connection (either HDMI or S-Video). Remember to change it when you
want to use other input.
11
Page 12
ENGLISH
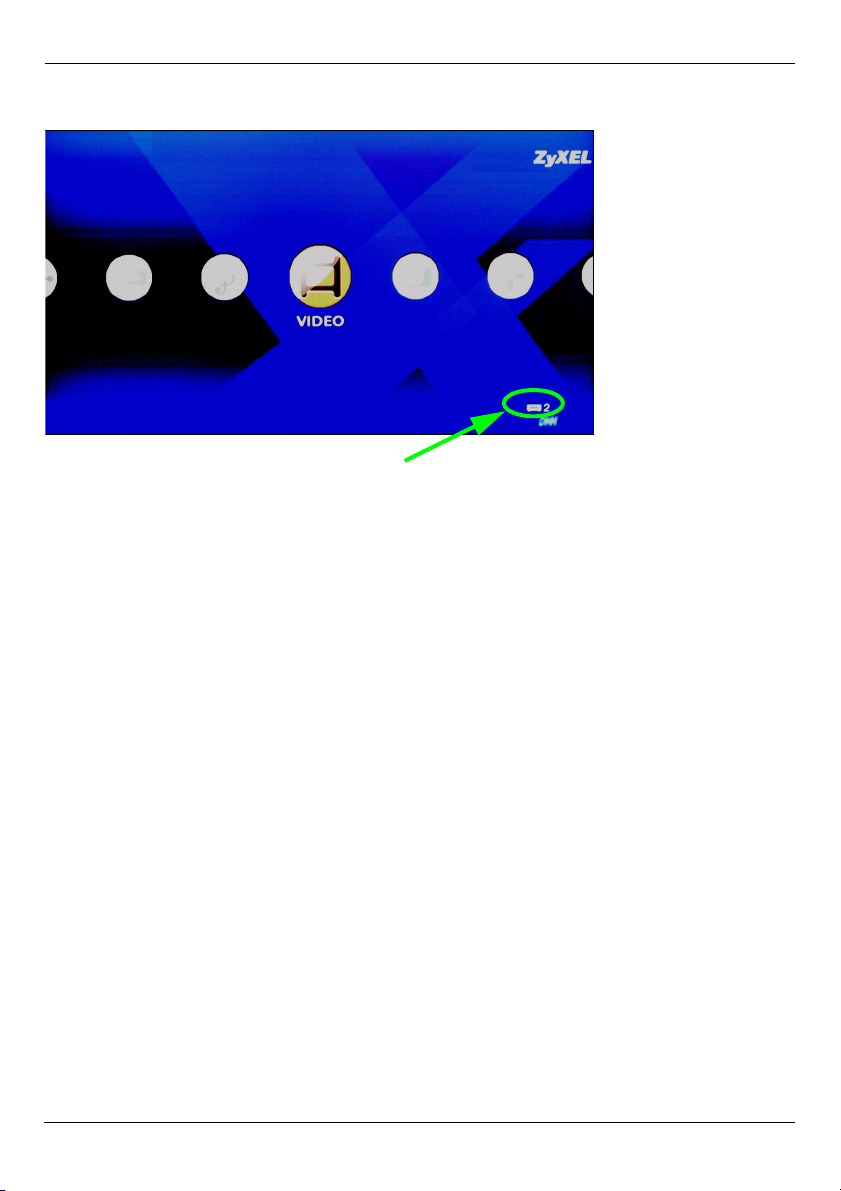
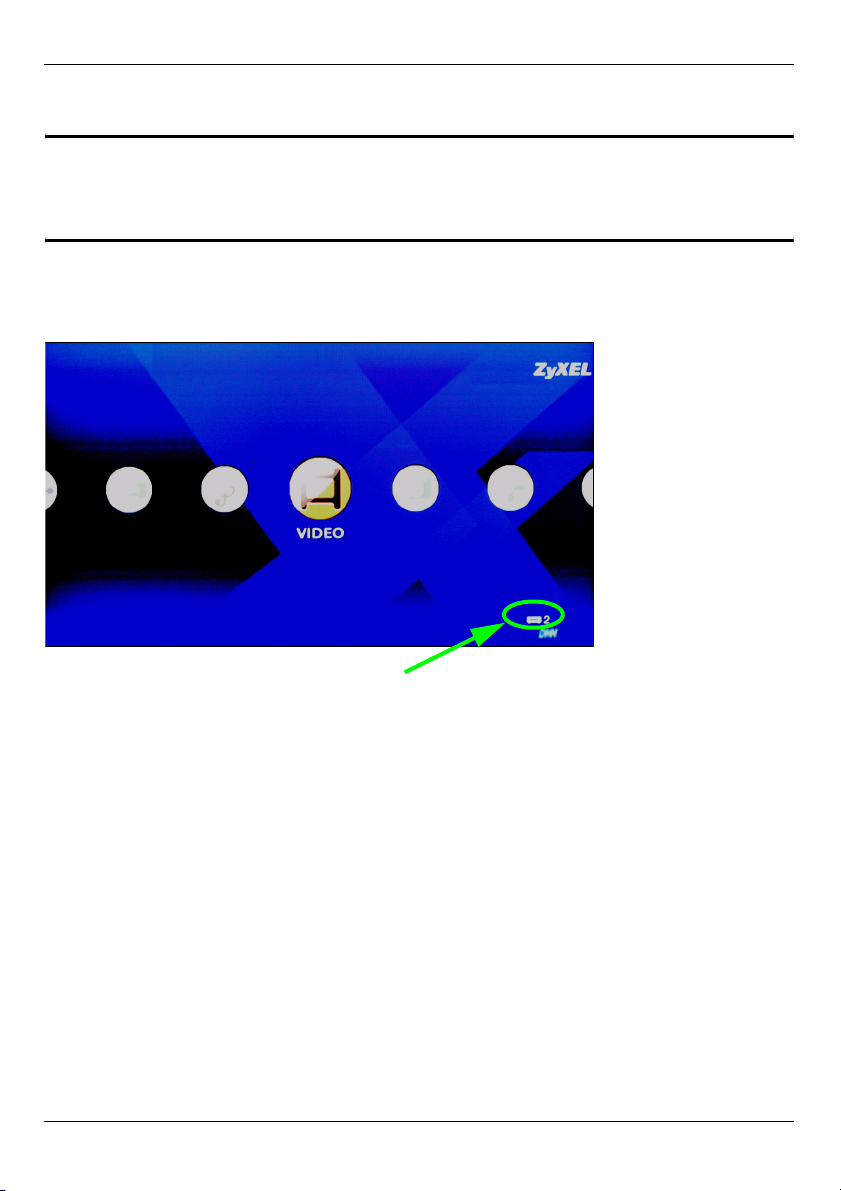
1 Look at your TV. The DMA-1000 automatically sorts the files on the server into the
MUSIC, VIDEO and PHOTO menus. Files on a USB stick are in the USB menu.
Number of media servers the DMA-1000 detected.
2 Install the remote control’s batteries.
3 Point the remote control at the front of the DMA-1000.
12
Page 13

ENGLISH
4 Use the remote control to navigate the menus and play files.
Power switches between
standby and operation
modes.
Use the 0~9, CLEAR and
INPUT keys to input
numbers (like for
individual scenes or
times).
Return to the main
menu.
MUTE turns off the sound.
PAG E up/down scroll up
or down a list to the
previous or next page.
AUDIO switches audio
output between left, right
and stereo speakers.
A-B lets you select start
and stop times to repeat
an interval.
REPEAT keeps playing
(loops) the file.
INFO displays details
about the playing file.
SERVER opens a menu
where you select a media
server.
ROTATE turns a photo 90°
clockwise.
SHUFFLE plays your
playlist (favorites) files in
random order.
OPTION opens the menu
where you configure the
DMA-1000’s settings.
VOLUME up/down adjust
the volume.
Use the OK, BACK and
arrow buttons to go
through the menus and
play your files.
TOOL opens the TOOL
menu for additional
options (see the User’s
Guide).
These buttons perform the
previous, play, next,
reverse, stop, fast
forward, skip, pause and
slow motion functions
during file playback.
PHOTO opens a menu of
picture files to view.
VIDEO opens a menu of
video files to play.
MUSIC opens a menu of
music files to play.
USB opens a menu of files
on your USB device.
13
Page 14

ENGLISH
Example of Playing Video Files
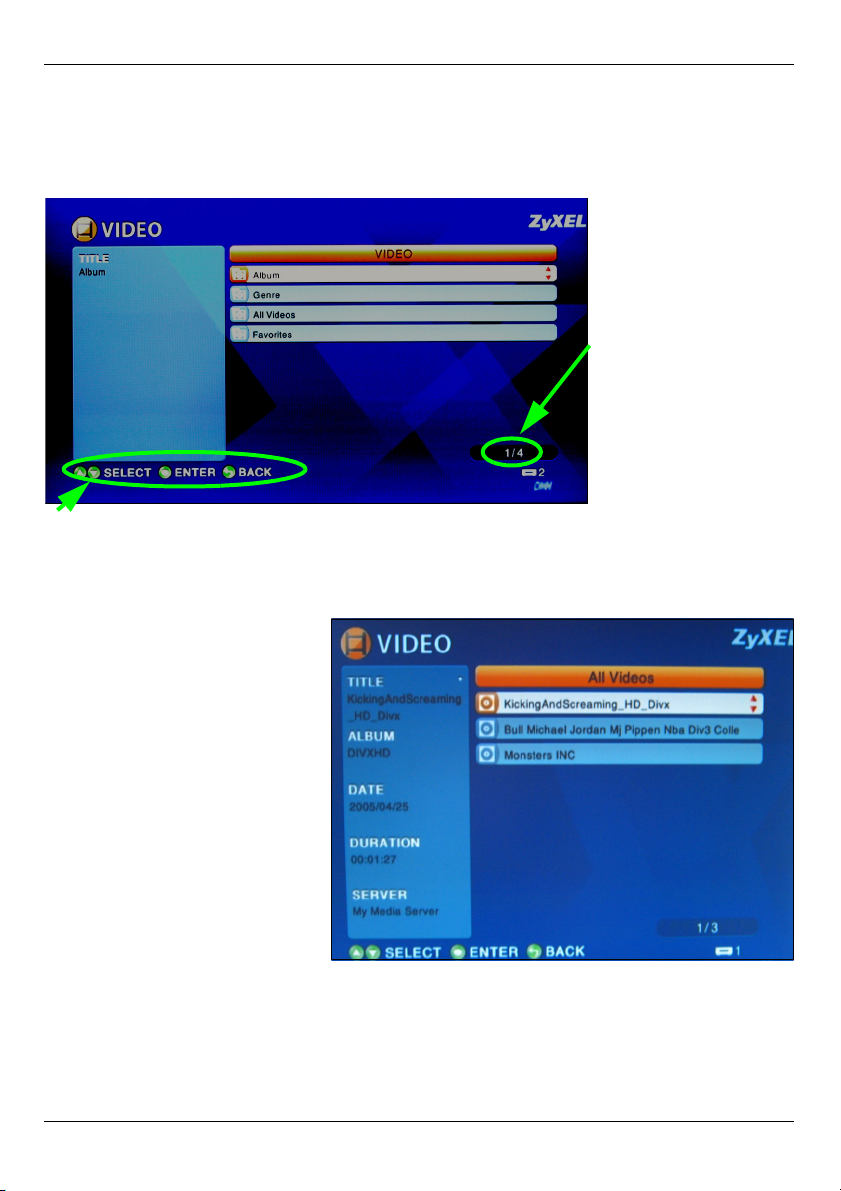
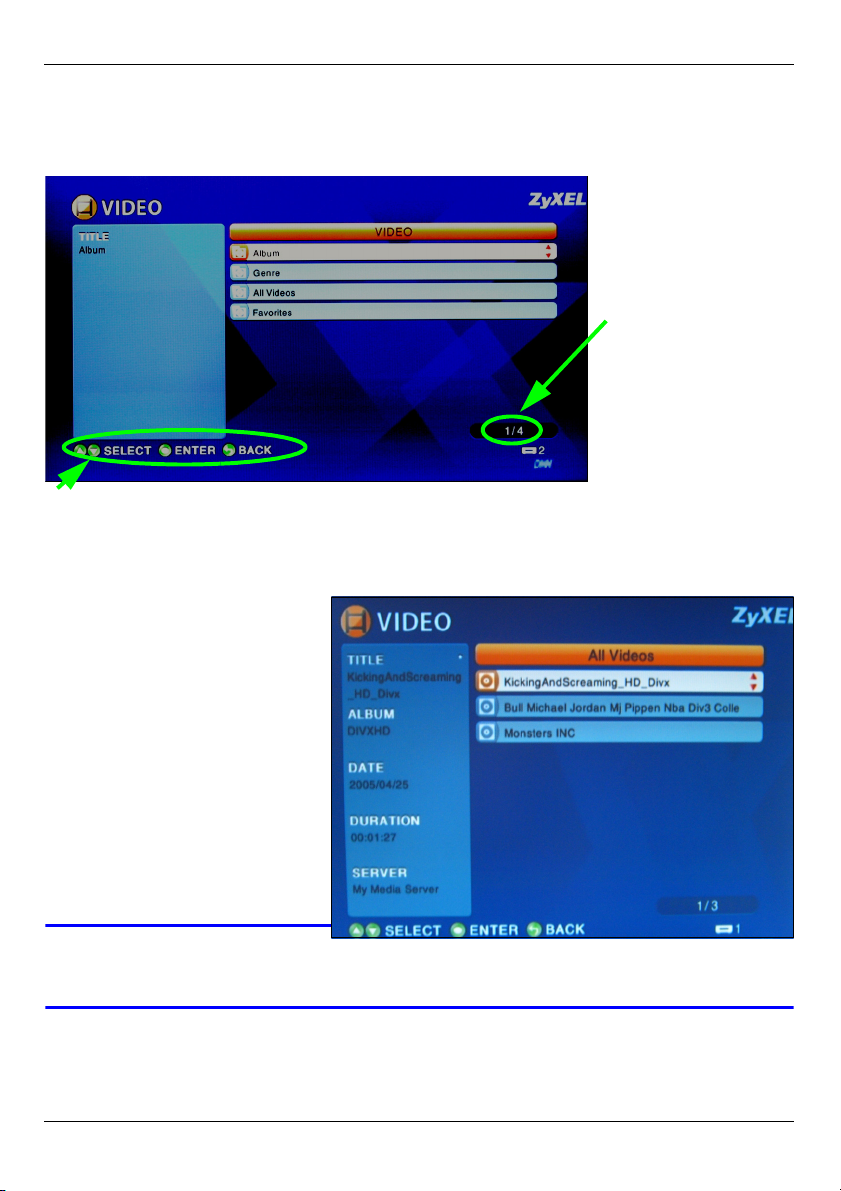
1 Press the remote’s VIDEO button to enter the VIDEO menu.
2 The video files are arranged in folders.
The number of the
item currently
selected followed by
the total number of
items in the menu.
Navigation instructions for the menu. In this example, use the arrow and OK buttons to
select a folder to see the video files sorted by that criteria. Or use the BACK button to go
up in the menu structure.
3 In this example, use the
remote’s arrow and OK
buttons to select the All
Videos folder. A list of all the
video files displays on the
right. Information about the
currently selected file
displays on the left.
4 Use the remote’s arrow and
OK buttons to select and play
a video file.
V Files with
unsupported formats
or codecs may not
display properly.
14
Page 15

ENGLISH
The DMA-1000 supports the following file formats. See the User’s Guide for more details.
Audio
Video MPEG-1, MPEG-2 MP@ML, MPEG-4 simple and advanced simple profile, MPEG-4 AVI
Photo TIFF, PNG, GIF, BMP, JPEG and JPEG2000.
Dolby Digital, DVD-Audio, MPEG-1 and MPEG-2 Layers I, II and III(MP3), MPEG2 BC multi-channel Layers I, II and III, MPEG-2 and MPEG-4 AAC-LC, WMA9.
files and WMV version 9.
Requirements
V If you have trouble installing the media server software, make sure your
computer meets the following requirements.
Microsoft Windows XP Home Edition Service Pack 1 or above, Professional Service Pack 1 or above, or
Media Center Edition 2005 Update Rollup or above.
*You must be logged in as the administrator to install and use the media server.
Software Windows Media Player 9 or above
CPU Celeron 1GHz or above, Pentium III or above (Pentium III 1GHz or above
Memory 256MB or above recommended
Peripherals CD-ROM drive
Hard Disk
Microsoft DirectX 9.0 or above
recommended) or compatible
300MB or above.
Procedure to View a Product’s Certification(s)
1 Go to www.zyxel.com.
2 Select your product from the drop-down list box on
the ZyXEL home page to go to that product's page.
3 Select the certification you wish to view from this
page.
15
Page 16

DEUTSCH
DEUTSCH
Verwenden Sie den DMA-1000 für die Wiedergabe von Audio-, Video und Fotodateien auf
einem Fernsehgerät anstelle eines Computers. Die Dateien können sich entweder auf
einem Computer, auf einem USB-Stick oder einer Festplatte befinden.
In der folgenden Abbildung wird dargestellt, wie der DMA-1000 mit einem Ethernet-Switch
(S) und einem Fernsehgerät verbunden wird. Die Computer A - C sind an den EthernetSwitch angeschlossen.
B
A
Um den DMA-1000 an einen HDMIAnschluss des Fernsehgeräts
anzuschließen, benötigen Sie ein HDMIKabel.
C
DMA-1000
TV
S
USB
" Eine Beschreibung des Umgangs DMA -1000 Dateien gespeichert auf
Windows Vista Systemen entnehmen Sie bitte dem Anhang Windows Vista
Media Server (CD-Inhalt).
Installieren Sie die enthaltene Mediaserver-Software, damit der DMA-1000 die auf dem
Computer gespeicherten Dateien abspielen kann. Für diese Software benötigen Sie
Windows XP. Wenn der Computer nicht mit Windows XP arbeitet, oder wenn Sie die
Software nicht installieren möchten, können Sie die Dateien auf einem USB-Stick
speichern. Der USB-Stick wird direkt an den DMA-1000 angeschlossen, sodass weder die
Mediaserver-Software noch ein Computer erforderlich sind.
In den folgenden Abschnitten finden Sie eine Beschreibung, wie Dateien eines Computers
und USB-Sticks (in der angegebenen Reihenfolge) abgespielt werden können.
16
Page 17
DEUTSCH
Wiedergeben von Dateien eines
Computers
1 Installieren der Mediaserver-Software
2 Anschließen des DMA-1000
3 Gemeinsamer Zugriff auf Dateien
4 Abspielen der Dateien
Wiedergeben von Dateien
eines USB-Sticks
2 Anschließen des DMA-1000
4 Abspielen der Dateien
1 Installieren der Mediaserver-Software
Die Mediaserver-Software muss auf allen Computern installiert werden, die mit dem DMA1000 gemeinsam auf Dateien zugreifen sollen.
" Die Mediaserver-Software kann nur auf Windows XP-Computern installiert
werden. Ausführliche Informationen dazu finden Sie unter
Systemvoraussetzungen.
1 Legen Sie die CD in das CD-ROM-Laufwerk. Klicken Sie im nächsten Fenster auf
Setup (Installieren).
17
Page 18
DEUTSCH
V Wenn dieses Fenster nicht erscheinen sollte, navigieren Sie auf der CD zur
Datei setup.exe und klicken Sie doppelt darauf.
2 Auf dem Bildschirm wird der Installationsassistent angezeigt. Führen Sie die
Anweisungen aus, um die Software zu installieren.
V Wenn Sie Probleme bei der Installation oder Benutzung des Medienservers
haben, lesen Sie im Abschnitt Systemvoraussetzungen nach.
3 Geben Sie in diesem Fenster die erforderlichen Daten ein. Geben Sie einen
Benutzernamen ein (bis maximal 64 ASCII-Zeichen, alle druckbaren Zeichen inklusive
Sonderzeichen, empfohlen). Die Eingabe des Firmennamens ist optional (bis maximal
64 ASCII-Zeichen, alle druckbaren Zeichen inklusive Sonderzeichen, empfohlen).
Klicken Sie in dem Fenster, das angezeigt wird, wenn Sie die CD-ROM einlegen, auf
Registration (Registrieren) (siehe Seite 17). Klicken Sie auf Media Server Serial
Number (Seriennummer des Medien-Servers), um eine Textdatei mit einer
Seriennummer zu öffnen. Fügen Sie die Seriennummer mit der Kopieren- und
18
Page 19

DEUTSCH
Einfügenfunktion im abgebildeten Fenster in das Feld Serial Number (Seriennummer)
ein.
4 Wählen Sie das Zielverzeichnis für die Software (oder belassen Sie das
Standardzielverzeichnis).
5 Sie können dem Mediaserver einen Namen geben, den der DMA-1000 auf dem
Fernsehgerät anzeigt. Wenn Sie den Medienserver auf mehreren Computern
19
Page 20

DEUTSCH
installieren, ist es sinnvoll, die Namen nicht doppelt zu vergeben. Ein Name sollte aus
34 ASCII-Zeichen, alle druckbaren Zeichen inklusive Sonderzeichen, bestehen.
6 Wenn Sie zum Konfigurieren der Windows XP-Firewall aufgefordert werden, klicken
Sie auf Yes (Ja). Dadurch erhält der DMA-1000 die Möglichkeit, auf die Dateien des
Computers zuzugreifen, die gemeinsam benutzt werden.
V Wenn auf Ihrem Computer eine andere Firewall-Software (z. B.
ZoneAlarm) verwendet wird, die konfiguriert werden muss, lesen Sie im
Benutzerhandbuch nach.
20
Page 21

DEUTSCH
7 Dieses Symbol wird nach der Installation in der Taskleiste (normalerweise in der
rechten unteren Ecke des Bildschirms) angezeigt. Klicken Sie doppelt auf dieses
Symbol, um die Fenster für die Serverkonfiguration aufzurufen.
8 In der Published Folder List (Liste freigegebener Ordner) werden die Ordner der
Dateien aufgelistet, die der Computer mit dem DMA-1000 gemeinsam verwendet.
• Standardmäßig sind die Ordner Eigene Musik, Eigene Bilder und Eigene Videos
enthalten.
• Um andere Dateien für die gemeinsame Verwendung freizugeben, klicken Sie auf
die Schaltfläche Add Folder (Ordner hinzufügen), und wählen Sie den entsprechenden Ordner aus.
21
Page 22

DEUTSCH
• Um einen Ordner aus der Liste zu entfernen, klicken Sie darauf und dann auf Can-
cel Publication (Freigabe abbrechen).
22
Page 23

DEUTSCH
2 Anschließen des DMA-1000
Schalten Sie das Fernsehgerät aus, und schließen Sie dann den DMA-1000 an.
1 Wenn das Fernsehgerät über einen HDMI-Anschluss verfügt, können Sie den HDMI-
Anschluss des DMA-1000 (siehe Abbildung) mit einem HDMI-Kabel an das
Fernsehgerät anschließen.
23
Page 24

DEUTSCH
2 Wenn das Fernsehgerät keinen HDMI-Anschluss hat:
A Verbinden Sie den S-VIDEO-Anschluss des DMA-1000 mit einem S-Video-Kabel an
das Fernsehgerät an.
B Wenn das Fernsehgerät oder
Audiosystem einen S/PDIFKoaxialanschluss hat, können Sie
diesen mit einem RCA-Kabel mit
dem S/PDIF-Anschluss des DMA1000 verbinden (siehe Abbildung).
C Wenn das Fernsehgerät oder
Audiosystem keinen S/PDIFKoaxialanschluss hat, schließen Sie
die RCA-Kabel an die Anschlüsse
LEFT und RIGHT des DMA-1000 an
(siehe Abbildung).
24
Page 25

DEUTSCH
3 Wenn sich die Inhaltsdateien auf dem Computer befinden,
verbinden Sie den LAN-Anschluss des DMA-1000. Die
Mediaserver-Software sollte bereits installiert sein. Wenn
nur Dateien von einem USB-Stick abgespielt werden
sollen, können Sie diesen Schritt überspringen.
• Verwenden Sie für den Anschluss an einen EthernetSwitch, Router oder Hub das Straight-through-Ethernetkabel (zum Zeitpunkt der Drucklegung grau).
• Verwenden Sie für den direkten Anschluss an den
Computer das Cross-over-Ethernetkabel (zum Zeitpunkt der Drucklegung rot).
4 Wenn Sie Dateien von einem USB-Stick abspielen
möchten, wird dieser an den USB-Anschluss des DMA1000 angeschlossen. (Das ist optional, wenn das Gerät an
den LAN-Port angeschlossen ist).
5 Verbinden Sie die Netzanschlussbuchse POWER
mit dem mitgelieferten Netzadapter an das
Stromnetz an.
6 Der Computer muss eingeschaltet sein. Schalten
Sie das Fernsehgerät und den DMA-1000 ein.
2.1 Die Bedeutung der LED-Anzeigen
Die LED-Anzeigen befinden sich an der Vorderseite des Geräts.
1 Die STATUS-LED beginnt zu leuchten.
2 Die LAN-LED und/oder die USB-LED?beginnt zu leuchten.
V Wenn die LEDs nicht leuchten, prüfen Sie die Kabelverbindungen.
25
Page 26

DEUTSCH
3 Gemeinsamer Zugriff auf Dateien
1 Sehen Sie auf den
Computerbildschirm. Der Mediaserver
erkennt den DMA-1000 und öffnet ein
Pop-up-Fenster, in dem die IP-Adresse
des DMA-1000 angezeigt wird. Wenn
der DMA-1000 nicht automatisch eine
IP-Adresse bezieht, weist er sich mit Auto-IP selbst eine IP-Adresse zu. Wenn auch der
Computer so eingestellt ist, dass er automatisch eine IP-Adresse bezieht, können der
Computer und der DMA-1000 miteinander kommunizieren. Im Benutzerhandbuch
finden Sie eine Anleitung, wie der DMA-1000 mit einer statischen IP-Adresse
konfiguriert wird. Klicken Sie auf eine beliebige Stelle dieses Fensters.
V Jetzt müssen Sie bis zu drei Minuten warten. Wenn das Fenster immer
noch nicht angezeigt wird, prüfen Sie die LED-Anzeigen des DMA-1000
und die Kabelverbindungen, und starten Sie den DMA-1000 neu.
2 Wählen Sie Allow Connection (Verbindung zulassen), und klicken Sie auf OK.
3 Klicken Sie auf Yes (Ja), um dem DMA-1000 den Zugriff auf die von Ihnen (für die
gemeinsame Verwendung) freigegebenen Dateien zu gewähren.
26
Page 27

DEUTSCH
4 Abspielen der Dateien
" Stimmen Sie den TV-Eingang auf den Anschluss des DMA-1000 ab
(entweder HDMI oder S-Video). Wenn Sie später einen anderen Eingang
verwenden möchten, muss dieser dann geändert werden.
1 Sehen Sie auf Ihr Fernsehgerät. Der DMA-1000 sortiert die Dateien des Servers
automatisch in die Menüs MUSIC (Musik), VIDEO (Video) und PHOTO (Foto). Die
Dateien eines USB-Sticks befinden sich im Menü USB.
Anzahl der Medienserver, die der DMA-1000 erkannt hat.
2 Legen Sie die Batterien der Fernbedienung ein.
3 Richten Sie die Fernbedienung auf die Vorderseite des DMA-1000.
27
Page 28

DEUTSCH
4 Mit der Fernbedienung können Sie nun in den Menüs navigieren und die Dateien
abspielen.
Mit der Ein/Aus-Taste (Power)
können Sie zwischen Standby
und den Betriebsmodi
umschalten.
Mit den Tasten 0-9, CLEAR
(Löschen) und INPUT
(Eingabe) können Sie Zahlen
eingeben (z. B. für einzelne
Szenen oder Zeiten).
PAG E up/down (Seite nach
oben/unten) Zum nach oben
und unten blättern zur
vorhergehenden oder
nächsten Seite.
AUDIO schaltet die
Audioausgabe zwischen dem
linken, rechten und beiden
Lautsprechern.
Mit A-B können Sie ein
Intervall für die Wiedergabe
festlegen.
Mit REPEAT (Wiederholen)
werden die Dateien
nacheinander wiederholt
abgespielt.
INFO zeigt die Informationen
der gerade abgespielten Datei
an.
SERVER Öffnet ein Menü, in
dem Sie einen Mediaserver
auswählen können.
ROTATE (Drehen) dreht ein
Bild um 90° im Uhrzeigersinn.
Mit SHUFFLE werden die
Dateien der Wiedergabeliste
(Favoriten) in zufälliger
Reihenfolge abgespielt.
OPTION öffnet das Menü, in
dem die Einstellungen des
DMA-1000 konfiguriert
werden.
Zurück zum Hauptmenü.
MUTE (Stumm) schaltet den
Ton aus.
Mit der Taste VOLUME up/
down (Lautstärke erhöhen/
verringern)?wird die Lautstärke
eingestellt.
Mit den Tasten OK und BACK
(Zurück) und den Pfeiltasten
können Sie in den Menüs
navigieren und die Dateien
abspielen lassen.
Mit der Taste TOOL wird das
Menü TOOL (Extras)
aufgerufen, in dem weitere
Optionen verfügbar sind (siehe
Benutzerhandbuch).
Mit diesen Tasten haben
während der Wiedergabe die
Funktionen "Zurück",
"Wiedergabe", "Weiter",
"Umkehren", "Stopp",
"Schneller Vorlauf",
"Überspringen", "Pause" und
"Zeitlupe".
PHOTO (Foto) öffnet ein Menü
von Bilddateien.
VIDEO öffnet ein Menü von
Videodateien.
MUSIC (Musik) öffnet ein Menü
von Musikdateien.
USB zeigt die Dateien, die sich
auf dem USB-Gerät befinden.
28
Page 29
DEUTSCH
Beispiel für die Wiedergabe von Videodateien
1 Drücken Sie auf der Fernbedienung auf die Taste VIDEO, um das Menü VIDEO
aufzurufen.
2 Die Videodateien befinden sich in Ordnern.
Dieses ist die Anzahl
der momentan
ausgewählten
Einträge und die
Gesamtzahl der
Einträge im Menü.
Anweisungen für die Navigation im Menü. In diesem Beispiel wird mit den Pfeiltasten und
der OK-Taste ein Ordner gewählt, dessen Videodateien nach diesem Kriterium sortiert
angezeigt werden sollen. Um in der Menüstruktur eine Ebene höher zu gehen, drücken
Sie auf die Taste BACK (Zurück).
3 Wählen Sie in diesem
Beispiel die Pfeiltaste und die
OK-Taste der Fernbedienung,
um den Ordner Alle Videos
aufzurufen. Rechts im
Fenster wird eine Liste aller
Videodateien angezeigt.
Links davon werden die
Informationen über die
gerade markierte Datei
angezeigt.
4 Wählen Sie mit der Pfeiltaste
und der OK-Taste der
Fernbedienung die
Videodatei aus, die
wiedergegeben werden soll.
29
Page 30

DEUTSCH
V Dateien nicht unterstützter Formate und Codecs werden u. U. nicht
einwandfrei wiedergegeben.
Der DMA-1000 unterstützt die folgenden Dateiformate. Ausführliche Informationen dazu
finden Sie im Benutzerhandbuch.
Audio
Video MPEG-1, MPEG-2 MP@ML, MPEG-4-Profile Simple und Advanced, MPEG-4 AVI-Dateien und
Foto TIFF, PNG, GIF, BMP, JPEG und JPEG2000.
Dolby Digital, DVD-Audio, MPEG-1 und MPEG-2 Layer I, II und III (MP3), MPEG2 BC Multi-channel-Layer I, II und III, MPEG-2 und MPEG-4 AAC-LC, WMA9.
WMV-Version 9.
Systemvoraussetzungen
V Wenn Sie Probleme bei der Installation der Mediaserver-Software haben,
prüfen Sie, ob der Computer die folgenden Systemvoraussetzungen erfüllt.
Microsoft Windows XP Home Edition Service Pack 1 oder höher, Professional Service Pack 1 oder
höher oder Media Center Edition 2005 Update Rollup oder höher.
*Für die Installation des Mediaservers müssen Sie als Administrator angemeldet sein.
Software Windows MediaPlayer 9 oder höher
Microsoft DirectX 9.0 oder höher
CPU Celeron 1 GHz oder höher, Pentium III oder höher (Pentium III 1 GHz oder höher
empfohlen) bzw. kompatible Geräte
Speicher 256 MB oder höher empfohlen
Peripheriegeräte CD-ROM-Laufwerk
Festplatte
300 MB oder mehr.
30
Page 31

DEUTSCH
Schritte zum Ansehen von Produktzertifizierung(en)
1 Zu www.zyxel.com.
2 Wählen Sie Ihr Produkt aus der Drop-down-Liste in dem Feld auf der
ZyXEL-Homepage und gehen Sie auf diese Produktseite.
3 Wählen Sie auf dieser Seite die gewünschte Zertifizierung.
31
Page 32

ESPAÑOL
ESPAÑOL
Utilice su DMA-1000 para reproducir audio, vídeo y archivos de fotos en su televisor en
lugar de en el monitor de su ordenador. Los archivos pueden estar en los ordenadores o
en un lápiz de memoria o disco duro USB.
La figura siguiente muestra al DMA-1000 conectado a un switch Ethernet (S) y a un
televisor. Los ordenadores A~C están conectados al switch Ethernet.
B
A
Necesita un cable HDMI si va a conectar el
DMA-1000 a un conector HDMI en su
televisor.
C
DMA-1000
Televisor
S
USB
" Si está usando Windows Vista, consulte el apéndice Windows Vista Media
Server en la Guía de Usuario (disponible en el CD incluido) para permitir al
DMA-1000 reproducir archivos almacenados en su ordenador.
Instale el software del servidor multimedia incluido para que el DMA-1000 reproduzca los
archivos almacenados en su ordenador. Este software requiere Windows XP. Si no tiene
Windows XP o no desea instalar el software, puede colocar los archivos en un lápiz USB.
El lápiz USB se conecta directamente al DMA-1000 sin necesidad del software del
servidor o un ordenador.
32
Page 33
ESPAÑOL
Utilice las siguientes secciones de esta guía (en el orden listado) para ver los archivos de
los ordenadores en un lápiz USB.
Ver archivos en ordenadores
Ver archivos en un
lápiz USB
1 Instalar el software del servidor multimedia
2 Conectar su DMA-1000
3 Compartir sus archivos
4 Reproducir sus archivos
2 Conectar su DMA-1000
4 Reproducir sus archivos
1 Instalar el software del servidor multimedia
Debe instalar el software del servidor multimedia en cada ordenador que utilice para
compartir archivos con el DMA-1000.
" Sólo puede utilizar el software del servidor multimedia en un ordenador con
Windows XP. Consulte Requisitos para más detalles.
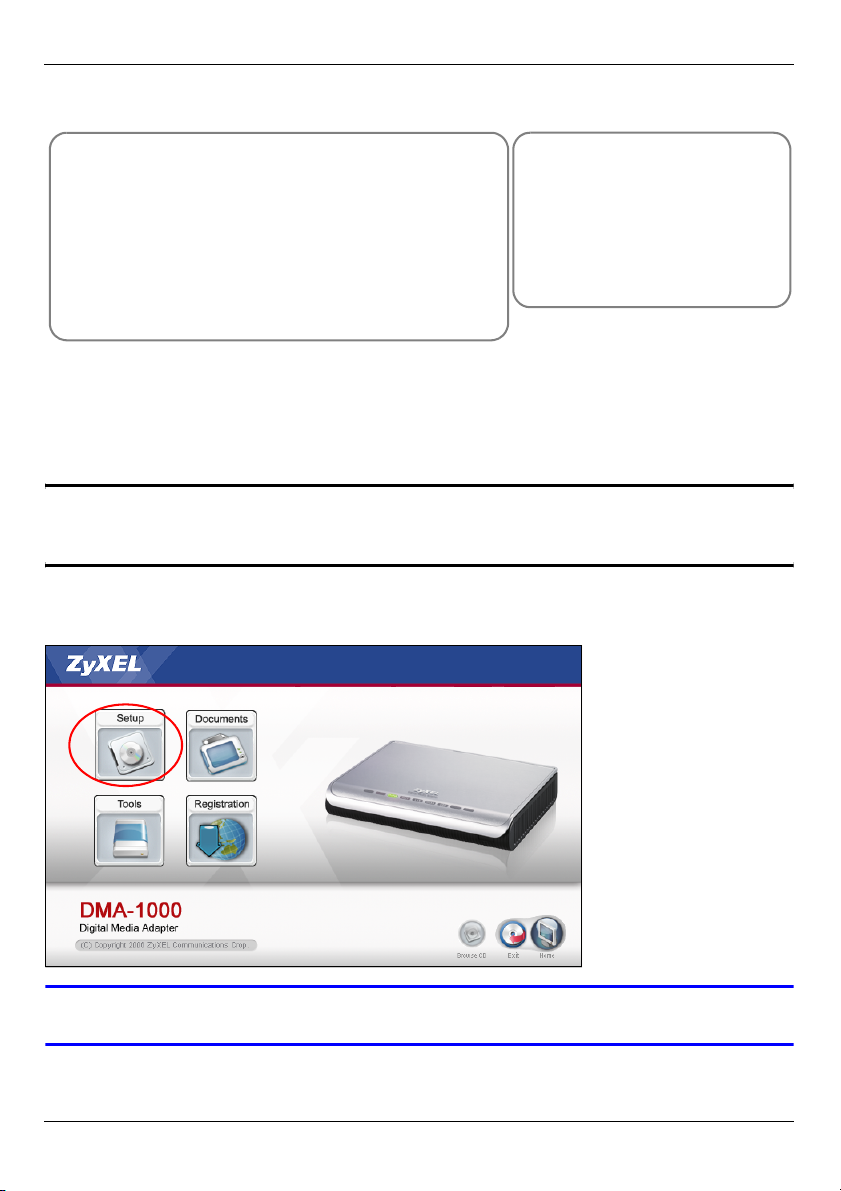
1 Coloque el CD en su CD-ROM. Haga clic en Setup (Instalación) en la siguiente
pantalla.
V Si la pantalla no aparece, busque y haga doble clic en setup.exe.
33
Page 34
ESPAÑOL
2 Aparecerá el asistente para la instalación. Siga las direcciones para instalar el
software.
V Consulte la sección de los requisitos si tiene problemas para instalar o
utilizar el servidor multimedia.
3 Escriba su información en esta pantalla. Escriba un nombre de usuario (hasta 64
caracteres ASCII recomendado). El nombre de la compañía es opcional (hasta 64
caracteres ASCII recomendado). Haga clic en Registration (Registro) en la pantalla
que se ha abierto al insertar el CD-ROM (ver página 33). Luego haga clic en Media
Server Serial Number (Número de serie de Media Server) para abrir un archivo de
34
Page 35
ESPAÑOL
texto con un número de serie. Copie y pegue el número de serie en el campo Serial
Number(Numero de serie) en la pantalla mostrada aquí.
4 Seleccione la ruta de destino para el software (o deje la predeterminada).
35
Page 36

ESPAÑOL
5 Puede especificar el nombre para el servidor multimedia que el DMA-1000 mostrará en
su televisor. Resulta útil utilizar nombres únicos si instala el servidor multimedia en
varios ordenadores. Hasta 34 caracteres ASCII recomendado.
6 Si ve una pantalla pidiéndole configurar el cortafuegos de Windows XP, haga clic en Sí.
Esto permite al DMA-1000 acceder a los archivos que comparte en su ordenador.
V Consulte la Guía del usuario si su ordenador tiene otro software
cortafuegos (como ZoneAlarm por ejemplo) que necesite configurar.
36
Page 37

ESPAÑOL
7 Este icono muestra la bandeja del sistema (normalmente en la esquina inferior
derecha) tras haber realizado la instalación. Haga doble clic en el icono para abrir las
pantallas de configuración del servidor.
8 La Published Folder List (Lista de carpetas publicadas) muestra las carpetas de
archivos que su ordenador compartirá con el DMA-1000.
• Sus carpetas Mi música, Mis imágenes y Mis vídeos están incluidas por defecto.
• Para compartir otros archivos, haga clic en el botón Add Folder (Agregar carpeta) y
busque y seleccione la carpeta que desea compartir.
37
Page 38

ESPAÑOL
• Para quitar la carpeta de la lista, haga clic en ella y luego en Cancel Publication
(Cancelar publicación).
38
Page 39

ESPAÑOL
2 Conectar su DMA-1000
Apague su televisor antes de conectar el DMA-1000.
1 Si su televisor tiene un conector HDMI, utilice un cable HDMI para conectar el conector
HDMI (mostrado) del DMA-1000 al televisor.
39
Page 40

ESPAÑOL
2 Si su televisor no tiene un conector HDMI:
A Utilice un cable de S-vídeo para conectar el conector S-VIDEO (mostrado) del
DMA-1000 al televisor.
B Si su televisor o sistema de audio
tiene una clavija coaxial, utilice un
cable RCA para conectarlo a la
clavija S/PDIF (mostrada) del DMA-
1000.
C Si su televisor o sistema de audio no
tiene una clavija S/PDIF, utilice cables
RCA para conectarlo a las clavijas
IZQUIERDA y DERECHA (mostradas)
del DMA-1000.
40
Page 41

ESPAÑOL
3 Conecte el puerto LAN del DMA-1000si los archivos de
contenidos están en su ordenador. El software del servidor
multimedia debería estar instalado. Vaya al próximo paso
si sólo va a reproducir archivos desde un lápiz USB.
• Utilice el cable Ethernet directo (gris en el momento de
la publicación) para conectarlo a un switch Ethernet,
router o hub.
• Utilice el cable Ethernet cruzado (rojo en el momento
de la publicación) para conectarlo directamente a su
ordenador.
4 Si desea reproducir archivos desde un lápiz de memoria
USB, conéctelo al puerto USB del DMA-1000. (Esto es
opcional si ha conectado el puerto LAN).
5 Conecte el zócalo POWER a una toma de
corriente utilizando únicamente el adaptador de
corriente incluido.
6 Su ordenador debería estar encendido. Encienda
el televisor y el DMA-1000.
2.1 Compruebe los LEDs (luces)
Mire la parte frontal del dispositivo.
1 El LED STATUS se encenderá.
2 La luz LAN y o la luz USB se encenderán.
V Compruebe las conexiones si las luces no se encienden.
41
Page 42

ESPAÑOL
3 Compartir sus archivos
1 Mire a la pantalla de su ordenador.
Espere a que el servidor multimedia
detecte al DMA-1000 y abra una
ventana emergente con la dirección IP
del DMA-1000. Si el DMA-1000 no
obtiene una dirección IP
automáticamente, utilizará Auto-IP para asignarse una dirección IP. Si su ordenador
también está ajustado para obtener una dirección IP automáticamente, el ordenador y
el DMA-1000 podrán comunicarse. Consulte la Guía del usuario si necesita configurar
el DMA-1000 con una dirección IP estática. Haga clic en cualquier lugar de esta
ventana.
V Puede que necesite esperar dos o tres minutos. Si la ventana continua sin
aparecer, compruebe los LEDs del DMA-1000 y las conexiones y utilice el
botón de alimentación para reiniciar el DMA-1000.
2 Seleccione Allow Connection
(Permitir la conexión) y haga clic
en OK (Aceptar).
3 Haga clic en Yes (Sí) para
permitir que el DMA-1000
acceda a sus archivos
publicados (compartidos).
42
Page 43

ESPAÑOL
4 Reproducir sus archivos
" Ajuste la entrada de su televisor a la conexión del DMA-1000 (bien HDMI o
S-Vídeo). Recuerde cambiarla cuando desee utilizar otra entrada.
1 Mire a su televisor. El DMA-1000 organizará automáticamente los archivos en el
servidor en los menús MUSIC (MÚSICA), VIDEO (VÍDEO) y PHOTO (FOTO). Los
archivos de un lápiz USB están en el menú USB.
Número de servidores multimedia que el DMA-1000 ha detectado.
2 Instale las pilas del mando a distancia.
3 Apunte con el mando a distancia a la parte frontal del DMA-1000.
43
Page 44

ESPAÑOL
4 Utilice el mando a distancia para navegar por los menús y reproducir música.
Power cambia entre los
modos suspendido y
operación.
Utilice las teclas 0~9, CLEAR
(BORRAR) y INPUT
(ENTRADA) para introducir
números (como para escenas
o secuencias individuales).
PAG E arriba/abajo sube o
baja por una lista a la página
anterior o siguiente.
AUDIO cambia la salida de
audio entre altavoces
izquierdo, derecho y estéreo.
A-B le permite seleccionar el
tiempo de inicio y parada para
repetir un intervalo.
REPEAT mantiene la
reproducción (repetir) del
archivo.
INFO muestra detalles sobre
el archivo en reproducción.
SERVER abre un menú
donde puede seleccionar un
servidor multimedia.
ROTATE gira una foto 90
sentido horario.
SHUFFLE reproduce su lista
de reproducción de archivos
(favoritos) en orden aleatorio.
OPTION abre el menú en el
que puede ajustar la
configuración del DMA-1000.
° en
Regresa al menú principal.
MUTE apaga el sonido.
VOLUME arriba/abajo ajusta
el volumen.
Utilice los botones OK, BACK
(ATRÁS) y las flechas para
pasar por los menús y
reproducir sus archivos.
TOOL abre el menú TOOL
(HERRAMIENTAS) para más
opciones (ver la Guía del
usuario).
Estos botones realizan las
funciones anterior, reproducir,
siguiente, atrás, detener, pasar
adelante, saltar, pausa y
cámara lenta durante la
reproducción de un archivo.
PHOTO abre un menú de
archivos de imágenes para ver.
VIDEO abre un menú de
archivos de vídeo para
reproducir.
MUSIC abre un menú de
archivos de música para
reproducir.
USB abre un menú con los
archivos de su dispositivo USB.
44
Page 45

ESPAÑOL
Ejemplo de reproducción de archivos de vídeo
1 Presione el botón VIDEO del mando y entre en el menú VIDEO.
2 Los archivos de vídeo están organizados en carpetas.
El número del
elemento
seleccionado
actualmente seguido
por el número total de
elementos en el
menú.
Instrucciones de navegación para el menú. En este ejemplo, utilice los botones de flechas
y OK para seleccionar una carpeta y ver los archivos de vídeo organizados por ese
criterio. O utilice el botón BACK para subir en la estructura del menú.
3 En este ejemplo, utilice los
botones de flechas del
mando y OK para seleccionar
la carpeta All Videos (Todos
los vídeos). Aparecerá una
lista con todos los archivos
de vídeo a la derecha. La
información sobre el archivo
seleccionado actualmente
aparecerá a la izquierda.
4 Utilice los botones de flechas
del mando y OK para
seleccionar y reproducir un
archivo de vídeo.
V Los archivos con formatos o códecs no soportados pueden no aparecer
apropiadamente.
45
Page 46

ESPAÑOL
El DMA-1000 soporta los siguientes formatos de archivo. Consulte la Guía del usuario
para más detalles.
Audio
Vídeo MPEG-1, MPEG-2 MP@ML, MPEG-4 perfil simple y avanzado, archivos AVI MPEG-4 y WMV
Foto TIFF, PNG, GIF, BMP, JPEG y JPEG2000.
Dolby Digital, DVD-Audio, MPEG-1 y MPEG-2 Capas I, II y III(MP3), MPEG-2 BC
Capas multicanal I, II y III, MPEG-2 y MPEG-4 AAC-LC, WMA9.
versión 9.
Requisitos
V Si tiene problemas para instalar el software del servidor multimedia,
compruebe si su ordenador cumple con los requisitos siguientes.
Microsoft Windows XP Home Edition Service Pack 1 o superior, Professional Service Pack 1 o superior,
o Media Center Edition 2005 Update Rollup o superior.
*Para instalar y utilizar el servidor multimedia debe iniciar sesión como administrador.
Software Windows Media Player 9 o superior
Microsoft DirectX 9.0 o superior
CPU Celeron 1GHz o superior, Pentium III o superior (Pentium III 1GHz o superior
recomendado) o compatible
Memoria 256MB o más recomendado
Periféricos Unidad de CD-ROM
Disco duro
300MB o más.
Procedimiento para ver la(s) certificación(es) del producto
1 Vaya a www.zyxel.com.
2 Seleccione su producto de la lista desplegable en la página
inicial de ZyXEL para ir a la página de ese producto.
3 Seleccione el certificado que desee visualizar en esta página.
46
Page 47

ESPAÑOL
47
Page 48
FRANÇAIS
FRANÇAIS
Utilisez votre DMA-1000 pour lire les fichiers audio, vidéo et photo sur votre téléviseur au
lieu du moniteur de votre ordinateur. Les fichiers peuvent se trouver sur les ordinateurs,
une clé USB ou sur un disque dur.
La figure suivante montre le DMA-1000 connecté à un commutateur Ethernet (S) et à une
téléviseur. Les ordinateurs A~C sont connectés au commutateur Ethernet.
C
B
A
Vous avez besoin d'un câble HDMI si vous
désirez connecter le DMA-1000 à un
connecteur HDMI de votre téléviseur.
S
USB
Téléviseur
DMA-1000
" Si vous utilisez Windows Vista, voir l'annexe sur Windows Vista Media
Server dans le guide utilisateur (inclus sur le CD) pour que le DMA-1000
puisse lire les fichiers stockés sur votre ordinateur.
Installez le logiciel du serveur multimédia fourni pour permettre au DMA-1000 de lire les
fichiers stockés sur votre ordinateur. Ce logiciel requiert Windows XP. Si vous n'avez pas
Windows XP ou que vous ne voulez pas installer le logiciel, vous pouvez placer vos
fichiers sur une clé USB. La clé USB se connecte directement au DMA-1000 sans l'aide du
logiciel du serveur multimédia ni d'un ordinateur.
48
Page 49
FRANÇAIS
Référez-vous aux sections suivantes de ce guide (dans l’ordre indiqué) pour visualiser les
fichiers sur les ordinateurs ou sur une clé USB.
Visualiser les fichiers sur les
ordinateurs
1 Installer le logiciel du serveur multimédia
2 Connectez votre DMA-1000
3 Partager vos fichiers
4 Lire vos fichiers
Visualiser des fichiers
sur une clé USB
2 Connectez votre DMA-1000
4 Lire vos fichiers
1 Installer le logiciel du serveur multimédia
Vous devez installer le logiciel du serveur multimédia sur chaque ordinateur que vous
utiliserez pour partager les fichiers avec le DMA-1000.
" Vous pouvez uniquement installer le logiciel du serveur multimédia sur un
ordinateur fonctionnant sous Windows XP. Voir Configuration requise pour
plus de détails.
1 Placez le CD dans votre lecteur de CD-ROM. Cliquez sur Setup (Installer) dans l'écran
suivant.
49
Page 50
FRANÇAIS
V Si cet écran n'apparaît pas, localisez et double cliquez sur setup.exe.
2 L'assistant d'installation apparaît. Suivez les instructions pour installer le logiciel.
V Voir la section Requirements (Configuration requise) si vous avez des
difficultés à installer ou à utiliser le serveur multimédia.
3 Entrez vos informations dans cet écran. Entrez un nom d'utilisateur (jusqu'à 64
caractères ASCII recommandé). Le nom de la société est facultatif (jusqu'à 64
caractères ASCII recommandé). Cliquez sur Registration (Inscription) dans l'écran qui
s'ouvre lorsque vous insérez le CD-ROM (voir page 49). Puis cliquez sur Media Server
Serial Number (Numéro de série de Media Server) pour ouvrir un fichier texte avec un
50
Page 51

FRANÇAIS
numéro de série. Copiez et collez le numéro de série dans le champ Serial Number
(Numéro de série) dans l'écran indiqué ici.
4 Sélectionnez une destination pour le logiciel (ou laissez simplement la valeur par
défaut).
5 Vous pouvez spécifier un nom au serveur multimédia que le DMA-1000 affichera sur
votre téléviseur. Il est plus pratique d'utiliser des noms uniques si vous installez le
51
Page 52
FRANÇAIS
serveur multimédia sur plusieurs ordinateurs. Jusqu'à 34 caractères ASCII
recommandé.
6 Si vous voyez apparaître un écran vous invitant à configurer le pare feu de Windows
XP, cliquez sur Yes (Oui). Cela permet au DMA-1000 d'accéder aux fichiers sur votre
ordinateur que vous partagez.
V Consultez le guide de l'utilisateur si votre ordinateur est équipé d'un autre
logiciel pare feu (comme ZoneAlarm par exemple) que vous devez
configurer.
52
Page 53

FRANÇAIS
7 Cette icône s'affiche dans la barre d'état (habituellement dans le coin inférieur droit)
une fois que l'installation est terminée. Double cliquez sur l'icône pour ouvrir les écrans
de configuration du serveur.
8 La Published Folder List (Liste des dossiers publiés) donne la liste des dossiers de
fichiers que votre ordinateur partagera avec le DMA-1000.
• Vos dossiers My Music (Ma musique), My Pictures (Mes images) et My Videos
(Mes vidéos) sont inclus par défaut.
• Pour partager d'autres fichiers, cliquez sur le bouton Add Folder (Ajouter un dossier) et sélectionnez un dossier que vous voulez partager.
53
Page 54

FRANÇAIS
• Pour supprimer un dossier dans la liste, cliquez sur celui-ci et cliquez ensuite sur
Cancel Publication (Annuler la publication).
54
Page 55

FRANÇAIS
2 Connectez votre DMA-1000
Eteignez votre téléviseur avant de connecter le DMA-1000.
1 Si votre téléviseur est équipée d'un connecteur HDMI, utilisez un câble HDMI pour
relier le connecteur HDMI du DMA-1000 (indiqué) au téléviseur.
55
Page 56
FRANÇAIS
2 Si votre téléviseur n'est pas équipée d'un connecteur HDMI :
A Utilisez un câble S-Vidéo pour relier le connecteur S-VIDEO du DMA-1000 (indiqué)
au téléviseur.
B Si votre téléviseur ou système audio
est équipé d'une prise coaxiale S/
PDIF, utilisez un câble RCA pour la
connecter à la prise S/PDIF du
DMA-1000 (indiquée).
C Si votre téléviseur ou système audio
n'est pas équipé d'une prise coaxiale
S/PDIF, utilisez des câbles RCA pour
la connecter aux prises LEFT
(GAUCHE) et RIGHT (DROITE)
(indiquées) du DMA-1000.
56
Page 57
FRANÇAIS
3 Connectez le port LAN du DMA-1000 si les fichiers de
contenu se trouvent sur votre ordinateur. Le logiciel du
serveur multimédia doit déjà être installé. Passez à l'étape
suivante si vous ne comptez lire que des fichiers
provenant d'une clé USB.
• Utilisez le câble Ethernet droit (gris au moment de la
rédaction) pour connecter à un commutateur Ethernet,
routeur ou hub.
• Utilisez le câble Ethernet croisé (rouge au moment de
la rédaction) pour connecter directement à votre ordinateur.
4 Si vous voulez lire des fichiers à partir d'une clé USB,
connectez-la au port USB du DMA-1000. (Ceci est
facultatif si vous connectez le port LAN).
5 Connectez la prise d’alimentation à une source
de courant en utilisant uniquement l’adaptateur
d’alimentation fourni.
6 Votre ordinateur doit déjà être allumé. Allumez le
téléviseur et le DMA-1000.
2.1 Observez les LED (Voyants)
Regardez la façade de l'appareil.
1 La LED STATUS (ÉTAT) s'allume.
2 Le voyant LAN et/ou le voyant USB s'allume(nt).
V Vérifiez vos connexions si les voyants ne s'allument pas.
57
Page 58

FRANÇAIS
3 Partager vos fichiers
1 Regardez l'écran de votre ordinateur.
Attendez que le serveur multimédia
détecte le DMA-1000 et ouvre une
nouvelle fenêtre avec l'adresse IP du
DMA-1000. Si le DMA-1000 n'obtient
pas automatiquement une adresse IP,
il utilise Auto-IP pour attribuer lui-même une adresse IP. Si votre ordinateur est aussi
paramétré pour obtenir automatiquement une adresse IP, l'ordinateur et le DMA-1000
pourront communiquer. Voir le guide de l'utilisateur si vous devez configurer le DMA1000 avec une adresse IP statique. Cliquez à un endroit quelconque dans cette
fenêtre.
V Patientez deux à trois minutes. Si la fenêtre ne s'ouvre toujours pas,
vérifiez les LED et les connexions du DMA-1000 et utilisez le bouton
d'alimentation pour redémarrer le DMA-1000.
2 Sélectionnez Allow Connection (Autoriser la connexion) et cliquez sur OK.
3 Cliquez sur Yes (Oui) pour permettre au DMA-1000 d'accéder à vos fichiers (partagés)
publiés.
58
Page 59

FRANÇAIS
4 Lire vos fichiers
" Paramétrez l'entré de votre téléviseur sur la connexion (HDMI ou S-Vidéo)
du DMA-1000. Pensez à changer cette valeur quand vous voulez utiliser
une autre entrée.
1 Regardez votre téléviseur. Le DMA-1000 trie automatiquement les fichiers sur le
serveur dans les menus MUSIC (MUSIQUE), VIDEO (VIDÉO) et PHOTO. Les fichiers
sur une clé USB se trouvent dans le menu USB.
Nombre de serveurs multimédia détectés par le DMA-1000.
2 Installez les piles de la télécommande.
3 Dirigiez la télécommande vers la façade du DMA-1000.
59
Page 60

FRANÇAIS
4 Utilisez la télécommande pour naviguer parmi les menus et lire les fichiers.
Power (Alimentation) bascule
entre les modes veille et
fonctionnement.
Utiliser les touches 0~9,
CLEAR (EFFACER) et INPUT
(ENTRÉE) pour entrer les
chiffres (comme pour les
scènes ou temps individuels).
Retourne au menu principal.
PAG E up/down (PAGE
précédente/suivante) défile
vers le haut et vers le bas dans
une liste vers la page
précédente ou suivante.
AUDIO bascule la sortie audio
entre les haut-parleurs
gauche, droit et stéréo.
A-B vous permet de
sélectionner les temps de
début et de fin pour répéter un
intervalle.
REPEAT (RÉPÉTER) lit en
continu (boucle) le fichier.
INFO affiche les détails du
fichier en cours de lecture.
SERVER (SERVEUR) ouvre
un menu où vous
sélectionnez un serveur
multimédia.
ROTATE (PIVOTER) fait
pivoter une photo de 90° dans
le sens horaire.
SHUFFLE (MÉLANGER) lit
les fichiers (favoris) de votre
liste de lecture en désordre.
OPTION ouvre le menu où
vous configurez les
paramètres du DMA-1000.
MUTE (MUET) coupe le son.
VOLUME up/down
(Augmenter/Diminuer le
VOLUME) ajuste le volume.
Utilisez les boutons OK, BACK
(RETOUR) et le bouton fléché
pour vous déplacer parmi les
menus et lire vos fichiers.
TOOL (OUTIL) ouvre le menu
TOOL (OUTIL) pour les options
supplémentaires (voir le guide
de l'utilisateur).
Ces boutons exécutent les
fonctions previous
(précédente), play (lecture),
next (suivante), reverse
(inverser), stop (arrêt), fast
forward (avance rapide), skip
(sauter), pause et slow motion
(ralenti) pendant la lecture des
fichiers.
PHOTO ouvre un menu de
fichiers images à visualiser.
VIDEO (VIDÉO) ouvre un menu
de fichiers vidéo à lire.
MUSIC (MUSIQUE) ouvre un
menu de fichiers vidéo à lire.
USB ouvre un menu de fichiers
sur votre périphérique USB.
60
Page 61

FRANÇAIS
Exemple de lecture de fichiers vidéo
1 Appuyez sur le bouton VIDEO de la télécommande et entrez dans le menu VIDEO.
2 Les fichiers vidéo sont classés par dossiers.
Le nombre
d'éléments
actuellement
sélectionnés suivi du
nombre total
d'éléments dans le
menu.
Instructions de navigation pour le menu. Dans cet exemple, utilisez le bouton fléché et le
bouton OK pour sélectionner un dossier pour voir des fichiers vidéo triés par ce critère. Ou
utilisez le bouton BACK (RETOUR) pour monter dans la structure du menu.
3 Dans cet exemple, utilisez le
bouton fléché de la
télécommande et le bouton
OK pour sélectionner le
dossier All Videos (Toutes
les vidéos). Une liste de tous
les fichiers vidéo s'affiche à
droite. Les informations
concernant le fichier
actuellement sélectionné
s'affichent à gauche.
4 Utilisez le bouton fléché et le
bouton OK de la
télécommande pour
sélectionner et lire un fichier
vidéo.
V Les fichiers ou codecs d'un format non pris en charge risquent de ne pas
s'afficher correctement.
61
Page 62

FRANÇAIS
Le DMA-1000 prend en charge les formats de fichiers suivants. Voir le guide de l'utilisateur
pour plus de détails.
Audio
Vidéo MPEG-1, MPEG-2 MP@ML, MPEG-4 profil simple et simple avancé, fichiers MPEG-4 AVI et
Photo TIFF, PNG, GIF, BMP, JPEG et JPEG2000.
Dolby Digital, DVD-Audio, MPEG-1 et MPEG-2 Couches I, II et III(MP3), MPEG-2
BC multi-canal Couches I, II et III, MPEG-2 et MPEG-4 AAC-LC, WMA9.
WMV version 9.
Configuration requise
V Si vous rencontrez des difficultés lors de l'installation du logiciel du serveur
multimédia, vérifiez que votre ordinateur répond à la configuration requise
suivante.
Microsoft Windows XP Edition Familiale Service Pack 1 ou supérieur, Professionnel Service Pack 1 ou
supérieur, ou Media Center Edition 2005 Update Rollup ou supérieur.
*Vous devez avoir ouvert une session en tant qu'administrateur pour installer et utiliser le serveur
multimédia.
Logiciel Windows Media Player 9 ou supérieur
CPU Celeron 1GHz ou supérieur, Pentium III ou supérieur (Pentium III 1GHz ou supérieur
Mémoire 256Mo ou plus recommandé
Périphériques Lecteur CD-ROM
Disque dur
Microsoft DirectX 9.0 ou supérieur
recommandé) ou compatible
300Mo ou plus
Procédure pour afficher la (les) certification(s) d'un
produit
1 Allez à www.zyxel.com.
2 Sélectionnez votre produit dans la liste déroulante dans la
page d'accueil de ZyXEL pour aller à la page de ce produit.
3 Sélectionnez la certification que vous désirez consulter
dans cette page.
62
Page 63

FRANÇAIS
63
Page 64

ITALIANO
ITALIANO
Utilizzare il DMA-1000 per riprodurre file audio, video e fotografie sulla TV invece che sul
monitor del computer. I file possono trovarsi su un computer, su una penna di
archiviazione o su un disco rigido USB.
Nella figura seguente è raffigurato il DMA-1000 collegato a uno switch Ethernet (S) e a una
TV. Allo switch Ethernet sono collegati i computer da A a C.
C
B
A
È necessario disporre di un cavo HDMI nel
caso in cui si colleghi il DMA-1000 a un
connettore HDMI sulla TV.
S
USB
TV
DMA-1000
" Se usate Windows Vista, fate riferimento al capitolo Windows Vista Media
Server nella Users Guide (all'interno del CD) lasciate i files DMA-1000 sul
vostro computer.
Installare il software Media Server fornito in dotazione per consentire al DMA-1000 di
riprodurre i file memorizzati sul computer. Il software richiede Windows XP. Se non si
dispone di Windows XP e non si desidera installare il software, è possibile archiviare i file
su una penna USB. La penna USB si collega direttamente allo DMA-1000 senza che siano
necessari il software Media Server o un computer.
Le sezioni seguenti della presente guida (nell'ordine elencato) illustrano come visualizzare
i file su un computer oppure su una penna USB.
64
Page 65
ITALIANO
Visualizzazione di file su un
computer
1 Installazione del software Media Server
2 Collegamento del DMA-1000
3 Condivisione dei file
4 Riproduzione dei file
Visualizzazione di file su
una penna USB
2 Collegamento del DMA-1000
4 Riproduzione dei file
1 Installazione del software Media Server
È necessario installare il software Media Server su ogni computer che si desidera
utilizzare per condividere i file con DMA-1000.
" Il software Media Server può essere installato solo su un computer
Windows XP. Vedere Requisiti per maggiori informazioni.
1 Inserire il CD nel lettore CD-ROM. Fare clic su Setup (installa) nella schermata
seguente.
65
Page 66
ITALIANO
V Se la schermata non viene visualizzata, individuare e fare doppio clic sul
file setup.exe.
2 Appare l'installazione guidata. Attenersi alle istruzioni per installare il software.
V Fare riferimento alla sezione dei requisiti di sistema in caso di problemi
nell'installazione o nell'uso del software Media Server.
3 Immettere le informazioni in questa schermate. Immettere un nome utente (massimo di
64 caratteri ASCII). Il nome della società è opzionale (massimo 64 caratteri ASCII).
Fare clic su Registration (registrazione) nella schermata che viene visualizzata quando
si inserisce il CD nel lettore CD-ROM (vedere pagina 65). A questo punto scegliere
Media Server Serial Number (numero seriale del server multimediale) per aprire un file
66
Page 67
ITALIANO
di testo con un numero seriale. Copiare e incollare il numero seriale nel campo Serial
Number (numero seriale) della schermata qui illustrata.
4 Selezionare la destinazione in cui installare il software (oppure lasciare la destinazione
predefinita).
67
Page 68
ITALIANO
5 È possibile specificare un nome per il Media Server che sarà visualizzato da DMA-1000
sulla TV. Se si installa il software Media Server su più computer è utile utilizzare nomi
univoci. Massimo 34 caratteri ASCII.
6 Se viene visualizzata una schermata relativa alla configurazione del firewall di
Windows XP, scegliere Sì. In questo modo, DMA-1000 può accedere ai file condivisi sul
computer.
V Fare riferimento alla Guida dell'utente se sul computer è presente un altro
software firewall (come ad esempio ZoneAlarm) che occorrerà configurare.
68
Page 69
ITALIANO
7 Una volta completata l'installazione, nell'area di notifica della barra delle applicazioni
(generalmente nell'angolo inferiore destro) viene visualizzata questa icona. Fare
doppio clic sull'icona per aprire le schermate di configurazione del server.
8 Il Published Folder List (elenco delle cartelle pubblicate) elenca le cartelle di file che il
computer dovrà condividere con DMA-1000.
• Per impostazione predefinita sono incluse le cartelle Musica, Immagini e Video.
• Per condividere altri file, fare clic sul pulsante Add Folder (aggiungi cartella) e
selezionare la cartella da condividere.
69
Page 70

ITALIANO
• Per rimuovere una cartella dall'elenco, selezionarla e quindi fare clic su Cancel
Publication (annulla pubblicazione).
70
Page 71
ITALIANO
2 Collegamento del DMA-1000
Spegnere la TV prima di collegare il DMA-1000 .
1 Se la TV dispone di un connettore HDMI, utilizzare un cavo HDMI per collegare il
connettore HDMI del DMA-1000 (vedere figura) alla TV.
71
Page 72
ITALIANO
2 Se la TV non dispone di un connettore HDMI:
A Utilizzare un cavo S-video per collegare il connettore S-VIDEO del DMA-1000
(vedere figura) alla TV.
B Se la TV o il sistema audio dispone
di un cavo S/PDIF coassiale,
utilizzare un cavo RCA per
collegarlo al jack S/PDIF del DMA1000 (vedere figura).
C Se la TV o il sistema audio non
dispone di un jack S/PDIF coassiale,
utilizzare cavi RCA per eseguire il
collegamento ai jack LEFT e RIGHT
del DMA-1000 (vedere figura).
72
Page 73
ITALIANO
3 Collegare la porta LAN del DMA-1000 se i file contenuti si
trovano sul computer. Il software Media Server deve già
essere installato. Saltare al prossimo passo se si
riprodurranno file solo da una penna USB.
• Utilizzare il cavo Ethernet con fili non intrecciati (di colore grigio alla scrittura del presente documento) per
eseguire il collegamento a uno switch, router o hub
Ethernet.
• Utilizzare il cavo Ethernet con fili intrecciati (di colore
rosso alla scrittura del presente documento) per
eseguire il collegamento direttamente al computer.
4 Per riprodurre file da una penna di memorizzazione USB,
eseguire il collegamento alla porta USB del DMA-1000
(opzionale se si esegue il collegamento alla porta LAN).
5 Collegare la presa POWER ad una fonte di
alimentazione utilizzando esclusivamente
l'alimentatore fornito in dotazione.
6 Il computer deve già essere acceso. Accedere TV
e DMA-1000.
2.1 Controllare i LED (spie)
1 Osservare la parte anteriore dell'unità. Il LED STATUS si accende.
2 La spia LAN e/o la spia USB si accendono.
V Se le spie non si accendono, controllare i collegamenti.
73
Page 74

ITALIANO
3 Condivisione dei file
1 Osservare la schermata del computer.
Attendere il rilevamento di DMA-1000
da parte del Media Server e l'apertura
della finestra popup con l'indirizzo IP
del DMA-1000. Se lo DMA-1000 non
ottiene automaticamente un indirizzo
IP, esso utilizza Auto-IP per assegnare esso stesso un indirizzo IP. Se anche il
computer ottiene automaticamente un indirizzo IP, il computer e lo DMA-1000 potranno
comunicare. Consultare la Guida per l'utente se occorre configurare lo DMA-1000 con
un indirizzo IP statico. Fare clic in un punto qualsiasi di questa finestra.
V Può essere necessaria un'attesa di 2 o 3 minuti. Se la finestra non viene
visualizzata, controllare i LED e i collegamento del DMA-1000 e utilizzare
l'interruttore di alimentazione per spegnere e riaccendere il DMA-1000.
2 Selezionare Allow Connection (consenti connessioni) e scegliere OK.
3 Fare clic su Yes (sì) per consentire al DMA-1000 di accedere ai file pubblicati
(condivisi).
74
Page 75

ITALIANO
4 Riproduzione dei file
" Impostare l'ingresso della TV al collegamento del DMA-1000 (HDMI oppure
S-Video). Ricordare di cambiare ingresso quando si desidera utilizzarne un
altro.
1 Osservare la TV. DMA-1000 ordina automaticamente i file sul server nei menu MUSIC,
VIDEO e PHOTO. I file presenti su una penna USB si trovano sotto il menu USB.
Numero di Media Server rilevati dal DMA-1000.
2 Installare le batterie nel telecomando.
3 Puntare il telecomando in direzione del DMA-1000.
75
Page 76

ITALIANO
4 Utilizzare il telecomando per navigare tra i menu e riprodurre i file.
Power consente di
commutare tra le modalità
standby e funzionamento.
Utilizzare i tasti da 0 a 9,
CLEAR (cancella) e INPUT
(ingresso) per immettere i
numeri (come per singole
scene oppure orari).
PAG E su/giù scorre su o già
l'elenco alla pagina
precedente o successiva.
Tornare al menu principale.
MUTE disattiva l'audio.
VOLUME su/giù consente di
regolare il volume.
AUDIO commuta l'uscita
audio tra gli altoparlanti
sinistro, destro e stereo.
A-B consente di selezionare i
tempi di inizio e stop per un
intervallo di ripetizione.
REPEAT (ripeti) esegue la
riproduzione ciclica del file.
INFO visualizza i dettagli
relativi al file in riproduzione.
SERVER apre un menu in cui
è possibile selezionare un
Media Server.
ROTATE (ruota) consente di
ruotare una foto di 90° in
senso orario.
SHUFFLE (casuale) riproduce
l'elenco di brani (preferiti) in
ordine casuale.
OPTION (opzioni) apre un
menu in cui è possibile
configurare le impostazioni del
DMA-1000.
Utilizzare i pulsanti OK, BACK
(indietro) e freccia per navigare
tra i menu e riprodurre i file.
TOOL (strumenti) apre il menu
TOOL in cui sono presenti
opzioni aggiuntive (vedere la
Guida dell'utente).
Questi pulsanti eseguono le
funzioni precedente, play,
successivo, indietro, stop,
avanzamento rapido, salta,
pausa e rallentatore durante la
riproduzione dei file.
PHOTO (foto) apre un menu di
file immagine da visualizzare.
VIDEO apre un menu di file video
da riprodurre.
MUSIC apre un meni di file
musicali da riprodurre.
USB apre il menu dei file
presenti sul dispositivo USB.
76
Page 77
ITALIANO
Esempio di riproduzione dei file video
1 Premere il pulsante VIDEO del telecomando per aprire il menu VIDEO.
2 I file video sono disposti in cartelle.
Il numero
dell'elemento
correntemente
selezionato seguito
dal numero totale di
elementi presenti nel
menu.
Istruzioni di navigazione del menu. In questo esempio, utilizzare i pulsanti freccia e OK
per selezionare una cartella per la visione dei file video ordinati con tale criterio. Oppure
utilizzare il pulsante BACK (indietro) per salire nella struttura dei menu di un livello.
3 In questo esempio, utilizzare
i pulsanti freccia e OK del
telecomando per selezionare
la cartella All Videos (tutti i
video). Sulla destra viene
visualizzato un elenco di tutti
i file video. Sulla sinistra
appaiono le informazioni
relative al file correntemente
selezionato.
4 Utilizzare i pulsanti freccia e
OK del telecomando per
selezionare e riprodurre un
file video.
V I file con formati o codec non supportati possono non essere visualizzati
correttamente.
77
Page 78

ITALIANO
DMA-1000 supporta i seguenti formati di file. Cedere la Guida dell'utente per ulteriori
informazioni.
Audio
Video Profili MPEG-1, MPEG-2 MP@ML, MPEG-4 semplici e avanzati, file AVI MPEG-4 e WMV
Foto TIFF, PNG, GIF, BMP, JPEG e JPEG2000.
Dolby Digital, DVD-Audio, MPEG-1 e MPEG-2 Layer I, II e III(MP3), MPEG-2 BC
Layer I, II e III multicanale, MPEG-2 e MPEG-4 AAC-LC, WMA9.
versione 9.
Requisiti
V In caso di problemi nell'installazione del software Media Server, verificare
che il computer soddisfi i requisiti seguenti.
Microsoft Windows XP Home Edition Service Pack 1 o successivo, Professional Service Pack 1 o
successivo, oppure Media Center Edition 2005 Update Rollup o successivo.
*È necessario adoperare un utente dotato di privilegi amministrativi per installare il software Media
Server.
Software Windows Media Player 9 o successivo
CPU Celeron 1GHz o superiore, Pentium III o superiore (consigliato Pentium III 1GHz o
Memoria Consigliati 256 MB o quantità superiore
Periferiche Unità CD-ROM
Disco rigido
Microsoft DirectX 9.0 o successivo
superiore) o compatibile
300 MB o quantità superiore.
Procedura per visualizzare le certificazioni di un
prodotto
1 Aprire la pagina www.zyxel.com.
2 Selezionare il prodotto dall'elenco di riepilogo a
discesa nella Home Page di ZyXEL per passare
alla pagina del prodotto in questione.
3 Selezionare da questa pagina la certificazione che
si desidera visualizzare.
78
Page 79

ITALIANO
79
Page 80
РУССКИЙ
РУССКИЙ
Ваш DMA-1000 может использоваться для воспроизведения аудио, видео или
графических файлов на телевизоре вместо монитора компьютера. Эти файлы могут
располагаться на компьютере, на карте памяти USB или на жестком диске.
На рисунке внизу показан DMA-1000, подключенный к коммутатору Ethernet (S) и
телевизору. Компьютеры A~C подключены к коммутатору Ethernet.
B
A
Если вы хотите подключить DMA-1000 к
разъему HDMI вашего телевизора, то вам
понадобится кабель HDMI (не входит к
комплект поставки).
C
DMA-1000
Телевизор
S
USB
" Для настройки работы компьютеров под управлением Windows Vista,
обратитесь к разделу Windows Vista Media Server в приложении к
Руководству Пользователя (на компакт диске).
Для воспроизведения при помощи DMA-1000 находящихся на вашем компьютере
файлов необходимо установить программное обеспечение с диска, входящего в
комплект поставки. Это программное обеспечение совместимо с операционной
системой Windows XP. Если Windows XP на вашем компьютере не установлена, или
вы не хотите инсталлировать программное обеспечение, то можно разместить ваши
файлы на карту памяти USB. Карта памяти USB подключается прямо к DMA-1000 без
необходимости установки программного обеспечения медиа-сервера или
подключения компьютера.
80
Page 81
РУССКИЙ
В следующих разделах руководства мы расскажем вам как просматривать файлы на
компьютерах или карте памяти USB.
Просмотр файлов на компьютере
Просмотр файлов на
карте памяти USB
1 Установка программного обеспечения
Media Server
2 Подключение DMA-1000
3 Совместный доступ к файлам
4 Воспроизведение файлов
2 Подключение DMA-1000
4 Воспроизведение файлов
1 Установка программного обеспечения Media Server
На каждом компьютере, который будет обмениваться файлами с DMA-1000
необходимо установить программное обеспечение медиа-сервера.
" Вы можете установить это ПО только на компьютер с Windows XP.
Смотрите Требования для получения дополнительной информации.
1 Вставьте установочный диск в дисковод CD-ROM вашего компьютера. Щелкните
Setup (Установить ) в появившемся окне.
81
Page 82

РУССКИЙ
V Если это окно не появляется автоматически, то дважды щелкните на
приложении setup.exe.
2 Появится окно мастера установки. Следуйте инструкциям по установке
программного обеспечения.
V При возникновении проблем с установкой или использованием медиа-
сервера обратитесь к разделу, где описаны системные требования.
3 Введите информацию в этом окне. Введите имя пользователя (рекомендуется до
64 символов). Название компании вводится по выбору (рекомендуется до 64
символов). В окне, которое появится после установки CD-диска, щелкните
Registration (Регистрация) (смотрите страницу 81). Затем щелкните на Media
Server Serial Number (Серийный номер медиа-сервера), чтобы открыть текстовый
82
Page 83

РУССКИЙ
файл с серийным номером. Скопируйте и вставьте серийный номер в показанное
здесь поле Serial Number (Серийный номер).
4 Выберите папку для установки ПО (или просто оставьте значение по умолчанию).
5 Вы можете присвоить медиа-серверу имя, которое будет отображаться DMA-1000
на экране телевизора. При установке медиа-сервера на несколько компьютером,
83
Page 84

РУССКИЙ
полезно присваивать им уникальные имена. Рекомендуемая длина имени до 34
символов.
6 При появлении окна с запросом на установку конфигурации брандмауэра Windows
XP щелкните Yes (Да). Это позволит DMA-1000 получить доступ к файлам на
вашем компьютере.
V Обратитесь к соответствующему руководству пользователя, если на
вашем компьютере установлен другой брандмауэр (например,
ZoneAlarm) и он нуждается в настройке.
84
Page 85

РУССКИЙ
7 Этот значок появится в системном трее (обычно в нижнем правом углу) по
окончании установки. Чтобы открыть окно настройки конфигурации сервера
дважды щелкните на этом значке.
8 В списке Published Folder List (Список опубликованных папок) приведены папки,
которые используются совместно вашим компьютером и DMA-1000.
• Ваши папки My Music (Моя музыка), My Pictures (Мои рисунки) и My Videos
(Мое видео) добавляются в этот список по умолчанию.
• Для совместного использования других папок щелкните на кнопке Add Folder
(Добавить папку) и выберите папку для публикации на сервере.
85
Page 86
РУССКИЙ
• Чтобы удалить папку из списка, выберите ее щелчком мыши, а затем нажмите
кнопку Cancel Publication (Отменить публикацию).
86
Page 87

РУССКИЙ
2 Подключение DMA-1000
Перед подключением DMA-1000 необходимо выключить телевизор.
1 Если ваш телевизор имеет разъем HDMI, то к нему можно подключить
расположенный на DMA-1000 разъем HDMI при помощи кабеля HDMI, который не
входит к комплект поставки.
87
Page 88
РУССКИЙ
2 Если ваш телевизор не имеет разъема HDMI:
A При помощи кабеля S-video соедините разъемы S-VIDEO вашего DMA-1000 и
телевизора.
B Если ваш телевизор или аудио-
система оборудована
коаксиальным разъемом S/PDIF,
то используйте кабель RCA для
подключения их к разъему S/PDIF
(показан) вашего DMA-1000.
C Если ваш телевизор или аудио-
система не имеют коаксиального
разъема S/PDIF, то используйте
кабели RCA для подключения их к
LEFT (ЛЕВОМУ) и RIGHT
(ПРАВОМУ) разъемам (показано)
вашего DMA-1000.
88
Page 89
РУССКИЙ
3 Подключите порт LAN вашего DMA-1000, если на
компьютере находятся файлы для воспроизведения.
При этом уже должно быть установлено программное
обеспечение медиа-сервера. Пропустите следующий
шаг установки, если вы будете воспроизводить файлы
только с карты памяти USB.
• Используйте прямой кабель Ethernet (серого цвета
на момент написания этого руководства) для
подключения к коммутатору или маршрутизатору
Ethernet.
• Используйте перекрестный кабель Ethernet
(красного цвета на момент написания этого
руководства) для подключения непосредственно к
вашему компьютеру.
4 Если вы хотите воспроизводить файлы с карты памяти USB, то подключите ее к
USB-порту вашего DMA-1000. (При подключении к порту LAN (ЛВС) это
необязательно.).
5 Подключите розетку POWER (ПИТАНИЕ) к
электросети при помощи входящего к комплект
поставки блока питания.
6 Ваш компьютер должен быть включен в этот
момент. Включите телевизор и DMA-1000.
2.1 Проверьте индикаторы (лампочки).
Посмотрите на индикаторы на передней части устройства.
1 К этому моменту индикатор STATUS (СОСТОЯНИЕ) должен быть активен.
2 Также должны быть активны индикатор LAN и/или USB.
V Если индикаторы не загораются, то проверьте соединения.
89
Page 90

РУССКИЙ
3 Совместный доступ к файлам
1 Посмотрите на экран компьютера.
Подождите, пока медиа-сервер
обнаружит DMA-1000 и выведет
окно с IP-адресом DMA-1000. Если
DMA-1000 не получит IP-адрес
автоматически, то он использует
функцию Auto-IP для его самостоятельного назначения. Если ваш компьютер
также получает IP-адрес автоматически, то он будет способен связаться с DMA1000 . Если вам необходимо назначить DMA-1000 статический IP-адрес, то
обратитесь к Руководству пользователя. Щелкните на любой части этого окна.
V Возможно, вам придется подождать две-три минуты. Если окно не
появляется, то проверьте индикаторы DMA-1000 и надежность
соединения. Перезапустите DMA-1000, используя кнопку включения
питания.
2 Выберите Allow Connection
(Разрешить подключения) и
щелкните на кнопке OK.
3 Щелкните на Yes (Да)
для разрешения
доступа DMA-1000 к
вашим опубликованным
(общим) файлам.
90
Page 91
РУССКИЙ
4 Воспроизведение файлов
" Переключите вход вашего телевизора на соединение с DMA-1000
(HDMI или S-Video). Не забывайте вносить изменения в настройки при
переходе на использование другого входа.
1 Посмотрите на экран телевизора. Ваш DMA-1000 автоматически отсортирует
файлы на сервере по категориям MUSIC (Музыка), VIDEO (Видео) и PHOTO
(Фотографии). Файлы на карте памяти USB будут доступны в меню USB.
Количество обнаруженных DMA-1000 медиа-серверов.
2 Установите батарейки в пульт дистанционного управления.
3 Направьте пульт дистанционного управления на переднюю панель DMA-1000.
91
Page 92

РУССКИЙ
4 Выберите с его помощью меню и файлы для воспроизведения..
Power (Питание)
выполняет переключение
между режимами
готовности и ожидания.
Для ввода чисел
используйте кнопки 0~9,
CLEAR (Очистить) и INPUT
(Ввод) (как для отдельных
сцен или количества
повторов).
PAG E up/down (Страница
вверх/вниз) вывод
предыдущей или
последующей страницы
списка.
AUDIO (Аудио) переключает аудио-выход
между левым, правым
каналом и режимом
стерео.
A-B - позволяют выбрать
время начала и
завершения для
повторяющего фрагмента.
REPEAT (Повтор)включает циклическое
воспроизведение файла.
INFO (Инфо) - показывает
информацию о текущем
файле.
SERVER (Сервер) открывает меню, в
которым вы выбираете
медиа-сервер.
ROTATE (Повернуть)поворот фотографии на 90
градусов по часовой
стрелке.
SHUFFLE (Случайный)воспроизведение вашего
списка произведения
(избранного) в случайном
порядке.
OPTION (Настройки) открывает меню настроек
DMA-1000.
Возврат в главное меню
MUTE (Звук) - выключает
звук.
Кнопки VOLUME up/down
(Громкость +/-) используются
для регулировки громкости.
Для выбора меню и файлов
используйте кнопки OK,
BACK (Назад) и кнопки со
стрелками.
TOOL (Инструменты)
открывает контекстное меню
TOOL (Инструменты) для
расширенной настройки
(смотрите руководство
пользователя).
Эти кнопки служат для ввода
команд при воспроизведении
файла: вернуться к
предыдущему,
воспроизведение,
следующий, реверс, стоп,
быстрая перемотка вперед,
пропустить, пауза и
медленное воспроизведение.
PHOTO (Фото) - открывает
меню выбора фотографий
для просмотра.
VIDEO (Видео) - открывает
меню выбора видеофайлов
для воспроизведения.
MUSIC (Музыка) - открывает
меню выбора аудиофайлов
для воспроизведения.
USB - открывает меню
выбора файлов на карте
памяти USB.
92
Page 93

РУССКИЙ
Пример воспроизведения видеофайлов.
1 Нажмите на кнопку VIDEO (Видео) пульта дистанционного управления и войдите в
меню VIDEO (Видео).
2 Видеофайлы рассортированы по категориям.
Количество
выбранных в
данный момент
элементов
указывается рядом с
общим количеством
файлов в меню.
Инструкции по перемещению между меню. В этом примере при помощи кнопок со
стрелками и кнопки OK выберите папку для просмотра файлов, отсортированных по
данному критерию. Или нажмите кнопку BACK (Назад) для возврата в основное
меню.
3 В этом примере при
помощи кнопок пульта со
стрелками и кнопки OK
выберите папку All Videos
(Все видео). Справа будет
выведен список всех
видеофайлов. Информация
о выбранном в данный
момент файле будет
показываться слева.
4 При помощи кнопок пульта
со стрелками и кнопки OK
выберите файл для
воспроизведения.
V Файлы в неподдерживаемых форматах и кодеках могут
воспроизводиться некорректно.
93
Page 94

РУССКИЙ
Ваш DMA-1000 поддерживает следующие форматы.
Аудио
Видео MPEG-1, MPEG-2 MP@ML, MPEG-4 простой и расширенный профиль, файлы
Фото TIFF, PNG, GIF, BMP, JPEG и JPEG2000.
Dolby Digital, DVD-Audio, MPEG-1, MPEG-2 Layers I, II и III(MP3), MPEG-2
BC multi-channel Layers I, II и III, MPEG-2 и MPEG-4 AAC-LC, WMA9.
MPEG-4 AVI и WMV версии 9.
Требования
V При возникновении проблем с установкой медиа-сервера проверьте
выполнение следующих системных требований.
Microsoft Windows XP Home Edition Service Pack 1 или выше, Professional Service Pack 1 или выше,
Media Center Edition 2005 Update Rollup или выше.
*Для установки ПО медиа-сервера вы должны войти в систему с административными правами.
Программное
обеспечение
ЦПУ Celeron 1ГГц или выше, Pentium III или выше (рекомендуется Pentium III 1ГГц
Память Рекомендуется 256Мб или выше
Периферия Привод CD-ROM
Жесткий диск
Windows MediaPlayer 9 или выше
Microsoft DirectX 9.0 или выше
или выше) или другие совместимые
300Мб или больше.
Процедура просмотра информации о
сертификации продукта
1 Посетите сайт www.zyxel.com
2 Выберите ваш продукт из выпадающего списка
на домашней странице ZyXEL и перейдите на
его страницу.
3 Выберите на этой странице сертификат, который
вы хотите просмотреть.
94
Page 95

РУССКИЙ
95
 Loading...