

Page 1

144 MHz
FM TRANSCEIVER
FT-25R
FT-25E
Operating Manual
Page 2

Contents
General Description ............................................ 1
Features of the FT-25R/E ................................1
About this manual ............................................ 2
Downloading the “Advance Manual” ............... 3
Accessories & Options ....................................... 4
Supplied Accessories ...................................... 4
Available Options.............................................4
Safety Precautions (Be Sure to Read) ............... 5
Control & Connections (Top & Front Panel) ... 11
Controls & Connections (Side Panel) .............. 12
Controls & Connections (LCD) ......................... 13
Normal operation display ............................... 13
The Set Mode and Preference Mode display 13
Display of features and settings .................... 14
Controls & Connections (Keypad) ................... 15
Installation of Accessories ............................... 16
Antenna Installation ....................................... 16
Preparation of SBR-25LI Battery Pack .......... 16
Installing the Battery Pack ....................... 16
Removing the Battery Pack ..................... 17
Attaching the Belt Clip ................................... 17
Charging the Battery Pack................................ 18
About Desktop charger lamp ........................ 18
Low Battery Indication ................................... 19
About Battery Indicator Icons .................. 19
Approximate Operating Time and Remaining
Charge Level Indication........................... 19
Basic Operation ................................................. 20
Turn the Power ON and OFF ........................20
Adjust the Audio Volume Level and Squelch
Setting ........................................................... 20
Changing between VFO A and B ...................20
FM Radio Broadcast Band Dual Watch ......... 20
Frequency Navigation ................................... 21
(1) Tuning Frequency .............................. 21
(2) Direct Keypad Frequency Entry ......... 21
(3) Scanning ............................................ 21
Transmission .................................................22
Changing the Transmit Power Level .......22
Activating the Set Mode ................................ 23
How to use the [P1]-[P4] keys ....................... 23
(1) One touch recall of the preferred status
................................................................ 23
(2) Set Mode Recall feature .................... 23
Preset Functions assigned to the [P1] to [P4]
keys ......................................................... 24
Setting the Preferred Operating Mode .......... 24
Advanced Operation ......................................... 25
Turning the Keylock Feature ON and OFF .... 25
Change the key locking scheme ............. 25
Change the LCD and keypad back light setting ..
...................................................................... 25
Disabling the Keypad and Scan Stop Beeper 26
Repeater Operation ........................................... 27
Repeater Shifts .............................................. 27
Automatic Repeater Shift (ARS) .................... 27
Manual Repeater Shift Setting ...................... 28
Tone Calling (1750 Hz) ..................................29
Memory Mode .................................................... 30
Memory Storage ............................................ 31
Memory Recall .............................................. 32
Changing the memory label (tag) name ........ 32
HOME Channel Memory Recall .................... 33
Changing the Home Channel Frequency 33
Memory Offset Tuning ...................................33
Deleting Memories ........................................ 34
Weather Broadcast Channels ....................... 35
Severe Weather Alert .............................. 35
Scanning ............................................................ 36
Setting the Scan-Resume Technique ......36
VFO Scanning ............................................... 37
Manual VFO Scan ................................... 37
Programmed Mode (VFO) Scan.............. 37
Input Character/Symbol List ............................. 39
Set (Menu) Mode ................................................ 40
Troubleshooting ................................................44
The transceiver does not turn on............. 44
There is no sound.................................... 44
There is no transmission of radio waves. 44
The keys or PTT do not respond. ............ 44
The battery pack cannot be charged or
battery power depletes immediately after
charging................................................... 45
Specifications .................................................... 46
General.................................................... 46
Transmitter ..............................................46
Receiver .................................................. 47
“AUTO” Mode Preset Operating Parameter .... 47
USA Version ............................................47
Asian/European Version ..........................47
Page 3

General Description
Features of the FT-25R/E
Congratulations on your purchase of the FT-25R/FT-25E Yaesu amateur
transceiver!
FT-25R/E is a FM transceiver, ruggedly constructed to meet commercial
specications. It is packed with the following popular and valuable features
demanded by Amateur Radio operators around the world.
Long-Life Battery
Supplied 7.4 V 1,950 mAh lithium ion battery.
Optional 7.4 V 2,500 mAh lithium ion battery.
5 Watts of Reliable RF Power
RF Power Output 5.0 W (High) / 2.5 W (Middle) / 0.5 W (Low) (@7.4 V)
Four Quick Recall Keys (User Programmable) for Individual Preferences
Set Mode Recall feature and Quick Memory Feature.
Powerful Audio
Bridged Transless (BTL) amplier provides One Full Watt of Audio for
operation in noisy environments.
Rugged Body Construction
IP54 Rating and MIL-STD-810-C, D, E certied.
Lockout Capabilities
Keypad/PTT Lockout.
Emergency Features
Emergency Operation (Alarm, SOS Flash and HOME channel display),
LED Flash light equipped.
FM Radio Broadcast Receiver Feature
1FT-25R/FT-25E Operating Manual
Page 4
General Description
About this manual
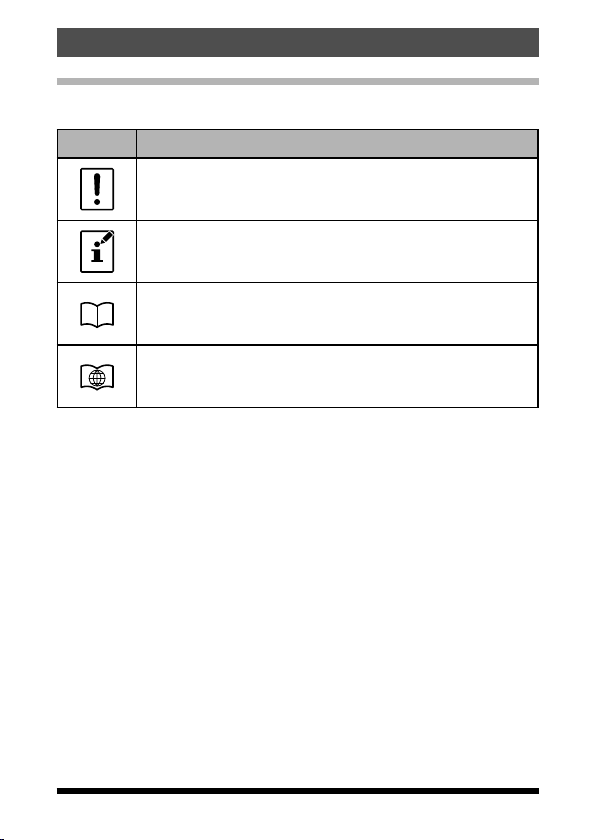
This manual contains symbols and conventions to call attention to important
information.
Symbols Description
This icon indicates cautions and alerts the user should be
aware of.
This icon indicates helpful notes, tips and information.
This icon indicates other pages containing relevant information.
This icon refers users to the FT-25R/E Advance Manual on
the YAESU Website containing relevant information.
• The settings of the transceiver at the time of purchase are referred to as the
“default” or “default setting”.
• The names of Set Mode items that are displayed on the LCD, and the
transceiver key names, are printed in bold characters in this manual.
2
FT-25R/FT-25E Operating Manual
Page 5

General Description
Downloading the “Advance Manual”
The Advance Manual provides detail information and features beyond the
scope and descriptions in this manual. Download the FT-25R/E Advance
Manual from the YAESU website and refer to it along with this Operating
Manual.
http://www.yaesu.com/
The features described in the FT-25R/E Advance Manual are below.
RF Squelch Emergency Channel Operation
Checking the Battery Voltage ARTS (Automatic Range Transponder
VOX Operation (with earpiece mic or
Internal / External mic)
VFO Split Mode DTMF Operation
Using the Squelch Feature Miscellaneous Settings
Selecting the Squelch Type Password
Setting CTCSS Tone frequency Changing the Channel Steps
Setting DCS CODE number TX Battery Saver
CTCSS/DCS/PAGER/ARTS Bell Operation
EPCS (Enhanced Paging & Code
Squelch)
Memory Bank Operation Transmitter Time-Out Timer (TOT)
Memory Only Mode Busy Channel Lock-Out (BCLO)
Scanning Changing the TX deviation Level
Memory scanning Voice Compander Feature
Weather Alert Scan Inversion Scramble (Asian version
Programmable (Band Limit) Memory
Scan (PMS)
“Priority Channel” Scanning Set (Menu) Mode
Automatic Lamp Illumination on Scan
Stop
System)
Basic ARTS Setup and Operation
Disabling the TX/BUSY LED Indicator
Automatic Power-Off (APO) Feature
only)
Cloning
FT-25R/FT-25E Operating Manual
3
Page 6

Accessories & Options
Supplied Accessories
7.4V, 1,950 mAh SBR-25LI
Rechargeable Li-Ion Battery Pack
AC Adapter (for USA model) SAD-20B*
AC Adapter (for European / Asian model) SAD-20C/U*
AC Adapter (for Chinese model) SAD-20G*
Rapid Charger SBH-22
Belt Clip SHB-18
Antenna for VHF only SRA-16N
(including FM Broadcast Radio)
Operating Manual
SBR-25LI/SBR-26LI Manual
Warranty Card
Available Options
7.4V, 1,950 mAh SBR-25LI
Rechargeable Li-Ion Battery Pack
7.4V, 2,500 mAh SBR-26LI
Rechargeable Li-Ion Large-Capacity
Battery Pack
Rapid Charger SBH-22
AC Adapter (for USA model) SAD-20B*
AC Adapter (for European / Asian model) SAD-20C/U*
AC Adapter (for Chinese model) SAD-20G*
Programming cable SCU-35
Cloning Cable SCU-36
VOX Earpiece Microphone SSM-512B
*B: for 120 VAC, C: for 220-240 VAC, U: for 220-240 VAC w/BF plug, G: for
230 VAC
Availability of accessories may vary. Some accessories are supplied as
standard for specic local requirements, while others may be unavailable in
some regions. This product is designed to perform optimally when used with
genuine Yaesu accessories. Yaesu shall not be liable for any damage to this
product and/or accidents such as re, leakage or explosion of a battery pack,
etc., caused by the malfunction of non-Yaesu accessories. Consult your Yae
su dealer for details regarding these and any newly-available options. Connection of any non-Yaesu-approved accessory, should it cause damage, may
void the Limited Warranty on this apparatus.
-
4 FT-25R/FT-25E Operating Manual
Page 7
Safety Precautions (Be Sure to Read)
Be sure to read these important precautions, and use
this product safely.
Yaesu is not liable for any failures or problems caused by the use or
misuse of this product by the purchaser or any third party. Also, Yaesu
is not liable for damages caused through the use of this product by
the purchaser or any third party, except in cases where ordered to
pay damages under the laws.
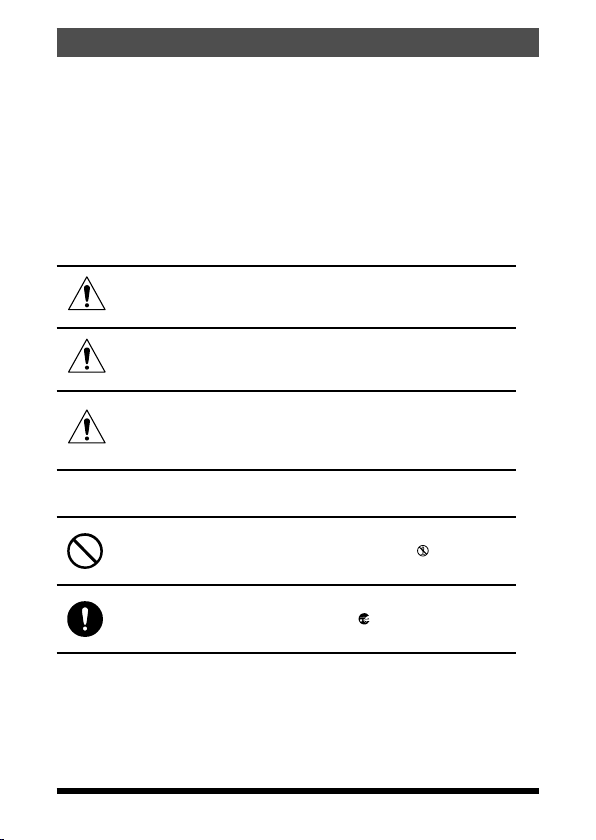
Types and meanings of marks
This mark indicates an imminently hazardous
DANGER
WARNING
CAUTION
Types and meanings of symbols
These symbols signify prohibited actions, which must not be
done to use this product safely. For example:
the product should not be disassembled.
These symbols signify required actions, which must be done to
use this product safely. For example,:
er plug should be disconnected.
situation, which, if not avoided, could result in
death or serious injury.
This mark indicates a potentially hazardous
situation, which, if not avoided, could result in
death or serious injury.
This mark indicates a potentially hazardous
situation, which, if not avoided, may result in
minor or moderate injury or only property dam
age.
indicates that
indicates that the pow-
-
5FT-25R/FT-25E Operating Manual
Page 8

Safety Precautions (Be Sure to Read)
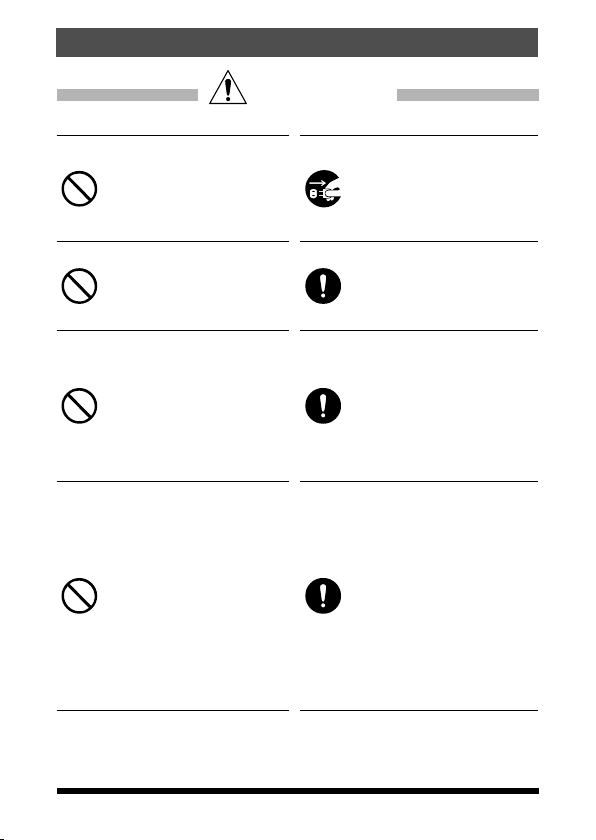
DANGER
Do not use this product in an
area where RF transmitters
are prohibited, e.g., inside of a
hospital, airplane, or train.
This product can affect electronic
or medical devices.
Do not use this product while
riding a bicycle or driving a
car. Accidents can result.
Be sure to stop the bicycle or car
at a safe place before using this
product.
Do not perform transmission
in a crowded place for the safe
ty of persons using a medical
device such as a cardiac pace
maker.
The radio wave emitted from this
product can cause the medical
device to malfunction and result
in an accident.
Do not touch any material leak
ing from the LCD display with
bare hands.
The chemical may adhere to your
skin or enter your eye, and cause
chemical burns. In such a case,
consult the doctor immediately.
Do not touch any material leaking from the battery pack with
bare hands.
The chemical that has stuck to
your skin or entered your eye can
cause chemical burns. In such a
case, consult the doctor immedi
ately.
Do not use this product or the
battery charger anywhere in
flammable gas is produced.
A fire or explosion can occur.
-
-
-
Do not solder or short-circuit
the terminals of the battery
pack.
A fire, leak, overheating, explo
sion, or ignition may result.
Do not carry the battery pack to
gether with a necklace, hairpin, or
small metal objects. A short circuit
can result.
If thunder and lightening de
velop nearby when an external
antenna is used, immediately
turn this transceiver OFF, and
disconnect the external anten
na from it.
A fire, electrical shock, or damage
may result.
-
-
-
-
-
-
6
FT-25R/FT-25E Operating Manual
Page 9

Safety Precautions (Be Sure to Read)
WARNING
Do not power this transceiver
with a voltage other than the
specified power supply volt
age.
A fire, electric shock, or damage
may result.
Do not use the battery pack for
any model other than the spec
ified transceiver.
A fire, leak, overheating, explo
sion, or ignition can result.
Do not make very long trans
missions.
The main body of the transceiver
may overheat, resulting compo
nent failure or operator burns.
Do not disassemble or make
any alteration to this product.
An injury, electric shock, or failure
may result.
Keep the terminals of the bat
tery pack clean.
If terminal contacts are dirty or
corroded, a fire, leak, overheat
ing, explosion, or ignition can
result.
Do not handle the battery pack
or charger with wet hands. Do
not insert or remove the power
plug with wet hands.
An injury, leak, fire, or failure may
result.
If smoke or a strange odor is
emitted from the main body,
battery pack, or battery charger,
immediately turn the transceiver
off; remove the battery pack,
and remove the power plug from
the outlet.
A fire, chemical leak, overheat-
-
ing, component damage, ignition,
or failure may result. Contact the
-
dealer from which you purchased
this product or Yaesu Amateur
Customer Support.
Do not use the battery pack
which is externally damaged or
deformed.
A fire, leak, heating, explosion, or
ignition can result.
Do not use any battery charger
which is not specified by Yaesu.
A fire or failure can result.
-
When transmitting, keep the
transceiver at least 5.0 mm (3/16
inch) away from your body.
-
Use only the supplied antenna.
Do not use modified or damaged
antennas.
If charging of the battery pack
cannot be completed within the
specified charging time, imme
diately remove the power plug
of the battery charger from the
outlet.
A fire, leak, overheating, explosion,
or ignition can result.
-
FT-25R/FT-25E Operating Manual
7
Page 10

Safety Precautions (Be Sure to Read)
CAUTION
Do not dangle or throw the
transceiver by holding its an
tenna.
This may injure others and may
also result in damage and failure
of the transceiver.
Do not use the transceiver in a
crowded place.
The antenna may strike others
and result in a injury.
Do not place this transceiver in
direct sunlight or near a heater.
The case may be deformed or
discolored.
Do not place this transceiver in
a humid or dusty place.
A fire or failure may result.
While transmitting, keep the
antenna as far from you as
possible.
Long-time exposure to electromagnetic waves may have a negative impact on your health.
Do not wipe the case using
thinner and benzene etc.
Use only a soft, dry cloth to wipe
stains from the case.
If the transceiver will not be
used for an extended period,
turn it OFF and remove the bat
tery pack for safety.
Do not drop, strike, or throw
the transceiver.
A failure or damage may result.
Keep magnetic cards and video
-
-
tape away from the transceiver.
The data recorded on cash cards
or videotapes may be erased.
Charge the battery pack within
the temperature range from +5
°C to +35 °C (+41 °F to +95 °F).
Charging the battery pack outside
this temperature range can cause
leak, overheating, decrease in
performance, or reduction in ser
vice life can result.
When unplugging the power
cord of the battery charger, be
sure to hold the power plug.
Pulling the power cord can dam
age it and cause a fire or electronic shock.
Do not use the earpiece mi
crophone, earphones, or headphones at an extremely high
volume level.
Hearing impairment can result.
Keep this product out of the
reach of children.
Injury to the child, or damage to
the transceiver may result.
Install the hand strap and belt
clip securely.
Improper installation may cause
the FT-25R/E to fall or drop, result
ing in an injury or damage.
-
-
-
-
8
FT-25R/FT-25E Operating Manual
Page 11
Safety Precautions (Be Sure to Read)
CAUTION
Do not place a heavy object on
the power cord of the battery
charger.
The battery cord can be dam
aged, resulting in a fire or electric
shock.
Do not use the included battery
charger to charge any battery
pack which is not specified for
use with the charger.
A fire can result.
Do not operate the transceiver
near the TV or radio.
Radio disturbance can occur in
the transceiver, the TV, or the
radio.
Do not use any products other
than the specified options and
accessories.
Failure or miss operation may
result.
-
When the battery charger is not
in use, remove its power plug
from the outlet.
Before discarding a depleted
battery pack, affix tape or insu
lating covering to its terminals.
Be sure to check with the man
ufacturer of any hybrid or fuel-saving automobile regarding
use of the transceiver in that
car.
Noise generated by an on board
electrical device (inverter, etc.)
can disrupt the normal operation
of the transceiver.
This product has a water
proof structure and conforms
to “IP54” when the included
antenna and battery pack are
installed and rubber caps are
securely attached to the MIC/
SP jack. If this transceiver gets
wet, dry it with a soft cloth,
do not leave it exposed to the
moisture.
Exposure to excessive moisture
may degrade the transceiver per
formance, shorten its life, or cause
a failure or electrical shock.
-
-
-
-
FT-25R/FT-25E Operating Manual
9
Page 12

Safety Precautions (Be Sure to Read)
About Splash, Water, and Dust
Resistant Features Conforming to IP54
When the included antenna and battery pack are installed, and
the MIC/SP jack is securely covered with rubber caps, this product
is dust and splash resistant. To ensure continued Splash, Water,
and Dust Resistant Features be sure to check the following points
before each use.
r Check for damages, deterioration, and dirt.
Antenna rubber, key switch rubber, MIC/SP jack rubber cap, and battery pack
seals.
r Cleaning
Wipe with a dry soft cloth.
When this product is contaminated with seawater, sand or dirt, clean it with a
soft damp cloth immediately.
r Recommended maintenance interval
To insure continued optimal performance, it is recommended that maintenance be performed annually, or when any damage or deterioration is found.
Note that the maintenance service is subject to fees.
r Do not pour or immerse this product in the following
liquids:
Sea, pool, hot spring, water containing soap, detergent, or bath additive, alcohol, or chemicals.
r Do not leave this product for an extended time in a very
humid location:
Bathroom, kitchen, or humid place.
r Other precautions
Do not remove the rubber cap from the battery pack, the MIC/SP jack when
water drops have accumulated on the transceiver, or when it is placed in a
wet environment. This may result in water penetrating the transceiver, and
causing equipment failure.
This product is not totally waterproof, and must never be immersed in water.
10
FT-25R/FT-25E Operating Manual
Page 13

Control & Connections (Top & Front Panel)
Antenna Jack ........................................................................ 16
Connect the supplied SMA male antenna (or another antenna presenting
a 50-Ohm impedance) here.
Emergency key
• Press this switch briey to turn the LED Flash-Light.
• Press and hold it for three seconds to enable the Emergency Alarm
beep functions.
• Press the keypad F key, and then press this switch to blink the LED
Flash-Light for SOS.
TX/BUSY Indicator Lamp
This indicator glows green when the squelch opens, and it glows red
during transmit.
PWR/VOL Knob
Turn this control clockwise to turn the transceiver ON and to increase the
volume. Counter-clockwise rotation into the click-stop will turn the trans
ceiver OFF.
Speaker
The internal speaker is located here.
Microphone
The internal microphone is located here.
LED Flash-Light
LCD (Liquid Crystal Display)
The display shows current operating condition.
Keypad
These 18 keys select the important operating functions of the FT-25R/E.
..................................................
...................................................... 20
..................................................................... 20
................................................................................. 20
........................................................................... 22
............................................... 13
.................................................................................. 15
Advance Manual
-
11FT-25R/FT-25E Operating Manual
Page 14

Controls & Connections (Side Panel)
PTT switch
MONI/T.CALL key
F key
PTT (Push To Talk) Switch ..................................................
• Press this switch to transmit, and release it (to receive) after your transmission is completed.
• In the Set mode, press the PTT switch to save the new setting and return
to normal operation.
MONI/T.CALL Key (Function is selectable from Set mode)
....................................................................................................
•USA/Asian Version:
Press this switch to open the squelch, and listen for very weak signals
near the background noise level.
•European Version:
Pressing this switch activates the T-CALL (1750 Hz) for repeater access.
F key .....................................................................................
Press and hold this key to enter the Set Mode.
SP Jack
This three-conductor miniature jack provides connection for an earpiece
microphone.
MIC Jack ............................................................
This three-conductor miniature jack provides connection for an earpiece
microphone and clone cable.
SP Jack
MIC Jack
22
29
23
Advance Manual
12 FT-25R/FT-25E Operating Manual
Page 15

Controls & Connections (LCD)
Dual Watch
Normal operation display
2 3 41
Default Display Mode FM Radio Broadcast Band
1 VFO-A / VFO-B ................... 20 4 Battery Indicator ………… 19
2 S & PO Meter ..................... 22 5
3 Operating Frequency ....... 21
FM Broadcast Band Frequency
………………………………
5
The Set Mode and Preference Mode display
6
Set Mode Preferred Operating Mode
6 Set Mode Menu ................. 23 7
7
Preferred Operating Mode ............
.............................................
20
24
13FT-25R/FT-25E Operating Manual
Page 16

10 11 13
17
2223 21
20 19 18
24
Control & Connections (LCD)
Display of features and settings
8 9
12
v
14
28
27
v
v
v v
15
16
26
25
8 Operating Mode 19
Secondary Keypad Active ..........
9
.............................................
10
Repeater Shift Direction .... 27
Programmable Memory (Mode
11
(VFO)) Scan .....................
12 Priority Channel .............. 15 23
13 Squelch Operation .......... 40 24 Home Channel .................. 33
14 Scramble Feature* .......... 40 25
15 DTMF Mode ..................... 40 26 Memory Offset Tuning ...... 33
16 Keypad Lock .................. 25 27
17 VOX Feature .................... 40 28
Automatic Power-Off Feature ..
18
..........................................
* This feature is displayed depending on the transceiver version.
Memory Tag Name ........ 31,32
20 Weather Channel .............
15
21 Memory Bank ................... 30
22 Memory Mode ...................
37
Skipped Memory Channel........
....................
TX Power Level Indicator ... 22
Selecting ICON indicator .........
....................
Memory (BANK) Channel Num-
ber ...............
40
Advance Manual
Advance Manual
Advance Manual
35
30
14
FT-25R/FT-25E Operating Manual
Page 17

Controls & Connections (Keypad)
tion
Third Function
(Press and Hold Key)
Recalls the “Weather”
broadcast
channel bank
Activates the ARTS
feature
store or assign a
setting to the key
Memory write mode
Program Scan Setting
Key
*1 : When entering a frequency from the keypad, there is a short-cut for
frequencies ending in zero - after the last non-zero digit, press and hold
the [0/SET] key to enter all the zeros at once.
Primary Function
(PRESS Key)
Frequency entry digit “1” ―
Frequency entry digit “2” ―
Frequency entry digit “3” ― ―
Frequency entry digit “4” ― ―
Frequency entry digit “5” ― ―
Frequency entry digit “6” ― Key Lock feature
Frequency entry digit “7” ― ―
Frequency entry digit “8” ― ―
Frequency entry digit “9” ― ―
Frequency entry digit “0” ― ―*1
recalls the stored or
assigned setting
recalls the Memory Mode and
activates the “Memory “Tune”
Mode while in the Memory
Mode.
Switches VFO A and VFO B
Secondary Func
(PRESS F + Key)
HOME (Fixed
setting)
TX PWR (Fixed
setting)
DUAL WATCH
(Fixed setting)
REV (Fixed setting)
Activates the Priori-
ty function
PMS(Program Mem-
ory (Mode) Scan)
15FT-25R/FT-25E Operating Manual
Page 18

Installation of Accessories
Antenna Installation
The supplied antenna provides good results over the entire frequency range
of the transceiver. However, for enhanced reception on certain non-Amateur
frequencies, you may wish to connect an an
tenna designed specically for that frequency
range, as the supplied antenna is necessarily
a compromise outside the Amateur bands,
and cannot be expected to provide high per
formance at all frequencies.
To install the supplied antenna, hold the bot
tom end of the antenna, then screw it onto the
mating connector on the transceiver until it is
snug. Do not over-tighten by using of extreme
force.
• Never transmit without having an antenna connected.
• When installing the supplied antenna, never hold the upper
part of the antenna while screwing it onto the mating con
nector on the transceiver.
• If using an external antenna for transmission, ensure that the
SWR presented to the transceiver is 1.5:1 or lower, to avoid
excessive feedline loss.
Preparation of SBR-25LI Battery Pack
The SBR-25LI is a high-performance Li-Ion battery providing long operating
time in a compact package. Under normal use, the SBR-25LI may be used
for approximately 300 charge cycles, after which operating time may be ex
pected to decrease. When an old battery pack exhibits diminished capacity,
replace the pack with a new one.
Installing the Battery Pack
1. Insert the battery pack into the battery compartment on the back of the
transceiver(
2. Push the battery in until the battery
latch on the lower back side of the
transceiver clicks securely().
).
-
-
-
-
-
16 FT-25R/FT-25E Operating Manual
Page 19

Installation of Accessories
Removing the Battery Pack
To remove the battery, turn the
transceiver OFF. While sliding the latch
in the direction of the arrow, as shown
in the illustration, slide the battery pack
downward and out of the transceiver.
Attaching the Belt Clip
Attach the belt clip on the back of
transceiver using the supplied screws
(two).
FT-25R/FT-25E Operating Manual
17
Page 20

Charging the Battery Pack
If the battery has never been used, or its charge is depleted, it may be
charged by placing the FT-25R/E in the SBH-22 Rapid Charger desktop cra
dle, connected with the SAD-20B/C/U/G AC adapter.
AC line outlet
DC jack
FT-25R/E / SBH-22 with SAD-20B
(Example of USA model)
A fully-discharged SBR-25LI Battery Pack will be charged completely in
about 3.5 hours (depending on the battery being charged). Disconnect the
SAD-20B/C/U/G from the DC jack and the AC line outlet.
• The SAD-20B/C/U/G is not designed to power the transceiver for operation (reception or transmission).
• Please be advised that the SAD-20B/C/U/G may contribute
noise to TV and radio reception in the immediate vicinity, so
we do not recommend its use adjacent to such devices.
• It takes about 4.5 hours to charge the SBR-26LI (optional).
About Desktop charger lamp
The battery charging status is indicated by the
desktop charger lamp, as shown in the below table:
-
Lamp Status Description
Red lighting Charging
Green lighting Charge Complete
Red blinking Charge Error
18 FT-25R/FT-25E Operating Manual
Page 21

Charging the Battery Pack
Low Battery Indication
As the battery discharges during use, the
•
voltage will gradually become lower. When
the battery voltage is too low for reliable op
eration, the “ ” icon will blink on the LCD
display, indicating that the battery pack must
be recharged before further use.
Avoid recharging Li-Ion batteries before the “ ” indicator is observed, as
•
this can degrade the charge capacity of your Li-Ion battery pack.
About Battery Indicator Icons
Battery charge indicator icons are shown below:
Icons Description
(w/blink)
Approximate Operating Time and Remaining
Level Indication
Approximate operating time for the transceiver with the fully charged battery
pack is as follows.
Frequency Band SBR-25LI SBR-26LI
Amateur Band 144 MHz band Approx. 10.0 hours Approx. 12.5 hours
FM Broadcast Band Approx. 11.5 hours Approx. 15.0 hours
Transmit 6 seconds; Receive 6 seconds; Stand by 48 seconds.
-
Full battery power
Enough battery power
Low battery power
charge (or replace) the
battery
Charge
FT-25R/FT-25E Operating Manual
19
Page 22

Basic Operation
Turn the Power ON and OFF
Be sure the Battery Pack is installed, and is fully
•
charged. Connect the antenna to the top panel
Antenna jack.
Rotate the PWR/VOL knob out of the click-
•
stop to turn the transceiver ON. The current DC
supply voltage will be shown on the display for
two seconds. After the two second interval, the
display will commence the normal operating fre
quency indication.
To turn the transceiver OFF, turn the PWR/VOL knob fully counter-clock-
•
wise into the click-stop position.
Adjust the Audio Volume Level and Squelch Setting
Rotate the PWR/VOL knob to adjust the receiver
volume. Listen to the open squelch background
noise to adjust the audio to a comfortable level.
1. To set the squelch level, press the F key and
then press the MONI/T.CALL key, to open the
SQ LEVEL set mode.
2. Press the [
which the background noise is muted.
3. Press the PTT switch to save the squelch setting and return to normal
operation.
] or [
] key to adjust to a level at
Changing between VFO A and B
#
Press the [
•
frequency control between the VFO A and B.
VFO] key repeatedly to toggle the
FM Radio Broadcast Band Dual Watch
1. Press the F key, and then press the [P3] key.
Both VFO A, and the FM broadcast radio frequencies are displayed on the LCD.
2. Within 10 seconds, press the [▲], [▼] keys, or use the keypad to tune to
the desired FM radio frequency. Then 10 seconds after tuning is completed,
press and hold the [▲] or [▼] key to begin upward or downward scanning.
3. To return to normal operation, press the F key, and then press the [P3]
key again.
-
20 FT-25R/FT-25E Operating Manual
Page 23

Basic Operation
Frequency Navigation
The FT-25R/E will initially be operating in the “VFO” mode. The VFO permits
free tuning throughout the currently-selected operating band in designated
frequency steps (operating channels).
Three basic frequency navigation methods are provided on the FT-25R/E.
(1) Tuning Frequency
Pressing the [] key tunes the FT-25R/E toward a higher frequency, while
pressing the [] key will lower the operating frequency, in steps prepro
grammed for the current operating band.
(2) Direct Keypad Frequency Entry
The operating frequency may be entered directly from the keypad by pressing the numbered digits on the keypad in the proper sequence.
Examples:
To enter 145.560 MHz, press [1] [4] [5] [5] [6] [0
To enter 145.000 MHz*, press [1] [4] [5] [0] [0] [0]
*There is a short-cut to enter frequencies ending in zeros - after
the last non-zero digit, press and hold the [0/SET] key to enter the
remaining zeros.
(3) Scanning
Manual VFO Scan:
To manually initiate VFO scanning, press and hold
either the
ward scanning, respectively.
[]
[
or
] key to begin upward or down
-
]
-
Programmed Mode VFO Scan:
To begin scanning within a limited sub-band range
from the VFO mode, press and hold the [#VFO]
key to select the bandwidth for the Programmed
Mode (VFO) scanner. Then press the F key and
the [#VFO] key to start scanning.
The scanner will stop when it receives a signal
strong enough to open the Squelch threshold.
The FT-25R/E will then hold on that frequency in accordance with the “RESUME” mode setting (Set Mode Item “25 RESUME”).
Press the PTT switch momentarily to cancel the scanning (this only stops the
scan; it does not cause a transmission to occur).
FT-25R/FT-25E Operating Manual
(Manual VFO Scan)
(Programmed Mode
VFO Scan)
21
Page 24

Basic Operation
The direction of the scan may not reverse while FT-25R/E is
scanning.
For more details on the scanning, see page 36.
Transmission
To transmit, press the PTT switch, and speak into the front panel micro-
•
phone (located in the lower left-hand corner of the speaker grille) in a normal voice level. The TX/BUSY indicator will glow red during transmission.
To return to the receive mode, release the PTT switch.
•
During transmit, the power level will be indicated relatively on the bar
•
graph at the bottom of the LCD. Full scale deection conrms “High Pow
er” operation. Five bars indicate “Medium Power” operation, while one bar
indicates “Low Power” operation. Additionally, while operating on the “Low
Power” or “Medium Power” setting, the “
at the bottom-left of the display.
Changing the Transmit Power Level
To change the power level:
1. Press the F key and then press the [P2] key.
• The present TX power output level will appear on the display.
• To adjust the TX power in the Set Mode, press and hold the F key.
Then repeatedly press the [▲] or [▼] key to select Set Mode item “32 TX
PWR” and then press the F key.
2. Press the [▲] or [▼] key to select the desired power output level.
Available selections are “HI ” (5 W), “MID” (2.5 W), and “LOW” (0.5 W).
3. Press the PTT switch to save the new setting and return to normal oper-
ation.
” icon or “ ” icon will appear
-
22
FT-25R/FT-25E Operating Manual
Page 25

Basic Operation
Activating the Set Mode
Use the following procedure to activate the Set Mode and configure the
transceiver parameters.
1. Press and hold the F key to enter the Set Mode.
2. Repeatedly press the [▲] or [▼] key to select the Set Mode Item to be
adjusted.
3. Press the F key momentarily to enable adjustment of the Set Mode Item.
4. Press the [▲] or [▼] key to adjust the level, or choose the parameter, of the
selected Set Mode Item.
5. After completing the selection and adjustment, press the PTT switch to
save the new setting and exit to normal operation.
How to use the [P1]-[P4] keys
[P1], [P2], [P3] and [P4] keys may be used for
the followings:
•
One Touch Recall of a preferred setting
•
One Touch Recall of the Mode settings
Key Store (Press and hold) Recall (Press)
Store a preferred operating status or a Set Mode
Recall the stored operat
ing status or the Set Mode
(1) One touch recall of the preferred status
1. To store a preferred setting, Press and hold one of the [P1], [P2], [P3] or
[P4] keys.
2. To recall a stored one touch preferred status, press the associated [P1],
[P2], [P3] or [P4] key.
(2) Set Mode Recall feature
1. Press and hold the F key to enter the Set Mode.
2. Press the [▲] or [▼] key to select the Set Mode Item you frequently use.
3. When the desired Set Mode item is displayed on the screen, press and
hold one of the [P1], [P2], [P3] or [P4] keys to store the Set Mode item.
4. To recall a stored one touch preferred Set Mode, press a [P1], [P2], [P3] or
[P4] key to recall the assigned Set Mode Item.
FT-25R/FT-25E Operating Manual
23
-
Page 26

Basic Operation
Preset Functions assigned to the [P1] to [P4] keys
Press the F key, then press
the [P1], [P2] , [P3] o r [P4]
keys to recall the preset func
tions as listed in the table at
the right. These F key func
tions may not be changed.
-
-
Setting the Preferred Operating Mode
The following reset or preferred operating modes may be selected.
Display Description
F1:SET RESET Reset the Set Mode settings to factory defaults.
F2:MEM RESET Clear the Memory settings to factory defaults.
F3:BANK RESET Clear the Memory Bank assignments.
F4:ALL RESET
F5:MEM-ONLY Operation on the Memory mode only.
F6:VHF-ONLY Operation on the VHF Band only.
F7:FM-ONLY Operation on the FM Radio Broadcast Band only.
F8:CLONE Clone mode.
1. Turn the transceiver OFF.
2. Press and hold the MONI/T.CALL key and the PTT switch simultaneously,
while turning the radio ON.
3. When the LCD backlight comes on, release the MONI/T.CALL key and
PTT switch.
4. Referring to the above table, press the [▲] or
[▼] key to select the desired operating mode.
Clear the All memories and other settings to factory
defaults.
Key Function
F key +
F key +
F key +
F key +
DUAL WATCH ON/OFF
HOME channel
TX PWR setting
REV
5. Press the F key momentarily to activate the selected operating mode.
24
FT-25R/FT-25E Operating Manual
Page 27

Advanced Operation
After becoming familiar with the basic operations of the FT-25R/E, you will
want to learn about some of the really handy operating and convenience fea
tures.
Turning the Keylock Feature ON and OFF
The F T-25R/E keypad may be locked to prevent accidental frequency
change or inadvertent transmissions,
1. Press and hold the [6] key to lock the keys and switches.
•The icon will appear on the LCD display.
•To unlock, press and hold the [6] key again.
Change the key locking scheme
The following locking schemes may be selected.
Display Description
KEY(default setting) Only the front panel keypad is locked out.
PTT The PTT switch is locked out (TX not possible).
P+K Both the PTT switch and the keypad are locked out.
1. Press and hold the F key to enter the Set Mode.
2. Press the [▲] or [▼] key to select Set Mode Item “15 KEY LOCK”.
3. Press the F key momentarily to enable adjustment of this Item.
4. Press the [▲] or [▼] key to choose one of the
above listed locking schemes.
5. Press the PTT switch to save the new setting and return to normal operation.
Change the LCD and keypad back light setting
Display Description
5secKEY (default setting) Keypad and LCD Lamp lights for 5sec.
10secKEY Keypad and LCD Lamp lights for 10sec.
30secKEY Keypad and LCD Lamp lights for 30sec.
CONT Keypad and LCD Lamp lights continually.
OFF Disable the Keypad and LCD Lamp function.
1. Press and hold the F key to enter the Set Mode.
2. Press the [▲] or [▼] key to select Set Mode item “16 LAMP”
3. Press the F key to enable adjustment of this Item.
-
25FT-25R/FT-25E Operating Manual
Page 28

Advanced Operation
4. Press the [▲] or [▼] key to select one of the
modes described above.
5. Press the PTT switch to save the new setting and return to normal operation.
Disabling the Keypad and Scan Stop Beeper
An audible beep tone will sound when a keypad button is pressed, and also
when the receiver scanning stops. The beep tone operation may be changed
as shown in the below table:
Display Description
KEY
KEY+SC(default setting)
OFF The beeper does not sound.
1. Press and hold the F key to enter the Set Mode.
2. Press the [▲] or [▼] key to select Set Mode item “5 BEEP”
3. Press the F key to enable adjustment of this Item.
4. Press the [▲] or [▼] key to select “OFF”
5. Press the [▲] or [▼] key to select one of the
modes described above.
6. Press the PTT switch to save the new setting and return to normal operation.
7. To turn the beep back on again, select “KEY” or “KEY+SC (Default setting)”
in step 4 above.
The beeper sounds when a keypad button is
pressed.
The beeper sounds when a keypad button is
pressed, or when the receiver scanning stops.
26
FT-25R/FT-25E Operating Manual
Page 29

Repeater Operation
Repeater stations are often located on mountaintops or other high locations,
and provide a dramatic extension of the communication range for low-pow
ered hand-held or mobile transceivers. The FT-25R/E includes a number of
features which make repeater operation simple and enjoyable.
Repeater Shifts
The transceiver has been congured at the factory for the repeater shifts
customary in the sales destination country. For the 144 MHz band the re
peater shift will be 0.6 MHz.
Automatic Repeater Shift (ARS)
The FT-25R/E provides a convenient Automatic Repeater Shift feature, which
automatically applies the appropriate repeater frequency shift when tuning in
the repeater sub-bands of the designated country. The ARS setting options
are listed below:
Display Description
ARS : ON (default setting) Enable the Automatic Repeater Shift function.
ARS : OFF Disable the Automatic Repeater Shift function.
1. Press and hold the F key to enter the Set Mode.
2. Press the [▲] or [▼] key to select Set Mode item “24 REPEATER”.
3. Press the F key to enable adjustment of ARS.
4. Press the [▲] or [▼] key to select “ON” or
“OFF”.
5. Press the PTT switch to save the new setting
and return to normal operation.
-
-
27FT-25R/FT-25E Operating Manual
Page 30

Repeater Operation
Manual Repeater Shift Setting
If the ARS feature has been deactivated, or if a repeater shift direction other
than the established ARS setting is desired, the repeater shift direction may
be set manually.
1. Press and hold the F key to enter the Set Mode.
2. Press the [▲] or [▼] key to select Set Mode item “24 REPEATER”, then
press the F key to enable this item.
3. Press the [▲] or [▼] key to select MODE, and press F key to enable this
item.
4. Press the [▲] or [▼] key to select the Shift
Mode, and press the F key to enable adjustment of this Item.
Display Description
MODE : SIMPLEX
(default setting)
MODE : +REP Enable the Manual Repeater Shift + direction.
MODE : -REP Enable the Manual Repeater Shift - direction.
5. To change the repeater shift magnitude, press the [▲] or [▼] key to select
SHIFT in step 4 (shown above).
6. Press the F key to enable adjustment of this Item.
7. Press the [▲] or [▼] key to select the repeater shift magnitude (0.05 MHz
~ 99.95 MHz(USA/European version)/0.025 MHz ~ 99.975 MHz(Asian version)).
8. Press the PTT switch to save the new setting and return to normal operation.
Disable the Manual Repeater Shift function.
28
FT-25R/FT-25E Operating Manual
Page 31

Repeater Operation
Tone Calling (1750 Hz)
For operation in counties that require a 1750-Hz burst tone for repeater
access (typically in Europe), the MONI/T.CALL key may be programmed to
serve as a “Tone Call” key instead. Use Set Mode item “19 MON/T-CL”, to
change the conguration of this key.
Display Description
(default setting (USA and Asian
MONITOR
version))
T-CALL1750
(default setting (European
version))
T-CALL2100
T-CALL1000
T-CALL1450
1. Press and hold the F key to enter the Set mode.
2. Press the [▲] or [▼] key to select Set Mode item “19 MON/T-CL”.
3. Press the F key to enable adjustment of this Item.
4. Press the [▲] or [▼] key to select a Tone
Calling feature.
5. Press the PTT switch to save the new setting
and return to normal operation.
To access a tone burst controlled repeater, press and hold in the MONI/
T.CALL key for the time duration specified by the repeater owner/operator.
The transmitter will automatically be activated, and the 1750-Hz audio tone
will be superimposed on the carrier. Once the repeater is accessed, release
the MONI/T.CALL key and use the PTT switch to activate the transmitter
thereafter.
Pressing the MONI/T.CALL key opens
the receiver noise squelch.
Pressing the MONI/T.CALL key acti
vates the 1750 Hz burst tone.
Pressing the MONI/T.CALL key acti
vates the 2100 Hz burst tone.
Pressing the MONI/T.CALL key acti
vates the 1000 Hz burst tone.
Pressing the MONI/T.CALL key acti
vates the 1450 Hz burst tone.
-
-
-
-
FT-25R/FT-25E Operating Manual
29
Page 32

Memory Mode
144 MHz Band
Broadcasting
The FT-25R/E provides a wide variety of memory system resources. These
include:
200 “Standard” memory channels, numbered “001” through “200”.
•
2 “Home” channels, providing storage and quick recall of one prime fre-
•
quency on each operating band.
10 sets of band-edge memories, also known as “Programmable Memory
•
Scan” channels, labeled “L01/U01” through “L10/U10”
10 Memory Banks, labeled “BANK 1” through “BANK10” Each Memory
•
Bank can be assigned up to 200 channels from the “standard” and “PMS”
memory channels.
10 “Weather Broadcast” Channels.
•
Standard Memory Channels
(200 channels)
198
4
3
2
1
Weather Broadcast Channels
(10 channels)
WX 4
WX 3
WX 2
WX 1
199
Memory Banks
WX 9
200
Memory Bank 4
Memory Bank 3
Memory Bank 2
Memory Bank 1
(10 banks)
WX 10
PMS Memory Channels
(10 Sets)
L4/U4
L3/U3
L2/U2
L1/U1
Memory Bank 10
Memory Bank 9
Memory Bank 8
Memory Bank 7
Memory Bank 6
Memory Bank 5
HOME Channels
(2 channels)
+
L9/U9
L8/U8
FM Radio
Band
L10/U10
30 FT-25R/FT-25E Operating Manual
Page 33

Memory Mode
Memory Storage
1. Select the desired frequency, while operating in the VFO mode.
Be sure to set up any desired CTCSS or DCS tones, as well as any desired repeater offset. The power level may also be set at this time, if you
wish to store it.
2. Press and hold the [ MR] key.
A blank memory channel will be displayed automatically.
3. If it is desired to change to another channel number, press the [▲] or [▼]
key.
4. Press the Alphabet / Numeric keys to input
characters and create a “Tag” (label) for the
memory channel.
If not inputting a “Tag” (label), proceed to step 5.
• To move the cursor to the next character, press the F key.
• To correct a mistake, press the F key repeatedly until the
cursor returns to the character position.
For more details on the character/symbol, see page 39.
5. Press and hold the [ MR] key to store the frequency and settings into the
selected memory channel.
“MEM-IN” on the display will blink twice and the tone will sound to complete the memory setting.
FT-25R/FT-25E Operating Manual
31
Page 34

Memory Mode
Memory Recall
1. While operating in the VFO mode, press the [ MR] key to enter the Mem-
ory mode.
2. Press the [▲] or [▼] key to select the desired
memory channel.
3. To return to the VFO mode, press the [#VFO]
key.
When the transceiver is already set to the Memory mode, an easy way to
recall a memory channel is to enter the memory channel number using the
numeric keypad.
For example: in the Memory Mode to recall memory channel #002, press
the [2] key.
To recall Memory Channel #200, enter “200”. To recall Programmable Memory channels “L1/U1” through “L10/U10”
enter “201/202” through “210/220”.
Changing the memory label (tag) name
1. Press the [ MR] key to recall the memory channel that you wish to label
or rename.
2. Press and hold the F key to enter the Set Mode.
3. Press the [▲] or [▼] key to select Set Mode item “20 NAME TAG”.
4. Press the F key to enter (or edit) the channel
name tag.
“NAME-TAG ” message will appear.
5. Press the Alphabet / Numeric keys to enter the characters or symbols for
the memory channel “Tag” (label).
• To move the cursor to the next character, press the [▲] key.
• To correct a mistake, press the [▼] key repeatedly until the cursor returns
to the character position.
For more details on character/symbol input, see page 39.
6. Press the PTT switch to save the new setting and return to the memory
channel.
32
FT-25R/FT-25E Operating Manual
Page 35

Memory Mode
HOME Channel Memory Recall
A “HOME” channel memory is provided for each operating band, to allow
quick recall of a favorite operating frequency on each band. The default
home channels are below:
Default Home Channels
Band Frequency
144 MHz Band 144.000 MHz
FM Radio Band 95.000 MHz
1. Press the F key, then press the [P1] key.
The default home channel, as listed above,
is displayed.
2. Press the F key, then press the [P1] key to exit to normal operation.
Repeat this process to recall the HOME channel on any operating band.
Changing the Home Channel Frequency
The home channel frequencies may be changed from the default settings.
1. While operating in the VFO mode, select the desired frequency.
2. Press and hold the [
A blank memory channel will be displayed.
3. Press the [P1] key.
• “HOME-IN” will be displayed, and then exit
to normal operation.
• The home channel frequency is changed and overwriting is complete.
Memory Offset Tuning
Once a particular memory channel is recalled, it is easy to tune off that channel, as though you were in the “VFO” mode.
1. Recall the memory channel.
2. Press the [
Channel Tuning” feature.
The Memory Channel number on the LCD
display will be replaced by “tun”.
MR] key.
MR] key to activate the “Memory
FT-25R/FT-25E Operating Manual
33
Page 36

Memory Mode
When an alpha-numeric Tag is shown in place of the
memory channel operating frequency display, the display
will automatically revert to display the operating frequen
cy along with the “tun” indication. It is not necessary to
enter the Menu and change from the alpha-numeric Tag
display to the operating frequency display.
-
3. Press the [▲] , [▼] or numeric keys to tune to the desired frequency.
4. To return to the original memory frequency, just press the [
The display will revert to a display of the alpha-numeric Tag (if any) that
may have originally appeared on the LCD.
To store the new frequency while using Memory Offset Tuning, press and hold the [ MR] key (per the normal memory
storage procedure). The next-available clear memory location
will be displayed. Then press and hold the [
to save the new frequency the available memory channel.
MR] key.
MR] key again
Deleting Memories
All excerpt the Memory Channel “001” and the Home Channels may be easily deleted.
Once deleted, the channel data cannot be recovered, so
make a note of the information (Memory Channel settings,
etc), before deleting the memories.
1. Press and hold the F key to enter the Set Mode.
2. Press the [▲] or [▼] key to select Set Mode item “18 MEM DEL”.
3. Press the F key to enable adjustment of this Item.
4. Press the [▲] or [▼] key to select the memo-
ry channel to be “deleted”.
5. Press the F key to delete the selected memory channel.
6. Press the PTT switch to return to normal operation.
34
FT-25R/FT-25E Operating Manual
Page 37

Memory Mode
Weather Broadcast Channels
In the USA, the VHF Weather Broadcast Station Memory Channel Bank has
been pre-programmed at the factory for immediate access to NOAA weather
information stations.
1. Press and hold the [1] key to recall the
Weather Broadcast Memory Bank.
2. Press the [▲] or [▼] key to select the desired
Weather Broadcast channel.
3. To scan for additional or stronger
Weather stations, just press the PTT
switch (or press and hold the [▲] or
[▼] key).
When the scanner pauses on a station, press the PTT switch once to
halt the scan, or press it again to re
start the scan.
4. To return to normal operation, press the [ MR] key, or press and hold the
[1] key again.
Severe Weather Alert
In the event of extreme weather disturbances, such as severe thunderstorms
and hurricanes, the NOAA (National Oceanic and Atmospheric Administra
tion) sends a weather alert accompanied by a 1050 Hz tone and subsequent
weather report on one of the NOAA weather channels.
CH Frequency CH Frequency
01 162.550 MHz 06 162.500 MHz
02 162.400 MHz 07 162.525 MHz
03 162.475 MHz 08 161.650 MHz
04 162.425 MHz 09 161.775 MHz
05 162.450 MHz 10 163.275 MHz
-
-
FT-25R/FT-25E Operating Manual
35
Page 38

Scanning
The FT-25R/E makes available scanning of the stored memory channels, or
scanning of the entire operating band, or scanning of a programmable sub
band portion. Scanning will halt when signals are encountered, and commu
nication may be initiated on that frequency.
Operation is basically the same in each of the above scanning modes. Be
fore beginning, take a moment to select the way the scanning will resume
after it halts on a signal.
Setting the Scan-Resume Technique
Three options for the Scan-Resume mode are available:
Display Description
BUSY
(default setting)
HOLD
TIME
1. Press and hold the F key to enter the Set mode.
2. Press the [▲] or [▼] key to select Set Mode Item “25 RESUME”.
3. Press the F key to enable adjustment of this Set Mode Items.
4. Press the [▲] or [▼] key to select the desired
scan-resume mode.
5. Press the PTT switch to save the setting and
exit to normal operation.
In BUSY mode, the scanner will halt on a signal it en
counters. Scanning will resume one second after the
other station signal ceases transmitting. In the case
of constant-carrier signals like Weather Station broad
casts, the scanner will likely remain on this frequency
indefinitely.
In HOLD mode, the scanner will halt on a signal it en
counters.
Scanning will only resume when it is manually re-initiat
ed.
In TIME mode, the scanner will halt on a signal it en
counters, scanning will resume after five seconds even
if a signal is still on the frequency. To cancel scanning,
press the PTT switch, [▲] or [▼] key.
-
-
-
-
-
-
-
36 FT-25R/FT-25E Operating Manual
Page 39

Scanning
VFO Scanning
The FT-25R/E provides two VFO scanning functions: “Manual VFO Scanning” and “Programmed Mode (VFO) Scanning.”
Manual VFO Scan
1. If necessary, press the [ MR] key to change to the VFO mode.
2. Press and hold the [▲] or [▼] key to initiate upward or downward scanning,
respectively.
3. When scanning encounters a signal strong enough to open the squelch,
the scanner will halt temporarily; the decimal point of the frequency display
will blink to indicate this “Resuming” condition.
4. The scanning will resume according to the Scan-Resume mode selected in
the Set Mode Item “25:RESUME”.
5. To cancel scanning, press the PTT switch,
Programmed Mode (VFO) Scan
1. Press and hold the [#VFO] key.
2. Press the [▲] or [▼] key to select the bandwidth for Programmed Mode (VFO) scanner.
Available selections are +-1 MHz, +-2 MHz, +-5 MHz, ALL, PMS-X, and
BAND.
Display Description
BAND
(default setting)
+-1MHz
+-2MHz
+-5MHz
ALL The scanner will sweep all frequencies.
PMS-X
The scanner will sweep frequencies on the current op
erating band.
The scanner will sweep ±1 MHz from the operating fre
quency.
The scanner will sweep ±2 MHz from the operating frequency.
The scanner will sweep ±5 MHz from the operating fre
quency.
The scanner will sweep frequencies designated by the
currently selected PMS (Programmable Memory Scan)
frequency pair.
[▲] or [▼
] key.
-
-
-
PMS-X will appear in the [#VFO] selections after setting a
PMS frequency pair.
FT-25R/FT-25E Operating Manual
37
Page 40

Scanning
3. Press the [#VFO] key to save the new setting and return to normal operation.
4. Press the F key, then press the [#VFO] key to start scanning.
5. When scanning encounters a signal strong enough to open the squelch,
the scanning will halt temporarily; the decimal point of the frequency display
will blink during this “Pause” condition.
6. The scanner will then resume according to the Scan-Resume mode selected in the “RESUME” setting.
7. To cancel scanning, press the PTT switch,
[▲] or [▼
] key.
38
FT-25R/FT-25E Operating Manual
Page 41

Input Character/Symbol List
On a character inputting display such as the memory mode “tag” display, the
characters and symbols may be input as below:
Key Key Assignment Key Key Assignment
1 7 P Q R S p q r s
2 A B C a b c 8 T U V t u v
3 D E F d e f 9 W X Y Z w x y z
4 G H I g h i 0 (blank character)
5 J K L j k l
6 M N O m n o
+ - , . / : ; @ (blank character)
Û
39FT-25R/FT-25E Operating Manual
Page 42

Set (Menu) Mode
The FT-25R/E Set Mode, already partially described in the previous chapters, may be activated to select or change various transceiver functions.
Many of the useful parameter congurations have not been fully detailed in
this manual. Refer to the chart below for a list of the Set Mode Items and
their various parameters.
1. Press and hold the F key to enter the Set Mode.
2. Press the [▲] or [▼] key to select the Set Mode Item to be adjusted.
3. Press the F key momentarily to enable adjustment of the Set Mode Item.
4. Press the [▲] or [▼] key to adjust or select the parameter to be changed
on the Set Mode Item selected in above step.
5. After completing your selection and adjustment, press the PTT switch momentarily to save the new setting and exit to normal operation.
Press and hold the F key to move from the lower menu contents to the upper menu contents in the Set Mode.
Item
(lower menu
item)
1 APO Setting of the Automatic
2 ARTS Selects the Beep
3 BATTSAVE Selects the Receive-
4 B-CH.L/O Enables/Disables the
5 BEEP Beep function Enable/
6 BELL Select the number of
7 COMPANDE
(COMPANDER)
Function Values Default Value
Power-Off feature.
option and the Polling
Interval during ARTS
operation.
mode Battery Saver
interval (“sleep” ratio)
Busy Channel LockOut feature.
Disable on presssing
the keypad, or stopping
the receiver scanning.
CTCSS/DCS/PAGER/
ARTS Bell ringer
repetitions.
Enables/Disables the
Voice Compander
feature
OFF / 0.5H to 12.0H
(Step 0.5H)
BEEP= INRANG /
ALWAYS / OFF
INTV= 25SEC / 15SEC
200mS / 300mS / 500mS
/ 1SEC / 2SEC / OFF
OFF / ON OFF
KEY+SC / KEY / OFF KEY+SC
OFF / 1Time / 3Times/
5Times / 8Times /
CONTINUE
OFF / ON OFF
OFF
BEEP=OFF
INTV= 25SEC
200mS
OFF
40 FT-25R/FT-25E Operating Manual
Page 43

Set (Menu) Mode
Item
(lower menu
item)
8 CTCSS
(CTCSS TONE)
9 CW ID CW Identifier during
10 DC VOLT displays Battery DC
11 DCS CODE Setting the DCS CODE
12 DTMF SET Selects the MANUAL
13 DTMF WRT Programming to DTMF
14 EDG.BEEP Enables/Disables the
15 KEY LOCK Keyboard Lock function KEY / PTT / P+K KEY
16 LAMP Selects the LCD/
17 LED Selects the enable or
18 MEM DEL
(MEM DELETE)
19 MON/T-CL
(MON/T-CALL)
20 NAME TAG Renames Alpha-
Function Values Default Value
Setting the CTCSS
Frequency TX and RX
ARTS operation.
Voltage.
TX and RX
or AUTO DTMF tones.
Setting the DTMF
autodialer sending
delay time and Speed.
autodialer.
Band-edge beeper
while selecting the
frequency via the [▲]
or [▼] key.
Keypad Lamp mode.
disable TX/BUSY LED
function.
Deletes Memory
Channel
Selects the MONI
or T.CALL switch
function.
Numeric “Tags” for the
Memory channels.
50 CTCSS tones / OFF TX=100.0Hz
TX= OFF / ON
ID= ------ (6 characters)
− −
104 DCS CODEs / OFF TX=023
MODE= MANUAL /
AUTO
DELAY= 50mS / 250mS /
450mS / 750mS
/ 1000mS
SPEED= 50mS / 100mS
− −
BEEP OFF / BEEP ON BEEP OFF
5secKey / 10secKey /
30secKey / CONT / OFF
TX= ON / OFF
BUSY= ON/ OFF
− −
MONITOR / T-CALL1750
/ T-CALL2100 /
T-CALL1000 /
T-CALL1450
− −
RX=100.0Hz
TX= OFF
ID= blank
RX=023
M=MANUAL
D=450mS
S=50mS
5secKey
TX=ON
BUSY=ON
MONITOR (*) or
T-CALL1750 (*)
FT-25R/FT-25E Operating Manual
41
Page 44

Set (Menu) Mode
Item
(lower menu
item)
21 PAGER Setting the TX CTCSS
22 PASSWORD Enables/disables the
23 PRI.RVT Enables/disables the
24 REPEATER ARS / MODE / SHIFT
Function Values Default Value
of 2 tone and the RX
CTCSS of 2 tone.
Enables/disables the
Answer Back function.
Password feature
Priority Revert feature.
function setting
TX: ** **
RX: ** **
ACK : ON / OFF
OFF / ON / OFF
RVT.OFF / RVT. ON RVT.OFF
ARS= ON / OFF
MODE=SIMPLEX / +RTP
/ -RTP
SHIFT= 0.05 MHz - 99.95
MHz/0.025 MHz - 99.975
MHz* (per **KHz*)
TX=05 47
RX=05 47
ACK=OFF
ARS=ON
MODE=SIMPLEX
SHIFT=**.***M (*)
25 RESUME Selects the Scan
26 RF SQL Adjusts the RF Squelch
27 SCN.LAMP Enables/Disables
28 SKIP
(SKIP SCAN)
29 SQL TYPE Selects the Tone
30 STEP Setting of the frequency
31 TOT Setting of the TOT
32 TX PWR Selects TX Power HI(5W) / MID(2.5W) /
42
Resume mode.
threshold level.
the Scan lamp while
paused.
Selects the Memory
Scan “Skip” channelselection mode.
Encoder and/or
Decoder mode.
steps.
time.
FT-25R/FT-25E Operating Manual
BUSY / HOLD / TIME BUSY
S-1 / S-2 / S-3 / S-4 / S-5
/ -6 / S-8 / S-FULL / OFF
ON / OFF ON
− −
OFF / R-TONE / T-TONE
/ TSQL / REV TN / DCS /
PAGER
5 / 6.25 / 10 / 12.5 / 15 /
20 / 25 / 50 / 100 kHz, or
AUTO
1 min - 30 min (per 1
min) or OFF
LOW(0.5W)
OFF
OFF
AUTO
3min
HI(5W)
Page 45

Set (Menu) Mode
Item
(lower menu
item)
33 TX SAVE Enables/Disables the
34 VFO.SPL Enables or disables
35 VOX Enable / Disable VOX
36 WFM.RCV Broadband FM
37 WIDE/NAR Select Wide (±5 kHz)
38 WX ALERT Enables/Disables the
39
SCRAMBLE(*)
(*) : This function may be displayed, depending on the transceiver ver-
sion.
Function Values Default Value
Transmitter Battery
Saver.
“VFO Split” operation.
function.
Radio(WFM) function
Enables/Disables
or Narrow (±2.5 kHz)
TX Deviation.
Weather Alert Scan
feature.
Inversion scrambling
(Encryption)
SAVE OFF / SAVE ON SAVE OFF
VSP.OFF / VSP.ON VSP.OFF
VOX OFF / VOX ON VOX OFF
WFM.ON / WFM.OFF WFM.ON
WIDE / NARROW WIDE
ALT.OFF / ALT. ON ALT.OFF
SCRB.OFF/SCRB.ON SCRB.OFF
FT-25R/FT-25E Operating Manual
43
Page 46

Troubleshooting
If you suspect a malfunction, check the following items before requesting a
repair.
The transceiver does not turn on.
• Is the battery depleted?
• Charge the battery pack after purchase, and when the transceiver has not
been used for a long time.
• Is the battery pack properly attached?
Refer to “Installing the Battery Pack” and securely mount the battery pack.
There is no sound.
• Is the squelch level (or S meter squelch) set too high?
Press the MONI/T.CALL key and verify that you can hear white noise.
Adjust the squelch level (or S meter squelch) when receiving a weak sig-
nal.
• Is the volume low?
Rotate the PWR/VOL knob clockwise to increase the volume.
• Is the tone squelch or DCS on?
When the tone squelch or DCS is on, the sound is not output until the
transceiver receives a signal containing the same tone frequency or DCS
code set.
For more details on the DCS code, refer to the Advance Manual.
There is no transmission of radio waves.
• Are you pressing the PTT switch properly?
• Is the PTT lock on?
• Is the Busy TX Block (BCLO function) on?
When the Busy TX Block (BCLO function) is on, transmission is inhibited
when receiving a signal, even if the PTT switch is pressed. Wait until the
signal being received stops and then press the PTT switch.
• Is the transmission frequency on a ham radio band?
• Is the voltage of the battery pack correct?
Check the remaining charge on the battery pack.
The keys or PTT do not respond.
• Is the Keypad Lock or PTT Lock on?
44 FT-25R/FT-25E Operating Manual
Page 47

Troubleshooting
The battery pack cannot be charged or battery power depletes immediately after charging.
• Is the battery pack being charged with a charger specied by Yaesu?
Charge the battery pack using the accessory AC Adapter (SAD-20B/C/U/G)
or the rapid charge cradle (SBH-22).
• Is the battery pack in use exhausted?
If the “Charging Error” appears on the desktop charger lamp when
charging, there is a chance the battery pack is over discharged. If the error is repeatedly displayed after charging the battery pack several times,
the battery pack may have reached its service life or be defective. Battery
packs are consumables. Please replace an exhausted battery pack with
a new one immediately. Battery packs can be charged and reused up to
approximately 300 times.
Some specic combinations of signals may cause internal beats (“birdies”)
from high frequencies, caused by the internal oscillator. This is not a mal
function.
(See the calculation formula below: “n” is for the arbitrary integer). Also, de
pending on the combination of simultaneously received signals, there may
be uctuations in receive sensitivity.
• Receive Frequency = 13 MHz × n multiplicative
• Receive Frequency = 19.2 MHz × n multiplicative
-
-
FT-25R/FT-25E Operating Manual
45
Page 48

Specifications
General
Frequency Ranges: RX 136 - 174 MHz
TX 136 - 174 MHz (Asian version)
144 - 146 MHz (European version)
144 - 148 MHz (USA version)
FM Broadcast 65-108 MHz
Channel Steps: 5 / 6.25 / 10 / 12.5 / 15 / 20 / 25 / 50 / 100 kHz
Frequency Stability: ±5 ppm (–10 °C to +60 °C, +14 °F to +140 °F )
Repeater Shift:
Emission Type: F2D, F3E, F2A
Antenna Impedance: 50 Ohms
Supply Voltage: Nominal: 7.4V DC, Negative Ground
Current Consumption: 205 mA (Receive) 200 mW Output
(Approx. @7.4V) 100 mA (Standby, Saver Off)
18 mA (Standby, Saver On)
4 mA (Auto Power Off)
1.5 A (5 W Tx , 144 MHz) 7.4 V DC
Operating Temperature: – 4 °F to +140 °F (– 20 °C to + 60 °C)
Case Size:
(W/O knob and antenna)
Weight: 9.17 oz (260 g) with SBR-25LI and antenna
Transmitter
RF Power Output: 5.0 W (High) / 2.5 W (Middle) / 0.5 W (Low)
(@ 7.4 V with SBR-25LI)
Modulation Type: Variable Reactance
Maximum Deviation: ±5.0 kHz
Spurious Emission: At least 60 dB down (@ High and Middle power)
At least 40 dB down (@ Low power)
Microphone Impedance: 2 kOhms
±600 kHz (144 MHz)
2.0” (W) x 4.1” (H) x 1.2” (D) (52 x 104.5 x 30 mm)
46 FT-25R/FT-25E Operating Manual
Page 49

Specifications
Receiver
Circuit Type: Direct-Conversion
Sensitivity : 0.2 µV for 12 dB SINAD (140 - 150 MHz, NFM)
Selectivity: 12 kHz / 35 kHz (–6 dB /–60 dB)
AF Output: 0.8 W @ 16 ohms for 10% THD (@ 7.4 V)
(Internal SP Max Power 1 W)
0.8 W @ 16 ohms for 10% THD (@ 7.4 V)
(EXT SP Jack Max Power 1 W)
Specifications are subject to change without notice, and are guaranteed with
in the 144 MHz amateur band only. Frequency ranges will vary according to
transceiver version; check with your dealer.
“AUTO” Mode Preset Operating Parameter
USA Version
Frequency Range (MHz) Mode Step
136.000-144.000 FM 12.5 kHz
144.000-148.000 FM 5k Hz
148.000-156.000 FM 12.5 kHz
156.000-157.450 FM 25 kHz
157.450-160.600 FM 12.5 kHz
160.600-160.975 FM 25 kHz
160.975-161.500 FM 12.5 kHz
161.500-162.900 FM 25 kHz
162.900-174.000 FM 12.5 kHz
65.000-108.000 (RX only) WFM 100kHz
Asian/European Version
Frequency Range (MHz) Mode Step
136.000-160.600 FM 12.5 kHz
160.600-162.025 FM 25 kHz
162.025-174.000 FM 12.5 kHz
65.000-108.000 (RX only) WFM 100 kHz
FT-25R/FT-25E Operating Manual
47
-
Page 50

We, Yaesu Musen Co. Ltd of Tokyo, Japan, hereby declare that this radio
EU Declaration of Conformity
equipment FT-25E is in full compliance with EU Radio Equipment Directive
2014/53/EU. The full text of the Declaration of Conformity for this product is
available to view at http://www.yaesu.com/jp/red
ATTENTION – Conditions of usage
This transceiver works on frequencies that
are regulated and not permitted to be used
without authorisation in the EU countries
shown in this table. Users of this equipment
should check with their local spectrum
management authority for licensing
conditions applicable for this equipment.
AT BE BG CY CZ DE
DK ES EE FI FR UK
GR HR HU IE IT LT
LU LV MT NL PL PT
RO SK SI SE CH IS
LI NO – – – –
Products with the symbol (crossed-out wheeled bin) cannot be
Disposal of Electronic and Electric Equipment
disposed as household waste.
Electronic and Electrical Equipment should be recycled at a
facility capable of handling these items and their waste byproducts.
Please contact a local equipment supplier representative
or service center for information about the waste collection
system in your country.
1. Changes or modifications to this device that are not expressly approved
by YAESU MUSEN could void the user’s authorization to operate this
device.
2. This device complies with part 15 of the FCC Rules. Operation is subject
to the following two conditions: (1) This device may not cause harmful
interference, and (2) this device must accept any interference including
received, interference that may cause undesired operation.
3. The scanning receiver in this equipment is incapable of tuning, or
readily being altered, by the User to operate within the frequency bands
allocated to the Domestic public Cellular Telecommunications Service in
Part 22.
48 FT-25R/FT-25E Operating Manual
Page 51

This device complies with Industry Canada license-exempt RSS
standard(s). Operation is subject to the following two conditions: (1) this
device may not cause interference, and (2) this device must accept any
interference, including interference that may cause undesired operation
of the device.
Le présent appareil est conforme aux CNR d’Industrie Canada
applicables aux appareils radio exempts de licence. L’exploitation est
autorisée aux deux conditions suivantes : (1) l’appareil ne doit pas
produire de brouillage, et (2) l’utilisateur de l’appareil doit accepter tout
brouillage radioélectrique subi, même si le brouillage est susceptible
d’en compromettre le fonctionnement.
The Scanner receiver is not a digital scanner and is incapable of being
converted or modified to a digital scanner receiver by any user.
WARNING: MODIFICATION OF THIS DEVICE TO RECEIVE
CELLULAR RADIOTELEPHONE SERVICE SIGNALS IS PROHIBITED
UNDER FCC RULES AND FEDERAL LAW.
DECLARATION BY MANUFACTURER
49FT-25R/FT-25E Operating Manual
Page 52

Copyright 2017
YAESU M USEN CO., LTD.
All rights reserved.
No portion of this manual may be
reproduced without the permission of
YAESU M USEN CO., LTD.
YAESU MUSEN CO., LTD.
Tennozu Parkside Building
2-5-8 Higashi-Shinagawa, Shinagawa-ku, Tokyo 140-0002 Japan
YAESU USA
6125 Phyllis Drive, Cypress, CA 90630, U.S.A.
YAESU UK
Unit 12, Sun Valley Business Park, Winnall Close
Winchester, Hampshire, SO23 0LB, U.K.
Printed in China
1710G-DC
 Loading...