


Instruction Sheet
®
Phaser
840
Adding Plus Features to a standard Phaser 840 —
Upgrade Kit Z840FP
Installing the Z840FP upgrade provides the printer with
board, referred to as a SCSI riser board. The presence of the SCSI riser board and the extra memory enables faster
image processing, higher resolution 1200 x 600 dots-per-inch High Resolution/Photo printing and automatic
duplex for two-sided printing. With the upgrade, the printer also supports image pipelining for faster print job
throughput and Check Print Preview for proofing the first print of a job. The SCSI interface allows connecting a
scanner and an external hard drive to the printer. With either an internal or external hard drive attached, the Plus
upgrade enables fast print collation.
32 Mbytes of additional memory and a SCSI interface
Static electricity precautions
Service personnel: Plug in the ground adapter (003-1501-00) in an AC
■
outlet. Connect the anti-static mat (006-7056-00) to the adapter’s
groundplug.
Service personnel: Put on your anti-static wrist strap and connect it to
■
the anti-static mat.
Leave the printer plugged into its power outlet; this preserves a
■
ground path for static discharges.
Touch the printer's bare metal frame often to discharge static
■
electricity from your body.
Handle the circuit board(s) by their edges only.
■
■
■
On-site installation
Professional, on-site installation is just a phone call away. Productivity is
important to your business success – so when you need it done right, the first
time – call Tektronix. Tektronix’ on-site installation delivers what you’ve been
looking for: expert service technicians who provide quality, on-site product
installation. In the United States and Canada, call 1 800-835-6100.
Do not install this kit if you are not comfortable modifying electronic equipment.
You will be liable for any damage caused to the printer.
Copyright
1998 by Tektronix, Inc.. All rights reserved. 075-0418-AA
©
Do not lay the board(s) on a metal surface.
Avoid wearing nylon or polyester clothing; they generate static
electricity.
Adding Plus Features to a standard Phaser 840 — Upgrade Kit Z840FP
Installing the RAM SIMM
The printer’s built-in Configuration Page lists what size RAM DIMM is installed
in each of the printer’s RAM DIMM slots. To determine what size and type of
RAM DIMMs are installed in your printer, scroll though the front panel to the
menu item
Configuration Page.
1.
2.
3.
4.
Printer Configuration
Turn off the printer. Do not unplug the printer; this preserves a
ground path to dissipate static charges.
Disconnect all host interface cables.
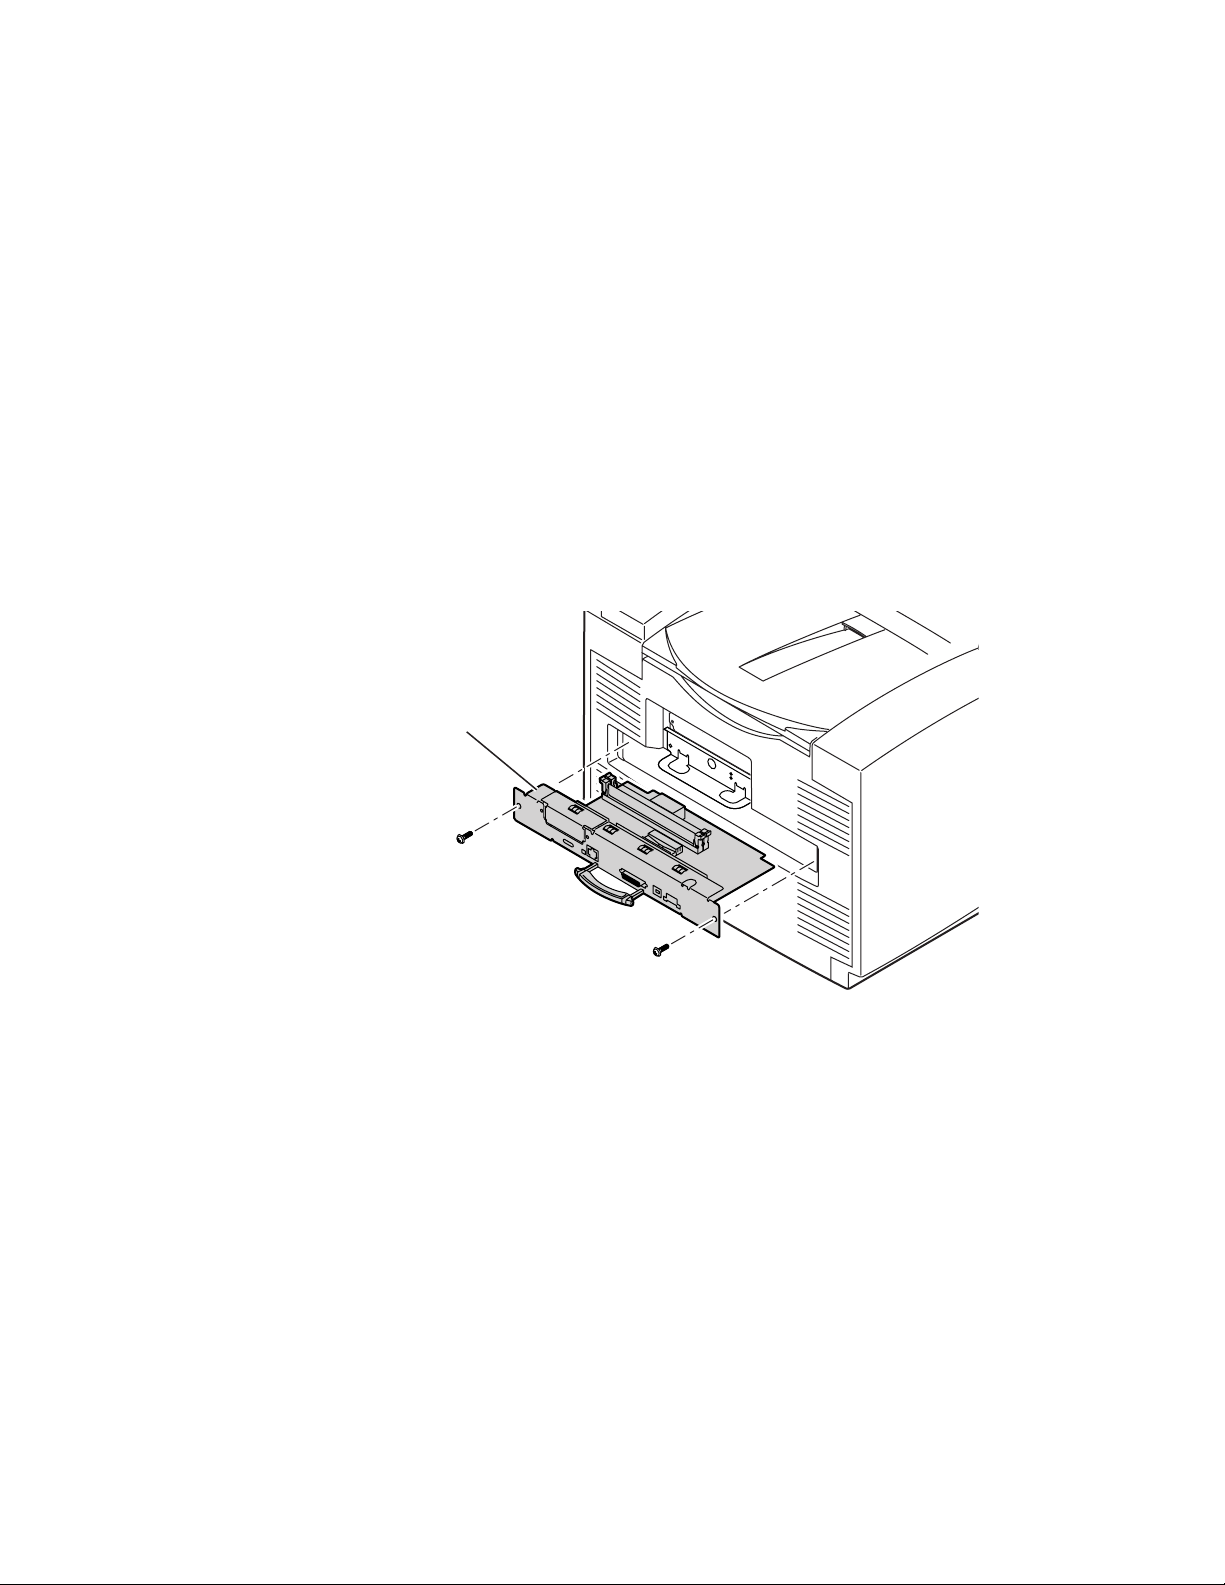
Remove the two screws securing the printer’s rear panel to the printer.
Grasp the rear panel by the handle and slide the main board out of the
printer card cage.
and press Select to print the
Main
board
0418-1
2
Adding Plus Features to a standard Phaser 840 — Upgrade Kit Z840FP
Note
The printer accepts two RAM DIMMs which can vary in size from
32 Mbyte to 64 Mbyte in size. The printer recognizes any acceptable
size RAM DIMM in any RAM DIMM slot. Slot DIMM 1 should
already contain a RAM DIMM when the printer was shipped from
the factory.
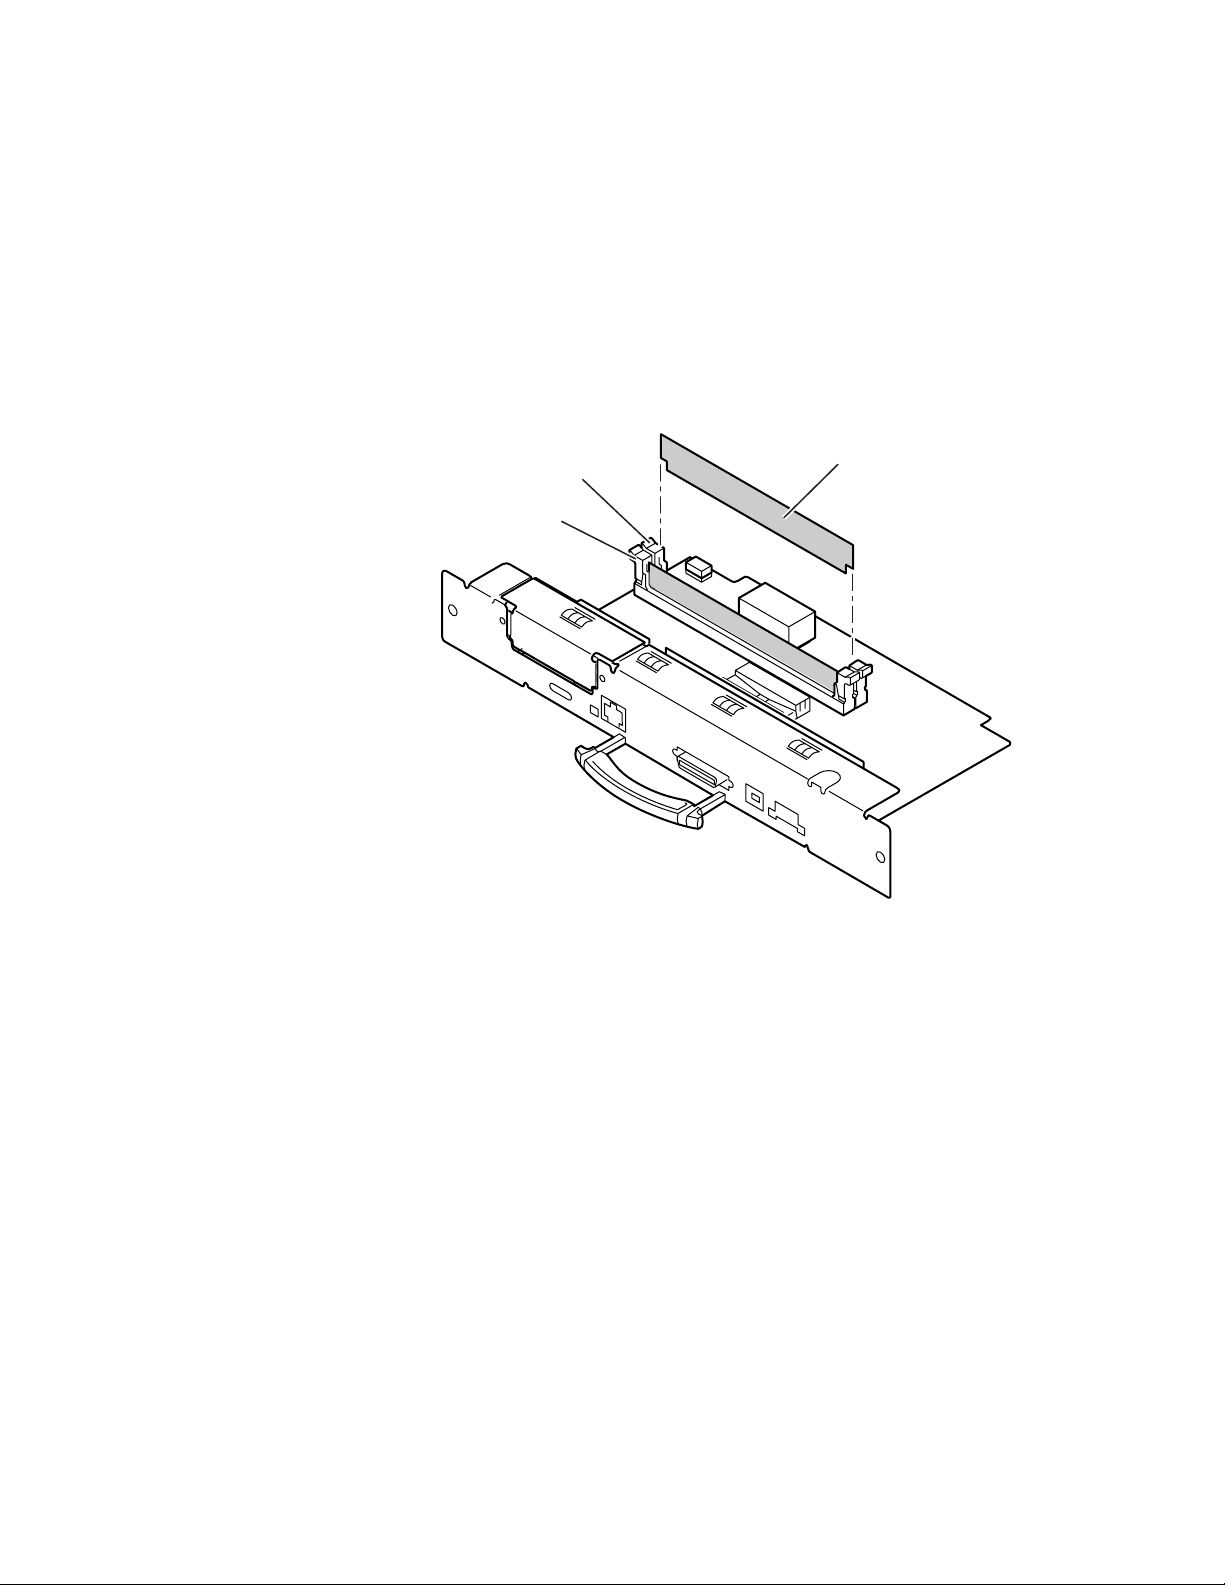
To install a RAM DIMM in the keyed DIMM connector, insert the
5.
DIMM until it locks in place. When properly inserted, a tab on each
end of the connector slips into a notch on each end of the RAM DIMM.
DIMM 2
DIMM 1
DRAM DIMM
840-4-37a
3

Adding Plus Features to a standard Phaser 840 — Upgrade Kit Z840FP
6.
A metal plate holds the place of the SCSI riser board on the rear panel.
Remove the metal plate.
7.
Carefully install the SCSI riser board on the main board.
a.
Carefully align the two rows of pins on the main board with the
two connectors on the bottom side of the SCSI riser board; orient
the riser board’s SCSI connector through the cutout in the rear
panel.
Press down firmly on the SCSI riser board to seat it squarely and
b.
completely on the two rows of pins.
8.
Secure the SCSI connector with two screws provided in the upgrade
kit.
SCSI riser board
9.
Carefully align the main board with the board guides at the rear of the
printer and insert the main board into the printer. Ensure the main
board is fully seated. Secure the board with the two screws removed
earlier.
840-4-39
Print a configuration page to check its listing of the printer's memory
10.
and options.
11.
Update your host computer’s printer driver so the driver matches the
Plus-upgraded printer; this involves configuring the printer driver
residing on your computer. This is discussed in the
Guide
as well as in the printer CD-based document Advanced Features
and Troubleshooting Manual
.
Phaser 840 Setup
4
 Loading...