

Page 1
Preface
Thank you for choosing Document Centre 1015S Series.
Written with the new user in min d, this manual aims to provide all the information necessary for effectively
operating the copier and the server, as well as notes on safety precautions and maintena nc e tips.
To get the most out of your copier, please read the manual carefully and completely before using the machine.
Keep this manual handy as a quick reference should y ou enc ounter any difficulties when using the copier. The
samples that are used in this manual include the procedures for easier understanding of the machine.
In this manual, safety instructions are preceded by the symbol .
Always read and follow the instructions before performing the required procedures.
As a member of the International Energy Star Program, Fuji Xerox confirms this product satisfies the Japanese
requirements for international Energy Star Program standards.
Fuji Xerox shares the global concern about environmental conservation and has integrated that concern in its business
activities from research and development to disposal. We have implemented a number of programs to lessen the burden on
the environment. For example, we have totally eliminated ozone-depleting chlorofluorocarbons from our manufacturing
facilities.
We are committed to leadership in the conservation of resources by reusing and recycling post-consumer waste material such
as paper, cartridges, and parts from our customer's copiers and printers. Along with our efforts to make environmental values
a part of Fuji Xerox culture, Document Centre 1015S adopts recycled components that satisfy our strict quality standards.
This product is in the Class A category based on the standard of Voluntary Control Council for Interference from Information
Technology Equipment (VCCI)*. In a domestic environment, this product may cause radio interference, In this case, the user
may be required to take adequate measures.
*This regulation applies only to Japan.
Reception In te r f erence
When installed at a certain location, the machine may cause interference with radio and television reception. If you notice
flickering, or distorted images or noises on your audio-visual units, your machine may be casuing radio interference. Switch it
off, and if the interference disappears, the machine is the cause of radio interference. Perform the following procedures until
the interference is corrected.
●
Move the machine and the TV and/or radio away from each other.
●
Reposition or re-ori entate the machine and/or the TV and radio.
●
Unplug the machine, TV, and radio, and replug them into outlets that operate on different circuits.
●
Re-orientate the TV and/or radio antennas and cables until the interference stops. For an outdoor antenna, you should ask
your local electrici an for support.
●
Use coaxial cable anten nas.
This equipment conforms to the guidelines of the Japan Business Machine Makers Association on the harmonic effects by
copiers and other reproduction devices. These guidelines conform to the guides on the harmonic suppressors of electronic
appliances and general -purpose machine.
i
Page 2
Features in Brief
The following is a list of the main features of this machine in brief.
The illustrations in this manual a re created as realistic as possible to help in makin g the explanation of the
features easier to understand.
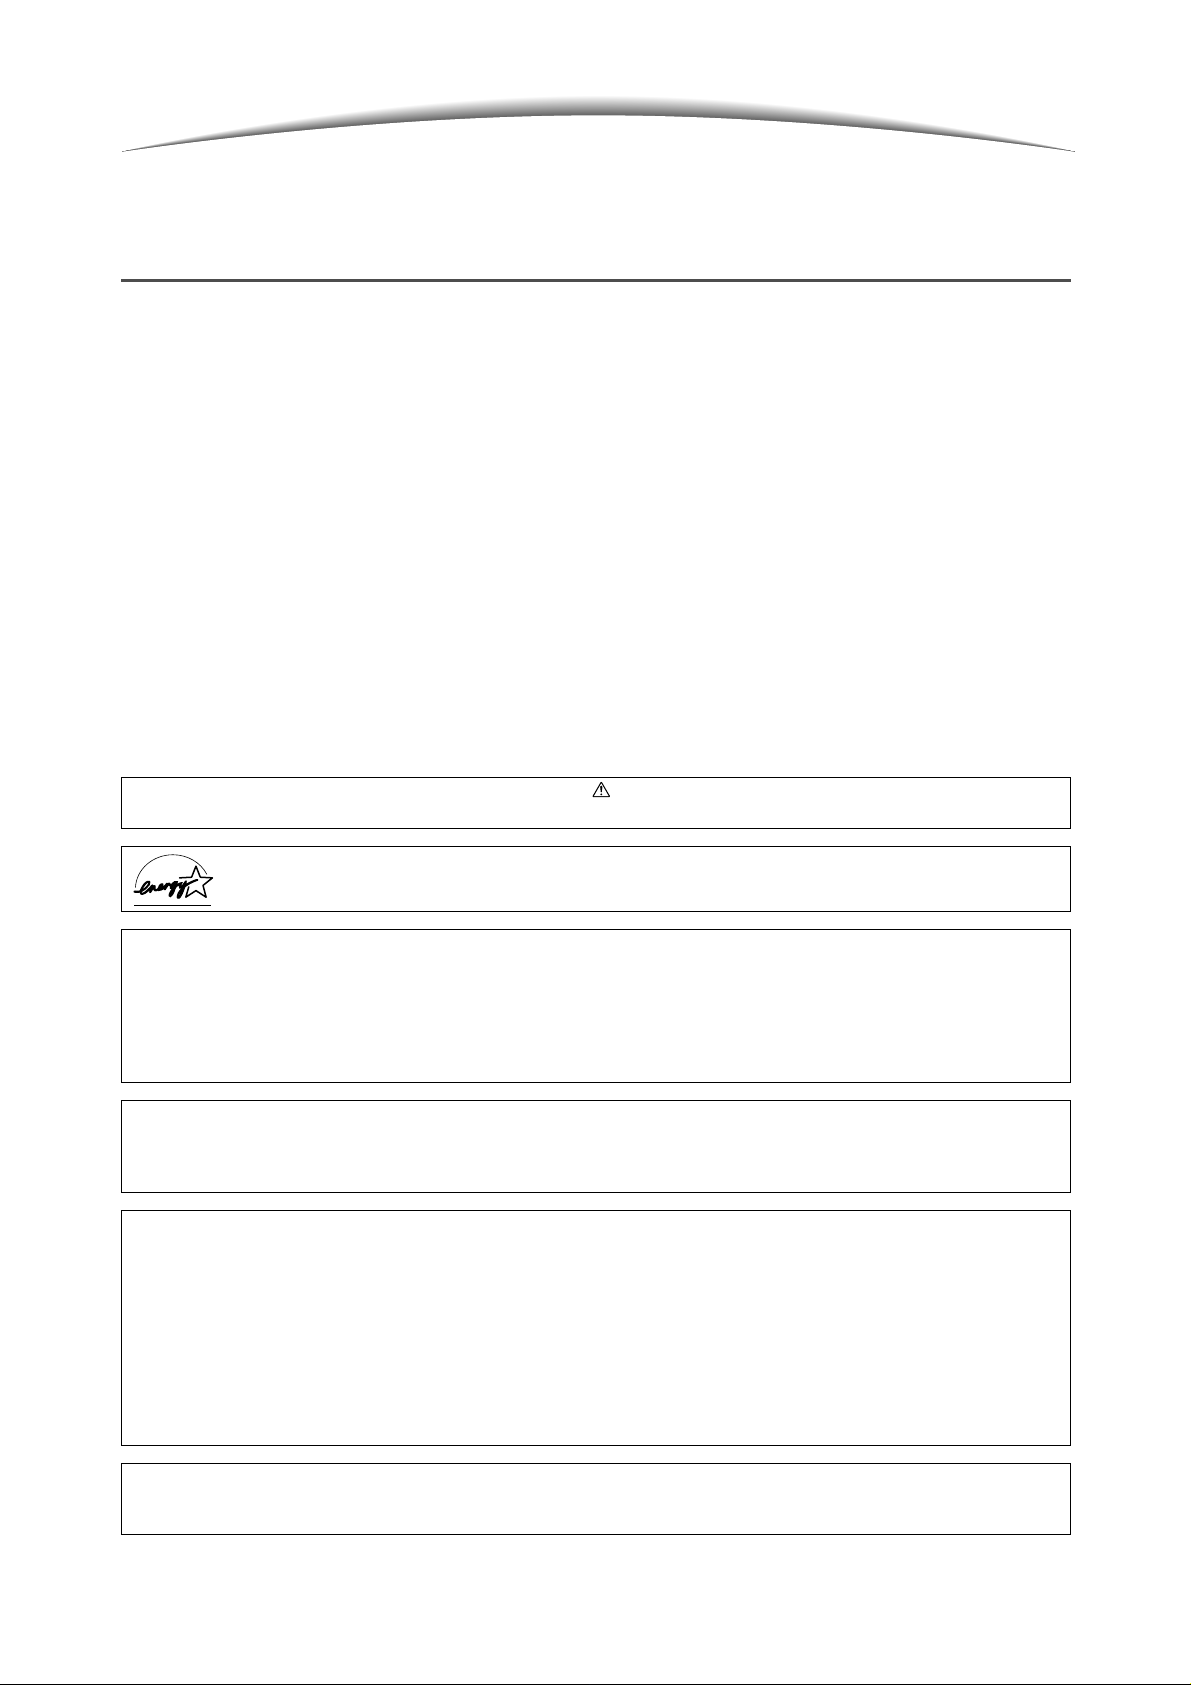
● 1-Sided/2-Sided Copying
You can copy 1- or 2-sided documents as 1- or 2sided copies.
A
Report
Report
B
“5.1 1-Sided/2-Si de d Cop y ing”
● Enlarging/Reducing Image
You can set similar or different percentage for the
length and width to change image size.
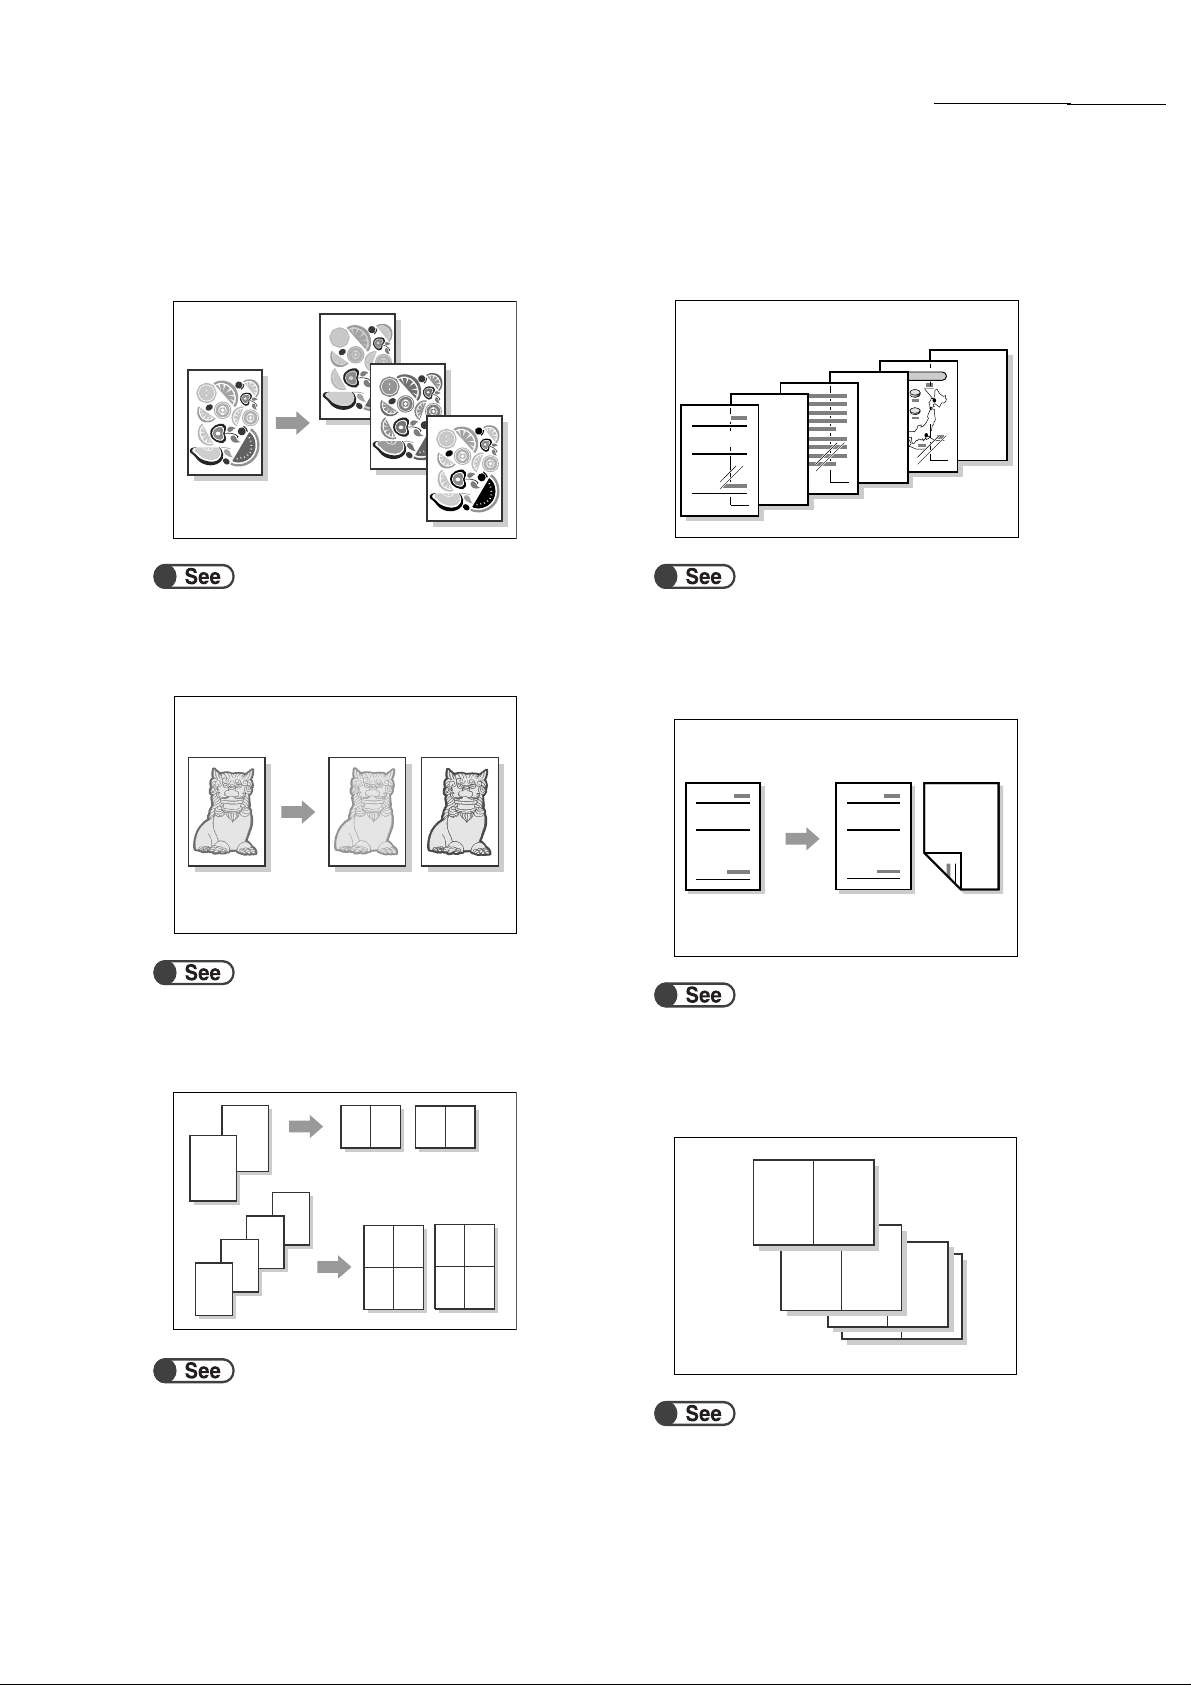
● Sorting Output
You can select to output multiple sets of copies b y
sets or page numbers.
A
Report
B
2
1
Report
“5.4 Sorting Output”
1
Report
3
Report
1
A
B
3
2
1
A
A
B
B
2
2
3
3
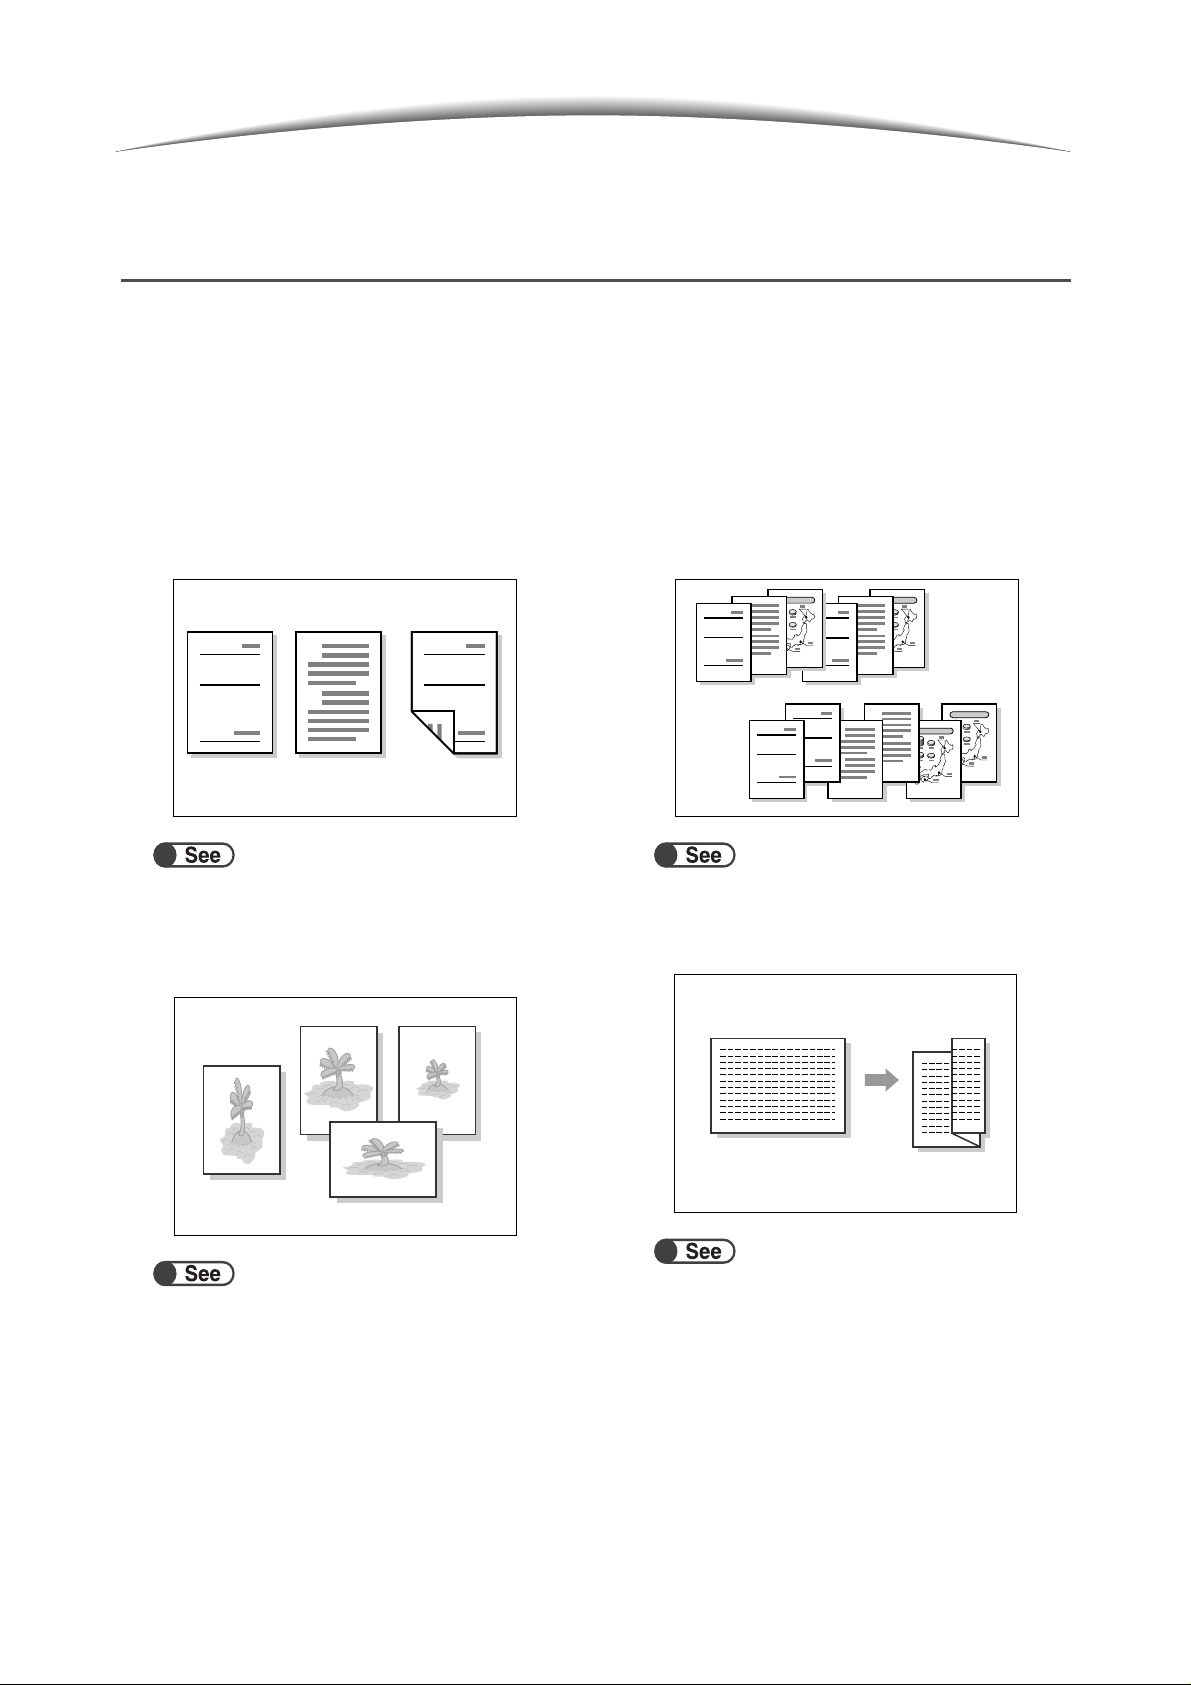
● Z folding
You can output z-folded copies.
“5.7 Z-Folding”
“5.2 Enlarging/ Re du c i ng Im age ”
ii
Page 3
Features in Brief
● Stapling
You can staple and output copies.
A
Report
B
“5.5 Stapling”
● Punching Holes
You can punched and output copies.
Report
● Erasing Edges
You can erase shadows that might form on the
sides or center portion of bound document image.
“5.10 Erasing Edges”
● Shifting Image
You can shift or specify image position for copying
with white space.
A
B
“5.6 Punching Holes”
● Making Sample Copies
When making multiple copies of a docume nt, you
can output a single copy in advance to confirm
settings.
Report
A
B
“5.8 Making Sample Copies”
A
B
“5.11 Shifting Image”
● Specifying Document Size
You can set the document size when copying a
non-standard document size or when copying a
document using a scanning size that differs from
the size of the document that is set.
X
Question
Answer
Y
Question
“5.12 Specifying D oc um ent Size”
iii
Page 4
Features in Brief
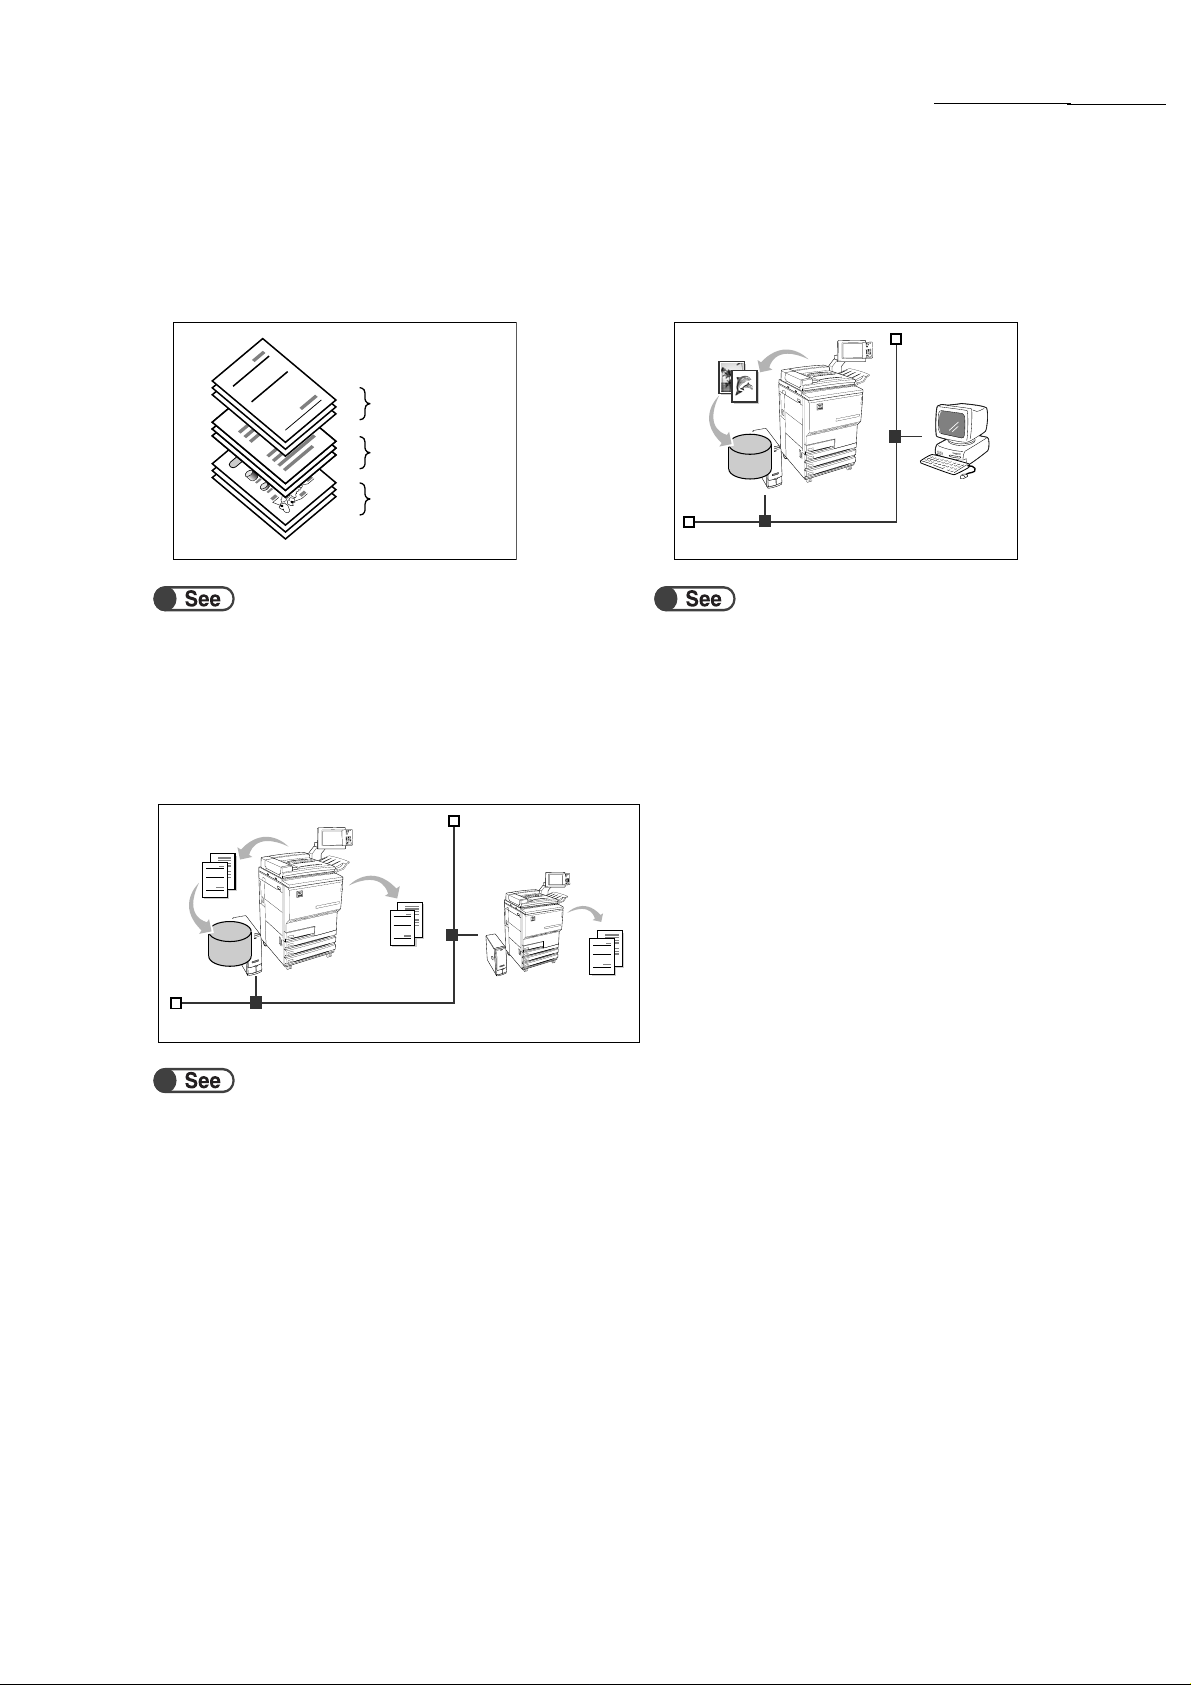
● Separating Facing Pages
You can make copies from a bound document onto
separate sheets.
“5.13 Copying Facing Pages onto Separate Sheets”
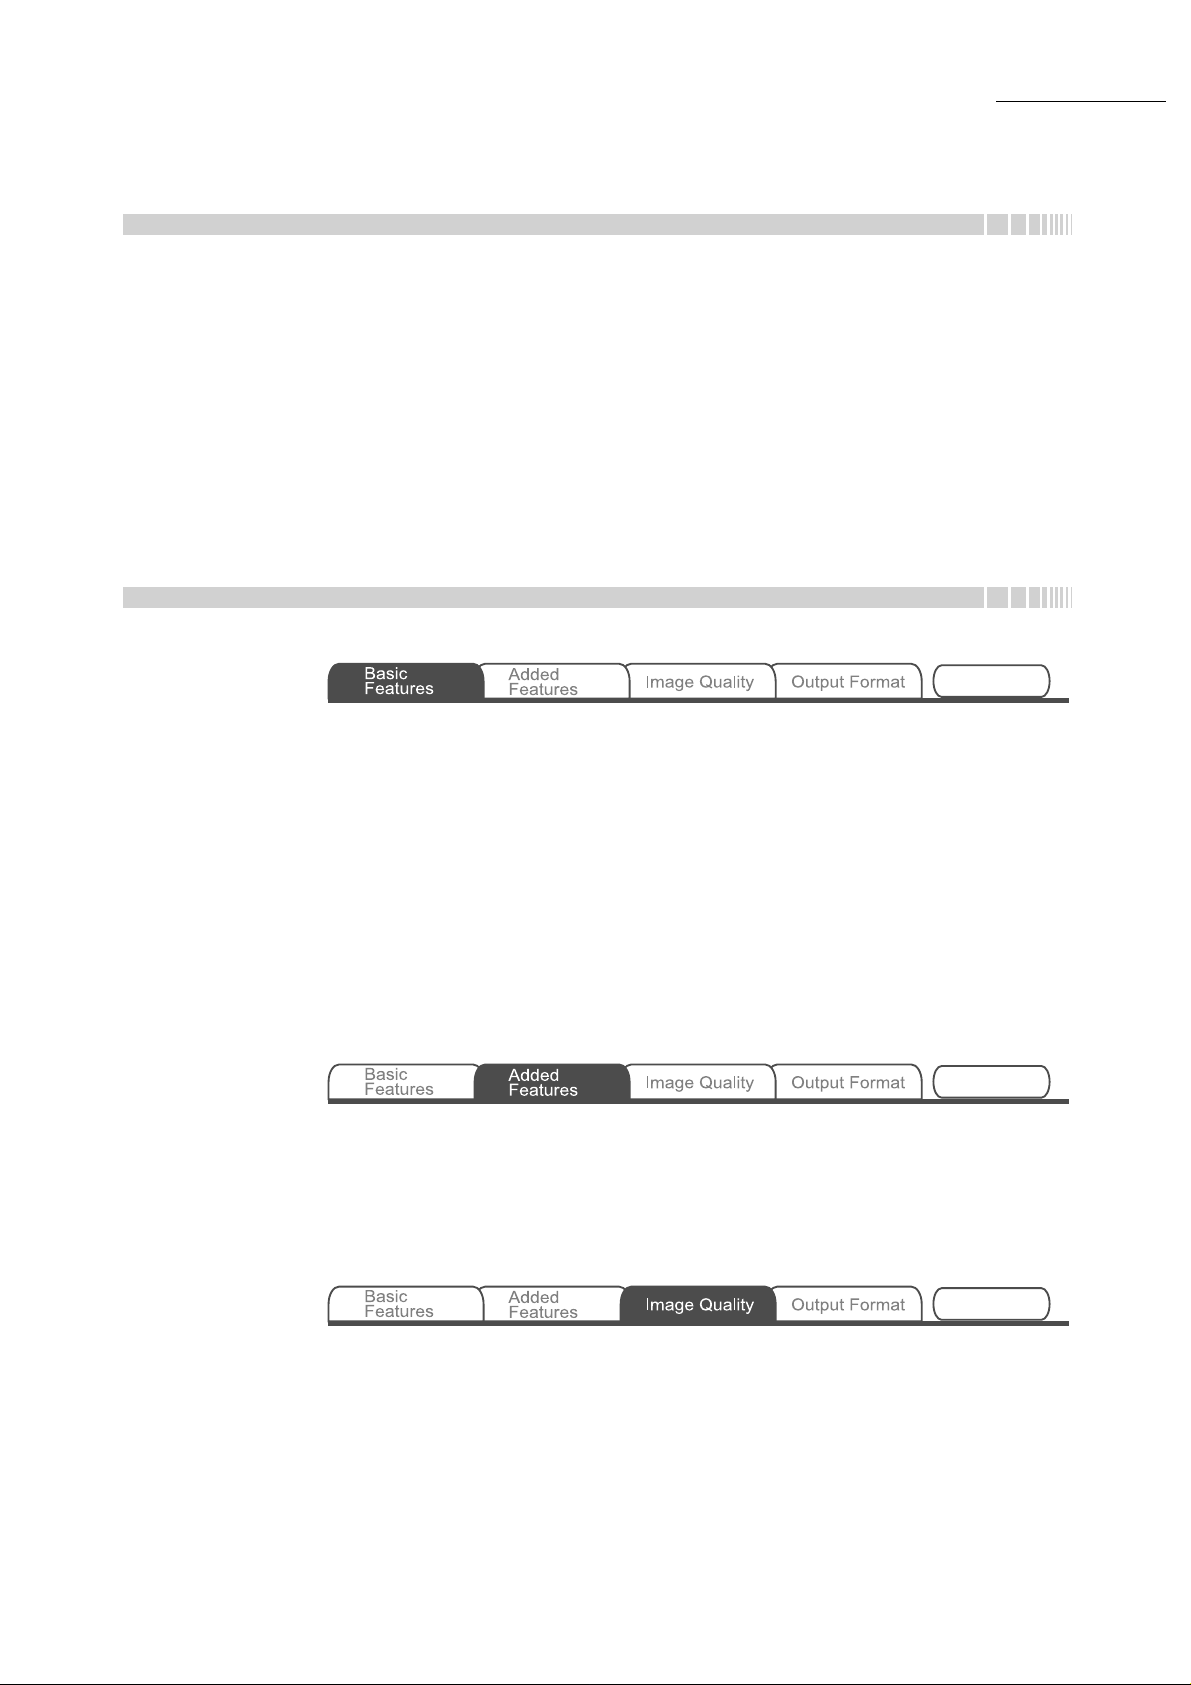
● Copying Mixed Sized Originals
You can scan documents of various sizes for
copying without specifying sizes.
A
B
Report
1
Report
1
2
3
A
B
3
2
Report
1
A
B
2
3
● Adjusting Image Quality
You can prevent copying of images from reverse
page and adjust contrast automatically.
“5.17 Adjusting Image Quality”
● Adjusting Copy Density
You can adjust how light or dark the copies should
be.
“5.15 Copying Mixed Size Originals”
● Making Two Sided Copies from a
Bound Document
You can make two-sided copies from a bound
document onto separate sheets of paper.
Blank page
C
D
No.1
A
B
No.1
Report
A
B
“5.16 Making Two sided Copies From a
Bound Documen t”
“5.18 Adjusting Copy Density”
● Specifying Document Type
You can select preset option according to your
document type to make faithful copies.
“5.19 Specify ing Document Type”
iv
Page 5
Features in Brief
● Adjusting Density Control
You can adjust color density of image in terms of
low/medium/high density levels.
“5.20 Adjusting Density Control”
● Adjusting Sharpness
You can soften or sharpen image outline.
● Inserting Separators
You can insert blank sheets of paper as separators
between transparencies.
A
Report
1
B
3
2
“5.23 Inserting Transpare ncy Separa tors”
● Specifying Face Up or Down
You can select whether copies should be output
facing up or down.
“5.21 Adjust ing Sharpness”
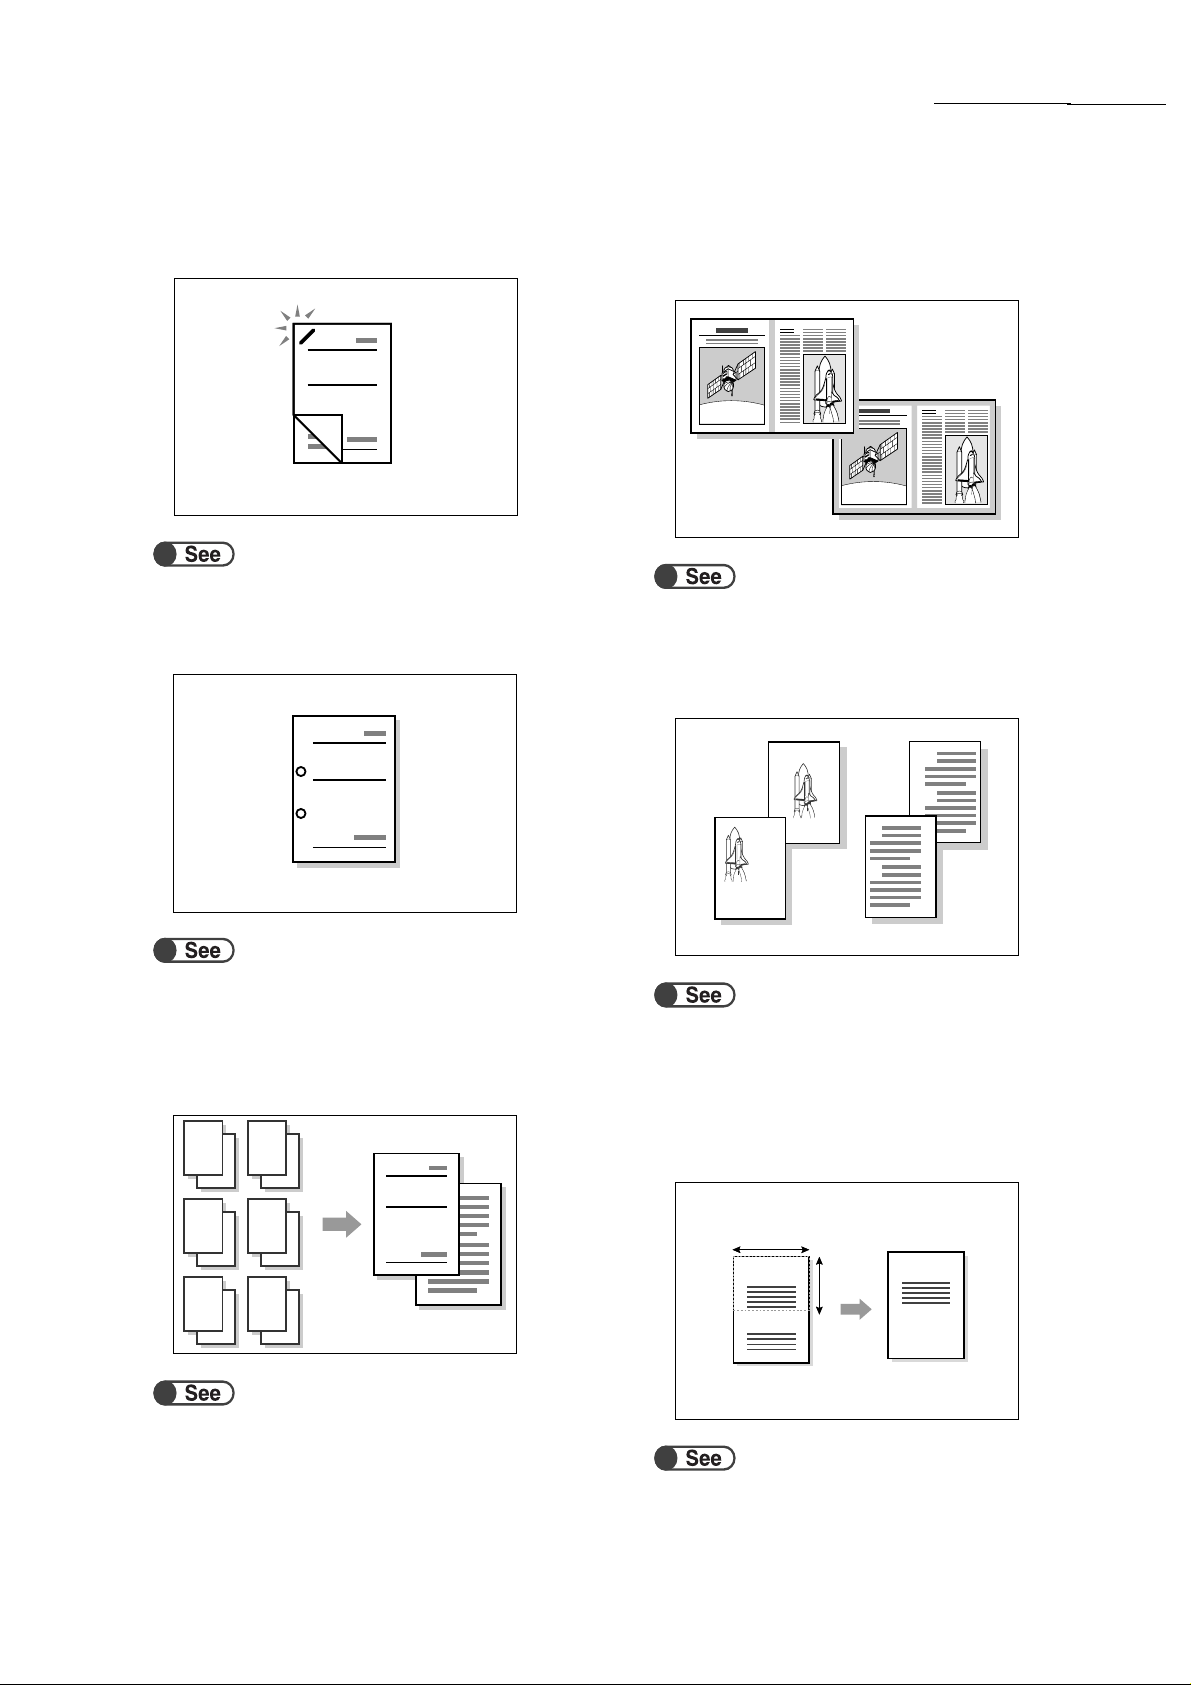
● Multi Documents to One Copy
You can merge multiple documents to one copy.
2
21
1
4
3
2
1
“5.22 Multiple-Documents Copying on One
Copy”
12
21
43
13
24
Report
“5.24 Outputting Face Up /D ow n”
Report
● Copying Repeatedly
You can make multiple copies of a document on the
same sheet.
11
22
33
33
“5.25 Making Multiple Copies on a Single Sheet”
v
Page 6
Features in Brief
● Copying With Covers
You can add color or heavy weight paper as covers
for copies.
B
A
Report
1
B
B
4
3
2
“5.26 Copying With Covers”
Report
B
A
1
B
B
4
3
2
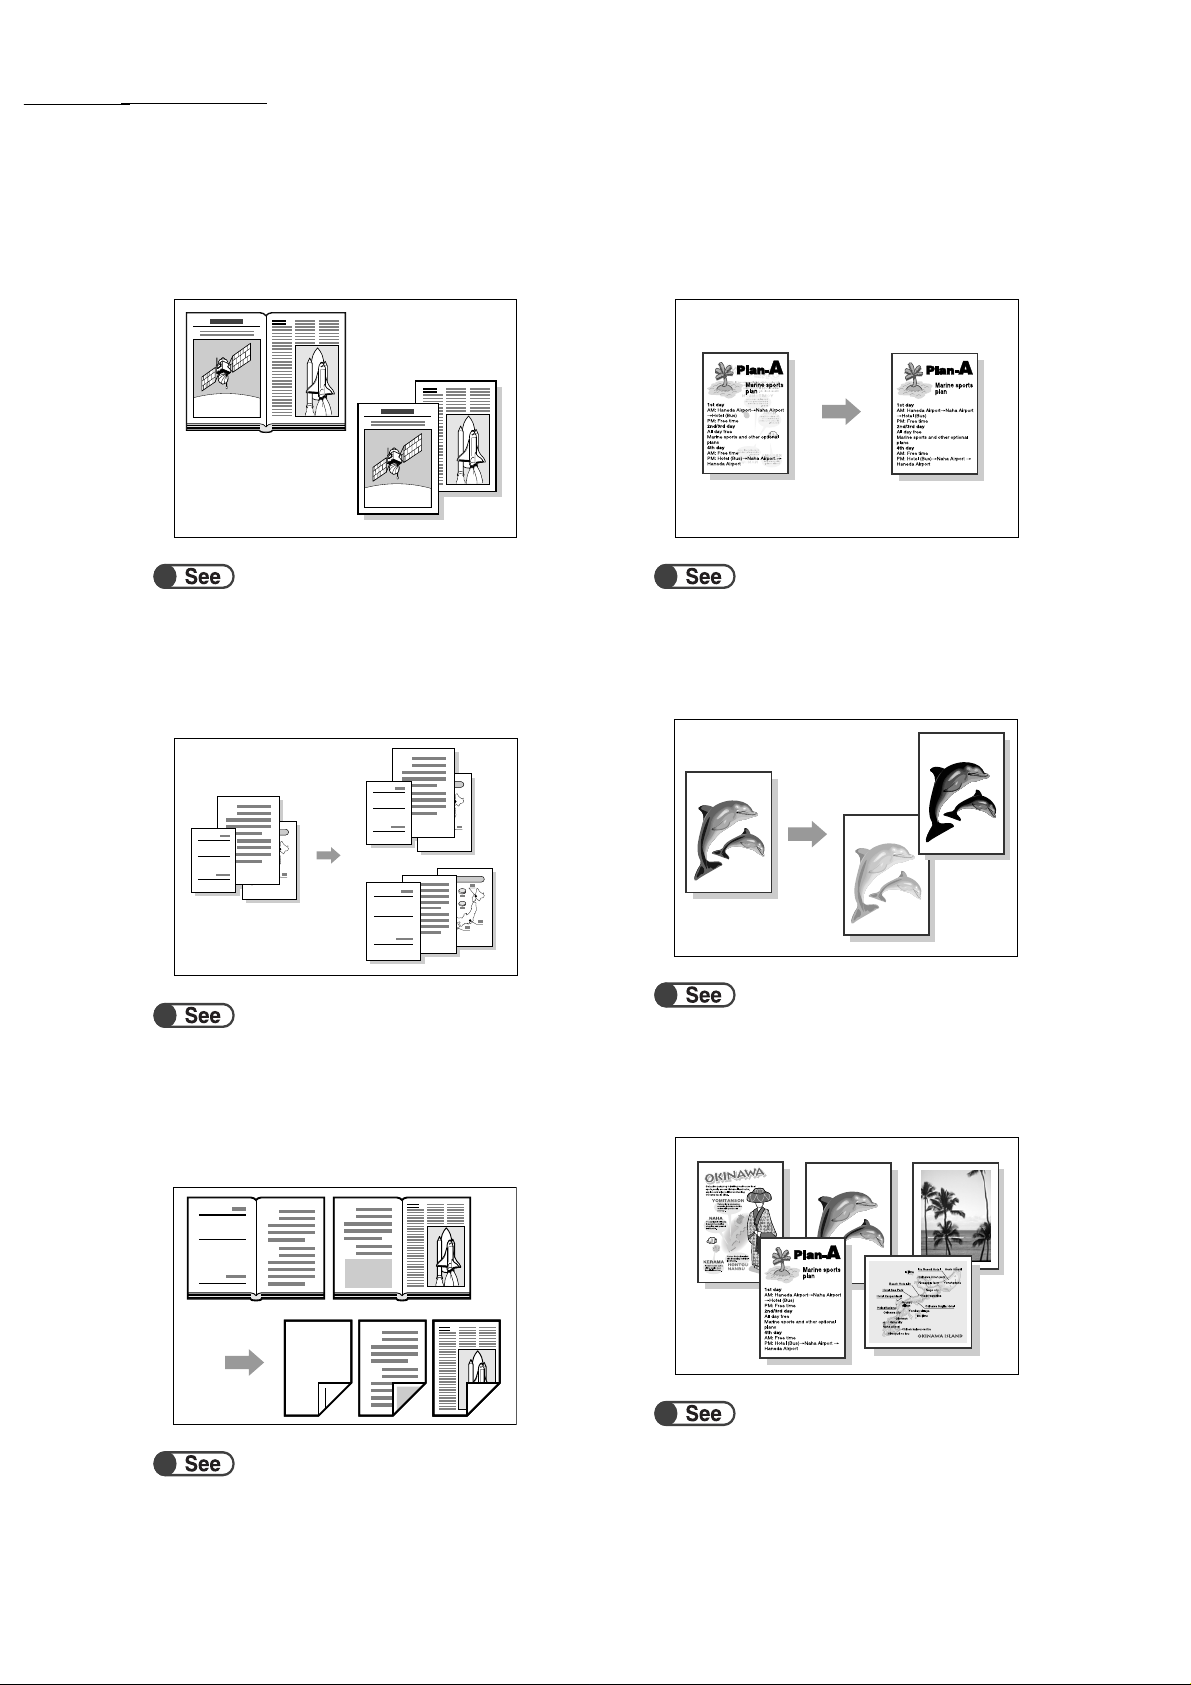
● Creating a Booklet
You can create booklets from one or two-sided
document.
A
Report
B
7
1
A
B
3
3
A
A
B
Report
B
3
7
3
1
● Copying on Tab Paper
You can copy on tab paper
Report
Report
Report
“5.29 Copying on Tab Paper”
● Outputting Bi-Folded or Tri-Folded
paper
You can make copies to be folded in half or in
thirds.
“5.27 Creating a Booklet”
● Printing Annotations
You can output copies with stamps, dates, page
numbers, and copy management.
Report
URGENT
Report
2003/01/01
“5.28 Copying with Stamp or Date”
Report
- 1 -
Report
“5.30 Outputting Bi-Folded or Tri-Folded
Copies”
● Copying on Postcards
You can copy on postcards using tray 5 (bypass).
“4.3 Copying on Postcards”
vi
Page 7
Features in Brief
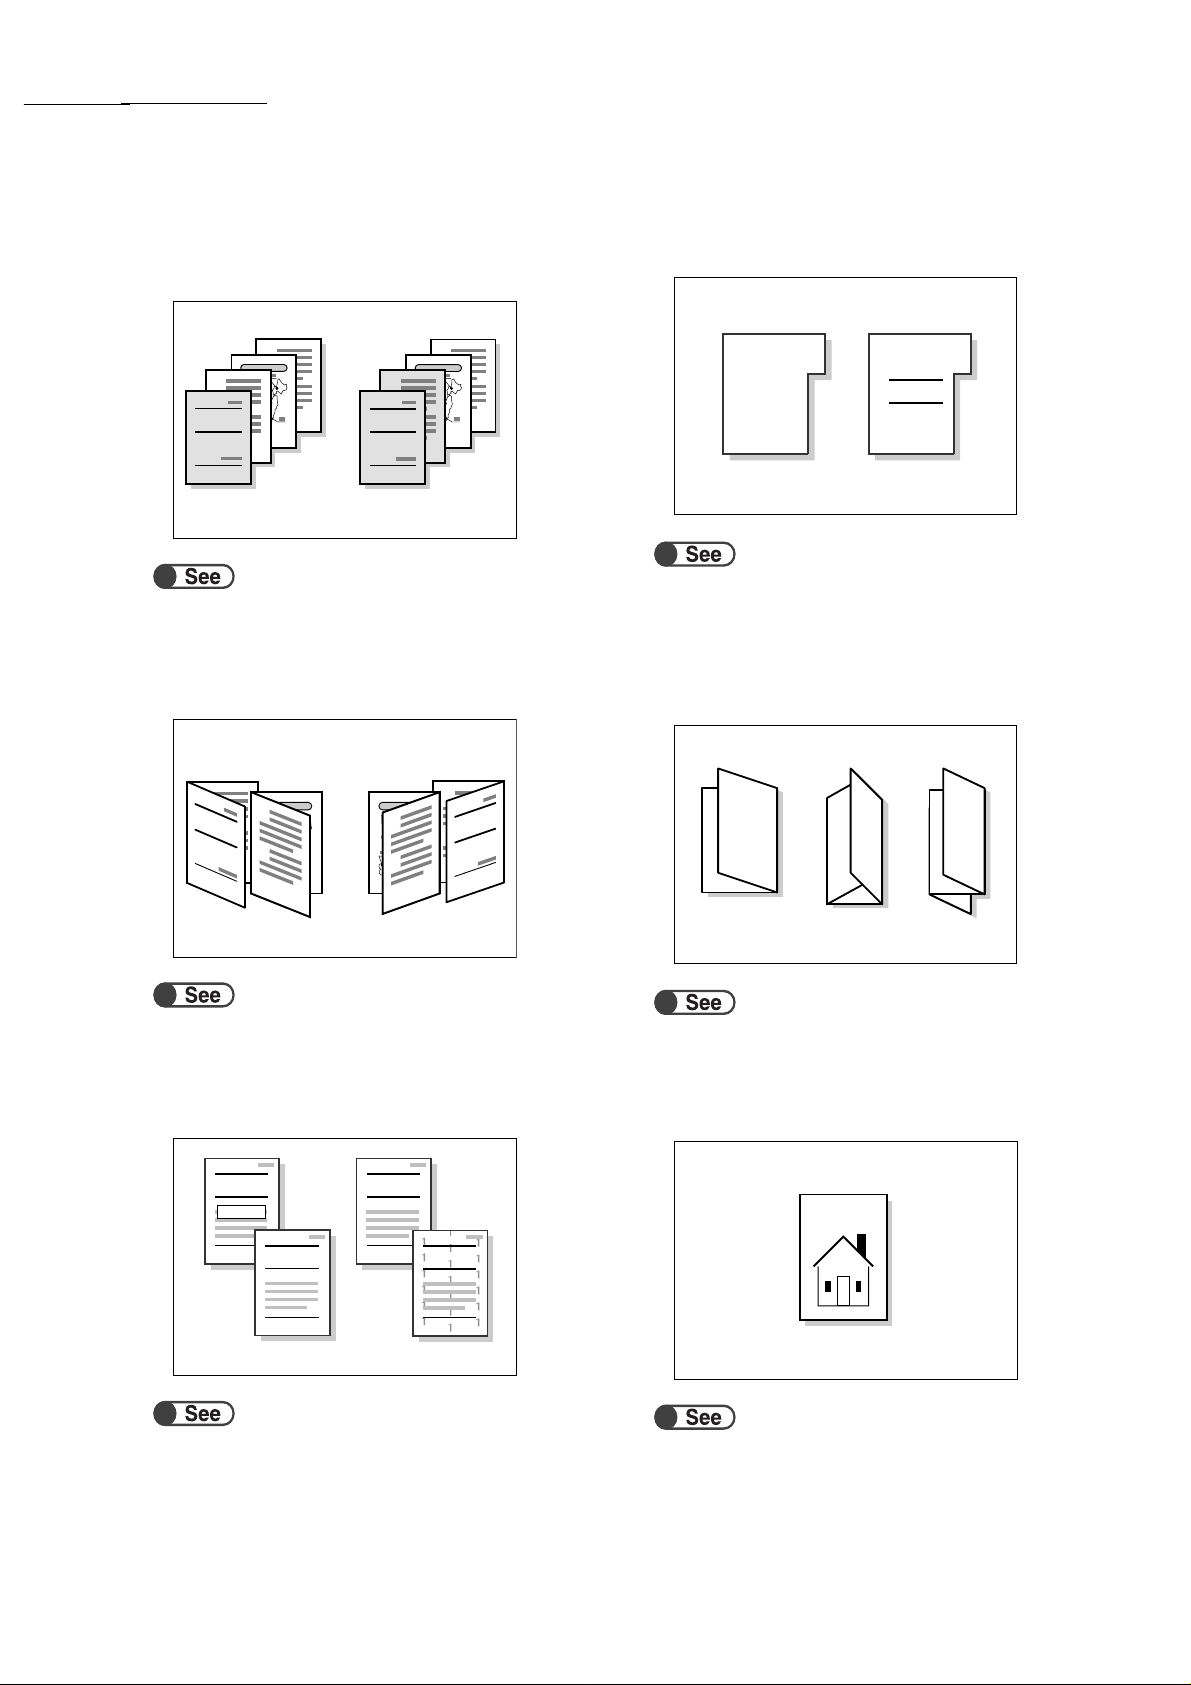
● Documents With Different Settings
You can scan documents of different copying
settings by batches and then output the copies
together.
Report
Report
Report
A
A
A
B
B
B
“5.32 Copying Doc ume nt s of Dif fere nt Se ttings (Build Job)”
First setting
Next setting
Third setting
● Saving Scanned Data
You can save scanned data with copying settings on the hard disk
as a copy file. By connecting to a network, you can also share
documents scanned by another machine and print the data from
several machines.
● Scanning Documents
You can download files of scanned data from a
client-side computer, transfer them by E-mail or to
FTP server.
Scan
Save
Hard disk
“Chapter 7 Scanning”
Save
Scan
A
Report
3
2
1
Hard disk
“Chapter 6 Server”
Print
Report
A
3
2
1
Report
A
3
2
1
vii
Page 8

Contents
Preface..........................................................................................................................................................................i
Features in Brief...........................................................................................................................................................ii
Contents....................................................................................................................................................................viii
Using This Guide.......................................................................................................................................................xiii
Conventions...............................................................................................................................................................xv
Safety Notes.......... .................... .................................... .................... ................... .....................................................xvi
The Objective of the International Energy Star Program ........................................................................................ xxiii
Illegal Copies........................................................................................................................................................... xxiv
Chapter 1 Knowing Your Copier
1.1 Main Components and Their Functions................................................................... 2
1.2 Switching On/Off Power........................................................................................... 6
1.2.1 Switching On/Off Power............................... ................... .................... ....... 6
1.2.2 Saving Energy............................................................................................. 8
1.2.3 Auto Start............................. ...................................................................... 9
1.2.4 Breaker Switc h........... .................... ................... .................... ................... .10
1.3 Using the Touch Panel Display.............................................................................. 11
1.3.1 Main Control Panel ................................................................................... 11
1.3.2 Touch Panel Display....................................................................... ..........13
1.3.3 Copier Screen............................................................ ............................... 14
1.3.4 Other Screens ........................................................................................... 17
1.3.5 Operations on saved file...........................................................................18
1.4 Entering Password................................................................................................. 19
1.5 Using the Copyly ze r........................................................... .................... ................20
viii
Chapter 2 Loading Paper
2.1 Paper to Use................................................. .. .. .. ..... .. .... .. .. ..... .. .. .. .. ..... .. .. .. .. ..... .... .22
2.2 Loading Paper/Changing Paper Size of Paper Trays............................................ 25
2.2.1 Loading Paper in Trays 1, 2, 3, 4.............................................................. 25
2.2.2 Loading Paper in Tray 5 (Bypass)............................................................ 28
2.2.3 Loading Paper in Tray 6 (HCF)................................................................. 31
2.2.4 Loading Paper in Tray 7............................................................................ 33
2.3 Checking/Changing Paper Supply Settings........................................................... 35
Chapter 3 Loading Documents
3.1 Types of Documents........................................................................................... ... 42
3.1.1 Document Sizes................................................................................... ..... 42
3.1.2 Automatic D oc u me n t Size Sensing.................................................... ....... 42
3.1.3 Special Documents to Note ......... .................................... .................... ..... 43
3.2 Loading Documents ............................................................................................... 44
3.2.1 Loading on Document Glass..................................................................... 44
3.2.2 Loading in DADF....................................................................................... 45
3.2.3 Original Orientation................................................................................... 46
3.2.4 Automatic Image Rotation......................................................................... 46
Page 9
Chapter 4 Basic Copy Procedure
4.1 Basic Copying Procedures. .................................................................................... 48
4.1.1 Making Copies..........................................................................................48
4.1.2 Checking Settings..................................................................................... 52
4.1.3 Programming Ahead.... ............................................................................. 55
4.1.4 Checking Job Status................................................................................. 56
4.1.5 Priority Prin ting..........................................................................................58
4.2 Interrupting Co p ying................ .................... ................... ..................................... ... 59
4.3 Copying on Postcards............................................................................................ 60
4.4 Copying on Transparency...................................................................................... 62
4.5 Copying on Heavy Weight.................... ........................................................ .......... 65
4.6 Removing Copies fr o m the Tri-Fold Output Tray........... .................... .................... 66
4.7 Removing Copies fr o m the Bo o k l e t Output Tray.................................... ................67
Chapter 5 Making Copies
Contents
Stored
Job Templates
5.1 1-Sided/2-Sided Copying....................................................................................... 70
5.1.1 1-Sided Copyi n g.............................. ................... ......................................70
5.1.2 2-Sided Copyi n g.............................. ................... ......................................72
5.2 Enlarging/Reducing Image..................................................................................... 76
5.2.1 Same % for Length and Width.................................................................. 76
5.2.2 Different % for Length and Width........................................................... ...81
5.3 Selecting Paper Tray.............................................................................................. 84
5.3.1 Automatically Selecting Paper Tray.......................................................... 84
5.3.2 Manually Selecting Paper Tray................................................................. 85
5.4 Sorting Output........................................................................................................ 89
5.5 Stapling.................................................................................................................. 91
5.6 Punching Holes....................... ..................................... ................... .................... ... 94
5.7 Z-Folding................................................................................................................ 97
5.8 Making Sample Cop ies................................. ................... .................... ................ 100
5.9 Loading Documents in Batches ........................................................................... 102
Stored
Job Templates
5.10 Erasing Edges......................................................................................................104
5.11 Shifting Image...................................................................................................... 107
5.12 Specifying Document Size...................................................................................111
5.13 Copying Facing Pages onto Separate Sheets..................................................... 114
5.14 Specifying Image Orientation............................................................................... 116
5.15 Copying Mixed Size Originals..............................................................................118
5.16 Making Two sided Copies From a Bound Document ........................................... 121
Stored
Job Templates
5.17 Adjusting Image Quality ....................................................................................... 123
5.18 Adjusting Copy De ns ity.......................... .................... ................... .................... ... 125
5.19 Specifying Document Type.................................................................................. 126
5.20 Adjusting Density Control................................................. ....................................129
5.21 Adjusting Sharpness......................................................................................... ...131
ix
Page 10
Contents
Stored
Job Templates
5.22 Multiple-Documents Copying on One Copy......................................................... 133
5.23 Inserting Transparency Separators......................................................................137
5.24 Outputting Face Up/Down.................................................................................... 140
5.25 Making Multiple Copies on a Single Sheet........................................................... 142
5.26 Copying With Covers ........................................................................................... 145
5.27 Creating a Book le t...................... .................................... .................... ..................151
5.28 Copying with Stamp or Date ................................................................................ 160
5.29 Copying on Tab Paper ......................................................................................... 164
5.30 Outputting Bi-Folded or Tri-Folded Copies .......................................................... 166
Stored
Job Templates
5.31 Programming Settings for Copying...................................................................... 168
5.31.1 Storing Job Templates............................................................................ 168
5.31.2 Entering the Job Name........................................................................... 170
5.31.3 Deleting Jo b Temp lates................................................... .................... ... 171
5.31.4 Recalling Job Templates......................................................................... 172
5.32 Copying Documents of Different Settings (Build Job).......................................... 173
Chapter 6 Server
6.1 About Server........................................................................................................182
6.2 Setting Folders..................................................................................................... 184
6.2.1 Roles of the Fol d e r s................................................. ................... ............ 184
6.2.2 Setting St or a g e Fo ld e r s................. ................... ..................................... .186
6.2.3 Setting Share d Fo l d e r...................... ................... .................... ................189
6.2.4 Setting Link Folder/FTP Folder............................................................... 193
6.2.5 Setting Fol d e r Na me....................................... ................... ..................... 196
6.3 Saving Data......................... ................... ..................................... .................... ..... 198
6.3.1 Saving Data ............................................................................................ 199
6.3.2 Checking Saved File............................................................................... 203
6.4 Editing Files... .................... ................... ................................................................ 206
6.4.1 Changing File Name............................................................................... 206
6.4.2 Deleting Fi les.................. .................................... .................... ................208
6.4.3 Merging Files .......................................................................................... 210
6.4.4 Deleting Pages/Inserting File.................................................................. 215
6.5 Copying and Moving Files.................................................................................... 220
6.5.1 Copying or Moving Files to a Folder....................................................... 220
6.5.2 Copying or Moving Files to MO Disk.......................................................226
6.6 Printing Files.................................................................. .................... ..................229
6.7 Retrieving File s............. ................... ................... ................................................. 234
6.7.1 Installing the Converter........................................................................... 235
6.7.2 Retrieving Files.......................................................................................237
6.7.3 Uninstalli n g th e Converter................................. .................... ..................239
Chapter 7 Scanning
7.1 About Scanning....................................................................................................242
7.2 Mailbox Setti n g s............................... ..................................... ................... ............ 243
7.2.1 Assigning a Password to the Mailbox.....................................................243
7.2.2 Setting the Ma ilbox Name............ .................................... .................... ... 246
7.2.3 Displayin g th e Fi le Name Entry Screen.............. ....................................248
7.2.4 Setting a Mailbox as the SMB Shared Folder......................................... 250
x
Page 11

7.2.5 Sending Scanned Files Automatically..................................................... 253
7.3 Scanning Documen ts............................. .............................................................. 265
7.3.1 Scanning Documents..............................................................................266
7.3.2 Checking Saved Files............................................................................. 271
7.3.3 Changing File Name............................................................................... 272
7.3.4 Deleting Fi les.................. .................................... .................... ................275
7.4 Installing the Scanner Driver................................................................................ 277
7.4.1 About the Operating Environment........................................................... 277
7.4.2 Installing the Scanner Driver...................................................................278
7.4.3 Uninstalling the Scanner Driver .............................................................. 280
7.5 Downloading Scanned Data................................................................................. 281
7.5.1 About the Applications............................................................................ 281
7.5.2 Registering the Scanner ......................................................................... 281
7.5.3 Downloading Files................................................................................... 284
7.5.4 Downloading files with a Web browser................................................... 287
7.5.5 Downloading files Using FTP.................................................................. 288
7.5.6 Accessing SMB Shared Folder............................................................... 288
Chapter 8 System Administrator Mode Settings
Contents
8.1 System Administrator Mode................................................................................. 290
8.1.1 Using System Administrator Mode.......................................................... 290
8.1.2 Entering/Exiting Tools Mode ................................................................... 293
8.1.3 Entering/Exiting Auditron Mode.............................................................. 296
8.2 Overview of Tools Mod e............................. ................... .................... ..................298
8.3 Setting Tools Mode.............................................................................................. 308
8.3.1 Changing Tools Mode Settings............................................................... 308
8.3.2 Changing Tools Password...................................................................... 310
8.4 Overview of Auditron Mo d e............ ................... .................... ................... ............ 312
8.5 Auditron Menu......................................................................................................314
8.5.1 Review Accounts .................................................................................... 314
8.5.2 Create/Modify Accounts.............................. ................... .................... ..... 315
8.5.3 Reset Account Data................................................................................318
8.5.4 Auditron Setup........................................................................................319
8.5.5 Change of Password..................................................................... ....... .. .321
8.6 Checking Network Set tings....................... ................... ................... .................... .323
Chapter 9 Troubleshooting
9.1 Troubleshooting ...................................................................................................326
9.1.1 Dealing With Error Messages................................................................. 326
9.1.2 Dealing With Server Faults..................................................................... 326
9.1.3 Dealing With Other Troubles................................................................... 327
9.2 Clearing Paper Jams............................................................................................ 330
9.2.1 Trays 1 - 4............................................................................................... 331
9.2.2 Tray 5 (Bypass)....................................................................................... 332
9.2.3 HCF......................................................................................................... 334
9.2.4 Tray 7...................................................................................................... 340
9.2.5 Lower Left Area.......................................................................................341
9.2.6 Inside Copier........................................................................................... 343
9.2.7 Inside Finisher Left Door......................................................................... 346
9.2.8 Inside Finisher Right Door......................................................................350
9.2.9 Folding Unit (Z and C)............................................................................. 355
9.2.10 Output Area of Finisher........................................................................... 362
9.3 Clearing Document Jams ..................................................................................... 365
xi
Page 12

Contents
9.4 Solving Stapli n g Pr o ble ms ....................................... ............................................ 369
9.5 Solving Curled Outp u t......................................... .................... ................... .......... 373
Chapter 10 Daily Care
10.1 Cleaning Copier ................................................................................................... 376
10.2 Consumables....................................................................................................... 377
10.3 Replacing Toner Cartridge................................................................................... 380
10.4 Replacing Waste Toner Bottle A.......................................................................... 383
10.5 Replacing Staple Cartridge..................................................................................385
10.6 Emptying Punch Sc ra p Co n ta i n e r....................... .................... ................... .......... 389
10.7 Checking Met er......................................... .................................... .................... ... 391
10.7.1 Checking sum of copies made................................................................ 391
10.7.2 Checking the Total Number of Copies for Each Department.................. 392
Appendix
A Specifications....................................................................................................... 396
B Possible Combinati o n s o f Fe a tures ........................... ..................................... ..... 402
C Orig i nal s /Copies Orientation (With Covers).........................................................411
D Originals/Copies Orientation (With Drilled Paper)................................................ 414
Index ....................................................................................................................................................................... 417
xii
Page 13

Using This Guide
The organisation of this manual is as follows.
When an optional product is installed, the display of the feat ures and m ac hine m i ght be different.
Chapter 1 Knowing Your Copier
Contains information that you should know before using the machine , like the name of each part of the
machine, how to switch on/off the power and how to use the touch panel display. Read this chapter
immediately after the machine has been installed.
Chapter 2 Loading Paper
Explains the types of paper you can use, as well as how to handle and change/replenish them.
Read this chapter when loading paper.
Chapter 3 Loading Documents
Explains the types of documents you can use for copying, as well as how to handle and load them.
Read this chapter when loading documents.
Chapter 4 Basic Copy Procedure
Explains the basic knowledge of making copies; copying onto pos tcard, transparency, heavy weight paper;
and interrupt copying.
Chapter 5 Making Copies
Explains the common cop ying procedures, involving the features of Basic F eatures, Added Featu res, and
Image Quality tabs. Read this chapter when making copies .
Chapter 6 Server
Explains how to save th e document data as a copy file and h ow to merge/edit saved copy files. Read this
chapter when using the server.
Chapter 7 Scanning
Explains how to scan the do cument and save the data to the server. Read this chapter when scanning
documents.
Chapter 8 System Administrator Mode Settings
Explains about the factory settin gs and default values of the variou s features so that you could c ustomise
the machine according to your nee ds, making it easier to use. Read this cha pter when customising your
machine.
This machine is equipped with the feature to control the number of copies made by users. Read this chapter
also when you are controlling or calculating the number of copies made.
xiii
Page 14

Using This Guide
Chapter 9 Troubleshooting
Explains how to deal with paper/document jams and error messages. Read this chapter when you
encounter problems with your machine .
Chapter 10 Daily Care
Explains how to carry ou t maintenance of your machine, like cleaning, replacing consumables like toner
cartridge and checking meters. Read this chapter when necessary.
Appendix
Explains about the specif ications of the m achin e, poss ible comb inations of f eature s, the documents/copie s
orientation when copying with covers, and the orientation of documents and paper when copying on
punched paper.
xiv
Page 15
Conventions
This manual uses the following conventions :
Additional information about operations and f eat ures .
Indicates reference sources.
Points to pay attention to.
xv
Page 16
Safety Notes
Read these safety notes carefully before usin g this product to ensure you operate the machine safely.
This section explains the safety symbols used throughout the
is used to alert operators to an operating procedure, practice, or condition that, if
not strictly observed, can result in severe injury or loss of life.
is used to alert operators to an operating procedure, practice, or condition that, if
not strictly observed, might result in safety haz ards to personnel or damage to
the equipment.
This symbol is used to alert operators to a specific operating
procedure that requires cl ose attention. Read and follow ins tructions
carefully to insure the task is accomplished safely.
This symbol is used to alert operators to a specific operating
procedure that must not be perform ed. Read and follow instructions
carefully.
This symbol is used to alert operators to a specific operating
procedure that should be em phasized for operating s afety. Read and
follow instructions carefully.
Precautions for Installation and Relocation
The machine has ventilation holes on its
bottom. A poorly ventilated machine can
cause excessive internal heat and fire.
Do not place the machine in a hot, humid,
dusty, or poorly ventilated environment.
Prolonged exposure to these adverse
conditions can cause fire or electric shocks.
Do not place the machine near heaters or
volatile, flammable, or combustible materials
such as curtains that may catch fire.
Place the machine on a level and sturdy
surface that can withstand the machine weight
of 421 kg (when installng all optional products).
If tilted, the machine may fall over and cause
injuries.
The accompanying diagrams show the
minimum clearances required for normal
operation, consumables replacement, and
maintenance to ensure your machine
operates at peak performance. Your
representative will provide necessary support
for the proper installation of the machine.
xvi
When relocating the machine, contact your
Customer Support Center.
Page 17
Safety Notes
1748
1748
480
480
126.5
With staple finisher (optional)
255
455
With booklet maker finisher (optional)
255
455
200
255
620
2455
620
2460
With staple finisher (optional),
folding unit (optional), and HCF (optional)
500 620
312
312
100
100
312
1045
1050
1245
330
330
437
(Unit: mm)
437
(Unit: mm)
80
825
523
400
80
825
523
400
When moving t he machin e, be sur e to unplu g
the power cord from the outlet. If the machine
is moved with the power cord connected, it
can cause damage to the cord which could
result in fire or electric shocks.
When moving the machine, do not tilt it more
than 10 degrees. If tilted excessively, the
machine may fall over and cause injuries.
Front
Left
Back
Right
Front
Left
Back
10˚10˚
Right
10˚10˚
When the machine is installed, be sure to lock
80
the caster stoppers. An unlocked machine
may fall over or slide and cause injuries.
1760
1760
653
411
126.5
653
411
480
480
2900
With booklet maker finisher (optional),
folding unit (optional), and HCF (optional)
500 620
200
255
2905
312
100
100
437
437
1250
523
523
(Unit: mm)
(Unit: mm)
825
535
400
80
● The machine i s capable of ope rating normally
825
within the following recommended
environmental limits:
Temperature range: 10-32°C;
535
400
Humidity range: 30-80% (no condensation).
Humidity should be 61% or below at 32°C, and
temperature should be 29°C or below at 80%
humidity.
xvii
Page 18
Safety Notes
● Do not expose the ma chine to direct sunlight.
Sudden temperature fluctuations can affect copy quality. Rapid
heating of a cold room can cause condensation inside the
machine, directly interfering with image transfer.
Exposure to direct sunlight can adversely
affect the machine's performance.
Precautions on Power and Earth Connections
Customer Support Center if you need to obtain
an extension cord.
Three power specifications are listed below.
The specif ications th at apply to your machi ne
depend on your machine configuration.
Connect the plugs directly to sockets with the
equivalent or higher rates. Never use multiplug adaptors to connect multiple plugs to the
same socket as i t ca n le ad to ov erhe at in g a nd
cause electric s ho ck or fire. If in doubt, contac t
your Customer Support Center.
● Rated voltage: 100 V
Two electric cords with th e rates of 100 V/
15 A and 100 V/5 A, are provided.
Check the labels pasted on the machine.
● Rated voltage: 200 V
Rated current: 15 A
● Rated voltage: 220-240 V
Rated current: 15 A
For the 100 V model, the combined electric
current of the two electric cords is 20 A.
Before ins erting any electric cor d to a sock et,
check the all owed elect ric current of a branch
circuit of the switchboard in use, which is
usually 20 A. Never connect any other
electrical appliances to the socket used for
this machine.
Ensure that the pl ug con nect ion is free of dus t.
In a damp environment, a contaminated
connector can draw a non-negligible amount
of currect that can generate heat and
eventually cause fire over an extended period
of time.
For the 100 V model, do not use any
extension power cord less than the rate of 125
V/15 A. Also, do not connect more than one
power cord to the extension power cord.
Overloading can cause fire. Contact your
Do not attempt to rework, pull, bend, chafe, or
otherwise damage the power cord. Do not
place a heavy obje ct on the cord. A damage d
cord can cause fire or electri c shocks.
Never touch a power cord with wet hands.
Danger of electric shoc ks exis ts.
Stop operation immediately if your machine
produces smoke, excessive heat, unusual
noise, or smell, or if water is spilt onto the
machine. These conditions can cause fire.
Immediately switch off and unplug the
machine, and contact your Customer Support
Center.
To prevent fire or electric shocks, follow the
instruction below based on your machine
configuration. If in doubt, contact your
Customer Suppor t Cen ter.
● If your machine is a 200 V or 220-240 V
model, there is no need to attach a
separate earth line since the earth
connection is incorporated in the power
line. Plug it into a properly rated outlet.
● If your machine is a 100 model, use the
green earth wire bundled with the power
cord located at the rear of the machine.
The earth wire mus t be connected to one of
the following conductors:
●
Earth terminal of the specified power
outlet.
●
A piece of copper buried in the earth 650
mm or deeper.
●
Earth termi nal with Class D* earthing.
* Class D is the regulation fo r Japan only.
xviii
Page 19
Safety Notes
Never connect the earth wire to any of the
following:
● Gas pipe, which can be ignited and explode
● Telephone line earth wire or lightning rod,
which can draw an excessive electric
current if hit by lightning
● Water faucet or pipe whose electrical
conductivity is broken by a non-metal part.
If the power cord is broken or insulated wires
are exposed, ask your Customer Support
Center for a replacement. Using a damaged
cord can cause a fire or shock hazard.
Do not plug or replug the machine while it is
on. Unplugging a live connector can deform
the plug and cause fire.
When unplugging the machine, grasp the plug
instead of t he cord. For cibly pullin g on a cord
can damage it and cause fire or electric
shocks.
Once a month, unplug the machine and check
the power cord for the following:
● The power cord is plugged firmly into a
receptacle.
● The plug is no t excessiv ely heated, rusted,
or bent.
● The plug and receptacle are free of dust.
● The cord is not cracked or frayed.
If you notice any unusual conditions, contact
your Customer Support Center.
When the machine is not used over an
extended period of time, switch it off and
unplug it. If an unused machine is left
connected to a power source for a long period,
degraded insulation can cause electric shocks,
current leakages, or fire.
1. Press the power switch to the position.
1 Power switch
2. Press the test button below the breaker
switch.
2 T est button
When the breaker switch is turned from | to
O, the circuit is all OK.
3. Turn the breaker switch, then the power
switch to the | position.
Be sure to switch off and unplug the machine
before accessing the interior of the machine
for cleaning, maintenance, or fau lt clearance.
Access to a live mach ine's interior can caus e
electric shocks.
● The machine has a built-in circuit for
protection against lightning-induced surge
current. If lightning strikes in your
neighborhood, switch off the machine.
Disconnect the power cord from the machine,
and reconnect them only when the lightning
has stopped.
This machine has a earth fault interrupter.
Once a month, check th e protect ion circ uit for
correction operations using the following
procedure. If the circuit does not operate, an
electric shock can occur on a poorly earthed
component. If you notice any unusual
conditions, contact your Customer Support
Center.
xix
Page 20

Safety Notes
Operating Safeguards
Do not place any liquid container such as a
vase or coffee cup on the machine. Spilt water
can cause a fire or shock hazard.
Do not place any metal parts such as staples
or clips on the machine. If metal and
flammable parts get into the machine, they
can short-circuit internal components, and
cause fire or electric shocks.
If debris (metal or liquid) gets into the
machine, switch off and unplug th e machine.
Contact your Customer Support Center.
Operating a debris-contaminated machine can
cause fire or electric shocks.
Never open or remove machine covers that
are secured with screws unless specifically
instructed in this manual. A high voltage
component ca n cause electric shocks.
Do not try to alter the machine config uration,
or modify any parts. An unauthorized
modification can cause smoke or fire.
This equipment is certified as a Class 1 laser
product under IEC60825-1 (1998). This
means that the machine does not emit
hazardous laser radiation. Since radiation
emitted inside the machine is completely
confined within the protective housings and
external covers, the laser beam cannot
escape from the mac hine d uri ng any phas e of
user operati on. Do not per form any operati on
apart from the instructions given in the
manual. There m ay be a danger of laser beam
leakage.
If you make copies with the document cover
open, avoid looking direc tly at the c opy lamp.
Direct eye ex posure can cause eye fat igue or
damage.
Do not use a highly flammable spray or
solvent near the machine. It can cause fire.
When copying a thick document, do not use
excessive force to press it against the
document glass. The glasss may break and
cause injuries.
Do not place a heavy object or lean your
elbow on the touch-sen sitive panel or displa y.
The panel or displa y ca n brea k and th e brok en
glass can caus e injuries.
Do not use paper that are good electricity
conductors (origami paper, carbon paper,
coated paper, etc.). If the paper is jammed in
the machine, it can result in a short circuit or
fire.
Do not staple document with punched holes
(e.g. perforated paper available in the market)
as the resultant detached staples can injure
your fingers.
Do not touch the areas that are affixed with the
label "High Voltage". You may get an electric
shock.
Do not touch the areas on or near the fuser
unit that are affixed with the label "Hot
Surface". You can get burnt as a result.
Do not forcef ully remo ve paper th at are in the
fuser unit or wrapped around the heat roller.
You can get burnt as a result. Switch off the
machine, and contact your Customer Support
Center.
xx
Page 21
Safety Notes
When sliding out a p a per t ray, pull it out slowly.
If it is pul led out with too much forc e, the tray
can hit and injure your knees.
When removing jammed paper, make sure
that no pieces of torn paper are left in the
machine. A piece of paper remaining in the
machine can ca use a fire. If a sheet of paper
cannot be removed or wrapped around the
heat roller, do not try to remove it by yourself.
Doing so can cause injuries. Switch off the
machine immediately, and contact your
Customer Support Center.
Consumable Safeguards
Never throw a toner cartridge into an open fire.
Toner remainin g in th e ca rtri dge c an c ause an
explosion and you can get burnt.
Never throw toner or a waste toner bottle into
an open fire. It can cause an explosion and
you can get hur t.
Do not pull out the drum car t ri dge with force. It
may hit you and injure you.
It is recommended to ventilate the room to
keep the environment comfortable and free
you from getting a headache during
continuous copying runs in a small room.
When removi ng jam med st aples , t ake care no t
to injure your fingers.
● When clearing a paper jam or other fault,
follow the appropriate procedures given in this
manual.
-- Handling instructions --
Used toner cartridges and drum cartridges
should be properly disposed of. Contact your
Customer Support Center.
● Administer emergency treatment as follows:
●
If toner gets into your eyes, rinse them well
with plenty of clean water. Consult a do ctor,
if necessary.
●
If toner adheres to your skin, wash it with
soap and water, then rise it well.
●
If you inhale toner, exit the area immediately
and gargle with plenty of water.
●
If you swallow toner, induce vomiting and
consult a docto r immediately.
● Open the consumables only when you wan t to
use them. Do not store them in the following
places:
●
High temperatur e, humid places
●
Near a fire
●
Under direct sunlight
●
Dusty places
● When using consumables, read and observe
operating instructions and safeguards written
on the package and container.
● Used toner cartridge and drum cartridges are
recycled for resource conservation.
xxi
Page 22
Safety Notes
■Locations of warning and caution labels
To ensure your safety in operating the copier, please read the warning and caution labe ls pasted on the
internal parts of the machine carefully.
xxii
Page 23

The Objective of the International
Energy Star Program
To protect the global environment and conserve energy resources, the International Energy Star Program
encourages the following product fea tures. Fuji Xerox confirm s this product satisfies the requirements for this
program.
■Two-sided copying feature
This product has a two-sided co pying feature to re duce the volum e of copy paper used. This feature is set
as the factory setting for this machine. For example, by copying two single-sided originals on both sides of a
sheet of paper, you can reduce the number of paper used. Of course, you can also make single-sided
copies. For details, see “5.1.2 2-Sided Copying”.
■Auto shut-off feature
This product has a power-saving feature, which turns the machine off automatically if it is on and not
operated for a certain period of time. The factory setting of the auto shut-off time is set at 60 minutes.
For details, see "
■
Timeouts" of "8.2 Overview of Tools Mode".
■Low power mode feature
This product has a power-saving f eat ure, which switches the machine to a low pow er mode automatically if
the machine is on and not op erated for a certain period of time. In this mode the m achine lowers the fuser
temperature to save pow er consumption. The factory setting of the low power mode start time is s et at 15
minutes. You can change this setting from 1 to 240 minutes. The recovery time from the low power mode is
as follows:
(applicable only if the machine recovers after one hour it has moved to low power mode)
- for 100 V model: about 112 seconds;
- for 200 V model: about 104 seconds;
- for 220 V model: about 144 seconds;
- for 240 V model: about 108 seconds.
For details, see "
■
Timeouts" of "8.2 Overview of Tools Mode".
■Use of recycled paper
As part of our commitment to environmental protection, this product is desig ned to run recycled paper as
reliably as normal bond paper. The weight of usable recycled paper is 60 to 90 g/m
Fuji Xerox supplies the following types of recycled paper in Japan.
• Xerox R Paper V-681 (A4) 67g/m
• Xerox WR Paper V-581 (A4) 67g/m
• Xerox WR100 Paper V-695 (A4) 67g/m
• Xerox Green100 Paper V-883 (A4) 67g/m
2
(58kg) 70%
2
(58kg) 70%
2
(58kg) 100%
2
(58kg) 100%
2
.
xxiii
Page 24

Illegal Copies
It is illegal to make copies of certain documents
Copying certain documents may be illegal in your country. Penalties of fines or imprisonment may be imposed
on those found guilty. The following are examples of item s that may be illegal to copy in your count ry. See
"Legal Requirements in Japan" below for the requirements in Japan:
●
Currency
●
Banknotes and cheques
●
Bank and government bonds and secur itie s
●
Passports and identification cards
●
Copyright material or trademarks withou t the co ns ent of the owner
●
Postage stamps and other negotiable instruments
This list is not inclusive and no liability is a ssumed for either its completeness or accurac y. In case of doubt,
contact your legal counsel.
Legal Requirements in Japan
1. Counterfeiting currencies and securities for the purpose of uttering shall be strictly prohibited in Japan.
●
In the case of the following items, not only counterfeiting but also reproduc ing any items with a similar
appearance shall be punishable:
currencies, foreign currencies, national bonds, local bonds, postal money order, postage stamps,
revenue stamps, etc.
●
In the case of the following items, counterfeiting s hall be punishable:
share certificates, corporate bonds, bank notes and cheques, consignment sheets, warehouse
certificates, vouchers, gift certificates , train tickets, commuter tickets, tokens, discount cou pons, public
lottery tickets, betting tickets, etc.
2. Forgery of documents and cou nterfeiti ng of seals for the pu rpose of uttering shall be severe ly punis hed in
Japan. The following cases shall be punishable:
●
Forgery of official documents, suc h as certificates.
●
Forgery of private documents relating to rights and duties, such as agreements.
●
Forgery of private docum ents relating to the certification of a fact, such as le tter of recommendation,
resume and letter of greeting.
●
Counterfeiting of official seals.
●
Counterfeiting of private seals.
3. Exploiting copyrighted works, including but not limited to books, newspapers, magazines, brochures,
paintings, plans, photography, images, movies, music a nd computer progra ms shall NOT be permissible
without obtaining the consent of the copyright owner. In the following cases, the copyright owners may
exercise their right of demanding cessation and/or may claim compensation for damages. Also, the
following cases may be punishable:
(1) Reproduction To make a copy of copyrighted works which have been fix ed on paper by means of
copier machines; to make sound or visual recording from copyrighted works which
have been fixed in magnetic tapes; to input copyrighte d works by means of reading
device and make use of the electronic data thereof (i.e. record the data on PC or other
mediums, output the data by printer); and to download copyrighted works, etc.
xxiv
Page 25

Illegal Copies
(2) Modification To distort, mutilate or modify copyrighted works which have been fixed in paper or
fixed as electronic information, etc.
(3) Transmission To publicly transmit copyrighted works, including those that have been fixed as
electronic information, by means of telecommunication networks such as Internet,
facsimile and email; and to upload copyrighted works to interactive transmission
communications server alrea dy connected with tele communication network s for use
by the public, etc.
HOWEVER, THE FOLLOWING SHALL BE PERMISSIBLE UNDER THE COPYRIGHT LAW OF JAPAN.
In the following cases, it is NOT necessary for a user to obtain the consent of the copyright owner:
●
Reproduction of copyrighted works for the purpose of the user's personal use, family use or other similar
uses within a limited domain.
●
Making quotations from copyrighted works, provided that their making is compatible with fair p ractice
and their extent does not exceed that justified by purposes such as news reporting, criticism or research.
●
Reproduction of informatory, investigatory or statistical data and reports which have been prepared b y
the State or local governments for the press or other periodicals, provided that the reproduction thereof is
not expressly prohibited.
Notice:
This list is NOT inclusive and no liability is assumed for its completeness or accuracy. In case of doubt,
please contact your legal counsel.
xxv
Page 26

Page 27

1 Knowing Your
Copier
1.1 Main Components and Their Func tions.............................2
1.2 Switching On/Off Power......................................................6
1.3 Using the Touch Panel Dis p la y.................................... .....11
1.4 Entering Password.............................................................19
1.5 Using the Copylyzer...........................................................20
Page 28
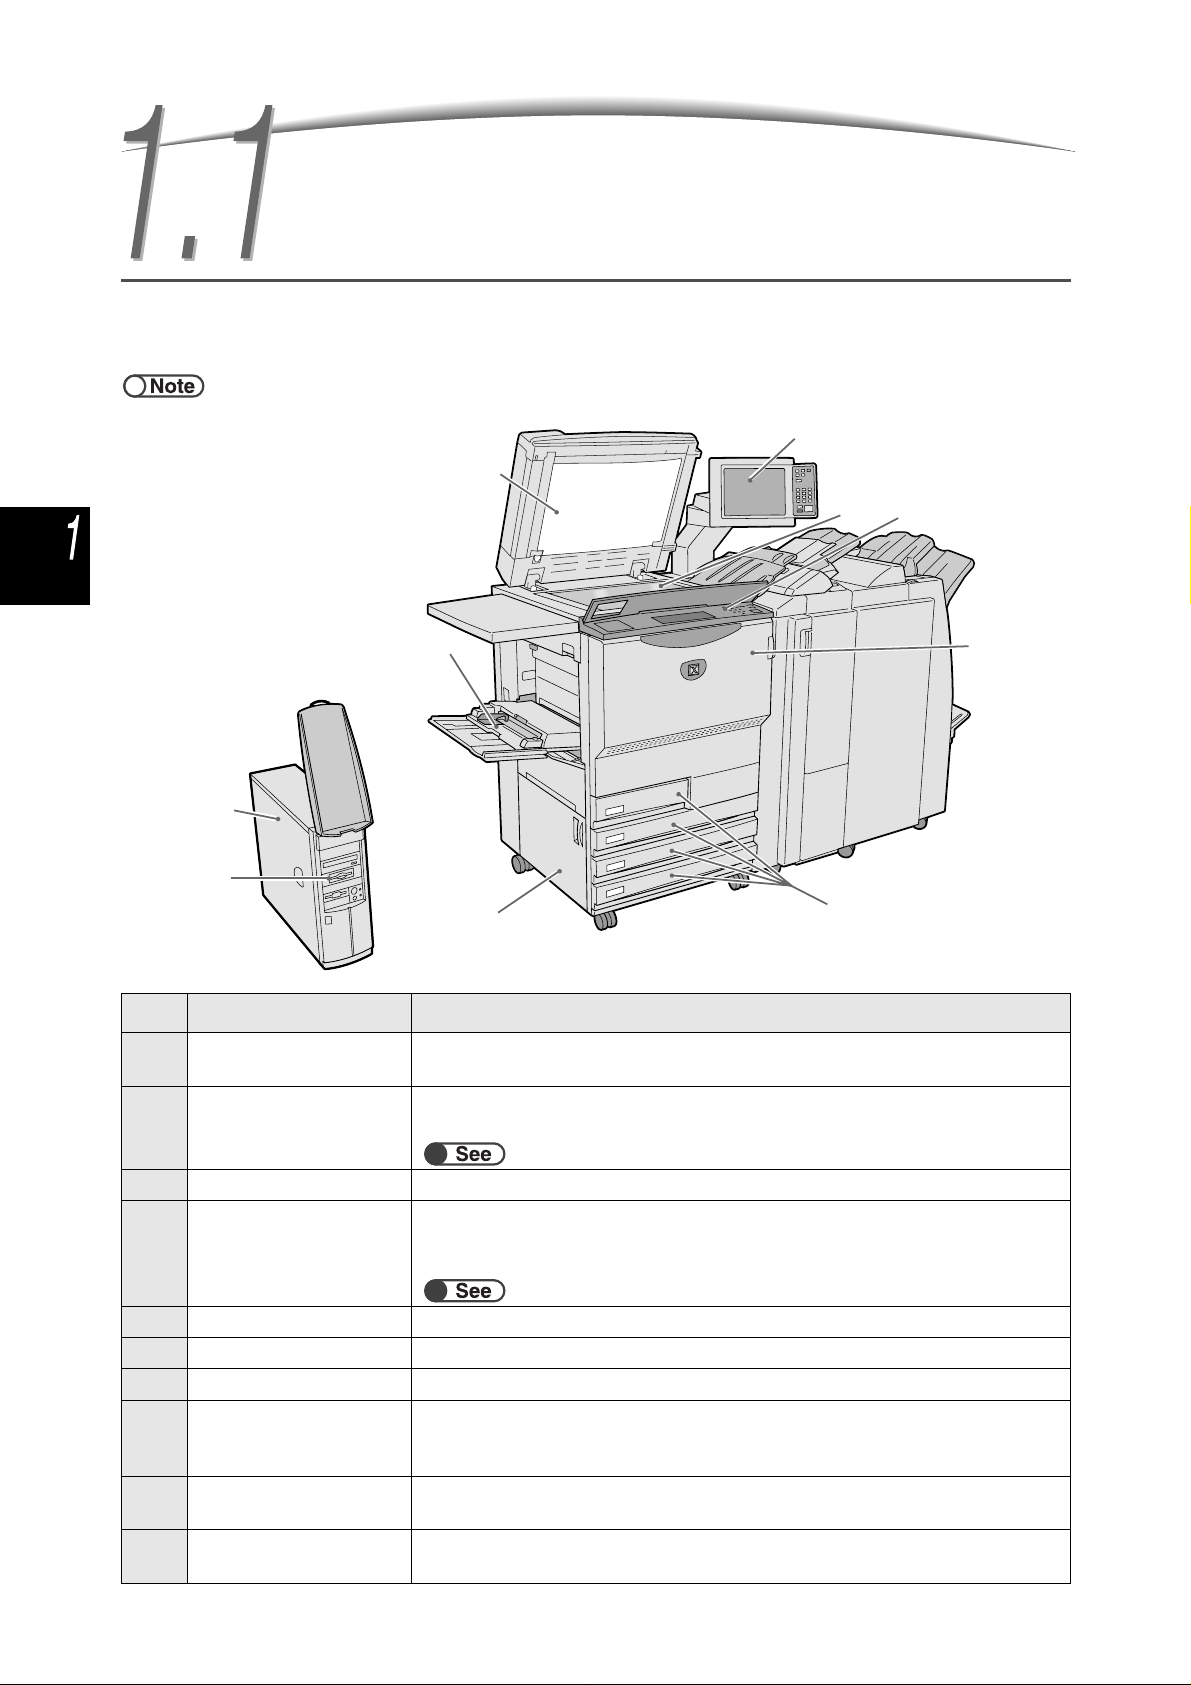
1.1 Main Components and Their
2
5
Knowing Your Copier
Functions
This section explains the names and functi ons of every part of the copier.
● The diagram below shows how the machine will look like when all th e optional products are installed.
1
8
9
4
3
10
7
No. Name Function
1 Document cover To press down the document that is placed on the document glass.
The Duplex Automatic Document Feeder (DADF) is integrated into this cover.
2 Main control panel Contains operating buttons, indicator lights and the touch panel display.
This control panel is used in most operations.
“1.3 Using the Touch Panel Display”
3 Document glass To place the document for copying.
4 Copier control panel Lift up the cover to perform settings in the Tools and Auditron Administration
Mode. To use the Tools and Auditron Administration Mode, switch operation
from the main control panel to this copier control panel.
“8.1.1 Using System Administrator Mode”
5 Front door Open to clear paper jams or to replace the drum/toner cartridge.
6 Trays 1, 2, 3, and 4 To load the paper.
7 Lower left cover Open to clear paper jams.
8 Tray 5 (bypass) To load non-standard size paper that cannot be loaded in trays 1, 2, 3, and 4
(e.g. special paper such as transparency and heavy weight paper) for c opying
on them.
9 Server Server connected to the copier. Saves scanned document data. The scanned
image data can then be downloaded to the client computer.
10 MO Drive (Optional) When the optional MO drive is installed, you can copy or move files between a
folder and an MO disk.
2
6
Page 29
19
20
21
22
23
Back
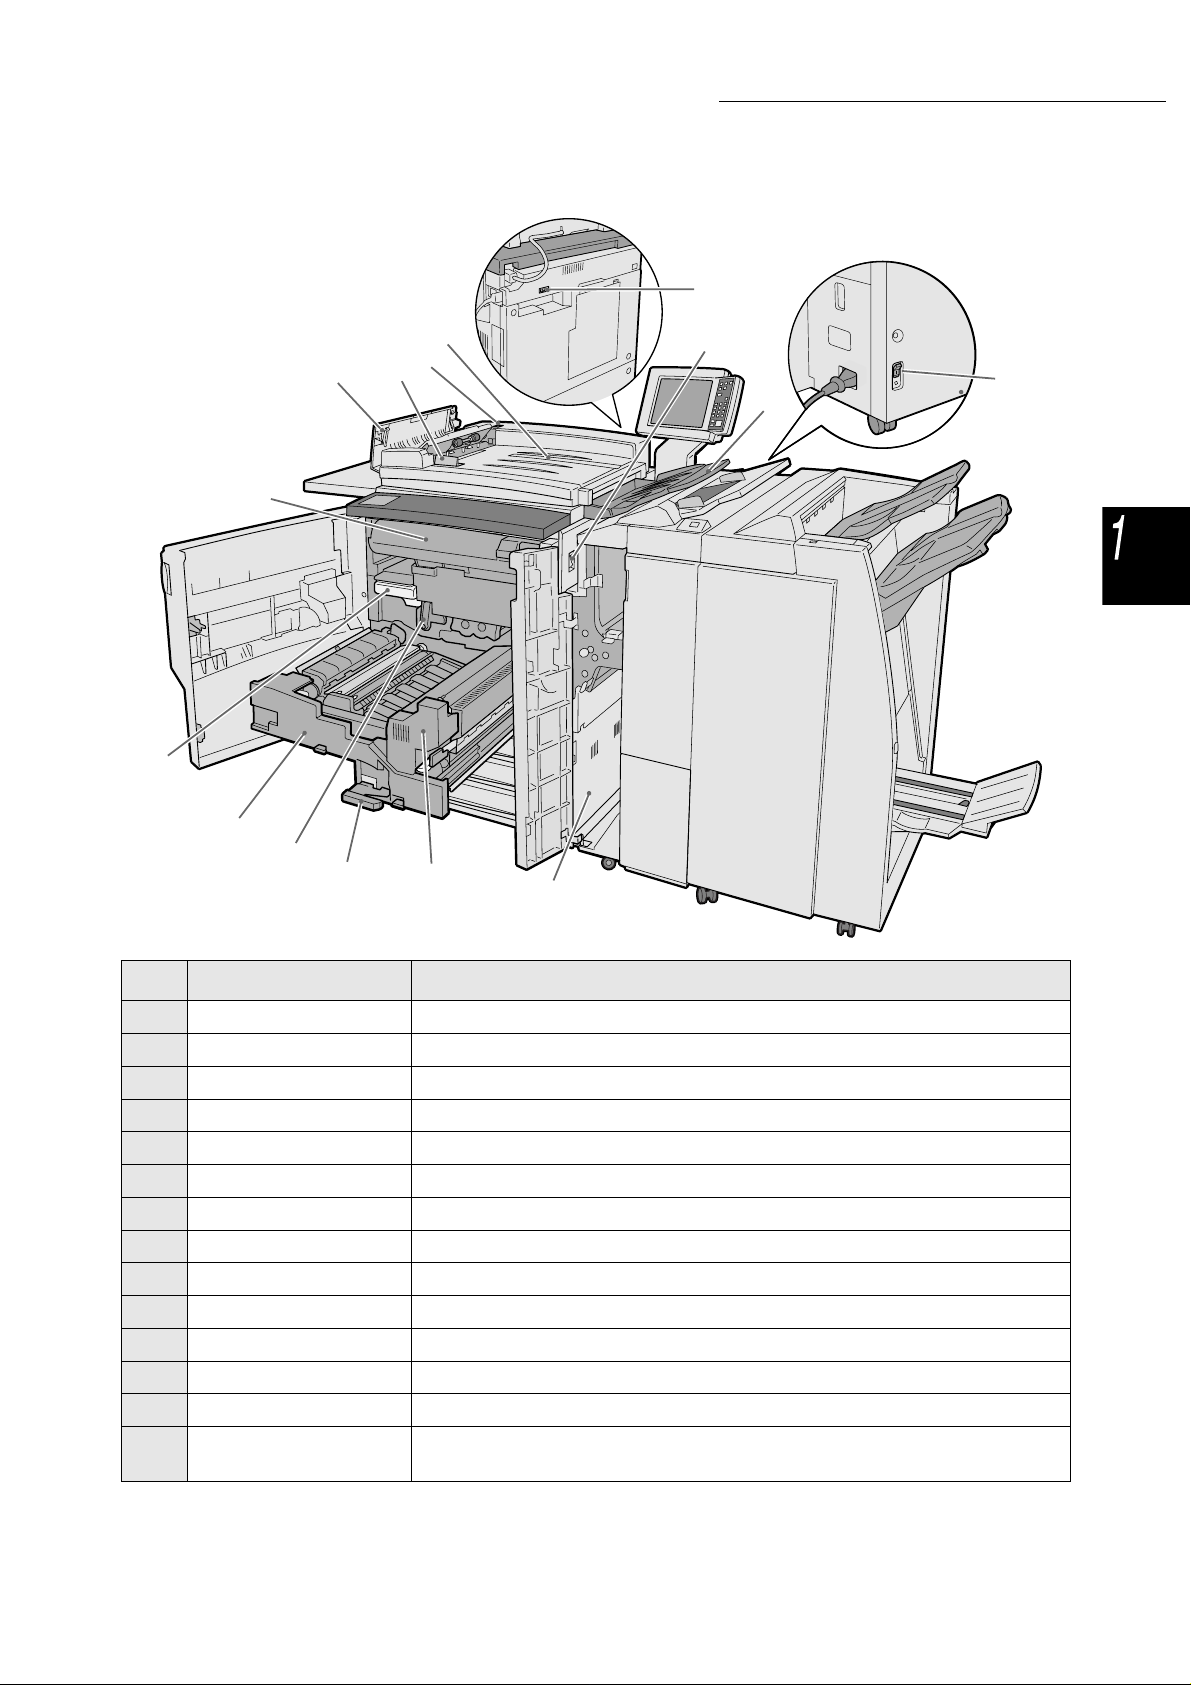
1.1 Main Components and Their Functions
Knowing Your Copier
24
Back
11
25
12
18
17
16
15
14
13
No. Name Function
11 Power switch Switches on/off the power of the machine.
12 Document output tray Receives documents that are scanned and output from the machine.
13 Lower right cover Open to clear paper jams.
14 Fuser unit Fuses toner to fix image on the paper. Do not touch as it is extremely hot.
15 Lever Lever for pulling out the transfer module.
16 Drum cartridge (B) Includes devices such as the photoreceptor.
17 Transfer module Copies the image from the drum to the paper. Pull out to clear paper jams.
18 Waste toner bottle (A) Collects used toner.
19 Toner cartridge Contains toner.
20 Left cover Open to clear document jams at the DADF.
21 Document guide To align the edges of documents loaded into the DADF.
22 Document check light Indicates that documents have been loaded properly.
23 Document input tray The part of the DADF to load documents.
24,25 Breaker switch Automatically interrupts the power supply to the machine once electricity
leakage is detected.
3
Page 30
32
●
1.1 Main Components and Their Functions
Optional kit
Knowing Your Copier
High Capacity Feeder (HCF)
28
27
26
● Optional kit
Booklet Maker Finisher
and Folding Unit (Z and C)
42
41
40
39
38
37
36
29
30
31
33
34
35
4
Page 31

1.1 Main Components and Their Functions
No. Name Function
26 Tray 6 (HCF) (optional) Load the paper.
27 Top cover Open to clear paper jams in tray 6.
28 Top right cover Open to clear paper jams in tray 6. Shift tray 6 to the left to open.
29 Tray 7 Load paper for covers or transparency separators. Paper loaded in tray 7 as
cover/transparency separator will not be used for copying.
30 De-curl button Press this button to decurl copied paper.
31 Output tray Receives copies output from the machine.
32 Finisher tray Receives stapled and punched copies. Copies are also output here when files
are merged, or when Large Output, Collated, or Uncollated are selected.
33 Booklet output tray Receives copies when you select Bi-Fold or Bi-Fold + Stapling.
34 Booklet output tray
button
35 Right door Open to clear paper jams; replace staples or clear jammed staples; or replace
36 Staple cartridge for
booklet
37 Staple cartridge Open to replace staples or remove jammed staples.
38 Punch scrap container Collects the scraps from the puncher. Open to throw away the scraps.
39 Tri-Fold output tray Receives copies when you select Tri-Fold In or Tri-Fold Out.
40 Tri-Fold output tray
button
41 Left door Open to clear paper jam.
42 Staple cartridge holder When you replace the staple cartridge installed to the optional staple
Press this button to deliver booklets to the removal position.
the scraps from the puncher.
There are two staple cartridge for booklet.
Press this button to open the tri-fold output tray.
cartridge, you can put the replaced one here.
Knowing Your Copier
● Tri-Fold In and Tri-Fold Out are a vailable only when the optional folding unit (Z and C) installed.
5
Page 32

Knowing Your Copier
1.2 Switching On/Off Power
Switch on the power of the copier before you begin copying. The server will then start automatically.
After the power is on, the machine will take about 7 minutes (for 100 V model) or 6 minutes (for 200 V, 220-240
V models) to warm up before you can start making copies. Sw itch off the power of the copier at the end of the
day, or when it will not be used for a long time. You can make use of the Power Saver feature if the copier is to
be left idle for a while. The Power Saver feat ure reduces the power consumption of the machine, thereby
helping to conserve energy.
“1.2.2 Saving Energy”
1.2.1 Switching On/Off Power
■ Switching on power
Procedure
Turn the power switch to
1
● If you switch on the machine
immediately after it has just been
switched off, it will take more than
five seconds to warm up.
● If you switch on the power, the copy
server will activate automatically.
the “|” (On) position.
The server starts automatically
once the power of the copier is
switched on.
“1.4 Entering Passwo rd”
● The User Password Entry screen
will not be displayed if th e Auditron
Mode is not enabled.
● If you made a mist ake wh ile enteri ng
the password, press the Clear
button to clear, and then re-enter.
6
Enter the password (by department/user) by using the keypad
2
and then select Enter.
Each input digit is represented by an asterisk.
Please enter the password.
Password Entry Screen
Key in the password and touch Enter.
1
2 3
5
Enter
To clear the password, you have entered,
pass C button.
The mess age “Please wait for X minute(s).” (X refers to the numeric value) is
displayed.
4
7
8
0
Clear
6
9
Page 33

● The content of error messages and
screen to be displayed may differ
with the optional products installed.
1.2 Switching On/Off Power
The message displayed changes to “Ready to copy” after X minutes.
Original Count 0
Ready to copy Quantity
Basic
Features
2 Sided
1 -> 1 Sided
1 -> 2 Sided
(Head to Head)
2 -> 2 Sided
(Head to Head)
2 -> 1 Sided
(Head to Head)
More...
Sample Set
Off
Doc.>50
Off
Added
Features
Reduce/Enlarge
100%
Auto %
70%
A3->A4,B4->B5
81%
B4->A4,B5->A5
86%
A3->B4,A4->B5
141%
A4->A3,B5->B4
More...
Output FormatImage Quality
Paper Supply
Auto
Tray 1
A4 P
Tray 2
A4
Tray 3
B4
Tray 4
A3
Tray 5 (Bypass)
A4 P
Tray 6 (HCF)
A4 P
Stored
Job Templates
Lighter/Darker
Original Type
Text
(Normal Text)
Mixed Size
Originals
Off
Finishing
Auto
1
Knowing Your Copier
■ Switching off power
● The fan in the machine will continue
to operate for about one hour after
you have switched off the power.
● Do not turn off the power switch of
the server.
●
Procedure
1
●
Check that all copying is
completed. Then turn the
power switch to the “”
(Off) position.
The display on the screen
disappears and the power is
switched off.
The server will shut down
automatically once the power of
the copier is switched off.
7
Page 34

1.2 Switching On/O ff Power
Knowing Your Copier
1.2.2 Saving Energy
This machine h as a P owe r Sav er fea t ure t h at r ed uc es th e p ow er co nsu mpt i on of t he ma ch in e in tw o
stages, namely, the Low Power Mode and Power Saver Off Mode:
● Low Power Mode
Power consumption Standby mode
100 V mode 285 W or less about 460 W
200 V mode 295 W or less about 440 W
The power to the control panel and fuser unit is reduced.
The display disappears while the power saver indicator light is lit.
If you need to make copies, pres s the Power Saver button. The indicator light will be off and the Power
Saver mode c anceled.
● Power Saver Off Mode
Power consumption
100 V mode 10 W or less
200 V mode 14 W or less
The power switch is turned to the “” (Off) position and the power is switched off.
If you need to make copies, turn the power switch to the “|” (On) position.
■ Entering the Power Saver Mode automatically
The machine automatically enters the Low Power Mode if it has been left idle after a fixed period of
time. If the machine continue s to be lef t unused, it will en ter the Pow er Saver Of f Mode and the power
will be cu t off.
● The default time for th e machine to enter the Low Power Mode and Power Save r Off mode are 15 mi nutes and 60 minu tes
respectively. This defaul t time set ting ca n be chang ed in th e Tools Mode. If you do not w ant the m achine to enter the Powe r
Saver Mode automa tically, you can choose t o disab le this fe ature. F or detail s, refer to “Chap ter 8 Syst em Admi nistrato r Mode
Settings”.
8
Page 35

■ Switching to the Power Saver Mode manually
You can also switch to Low Power Mode manually.
Procedure
Press Power Saver.
1
The machine enters the Low
● Once the machine is in the Low
Power Mode, it will en ter the Power
Saver Off Mode if the machine
continues to be left idle for a fixed
period of time. The power is then cut
off from the machine. When you
need to make copies, switch on the
power of the machine.
●
Power mode. When you need to
make copies, press the Power
Saver button.
1.2 Switching On/Off Power
Knowing Your Copier
■ Exiting the Power Saver Mode
You can exit the Low Power Mode by pressing the Power Saver button.
The Power Saver Off Mode refers to the state when the power of the machine is switched to the
“ ”
(Off) position.
To make copies, swi tch on the power of the machine.
1.2.3 Auto Start
While waiting for the machine to warm up after the power is switched on, you can press the Start
button to program copying. This feature is called Auto Start.
■ Enabling Auto Start
To use the Auto Start feature, load the document, specify the desired settings and then press the Start
button.
The message “Please wait ... The job will start automatically.” will be displayed and copying will begin
automatically once the machine has ente red th e Re ady to Copy mod e.
● If you have set the machine ready tone in Tools Mode, you will hear the t one whe n the mach ine ha s warm ed up and is read y to
accept copy jobs. You can then proceed to set an Auto Start job after the tone. T o set the machine ready tone or change its tone
volume, refer to “8.3 Setting Tools Mode”.
9
Page 36

1.2 Switching On/O ff Power
Knowing Your Copier
Auto Start screen: When an A4 document is placed on the document glass and
three sets are to be made with no change in size.
Please wait...
The copy job will start automatically.
Copy Job
0/ 3
No. of Originals
0
No. of Pages Printed
0
Paper Supply
Tray 1 A4 P
Reduce/Enlarge
100%
Original OrientationSets
Output
Stop
■ Cance ling Auto Start
To cancel an Auto Start job, select Stop on the screen or press the Stop button on the control panel
before the document is scanned.
Then press the C button and the Auto Start job will be canceled.
1.2.4 Breaker Switch
There are two breaker switches on this machine.
The breaker switch is usually at the positions shown in the diagram below. If the machine will not be
used for a long time or when moving the machine, push the switch down or to the right.
To switch it on, push it up; or to switch if off, push it down.
● The power will be cut off automatically once the breaker switch detects a power leakage. Do not use the machine in such a
case.
● Check that the power switch is turned off when you turn off the breaker switch.
“Safety Notes”
10
Page 37

1.3 Using the Touch Panel
Display
This section explains the names and functions of every part of the main control panel and the messag es that
appear in the touch panel display.
1.3.1 Main Control Panel
This section explains the names and functions of every part of the main control panel.
Copy
Copy and
Save
Ready to copy Quantity
Basic
Features
2 Sided
1 -> 1 Sided
1 -> 2 Sided
(Head to Head)
2 -> 2 Sided
(Head to Head)
2 -> 1 Sided
(Head to Head)
More...
Sample Set
Off
Doc.>50
Off
Added
Features
Save to
File
Reduce/Enlarge
100%
Auto %
70%
A3->A4,B4->B5
81%
B4->A4,B5->A5
86%
A3->B4,A4->B5
141%
A4->A3,B5->B4
More...
Build Job Scan
Output FormatImage Quality
Paper Supply
Auto
Tray 1
A4 P
Tray 2
A4
Tray 3
B4
Tray 4
A3
Tray 5 (Bypass)
A4 P
Tray 6 (HCF)
A4 P
Edit/Print
Files
Original Count 0
Stored
Job Templates
Original Type
Text
(Normal Text)
Mixed Size
Originals
Off
Finishing
Auto
Lighter/Darker
1
Memory
80%
Paper
Remaining
1
2
3
4
5
6
Knowing Your Copier
* The * button c annot be selected.
● Use the copier control panel to switch between the display of the Tools Mode and the Auditron Administration Mode. For details
of the switching function, refer to “8.1 System Administrator Mode”.
11
Page 38

1.3 Using the Touch Panel Display
Knowing Your Copier
No. Name Function
1 Touch panel display Displays the respective features and machine status.
Touch this panel directly to select the features and instructions displayed.
“1.3.2 Touch Panel Display”
2 Job Status button Press to check the presently processed job.
On the Job Status screen, once a job is selected, you can pause it if it is being
scanned or delete it if is paused. When printing multiple jobs, you can promote
a print job over ones that are waiting to be printed. The promoted job is
printed following the job that is currently being printed.
3 System Settings/
Meter Check button
For the system administrator to press to define the specifications of the copier
features, or to check the meter reading or status of the consumables.
● To use the Tools Mode and the Auditron Administration Mode, switch to the
copier control panel for operation. For details o f the switching, refer to “8.1.1
Using System Administrator Mode”.
4 Power Saver button Press to put the machine in the Power Saver mode if it is not to be used for a
while to reduce power consumption.
The Power Saver indicator light will be lit if i t is in Power Saver mode. To
return to the Ready (Copy) mode, press the button again.
5 Password button Press to display the User Password Entry screen if the Auditron Mode is
enabled. Use of the machine can be controlled by requiring each user to enter
his password (by department/user).
6 Review button Press to check the copy settings.
You can check the status of the settings displayed on the screen.
In the Copy , Sav e to File, Copy and Save modes, you can check c opy settings
before pressing the Start button. You can also check the copy settings of a
selected job from the list on the Job Status screen.
In the Edit/Print Files mode, you can check the copy settings of the selected
copy file when saved.
7 Clear All button Press to clear all settings and return to the default screen. The default screen
is the screen that is displayed when the machine is switched on.
8 Volume adjustment dial Turn to set the volume of error tones to inform you of a completed copy job or
a machine fault. Adjust by rolling the dial to the left or right.
12
● You can also set the tone off. For details, refer to “Setting Tone” in “8.2
Overview of Tools Mode”.
9 Keypad Use the keys on this keypad to enter numeric values, such as the number of
sets to be copied.
10 C (Clear) button Press to delete or correct a wrong entry made by using the keypad.
11 Start button Press to start copying.
12 Interrupt button/indicator Press to interrupt the current copy job for an urgent job. The indicator light on
the left lights up when this button is pressed.
Press again to cancel the interrupted copy job and return to the original copy
job.
13 Stop button Press to stop the current copy job.
Page 39

1.3 Using the Touch Panel Display
1.3.2 Touch Panel Display
The touch panel display is located at the left side of the control panel. It displays the messages and
feature buttons required for performing a copy job. By touching the display with your fingers, you can
make settings or select required screens. In the following section, the main screens will be used to
explain the screen contents, as well as how to select the feature buttons. The touch panel display will
be referred to as the display from now on. And the contents shown on the display will be referred to
as the screen.
Copy
Copy and
Save
Ready to copy Quantity
Basic
Features
2 Sided
1 -> 1 Sided
1 -> 2 Sided
(Head to Head)
2 -> 2 Sided
(Head to Head)
2 -> 1 Sided
(Head to Head)
More...
Sample Set
Off
Doc.>50
Off
Added
Features
Reduce/Enlarge
Save to
File
100%
Auto %
70%
A3->A4,B4->B5
81%
B4->A4,B5->A5
86%
A3->B4,A4->B5
141%
A4->A3,B5->B4
More...
Build Job Scan
Edit/Print
Files
Original Count 0
1
Output FormatImage Quality
Paper Supply
Auto
Tray 1
A4 P
Tray 2
A4
Tray 3
B4
Tray 4
A3
Tray 5 (Bypass)
A4 P
Tray 6 (HCF)
A4 P
Stored
Job Templates
Original Type
Text
(Normal Text)
Mixed Size
Originals
Off
Finishing
Auto
Lighter/Darker
Memory
80%
Paper
Remaining
1
2
3
4
5
6
Switch mode buttons
Memory
Paper Remaining
Knowing Your Copier
● Switch Mode buttons
You can use these buttons to switch between the basic copying and server operation.
● Select Copy to make copies.
● Select Copy and Save to make copies and to save the scanned document data to the server.
● Select Save to File to save scanned document data to the server.
● Select Build Job to define build job settings.
● Select Edit/Print Files to change names of copy files and scan files saved to the server, merge copy files,
duplicate/move copy files, change settings and print copy files.
● Select Scan to scan documents such as photographs as image data. Scanned document data is stored in
a mailbox as scan files. Scan files stored in mailboxes ca n be dow nloaded onto client computers.
“6 Server”
“7 Scanning”
● Free Memory
Indicates the amount of rem aining hard disk memory in % that can be used for saving copied or scanned
document data.
● Free Memory doesn’t mean the amount of remaining memory that can be used for scanning.
● Paper Remaining
The number of horizontal lines increases and decreases accordingly to display the amount of paper
remaining in the paper tray: 100%, 75%, 50%, 25% or No paper.
During copying, a green indicator lights up on the left of the tray icon that is being used.
● Tray 5 (bypass) has a horizontal line that indicates paper being loaded.
● Tray 6 (HCF) is optional. If it is not installed, the icon will not be displayed.
13
Page 40

1.3 Using the Touch Panel Display
Knowing Your Copier
1.3.3 Copier Screen
There are four tabs for these screen displays: Basic Features, Added Features, Image Quality,
Output Format and one button: Stored Job Templates. The respective screens of these tabs are
called Basic Features screen, Added Features screen, Image Quality screen, Output Format screen
or Stor ed Job Templates screen.
Each screen contains the feature buttons.
<Basic Features Screen> <Added Features Screen>
Basic
Features
2 Sided
1 -> 1 Sided
1 -> 2 Sided
(Head to Head)
2 -> 2 Sided
(Head to Head)
2 -> 1 Sided
(Head to Head)
More...
Sample Set
Off
Doc.>50
Off
Added
Features
Reduce/Enlarge
100%
Auto %
70%
A3->A4,B4->B5
81%
B4->A4,B5->A5
86%
A3->B4,A4->B5
141%
A4->A3,B5->B4
More...
Output FormatImage Quality
Paper Supply
Auto
Tray 1
A4 P
Tray 2
A4
Tray 3
B4
Tray 4
A3
Tray 5 (Bypass)
A4 P
Tray 6 (HCF)
A4 P
Stored
Job Templates
Original Type
Text
(Normal Text)
Mixed Size
Originals
Off
Finishing
Auto
Lighter/Darker
Basic
Features
Added
Features
Edge Erase
T/B: 0.1/ 0.1"
L/R: 0.1/ 0.1"
Bind: 0.1"
Bound Originals
Off
Book Duplex
Off
Image Quality
Margin Shift
S1: No Shift
S2: No Shift
Original Orientation
Head to Top
Output Format
Stored
Job Templates
Original Size
Auto Detect
Mixed Size Originals
Off
Basic
Features
Image Quality Presets
Normal
Background
Suppression
Auto
Contrast
<Image Quality Screen> <Output Format Screen>
Multiple Up
1 Up
Repeat Image
Off
Annotation
Off
Added
Features
Image Quality
Transp. Separators
Off
Covers
No Covers
Tab Copying
Off
Output Format
Added
Features
Image Quality
Lighter/Darker
Lightest
Normal
Darkest
Output Format
Auto
Stored
Job Templates
Original Type
Text
(Normal Text)
Density Control
Normal
Sharpness
Normal
Basic
Features
<Stored Job Templates Screen>
Prev
Close
Job No. 9
Job No. 10
Next
Stored Job Templates
Recall
Job Templates
Store
Job Templates
Delete
Job Templates
Enter/Change
Job Name
Job Number (Nob Name)
Job No. 1
Job No. 2
Job No. 3
Job No. 5
Job No. 6
Job No. 7
Job No. 8Job No. 4
Stored
Job Templates
Output Orientation
Auto
Booklet Creation
Off
Folding
Off
14
● Unlike other screens, the frequently-used features on the Basic Features screen are represented by rectangular buttons for fast
selections. Al so, y o u c a n r ep l ac e O ri g in al Type or Mixed Si ze Originals with a not her feature. For d etail s , r efe r to “8.2 Overview
of Tools Mode.
● Each feature is at factory setting. Th is de fault setting can b e c h an ged in the Tools Mode. For details, r efer to “8.3 Settin g Tools
Mode”.
Page 41

■ Copier Screen
Message area
Tab
1.3 Using the Touch Panel Display
Document count
Knowing Your Copier
Ready to copy Quantity
Basic
Features
2 Sided
1 -> 1 Sided
1 -> 2 Sided
(Head to Head)
2 -> 2 Sided
(Head to Head)
2 -> 1 Sided
(Head to Head)
More...
Sample Set
Off
Doc.>50
Off
● Message area
Displays messages like machine status and operation guide.
Added
Features
Reduce/Enlarge
100%
Auto %
70%
A3->A4,B4->B5
81%
B4->A4,B5->A5
86%
A3->B4,A4->B5
141%
A4->A3,B5->B4
More...
Selection button
Output FormatImage Quality
Paper Supply
Auto
Tray 1
A4 P
Tray 2
A4
Tray 3
B4
Tray 4
A3
Tray 5 (Bypass)
A4 P
Tray 6 (HCF)
A4 P
Original Count 0
Stored
Job Templates
Original Type
Text
(Normal Text)
Mixed Size
Originals
Off
Finishing
Auto
Lighter/Darker
No. of copies
1
Stored Job Templates button
● Tab
Select by touching the various tabs like Basic Features, Added Features, Image Quality, Output Format,
and Others to display their corresponding scree ns .
● Stored Job Templates button
Touch this button to display the Stored Job Templates screen.
● Document count
Displays the number of documents being scanned.
● The maximum number of or iginals that can be sca nn ed i s 1,000 (A4-sized) shee ts. Ho w ev e r, depending on the document size,
error messages may appear on the display before the number of documents reaches 1,000 sheets.
● No. of copies
Indicates the number of sets of copies to make. Enter a val ue by using the keypad. You can set a value
between 1 to 9,999. To reset the value to “1”, press the C button.
● Selection buttons
Once touched, the button will be highlighted.
“...” indicates that there are more setting screens following.
15
Page 42

1.3 Using the Touch Panel Display
■ Buttons in each s creen
Knowing Your Copier
When a feature button is selected, the screen displaying the settings for that selected button will be
shown. After selec tions ar e made o n this scre en, se le ct the Save butto n to co nfirm the s elect ions a nd
exit that screen. Select the Cancel button to cancel any selections made halfway.
Selection
buttons
Basic
Features
Edge Erase
T/B: 0.1/ 0.1"
L/R: 0.1/ 0.1"
Bind: 0.0"
Bound Originals
Off
Book Duplex
Off
Bound Originals (Scan Order)
Off
Left Page
Then Right
Right Page
Then Left
Top Page
Then Bottom
Added
Features
Image Quality
Margin Shift
S1: No Shift
S2: No Shift
Original Orientation
Head to Top
Both Pages
Left Page
Only
Right Page
Only
Output Format
Binding Erase
(0-50)
0
Cancel
Load your originals
as shown below.
mm
Stored
Job Templates
Original Size
Auto Detect
Mixed Size Originals
Off
Save
Feature
buttons
Input area
Scroll buttons
● Feature buttons
Touching a feature button displays its corresponding feature setting screen. Once the feature is set, a check
mark ( ) will be added and the item set displayed.
● Scroll buttons, inpu t area
Touch , , , to scro ll the display, or to select a numeric value or feature.
For numeric value, touch t he buttons continuously and the display will change rapidly. The range of the
value is displayed within the parentheses ( ). The value that you have se t is shown in t he input area.
● Invalid buttons
Features that cannot be selected together with some other f eat ures or buttons that are not within t he range
of the settings are displayed in light grey.
● Cancel button
Select this button to cancel a selected setting or value, and to close the existing screen.
● Save/Close button
Select this button to save a selected setting or value, and to close t he ex isting s creen.
16
Page 43

1.3 Using the Touch Panel Display
1.3.4 Other Screens
■ User Password Entry screen
When the Auditron Mode is enabled, the following screen will be displayed. Enter your password by
using the keypad on the screen and the copier screen will be displayed.
“1.4 Entering Password”
■ Error message screen
When a job cannot be continued due to a fault with the machine like paper jam, or when a
consumable has to be replaced, a message such as the following will be displayed. Follow the
instructions sh own on th e sc reen to tr ouble shoo t. On ce th e er ror is r esolved , t he co pier scre en w ill be
displayed.
Paper Jam
1. Pull out Tray 2 and remove jammed sheets.
2. Ensure that Paper Guides touch the edges
of paper loaded in tray.
3. Push in the tray.
Knowing Your Copier
■ Power Saver screen
Once the machine enters the Power Saver Mode, the display disappears while the Power Saver
indicator light remains lit. To return to the copier screen, press the Power Saver button.
“1.2.2 Saving Energy”
● Sometimes there is no display even though the power saver indicator light is not on. This is because the power may be
switched off. Check the power switch.
17
Page 44
1.3 Using the Touch Panel Display
Knowing Your Copier
1.3.5 Operations on saved file
You can do the following operations on a saved copy file:
Hard Disk
(Copy File)
Order File Name Pages Data Size Date/Time
1
2
3
4
5
6
2000-10-05_18-06-02 128 3,384KB 10-05_18-06
2000-10-05_18-06-02 1 38KB 08-28_05-05
2000-10-05_18-06-02 48 2,004KB 08-28_14-38
2000-08-26_18-28-06 2 648KB 08-26_18-28
2000-10-05_18-06-02 26 1,008KB 06-18_16-45
2000-05-28_13-06-18 3 148KB 05-28_13-06
Copy/Move
Files
MO
Merge/Edit
Files
Change
File Name
Delete
File(s)
Change
File Order
First
Prev
1/5
Next
Last
Select All/
Deseled All
● Selecting/deselecting file
Select a file from the displayed list.
Select the file again for deselection.
“Order” displays numbers in the sequence of file selec tio n.
If a file in the middle of sequence is deselected, the succeeding file numbers are incremented one each.
● You cannot select Copy/Move Files, Merge/Edit Files, Change File Name, Delete File(s) without specifying a file.
● In this manual, a screen that appears when the Hard Disk (Copy File) tab is selected is refer red to as the Ha rd Disk ( Co py File)
screen.
● Selecting all files
Select Select All/Deselect All to select all files.
Select Select All/Deselect All again to deselect all files.
● Switching between pages
Select Next to proceed to the next page or Prev to return to the previous page.
Select First to display the first page or Last to display the last page.
● Sorting files
Select Change File Order to sort files by names or times.
A newly saved file will be displayed at the top.
18
Page 45

1.4 Entering Password
If the Auditron Mode is enabled, you need to enter your passwo rd (by department/user) before you can start
making copies.
This section explains how to enter t he password and to display the User Password Entry screen. Approach
your Auditron Administrator if you need a user password.
● The Auditron Mode all ows you to contro l the numb er of copi es that each account (by depart ment/ user) ca n make. The settin g
and change of passwords are handled by the Auditron Administrator via the Auditron Administration Mode screen.
Please enter the password.
Password Entry Screen
Key in the password and touch Enter.
1
2 3
5
Enter
To clear the password, you have entered,
pass C button.
4
7
8
0
Clear
6
9
Knowing Your Copier
● When the copying is done, the
display returns to the User
Password Entry screen.
Unauthoriz ed user with no p asswor d
cannot make copies.
● If you have set a timeout period for
the Password Entry Screen timeout,
the display will return to the User
Password Entry screen even if you
did not press the Password button.
For details, refer to “8.5.4 Auditron
Setup”.
● If you made a mist ake wh ile enteri ng
the password, press the Clear
button to clear, and then re-enter.
Procedure
1
2
3
●
Press Password.
The User Password Entry screen
is displayed.
Enter your password by using the keypad.
Each digit in put is represe n te d b y an as terisk.
Select Enter on the screen.
The Copier screen appears once you have entered the correct password.
19
Page 46

Knowing Your Copier
1.5 Using the Copylyzer
The following screen will be displayed if the Copylyzer (optional) is installed.
Follow the instructions.
Please insert Xerox Charge Card.
If another type of copy control device is used, follow the inst ruc tio ns displayed on the screen.
Optional
● When a copy control device is used, you cannot use the Auditron Administration features.
● For details on the Auditron Administration screen, refer to “8.4 Overview of Auditron Mode”.
20
Page 47

2 Loading Paper
2.1 Paper to Use ........ ................... .................... ........................22
2.2 Loading Paper/Chan gi ng Paper Size of Paper Trays......25
2.3 Checking/Changing Paper Supply Settings ....................35
Page 48

2.1 Paper to Use
This chapter describes the types of paper that can be used on this machine. To obtain better image quality , it is
suggested that you use the recommen ded paper. Contact your Customer Support Ce nter if you are using a
paper stock other than the one recommended here.
Loading Paper
■ Recom men ded paper
Blue Wrap, Blue, Lucky Boss, KX-X
The following types of paper ca n also be us ed bes ides the r ecomme nded paper s tock. Howev er, you have
to follow the instructions in this manual to load the paper stock in the approp riate tray, and select the paper
size and paper type when you make copies.
• Pu rple Wrap, Green Wrap, X Print, KX-H, FX co lor paper, Golden Star.
• Contact your C us tomer Support Center if you wish to use any other paper types.
● Do not use transparencies and paper meant for ink jet printer as they can cause machine breakdown.
■ Paper stock that can be used
The types of paper stock that can be used are displayed in the following table. Tray 6 (HCF) and tray
7 are optional products.
● Paper size and capacity of paper tray
The paper sizes and number of sheets that can be loaded in each paper tray are as follows:
Tray Paper sizes that can be loaded Capacity (sheets)
Tray 1 A4 portrait 560 (FX P paper)
Trays 2, 3, 4 B5 portrait, B5, A4 portrait, A4, B4, A3, 8×10" portrait,
8.5×11" portrait, 8.5×11", 8.5×13", 8.5×14", 11×17", 8 K, 16 K portrait
Tray 5 (bypass): Non-standard size:
Y direction: 148-297 mm
X direction: 200-432 mm
Standard size:
Postcard, A5, B5, A4 portrait, A4, B4, A3, SRA3
8×10" portrait, 8.5×11" portrait, 8.5×11", 8.5×14", 11×17",
*2
12×18"
*1
, 5.5×8.5",
Tray 6 (HCF) B5 portrait*3, A4 portrait, 8.5×11" portrait Up to 390 mm
Tray 7
(Separators/
B5 portrait*4, A4, A4 portrait*5, 8.5×10" portrait*4, 8.5×11"*5, 8.5×11"
portrait, 8.5×13"
*6
, 8.5×14"*6, B4, 16 K, 8 K, A3, 11×17"
Cover Tray)
*1 *2 To make copies on 12×18" and SRA3 paper, adjust the paper guide first before you load the paper.
SRA3 refers to the size, 320×450 mm or 12.6×17.7".
*3 When loading B5 portrait paper first, contact your Customer Support Center.
*4 When changing B5 portrait to 8×10" paper, contact your Customer Support Center.
*5 When changing A4 to 8.5×11" paper, contact your Customer Support Center.
*6 When changing 8.5×14" to 8.5×13" paper, contact your Customer Support Center.
620 (FX P paper)
Up to 15 mm
150 (FX P paper)
4,500 (FX L paper)
4,300 (FX P paper)
150 (FX P paper)
22
● Paper tray sizes that can be cha nged by the customer engineer are as foll ows. Contact your C ustomer Support Center.
• Tray 1 can be changed to either A5, B5 portrait or 8.5×11" portrait.
• Trays 2, 3, 4 can be changed to 12×18" or any non-standard sizes within the range of 182-297 mm (Y direction) and
182-432 mm (X direction).
Page 49

2.1 Paper to Use
● Paper stock th at can be used
For each paper tray, use paper with the following paper weight , paper type and paper tray capacity:
Paper tray
Tray 1 56g/m
64 - less than
105 g/m
Tray 2, 3, 4 56g/m
64 - 128 g/m
Tray 5 (bypass) 56g/m
64 - 220g/m
Tray 6 (HCF) 56g/m
64 - 128 g/m
Tray 7
60 - 220 g/m
(Separators/
Cover Tray)
Paper weight
*1
GSM
2
2
2
2
2
Ream weight
*2
Paper type Paper classification
48kg Normal S Paper
55 - less than 90kgNormal Lucky Boss,
48kg Normal S Paper
2
55 - 110 g/m
2
Normal
64 - less than 105 g/m
Heavywt1
105 - 128 g/m
*4
2
48kg Normal S Paper
2
55 - 189 g/m
2
Normal Lucky Boss,
Heavywt1
105 - 162 g/m
Heavywt2
163 - 220 g/m
Transparency
2
2
*5
Label Label (V860/V862)
Tab paper 1
64 - 128 g/m
Tab paper 2
129 - 162 g/m
2
2
48kg Normal S Paper
2
55 - 110 g/m
2
Normal
64 - less than 105 g/m
*4
2
- Lucky Boss,
2
55 - 189 g/m
Heavywt1
105 - 128 g/m
2
Blue Wrap, Blue, X Print
Lucky Boss,
2
Blue Wrap, Blue, X Print
X Print
Blue Wrap, Blue, X Print
X Print
Postcard
V516, V515
Color tab paper
Lucky Boss,
2
Blue Wrap, Blue, X Print
*6
FX-JD, X Print
Blue Wrap, Blue, X Print,
Color tab paper
*3
Loading Paper
*1 GSM or g/m2 is a measure of the substance of pape r expressed in g ra ms per square meter, which does not depend on the numbe r of
sheets in the ream.
*2 Ream weight is the weight of a 788×1,091 mm ream consisting of 1,000 sheets.
*3 Paper size of the paper classification mentioned here may differ in size depending on the brand.
*4 When you load heavy weight paper in the tray, set the paper type to Heavywt1 in the Tools Mode.
*5 The sizes of transparency are only A4 portrait, and A4.
*6 Use only the recommended color tab paper. If not, it may cause machine breakdown or paper jam.
● Paper jams may occu r if you mak e copies on paper that are diffe rent in s ize and ty pe from tho se selec ted on the di splay, or if
you load the paper stock in the wrong tray. To make copies properly, select the correct paper size, paper type, and tray.
23
Page 50

2.1 Paper to Use
■ Storing and handling paper
Take note of the following when storing paper:
• Always store paper in a cabinet or at a place with low humidity. Damp paper may cause jams or affect the
image quality.
• Always re-pack unused paper, preferably with desiccant.
• Alway s store paper on a flat horiz ontal surf ace to prevent bending or curling.
Take note of the following when loading paper:
Loading Paper
• Do not combine and load paper left over from different reams into a tray.
• Do not use folded or wrinkled paper.
• Do not load mixed size paper into a tray.
• Always fan transparencies or labels before loading to prevent jamming or multi-sheet feeding.
• Do not use paper meant for ink jet print er as they can cause m achine breakdown.
24
Page 51

2.2 Loading Paper/Changing
Paper Size of Paper Trays
This section explains how t o load paper into and change the paper size of trays 1-4, tray 5 (bypass) and the
optional tray (HCF) and 7.
If paper runs out during copying, the following message will be displayed: “Tray x is out of paper. Load xx paper
into the tray.” (where x refers to the tray number and xx the paper size). Add paper to the tray accordingly.
● The type of paper that can be loaded differs for each tray. For details, refer to “2.1 Paper to Use”.
● Change the paper type setting if you need to change both th e paper size and typ e.The paper type set ting is change d by the
administrator. For details, refer to “2.3 Checking/Changing Paper Supply Settings”.
Always pull out a tray slowly. The tray may hit and hurt your knees if it is pulled out too
quickly with excessive force.
2.2.1 Loading Paper in Trays 1, 2, 3, 4
No change in site and orientat ion can be made for tray 1 as it is fixed at A4 portrait.
You can chang e the paper size and orientation for trays 2, 3, 4, bu t you can only chan ge the paper
size to standard sizes for tra ys 2, 3, 4.
Loading Paper
● The paper sizes for load ing in the paper trays can be changed by the cust omer engineer. The paper size for tray 1 can be
changed to A5, B5 portrai t, or 8 .5×11" portrait; and for trays 2 – 4, 12×18" or a ny non-s tandard sizes wit hin the range o f 182297mm (Y direction) and 182-432mm (X direction).
● During copying, paper can be added to trays not in use.
● Do not load different types of paper
in the tray. This may result in paper
jam.
● Do not load paper exceeding the
maximum fill line.
Procedure
Pull the paper tray out
1
right to the end.
Load the paper, aligning to
2
the left side of the tray and
with the side to be copied
facing down.
25
Page 52

2.2 Loading Paper/Changing Paper Size of Paper Trays
Loading Paper
When changing the paper size:
You can change the paper size for trays 2, 3, 4.
(1)Remove any paper in the
tray .
(2)While gripping the
paper guide lever A,
shift it back until the
end.
● Do not load different types of paper
in the tray. This may result in paper
jam.
● Do not load paper exceeding the
maximum fill line.
(3)While gripping the
paper guide lever B,
shift it to the right.
(4)Load the paper,
aligning to the left side
of the tray and with the
side to be copied
facing down.
(5)While gripping levers A
and B, shift and align
them with the edges of
the paper.
You will hear a click sound if the
guides are adjusted to their
correct positions.
26
Page 53

● After you hav e replenished the
paper supply, you can press the
Start button on the control panel to
resume copying.
(6)Paste the paper size
label on the tray.
Push the tray in slowly
3
until the end.
Once the tray is correctly set, the
message, “Press Start button to
continue.” will be displayed .
2.2 Loading Paper/Changing Paper Size of Paper Trays
Loading Paper
● Change the paper type setting if you
need to change both the paper size
and type. The paper type setting is
done by the administrator. For
details, refer to “2.3 Checking/
Changing Paper Supply Settings”.
●
From Paper Supply on the Basic Fea tures screen, check if
4
the changed paper size for the paper tray is correctly
displayed.
If the changed paper size is not displayed, repeat Step 5 and check that levers
A and B are at the correct positions.
27
Page 54

2.2 Loading Paper/Changing Paper Size of Paper Trays
12"
305mm
12.6"
320mm
Standard
標準
2.2.2 Loading Paper in T r ay 5 (Bypass)
Load the following paper in tray 5 (bypass): transparency, postcard, heavy weight paper and other
special and non-standard size paper that cannot be loaded in trays 1 - 4 and the optional tray 6
(HCF).
When making copies onto SRA3 (320×450mm/12.6×17.7") or 12×18" paper, shift the paper guide on
Loading Paper
the bypass tray before copying.
Always rememb er to shift the paper guide back to its Standard position after the copying is done.
● For details on the type of paper that can be loaded in tray 5 (bypass), refer to “2.1 Paper to Use”.
● 2-sided copying cannot be done with tray 5 (bypass).
● For details on loadi ng the side for copying (face up/down) and paper orientation, refer to “5 .26 Copying With Covers ” and
“Appendix C Originals/Copies Orientation (With Covers)”.
Procedure
● If the paper gu ide has been move d
to the 12"/305 mm or 12.6"/32 0 mm
position, shift it back to its Standard
position.
Open tray 5 (bypass).
1
If necessary, pull out the
extension flap. The extension flap
can be pulled out in two steps.
Check the position of the
2
paper guide, which is
located as shown in the
diagram on the right.
Usually, the paper guide should
be at its original position.
When loading paper:
Proceed to S tep 3
When changing the paper size:
(1)Loosen the screw on
● Do not shift the paper guide unless
you are copying onto SRA3
(320×450mm/12.6×17.7") or 12×18"
paper. Usually, the paper guide
should be at its Standard position.
the right of the paper
guide.
28
Page 55

2.2 Loading Paper/Changing Paper Size of Paper Trays
12"
305mm
12.6"
320mm
Standard
標準
12"
305mm
12.6"
320mm
Standard
標準
12"
305mm
12.6"
320mm
Standard
標準
(2)Lift the paper guide to
shift its position.
The Standard positions of the
paper guide are as follows:
12"/305mm refers to 12×18";
12.6"/320mm refers to SRA3
(320×450mm/12.6×17.7").
Loading Paper
● You cannot load mixed paper size in
this tray.
(3)Tighten the screw.
Place the paper with the
3
side to be copied facing
up, and with the edges
touching the sides of the
tray and aligned with the
paper guide.
Once you have loaded paper in
tray 5 (bypass), the Tray 5 screen
is displayed.
Adjust the guide for paper
4
size gently to align it with
the paper.
29
Page 56

2.2 Loading Paper/Changing Paper Size of Paper Trays
Select A/B Series, Inch, or Non-standard as the paper size
5
type, then select the paper size.
● For details on selecting paper size,
refer to “5.3 Selec ting Paper T r ay”.
● Shift the paper guide if you are
copying onto the following paper
sizes: SRA3
Loading Paper
of A/B Series Siz e ; 1 2
Size. For details on shifting the
paper guide, refer to “2.2.2 Loading
Paper in Tray 5 (Bypass)”.
(320×450mm/12.6×17.7")
×
18" of Inch
Tray 5 (Bypass)
A3
A/B Series
Size
Inch Size
Non-standard
Size
B4
A4
A4 P
B5
A5
Postcard
SRA3
Cancel
Paper Type
Plain/Heavywt 1
(64-128g/m2)
Heavywt 2
(163-220g/m2)
Transp./Heavywt 1
(129-162g/m2)
Labels
Tab Heavywt 1
(64-128g/m2)
Tab Heavywt 2
(129-162g/m2)
Save
Specify the paper type by selecting Paper Type.
6
Specify settings for other features if necessary, and then start
7
copying.
After copying, shift the paper guide to the Standard position by
8
following Steps 2 to 4.
●
Move tray 5 (bypass) back
9
to its original position after
copying.
Remove an y pape r sti ll rem ainin g
in tray 5 (bypass).
If you have pulled out the
extension flap, push it back to its
original position and close the
tray.
30
Page 57

2.2 Loading Paper/Changing Paper Size of Paper Trays
2.2.3 Loading Paper in Tray 6 (HCF)
The factory setting of the paper size is A4 portrait. You can change the paper size to B5 portrait, A4
portrait, or 8.5×11" portrait.
● Tray 6 is optional.
● For details on the type of paper that can be loaded in tray 6 (HCF), refer to “2.1 Paper to Use”.
Procedure
Pull tray 6 (HCF) out right
1
to the end.
The bottom plate is lowered
automatically.
Loading Paper
● Do not load different types of paper
in the tray. This may result in paper
jam.
● Do not load paper exceeding the
maximum fill line.
● Before changing the factory setting
of the paper size to B5 portrait,
contact y our Customer Supp ort
Center.
Load the paper, aligning to
2
the right side of the tray
and with the side to be
copied facing up.
When changing the paper size:
(1)Remove any paper in
the tray.
(2)Loosen the screw to
remove the paper
guide.
31
Page 58

2.2 Loading Paper/Changing Paper Size of Paper Trays
Loading Paper
● When B5 portrait has been changed
to A4 portrait or 8.5
remove the horizontal guide and fix
it on the right side of the tray with the
screw.
×
11" portrait,
(3)Insert the guide into the
slot of the desired
paper size and tighten
the screw.
(4)When the paper size is
changed to B5 portrait,
remove the horizontal
guide on the right side
of the tray by looseni ng
the screw.
● The bottom plate is raised
automatically and for up to 17
seconds, the following message will
be displayed in the control panel:
“Add Paper”.
(5)Insert the guide to the
B5 slot and then tighten
the screw.
(6)Paste the appropriate
paper size lab el on the
tray.
Push in the tray slowly
3
until it stops.
When pushing in the tray, do not
touch the inner sides of the tray
as your fingers might be
pinched.
32
●●
Page 59

2.2 Loading Paper/Changing Paper Size of Paper Trays
2.2.4 Loading Paper in Tray 7
The factory setting of the paper size is A4 portrait. You can change the paper size to B5 portrait, A4
portrait, or 8.5×11" portrait.
Tray 7 is meant for loading paper to be used as separators when copying with transparency
separators or c overs.
● When adding paper to tray 7, rem ove any paper remain ing i n the tr ay, add it to the stack of paper to be add ed, the n loa d all of
the paper into the tray at once.
● For details on the type of paper can be loaded in tray 7, refer to “2.1 Paper to Use”.
Procedure
Load the paper, aligning to
1
● Do not load different types of paper
in the tray. This may result in paper
jam.
● Do not load paper exceeding the
maximum fill line.
the front side of the tray.
Loading Paper
When changing the paper size:
(1)Remove any paper
from the tray.
(2)While gripping the
paper guide, shift it
back until the end.
33
Page 60

2.2 Loading Paper/Changing Paper Size of Paper Trays
● Do not load different types of paper
in the tray. This may result in paper
jam.
● Do not load paper exceeding the
maximum fill line.
Loading Paper
● After copying, shift the paper guide
to the A4 position.
2
(3)Load the paper, aligning
to the front side of the
tray.
While gripping the guides,
shift and align them with
the edges of the paper.
●●
■ Loading tab paper
This sectio n describ es how to load the tab pape r in tra y 7. Paper loaded in tray 7 is se quentia lly fe d
from the top of the stack.
Procedure
If the paper is already
1
printed on, load the paper
with the printed side
facing up and with the tab
side to be fed first.
While gripping the guides,
2
shift and align them with
the edges of the paper.
ABC
34
●
Page 61

2.3 Checking/Changing Paper
Supply Settings
The types of paper loaded in the respective trays are shown on the screen. The displayed information includes
the paper size, orientation, and paper t ype. This sect ion explains how to check and change the paper supply
settings.
● If you make copi es on paper that is different f rom the displ ayed informat ion, paper jam m ay occur. In order to make copies
correctly, change the paper supply settings as well if you change the size or orientation of the paper for copying.
■ Checking the paper supply settings
Y ou can check the paper supply settings in Paper Supply on the Basic Features screen.
Displayed information of the tray includes the paper tray number, as well as the paper size and orientation.
● For tray 5 (bypass), you have to specify the paper type each time you load paper in it.
Basic
Features
2 Sided
1 -> 1 Sided
1 -> 2 Sided
(Head to Head)
2 -> 2 Sided
(Head to Head)
2 -> 1 Sided
(Head to Head)
More...
Sample Set
Off
Doc.>50
Off
Added
Features
Reduce/Enlarge
100%
Auto %
70%
A3->A4,B4->B5
81%
B4->A4,B5->A5
86%
A3->B4,A4->B5
141%
A4->A3,B5->B4
More...
Output FormatImage Quality
Paper Supply
Auto
Tray 1
A4 P
Tray 2
A4
Tray 3
B4
Tray 4
A3
Tray 5 (Bypass)
A4 P
Tray 6 (HCF)
A4 P
Stored
Job Templates
Original Type
Text
(Normal Text)
Mixed Size
Originals
Off
Finishing
Auto
Lighter/Darker
Tray number
Paper size/orientation
Loading Paper
■ Changing the paper supply settings
The informat ion of th e paper size and orientati on for tr ays 2, 3, and 4 will be cha nged auto maticall y
once you load different papers in these trays. If a different paper type is used, you will need to ask
your administ rato r to ch ange the se ttin gs i n Tools Mode . Th e foll owing proc edure will s how y ou ho w
to change the paper type.
“2.2 Loading Paper/Changing Paper Size of Paper Trays”
35
Page 62

2.3 Checking/Changing Paper Supply Settings
Loading Paper
Procedure
Press System Settings/
1
Meter Check.
The Menu screen is displayed.
Select System Administrator Mode.
2
Menu
Copy Counter
Total Originals Scanned
850
Reset
Close
● You can also switch the screen by
pressing Stop on the main control
panel and 2 on the keypad at the
same time.
Total Impressions
1250
Billing Meter Create/Change
Account
Billing Meter
A screen to confirm whether you want to switch control panel appears.
Reset
Folder
Create Mailbox
Select Switch.
3
To make selections for Tools Mode and Auditron Administration Mode,
select Switch to change screen and operate from the control panel in
front of the Document Feeder.
Or, select Cancel to return to the previous screen.
Version A:X-XXXX
Version B:X-XXXX
Version C:X, X, X, X
Version D:X.X.X
Version E:X
Consumables
Network
Settings
System
Administrator Mode
36
Cancel Switch
Page 63

2.3 Checking/Changing Paper Supply Settings
After a while, the following screen is displayed and operation is switched from
the main control panel to the copier control panel.
To return to the normal programming screen, exit administration mode
using the control panel of the copier and select Back on this screen.
The control panel of the copier is in front of the Document Feeder.
Lift the cover of the cop ier
4
control panel.
Loading Paper
Back
● For details on the Auditron
Administration mode, refer to “8.5
Auditron Menu”.
Select Tools Mode.
5
Tools Mode
Menu
Tools Mode Auditron
The Tools Password Entry screen is displayed.
Close
Administrator Mode
37
Page 64

2.3 Checking/Changing Paper Supply Settings
● The factory setti ng of the Tools
Password is 11111. If you do not
have a password, check with your
administrator.
● Each input digi t is repres ented by an
asterisk. If you made a mistake
while entering the password, press
Loading Paper
the C button to clear and then reenter.
Enter the to ol s pass wo rd b y us ing t he ke ypad a nd t he n sele ct
6
Confirm.
Please enter the password.
Password Entry
Use the Numeric Keypad to enter the
Tools Password and select Enter.
To clear the password you have entered,
press C button.
The Tools Menu screen is displayed.
Tools Password
Select Paper Tray Attributes.
7
Tools Mode
Tools Menu
Paper Tray
Attributes
Copy Defaults
Others
Audio Tones
Screen Layout
Image Quality
Timers
Reduce/Enlarge
Presets
Scan Mode
Settings
Cancel
Confirm
Exit
Administrator
Password
Original Size
Defaults
The Paper Tray Attributes screen is displayed.
Select Paper Type/Paper Color.
8
Tools Mode
Paper Tray Attributes
Paper Type/
Paper Color
The Paper Type screen is displayed.
Close
Auto Paper/
Auto Tray Switching
38
Page 65

● Disable the ATS/APS setting of all
the trays in Tools Mode if you want
to set the Paper Type as Heavywt 1.
For details, refer to “8.2 Overview of
Tools Mode”.
9
10
2.3 Checking/Changing Paper Supply Settings
Use to select the tray which you want to change setting,
and then select Change Settings.
Tools Mode
Paper Type/Paper Color
Tray 1
Tray 2
Tray 3
Tray 4
The screen of the selected tray is displayed. Here, we will illustrate by
selecting Tray 2.
Select the desired paper type.
Items Current Settings
Plain: White
Plain: White
Plain: White
Plain: White
Close
Change
Settings
Tools Mode
Tray 1
Plain
White
Blue
Buff
Goldenrod
Save
Loading Paper
11
12
13
14
Green
Yellow
Select Save when all the settings have been checked.
The display returns to the screen for setting the paper type.
Select Close when all the setti ngs have been checked.
The display returns to the Paper Tray Attributes screen.
Select Close.
The display returns to the Menu screen.
Select Exit.
The default screen or the User Password Entry screen is displayed.
Other 1
Other 2
39
Page 66

2.3 Checking/Changing Paper Supply Settings
Loading Paper
15
Select Back on the screen displayed on the main control
panel.
To return to the normal programming screen, exit administration mode
using the control panel of the copier and select Back on this screen.
The control panel of the copier is in front of the Document Feeder.
Back
Operation is switched from the copier control panel to the main control panel,
and after a while, the Copy screen is displayed.
●
40
Page 67

3 Loading
Documents
3.1 Types of Documents ................... .................................... ...42
3.2 Loading Documents....................................... ....................44
Page 68

3.1 Types of Documents
You can load your document either on the document glass or in the optional Duplex Automatic Document
Feeder (DADF). The DADF allows multiple shee ts of documen ts to be loaded and copie d. This sect ion
explains the types of documents that can be placed on the doc um ent glas s or loa ded in the DADF.
Loading Documents
3.1.1 Document Sizes
The sizes of documents that can be loaded on the document glass or in the DADF are as follows:
Document glass DADF
Document size Minimum: 10×10 mm
Maximum: 297×432 mm (A3, 11×17")
297mm
432mm
Document weight
*1
(GSM
)
Maximum capaci ty
(sheets)
*1
GSM or g/m2 is a measure of the substance of paper expressed in grammes per square meter, which does not depend on the number of sheets
in the ream.
*2
The value when copying 2 to 2 sided or 2 to 1 sided.
_
1
Minimum: 148×210 mm (A5, A5 portrait)
Maximum: 297×432 mm (A3, 11×17")
210mm
210mm
38-128g/m
50-110 g/m
148mm
2
(one-sided document)
2
(two-sided document*2)
148mm
297mm
432mm
50 (FX P paper)
40 (heavy weight paper: 101-128 g/m
2
)
3.1.2 Automatic Document Size Sensing
This machine can automatically detect the document size for copying. You do not need to specify the
size of your document if it is in one of the sizes listed below.
● If you are making c o pi es o nto non-standard pape r sizes, specify the document si z e b y s el e ct in g Document Size In pu t fr om the
Added Features screen. For details on entering document sizes, refer to “5. 12 Specifying Document Size”.
Document glass DADF
Document sizes that
can be automatically
sensed
A6, B6, B6 portrait, A5, A5 portrait,
5.5×8.5", 5.5×8.5" portrait, B5,
B5 portrait, A4, A4 portrait, 8.5×11",
A5, A5 portrait, B5, B5 portrait, A4,
A4 portrait, 8.5×11", 8.5×11" portrait,
8.5×13", 8.5×14", B4, A3, 11×17"
8.5×11" portrait, 8.5×13", B4, 8 K, A3,
11×17"
42
Page 69

3.1 Types of Documents
3.1.3 Special Documents to Note
■ Docum ent glass
When using the following types of documents for copying, automatic document size sensing might
not work and image loss might occur. Resolve the problem accordingly.
•Non-standard size documents
Specify the document size by selecting Original Size from the Added Features screen.
•Highly transparent documents (e.g. transparencies)
Place a piece of white paper of the same size on the transparent document. Alternatively, specify the
document size by selecting Original Size from the Added Features screen.
•Glossy documents
Specify the document size by selecting Original Size from the Added Features screen.
•Thick documents (e.g. books)
Specify the document size by selecting Original Size from the Added Features screen.
“5.12 Specifying Document Size”
■ Duplex automatic document feeder (DADF)
The following types of documents might be jammed or spoilt if loaded in the DADF. Place them on the
document glass:
• Torn, wrinkled, punched, curled documents • Highly transparent documents
• Clipped, stapled or glued documents
• Paste-up documents
• Folded documents
• Doc um ents with coa ting or carb on on th e rev ers e side
• Glossy documents
• Heat-sensitive documents
• Heavy weight documents
• Light weight documents
Loading Documents
43
Page 70

3.2 Loading Documents
This section explains how to load your documents on the do cu me nt gla ss or in the DAD F.
3.2.1 Loading on Document Glass
Loading Documents
The following procedure explains how to load document on the document glass.
● When using the document glass, options like 2 -> 2 Sided and 2 -> 1 Sided cannot be selected.
● If documents are pla ced one at a time on th e do cum ent g lass a nd the co pie s will be s tapl ed, Doc.>50 must first be set to On.
Refer to “5.9 Loading Documents in Batches” for High Document Volume settings.
Procedure
Lift up the document
1
cover.
● Place a sheet of white paper on the
document if it i s a h igh ly t rans p ar en t
material like transparency or tracing
paper.
Place the document face
2
down and align it wit h the
upper left corner of the
document glass.
Lower the document
3
cover.
●When copying a thick
document, do not use
excessive force to press it
against the document glass.
The glass may break and
injure you.
●When making copies with the
document cover open, do not
look directly at the copy lamp.
It might tire or hurt yo ur eyes.
44
Page 71

3.2 Loading Documents
3.2.2 Loading in DADF
The DADF allows you to load up to 50 sheets of documents from 148×210 mm to 297×432 mm.
Scanning f or copying will beg in with the topmost sheet of documen t and the copies w ill be output
facing down. This following procedure explains how to load your documents in the DADF.
● Up to 40 shees of heavy weight document (101 g/m
● If Next Original is selected on the screen that is displayed while scanning a document loaded in the DADF, the document will
be copied according to the initial feature settings.
● Up to 1,000 pages o f an A4-sized docum ent can be scanned. De pending on the size o f the document, howeve r, an er ror
message may appear before 1,000 pages are scanned.
● Pull out the extension tray if you are
loading large do c um ents.
2
to 128 g/m2) can be loaded.
Procedure
Align the ed ges of the documen ts.
1
Remove any staples or clips.
Place the documents
2
facing up in the DADF
(side one facing up for 2sided copyi ng), aligned to
the upper left corner of the
DADF, and as indicated by
the arrow in the diagram.
The confirmation indicator lights
up and the message, “The DADF
is selected” appears on the message area of the copier control panel.
Loading Documents
● Take note of the following as they
may result in document jams or
damage your documents:
• Do not press the documents wh ile
they are being fed into the feeder.
• Do not allow documents that have
been scanned for copying to overstack on the document output tray.
• Do not place any object on the
document output tray.
●
Shift the document guide
3
gently to touch the
document edges.
45
Page 72

3.2 Loading Documents
3.2.3 Original Orientation
This machine comes with the Margin Shift feature that allows you to adjust the position of the image
by adjusting its top, bottom, left, right positions. The orientation of the document must be right in order
for copying to be done correctly. The document orientation can be set by using the Original
Orientation feature. The machine will then be able to determine the top, bottom, left, and right
positions and move the image to the specified position to make copies.
Loading Documents
There are two types of document orientations: Head to Top and Head to Left. As Head to Top is usually
the factory setting, load your documents in this orientation. For documents that cannot be loaded in the
Head to Top orientation, change the Original Orientation on t he Others screen to H ead to Left and lo ad the
document in that orientation.
“5.14 Specifying Image Orientation”
● Features relat ed to set ting the or ig ina l or ientation are 2 to 1 Sided, Marg in Shi f t, Mixe d Size Origin al s, Mu ltip le Up, In depe ndent
X-Y %. Take note of these when you set the original orientation.
● You can change the factory setting of the origina l orientation to H ead to Left in Tools Mode. For details, refe r to “8.3 Sett ing
Tools Mode”.
● Labels affixed on the document g l as s and DADF sho w the H ead to Top setting. If the de fault value has b een changed in Tools
Mode, the display shown and the labels will differ.
3.2.4 Automatic Image Rotation
The machine will aut omat ica lly ro tate the image of the document a nd mak e t he co rre ct copies even if
the document and the paper tray are not in the same orientation.This feature is called Automatic
Image Rotation.
This feature will be effective if Auto % is selected for Reduce/Enla rge, or Auto for Paper Su pply; and
that a standard-sized document is copied onto a standard-sized paper of A4 or smaller.
46
Page 73

4 Basic Copy
Procedure
4.1 Basic Copying Procedures ...............................................48
4.2 Interrupting Copying..........................................................59
4.3 Copying on Postcards.......................................................60
4.4 Copying on Transparency.................................................62
4.5 Copying on Heavy Weight.................................................65
4.6 Removing Copies from the Tri-Fold Output Tray............66
4.7 Removing Copies from the Booklet Output Tray............67
Page 74

4.1 Basic Copying Procedures
This section explains about the basic copy ing proc edures of this machine.
It also shows you how to check specified features and status of current jobs, as well as to store programmings
for the next job. Before you begin copying, first chec k that you are in Cop y or Copy and Save mode.
The factory s ettings are as fol lows: 1 -> 1 Sided for 2 Sid ed , Auto for Output, 100% for Reduce/Enlarge, Auto
for Paper Supply, and Text (Normal Text) for Original Type.
If copying is done with the factory settings, the copies made will be on a paper size similar to the document and
in 100%.
Basic Copy Procedure
● The factory settings can be changed in the Tools Mode. For details, refer to “8.3 Setting Tools Mode”.
If you make copies with the do cument cover open, do not look directly at the copy lamp. It
might tire or hurt your eyes.
● About copies ejection timing
In all the following cases, copy outputs are ejected together after all pages are scanned:
(1) Booklet Creation is selected.
(2) Face Up is selected at Output Orientation and also Collated.
(3) For Back Cover Only in Covers, options other than Blank Covers is selected at Printing Page.
(4) Buil d Jo b is selected.
(5) Mixed Size Originals is selected.
(6) When scanning documents from the document glass in High Document Volume mode, Auto for Paper
Supply, Auto % for Reduce/Enlarge, or stapling/punching is specified.
(7) End Page for Book Duplex is specified.
4.1.1 Making Copies
“Chapter 3 Loading Documents”
● Enter your password if the message
“Please enter your password.” is
shown on the display. If you do not
have a password, check with your
administrator. For details on how to
enter the password, refer to “1.4
Entering Password ”.
● Press Clear All to return to the
default settings (when the power is
on) if you wish to cancel the features
that you have selected.
48
Procedure
Load the documents.
1
● On the document glass:
Lift the document cover; place
the document facing down;
align the document wit h the t op
left corner of the document
cover; and then close the
cover.
● In the DADF:
Load the documents facing up
as shown in the illustration and
then adjust the document gu ide to align the documents.
Check that Copy mode is selected.
2
Page 75

“5.2 Enlarging/ Re du c i ng Im age ”
“5.3 Selecting Paper Tray”
● When Auto % is selected for
Reduce/Enlarge or Auto for Paper
Supply, the document image will be
rotated to fit the orientation of the
paper loaded for copying. However,
this is only applicable when a
standard-sized document is being
copied to a standard-sized paper of
A4 or smaller. For non-standard
paper sizes, the image cannot be
automatically rotated.
4.1 Basic Copying Procedures
Select a percentage from Reduce/Enlarge, and Select a
3
paper tray fro m Paper Supply.
If you select Auto, a paper size matching the size of the document will be
automatically selected.
Basic
Features
2 Sided
1 -> 1 Sided
1 -> 2 Sided
(Head to Head)
2 -> 2 Sided
(Head to Head)
2 -> 1 Sided
(Head to Head)
More...
Sample Set
Off
Doc.>50
Off
Added
Features
Reduce/Enlarge
100%
Auto %
70%
A3->A4,B4->B5
81%
B4->A4,B5->A5
86%
A3->B4,A4->B5
141%
A4->A3,B5->B4
More...
Output FormatImage Quality
Paper Supply
Auto
Tray 1
A4 P
Tray 2
A4
Tray 3
B4
Tray 4
A3
Tray 5 (Bypass)
A4 P
Tray 6 (HCF)
A4 P
Lighter/Darker
Stored
Job Templates
Original Type
Text
(Normal Text)
Mixed Size
Originals
Off
Finishing
Auto
Basic Copy Procedure
“5.19 Specifying Document Type”
● You can choose from seven levels of
copy density to adjust the density of
your output. The factory setting is
Normal. For details, refer to “5.18
Adjusting Copy Densit y”.
Select your document type from Original Type on the Image
4
Quality screen.
Basic
Features
Image Quality Presets
Normal
Background
Suppression
Auto
Contrast
Added
Features
Image Quality
Lighter/Darker
Lightest
Normal
Darkest
Output Format
Auto
Select an opt ion according to your document type.
5
Original Type
Text & Photo
Normal Text
Cancel
Stored
Job Templates
Original Type
Text
(Normal Text)
Density Control
Normal
Sharpness
Normal
Save
Text
Photo
Map
Pencil Text (Black)
49
Page 76

4.1 Basic Copying Procedures
● Press the C button on the control
panel to clear any error when
entering the number of sets to be
copied. Once you have pressed the
C button, the number of sets will
return to “1”. No other settings will
be changed.
Basic Copy Procedure
● To stop the scanning documents for
copying, select Stop in the screen,
and then press C(Clear). When the
Clearing Paper screen is displayed,
press Start to output the copies.
Select Save to specify settings for other features.
6
Enter the number of
7
copies by using the
keypad.
The number of copies will be
displayed at the top right corner of
the screen.
Press Start.
8
Copies will be made.
● The number of copies can be
changed on the screen that appears
when a stack of documents has
been scanned or when you select
Stop. This does not apply when
copies are to be ejected together
after all pages are scanned. Refer to
“
timing” for further details.
● If Doc.>50 is On for the document
placed on the document glass, you
can continuously copy the
subsequent documents with the
previous settings. Refer to
“5.9 Loading Documents in Batches”
for High Document Volume settings.
●
About output ejection
●●
If you select Next Original while scanning documents loaded in the DADF, you
can continuously copy the docum ents.
Copy Job - Scanning in progress...
Copy Job
0/ 3
No. of Originals
25
No. of Pages Printed
0
Paper Supply
Tray 1 A4 P
Reduce/Enlarge
100%
Original OrientationSets
Output
Program
Ahead
Stop
Next Original
50
Page 77

4.1 Basic Copying Procedures
● The Stop button for stopping any ongoing copying
Press the Stop button on the control panel to terminate a copy job that is in progress. Once you
have pressed the Stop button, the copy job will be suspended and the following message will be
displayed: “Press Start to continue or C button to cancel.”
To resume the copy job, press the Start button again. To stop the job, press the C button.
● The Clear All button to cancel feature settings
To clear all the settings of the selected features, press the Clear A ll button on the control panel.
Once you have pressed the Clear All button, all settings will return to their default settings when the
power of the machine is on. The Clear All button cannot be used when copying is in progress.
The settings can automatically return to their default settings by setting a timer. Refer to “8.2
Overview of Tools Mode”.
● The C (Clear) button for correcting the number of sets for copying
Press the C button on the control panel to clear any error when entering the number of sets to be
copied. Once you have pressed the C button, the number of sets will return to “1”. No other settings
will be changed.
Basic Copy Procedure
● The Stop button for changing the number of copies for any ongoing copying
You can change the number of copies on the screen to be displayed when pressing the Stop button
on the control panel (or Stop on the screen), except Collated is activated.
■ Autom atic tray switch ing
This feature allows the machine to automatically switch to another paper tray with paper of the same
size, orientation, and type to continue with the copy job, when paper in the specified tray runs out.
This feature is called Automatic Tray Switching (ATS).
This feature is enabled by the Tools Administrator in Tools Mode.
All trays have this feature enabled as the factory setting.
If all tray s are l oad ed wit h paper of th e sam e si ze, type (norm al pape r) a nd o rientat ion, the tr ays will
be switched in the order of tray s 1, 2, 3, an d 4.
● The factory setting can be changed in the Tools Mode. For details, refer to “8.3 Setting Tools Mode”.
● When the optional HCF is equipped, the trays will then be switched in the order of tray 6 (HCF), trays 1, 2, 3, and 4.
51
Page 78

4.1 Basic Copying Procedures
4.1.2 Checking Settings
You can check settings on the displayed Review screen.
For copy fil es stored in the server, you can check the features specified when saved.
■ Checking settings
In the Copy, Save to File, Copy and Save modes, you can check the specified features before
pressing the Start button.
Basic Copy Procedure
● You can also check the settings on
the Job Status screen. For details,
refer to “4.1.4 Checking Job Status”.
● The features that are not enabled
are dimmed.
● For copy jobs, settings that are in the mid s t of being specified will also be reflected on the R ev i ew screen if it is displaye d.
● Only settings related to t he files being specified will be displayed when specifying Build Job settings.
Procedure
Press Review on the
1
control panel.
The Review screen is displayed.
Select Next to check the settings whe n nec es sa ry.
2
Select Close when all the setti ngs have been checked.
Review
<Basic Features>
· 2 Sided: 1->1 Sided
(Head to Head)
· Reduce/Enlarge: 100%
· Paper Supply: Auto
· Sample Set: Off
· Doc.>50: Off
· Output: Auto
Staple: Off, Punch: Off
Close
52
●
The display returns to the Basic Features screen.
Prev
Next
Page 79

■ Checking settings of saved files
You can check the copy settings of the copy files saved in the server.
● If the build job files and merged files are selected, all the settings for the entire file are displayed.
Procedure
Select Select Folder to display the Hard Disk (Copy File)
1
screen.
A list of copy files stored on the server is displayed.
4.1 Basic Copying Procedures
● You can also select the folder by
entering the folder number from the
keypad and then pressing Start on
the control panel.
● The password screen is displayed if
the folder password is enabled.
From the list, select the folder with the files that you want to
2
check and then pres s th e S elec t F older button.
Hard Disk
(Copy File)
1
2
3
44
5
6
Folder Name No. of Files
Search Folder Number
MO
Product_A 23
Product_B 118
Product_C 44
Product_D 87
Product_E 120
(No Name) 0
Select the copy file with the sett ings that you want to check and
3
then press the Review butto n.
Hard Disk
(Copy File)
MO
First
Prev
Next
Last
Select
Folder
Basic Copy Procedure
1/6
Order File Name Pages Data Size Date/Time
1
2
3
4
5
6
The Review screen is displayed.
2000-08-10_16-45-23 5 6504KB 08-10_16-45
2000-08-08_10-05-27 1 38KB 08-08_10-05
2000-08-07_08-23-45 152 1,010KB 08-07_08-23
2000-08-01_11-38-07 220 2,120KB 08-01_11-38
Copy/Move
Files
Merge/Edit
Files
Change
File Name
Delete
File(s)
Change
File Order
First
Prev
1/1
Next
Last
Select All/
Deseled All
53
Page 80

4.1 Basic Copying Procedures
This screen will display information like the file name and
4
stored date of the copy file when saved into the server.
Basic Copy Procedure
Review
<File Details>
File Name
· 2000-08-07_08-23-45
Date Stored
· 2000/10/25/ (Y/M/D) 16:06:29
Original Size
· Auto Detect Others
Number of Pages
· 152
Data Size
· 770MB
Format
· Document Data
<File Output Settings>
Paper Tray Settings
Tray 6: A4 P/Plain
Merge Files/Build Job Settings
Front Cover:
No Covers
Back Cover:
No Covers
Separators:
Off
Output: Collated
Finishing
Staple: Off, Punch: Off
Select Review on the screen.
5
The Review screen is displayed.
Select Next to check the settings whe n nec es sa ry.
6
After checking all the settings, select Close until you return to
the Hard Disk (Copy File) scre en.
Review
Close
Review
Close
●
<Basic Features>
· 2 Sided: 1->1 Sided
(Head to Head)
· Reduce/Enlarge: 100%
· Paper Supply: Auto
· Sample Set: Off
· Doc.>50: Off
· Output: Auto
Staple: Off, Punch: Off
Select Copy mode to return to the copier screen.
7
Prev
Next
54
Page 81

4.1 Basic Copying Procedures
4.1.3 Programming Ahead
Once the scan ni ng of doc umen ts lo aded on the D ADF for co pyin g has beg un, you can st a rt to spec ify
settings for the next copy job before you load the next set of documents. Once the current set of
documents is scan ned, the ne xt set of doc uments, if loa ded, can be sc anned immed iately. Up to 10
jobs can be programmed ahead.
● The Interrupt feature cannot be used with Progra m Ahead feature.
Procedure
Load the first set of documents and specify settings for other
1
features if necessary.
Basic Copy Procedure
● When Program Ahead is selected,
settings for the next copy can be
made while documents are being
scanned.
● Pressing Stop on the control panel
will also stop the outputting of
copies.
Press Start.
2
Scanning of the documents for copying will begin.
Select Program Ahead when the documents are being
3
scanned.
If On is selected fo r Doc.>50, Program Ahead can be selected only after End
Job is selected and scanning documents is completed.
Copy Job - Scanning in progress...
Copy Job
0/ 3
No. of Originals
25
No. of Pages Printed
0
Paper Supply
Tray 1 A4 P
Reduce/Enlarge
100%
Original OrientationSets
Output
Program
Ahead
Stop
Next Original
A message will appear to say that you can program ahead and the Basic
Features screen appears.
When saving files, a message will appear to say that you can save the
programming.
Specify settings for any feature, if necessa ry.
4
When the first set of documents loaded has been scanned for
5
copying, load the next set of documents, and press Start.
55
Page 82

4.1 Basic Copying Procedures
Repeat steps to continue scanning of other documents.
6
●
4.1.4 Checking Job Status
On the Job Status screen, you can check job status like whether the documents are being scanned
for copying or a print job is being carried out.
You can also pause or cancel job s that are displayed on the list.
Basic Copy Procedure
● Where there are no o ngoing jobs, the Job Statu s screen will not be displayed even if you sel ect the Job Status button.
■ Pausing/resuming ongoing operations
To pause and resume ongoing operations.
Procedure
1
● When you want to verify settings,
select the job to be checked and
press the Check Settings button. For
details, refer to “4.1.2 Checking
Settings”.
● If multiple files stored in the folder
are selected and to be reprinted,
only one file is displ ayed.
● You cannot assign the files stored in
the folder to the next job while you
are copying the current job, or you
cannot reserve the next job while
reprinting the files stored in the
folder.
● If Auto Print feature is enabled for
the files stored in the folder, only the
one file that is currently being
printed is displayed. You can check
which files are set to be printed
through the shared folder. Refer to
“6.2 Setting Folder” for the shared
folder.
2
During a copying job,
press the Job Status
button.
You can check the job status on
the Job Status screen displayed.
Select the job that you want to pause and then select Pause.
Copying or scanning of documents for copying will be paused.
Once the job is paused, the message, “Stop/User Action” will be displayed
under Job Status.
Job Status
1
2
3
4
5
6
Time Quantity Job Status
2000-08-21_11-03-32 0/ 20 Print Wait
2000-08-21_10-55-59 0/ 12 Stop/User Action
2000-08-21_10-52-45 0/ 10 Print Wait
2000-08-21_10-50-05 0/ 10 Print Wait
2000-08-21_10-47-50 0/ 50 Print Wait
2000-08-21_10-45-23 22/ 35 Stop/User Action
Promote
Job
Close
Prev
1/2
Next
PauseDelete Job
56
Page 83

To resume paused jobs, select the job or jobs to be resumed
3
(ones whose Job Status is Stop/User Action) and pre ss Start .
Copy or scan operation is resumed from the point where the jobs’ status
changed to St op/User Action.
●
■ Deleting jobs
To delete paused jobs or to stop copying or scanning of documents.
Procedure
4.1 Basic Copying Procedures
● You can select Delete Job only
when the job that has been paused
is selected.
●
Select a job whose job status is Stop/Us er A ctio n, and then
1
press Delete Job.
Job Status
Time Quantity Job Status
1
2
3
4
5
6
The job that has been paused will be deleted and copying will stop.
2000-08-21_11-03-32 0/ 20 Print Wait
2000-08-21_10-55-59 0/ 12 Stop/User Action
2000-08-21_10-52-45 0/ 10 Print Wait
2000-08-21_10-50-05 0/ 10 Print Wait
2000-08-21_10-47-50 0/ 50 Print Wait
2000-08-21_10-45-23 22/ 35 Stop/User Action
Promote
Job
Select Close.
2
The display returns to the copy screen.
Basic Copy Procedure
Close
Prev
1/2
Next
PauseDelete Job
57
Page 84

4.1 Basic Copying Procedures
4.1.5 Priority Printing
When there are multiple jobs waiting to be print ed, you can give a particu lar job higher priority so t ha t
it is printed first. A job th at is as sig ne d higher print priority will be output immediately following the job
that is currently being printed.
● If priority print ing is specified for two jobs, the one tha t is specified second will be printed before the job that was specified first.
● Priority printing is not available during sample copying.
Procedure
Basic Copy Procedure
Press Job Status.
1
The Job Status screen is
displayed.
●
Select the job to be promoted , then press Promot e Job.
2
Job Status
Time Quantity Job Status
1
2
3
4
5
6
The selected job is displayed following the job that is currently being printed.
Select Close.
3
The display returns to the copy screen.
2000-08-21_11-03-32 0/ 20 Print Wait
2000-08-21_10-55-59 0/ 12 Stop/User Action
2000-08-21_10-52-45 0/ 10 Print Wait
2000-08-21_10-50-05 0/ 10 Print Wait
2000-08-21_10-47-50 0/ 50 Print Wait
2000-08-21_10-45-23 22/ 35 Stop/User Action
Promote
Job
Close
Prev
1/2
Next
PauseDelete Job
58
Page 85

4.2 Interrupting Copying
You can interrupt a current copy job to procee d with a m ore urgent job by pressing the Interrupt button.
Once you press the Interrupt button, the current copy job will be paused as soon as it is possible. The
interrupted copy job can be resumed once you exit the Interrupt mode.
● You cannot press Interrupt to interrupt copying for a job that is programmed ahead or is a waiting job.
● For copying wi th Collated selected, once the scanning of documents for copying is done and End Job is selected, the machine
will stop once all the scanned documents are copied.
● Interrupt copying cannot be done when in the Save to File, Build Job, Edit/Print File, and Scan modes, except for reprinting
saved files.
● You cannot do Interrupt copying when using System Settings/Meter Check.
Procedure
Press Interrupt.
1
The interrupt indicator lights up
and the machine stops. If you
press Interrupt when docum ents
are being scanned for copying or
when a copy job is being done,
the machine will enter the
interrupt mode with the indicator
light blinking. Once the machine
stops, the light is lit.
Basic Copy Procedure
● Up to 1,000 pages of A4-sized
pages can be scanned for interrupt
copying. Depend ing on the size of
the document, however, an error
message may appear before 1,000
pages have been scanned.
Load the document for the interrupt copy job, and specify
2
settings for other features if necessary.
Using the keypad, enter the number of copies desired and
3
then press Start on th e control panel.
The documents will be scanned for copying and the copies output onto the
output tray.
After the interrupt copy job
4
has been done, press
Interrupt.
The interrupt indicator will be off
and the machine will exit the
Interrupt mode.
Remove documents that are loaded in the DADF for interrupt
5
copying.
Press Start.
6
The job interrupted in Step 1 resumes.
●
59
Page 86

4.3 Copying on Postcards
This section explains how to copy on postcards . For co py ing ont o pos t cards, use tray 5 (bypass).
● Usable postcards depend on the weight, size, and paper type. Contact your Customer Support Center for more information.
● Do not load the postcards into trays 1, 2, 3, and 4 and the optional trays 6 (HCF) and 7 as it may cause machine breakdown or
paper jam.
■ Copying onto postcards
Basic Copy Procedure
“3.2 Loading Doc um en ts”
“2.2.2 Loading Paper in Tray 5
(Bypass)”
Procedure
Load the documents.
1
Align the head of the document
against the left side of the
document glass.
Load the postcards in tray
2
5 (bypass).
Load the postcard s wi th th e side to
be copied facing up and its head on
the right side, and then gently push
the guide to align the postcards.
The Tray 5 (bypass) screen is
displayed.
60
Page 87

● “When Postcard is selected for
paper size, Heavywt 2 is
automatically selected for Paper
Type.
Select A/B Series Size or Postcard for paper size.
3
Tray 5 (Bypass)
B5
A5
Postcard
A/B Series
Size
Inch Size
A3
B4
A4
4.3 Copying on Postcards
Cancel
Paper Type
Save
Plain/Heavywt 1
(64-128g/m2)
Heavywt 2
(163-220g/m2)
Transp./Heavywt 1
(129-162g/m2)
Labels
●
Non-standard
Size
A4 P
SRA3
Select Save to specify settings for other features.
4
Using the keypad, enter the number of copies desired and
5
then press Start on th e control panel.
Copies will be made.
Tab Heavywt 1
(64-128g/m2)
Tab Heavywt 2
(129-162g/m2)
Basic Copy Procedure
61
Page 88

4.4 Copying on Transparency
To copy on transparencies, load them in tray 5 (bypass) and then select the correct paper type for copying.
● Do not load the tr ansparencies into trays 1, 2, 3, and 4 and the optional tr ays 6 (HCF) and 7 as it may cause machine
breakdown or paper jam.
● Use only the recommended transparencies. If not, it may cause machine breakdown or paper jam.
If you select Transp Separators on the Output Format screen, one sheet of blank paper will be inserted
automatically after every transparency copied.
To copy on transparency, you must load paper in the same orientation an d of the same paper size as the
Basic Copy Procedure
document in trays 1, 2, 3, 4 or the optional trays 6 (HCF) and 7 beforehand.
● The separato rs, output as blank paper, will not be us ed for copying and will not be counted by the meters. However, they will be
counted if Printed Separators is selected on the Transparency Separators screen.
“5.23 Inserting Transparency Separators”
Procedure
Load the documents.
“3.2 Loading Doc um en ts”
1
● Use transparencies meant for
printing in black and white.
● Load OHP (V515) in portrait
direction to prevent paper jam.
Load transparencies in
2
tray 5 (bypass).
Adjust the guide gently to align
the transparencies.
The Tray 5 (bypass) screen is
displayed.
Select A/B Series Size and A4 P for Paper Size and Transp./
3
Heavywt 1 for Paper Type.
Tray 5 (Bypass)
A/B Series
Size
Inch Size
Non-standard
Size
A3
B4
A4
A4 P
B5
A5
Postcard
SRA3
Cancel
Paper Type
Save
Plain/Heavywt 1
(64-128g/m2)
Heavywt 2
(163-220g/m2)
Transp./Heavywt 1
(129-162g/m2)
Labels
Tab Heavywt 1
(64-128g/m2)
Tab Heavywt 2
(129-162g/m2)
62
Page 89

4.4 Copying on Transparency
Select Save to specify settings for oth er fea tures if necessary.
4
Load separators if needed.
5
Proceed to Step 6 if no
separator is required.
Load the separators in the same
orientation and of the same paper
size as the transparencies in trays
1-4 or the optional trays 6 (HCF) or
7.
“5.23 Inserting Transparency
Separators”
When loading separators:
(1)Select Output Format and then Transp Separators.
Basic
Features
Multiple Up
1 Up
Repeat Image
Off
Annotation
Off
The Transparency Separators screen is displayed.
Added
Features
Image Quality
Transp. Separators
Off
Covers
No Covers
Tab Copying
Off
Output Format
Stored
Job Templates
Output Orientation
Auto
Booklet Creation
Off
Folding
Off
(2)Select On and specify whether or not to copy on the
separators.
When On is s elected for Transparency Separators, option buttons to specify
whether to print on the separators and Paper Tray Settings are displayed on
the right of the screen.
Basic Copy Procedure
Transparency Separators
Off
On
Select Blank Separators to make copies with blank separators inserted.
Select Printed Separators to make copies on both the transparencies and
separator s in s e r te d.
Blank
Separators
Printed
Separators
Cancel
Paper Tray Settings
Transp: Tray 5 Bypass
A4 P
Transp
Sep: Tray 6
A4 P
Plain
Save
63
Page 90

4.4 Copying on Transparency
(3)Select Paper Tray Settings.
The Paper Tray Settings screen is displayed.
(4)From Separators Tray, select the tray that you have
loaded paper as separators in Step 5.
Basic Copy Procedure
“5 Making Copies”
● When copying on tr ans pa re nc i es
with separators, you can copy only
one set at a time.
●
Paper Tray Settings
Transparency Tray
A4 P
1
Plain
A4
2
Plain
B4
3
Plain
A3
4
Plain
5
6
Bypass...
A4 P
A4 P
Plain
A4 P
1
Plain
A4
2
Plain
B4
3
Plain
A3
4
Plain
Separators Tray
Cancel
5
6
Select Save to specify settings for other features.
6
Using the keypad, enter the number of copies desired and
7
then press Start on th e control panel.
Copies will be made.
Bypass...
A4 P
A4 P
Plain
Save
64
Page 91

4.5 Copying on Heavy Weight
To copy on special papers like heavy weight paper, load them in tray 5 (bypass) and then select the correct
paper type for copying.
“2.1 Paper to Use”
Procedure
“3.2 Loading Doc um en ts”
“2.2.2 Loading Paper in Tray 5
(Bypass)”
● For details on selecting paper size,
refer to “
■
in “5.3.2 Manually Selecting Paper
Tray”.
Selecting tray 5 (bypass)”
Load the documents.
1
Place the paper with the
2
side for copy ing facing up
and then insert the paper
to align with the paper
guide.
Once you have loaded the paper
properly, the Tray 5 (Bypass)
screen will be display ed .
Select the paper size and type.
3
Here, we will illustrate with A4 and Heavywt 2 being selected.
Tray 5 (Bypass)
A3
A/B Series
Size
Inch Size
B4
A4
B5
A5
Postcard
Cancel
Paper Type
Plain/Heavywt 1
(64-128g/m2)
Heavywt 2
(163-220g/m2)
Transp./Heavywt 1
(129-162g/m2)
Labels
Basic Copy Procedure
Save
●
Non-standard
Size
A4 P
SRA3
Select Save to specify settings for other features.
4
Using the keypad, enter the number of copies desired and
5
then press Start on th e control panel.
Copies will be made.
Tab Heavywt 1
(64-128g/m2)
Tab Heavywt 2
(129-162g/m2)
65
Page 92

4.6 Removing Copies from the
Tri-Fold Output Tray
This section explains how to remove the copies from the tri-fold output tray.
● Keep the power on while you r emove the copies from the tri-fold outpu t tray. If you turn off the power and pr ess the Tri-Fold
Output Tray button, the tray will not open.
● When the tri-fold output tray is full, a message appears on the screen. Follow the instructions to remove the copies.
Procedure
Basic Copy Procedure
Press Tri-Fold Output
● When you pull out the tri-fold output
tray, remove all the copies. If you
leave copies in the tray, the next
copy job may not be completed due
to the previous copies left.
1
Tray.
The tri-fold output tray opens.
● If the tri-fold output tray is not
completely closed, a message
appears on the screen and the
machine does not start.
●
Pull out the tri-fold output
2
tray and remove all the
copies.
Slowly push back the tri-
3
fold output tray.
66
Page 93

4.7 Removing Copies from the
Booklet Output Tray
This section explains how to remove the copies from the booklet output tray.
● When the booklet output tray is f ull, a message appear s on the screen. Follow the instructions to r emove the copies.
● The copies deliver ed to the booklet o utput tra y autom atically m ove to the posit ion for r emoval if the re quire d setting has been
made. Contac t your Customer Support Center for details.
Procedure
Press Booklet Output.
1
The paper transport belt for the
booklet output tray moves the
copies to the position for removal.
Basic Copy Procedure
●
Remove all the copies.
2
67
Page 94

4.7 Removing Copies from the Booklet Output Tray
■ Lowering the Flap of the Booklet Output Tray
If you lower the flap of the booklet output tray, the copies will drop from the tray. If you place a box
under the tray, it will temporarily hold the copies and you can make a large volume of copies without
removing the output each time the tray fills up.
Procedure
Pull the fla p of the bookle t
1
output tray to the right.
Basic Copy Procedure
●
Lower the flap.
2
Raise the flap of the
3
booklet output tray and
push it back to the ori gina l
position when necessary.
68
Page 95

5 Making Copies
5.1 1-Sided/2-Sided Copying [2 Sided]...................................70
5.2 Enlarging/Reducing Image [Reduce/Enlarge] .................76
5.3 Selecting Paper Tray [Paper Supply] ...............................84
5.4 Sorting Output [Finishing] ................................................89
5.5 Stapling [Finishing]............................................................91
5.6 Punching Holes [Finishing]...............................................94
5.7 Z-Folding [Finishing] .........................................................97
5.8 Making Sample Copies [Sample Set].............................100
5.9 Loading Documents in Batches [Doc.>50]....................102
5.10 Erasing Edges [Edge Erase] ...........................................104
5.1 1 Shifting Image [Margin Shift] ..........................................107
5.12 Specifying Document Size [Original Size]................ .....111
5.13 Copying Facing Pages onto Separate Sheets
[Bound Originals].............................................................114
5.14 Specifying Image Orientation [Original Orientation].....116
5.15 Copying Mixed Size Originals [Mixed Size Originals] ..118
5.16 Making Two sided Copies From a Bound Document
[Book Duplex]...................................................................121
5.17 Adjusting Image Quality [Image Quality Presets] ......... 123
5.18 Adjusting Copy Density [Lighter/Darker].......................125
5.19 Specifying Document Type [Or ig inal Type]...................126
5.20 Adjusting Density Control [Density Control].................129
5.21 Adjusting Sharpness [Sharpness] .................................131
5.22 Multiple-Documents Copying on One Copy
[Multiple Up] ................... ................... .................... ...........133
5.23 Inserting Transparency Separators
[Transp arency Separators]..............................................137
5.24 Outputting Face Up/Down [Output Orientation]............140
5.25 Making Multiple Copies on a Single Sheet
[Repeat Image] .................................................................142
5.26 Copying With Covers [Covers].......................................145
5.27 Creating a Booklet [Booklet Creation]...........................151
5.28 Copying with Stamp or Date [Annotation].....................160
5.29 Copying on Tab Paper [Tab Copying] ............................164
5.30 Outputting Bi-Fold e d or Tri-Folded Copies [Folding] ...166
5.31 Programming Settings for Copying
[Stored Job Templates]....................................................168
5.32 Copying Documents of Different Settings (Buil d Job ) .173
Page 96

5.1 1-Sided/2-Sided Copying
2 Sided
This feature allows you to make 2- or 1-sided copies from 1- or 2-sided documents.
● The factory setting for this 2-Sided feature is 1 -> 1 Sided .
● The factory setting can be changed in the Tools Mode. For details, refer to “8.3 Setting Tools Mode”.
5.1.1 1-Sided Copying
The following procedure explains how to make 1-sided copies from 1- or 2-sided documents:
Features
Features
Making Copies
Basic
Added
1-sided document 2-sided document
Report
1st page 2nd page
“3.2 Loading Doc um en ts”
1-sided copy
A
Report
Report
B
1st page 2nd page
A
B
Procedure
Load the documents.
1
When making 1-sided copies from 2-sided documents, load the documents in
the DADF.
From 2 Sided, select 1 -> 1 Sided or 2 -> 1 Sided.
2
Select More to specify Originals or Original Orientation.
Basic
Features
Added
Features
Output FormatImage Quality
Stored
Job Templates
JOb Templates
Image Quality
Output Format
Stored
2 Sided
1 -> 1 Sided
1 -> 2 Sided
(Head to Head)
2 -> 2 Sided
(Head to Head)
2 -> 1 Sided
(Head to Head)
More...
Sample Set
Off
Doc.>50
Off
Reduce/Enlarge
100%
Auto %
70%
A3->A4,B4->B5
81%
B4->A4,B5->A5
86%
A3->B4,A4->B5
141%
A4->A3,B5->B4
More...
Paper Supply
Auto
Tray 1
A4 P
Tray 2
A4
Tray 3
B4
Tray 4
A3
Tray 5 (Bypass)
A4 P
Tray 6 (HCF)
A4 P
Original Type
Text
(Normal Text)
Mixed Size
Originals
Off
Finishing
Auto
Lighter/Darker
70
Page 97

● When 2 -> 1 Sided is selected,
specify in Originals, how the two
sides of the 2-sided document are
printed.
•Select Head to Head for
documents wit h both s ides pr inted
in the same direction.
•Select Head to Toe for documents
with the two sides printed in
opposite direction.
5.1 1-Sided/2-Sided Copying
When More is selected:
(1)Select 1 -> 1 Sided or 2 -> 1 Sided.
(2)When 2 -> 1 Sided is selected, specify Originals.
When 1 -> 1 Sided is selected, proceed to Step (3).
2-Sided
1 -> 1 Sided
1 -> 2 Sided
2 -> 2 Sided
2 -> 1 Sided
Head to
Head
Originals
Head to
Toe
Cancel
Original Orientation
Head to Top
Head to Left
Save
“5.14 Specifyin g Ima ge Or ie ntati o n”
● To ca ncel a ny setting, select Cancel.
●
(3)Check Original Orientation.
Confirm the documents are loaded in the direction as specified in Original
Orientation.
● Head to Top: ● Head to Left:
(4)Select Save to specify settings for other features if
necessary.
Using the keypad, enter the number of copies desired and
3
then press Start on the control panel.
Copies will be made.
Making Copies
Features
Features
Basic
Added
Image Quality
71
Job Templates
Output Format
Stored
Page 98

5.1 1-Sided/2-Sided Copying
5.1.2 2-Sided Copying
The following procedure explains how to make 2-sided copies from 1- or 2-sided documents:
Features
1-sided document 2-sided document
A
Report
B
1st page 2nd page
■ Making 2-sided copies from 1-sided documents
To make 2-sided copies from 1-sided documents:
Making Copies
“3.2 Loading Doc um en ts”
Basic
● You cannot make 2-sided copies using tray 5 (bypass) or 12 ✕18” paper.
Procedure
Load the documents.
1
From 2 Sided, select 1 -> 2 Sided.
2
Select More to specify Originals or Original Orientation.
Basic
Features
Report
Added
Features
2-sided copy
Report
Output FormatImage Quality
Stored
Job Templates
Features
JOb Templates
2 Sided
Added
Image Quality
Output Format
Stored
1 -> 1 Sided
1 -> 2 Sided
(Head to Head)
2 -> 2 Sided
(Head to Head)
2 -> 1 Sided
(Head to Head)
More...
Sample Set
Off
Doc.>50
Off
Reduce/Enlarge
100%
Auto %
70%
A3->A4,B4->B5
81%
B4->A4,B5->A5
86%
A3->B4,A4->B5
141%
A4->A3,B5->B4
More...
Paper Supply
Auto
Tray 1
A4 P
Tray 2
A4
Tray 3
B4
Tray 4
A3
Tray 5 (Bypass)
A4 P
Tray 6 (HCF)
A4 P
Original Type
Text
(Normal Text)
Mixed Size
Originals
Off
Finishing
Auto
Lighter/Darker
72
Page 99

●
When 2 -> 1 Sided is selected,
specify in Originals, how the two
sides of the 2-sided document are
printed.
•Select Head to Head for
documents wit h both s ides pr inted
in the same direction.
When More is selected:
(1)Select 1 -> 2 Sided.
(2)Specify Copies.
2-Sided
1 -> 1 Sided
5.1 1-Sided/2-Sided Copying
Cancel
Original Orientation
Head to Top
Save
•Select Head to Toe for documents
with the two sides printed in
opposite direction.
“5.14 Specifyin g Ima ge Or ie ntati o n”
● To ca ncel a ny setting, select Cancel.
1 -> 2 Sided
2 -> 2 Sided
2 -> 1 Sided
Head to
Head
Copies
Head to
Toe
Head to Left
(3)Check Original Orientation.
Confirm the documents are loaded in the direction as specified in Original
Orientation.
● Head to Top: ● Head to Left:
(4)Select Save to specify settings for other features if
necessary.
Making Copies
Features
Basic
●
Using the keypad, enter the number of copies desired and
3
then press Start on the control panel.
Copies will be made.
73
Features
Job Templates
Added
Image Quality
Output Format
Stored
Page 100

5.1 1-Sided/2-Sided Copying
■ Making 2-sided copies from 2-sided documents
To make 2-sided copies from 2-sided documents:
Procedure
Load the documents.
1
“3.2 Loading Doc um en ts”
When making 2-sided copies from 2-sided documents, load the documents in
the DADF.
From 2 Sided, select 1 -> 1 Sided or 2 -> 1 Sided.
2
Select More to specify Originals or Original Orientation.
Features
Features
JOb Templates
Making Copies
Basic
● When 2 -> 2 Sided is selected,
Added
Image Quality
Output Format
Stored
specify in Originals and Copies,
how the two sides of the 2-sided
documents and copies are printed/to
be printed.
•Select Head to Head in
Originals/Copies for documents/
copies with two sides printed/to be
printed in the same direction.
•Select Head to Toe in Originals/
Copies for documents/copies with
the two sides printed/to be printed
in opposite direction.
Basic
Features
2 Sided
1 -> 1 Sided
1 -> 2 Sided
(Head to Head)
2 -> 2 Sided
(Head to Head)
2 -> 1 Sided
(Head to Head)
More...
Sample Set
Off
Doc.>50
Off
Added
Features
Reduce/Enlarge
100%
Auto %
70%
A3->A4,B4->B5
81%
B4->A4,B5->A5
86%
A3->B4,A4->B5
141%
A4->A3,B5->B4
More...
When More is selected:
(1)Select 2 -> 2 Sided.
(2)Specify Originals and Copies.
2-Sided
Originals
1 -> 1 Sided
1 -> 2 Sided
2 -> 2 Sided
2 -> 1 Sided
Head to
Head
Head to
Head
Copies
Output FormatImage Quality
Paper Supply
Auto
Tray 1
A4 P
Tray 2
A4
Tray 3
B4
Tray 4
A3
Tray 5 (Bypass)
A4 P
Tray 6 (HCF)
A4 P
Head to
Toe
Head to
Toe
Stored
Job Templates
Original Type
Text
(Normal Text)
Mixed Size
Originals
Off
Finishing
Auto
Lighter/Darker
Cancel
Original Orientation
Head to Top
Head to Left
Save
74
 Loading...