

Page 1
DocuMate 765
scanner
user’s guide
Page 2

DocuMate 765
scanner
user’s guide
Page 3

Copyright © 2009 Visioneer, Inc.
Reproduction, adaptation, or translation without prior written permission is prohibited, except as allowed under the
copyright laws.
XEROX ® is a trademark of Xerox Corporation in the United States and/or other countries and is used under license.
DocuMate is a trademark of Xerox Corporation used under license. All other Xerox product names and product numbers
mentioned in this publication are trademarks of Xerox Corporation.
The Visioneer brand name and logo are registered trademarks of Visioneer, Inc. The OmniPage® Pro brand name and
logo are registered trademarks of Nuance Communications, Inc. Kofax® and Virtual ReScan® are registered trademarks,
and VRS
TM
is a trademark of Kofax Image Products, Inc. QuickScan® is a trademark and ISIS is a registered trademark of
Captiva Software Corporation. Adobe®, Adobe® Reader®, Adobe® Acrobat®, and the Adobe® PDF logo are registered
trademarks of Adobe Systems Incorporated in the United States and/or other countries. The Adobe PDF logo will appear
in this product’s software, and full access to Adobe software features is only available if any Adobe product is installed on
your computer.
Microsoft is a U.S. registered trademark of Microsoft Corporation. Windows is a trademark and SharePoint® is a
registered trademark of Microsoft Corporation. ZyINDEX is a registered trademark of ZyLAB International, Inc. ZyINDEX
toolkit portions, Copyright © 1990-1998, ZyLAB International, Inc. All Rights Reserved. All other products mentioned
herein may be trademarks of their respective companies.
The ENERGY STAR® and ENERGY STAR MARK® are registered United States trademarks.
Information is subject to change without notice and does not represent a commitment on the part of Visioneer. The
software described is furnished under a licensing agreement. The software may be used or copied only in accordance with
the terms of such an agreement. It is against the law to copy the software on any medium except as specifically allowed in
the licensing agreement. No part of this document may be reproduced or transmitted in any form or by any means,
electronic or mechanical, including photocopying, recording, or information storage and retrieval systems, or translated to
another language, for any purpose other than the licensee's personal use and as specifically allowed in the licensing
agreement, without the express written permission of Visioneer.
Part Number: 05-0756-300
Restricted Rights Legend
Use, duplication, or disclosure is subject to restrictions as set forth in contract subdivision (c)(1)(ii) of the Rights in
Technical Data and Computer Software Clause 52.227-FAR14. Material scanned by this product may be protected by
governmental laws and other regulations, such as copyright laws. The customer is solely responsible for complying with all
such laws and regulations.
Page 4

Welcome
What’s in the Box . . . . . . . . . . . . . . . . . . . . . . . . . . . . . . . . . . . . . . . . . . . . . . . . . . . . . . . . . . . . . . . . .1
The Xerox DocuMate 765 Scanner . . . . . . . . . . . . . . . . . . . . . . . . . . . . . . . . . . . . . . . . . . . . . . . . . . .2
What You Need . . . . . . . . . . . . . . . . . . . . . . . . . . . . . . . . . . . . . . . . . . . . . . . . . . . . . . . . . . . . . . . . . .3
Documentation . . . . . . . . . . . . . . . . . . . . . . . . . . . . . . . . . . . . . . . . . . . . . . . . . . . . . . . . . . . . . . . . . . .3
Installation
Before You Begin . . . . . . . . . . . . . . . . . . . . . . . . . . . . . . . . . . . . . . . . . . . . . . . . . . . . . . . . . . . . . . . . .4
Step 1: Unpack and Assemble the Scanner . . . . . . . . . . . . . . . . . . . . . . . . . . . . . . . . . . . . . . . .5
Step 2: Install the Software . . . . . . . . . . . . . . . . . . . . . . . . . . . . . . . . . . . . . . . . . . . . . . . . . . . . . 6
Step 3: Connect the Scanner . . . . . . . . . . . . . . . . . . . . . . . . . . . . . . . . . . . . . . . . . . . . . . . . . . .16
Additional Applications Available with Your Scanner . . . . . . . . . . . . . . . . . . . . . . . . . . . . . . . . . . . . .17
View the User Guides . . . . . . . . . . . . . . . . . . . . . . . . . . . . . . . . . . . . . . . . . . . . . . . . . . . . . . . . . . . . .19
Register Your Scanner and Check for Updates . . . . . . . . . . . . . . . . . . . . . . . . . . . . . . . . . . . . . . . . .20
Loading Documents to Scan . . . . . . . . . . . . . . . . . . . . . . . . . . . . . . . . . . . . . . . . . . . . . . . . . . . . . . . . 21
Scanning Interfaces . . . . . . . . . . . . . . . . . . . . . . . . . . . . . . . . . . . . . . . . . . . . . . . . . . . . . . . . . . . . . .22
Table of Contents
Table of Contents
Scanning from One Touch
Scanning with the One Touch Buttons . . . . . . . . . . . . . . . . . . . . . . . . . . . . . . . . . . . . . . . . . . . . . . . .23
Using the One Touch Button Panel . . . . . . . . . . . . . . . . . . . . . . . . . . . . . . . . . . . . . . . . . . . . . . . . . .24
Scan from the One Touch Button Panel . . . . . . . . . . . . . . . . . . . . . . . . . . . . . . . . . . . . . . . . . .24
The Default One Touch Settings on Your Scanner . . . . . . . . . . . . . . . . . . . . . . . . . . . . . . . . . .25
Configuring the One Touch Buttons . . . . . . . . . . . . . . . . . . . . . . . . . . . . . . . . . . . . . . . . . . . . . . . . . .26
About the One Touch Properties Window . . . . . . . . . . . . . . . . . . . . . . . . . . . . . . . . . . . . . . . . .26
Selecting New Settings for a Button . . . . . . . . . . . . . . . . . . . . . . . . . . . . . . . . . . . . . . . . . . . . . . 28
Creating a New Scan Configuration . . . . . . . . . . . . . . . . . . . . . . . . . . . . . . . . . . . . . . . . . . . . . .29
Editing or Deleting Scan Configurations . . . . . . . . . . . . . . . . . . . . . . . . . . . . . . . . . . . . . . . . . .35
Setting Destination Application Properties . . . . . . . . . . . . . . . . . . . . . . . . . . . . . . . . . . . . . . . . .37
Selecting Page Format Options . . . . . . . . . . . . . . . . . . . . . . . . . . . . . . . . . . . . . . . . . . . . . . . . .42
Selecting Options for a Button . . . . . . . . . . . . . . . . . . . . . . . . . . . . . . . . . . . . . . . . . . . . . . . . . .46
Special Features and Scanning Destinations . . . . . . . . . . . . . . . . . . . . . . . . . . . . . . . . . . . . . . . . . . .48
Scanning with Optical Character Recognition (OCR) . . . . . . . . . . . . . . . . . . . . . . . . . . . . . . . .48
Scan and Burn to a CD . . . . . . . . . . . . . . . . . . . . . . . . . . . . . . . . . . . . . . . . . . . . . . . . . . . . . . .49
Scanning with Event Forwarding . . . . . . . . . . . . . . . . . . . . . . . . . . . . . . . . . . . . . . . . . . . . . . . .50
Creating an HTML Web Page from Your Scanned Documents . . . . . . . . . . . . . . . . . . . . . . . . . 51
Transferring Scanned Documents to Storage . . . . . . . . . . . . . . . . . . . . . . . . . . . . . . . . . . . . . . 52
Scanning from TWAIN
Accessing the TWAIN Interface . . . . . . . . . . . . . . . . . . . . . . . . . . . . . . . . . . . . . . . . . . . . . . . . . . . . .57
TWAIN Interface Options . . . . . . . . . . . . . . . . . . . . . . . . . . . . . . . . . . . . . . . . . . . . . . . . . . . . . . . . . . 58
Configurations Tab . . . . . . . . . . . . . . . . . . . . . . . . . . . . . . . . . . . . . . . . . . . . . . . . . . . . . . . . . . . 58
Scan Settings Tab . . . . . . . . . . . . . . . . . . . . . . . . . . . . . . . . . . . . . . . . . . . . . . . . . . . . . . . . . . .59
DocuMate 765 Scanner User’s Guide iii
Page 5

Table of Contents
Document Settings Tab . . . . . . . . . . . . . . . . . . . . . . . . . . . . . . . . . . . . . . . . . . . . . . . . . . . . . . .61
Image Enhancements Tab . . . . . . . . . . . . . . . . . . . . . . . . . . . . . . . . . . . . . . . . . . . . . . . . . . . . .62
About Tab . . . . . . . . . . . . . . . . . . . . . . . . . . . . . . . . . . . . . . . . . . . . . . . . . . . . . . . . . . . . . . . . . . 65
Scanning from ISIS
Opening QuickScan and Selecting the Scanner . . . . . . . . . . . . . . . . . . . . . . . . . . . . . . . . . . . . . . . . .67
Scanning from QuickScan . . . . . . . . . . . . . . . . . . . . . . . . . . . . . . . . . . . . . . . . . . . . . . . . . . . . . . . . . 68
ISIS Preview Settings . . . . . . . . . . . . . . . . . . . . . . . . . . . . . . . . . . . . . . . . . . . . . . . . . . . . . . . . . . . . .72
Presets Options . . . . . . . . . . . . . . . . . . . . . . . . . . . . . . . . . . . . . . . . . . . . . . . . . . . . . . . . . . . . . 72
Main Options . . . . . . . . . . . . . . . . . . . . . . . . . . . . . . . . . . . . . . . . . . . . . . . . . . . . . . . . . . . . . . .73
Layout Options . . . . . . . . . . . . . . . . . . . . . . . . . . . . . . . . . . . . . . . . . . . . . . . . . . . . . . . . . . . . . .75
Paper Handling Options . . . . . . . . . . . . . . . . . . . . . . . . . . . . . . . . . . . . . . . . . . . . . . . . . . . . . . .80
Image Processing Options . . . . . . . . . . . . . . . . . . . . . . . . . . . . . . . . . . . . . . . . . . . . . . . . . . . . . 83
Imprinter Options . . . . . . . . . . . . . . . . . . . . . . . . . . . . . . . . . . . . . . . . . . . . . . . . . . . . . . . . . . . . 90
Scanning from WIA
Fine Tuning Your Scans . . . . . . . . . . . . . . . . . . . . . . . . . . . . . . . . . . . . . . . . . . . . . . . . . . . . . . . . . . . 95
Scanner Options, Maintenance and Troubleshooting
Scanner Hardware Options . . . . . . . . . . . . . . . . . . . . . . . . . . . . . . . . . . . . . . . . . . . . . . . . . . . . . . . .97
Wire Frame Accessory . . . . . . . . . . . . . . . . . . . . . . . . . . . . . . . . . . . . . . . . . . . . . . . . . . . . . . . .97
Changing the Background Color . . . . . . . . . . . . . . . . . . . . . . . . . . . . . . . . . . . . . . . . . . . . . . . . 99
Manual Feed . . . . . . . . . . . . . . . . . . . . . . . . . . . . . . . . . . . . . . . . . . . . . . . . . . . . . . . . . . . . . .102
User Utility . . . . . . . . . . . . . . . . . . . . . . . . . . . . . . . . . . . . . . . . . . . . . . . . . . . . . . . . . . . . . . . . . . . .104
Main Screen Options . . . . . . . . . . . . . . . . . . . . . . . . . . . . . . . . . . . . . . . . . . . . . . . . . . . . . . . .105
Scanner Error Codes . . . . . . . . . . . . . . . . . . . . . . . . . . . . . . . . . . . . . . . . . . . . . . . . . . . . . . . .107
Setting Sleep Mode . . . . . . . . . . . . . . . . . . . . . . . . . . . . . . . . . . . . . . . . . . . . . . . . . . . . . . . . .109
Paper Mode and Buzzer Setting . . . . . . . . . . . . . . . . . . . . . . . . . . . . . . . . . . . . . . . . . . . . . . . 110
Shading Adjustment . . . . . . . . . . . . . . . . . . . . . . . . . . . . . . . . . . . . . . . . . . . . . . . . . . . . . . . . .111
Cleaning the Outside of the Scanner . . . . . . . . . . . . . . . . . . . . . . . . . . . . . . . . . . . . . . . . . . . . . . . .114
Cleaning the Inside of the Scanner . . . . . . . . . . . . . . . . . . . . . . . . . . . . . . . . . . . . . . . . . . . . . . . . . .115
Cleaning the ADF Rollers . . . . . . . . . . . . . . . . . . . . . . . . . . . . . . . . . . . . . . . . . . . . . . . . . . . . .116
Cleaning the Exit Path Rollers . . . . . . . . . . . . . . . . . . . . . . . . . . . . . . . . . . . . . . . . . . . . . . . . .119
Cleaning the Scanner Glass and Background Plates . . . . . . . . . . . . . . . . . . . . . . . . . . . . . . . 121
Reset the Roller Count in the User Utility . . . . . . . . . . . . . . . . . . . . . . . . . . . . . . . . . . . . . . . . . 122
Cleaning the Paper Sensors . . . . . . . . . . . . . . . . . . . . . . . . . . . . . . . . . . . . . . . . . . . . . . . . . . . . . . .123
Cleaning the ADF Sensors . . . . . . . . . . . . . . . . . . . . . . . . . . . . . . . . . . . . . . . . . . . . . . . . . . . .123
Cleaning the Exit Sensors . . . . . . . . . . . . . . . . . . . . . . . . . . . . . . . . . . . . . . . . . . . . . . . . . . . .125
Clearing Paper Jams . . . . . . . . . . . . . . . . . . . . . . . . . . . . . . . . . . . . . . . . . . . . . . . . . . . . . . . . . . . . 127
Troubleshooting . . . . . . . . . . . . . . . . . . . . . . . . . . . . . . . . . . . . . . . . . . . . . . . . . . . . . . . . . . . . . . . .130
Uninstalling Your Scanner . . . . . . . . . . . . . . . . . . . . . . . . . . . . . . . . . . . . . . . . . . . . . . . . . . . . . . . .133
Xerox DocuMate 765 Scanner Specifications . . . . . . . . . . . . . . . . . . . . . . . . . . . . . . . . . . . . . . . . .134
Xerox DocuMate 765 Scanner Parts List . . . . . . . . . . . . . . . . . . . . . . . . . . . . . . . . . . . . . . . . . . . . .135
Notices . . . . . . . . . . . . . . . . . . . . . . . . . . . . . . . . . . . . . . . . . . . . . . . . . . . . . . . . . . . . . . . . . . . . . . . . .137
Section 1: Safety Introduction . . . . . . . . . . . . . . . . . . . . . . . . . . . . . . . . . . . . . . . . . . . . . . . . . . . . . . 137
Section 2: EMC . . . . . . . . . . . . . . . . . . . . . . . . . . . . . . . . . . . . . . . . . . . . . . . . . . . . . . . . . . . . . . . . .137
iv DocuMate 765 Scanner User’s Guide
Page 6

Table of Contents
Section 3: Operational Safety Information . . . . . . . . . . . . . . . . . . . . . . . . . . . . . . . . . . . . . . . . . . . . 138
Section 4: Electrical Information . . . . . . . . . . . . . . . . . . . . . . . . . . . . . . . . . . . . . . . . . . . . . . . . . . . . 139
Section 5: Emergency Power Off . . . . . . . . . . . . . . . . . . . . . . . . . . . . . . . . . . . . . . . . . . . . . . . . . . . 140
Section 6: Maintenance Information . . . . . . . . . . . . . . . . . . . . . . . . . . . . . . . . . . . . . . . . . . . . . . . . .140
Section 7: Product Safety Certification . . . . . . . . . . . . . . . . . . . . . . . . . . . . . . . . . . . . . . . . . . . . . . .140
Section 8: Regulatory Information . . . . . . . . . . . . . . . . . . . . . . . . . . . . . . . . . . . . . . . . . . . . . . . . . . 141
Section 9: Compliance Information . . . . . . . . . . . . . . . . . . . . . . . . . . . . . . . . . . . . . . . . . . . . . . . . . .141
Section 10: Illegal Copies . . . . . . . . . . . . . . . . . . . . . . . . . . . . . . . . . . . . . . . . . . . . . . . . . . . . . . . . . 143
Section 11: EH&S Contact Information . . . . . . . . . . . . . . . . . . . . . . . . . . . . . . . . . . . . . . . . . . . . . . .145
Index . . . . . . . . . . . . . . . . . . . . . . . . . . . . . . . . . . . . . . . . . . . . . . . . . . . . . . . . . . . . . . . . . . . . . . . . . . . .147
DocuMate 765 Scanner User’s Guide v
Page 7

Table of Contents
vi DocuMate 765 Scanner User’s Guide
Page 8
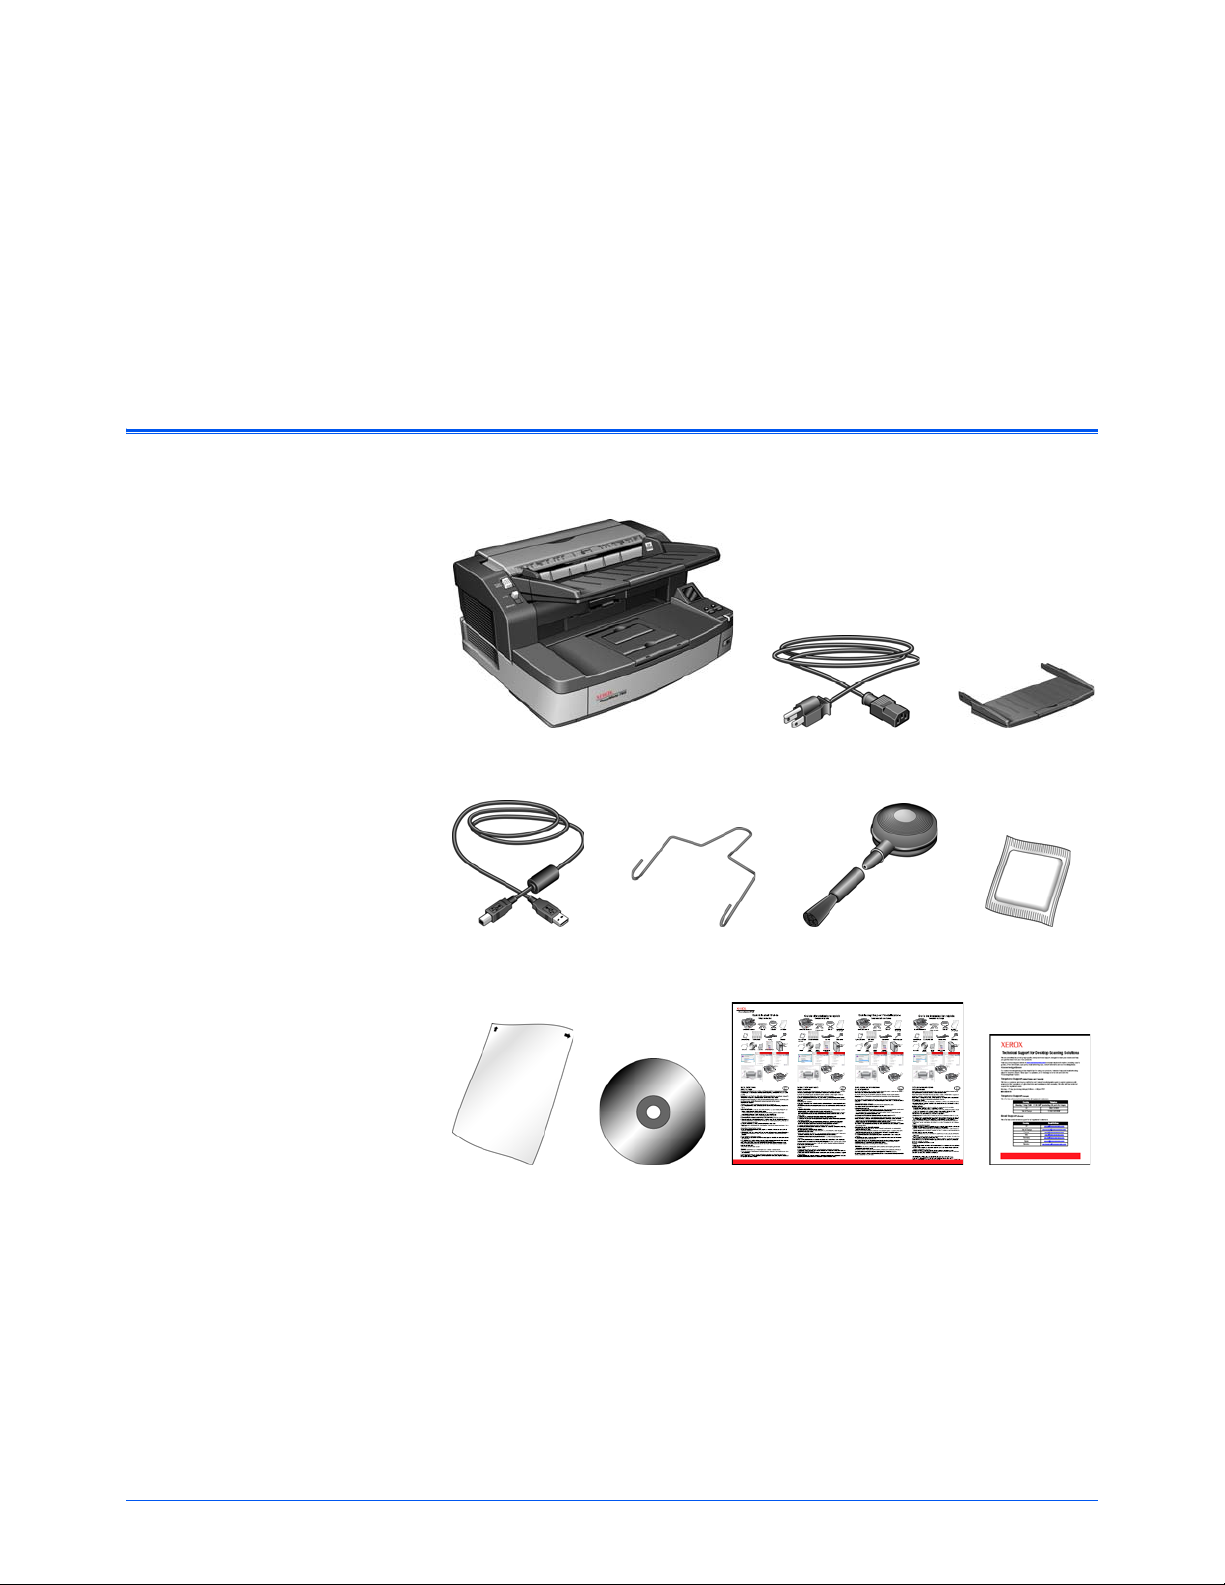
What’s in the Box
DocuMate 765 Scanner
Blower Brush
Input Tray
Wire frame Roller Cleaning
Paper
Power Cord
USB Cable
Installation DVD Quick Install Guide Technical
Support Card
Shading paper
Welcome
Your new Xerox DocuMate 765 scanner can quickly scan single-sided or
double-sided stacks of documents and place their images on your
computer.
Before proceeding, check the contents of the box. If items are missing or
damaged, contact the dealer where you purchased the scanner.
DocuMate 765 Scanner User’s Guide 1
Page 9
Welcome
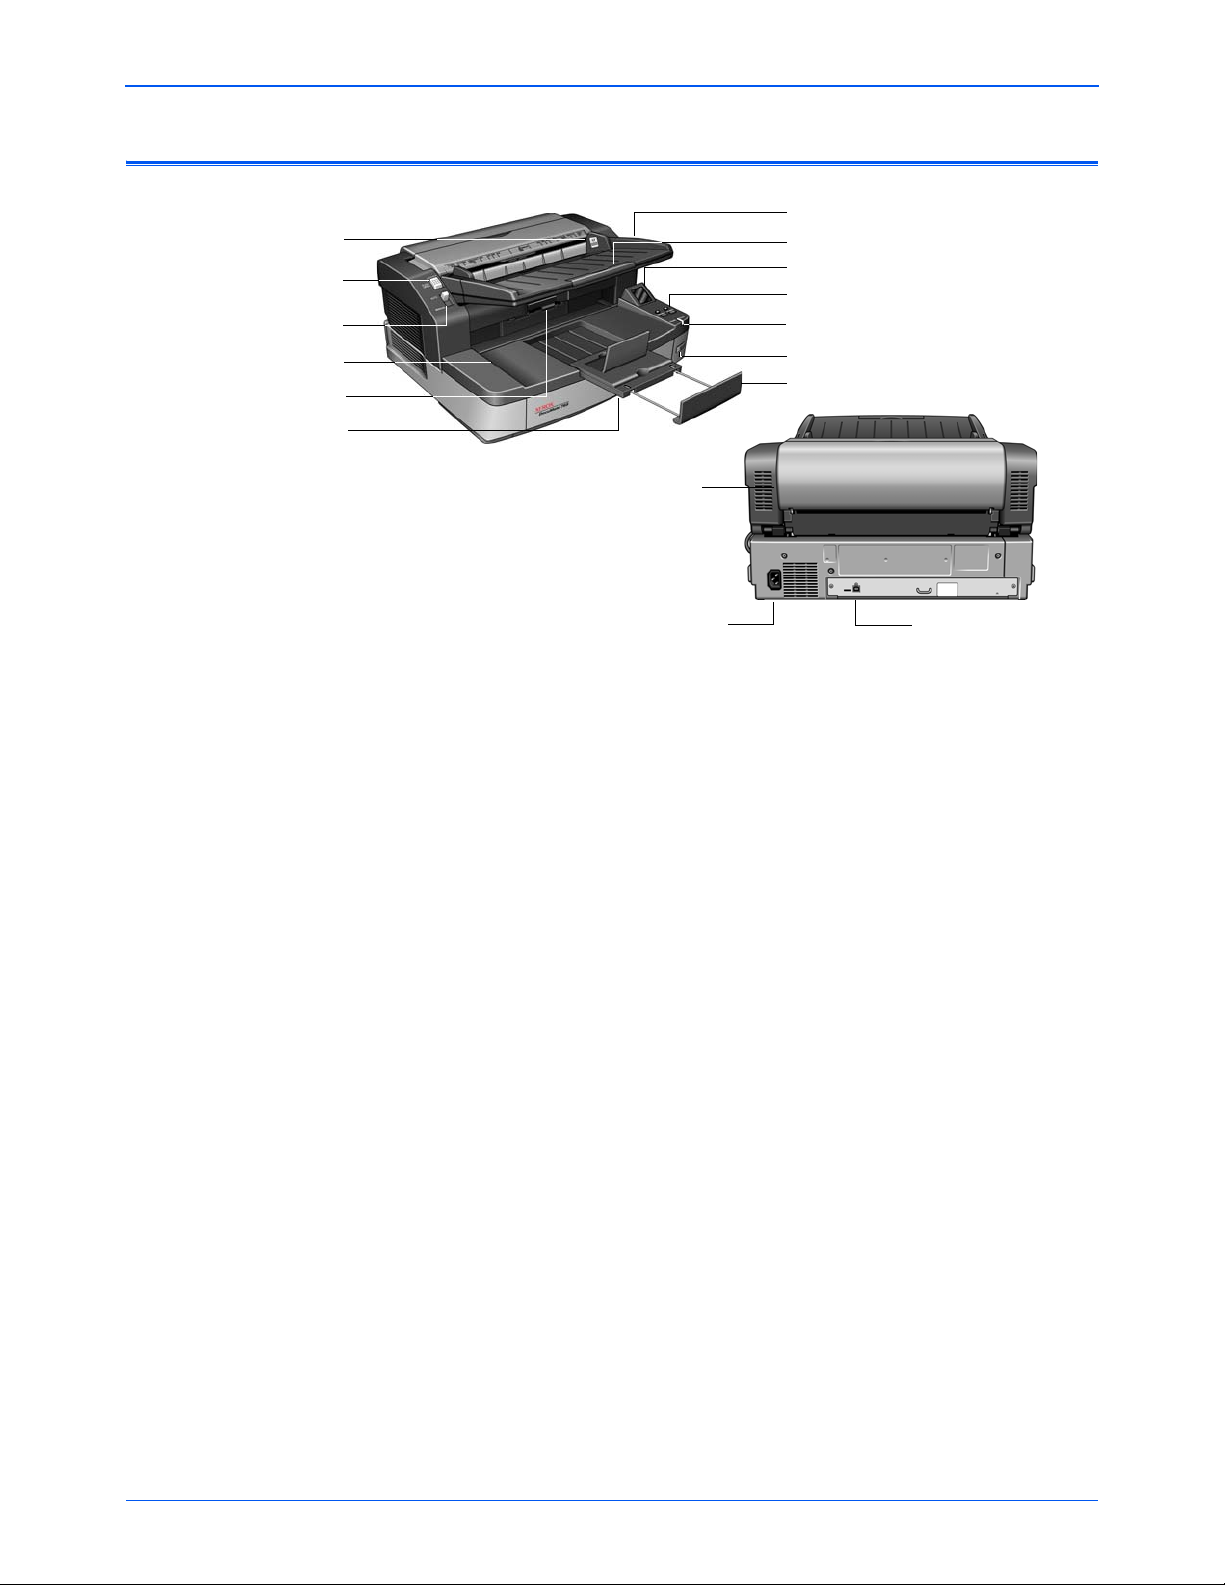
Output tray extension
ADF cover release
Power switch
USB port
Power jack
Status light
LCD display
One Touch buttons
Input tray extension
Output tray
Input tray
Paper feed switch
Paper guides
Exit door release
Paper stop
Imprinter door
The Xerox DocuMate 765 Scanner
Input tray—Holds paper in the scanner.
Input tray extension—Extends to support various paper sizes.
Paper guides—Adjusts to fit paper width.
LCD display—Shows the current scan setting.
One Touch buttons—Press to start scanning.
Status light—Shows the scanner’s status. Refer to the Troubleshooting
section for additional details.
Power switch—Turns the power on and off.
ADF cover release—Press to open the Automatic Document Feeder
(ADF) cover.
Paper feed switch—Switches between automatic and manual feed
scanning.
Output tray—Holds documents in place after being fed through the
scanner.
Output tray extension—Extends to support various paper sizes.
Paper stop—Holds paper in the exit tray.
Exit door release—Opens the scanner.
Imprinter door—Open to change the printer cartridge.
Power jack—Connects the power cord to the scanner.
Universal Serial Bus (USB) port—Connects the scanner to the
computer.
2 DocuMate 765 Scanner User’s Guide
Page 10

What You Need
Welcome
IBM-compatible Intel Pentium™ 4 PC, or AMD equivalent with:
• A DVD-ROM drive
• An available Universal Serial Bus 2.0 (USB) port
•Microsoft
32-bit XP (Service Pack 2 or 3), 32-bit or 64-bit Vista
• Windows 2000 and XP: Minimum of 512 megabytes (MB) of internal
memory (RAM)
Windows Vista: Minimum of 1 gigabyte (GB) of internal memory
(RAM)
• Windows 2000: 350 MB minimum of free hard disk space
Windows XP and Vista: 500 MB minimum of free hard disk space
®
Windows® operating system: 2000 (Service Pack 4),
A VGA or SVGA Monitor
The recommended settings for your monitor are:
Documentation
• High Color (16-bit) or True Color (24-bit or 32-bit)
• Resolution set to at least 800 x 600 pixels
The following documentation is provided with your scanner:
• Quick Install Guide—Abbreviated installation instructions.
• Xerox DocuMate 765 Scanner User’s Guide—On the scanner
installation disc; contains detailed installation, scanning,
configuration, and maintenance information.
• Online Help—For the scanner configuration, TWAIN and WIA
interfaces.
DocuMate 765 Scanner User’s Guide 3
Page 11

Installation
Before You Begin
Installation
Installation is a quick, three-step process:
1. Unpack and assemble the scanner
2. Install the software
3. Connect the scanner
Please make sure of the following before you begin installation:
• The information in this guide may cover software not provided
with the scanner you purchased. Disregard any information
about the software not applicable to your chosen product.
Please visit our web site at www.xeroxscanners.com for the
latest software updates for your Xerox DocuMate 765 scanner.
• If your computer has AntiVirus or Ant iSpyware sof tware running,
you may see messages during installation asking you to allow
the installation to proceed. Although the messages will differ
based on the software your computer is running, in each case
you should allow the installation to proceed . Alternatively, you
can turn off the AntiVirus or AntiSpyware software before
installing your scanner. But if you do, make sure to turn it back
on again when installation is fi nished.
• If you already have a scanner connected to your computer, you
may need to remove its driver programs to properly install and
operate your Xerox DocuMate 765 scanner. Please see
“Troubleshooting” on page 130 for more information, and
“Uninstalling Your Scanner” on page 133 for basic instructions
to uninstall driver programs. Also see the User’s Guide that you
received with your other scanner for specific instructions.
• If your computer is running Windows Vista, you may see the
Vista User Account Control scr een asking you to confirm system
changes. Click the continue button to allow the installation to
proceed.
4 DocuMate 765 Scanner User’s Guide
Page 12
Step 1: Unpack and Assemble the Scanner
Use care when unpacking, moving and assembling the scanner. Follow
these instructions to prevent injury and damage to the scanner.
• Always have at least two people carry the scanner , lifting th e scanner
up from underneath.
• Keep at least 15 inches of space on every side of the scanner for the
input and exit tray extensions, performing maintenance, and to have
sufficient air flow for ventilation.
• Use a desk or table that can support the weight of the scanner, do not
place the scanner on a cloth covered surface.
Unpack the scanner:
1. Remove the scanner from the shipping box, verify all parts listed on
page 1 are in the box.
We recommend that you keep the original packing materi als in case
you need them later.
2. Place the scanner on a level surface near the computer.
3. Remove all shipping tape from the top and side of the scanner.
Installation
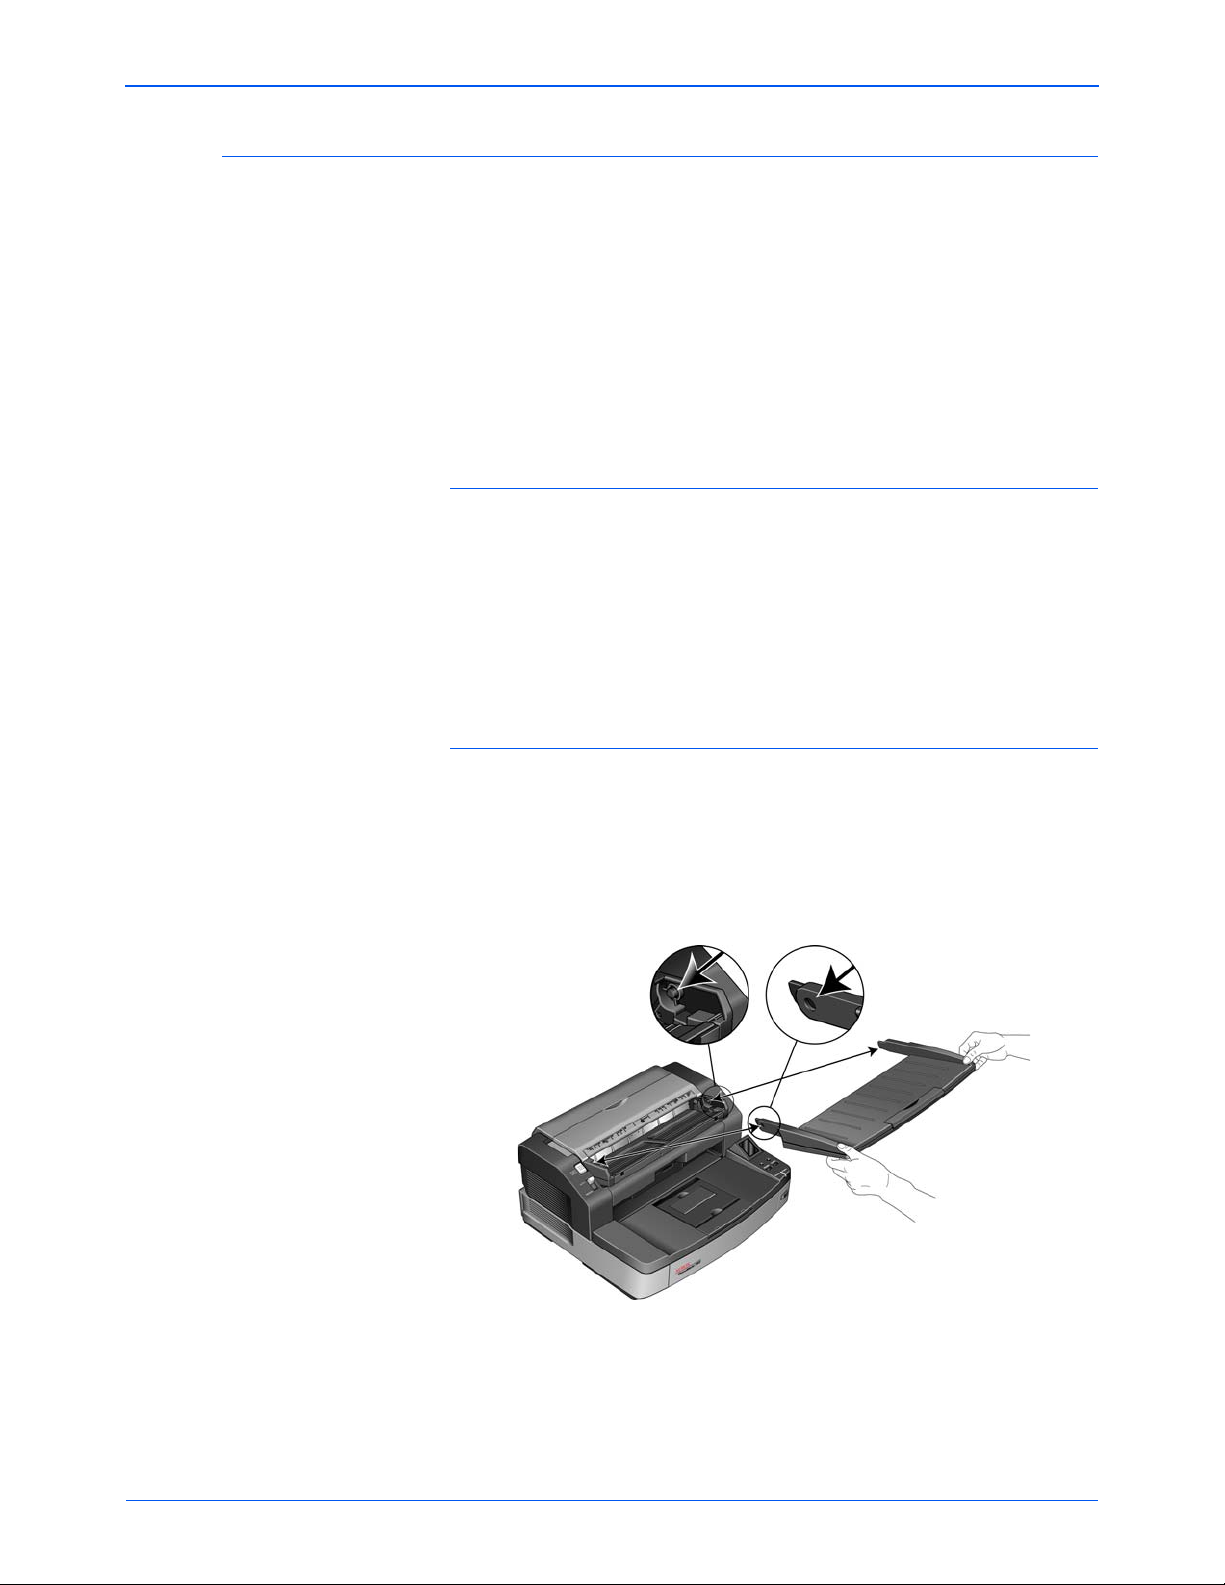
Attach the input tray:
1. Align the holes on the input tray arms with the pins on the scanner.
2. Insert the pin on the left side of the scanner into the hole on the left
input tray arm.
3. Apply slight pressure to the right arm of the input tray and insert the
pin on the scanner into the hole in the tray arm.
DocuMate 765 Scanner User’s Guide 5
Page 13
Installation
Step 2: Install the Software
1. Start Microsoft Windows and make sure no other applications are
running.
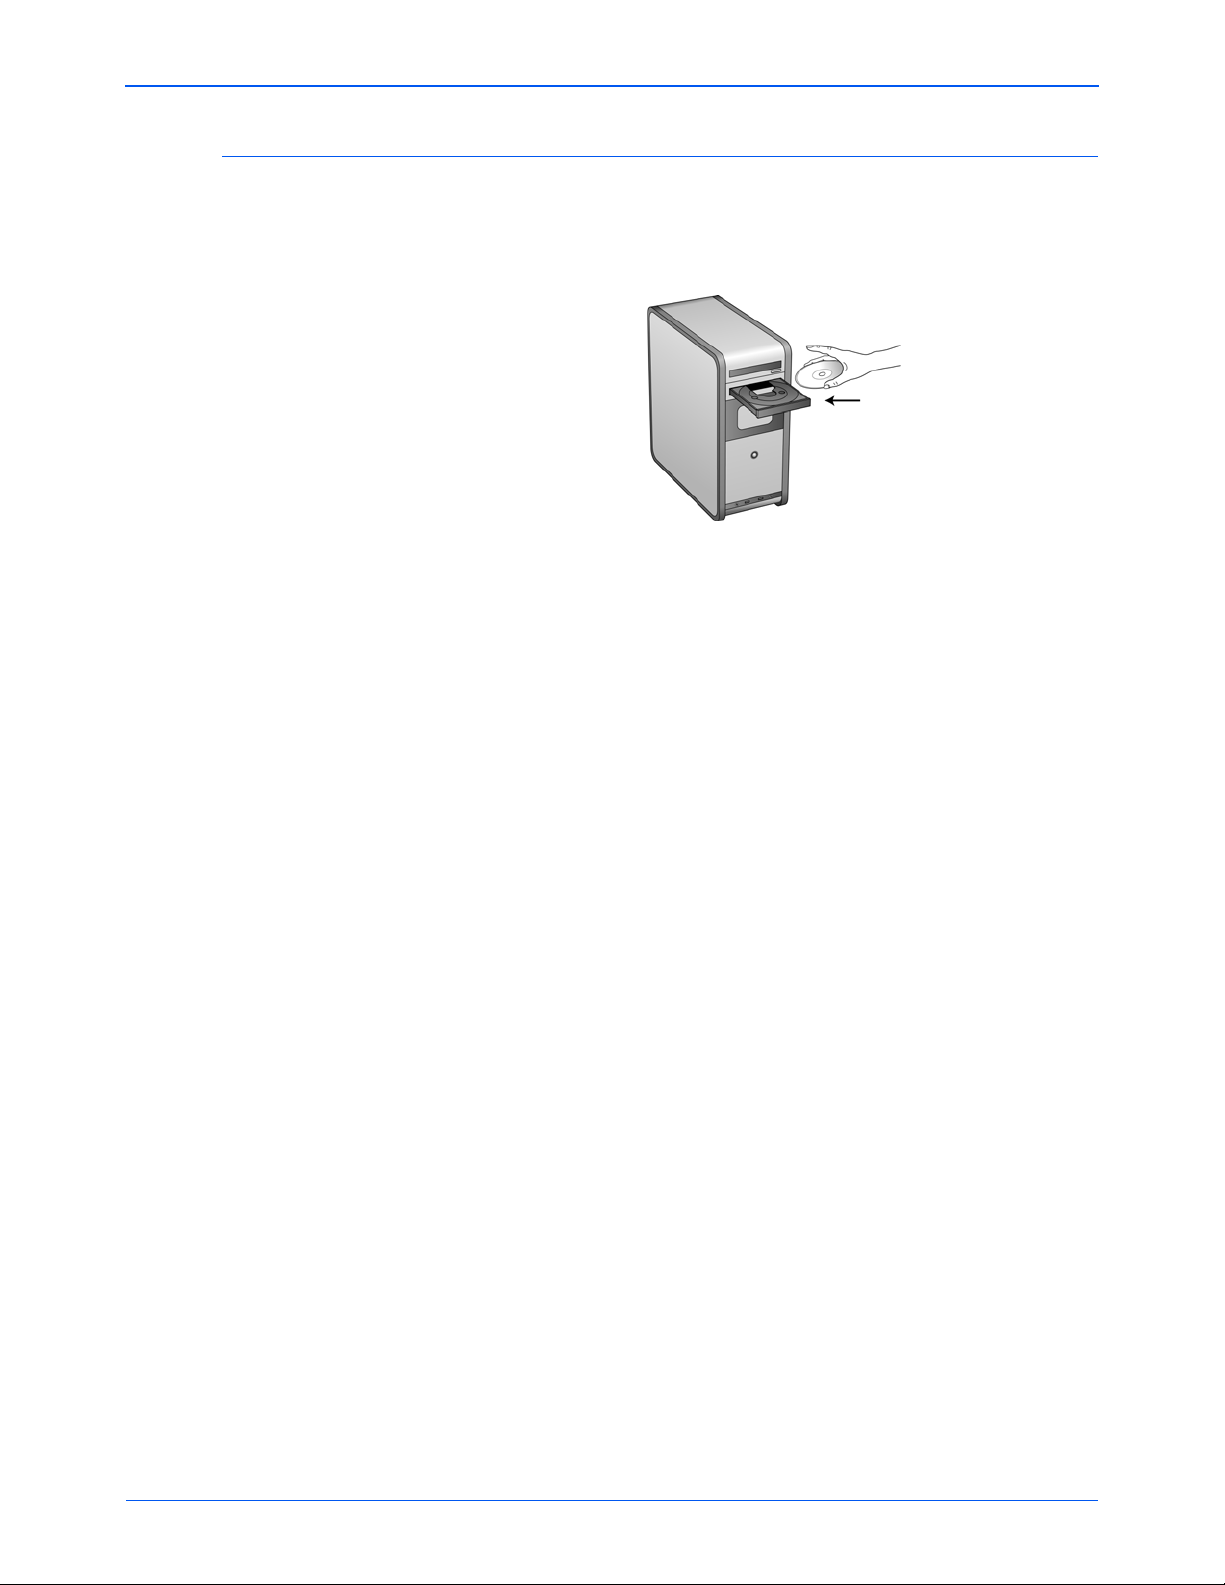
2. Insert the installation disc into your computer's DVD-ROM drive.
The disc automatically starts and the Select Language window
opens.
3. Select a language from the list of available languages.
The disc’s main menu opens in the language you selected.
NOTE: If the disc does not start, check the following:
• Make sure the DVD drive’s door is completely shut.
• Make sure the disc was inserted in the drive in the proper direction
(label side up).
To launch the disc manually:
• Open the Windows option for your computer’s disk drives from the
Windows start menu.
• Double-click the icon for your DVD-ROM drive.
• The Installation menu for the disc should now open.
If the menu does not open:
• From the list of files on the disc, double-click the file named
START32.EXE.
6 DocuMate 765 Scanner User’s Guide
Page 14
Installation
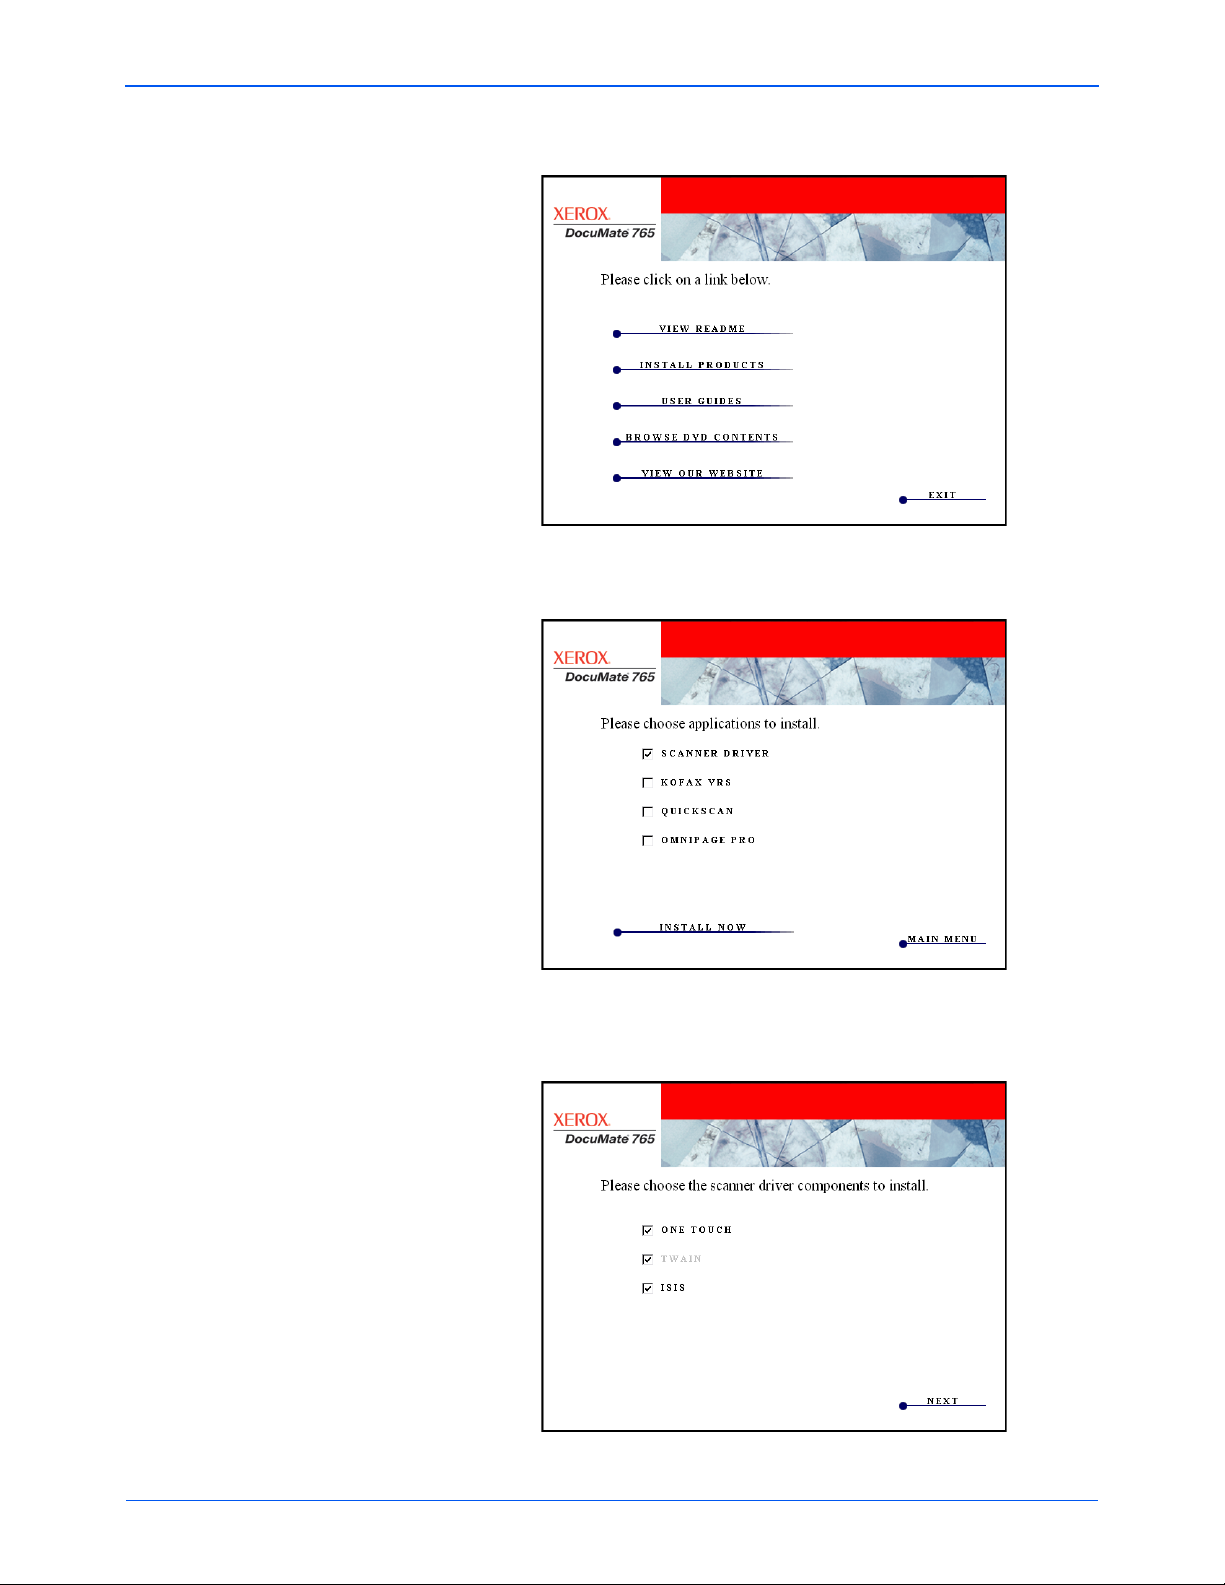
4. On the Installation menu, select Install Products.
5. Make sure the box for Scanner Driver is checked then click Install
Now.
6. The next window shows the scanner driver options available for you
to install.
DocuMate 765 Scanner User’s Guide 7
Page 15

Installation
Options Description
One Touch The One Touch software is installed, which is the
necessary software for the buttons on your scanner to
work.
TWAIN The TWAIN driver is installed. This option is always
selected and disabled, the TWAIN driver must be
installed with your scanner. You can scan from TWAIN
scanning applications such as OmniPage®. Selecting
only the TWAIN driver to install means that you will not
be able to use the scanner’s buttons.
ISIS The ISIS driver is installed. You can scan from ISIS
scanning applications such as QuickScan™. Selecting
only the ISIS and TWAIN drivers to install means that
you will not be able to use the scanner’s buttons.
NOTE: If your computer is running Windows XP or Windows Vista,
Microsoft’s Windows Image Acquisition (WIA) interface for scanning is
always available regardless of your selection in this window.
8. On the Xerox License Agreement window, read the license
agreement. If you accept the terms, select I Agree then click Next.
If you choose not to accept the license agreement, the installation will
terminate and the scanner driver will not be installed.
The scanner driver installation will now begin. During installation of
scanner’s drivers you will be prompted to choose the location for the
installation files. We recommend that you keep the defaults as you
proceed through the installation.
TWAIN Driver Installation
1. The TWAIN driver installation will start first. Click Next on the
Welcome window
8 DocuMate 765 Scanner User’s Guide
Page 16
Installation
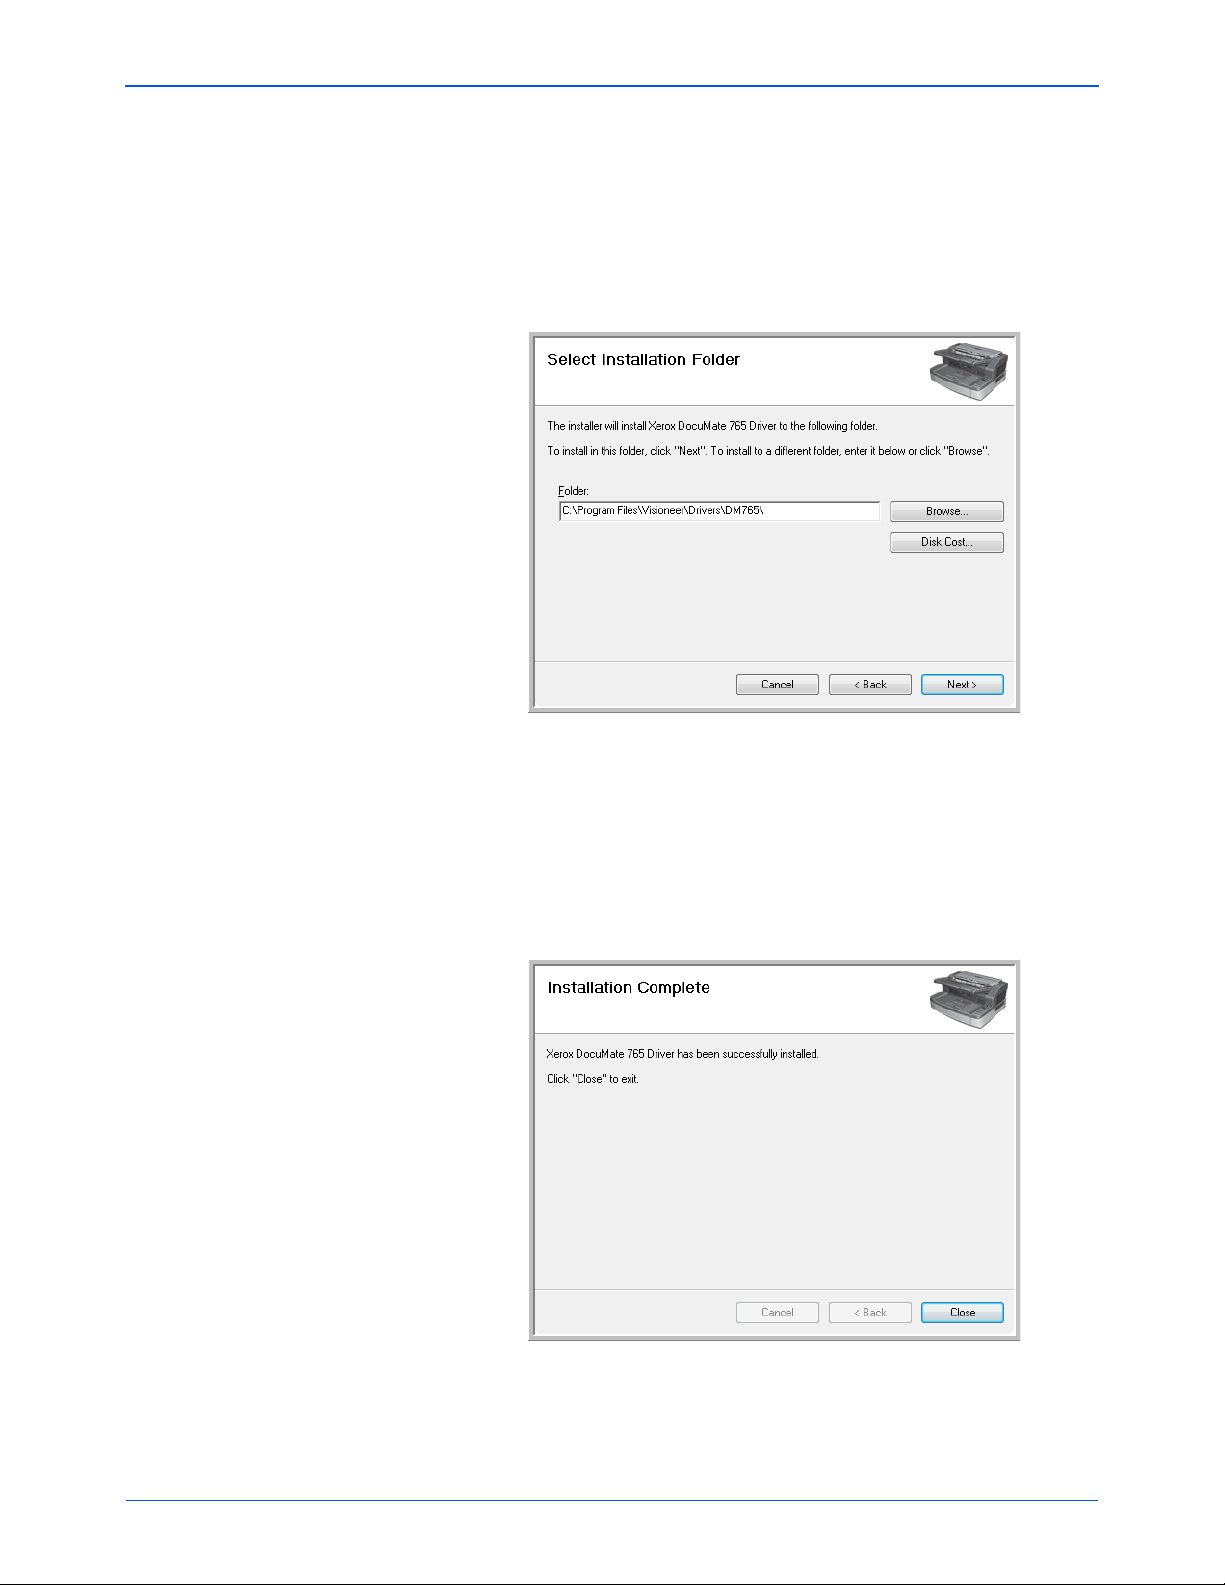
2. The next screen lets you choose where the installation files are going
to be on your computer. Click on Browse... to change the location
where the files are installed. You can also choose to install the
scanner just for your Windows profile or, for every profile on your
computer to be able to use the scanner.
We recommend that you keep the defa ult options on this window and
just click on Next to proceed with the installation.
3. The TWAIN driver will now be installed on your computer.
4. At the Installation Complete window you can now plug the scanner
into your computer , see “S tep 3: Connect the Scanner” on page 16 for
instructions.
After the TWAIN driver has been installed you can plug in your
scanner at any time. If you selected other driver options to install, you
can also wait to plug in the scanner after all installations wrap up.
5. Click Close on the Installation Complete window.
DocuMate 765 Scanner User’s Guide 9
Page 17
Installation
User Utility Installation
The User Utility installation will automatically start after you close the
TWAIN installation. The User Utility is a software diagnostic and
maintenance software that you can use for monitoring your scanner
hardware.
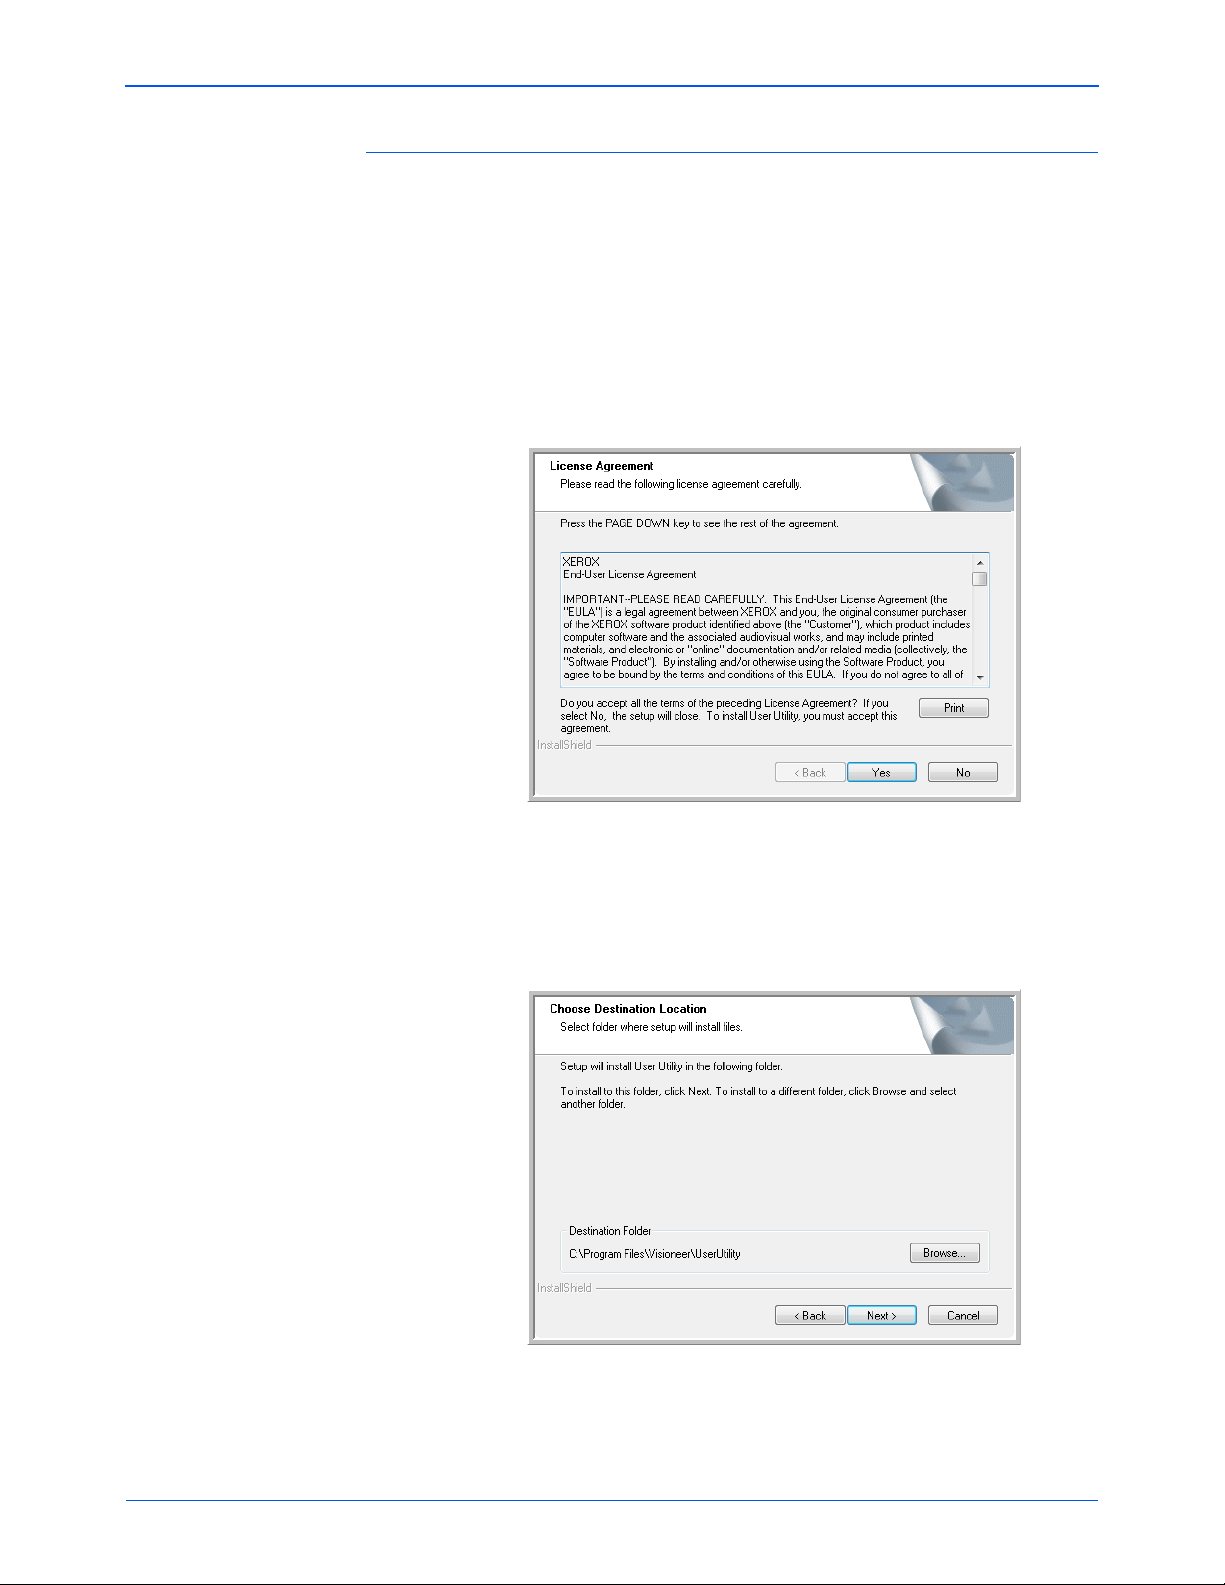
1. On the Xerox User Utility License Agreement window, read the
license agreement. If you accept the terms, select Yes to accept the
agreement and continue with the installation.
If you choose not to accept the license agreement, the installation will
terminate and the User Utility will not be installed.
2. The next screen lets you choose where the installation files are going
to be on your computer. Click on Browse... to change the location
where the files are installed.
We recommend that you keep the defa ult options on this window and
just click on Next to proceed with the installation.
10 DocuMate 765 Scanner User’s Guide
Page 18
Installation
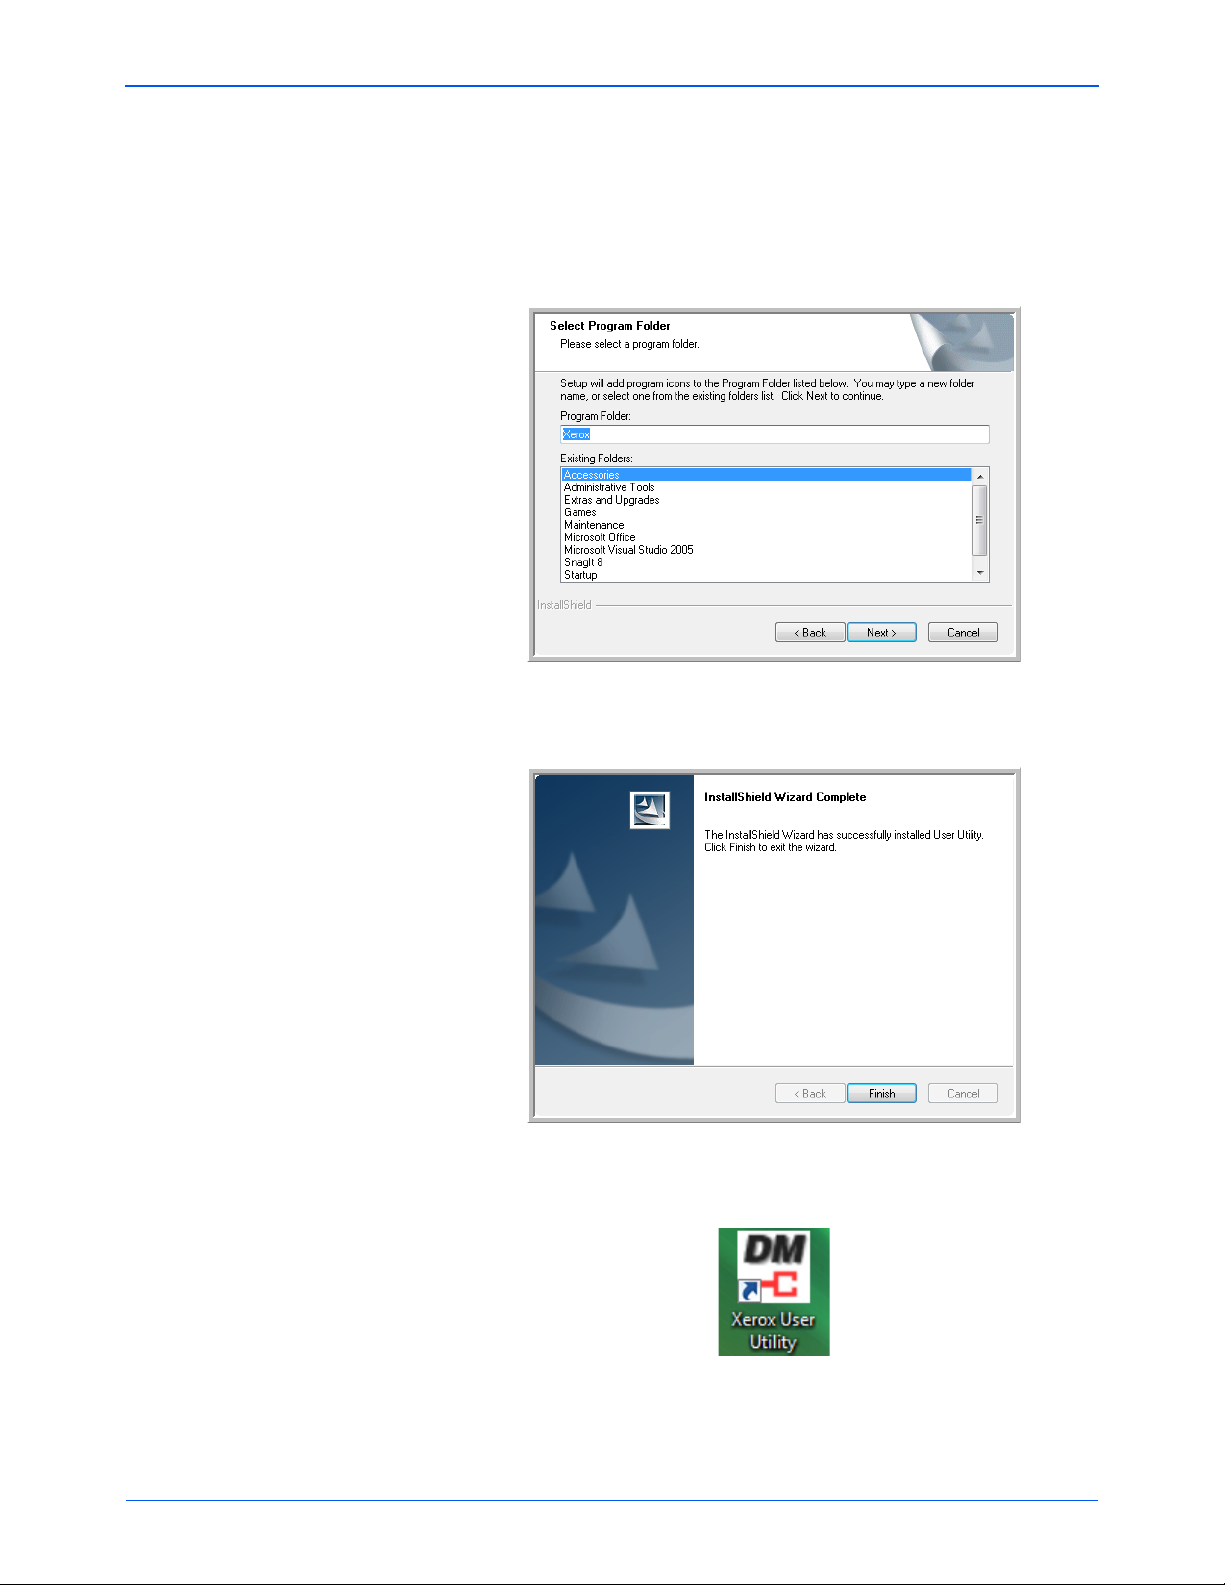
3. The next screen lets you change the Program Files folder name and
where the program appears in your Windows Start Programs list.
The default options on this window will install put the shortcut icon in
your Windows All Programs list in the Xerox folder. We recommend
that you keep the default options on this window and just click on
Next to proceed with the installation.
4. Click on Finish on the Installation Complete window to close the
installation window.
5. A shortcut icon for the User Utility will be on your Windows desktop
and in the Windows Start All Programs menu.
DocuMate 765 Scanner User’s Guide 11
Page 19
Installation
One Touch Installation
The One Touch installation will automatically launch after the User Utility
is finished.
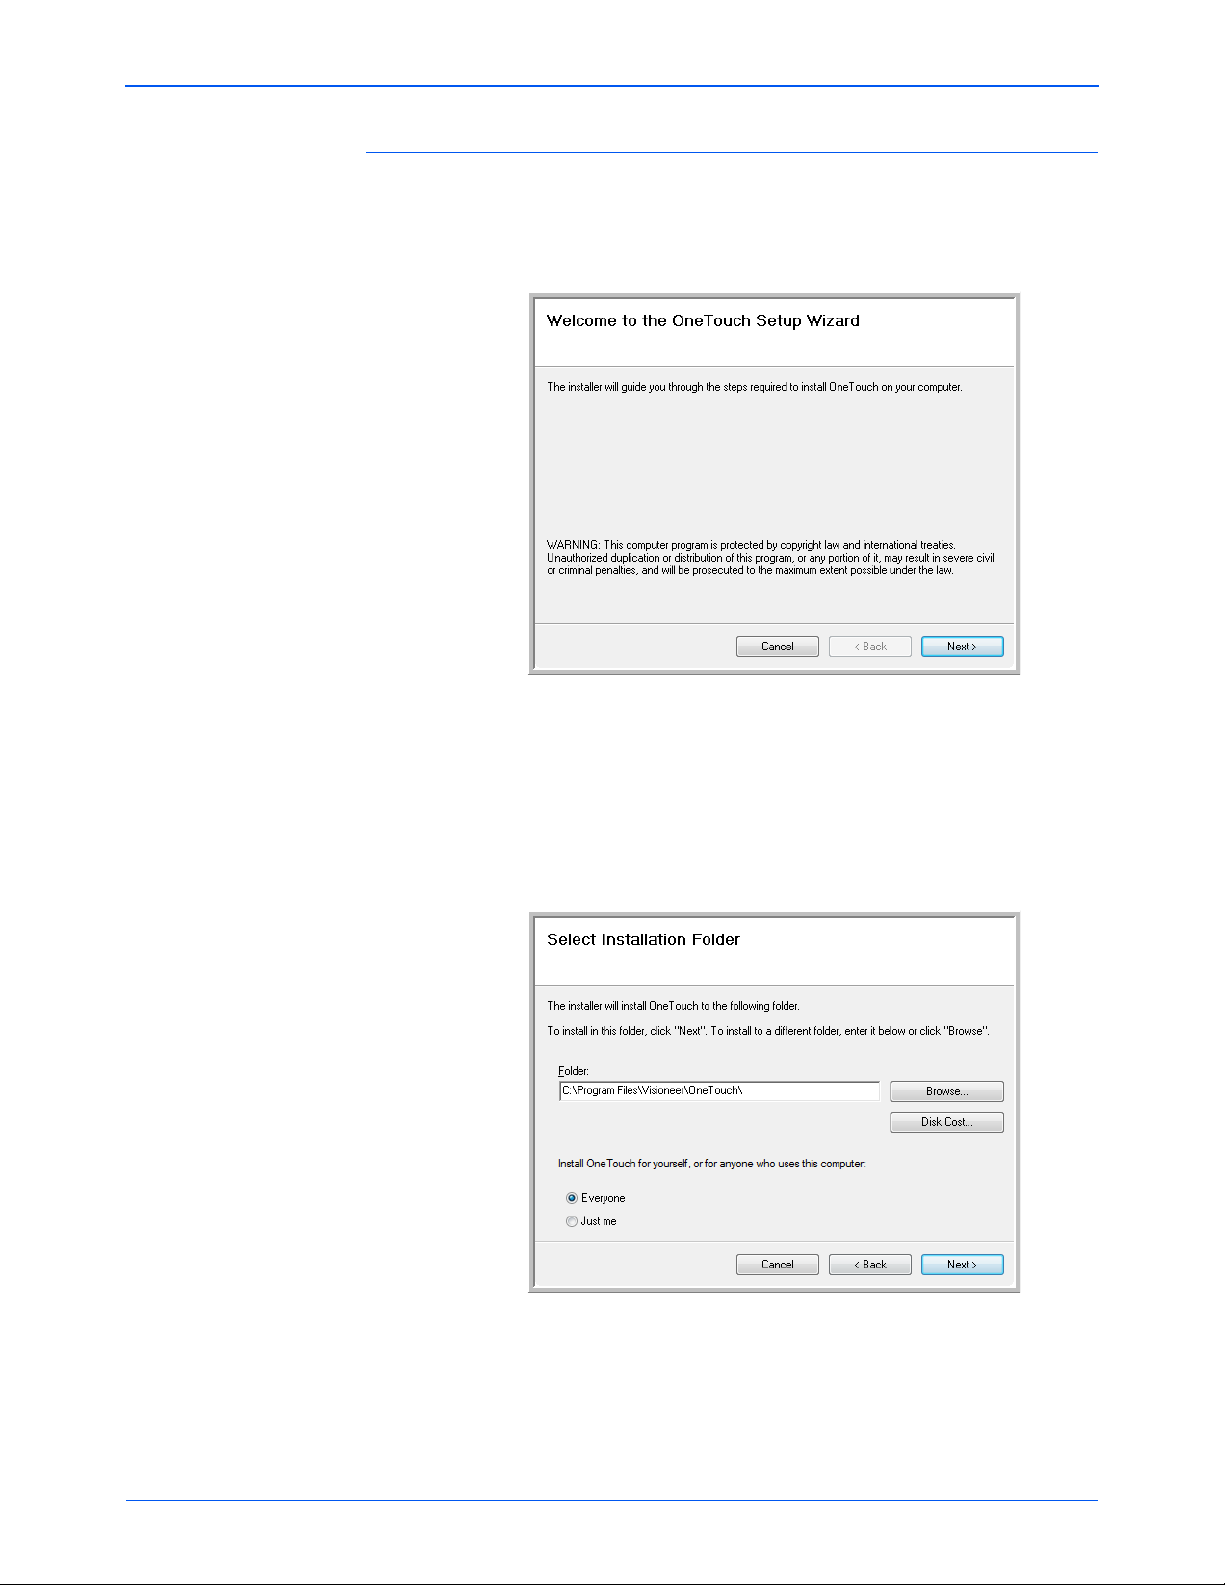
1. Click Next on the Welcome window to start the installation.
2. The next screen lets you choose where the installation files are going
to be on your computer. Click on Browse... to change the location
where the files are installed. You can also choose to inst all One Touch
just for your Windows profile or, for every profile on your computer to
be able to use the scanner.
We recommend that you keep the defa ult options on this window and
just click on Next to proceed with the installation.
12 DocuMate 765 Scanner User’s Guide
Page 20
Installation
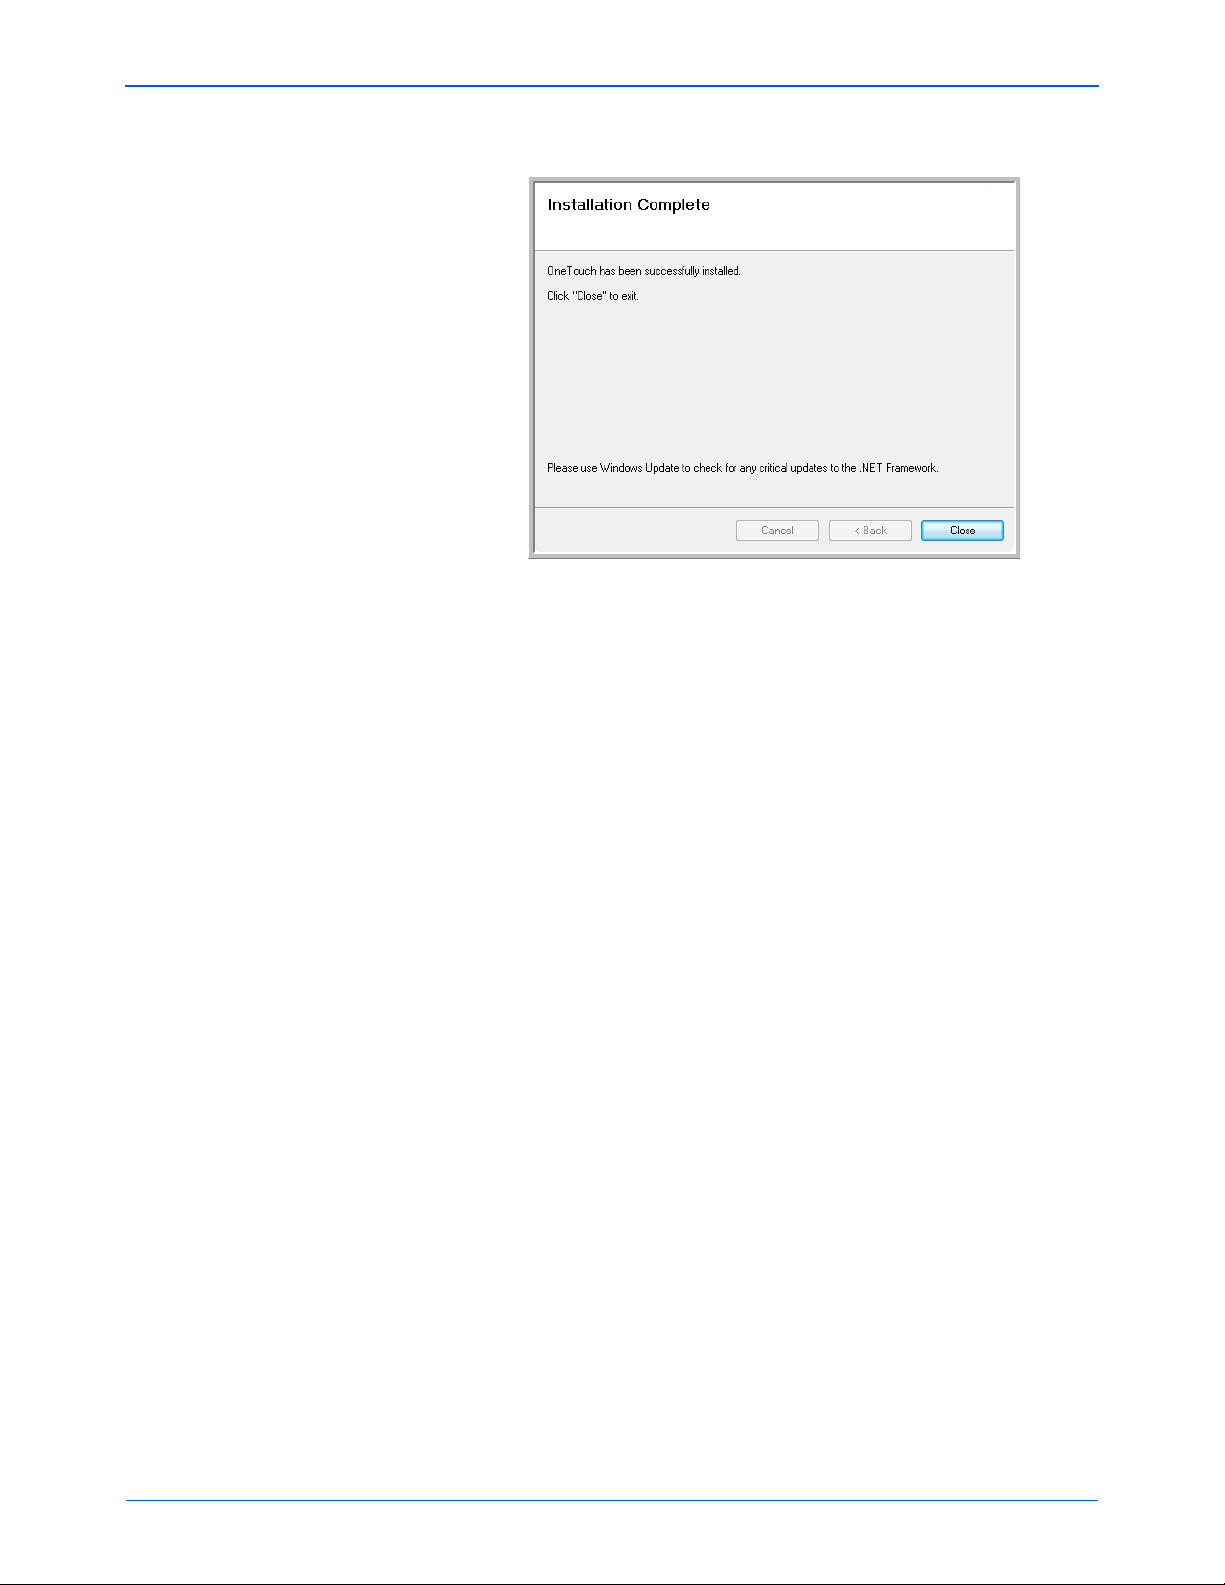
3. The One Touch software will now be installed on your computer.
4. Click Close on the Installation Complete window.
DocuMate 765 Scanner User’s Guide 13
Page 21
Installation
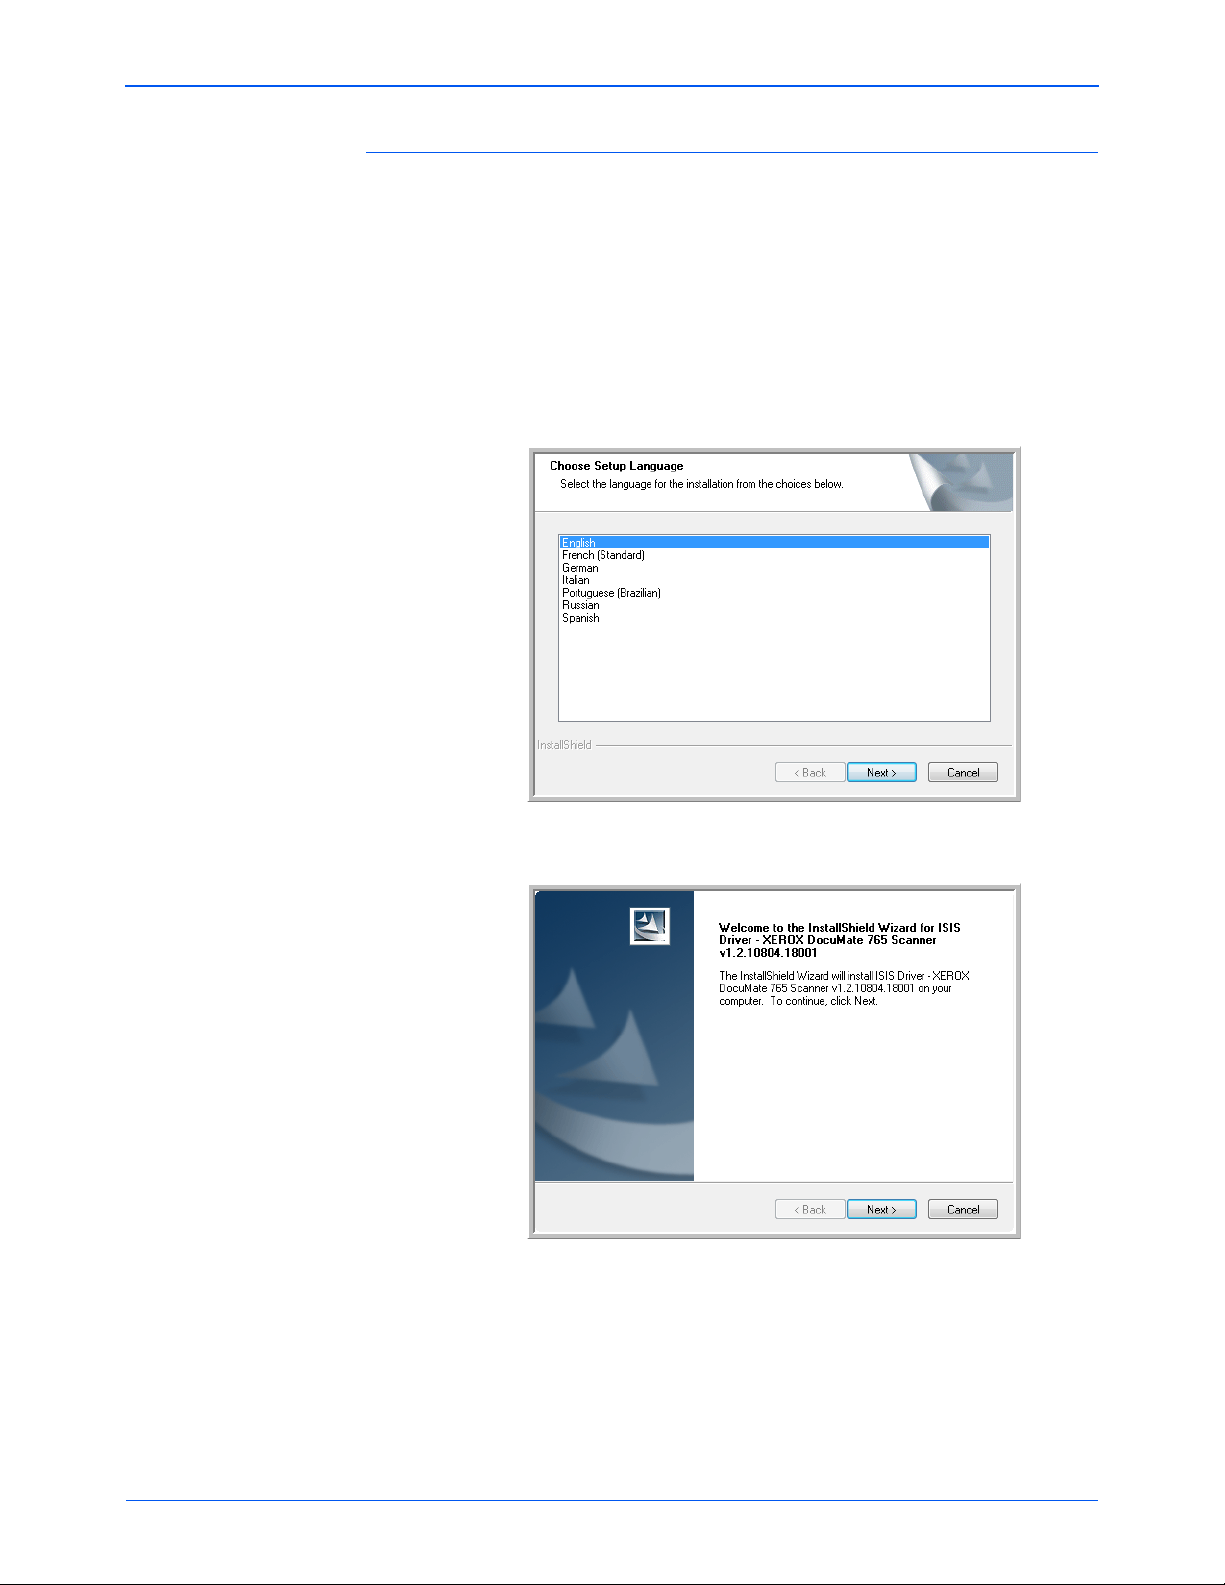
ISIS Driver Installation
If you selected the ISIS driver to install, the installation will launch after the
other programs have finished. For instance, if you only selected TWAIN
and ISIS, after the User Utility finishes installing the ISIS driver will install.
If you selected One Touch to install, the ISIS installation will start after
One Touch is complete.
1. You will first be prompted to select a language for the ISIS driver. The
language selection on this screen only applies to the ISIS scanning
interface.
Select the language you want to use then click on Next.
2. Click on Next in the ISIS Installation Welcome window.
14 DocuMate 765 Scanner User’s Guide
Page 22
Installation
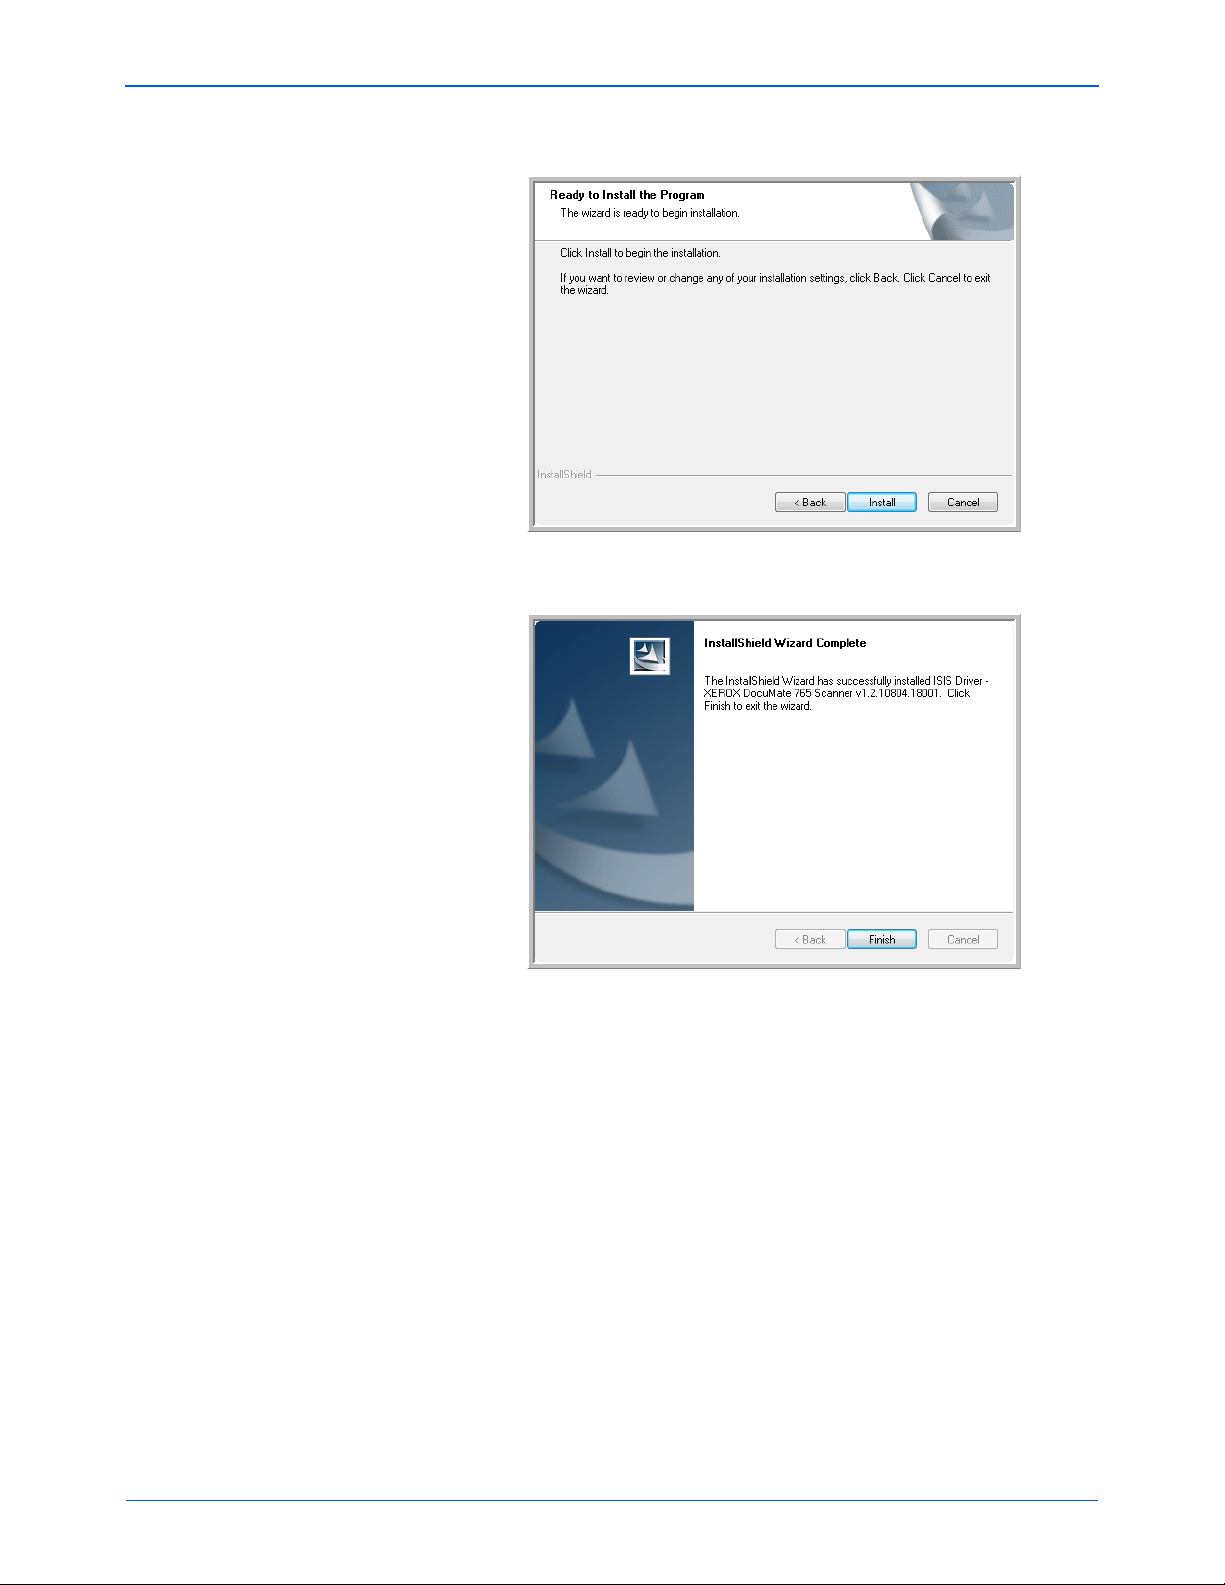
3. Click on Install to begin the ISIS driver installation.
4. Click on Finish to close the ISIS installation complete window.
NOTE: After the scanner driver installation is complete, any other
software you chose to install will automatically begin installing after the
driver is complete. If you did not plug in the scanner after the TWAIN
driver was installed, you can plug it in now or after you finish installing the
other software.
DocuMate 765 Scanner User’s Guide 15
Page 23
Installation
USB
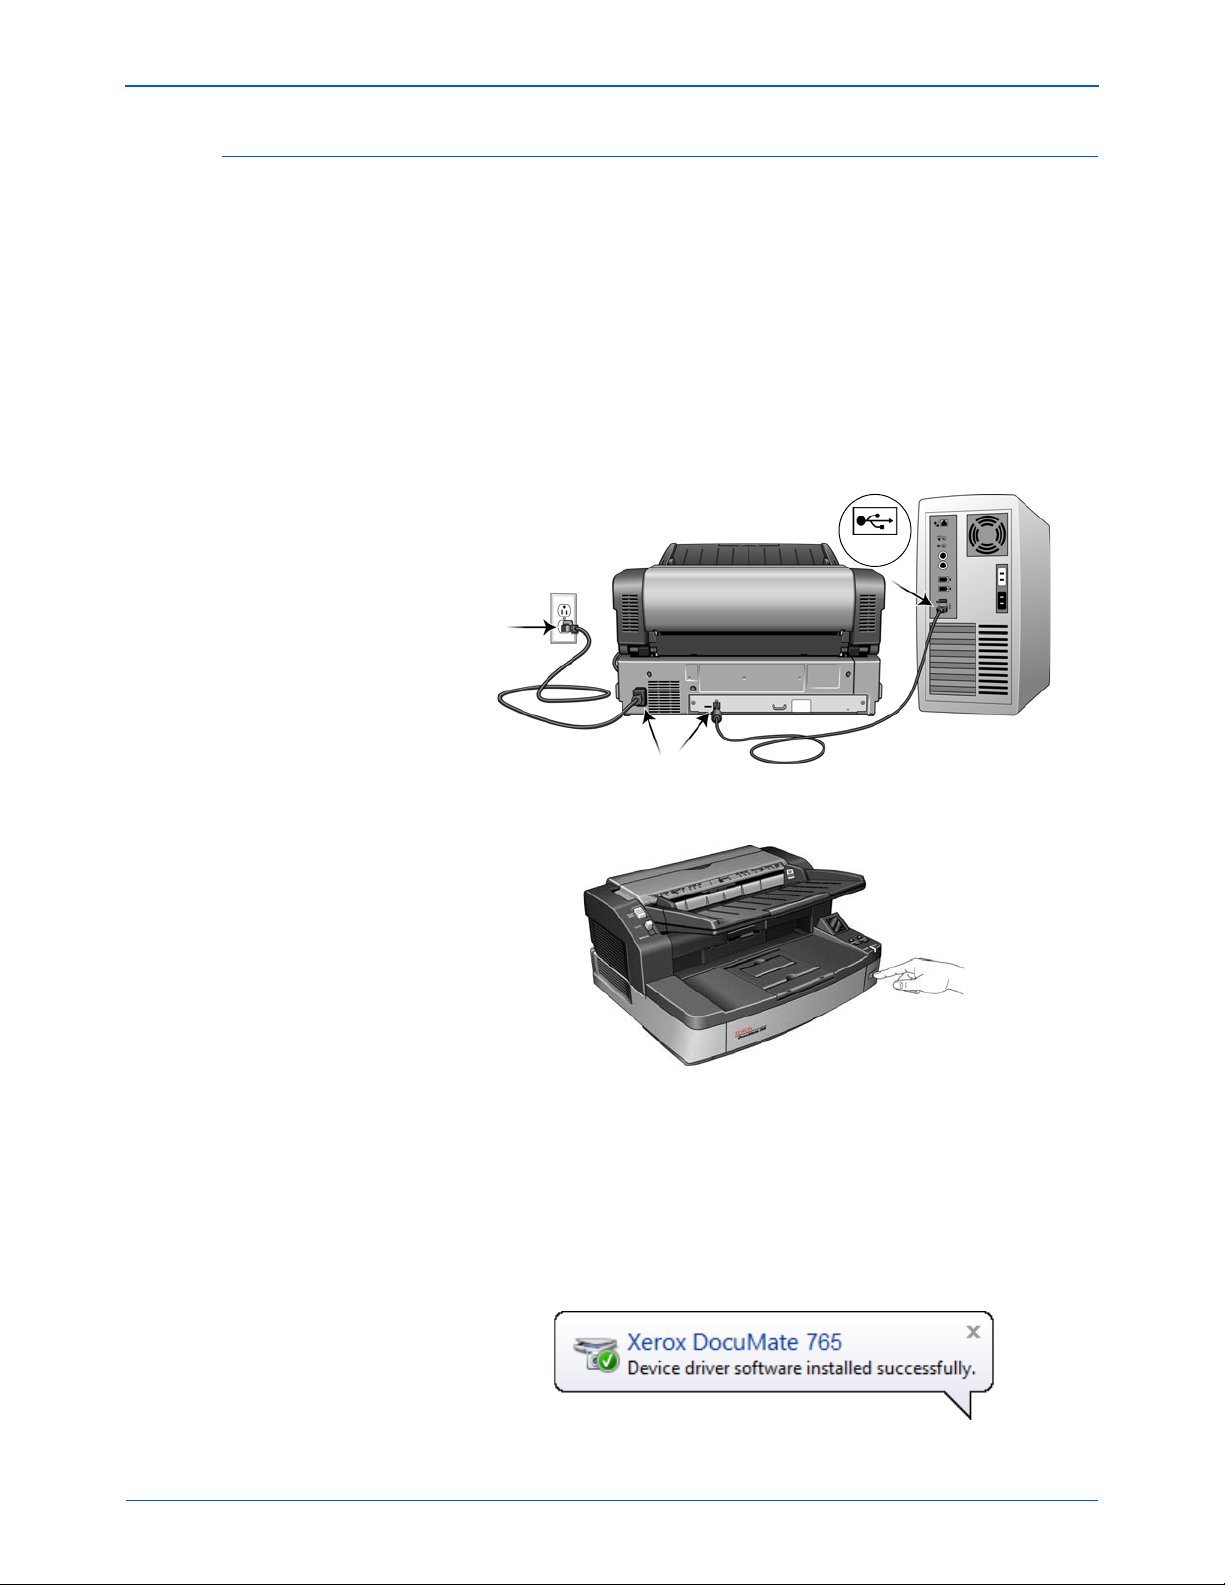
Step 3: Connect the Scanner
NOTE: Only use the power cord included with your scanner. Connecting
any other type of power cord may damage your scanner, and will void its
warranty.
1. Plug the power supply into the power port on the scanner and to a
wall outlet.
2. Remove any protective tape from the USB cable.
3. Plug the USB cable into the USB port on the scanner the n into a USB
2.0 port on the computer.
The DocuMate 765 scanner connects to any available USB p ort.
Check your computer’s manual for USB port locations.
4. Turn on the power switch, located on the front of the scanner.
The status light comes on and flashes indicating that the scanner is
receiving power.
Your computer recognizes that a scanner has been plugged into the
USB port and automatically loads the appropriate software to run the
scanner.
If your computer is running Windows XP or Windows Vista, you will
see a Found New Hardware message similar to the following:
16 DocuMate 765 Scanner User’s Guide
Page 24

Additional Applications Available with Your Scanner
Y our scanner includ es free, additional applications on th e installation disc.
1. Return to the Main Menu on the installation disc and click on Install
Products.
Installation
The free Adobe® Reader® software is located on the DVD with the
User Guides.
2. Click Install Products.
You will see the screen that shows the applications. Applications
already installed have Installed! next to them.
3. On the window shown above, click in the boxes of the other software
you want to install, and click Install Now. Follow the instructions on
the screen to install each of the additional products.
See the following table to decide which software you would like to
install.
DocuMate 765 Scanner User’s Guide 17
Page 25

Installation
Software About the Software
®
Adobe
QuickScan™
Demo
®
Kofax
and
®
Kofax
Scan Demo
OmniPage
Reader
VRS
®
®
Adobe Reader is a stand-alone application that you use to open, view, search,
and print PDF files. The User Guides on your scanner’s installation disc are in
PDF format and require Adobe Reader for you to view and save them.
QuickScan is a standalone, out-of-the-box imaging solution that provides all the
necessary capabilities for high-speed scanning, image enhancement, viewing,
annotation, printing, and storing images, for both black-and-white and color
pages. It uses an ISIS-certified driver for scanning, and includes flexible job
separation and barcode recognition.
The Demo version lets you try the application first.
®
Kofax VRS automatically enhances scanned documents from less than perfect
originals. It is an additional scanning interface that uses patented VRS (Virtual
ReScan) technology, and ensures your scanning is as efficient and easy as
possible, while also improving the quality of the scanned images. Kofax VRS
uses an ISIS-certified driver for scanning.
At the end of the Kofax VRS software installation you may see the message
"SVS001: The VRS installation does not install an ISIS driver for the scanner you
selected. Please install the ISIS driver packaged with your scanner.”
This is not an error, Kofax does not install your scanner’s ISIS driver. Please
disregard this message in the VRS installation and click OK. The Kofax VRS
Certified ISIS
®
driver is installed correctly when you select the ISIS driver to install
with the scanner, please see page 7.
OmniPage Pro provides precision OCR analysis, advanced layout detection, and
Logical Form Recognition
TM
(LFR) technology. Advanced security features
quickly turn office documents and forms into over 30 different PC applications for
editing, searching and sharing. Custom workflows handle large volumes of
documents, and you can use its tools to print to PDF.
18 DocuMate 765 Scanner User’s Guide
Page 26
View the User Guides
Installation
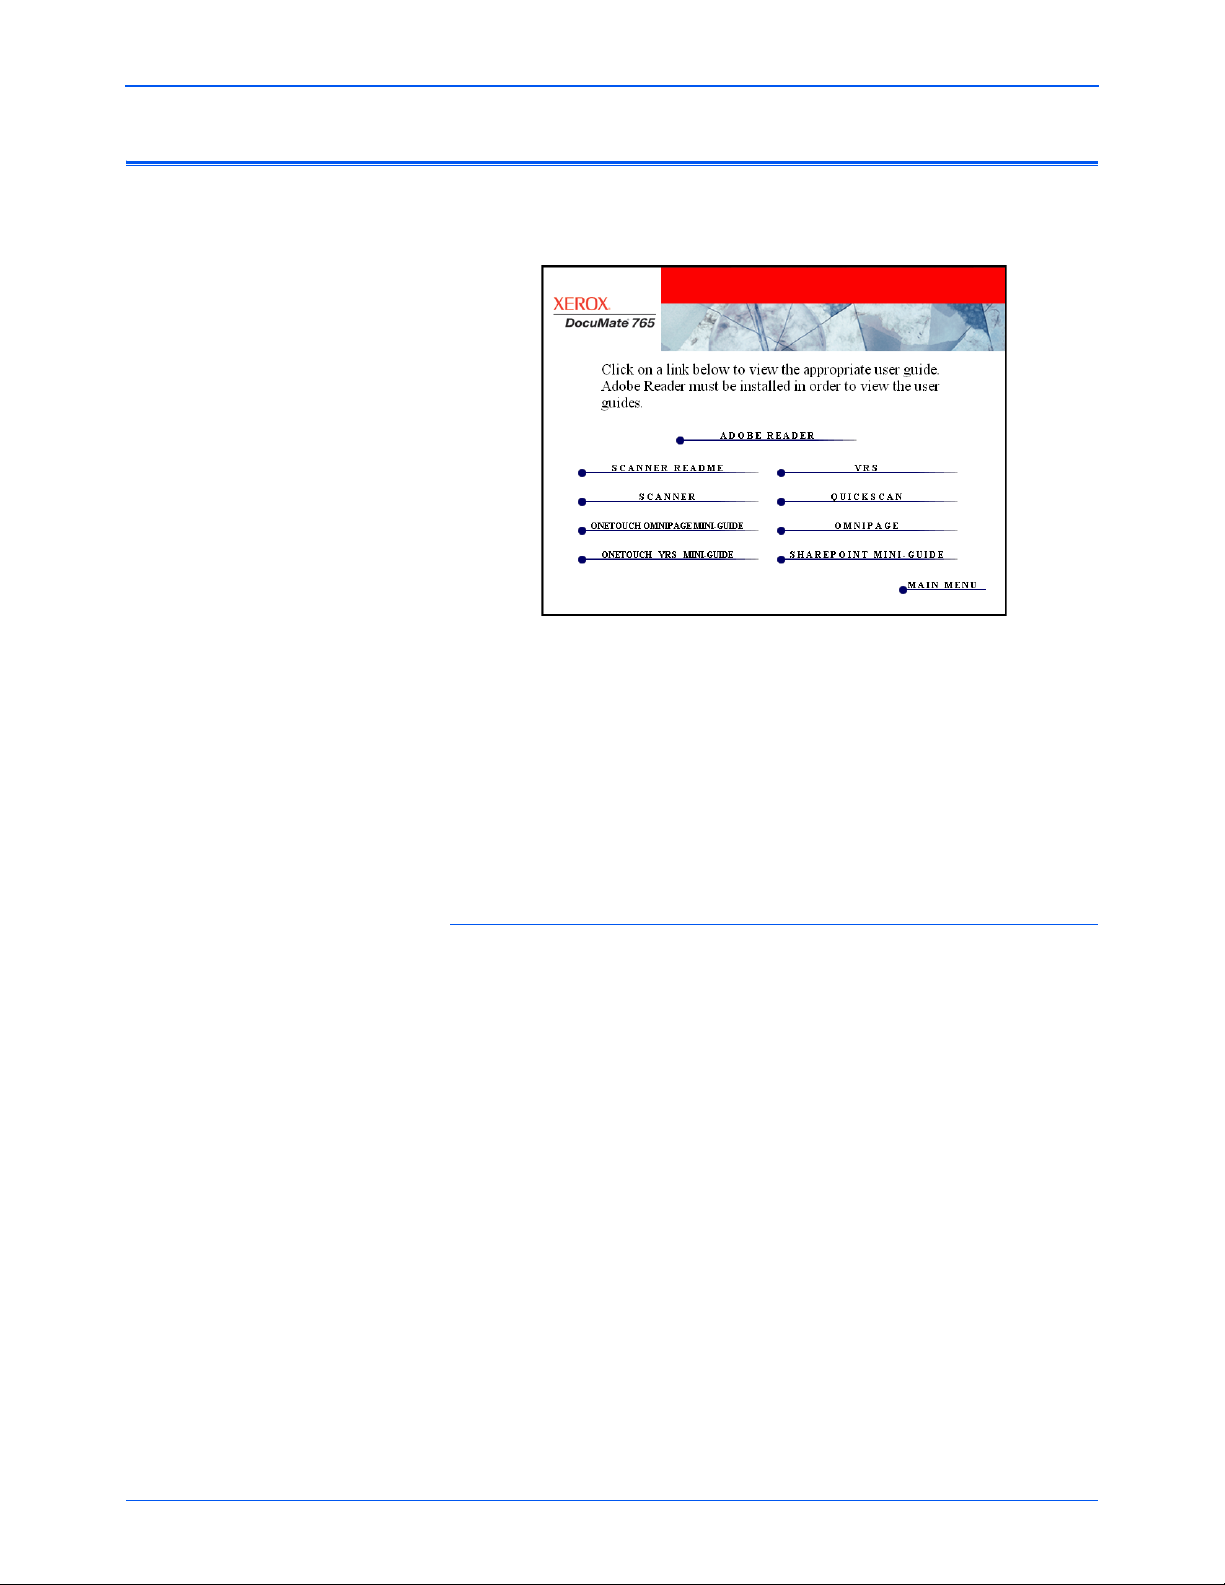
1. To get the documentation for each of the products, return to the
installation disc’s Main Menu window and click User Guides.
2. Click the links of the Guides you want to view.
The User Guides are in Adobe® PDF format. The Scanner Readme
file is in HTML format and will open in any standard browser.
If you need to, click Adobe Reader to install it now. Follow the
instructions on the installation windows.
If your computer already has Adobe Reader installed, please do not
select it unless the version provided on the installation disc is a newer
version than the one currently installed on your computer.
To view and save the User Guides:
1. Click the name of a User Guide you want to view and it will open in
Adobe Reader. Use the Adobe Reader Save command to save that
User Guide on your computer.
2. Return to the User Guides window and repeat the process to open,
view, and save all the other User Guides you want. The Scanner
Readme file has late-breaking news about your scanner.
3. When you’re finished, click Main Menu to return to the Main Menu
window and click Exit.
4. Remove the installation disc and store it in a safe place.
That’s it! Installation is finished and your Xerox DocuMate 765 scanner is
ready to scan.
DocuMate 765 Scanner User’s Guide 19
Page 27
Installation
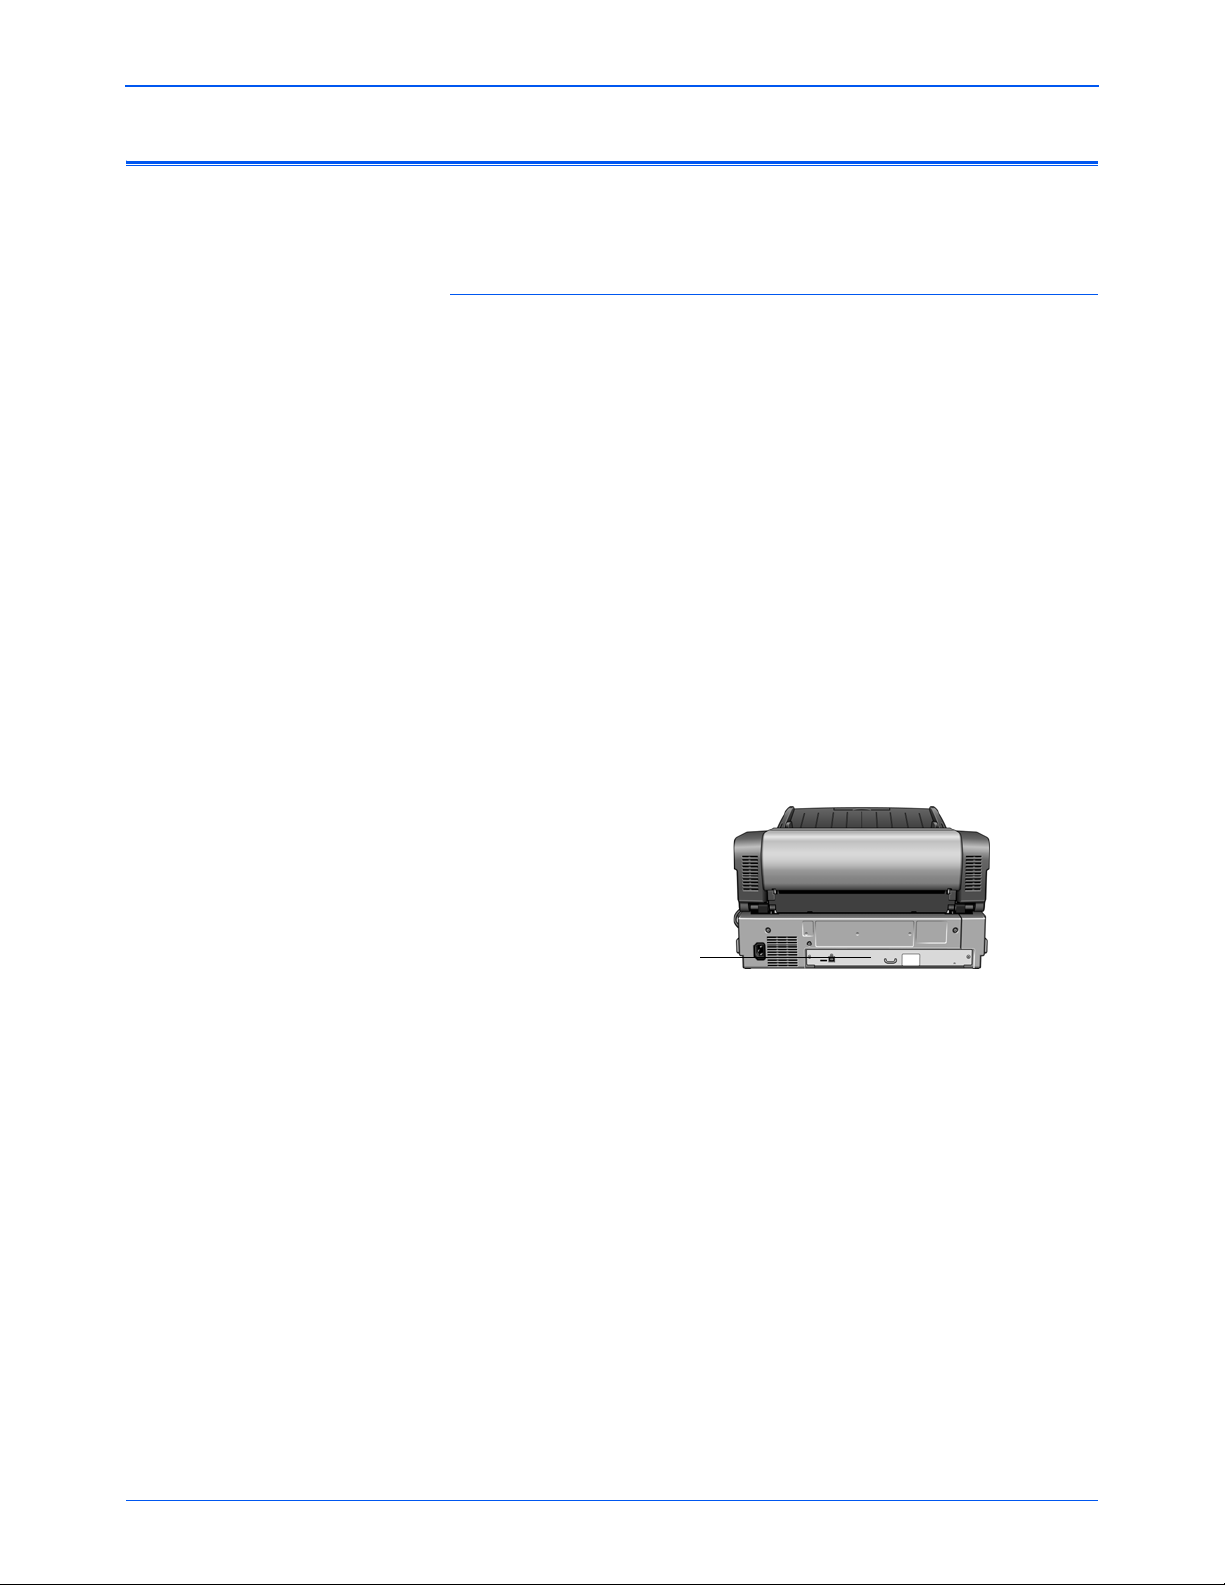
The Serial Number.
Register Your Scanner and Check for Updates
Registering your scanner is important as it provides you with access to
free telephone support service and software updates for your scanner.
To register your scanner:
Y ou will need an active internet connection to register your scanner . If you
do not have internet access you can contact our customer service
department to register the scanner. Please refer to the Technical Support
Card, that you received with the scanner , for our custom er service contact
information.
1. Open an Internet Explorer window, or any other internet browser you
have installed on your computer.
2. In the web address field type www.xeroxscanners.com.
3. Press Enter on your computer’s keyboard or click the optio n on
screen to go to the web address.
4. When the Xerox scanners web page loads click on Register Your
Product.
5. Fill in the registration form, all required fields have an asterisk (*).
A valid email address is required for registration.
You will be asked to enter the serial number for the scanner, it is
located on the back of the scanner.
6. After filling in the form, click on Submit Your Registration to complete
the registration.
20 DocuMate 765 Scanner User’s Guide
Page 28
Loading Documents to Scan
Maximum paper stack height
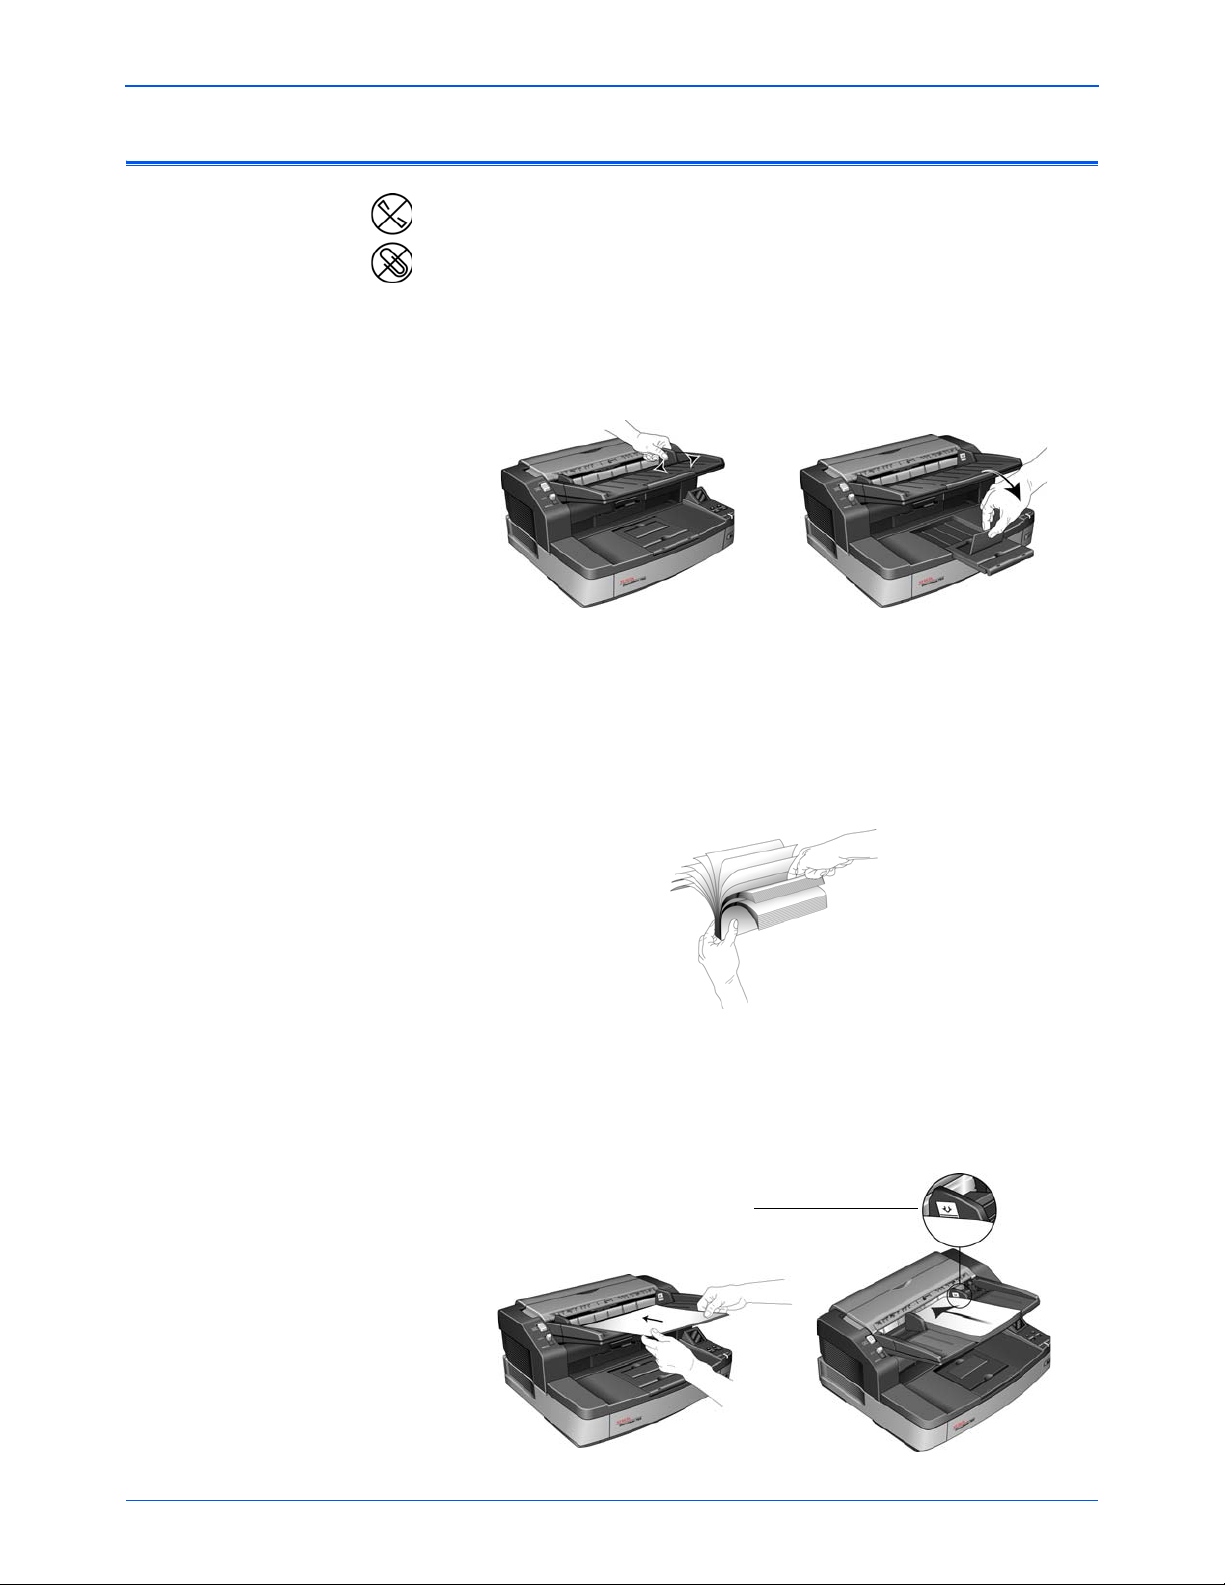
NOTE: Always remove any staples or pape r clips f rom document s befor e
inserting them into the scanner’s Automatic Document Feeder. Staples
and paper clips can jam the feed mechanism and scratch the internal
components. Also remove any labels, stickers, or Post-It™ notes that
may come off during the scanning process and get stuck in the scanner.
Misuse as described here will void your scanner’s warranty.
1. Adjust the paper guide for the wid th of paper, and make sure the input
and output trays are extended.
2. Prepare the pages before loading them into the scanner, this helps to
prevent multiple-page feeding and paper jams.
• If the edges of the paper are curled or folded, flatten them as
much as possible.
• Fan the edges of the paper to make sure none of the pages are
stuck together.
Installation
DocuMate 765 Scanner User’s Guide 21
3. Load the documents face up with their tops into the Automatic
Document Feeder.
The stack of pages should not exceed the maximum height indicated
on the input tray.
Page 29

Installation
Scanning Interfaces
Avoid scanning the following:
The following types of documents can cause multiple-p age feeding, paper
jams, or damage to the scanner.
• Plastic items such as credit cards, identification cards, overhead
projector sheets, film, and cloth or metallic sheets.
• Photographs or other coated paper as the coating can flake off during
the scan process.
• Documents with wet ink, correction fluid, or carbon paper that can
leave residue inside the scanner.
• Torn, damaged, wrinkled or perforated paper.
• Lightweight paper such as carbon-less paper or tracing pap er.
• Irregular paper such as extremely thick card-stock paper, cardboard
backing, documents that are glued together, paper with tabs, paper
with glue residue, extremely smooth or glossy paper, and thermal or
heat sensitive paper.
If you selected the recommended installation op tions (see page 7), then
you have several different options to scan with your Xero x DocuMate 765
scanner. Each method scans equally well, so use the one with
appropriate options for the item you are scann in g.
• One Touch—When you press either the Simplex or Duplex button,
documents are scanned using the scan settin gs indicated by the LCD
display. The scanned images are then sent to a software application
on your computer . You can also scan using the on-screen On e Touch
software interface. The One Touch software is where you configure
the scan settings for your One Touch scanning buttons. See
“Scanning from One Touch” on page 25.
• TWAIN Interface—This option uses your scanner’s TWAIN interface
to scan. Select scanning options before scanning, put the document
in the scanner, then click a button on the TWAIN interface window.
See “Scanning from TWAIN” on page 57.
• Windows Image Acquisition (WIA)—This option uses the Microsof t
Windows set of choices for scanning. Select the WIA scan settings,
put the document in the scanner, then click a button on the WIA
window. See “Scanning from WIA” on page 93.
• ISIS Interface—This option uses the ISIS interface for scanning.
Select the ISIS scan settings, put the document in the scanner, then
click a button on the ISIS window. See “Scanning from ISIS” on
page 67.
22 DocuMate 765 Scanner User’s Guide
Page 30
Scanning from One Touch
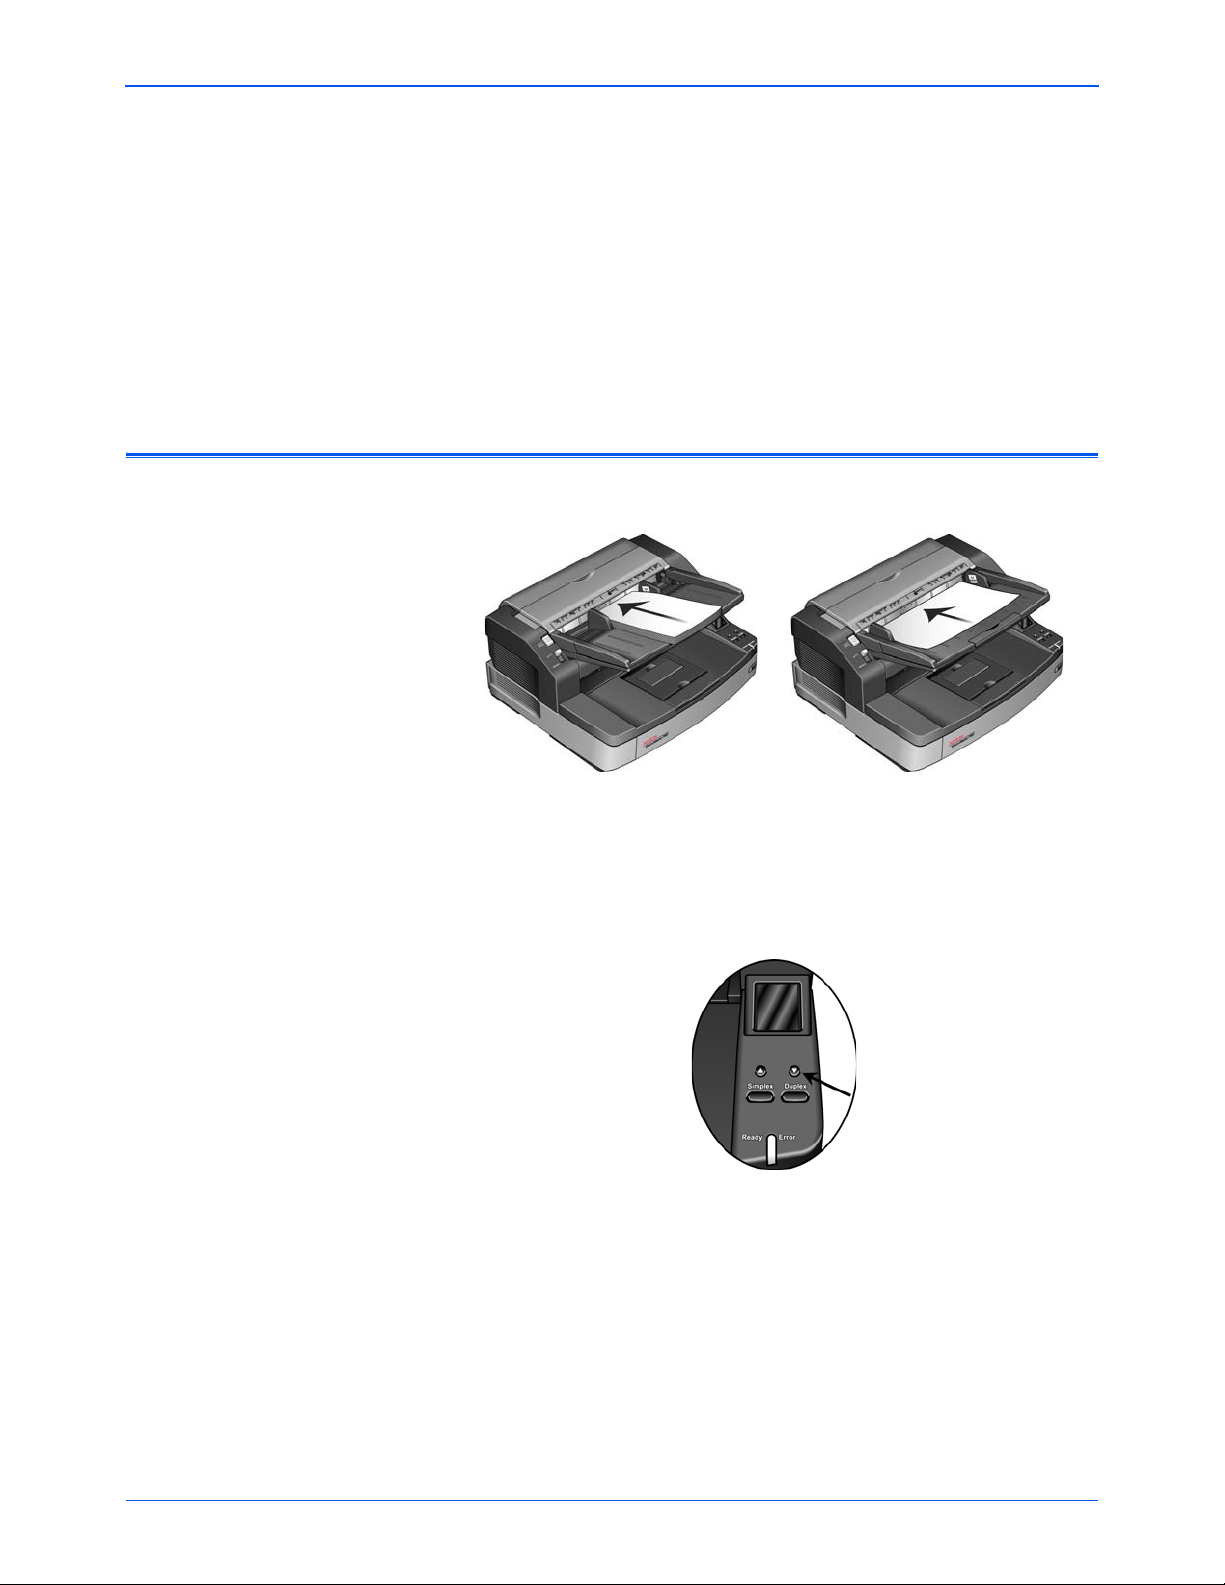
One Touch is your main set of controls for the scanner. When the
One Touch software is installed you can scan by pressing either the
Simplex or Duplex button on the scanner. The pages are scanned and
sent to the location, with the scan settings, displayed on the LCD screen.
Scanning with the One Touch Buttons
1. Load the documents face up in the ADF.
Scanning from One Touch
2. On the scanner, tap the up or down arrow until you see a profile
appropriate for your scanning job.
As you press the arrow button, the LCD screen will show the name of
each profile, and basic setting information such as resolution (dpi),
color mode, and page size.
3. Press the Simplex button to scan a one-sided document. Press the
Duplex button to scan a two-sided document.
4. The pages are scanned and the final image sent to the destination
specified in the One Touch Properties.
DocuMate 765 Scanner User’s Guide 23
Page 31

Scanning from One Touch
The One Touch Icon.
The Button View.
The Hardware View. The Detail View.
Click these
arrows to
navigate
through the
panel’s three
views.
Click these arrows
to navigate through
the 10 buttons.
Click these arrows
to navigate through
the 10 buttons.
Click the button you
want to use to scan.
Using the One Touch Button Panel
The One Touch Button Panel is also your on-screen set of controls for the
scanner. The One Touch Button Panel shows information about the
scanner and its settings.
1. To open the One Touch Button Panel, click the One Touch icon. It is
located in the Windows Notification Area at the bottom right cor ner o f
the screen.
• The Button View is your main scanner control panel. Use it to
scan or to see all nine buttons.
• The Detail View shows the current scan settings for a button.
• The Hardware View shows the current scanners connected to
your computer.
2. To close the One Touch Button Panel, click the close button on the
panel.
Scan from the One Touch Button Panel
1. Adjust the paper guide for the paper width. Load the documents face
up with their tops into the Automatic Document Feeder.
2. Now click on the One Touch icon in the Windows Notification Area (at
the bottom right corner of the screen).
3. On the screen click the button you want to use to scan.
24 DocuMate 765 Scanner User’s Guide
Page 32

4. The scanner begins scanning. When the process finishes, the
scanned images appear in the Destination Application, just as if you
scanned with the Simplex or Duplex scanner buttons.
The Default One Touch Settings on Your Scanner
Based on the recommended full install of the scanner driver , your scanner
is pre-configured to scan items for various basic tasks, such as email or
fax, then send the scanned image to an appropriate, pre-selected
Destination Application. The button names, such as PDF, eMail or Fax,
indicate the original factory settings for the Destination Application
assigned to a button.
You can change any of these settings. Please see “Configuring the One
Touch Buttons” on page 26 for instructions.
For example, the eMail button is set up to scan documents then
immediately attach them to a new eMail message in your default eMail
program. The email application will default to the email program specified
in the internet options of Internet Explorer.
A folder icon for a button, such as shown for Button 7, means that the
button is set up to archive the scanned item. This is a special preconfigured Transfer to Storage option for your scanner. The scanner
sends the scanned image directly to a folder without opening the image
first in a Destination Application.
A question mark for a button means your computer does not have
appropriate software for the initial factory settings. In that case, you would
probably want to change the name and Destination Application to
something else.
If OmniPage or One Touch OmniPage is not installed, then th e options for
sending to word processing applications such as Microsoft Word will not
be available.
Scanning from One Touch
NOTE: The default page size in each configuration is based on your
computer’s Windows setup of United States or Metric Units.
• If United States is the selected measurement, the default page size
in each profile will be based on the United States standard page
sizes, such as 8.5” x 11”.
• If Metric is the selected measurement, the default page size in each
profile is based on the ISO 216 standard and the majority of the
profiles will default to A4.
DocuMate 765 Scanner User’s Guide 25
Page 33

Scanning from One Touch
The Destination Application.
This is the application that
opens when you are finished
scanning.
The settings that
the scanner uses
when scanning
with the currently
selected button
(in this case
button 2).
The file format of
the images of
the scanned
item.
Click to select
options.
Right-click on a button (for
example, button 2) and the
Properties window opens for
that button.
Configuring the One Touch Buttons
Each One Touch button configuration consists of a Destination
Application, a Scan Configuration, and a Document Format. The One
Touch Properties window is where you select these three elements for a
button.
To open the One Touch Properties window:
1. Click the One Touch icon. It is located in the Windows Notification
Area at the bottom right corner of the screen.
2. Right-click a button on the One Touch Button Panel.
3. The One Touch Properties window opens for that button.
The One Touch Properties window also opens when you press, hold
down, and release the Simplex or Duplex button on the scanner.
About the One Touch Properties Window
The One Touch Properties window is where you can select new settings
for the buttons. The One Touch Properties window also contains special
scanning features such as scanning and burn to a CD, scanning and
converting text directly into an HTML web page, and scannin g with optical
character recognition (OCR) that turns a scanned image into te xt that you
can edit.
The following example of the One Touch window shows the settings for
Button 2.
26 DocuMate 765 Scanner User’s Guide
Page 34

Scanning from One Touch
Color GrayscaleBlack and White
The settings on the Properties window are:
Select Destination—The list of applications that can open to display the
scanned image for the selected button.
NOTE: Later on, If you install new software that can be used as a
Destination Application, click the Refresh button to link the new
software to One Touch 4.0.
Select Configuration—The list of available scan configurations for the
selected button. The configuration’s basic setti ngs include: scanning
mode, resolution (dpi), page size, brightness (Br), and contrast (Cr). See
“Creating a New Scan Configuration” on page 29.
These icons next to each scan configuration indicate the scanning mode:
You can also click the Edit button or double-click the configuration to see
more detailed information about the selected configur ation. See “Editing
or Deleting Scan Configurations” on page 35.
Select Format—A set of file formats for the scanned image for the
selected button. The formats are based on the type of destination
application you select. The button names indicate their file types. See
“Selecting Page Format Options” on page 42.
Options tab—Displays a window for selecting options related to the
selected destination application for the scanned image.
DocuMate 765 Scanner User’s Guide 27
Page 35

Scanning from One Touch
Select a software application
as the destination to send
scanned documents.
Select a configuration
for scanning the item.
Select a format for
the scanned image.
Click these arrows to see the
properties for the button
whose settings you want to
change.
Selecting New Settings for a Button
For each of the nine One Touch button s, yo u can s elect a ne w
Destination Application, Scan Configuration, and Document Format.
To select new settings for a Scanner Button:
1. Click the button selection arrows to select the button you want to
change.
2. From the Select Destination list, select the application where you
want documents sent when scanning is finished.
See “Selecting Options for a Button” on page 46 to display a full list of
the Destination Applications that you can use with the scanner.
NOTE: If you select a word processing program such as Microsoft
WordPad or Microsoft Word and a page format that can be used for
OCR (such as TEXT, RTF, DOC, sPDF, or nPDF), the text in scanned
images is automatically converted to word processing text. See
“Scanning with Optical Character Recognition (OCR)” on page 48 for
details.
3. From the Select Configuration list, select a scan configuration.
4. Select a Format option.
The available options apply to the Destination Application you select.
For example, if you select Microsoft Word as the Destination
Application, the available formats are for text, such as .doc, .txt, and
.rtf. However, if you select Microsoft Paint as the Destination
Application, then the available formats are for graphics, such as .bmp,
and .jpg.
28 DocuMate 765 Scanner User’s Guide
Page 36

5. Click OK to accept any changes and close the window.
The Scan Configurations.
Click New to create a
new Scan Configuration.
To accept changes but keep the window open to work with other
features, click Apply.
Note that while the One Touch Properties window is open, you cannot
scan yet by clicking a button on the One Touch Panel. You must click
OK or close the One Touch Properties window first. However , you can
scan at any time by pressing the Simplex or Duplex button on the
scanner.
6. When you are finished selecting new settings for a button and you
press or click a scanner button, the document is scanned using the
newly configured settings for that button.
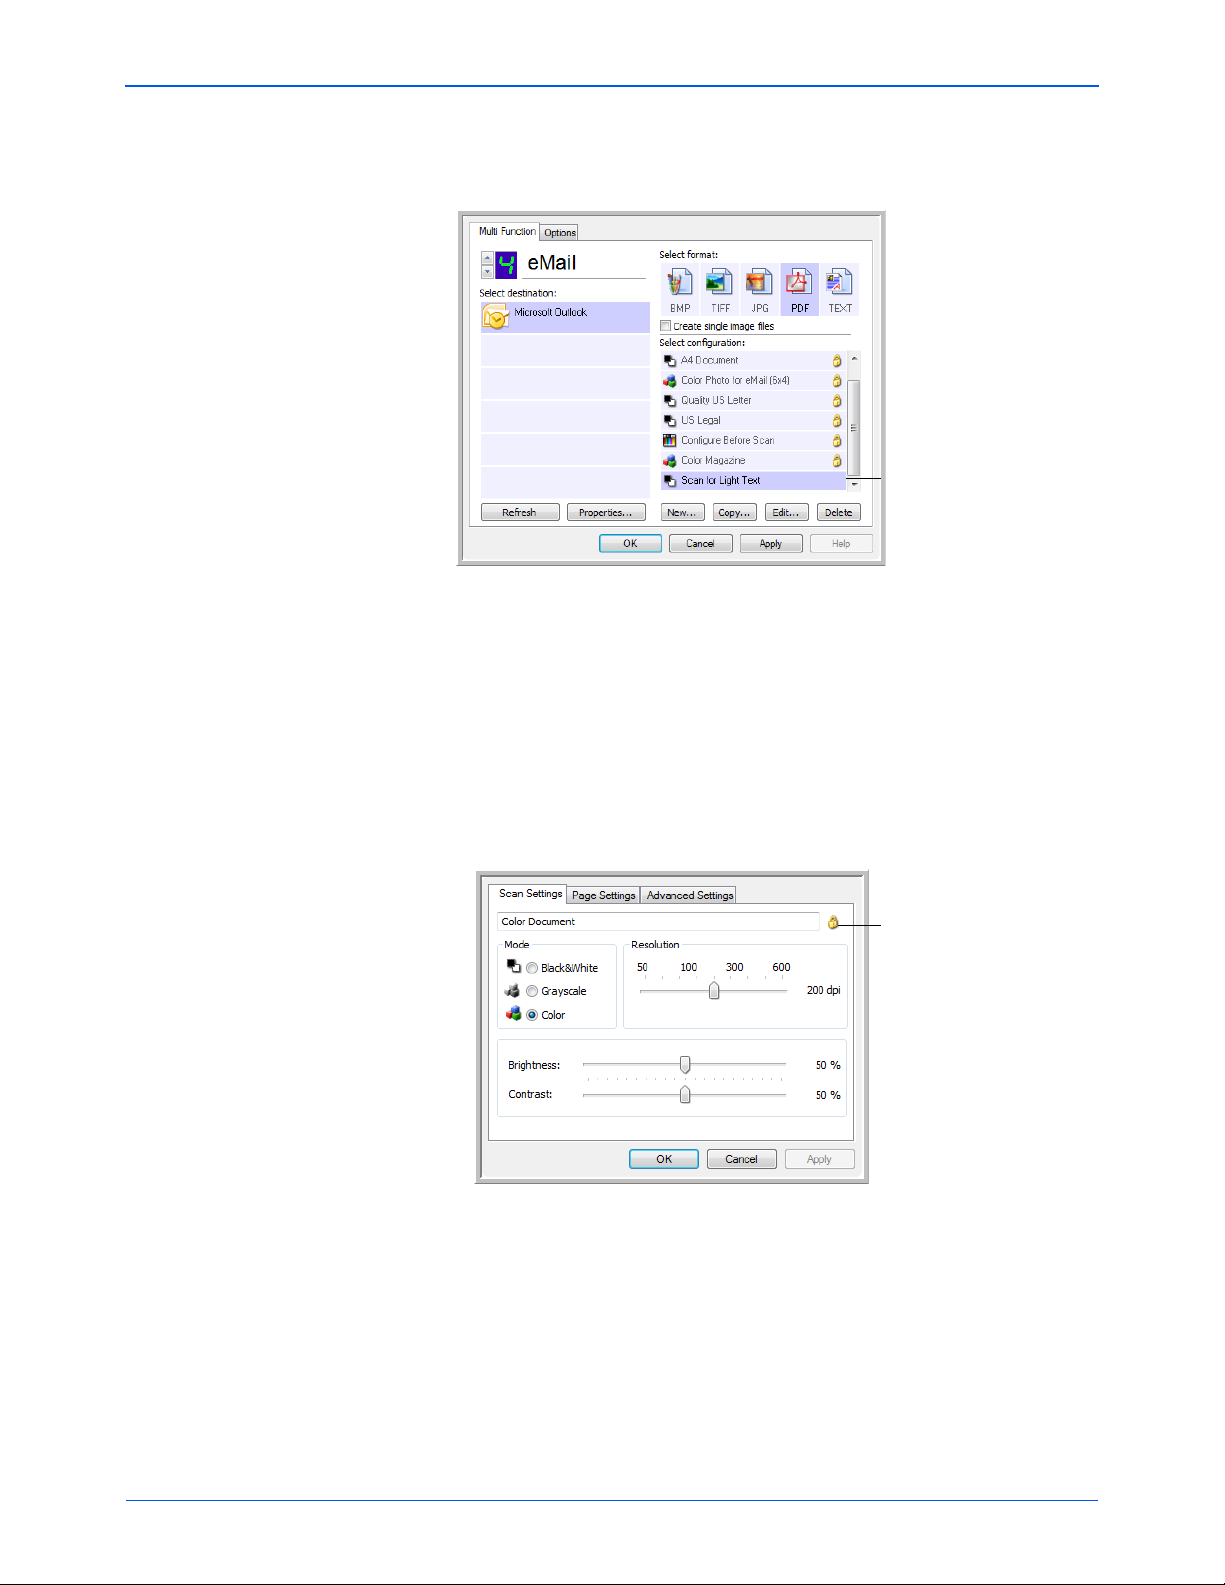
Creating a New Scan Configuration
The scan configurations are where you sele ct the scan nin g re so lut ion ,
brightness, mode (color, black&white, or grayscale), and a number of
other settings.
Scanning from One Touch
1. Open the One Touch Properties windo w an d ma ke sur e th e Multi
Function tab is selected.
2. Scroll through the applications in the Select Destination list and click
the type of application for which you want to create a new scan
configuration.
3. Click the New button.
If you want to start from the settings of another configuration, select
the configuration, then click the Copy button.
NOTE: If you select a printer or other device in the Select Destinations
list, the dialog box may have an additional Device Settings tab for
setting specific options for the particular device.
DocuMate 765 Scanner User’s Guide 29
Page 37

Scanning from One Touch
Type a new name for
the configuration.
Select the scan mode
and drag the slider to
set the resolution.
Drag the sliders to set
the Brightness and
Contrast.
The Scan Settings Tab
1. On the Scan Configuration Properties dialog box, type a name.
TIP: If you’re going to set up the new configuration to scan duplex
(two-sided), include that in the name, such as “Scan for Dark Print
(Duplex),” to remind you that it is a duplex scan.
2. Select scan settings for the new scan configuration.
Mode—Select a scanning mode:
• Black&White to scan in black and white.
• GrayScale to scan items such as documents containing
drawings or black and white photographs.
• Color to scan color photographs and other color items.
Resolution—Drag the slider to the right or left to adjust the dots per
inch (dpi) of the resolution. The maximum resolution is 600 dpi; the
minimum is 100 dpi. The higher the dpi setting, the sharper and
clearer the scanned image. However, higher dpi settings take longer
to scan and produce larger files for the scanned images.
Brightness and Contrast—Drag the sliders to the right or left to
adjust the brightness and contrast of the scanned image. The
Contrast setting does not apply to the Black&White mode.
Brightness refers to the lightness or darkness of the image. Contrast
is the range between the darkest and lightest portions of the image.
The greater the contrast, the more dif ference b etween the lighter and
darker shades in the image.
3. If you want to lock the configuration, click the key icon to change it
from a key to a lock.
30 DocuMate 765 Scanner User’s Guide
Page 38

The Page Settings Tab
Click to toggle
between inches
and millimeters.
Original Image. Inverted Image.
Click the Page Settings tab to select page settings.
Size—Click Standard, click the menu arrow and choose a page size from
the list, or click Custom and enter the horizontal and vertical page
dimensions in the boxes. The maximum size is 11.7" x 38". The units of
measurement can be inches or millimeters. Click the name of the units,
inches or millimeters, to toggle between them.
Improvements and Settings—Only the options th at apply to the
selected Scanning Mode are available.
• AutoCrop to Original—Select this option to let the scanner
automatically determine the size of the item being scanned.
Scanning from One Touch
• Reduce Moire Patterns—Moire patterns are wavy, rippled lines that
sometimes appear on the scanned images of photographs or
illustrations, particularly newspaper and magazine illustrations.
Selecting Reduce Moire Patterns will limit or eliminate moire
patterns in the scanned image. This option is only available for the
GrayScale or Color Mode at 300dpi or less.
• Straighten Image—Select this option to let the scanner automatically
determine if a page is skewed, then straighten its image. However, if
the page is fed through at too great an angle, the image may not
straighten correctly. In that case, re-scan the page using the paper
guides to feed the paper in straight.
• Invert Image—Only available for Black&White Mode, this option
reverses the black and whites of an image.
DocuMate 765 Scanner User’s Guide 31
Page 39

Scanning from One Touch
The original with a red
watermark over black text.
The scanned item with the
red filtered out.
• Duplex—Scan both sides of the page. If this option is not selected,
the scanner will scan the front side of the page only.
NOTE: The Simplex and Duplex buttons on the scanner take
precedence over the One Touch settings. In other words, if the LED
number on the scanner is configured to scan as Duplex, but you press
the Simplex button, the scanner scans in Simplex, and vice versa.
• Skip Blank Originals—Skips pages that are completely blank.
Typically you use this option when you will scan a stack of two-sided
pages which have a number of blank sides. This option is only
available for Duplex scanning in Black&White Mode.
• Color Filter—Color filter is the ability of your scanner to automatically
remove a color from a scanned item. Color filter applies to
Black&White or Grayscale Mode.
32 DocuMate 765 Scanner User’s Guide
Page 40

The Advanced Settings Tab
Click the Advanced Settings tab.
The options of the Advanced Settings tab are for the Color or Grayscale
scanning mode.
1. Drag the sliders to the left and right to change the color settings. As
you do, the image changes to show the effects of the new settings.
Saturation—Saturation is the strength or purity of a color.
Scanning from One Touch
Hue—Hue is the color your eyes see as reflected from the image.
Gamma—Gamma controls the brightness of the midtones of the
color.
2. Click OK to save the new configuration.
It will now appear in the list of Scan Configurations on the One T ouch
Properties window for the appropriate Destination Applications.
DocuMate 765 Scanner User’s Guide 33
Page 41

Scanning from One Touch
The Device Settings Tab
A Device Settings tab appears on the Scan Configurations dialog box
when your selected Destination Application sends the scanned image to a
printer, fax application, or other device. You use the options on the Device
Settings tab to select settings for the device.
1. Click on the Device Settings tab.
Fit to page, reduce image if necessary—If the scanned image is
too big to be printed or faxed on a single page, the image will
automatically be reduced to fit the page.
Actual size, crop image if necessary—If the scanned image is too
big to be printed or faxed on a single page, the image will
automatically be cropped around its edges to fit on the page.
Center image on page—The image will be printed in the center of
the page instead of at the top right corner.
Maintain aspect ratio—The aspect ratio is the length-to-width
relationship of the image’s dimensions. Select this option so the
image’s relative proportions remain constant.
AutoRotate image for best fit—If the image is a Landscape format
and the device is printing in the Portrait mode, or vice versa, rotate
the image to fit on the page.
Collate copies—If you are printing more than one page, collate the
copies. Enter the number of copies in the Copies box.
Advanced—Click to see additional settings for the device. The dialog
that opens is specific to the device. For example, if the d evice is yo ur
printer, the dialog box is your printer’s setup settings.
2. Click OK or Apply.
34 DocuMate 765 Scanner User’s Guide
Page 42
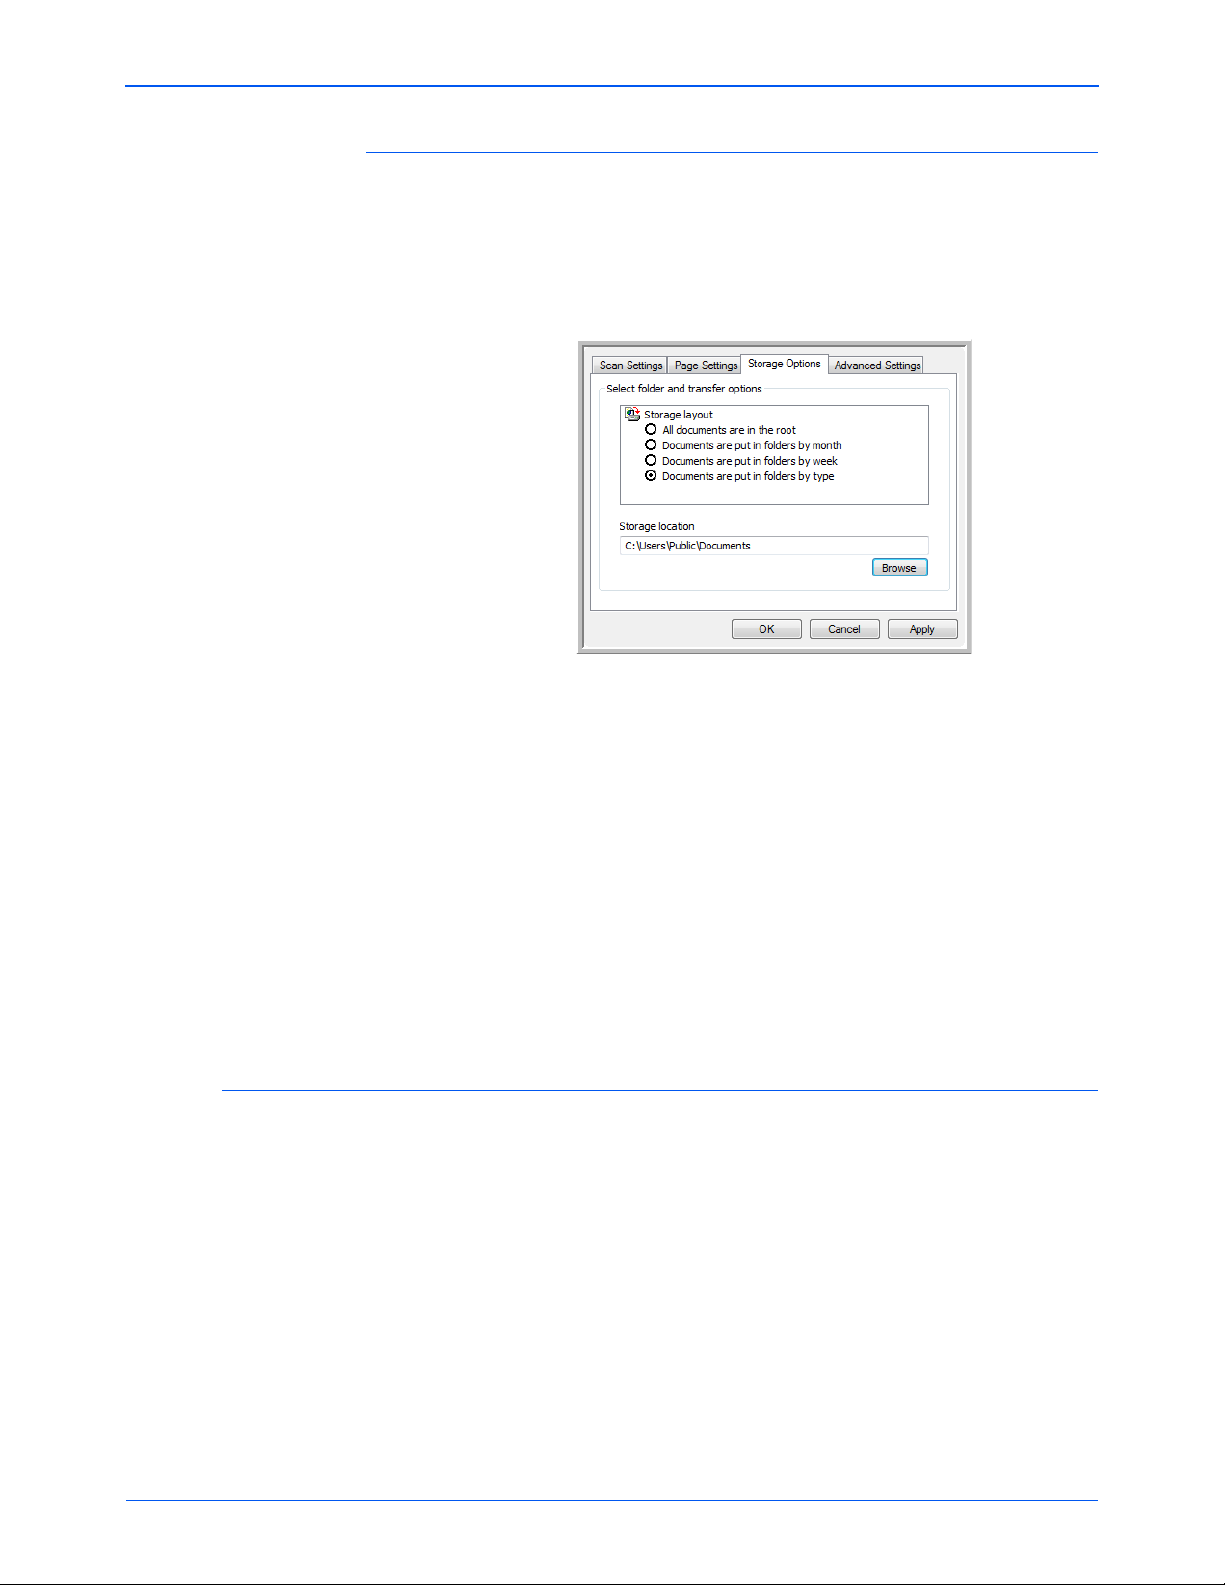
The Storage Options Tab (Archive)
A Storage Options t ab is on the Scan Configuration s dialog box when the
selected Destination Application is set as Transfer to Storage. You use
the options on this tab to select where you want to save your scanned
items for storage when scanning with that particular Scan Configuration.
1. Click on the Storage Options tab.
Scanning from One Touch
2. Click the Storage Layout options you want.
All documents are in the root—The scan ned documen ts are saved
in the root of the folder specified in the Storage Location.
Documents are put into folders by month, week, or type—Folders
are created based on your selection (month, week, or type) and the
scanned documents are saved in those folders.
By default, the location of the archived documents is at \My
Documents\My OneTouch Archive and then in a folder based on
your selection for the Storage Location.
3. Click the Browse button to specify the location to store the scanned
documents, or type a location directly into the box.
4. Click OK or Apply.
Editing or Deleting Scan Configurations
NOTE: Your scanner comes with a nu mber of configurations pre-set at
the factory . To ensure that your scanner will always have a set of
correct scan configurations, do not delete the preset configurations.
We also recommend that you keep those configurations locked so the y
are not inadvertently deleted. That way, you will always have the
factory-settings available. If you do edit or delete them, and want to get
the factory pre-sets back again, you will need to uninst all then re-inst all
your scanner.
DocuMate 765 Scanner User’s Guide 35
Page 43
Scanning from One Touch
Select the scan
configuration to edit or
delete. It must be unlocked,
as indicated by not having a
lock displayed here.
Click the Key/Lock icon to
toggle between locked
and unlocked.
1. Open the One Touch Properties window.
2. Select the scan configuration you want to edit or delete.
3. To delete the configuration, click the Delete button.
4. To edit the configuration, click the Edit button.
The Scan Configuration Properties dialog box opens for that
configuration.
You can make changes to a configuration, but for the changes to be
saved, the configuration must first be unlocked. Click the Lock icon to
unlock the configuration. Clicking it toggles between locking and
unlocking the configuration. The key icon indicates the configuration
is unlocked.
5. Edit the settings and click OK.
6. Click OK to close the dialog box.
36 DocuMate 765 Scanner User’s Guide
Page 44

Setting Destination Application Properties
Click a Destination
Application.
Click the Properties
button.
The different types of Destination Applications have various proper ties
that you can select.
1. On the One Touch Properties window, click a Destination Application.
2. Click the Properties button.
Scanning from One Touch
A One Touch 4.0 Link Properties dialog box opens for the type of
Destination Application you selected, and the available options are for
that type of application.
Text Documents Properties
These properties apply to Microsoft W ord, Microsoft Excel®, and the other
applications indicated by their icons in the list. The properties apply to the
OCR settings for the applications.
DocuMate 765 Scanner User’s Guide 37
Page 45
Scanning from One Touch
1. Click in the OCR settings boxes for the options you want.
The options will apply to all the applications in the group.
Always send a file, even when no text was found—The scanned
file is sent to the OCR reader even if the image does not appear to
contain text. This could occur if you scanned a photograph with a On e
Touch button set for text applications.
Show message if text recognition failed—A message will open on
the screen if the OCR reader does not detect text in the image.
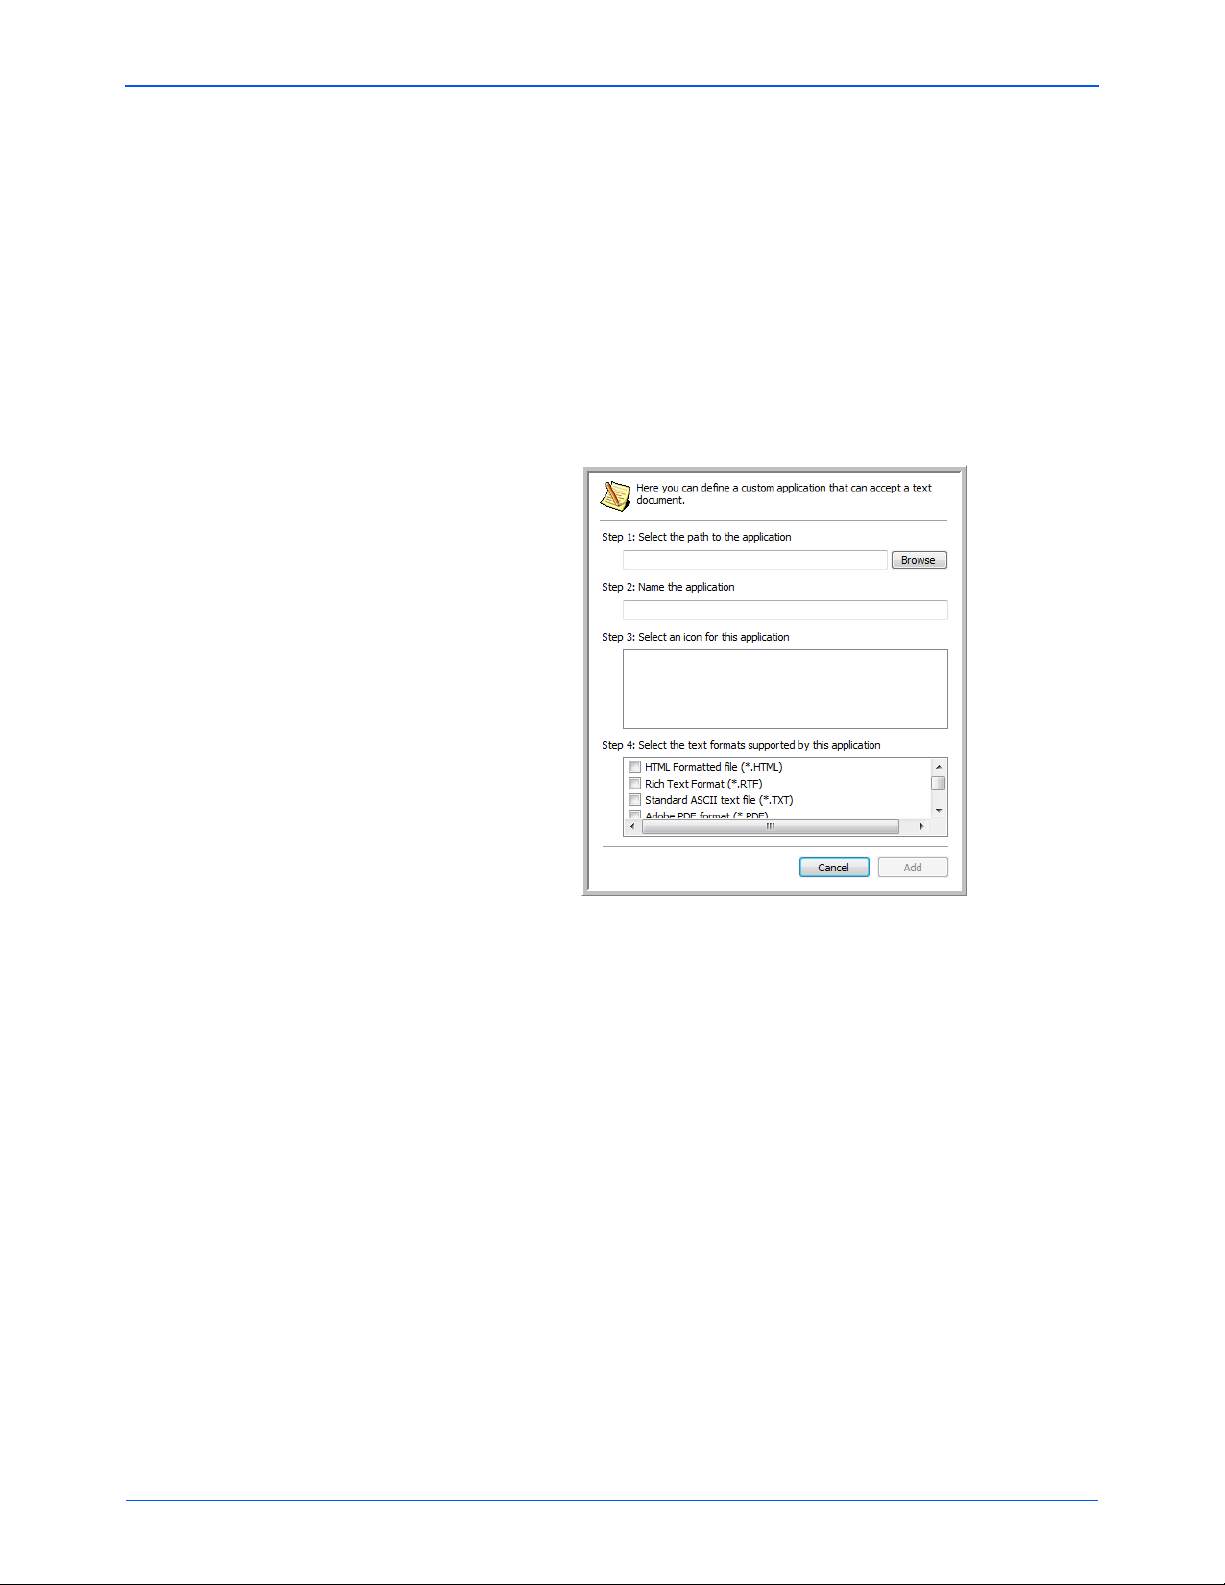
2. To add another application to the list, click the Add Applicati on
button.
The Add Text Based Link dialog box opens.
3. Click Browse to find the application you want to add to the list.
When you select the application using the Browse button, steps 1,
and 2 on the dialog box are automatically filled in, and the application
icon appears in step 3.
4. Select the icon in Step 3 of the dialog box. That is the icon that will
appear in the One Touch Destination List.
5. In step 4 of the dialog box, select the file formats that the application
will accept.
Refer to the documentation that you received with the application to
see which text formats the application accepts.
The options you select under step 4 determine the page forma t ico ns
that appear in the One Touch Properties window for that group of
applications.
6. Click the Add button.
7. Click OK or Apply on the Link Properties window.
8. Click Refresh on the One Touch Properties window.
9. Click OK or Apply on the One Touch Properties window.
38 DocuMate 765 Scanner User’s Guide
Page 46
Scanning from One Touch
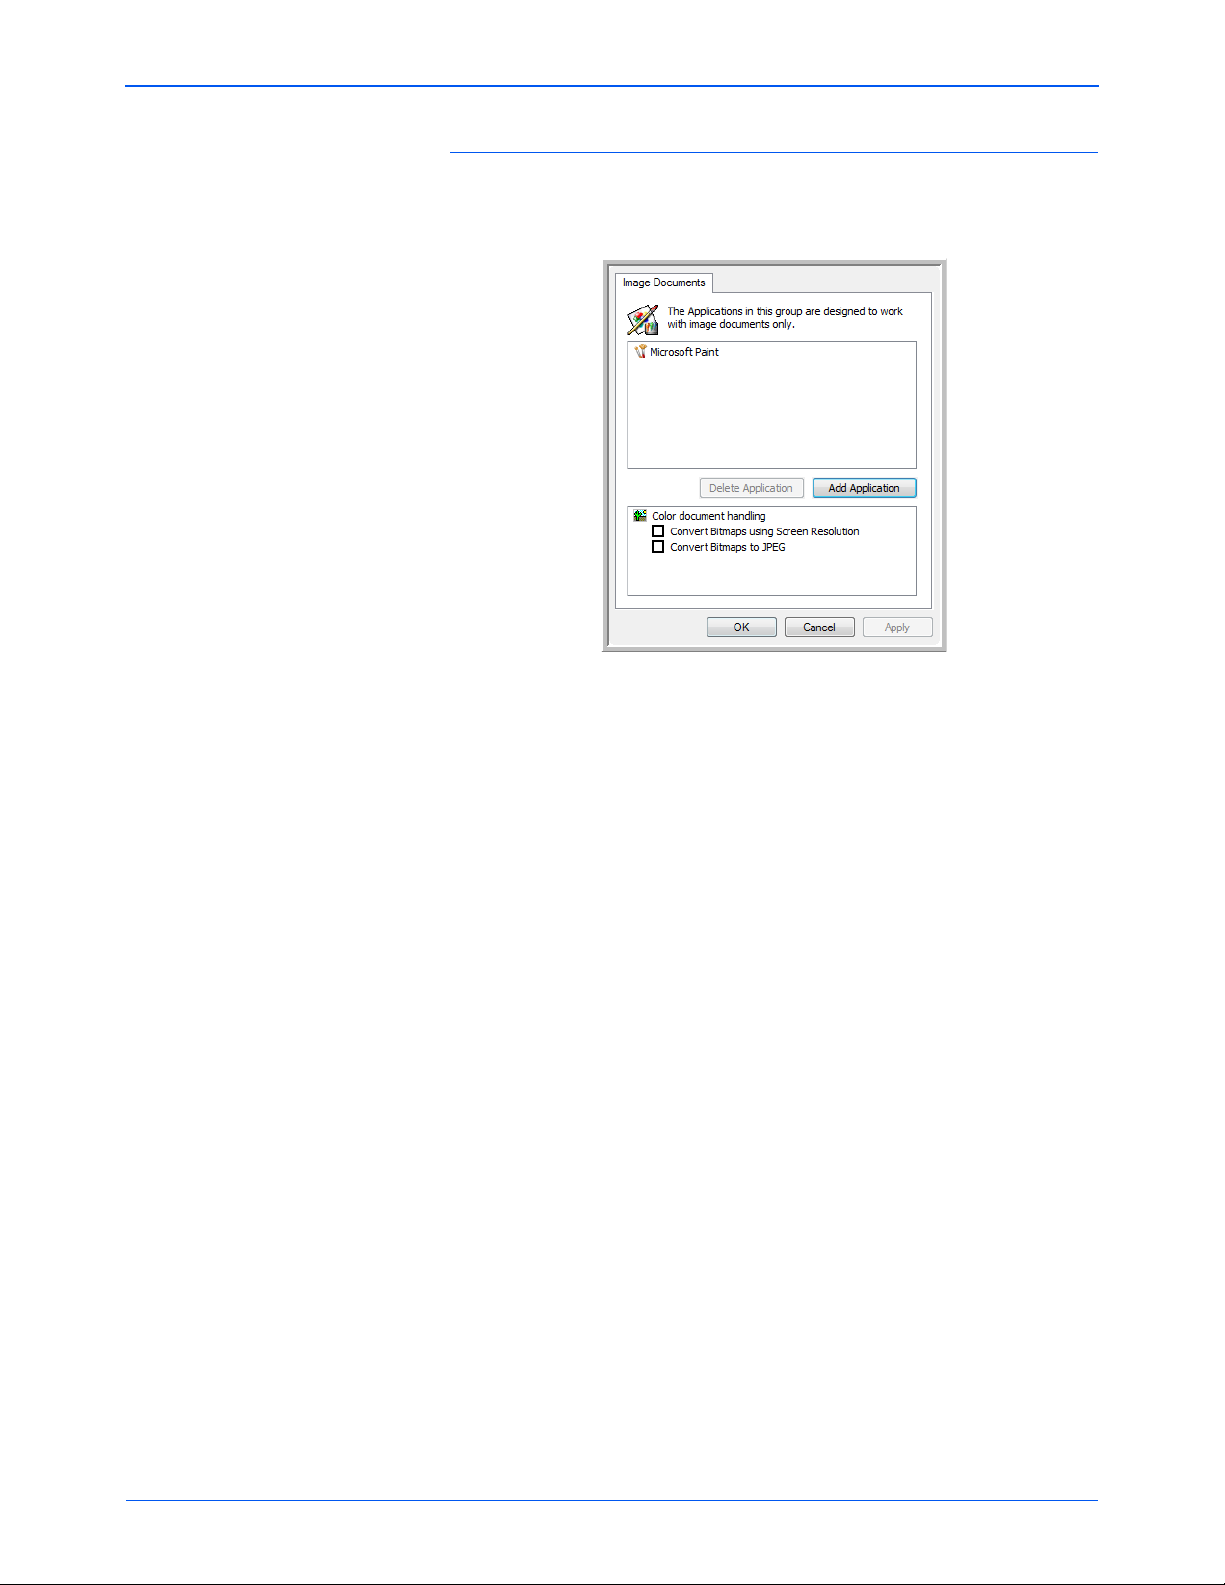
Image Documents Properties
These properties apply to OmniPage Pro that you received with your
scanner, plus Microsoft Paint and other image processing applications.
1. Click in the Color document handling settings boxes for the options
you want.
The options will apply to all the applications in the group.
Convert Bitmaps using Screen Resolution—Use this option to
ensure that an image will fit on the computer’s screen. When a
computer screen is set to a lower resolution, bitmap images with a
higher resolution may be too big to fit on the screen.
Convert Bitmaps to JPEG—JPEG files can be compressed to
produce smaller file sizes and, therefore, shorter transmission times.
Use this option to provide that compression capability to image files.
2. To add another application to the list, click the Add Applicati on
button.
See the steps on page 38 to add an application to the list.
3. Click OK.
4. Click Refresh on the One Touch Properties window.
5. Click OK or Apply on the One Touch Properties window.
DocuMate 765 Scanner User’s Guide 39
Page 47
Scanning from One Touch
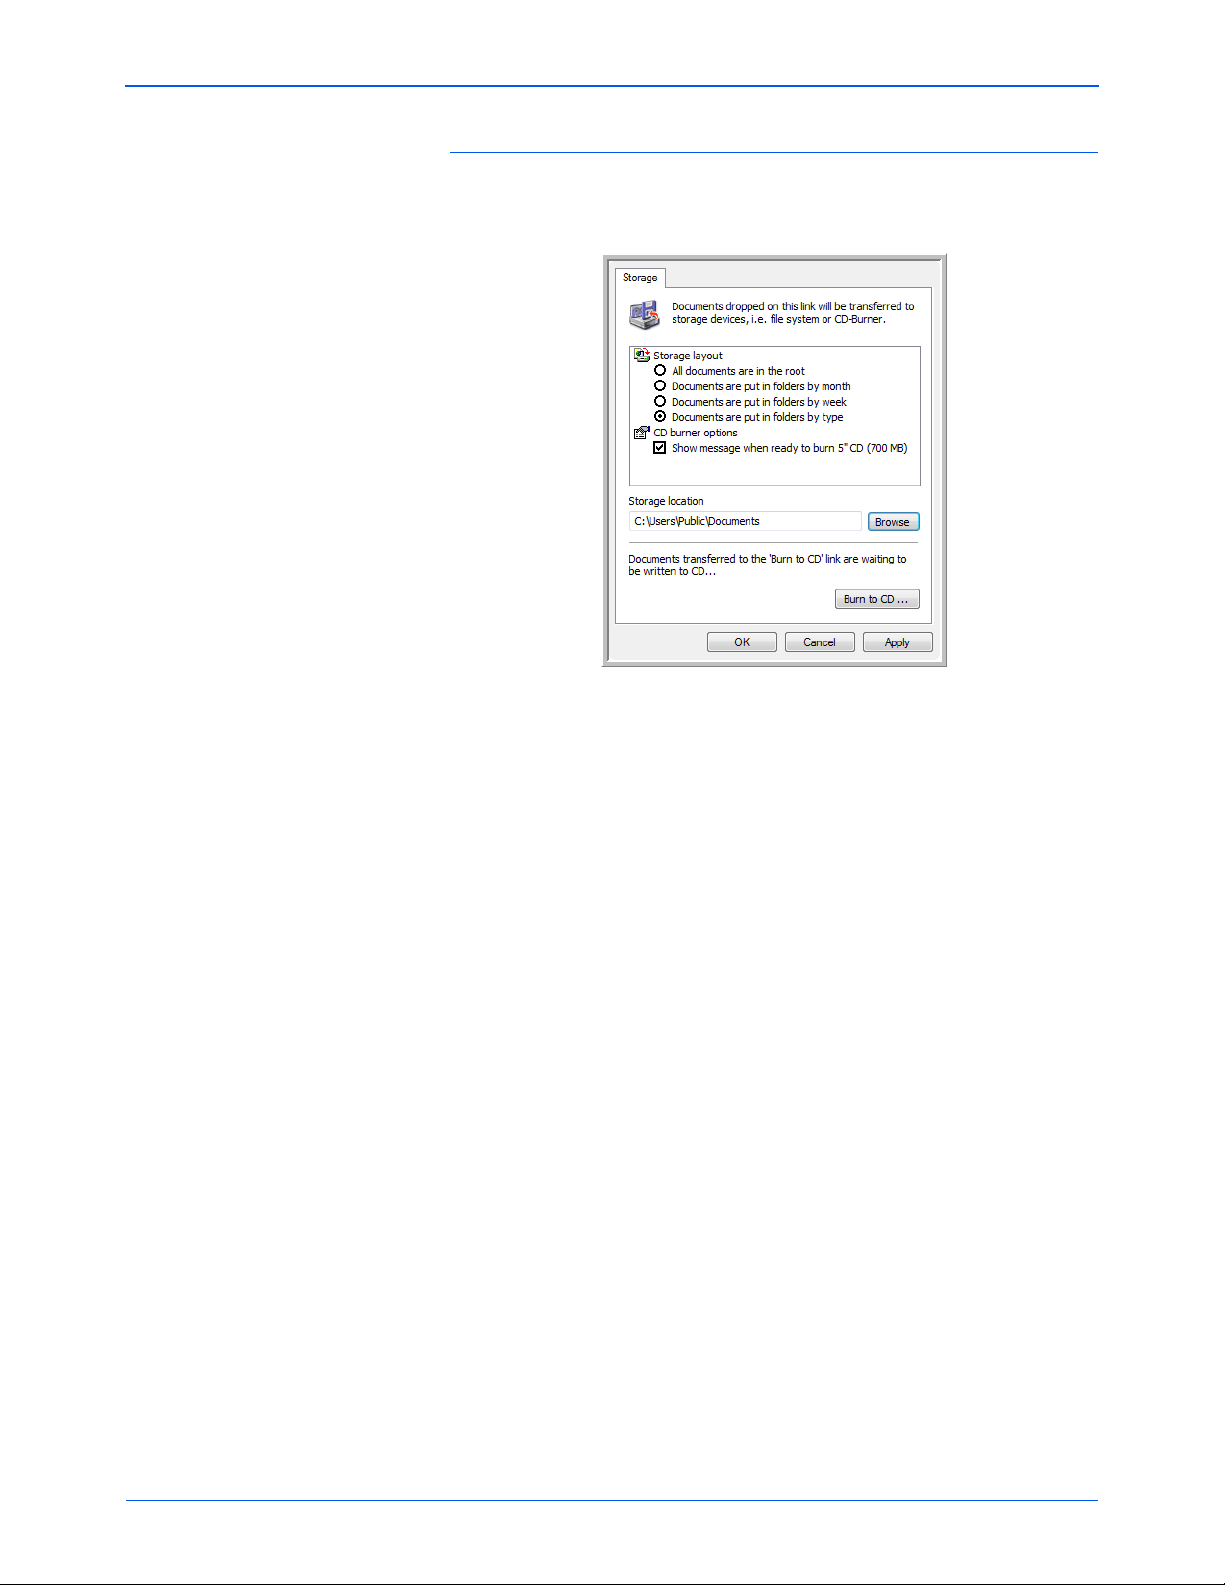
Storage Properties
These properties apply to the Destination Application named Transfer to
Storage.
1. Click the Storage Layout options you want.
All documents are in the root—The scan ned documen ts are saved
in the root of the folder specified in the Storage Location.
Documents are put into folders by month, week, or type—Folders
are created based on your selection (month, week, or type) and the
scanned documents are saved in those folders. New folders are
created for each month and week so you can keep track of when you
scanned the documents.
2. Click the Browse button to specify the location to store the scanned
documents, or type a location directly into the box.
3. If you have a CD burner attached to your computer, the option Show
message when ready to burn 5" CD (700MB), should also be
selected so you will see a message when it’s time to click the Burn to
CD button.
4. Click OK on the Link Properties window.
40 DocuMate 765 Scanner User’s Guide
Page 48

Scanning from One Touch
eMail Properties
These properties apply to email applications so you can specify the folder
for documents that you will attach to an email message. Microsoft
Outlook
message as soon as scanning is finished, but other email applications
may not. If you’re using one of those applications, such as America
Online
documents so you can manually attach them to your email messages.
®
will accept direct attachment of documents to a blank email
®
(AOL), you need to know which folder contains the scanned
1. Click the Browse button for Folder for storing attachments and
choose a folder for your eMail attachments.
2. If you are using AOL on your computer, and the folder name for AOL
is incorrect, click the Browse button and find the correct AOL folder.
For scanned images to be auto-attached to a blank email message,
you must have the specific folder location AOL uses to find the
attachments. Please contact AOL for more information about the
folder location in which AOL stores attachments.
3. If you need to change your email client, or any other internet options,
click the Internet Options button.
The Windows Internet Options Control Panel opens. Click the
Programs tab and choose a new email client from the Email list.
These are the standard Windows Internet options. Please see your
Windows documentation for more information about Internet options.
If you are using AOL, please see the AOL user manual for making
changes to the Internet options applicable to AOL.
4. Select the options for color document handling.
Convert Bitmaps using Screen Resolution—Use this option to
ensure that an image will fit on the computer’s screen. When a
computer screen is set to a lower resolution, bitmap images with a
higher resolution may be too big to fit on the screen.
Convert Bitmaps to JPEG—JPEG files can be compressed to
produce smaller files sizes and, therefore, shorter transmissio n times.
Use this option to provide that compression capability to image files.
DocuMate 765 Scanner User’s Guide 41
Page 49

Scanning from One Touch
Image Formats. Text Formats; sPDF is
only one of several text
formats available.
Selecting Page Format Options
5. Click OK.
6. Click OK or Apply on the One Touch Properties window.
The Page Format options that you select determines the file format of the
scanned document. Appropriate page format options and file types are
available for the type of Destination Application selected for the button.
The available options are for images and text.
Create Single Image Files
The TIFF and PDF formats support multiple page documents. If you are
scanning as a TIFF or PDF file and want one file created for each image
scanned, select Create single image files. Note that this option is
automatically selected and disabled if you have selected a format that
only supports single pages, such as BMP or JPG.
Image Formats
Select an image file format for photos, artwork or other documents that
you want to save as images. BMP and TIFF are standard image file
formats generally used if you want to do additional image processing,
such as photo touch-up or color correction. Both of those file fo rmats tend
to be larger than the JPEG format.
Because JPEG image files can be reduced in size, the JPEG format is
often used for images on web pages, or if file size might be a problem
when electronically sending the files. JPEG files are reduced in size by
lowering their image quality, and you can select the degree of quality for
your scanned images from the JPEG file format icon.
42 DocuMate 765 Scanner User’s Guide
Page 50

Scanning from One Touch
The PDF format is often used to create images of text pages. You may
want to select PDF as the page format when scanning text pages that do
not require OCR processing or other processing. The PDF format is also
used to put multi-page documents on web sites as pdf-readable files. As
with the JPEG option, the PDF format can be reduced in size or quality.
To select a JPEG or PDF file size:
1. Select JPG or PDF as the page format.
2. Right-click on the JPG or PDF icon.
A menu opens.
3. Choose the file size/image quality option for your scanned images.
Minimize Size—Smallest file size, lowest image quality.
Normal—Medium file size, some loss of image quality.
Maximum Quality—Largest file size, no loss of image quality.
Your selection pertains only to the button currently selected on the
One Touch Properties window. Other buttons that have JPG or PDF
selected as the Page Format are not affected, so you can set the
JPEG or PDF file size/image quality independently for each button.
4. Click OK or Apply on the One Touch Properties window.
Text Formats
Selecting the text format option also selects OCR processing as an
automatic step for scanning. Therefore, when you scan a document with
the text format selected, the text portions of the document are
automatically converted to editable text. See “Scanning with Optical
Character Recognition (OCR)” on page 48.
Select a text format for documents with text or numbers, such as a
business letter, report, or spreadsheet. The text format icon has several
file formats available, depending on the Destination Application you
select.
The specific file format is the file name extension on the text format icon.
As you select Destination Applications that are text applications, the text
format icon changes to match the file type of the application. In some
cases, the Destination Application supports several file types, and you
can right-click on the icon to choose the particular file type for that
application.
DocuMate 765 Scanner User’s Guide 43
Page 51

Scanning from One Touch
Example menu for the text format when
the Destination Application is Microsoft
Word.
Example menu for the text format
when the Destination Application is
a Storage location.
To select a file type for the text format:
1. Select the Destination Application.
2. Right-click on the text format icon.
A menu opens. The following figure shows samples for different
Destination Applications.
3. Choose the file type that you want for the text format.
Your selection of a file type pertains only to the button currently
selected on the One Touch Properties window. Other buttons that
have a text option selected as the Page Format are not affected, so
you can set the text file type independently for each button.
Simple T ext—The .txt file format. Text with no formatting; used by the
standard Microsoft Notepad application.
Rich Text Format—The .rtf file format. Text that retains formatting
when converted. Available with Microsoft Wordpad and Word.
Word Document—The .doc file format used by Microsoft Word.
Comma Delimited—The .csv file format; used for database or
spreadsheet data with fields separated by commas. When the
document is converted into editable text by the OCR software, the
fields are maintained so you can copy and paste them to a database
or spreadsheet application.
Excel Spreadsheet—The .xls file format used by Microsoft Excel.
44 DocuMate 765 Scanner User’s Guide
Page 52

Scanning from One Touch
HTML Document—The .htm file format used to create web pages.
Searchable PDF—The .sPDF file format used by Adobe Acrobat and
OmniPage Pro. This format converts scanned text into PDF with text
search and OCR capabilities.
Normal PDF—The .nPDF file format used by Adobe Acrobat and
OmniPage Pro. This format converts scanned text into PDF with text
search and OCR capabilities, you can edit the text in an nPDF image
if a PDF editing program is installed.
4. To change the OCR settings, choose OCR Options.
The OCR Options provide a series of selections for the OCR feature
when you scan text. This menu option is only available if you have the
One Touch OmniPage Module or OmniPage Pro installed on your
computer. See the One Touch OmniPage Mini-Guide on the
installation Disc for details.
Note that the OCR Options settings apply to all buttons. If you change
them for one button, those changes apply to the other buttons as well.
5. Click OK on the One Touch Properties window.
DocuMate 765 Scanner User’s Guide 45
Page 53

Scanning from One Touch
Options tab.
Selecting Options for a Button
The One Touch Options determine the types of Destination Applications
available for a button, as well global settings for choosing the location of
the files for your scanned items.
1. Open the One Touch Properties windo w an d click the Options tab.
2. Click the Select Button menu arrow and select the button for new
options.
3. Select button options as described below.
Show All Destinations—This option selects all the Destination
Application categories.
Select Destinations—Select this option to individually choose the
types of applications to include in the list of De stin at ion App lic ations.
Check the boxes for the type of application to include.
• Document Management includes Nuance PaperPort and other
applications for processing and keeping track of your scanned
documents.
• Image Editors include Microsoft Paint and other drawing and
graphics applications.
• Text Editors include Microsoft Word and WordPad, Microsoft
Excel, and other word processing and spreadsheet applications.
Select this option if you want OCR processing to convert your
scanned documents to text that you can edit. See “Scanning with
Optical Character Recognition (OCR)” on pa ge 48 for more abo ut
OCR.
• PDF applications are for documents scanned to the PDF for mat.
• Email includes Microsoft Outlook and other email applications.
See “eMail Properties” on page 41 for details about attaching
scanned documents to your email messages.
46 DocuMate 765 Scanner User’s Guide
Page 54

Scanning from One Touch
• Storage and CD-R/W is for either storing scanned documents in
a folder, or sending them to a CD burner to create a CD
containing the scanned documents. See “Transferring Scanned
Documents to Storage” on page 52 and “Scan and Burn to a CD”
on page 49 for details.
• Fax and Print is for sending your scanned documents directly to
your printer or fax software for faxing.
• Sti event forwarding is for using another application’s interface
for scanning. The One Touch Event Forwarding dialog box opens
so you can select which application to use to continue scanning.
See “Scanning with Event Forwarding” on page 50 for details.
4. After selecting a new category for the Destination Applications, click
the Multi Function tab to see which ones are added to the list.
Global Options for All Scanning Functions
• Show Progress Window—Select this option to display the progress
window of the document(s) during scanning .
• Use enhanced folder browser—Select this option if you want to
save your scans to a network location that is not a mapped drive on
your computer.
• Create copies of scanned documents—Sometimes the image of a
scanned document is only saved as a temporary file until its
Destination Application is finished using it. In those cases you may or
may not want an additional, permanent copy saved on your hard
drive.
The copies will be saved in the folder specified in the Folder Copy
Options section.
This option is not available if either Document Management or
Storage and CD-R/W are selected because, by default, file copies for
those types of Destination Applications are already automatically
saved in the folder for copies.
• Folder Copy Options—This section of the dialog box sets the
location for copies of your scanned documents and how you want to
group them.
Click the Browse button and find the folder for the copies. Select the
grouping option for the documents. The Group by button option
groups the documents under the name of the One Touch button. For
example, if the button is named Printer, the documents are grouped
under the name Printer. Group by type arranges the scanned
documents by the type of file, such as .doc or .jpg. If you also want to
group them by date you can choose the week and month options.
DocuMate 765 Scanner User’s Guide 47
Page 55

Scanning from One Touch
Special Features and Scanning Destinations
The One Touch software has unique scanning op tions available. You can
scan directly to word processing programs, to your computer’s CD burner ,
HTML files and so on.
Scanning with Optical Character Recognition (OCR)
Please see the One Touch OmniPage MiniGuide, on the installation disc,
for complete instructions on scanning with Optical Character Recognition.
Optical Character Recognition (OCR) is like a printer in reverse. Instead
of printing what’s on the screen onto paper, OCR converts text and
numbers on a scanned page into editable text and num bers. You can then
work with the text and numbers to edit, spellcheck, change font or type
size, sort, calculate, and so forth.
NOTE: For all OCR processing, use the original factory settings for
OCR scanning that came with your scanner . When scanning with other
settings, use at least 300 dpi for the resolution. If the original
documents are of poor quality and have small type, 400 dpi can be
used as the maximum resolution.
The One Touch OmniPage Module or the OmniPage Pro software must
be installed on your computer in order to use the OCR options with the
One Touch 4.0 software and your DocuMate 765 scanner. One Touch 4.0
and OmniPage Pro work together to combine scanning with OCR
processing into one integrated step. The One Touch OmniPage Module
was automatically installed when you installed your driver, the OmniPage
Pro software is on the installation disc that you received with your
scanner. T he One Touch OmniPage Modu le and the OmniPage Sof tware
can both be installed on your computer at the same time, however, the
features in the One Touch OmniPage Module will take precedence over
the OmniPage software features when using One Touch 4.0. The “One
Touch OmniPage Mini-Guide” is available on the installation disc.
With the One Touch OmniPage Module or OmniPage Pro software
installed, the OCR process is automatic when the page format on the One
Touch Properties window is a text format, such as DOC, TEXT, XLS, RTF,
and so forth.
NOTE: If you have uninstalled the One Touch OmniPage Module or
the OmniPage Pro software from your computer, items scanned as a
text format are still converted with the OCR process, however, the
options available with the process are then limited.
48 DocuMate 765 Scanner User’s Guide
Page 56

Scan and Burn to a CD
If you have a CD burner attached to your compu ter, you can scan directly
from your Xerox DocuMate 765 scanner onto a CD. This feature is
available only on computers running Windows XP or Windows Vista.
To scan and burn to a CD
1. Open the One Touch Properties window.
2. Using the arrows, choose a button to use for scanning and burning to
a CD.
3. Select Burn to CD as the Destination Application.
Scanning from One Touch
4. Choose a Page Format and a Scan Configuration.
5. Click OK.
The One Touch Properties window closes.
6. Now start scanning using the button you selected to use to scan and
burn to CD.
When scanning is finished, a bubble message on the screen tells you
that files are waiting to be burned to the CD.
7. Open the One Touch window and make sure that the Burn to CD
Destination Application is still selected and click the Properties
button.
The One Touch 4.0 Link Properties window opens.
8. Make sure a CD is in the CD burner.
9. Click the Burn to CD button. The CD burner begins and your
scanned documents are written to the CD.
NOTE: If other files are also waiting in this location, they will get
written with the One Touch files on the CD.
DocuMate 765 Scanner User’s Guide 49
Page 57

Scanning from One Touch
Scanning with Event Forwarding
If you want to specify an application to use for scanning at the start of the
process, you can use event forwarding. The scanner will feed in the first
page, but will then stop until you select the application to use.
To scan with event forwarding:
1. Open the One Touch Properties window.
2. Using the arrows, choose a button to use for the event forwarding.
3. Select Still Image Client as the Destination Application.
4. Click OK.
5. Start scanning using the button you selected for event forwarding.
A dialog box opens for you to select the application to use for
scanning.
6. Select the application in the box and click OK.
Now the application you selected opens and you can continue the
scanning from that application’s TWAIN interface.
50 DocuMate 765 Scanner User’s Guide
Page 58

Scanning from One Touch
Choose HTML.
Creating an HTML Web Page from Your Scanned Documents
If you scan a document, whether a single p age or multiple p ages, yo u can
have the pages converted directly to HTML formatted pages for posting
directly to your web site.
To scan and create an HTML web page:
1. Open the One Touch Properties window.
2. Using the arrows, choose Button 8, or any other button that has
Microsoft Explorer as one of its Destination Applications.
3. Select Microsoft Explorer as the Destination Application.
4. Choose HTML as the Page Format.
5. Choose a Scan Configuration that has the settings for the image on
the HTML page.
6. Click OK.
7. Now on the One Touch Button Panel, click Button 8.
When scanning is finished, the document is first converted to editable
text using the OCR process, then is converted into an HTML format.
Microsoft Internet Explorer then opens showing your converted page.
8. Choose Save As from the Internet Explorer File menu, give the pag e
a name, and save it in the location you use for your web page files.
9. You can now use Microsoft Internet Explorer or other application to
post the document to your web page as you would any other HTML
page.
DocuMate 765 Scanner User’s Guide 51
Page 59

Scanning from One Touch
Your scanned documents
will be stored at this location.
Transferring Scanned Documents to Storage
With the Transfer to Storage scanning process, you can scan documents
and save them in a folder in one step. The process is ideal for archiving
documents without having to manually save or process them in any other
way . If you choose a text format for the file forma t, the documents ar e also
automatically converted by the OCR process into editable text and
numbers before being stored.
1. To scan using the buttons on the scanner, press the Destination
Selector until the LED is at 7, then press the Simplex or Duplex
button.
2. To scan from the One Touch Button Panel, click the One Touch icon in
the Windows Notification Area, click the arrows to see Button 7, then
click Button 7.
Your scanned pages are stored in the location that you specified on
the One Touch 4.0 Link Properties windo w.
When selecting the storage location for scanned documents, you can
select a local folder, or a folder on a server or mapped drive.
52 DocuMate 765 Scanner User’s Guide
Page 60

Scanning to Multiple Folders
Select Transfer to Storage.
Click the New button.
When archiving documents with the Transfer to Storage option, you can
scan them to multiple folders. For example, one folder might be for
“Business Receipts,” a second folder might be for “Personal Receipts,”
and a third folder might be for “Annual Receipts.”
To scan to multiple folders, you create multiple scan configurations with
Transfer to Storage as the Destination Application, and assign each scan
configuration to one of the scanner buttons.
NOTE: The selections you make using the Storage Options tab
override the storage options that apply to the Storage Properties.
Setting up multiple folders for transfer to storage:
1. Using Microsoft Windows, create the folders that you want to use for
storing scanned items.
2. Open the One Touch Properties window.
3. Select Transfer to Storage as the Destination Application.
4. Click the New button.
Scanning from One Touch
The Scan Configuration Properties dialog box opens.
5. To help you remember which folder it is, give the new configuration a
name that indicates the folder name, such as “Storage for Business
Receipts.”
6. Click the Scan Settings, Page Settings, and Advanced Settings
tabs, and select the settings you want.
DocuMate 765 Scanner User’s Guide 53
Page 61

Scanning from One Touch
7. Click the Storage Op tion s tab.
8. Click the Browse button.
9. Select the folder you created for storing the scanned documents.
If you haven’t created the folder yet, you can click the Make New
Folder button and type the name for the new folder.
10. Click OK. The selected folder will now be set as the Storage Location,
such as “Business Receipts.”
54 DocuMate 765 Scanner User’s Guide
Page 62

Scanning from One Touch
The new
configurations apply
to the Transfer to
Storage Destination
Application.
11. Click Apply. The new configuration is now listed as a Transfer to
Storage configuration.
12. Repeat the process to create additional new configurations, such as
one named “Storage for Personal Receipts.”
13. Make sure to designate sep arate folders as the Storage Locations for
the new configurations.
You will now have multiple configurations set up for the Transfer to
Storage destination, and each configuration scans documents to
separate folders.
14. Now click the arrow buttons to select a scanner button for each new
configuration. Click Apply to set that button for that configuration.
The following examples show that buttons 7 and 8 ha ve bee n set to
scan to each of the new configurations.
Note that the button names have also been changed to S torage 1 and
Storage 2 to remind you that both send documents to storage, but to
different locations.
DocuMate 765 Scanner User’s Guide 55
Page 63

Scanning from One Touch
Scan to multiple storage folders:
1. Insert the documents you want to scan to storage.
2. Press the Destination Selector buttons on the sca nner to ge t to o ne
of the buttons set up for scanning to storage.
3. Press the Simplex or Duplex button to scan the documents.
4. When scanning is finished, insert the next set of documents and
press the Destination Selector buttons to get to the next button you
have set up for scanning.
5. Press the Simplex or Duplex button to scan the documents.
When scanning is finished, the two sets of documents are stored in two
separate folders.
To Use OCR Before Transferring to Storage
If the documents you want to transfer to storage are text documents or
spreadsheets, you can have them converte d by the OCR process prio r to
being stored.
1. Open the One Touch Properties window.
2. Using the arrows, choose Button 7, or any other button if it is set up
with Transfer to Storage as one of its Destination Applications.
3. Choose a text format as the file format.
4. Right-click on the text format icon and choose the file format for the
scanned documents.
5. Choose a Scan Configuration.
6. Click OK.
7. Now start scanning using Button 7 (or other button you set up for
archiving).
When scanning is finished, the documents are saved in the text file format
and in the location you specified.
56 DocuMate 765 Scanner User’s Guide
Page 64

Scanning from TWAIN
Scanning from TWAIN
One Touch sends scanned images to applications or folders on your
computer. You can also scan from within scanning applications using the
TWAIN interface. You then use that application’s options to modify and
save the file.
A Note About Your Scanner and the TWAIN standard: TWAIN is a
widely recognized standard that software applications use to receive
images from scanners, digital cameras, and other digital devices. The
OmniPage Pro software that you received with your scanner uses the
TWAIN standard. The TWAIN interface described in this section is the
one provided with your scanner and you will see it from OmniPage. Other
TWAIN compliant scanning applications may also access this interface.
However, there are some applications that have their own TWAIN
interface. If you are scanning from a software application and see the
interface shown in this section, you can use these instructions to scan
with the TWAIN interface. If you do not see this TWAIN interface, please
refer to your scanning application user guide for instructions.
The OmniPage software includes a complete set of help topics that
answer questions about each feature of the software. To open the Help
Topics window, press the F1 key or choose Help Topics from the Help
menu. The OmniPage user guide is on the installation disc.
Accessing the TWAIN Interface
Each TWAIN-compliant software application has its own specific steps to
open the TWAIN interface, but the basic process is the same for most of
them. Please refer to your scanning application’s user guide for
instructions on accessing the TWAIN interface.
1. Open an application that is TWAIN-compliant.
2. Use the application’s command that opens the TWAIN interface.
For example, in OmniPage click go to File, then Get Page, then click
on Scan. If you get a message that the scanner is not in the
OmniPage database, follow the instruction so screen to run the
Scanner Setup Wizard.
3. The TWAIN Interface will open.
Scanning
After the TWAIN interface is open, put your documents in the scann er and
click Scan to start scanning with the default settings in this interface. The
next section describes the available features with the scanner’s TWAIN
driver.
DocuMate 765 Scanner User’s Guide 57
Page 65

Scanning from TWAIN
TWAIN Interface Options
When Xerox DocuMate 765 TWAIN interface first opens the initial view of
the Configurations tab, shows the Current Settings profile and basic
information about the scanning selections in the Summ ary field. The other
tabs, Scan Settings, Document Settings, and Image Enhancement, are
where you set these scanning options for a profile.
The status field and buttons at the bottom of the TWAIN interface are
always available. Click on the Scan button to initiate a scan with the
current settings. Click on Cancel to discard any changes and close the
window.
Configurations Tab
Scan Profile—click the drop arrow and select a scan profile from the list.
A profile contains all features in the TWAIN interface, including color
mode, resolution, paper size, double-feed detection, and so on. There are
no predefined profiles, if you make changes and initiate a scan, the Last
Used profile will contain those changes until you adjust other settings.
The buttons on the interface are for saving and distributing profile s.
• Save—click this button to sa ve the settings in TW AIN to a profile. You
will be prompted specify a profile name, type in the name you want
then click on OK. If you are making changes to a profile you have
already saved, you will be asked if you want to replace the current
profile. Click on Yes to replace the current profile settings, or No to
specify a new profile name. The Current Settings prof ile sh ow th e
scan settings last used.
• Export—if you want to share your settings with another user who has
these TWAIN options, you can export a profile then import it on
another computer. After clicking the Export button, you will be
prompted for a file name and a location to save the profile. Choose a
location on your computer where you will be able to find it.
58 DocuMate 765 Scanner User’s Guide
Page 66

Scan Settings Tab
Scanning from TWAIN
• Import—if you have exported profiles from TWAIN previously, click
on import to add those profiles to your current profile list. Browse to
the location on your computer where the profiles are saved, select the
profile then click on Import. If you import a profile that has the same
name as a profile you already have in the list, you will be prompted to
either overwrite the current profile or cancel the import of that profile.
• Delete—on the Configurations tab, select a profile from the list then
click on the Delete button to remove that profile.
Summary—this section lists some of the details of the current scan
profile. These are the options found on the Scan Settings, Document
Settings, and Image Enhancements tabs.
Mode—select the color you want the image to be saved as.
Black and White scans the image bitonal where everything on the
page is either black or white. This setting is often used when scanning
typed or written documents. When there are not a lot of graphics or if
the graphics are not needed, this setting is ideal for archiving
documents to a server or on a disc, emailing, or posting to a web
page, as the file size is smaller than the other scanning modes.
Grayscale scans the image using varying shades of gray to
reproduce the document. This setting is often used when scanning
documents or graphics where the original color does not need to be
retained, but the graphics need to be maint ained. Grayscale scanning
preserves the graphic quality while keeping the file size less than that
of a full color scan.
Color scans the image in color , creating a full color copy of an original
document. This setting is often used when scanning color docume nts
where the background or images on the page are illegible when
scanned in grayscale or black and white. Color scans have the
largest file size.
DocuMate 765 Scanner User’s Guide 59
Page 67

Scanning from TWAIN
Resolution—move the slider left or right to change the resolution for the
scanned image. Resolution is the clarity of the image measured in dotsper-inch (dpi). The higher the resolution the clearer the image. However,
high resolution scans can result in a large file size. When making copies
of black and white documents, 100-150 dpi will create an image of similar
quality to the original. When making copies of color documents, 150-200
dpi will create an image of similar quality to the original. Higher
resolutions are generally used for creating an image that can be enlarged
without losing image quality.
Page Type—your scanner supports both Single-Sided (simplex) and
Double-Sided (duplex) scanning. If you only want one side of the page
scanned, select Single-Sided. If your document contains information on
both sides of the page, select Double-Sided to have both sides of the
page scanned.
Page Size—click the down arrow and select a pre-defined page size from
the list. The available page size are within the scanner’s range of
minimum and maximum item size. The list includes options that may be
specific to your locale, such as U.S. Letter, A4, B5, etc...
If the list does not include the page size for your scanning batc h, click on
Custom, then input the Width and Height of the document. Click on
Inches to change the setting to millimeters (mm). You can only specify
values within the scanner’s range of minimum and maximum item size.
When inputting a custom page size value, click on Long Document to
enable long paper support. When Long Document is selected the
maximum page length is 53.33 inches (1,354.58 mm) . When Long
Document is not selected, 17 inches (431.8 mm) is the maximum custom
length that can be specified. Please see “Xerox DocuMate 765 Scanner
Specifications” on page 134 for minimum and maximum paper sizes.
Page Orientation—the Portrait and Landscape option is for you to
select what direction you placed the pages in the scanner. Choose
portrait if the papers are in the input tray with the tops in the scanner.
Choose landscape if the papers are in the input tray with the sides in the
scanner.
60 DocuMate 765 Scanner User’s Guide
Page 68

Document Settings Tab
Scanning from TWAIN
Crop image to guide width—this option tells the scanner to look at the
input tray’s paper guides and crop the final image to that size. For
instance, if the selected paper size is for an U.S. Letter but you place an
A4 page in the scanner, adjust the paper guides to the edge of the paper,
and the scanner automatically crops the sides from the final image.
Crop image to paper length—this option tells the scanner to crop the
final image the bottom of the page being scanned. This option may
occasionally be grayed out, not all TWAIN scanning applications support
this feature.
Double Feed Detection (DFD) is the scanner’s ability to detect when two
or more pages are fed through the scanner at the same time.
When this option is turned on, ultrasonic waves are aimed at the
document to detect multiple pages by the level at which the waves
pass through the pages. The accuracy of this sensor depends on
paper thickness and whether or not creasing is in the original
document. Standard printer paper between 16lb and 20lb works best
with this feature.
You can set the scanner’s sensitivity level and what action you want
the scanner to take when the double-feed is detected. Detect only
means that your scanner will beep if a double feed is detected but
continue scanning. Detect and stop means that when the double feed
is detected, scanning stops and you can take the pages out of the
scanner and place them back on the stack to be scanned again.
DFD Sensitivity allows you to change how sensitive the sensor is. Move
the slider to the left or right to adjust this setting.
DocuMate 765 Scanner User’s Guide 61
Page 69

Scanning from TWAIN
Image Enhancements Tab
Skew detection is the scanner ’s ability to detect when a page has been
fed through at an angle (skewed). Click on the drop arrow to select one of
the options from the list. You can set the scanner to Detect and stop
scanning so you can rescan the page, or turn off the feature. When
scanning, make sure the paper guides are to the sides of the paper to
hold them in the ADF properly.
Invert Image—this option reverses black and white on a page, so that
when scanned a white page with black text image will be a black page
with white text. The option is only available when scanning in Black and
White.
Mirror Image—this option flips the image left-to-right and is only availa ble
when scanning in Black and White.
Despeckle—removes speckles from the background. Speckles are small
spots on an image that the scanner interpreted as a valid part of the
document. For example, an irregularity in the paper, a small wrinkle, or
holes where a staple was removed may show up as speckles in the
scanned image. The Despeckle option identifies these spots and remo ves
them. Despeckle is only available for the Black and White scanning
mode.
Speckle diameter—is where you can set the size of the speckles you
want the software to look for and remove. The size of the speckle
removal is measured in pixels. For instance, if you have small black
dots all over the image, a value of 1 will look for black dots in the
image that exactly 1 pixel in size. A value of 2 will remove a square
block of 4 pixels, a value of 3 will remove a square block of 9 pixels,
and so on. However , as you increase the spec kle diameter the dot s of
“i” and “j”, accent marks above letters, and punctua tion marks such as
periods or commas, may be removed as well.
62 DocuMate 765 Scanner User’s Guide
Page 70

Scanning from TWAIN
Color Dropout tells the scanner and software to remove a specific color
from the image. You can choose either Red, Blue or Green to be dropped
out of an image. This option is only available when scanning in grayscale
or black and white.
Brightness is the overall lightness of the image. Move the slider to the
left to decrease (darken) the image, move the slide to the right to in crease
(lighten) the image. You might use this option if you are scanning in a
document with handwritten notes using a pencil. This option is only
available when scanning in Color and Grayscale.
Contrast refers to the difference between the light and dark portions of
the image. Increasing the contrast emphasizes the difference between
the lighter and darker portions, decreasing the contrast
de-emphasizes that difference. This option is only available when
scanning in Color and Grayscale.
Threshold technique is specific to the type of documents you are
scanning. When you select a threshold technique the sub-panel below will
update with the options available to that technique. These options are
only available when scanning in Black and White.
• Text (threshold) enables you to set what level of light or dark text to
look for on a page. When scanning in black and white, everything on
the page is set to either white pixels or black pixels in the fina l image.
If the text on the page is a light color, then the text may be gone in the
final image as the scanner will change those light colors to white
pixels. The text threshold technique lets you set the level of darkne ss
or lightness of the text on the page. This option works best for
document that contain only text such as business letters,
spreadsheets, reports, etc...
• Photo (dither / halftone / error diffusion) is the intentional
application of noise in the image to help alleviate banding when
scanning in binary (Black and White) mode. For example, if you scan
a color photo in black and white, the image file will have large blocks
of black and white and the image barely recognizable. Dithering the
image creates a black and white image that is recognizable. The
dither option is only available when you are scanning in Black and
White.
• Mixed content (automatic separation) applies both a threshold
level and a dither diffusion to the image. It looks at the page and
breaks it up into sections of graphics and text, then applies the
threshold and dither value the appropriate section. This option works
well when scanning items that have both text and graphics, such as
marketing brochures. After selecting this technique, both sub-options
for Threshold and Dither will be available.
• Dynamic threshold enables you to set what level of light or dark text
to look for on a page. When scanning in black and white, everything
on the page is set to either white pixels or black pixels in the final
image. If the text on the page is of a light color, then the text may be
gone in the final image as the scanner will change those light colors
to white pixels. The text threshold technique lets you set the level of
darkness or lightness of the text on the page.
DocuMate 765 Scanner User’s Guide 63
Page 71

Scanning from TWAIN
Full Color Black and White Bayer Dither 64 Steps
Close-up of Bayer Dither
Threshold—move the slider to the left or ri ght to set the level of ligh tness
or darkness for the scanner to leverage from. This option is only enabled
if you have selected Text or Mixed Content as the threshold technique to
use.
For example, if you are scanning a document with gray text, such as
hand written pencil notes, move the slider towards Light. This te lls the
scanner that the level to look for is light, and gray pixels are converted
to black pixels instead of white. If the overall tone of the original
document is dark, such as a colored background that may interfere
with detecting black, move the slider towards Dark. This tells the
scanner that the level to look for is dark, only very dark areas such as
text are converted to black pixels.
If you are scanning documents that are in good condition, with black
text on a white background, the default threshold option will properly
scan the item. This level only needs to be adjusted if the scanned
image does not have image clarity similar to the original.
Dither / Halftone / Error Diffusion Method—select the dithering type
you want to use from the drop list in the sub panel.
Below is an example of a color scan, a black and white scan without
dithering, and a black and white scan with dithering (using Bayer
Dither 64 steps). When the image is scaled down, it may look like a
grayscale scan. When the image is at normal size or enlarged you will
be able to clearly see the dithering pattern, as shown in the close-up
image.
Dynamic Threshold—move the slider to the left or right to set the le vel of
lightness or darkness for the scanner to leverage from.
For example, if you are scanning a document with gray text, such as
hand written pencil notes, move the slider towards Light. This te lls the
scanner that the level to look for is light, and gray pixels are converted
to black pixels instead of white. If the overall tone of the original
64 DocuMate 765 Scanner User’s Guide
Page 72

About Tab
Scanning from TWAIN
document is dark, such as a colored background that may interfere
with detecting black, move the slider towards Dark. This tells the
scanner that the level to look for is dark, only very dark areas such as
text are converted to black pixels.
The threshold option in this section individually looks at each page
and applies the threshold if the software determines that it is needed.
TWAIN Driver Information—this area shows the current driver version
and scanner name. If you have more than one scanner, of the same
model, connected to your computer you will see a counting number after
the scanner model.
Scanner Information—this area shows the hardware specific
information.
The Serial number is unique to each scanner, looking at different
serial numbers allows the software to have multiple scanners of the
same model installed on one computer.
The Total number of pages scanned shows the number of pages
the scanner has ever scanned. The scanner’s user utility displays
other count information, see page 104.
The Front and Back background color displays the current side of
the background plate. Please see page 99 for instructions on
changing the background color.
The Scanner memory shows the total amoun t of installed me mory in
the scanner.
Click the Refresh button to update the information in this window.
DocuMate 765 Scanner User’s Guide 65
Page 73

Scanning from TWAIN
66 DocuMate 765 Scanner User’s Guide
Page 74

Scanning from ISIS
Scanning from ISIS
The ISIS interface is another driver option that you can use for scanning
with your Xerox DocuMate 765 scanner. The ISIS interface can only be
accessed from ISIS scanning applications. The QuickScan Demo and
Kofax VRS Pro applications, provided with your scanne r, are scanning
applications that use the ISIS driver.
Each ISIS-compliant software application has its own specific steps to
open the ISIS interface. Please refer to that application’s User Guide for
instructions on scanning with ISIS. The instructions in this section
describe how to open and scan with the ISIS interface in QuickScan.
Additional information about the advanced features, esp ecially those
specific to the QuickScan application, can be found by pressing F1 on
your keyboard to open the help file for the ISIS interface when the ISIS
interface is open.
Opening QuickScan and Selecting the Scanner
1. Open the QuickScan software from the Windows programs list.
Please note that you may see the following warning message:
2. Please disregard this message and click Continue.
QuickScan detects all ISIS drivers installed on your computer. The
Kofax KfxScan.PXN ISIS driver, that you use from the Kofax VRS
software, may not show as certified with QuickScan.
3. From the QuickScan main window, click on Scan on the menu bar at
the top of the window.
4. Click on Select Scanner...
Select Xerox DocuMate 765 from the list of scanners and click OK.
DocuMate 765 Scanner User’s Guide 67
Page 75

Scanning from ISIS
Scanning from QuickScan
QuickScan has several preset configurations you can use for scanning.
You can also create new scanning configurations to use the advanced
features available with your Xerox DocuMate 765 scanner.
1. Place your documents face up with their tops in the scanner.
2. In the QuickScan main window, click on the Scan button on the
toolbar then select New Batch from the list.
3. Select one of the predefined options in the New Batch window.
4. Click on the Scan button.
The scanner starts scanning, when finished the images will be in the
Quick Scan application.
68 DocuMate 765 Scanner User’s Guide
Page 76
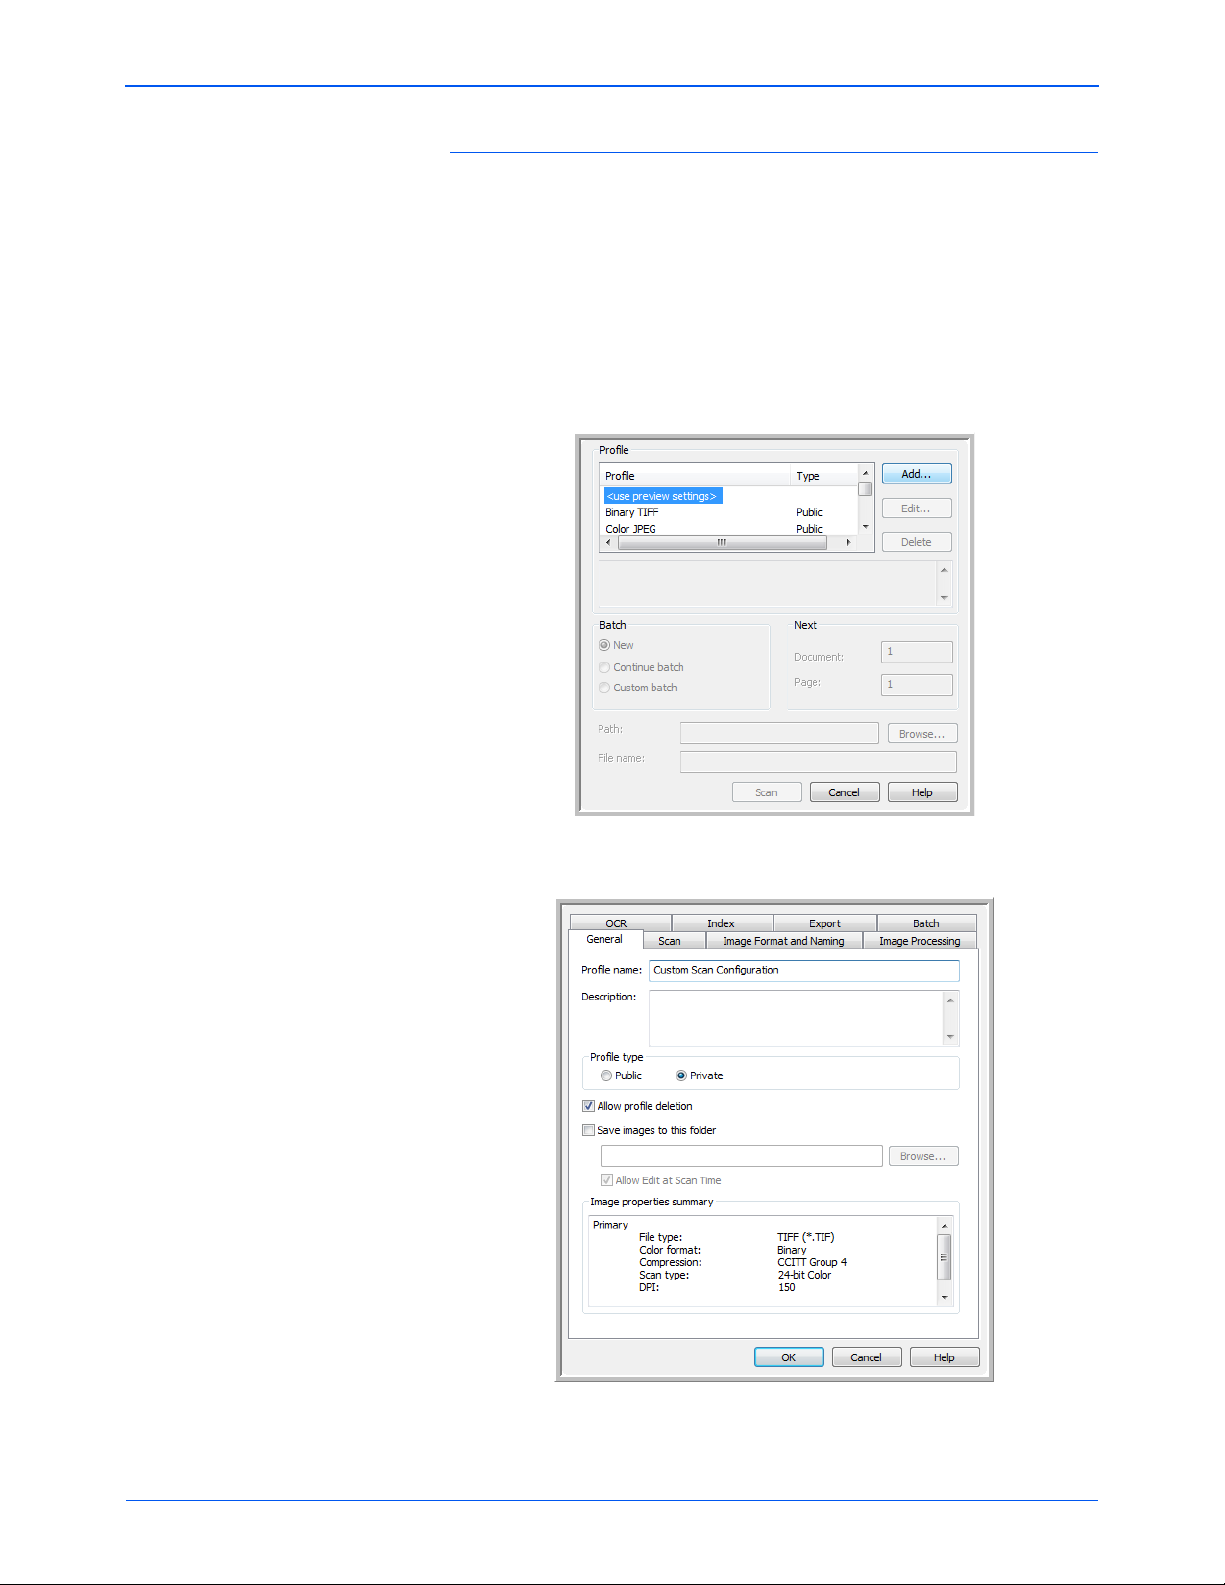
Scanning from ISIS
To create a new scanning preset:
This section briefly describes how to choose new settings and the basic
options for file saving. Detailed information about the options on each of
the tabs are in the QuickScan user guide.
If you do not want to use the preset configurations in QuickScan, you can
create new ones.
1. In the QuickScan main window, click on the Scan button on the
toolbar then select New Batch from the list.
2. Click on Use Preview Settings then click on Add.
3. Type a name for the new configuration into the Profile Name field.
DocuMate 765 Scanner User’s Guide 69
Page 77

Scanning from ISIS
4. Click on the Scan tab to set the configuration properties.
5. Click on the Scan Settings button to open the Preview Settings
window where you set the options you want for scanning.
6. Click on the Preset Name you want to use for this scanning batch
then click on OK to close the window.
The next section “ISIS Preview Settings” provides full details of the
features in this interface and how to create new preset configurations
for scanning.
70 DocuMate 765 Scanner User’s Guide
Page 78

Scanning from ISIS
7. Click on the Image Format and Naming tab. Select the file type you
want the image saved as and the color mode of the image (color,
grayscale or black and white).
8. Click on OK in the new batch window to accept the changes and
close the window.
9. Place your documents face up with their tops in the scanner.
10. Click on your configuration name then click on the Scan button to
begin scanning.
The scanner starts scanning, when finished the images will be in the
Quick Scan application.
DocuMate 765 Scanner User’s Guide 71
Page 79

Scanning from ISIS
ISIS Preview Settings
The QuickScan user guide, on the installation disc, contains complete
instructions on using the QuickScan software. The instructions in this
section detail the features of the Xerox DocuMate 765 ISIS interface and
how to scan with the default settings only.
1. From the QuickScan main window, click on Scan on the menu bar at
the top of the window.
2. Click on Preview Settings...
3. The Preview Settings window opens.
The buttons in the middle of the window are available on all o f the settings
tabs.
Save As—click this button to save the settings you have chosen into a
new configuration file. This opens a standard Windows Save As dialog
window. Name the file something that will help you remember what it is,
but do not change the location where the file is saved. The default
location is where QuickScan saves the configuration files to use.
Delete—select an option in the Preset Name list then click the Delete
button to delete the configuration.
Import—if you have used QuickScan with your DocuMate 765 scanner,
you can import the configuration files from your other computer.
Presets Options
Preview—place a page in the scanner then click on th e Preview button to
scan and view the results in the preview area on the right side of the
screen. As you are making changes on the various settings tab s, you can
check the settings by clicking on this button. Any pages you preview in
this area are not saved.
When opening the ISIS preview settings window, the Presets tab lists all
of the scanning presets that you have created.
Select a configuration in the Preset Name list, then click on OK to use that
option when scanning.
72 DocuMate 765 Scanner User’s Guide
Page 80

Main Options
Scanning from ISIS
The Main tab has the basic settings you need for scanning. This includes
color type, resolution (dpi), brightness, contra st, an d so forth.
Mode—select the color mode for your scanning batch.
• Black and White—select this option to scan in black and white. This
option is mostly used for letters or spreadsheets that do not contain
pictures. Every item on the page will be in binary black or white, which
results in a smaller file size that other scanning modes.
• 256-Level Gray—select this option to scan in grayscale. This option
is often used to make copies of black and white photos or scanning
color images to turn them into grayscale. Scanning in grayscale will
result in a larger file size than scanning black and white, but about 1/3
of the size of a color scan.
• 24-bit Color—select this option to scan in full color . Th is option is
often used to make direct copies of original photos and color
documents. This option has the largest file size.
The Xerox DocuMate 765 scanner supports 2 additional scanning mode s,
these scanning modes are called Multistream scanning.
• Binary&Color—select this option to have the final image retain the
binary black and white on the page with color or grayscale graphics.
This option might be used to scan marketing brochures or business
letters where the text on the page is black while the images or logos
are in color. The resulting file size is larger than black and white
scanning, but the images are clear and the file size is smaller than a
full color scan.
DocuMate 765 Scanner User’s Guide 73
Page 81

Scanning from ISIS
• Binary&Gray—select this option to have the final image retain the
binary black and white on the page with grayscale graphics. This
option might be used to scan marketing brochu res or business letter s
where the text on the page is black while the image or logo are in gray
or color. The resulting file size is larger than binary (black and white)
scanning, but the images are clear and the file size is smaller than a
grayscale, color, or binary and color scan.
Dots per inch (dpi) —this option, also called th e scan resolution, set s the
clarity of the scanned image.
• When making a direct copy of a letter or grayscale document,
resolution between 150dpi or 200dpi will create an image of similar
quality to the original.
• When making a direct copy of a color document or color photograph,
resolution between 200dpi and 300dpi will create an image of similar
quality to the original.
• Higher dpi settings should be used when you are scanning a
document to create an enlargement of the original.
Paper Source—click on the arrow and select either ADF Simplex or ADF
Duplex. If you choose to leave the default Auto Select then all scans will
be simplex.
ADF Simplex—this is single side scanning, only the side of the page
facing up is scanned.
ADF Duplex—this is double side scanning, both sides of the page
are scanned at the same time.
Dither—dither is the intentional application of noise in the image to help
alleviate banding when scanning in binary mode. For example, if you
scan a color photo in black and white, the image file will have large blocks
of black and white and barely recognizable when compared to the
original. Dithering the image creates a black and white image that is
recognizable as the original. The dither option is only available when you
are scanning in black and white or a multistream color mode, and the
Brightness mode must be set to Manual.
Brightness—use brightness when the original is too dark or light to be
seen clearly. For example, a note written with a pencil may be too light to
see in the final image clearly, decreasing the brightness will help the
software to provide a clearer image of the original.
When you select Manual, you can manually adjust the brightness level by
moving the slider left or right, or by clicking on one of the preset options.
When you select Automatic, all other options in the Brightness field
automatically disable and the software attempts to determine the needed
level of brightness during the scan process.
74 DocuMate 765 Scanner User’s Guide
Page 82

Layout Options
Scanning from ISIS
Three preset options, of the most commonly used brightness levels, have
been provided. Clicking on one of the buttons below the Brightness level
will change the level as follows:
• Darken—the brightness level will be set to 51.
• Normal—the brightness level will be set to 128, this is the default
setting.
• Lighten—the brightness level will be set to 205.
Contrast—contrast refers to the difference between the light and dark
portions of the image. Increasing the contrast emphasizes the difference
between the lighter and darker portions, decreasing the contrast
de-emphasizes that difference.
The Layout tab is where you select the options specific to the type of
paper you are scanning.
Select Setting Side—when you have selected to scan in Duplex, there
will be multiple options. This allows you to select settings that are for only
the front side of the page (face up side), back side of the page, or to have
settings apply to both sides.
Page Size—click on the drop menu and select the size of your paper from
the list of available options. Or , you can select Custom to manually set the
page size. Selecting Custom automatically enables the scroll ba r an d
input fields.
• Custom Page Width—move the scroll bar left or right to manually
adjust the page width. Or, type the width of the paper in the input field
next to the scroll bar.
• Custom Page Height—move the scroll bar left or right to manually
adjust the page height. Or, type the height of the paper in the input
field.
NOTE: Any changes made to the paper size are automatically reflected
in the preview area as it resizes to show the size you input.
DocuMate 765 Scanner User’s Guide 75
Page 83

Scanning from ISIS
Area—in this section you can select the measurement method that you
want your page size units to display. You can select Pixels, Inches or
Centimeters. When you select one of these options, the numbers in the
Page Size section will change to reflect your choice.
• Click on Snap to have the measurements round to the nearest 1/8
inch or 1/2 centimeter.
• The X and Y coordinates tells the scanner where to start capturing the
image as the page passes across the scanner glass. In the case of
“0” it is capturing the image from the center of the page, at the top of
the page.
If you have changed the starting position s of the X and Y coordinates,
the preview area will show a handling box for you to see where the
image will be captured. You can manually drag the handling box
around the screen to change the position where image capture
occurs.
To activate this option, click on the Paper Handling tab and deselect
Length Control. Click back on they Layout Tab and you will now be
able to manually enter the area where you wan t th e ima ge captur e to
start from.
• The Width and Length areas show the size of the paper being
captured.
Page Layout—select either Portrait or Landscape as the scanning
direction of the pages in the scanner.
Feed—the options in this section are for telling the scanner what direction
the pages are facing so that the resulting image has the papers in the
proper orientation.
• Portrait—selecting portrait for the page layout activate s the option for
top edge or bottom edge first. This means that if you put the pages in
the scanner with the top of the page in the scanner, then you would
select Top edge first. If you placed the pages in the scanner with the
bottoms in the scanner, then the image will be upside down if you do
not select Bottom edge first before scanning.
• Landscape—selecting landscape for the page layout activates the
option for left or right edge first. This means that if you put the pages
into the scanner with the right side of the page in the scanner, then
you would select Right edge first. If you placed the pages in the
scanner wit h the left side in the scanner, then the image will be
upside down if you do not select Left edge first.
76 DocuMate 765 Scanner User’s Guide
Page 84

Page Layout Sub Area
The Sub Area is a special feature in the Page Layout tab. The Sub Area
option allows for separate scanning conditions to be set for on e part of the
image capture area.
For example, if there is an area on your documents that conta in a color
graphic, you can get better scanning results by setting the whole page in
Black and White mode and then specifying the color image area as a
Halftone (dither).
Requirements:
• The Sub Area feature can only be used when scanning in Black and
White color mode, this scanning option is on the Main tab.
• Only one type of Halftone (dither) can be configured.
• Three scanning areas can be specified for each side of the paper.
• Place a sample page face-up in the scanner, then click on Preview in
the Page Layout tab before opening the Sub Area window.
If you do not preview a page before opening the Sub Area. The area
where you will place your focus box will be the default empty preview
window.
• The Sub Area feature is disabled when the following options on the
Paper Handling tab are enabled:
• Length Control
Scanning from ISIS
• Detect Paper Width
• Margin
• Long Paper
• The Sub Area feature is disabled when the following options on the
Image Processing tab are enabled:
• Automatic Separation
• Binary Dynamic Threshold
• Noise Reduction
DocuMate 765 Scanner User’s Guide 77
Page 85

Scanning from ISIS
Configuring the Sub Area Window
1. On the Page Layout tab, click the SubArea(W) button.
The Sub Area window opens. If the button is disabled, please check
through the above requirements list to verify that none of the options
listed are enabled.
2. Select the side of the page you want the Sub Area created for. You
can set the Sub Area independently for both sides of the page.
Your scanner is a duplex scanner, this means that both sides of the
page can be scanned at the same time.
Front—when you load paper in the scanner, the face-up side is the
front side. If you scan in Simplex, this is the only side of the paper that
is capture.
Back—this is the Duplex side of the page. You set the parameters
separately for each side of the page. If you only scan items, such as
letter head, that are only one sided, you do not need to do anything
with the back side of the page.
3. Click on the Region button #1. This will activate the area box.
Initially the selected area will be the entire page size in the preview
window.
4. Click on the box next to Enable to enable the Dither option.
5. Click on the drop menu and select a dither option from the list. A
common dithering option is Bayer 64.
6. In the Brightness section, move the bar left or right to ad just the
brightness level. Y ou can also leave it at the default Normal or click on
the quick key for Darken and Lighten.
78 DocuMate 765 Scanner User’s Guide
Page 86

Scanning from ISIS
7. You can now either click on one of the black boundary squares and
drag your mouse to resize the boundary box. Click in the middle of
the boundary box then drag your mouse to move the boundary box
around the preview area.
You can also manually ente r th e coor din at es where the sub area
should be located on the page in the Area section.
First, select the units of measurement you want to use. The available
options are Pixels, Inches and Centimeters. The instructions here are
using inches as an example.
• X—input the starting point of the image from the left side of the
page. For example, the left most edge of the logo is 6 inches from
the left side of the paper, input 6 in the X coordinate field.
• Y—input the starting point of the image from the top of the page.
For example, the top of the logo is 2 inches from the top of the
page, input 2 in the Y coordinate field.
• Width—type in the width of the image, the minimum width is 2
inches.
• Length—type in the length of the image, the minimum length is 3
inches.
8. Click on OK to save the changes and close the window.
Y ou can a lso leave the window open a nd add a 2nd or 3rd sub area to
the front side, or add a sub area for the back side of the paper.
9. Place your page back in the scanner. Click on the Preview button in
the Page Layout tab. The scanner will scan the image and the scan
results in the preview area should match the settings you chose in the
Sub Area window.
DocuMate 765 Scanner User’s Guide 79
Page 87

Scanning from ISIS
Paper Handling Options
The Paper Handling tab is where you select feeding options for the
scanner. This tells the scanner how fast to feed the paper, detect double
page feed, and several other options where you specify how the scanner
should handle paper.
Feeding Features—this option tells the scanner how to handle the p aper
as it is feeding through the scanner.
• Detect Double Feed—select this option to turn on the scanners’
ability to detect when two or more pages are fed through the scanner
at the same time.
When this option is turned on, ultrasonic waves are aimed at the
document to detect multiple pages by the level at which the waves
pass through the pages. The accuracy of this sensor depends on
paper thickness and whether or not creasing is in the original
document. Standard printer paper between 16lb and 20lb works best
with this feature.
You can set the sensor’s sensitivity level and what action you want
the scanner to take when the double-feed is detected.
• Sensitivity—click on the drop menu and select either Low,
Normal or High.
Low: select this option when scanning thick paper.
Normal: this is the default option and is best used with standard
18lb to 20lb printer paper.
High: select this option when scanning thin documents, such as
paper 16lb or less.
• Action—click on the drop menu and select either Beep or Stop
Scanning.
Beep: scanner alerts you when a double-feed is detected but
continues scanning the rest of the documents in the input tray.
Stop: this is the default option, the scanner stops scanning and
waits for you to remove the double-feed and resume scanning.
80 DocuMate 765 Scanner User’s Guide
Page 88

Scanning from ISIS
• Feeding Speed—you can slow the scanning speed of the ADF to
scan items that may be too fragile to scan at normal feeding speeds.
You can choose either Normal or Slow feeding, slow feeding is about
1/3 the speed of normal scanning.
Even when using the slow feeding option you should only scan items
that will not tear in the scanner. Paper that already has tears it should
not be fed through the scanner.
• Length Control—when this option is selected, the scanner detects
the length of the document starting at the top of the page. The final
image is cropped to the actual length of the documen t inst ea d of
using a predefined page size such as U.S. Letter or A4.
When you deselect this option the X and Y coordinates enable on the
Layout Tab.
• Detect Paper Width (Z)—when this option is selected, the scanner
automatically detects the width of the p aper being scanned and crops
the final image to the sides of the paper.
• Margin—when this option is selected, the scanner will add a 1/8 inch
blank margin at the top and bottom of the image.
• Skew Stop—select this option to have the scanner stop scanning
when the paper has been pulled through at too great of angle
(skewed). Remove the pages, adjust the paper guides to the width of
the documents being scanned then start the scan again.
• Long Paper (X)—select this option to have the final image of a long
document be split across multiple pages of the chosen page size. For
instance, if you are scanning a page that is 22 inches long, the Long
Paper option will split the image up into two 11 inch long pages
without losing any portion of the image.
When this option is selected the Double Feed Detection feature is
disabled. When you are scanning pages longer than 17 inches, you
should only scan 1 page at a time.
• Fit to Page—select this option to have the final image fit within the
scan area you defined. For instance, if you have selected to scan
U.S. Letter paper but have a U.S. Legal pa ge in the scanner . The final
image will be adjusted to fit within the boundaries of a U.S. Letter
sized paper.
Manual Feed Mode—turning on this option sets the scanner into a timeout waiting mode. This means that if you have multiple stacks of
documents, or even single pages, and you want all of the pages to be in
one final file, the manual feed gives you a waiting period between the end
of the last page and when you set the next batch of p ages in the scanner.
1. Click the drop menu and select On to enable this feature.
2. In the Time Out field, scroll up or down to set the time between pages
you want to have the scanner wait.
The default is 30 seconds, you can change this to any number
between 1 and 300.
3. Click on OK to close the settings window.
4. Click on OK to save the changes and close the new batch window.
DocuMate 765 Scanner User’s Guide 81
Page 89

Scanning from ISIS
5. Click on Scan in the batch scanning mode.
The rollers in the scanner will immediately start.
6. Place your page(s) in the scanner’s input tray.
The page will feed through the scanner, if you put in multiple p ages all
pages will be scanned.
7. After the last page has scanned through, the scanner’s rollers will
continue running until you place another page in the scanner or until
the time-out period has been reached.
For instance, if you left the default setting of 30 seconds, the
scanner’s rollers will continue to run until the 30 seconds has run out
or you place another page in the scanner. When 30 seconds has
been reached, the scanner will stop scanning an d yo ur do cument will
be in QuickScan.
8. After you have finished placing all p ages in the scanner. Wait until the
time-out has reached 0. The images will be saved in the QuickScan
application.
NOTE: The ot he r op tio ns for th e Ma n ua l Feed Mo de , Automatic and
Button can also be used. Simply press the Simplex and Duplex buttons,
on the scanner, at the same time to stop scanning. If you have set a time
frame for the scanner to time-out, then scanning will automatically stop
scanning at the end of the countdown. If you select Unlimited then the
time-out is infinite and you must press the Simplex and Duplex button to
end the scanning batch.
You can use this feature in conjunction with slow speed scanning to feed
single pages at a time. You can also use this when you have set your
scanner to Manual feed.
The manual feed on the scanner is different than the one in the software.
The hardware manual feed drops the rollers away from each other to
allow thicker items to be fed through. The software manual fe ed keeps the
scanner ready for new pages until you have finished scanning all p ages in
the batch.
82 DocuMate 765 Scanner User’s Guide
Page 90

Image Processing Options
The Main tab has the basic features you need for image capture when
scanning. The basic settings include color mode, resolution (dpi),
brightness, contrast, and dither options. The options on the Image
Processing tab are advanced image capture options for improving the
quality of the scanned image, or just modifications such as removing
watermarks.
Scanning from ISIS
Extra Features—the options in this section will be enabled if the
scanning software supports the feature.
• White Level From Paper—this option uses white as the reference
color when the documents being scanned are on colored paper.
When colored paper is scanned, the resulting image may be filled
with a lot of noise and the image quality will be poor.
This option will not work properly if the paper being scanned has
multiple background colors on each page, or if the color intensity
varies across the page.
This option will be disabled if you are scanning in Color Mode, or you
have selected the options for AutoCrop, Deskew or Margin.
• Automatic Separation—this option enables the scanner to
automatically differentiate between text areas and photo areas on a
page. Text areas are scanned in Binary (Black and White) mode,
while the photo areas are scanned using the Dither (half tone) p attern.
In some cases, it may not be possible to separate the text and images
completely using this automatic feature. If you often scan documents
where the image area is always at the same part of the p age you can
get better results by creating a Sub Area. Please see “Page Layout
Sub Area” on page 77 for more information.
The Automatic Separation option is only ava ilabl e in Black an d Wh ite
color mode. This feature will automatically be disabled if Noise
Reduction, Sub Area, Dynamic Threshold, Automatic Crop or
Deskew are enabled.
DocuMate 765 Scanner User’s Guide 83
Page 91

Scanning from ISIS
• Binary Dynamic Threshold—this option enables the scanner to
automatically adjust the brightness according to the background
color. Dynamic Threshold is only available when scanning in Black
and White color mode.
Click on the drop menu and select a threshold value to use when
scanning. The values range from 1 (light) to 5 (dark).
• Color Matching—this option enables the scanner to select colors
from the standard color space (sRGB) that most closely matches the
colors from the original document.
When an image is created during scanning, the colors from the
original document are condensed to the scanners’ range of colo rs.
When this option is enabled, the color matching algorithm tries to
more accurately represent the original document colors in the final
image. This option is only available when scanning in color.
• Image Processing—there are several advanced image filters
options available with your scanner. The Image Processing options
are only available when the selected scanning mode is Black and
White. Click on the box next to Enable to use these features while
scanning.
You can use multiple image filters, however, multiple filters may
decrease the scanning speed.
Click on the Configure... button to open image processing filters
options.
To add or remove filters:
1. Click on the filter name on the left side of the screen.
2. Click on the Add => button to add that filter in the list on the right
side of the screen.
3. Click on the filter name in the right side of the screen then click on
Configure... to configure the options for that filter.
4. Click on OK after you have added the filter(s) you want to use.
Click on a filter on the right side of the screen then click on the
<=Remove button to remove it from the list.
84 DocuMate 765 Scanner User’s Guide
Page 92

Scanning from ISIS
If you have selected more than one filter, click on a filter on the right
side of the screen then click on the up or down arrow to move the
filter in the list. This tells the software which filter to use first, second,
and so on. For instance, if you choose the Barcode Detection and
Noise Removal filters, you may want the Noise Removal filter to occur
first so that the software gets a clear picture of the barcode.
The image processing filters are briefly described below. The
QuickScan user guide and software help file contains detailed
instructions on using the filters. After you have opened the filtering
list, pressing F1 on your keyboard will open the QuickScan software
help file.
Barcode Detection—this option detects when a barcode is on the
page being scanned. Barcode recognition can be used in a va riety of
ways, such as job separation or file saving. This depends on the
scanning application you are using, pease refer to the user guide for
that application.
There are different types of barcodes, if you know which one(s) are
on the document you are scanning, you can select it by click on the
Configure... button. In that window you can also specify the
orientation of the barcode on the page, height, number of characters,
and so on.
Border Removal—this option removes the small black lines that may
appear in the image around the edges of the document that was
scanned.
Dilation—this option enlarges the black areas in the scanned image.
For instance, if you are scanning something with a small type font,
this option can be used to enlarge the text. The configuration options
for this feature allows you to specify the size of the enlargement.
Erosion—this option removes the edges of black on the page,
making them smaller or thinner. The configuration options for this
feature allows you to specify the size of the erosion.
Halftone Removal—this option can remove the grays in a scanned
image. For instance, if you scan a page that is green paper with black
text, the image may appear very dark. The halftone filter attempts to
remove the gray tones from the image leaving a white document with
black text.
Hole Removal—this option will detect and remove holes on the
scanned image. For instance, if you scan documents th at were
removed from a binder, the binding holes down the side of one page
will appear as black circles in the final image. This filter removes the
black circles from the image.
Invert Image—this option converts black pixels to white and vice
versa. For instance, if your document has a black background with
white text, this option will reverse the image so that it appears as
standard black text on a white background.
Line Removal—this option removes lines from the image. For
instance, if you scan items from a notebook that has ruled paper, this
option filters them out and are not in the final image. In the
configuration options for this filter you can specify if the lines are
horizontal or vertical, line width, and gap between the lines.
DocuMate 765 Scanner User’s Guide 85
Page 93

Scanning from ISIS
Noise Removal—this option reduces the black spots that may
appear when scanning some documents. For instance, if you scan in
a document that has tables with shading on them, the resu lting
scanned image will have black dots (pixilation or noise) in the areas
where the shading occurs. The noise removal will attempt to reduce
this pixilation on the page. In the configuration options for this filter
you can specify the size of the pixilation for the filter to look for.
Please note that depending on size specified and the font size on the
original document, some punctuation marks may be removed.
Patchcode Detection—this option is used in conjunction with job
separation, it detects patchcode on a p age and attempts to decode it.
Please refer to your application’s user guide for whe n and how to use
this option.
Skeleton—this options reduces the black portions of the page, such
as text, down to a single pixel width. For instance, if you scan in a
page that is a single large X, the resulting image will still be of a page
size X but the line thickness will only be one pixel making it appear
like a pencil.
Smooth—this option smooths the edges of the text or image. For
instance, if you scan in something drawn with a marker, the edges will
appear block-like, the smoothing filter softens the outside edge.
• Noise Reduction—this option reduces the black spots that may
appear when scanning some documents. For instance, if you scan in
a document that has tables with shading on them, the resu lting
scanned image will have black dots (pixilation or noise) in the areas
where the shading occurs. The noise removal will attempt to reduce
this pixilation on the page.
Click on the drop menu then select one of the options in the list to
enable the feature. The options in the list refe r to the size of the spot s
you want the filter to remove. For instance, if the noise on the image
is very small, you might choose 1x1. This tells the software to filter
out any noise that is exactly 1 pixel in size.
The numbers refer to the length and height of the pixels for the filter to
remove. If you select 2x2 you are having the filter remove dots that
are 2 pixels long and 2 pixels high, removing a total of 4 pixels.
Please note that depending on the noise size specified and the font
size on the original document, some punctuation marks may be
removed as well.
Image Features—the options in this section tell the scanner how to
handle the actual image after the scan.
• Mirror—this option flips the image left-to-right.
• Invert—this option converts black pixels to white and vice versa. For
instance, if your document has a black background with white text,
this option will reverse the image so that it appears as standard black
text on a white background.
• Image Emphasis—this option tells the software how much emphasis
to put in the image.
86 DocuMate 765 Scanner User’s Guide
Page 94

Scanning from ISIS
• Chroma—this option allows you to specify the amount of gray or
white used to dilute the colors in the scanned image. Move the slider
left or right to change the chroma level between 1 to 255. Low
saturation colors will appear washed out and highly saturated colors
will be pure and vivid.
JPEG Quality—JPG files have different levels of compression. When
used with high compression, images are small enough in file size to email
or put on a web page. Low compression images maintains better image
quality when compared to the original, but the file sizes are higher.
Move the slider left or right to change the JPEG quality. Low quality
means that the compression level is high and some image quality will be
lost. High image quality means that the compression level is low and the
image quality is close to that of the original.
Drop Out—this option tells the scanner and softwar e to remove a specific
color from the image. This option is only available when scanning in
grayscale or black and white.
• Single Color—click on the drop menu and select either Red, Blue or
Green to remove that color
• Multiple Colors—this option allows you to set up to 6 specific colors
that you want to remove from the image.
1. Click on the Dropout... box to open the Multiple Colors dropout
window.
2. Click on Enable.
DocuMate 765 Scanner User’s Guide 87
Page 95

Scanning from ISIS
3. Click on Selection 1 to set the first option color.
When you first click on Enable there will be a default red color.
4. Click on Choose... to open the Windows color palette.
5. Y ou can se lect a predefined color , input the color code in the input
fields on the lower right, or click anywhere in preview area to
jump to a color range.
6. Click on OK to close the color palette window.
7. Your first color selection will now be in the multi-color dropout
window.
When you select a color, the scanner looks for colors in that
range showing a rainbow of colors in that set.
8. Click on Selection 2.
88 DocuMate 765 Scanner User’s Guide
Page 96
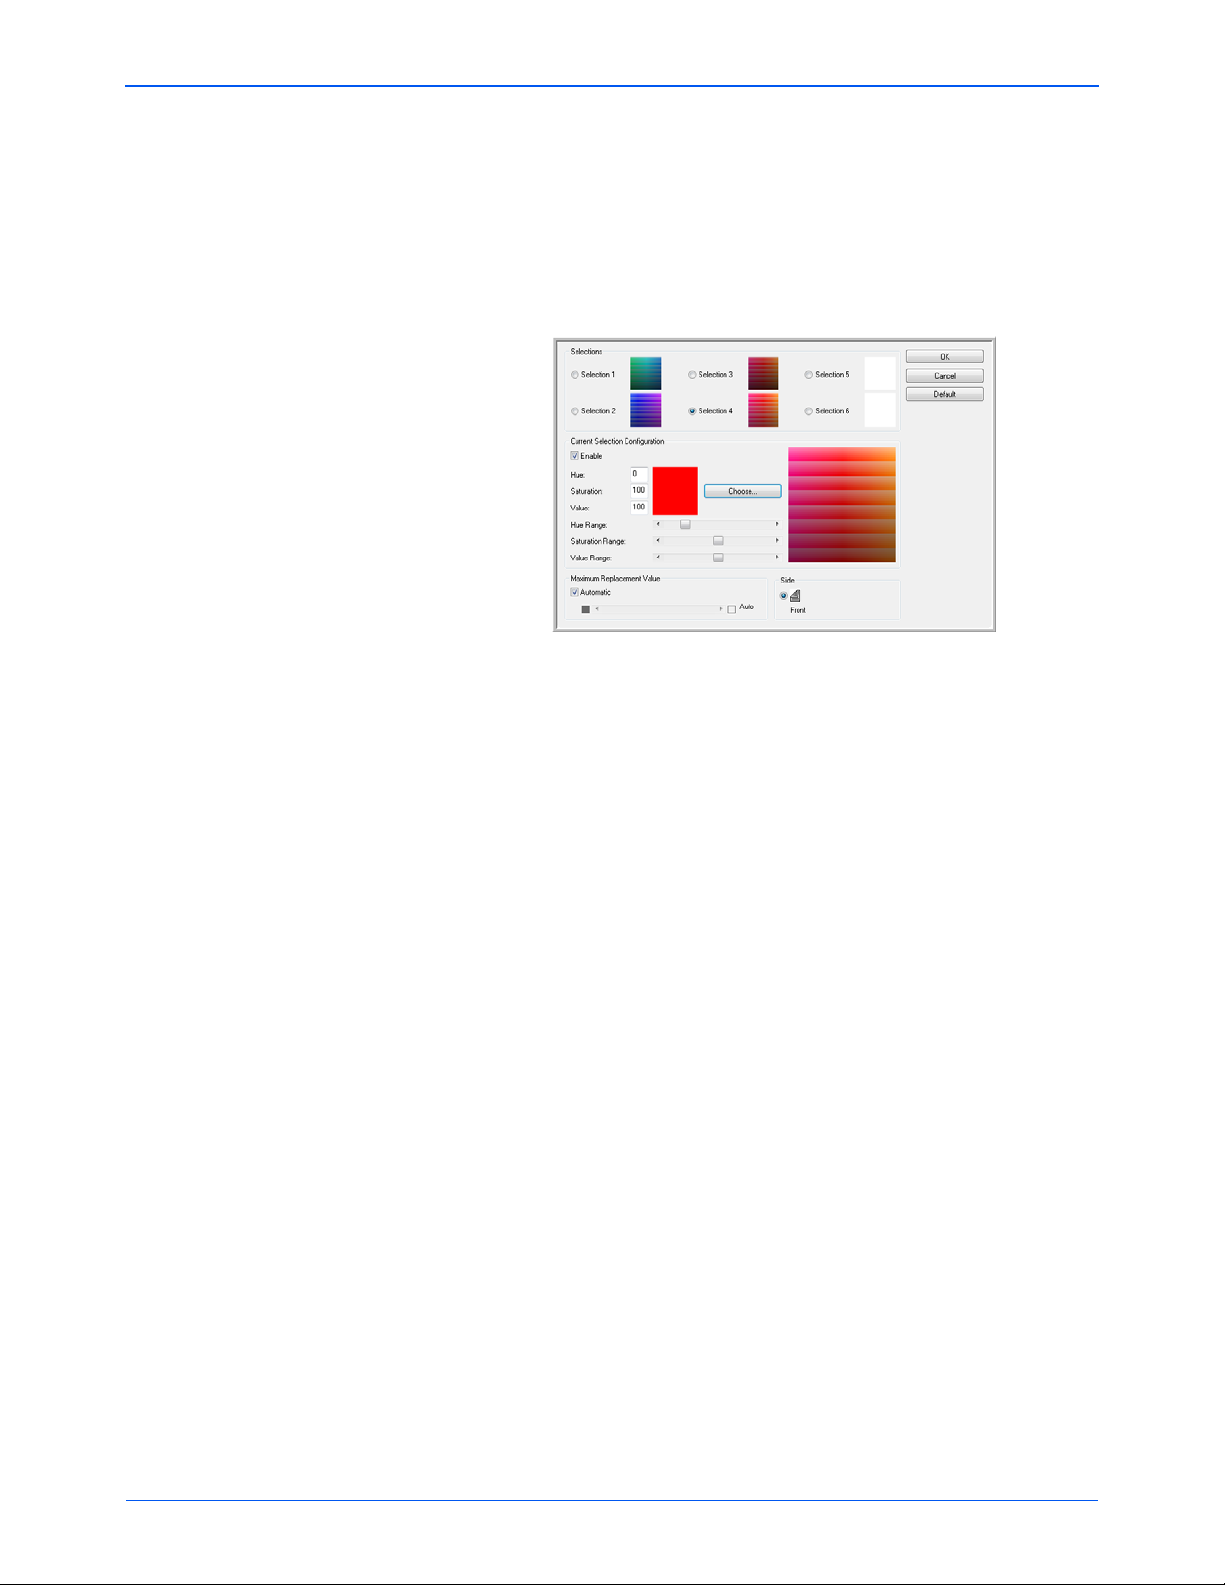
Scanning from ISIS
9. Click on Choose... to open the Windows color palette.
10. Follow the same steps to create another dropout color.
11. Click on OK to close the window.
12. Your second color will now be in the multi-color dropout window.
You can select up to 6 colors for the scanner to drop from the
image.
13. Click on OK after you are done setting colors for dropout.
You can place a test page in the scanner and click on the
Preview button in the ISIS interface to test the color dropout
results.
Gamma—this option controls the brightness and contrast of the midtone
of an image without affecting the overall brightness (dark or light) of the
image
The Gamma option is only available in Color and Grayscale scanning
modes. If you have selected Color Matching options, Gamma will be
disabled when sRGB or ICM have been chosen.
• Normal—this is the default setting and is most often used for
reproducing printed materials. The Gamma setting helps to keep
image quality comparable to the original document.
• For CRT—this option is most often used when creating scanned
documents that are only viewed on the computer.
• User Download—this option is an advanced feature option. Please
refer to your scanning application user’s guide for instructions on
using this feature.
• Linear—this option turns off the Gamma setting.
DocuMate 765 Scanner User’s Guide 89
Page 97

Scanning from ISIS
10 mm
10 mmPrinting area
Paper feed
direction
Orientation
Imprinter Options
The Imprinter tab is where you set the options for the pre-scan imprinter.
The imprinter pre-prints data on a p age just before the paper is pulled
through the scanner, the printed data is then captured in the final image.
The the options for the imprinter are only available if you have an
imprinter unit installed in your scanner. The imprinter unit is an optional
accessory that you can purchase from our website, in the Parts &
Accessories page for your scanner, at www.xeroxscanners.com.
1. Click on Enable to turn on the imprinter function.
2. Select the options for the imprinter.
Bold Font—select this option to print everything in a bold font.
Imprinter String—input the characters you want printed on each
page.
The following table shows the available alphanumeric cha racters and
symbols that can be printed. A maximum of 72 characters can be
printed.
Printing Offset—input an offset number where printing should occur .
A 10 mm offset is always added to this value.
Unit: 2.38 mm per increment (printing orientation: 900, 270°)
1: 12.38 mm
2: 14.76 mm
Unit: 3.44 mm per increment (printing orientation: 00 , 18 0° )
1: 13.33 mm
2: 16.88 mm
Orientation—click the down arrow and choose an orientation for the
imprint to appear on the page.
Start Number—type in the default value of the counter specified by
the imprinter string.
90 DocuMate 765 Scanner User’s Guide
Page 98

Scanning from ISIS
Step Number—type in the step number of the counter specified by
the imprinter string.
Start Numbering Automatic Increment—select this option to use
the default increment function. When used, the starting number is
incriminated to the number at the start of scanning + (number of
pages scanned x step number) upon completion of scanning.
3. Click on OK to save the changes and close the imprinter settings
dialogue window.
Clicking on the Help... button will open the help file to provide more
information about the settings in this window.
Clicking on the Default button will restore the default values in this
window.
Clicking on the Cancel button will close the Imprinter Settings
dialogue window without saving any settings you specified.
DocuMate 765 Scanner User’s Guide 91
Page 99

Scanning from ISIS
92 DocuMate 765 Scanner User’s Guide
Page 100

Scanning from WIA
Scanning from WIA
Microsoft Windows XP and Windows Vista include their own scanning
interface—known as Windows Image Acquisition (WIA)—for acquiring
images from scanners, digital cameras, and other digital devices.
This section shows how to use Microsoft Paint to scan using the WIA
interface, but you can use other Windows applications as well.
To scan using WIA from Microsoft Paint:
1. On the Windows taskbar, click Start, point to Programs, point to
Accessories, and then click Paint.
The Paint window opens.
2. From the File menu choose From Scanner or Camera.
DocuMate 765 Scanner User’s Guide 93
 Loading...