

Page 1

®
magicolor 6100 DeskLaser User’s Guide
1800543-001C
Page 2

Trademarks
The following are trademar ks or registered tr ademarks of their respective owners. Other pro duct names
mentioned in this manual ma y also be trade marks or register ed trademark s of their respective ow ners.
Registered trademarks are regis tered in the United Sta tes Patent and Trademark Office; some tradem ark s
may also be registered in other countries. QMS, ColorDepth, magicolor, and the MINOLTA-QMS logo are
registered trademark s of MINOLTA-QMS, Inc. PostScript is a trademark of Adobe Syst ems Incorp orated
for a page description lan guage and ma y be regist ered in certain jurisdictions . Adobe, Acr obat, the
Acrobat logo/Adobe Systems Incorporated. 3M/3M. Aldus PageMaker/Aldus Corporation. Macintosh/Apple
Computer, Inc. Centronics/Centronics. IBM/International Bus iness Machines Cor poration. Microsoft, MSDOS/Microsoft Corporation. Novell and NetWare/Novell, Inc. Quar kXPress/Quark, Inc. UNIX/UN IX
Systems Laboratori es. Ethernet, Xe rox/Xerox Co rporation . All other tradem arks are the pro perty of their
respective own ers.
Proprietary Statement
The digitally encoded softwa re included with y our
MINOLTA-QMS, Inc. All Rights Reserved. Th is software may n ot be reproduced , modified, displaye d,
transferred, or copied in any form o r in any manner or o n any media, in whol e or in part, without the
express written permissio n of MINOLTA-QMS, Inc.
magicolor
6100 DeskLaser is Copyri ghted © 2001 by
Copyright Notice
This manual is Copyrighted © 2001 by MINOLTA-QMS, Inc., One Magnum Pass, Mobile, AL 36618. All
Rights Reserved. This manu al may not be copied in whole o r in part, no r trans ferred to any othe r media or
language, without the expres s written permis sion of MINO LTA-QMS, Inc.
Page 3

Contents
1 About Your Printer
Standard Product Documentation ................................................................. 1-2
Manuals on the CD-ROM 1-2
Typographic Conventions 1-3
Printer Components ........................................................................................ 1-4
Control Panel ................................................................................................... 1-5
Control Pa nel Indicators 1-5
Control Pa nel Keys 1-6
Configuration Menu ........................................................................................ 1-7
Language 1-8
Sample Page 1-8
Calibration Page 1-8
Engine 1-9
Network 1-11
Service 1-16
Page 4

2 Printer Driver Configuration
Selecting the Crown Port ................................................................................2-2
Configuring the Printer Driver ........................................................................2-3
Windows 95/98 Configuration Methods 2-3
Windows 2000/NT 4.0 Configuration Methods 2-5
32-bit SuperDriver Setup ................................................................................2-7
Printer Driver Controls for Windows 95/98/2000/NT 4.0 2-7
Configuring Paper Options 2-8
Configuring Page Layout Options 2-14
Configuring Image Options 2-21
Configuring Device Options 2-25
Information on the About Tab 2-26
Sharing the Printer ........................................................................................2-26
Using the Crown Print Monitor .....................................................................2-27
Components 2-27
3 Everyday Operations and Printer Care
Media Sizes ......................................................................................................3-3
Loading the Media Cassette ...........................................................................3-4
Paper Specifications 3-4
Prepare the Paper 3-4
Load the Cassette 3-5
Using Letterhead and Memo Media 3-6
Using Media Other Than Paper ......................................................................3-7
Using Envelopes 3-7
Using Glossy St ock 3-9
Using Labels 3-10
Using Thick Stock 3-11
Using Transfer Media 3-11
Using Transparencies 3-12
Imageable Areas ............................................................................................3-14
Working Within the Imageable Area 3-14
Imageable Area 3-15
magicolor 6100 DeskLaser User’'s Guideii
Page 5

Using Toner Cartridges ................................................................................ 3-17
Toner Cartridge Life 3-17
Refilled Toner Cartridges 3-18
Ordering Toner Cartridges 3-18
Toner Cartridge Storage 3-19
Replacing a Toner Cartridge ........................................................................ 3-19
Replacing the OPC Belt Cartridge ............................................................... 3-21
Replacing the Fuser Oil Bottle ..................................................................... 3-24
Replacing the Cleaning Roller ..................................................................... 3-25
Replacing the Waste Toner Bottle ............................................................... 3-27
Replacing the Ozone Filter .......................................................................... 3-28
Handling the Printer ...................................................................................... 3-28
Cleaning the Printer ...................................................................................... 3-30
Guidelines for Cleaning Inside the Printer 3-30
Cleaning the Transfer Unit 3-30
Cleaning the OPC Belt Cartridge 3-34
Cleaning the Laser Lens 3-35
Cleaning the Paper Exit Rollers 3-36
Cleaning the Exterior of the Printer 3-38
Maintenance Schedule ................................................................................. 3-39
Cleaning Schedule 3-39
Preventive Maintenance Schedule 3-40
Replacement Schedule 3-41
4 Advanced Printer Operations
High-Resolution Printing ............................................................................... 4-2
Minimum Syste m Memory Requirem ents 4-2
Optimizing Printing Performance over a Parallel Port ................................ 4-3
ECP Setting Instructions 4-3
Cassette Chaining ........................................................................................... 4-4
Enabling/Disabling Cassette Chaining 4-4
Contents iii
Page 6

Duplex (2-Sided) Printing .......................... ...... ....... ...... ....... ............................4-5
Manual Duplexing 4-5
Auto Duplexing 4-5
Printing Sample Pages ................. ............................................. ...... ................4-5
Printing a Sample Page 4-5
Updating the Printer Driver/Monitor ..............................................................4-6
Updating System Software .............................................................................4-7
5 Options
Additional Media Handling .............................................................................5-2
Media Cassettes 5-2
Envelope Adapter 5-2
Postcard Adapter (Japanese Model Only) 5-2
Lower Feeder Unit (LFU) .................................................................................5-3
What's in the Kit? 5-3
Unpacking the LFU 5-4
Installing the LFU 5-4
Duplex Unit ............................. ....... ...... ............................................. ..............5-10
Dual In-Line Memory Modules ......................................................................5-13
Installat ion Procedure 5-13
Printer Cabinet ...............................................................................................5-16
6 Printer Jams and Troubleshooting
Automatic Jam Recovery ................................................................................6-3
Preventing Media Jams ..................................................................................6-3
Understanding the Media Path .......................................................................6-5
With Optional Duplex Unit 6-6
Media Jam Status Messages ..........................................................................6-7
magicolor 6100 DeskLaser User’'s Guideiv
Page 7

Removing Media Jams ................ ....... ...... ............................................. ....... .. 6-7
Misfeed Jams 6-8
Inner Jams, Outer and Drum Jams 6-8
Duplex Unit Jams 6-11
Other Jams 6-13
Installation Troubleshooting ............. ...... ....... ...... ....... ...... ...... ....... ...... ....... 6-14
Status and Service Messages ...................................................................... 6-14
Status Messages 6-15
Service Messages 6-19
Testing Ethernet Communication ............................................................... 6-21
Printer Problem Checklist ........................................................................... 6-23
OPC Belt Cartridge Problems ...................................................................... 6-24
Control Panel Problems ............................................................................... 6-24
Paper Jam Message Stays On 6-24
Printer Resets 6-24
Printer Driver/Print Monitor Problems ........................................................ 6-25
Output Problems ........................................................................................... 6-25
600x600, 1200x600 dpi Printing Unavailable at Rated Speed 6-25
Blank Pages 6-25
Not All Pages Print 6-26
Printing is Slow 6-26
Duplex Unit Problems ..... ....... ...... ....... ...... ............................................. ....... 6-26
General 6-26
Print Quality Problems ................................................................................ 6-27
Image Defects ..... ....... ...... ....... ...... ....... ............................................. ...... ....... 6-28
General 6-28
Specific 6-29
Blurred or Lightly Stained Background 6-29
Colored Bands, Horizontal Banding 6-29
Insufficient Gloss or Fusing 6-30
Irregular Print, Mottled Image 6-30
Missing Image at Edge 6-31
Mixed Color Image, Color Misregistration 6-31
Spotting 6-32
Too Dark 6-32
Too Light 6-33
Contents v
Page 8

Toner Smudges, Residual Images 6-33
Uneven Print Density 6-34
Vertical Streaking 6-34
Dashed Lines Not Printing 6-35
Placing a Service Call ..................................................................................6-35
7 Repacking the Printer
Storing the Printer ...........................................................................................7-2
Relocating the Printer .....................................................................................7-3
Repacking the Printer .....................................................................................7-4
What's Involved? 7-4
Remove the Cables and Media Tray(s) 7-5
Remove the Toner Cartridges 7-5
Prepare the Fuser Unit 7-5
Change the Waste Toner Bottle 7-8
Remove the Duplex Unit 7-9
Remove the Lower Feeder Unit(s) 7-11
Repack the Printer 7-13
A Technical Specifications
Requirements .................................................................................................A-2
Location Requirements A-2
Power Requirements A-3
Energy Star Compliance A-5
Year 2000 (Y2K) Compliance A-5
Recommended PC Configuration A-5
Engine and Controller Specifications ........................................................... A-6
Engine A-6
Print Speed—Simplex A-6
Print Speed—Duplex A-7
General A-7
Consumable Life Expec tancies A-8
Controller A-9
Electrical A-10
Environmental A-11
Physical A-12
magicolor 6100 DeskLaser User’'s Guidevi
Page 9

Print Media ....................................................................................................A-13
PC Cable Pinouts ......................................................... ...... ...... ....... ...... .......A-15
Centronics/IEEE 1284 Parallel A-15
Ethernet A-16
Regulatory ....................................................................................................A-17
Warranty Considerations .............................................................................A-18
Consumables and Your Warranty A-18
Electrostatic Discharge and Your Warranty A-18
B Notices
Manual Notice ..................................................................................................B-2
FCC Compliance Statement ...........................................................................B-2
Canadian Users Notice ...................................................................................B-3
Laser Safety .....................................................................................................B-3
International Notices .......................................................................................B-4
Power Cord B-4
Voltage B-4
C Documentation on CD-ROM
Viewing Manuals on the CD-ROM ..................................................................C-2
Viewing the Documentation C-2
Using Adobe Acrobat Reader ........................................................................C-2
Contents vii
Page 10

Page 11

1
About Your Printer
In This Chapter . . .
“Standard Product Documentation” on page 1-2
“Printer Components” on page 1-4
“Control Panel” on page 1-5
“Configuration Menu” on page 1-7
Page 12
Standard Product Documentation
Introduction
This chapter provides information about your product documentation, printer components, printer control panel, and configuration menu.
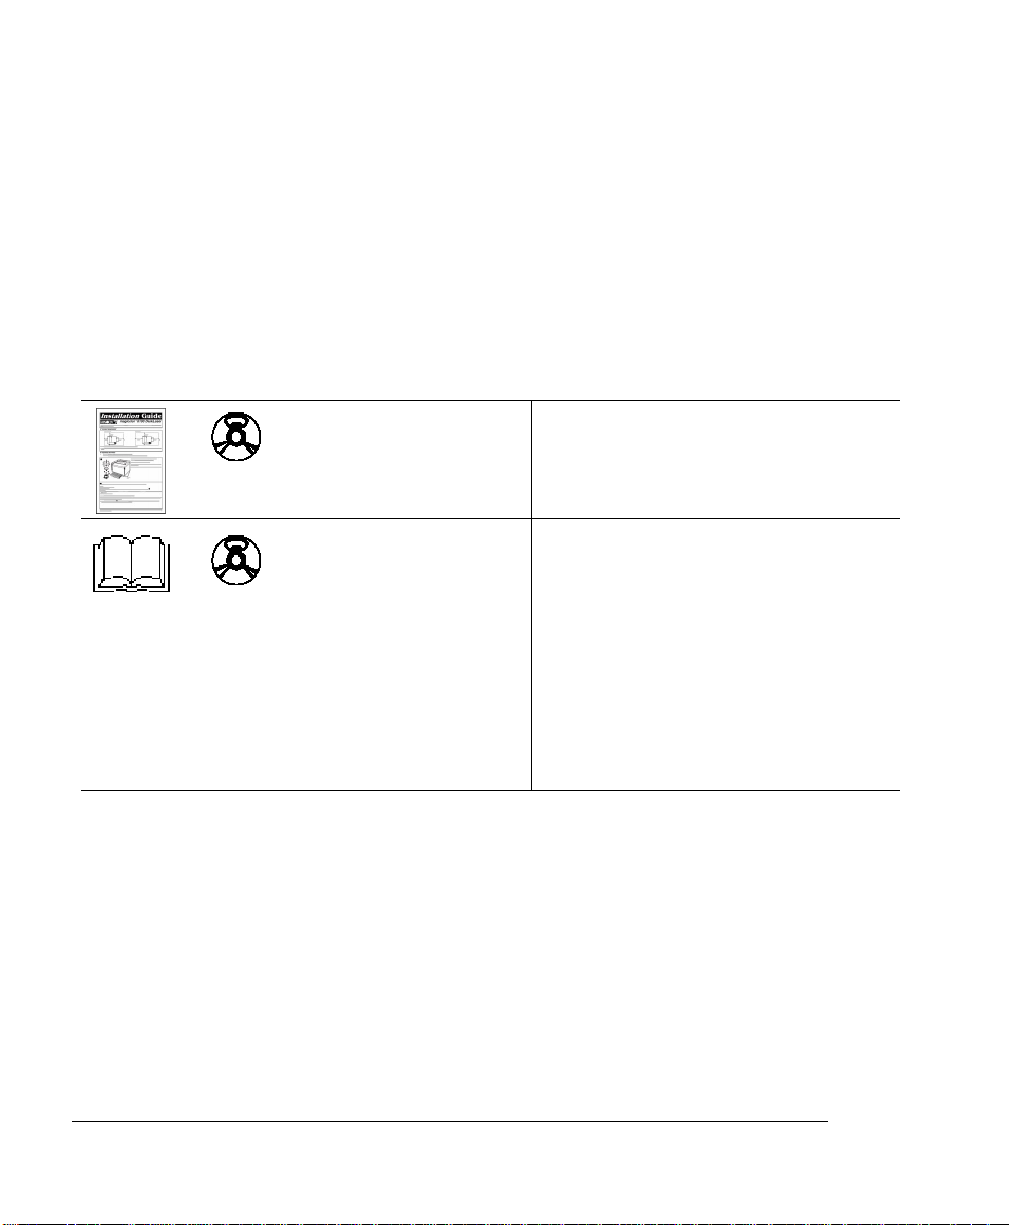
Standard Product Documentation
+
CD-ROM
+
CD-ROM
magicolor 6100
DeskLaser
Installation Guide
magicolor 6100
DeskLaser User’s
Guide
This guide assists in setting up the printer
hardware. Use it in conjunction with this
manual.
You’re looking at this document right now. It
introduces the printer and documentation,
and explains how the configuration menu
items can be accessed and controlled using
the control panel. This manual also guides
you through the day-to-day operation of your
printer. It includes information on printing files,
adding print media, and replacing toner. It
also includes information on handling,
cleaning, and maintaining your printer;
improving print quality; and troubleshooting
printer problems.
Manuals on the CD-ROM
The manuals included on the
Software
Acrobat Reader and QuickTime programs on the CD-ROM. The CD-ROM insert
provides instructions on installing them. For information about PDF files and the
Acrobat Reader see appendix C, “Documentation on CD-ROM.”
CD-ROM are in Adobe Acrobat PDF format. We’ve also provided the
magicolor 6100 DeskLaser Documentation and
magicolor 6100 DeskLaser User's Guide1-2
Page 13
Standard Product
Documentation
Other Reference Sources
Don’t forget that your application documentation, host operating system documentation, and network documentation all contain useful printing information. Further information is available at www.minolta-qms.com.
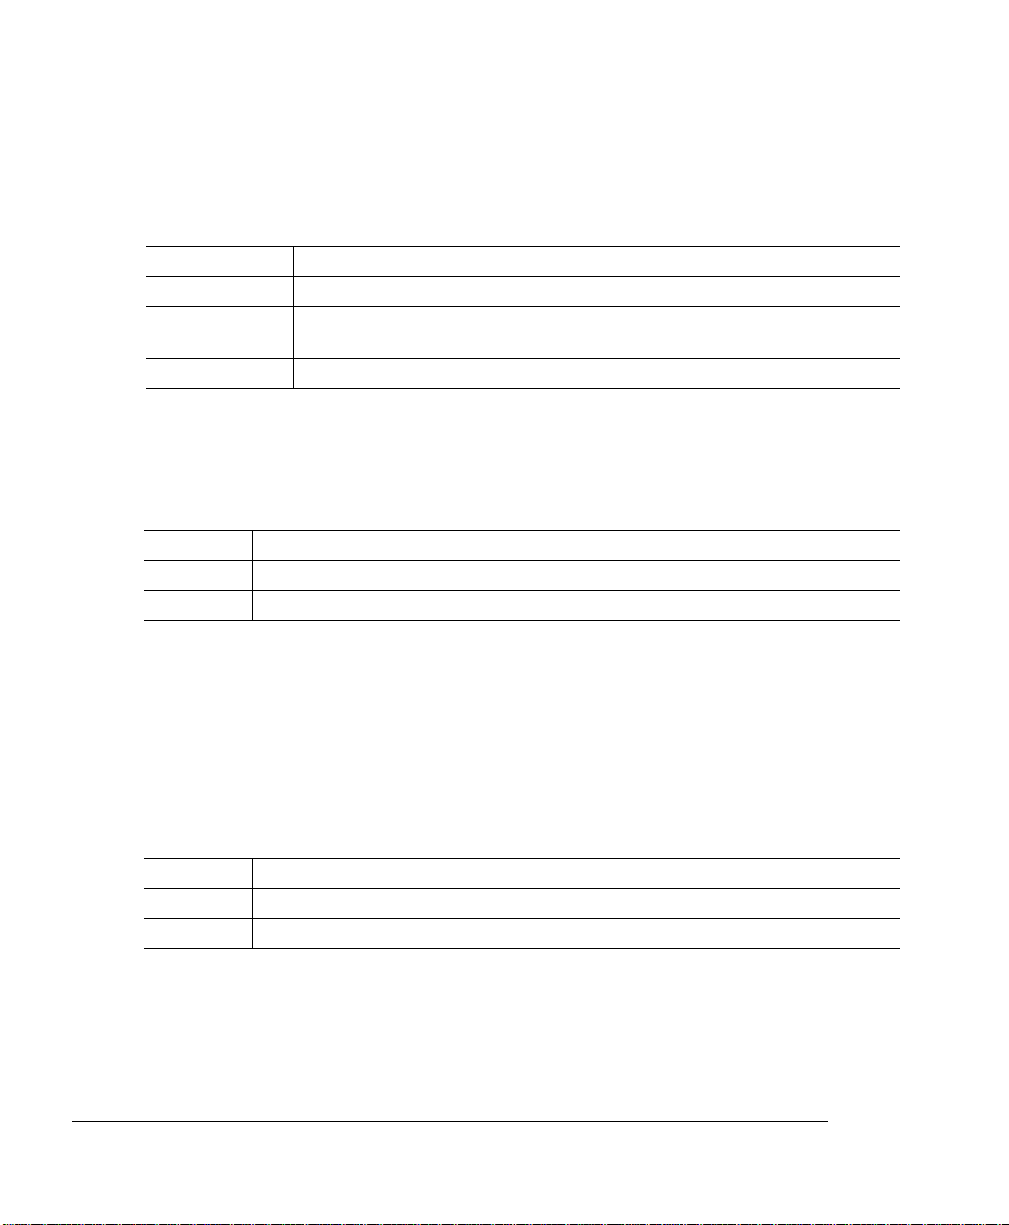
Typographic Conventions
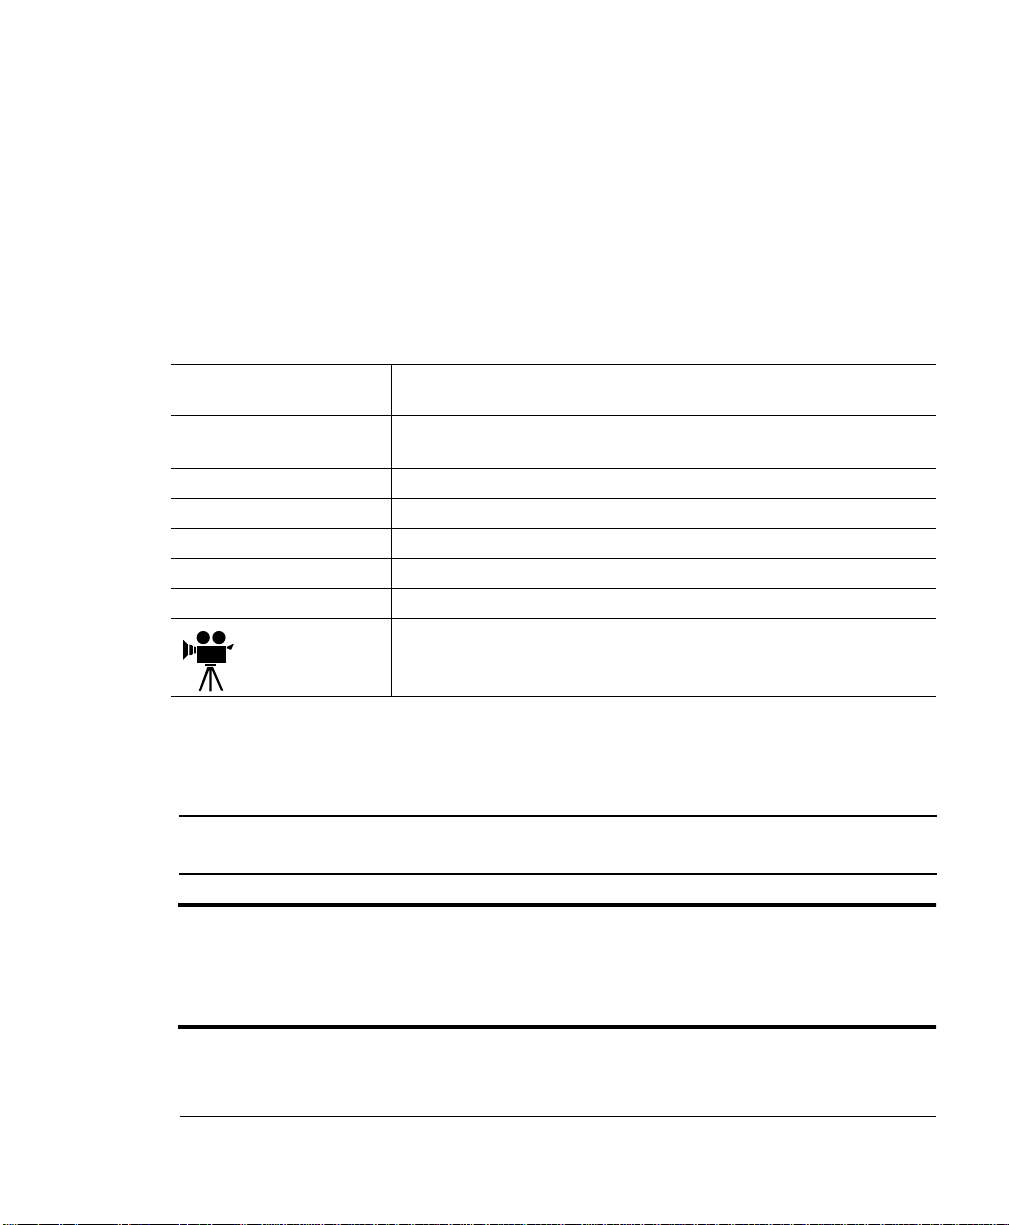
The following typographic conventions are used in this manual:
Mixed-Case Courier
Mixed-Case Italic
Courier
UPPERCASE COURIER
lowercase italic
UPPERCASE File and utility names
↵
^ Press and hold down the Ctrl key (PC)
»Note:
Notes contain tips, extra information, or important information that deserves
emphasis or reiteration
Caution:
Cautions present information that you need to know to avoid equipment
Text you type, and messages and information displayed on the
screen
Va riable text y ou type; replac e the italic ized word(s) wit h informati on
specific to your printer or computer
Information display ed in the printer message window
Variable information in text
Press the Enter key (PC)
In Adobe Acrobat PDF versions of the manual, click to
play a QuickTime video clip of the procedure described in the text.
.
damage, process failure, or extreme annoyance.
WARNING!
Warnings indicate the possibility of personal injury if a specific procedure
is not performed exactly as described in the manual.
ACHTUNG!
Bitte halten Sie sich exakt an die im Handbuch beschriebene
Vorgehensweise, da sonst Verletzungsgefahr bestehen könnte.
About Your Printer 1-3
Page 14
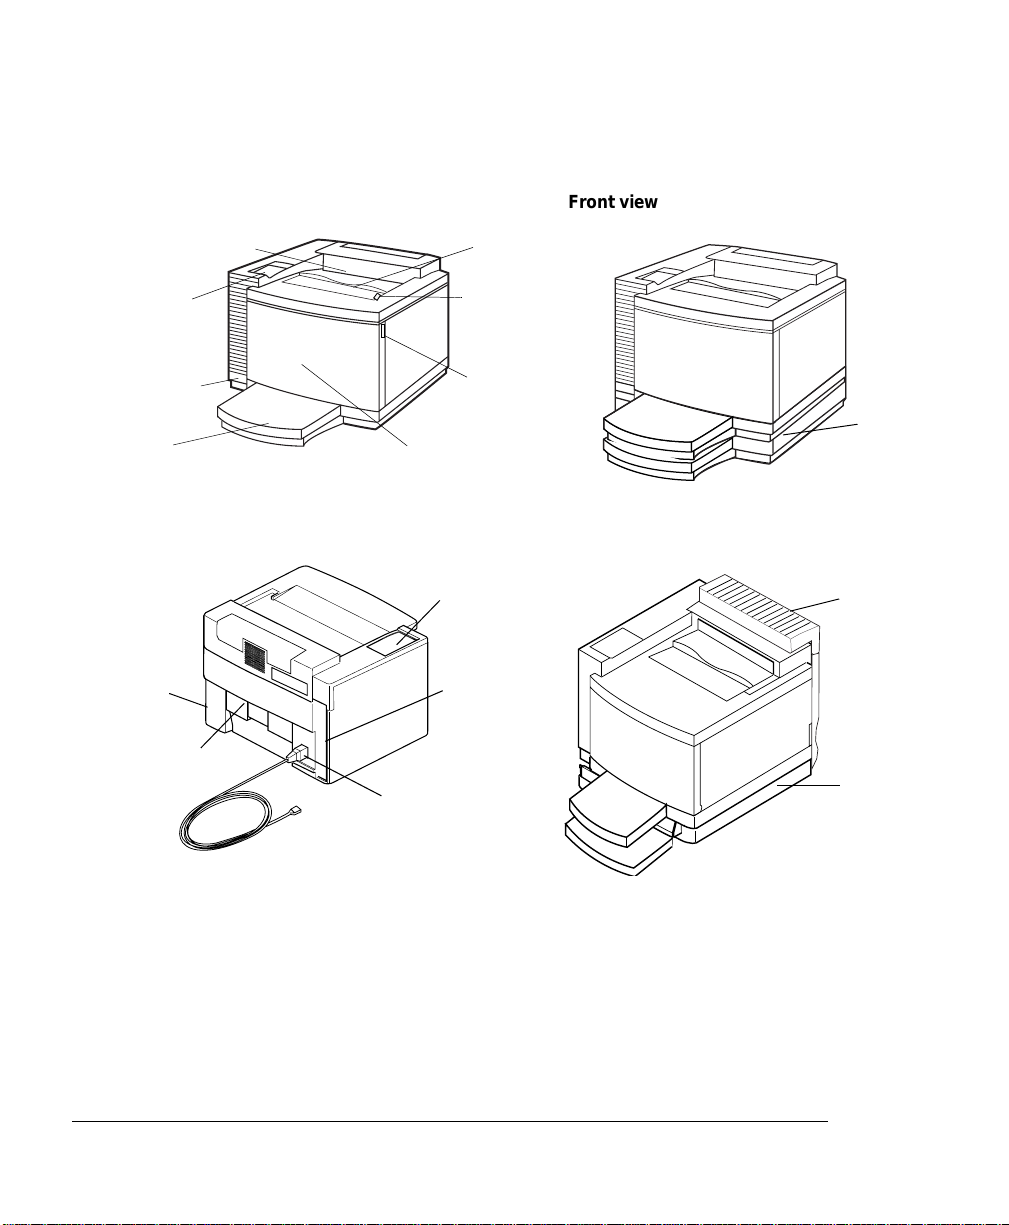
Printer Components
106mati.eps
Printer Components
Output tray
Control panel
Power switch
Media
cassette
Ozone
filter
Rear
cover
Front view
029mati.eps
Rear view
Front cover
AC power
connector
Top
cover
Top cover
latch
Front cover
latch
Control
panel
Interface
panel
Front view with lower feeder unit (LFU)
LFU
Front view with duplex unit and LFU
Duplex
unit
LFU
magicolor 6100 DeskLaser User's Guide1-4
Page 15
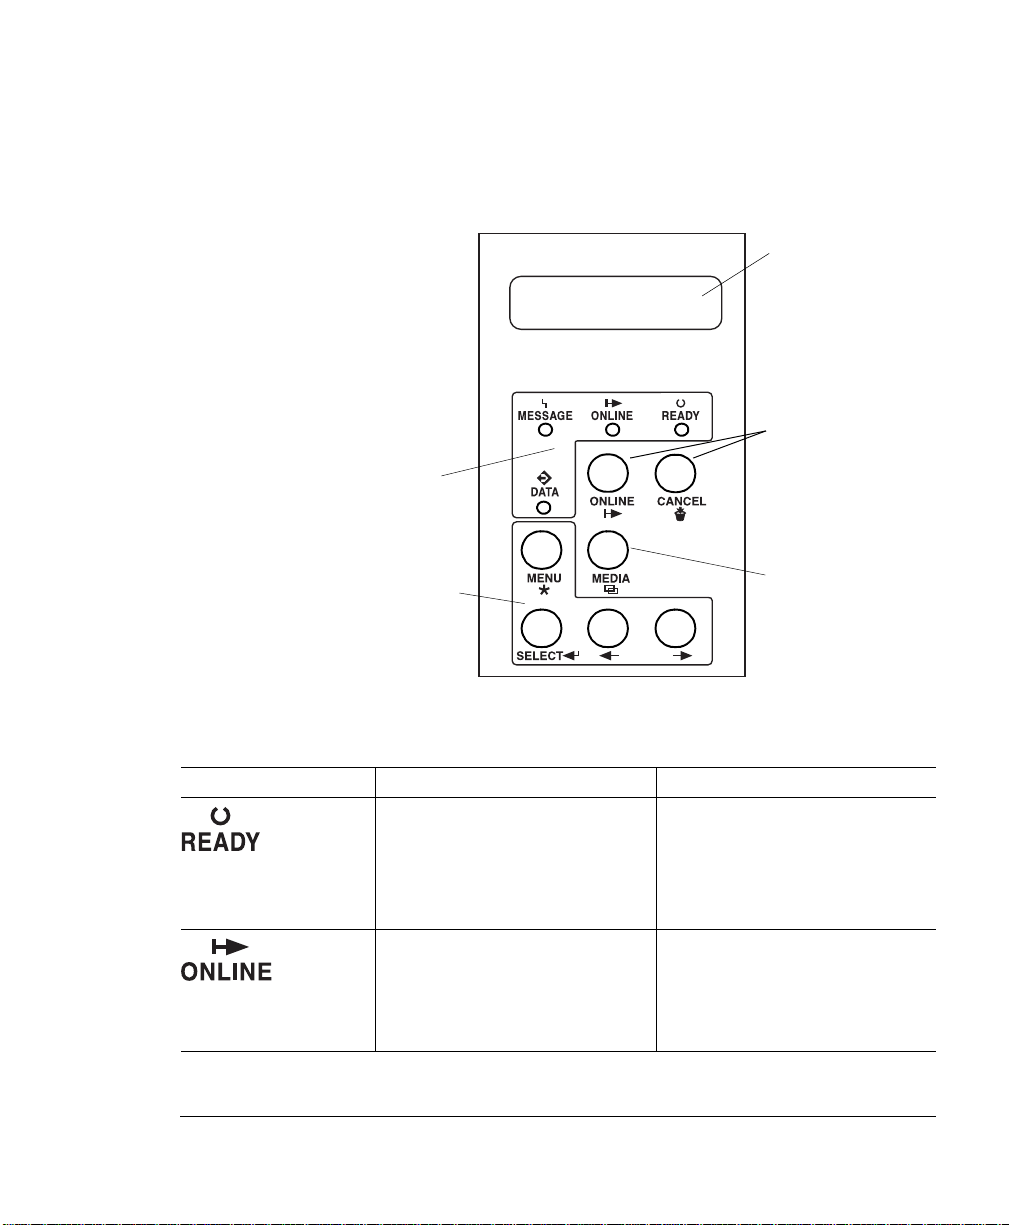
Control Panel
4 indicators
provide printer
status
information.
4 keys used in
printer
configuration.
Control Panel
A 2-line, 16
characters/line,
message window
displays status and
configuration
information.
2 keys used to
manually co ntrol
printing status.
Not used on this
model.
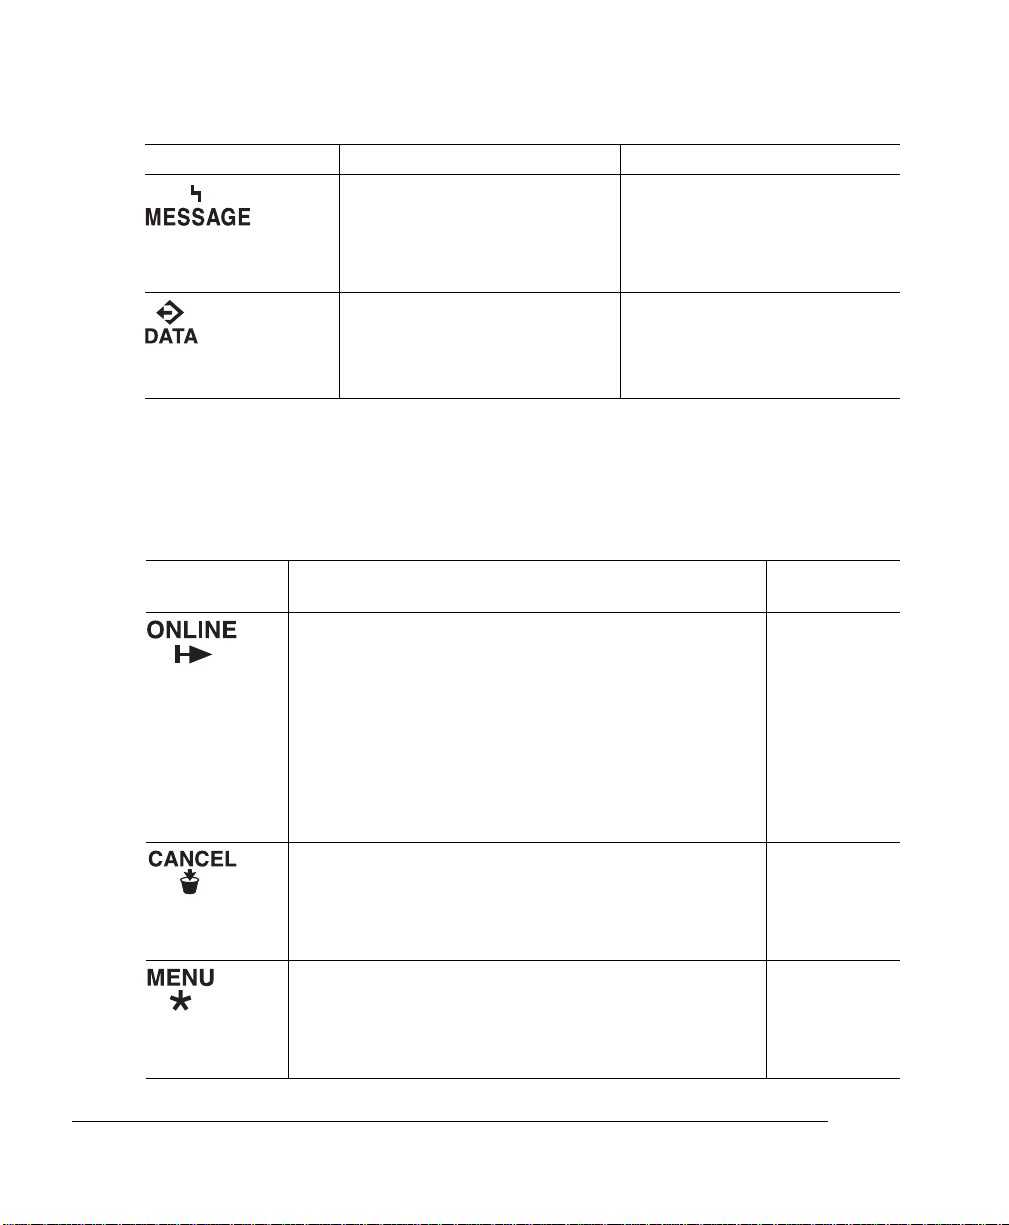
Control Panel Indicators
Indicator Off On
The printer is not ready to print.
»Note:
The printer is of f line an d not read y
to accept data.
When this indicator
is blinking, the printer is
warming up or is in Energy
Saver mode.
About Your Printer 1-5
The printer has finished warming
up and is ready to print.
The printer is on line and ready to
accept data.
Page 16
Control Panel
Indicator Off On
Control Panel Keys
No problem. The printer requires operator
attention (usually ac compani ed by
a status message in the message
window).
The printer is not receiving data. The printer is receiving or
processing data through its
interface port.
»Note:
The Media key has no function on the magicolor 6100 DeskLaser model. This
key becomes functional if the printer is upgraded to a full-featured magicolor 6100
Print System.
Key Function Press Online
First?
The Online key switches the printer between online and
offline status.
When off line, the printer continues printing until it has
finished all jobs received, but it doesn’t accept any new
data. Although jobs continue to compile and print using the
data already received, a job may be interrupted.
If a remote console has taken the printer offline, pressing
the Online key on the control panel will not take effect until
the remote console puts the printer back on line.
Allows you to cancel the print job.
If the printer is on line, press the Cancel key to cancel the
print job.
Accesses the configuration menu. When you’re changing
the printer configuration, press this key to cancel a change
(before pressing the Select keys), to return to a previous
menu, or to return to a previous character when entering
character information .
N/A
No
Yes
magicolor 6100 DeskLaser User's Guide1-6
Page 17
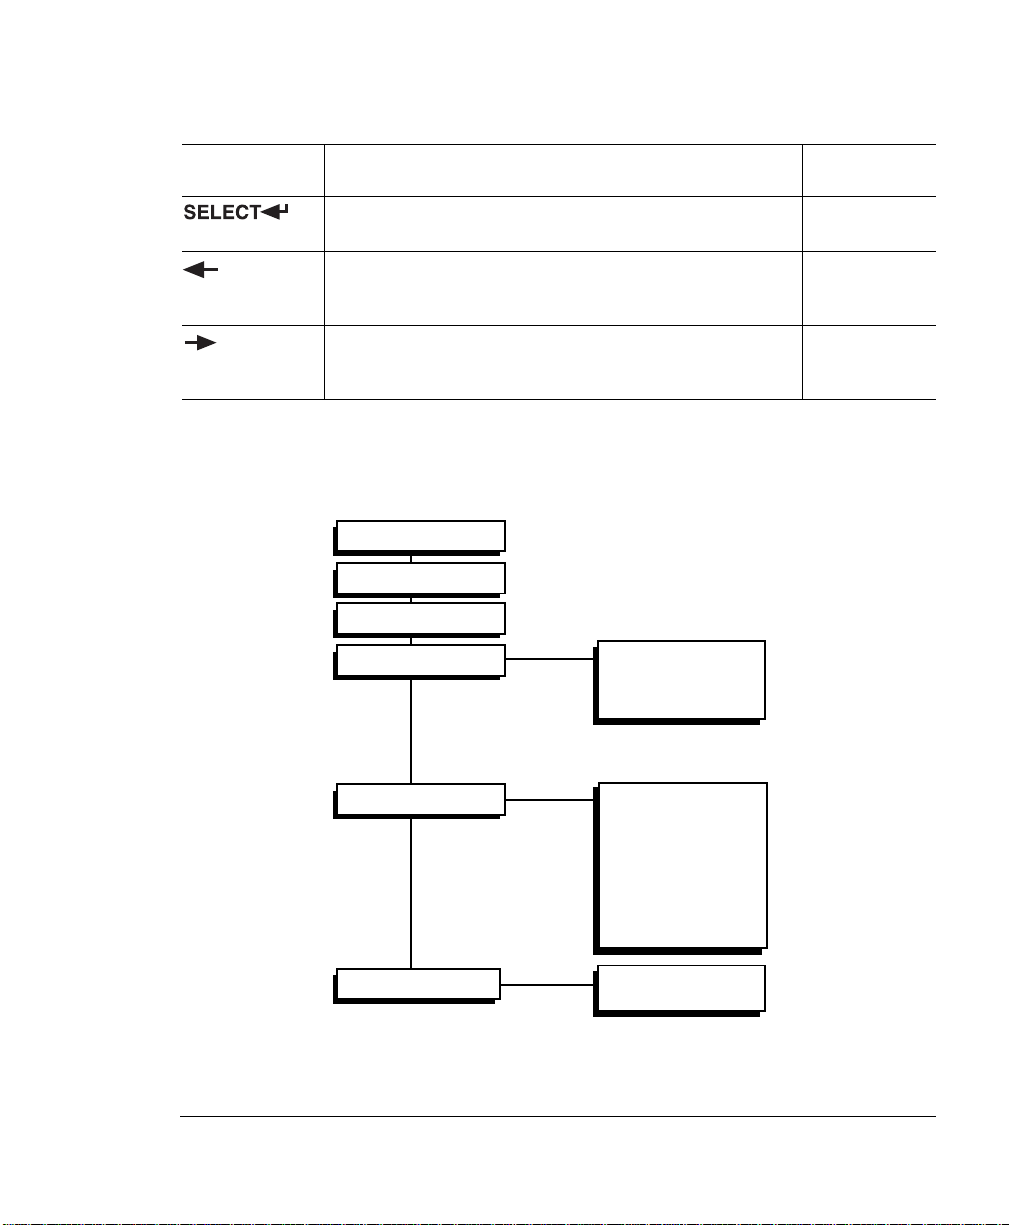
Configuration Menu
Key Function Press Online
First?
Accesses menu or chooses a displayed menu option. Yes
Returns to the previous selection or option for the current
menu. Also returns to the previous choice when changing
character information .
Advances to the next selection or option in the current
menu. Also advances to the next choice when changing
character information .
Configuration Menu
Language
Sample Page
Calibration Page
Engine
Network
Error recovery
Energy saver
Print density
Chain inputbins
IP address
HW address
Subnet mask
Conn. timeout
Ethernet speed
Default router
NMS1
NMS2
NMS3
N/A
N/A
Service
Page count
Clear care
About Your Printer 1-7
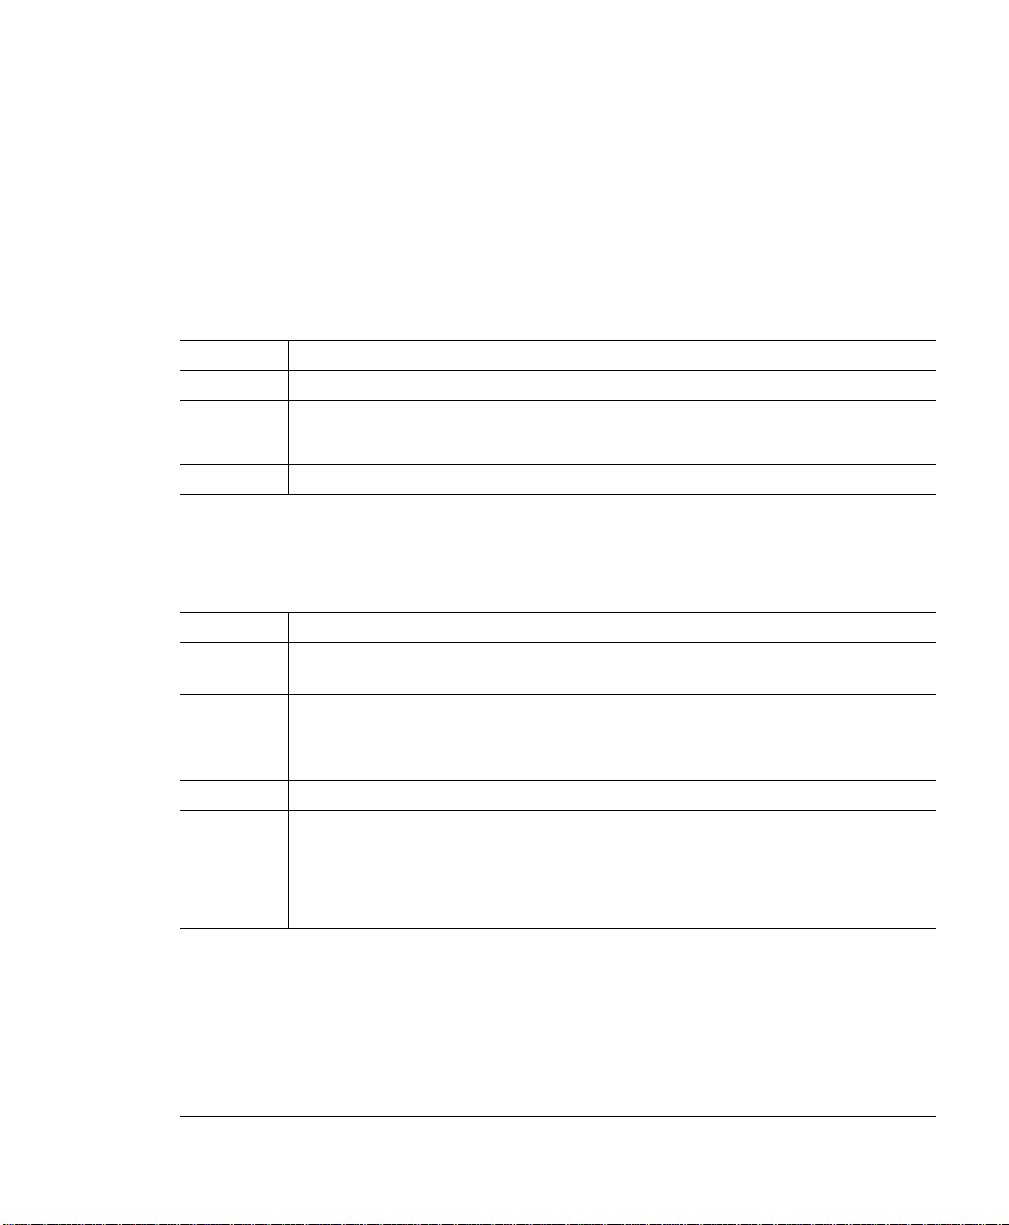
Page 18
Configuration Menu
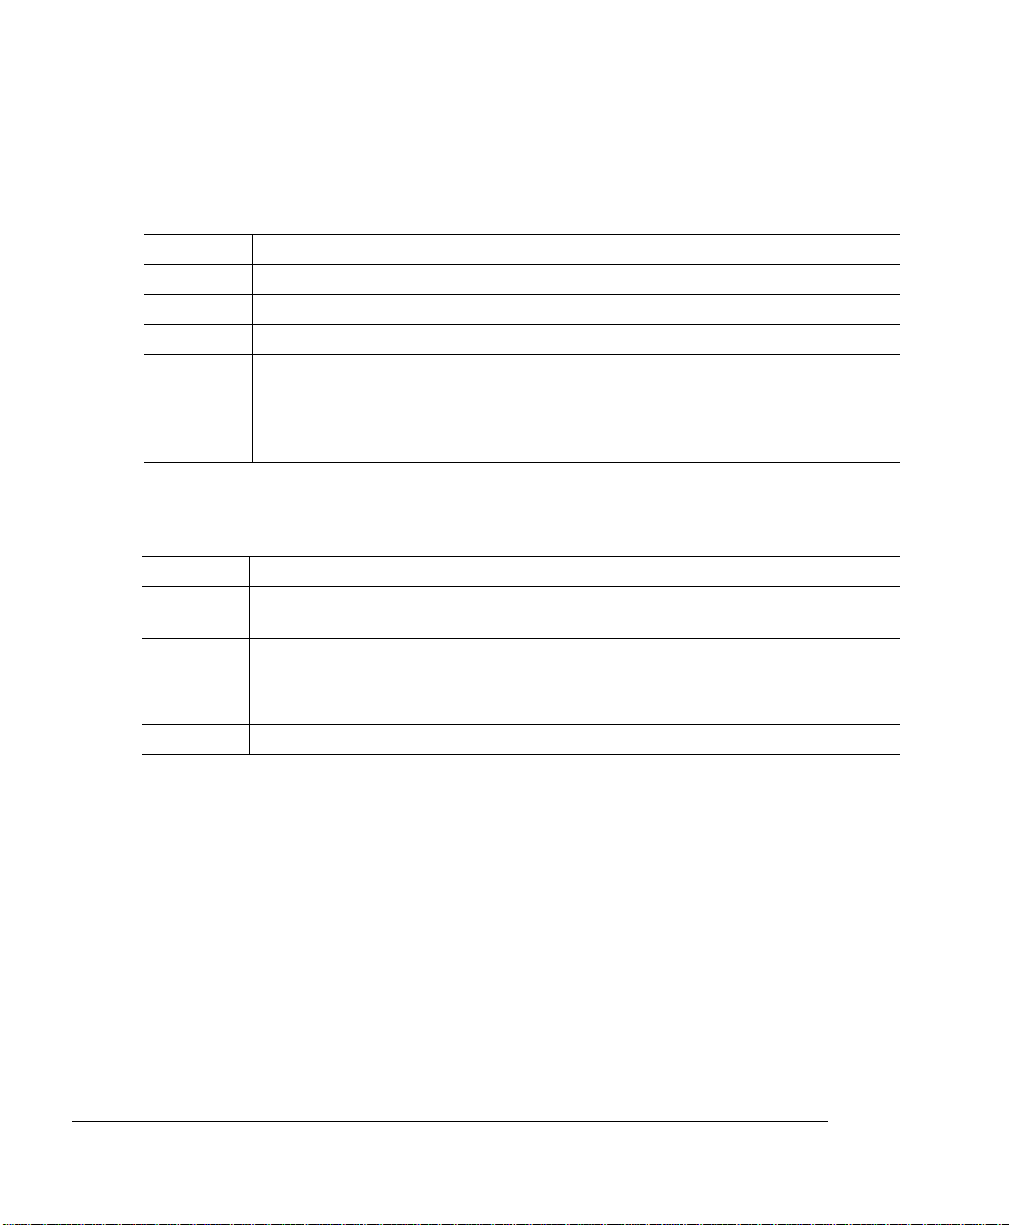
Language
Status and error messages as well as configuration menus and options can be displayed in the message window in one of the available languages.
Menu
Purpose
Choices
Default
Language
Change the message window language.
Czech, Danish, Dutch, English, French, German, Italian, Katakana,
Portuguese, Spanish
English
Sample Page
This menu item initiates the printing of a sample page that can be used to check print
quality.
Menu
Purpose
Default
Sample Page
Prints a sample page.
Yes
Calibration Page
This menu item initiates the printing of a calibration page that is used when adjusting
color density. The instructions for performing color density adjustments are located in
the color density adjustment readme file. To access the readme file, located on the
Utilities and Documentation CD-ROM, insert the CD-ROM and select View Color Support Readme Files. From the Color Support Readme Files window, select Calibration
from the list box, and then select Next.
Menu
Purpose
Default
Calibration Page
Prints a calibration page.
Yes
magicolor 6100 DeskLaser User's Guide1-8
Page 19
Configuration Menu
Engine
The following menus allow you to configure the hardware control settings of your
printer.
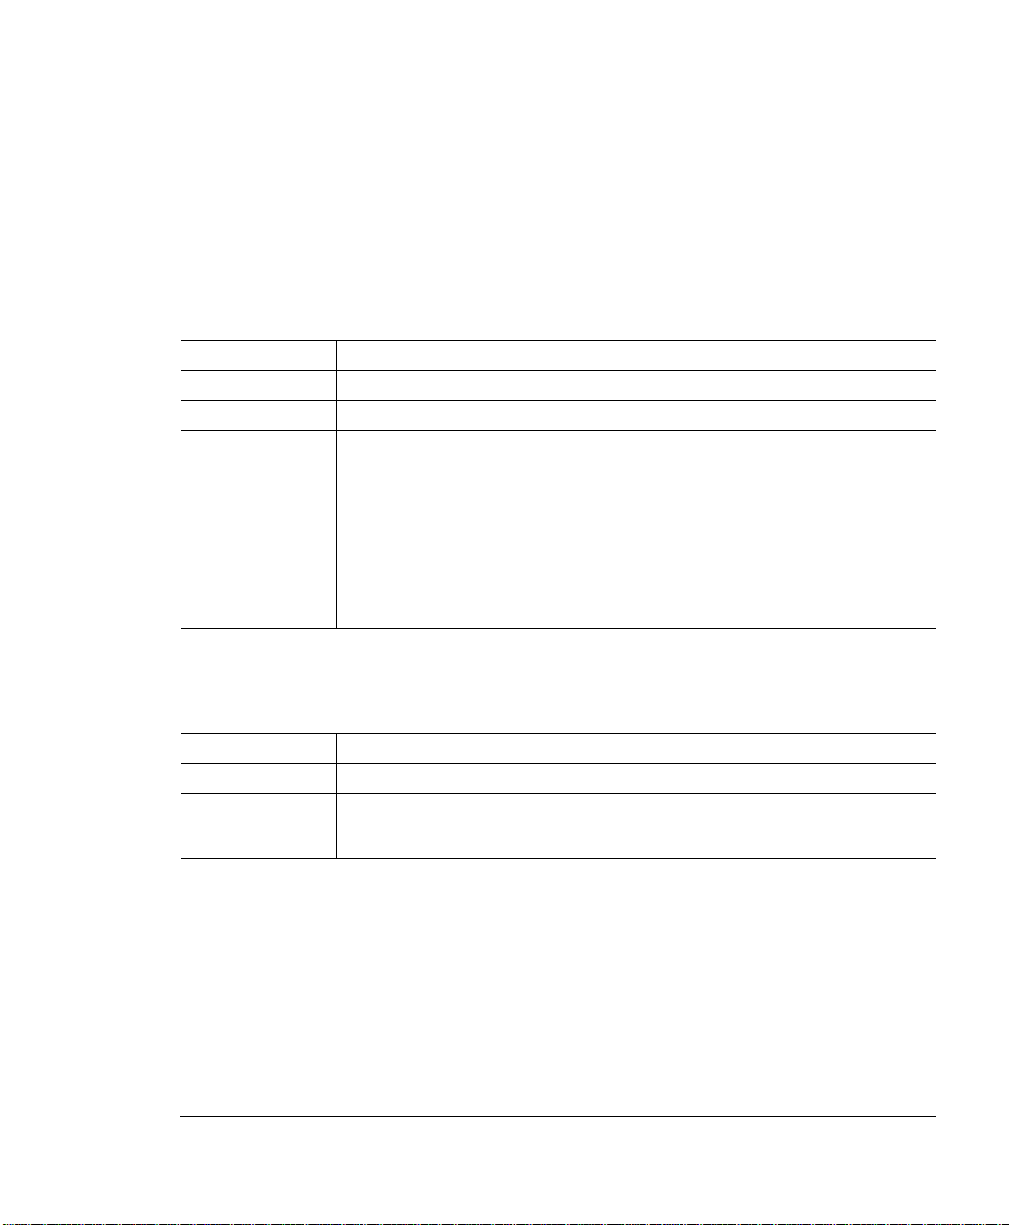
Error Recovery
When the Error Recovery feature is On, the printer will automatically reprint pages that
are halted due to media jams or other errors.
Menu
Purpose
Choices On
Default
Engine/Error Recovery
Enables or disables error recovery.
—Reprints a print job from the page on which the jam or error occurred.
Off
—Don’t reprint a print job when a jam or error occurs.
On
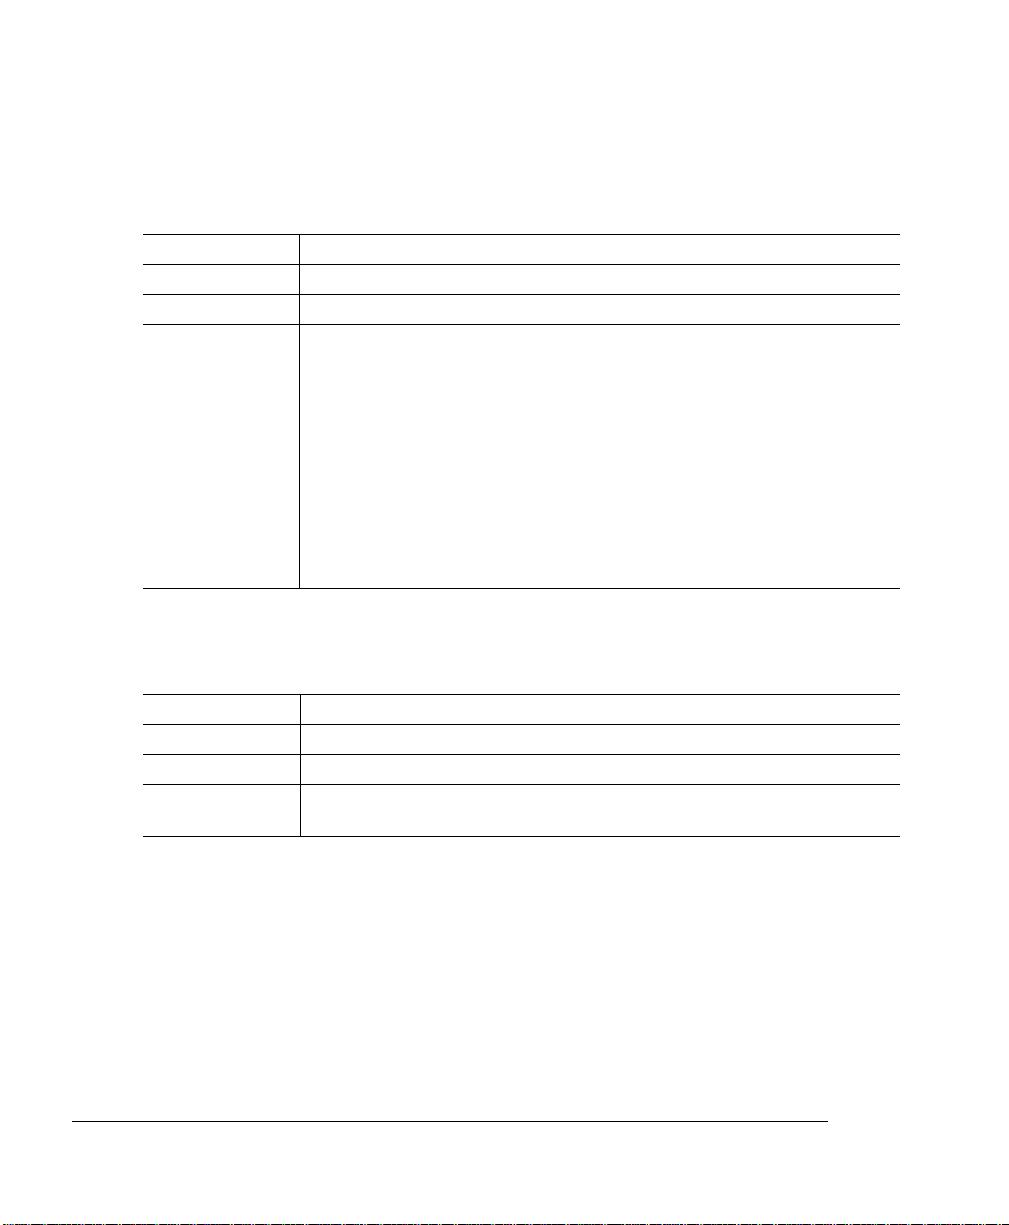
Energy Saver
From this menu item you can set the time interval that the printer must remain inactive
before it will switch to a state of reduced power consumption.
Menu
Purpose
Choices 15 minutes, 30 minutes, 1 hour, 2 hours, 3 hours
Default
Notes
Engine/Energy Saver
Sets the length of inactivity before the printer changes to a low-power state (the
engine remains on, but the fuser turns off).
—Idle time before activation
of low-power state.
Off
—Use normal power all the time.
1 hour
After the chosen time expires (for example, 30 minutes), the printer enters a
low-power mode. The printer remains in low power mode until a print job is
received or until the printer is manually switched from offli ne to online. After
receiving a signal to print or to go on line, the printer warms up and returns to
normal power.
About Your Printer 1-9
Page 20
Configuration Menu
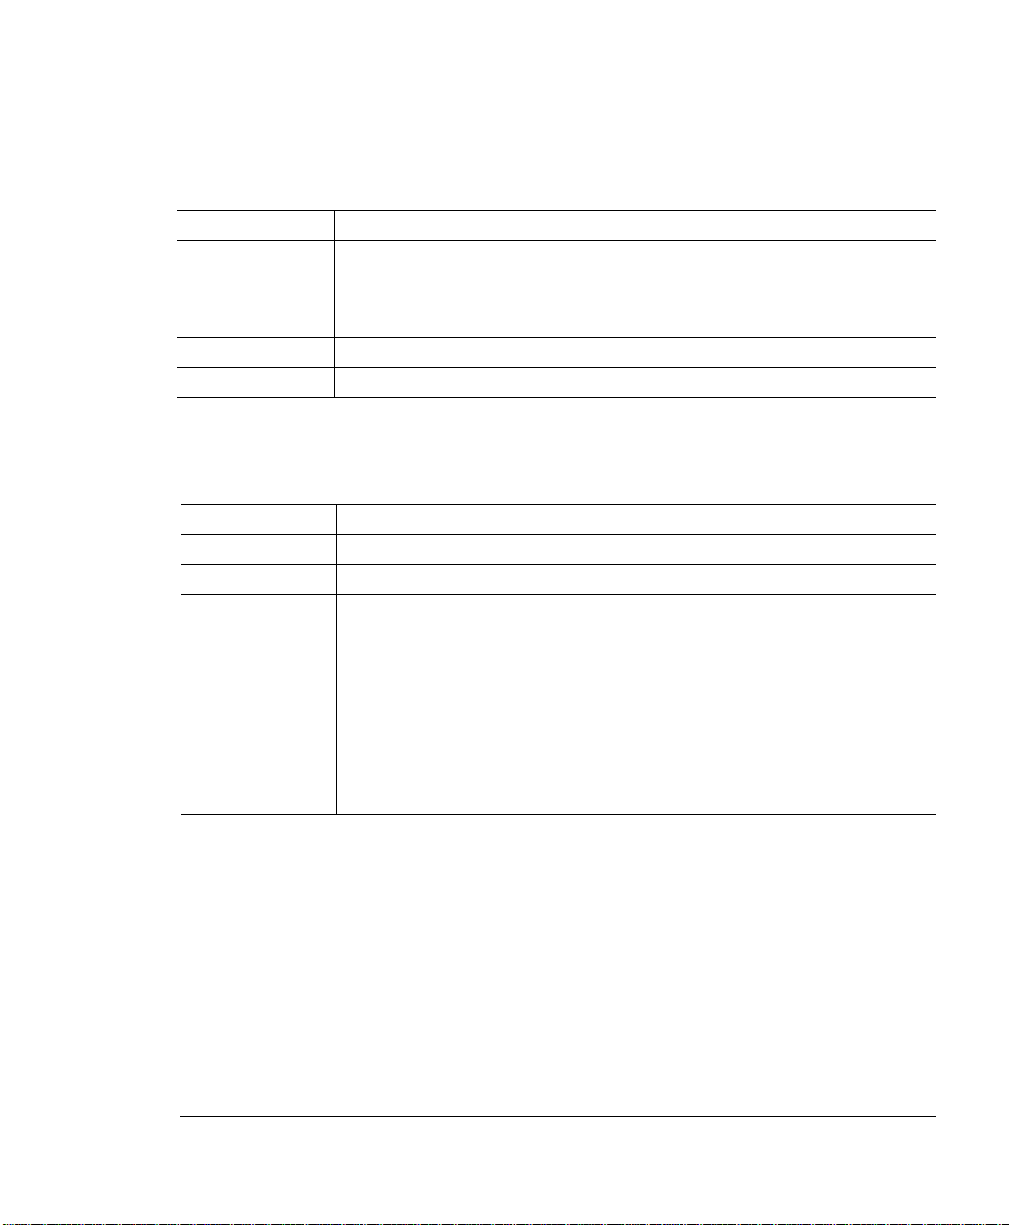
Print Density
This menu item allows you to adjust the amount of toner applied during the printing
process.
Menu
Purpose
Choices
Default
Notes
Chain Inputbins
»Note:
This menu item is available only if an optional media cassette is installed.
Menu
Purpose
Choices On
Default
Engine/Print Density [Yellow, Magenta, Cy an and Black]
Adjusts toner (color) density.
-4 to +4 (lowest to highest density)
0
L = Light, D = Dark
For instructions on adjus ting prin t density, refer to the magicolor 6100 DeskLa ser
Utilities and Documentation
your printer.
Engine/Chain Inputbins
Allows you to “chain” cassettes (inputbins) so that when the first cassette
empties, the printer automatically draws media from the other cassette.
—Switch to the next cassette with the same size and type of media when the
default cassette is empty.
Off
—Don’t switch cassettes; use only the default cassette.
On
CD-ROM and the color calibration kit shipped with
magicolor 6100 DeskLaser User's Guide1-10
Page 21
Configuration Menu
Network
The following menu items allow you to configure your printer for connection to your
network.
IP (Internet) Address
The IP Address menu allows you to set the printer’s network (Internet Protocol)
address. The address is in the format
xxx.xxx.xxx.xxx
.
Menu
Choices
Default
Notes
Network/Internet addres s
Each
xxx.xxx.xxx.xxx
000.000.000.000
This address must be set, and it must be unique.
Once you save your changes to this menu, the printer automatically
reboots.
The address must consist only of numbers and periods. Selecting a letter
or another symbol results in an error message.
All
xxx
values must be three digits (for example, 1 is entered as 001, and
10 is entered as 010).
triplet can have a value of 001–254.
HW (Hardware) Address
The Ethernet HW Address menu allows you to view the printer’s factory-default Ethernet hardware address.
Menu
Choices
Default
Network/HW address
None
The printer’s serial number in the form
HW:080086
xxxxxx
About Your Printer 1-11
Page 22
Configuration Menu
Subnet Mask
The Subnet Mask menu allows you to set the printer’s subnet mask. The address is in
the format
xxx.xxx.xxx.xxx
.
Menu
Choices
Default
Notes
Network/Subnet mask
Each
xxx.xxx.xxx.xxx
000.000.000.000
If subnets are not used with your network, the subnet mask should remain
000.000.000.000. (Check with your network administrator.) This allows the
interface to prov ide au tom ati c sensing of gateways. If you ident ify a su bne t
mask, this automatic sensing is disabled.
Once you save your changes to this menu, the printer automatically
reboots.
The address must consist only of numbers and periods. Selecting a letter
or another symbol results in an error message.
All
xxx
values must be three digits (for example, 1 is entered as 001, and
10 is entered as 010).
triplet can have a value of 001–254.
Connection Timeout
This setting determines the amount of time that the network connection can remain
inactive before it is closed.
Menu
Choices
Default
Notes
Network/Conn. Timeout
0–999 (seconds)
0
A new network connection is established every time a print jo b is sent to
the printer.
magicolor 6100 DeskLaser User's Guide1-12
Page 23
Configuration Menu
Ethernet Speed
The Ethernet Speed menu allows you to select the Ethernet Network Speed.
Menu
Choices
Default
Effectivity
Network/Ethernet Speed
Autodetect
10MBit–10 Mbit/Sec Half Duplex
100MBit–100 Mbit/Sec Half Duplex
Autodetect
Immediately
Default Router
The Router menu allows you to set the Internet address of a router. The address is in
the format
Menu
Choices
Default
Notes
xxx.xxx.xxx.xxx
Network/Default Router
Each
000.000.000.000
If gateways are not used with your ne twork, the router address should
remain 000.000.000.000. (Check with your network administrator.)
Once you save your changes to this menu, the printer automatically
reboots.
The address must consist only of numbers and periods. Selecting a letter
or another symbol results in an error message.
All
10 is entered as 010).
.
xxx.xxx.xxx.xxx
xxx
values must be three digits (for example, 1 is entered as 001, and
triplet can have a value of 001–254.
About Your Printer 1-13
Page 24

Configuration Menu
NMS1–NMS3
SNMP (Simple Network Management Protocol) is a standard protocol used to monitor
devices and the networks to which they attach.
The NMS1, NMS2, NMS3 menus allow you to identify and configure up to three
Network Management Stations (NMSs). You must provide the following information
about each NMS that you want to be able to access the printer: Internet address, community name, and access.
NMSx Community Name
A community is a group of SNMP agents managed by an NMS, and a community
name is associated with a specific NMS address. For the NMS to gain access to the
device, the correct community name (up to 15 characters in length) must be supplied
when connecting.
Menu
Choices
Default
Notes
Network/NMSx/NMS
Up to 15 characters
Public
Once you save your changes to this menu, the printer automatically
reboots.
x
Community
NMSx Address
The NMS Address option allows you to set the IP (internet protocol) network address
for the NMS so the printer can communicate with the network. Traps, if enabled, are
sent to this address. The address has the form
Menu
Choices
Default
Network/NMSx/NMSx Address
Each triplet can have a value of 000–255
000.000.000.000
xxx.xxx.xxx.xxx
.
magicolor 6100 DeskLaser User's Guide1-14
Page 25
Configuration Menu
Notes
000.000.000.000 is a wildcard address that al lows any host to connect to
the printer using the defined community name.
Once you save your changes to this menu, the printer automatically
reboots.
The address must consist only of numbers and periods. Selecting a letter
or another symbol results in an error message.
Any
xxx
value between 10 and 99 must begin with 0 (for example, 10 is
entered as 010 and 99 is entered as 099).
Any
xxx
value between 1 and 9 must begin with 00 (for example, 1 is
entered as 001 and 9 is entered as 009).
NMSx Access
The NMS Access option provides security for the SNMP by configuring the privileges
associated with each NMS
Menu
Choices None
Default
Notes
Network/NMSx/NMSx Access
the printer via SNMP.
Read
Read-Trap
Trap
Write
defined.
Write-Trap
defined, and receive SNMP traps on printer errors.
Write
Once you save your changes to this menu, the printer automatically
reboots.
.
—The NMS isn’t configured . Other c onfigu red NM S’ s can st ill acc ess
—The NMS can read all SNMP variables.
—The NMS can read all SNMP variables and receive traps.
—Traps are sent to the NMS (if defined) when printer errors occur.
—The NMS can read all SNMP variables as well as set the ones so
—The NMS can read all SNMP variables, set the ones so
About Your Printer 1-15
Page 26
Configuration Menu
Service
Service menu items are used to clear service messages and to view the number of
faces printed.
Page Count
This menu item allows you to view the number of pages that have been printed.
Menu
Choices
Default
Service/Page Count
None
0
Clear Care
Use this menu item to clear service messages from the control panel.
Menu
Choices
Default
Notes
Service/Clear Care
Yes, No
No
Service messages will be erased from the control panel display after you
select Yes in this menu, and then place the printer back on line.
What’s Next?
See chapter 2, “Printer Driver Configuration,” for software setup instructions.
magicolor 6100 DeskLaser User's Guide1-16
Page 27

2
Printer Driver Configuration
In This Chapter . . .
“Selecting the Crown Port” on page 2-2
“Configuring the Printer Driver” on page 2-3
“32-bit SuperDriver Setup” on page 2-7
“Sharing the Printer” on page 2-26
“Using the Crown Print Monitor” on page 2-27
Page 28

Selecting the Crown Port
Introduction
The magicolor 6100 DeskLaser printer driver is for use with Windows 95/98/2000 and
NT 4.0 operating systems. This chapter describes how to configure the printer driver
and the Crown Print Monitor. We’ve also included information about using the
MINOLTA-QMS Printer Status Monitor.
Selecting the Crown Port
If you installed the Crown Print Monitor, follow the instructions in this section to assign
the new Crown port that was created.
1 From the Start menu, choose Settings.
2 Choose Printers.
3 In the Printers window click the right
mouse button on the magicolor 6100
DeskLaser printer to display the
printer’s menu.
4 Choose Properties.
5 Choose the Details tab (Windows 95/
98) or Ports tab (Windows 2000/NT
4.0).
6 From the Print To The Following Port
list, choose the Crown port that was
added during the Crown Print Moni-
tor installation.
7 Choose OK to close the Printer
Properties window.
8 Close the Printers window.
magicolor 6100 DeskLaser User's Guide2-2
Page 29

Configuring the Printer Driver
This section explains how to access and configure the magicolor 6100 DeskLaser
printer driver for Windows 95/98, and for Windows 2000/NT 4.0 installations.
Configuring the Printer
Driver
The printer configuration options are located on tabs that appear in the
magicolor
6100 DeskLaser printer driver window. To access options for viewing or modification,
open the printer driver window and click on the tab appropriate for your needs. Online
help is also available while you’re configuring the printer driver. Just choose any Help
button.
Windows 95/98 Configuration Methods
»Note:
If you’re using Windows 2000/NT 4.0, refer to “Windows 2000/NT 4.0
Configuration Methods” on page 2-5 for complete information.
There are two methods of accessing the configuration options of the printer driver:
... via the printer device properties ... via your application’s printer setup
Gives you access to all printer settings Gives you access to Paper, Page Layout,
Image, Device Option, and About tabs.
Lets you assign the default printer settings for
all print jobs
Retains your settings until changed again via
properties
How To:
1 From the Windows Start menu choose
Settings.
2 Choose Printers.
3 Select the magicolor 6100 DeskLaser
printer driver .
4 From the File menu, choose Properties.
5 Make your selections, and then choose
OK to save your changes.
6 Close the Printers window.
Lets you assigns the printer settings only for
the current print job
Temporarily overrides the existing default
settings
How To:
1 From the application’s File menu choose
Print (or, in some cases, Print Setup or
Page Setup).
2 In the Print, Print Setup, or Page Setup
dialog box, select the magicolor 6100
DeskLaser printer driver.
3 Choose the Properties button.
4 Make your selections, and then choose
OK to save your changes.
5 Choose OK from the Print Setup window.
Printer Driver Configuration 2-3
Page 30

Configuring the Printer
Driver
»Note:
You should configure your printer driver settings via the printer driver properties
method for your typical print jobs and use your application’s printer setup method for
print jobs that require special, less frequently needed printer settings.
The tabs and a summary of the options found on each are as follows:
General
test page. See your Windows documentation.
Details
documentation.
Sharing
See your Windows documentation.
Color Management (Windows 98 only)
file associated with your printer or allow the operating system to make the
selection for you.
32-bit SuperDriver Setup
also available from your application’s printer setup properties. See “32-bit
SuperDriver Setup” on page 2-7.
Paper
Page Layout
—Allows you attach comments, use a separator page, and print a
—Allows you to set interface connection details. See your Windows
—Allows you to set up the printer so others on the network can use it.
—Allows you to select the color pro -
—This tab leads to the following set of tabs that are
—Allows you to provide information about the document type and
location of the media you want to print on. See “Configuring Paper
Options” on page 2-8.
—Allows you to specify N-up (Number-up) settings, scaling
and watermarks used for your print jobs. See “Configuring Page Layout
Options” on page 2-14
Image
Device Option
About
—Allows you to provide settings for color format, image brightness
and contrast, color balance, and color matching. See “Configuring Image
Options” on page 2-21.
—Allows you to specify which printer options are installed
on your printer. See “Configuring Device Options” on page 2-25.
—Displays the magicolor 6100 DeskLaser printer driver release
version and date. See “Information on the About Tab” on page 2-26.
magicolor 6100 DeskLaser User's Guide2-4
Page 31

Windows 2000/NT 4.0 Configuration Methods
Configuring the Printer
Driver
»Note:
If you’re using Windows 95/98, refer to “Windows 95/98 Configuration Methods”
on page 2-3 for complete information.
There are three methods you can use to configure the printer driver. However, these
three methods don’t all have the same options or control.
... via the printer driver properties ... via your application’s printer setup
Gives you access to the General, Ports,
Scheduling (Windows NT 4.0) or Advanced
(Windows 2000), Sharing, Securi ty , and About
tabs
Lets you assign the pri nte r se ttings for all print
jobs
Retains your settings until changed again via
properties
How To:
1 From the Windows Start menu choos e
Settings.
2 Choose Printers.
3 Select the magicolor 6100 DeskLaser
printer driver.
4 From the File menu, choose Properties.
5 Make your selections, and then choose
OK to save your changes.
6 Close the Printers window.
Gives you access to the Paper, Page Layout,
Image, Device Option, and About tabs
Lets you assigns the printer settings only for
the current print job
Temporarily overrides the existing default
document settings
How To:
1 From the application’s File menu choose
Print (or, in some cases, Print Setup or
Page Setup).
2 In the Print, Print Setup, or Page Setup
dialog box, select the magicolor
DeskLaser printer driver.
3 Choose the Properties button.
4 Make your selections, and then choose
OK to save your changes.
5 Choose OK from the Print Setup window.
6100
... via document defaults (Windows NT 4.0) or via printing preferences (Windows 2000)
Gives you access to the Paper, Page Layout, Image, Device Option, and About tabs
Lets you assign the default printer settings for all print jobs
Retains your settings until changed again via properties
Printer Driver Configuration 2-5
Page 32

Configuring the Printer
Driver
... via document defaults (Windows NT 4.0) or via printing preferences (Windows 2000)
How To:
1 From the Windows Start menu choose Settings.
2 Choose Printers.
3 Select t he magicolor 6100 DeskLaser printer driver.
4 From the File menu, choose Default Document Properties (Windows NT 4.0) or choose
Printing Preferences (Windows 2000).
5 Make your selections, and then choose OK to save your changes.
6 Close the Printers window.
»Note:
You should configure your printer driver settings via the printer device
properties and document defaults properties for your typical print jobs and use your
application’s printer setup method for print jobs that require special, less frequently
needed printer settings.
»Note:
Because Windows NT remembers the configuration changes you make to the
driver, reinstalling the driver does not restore the factory default configuration.
Five tabs appear in the
magicolor
6100 DeskLaser Properties window through the
Start menu: General, Ports, Color Management, Scheduling, Sharing, and Security. The tabs and a summary of the options found on each are as follows:
General
—Allows you to name the printer, specify a location, specify a driver
to be used, install a new or updated printer driver, use a separator page
between documents, specify a specialized print processor/data type, and print
a test page. See your Windows documentation.
Ports
—Lists the available ports (under Ports), the associated port monitor
(under Description), and a comma-delimited list of printers that use the port
(under Printer). Allows you to add, delete, or configure ports. It also allows the
printer to get setting and status information from other printing devices, and
enables printer pooling (printing to two or more identical printing devices
through one logical printer). See your Windows documentation.
Color Management
—Allows you to select the color profile associated with
your printer or allow the operating system to make the selection for you.
Scheduling (Windows NT 4.0) or Advanced (Windows 2000)
—Allows you
to configure the printer for availability, set spooling information, and define
default document printing priority. See your Windows documentation.
magicolor 6100 DeskLaser User's Guide2-6
Page 33

32-bit SuperDriver Setup
Sharing
your Windows documentation.
Security
view or set auditing information, or view or take ownership of the selected
item(s). See your Windows documentation.
The Paper, Page Layout, Image, Device Option, and About tabs—accessible from
your application’s printer setup and from document default properties are explained in
the “32-bit SuperDriver Setup,” section that follows.
—Allows you to share the printer and install alternate drivers. See
—Allows you to modify the permissions to limit access on the printer,
32-bit SuperDriver Setup
Printer Driver Controls for Windows 95/98/2000/NT 4.0
The following pages in this section describe the function and available settings for the
controls located on the Paper, Page Layout, Image, Device Option and About tabs in
the magicolor 6100 DeskLaser printer driver. These tabs are common for all of the
supported Windows operating systems.
Printer Driver Configuration 2-7
Page 34

32-bit SuperDriver Setup
Configuring Paper Options
The Paper tab allows you to provide information about the type, size, and location of
the media you want to print on. If a duplex unit is installed, there is also a setting for
duplex print options.
»Note:
Optional printer components such as a duplex unit and lower feeder units must
be identified in the Device Option tab before you can identify settings for these
features (settings for optional components will be grayed out or will not appear).
Paper graphic
magicolor 6100 DeskLaser User's Guide2-8
Page 35

Paper Size
32-bit SuperDriver Setup
Purpose
Choices Size Inches Millimeters
Default
Sets the media size.
A3 11.7 x 16.5 297.0 x 420.0
A4 8.3 x 11.7 210.0 x 297.0
B4 (JIS) 10.1 x 14.3 257.0 x 364.0
B5 (ISO) 6.9 x 9.8 176.0 x 250.0
B5 (JIS) 7.2 x 10.1 182.0 x 257.0
Envelope Com 10 4.1 x 9.5 104.1 x 241.3
Envelope DL 4.3 x 8.7 109.2 x 221.0
Executive 7.3 x 10.5 185.4 x 266.7
Ledger 17.0 x 11.0 431.8 x 279.4
Legal 8.5 x 14.0 215.9 x 355.6
Letter 8.5 x 11.0 215.9 x 279.4
Oversize 13.0 x 19.0 330.2 x 482.6
Letter 8.5 x 11.0 in (215.9 x 279.4 mm)
Copies
Purpose
Choices
Default
Additional
Choices
Sets the number of copies to be printed.
1–999
1
See “Collate” and “Reverse Page Order” in this section.
Printer Driver Configuration 2-9
Page 36

32-bit SuperDriver Setup
Collate
Purpose
Choices Enabled (selected)
Default
Notes
Collates multiple copies of documents when select ed.
copy is printed.
Disabled
printed.
Disabled
If you are making multiple duplex copies of a job that has an uneven number
of pages, deselect collation in the application and then select Collate in the
driver on the Paper tab.
—All copies of each page are printed before the next page is
Reverse Page Order
Purpose
Choices Enabled (selected)
Default
Prints pages in reverse order when selected.
Disabled
Disabled
—Prints from the first page of the document to the last page.
Orientation
Purpose
Choices Portrait
Default
Sets the orientation (printing direction) of the print media.
—Prints along short edge of the page (vertical page orientation)
Landscape
Portrait
—Prints along long edge of the page (horizontal page orientation)
—All pages of the document are printed before the next
—Prints from the last page of document to the first page.
magicolor 6100 DeskLaser User's Guide2-10
Page 37

Paper Source
32-bit SuperDriver Setup
Purpose
Choices Auto
Default
Notes
Sets the input source (cassette) from which print media is pulled into the
printer
—The printer will use the first cassette it can find that contains media
large enough to satisfy the print job requirements.
Upper Tray
Optional (1 or 2)
printers with one or two lower feeder units installed).
None
When the printer is first turned on, the upper tray is selected. After that, the
printer uses the last cassette selected.
See “Different Paper for 1st Page” in this section.
—The cassette in the standard (upper) position.
Different Paper for 1st Page
Purpose
Choices Enabled (selected)
Default
Additional
Choices
Allows you to selec t th e p ape r s ource that will be used for the first page of the
document.
source identified in the 1st Page list.
Disabled
Disabled
When enabled is selected , the 1st Page list is ac tivated. See “1st Pag e” in this
section.
—All pages of the document use the same paper source.
—The cassette(s) in the lower position (available only on
—The first page of the document will use the paper
Printer Driver Configuration 2-11
Page 38

32-bit SuperDriver Setup
1st Page
Purpose
Choices Upper Tray
Default
Notes
This list allows you to identify the paper source for the first page of the
document.
Optional (1 or 2)
units installed.
Upper Tray
This list is disabled (grayed-out) if Different Paper for 1st Page is disabled, or
if there are no lower feeder units installed.
—available only on printers with one or two lower feeder
Paper Graphic
The paper graphic image will change according to Paper Size, Orientation and
Duplex/Booklet selections, and will display the selected N-up setting.
Duplex/Booklet
Purpose
Choices None
Default
Notes
Allows you to specify whether and how your print job will be duplexed.
Long Edge
notebook.
Short Edge
Booklet Left Binding
—Prints flipped horizontally on the long edge as in a loose-leaf
—Prints flipped vertically on the short edge as on a clipboard.
—Orients faces (2-up) with binding (fold) on left.
this option for booklets designed to be read right to left.
Booklet Right Binding
—Orients faces (2-up) with binding (fold) on right.
this option for booklets designed to be read left to right.
None
Duplex/Booklet options are supported only on printers with a duplex unit
installed and the duplexer option selected on the Device Options tab.
Duplex/Booklet options are only available when Plain Paper is the Media
Type.
Use
Use
Printing with booklet binding produces four faces of print on each duplexed
sheet of media (2-up on each side of the media). The faces are arranged so
that when the media is folded, the page ordering is booklet style.
To use Booklet Left Binding or Booklet Right Binding, the N-up option (on the
Page Layout tab) must be Off.
magicolor 6100 DeskLaser User's Guide2-12
Page 39

Media Type
32-bit SuperDriver Setup
Purpose
Choices Plain Paper
Default
Notes
Sets the type of media to be printed.
mode—Long-grain paper 16–24 lb (60–90 g/m²)
Transparency
Thick Stock
Plain Paper
Duplex Options are available only when Plain Paper is selected as the Media
Type.
mode—Transparencies 24–41.75 lb (90–157 g/m²)
mode—Thick stock 24 lbs–43 lbs (90–163 g/m²)
Default Butto n
The Default button on the Paper tab allows you to restore all of the options on the
Paper tab to their default settings.
Printer Driver Configuration 2-13
Page 40

32-bit SuperDriver Setup
Configuring Page Layout Options
The Page Layout tab allows you to provide information about the number of document
pages to print on a single side of media, the scaling percentage to be applied and the
identification and placement of watermarks to be printed.
Paper graphic
magicolor 6100 DeskLaser User's Guide2-14
Page 41

N-up (Number-up)
32-bit SuperDriver Setup
Purpose
Choices Off
Default
Notes
Selects the number of document pages to print on a single side of the media.
—One document page will be printed on each media page.
2-, 4-, 6-, 9-, 16-Up
page.
Off
The N-up option setting is disabled (grayed-out) if the Scaling option is in
effect. To enable the N-up option, set the Scaling option setting to 100.
—Multiple document pages will be printed on each media
Detail of N-up Button
This button, which is activated when N-up is set to a choice other than Off, opens the
N-up Style window to allow you to select the orientation of the document pages on
your media.
Printer Driver Configuration 2-15
Page 42

32-bit SuperDriver Setup
N-up Style Buttons
Purpose
Choices Horz. Ascending
Default
Each N-up style opti on is selec table by ena bling (selec ting) t he butt on l ocate d
next to the style graphic. Only one style may be selected at a time.
Horz. Descending
Vert. Ascending
Vert. Descending
Horz. Ascending
Border Line
Purpose
Choices Enabled (selected)
Default
Allows you to place a border line between N-up page images on the printed
media.
Disabled
Disabled
—No border line is printed.
Scaling
Purpose
Choices 50%–200%
Default
Notes
Allows you to set the magnification of your document page as it is printed on
the media.
100
The Scaling option setting is disabled (grayed-out) if N-up page layout is in
effect. To enable the Scaling option, change the N-up setting to Off.
—Prints a border line between N-up page images.
Watermark
Purpose
Choices (Customizable list)
Default
Additional
Choices
Allows you to select the type of watermark to be printed on the media.
None
See “First Page Only,” “In Background,” and “Edit Watermark Button” in this
section.
—Selects the watermark chosen from the list.
magicolor 6100 DeskLaser User's Guide2-16
Page 43

First Page Only Button
32-bit SuperDriver Setup
Purpose
Choices Enabled (selected)
Default
Notes
This option setting determines whether the watermark only prints on the first
page of the document or on all document pages.
document.
Disabled
Disabled
This option is unavailable (grayed-out) until a watermark is selected.
—The watermark prints on all pages of the document.
In Background
Purpose
Choices Enabled (selected)
Default
Notes
Gives you the choice to have the wate rmark superimp osed over the text or the
text super imposed over the watermark.
watermark.
Disabled
Enabled
This option is unavailable (grayed-out) until a watermark is selected.
—The watermark is superimposed over the document text.
—The watermark prints only on the first page of the
—The document text is superimposed over the
Printer Driver Configuration 2-17
Page 44

32-bit SuperDriver Setup
Edit Watermark Button
Selecting this button opens the Watermark window, where you can add, delete, or
modify watermarks to be printed on your media.
Watermark
graphic
Editing an Existing Watermark
1 Select the watermark you want to edit from the Watermark list.
When you select a watermark, it displays in the watermark graphic, and the watermark configuration details appear in the Watermark Edit fields located on the right
side of the window.
2 Make changes to the settings in each option as needed.
»Note:
3 Choose OK to save your changes and close the Watermark window or
»Note:
See “Configuring Watermark Edit Options” on page 2-19 for a description of
Watermark Edit options.
choose Cancel to disregard your changes.
If you choose another watermark from the list before selecting the OK
button, any changes that were entered for the initial watermark selected will be
lost.
magicolor 6100 DeskLaser User's Guide2-18
Page 45

32-bit SuperDriver Setup
Adding a New Watermark
1 Choose the Add button.
When the Add button is selected the Watermark Edit fields will be filled by default
values. You may choose to accept or change any of the default option values.
2 Modify the settings for each Watermark Edit option as needed.
»Note:
See “Configuring Watermark Edit Options” on page 2-19 for a description of
Watermark Edit options.
3 Choose OK to save your changes and close the Watermark window or
choose Cancel to disregard your changes.
Deleting a Watermark
1 Select the watermark that you want to remove from the Watermark list.
2 Choose Delete.
The selected watermark disappears from the Watermark list.
3 Repeat steps 1 and 2 for each watermark that you want to remove.
4 Choose OK to save your changes and close the Watermark window or
choose Cancel to disregard your changes.
Configuring Watermark Edit Options
The following configuration settings are available for watermark options located on the
right-half of the Watermark window:
Watermark Name:
list.
String:
Color:
the watermark string. There is an adjustment control for red, blue and green.
The watermark text that appears on the printed media.
Either type or use the scroll buttons on this control to adjust the hue of
The name that identifies the watermark in the Watermark
Style:
Font:
Printer Driver Configuration 2-19
Gives you optional choices of bold and italic text for your watermark.
Allows you to specify the font and font size for your watermark. You
may choose from any of the fonts installed on your computer. Changes to the
font and/or font size are reflected in the watermark graphic.
Page 46

32-bit SuperDriver Setup
Angle:
media. You may select any angle between -90 and 90 degrees. Changes to
the angle setting are reflected in the watermark graphic.
Position:
watermark on the media. Changes to the position setting are reflected in the
watermark graphic.
This option allows you to set the angle of the watermark on your
Use the horizontal and vertical controls to adjust the position of the
Watermark Graphic
The Watermark Graphic is located on the lower-left side of the Watermark window.
The graphic shows the media in the selected print orientation with the currently
selected watermark. Changes to the Watermark Edit option settings are represented
by changes to the appearance of the graphic.
Default Butto n
The Default button on the Page Layout tab allows you to restore the options on this
tab to their default settings.
magicolor 6100 DeskLaser User's Guide2-20
Page 47

32-bit SuperDriver Setup
Configuring Image Options
The Image tab allows you to provide settings for color selection, color matching, document type, composite black, and resolution.
Printer Driver Configuration 2-21
Page 48

32-bit SuperDriver Setup
Color
Purpose
Choices Enabled (selected)
Default
Notes
Selects color or monochrome printing.
Disabled
Enabled (selected)
The Disabled setting is designed only for text and grayscale graphics.
If Color is disabled, the Composite Black settings will not be available
(grayed-out).
—Monochrome (black only)
Color Match
Purpose
Choices Disabled—
Default
Selects the method for color matching.
No color matching is applied by the printer driver.
Use Windows’ matching
ICM-based applications (for example, PhotoShop and CorelDRAW).
Use Driver’s matching
color matching to bitmap objects. The ICC profile files are located in the
C:\WINDOWS\SYSTEM\COLOR directory:
DL61006.ICM (600x600 resolution)
DL610012.ICM (1200x600 resolution)
Use Driver’s matching.
—Full color (cyan, magenta, yellow, and black)
—Applies the color matching provided by
—Uses the dr iver’s ICC color profile files to apply
Composite Black
Purpose
Choices Enabled
Default
Sets each of the three types of rendered objects (Text, Graphics, and Bitmap
objects) to print in composite black (using a combination of cyan, magenta,
and yellow toner), or true black (black toner only).
Disabled
Text—Disabled, will print using true black
Graphics—Enabled, will print in composite black
Bitmap—Enabled, will print in composite black
(checked) - will print in composite black
(not checked) - will print using true black
magicolor 6100 DeskLaser User's Guide2-22
Page 49

Resolution
32-bit SuperDriver Setup
Purpose
Choices
Default
Selects print resolution to use.
600 x 600 dots per inch
1200 x 600 dots per inch
600 x 600 dots per inch
Fine Mode
Purpose
Choices Enabled (selected)—
Default
Notes
Used to enable or disable fine mode.
Turns fine mode on.
Disabled—
Disabled
Setting the print quality to Fine will reduce the printing speed by as much as
50 percent. The m edia fee d rate is reduced to allow media to pass t hrough the
image transfer process before the next sheet is fed into the media path. This
setting reduces printer chassis vibration that can occur during the imaging
process to its minimum level.
Turns fine mode off.
Detail Button
The Detail Button opens the Graphics window, where you can make adjustments to
contrast, brightness, saturation, and sharpness.
Graphics
window image
Printer Driver Configuration 2-23
Page 50

32-bit SuperDriver Setup
Brightness and Contrast Adjustments
Purpose
Choices
Default
Notes
Allow you to customize the brightness (lightness and darkness) and contrast
of an image.
Brightness
Contrast
0%—100%
The center setting (50%) on each slider bar.
The settings on the slider bars can be changed using keyboard arrow keys.
—Increase for a lighter print; decrease for darker.
—Increase for higher contrast print; decrease for lower contrast.
Saturation and Sharpness Adjustments
Purpose
Choices
Default
Notes
Allow you to customize the color saturation and sharpness of an image.
0%—100%
Saturation: 20%
Sharpness: 50%
The settings on the slider bars can be changed using keyboard arrow keys.
Graphics Window Image
The image located on the left side of the Graphics window will change in appearance
as adjustments are made.
Default Butto n
The Default button on the Image tab allows you to restore the options on this tab to
their default settings.
magicolor 6100 DeskLaser User's Guide2-24
Page 51

32-bit SuperDriver Setup
Configuring Device Options
The Device Option tab allows you to identify which options have been installed on
your printer.
Installable Options, Installed Option Lists, and Options Graphic
The Installable Options list displays all printer options that are available for your
printer. The Installed Options list displays the current configuration that has been
selected. These settings are represented by changes in the Options Graphic.
Adding an Option Removing an Option
1 Select the option you want to add from
the Installable Options list.
2 Choose Add.
The option you selected now appears
in the Installed Option list and in the
Options Graphic.
Printer Driver Configuration 2-25
1 Select the option you want to remove
from the Installed Options list.
2 Choose Remove.
The option you selected now appears
in the Installable Option list and is
removed from the Options Graphic.
Page 52

Sharing the Printer
Information on the About Tab
The About tab contains the version information for your printer driver and associated
files.
Sharing the Printer
The magicolor 6100 DeskLaser may be shared via two communication protocols:
Ethernet
Refer to your Windows online help for information about printer sharing. Users
who intend to print over a network using TCP/IP need to install the Crown Print
Monitor. See “J. Plug and Play Printer Driver Installation,” in the
DeskLaser Installation Guide
replace the Crown Print Monitor, see “Updating the Printer Driver/Monitor,” in
chapter 4, “Advanced Printer Operations.”
Parallel
Refer to your Windows online help for information on sharing printers and files.
magicolor 6100
for installation instructions. If you need to update or
magicolor 6100 DeskLaser User's Guide2-26
Page 53

Using the Crown Print Monitor
The Crown Print Monitor (CROWNMON) for Windows is designed specifically for
MINOLTA-QMS printers using TCP/IP protocol to transport print jobs and Print Manager to access printer status information.
The Print Monitor’s Print Spooler (both workstation and server versions) controls the
printing environment for both local and remote print jobs submitted through shared
resources via TCP/IP. The Print Spooler “monitors” or “despoolers” are configured to
service print jobs in a particular queue.
Components
Status component
This component obtains information from the printer, such as print job “go/nogo”
and error or warning conditions. Status information displays in Print Manager
through the print queue status dialog box. Status information comes from either
the Windows Print Spooler, the Crown Print Monitor, or the printer, depending on
where the job is in the p rinting process. See chapter 6, “Printer Jams and Troubleshooting,” for more information on status messages.
Using the Crown Print
Monitor
Send component
»Note:
Configuration component
Printer Driver Configuration 2-27
The Crown Print Monitor uses TCP/IP socket 35 for high-performance data
transfer.
This component transports print jobs to a specific MINOLTA-QMS print device.
When a job is sent to a print device by the Crown Print Monitor, it utilizes all allocated Windows operating system resources to transport the job. If a connection is
broken while a job is being transported, the monitor gives control back to the Print
Monitor Print Spooler. Any job sent to the printer while it is recovering from the
break in communication is flushed from the Windows print queue.
This component configures the port name, Internet address, time delays, and
problem sound alert. It consists of the Add MINOLTA-QMS Port and Configure
MINOLTA-QMS Port dialog boxes. All configuration changes made via this component are automatically recorded in the Windows system registry.
Page 54

Using the Crown Print
Monitor
Viewing the Crown Print Monitor
1 From the Start menu, choose Settings.
2 From the Settings menu, choose Printers.
3 Double-click the
Caution:
When printing, do not cancel a print job in the Crown Print Monitor while the
job is paused.
Whenever a print job is sent to that port, its status is reported in a status window.
The following table explains the status window field names:
Field Name Explanation
Status The current state of the print job in process. A print job either
Document Name The document’s title (it may also be the filename).
Owner The document owner.
Printed at The time the print job is submitted to the NT Print Spooler.
Pages The number of pages in the document.
Size The document size.
Priority The document priority in the queue. Range of Priorities
magicolor
proceeds in a normal error-free state or it is in an error state. Error
states can be nonvolatile like
volatile like the inability to connect to a target printer (this state is
displayed as
Remote Downlevel Document displays when the client workstation,
spooling jobs to an NT server, does not transmit complete job
information. See your Microsoft Windows NT documentation for
more information on this message.
is 1–99.
6100 DeskLaser printer icon.
PAPER OUT
Printer Not Responding
or
PAPER JAM
).
or
What’s Next?
See chapter 3, “Everyday Operations and Printer Care,” for a description of typical
printer use and user maintenance procedures.
magicolor 6100 DeskLaser User's Guide2-28
Page 55

3
Everyday Operations and Printer Care
In This Chapter . . .
“Media Sizes” on page 3-3
“Loading the Media Cassette” on page 3-4
“Using Media Other Than Paper” on page 3-7
“Imageable Areas” on page 3-14
“Using Toner Cartridges” on page 3-17
“Replacing a Toner Cartridge” on page 3-19
“Replacing the OPC Belt Cartridge” on page 3-21
“Replacing the Fuser Oil Bottle” on page 3-24
Page 56

“Replacing the Cleaning Roller” on page 3-25
“Replacing the Waste Toner Bottle” on page 3-27
“Replacing the Ozone Filter” on page 3-28
“Handling the Printer” on page 3-28
“Cleaning the Printer” on page 3-30
“Maintenance Schedule ” on page 3-39
magicolor 6100 DeskLaser User's Guide3-2
Page 57

Introduction
This chapter covers basic printer operation, such as loading paper, transparencies,
labels, and envelopes; and how to replace a toner cartridge, the OPC belt cartridge,
the fuser oil bottle, the cleaning roller, and the waste toner pack.
Media Sizes
The
magicolor
input source/locat ion varies .
A3 11.7x16.5 297.0x420.0 U or L
A4 8.3x11.7 210.0x297.0 U or L or A
A4 Transparency (OHP) 8.3x11.7 210.0x297.0 U or A
B4 (JIS) 10.1x14.3 257.0x364.0 U or L
B5 (ISO) 6.9x9.8 176.0x250.0 U
B5 (JIS) 7.2x10.1 182.0x257.0 U or A
Com 10 Envelope 4.1x9.5 104.1x241.3 U or A
DL Envelope 4.3x8.7 109.2x221.0 U or A
Executive 7.3x10.5 185.4x266.7 U or A
Legal 8.5x14.0 215.9x355.6 U or L
Letter 8.5x11.0 215.9x279.4 U or L or A
Letter-Size Transparency
(OHP)
Ledger 11x17 279.4x431.8 U or L
Oversize 13x19 330.2x482.6 U
*
U = Upper (Standard) cassette (250-sheet)
A = Upper (Letter/A4) cassette (250-sheet)
L = Lower (optional) cassette (500-sheet)
6100 DeskLaser prints on a wide variety of media sizes. However, the
Media Media Size Input Source/Location*
Media Sizes
Inches Millimeters
(using envelope adaptor)
(using envelope adaptor)
8.5x11 215.9x279.4 U or A
Everyday Operations and Printer Care 3-3
Page 58

Loading the Media Cassette
Loading the Media Cassette
This section discusses loading the media cassette with paper. If you’re using another
type of media, refer to “Using Media Other Than Paper” on page 3-7 for information.
Paper Specifications
Input Cassette
Capacity
Type
Weight
Print Mode
Duplexing
Notes
Any standard or recycled office paper suitable for plain-paper laser printers,
such as
–
Hammermill Laser Print
Letterhead/memo paper
Plain paper, 16–24 lb bond (60–90 g/m²), thick stock 24–43 lb (90–163 g/m²)
Automatic (Plain Paper)
Duplexing is suppo rted onl y on plain paper and limited thick stock. Supp orte d
up to 28 lb (105 g/m²). See “Duplex (2-Sided) Printing” in chapter 4,
“Advanced Printer Operations.”
We do not recommend using perforated or prepunched paper.
You should test any stock thicker than 24 lb (90 g/m²) to ensure that its
performance is acceptable.
Universal or optional Letter/A4
250 sheets of 20 lb bond (75 g/m²) paper; capacity for other
weights varies accordingly
Prepare the Paper
1 Take a stack of about 250 sheets (
»Note:
Don’t unwrap the paper above the printer as this might cause paper
particles to fall into the printer.
½ ream).
2 Holding the stack with one hand, fan the
paper with the other.
This gets air through the sheets and prevents
static buildup.
3 Take off the top and bottom sheets.
Residual glue buildup on these sheets may cause media jams.
magicolor 6100 DeskLaser User's Guide3-4
Page 59

Load the Cassette
1 Remove the media cassette from the printer.
2 Adjust the media guides to fit the size paper you’re loading.
Squeeze the retainers at the ends of the left guide and/or the center guide, move
the guide to the appropriate location (media sizes are listed on the cassette), and
release the retainers.
Loading the Media
Cassette
Left guide
Center guide
3 Push the media pressure plate down to lock it in position.
4 Load the paper.
A fill limit mark is provided on the inside left
side of the cassette. The media cassette
holds 250 sheets of 20 lb bond (75 g/m²)
paper. (Paper is packed in reams of 500
sheets.) Do not overfill the cassette.
The printing side of the paper should face up.
An arrow on the paper package label indicates the face-up side of the paper.
Media
pressure plate
5 Slide the media cassette back into the
printer.
Everyday Operations and Printer Care 3-5
Page 60

Loading the Media
Cassette
Using Letterhead and Memo Media
Formatting
Input Cassette
Type
Weight
Print Mode
Notes
Format letterhead or memo d ata within your app lication. T ry pri nting yo ur data
on a plain sheet of paper first to check placement.
Universal or Letter/A4
Capacity
Refer to “Paper Specifications” on page 3-4.
Refer to “Paper Specifications” on page 3-4.
Automatic
Check your application documentation for other information about printing on
letterhead and memo media.
Up to 250 sheets, depending on the thickness of the media
Loading and Printing Letterhead and Memo Media
1 In the printer driver (Paper tab, Media Type option), select Automatic.
2 Remove the media cassette from the printer (and remove any media in the
cassette).
3 Load the new media.
»Note:
If you are using the standard universal
cassette and are printing simplex (one-side per
sheet), load the media printing-side up with the
top of the media (the letterhead or memo
information) on the right side of the cassette.
When printing duplex (both sides of sheet) from
the standard universal cassette, load the media
printing-side down with the top of the media on
the right side of the cassette.
Standard universal cassette
Letterhead
If you’re using the optional Letter/A4 cassette and are printing simplex, load the
media printing-side up with the top of the media (the letterhead or memo
information) toward the back of the cassette. If you want to print duplex (both
sides per sheet) from the Letter/A4 cassette, load the media printing-side down
with the top of the media toward the back of the cassette.
4 Slide the media cassette back into the printer.
magicolor 6100 DeskLaser User's Guide3-6
Page 61

Using Media Other Than Paper
Using Media Other Than
Paper
Caution
Although your printer was designed for occasional printing on a wide range
:
of media types, it is not intended to print exclusively on a single media type except
plain paper. Continuous printing on media other than plain paper (such as envelopes,
glossy stock, labels, thick stock, transfer media, or transparencies) may adversely
affect print quality or reduce engine life.
»Note:
For media other than standard plain paper or transparencies, the driver (Paper
tab, Media Type option) needs to be selected to tell the printer that thick stock is
loaded.
»Note:
Duplexing is only supported on plain paper and limited thick stock.
Using Envelopes
Formatting
Input Cassette
Type
Print Mode
Notes
Your printer receives the instruc tions to print on envelop es from your
application.
Print on the front side only. Some parts of the envelope consist of three
layers of paper—the front, back, and flap. Anything printed in these
layered regions may be lost or faded.
See your application documentation for specific information on printing
envelopes.
Envelope adaptor installed in Universal or Letter/A4
Location
Capacity
Use common office envelopes with diagonal joints, sharp folds and edges,
and ordinary gummed flaps, such as
–
Envelope Com 10: Columbian Recycled COR02
–
International DL: Auto Fil #01914
Thick Stock
Print envelopes from the envelope adaptor installed in the upper media
cassette only.
Use envelopes approved for laser printing.
Print
Envelopes should be dry. Do not preseal envelopes.
Standard upper media cassette only
Up to 15, depending on the thickness of the envelopes
only
on the address side of the envelope.
Everyday Operations and Printer Care 3-7
Page 62

Using Media O ther Than
Paper
Loading and Printing Envelopes
1 In the printer driver (Paper tab, Media Type option), select Thick Stock.
2 Place the envelopes on a flat surface, and flatten them by pressing down the
corners.
3 Flex the envelope stack (including the edges) to remove any stiffness.
4 Correct any bent corners, and then tap the
envelopes on a flat surface to align them.
5 Remove the upper media cassette from the
printer (and remove any media in the cassette).
The envelope adapter can be installed only in the
upper media cassette.
6 Install the envelope adapter onto the cassette
as shown.
7 Adjust the media guides to the length and width
of the envelopes.
»Note:
Make sure the guides are snug enough to
keep the envelopes straight, but not so tight that
they buckle the envelopes.
8 Place the envelope stack into the cassette with
the printing-side up.
»Note:
Check your application documentation to determine if the flap should be
placed on the left or on the right. You can also print a single envelope to check the
orientation before printing multiple copies.
9 Slide the media cassette back into the printer.
The media cassette must be located in the upper position, not in the optional
lower input feeder.
10 Open the flap of each envelope immediately (before it cools) after the enve-
lope is delivered to the output tray.
»Note:
Because the envelopes pass through heated rollers, the gummed area
on the flaps may seal. Using envelopes with emulsion-based glue avoids this
problem.
magicolor 6100 DeskLaser User's Guide3-8
Page 63

Using Glossy Stock
Using Media Other Than
Paper
Formatting
Input Cassette
Weight
Print Mode
Note
Format the information to be printed on the glossy (book) stock within your
application. Try printing your data on a plain sheet of paper first to check
placement.
Standard upper media cassette only
Capacity
24–42 lb (90–157 g/m²)
Thick Stock
The printer doesn’t support duplex printing on glossy stock.
Up to 50 sheets, depending on the thickness of the media
Loading and Printing Glossy Stock
1 In the printer driver (Paper tab, Media Type option), select Thick Stock.
2 Remove the upper media cassette from the printer (and remove any media
in the cassette).
3 Load the new media.
4 Slide the upper media cassette back into the printer.
Everyday Operations and Printer Care 3-9
Page 64

Using Media O ther Than
Paper
Using Labels
Formatting
Input Cassette
Type
Weight
Print Mode
Notes
Format label data within your application. Try printing your data on a plain
sheet of paper first to check placement.
Standard upper cassette only
Capacity
Use only labels recommended for laser printers, such as Avery 5260.
24–42 lb (90–157 g/m²)
Thick Stock
Adhesive label stock in si zes letter or A4.
A label consists of a face sheet (the printing surface), adhesive, and a
carrier sheet
— The face sheet must follow to the plain paper specification listed on
— The face sheet surface must cover the entire carrier sheet, and no
— The adhesive and carrier sheet must withstand the fusing temperature
Check your application documentation for other information on printing
labels.
Up to 50 sheets, depending on the thickness of the labels
“Paper Specifications” on page 3-4.
adhesive should come through on the surface. Exposed adhesives
may stick to the t ransfer drum o r the fix ing ro ller, causing labels to peel
off and media jams to occur.
(392° F/200° C).
Loading and Printing Labels
1 In the printer driver (Paper tab, Media Type option), select Thick Stock.
2 Remove the upper media cassette from the printer (and remove any media
in the cassette).
3 Load the new media.
»Note:
If your label stock has a top-of-page, place the top-of-page toward the right
side of the cassette.
4 Slide the upper media cassette back into the printer.
5 In the printer driver (Paper tab, Media Type option), select Thick Stock.
magicolor 6100 DeskLaser User's Guide3-10
Page 65

Using Thick Stock
Using Media Other Than
Paper
Formatting
Input Cassette
Type
Weight
Print Mode
Notes
Format the information to be pri nted on the thick sto ck within your appl ication.
Try printing your data on a plain sheet of paper first to check placement.
Standard upper media cass ette only
Capacity
For information about thick stock media recommended for your printer, refer to
the magicolor 6100 Answer Base at www.minolta-minolta-qms.com/support/
(click on Answer Base or the sun icon).
Simplex: 24 lb (90 g/m²) to
43 lb (163 g/m²)
Thick Stock
You should test the number of sheets of thick stock a media cassette can
hold to ensur e that its performance is acceptable. Do not exceed the fill level
on the inside left side of the cassette.
Up to 50 sheets, depending on the
thickness of the media
Duplex: 24 lb (90 g/m²) to
28 lb (105 g/m²)
1 In the printer driver (Paper tab, Media Type option), select Thick Stock.
2 Remove the upper media cassette from the printer (and remove any media
in the cassette).
Caution:
Do not mix thick stock with any other media in the same cassette, as
this will cause printer jamming.
3 Load the new media.
4 Slide the upper media cassette back into the printer.
Using Transfer Media
Formatting
Input Cassette
Everyday Operations and Printer Care 3-11
Format the information to be printed on the transfer media within your
application. Try printing your data on a plain sheet of paper first to check
placement.
Standard upper media cassette
Capacity
Up to 50 sheets, depending on the thickness of the transfer
media.
Page 66

Using Media O ther Than
Paper
Type
Weight
Print Mode
For information about transfer media recommended for your printer, refer
to the magicolor 6100 Answer Base at www.minolta-qms.com/support/
(click on Answer Base or the sun icon).
Do not exceed the limits for thick stock, up to 43 lb (163 g/m²).
Thick Stock
Loading and Printing Transfer Media
1 In the printer driver (Paper tab, Media Type option), select Thick Stock.
2 Remove the upper media cassette from the printer (and remove any media
in the cassette).
3 Load the new media.
4 Reinsert the upper media cassette in the printer.
Using Transparencies
Formatting
Input Cassette
Type
Weight
Print Mode
Format the information to be printed on the tran sparencies within your
application. Try printing your data on a plain sheet of paper first to check
placement.
Standard upper media cassette only
Capacity
Use any transparencies (also known as OHP film) that meet normal
photocopier standards and that can withstand the fusing temperature (392°
F/200° C). We recommend
— Xerox 3R5765
— 3M CG3710
24–41.75 lb (90–157 g/m²)
Automatic
Up to 50 sheets, dependi ng o n th e thi ck ne ss of the transparencies
»Note:
If you have problems feeding 50 sheets, try loading only
5–10 sheets at a time. Loading a large number of
transparencies at a time may cau se static buildu p, thus causi ng
feeding problems.
magicolor 6100 DeskLaser User's Guide3-12
Page 67

Using Media Other Than
Paper
Notes
Xerox 3R5765 is placed in cassette as long-edge fed with non-striped edge
first and striped side down.
3M CG3710 is placed in cassette as short-edge fed with non-striped edge
first and striped side down.
Transparencies fed short-edge generally provide better print quality than
those fed long-edge.
Keep the media path cl ean. Transparencies are especially se nsiti ve to a dir ty
media path. If there are shadows on either the top or the bottom of the
sheets, see “Cleaning the Printer” on page 3-30 for instructions on how to
clean the printer.
Check your applicati on docu menta tion for othe r informa tio n about pri nting on
transparencies.
Loading and Printing Transparencies
1 In the printer driver (Paper tab, Media Type option), select Automatic.
2 Remove the upper media cassette from the printer (and remove any media
in the cassette).
Caution:
sense that transparencies are present.
3 Load the new media.
Do not leave paper in the cassette, or the printer will not automatically
4 Slide the upper media cassette back into the printer.
Everyday Operations and Printer Care 3-13
Page 68

Imageable Areas
Imageable Areas
Working Within the Imageable Area
The imageable area for media sizes except oversize and envelopes is the page size
minus 0.197" (5 mm) from the top, left, and right edges. See the diagram on page
3-15 for standard plain paper. See the diagram on page 3-16 for glossy stock, label,
thick stock, transfer media, and transparency printable areas.
For printable areas on envelopes, see “Envelopes” on page 3-17.
»Note:
The nonguaranteed print areas are areas on which you can print, but image
quality in these areas may be less than perfect.
Duplexing and Imageable Area
The guaranteed imageable area is reduced by an additional 0.08" (2 mm) on the leading edge of the front side of a duplexed page.
»Note:
Since some media sizes can be fed into the printer either short- or long-edge
first, the “leading edge” isn’t necessarily the top of the page. Check the orientation of
the media in the media cassette to determine which side is the “leading edge.”
Leading edge
magicolor 6100 DeskLaser User's Guide3-14
Page 69

Imageable Area
Plain Paper
»Note:
The nonguaranteed print areas are areas on which you can print, but image
quality in these areas may be less than perfect.
Leading edge of media
Nonguaranteed area
Nonguaranteed area
0.039" (1 mm) Simplex, Duplex - back side
Med ia feed
direction
Nonprintable area
0.157" (4 mm)
0.118" (3 mm) Du plex - front sid e
Imageable Areas
0.078" (6 mm)
Nonguaranteed area
Nonprintable area
0.118" (3 mm)
Print guaranteed area
11.7" (297 mm)
maximum
Nonguaranteed area
0 .0 3 9 " (1 m m)
18.0" (457 mm)
maximum
Nonprintable area
(The print guaranteed area varies with media size)
0.118" (3 mm)
0.078" (6 mm)
Nonguaranteed area
Nonprintable area
0.157" (4 mm)
Everyday Operations and Printer Care 3-15
Page 70

Imageable Areas
Glossy Stock, Labels, Thick Stock, Transfer Media, Transparencies
Leading edge of media
Med ia feed
direction
— Leading edge of media—
Nonprintable area
0.157" (4 mm)
Nonguaranteed area
(The print guaranteed area varies with m edia size)
Nonprintable are a
0.118" (3 mm)
0.078" (2 mm)
Nonguaranteed area
Print guaranteed area
11.7" (297 mm)
Nonguaranteed area 0.236" (6 mm )
0.236" (6 mm)
maximum
18.0" (457 mm)
maximum
Nonguaranteed area
Nonprintable area
0.118" (3 mm)
0.078" (2 mm)
Nonprintable area
0.157" (4 m m )
magicolor 6100 DeskLaser User's Guide3-16
Page 71

Envelopes
»Note:
Nonprintable area 0.157" (4 mm )
Print orientation is determined by your application.
Nonprintable area 0.118" (3 mm )
Nonguaranteed area
Guaranteed print area
(Guaranteed print area varies with media size)
1.65" (42 mm)
maximum
4.15" (105.3 mm)
maximum
Nonprintable area 0.118" (3 mm )
Using Toner Cartridges
Nonprintable area 0.157" (4 mm)
Using Toner Cartridges
Characters and images are created in your laser printer through a process that
applies toner (made of carbon particles) to the photosensitive belt (which functions
like photographic film).
Toner Cartridge Life
A toner cartridge contains enough toner to print the following number of letter/A4size pages:
Color Rated life @ normal 5% page coverage
Black 14,000 pages (Replacement cartridge)/7,000 pages (Starter cartridge)
Yellow 8,500 pages (Replacement cartridge)/4,250 pages (Starter cartri dge)
Magenta 8,500 pages (Replacement cartridge)/4,250 pages (Starter cartridge)
Cyan 8,500 pages (Replacement cartridge)/4,250 pages (Starter cartridge)
Everyday Operations and Printer Care 3-17
Page 72

Using Toner Cartridges
»Note:
The toner cartridges that are shipped with the printer (Starter cartridges), will
print about half as many pages as replacement cartridges.
Consumable life is expressed in simplex letter/A4 pages (1 face). A duplex page (2
faces) is equivalent to two simplex pages.
x
When toner runs low in a cartridge,
It’s your option whether to continue printing; usually, parts of the page print lighter.
When toner is low, it’s sometimes helpful to take the cartridge out of the printer and
redistribute the toner by gently rocking the cartridge horizontally side to side (as you
do for a new cartridge) five or six times. Then reinstall the cartridge. If the
Low
message remains in the message window after you redistribute the toner, you
must replace the toner cartridge.
The printer stops approximately 100 page s after detecti ng that tone r in a cartr idge is
x
low.
toner Empty
displays in the message window.
Toner Low
displays in the message window.
x
Refilled Toner Cartridges
Refilled toner cartridges may produce variations in toner quality and reliability and
may reduce the print quality of your documents. Any damage to the printer caused by
refilled toner cartridge use will not be covered by warranty.
Ordering Toner Cartridges
Toner
Choosing the right consumables for your printer will not only increase its reliability and
performance, but also minimize the risk of damage. Only MINOLTA-QMS toner cartridges are designed to meet the exact specifications of your printer, guaranteeing
maximum performance, efficiency, and long life.
In the US, call 1 (800) 523-2696 for information on ordering toner cartridges and other
consumables. In other countries, refer to www.minolta-qms.com or the
port Guide
»Note:
for the telephone number of the MINOLTA-QMS reseller nearest you.
You can also obtain supplies through Q-Shop at www.q-shop.com.
magicolor 6100 DeskLaser User's Guide3-18
Service & Sup-
Page 73

Toner Cartridge Storage
029amati.eps
Keep toner cartridges in their packaging until you’re ready to install them.
Store toner cartridges in a cool, dry location away from sunlight (due to heat). The
°
maximum storage temperature is 95
ity is 80% without condensation.
Keep toner cartridges level during storage. Do not stand or store cartridge on their
ends or turn upside down; the toner inside the cartridges may become caked or
unequally distributed.
Keep toner cartridges away from salty air environments and corrosive gases such
as aerosols.
Keep toner cartridges away from disk drives and floppy disks. The magnets in the
cartridge can damage stored data.
F (35° C) and the maximum storage humid-
Replacing a Toner Cartridge
Replacing a Toner
Cartridge
Caution
Caution:
Your printer uses four toner cartridges: black, yellow, magenta, and cyan.
1 Open the printer’s front cover.
Press the front cover latch on the upper right
side of the printer.
2 Remove and discard the empty toner car-
tridge.
Dispose the used toner cartridge
:
according to your local regulations. Do not
dispose of it by burning.
3 Remove the toner cartridge from its shipping carton.
Front cover
latch
Do not hold the toner cartridge vertically.
Everyday Operations and Printer Care 3-19
Page 74

Replacing a Toner
Cartridge
4 Remove the protective cover.
Caution:
Each toner cartridge has a colored label that corresponds to a colored
label to the right of the cartridge slots. Always install the toner cartridge in the slot
with a label of the same color. If a toner cartridge doesn’t slide in easily, don’t
force it.
5 Align the toner cartridge with the
cartridge guides, and gently push
the cartridge into the printer.
»Note:
While the cartridges may appear
not to be fully inserted, gently closing
the front cover will guide them to their
proper operating position.
6 Close the printer’s front cover.
7 Check the status message in the
message window.
If a toner alert message is displayed,
use the Service/Clear care menu to
remove it.
Colored
labels
magicolor 6100 DeskLaser User's Guide3-20
Page 75

Replacing the OPC Belt Cartridge
Replacing the OPC Belt Cartridge
Caution
The OPC belt is extremely
:
sensitive to bright light and direct sunlight.
Always leave it in its protective bag until
you’re ready to install it. Any exposure to
light should be limited to less than two
minutes, or permanent damage could
result. If you suspect a belt is damaged due to exposure to light, put the belt in a dark
place to recover. Depending on the amount of exposure, recovery may take up to two
hours. Recovery time is dependent on the amount of exposure sustained, and
recovery is not guaranteed.
Also, handle the cartridge carefully. The belt is also extremely sensitive to hand oils
and scratches, both of which reduce print quality.
Caution:
If you have a duplex unit installed, make sure you have opened the duplex
unit top cover before completing the following step. Forced opening of the printer’s top
cover first may damage the unit.
1 Open the printer’s top and
front covers.
Caution
Opening the front
:
cover pulls the toner cartridges
forward slightly to make room
for the OPC belt cartridge. You
Front cover
029amati.eps
could damage the OPC belt if
you don’t do this.
latc h
Everyday Operations and Printer Care 3-21
Page 76

Replacing the OPC Belt
Cartridge
2 Rotate up the two lock levers
(one on each side of the OPC
belt cartridge opening) to
prepare the opening for the
cartridge.
Lock
le ve r s
3 Remove the protective sheet
from the cartridge, and then
pull out the two orange
tension-release pins (one on
each side of the cartridge).
magicolor 6100 DeskLaser User's Guide3-22
Page 77

4 Holding the cartridge above the printer,
align the guide pins on the cartridge
with the guide slots in the lock levers.
The green surface of the cartridge
faces you.
Replacing the OPC Belt
Cartridge
Caution:
When lowering the cartridge into the guide slots, the metal contact on
the lower left side of the cartridge should be aligned outside of the left guide slot.
5 Gently guide the cartridge into the printer.
Caution
The cartridge should slide easily into the printer. Don’t force it.
:
6 Rotate the two lock levers to secure the
OPC belt cartridge in the printer.
7 Close the printer’s front and top covers.
8 Check the status message in the
message window.
Metal contact
If an OPC belt cartridge alert message is
displayed, use the Service/Clear care
menu to remove it.
Everyday Operations and Printer Care 3-23
Page 78

Replacing the Fuser Oil Bottle
Replacing the Fuser Oil Bottle
1 Turn off the printer.
Caution:
unit top cover before completing the following step. Forced opening of the printer’s top
cover first may damage the unit.
2 Open the top cover of the
3 Open the two bottle lock
If you have a duplex unit installed, make sure you have opened the duplex
printer.
levers.
magicolor 6100 DeskLaser User's Guide3-24
Page 79

4 Remove the empty oil bottle.
5 Install the new oil bottle.
6 Close the two bottle lock
levers.
7 Close the top cover and turn
on the printer.
8 Check the status message in
the message window.
If a fuser oil bottle alert
message is displayed, use the
Service/Clear care menu to
remove it.
Replacing the Cleaning Roller
Replacing the Cleaning
Roller
WARNING!
sure the unit is cool before handling it.
ACHTUNG!
besteht. Bitte lassen Sie die Fixiereinheit einige Zeit abkühlen, bevor Sie diese
berühren.
1 Turn off the printer.
Caution:
unit top cover before completing the following step. Forced opening of the printer’s top
cover first may damage the unit.
Everyday Operations and Printer Care 3-25
The fuser unit can become extremely hot and cause severe burns. Make
Die Fixiereinheit kann sehr heiß werden, so daß Verbrennungsgefahr
If you have a duplex unit installed, make sure you have opened the duplex
Page 80

Replacing the Cleaning
Roller
2 Open the top cover of the
printer.
3 Open the two cleaning roller
lock levers.
4 Grasp the handle of the
cleaning roller and remove it.
5 Install the new cleaning
roller.
6 Close the two cleaning roller
lock levers.
7 Close the top cover and turn
on the printer.
8 Check the status message in
the message window.
If a cleaning roller alert
message is displayed, use the
Service/Clear care menu to remove it.
Cleaning roller
magicolor 6100 DeskLaser User's Guide3-26
Page 81

Replacing the Waste
029amati.eps
Front cover
latch
Toner Bottle
Replacing the Waste Toner Bottle
1 Open the front cover.
2 Take out the old waste toner bottle.
Waste toner bottle
3 Use the label on the side of
the old waste toner pack to
seal the opening, and then
dispose of the pack in accor-
dance with safety laws and
regulations in your area.
4 Prepare the new waste toner
bottle.
5 Set the new waste toner bot-
tle in the holder and close the cover.
6 Check the status message in the message window.
If a waste toner pack alert message is displayed, use the Service/Clear care
menu to remove it.
Everyday Operations and Printer Care 3-27
Seal this opening.
Page 82

Replacing the Ozone Filter
Replacing the Ozone Filter
The ozone filter reduces exhausted ozone gas.
1 Remove the ozone filter case
on the left rear of the printer.
2 Remove the ozone filter from
the case.
3 Install a new ozone filter in
the case.
4 Reinstall the ozone filter
case.
5 Discard the old ozone filter.
6 Check the status message in
the message window.
If an ozone filter alert message is displayed, use the Service/Clear care menu to
remove it.
Ozone filter case
Ozone filter
Handling the Printer
Handle the printer with care to preserve its life. Abuse may cause damage. Keep the
following guidelines in mind:
Do not place anything on the top of the printer.
If you have an optional duplex unit installed, always open the duplex unit rear
cover before opening the printer’s top cover.
Avoid spraying cleaning solution directly on the printer’s surface; the spray could
penetrate through the air vents of the printer and damage the internal circuits.
Be careful when cleaning the inside or removing paper jams, as the fuser assembly and other internal parts become very hot. Open the printer cover, and let the
interior of the printer cool before handling the inside of the printer.
magicolor 6100 DeskLaser User's Guide3-28
Page 83

Handling the Printer
Always close the printer covers gently. Never expose the printer to vibrations.
Do not cover the printer immediately after using it. Turn it off and wait until it cools
down.
Do not leave the printer open for any length of time, especially in well-lit places;
light may damage the OPC belt cartridge.
Do not open the printer during printing and do not tap paper stacks on the printer.
Do not tilt, lubricate, or disassemble the printer.
Do not touch the electrical contacts, gears, or laser beam devices. Doing so may
damage the printer and cause the print quality to deteriorate.
Keep media in the output tray at minimum level. If the media stacks too high, your
printer may experience media jams and excessive media curl.
Lift the printer from the bottom only, using the carrying grips under each side cor-
ner. Make sure at least two people are available to lift the printer when moving it.
When moving the printer, keep the printer level to avoid spillage of fuser oil. See
chapter 7, “Repacking the Printer,” for printer shipping instructions.
Keep the following in mind when storing the printer for an extended period:
—Unplug the printer.
—Leave the OPC Belt Cartridge installed in the printer to help eliminate toner
contamination.
—Remove the toner cartridges from inside the printer. After removing the car-
tridges, return them to their original packaging. If the original packaging is not
available, protect the toner cartridges from spilling toner.
—Follow the procedures described in “Prepare the Fuser Unit” in chapter 7,
“Repacking the Printer.”
—See appendix B, “Technical Specifications,” for storage specifications. See
chapter 7, “Repacking the Printer,” for printer shipping instructions.
Everyday Operations and Printer Care 3-29
Page 84

Cleaning the Printer
Cleaning the Printer
Paper dust may accumulate inside the printer. Blurred or splotchy prints and paper
jams can result from dusty printer parts. Regular cleaning takes only a few minutes
and helps ensure print quality. You need to clean both the inside and outside of the
printer.
WARNING!
cables before cleaning .
ACHTUNG!
reinigen.
Turn off the printer, unplug the power cord, and disconnect all interface
Ziehen Sie den Netzstecker aus der Steckdose bevor Sie den Drucker
Guidelines for Cleaning Inside the Printer
Either clean the printer before use, or allow a few minutes after unplugging it to
allow the fusing unit to cool down.
Turn off the printer, unplug the power cord, and disconnect all interface cables
before cleaning inside the printer.
Read all caution and warning labels carefully, making sure to follow any instructions contained in them. These labels are located on the inside of the printer’s
covers and the interior of the printer body.
Use only dry, lint-free cotton cloths or swabs.
If the printer has a duplex unit installed, always open the duplex unit top cover
before opening the printer’s top cover.
Make sure any parts removed during cleaning are replaced before you plug in the
power cord, reconnect the interface cables, and turn on the printer.
Cleaning the Transfer Unit
These items in the transfer unit require cleaning:
Registration rollers
Transfer roller
magicolor 6100 DeskLaser User's Guide3-30
Page 85

Paper discharge
Cleaning the Printer
»Note:
A dry cotton cloth and dry cotton swab are required for these procedures.
1 Turn off and unplug the printer.
2 Open the printer’s rear cover.
If your printer has a duplex unit installed, you can access the printer’s rear cover
by opening the duplex unit rear cover and paper guide.
Duplex unit paper guide
Duplex unit rear cover
Everyday Operations and Printer Care 3-31
Page 86

Cleaning the Printer
3 Using a dry cotton cloth, clean any paper dust and toner buildup from the
registration rollers.
You can manually rotate
the rollers while cleaning
them by turning the gear
on the left end of the roller
shaft.
4 Clean the transfer roller.
Gear
Registration
rollers
a Remove the transfer roller
unit by lifting the lock lever
at the right end of the
transfer roller unit until the
unit is freed, and then lifting
the unit out.
»Note:
Because you cannot
see when the unit is
released, it’s best to lift the
unit and the lock lever at the
same time.
b Using a dry cotton cloth,
clean any paper dust and
toner buildup from the
transfer roller.
»Note:
Manually rotate the roller while cleaning it.
c Reinstall the transfer roller in the transfer unit.
Lock lever
Transfer roller
magicolor 6100 DeskLaser User's Guide3-32
Page 87

5 Clean the paper discharger.
a Remove the paper discharger by pushing it
to the right and then lifting it up and out of
the transfer unit. (It comes out after the tabs
on the charger have cleared their
retainers.)
b Using a dry cotton cloth, clean any paper
dust and toner buildup from the outside of
the paper discharger.
c Using a dry cotton swab, clean any paper
dust and toner buildup from the interior of
the paper discharger.
d Using a dry cotton swab, clean the paper
discharger wire.
Cleaning the Printer
Wire inside
e Reinstall the paper discharger in the transfer unit, and then push it down and
to the left to lock it in place.
6 Clean any paper dust and toner buildup found on the transfer unit itself.
7 Close the printer’s rear cover.
8 Plug in the printer, and turn it on.
»Note:
In compliance with UL guidelines, “The appliance inlet is considered to be
the main disconnect device.”
Everyday Operations and Printer Care 3-33
Page 88

Cleaning the Printer
Cleaning the OPC Belt Cartridge
Caution
you don’t touch the surface of the belt. Any body oil left on the surface of the belt will
prevent toner from adhering to the belt which results in poor image quality. Also, keep
the cartridge away from anything that may scratch the surface of the belt. Any
scratches will show in the image produced .
The OPC belt is also extremely sensitive to bright light and direct sunlight. Always
leave it in its protective bag until you are ready to install it. Any exposure to light
should be limited to two minutes. If you suspect the belt is damaged due to exposure
to light, put the belt in a dark place to recover. Depending on the amount of exposure,
recovery may take up to two hours. Recovery time is dependent on the amount of
exposure sustained. Recovery is not guaranteed.
1 Turn off and unplug the printer.
Caution:
unit top cover before completing the following step. Forced opening of the printer’s top
cover first may damage the unit.
The OPC belt is extremely sensitive to touch. Always handle the cartridge so
:
If you have a duplex unit installed, make sure you have opened the duplex
2 Open the top cover.
»Note:
3 Open the printer’s front cover, release
The illustrations for step 3 and
step 4 show the printer without the
duplex unit. However, the instructions are
the same for all models.
the OPC belt cartridge lock levers, and
remove the OPC belt cartridge.
magicolor 6100 DeskLaser User's Guide3-34
Page 89

Cleaning the Printer
4 Clean the corona wire using the built-in wire cleaner attached to the corona
case.
Wire cleaner
Corona case
While pinching the two tabs of the wire cleaner together, slide the wire cleaner to
both ends of the corona case.
Caution:
Failure to return the wire cleaner to its home position (marked by an
arrow on the corona case), may degrade print quality.
5 Reinstall the OPC belt cartridge, and secure its lock levers.
6 Close the printer’s front and top covers.
Cleaning the Laser Lens
It’s necessary to clean the laser lens only when you find vertical white or light-color
streaking in all primary colors on your printouts.
»Note:
A dry cotton cloth or dry cotton swab is required for this procedure.
1 Open the printer’s front cover.
2 Remove the four toner cartridges.
Everyday Operations and Printer Care 3-35
Page 90

Cleaning the Printer
3 Open the laser lens cover.
Release the two tabs on the front edge of the lens cover and rotate the hinged
lens cover toward the rear of the printer. This will allow enough access room to
clean the lens without the need of parts removal.
Tabs
4 Using a dry cotton cloth, wipe the lens.
5 Reinstall the laser lens cover.
The two tabs should snap back into place.
6 Reinstall the four toner cartridges.
7 Close the printer’s front cover.
Cleaning the Paper Exit Rollers
»Note:
A dry cotton cloth is required for this procedure.
1 Turn off and unplug the printer.
magicolor 6100 DeskLaser User's Guide3-36
Page 91

Cleaning the Printer
Caution:
If you have a duplex unit installed, make sure you have opened the
duplex unit top cover before completing the following step. Forced opening of the
printer top cover first may damage the unit.
2 Pull the latch to release the top cover, and then open the cover.
»Note:
The above illustration shows the printer without the duplex unit. The
cleaning instructions for models with and without the duplex unit are the same.
Paper exit rollers
3 Using a dry cotton cloth, clean the paper exit rollers.
While manually rotating each paper exit roller, clean each roller.
4 Close the printer’s top cover.
5 If you have a duplex unit installed, close the duplex unit rear cover.
6 Plug in the printer, and turn it on.
»Note:
In compliance with UL guidelines, “The appliance inlet is considered to be
the main disconnect device.”
Everyday Operations and Printer Care 3-37
Page 92

Cleaning the Printer
Cleaning the Exterior of the Printer
WARNING!
Turn off the printer, unplug the power cord, and disconnect all interface
cables before cleaning. Do not spill water or detergent into the printer; otherwise the
printer will be damaged and an electric shock may occur.
ACHTUNG!
reinigen. Versch
Ziehen Sie den Netzstecker aus der Steckdose bevor Sie den Drucker
ü
tten Sie kein Wasser oder andere Flüssigkeiten auf dem Drucker, da
das Gerät sonst beschädigt wird oder die Gefahr eines elektrischen Schlages besteht.
To protect your printer and maintain its appearance, clean the exterior regularly. Use
the following guidelines:
Use only a dry or slightly damp, lint-free, soft cloth moistened only with water or
mild detergent.
Never use cleaning solutions that contain solvents, such as alcohol and benzene.
Solvents may damage the printer’s finish.
Always test any cleaning solution on a small area of your printer to check the solution's performance.
Never use sharp or rough implements, such as wire or plastic cleaning pads.
Never spray a cleaning solution directly on the printer as the cleaning solution will
penetrate to the interior of the printer and cause damage.
magicolor 6100 DeskLaser User's Guide3-38
Page 93

Maintenance Schedule
Cleaning Schedule
You should perform a thorough cleaning every 30,000 single-sided pages or 12
months.
Maintena nc e Sc h e d ul e
This item needs
cleaning...
Corona wire (also known
as the OPC charge wire)
Laser lens O nly when you fin d vertical w hite or
OPC belt cartridge Every 30,000 single-sided pages,
Paper discharger Every 30,000 single-sided pages,
Paper exit rollers (also
known as paper guides)
Printer exterior As needed. User
Printer interior Every 30,000 single-sided pages,
After... By...
Every 30,000 single-s ided pages or
12 months, whichever comes
earlier (or whenever dark vertical
streaks appear on printed pages).
light-colored stre aking in all pri mary
colors on your printouts.
or 12 months, whichever comes
earlier.
or 12 months, whichever comes
earlier.
Every 30,000 single-sided pages,
or 12 months, whichever comes
earlier.
or 12 months, whichever comes
earlier.
User
See “Cleaning the OPC Belt
Cartridge” on page 3-34.
User
See “Cleaning the Laser
Lens” on page 3-35.
User
See “Cleaning the OPC Belt
Cartridge” on page 3-34.
User
See “Cleaning the Transfer
Unit” on page 3-30.
User
See “Cleaning the Paper Exit
Rollers” on page 3-36.
See “Cleaning the Exterior of
the Printer” on page 3-38.
User
See “Guidelines for Cleaning
Inside the Printer” on page
3-30.
Everyday Operations and Printer Care 3-39
Page 94

Maintenance Schedule
This item needs
cleaning...
Registration roller Every 30,000 single-sided pages,
Transfer roller Every 30,000 single-sided pages,
After... By...
or 12 months, whichever comes
earlier.
or 12 months, whichever comes
earlier.
Preventive Maintenance Schedule
This item needs
preventive maintenance...
Printer—30,000-page
preventive maintenance
Printer—240,000-page
preventive maintenance
After... By ...
30,000 single-sided pages. User
Replace 240K kit
the message window (after 240,000
single-sided pages).
displays in
User
See “Cleaning the Trans fer
Unit” on page 3-30.
User
See “Cleaning the Trans fer
Unit” on page 3-30.
See “Cleaning the Printer” on
page 3-30.
Authorized service provider
magicolor 6100 DeskLaser User's Guide3-40
Page 95

Maintena nc e Sc h e d ul e
Replacement Schedule
This item needs replacing... After... By...
Cleaning roller
Fuser oil bottle
OPC belt cartridge
Ozone filter Every 12 months. User
Toner 14,000 single-sided pages—
Waste toner bottle
Drum cleaner 240,000 single-sided pages. Authorized service provider.
Check fuser cleaning
roller
cleaning Roll er
in the message window (after
20,000 single-sided pages at
5% coverage of each color).
Check fuser oil &
cleaning roll er
in the message window (after
approximately 12,000
single-sided pages; however,
fuser oil bottle life is media
dependent—coarser paper
requires more oil).
Replace OPC
message window (maximum
life—120,000 planes* , usually
occurs with continuous use;
minimum life — 60,000 planes,
may occur with job sizes
averaging one page although
other factors also affect
cartridge life).
black; after 8,500 single-side
pages—yellow, magenta, cyan
@ 5% coverage of each color.
Check Waste Toner
displays in the message
window (after 18,000
single-sided pages.
Replace
or
displays
displays
displays in the
User
See “Replacing the Cleaning
Roller” on page 3-25.
User
See “Replacing the Fuser Oil
Bottle” on page 3-24.
User
See “Replacing the OPC Belt
Cartridge” on page 3-21.
See “Replacing the Ozone
Filter” on page 3-28.
User
See “Replacing a Toner
Cartridge” on page 3-19.
User
See “Replacing the Waste
Toner Bottle” on page 3-27.
Everyday Operations and Printer Care 3-41
Page 96

Maintenance Schedule
This item needs replacing... After... By...
Fuser unit
Paper discharger 240,000 single-sided pages at
Paper pickup roller and Paper
separation pad
Transfer drum 600,000 single-sided pages. Authorized service provider.
Transfer roller 240,000 single-sided pages at
Replace fuser
the message window (after
100,000 single-sided pages
maximum at an equal mix of
black and 4-color page s, all
with 5% coverage of each
color; however, fuser unit life is
media dependent).
5% coverage of each toner
color.
120,000 single-sided pages. Authorized service provider.
5% coverage of each toner
color.
displays in
Authorized service provider.
Authorized service provider.
Authorized service provider.
plane
*A
gle-sided (simplex) print job makes one pass (one plane), and a two-color print job makes
two passes (two planes). A single-sided color
passes (or planes) of the OPC belt, since most color print jobs use all four toner colors. A
two-sided (also known as duplex or two-faced) color page may consist of up to eight
passes of the OPC belt, since most color print jobs use all four toner colors.
Consumable life is expressed in simplex Letter/A4 pages (1 face). A duplex page (2 faces)
is equivalent to two simplex pages.
is a single pass of the OPC belt (one toner color). For example, a one-color, sin-
What’s Next?
See chapter 4, “Adv anced Printe r Oper ation s,” for a descr ipti on of the print er fea tures
and utilities designed to enhance your printing abilities.
page
(also called a
face
) consists of four
magicolor 6100 DeskLaser User's Guide3-42
Page 97

4
Advanced Printer Operations
In This Chapter . . .
“High-Resolution Printing” on page 4-2
“Minimum System Memory Requirements” on page 4-2
“Optimizing Printing Performance over a Parallel Port” on page 4-3
“Cassette Chaining” on page 4-4
“Duplex (2-Sided) Printing” on page 4-5
“Printing Sample Pages ” on page 4-5
“Updating the Printer Driver/Monitor” on page 4-6
“Updating System Software” on page 4-7
Page 98

High-Resolution Printing
Introduction
This chapter describes changing print resolution, chaining paper cassettes, collating
output, printing a status page, cancelling a print job, and ending a print job. Instructions for updating the printer’s system software and printer drivers are also included.
High-Resolution Printing
MINOLTA-QMS technology provides a print resolution for almost every application or
budget. The
magicolor
lowing resolutions at rated engine speed:
6100 DeskLaser supports 4-color printing for each of the fol-
600x600 dpi
1200x600 dpi
The default resolution in the
standard resolution for business documents. 600x600 dots per inch
(dpi), resolution provides excellent print quality for most business
applications, such as letters, proposals, and presentations.
For improved halftone quality in graphics and images, 1200x600 dpi
resolution is available for all supported media sizes on the
6100 DeskLaser.
magicolor
6100 DeskLaser is also the
Minimum System Memory Requirements
Media Size 600x600 1200x600
Mono 4-Color Duplex Mono 4-Color Duplex
A4
B4 (JIS)
B5 (ISO)
B5 (JIS)
Executive
Legal
Letter
Ledger, A3
13"x19"
Note:
See "Recommended PC Configuration" in appendix A, "Technical Specifications," for
recommended PC configuration requirements.
32 MB 32 MB 32 MB 32 MB 32 MB 32 MB
32 MB 32 MB 32 MB 32 MB 32 MB 64 MB
32 MB 32 MB 32 MB 32 MB 32 MB 64 MB
magicolor
magicolor 6100 DeskLaser User's Guide4-2
Page 99

Optimizing Printing Performance over a Parallel Port
You may need additional memory (DIMMs) for the following:
To print complex graphics
For increased collation performance
For increased spooling performance
For duplex printing on large media sizes
Optimizing Printing Performance over a
Parallel Port
»Note:
Caution:
This information applies only to PCs with Windows 95/98. On PCs with
Windows 2000/NT 4.0, the parallel port is controlled by printer driver software.
The parallel port on your PC is designed to operate in various communication modes
or protocols. These modes control how the PC communicates with your printer. Two of
these modes are
SPP–Standard Parallel Port -this is the default mode on most PCs (occasionally
referred to as compatibility, normal, or output only)
ECP–Extended Capabilities Port
The speed that SPP communicates over the parallel port varies on different PCs. It's
likely that the current settings for your PC will meet your common printing needs.
However, in the event that performance over the parallel port is inadequate (for example, with large, complex print jobs), you will need to change the communication mode
of the parallel port to ECP mode.
Using the wrong type of parallel cable can also cause poor performance. Be
sure that you’re using a Centronics IEEE 1284 bidirectional parallel cable.
ECP Setting Instructions
You can configure the parallel port mode on Windows 95/98 systems via your computer's BIOS (Basic Input/Output System). The BIOS is responsible for controlling the
many of the hardware settings on your PC.
Advanced Printer Operations 4-3
Page 100

Cassette Chaining
The method of accessing and changing the BIOS settings varies for each PC vendor
(and in some cases, for each model). In general, the two most common methods for
accessing the BIOS are by
1 pressing a particular key or keys on your keyboard when the PC is first
turned on
–or–
2 running a setup program provided by the manufacturer.
Refer to your PC manual for specific instructions on how to access the BIOS and
change the parallel port mode.
Cassette Chaining
If you have one or two optional lower feeder units, you may choose to have the printer
automatically draw media from other cassettes (inputbin) when the current cassette
empties. This is called cassette chaining, and it provides a total media input capacity
of 1250 sheets.
Enabling/Disabling Cassette Chaining
There are several ways to enable/disable cassette chaining:
Use your application. (Check the documentation to see if your application includes
a specific procedure for using a dual-cassette printer.)
Select an alternate cassette for chaining in the MINOLTA-QMS Advanced Level 2
Windows printer driver.
Configure the printer through the configuration menu.
Using the Configuration Menu
Menu
Choices
Default
Engine/Chain Inputbins
On—Switches to the n ext c asset te with t he same size and ty pe of media
when the default cassette is empty.
Off—Doesn’t switch cassettes; uses only the default cassette.
On
magicolor 6100 DeskLaser User's Guide4-4
 Loading...