

Page 1

Xerox 6030/6050 Wide Format
BT-PlotAssistant
User Guide
701P41592
Version 1.3
May 2004
Page 2

Xerox Corporation
Global Knowledge & Language Services
800 Phillips Road Bldg. 845-17S
Webster, NY 14580
Copyright © 2004 Xerox Corporation. All rights reserved.
Printed in the United States of America.
Copyright protection claimed includes all forms and matters of
copyrighted material and information now allowed by statutory
or judicial law or hereinafter granted, including without
limitation, material generated from the software programs that
are displayed on the screen such as styles, templates, icons,
screen displays, looks, etc.
Adobe® and the Adobe logo, InDesign®, Illustrator®,
PageMaker®, Photoshop®, Acrobat®, Distiller®, and the
Acrobat logo are either registered trademarks or trademarks of
Adobe Systems Incorporated in the United States and/or other
countries.
The Creo wordmark, Creo logo, and the names of Creo
products and services referred to this document are
trademarks of Creo, Inc.
Macintosh, Power Macintosh, and Mac are registered
trademarks of Apple Computer, Inc.
Microsoft® Windows NT® and Microsoft® Windows are
trademarks of Microsoft Corporation.
PANTONE® is a registered trademark of Pantone, Inc.
Sun Microsystems and Solaris are a trademarks, registered
trademarks, or service marks of Sun Microsystems, Inc. in the
U.S. and other countries.
SWOP® is a registered trademark of SWOP, Inc.
Quark and QuarkXPress are trademarks of Quark, Inc. and all
applicable affiliated companies, Reg. U.S. Pat. & Tm. Off. and
in many other countries.
Macromedia FreeHand® is a trademark of Macromedia, Inc.
This product includes software developed by the Apache
Software Foundation (http://www.apache.org).
This product includes software developed by the JDOM
Project (http://www.jdom.org).
This product includes software developed by the Jaxen
Project (http://www.jaxen.org).
XEROX®, The Document Company®, the digital X®, Xerox
6030/6050 Wide Format Printer are the trademarks of or
licensed to XEROX CORPORATION.
Page 3

Introduction
Welcome to Xerox 6030/6050 Wide Format BT-PlotAssistant User Guide.
This User Guide provides information on how to install and how to use BT-
PlotAssistant. Read this guide prior to using BT-PlotAssistant to get the most effective
use and for the maximum performance.
Please keep this user guide for reference, and always refer to this guide if a problem
occurs during the use of BT-PlotAssistant.
If you find anything unclear about printer operations, please refer to the Xerox 6030/
6050 Wide Format Printer User Guide.
.
Page 4
Using This Guide
[Conventions]
The table below provides you with a description of the typefaces and symbols
used in this user guide.
< >
key
[ ] Identifies an action to perform. It also identifies terms, a feature, an option
' ' Identifies a chapter or section for reference in the same user guide. Dialog
'' '' Identifies different user guide name.
Indicates the keys on the keyboard.
Press the <Enter> key.
or message.
Select [On] or [Off].
Displayed in the order of [Job], [Owner].
message is displayed in the same format.
Refer to '3.2 Print service'.
Refer to ''Printer User Guide''.
Identifies warning.
Identifies additional information, explanations, and helpful suggestions.
Indicates reference sources.
Using This Guide
Page 5

Introduction
Using This Guide
Table Of Contents
Chapter 1 Overview
1.1 About BT-PlotAssistant .............................................................................................. 2
1.2 Operating Environment of BT-PlotAssistant .............................................................. 3
Chapter 2 Installation
2.1 How to Install BT-PlotAssistant .................................................................................6
Precautions for installation ..................................................................................... 6
Install BT-PlotAssistant ..........................................................................................6
2.2 How to Uninstall BT-PlotAssistant ............................................................................ 9
Table Of Contents
Chapter 3 Basic Operation
3.1 How to Start/Exit BT-PlotAssistant.......................................................................... 12
3.2 General Operation Guide of BT-PlotAssistant .........................................................13
Register Extension, Owner Name and Printer Name ........................................... 15
Create Job Setting File.......................................................................................... 17
Print ...................................................................................................................... 20
Connect to PrintServices on Web .........................................................................24
Chapter 4 Error Messages
4.1 List of Error Messages..............................................................................................26
Table Of Contents
Page 6

Table Of Contents
Page 7

Chapter
Chapter 0
1
Overview
Chapter 1
Page 8
1.1
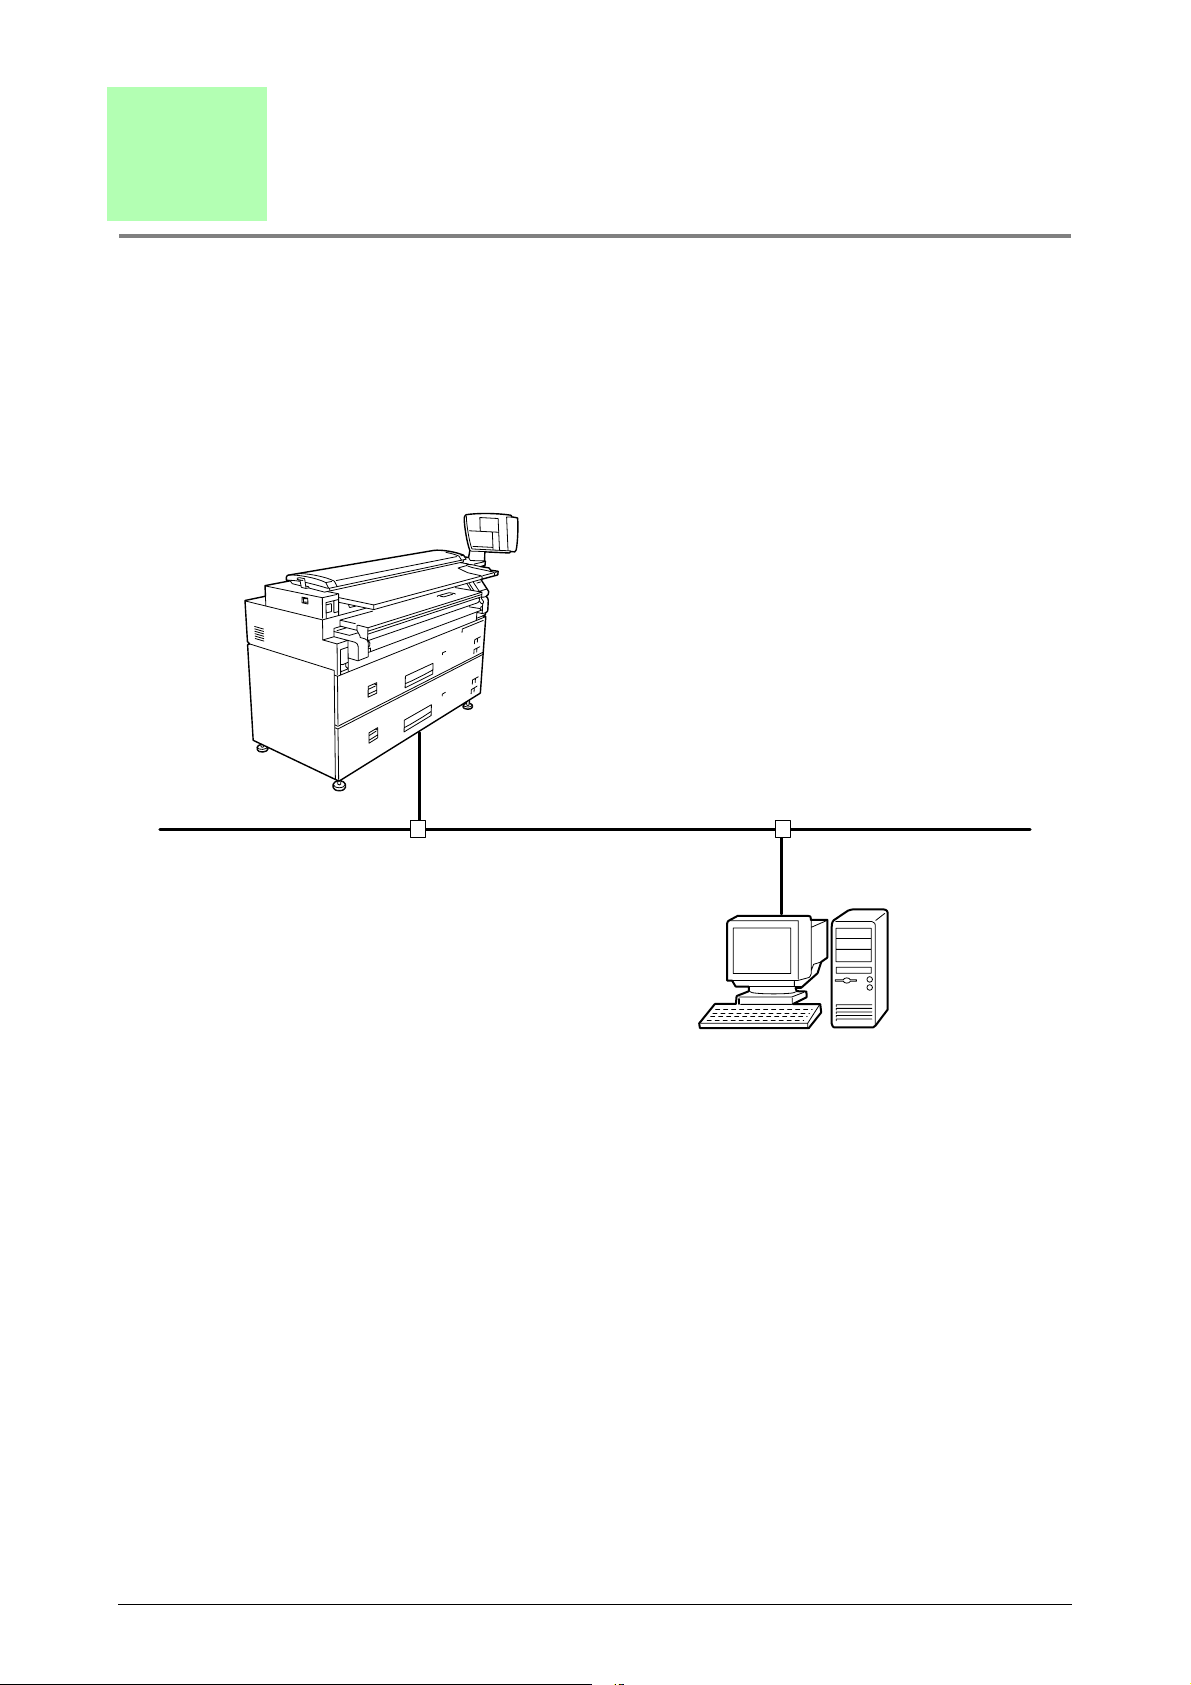
About BT-PlotAssistant
BT-PlotAssistant is a print utility software, which enables the user to send print data
from a personal computer to a Xerox printer with information such as pen definition and
media type. BT-PlotAssistant can be connected to the following printers.
• Xerox 6030 Wide Format
• Xerox 6050 Wide Format
Printer
(Wide Format series)
TCP/IP
PC
2
Chapter 1 Overview
Page 9

1.2
Operating Environment of BTPlotAssistant
The following is the operating environment of BT-PlotAssistant.
Hardware
Minimum PC hardware requirement:
• Pentium 200MHz/over processor
• Display with 256/over colors
• Memory 64Mbyte/over
• Harddisk with 5Mbyte/over free space
Operating system
Supported operating system:
• Microsoft
• Microsoft
• Microsoft
When printing data file stored in removable media (MO, CD-ROM,
etc.) or network drive, the file is temporarily copied on the hard disk.
Therefore, it is required to leave free disk space for the data size.
®
Windows® 98 English version
®
Windows® 2000 English version
®
Windows® XP English version
Network
Networked computer with TCP/IP communication capability.
Select [My computer] > [Control panel] > [Network], and confirm if [TCP/
IP] has been added.
1.2 Operating Environment of BT-PlotAssistant
3
Page 10

Supported browser for Web Access
Either of the following browsers are required to use Print Service on Web through BT-
PlotAssistant.
• Netscape
• Microsoft
®
Navigator 4.0 or later version
®
Internet Explorer 4.0 or later version
4
Chapter 1 Overview
Page 11

Chapter
Chapter 0
2
Installation
Chapter 2
Page 12

2.1
How to Install BT-PlotAssistant
This section will assist you on the installation of BT-PlotAssistant.
Precautions for installation
The following are the precautions for installation.
• It is required to log in as Administrator before installing BT-PlotAssistant into
Windows 2000 and Windows XP.
• Overwrite installation is not available. Check the computer before installing BT-
PlotAssistant Ver.2.x that the same program has not been
installed before. If BT-PlotAssistant Ver.2.x has been installed,
uninstall the program before re-installation.
Refer to ‘2.2 How to uninstall BT-PlotAssistant ‘ for uninstallation
procedure.
BT-PlotAssistant Ver.1.x and Ver.2.x can be installed in the same computer. It
is not required to uninstall BT-PlotAssistant Ver. 1.x before installing Ver.2.x.
Install BT-PlotAssistant
The following are the instructions on how to install BT-PlotAssistant.
Insert BT-PlotAssistant CD-ROM into CD drive. Installer is activated automatically.
Follow the instruction messages displayed on the screen.
If the installer does not start automatically, follow the instructions listed on the next
page.
6
Chapter 2 Installation
Page 13

Procedure
1 Select [Start] > [Run].
2 Enter 'D:/Disk1/setup.exe' and Click [OK].
Enter CD-ROM drive of your computer in the space of 'D:'.
Installer is activated.
3 Confirm the message on the screen and Click [Next].
2.1 How to Install BT-PlotAssistant
7
Page 14

4 Confirm where to install the program, and Click [Next]. To change the
location, Click [Browse] and Select a folder.
If you do not change the setting, BT-PlotAssistant will be installed in [Xerox]
folder of [Program Files] in Windows installed drive.
5 Remove the BT-PlotAssistant CD-ROM from the CD-ROM drive and Click
[Finish].
BT-PlotAssistant installation is completed.
FTP must be enabled for BT PlotAssistant to function properly. To enable
FTP, go to Print Services on Web and select Properties, [TCP/IP}, then
[FTP] and check the enabled box.
8
Chapter 2 Installation
Page 15

2.2
Procedure
How to Uninstall BT-PlotAssistant
The following procedure is how to uninstall BT-PlotAssistant, to allow you to install an
upgraded version if needed.
All files installed by BT-PlotAssistant are deleted by uninstallation. However, several
files are not deleted if they are used by other applications. If these files are not used by
any other application, a dialog box will be displayed to confirm if a user wants to delete
the files or not.
1 Select [My Computer] > [Control Panel] and Start [Add/Remove programs].
2 Select [BT-PlotAssistant] and Click [Change/Remove].
BT-PlotAssistant will be removed.
BT-PlotAssistant Ver.1.x and Ver.2.x are installed as different applications.
Even if both programs are installed on the same computer, there will be no
effect if one of them is uninstalled.
2.2 How to Uninstall BT-PlotAssistant
9
Page 16

10
Chapter 2 Installation
Page 17

Chapter
Chapter 0
3
Basic Operation
Chapter 3
Page 18

3.1
Start
How to Start/Exit BT-PlotAssistant
This section will guide you on how to Start and Exit the BT-PlotAssistant from a PC.
To start BT-PlotAssistant, Click [Start] on task bar, and Select [All Programs], [Xerox],
[BT-PlotAssistant], [BT-PlotAssistant 2.x].
BT-PlotAssistant operation screen will be displayed.
Exit
12
Click [Close] button, on the lower right of the screen to exit BT-PlotAssistant.
BT-PlotAssistant operation screen will be closed.
Chapter 3 Basic Operation
Page 19

3.2
Print File
List box
General Operation Guide of BTPlotAssistant
This section will describe BT-PlotAssistant general functions and operations.
[Print Option]
This section allows the user to define output settings such as Printer Name (or IP
address), Owner, and Logical Printer Number.
[Data File Selection]
This section allows the user to select a file to be printed. The selected file is displayed in
the Print File List box. You can also delete the selected file from the Print File List box.
[Option]
This section allows the user to add or modify a Printer Extension, Owner name and
Printer name or (IP address)
Refer to "Register Extension, Owner Name and Printer Name" (p15).
3.2 General Operation Guide of BT-PlotAssistant
13
Page 20

[Job Setting]
This section allows the user to assign or create a Job Setting. Job settings such as Media
size/type and pen can be specified.
It is also used to print the contents of a specified job setting file.
Refer to"Create Job Setting File" (p17).
[Web Access]
This section allows the user to Connect to PrintServices on Web. The user can also view
and set Logical Printer Settings, Status, and Job and Log.
Refer to "Connect to PrintServices on Web"(p24).
[Print File List box]
Files to be printed or deleted are displayed in this box. File Format and Copies to be
printed can be changed by utilizing the drop down menus.
[Print]
This button prints the selected file in the Print File List box.
Refer to "Print" (p20).
[Help]
Displays BT-PlotAssistant On-line Help. Features and functionality of the BT-
PlotAssistant are explained in more detail.
14
Chapter 3 Basic Operation
Page 21

Register Extension, Owner Name and Printer Name
Register an Extension type (file format) Owner name, and Printer name.
[Extension]
The extension type allows the user to enable automatic file format recognition.
Registered extensions are recognized automatically and the formats are displayed
in the [Format] column when the file is sent to the Print File List box.
It is possible to change the format later which was identified automatically
by extension type.
[Owner name]
The Owner name is displayed in the 'OWNER NAME' column of the output log.
[
Printer name]
A Printer name can be entered by the printer host name or IP address.
If you register a printer by host name, the host name needs to be registered in
Procedure
Windows Hosts file or DNS.
1 Select [Option] button.
[Option] dialog box will be displayed.
2 Select the [Extension], [Owner name], or [Printer name] tab.
3.2 General Operation Guide of BT-PlotAssistant
15
Page 22

3 Click [New] button.
Current data can be changed by using the [Modify] button and deleted by
using the [Delete] button.
4 Enter Extension, Owner, or Printer name (IP address) and Click [OK].
• .(Period), [ and ] (parenthesis), ;(Semi colon), = (Equal) cannot be
used as extension.
• [ and ] (parenthesis), ;(Semicolon), = (Equal) cannot be used as a
printer name.
5 After completing all settings, Click [OK].
The new Printer name(s) and Owner name(s) are added to the [Printer name] and
[Owner] drop down lists.
16
Chapter 3 Basic Operation
Page 23

Create Job Setting File
Job attribution such as Media size/type and pen can be set and saved in a job setting file.
When printing, you can specify a desired job setting file and print according to the
settings.
Job setting file is applied by each job. It is not possible to apply a job setting
by file.
[Media size/type]
Define the Media size series, Media size mapping, Media cut method.
[
Pen]
Define 32 pen attribution (Effective with HPGL/HPGL2/MGL only).[Color]
Color option is not supported by 6030/6050 Wide Format Printer
[Finisher]
Finisher option is not supported by 6030/6050 Wide Format Printer
[Stamper]
Stamper option is not supported by 6030/6050 Wide Format Printer
[Other]
Define other options such as manual paper feed, output destination, message print,
and media type.
3.2 General Operation Guide of BT-PlotAssistant
17
Page 24

Procedure
1 Click [Job Setting] button.
[Job setting] dialog box is displayed.
2 Select the [Media size/type], [Pen], and [Other] tabs and set the parameters as
required.
Refer to BT-PlotAssistant Help for detail of each item.
3 Click [Save] button after completing all settings. The ’Select a file name to
save job setting’ dialog box appears.
18
Chapter 3 Basic Operation
Page 25

4 Enter a Job Setting file name and Click [Save] button.
Job Setting file will be created.
The created file will be added to [Job Setting] drop down menu.
3.2 General Operation Guide of BT-PlotAssistant
19
Page 26

Procedure
This section describes the procedures on how to define print option settings and how to
print data file(s).
• When printing data file stored in removable media (MO, CD-ROM,
etc.) or network drive, the file is temporarily copied on the hard disk.
Therefore, it is required to leave free disk space for the data size.
• When creating a data file by Windows Plot Driver, Check Off
[Output PJL]. In the case of Xerox 6030/6050 Wide Format
Windows Driver, open the property of the printer in Control Panel,
and Select 'Default Setting' tab. Then Select 'Off' for 'Print job
control by driver'. Otherwise job setting defined by BT-PlotAssistant
may not be reflected correctly.
1 Drag & drop the data file to print into the Print File List box, or Click [File]
button and select a file. The selected file is displayed in Print File List box.
• To select all files within a folder, Click [Folder] button. Select a folder and
Click [OK]
• To delete a file from the Print File List box, Select the file and Click
[Delete] button. To delete all files in the Print File List box, Click [Delete
All] button. (The actually data file is not deleted, just removed from the
Print File List box.)
20
Chapter 3 Basic Operation
Page 27

2 Set each item in [Print Option] section.
[
Printer Number]
This option allows the user to Select logical printer number from 0 to 99.
[
Collate]
Select the [Collate] check box to print a file using collate function. Specify the
number of collated copies to be printed by using the [Copies] drop down menu.
[
Reverse Order]
Select this check box to output print by reverse order.
[
Printer Name]
This option allows user to select a printer name (or IP address) and owner name.
/[Copies]
Number of collated copies can be specified by each job. If not collated,
number of copies can be set by each file.
/[Owner]
If printer name or owner name is not listed, register using [Option] button.
Refer to "Register Extension, Owner Name and Printer Name" (p15) for
operation.
3.2 General Operation Guide of BT-PlotAssistant
21
Page 28
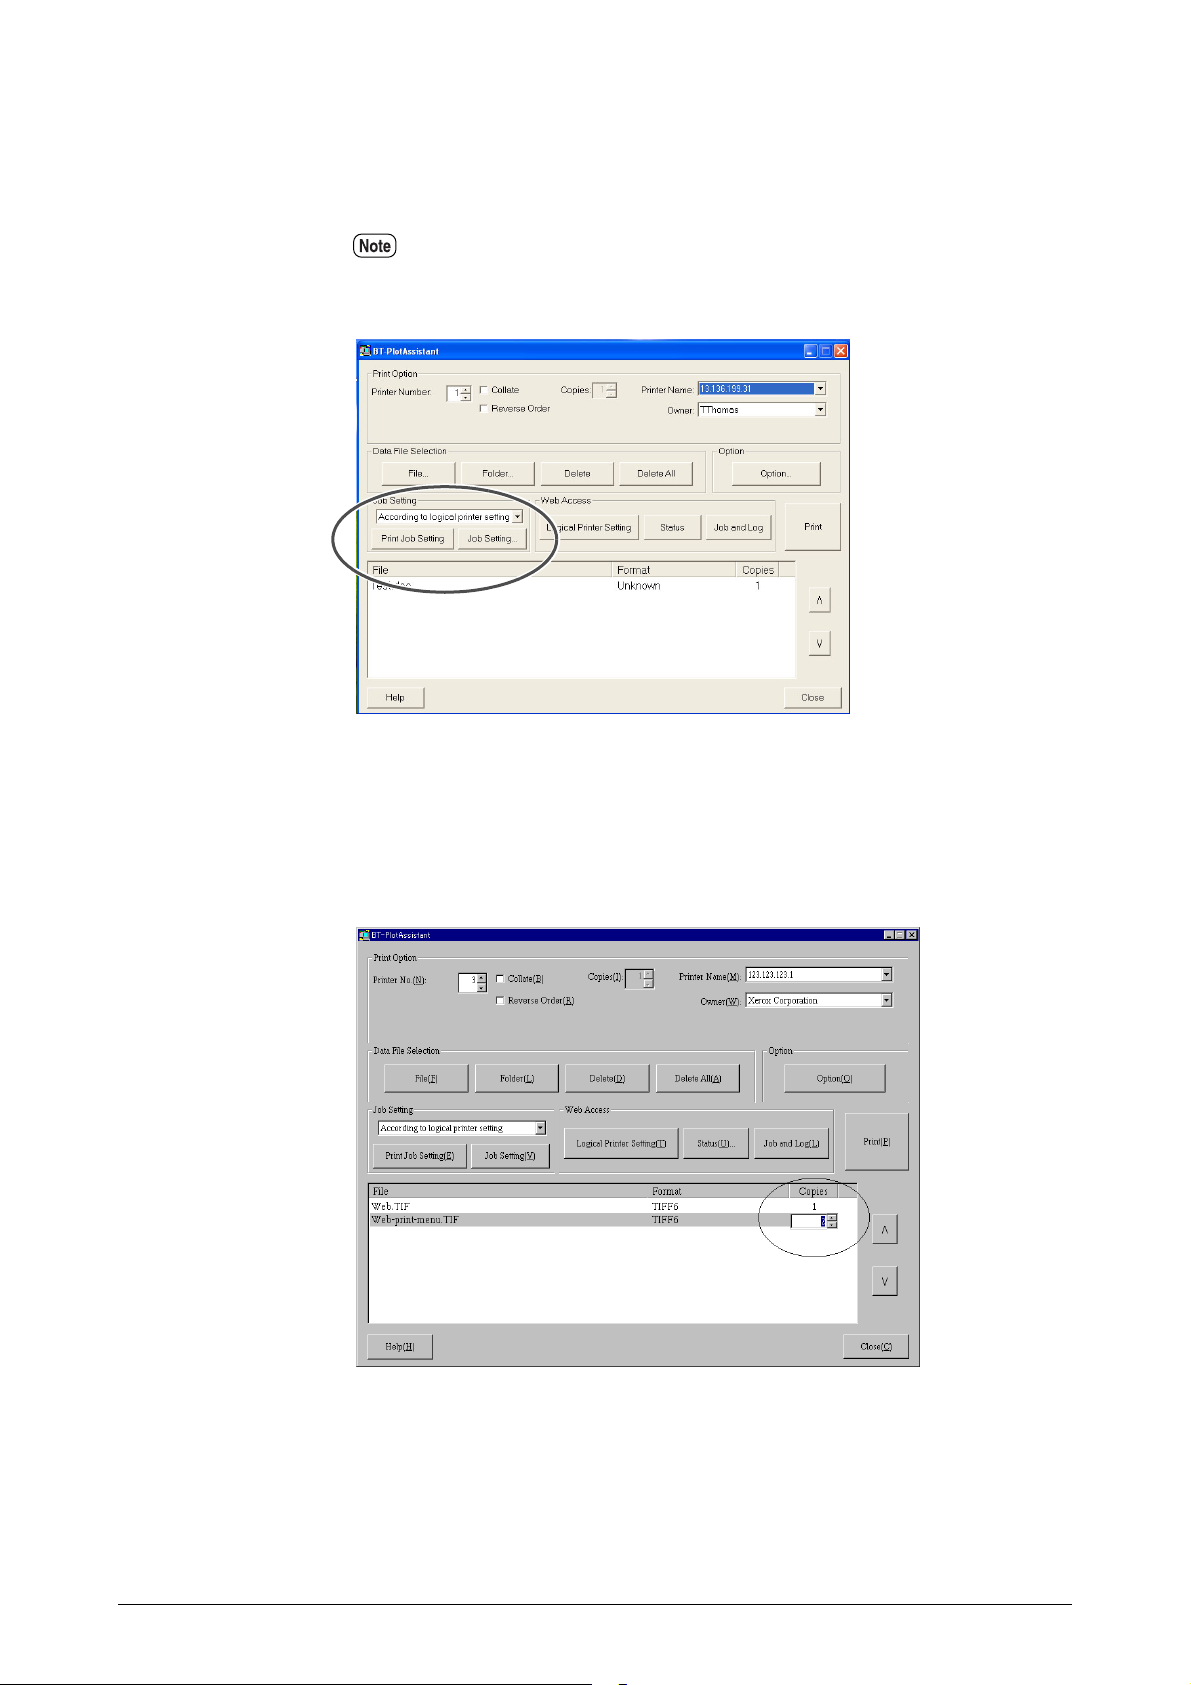
3 Select a job setting file to be applied using the [Job Setting] drop down menu.
If [According to logical printer setting] is selected, print setting defaults to the
logical printer settings, which are set in the [Print Option] section.
If the Job Setting file is not in the [Job Setting] drop down menu, create one
by using [Job Setting] button. Refer to "Create Job Setting File" (p17) for
detail.
4 To set the number of copies to be printed for a file, Double-Click [Copies] for
the file to print. Enter the number of copies from 1 to 99.
22
Chapter 3 Basic Operation
Page 29

5 If the file format is displayed as 'Unknown' or to modify the current format,
Double-Click [Format] for the file to print and Select the new file format from
the drop down menu.
6 Click [Print] button.
The selected file is printed by the specified printer.
3.2 General Operation Guide of BT-PlotAssistant
23
Page 30

Connect to PrintServices on Web
PrintServices on Web screen can be displayed by Selecting [Logical Printer Setting],
[Status] or [Job and Log] button in the [Web Access] section. It connects to a printer and
displays the printer status and job list. The parameters of the logical printer can also be
changed.
• The browser used for [Web Access] is the default browser specified
by the customer.
• Depending on the browser setting, connection to PrintServices on
Web may become via proxy server when accessing from BTPlotAssistant. If you want to connect directly, change the browser
setting.
Refer to PrintServices on Web Help for the operation of PrintServices on the
We b.
[Logical printer setting]
Displays logical printer setting screen.
[Status]
Displays Printer Status screen.
[Job and Log]
Displays Job and Log screen.
24
Chapter 3 Basic Operation
Page 31

Chapter
Chapter 0
4
Error Messages
Chapter 4
Page 32

4.1
Error message Meaning How to resolve
Select copies from 1 to 99. Number of copies is out of range. Correct the number of copies from
List of Error Messages
The following table shows error messages possibly displayed during the operation of
BT-PlotAssistant and their meaning, and how to resolve the errors.
1 to 99.
Printer name is not selected.
Select printer.
Same extension has been
registered already. Unable to
register.
Same owner name has been
registered already. Unable to
register.
Same printer name has been
registered already. Unable to
register.
File XXX copies are out of
range. Enter value from 1 to 99.
File XXX format is unknown.
Select format.
No printer was registered in
[Printer name] when you send
print command.
Same extension had been
registered when you tried to
register an extension.
Same owner name had been
registered when you tried to
register a owner name.
Same printer name had been
registered when you tried to
register a printer name.
Number of copies for file XXX is
out of range.
File XXX format is unknown. Specify the format for file XXX.
Register printer name or IP address
from [Printer name] of [Option].
Change extension name.
It is required to register unique
extension for automatic data format
recognition.
Change owner name.
Change printer name.
Correct number of copies for file
XXX from 1 to 99.
Invalid printer number. Specify
number from 0 to 99.
Pen width setting is out of
range. Enter value from XX to
XX.
Job setting file is corrupted.
Unable to set a job.
Cannot find the specified file.
Printing is halted.
26
Chapter 4 Error Messages
Printer number is out of range. Specify printer number from 0 to
99.
Pen width setting value is out of
range.
Job setting file is corrupted. Delete the corrupted job setting file
Cannot find job setting file in
specified location.
Enter pen width setting value within
limits.
and create new one.
Job setting file might have been
moved, or deleted. Bring back the
job setting file to original place, or
create new one.
Page 33

Error message Meaning How to resolve
Error was found in job setting.
Cannot print.
Unable to get the path of a
temporary file.
Unable to get a temporary file. Failed to get a temporary file. Re-start BT-PlotAssistant.
Failed to create print data.
Cannot print.
BT-Plot Assistant is not
installed correctly. Re-install
the program.
Printer connection failed.
Failed to print.
Unable to connect to this
printer from this application.
Cannot print.
Error was found in job setting
file.
Failed to get a temporary file. Re-start BT-PlotAssistant.
Failed to create a temporary file. Re- st a rt BT- Pl o tA ss i st an t an d
Either of the following reasons:
(1) You have copied BT-Plot
Assistant to another PC
without using installer.
(2) Registry is corrupted.
Printer is disconnected for some
reason.
The printer you have tried to print
to is not supported by BTPlotAssistant.
Check the contents of job setting
file to see if it is correct.
check the free space on Disk.
Re-install BT-PlotAssistant.
Check printer status and re-send
print data.
Specify a supported printer.
Printer is off-line. Re-send
print data after power on the
printer.
Cannot print this print job
setting.
Printer is out of use for some
reason.
You tried to print job setting
specifying [Same as logical
printer setting].
Check printer status and re-send
print data.
Unable to print [Same as logical
printer setting]. Select other job
setting file.
4.1 List of Error Messages
27
Page 34

28
Chapter 4 Error Messages
Page 35

Index
A
About BT-PlotAssistant......................................... 2
According to logical printer setting........................ 22
B
browsers............................................................. 4
C
Collate .............................................................21
Collated copies ..................................................21
Copies ............................................................. 22
D
Data File Selection ............................................. 13
Delete .............................................................. 20
Delete All ......................................................... 20
J
Job and Log ......................................................24
Job Setting ............................................14, 18, 22
job setting file....................................................17
L
logical printer number .........................................21
Logical printer setting .........................................24
M
manual paper feed ..............................................17
Media size/type............................................17, 18
media type ........................................................17
message print ....................................................17
Network .............................................................3
O
E
exit.................................................................. 12
Extension .........................................................15
F
Folder ..............................................................20
Format .............................................................23
H
Hardware............................................................ 3
Help ................................................................14
host name .........................................................15
Hosts file.......................................................... 15
I
IP address................................................... 15, 21
Operating Environment .........................................3
Operating system .................................................3
Option........................................................13, 15
Other ...............................................................18
output destination ............................................... 17
Owner........................................................15, 21
P
Paper cut method................................................17
Paper size mapping.............................................17
Paper size series.................................................17
Pen ..................................................................17
Print ................................................................14
Print File List box...............................................20
Print Option ................................................13, 21
Print Services on Web ...................................14, 24
Printer name................................................15, 21
Printer Number ..................................................21
PrintServices on Web....................................14, 24
Index
1
Page 36

R
Reverse Order ................................................... 21
S
start ................................................................. 12
Status .............................................................. 24
U
uninstallation ...................................................... 9
W
Web Access ............................................4, 14, 24
2
Index
 Loading...