

Page 1
Xerox 6030/6050 Wide
Format Printer With
Scan System User
Guide
AccXES Firmware Version 10.0
Page 2

Page 3

Contents
Getting to know the WIDE FORMAT COPY SYSTEM 5
Getting to know the WIDE FORMAT COPY SYSTEM............................................................. 5
Scan System standard components .....................................................................................7
Scan System compact components ...................................................................................10
Scan System Control Panel................................................................................................12
Media Selection........................................................................................................14
Image Quality Area ...................................................................................................16
Background Suppression ..........................................................................................20
Copy ........................................................................................................................21
Reduce/Enlarge........................................................................................................22
Graphical Display and Na vigation Keys......................................................................24
Numeric Keypad and Special Features/Control Keys...................................................26
Special Features Keys ..............................................................................................27
Scan Control Keys....................................................................................................27
Powering On the Xerox 6030/6050 Wide Format System with Scan System.......................28
Scan System Warm-up .............................................................................................29
Powering off the System ..................................................................................................... 30
Document quality 31
Document quality ................................................................................................................ 31
Dynamic Background Removal...........................................................................................31
Automatic edge detection and document centering .....................................................32
Determining document quality............................................................................................33
What is a good quality document ? .............................................................................33
What is a bad quality document? ...............................................................................33
Preparing documents .........................................................................................................34
Scanning strategies............................................................................................................35
Image Quality 37
Original, Type .....................................................................................................................38
COPY MODE.......................................................................................................................38
Type, Normal, Line, Photo, ........................................................................................38
SCAN MODE.......................................................................................................................40
Type, Normal ............................................................................................................40
Type Line .................................................................................................................41
Type Photo...............................................................................................................42
Type, Color ..............................................................................................................43
Background Suppression ...................................................................................................45
Copy ...................................................................................................................................46
Making copies 47
Making copies.....................................................................................................................47
Xerox 6030/6050 Wide Format Copy System Contents • i
Page 4

Controlling the scan ..................................................................................................47
Image Quality...........................................................................................................49
Making a copy with the default settings..............................................................................50
Making a copy the same size as the original document......................................................51
Fitting the image to a fixed copy size .................................................................................52
Scanning when using a Folder 53
Scanning when using a Folder ........................................................................................... 53
Ready to Copy Finisher Screen .................................................................................54
Scanning oversized documents 55
Scanning oversized documents..........................................................................................55
LONG DOCUMENTS ............................................................................................................ 55
WIDE DOCUMENTS ............................................................................................................55
Special features keys 57
Special features keys..........................................................................................................57
Printer Interrupt key............................................................................................................58
Store/Recall key..................................................................................................................59
Last Job ...................................................................................................................59
Job Templates..........................................................................................................61
Save Default Template..............................................................................................65
Recall Factory Defaults.............................................................................................65
Finisher key........................................................................................................................66
Finisher menu options...............................................................................................67
Sets Build key.....................................................................................................................70
Preparing to build the set ...........................................................................................70
Building and printing the set ......................................................................................70
Batch key ............................................................................................................................ 72
Transform key.....................................................................................................................73
Margins....................................................................................................................73
Justification..............................................................................................................75
Transform ................................................................................................................76
Sample key ......................................................................................................................... 78
Copy Mode Sample: .................................................................................................78
Scan Mode Sample:..................................................................................................79
Scanning to the Network (SCAN mode) 81
Scanning to the Network (SCAN mode)..............................................................................81
Switching between COPY mode and SCAN mode ..............................................................82
Understanding the READY TO SCAN screen......................................................................83
Selections disabled in SCAN mode ....................................................................................84
Operating in SCAN mode....................................................................................................84
Clearing the scanned images.............................................................................................86
Managing the file system....................................................................................................86
Main Menu 88
Main Menu..........................................................................................................................88
Configuration menu ............................................................................................................ 89
LOCALIZATION........................................................................................................90
CONTROL PANEL...................................................................................................91
COPY OPTIONS ......................................................................................................92
ii • Contents Xerox 6030/6050 Wide Format Copy System
Page 5

IMAGE ENHANCEMENTS ........................................................................................97
TIMERS ...................................................................................................................98
POWER SAVER.......................................................................................................99
SCAN SYSTEM CONTROL .................................................................................... 100
System Information menu................................................................................................. 102
SYSTEM DESCRIPTION........................................................................................ 102
RECENT FAULT LIST............................................................................................ 104
CONFIGURATION PRINTS .................................................................................... 105
System Administration menu ........................................................................................... 107
Entering the system administratio n password ........................................................... 107
JOB ACCOUNTING................................................................................................ 108
FILE SYSTEM........................................................................................................ 108
CHANGE PASSWORD ........................................................................................... 112
SECURITY SETTINGS ........................................................................................... 113
Diagnostics menu............................................................................................................. 114
USAGE METERS ................................................................................................... 115
CLEAR SCANNER USAGE ..................................................................................... 115
SCANNER DIAGNOSTICS ..................................................................................... 116
PASSWORD .......................................................................................................... 131
Job Accounting 132
Job Accounting ................................................................................................................ 132
Overview........................................................................................................................... 132
Job Accounting Mode menu ............................................................................................. 133
Submitting jobs................................................................................................................ 134
From the SCAN SYSTEM Control Panel .................................................................. 134
Over the network .................................................................................................... 135
Terminating use under an account ........................................................................... 135
Cleaning and maintenance - SCAN SYSTEM .................................................................... 137
Cleaning the Platen Glass and Document Drive Rolls...................................................... 138
Cleaning the Calibration Strip........................................................................................... 139
Problem solving 140
Problem solving ................................................................................................................ 140
Specifications 146
Specifications................................................................................................................... 146
Appendices 148
Appendix 1........................................................................................................................ 148
Appendix 2........................................................................................................................ 149
Appendix 3........................................................................................................................ 150
Appendix 4........................................................................................................................ 150
Appendix 5........................................................................................................................ 152
Appendix 6........................................................................................................................ 152
Appendix 7........................................................................................................................ 153
Xerox 6030/6050 Wide Format Copy System Contents • iii
Page 6

Page 7

Getting to know the WIDE
FORMAT COPY SYSTEM
Getting to know the WIDE FORMAT
COPY SYSTEM
This manual contains operating instructions for the user and the system
administrator for the Xerox 6030 and 6050 with version 10.0 AccXES
firmware loaded into the AccXES Print Server.
Your Xerox 6030/6050 Wide Format Copy System is an integrated
solution for electronically scanning and then printing good quality copies
of the captured images in engineering or architectural sizes for
engineering or architectural use.
The Xerox 6030/6050 Wide Format Copy System consists of the Xerox
6030 or 6050 printer, WIDE FORMAT SCAN SYSTEM with Control
Panel for capturing images, the AccXES Print Server for processing
these images, and the Printer for making the copies.
Table 1 below shows the WIDE FORMAT COPY SYSTEM configuration.
An optional Online Folder is available for each of these configurations to
provide further processing of the printed output.
Table 1. Xerox 6030/6050 Wide Format Copy System configurations
Scan System Printer AccXES Print
Server Product
Code
WIDE FORMAT SCAN SYSTEM Xerox 6030 or 6050 PUN
The Xerox Copy System 6030 or 6050 has two modes of operation COPY and SCAN. In the COPY mode, documents are scanned,
temporarily stored in memory or on the AccXES Print Server hard disk,
and then sent to the local Printer as soon as the Printer is available. In
the SCAN mode, documents are scanned and then stored on the
AccXES Print Server hard disk for later retrieval over a network by a
remote device. The Xerox 6030/6050 Wide Format Copy System allows
Xerox 6030/6050 Wide Format Copy System Getting to know the WIDE FORMAT COPY SYSTEM 5
Page 8

concurrent printing, copying, and scanning to the network, so there is no
need to wait for the Printer to finish before scanning the next document.
The Xerox 6030/6050 Wide Format Copy System contains Dynamic
Background Suppression technology. Dynamic Background
Suppression examines a sample of the document intelligently and makes
automatic image quality adjustments that yield a good copy even from
poor original documents. The document width is automatically detected
and the centering of a scanned original for most opaque documents is
adjusted. Translucent documents (transparencies, clear film, etc.) in
most cases will not be detected.
For documents that require additional adjustments to obtain the best
copy quality, a variety of image quality and reduction/enlargement
settings are available. All of these functions are controlled from the Scan
System Control Panel. This Control Panel, which is mounted on top of
the Scan System, receives all power and information from the Scan
System.
6 Getting to know the WIDE FORMAT COPY SYSTEM Xerox 6030/6050 Wide Format Copy System
Page 9
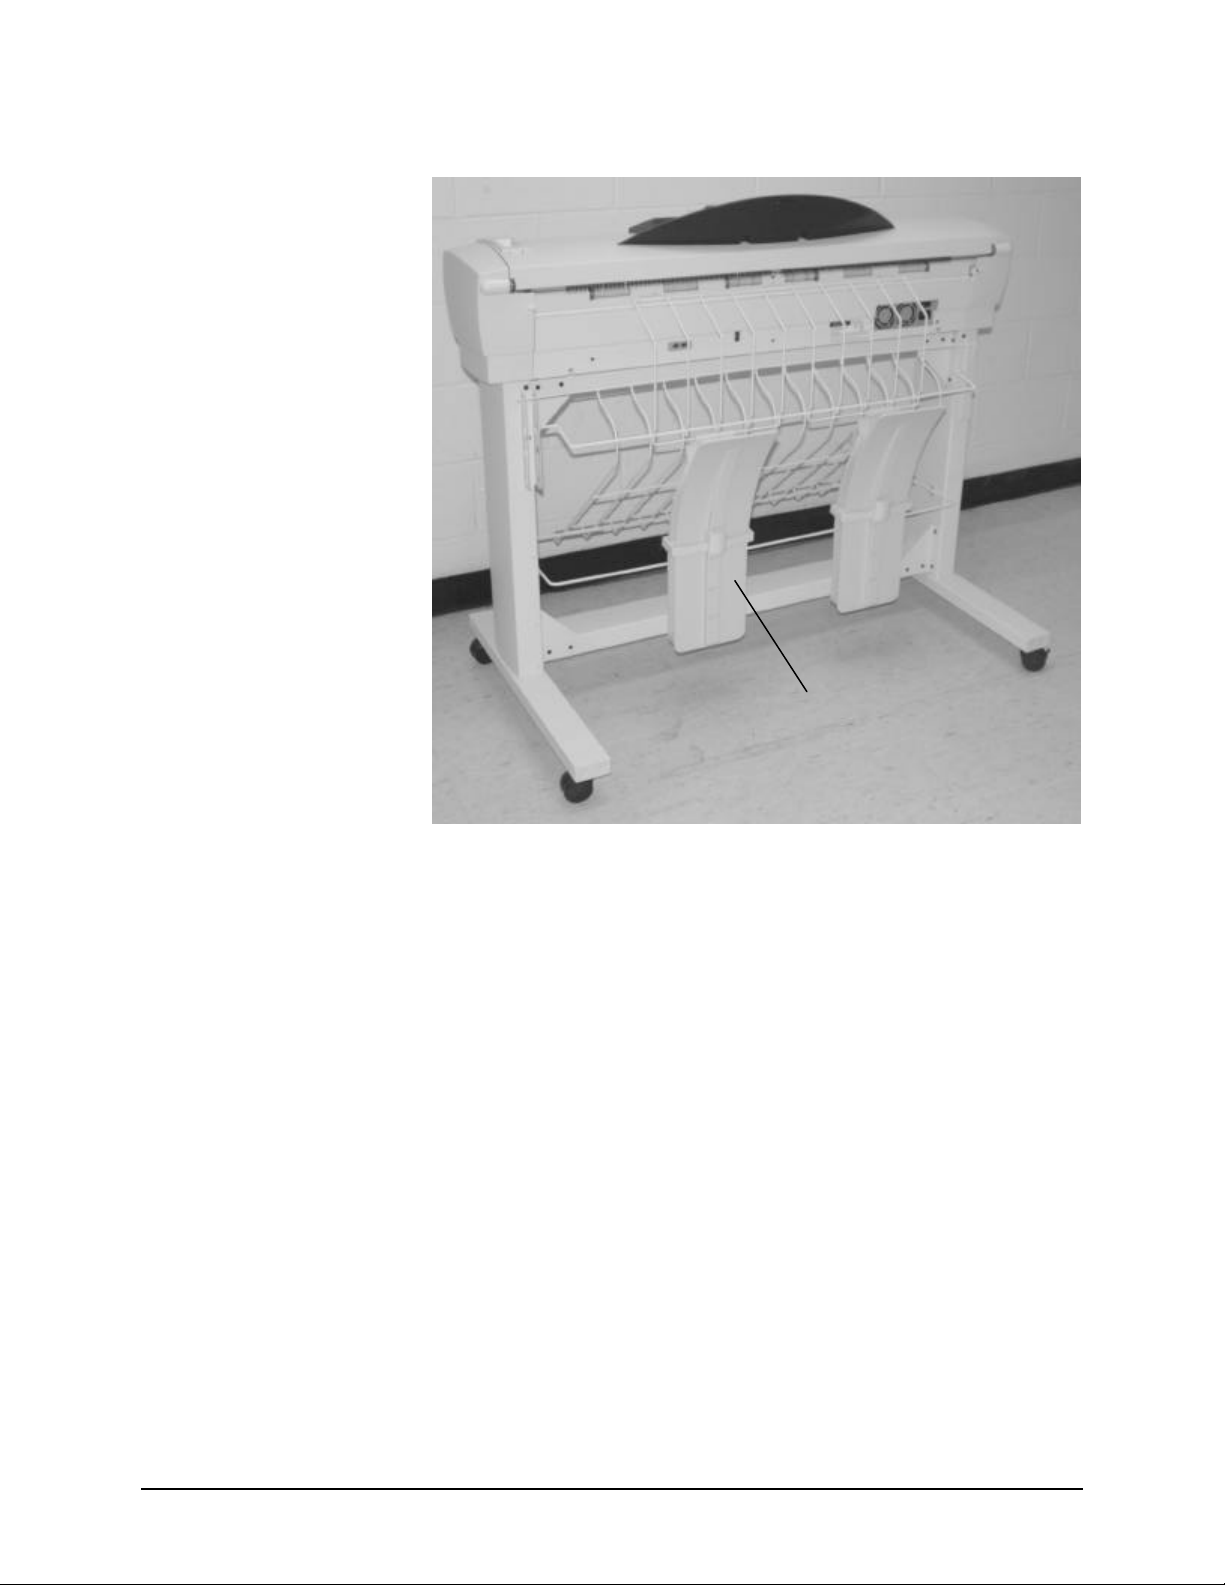
Scan System standard components
The illustrations below show the components of the WIDE FORMAT
SCAN SYSTEM. Following the illustrations are descriptions of each of
the components.
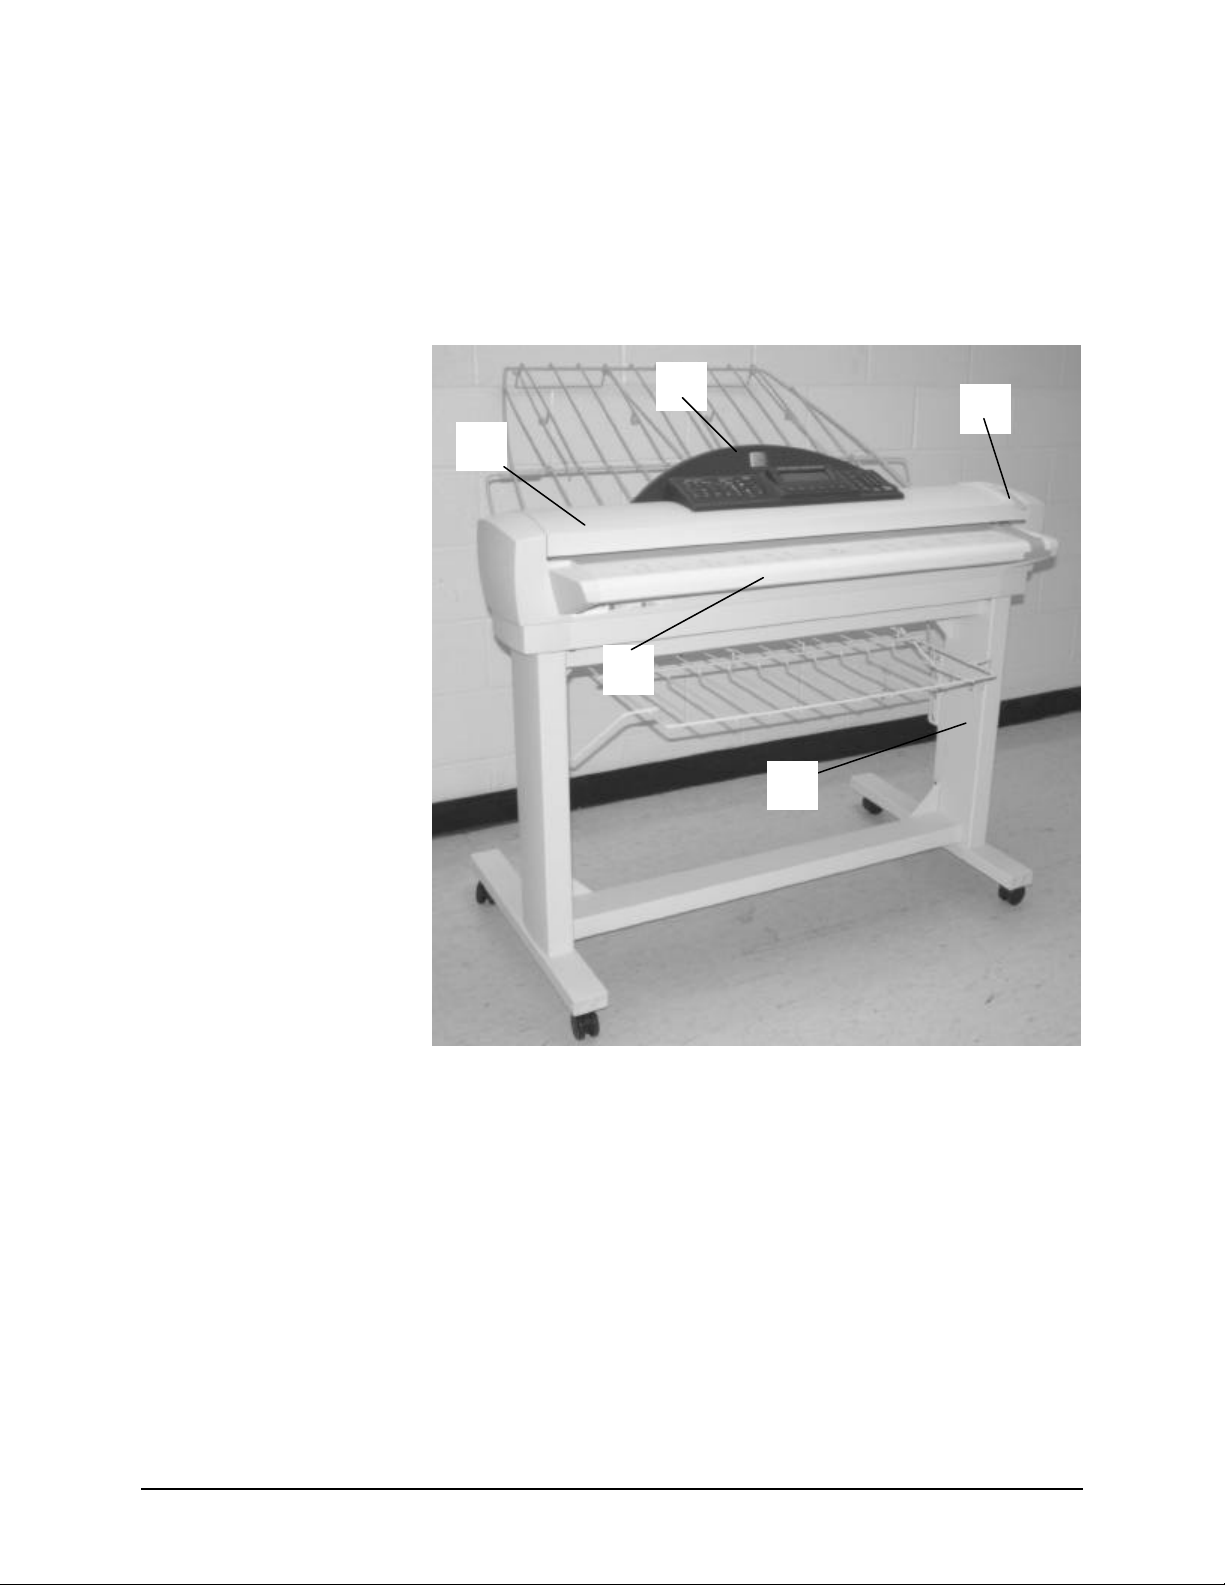
WIDE FORMAT SCAN SYSTEM Front View
B
C
A
E
D
A: Document Handler D: Stand
B: Scan System Control Panel E: Productivity Document Feed-in Tray
C: Thick Document Lever
A. Document Handler
Raise the Document Handler for routine maintenance functions and to
access the optical paper sensors for diagnostic routines.
B. Scan System Control Panel
The control panel allows the selection of options and features and
contains a graphical display for the communication of information and
instructions. Refer to Scan System Control Panel for additional
information.
Xerox 6030/6050 Wide Format Copy System Getting to know the WIDE FORMAT COPY SYSTEM 7
Page 10
C. Thick Document Lever
The Thick Document Lever is used to adjust the Scan System for thick
documents and to remo ve documents from the Scan System feed
mechanism. When setting the thickness for a document, raise the lever
to the next thickness. If the document slides past the Feed Rolls into the
Document Handler, lower the Lever to the next position.
D. Stand
The Stand is standard with the Xerox 6030/6050 Wide Format.
E. Standard Organizer
The Organizer is located on the front of the Scan System. It is useful for
holding multiple documents that are to be scanned. It has two
extensions at its end that can be pulled out to accommodate longer
documents (up to size E or A0).
F Document Feed Tray
Insert documents to be scanned face down and centered into the
Document Feed Tray.
F. Productivity Document Feed Tray
Provides built -in Document Width Sensors that eliminate the need to
prescan document to do width measurement. This increases the
document throughput resulting in higher.
.
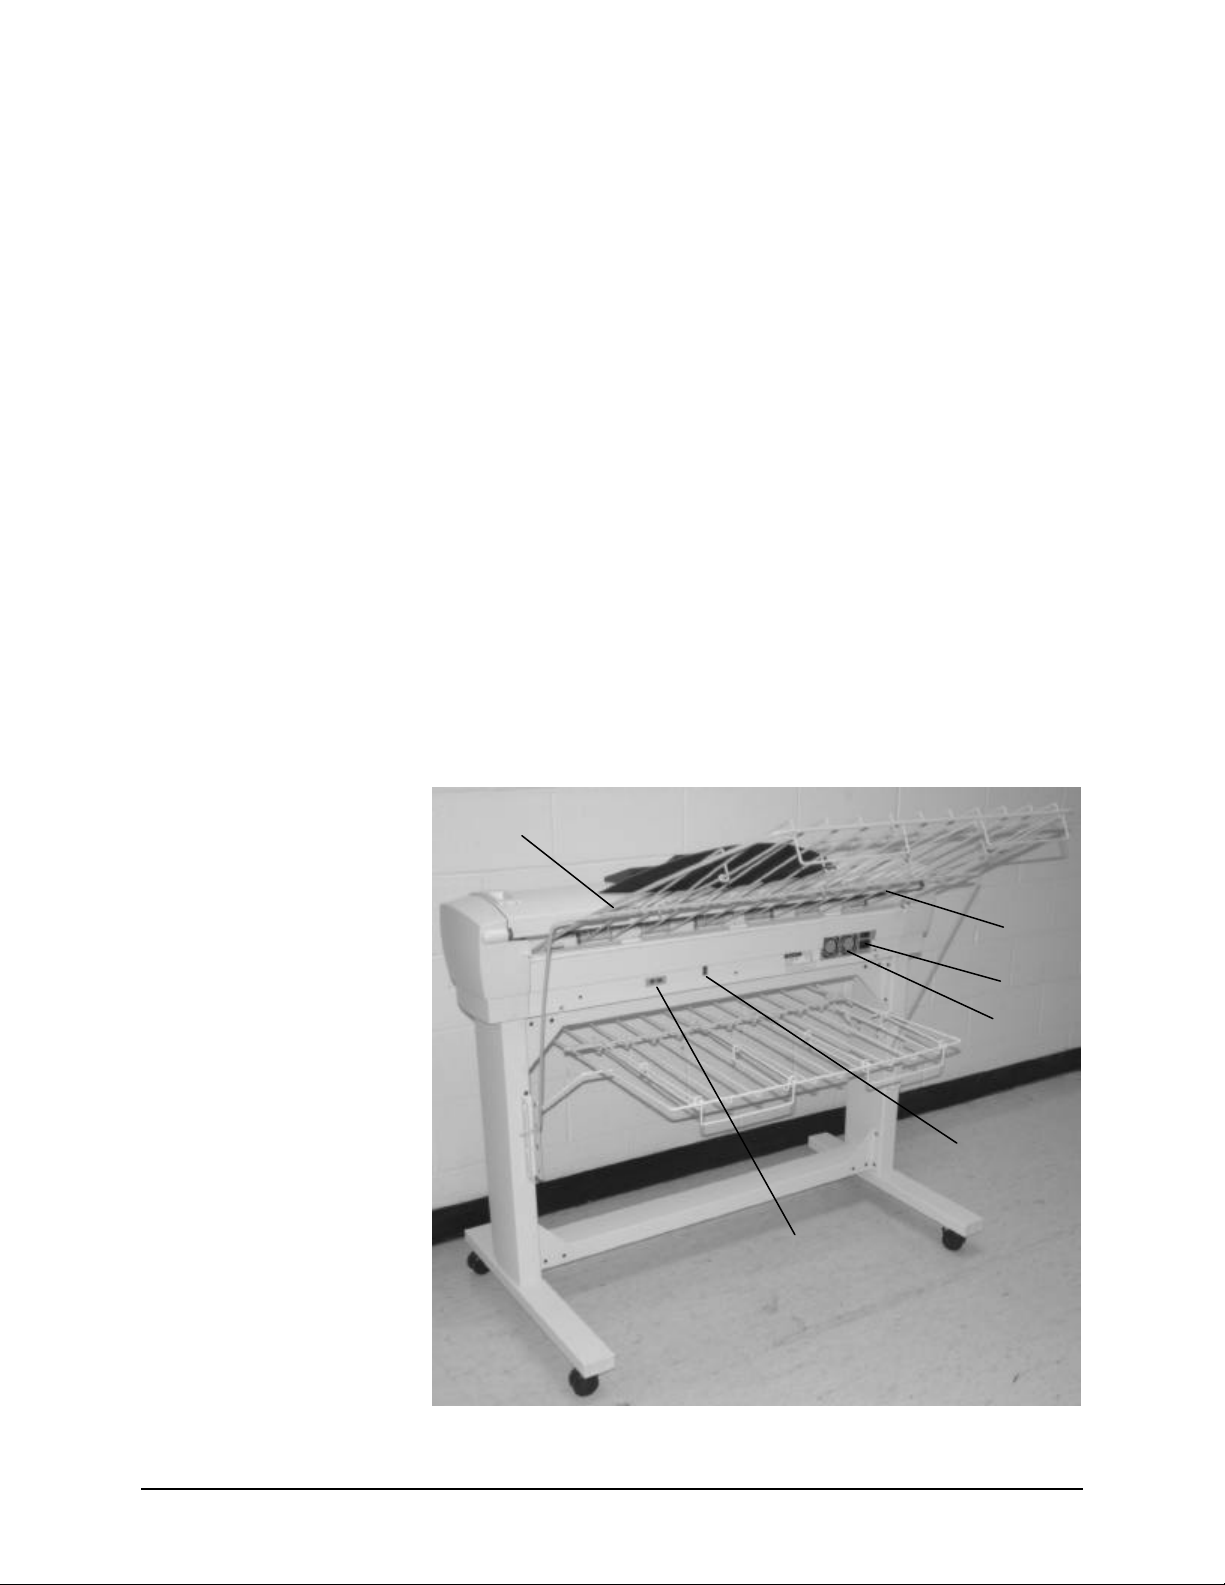
Rear View
A
B
C
D
D
D
8 Getting to know the WIDE FORMAT COPY SYSTEM Xerox 6030/6050 Wide Format Copy System
Page 11

A: Standard Stacker D: Power Cord and Connector
B: Document Exit Slot E: Status Indicator LED
C: Power On/Off swit ch F: IEEE 1394 Cable and Connector
NOTE: Components shown above with the exception of the Standard
Organizer are also available on all WIDE FORMAT SCAN SYSTEMs
A. Standard Stacker
The Stacker is located at the rear of the SCAN SYSTEM. When the
AUTORETURN feature is set to REAR, documents exit the SCAN
SYSTEM onto the Stacker. The Stacker can be adjusted to any one of
four positions by raising or lowering it. The height of the Stacker should
be adjusted to accommodate the document being scanned. It has two
extensions at its end that can be pulled out to accommodate longer
documents (up to size E or A0). When scanning most common weight
(20 lb, 80gsm) documents, move the Stacker to the 2nd rung from the
bottom.
NOTE: All thick documents and documents over 36 inches (914 mm)
exit from the rear of the Scan System (regardless of the AUTORETURN
setting). When scanning thick documents, the Stacker must be set to the
lowest position for optimum performance.
B. Document Exit Slot
When the DOCUMENT RETURN feature is set to REAR, documents exit
the Scan System through this slot and are delivered to the rear Stacker.
C. Power On/Off Switch
This switch turns the Scan System on and off. Press this switch to the
on (I) position to turn on the Scan System and to the off (O) position to
turn off the Scan System.
D. The Power Cord supplies power to the Scan System. Plug one end of
the cord into the Scan System and the other end into an electrical outlet.
E.Status LED
The digital status LED provides an indication of the condition of the Scan
System and communications with the AccXES Print Server. A P
displayed on the LED Display on the rear of the Scan System indicates
that the Scan System is operating normally and has established
communications with the AccXES Print Ser ver.
F. IEEE 1394 Cable and Connector
The IEEE 1394 Cable is the communications link between the Scan
System and the AccXES Print Server. Plug one end of the cable into
either one of the IEEE 1394 connections at the rear of the Scan System.
Plug the other end into the IEEE 1394 connection on the AccXES Print
Server.
Xerox 6030/6050 Wide Format Copy System Getting to know the WIDE FORMAT COPY SYSTEM 9
Page 12
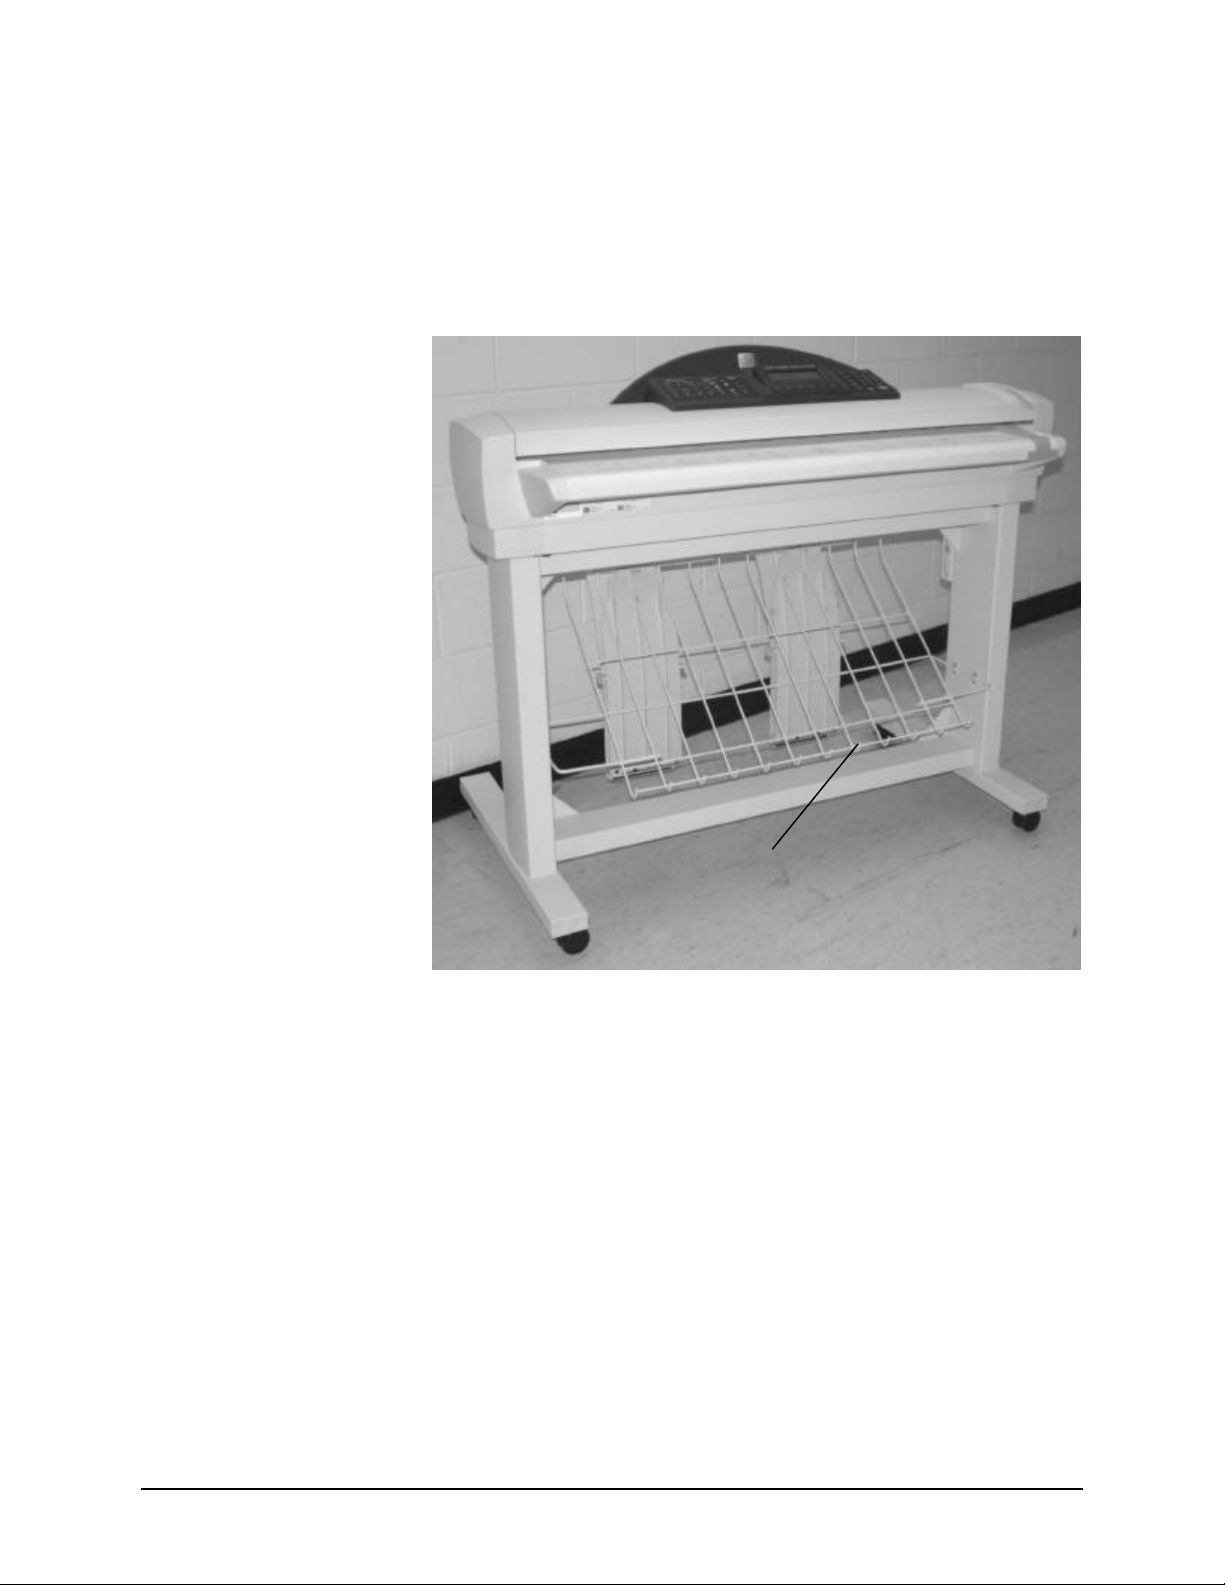
Scan System compact components
The illustrations show the optional compact Stacker and organizer that
are available for the WIDE FORMAT SCAN SYSTEM. The compact
components allow the XEROX 603 0/6050 Wide Format to be installed in
sites where space requirements are at a premium.
Front View
A: Compact Organizer
A
10 Getting to know the WIDE FORMAT COPY SYSTEM Xerox 6030/6050 Wide Format Copy System
Page 13
Rear View
A: Compact Stacker
A
Xerox 6030/6050 Wide Format Copy System Getting to know the WIDE FORMAT COPY SYSTEM 11
Page 14
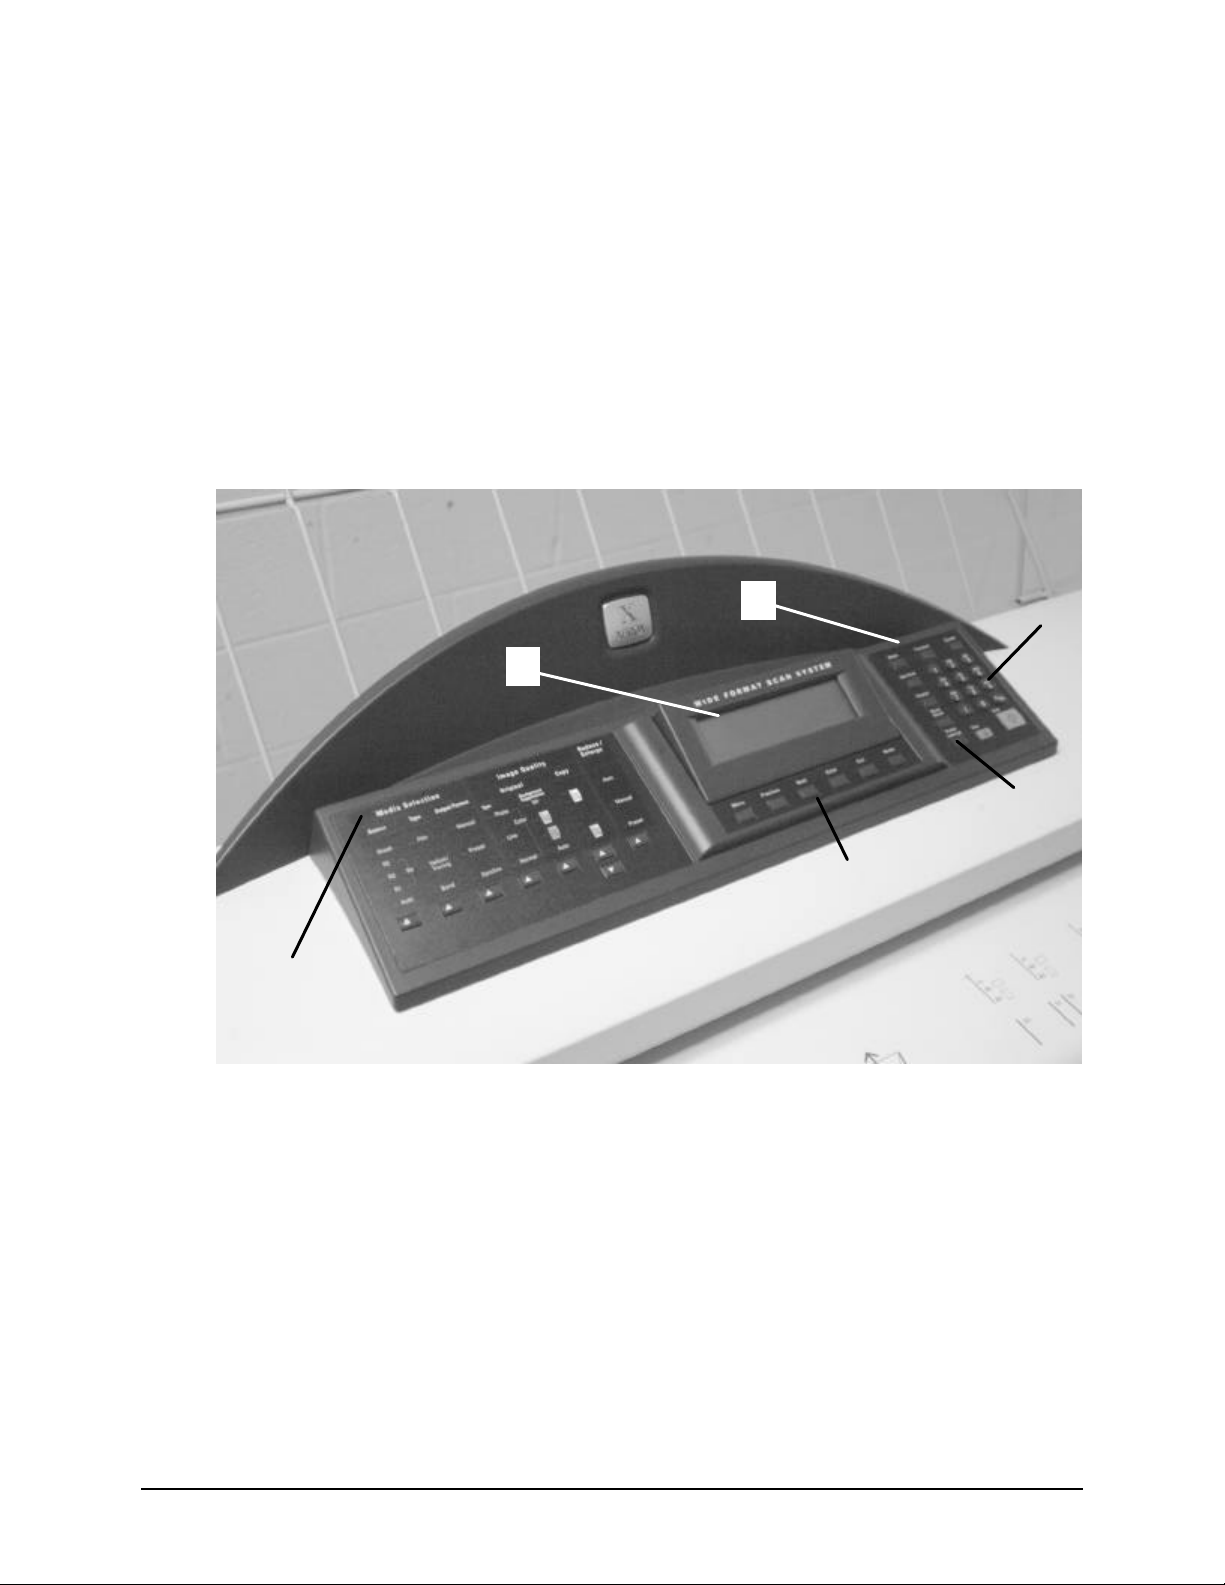
Scan System Control Panel
The Scan System Control Panel is divided into three sections:
• The options keys section, which contains the - Media Selection,
Image Quality, and Reduce/Enlarge options selections
• The graphical display and the navigation keys section.
• The right -hand section, which contains the numeric keypad, the
special features keys, and the scan control keys.
If the BEEP function is enabled (factory default), a beep sound will be
heard when a key is pressed. If an improper key is pressed, a multiple
beep sound will be heard.
C
B
F
A
A: Option Keys section D: Numerical Key pad
B: Graphical Display E: Special Features keys
D
E
C: Scan Control keys F: Navigation keys
12 Getting to know the WIDE FORMAT COPY SYSTEM Xerox 6030/6050 Wide Format Copy System
Page 15
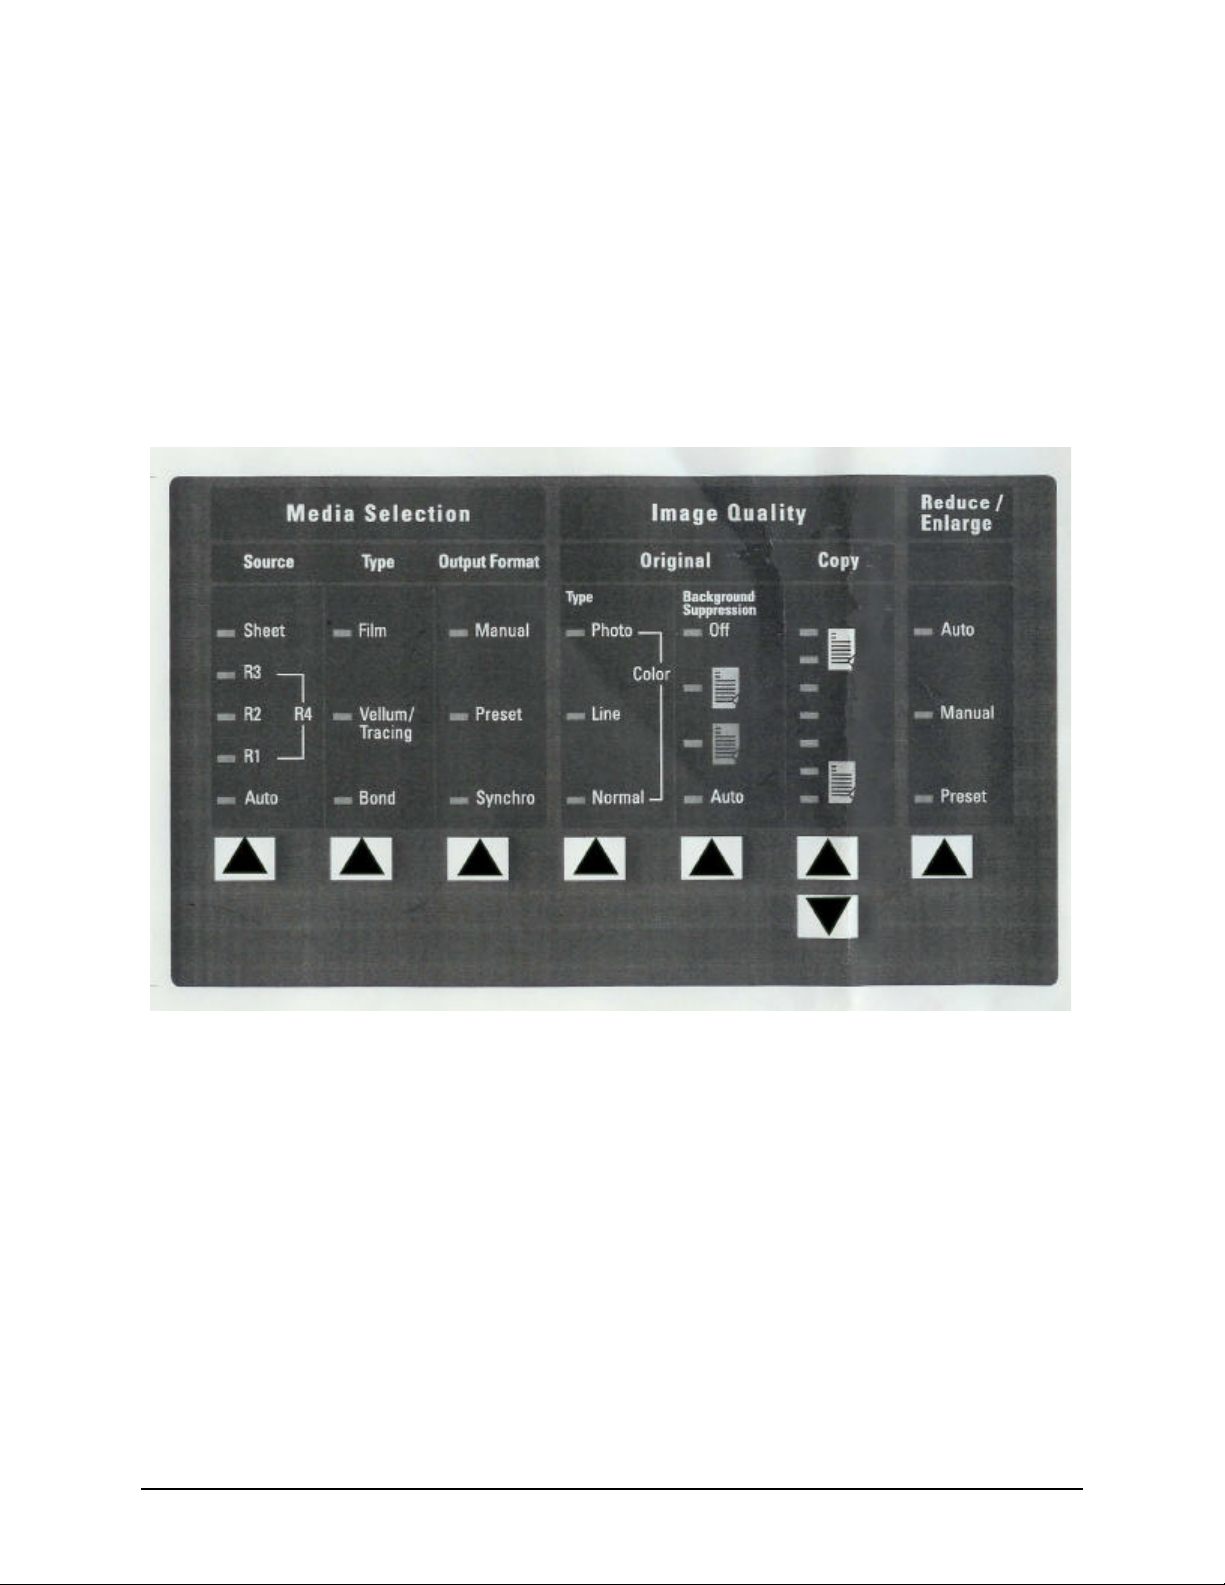
OPTIONS KEYS
The left side of the Scan System Control Panel contains the keys for the
selection of options. It is divided into three areas - Media Selection,
Image Quality, and Reduce/Enlarge .
To select an option, press the key(s) beneath the option. In some cases,
a screen requiring a selection or input is displayed on the graphical
display. When an option is selected, the indicator lamp to the left of the
option illuminates .
The illustration below depicts the options portion of the Scan System
Control Panel.
Control Panel Options Area
Xerox 6030/6050 Wide Format Copy System Getting to know the WIDE FORMAT COPY SYSTEM 13
Page 16
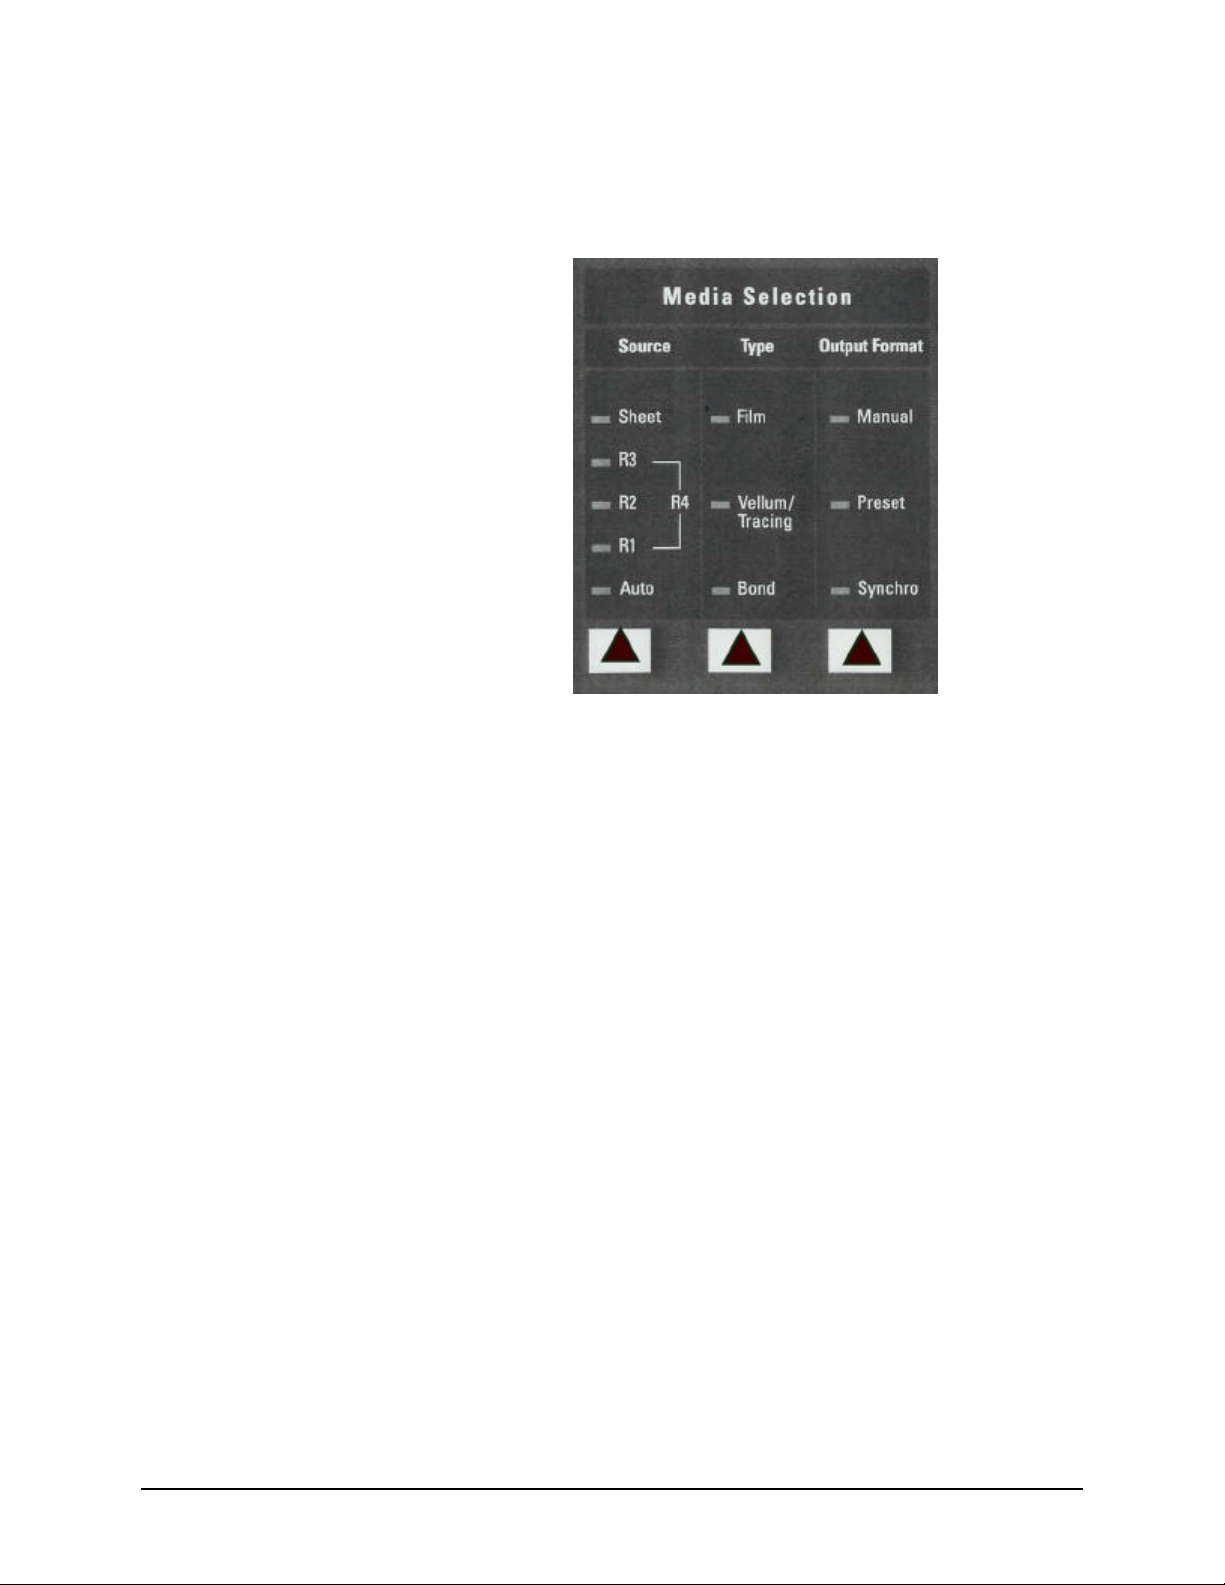
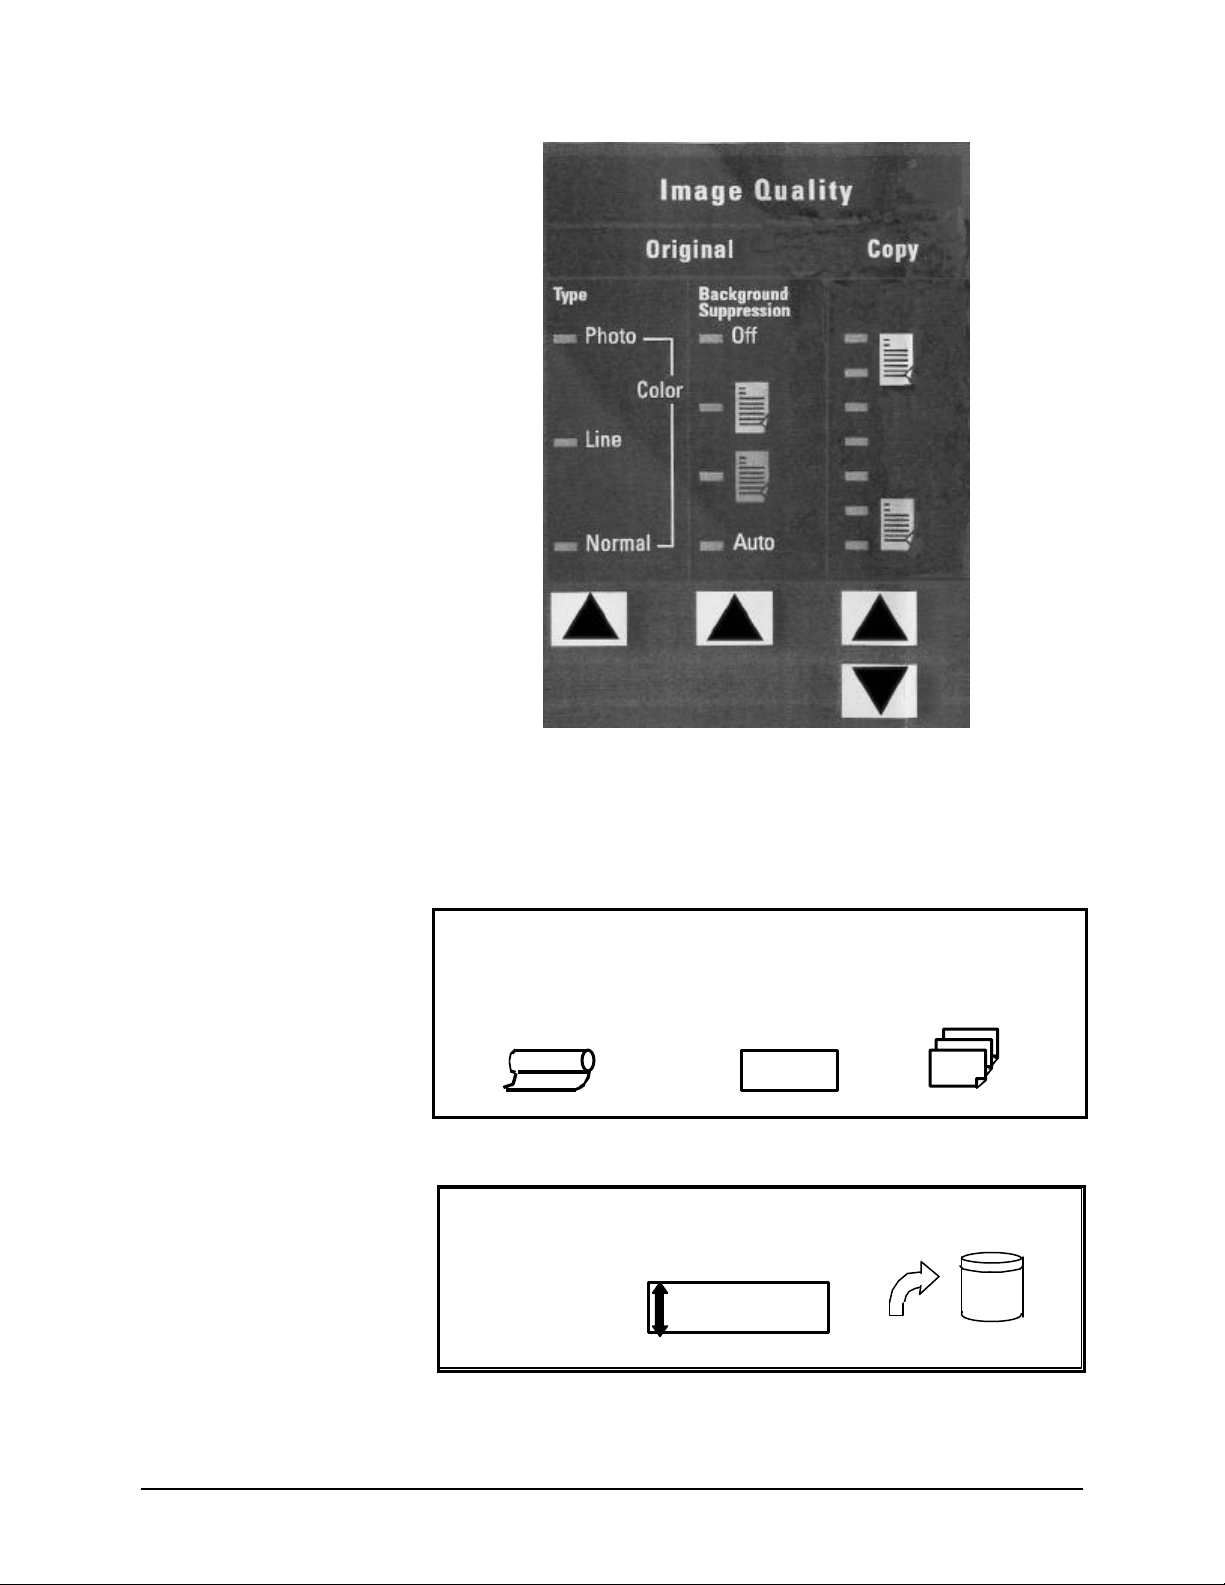
Media Selection
The Media Selection area of the Scan System Control Panel allows you
to select the media Source, Type, and Output Format. The illustration
below depicts the Media Selection portion of the control panel.
Source
The Source option allows you to select the source of the media on which
the image will be printed. To select the media source, press the key
beneath the Source settings until the desired source indicator lamp
illuminates.
The Source settings are:
• Sheet - This setting tells the Printer to print from a manually
inserted sheet of media.
• R4 - This setting is optional on the Xer ox 6030/6050 Wide
Format When it is selected, both the R1 and R3 indicator lamps
illuminate and the Printer selects the media stored on Roll 4.
• R3 - This setting is optional on the Xerox 6030/6050 Wide
Format. When it is selected on those systems, the R3 indicator
lamp illuminates and the Printer selects the media stored on Roll
3.
• R2 - This setting tells the Printer to select the media stored on
Roll 2.
• R1 - This setting tells the Printer to select the media stored on
Roll 1.
• Auto (factory default) - This setting automatically selects the roll
containing the media that best fits the size of the captured
image. For most documents, the Scan System is able to
automatically detect the width of the scanned document. This
permits the Auto function to automatically select the most
appropriate roll of media.
14 Getting to know the WIDE FORMAT COPY SYSTEM Xerox 6030/6050 Wide Format Copy System
Page 17

NOTE: Roll 3 and 4 are optional on the Xerox 6030/6050 Wide Format.
If these options are not installed, they cannot be selected.
Type
The Type option allows you to select the kind of media on which to print -
Bond, Vellum/Tracing, or Film. To select the media type, press the key
beneath the Type settings until the desired type indicator lamp
illuminates.
NOTE: Only media types actually loaded into the Printer can be
selected. When a roll is selected, the media type for that roll is
automatically selected also. If more than one media type is loaded when
the media source is set to Auto, the default choice priority is Bond (first),
Vellum (second), and Film (third). Refer to the applicable Printer
Operator Manual for instructions about how to load rolls and specify the
width and media type.
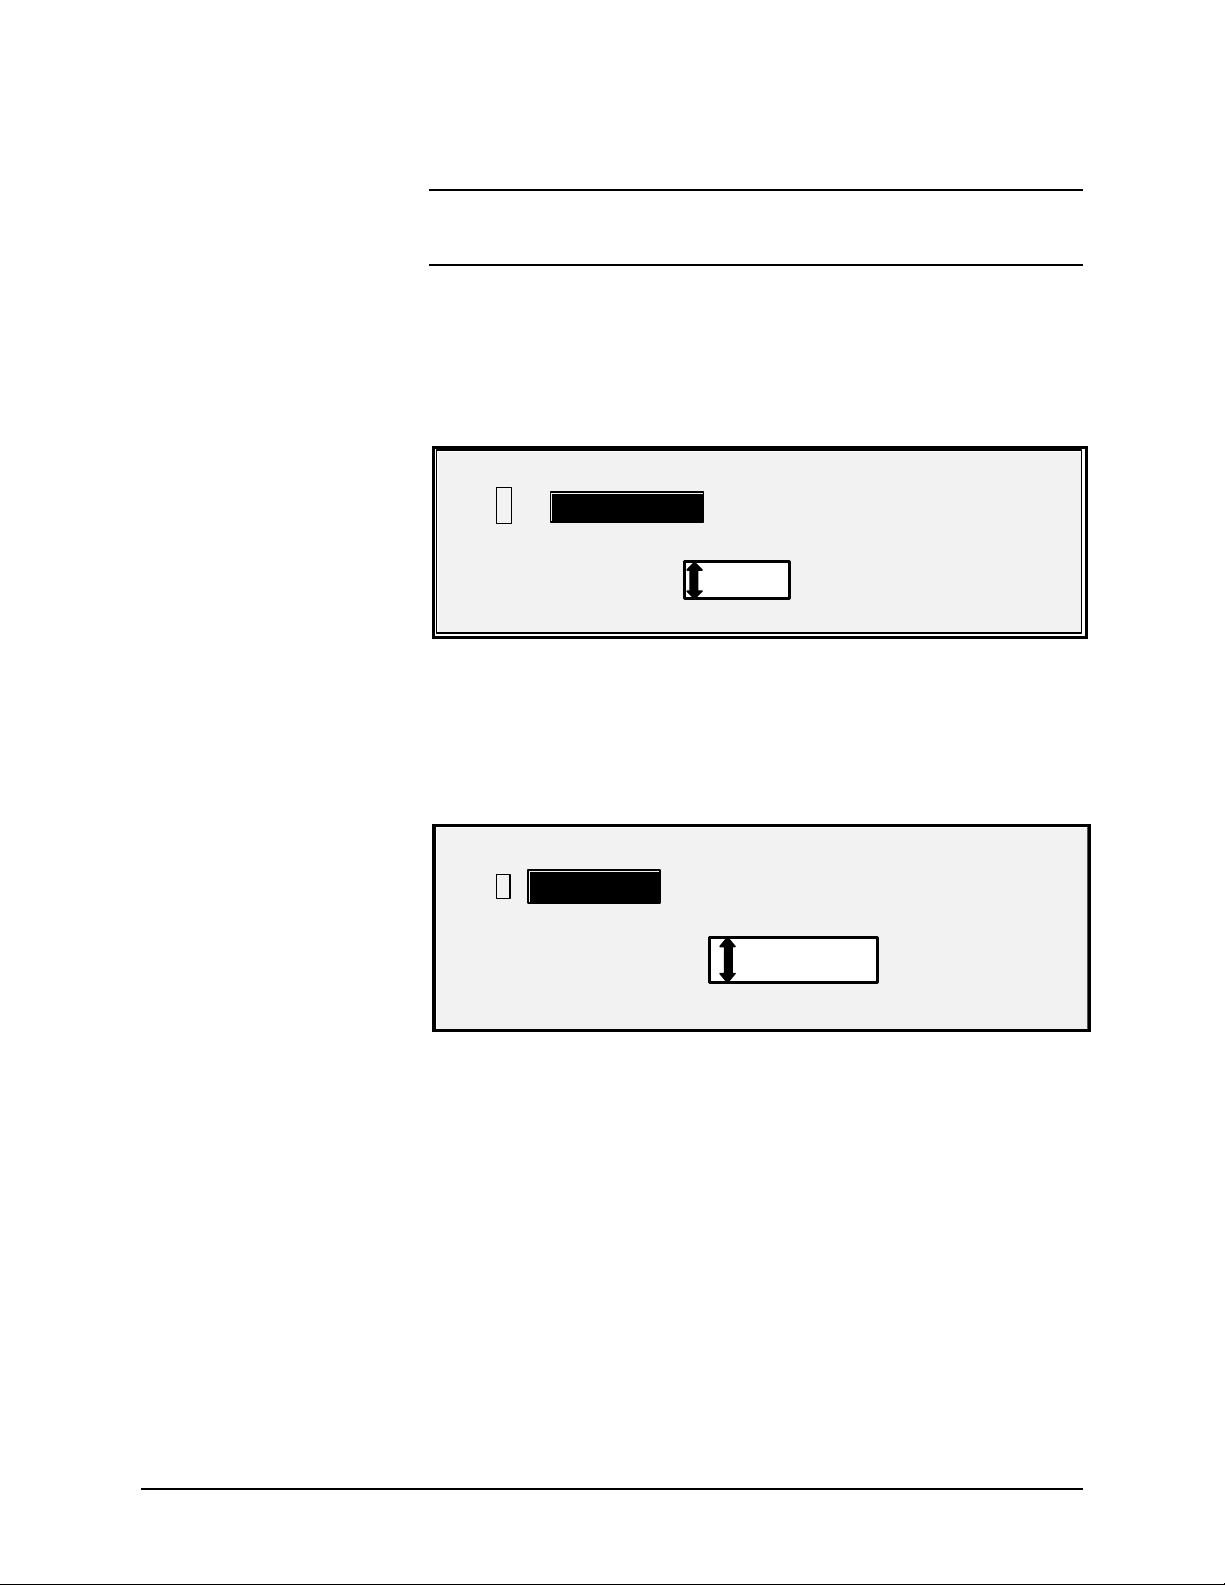
Output Format
The Output Format option allows you to select the size to which the roll
feed media will be cut. It has three modes - Manual, Preset, and
Synchro.
Manua l
Manual allows you to enter the desired length and width manually.
To select the Manual mode:
1. Press the key beneath Output Format until the Manual indicator
lamp illuminates. The CUSTOM OUTPUT FORMAT screen is
displayed.
NOTE: If the indicator lamp is already lit, press the key once to display
the screen.
CUSTOM OUTPUT FORMAT
ENTER CUSTOM MEDIA SIZE:
WIDTH (11.0 -36.0): 11.0 IN
LENGTH (8.3 – 1200.0): 8.5 IN
2. Press the Previous or Next key to select WIDTH or LENGTH.
3. Press the Enter key to confirm the choice.
4. Use the numeric keypad to enter the desired value.
NOTE: The entered value must be within the limits shown in
parentheses on the screen.
5. Press the Enter key to confirm the value.
6. Repeat steps 3 to 5 to enter the value for the remaining setting.
Xerox 6030/6050 Wide Format Copy System Getting to know the WIDE FORMAT COPY SYSTEM 15
Page 18
7. When the values for WIDTH and LENGTH are correct, press the
Exit key to return to the READY screen.
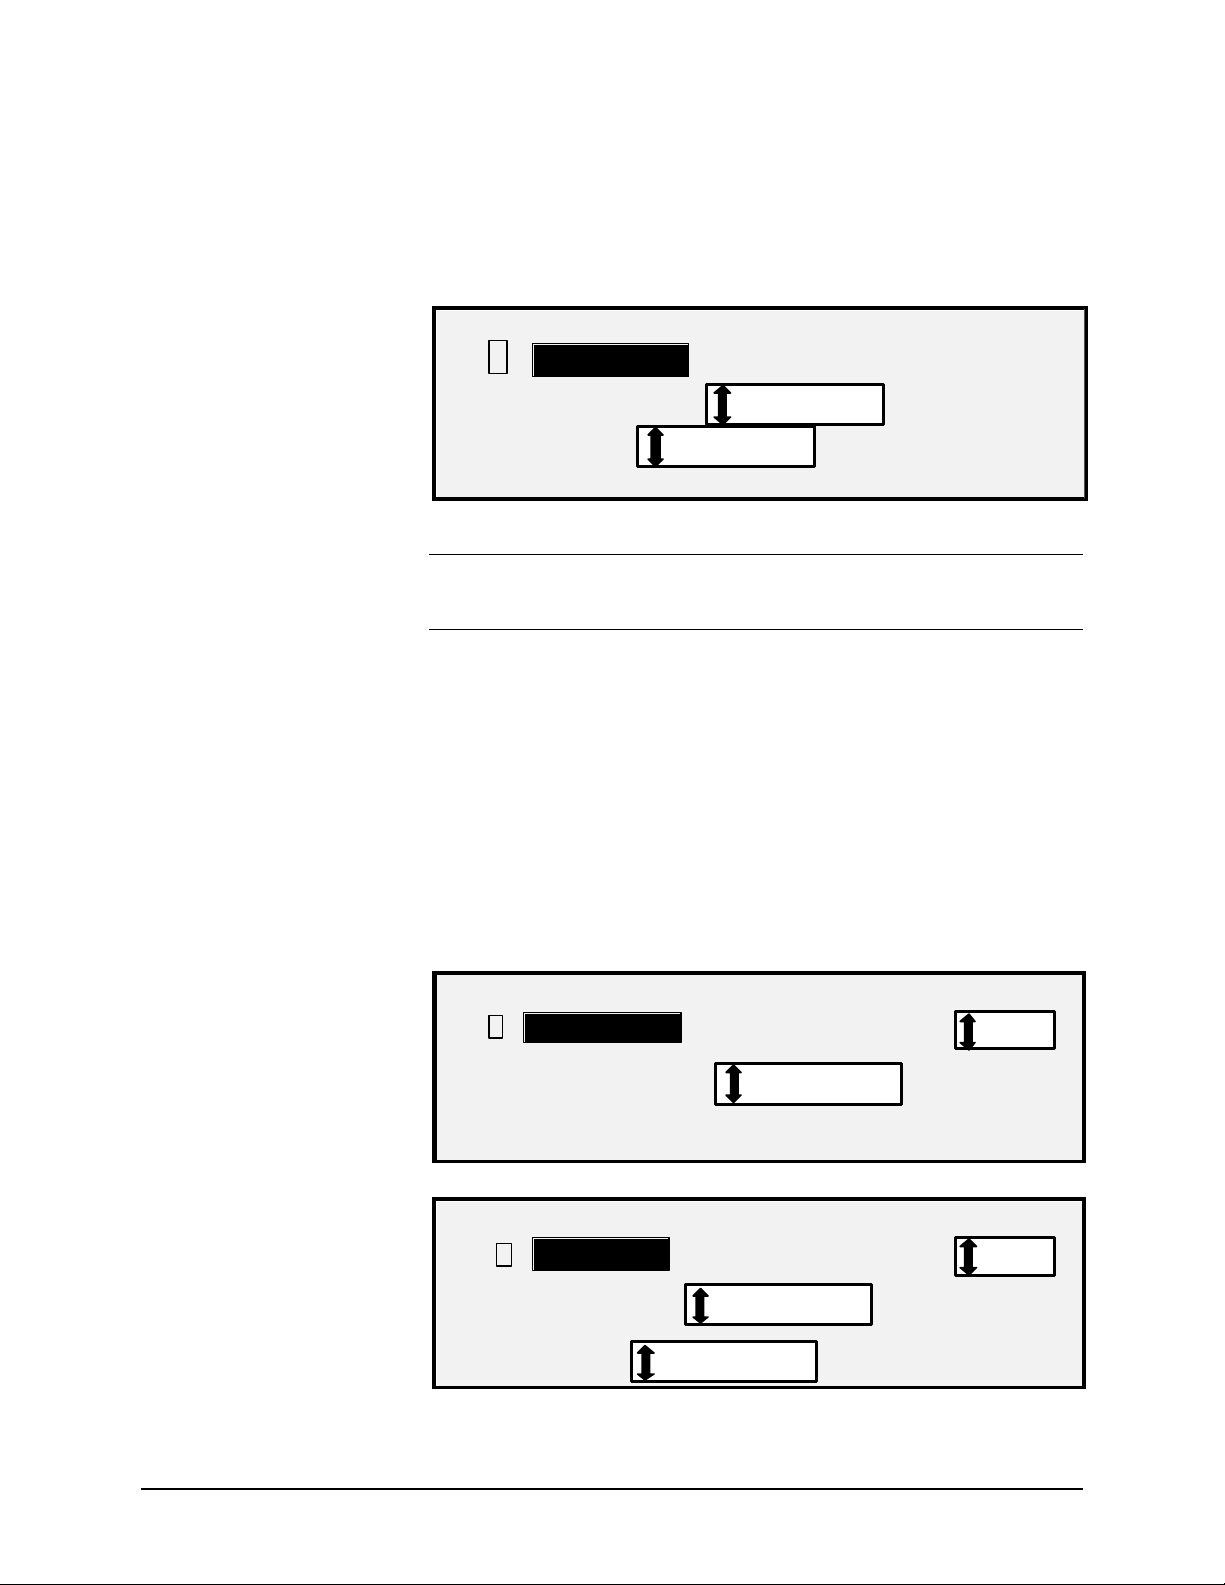
Preset
Preset allows you to select a predefined length to which the roll media
should be cut during printing. The associated width specification will
depend on the Media Source selection. If the Media Source selection
is set to Auto, the system will select the roll of media that best matches
the width specification. If Media Source is set to R1, R2, R3, or R4; the
system will use the selected roll regardless of the width specification.
To select the Preset mode:
1. Press the key beneath Output Format until the Preset indicator
lamp illuminates. The PRESET OUTPUT FORMAT screen is
displayed.
NOTE: If the indicator lamp is already lit, press the key once to display
the screen.
PRESET OUTPUT FORMAT
SELECT: 8.5 X 11 ANSI A
Image Quality Area
2. Press the Previous or Next key to select an item from the list.
NOTE: Formats can be added or removed from this list. Refer to
"Custom Media Formats" in the "Main Menu" section for more
information.
3. Press the Enter key to confirm the choice and return to the
READY screen.
Synchro
When the Synchro mode is selected, the length of the original is
measured as it passes through the Scan System and automatically cuts
the media at the Printer to match the length of the original document.
Synchro is the factory default. To select the Synchro mode, press the
key beneath Output Formats until the Synchro indicator lamp
illuminates.
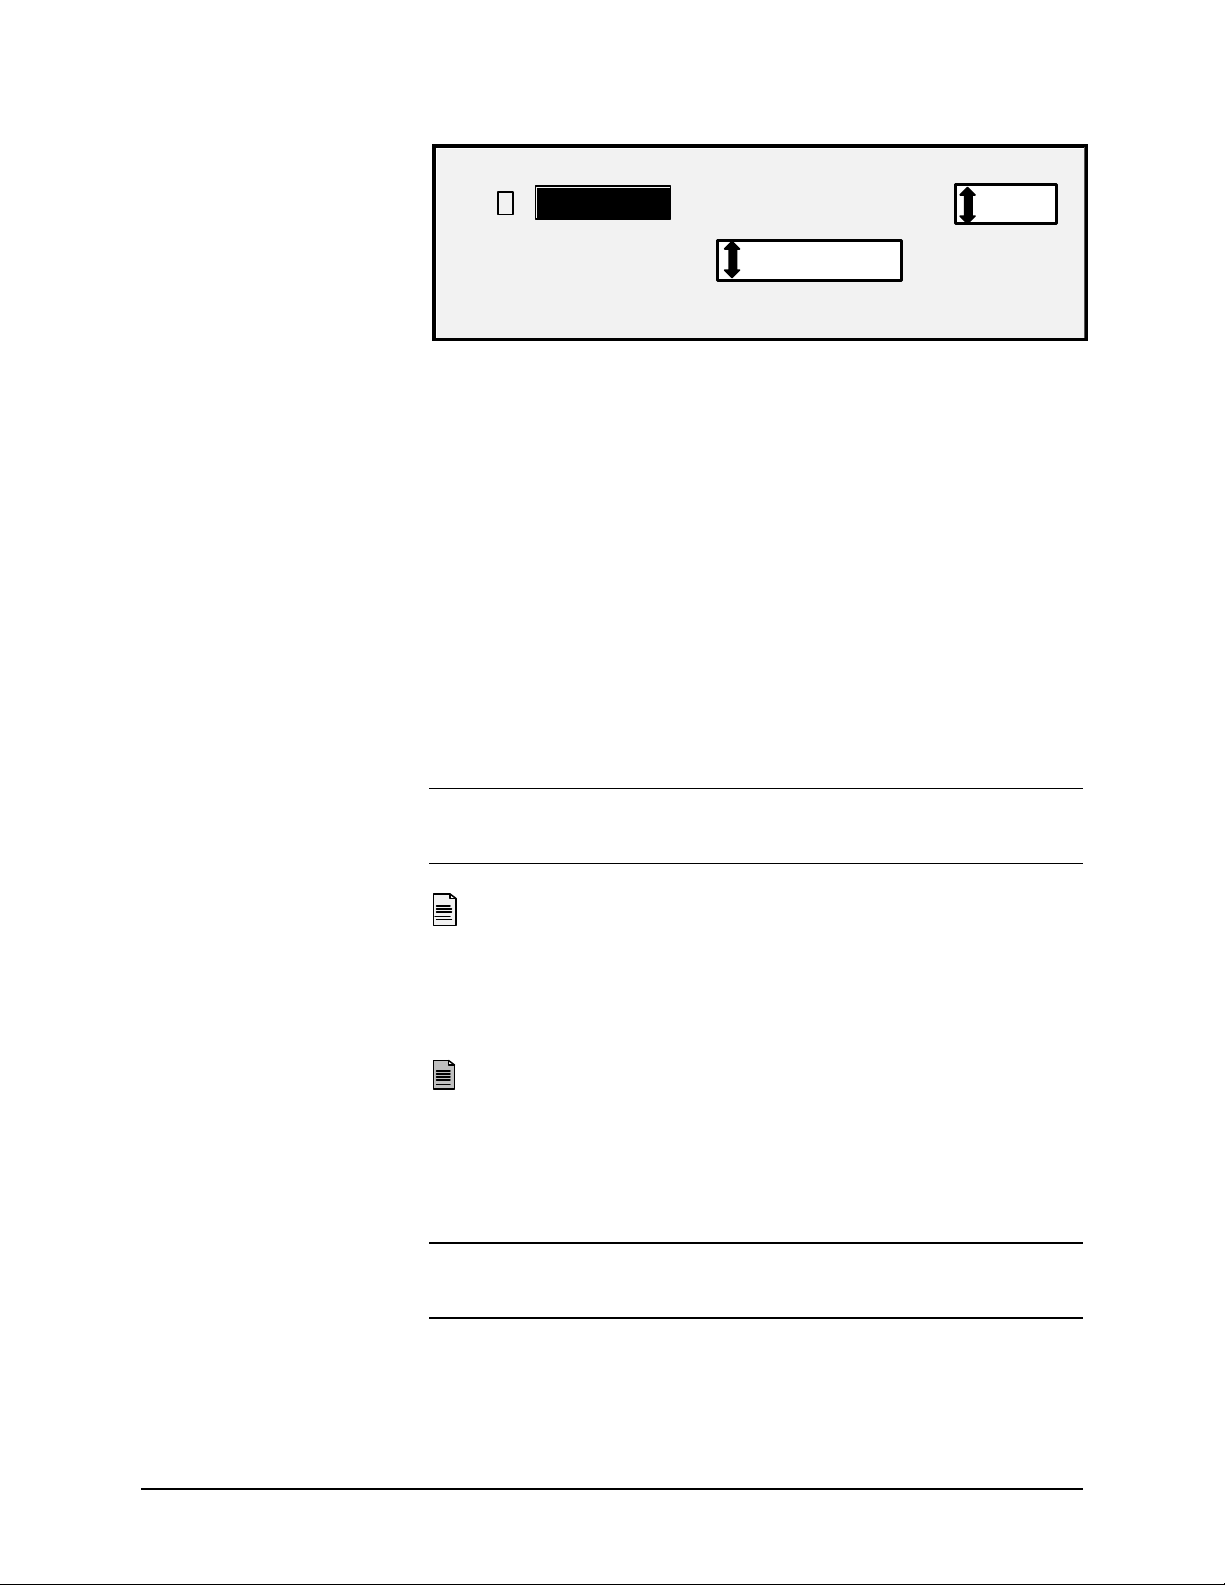
The Image Quality area of the Scan System Control Panel allows you to
make corrective adjustments to the image and extract the best possible
copy quality from an original document. It contains the Type,
Background Suppression, and Copy options.
The illustrations below depict the Image Quality portion of the Control
Panel for AccXES software version 10.0 and SCAN SYSTEM firmware
version 3.0.9 or higher.
16 Getting to know the WIDE FORMAT COPY SYSTEM Xerox 6030/6050 Wide Format Copy System
Page 19
TIFF/CCITTG4
100.0 %
The SCAN SYSTEM firmware must be at version 3.2.5 or greater to
support Normal, Line, Photo, or Color Type. If the SCAN SYSTEM is
not at the required version an error message. Depending on what Mode
is selected (COPY or SCAN) the message will be displayed as show
below.
INVALID MODE
UPGRADE SCANNER FIRMWARE
INVALID MODE
UPGRADE SCANNER FIRMWARE
1 BIT
AUTO
1
400 DPI
Xerox 6030/6050 Wide Format Copy System Getting to know the WIDE FORMAT COPY SYSTEM 17
Page 20
Original, Type
ü
ü
FILE FORMAT:
PREVIEW
Line
The Type option allows you to specify the type classification of your
document. To select the document type, press the key beneath the
Type settings until the desired Type indicator lamp illuminates.
Normal
Normal — (factory default) Select Normal for most copying needs. This
setting will provide good image quality for copying most types of
drawings containing text, line art, or a mixture of these. Shaded areas
will be preserved.
In the SCAN mode, the following scree n is displayed when the Normal
key is pressed.
SCAN OPTIONS (NORMAL)
PREVIEW
FILE FORMAT:
Line — Select Line for an image containing fine lines especially pencil.
Produces high contrast and dark black images.If the Mode selected is
SCAN, and the Scan to Net Feature Key is installed, the SCAN OPTION
(LINE) screen will be displayed. If the COPY mode is selected the
READY TO COPY screen will be displayed. Refer to the "Image Quality"
section of this manual for additional information.
TIFF
SCAN OPTIONS (LINE)
TIFF
18 Getting to know the WIDE FORMAT COPY SYSTEM Xerox 6030/6050 Wide Format Copy System
Page 21
FORMAT:
ü
ü
Photo
Photo — Select Photo when the document contains a gray scale or
color image, such as a photograph. If the Mode selected is SCAN, the
following screen will be displayed. If the COPY mode is selected the
READY TO COPY screen will be displayed. Refer to the Image Quality
section of this manual for additional information.
SCAN OPTIONS (PHOTO)
ü
PREVIEW
Color
COMPRESSION:
RAW
TIFF
NOTE: The Background Suppression option cannot be used with the
Photo setting. If Photo is selected, Background Suppression is
automatically set to Off.
The following screens will only be displayed in SCAN mode when the
Scan to Net and Color Scan System feature keys are installed. Color is
only selectable in the SCAN mode. The Normal and Photo LED's will be
lit when Color is selected.
Color — Select Color when scannin g full color documents. When Color
Type is selected a version of the following screens will be displayed. The
content of the screen will depend on the selected FORMAT and
COMPRESSION.
The selections that appear on the screen depend on the FORMAT and
COMPRESSION selections.
SCAN OPTIONS (COLOR)
PREVIEW
COMPRESSION:
FORMAT:
: PACKBITS
: TIFF
SCAN OPTIONS (COLOR)
PREVIEW
COMPRESSION:
PALETTE:
Xerox 6030/6050 Wide Format Copy System Getting to know the WIDE FORMAT COPY SYSTEM 19
INDEX
DEFAULT
FORMAT:
: TIFF
Page 22
SCAN OPTIONS (COLOR)
ü
Background
Suppression
FORMAT:
COMPRESSION:
Background Suppression
The Background Suppression option enables you to make adjustments
for documents that contain poor contras t between the foreground image
and the background.
Four Background Suppression choices are provided:
Off This setting disables Background Suppression. All the
characteristics of the original document with minimum alteration are
reproduced on the copy. Ch oose this selection when:
• The lead edge of the document is very different from the rest of
the document (e.g., the lead edge contains a black border).
• Maps with grayscale or color content may copy best in this
mode.
• To retain more light color information such as light gray or yellow
NORMAL
JPEGPREVIEW
NOTE: If Photo or Color is selected as the Original, Type, the Off
setting is automatically selected. The contrast can still be adjusted by
pressing the key(s) beneath Image Quality, Copy.
(Light) This setting works best for documents on translucent or
transparent media, such as vellum (tracing paper) or film, or with medium
levels of colored background on opaque media or for documents. Such
documents have a higher contrast between the foreground and
background than dark documents, but less contrast than normal
documents.
(Dark) Use this setting for documents with a dark background
or with medium contrast between the foreground and background. In
this mode, the background is not suppressed, but the foreground image
is improved to increase the contrast.
Auto (factory default) - The Scan System automatically adjusts the
image quality parameters to obtain the best copy.
NOTE: All three Background Suppression settings can be adjusted
further by changing the contrast setting in the Image Quality and Copy
area.
20 Getting to know the WIDE FORMAT COPY SYSTEM Xerox 6030/6050 Wide Format Copy System
Page 23
ü DYNAMIC BACKGROUND
REM
OVAL
Background Suppression can operate in either the dynamic or static
mode based on the whether the DYNAMIC BACKGROUND REMOVAL
is enabled, check mark in the box or disabled, no check mark in the box.
Reference Menu CONFIGURATION>IMAGE ENHANCEMENT.
IMAGE ENHANCEMENT
IMAGE ENHANCEMENT
Copy
COLOR IQ:
COLOR IQ: SRGB
SRGB
NORMAL MODE: BEST IQ
When enabled, the dynamic mode will monitor the whole document and
adjust the image quality settings as the document is being scanned in
order to optimize the background of the copy.
When disabled, the static mode monitors the first two inches to establish
a background threshold that is used through out the document in order to
optimize the background of the copy.
Static Background Suppression is not available in the PRODUCTIVITY
mode.
The Copy option allows you to darken or lighten the contrast of the copy
with respect to the original document. Press the down arrow key to
darken the contrast. Press the up arrow key to lighten the contrast. The
indicator lamp for the selected contrast setting illuminates. The middle
contrast setting is the factory default setting.
You can use this feature to further adjust the effects of the Type and
Background Suppression selections. The feature operates with all four
Background Suppression modes.
NOTE: Copy is not selectable in Color mode
Xerox 6030/6050 Wide Format Copy System Getting to know the WIDE FORMAT COPY SYSTEM 21
Page 24
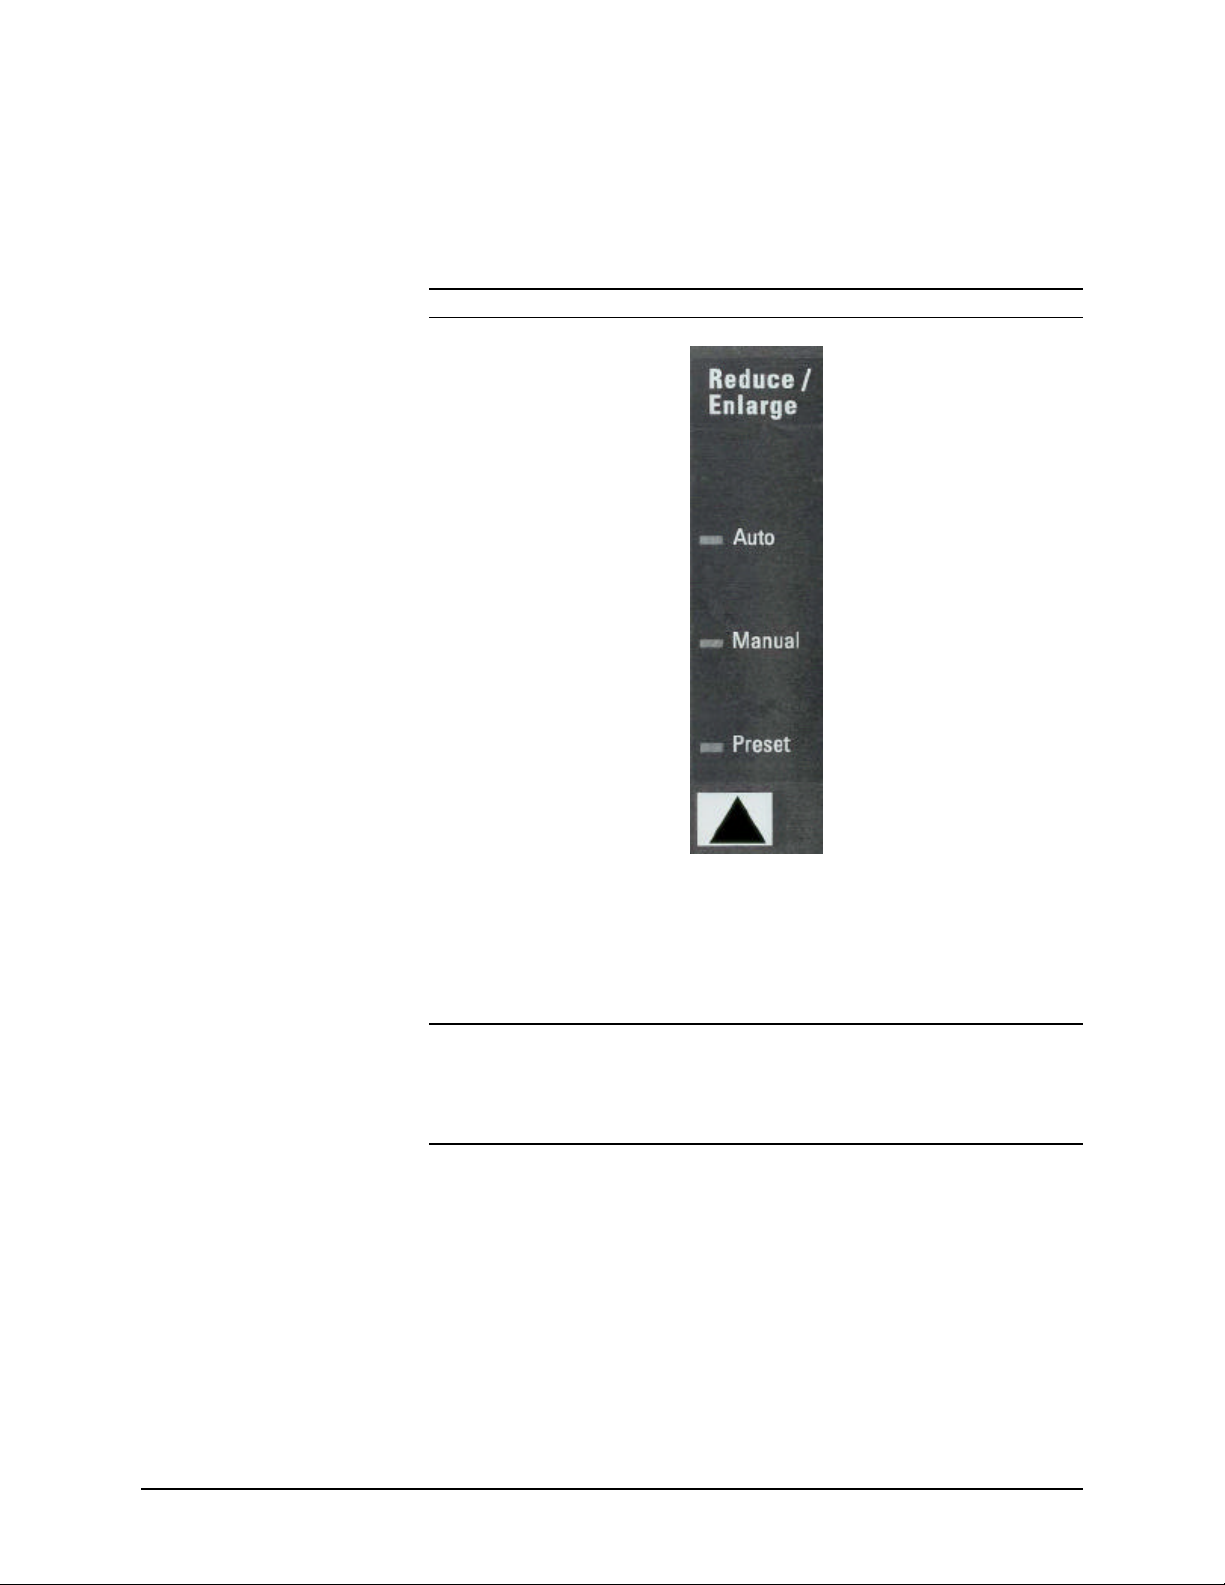
Reduce/Enlarge
The Reduce/Enlarge area of the Scan System Control Panel allows you
to select one of three reduction/enlargement modes - Auto, Manual, and
Preset. The illustration below depicts the Reduce/Enlarge portion of the
Control Panel.
NOTE: Reduce/Enlarge can only be selected in Copy mode.
Auto
Auto automatically adjusts the reduction/enlargement to fit the size of
media selected. To select the Auto mode, press the key beneath
Reduce/Enlarge until the Auto indicator lamp illuminates.
NOTE: The size of the output media must be known in advance for this
feature to operate. Therefore, Auto is not a valid selection if both the
Synchro cut option and the Sheet and Auto media source options are
selected. If you select this combination, an INVALID AUTO
COMBINATION status is displayed.
Manual
Manual allows you to reduce the image captured by the Scan System to
as little as 25% or as much as 400% of the original size before the copy
is printed.
To select the Manual mode:
1. Press the key beneath Reduce/Enlarge until the Manual
indicator lamp illuminates. The MANUAL
REDUCTION/ENLARGEMENT screen is displayed.
22 Getting to know the WIDE FORMAT COPY SYSTEM Xerox 6030/6050 Wide Format Copy System
Page 25
NOTE: If the indicator lamp is already lit, press the key once to display
the screen.
MANUAL REDUCTION/ENLARGEMENT
ENTER (25.0 – 400.0): 100.0%
2. Enter a reduction/enlargement between 25 and 400. You can
select any value between these limits in 0.1% increments.
3. Press the Enter key to confirm your choice and return to the
READY screen. The READY screen now displays the new
reduction/enlargement percentage.
NOTE: Pressing the Exit key rejects the choice and retains the previous
setting.
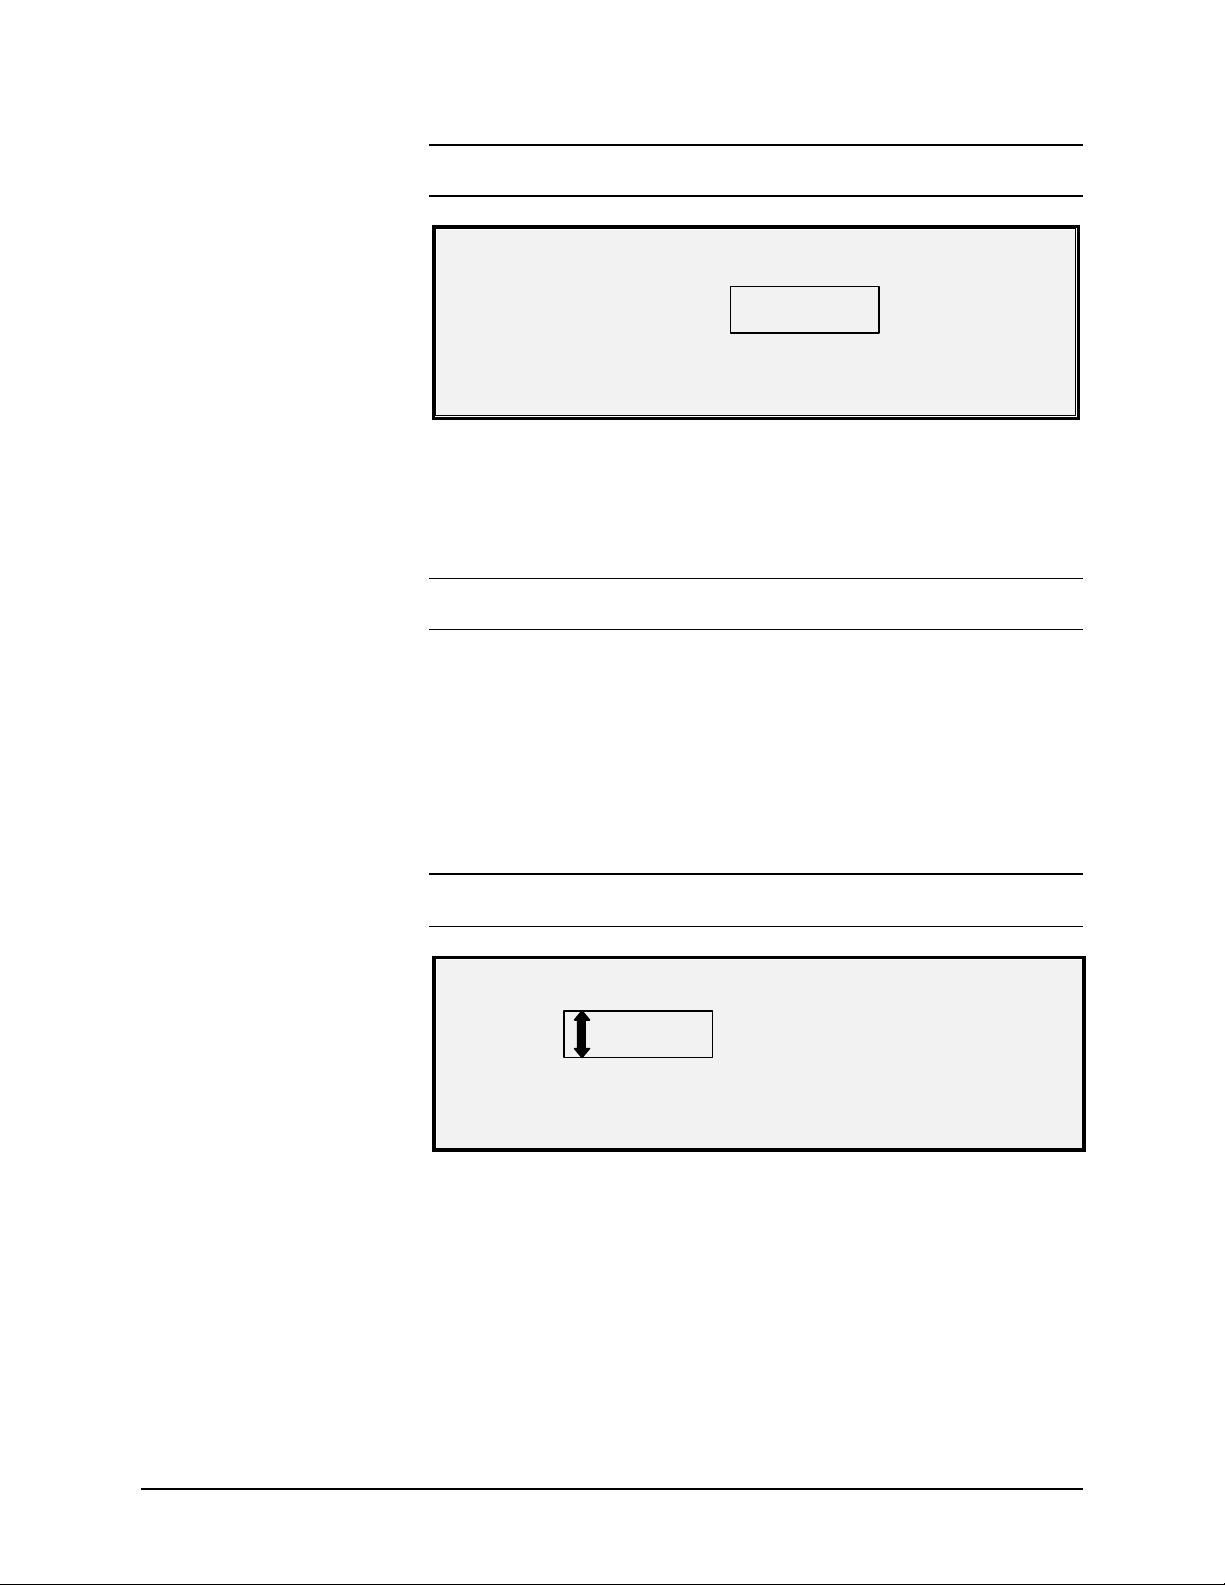
Preset
Preset (factory default) allows you to select a predefined reduction or
enlargement percentage.
To select the Preset mode:
1. Press the key under Reduce/Enlarge until the Preset indicator
lamp illuminates. The PRESET REDUCTION/ENLARGEMENT
screen is displayed.
NOTE: If the indicator lamp is already lit, press the key once to display
the screen.
PRESET REDUCTION/ENLARGEMENT
SELECT:
2. Press the Previous or Next key until the desired
100.0%
reduction/enlargement ratio is displayed. The possible choices
are any combination of the following:
• 50%, 100% (default), and 200%
• 65% and 129%, if the ANSI and ARCH sizes are enabled
• 71% and 141%, if the ISO A, ISO B or JIS B sizes are enabled
• Up to six additional preset values, if these values have been
defined using the CUSTOM R/E Presets menu function.
Xerox 6030/6050 Wide Format Copy System Getting to know the WIDE FORMAT COPY SYSTEM 23
Page 26
Next
AUTO
Graphical Display
and Navigation Keys
NOTE: Refer to "Media Series" in the "Main Menu" section for more
information about enabling media series and defining custom presets.
3. Press the Enter key to confirm you r choice and return to the
READY screen. The READY screen now displays the new
reduction/enlargement percentage.
NOTE: Pressing the Exit key rejects the choice and retains the previous
setting.
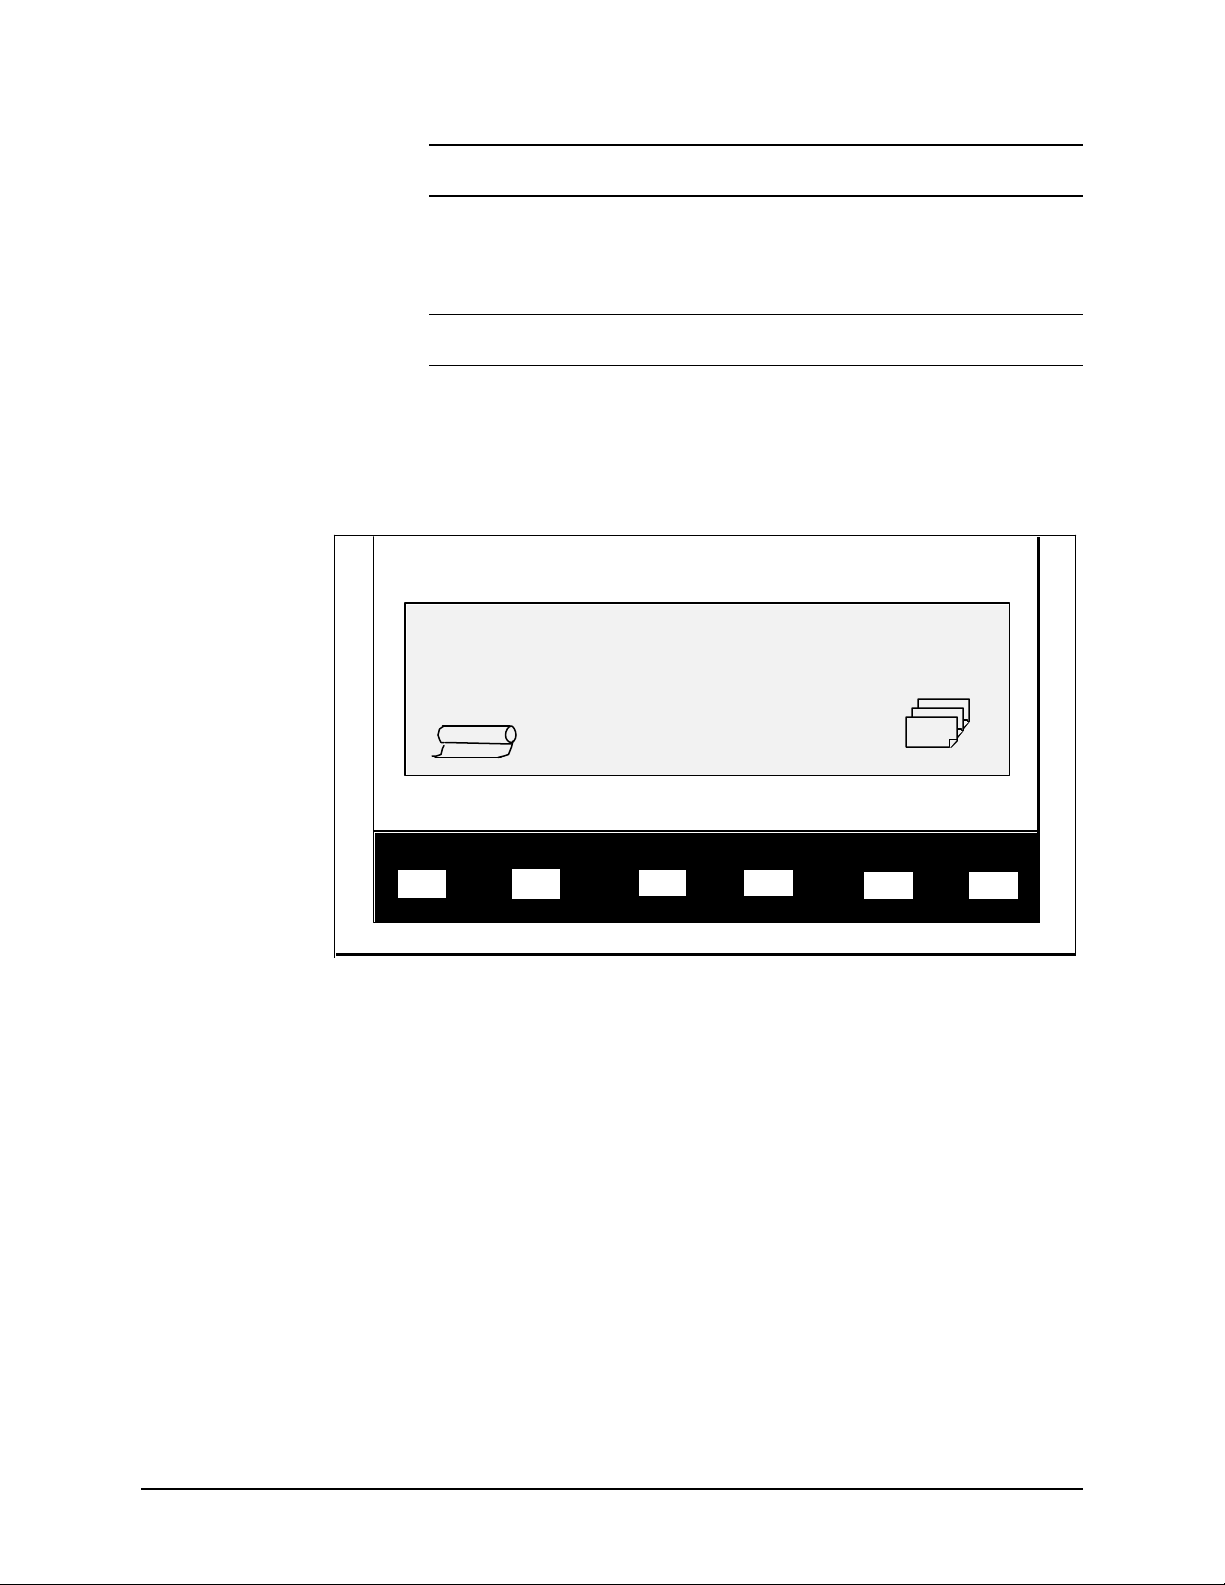
The middle portion of the Scan System Control Panel contains the
graphical display and the navigation keys. The illustration below depicts
the middle portion of the Control Panel.
READY TO COPY
INSERT DOCUMENT
Graphical Display
Navigation Keys
100.0%
Previous
The graphical display provides you with informat ion and instructions
pertaining to the system. It consists of up to four lines of text and
graphics. The display can be adjusted upward for better viewing.
The navigation keys, located beneath the display, are used to move
through the menu screens, to select items on the screen, and to specify
parameters when an options screen is displayed. Some keys have more
than one function depending on the screen being displayed at the time.
These special functions are explained in later sections.
Menu
The Menu key invokes the main menu. If a menu screen is already being
displayed, pressing this key exits the menus and directly returns you to
the previous READY State.
Previous
Enter Exit
1
ModeMenu
The Previous key highlights the previous item in a displayed list.
24 Getting to know the WIDE FORMAT COPY SYSTEM Xerox 6030/6050 Wide Format Copy System
Page 27

Next
The Next key highlights the following item in a displayed list.
Enter
The Enter key either confirms the selection of the currently highlighted
item or confirms an entered numeric value.
Exit
The Exit key cancels a selection operation and returns you to a pr evious
screen. It has other effects, depending upon the specific situation, that
are explained later.
Mode
The Mode key is a valid selection only when READY is displayed on the
screen. This key is used to switch between the READY TO COPY mode
and the READY TO SCAN mode. The SCAN mode can be entered only
if the Scan to Net feature key is loaded.
Below are examples of the READY screen in COPY and SCAN modes.
READY TO COPY
INSERT DOCUMENT
AUTO
100.0%
1
READY TO SCAN
INSERT DOCUMENT
TIFF/CCITTG4
1 BIT
In the COPY mode, the scanned image, or set of images is printed on
the Printer and then deleted from the hard disk.
In the SCAN mode, the scanned image, or set of images, is stored on
the hard disk for later retrieval over a network by a client running on a
remotely located device. Refer to the "Scanning to the Network" section
for more information about the SCAN mode.
NOTE: The SCAN mode is an optional feature that is enabled by
installing the Scan to Net feature key Contact your XEROX
representative for ordering information.
400 DPI
Xerox 6030/6050 Wide Format Copy System Getting to know the WIDE FORMAT COPY SYSTEM 25
Page 28
4
567
8
9
0
2
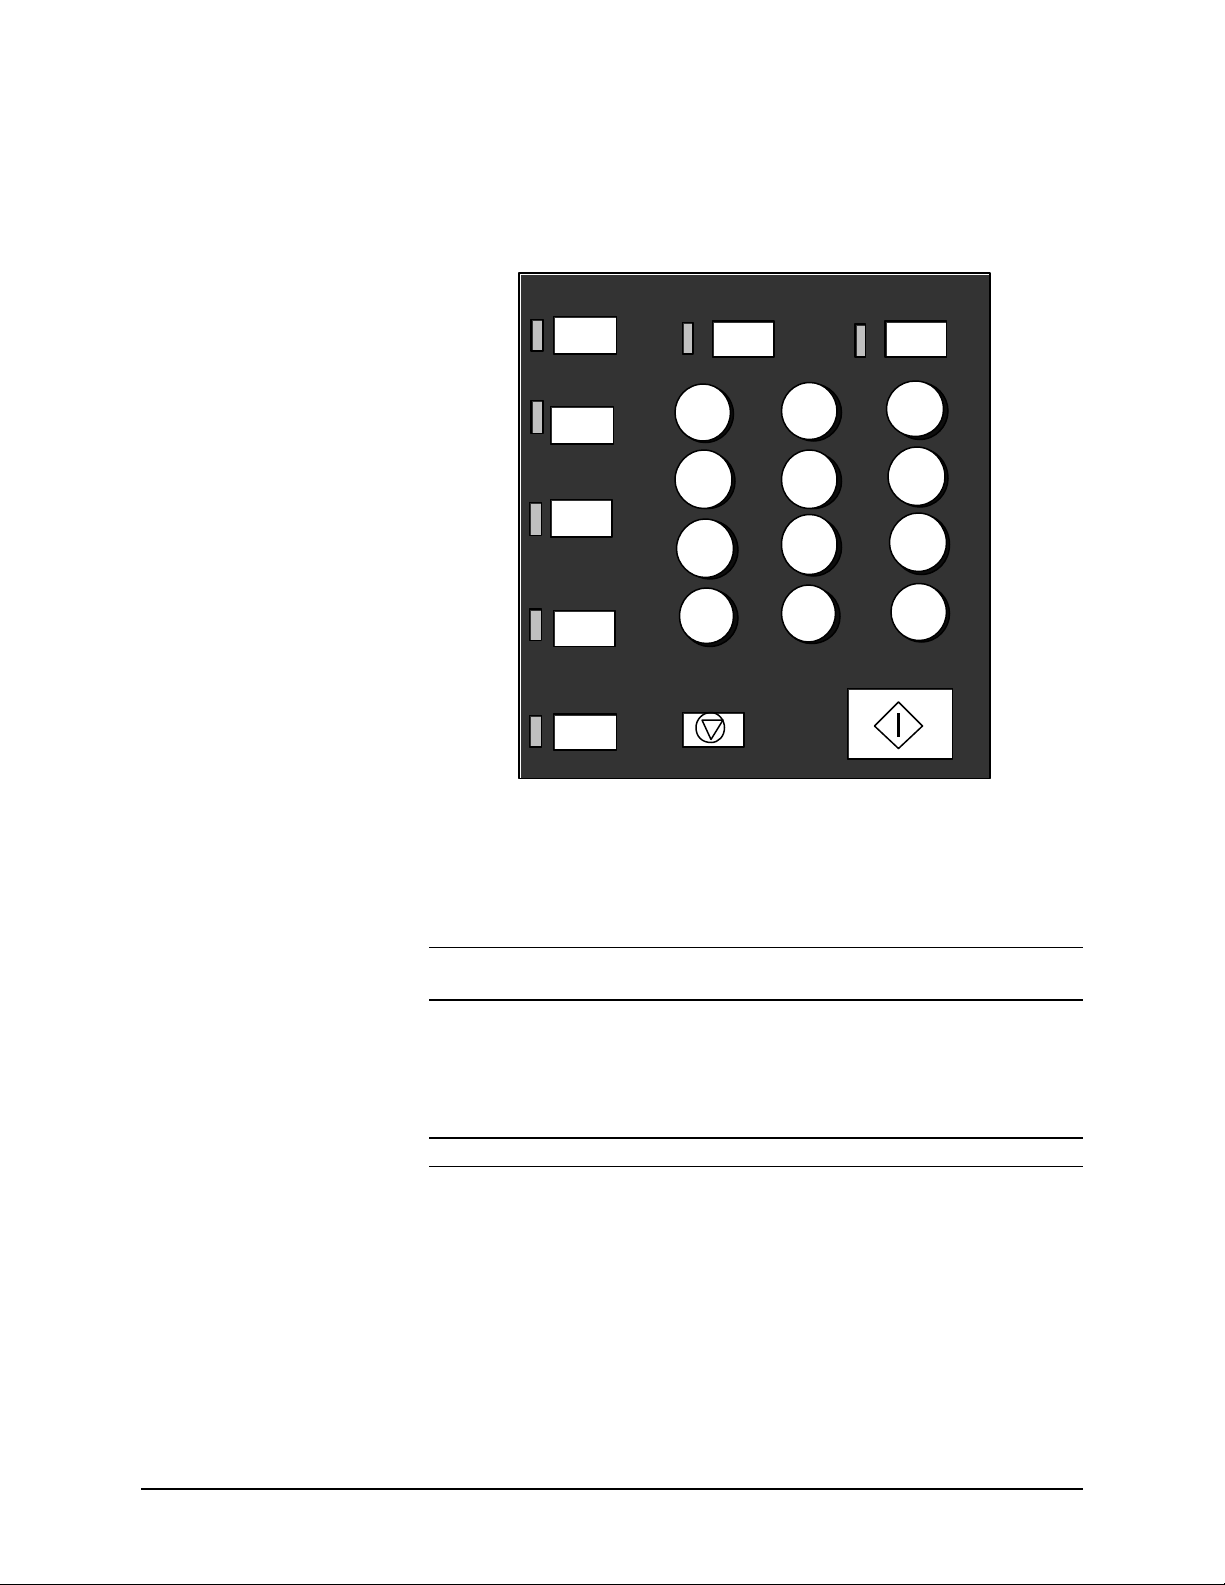
Numeric Keypad and
Special Features/Control
Keys
The right side of the Scan System Control Panel contains a numeric
keypad for entering quantities, keys for selecting other features, and
keys for controlling the scanning and printing of images. To the left of
some of the keys are indicator lamps that illuminate when the associated
feature has been selected.
Numeric Keypad
Batch
Sets Build
Transform
1
G H I
A B C
J K L
Sample
D E F
3
M N O
Finisher
P R S
T U V
W X Y
Store/
Recall
Printer
/.
Stop
C/CA
Start
Interrupt
The numeric keypad contains the 0 to 9 numeric keys, the decimal key
and the C/CA key.
Numeric (0-9) keys
These keys are used for numeric entry, password entry, and copy
quantity fields.
NOTE: The letters next to the numbers are for entering in User and
Account IDs and Scan Directory information.
/. (Decimal key)
This key is used for entering alphanumeric values and string entries for
account and user id netities and directory names.
NOTE: The forward slash (/) to the left of the decimal is for future use.
C/CA (Clear/Clear All) key
This key has the following functions:
• When in READY TO COPY mode, one press clears the current
copy count to one. Two presses within one-second resets the
copy parameters to the default settings.
• When in READY TO SCAN mode, pressing this key brings up
the CLEAR SCANNED IMAGE screen.
26 Getting to know the WIDE FORMAT COPY SYSTEM Xerox 6030/6050 Wide Format Copy System
Page 29

Special Features
Keys
Scan Control Keys
• When in READY TO BUILD SET mode, pressing this key brings
up the scanned document (Refer to Sets Build key section of
this manual for additional information).
• When in the entry state for numeric entry fields, pressing this key
acts as a backspace/delete key. When the last digit is deleted,
the numeric field goes to zero.
• When in password entry and string entry fields, pressing this key
acts as a backspace key. When the last character is deleted, the
field is blank.
• When in quantity entry fields, pressing this key clears the field to
1.
The special features keys are used to activate, deactivate, or change
parameters associated with special features. An indicator lamp adjacent
to each feature key illuminates whenever the corresponding feature is
activated.
The special features keys include the Printer Interrupt, Store/Recall,
Finisher, Sets Build, Batch, Transform, and Sample keys. These
keys are described in detail in the Special features keys section of this
guide.
The Start and Stop keys control the scanning and printing of images.
Start key
The Start key is used to begin the copy sequence when the AUTOSCAN
feature is not enabled.
If you press the Start key while the status is NOT READY or INVALID
AUTO COMBINATION, the system will beep to indicate an invalid key
press. If you press the Start key while the status is READY TO COPY or
READY TO SCAN, the document is scanned.
NOTE: INVALID AUTO COMBINATION indicates an incompatible
combination of AUTO settings (i.e., Media Selection, Source set to
Sheet or Auto, Media Selection, Output Format set to Synchro, and
Reduce/Enlarge set to Auto).
Stop key
The Stop key allows you to immediately stop the scanning operation to
prevent damage to the document. Any scanned information is discarded.
The READY screen prompts you to remove the document
Xerox 6030/6050 Wide Format Copy System Getting to know the WIDE FORMAT COPY SYSTEM 27
Page 30
SCAN SYSTEM
Powering On the Xerox 6030/6050
Wide Format System with Scan
System
To power on the Xerox 6030/6050 Wide Format System with Scan
System you first must switch on the SCAN SYSTEM and wait for 30
seconds or check that a P is displayed on the status LED in the back of
the SCAN SYSTEM. Then switch on the Xerox 6030/6050 Wide Format,
then the AccXES Print Server.
When the SCAN SYSTEM is present, the DDS parameter must be set to
Enabled in order to enable the COPY/SCAN functionality. If the DDS
parameter is set to Disabled, COPY/SCAN functionality will not be
enabled.
The default for the DDS parameter is disabled. You must ensure that it
is set to Enabled when powering on the XEROX WIDE FORMAT SCAN
SYSTEM for the first time. For the Xerox 6030/6050 Wide Format you
can set the DDS parameter from the PRINTER SETUP/Miscellaneous
screen of the Web PMT. Refer to the WebPMT Printer Manager Tool
User Guide for more information. After setting the DDS parameter, wait
30 seconds, and then power the system off then on. Once you enable
this parameter, it will remain enabled (even following future software
upgrades).
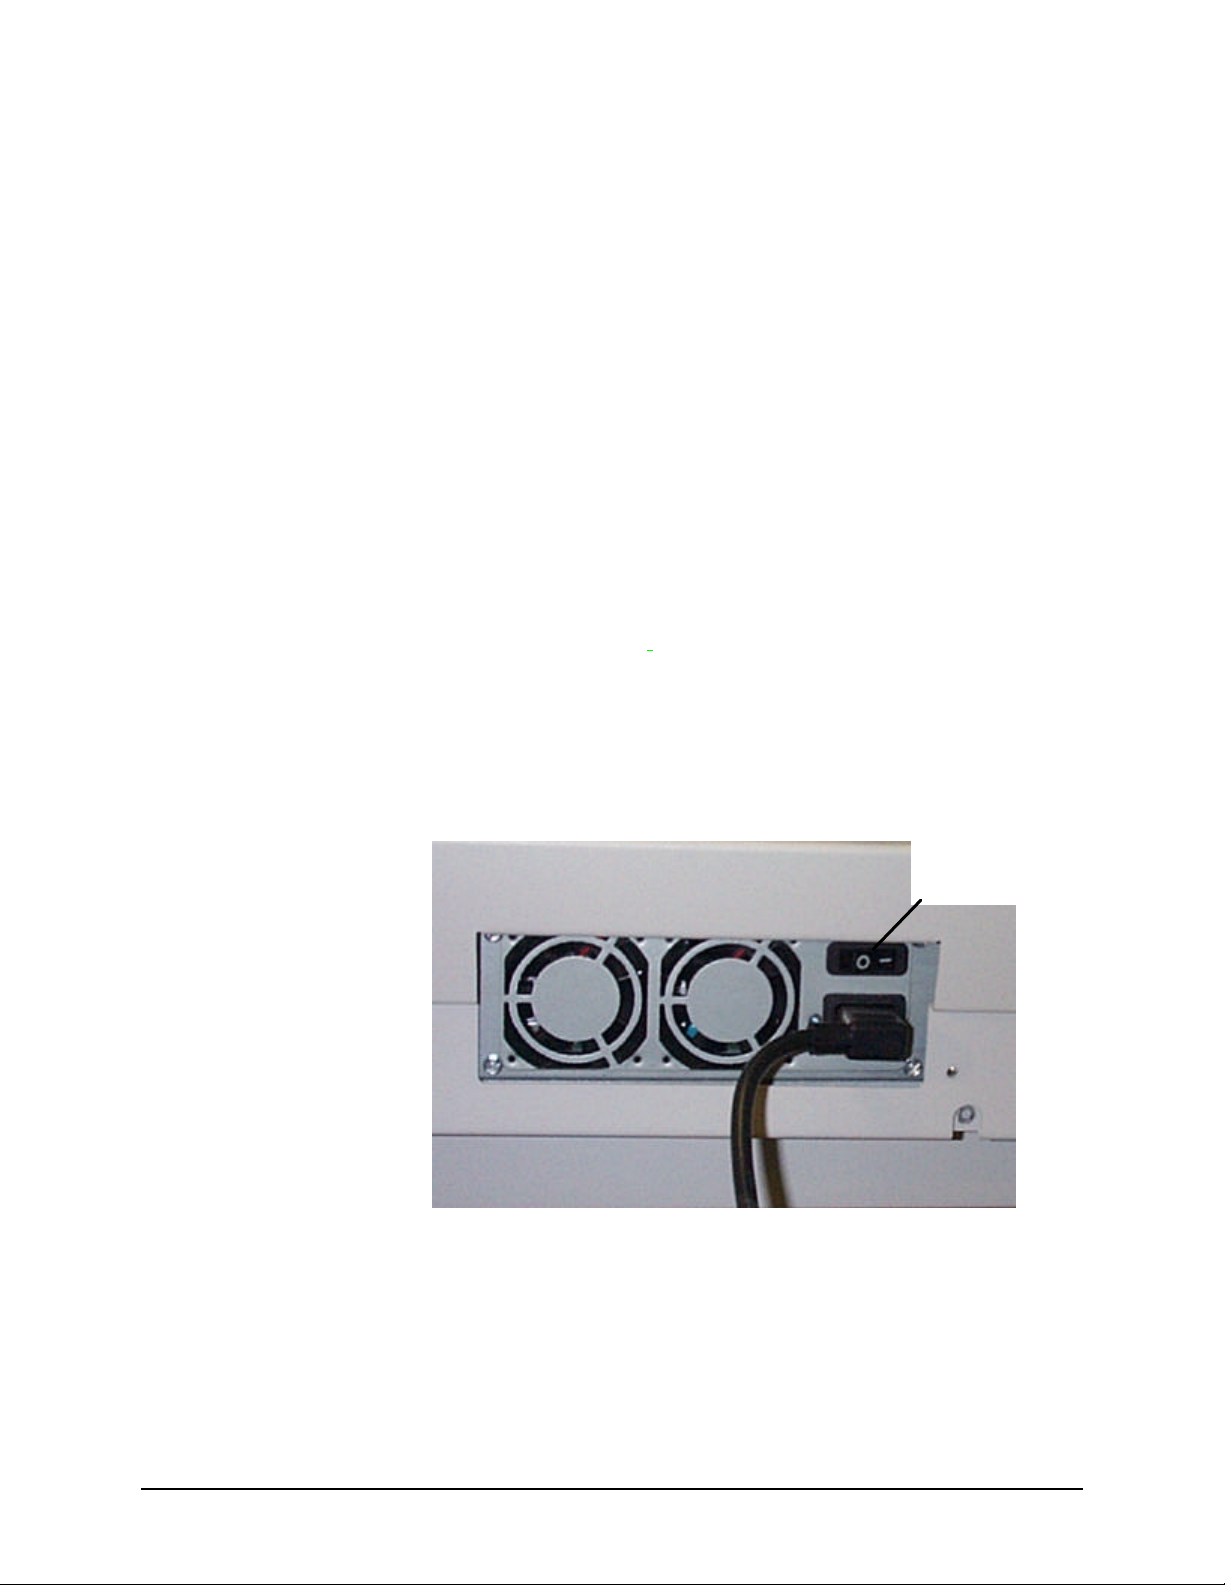
To switch on the Scan System, press the Power On/Off Switch on the
back of the Scan System to the On (I) position as shown below. Wait for
30 seconds or until a P is displayed on the status LED.
Power Switch
28 Getting to know the WIDE FORMAT COPY SYSTEM Xerox 6030/6050 Wide Format Copy System
Page 31

Xerox
AccXES
When the SCAN SYSTEM is switched on, the fluorescent lamp
illuminates immediately. If the lamp does not illuminate, refer to the
"Problem solving" section of this guide.
The AccXES Print Server has its own power switch. When powering on,
first power on the Xerox 6030/6050 Wide Format and then power on the
AccXES Print Server. Refer to the 6030/6050 Wide Format Printer User
guide for additional information on powering on the 6030/6050 Printer.
6030/6050
Wide Format
Power Switch
Scan System Warmup
The Scan System requires about 45 seconds to warm up and initialize
after you power on the Xerox 6030/6050 Wide Format. Once the
initialization is complete, the READY screen is displayed. Below is an
example of the READY screen.
Print Server
Power
Switch
READY TO COPY
INSERT DOCUMENT
AUTO
100.0 %
You can now insert a document into the Document Feed Tray of the
SCAN SYSTEM. The SCAN SYSTEM will then transport the document
to the starting position. This transportation of the document is called
staging.
1
If you cannot insert a document into the feed mechanism and achieve
staging after approximately 4 minutes, refer to the "Problem solving"
section of this guide.
Xerox 6030/6050 Wide Format Copy System Getting to know the WIDE FORMAT COPY SYSTEM 29
Page 32

Powering off the System
To power off the WIDE FORMAT COPY SYSTEM, do the following:
1. Power off the AccXES Print Server and the Xerox 6030/6050
Wide Format printer.
2. Switch off the Scan System by pressing the Power On/Off Switch
on the back of the Scan System to the Off (O) position as shown
below.
30 Getting to know the WIDE FORMAT COPY SYSTEM Xerox 6030/6050 Wide Format Copy System
Page 33

Document quality
Document quality
Document quality is the primary factor in obtaining good copies from
scanned originals. For most documents, the four Background
Suppression key selections with DYNAMIC BACKGROUND REMOVAL
enabled, which is the default setting, provides an accurate copy. Some
documents, however, require manual adjustments to the settings to
This section explains the DYNAMIC BACKGROUND REMOVAL feature,
describes the characteristics of good quality and bad quality documents,
provides tips for preparing and organizing documents for scanning, and
summarizes the procedures for scanning documents of different quality
types.
Dynamic Background Removal
NOTE: DYNAMIC BACKGROUND Removal cannot be disabled
(unchecked) when using the Productivity mode.
The DYNAMIC BACKGROUND REMOVAL eliminates the need to make
additional manual adjustments for most input documents. Reference
Menu, CONFIGURATION > IMAGE ENHANCEMENT.
This feature allows the system to dynamically adjust itself for each
document. There are two modes associated with this feature:
• When DYNAMIC BACKGROUND REMOVAL is enabled, the
image is continually monitored as it is being scanned and the
copy quality parameters adjusted to achieve the best copy
quality.
• When DYNAMIC BACKGROUND REMOVAL is not enabled, the
process takes a 0.70 inch (17.8 mm) snapshot over the full width
of the image after the first 1.5 inches scanned. It uses this fixed
area to set the copy parameters for the remainder of the image
being scanned. This operating mode should be used for
documents with consistent background throughout.
DYNAMIC BACKG ROUND REMOVAL only monitors the document in
the process direction, from the lead edge to the trail edge. It cannot
make adjustment from the left side to the right side of the document. For
example, if the input document is dark, DYNAMIC BACKGROUND
Xerox 6030/6050 Wide Format Copy System Document quality 31
Page 34

REMOVAL will automatically make the appropriate compensation to
optimize the reproduction of the dark details. If the input document has a
faded background, the feature will enable a faithful reproduction of the
original. However, the faded background must be inserted with the fading
running in the process direction with the darker side being inserted first.
In some cases, you may wish to optimize the settings for individual
documents. For example, you may not wish to faithfully reproduce
paste-up lines, or other artifacts on the original. For this reason,
additional controls are available for selection of document type,
document image quality, desired output darkness, and background
suppression.
The DYNAMIC BACKGROUND REMOVAL feature, when enabled, uses
information about the document captured during the scanning process to
set image quality settings. The system automatically adjusts for the
darkness of the background and the image content through out the
length of the document. When not enabled, it only uses the information in
a 0.70 (17.8 mm) area over the width of the document to establish the
image quality settings. Therefore, best results can be obtained if the
document is fed in with an edge that has a representative sampling of
both the background and the foreground image.
The Dynamic Background Removal feature provides an accurate copy
for most documents including blueline, blueprints, color line art/text, and
mixed documents containing combinations of halftone and art, or
photograph and art. For document s with inverted images, the INVERT
function should be enabled. Refer to "Inverting an image" in the "Special
features keys" section for instructions on the INVERT function.
Automatic edge
detection and
document centering
The AUTOWIDTH /AUTOCENTER features enable the system to
automatically detect the width and center of the document. In cases
such as transparencies or translucent documents where automatic
detection is not possible, a message will prompt you to enter the width
manually. You then must cent er the document before inserting it into the
Scan System.
You can enable/disable the AUTOWIDTH/CENTER feature at any time.
Refer to "Scan System Control" in the "Main Menu" section of this
manual for more information.
PRODUCTIVITY MODE: This feature is made available with version 10.0
AccXES software, and requires a new WIDE FORMAT SCAN SYSTEM
with the Productivity Document Feed Tray with the discrete width
sensors. This feature measures the document width without doing a prescan, requiring the operator to manually align the document within the
media size guidelines on the Feed -in Tray . The width sensors eliminate
the need for a prescan thereby increasing the overall throughput of the
system resulting in higher productivity
When the PRODUCTIVITY MODE is us ed the operator must select the
media series, ANSI, ARCH, ISO A, CUSTOM, etc since the number of
sensors that can be provided can not monitor every media series. The
PRODUCTIVITY mode can be enabled/disabled at anytime. Refer to
"Scan System Control" in the "Main Menu" section of this manual for
more information.
32 Document quality Xerox 6030/6050 Wide Format Copy System
Page 35

Determining document quality
Some documents require additional adjustments to obtain the best copy
quality. Documents of good quality are easy to scan and usually give
good copies on the first attempt. Documents of bad quality may require
more than one attempt, using different settings, to obtain the best copy
quality.
What is a good
quality document?
What is a bad quality
document?
Background
Foreground
4"
A good quality document has all of these characteristics:
• The contrast between the foreground (the image of interest) and
the background is high. The foreground may be color or black.
• The foreground is a solid, high -density black or dark color (or
dark blue on a blueline, or dark brown on a sepia). The
foreground density is uniform. There is only one kind of
foreground (e.g., there are no pencil additions on a blueline). If
the document is of mixed type, the foreground is color.
• If the document is white on black or white on blue, the
foreground is clear white or nearly white, and the background is
a solid, high -density black or dark color.
• The background is white or light -colored and is free of speckling
or other noise. The background density is uniform.
• The document has no creases, folds, stains, tears or extraneous
marks that the Scan System might interpret as foreground.
Bad quality documents often require special attention to achieve a
usable image. Fortunately, image processing technology is incorporated
that can extract acceptable images from documents degraded by many
kinds of problems.
A bad quality document has one or more of the following problems:
4"
• The foreground is light (e.g., a faded or overexposed blueprint or
light pencil lines).
• The foreground has variable density (i.e., some parts are dark
and some parts are light).
• The foreground consists of two or more densities or colors (e.g.,
pencil additions on an ink drawing, or pencil or ink additions on a
sepia).
• The background is medium dark or dark (e.g., underexposed
blueprint).
• The background has variable density.
• The background has speckles.
• The document has creases, folds, stains, tears, or extraneous
marks that the Scan System might interpret as foreground.
Xerox 6030/6050 Wide Format Copy System Document quality 33
Page 36

Preparing documents
When preparing documents for scanning, keep the following points in
mind:
If documents have been stored rolled up, flatten them out. They will be
much easier to handle if they have been stored flat for at least eight
hours. The longer that documents have been stored flat, the easier it will
be to scan them. Rolled-up documents will typically roll back up after
being scanned.
If possible, sort the documents you are going to scan according to these
guidelines:
• First, group the documents by media type -bond, vellum or
film. Within each document type, you can further group the
documents by image type (e.g., blueprint, pencil, sepia, line,
photo, mixed (photo and line, blueline and pencil), and so
forth).
• Line documents contain lines or text against a highly
contrasted background.
• Photo documents are continuous-tone or grayscale images.
• Mixed documents contain both line elements and photo
elements or halftone images.
• Scanning groups of documents of the same type or series
(ANSI, ARCH, etc.) minimizes the number of changes you
will need to make to the Image Quality settings.
• Next, divide the documents in each media type group into "good"
and "bad" piles based on your evaluation of their foreground and
background quality. See "What is a good quality document?"
and "What is a bad quality document?" in this section for
assistance in doing so.
• By grouping the documents in this way, you can scan the good
quality documents first. Then you can focus on the bad quality
documents, which will require more attention.
• Next, determine if any of the documents are inverted (i.e., white
or light foreground against dark background). If any documents
are inverted, refer to "Inverting an image" in the "Special features
keys" section.
• Finally, sort the documents by size or series (ANSI, ARCH, etc.).
This minimizes the number of times you will need to change the
Media Selection, Output Format settings when using preset or
custom format sizes.
34 Document quality Xerox 6030/6050 Wide Format Copy System
Page 37

Scanning strategies
When scanning documents, always try the default Image Quality
settings first. Select the documents type -, line, photo, mixed or color
and use the Original, Type, Normal, Line, Photo or Color default
settings for that type. Color is a Scan to Net feature and only available in
SCAN mode. These settings have been designed to give the optimum
image quality for most documents.
If you have a special original type, you may want to try some of the
advanced image processing features available on the Scan System.
Table 2 describes the scanning strategies for special original types.
Table 2. Scanning strategies for special documents
Type of original First step to try Second step to try Third step to try
Color photograph Set Original Type to Photo Mode Scan: Set Original
Type to Color and
Color lithograph Mode COPY: Set Original
Type to Normal..
Mode SCAN: Set Original
Type to Color.
Color map Mode COPY: Set Original
Type to Normal..
Mode SCAN: Set Original
Type to Color.
Old blueprint or sepia
with dark background
Old blueprint or sepia
with dark background
and side -to-side
fading
Set Original Type to Line
and Background
Suppression to Auto.
Transform, Invert to ON
Set Original Type to Line
and Background
Suppression to Auto.
Set Original Type to
Normal and Background
Suppression to Off
Set Original Type to
Normal and Background
Suppression to Off.
Set Original Type to Line,
Background Suppression
to dark original,
Transform, Invert to ON.
If fade is still visible in the
copy, rotate the original
90 degrees. Generally,
feeding the darkest edge
first provides the best
results.
Set Original Type to
Normal and
Background
Suppression to Off.
Set Original Type to
Photo
Set Original Type to
Photo
Adjust the Copy
contrast as required
for best image
quality.
Adjust the Copy
contrast as required
for best image
quality.
Faded line/text
drawing
Xerox 6030/6050 Wide Format Copy System Document quality 35
Set Original Type to Line,
Background Suppression to
Auto.
If fade is still visible in the
copy, rotate the original
90 degrees.
Adjust the Copy
contrast as required
for best image
quality.
In reduction, use
Reduction Line
Preservation..
Page 38

Type of original First step to try Second step to try Third step to try
Line, photo or mixed
original on film, clear
film, vellum/tracing or
other translucent
media
Film original with
banding in
background area
Film original with
blurring text or gray
shadows
Set Background
Suppression to (light) and
Normal. Select Photo for
photo and select Line for
line drawing. Use Normal
for mixed documents.
Set Background
Suppression to (light ).
Select Line for line drawing
Set Background
Suppression to (light) and
Type to Line
36 Document quality Xerox 6030/6050 Wide Format Copy System
Page 39

Image Quality
The Image Quality area of the SCAN SYSTEM Control Panel allows you
to make adjustments for both the type of Original document and the
output Copy to produce the best possible copy quality. It contains
selections for Original (Document): Type and Background
Suppression, and Copy options lighter or darker. There is also an
IMAGE ENHANCEMENT selection in the Menu options that can be used
in some copy jobs to improve the image quality. Press the Menu key and
scroll to CONFIGURATION > IMAGE ENHANCEMENT.
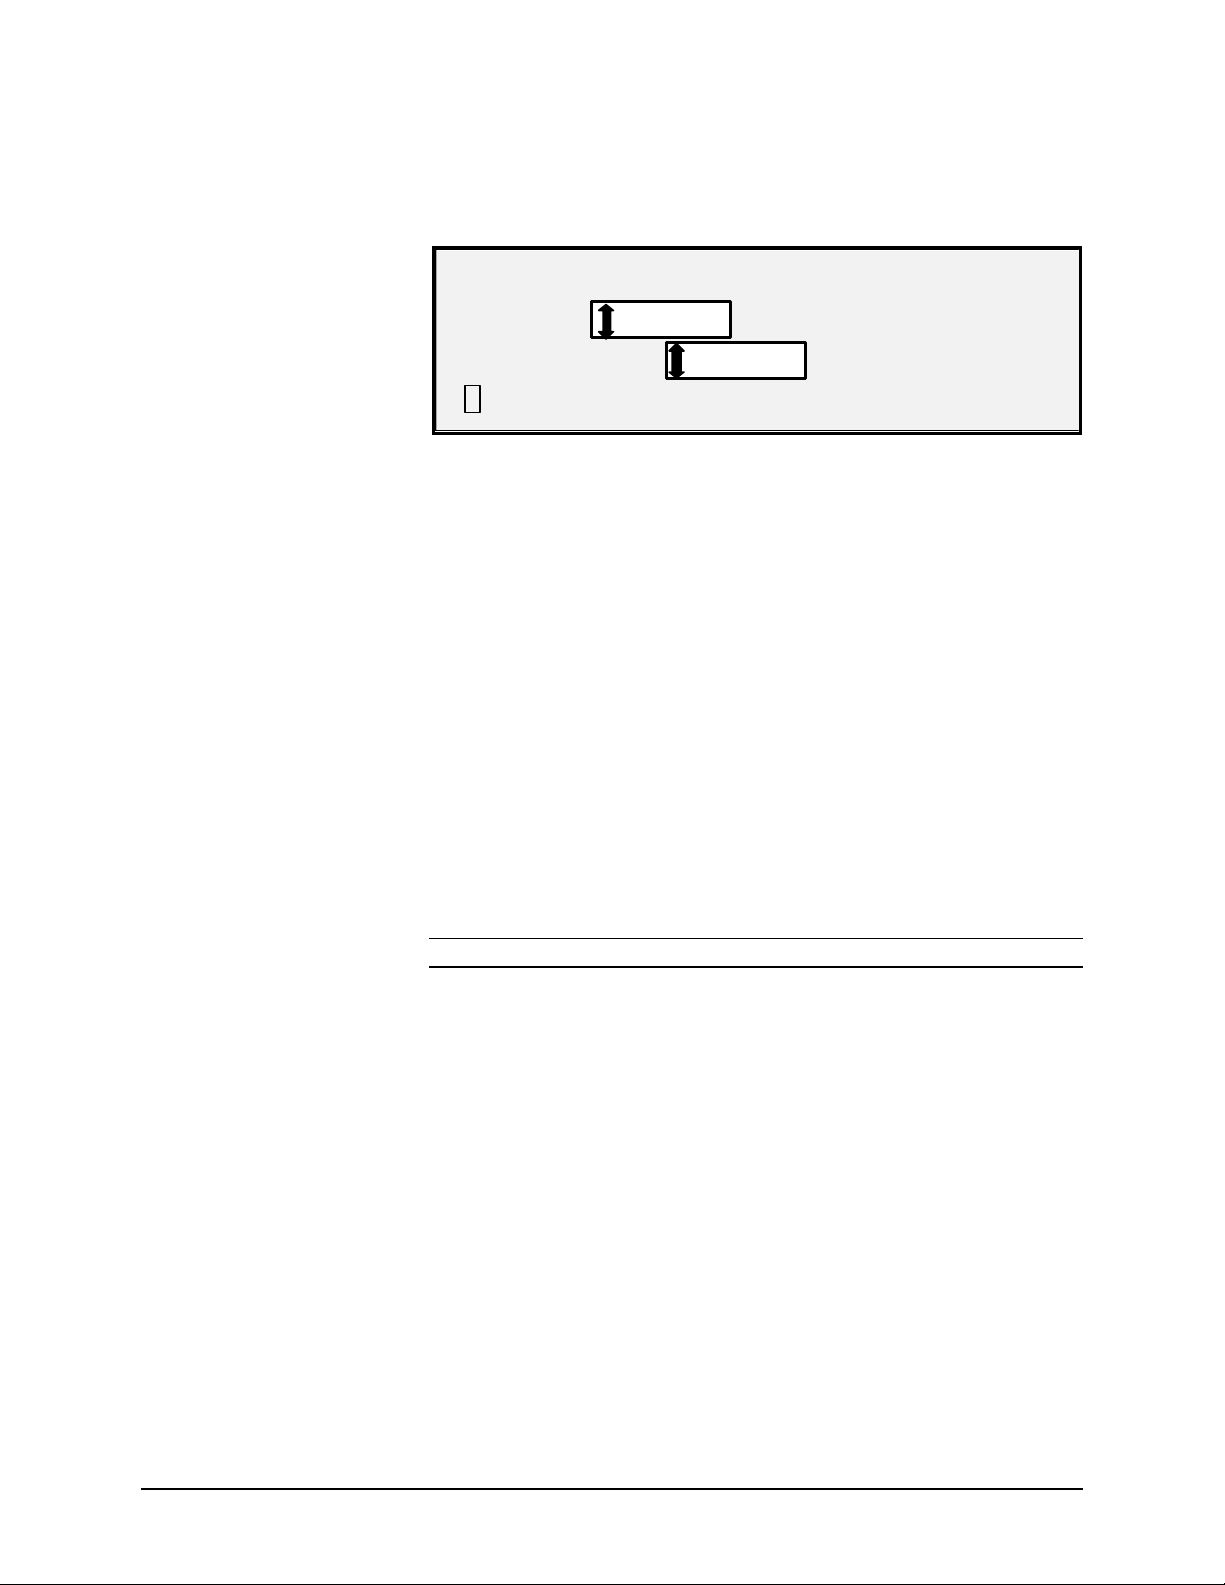
The illustration below depicts the Image Quality portion of the Control
Panel.
Xerox 6030/6050 Wide Format Copy System Image Quality 37
Page 40

Original, Type
Type
The Type option allows you to specify the type classification of your
document. To select the document type, press the key beneath the
Type settings until the desired Type indicator lamp illuminates.
NOTE: The SCAN OPTIONS will not be displayed unless the Scan to
Net feature is installed. To order this feature, contact your XEROX
representative.
COPY MODE
Type, Normal, Line,
Photo,
The Type settings are: Normal, Line, and Photo. Color is only available
in SCAN mode.
The Normal mode attempts to reproduce the document being scanned
to provide the best image quality including halftones and shadings as
well as fine lines.
The Line mode scans with high contrast to provide exceptional copying
of line drawings even light pencil is reproduced as a dark black line.
Select Photo when the document contains a gray scale or color image,
such as a photograph.
1. Select the Line, Photo or Normal by pressing the arrow key
below Original, Type.
Additional image quality settings associated with Normal, Line, and
Photo mode can be obtained by using the Menu key. Access the
IMAGING menu to use the REDUCTION LINE PRESERVATION and the
IMAGE ENHANCEMENT menu to use NORMAL MODE and DYNAMIC
BACKGROUND REMOVAL.
1. Press the Menu key to enter the menu options.
2. Press the Previous and Next keys to scroll to the
CONFIGURATION menu and press the Enter key.
3. Use the Previous and Next keys to scroll to the IMAGE
ENHANCEMENT or COPY OPTIONS>IMAGING menu, then press
the Enter key.
4. Use Previous and Next keys to select the option the press the Enter
key to select and enable the settings.
38 Image Quality Xerox 6030/6050 Wide Format Copy System
Page 41

ü DYNAMIC BACKGROUND
REM
OVAL
IMAGING screen
IMAGING
AUTO-ROTATE
4
REDUCTION LINE PRESERVATION
REDUCTION LINE PRESERVATION — fine lines in the original
document are preserved when reducing images during copying
in Normal and Line mode sonly.
IMAGE ENHANCEMENT screen.
IMAGE ENHANCEMENT
IMAGE ENHANCEMENT
COLOR IQ:
COLOR IQ: SRGB
SRGB
NORMAL MODE: BEST IQ
NORMAL MODE — BEST IQ provides the best image quality,
but it is a slower scanning speed.
FASTEST provides a faster scanning speed with lower image
quality. Only available if the Turbo III feature key is installed.
DYNAMIC BACKGROUND REMOVAL —The Dynamic
Background Removal feature, when enabled, uses information
about the document captured during the scanning process to set
image quality settings. Th e system automatically adjusts for the
darkness of the background and the image content through out
the length of the document. Reference DYNAMIC
BACKGROUND REMOVAL in the Document Quality section of
this manual for additional information.
Xerox 6030/6050 Wide Format Copy System Image Quality 39
Page 42

NOTE: SCAN mo de will not be displayed unless the Scan to Net feature
is enabled. To order this feature, contact your XEROX representative.
SCAN MODE
Type, Normal
Normal mode attempts to reproduce the document being scanned to
provide the best image quality including halftones and shadings as well
as fine lines. To select the scan options for Normal Mode:
1. Press the Mode key. The Please Enter Directory screen is
displayed.
2. Enter the Directory Name. The READY TO SCAN INSERT
DOCUMENT screen is displayed.
3. Select the Normal by pressing the arrow key below Original,
Type key until the Normal light comes on. The SCAN OPTIONS
(NORMAL) screen is displayed.
4. Use the Enter key to enable/disable checkbox selection and the
Next or Previous Key to select options with a colon (eg.
FORMAT: TIFF).
The options available for selections displayed on the screen will change
depending on the FORMAT and COMPRESSION that are selected.
Listed below are the selections and available options and their definition:
• PREVIEW - Use this checkbox to enable or disable the
generation of a preview image for your scanned document.
Default is enabled (checkbox is checked)
• FORMAT - Use this selection to determine which format you
would like to have the scanned image saved in, TIFF, CALS (1
BIT only) or PDF. Default is TIFF.
The screen shown below only appears in the SCAN mode.
Additional image quality selections are available by pressing the
Menu key and scrolling to CONFIGURATION>COPY
OPTIONS>IIMAGING or CONFIGURATION> IMAGE
ENHANCEMENT. Refer to the Main Menu section of the manual
for additional information on these selections.
SCAN OPTIONS (NORMAL)
ü PREVIEW
FILE FORMAT:
40 Image Quality Xerox 6030/6050 Wide Format Copy System
TIFF
Page 43

ü
FILE FORMAT:
Type Line
Line — Select Line for an image containing text, line art, or a mixture of
these. If the COPY mode is selected the READY TO COPY screen will
be displayed. If the Mode selected is SCAN, and the Scan to Net
Feature Key is installed, the SCAN OPTION (LINE) screen will be
displayed.
SCAN OPTIONS (LINE)
PREVIEW
TIFF
1. Select the Line by pressing the arrow key below Original, Type
key the SCAN OPTIONS (LINE) is displayed.
2. Press the Previous or Next key to highlight the scan option you
wish to change.
3. Select one of the following:
§ PREVIEW — Default is enabled and a check mark is present in
the box. Press the Enter key to enable/disable the preview.
When PREVIEW is enabled, a small JPEG (.JPG) file is created
during the scanning process and stored on the hard disk
AccXES Client Tools software, running on a network connected
terminal, can use this file to display a preview of the scanned
image.
§ FILE FORMAT — Default is TIFF. Use the Next and Previous
keys to select the format for the document to be saved as. The
selection is TIFF, CALS, PDF or JPEG.
4. Press the Enter key to confirm the select.
Xerox 6030/6050 Wide Format Copy System Image Quality 41
Page 44

PREVIEW
PREVIEW
Type Photo
Select Photo when the document contains a gray scale or color image,
such as a photograph. When Photo is selected in the Scan Mode, the
screen below will be displayed. The screen provides additional options
for the user
SCAN OPTIONS (PHOTO)
PREVIEW
COMPRESSION:
FILE FORMAT:
The SCAN OPTIONS (PHOTO) menu allows you to perform the
following functions:
• Enable or disable PREVIEW in Photo mode. When PREVIEW
is enabled, a small JPEG (.JPG) file is created during the
scanning process and stored on the hard disk AccXES Client
Tools software, running on a network connected terminal, can
use this file to display a preview of the scanned image.
• Specify the saved document compression format for Photo
mode.
• View the saved document file format for Photo mode. The
format is 8 bit TIFF.
RAW
TIFF
NOTE: This option will not be displayed unless the Scan to Net feature
is enabled. To order this feature, contact your XEROX representative.
NOTE: The Background Suppression option cannot be used with the
Photo setting. If Photo is selected, Background Suppression is
automatically set to Off.
1. Enter the SCAN mode by pressing the Mode key then entering
the Directory Name and pressing the Enter key.
2. Select Photo by pressing the arrow key below Original, Type
key. The screen shown below is displayed.
SCAN OPTIONS (PHOTO)
COMPRESSION:
FILE FORMAT:
3. Press the Previous or Next key to highlight the scan option you
wish to change.
4. Do one of the following:
RAW
TIFF
42 Image Quality Xerox 6030/6050 Wide Format Copy System
Page 45

• For PREVIEW, press the Enter key to enable or disable the
option. A check mark appears in the box to the left of the option
when the option is enabled. The factory default setting is
enabled.
• For COMPRE SSION, press the Previous or Next key to
highlight the desired setting. Then press the Enter key to select
the highlighted format. The choices are RAW and PACKBITS.
The factory default setting is RAW
5. For FILE FORMAT, the selection is TIFF, Repeat steps 3 and 4
to change the remaining setting, if desired.
6. Press the Enter key to confirm the selection.
7. Press the Exit key to return to the Ready screen.
Color — Select Color when scanning full color documents. When Color
Type, Color
Type is select a version of the following screens will be displayed. The
content of the screen will depend on the selected FORMAT and
COMPRESSION.
These screen will only be displayed in SCAN mode when the Scan to
Net and Color SCAN SYSTEM feature keys are installed. The Normal
and Photo LEDs will be lit when Color is selected.
To select the scan options for Color Mode:
1. Press the Mode key. The Please Enter Directory screen is
displayed.
2. Enter the Directory Name. The READY TO SCAN INSERT
DOCUMENT screen is displayed.
3. Select the Colo r by pressing the arrow key below Original, Type
key until the Normal and Photo lights come on. The SCAN
OPTIONS (COLOR) screen is displayed.
4. Use the Enter key to enable/disable checkbox selection and the
Next or Previous Key to select options with a colon (e.g.
FORMAT: TIFF).
The options available for selections displayed on the screen will change
depending on the FORMAT and COMPRESSION that are selected.
Listed below are the selections and available options and their definition:
• PREVIEW - Use this checkbox to enable or disable the
generation of a preview image for your scanned document.
Default is enabled (checkbox is checked)
• FORMAT - Use this selection to determine which format you
would like to have the scanned image saved in, TIFF or JPEG.
Default is TIFF.
• COMPRESSION (TIFF selected) - Use this selection to
determine the compression method to apply to the saved TIFF
document. Select one of the following:
• PACKBITS - Saves the document as 24 -bit RGB
compressed.
• INDEX - Saves the document as 8-bit indexed RGB (using
thresholding) compressed with PACKBITS.
Xerox 6030/6050 Wide Format Copy System Image Quality 43
Page 46

• INDEX ED - Saves the document as 8-bit indexed RGB
ü
PREVIEW
ü
ü
(using error diffusion) compression with PACKBITS
SCAN OPTIONS (COLOR)
: TIFF
COMPRESSION:
FORMAT:
: PACKBITS
SCAN OPTIONS (COLOR)
PREVIEW
COMPRESSION:
PALETTE:
• PALETTE - Is shown only when the selected FO RMAT is TIFF
and the COMPRESSION is INDEX or INDEXED. Use this
selection to determine which palette to use during RGB-to-index
color conversion. Select one of the following:
• DEFAULT - Is the standard Windows system palette.
• CAD_GIS - Is an AutoCAD-based palette suitable for
scanning CAD documents and GIS maps.
INDEX
DEFAULT
FORMAT:
: TIFF
• WEB - Is a Windows WEB palette of 216 colors suitable for
publishing documents on the WEB.
• PERCEPTUAL - Perceptual palette or Visual palette gives
more weight to visually sensitive colors.
SCAN OPTIONS (COLOR)
PREVIEW
COMPRESSION:
COMPRESSION (JPEG selected) - Use this selection to determine the
compression method to apply to the saved JPEG document. Select one
of the following:
• BEST IQ - Saves a document at a lower compression ratio
but has higher image quality.
• NORMAL - Saves a document at an average compression
ratio and has average image quality.
• BEST COMPRESSION - Saves a document at a higher
compression ratio but has a lower image quality.
NORMAL
FORMAT:
JPEG
44 Image Quality Xerox 6030/6050 Wide Format Copy System
Page 47

Background Suppression
The Background Suppression enables you to make adjustments for
documents that contain poor contrast between the foreground image and
the background. Background Suppression monitors the pre-scans
image, to ensure the best image quality possible. In the PRODUCTIVITY
mode, there is no prescan, therefore Background Suppression is done
while the document is being scanned.
NOTE: Off is the only choice for Photo, Scans, and Color Scanning.
Four choices are provided:
Off This setting disables Background Suppression. It produces a
document that reproduces all the characteristics of the original document
with minimum alteration. Choose this selection when:
• The lead edge of the document is very different from the rest of
the document (e.g., the lead edge contains a black border).
• Maps with grayscale or color content may copy best in this
mode.
• To retain more light color information such as light gray or yellow
(Light) This setting works best for documents on translucent or
transparent media, such as vellum (tracing paper) or film, or with medium
levels of colored background on opaque media or for documents. Such
documents have a higher contrast between the foreground and
background than dark documents, but less contrast than normal
documents.
(Dark) Use this setting for documents with a dark background
or with medium contrast between the foreground and background. In
this mode, the background is not suppressed, but the foreground image
is improved to increase the contrast.
Auto (factory default) - The SCAN SYSTEM automatically adjusts the
image quality parameters to obtain the best copy
NOTE: All three Background Suppression settings can be adjusted
further by changing the contrast setting in the Image Quality, Copy
area.
Xerox 6030/6050 Wide Format Copy System Image Quality 45
Page 48

Copy
The Copy option allows you to darken or lighten the contrast of the copy
with respect to the original document. Press the down arrow key to
darken the contrast. Press the up arrow key to lighten the contrast. The
indicator lamp for the selected contrast setting illuminates. The middle
contrast setting is the factory default setting.
You can use this feature to further adjust the effects of the Type and
Background Suppression selections. The feature operates with all four
Background Suppression modes.
46 Image Quality Xerox 6030/6050 Wide Format Copy System
Page 49

4
Making copies
Making copies
When the Graphical Display indicates READY TO COPY, the Xerox
6030/6050 Wide Format Copy System is ready to make copies.
Controlling the scan
Several settings are available for controlling how the SCAN SYSTEM
starts and finishes a scan. These settings are accessible from the SCAN
SYSTEM CONTROL optio n of the CONFIGURATION menu.
SCANNER CONTROL
AUTOSCAN
DOCUMENT RETURN:
MODE:
When making a copy, you need to be aware of these settings. If any of
these settings have been changed from the default settings, the SCAN
SYSTEM may not operate according to your expectations.
Below is a brief summary of the scan control settings. For complete
information about these settings, refer to "Scan System Control" in the
"Main Menu" section of this manual.
AUTOSCAN
AUTOSCAN enabled is the default setting. Normally, the AUTOSCAN
mode is en abled. When it is enabled, the SCAN SYSTEM automatically
begins the scanning of a document when the document is inserted. If
AUTOSCAN is disabled, the SCAN SYSTEM transports the document to
the starting position and then waits for you to press the Start key before
beginning the scan.
DOCUMENT RETURN
PRODUCTIVITY — ARCH
FRONT
FRONT is the default setting. When the DOCUMENT RETURN feature
is set to FRONT, the SCAN SYSTEM returns the document to the front
or READY position at the completion of the scan. When the
DOCUMENT RETURN feature is set to REAR, the SCAN SYSTEM
delivers the document to the rear Stacker at the completion of the scan.
Xerox 6030/6050 Wide Format Copy System Making copies 47
Page 50

Some documents will always exit to the rear at the completion of the
scan regardless of the DOCUMENT RETURN setting. These documents
include:
• Thick documents
• Documents longer than 5 feet (1.52 meters)
• Documents over 36 inches (914 mm) in width
MODE:
MANUAL
The user must enter the width of the document manually, and very
carefully center the document when inserting it into the SCAN SYSTEM.
The doc ument is prescanned in this mode.
AUTOWIDTH
AUTOWIDTH enabled is the default setting. When AUTOWIDTH is
selected, the SCAN SYSTEM automatically detects the width of the
document.AUTOWIDTH/AUTOCENTER. The document is prescanned in
this mode.
When AUTOWIDTH /AUTOCENTER is enabled, the SCAN SYSTEM
automatically centers the image and automatically detects the document
width.
PRODUCTIVITY - ANSI
PRODUCTIVITY is only available on SCAN SYSTEMs with AccXES
firmware 10.0 or higher, SCAN SYSTEM firware 3.2.5 and the
Productivity Document Feed Tray that includes discrete width sensors.
PRODUCTIVITY - ANSI is the default. Other media type selections
include ARCH, ISO A, ISO B, JIS B and CUSTOM. These selections
must be made so that the sensors detect the correct width. This feature
eliminates the prescan width measurement, which increases document
throughput speed resulting in greater productivity. Use CUSTOM when a
copy job has mixed width sizes. CUSTOM requires standard media sizes
to be entered in CUSTOM MEDIA FORMA TS (Menu,
CONFIGURATION>COPY OPTIONS).
AUTOWIDTH and AUTOWITH/AUTOCENTER are not available in this
mode.
Reference Menu, CONFIGURATION>SCANNER CONTROL, MODE: for
additional information.
48 Making copies Xerox 6030/6050 Wide Format Copy System
Page 51

Image Quality
The Image Quality area of the SCAN SYSTEM Control Panel allows you
to make adjustments for both the type of original document and the
output copy to produce the best possible image quality. It contains
selections for Original (Document): Type and Background
Suppression, and Copy options lighter or darker.
The illustration below depicts the Image Quality portion of the Control
Panel. Refer to the Image Quality section of this manual for additional
information.
There are many settings. other than Media Selection, Image Quality
and Reduce/Enlarge areas, available on the Control Panel. The
Transform special features key allows you adjust the margins around the
image, specify the position of the image on the media, and transform the
image into a mirror and/or inverted. Refer to the applicable sections of
this guide for detailed information about the many document settings
available to you.
Xerox 6030/6050 Wide Format Copy System Making copies 49
Page 52

Making a copy with the default
settings
When the default document settings are used, the display indicates that
the roll of media that best fits the size of the original document will be
automatically selected. The reduction/ enlargement setting is 100%, so
the copy will be the same size as the original document. The copy
quantity is set to 1.
The illustration below shows the READY screen in its default state.
READY TO COPY
INSERT DOCUMENT
AUTO
100.0%
NOTE: Many document settings other than the default settings are
possible. For example, the options keys on the SCAN SYSTEM Control
Panel allow you to control the media selection, image quality and
reduction/enlargement percentage. The Transform special features key
allows you adjust the margins around the image, specify the position of
the image on the media, and transform the image into a mirror and/or
inverted image. Refer to the applicable sections of this guide for detailed
information about the many document settings available to you.
NOTE: When scanning to print, the copy is made using the current
Printer processing defaults including margins. If the image being
scanned is the same size as the media being used, set the margins to 0
(zero) to prevent the image from bieng clipped or select a larger media
size.
To make a copy using the default document settings:
1. Insert the original document face down and centered on the
Document Feed-in Tray of the SCAN SYSTEM.
NOTE: If the document is not exactly centered and the AUTOCENTER
feature is enabled, the SCAN SYSTEM will automatically correct the
problem electronically. The resulting image will still be correctly
positioned on the output media. If AUTOWIDTH/AUTOCENTER is
disabled, you will need to carefully center the document when inserting it.
Refer to "Controlling the scan" on the previous page.
AUTOWIDTH/AUTOCENTER is not available in the PRODUCTIVITY
mode, requiring the user to manually align the document within the
appropriate docum ent size guidelines on the Feed-in Tray.
1
2. Gently move the document forward until the lead edge engages
the feed rolls. The SCAN SYSTEM transports the document to
50 Making copies Xerox 6030/6050 Wide Format Copy System
Page 53

the starting position. It then scans the document. The resulting
image is electronically sent to the Printer and your copy is
printed.
NOTE: If AUTOSCAN is disabled, you will need to press the Start key to
begin the scan. Refer to "Controlling the scan" on the previous page.
NOTE: If the PRODUCTIVITY mode is enabled the document will start
scanning immediately. If the PRODUCTIVITY mode is not enabled, the
document will pre-scan a small distance then reverse itself before
starting the complete scan.
3. When the document is returned to the READY position, do one
of the following:
• Pull the document to remove it. Lift the Thick Document Lever to
remove fragile or thick documents.
• Press the Start key on the SCAN SYSTEM Control Panel to
scan the document again.
NOTE: If DOCUMENT RETURN is set to REAR, the document is
delivered to the rear Stacker. Some documents exit to the rear Stacker
regardless of the DOCUMENT RETURN setting. Refer to "Controlling
the scan" on the previous page.
Making a copy the same size as the
original document
1. Set the Media Selection Source to Auto. The Auto indicator
lamp illuminates. This setting allows the WIDE FORMAT COPY
SYSTEM to automatically select the available media roll that
best fits the image width.
NOTE: If the correct media size is not loaded, the next larger size will be
used.
2. Select the Media Selection, Type. The default setting is Bond.
3. Set the Media Selection, Output Format to Synchro. This
setting cuts the media to the same length as the original
document.
4. Set Reduce/Enlarge to Preset. If the size is not already set to
100%, use the Previous and Next keys to select a reduction and
press the Enter key.
5. Insert the document face down into the SCAN SYSTEM. If the
scan does not start automatically, press the Start key.
NOTE: To set the scan to begin automatically, refer to "Scan System
Control" in the "Main Menu" section.
NOTE: If the image needs to be rotated to fit on the selected media size,
additional processing time is required. If possible, feed the original
Xerox 6030/6050 Wide Format Copy System Making copies 51
Page 54

image so that no image rotation is required. This will achieve the fastest
processing time. For example, if an A-size copy is required on a 12 -inch
(30.48 cm) roll, feed the original with the short edge first, not the long
edge first. If a B-size copy is required on a 17 -inch roll, feed the
document with the long edge first, not the short edge first.
The SCAN SYSTEM scans the document and the Printer (if not already
busy) prints the copy immediately. If the Printer is busy when the scan is
made, the copy will be printed when the Printer becomes available.
When the SCAN SYSTEM detects the trail ed ge of the document, the
Printer automatically cuts the media so that the copy is the same length
as the original document.
Fitting the image to a fixed copy size
The scanned image can be automatically fit onto a predefined size of
media.
1. Set the Media Selection, Source to Auto. The Auto indicator
lamp illuminates. This setting automatically selects the available
media roll that best fits the image width.
2. Select the Media Selection, Type of media. The default setting
is Bond.
3. Set the Media Selection, Output Format to Preset and select
the desired page size. This setting cuts the media to a
previously defined length that the operator chooses.
PRESET OUTPUT FORMAT
SELECT
4. Press the Previous or Next key until the desired output size is
highlighted.
5. Press the Enter key to confirm your choice.
6. Set the Reduce/Enlarge to Auto.
7. Insert the document face down into the SCAN SYSTEM. If the
scan does not start automatically, press the Start key.
NOTE: To set the scan to begin automatically, refer to "Scan System
Control" in the "Main Menu" section of this manual.
The SCAN SYSTEM scans the document, and the Printer (if not already
busy) prints the copy immediately. If the Printer is busy when the scan is
made, the copy will be printed when the Printer becomes available.
8.5 X 11 ANSI A
52 Making copies Xerox 6030/6050 Wide Format Copy System
Page 55

Scanning when using a Folder
Scanning when using a Folder
When using a Folder, the document must be inserted in the correct
orientation in order to have the title block visible after the copy is folded.
Refer to the Finisher key information in the Special feature keys section
of this manual for additional information to set up the desired fold and
other Finisher options. Documents larger than 80 inches (2.1M) can only
be partially folded.
When using the Reduce/Enlarge feature and a Folder, you must orient
and insert the document title block in the same orientation as the
resulting enlargement or reduction copy size. In addition, the
recommended media should be used.
For example: the job requires that an A (A4) document be enlarged to a
C (A2) document . To have the title block be visible after folding, the A
(A4) document must be inserted as if it were a C (A2) document.
You may want to refer to "CUSTOM R/E PRESETS " in the "Main Menu,
COPY OPTIONS" section, and set up the
REDUCTION/ENLARGEMENT default to show the standard reduction
and enlargement. Set the reduction /enlargement to display A to C (A4
to A2) above the keys.
To ensure that the selected fold is made correctly, it is critical that the
document be centered on the SCAN SYSTEM Document Feed Tray
when scanning.
For additional folding and title block positioning information, refer to the
Folder Operator Manual or the Folding Supplement CD.
Xerox 6030/6050 Wide Format Copy System Scanning when using a Folder 53
Page 56

Ready to Copy
Finisher Screen
When the Finisher key is pressed and the finishing options are selected
a new page icon is added to the READY TO COPY screen. The page
icon is displayed with a dotted box at one of the page corners. The
dotted box indicates the title block location selection made using the
Finisher menu. The title block location can be changed on this screen
using the Next and Previous keys. Refer to the Finisher Key section for
additional finishing information. The title block location icon will show
dotted line in all corners when the DON'T CARE option is selected.
READY TO COPY
INSERT DOCUMENT
AUTO
100.0 %
NOTE: Any of the finishing options can be changed during a Sets Build
job. The option(s) must be changed before the document to be copied is
inserted.
1
54 Scanning when using a Folder Xerox 6030/6050 Wide Format Copy System
Page 57

Scanning oversized documents
Scanning oversized documents
An oversized document is defined as any document that is larger in width
or length than a standard E-size (A0) document.
LONG DOCUMENTS
Operator assistance will be required to guide and control the position of a
long document to prevent it from skewing or moving from side-to-side as
it feeds throu gh the SCAN SYSTEM. Documents longer than 36 inches
(914 mm) will always exit to the rear of the SCAN SYSTEM.
WIDE DOCUMENTS
Documents wider than 36 inches (914 mm) but less than 42 inches
(1057 mm) can be scanned. However, the scanned image area, of a
document centered on the Feed -in Tray, is 36 inches (914 mm). Any
image beyond the 36 inch (914 mm) width will be clipped off on the
output copy.
When a document wider than 36 inches (914 mm) is inserted into the
Document Handler, a message will be displayed to enter the scan width.
To scan the document, enter 36 in.(914 mm) then press the Enter key to
start the scan. A number larger than 36 (914) will not be accepted.
Xerox 6030/6050 Wide Format Copy System Scanning oversized documents 55
Page 58

Page 59

Special features keys
Special features keys
There are many enhanced features for making copies that meet special
needs. The keys that control these features are on the right side of the
SCAN SYSTEM Control Panel.
To enable a feature, press the applicable key. If the feature has an
associated screen, that screen is displayed when the key is pressed. If
any settings are changed from the default state, the corresponding
indicator lamp next to the key illuminates. Pressing the C/CA key on the
numeric keypad twice returns all settings for the feature to the default
state and the corresponding indicator lamp is extinguished.
When the settings for a feature are appropriately set, pressing the same
feature key causes the changes to be accepted and the system returns
to the READY state. Pressing a different feature key while editing a
setting is invalid and causes a beep. Pressing a different feature key
while not editing a setting causes the requested feature screen to be
displayed.
If a feature has no associated screen, pressing that feature key switches
the feature on (enabled) or off (disabled ). When such a feature is
enabled, the corresponding indicator lamp is illuminated.
If the BEEP function (factory default) is enabled, a beep sound will be
heard when a key is pressed. If an improper key is pressed, a multiple
beep sound will be heard.
The illustration on the following page depicts the special features portion
of the SCAN SYSTEM Control Panel.
Xerox 6030/6050 Wide Format Copy System Special features keys 57
Page 60

Batch
4
567
8
9
0
2
Transform
Sample
Sets Build
1
G H I
A B C
J K L
D E F
3
M N O
Finisher
P R S
T U V
W X Y
Store/
Recall
Printer
/.
Stop
C/CA
Start
Interrupt
Printer Interrupt key
Jobs on the WIDE FORMAT COPY SYSTEM have the following priority:
1. Any job currently printing
2. A copy job that is ready to print
3. A remote print job.
If a remote print job is in progress, a copy job (one or more images
captured by the SCAN SYSTEM), cannot normally use the Printer until
the remote print job has finished. The Printer Interrupt key enables you
to switch the copy priority from normal to high.
To process a copy job immediately, press the Printer Interrupt key. The
Printer Interrupt indicator lamp illuminates. The current pages of the
most current remote print job are completed. Usually a maximum of two
pages are printed. The print job is then suspended and you can run copy
jobs. When the copy jobs are finished, you can press the Printer
Interrupt key again. The Printer Interrupt indicator lamp is
extinguished. The interrupted remote print job resumes.
If you send no more copy jobs, press no keys, and scan no documents,
the Printer Interrupt feature is automatically disabled after a time set by
the PRINTER INTERRUPT timer. Refer to "Timers" in the "Main Menu,
CONFIGURATION" section for instructions about how to set this value.
The default value is 1 minute. It can be set to a value between 1 and 99
minutes.
58 Special features keys DocuWide 6030/6050
Page 61

Store/Recall key
The Store/Recall feature contains the following menu choices:
• LAST JOB - Enables you to recall and reuse the informat ion from
the last copy job.
• JOB TEMPLATES - Enables you to save the settings from
previous jobs in memory as templates.
• SAVE DEFAULT TEMPLATE - Enables you to save the settings
from the current job as the default template.
• RECALL FACTORY DEFAULTS - Enables you to recall the
factory default settings as the active default settings.
To access the STORE/RECALL menu:
1. Press the Store/Recall key. The STORE/RECALL menu screen
is displayed. The black arrows indicate that the menu contains
more options than are visible. The selected option is highlighted.
STORE/RECALL
LAST JOB
Last Job
JOB TEMPLATES
SAVE DEFAULT TEMPLATE
2. Press the Previous or Next key to scroll through the list of
options.
3. When the desired option is highlighted, press the Enter key to
select the option. The menu or screen for the selec ted option is
displayed.
The LAST JOB option of the STORE/RECALL menu provides a submenu of the following choices:
• RECALL LAST JOB - Enables you to recall and reuse the
parameters, images, and features associated with the last copy
job. You can either reprint the last job or print a new job using all
of the recalled settings. If you desired, the recalled settings could
be changed without scanning the job again.
• DELETE LAST JOB - Enables you to delete the information from
the last job.
NOTE: In the SCAN mode, the Last Job option is not available.
To access the LAST JOB menu:
1. Press the Store/Recall key. The STORE/RECALL menu screen
is displayed.
Xerox 6030/6050 Wide Format Copy System Special features keys 59
Page 62

2. Press the Enter key to select LAST JOB. The LAST JOB menu
screen is displayed. The selected option is highlighted.
LAST JOB
RECALL LAST JOB
DELETE LAST JOB
3. Press the Previous or Next key to highlight the desired option.
4. Press the Enter key to select the highlighted option. The screen
for the selected option is displayed.
Recalling the Last Job
Use the RECALL LAST JOB option to recall the information from the last
job.
To recall the last job information:
1. Press the Store/Recall key. The Store/Recall menu screen is
displayed.
2. Press the Enter key to select LAST JOB. The LAST JOB menu
screen is displayed.
3. Press the Enter key to select RECALL LAST JOB. The screen
shown below is displayed.
COPIER PARAMETERS AND IMAGES
FOR LAST JOB RECALLED
PRESS ENTER TO
4. Press the Enter key to return to the READY screen.
You can now use the settings as they have been recalled, or you can
change one or more of them.
NOTE: The recalled job must be printed or cleared before the next
document can be scanned. If there is no last job to be restored, as is the
case at power up or after the last job has been deleted, a warning
message will advise you.
60 Special features keys DocuWide 6030/6050
Page 63

ARE YOU
SURE ?: NO
Deleting the Last Job
If, for security reasons, the parameters and images of the last job should
not be left stored, use the DELETE LAST JOB option.
To delete the information from the last job:
1. Press the Store/Recall key. The STORE/RECALL menu screen
is displayed.
2. Press the Enter key to select LAST JOB. The LAST JOB menu
screen is displayed.
3. Press the Next key to highlight DELETE LAST JOB.
4. Press the Enter key to select DELETE LAST JOB. A delete
confirmation screen is displayed. The default response is NO.
DELETE LAST JOB
Job Templates
5. Press the Previous or Next key to change the response to YES.
6. Press the Enter key to confirm the deletion. The screen shown
below is displayed. The last job images and parameters are
deleted.
JOB PARAMETERS AND IMAGES
FOR LAST JOB DELETED
PRESS ENTER TO CONTINUE
7. Press the Enter key to return to the READY screen.
The JOB TEMPLATES option of the STORE/RECALL menu provides a
sub-menu of the following choices:
• RECALL TEMPLATE - Enables you to recall saved settings.
• SAVE TEMPLATE - Enables you to save job settings in memory.
• DELETE TEMPLATE - Enables you to delete saved settings.
To access the JOB TEMPLATES menu:
1. Press the Store/Recall key. The STORE/RECALL menu screen
is displayed.
2. Press the Next key to highlight JOB TEMPLATES.
Xerox 6030/6050 Wide Format Copy System Special features keys 61
3. Press the Enter key to select JOB TEMPLATES. The JOB
TEMPLATES menu screen is displayed. The selected option is
highlighted.
Page 64

JOB TEMPLATES
RECALL TEMPLATE
SAVE TEMPLATE
DELETE TEMPLATE
4. Press the Previous or Next key to highlight the desired option.
5. Press the Enter key to select the highlighted option. The screen
for the selected option is displayed.
Recalling Job
Templates
The RECALL TEMPLATE option allows you to recall job parameters that
were previously saved as templates and use them for the current job.
To recall a template:
1. Press the Store/ Recall key. The STORE/RECALL menu
screen is displayed.
2. Press the Next key to highlight JOB TEMPLATES.
3. Press the Enter key to select JOB TEMPLATES. The JOB
TEMPLATES menu screen is displayed.
4. Press the Enter key to select RECALL TEMPLATE. The
RECALL TEMPLATE screen is displayed. The storage locations
that actually contain templates are shown. Locations that do not
contain a template are not shown.
Below is an example of the RECALL TEMPLATE screen.
RECALL TEMPLATE
TEMPLATES IN USE: 1 2 3 4 5
ENTER TEMPLATE NUMBER 0
5. Use the numeric keypad to enter the location of the template to
be recalled.
6. Press the Enter key to confirm your choice. A recall
confirmation screen is displayed. The associated template is
recalled and the SCAN SYSTEM Control Panel settings are
configured accordingly.
JOB PARAMETERS RECALLED
PRESS ENTER TO CONTINUE
62 Special features keys DocuWide 6030/6050
Page 65

You can now use the parameter settings as they have been recalled, or
you may change some of them.
NOTE: If you change any of the Image Quality settings (i.e., document
type, background suppression, or copy contrast) or if you want to invert
the image, an error message will advise you to rescan the image. You
must rescan the image to change any image quality settings for a job
that has been recalled.
7. Press the Enter key to return to the READY screen.
Saving Job Templates
The SAVE TEMPLATE option allows you to save groups of settings
associated with a job in memory as templates. Up to nine such
templates can be saved.
To save a job template:
1. Press the Store/Recall key. The STORE/RECALL menu screen
is displayed.
2. Press the Next key to highlight JOB TEMPLATES.
3. Press the Enter key to select JOB TEMPLATES. The JOB
TEMPLATES menu screen is displayed.
4. Press the Next key to highlight SAVE TEMPLATE.
5. Press the Enter key to select SAVE TEMPLATE. The SAVE
TEMPLATE screen is displayed. It shows the unused template
locations. Locations that contain a template already are not
shown.
Below is an example of the SAVE TEMPLATE screen.
SAVE TEMPLATE
UNUSED TEMPLATES: 6 7 8 9
ENTER TEMPLATE NUMBER: 0
6. Choose an unused location and use the numeric keypad to enter
its location.
7. Press the Enter key to confirm your location choice. The
settings from the current copy job are saved at the location
entered and a save confirmation screen is displayed.
JOB PARAMETERS SAVED
PRESS ENTER TO CONTINUE
Xerox 6030/6050 Wide Format Copy System Special features keys 63
Page 66

NOTE: You can replace the contents of a used location with the current
job settings information. If you choose a location that already contains
information, the TEMPLATE IS IN USE screen is displayed as shown
below. Press the Enter key to ove rwrite the contents. Press the Exit key
to cancel the operation.
TEMPLATE IS IN USE
PRESS ENTER TO CONTINUE
EXIT TO ABORT
8. Press the Enter key to return to the READY screen.
Deleting Job Templates
Use the DELETE TEMPLATE option to delete previously saved
templates. Doing so leaves the template location blank and available to
use again. Once a template has been deleted, it cannot be recalled.
To delete a saved template:
1. Press the Store/Recall key. The STORE/RECALL menu screen
is displayed.
2. Press the Next key to highlight JOB TEMPLATES.
3. Press the Enter key to select JOB TEMPLATES. The JOB
TEMPLATES menu screen is displayed.
4. Press the Next key until DELETE TEMPLATE is highlighted.
5. Press the Enter key to select DELETE TEMPLATE. The
DELETE TEMPLATE screen is displayed. This screen indicates
the locations for the templates currently in use. Locations that
do not contain a template are not shown.
Below is an example of the DELETE TEMPLATE screen.
DELETE TEMPLATE
TEMPLATES IN USE: 1 2 3 4 5
ENTER TEMPLATE NUMBER: 0
6. Use the numeric keypad to enter the location of the template to
be deleted, then press the Enter key. The deleted location is
removed from the list in the DELETE TEMPLATE screen and the
contents of that location are deleted.
You can now select other locations to be deleted in the same way.
7. If no more locations are to be deleted, press the Exit key to
return to the READY screen.
64 Special features keys DocuWide 6030/6050
Page 67

Save Default
Template
The SAVE DEFAULT TEMPLATE option of the STORE/RECALL menu
enables you to save the settings for the current job as the default
settings. Each additional job will then have these settings established as
the default selections.
To save the current job settings as the default template:
1. Ensure that all the options under Media Selection, Image
Quality, and Reduce/Enlarge are set as desired. Make any
necessary changes.
2. Press the Store/Recall key. The STORE/RECALL menu screen
is displayed.
3. Press the Next key until SAVE DEFAULT TEMPLATE is
highlighted.
4. Press the Enter key to select SAVE DEFAULT TEMPLATE. A
confirmation screen is displayed indicating that the job
parameters have been saved.
JOB PARAMETERS SAVED
PRESS ENTER TO CONTINUE
Recall Factory
Defaults
5. Press the Enter key to return to the REA DY screen.
The factory default job settings are permanently stored in memory. The
RECALL FACTORY DEFAULTS option of the STORE/RECALL menu
enables you to recall the factory default settings as the active default
settings.
To recall the factory default settings:
1. Press the Store/Recall key. The STORE/RECALL menu screen
is displayed.
2. Press the Next key until RECALL FACTORY DEFAULTS is
highlighted.
3. Press the Enter key to select RECALL FACTORY DEFAULTS.
The factory default settings are immediately recalled. A
confirmation screen is displayed.
JOB PARAMETERS RECALLED
PRESS ENTER TO CONTINUE
4. Press the Enter key to return to the READY screen.
Xerox 6030/6050 Wide Format Copy System Special features keys 65
Page 68

Finisher key
FINISHER
FOLD PROGRAM
TITLE BLOCK LOCATION
OUTPUT BIN
OVERLENGTH OPTION
TAB OPTIONS
A finishing device, such as a folder, can be connected to the WIDE
FORMAT COPY SYSTEM If such a device is connected, the Finisher
key enables or disables that device.
To enable/disable a finishing device:
1. Press the Finisher key. The Finisher indicator lamp illuminates
and the FINISHER menu screen are displayed. The black
arrows indicate that the menu contains more options than ar e
visible. The selected option is highlighted.
NOTE: If no finishing device is connected, pressing the Finisher key
produces the error message shown below.
FINISHER
FINISHER OPTION
IS NOT AVAILABLE
When a set is being built, the finisher options cannot be changed and
pressing the Finisher key is invalid. The error screen shown below is
displayed. Enable the finisher and select the finisher options either
before selecting the Sets Build option or after the set has been built.
FINISHER
FINISHER OPTION CANNOT BE CHANGED
DURING SETS BUILD OPERATION
For either error screen, press the Exit key to return to the READY
screen. The Finisher indicator lamp is extinguished
2. Press the Previous or Next key to scroll through the list of
options.
66 Special features keys DocuWide 6030/6050
3. When the desired option is highlighted, press the Enter key to
select the option. The screen for the selected option is
displayed. See Finisher menu options below and on the next
Page 69

page for an illustration and description of each option. Also refer
to the Folder User Documentation for additional information on
the available folding options.
4. Press the Previous or Next key to scroll through the choices for
the selected option.
5. When the desired choice is highlighted, press the Enter key to
confirm your selection.
6. Repeat steps 4 and 5 if you want to change a setting for any
other options.
7. Press the Exit key to return to the READY screen.
A page icon is displayed with a dotted box at one of the page corners.
The dotted box indicates the title block location selection made using the
Finisher menu. The title block location can be change on this screen
using the Next and Previous keys.
READY TO COPY
INSERT DOCUMENT
Finisher menu
options
FOLD PROGRAMS
AUTO
100.0 %
8. To disable the finisher, press the Finisher key again. The
Finisher indicator lamp is extinguished.
Below are descriptions of each of the Finisher menu options. Refer to the
Finisher user documentation for additional information on these options.
The FOLD PROGRAM option enables you to select one of up to 20 user defined programs. The program names are programmed into the finisher
and passed to the AccXES Print Server when the finisher goes through
its power -up sequence.
1
FOLD PROGRAM
PROGRAM: USER PROGRAM
OVERLENGTH
OPTIONS
Xerox 6030/6050 Wide Format Copy System Special features keys 67
The OVERLENGTH OPTIONS option enables you to specify how long
documents (documents over 80 inches long) are handled by the folder.
The choices are NO FOLD an d Z-FOLD. If NO FOLD is selected, the
long document will not be folded. If Z-FOLD is selected, the long
document will be Z-FOLDED, but not cross-folded. NO FOLD is the
factory default setting.
Page 70

TAB OPTIONS
PUNCH OPTIONS
OVERLENGTH OPTIONS
OVERLENGTH: NO FOLD
The TAB OPTIONS option enables you to override the pre-programmed
tab settings for the selected finishing program. The choices are
ALWAYS ON, ALWAYS OFF, and USE PROGRAM SETTING. USE
PROGRAM SETTING is the factory default setting.
TAB OPTIONS
TAB: USE PROGRAM
The PUNCH OPTIONS option enables you to override the preprogrammed hole punch settings for the selected finishing program. The
choices are ALWAYS ON, ALWAYS OFF, and USE PROGRAM
SETTING. USE PROGRAM SETTING is the factory default setting.
MARGIN OPTIONS
CROSSFOLD OPTIONS
PUNCH OPTIONS
PUNCH: USE PROGRAM
The MARGIN OPTIONS option enables you to override the pre programmed margin settings for the selected finishing program. The
choices are ALWAYS OFF and USE PROGRAM SETTING. Note that
ALWAYS ON is not an available setting. USE PROGRAM SETTING is
the factory default setting.
MARGIN OPTIONS
MARGIN: USE PROGRAM
The CROSSFOLD OPTIONS option enables you to override the pre programmed crossfold settings for the selected finishing program. The
68 Special features keys DocuWide 6030/6050
Page 71

choices are ALWAYS ON, ALWAYS OFF, and USE PROGRAM
SETTING. USE PROGRAM SETTING is the factory default setting.
CROSSFOLD OPTIONS
CROSSFOLD: USE PROGRAM
TITLE BLOCK
LOCATION
The TITLE BLOCK LOCATION option enables you to specify the location
of the title block for the copy jobs that are about to be run. The choices
are BOTTOM RIGHT, BOTTOM LEFT, TOP RIGHT, TOP LEFT, and
INTELLIGENT TITLE BLOCK. BOTTOM RIGHT is the factory default
setting.
INTELLIGENT TITLE BLOCK should be used if the title block is not
located in the desired location on the fol ded copy. This selection will use
information, document size, selected fold program, title block position
input to place the title block in a position based on the information. It may
not be the user's desired or location. Before making this selection, check
the following:
• Autorotate is selected.
• Document being scanned is oriented correctly for scanning.
• Ensure the title block position specified is correct.
• For additional help, refer to the Folding Supplement manual.
NOTE: The title block location may also be selected on the READY TO
COPY screen using the title block location icon. The title block location is
indicated by the dotted lines.
TITLE BLOCK LOCATION
TB LOCATION : BOTTOM RIGHT
Xerox 6030/6050 Wide Format Copy System Special features keys 69
Page 72

OUTPUT BIN
The OUTPUT BIN option enables you to specify which finisher output bin
to use for the finished output. The choices are DON'T CARE, BIN X
(where X equals 1 to the actual number of finisher bins), FANFOLD, and
BYPASS. BYPASS is the factory default setting.
OUTPUT BIN
OUTPUT BIN: BYPASS
Sets Build key
The Sets Build mode allows you to scan a series of images and build an
electronically collated set. Once the set is built, one or more collated
copies can be printed.
NOTE: The Sets Build mode is not available unless the WIDE FORMAT
COPY SYSTEM is in the COPY mode.
NOTE: Any of the finishing options can be changed during a Sets Build
job. The option(s) must be changed before the document to be copied is
inserted.
Preparing to build the
set
Building and printing
the set
In Sets Build mode, documents of C (A2) size and larger are normally
delivered to the rear of the SCAN SYSTEM after the scan. If the
DOCUMENT RETURN parameter is set to REAR, then all documents
are delivered to the rear after scanning. The WIDE FORMAT SCAN
SYSTEM is equipped with a document catching device, called the
Stacker, to receive these document s. Refer to "Scan System Control" in
the "Main Menu" section of this manual for further information about the
DOCUMENT RETURN parameter.
To build a collated set:
1. Press the Sets Build key. The Sets Build indicator lamp
illuminates and the SETS BUILD screen are displayed.
SETS BUILD
COLLATION: FORWARD
70 Special features key s DocuWide 6030/6050
Page 73

PRINTED
SCANNED
100.0
2. Press the Previous or the Next key to select FORWARD or
REVERSE collation.
• FORWARD prints the collated set in the order that the sheets
were scanned. Page 1 will be on the top.
3
• REVERSE prints the set in the reverse order that they were
scanned. Page 1 will be on the bottom.
1
2
3
SCANNED
3. Press the Enter key to confirm your choice. The READY TO
BUILD SET screen is displayed.
3
1
PRINTED
1
2
1
2
3
2
READY TO BUILD SET
INSERT DOCUMENT: 1
AUTO
100.0
%
4. Insert each document of the set one at a time into the SCAN
SYSTEM as prompted by the display. As the documents are
scanned, the amount of memory used is shown in the
rectangular graphical display.
MEMORY
NOTE: You can select reduction/enlargement and copy quality settings
for each sheet prior to scanning that sheet.
5. When the set is completely scanned, press the Sets Build key
again. The Sets Build indicator lamp is extinguished when the
Start key is pressed then the READY TO PRINT SET screen is
displayed.
READY TO PRINT SET
PRESS START TO PRINT
3
6. If desired, you can now make further changes to the Media
Selection, Source selection and the Reduction/Enlargement
value. Any such change will be applied to that printing of the
entire set.
Xerox 6030/6050 Wide Format Copy System Special features keys 71
Page 74

7. Enter the number of copies desired and press the Start key.
The Printer prints the number of sets requested.
NOTE: In COLLATION FORWARD only, an extra set is made as a check
plots set.
After the printing of the set, the set can be recalled, the values changed
again, and the set reprinted using the new values. To recall the set, refer
to "Store/Recall key" in the "Special features key" section of this manual
for further information.
Batch key
The Batch feature allows you to improve copy speed by enabling Batch
Mode processing of several documents on the SCAN SYSTEM. When
Batch Mode processing is enabled, the SCAN SYSTEM collects prescan
information for just the first document inserted into the SCAN SYSTEM.
Prescan information on subsequent documents in the set is not
collected. The subsequent documents will be scanned using the
information collected on the first document. Eliminating the collection of
this information increases overall copy speed.
To enable Batch Mode processing:
1. Press the Batch key. The Batch indicator lamp will begin
flashing.
2. Insert the first original into the SCAN SYSTEM. The SCAN
SYSTEM scans the original and the screen shown below is
displayed.
WIDTH FOUND FOR SET IS XX.X
INPUT ANOTHER WIDTH OR
PRESS ENTER TO ACCEPT
3. Do one of the following:
Use the numeric keypad to enter the width of the set and press the Enter
key to accept the value.
Press the Enter key to accept the width detected by the WIDE FORMAT
COPY SYSTEM.
The Batch indicator lamp becomes steady and remains so until batch
mode is disabled.
4. When the last document in the set has been scanned, press the
Batch key to disable batch mode. The Batch indicator lamp is
extinguished.
NOTE: When Batch mode is ENABLED, the AUTOCENTER feature is
temporarily disabled. Be careful to manually center each document that
is inserted into the SCAN SYSTEM
72 Special features keys DocuWide 6030/6050
Page 75

JUSTIFICATION
Lead
Transform key
The Transform feature contains the following menu choices:
• MARGINS - Allows you to adjust the dimensions of the margins
around the image. By entering positive margins, blank space is
inserted around the image. By entering negative values,
unwanted parts of the image can be cropped.
• JUSTIFICATION - Allows you to adjust the position of the image
on the media.
• TRANSFORM - Allows you to request transformation of the
scanned image into a mirror image, a negative photographic
inversion, or both.
NOTE: The image can also be rotated. Refer to "Imaging" in the "Copy
Options" section for further information about image rotation.
To access the TRANSFORM MENU:
1. Press the Transform key. The TRANSFORM MENU screen is
displayed. The selected option is highlighted.
Margins
TRANSFORM MENU
MARGINS
TRANSFORM
2. Press the Previous or Next key to highlight the desired option.
3. Press the Enter key to select the highlighted option. The screen
for the selected option is displayed.
The MARGINS option of the TRANSFORM MENU allows you to select
the dimensions for the margins that surround an image. These margins
are referred to as the lead, left, right and trail edges.
NOTE: Margins can only be adjusted when the Xerox 6030/6050 Wide
Format Copy System is in the COPY mode.
The example below illustrates an image entering the SCAN SYSTEM
and the orientation of the image margins.
Scanner
Xerox 6030/6050 Wide Format Copy System Special features keys 73
Right image
Left image
Trail
Page 76

Margins are added to the image in one of two ways:
• If Synchro has been selected from the Output Format area of
the SCAN SYSTEM Control Panel, the lead margin is added
before the image is printed. The trail margin is added after the
media cut signal is received from the SCAN SYSTEM. Thus, the
length of the media from the Printer will be the scanned
document length plus the lead and trail margins.
• If a fixed media length (Preset or Manual) has been selected as
the Output Format, the white space of the specified margin
surrounds the image, but the actual physical dimensions of the
media remain as specified. The margins reduce the allowable
area on the media in which the image may be placed.
To adjust the margins for an image:
1. Press the Transform key. The TRANSFORM MENU screen is
displayed.
2. Press the Enter key to select MARGINS. A screen displaying
the settings for each margin is displayed. Below is an example
of the screen.
LEAD + 1.0 IN
LEFT + 0.0 IN
RIGHT + 0.0 IN
TRAIL + 0.0 IN
If the unit of measure has been set to inches, "IN" appears next to each
value. If the unit of measure has been set to millimeters, "MM" appears
next to each value. Refer to "Localization" in the "Main
CONFIGURATION " section for information about setting the display
units.
The graphical display to the right of the margin settings illustrates the
approximate placement of the image as a result of the settings.
3. Press the Previous or Next key to highlight the setting you wish
to change.
NOTE: Each margin has two components. They are a "+/-" indicator
and a numeric value. As you press the Previous or Next key, the
components highlight individually.
4. Press the Enter key to select the setting.
5. Change the setting as follows:
• To change the "+" or "-" setting, press the Previous or Next key.
n edge of the image can be clipped by entering a negative
margin value for that edge. In that case, the affected edge is
shown as a dotted line and the image icon is shown as partially
outside the bounds of the media.
74 Special features keys DocuWide 6030/6050
Page 77

Y:
LEAD + 1.0 IN
LEFT - 1.0 IN
RIGHT + 0.0 IN
TRAIL + 0.0 IN
The illustration below shows a negative left margin with TOP LEFT
justification.
• To change the value setting, use the numeric keypad to enter the
value. The values can be set in increments of 0.1 in (1.0 mm)
and over a range of +4 to -4 in (+100 to -100 mm). Values
outside the allowed range are rejected. If you enter an invalid
value, press the Exit key to clear it. The default margins are 0.
6. Press the Enter key to confirm the setting. The graphical display
updates accordingly
Justification
NOTE: To cancel the setting, press the Exit key
7. When you have set all the margins as desired, press the Exit
key to return to the TRANSFORM MENU screen.
The JUSTIFICATION option of the TRANSFORM MENU allows you to
adjust the position of the image on the media.
NOTE: "Image" means the entire scanned page including the white
space.
To specify the image position:
1. Press the Transform key. The TRANSFORM MENU screen is
displayed.
2. Press the Next key to highlight JUSTIFICATION.
3. Press the Enter key to select JUSTIFICATION. The
JUSTIFICATION screen is displayed. This screen shows the
current settings for the X and Y coordinates. It also includes a
graphical display of the approximate position of the image as a
result of the settings.
Below is an example of the JUSTIFICATION screen.
JUSTIFICATION
X: LEFT
CENTER
Xerox 6030/6050 Wide Format Copy System Special features keys 75
Page 78

4. Press the Previous or the Next key to select the X (horizontal)
or Y (vertical) coordinate.
5. Press the Enter key to confirm your choice.
6. Press the Previous or Next key to select a choice for
justification.
For the X direction, the choices are LEFT, CENTER, and RIGHT. For
the Y direction, the choices are TOP, CENTER, and BOTTOM.
7. Press the Enter key to confirm your choice. The graphical
display updates accordingly.
NOTE: To cancel your choice, press the Exit key.
8. Repeat steps 4 through 7 if you wish to change position of the
other coordinate.
9. Press the Exit key to return to the TRANSFORM MENU screen.
Transform
Creating a Mirror Image
The TRANSFORM option of the TRANSFORM MENU allows you to
create a mirror image of a scanned image and to convert a scanned
image to a negative image.
The MIRROR option allows you to create a mirror image of a scanned
image.
To create a mirror image:
1. Press the Transform key. The TRANSFORM MENU screen is
displayed.
2. Press the Next key until TRANSFORM is highlighted.
3. Press the Enter key to select TRANSFORM. The TRANSFORM
screen is displayed.
Below is an example of the TRANSFORM screen with both the MIRROR
and INVERT options turned off.
TRANSFORM
MIRROR: OFF
INVERT:
OFF
4. Press the Enter key to select MIRROR.
5. Press the Previous or Next key to select the desired
transformation. Four choices are available - X, Y, XY, and OFF.
Table 4 below graphically depicts the choices.
76 Special features keys DocuWide 6030/6050
Page 79

Table 4. Mirror transformations
Axis Transform
X
Y
XY
OFF
6. Press the Enter key to confirm your choice. The graphical
display updates accordingly. The illustration below shows the
TRANSFORM screen with "X" as the mirror image selection.
TRANSFORM
MIRROR: X
Inverting an Image
INVERT : OFF
NOTE: To cancel your choice, press the Exit key
7. Press the Exit key to return to the READY screen.
The INVERT option allows you to convert a scanned image to a negative
image. For black and white images, the white pixels will be printed black
and the black pixels will be printed white. For grayscale images, the
image will be converted into its photographic negative. INVERT is not
selectable when Color is selected as an Original, Type.
To invert an image:
1. Press the Transform key. The TRANSFORM MENU screen is
displayed.
2. Press the Next key until TRANSFORM is highlighted.
3. Press the Enter key to select TRANSFORM. The TRANSFORM
screen is displayed.
Below is an example of the TRANSFORM screen with both the MIRROR
and INVERT options turned off.
Xerox 6030/6050 Wide Format Copy System Special features keys 77
Page 80

TRANSFORM
MIRROR:
OFF
INVERT: OFF
4. Press the Next key to highlight INVERT.
5. Press the Enter key to selec t INVERT.
6. Press the Previous or Next key to turn the option ON or OFF.
7. Press the Enter key to confirm your choice. The graphical
display updates accordingly.
When INVERT is ON, the icon on the right side of the TRANSFORM
screen is inverted. The example below shows the TRANSFORM screen
with INVERT turned ON.
TRANSFORM
MIRROR
OFF
Copy Mode Sample:
INVERT
NOTE: To cancel your choice, press the Exit key.
8. Press the Exit key to return to the READY screen.
ON
Sample key
The Sample key allows you to print a sample of a scanned image in both
the COPY mode and the SCAN mode. You can then check the sample
for quality or observe the results of features or copy quality adjustments
before document is copied or scan to a file.
The dimensions of the sample, in the Copy mode, are the width of the
page by 210 mm. The sample is taken from a point equidistant from the
lead and trail edge of the image. Refer to Copy Mode below for
instruction to print a sample.
In the SCAN mode the sample size is the whole document. To enable
the Sample key in the SCAN Mode, the Scan -to-net feature must be
installed. To enable a print sample the Scan-to-print feature key must be
installed. Refer to Scan Mode Sample below for instructions to print a
sample.
To print a sample of a scanned image:
1. Press the Sample key. The Sample indicator lamp illuminates.
The SCAN SYSTEM Control Panel is placed in Printer Interrupt
78 Special features keys DocuWide 6030/6050
Page 81

4
SCAN IMAGE TO FILE
mode and the Printer Interrupt indicator lamp illuminates. The
Printer immediately prints a sample of the next image inserted
into the SCAN SYSTEM. The SAMPLE MODE screen is
displayed.
SAMPLE MODE
PRESS START TO ACCEPT PAGE.
PRESS C/CA TO REJECT.
2. Do one of the following:
• Press the Start key to print the complete image as a full -size
copy.
• Press the C/CA key to delete the scanned image.
3. Press the Sample key again to disable the Sample feature. The
Printer is returned to the default priority setting and the Sample
and Printer Interrupt indicator lamps are extinguished.
Scan Mode Sample:
The best sample prints will be produced if the image enhancement
features have been enabled. Refer to the Im age Quality section for more
information.
In order to have the selections indicated below in the SAMPLE MODE
screen, the Scan -to-Net feature key must be installed to get SCAN
IMAGE TO FILE, and the Scan-to-Print Feature key must be installed to
get SCAN IMAGE TO PRINTER.. It is convenient to be able to make a
sample before scanning an image to file.
To print a sample copy, perform the following:
1. If the SCAN SYSTEM is set to COPY mode switch to SCAN
mode for instructions, refer to “Switching between COPY mode
and SCAN mode ”
2. Enter the Directory name.
3. Press the Sample special function key. The SAMPLE MODE
screen is displayed.
SAMPLE MODE
SCAN IMAGE TO PRINTER
Xerox 6030/6050 Wide Format Copy System Special features keys 79
4. Press the Next key to highlight SCAN IMAGE TO PRINTER.
NOTE: The SCAN IMAGE TO FILE and SCAN IMAGE TO PRINTER
options can be individually or simultaneously selected. However, you
cannot deselect both options
Page 82

5. Press the Enter key to enable SCAN IMAGE TO PRINTER.
Press the Exit key to exit the menu.
The processing time for Scan to Printer images will be longer, depending
on the image size.
80 Special features keys DocuWide 6030/6050
Page 83

Scanning to the Network (SCAN
mode)
Scanning to the Network (SCAN
mode)
The WIDE FORMAT COPY SYSTEM has two scanning modes of
operation: COPY mode and SCAN mode.
NOTE: The SCAN mode is optional on the Xerox 6030/6050 Wide
Format. Scan-to-Net is an available option for all Xerox 6030/6050 Wide
Format equipped with the WIDE FORMAT SCAN SYSTEM. The Color
Scan-to-Net feature requires a separately purchased, Color Enablement
feature key.. For ordering information, contact your XEROX
representative.
NOTE: The COPY mode will be disabled and the READY TO COPY
screen will not be accessible when the SCAN OPTION (COLOR) is
enabled and a color printer is connected to the AccXES Print Server.
• In COPY mode, documents are scanned and temporarily stored
in memory or on the AccXES Print Server internal hard disk, and
then sent to the local Printer as soon as the Printer is available.
When the next job is scanned, the file from the previous job is
automatically deleted from the hard disk, making room for new
files. Operation of the system works as described in the previous
sections.
• In SCAN mode, the image file created by scanning is stored
directly on the AccXES Print Server hard disk for later retrieval
over a connected network by a remote system. The image is
stored in Tagged Image File Format (TIFF) 6.0 using CCITT
Group 4, CALS compression, Packbits, or PDF. High resolution
JPG files are also available with the Color Scan -to-Net option.
Xerox 6030/6050 Wide Format Copy System Scanning to the Network (SCAN mode) 81
Page 84

Files stored in SCAN mode can be retrieved over the network. After the
AccXES Client Tools program running on a network -connected computer
retrieves the file, the image residing on the local hard disk is deleted
automatically. For more information, refer to the AccXES Client Tools
User Guide.
Other remote retrieval programs can use the File Transfer Protocol (FTP)
to retrieve and delete files from the WIDE FORMAT COPY SYSTEM
hard disk over the network. These other programs will copy the files
rather than move them, so the files remain on the local hard disk after
retrieval.
After a file has been on the local hard disk for longer than the time
specified for the FILE DELETION Timer, the system automatically
deletes the file. Refer to the Main Menu, CONFIGURATION menu,
TIMERS section of this manual for information about setting the FILE
DELETION timer.
Switching between COPY mode and
SCAN mode
NOTE: The COPY mode will be disabled and the READY TO COPY
screen will not be accessible when a color printer is connected to the
AccXES Print Server.
To switch between the COPY mode and the SCAN mode, perform the
following steps:
1. Ensure that the READY TO COPY screen is displayed. If a
menu is displayed, press the Menu key to return to the READY
screen. If PLEASE ENTER ACCOUNT is displayed, enter a
valid User ID code then enter a valid account number to obtain
the READY screen.
2. Press the Mode key. The system switches to the SCAN mode
and the screen now displays. Pressing the Mode key again
returns the system to the COPY mode.
PLEASE ENTER
DIRECTORY
Images
Enter a Directory name, up to 16 alphanumeric characters, to which you
will scan the images. The name cannot begin with a period/decimal
point.
NOTE: The TCP/IP network protocol must be enabled in the AccXES
Print Server or the WIDE FORMAT COPY SYSTEM will not enter the
SCAN mode. To enable the TCP/IP protocol, refer to the AccXES Print
Server Setup Manual.
82 Scanning to the Network (SCAN mode) DocuWide 6030/6050
Page 85

TIFF/CCITTG4
Understanding the READY TO SCAN
screen
Below is an example of the READY TO SCAN screen. Following the
example are descriptions of the special information displayed on the
screen.
READY TO SCAN
INSERT DOCUMENT
400
BIT
TIFF/CCITTG
41 BIT
This icon shows how much Random Access Memory (RAM)
is in use by the scanned file. As space is used, the dark area
increases. After the scan is complete, the file is processed
and then moved to the internal hard disk. The RAM space
then becomes available agai n.
This area indicates the selected file format. Refer to
SCAN OPTIONS (LINE) or SCAN OPTIONS (PHOTO)
or SCAN OPTIONS (COLOR) to set these options. The
available options will differ depending upon your Scan
Option selection.
This area shows the selected scanning resolution.
Press the Previous or Next key to select a value of 100,
200, 300, or 400 DPI (Dots Per Inch). A new value can
be selected before each scan.
This icon shows how much hard disk space is in use by
stored files. As space is used, the dark area increases.
When files are moved off the disk over the network to
remote devices, the space becomes available again. Files
are also deleted when the age of the file exceeds the value
set in the timer. Refer to "Timers" in the "Main Menu"
section to set this value. The factory default is 24 hours.
Xerox 6030/6050 Wide Format Copy System Scanning to the Network (SCAN mode) 83
Page 86

Selections disabled in SCAN mode
Certain selections available in COPY mode are not available in SCAN
mode. The unavailable selections are:
• Sets Build - In SCAN mode each document has a separate
image stored on the disk. Each image is separately retrieved at
the remote device. Images cannot be grouped in sets.
• Specifying the media Source and Type - Since the output is now
an electronic file, specifying the media is not applicable.
• Specifying the output format - The image file always has the
format of the length of the document by the scan width. The
scan width can be manually specified, if the entire width of the
document is not desired. Refer to "Scan System Control" in the
"Main Menu" section to enable or disable manual specification of
the scan width.
• Selection of Margins or Justification - You can crop equal
amounts from each side edge of the document by manually
specifying a scan width that is narrower than the actual
document. Refer to "Scan System Control" in the "Main Menu"
section to enable or disable manual specification of the scan
width.
• Specification of Finishing Options - Since there is no physical
output, the finishing operations are not applicable.
• Selection of Reduce/Enlarge - The electronic file is saved
without alteration, so all scanned information is preserved.
• Selection of Image Type. Only Line ,Photo, Normal, and Color
image types are valid for SCAN mode. Refer to the "Image
Quality", "Scan Mode" section in this manual for additional
information
• Background Suppression - This selection is automatically
switched to off if a color printer is connected.
Operating in SCAN mode
To scan documents for later retrieval over the network:
1. If job accounting is enabled, enter in your User ID and Account
ID when prompted and press Enter. If job accounting is not
enabled, you will not have to enter your IDs.
2. If you want to see a preview of the scanned images when they
are retrieved from the AccXES Print Server to your workstation,
verify that the SCAN SYSTEM's default "PREVIEW" box is
checked when selecting the Original, Type Use the Previous,
Next, and Enter keys to enable PREVIEW. Use the Enter key to
confirm your choice(s).
3. With READY TO COPY displayed on the SCAN SYSTEM
Control Panel, press the Mode key to display READY TO SCAN.
4. Use the keypad on the SCAN SYSTEM Control Panel to enter in
your 16 alphanumeric character Scan Directory name.
84 Scanning to the Network (SCAN mode) DocuWide 6030/6050
Page 87

5. To view a sample of the file before it is scan to a file, Press the
Sample key on the Control Panel. Use the Next or Previous key
to highlight SCAN TO PRINTER and press the Enter key. Press
the Exit key to return to the READY screen, then press Start. A
copy will be sent to the printer.
6. When the SCAN SYSTEM Control Panel displays READY TO
SCAN, select your desired scanning resolution using the Next
and Previous keys.
NOTE: When making a color scan, be sure to select Color with the
arrow key under Image Quality on the SCAN SYSTEM Control Panel.
The Normal and Photo lights will be on.
7. Select the Image Quality, Original, Type by pressing the arrow
button located under Type. When the Type (Normal, Line,
Photo,or Color) is selected the appropriate SCAN OPTION
(NORMAL, LINE, PHOTO, or COLOR) is displayed. Use the
Next, Previous, and Enter keys to navigate to and through the
avaliable options on the screen. Press the Enter key to confirm
your choice(s). For additional information refer to the "Image
Quality, Scan Mode" section of this manual.
8. Insert your original document face down and centered on the
feed tray of the SCAN SYSTEM.
9. Gently move your document forward until the SCAN SYSTEM's
feed rolls engage the document's leading edge.
10. If prompted to do so, enter the desired scanning width and press
Enter.
11. As your document is automatically fed into the SCAN SYSTEM,
the resulting image is stored as a file in the Scan Directory on
the system AccXES Print Server's hard drive. The image can be
retrieved at your workstation using the Retrieve Tool of the
AccXES Client Tools.
NOTE: You may have to press the Start button if the configuration (for
Auto Scan) has been changed from the factory default.
Xerox 6030/6050 Wide Format Copy System Scanning to the Network (SCAN mode) 85
Page 88

Clearing the scanned images
The C/ CA key enables you to remove scanned images from the WIDE
FORMAT COPY SYSTEM hard disk.
To clear scanned images:
1. Press the C/CA key. The CLEAR SCANNED IMAGE screen is
displayed.
CLEAR SCANNED IMAGE
DO NOT CLEAR IMAGE
2. Press the Previous or Next key to highlight the desired
selection.
3. Press the Enter key to select the highlighted selection. The
choices are:
• DO NOT CLEAR IMAGE - The image is not deleted.
• CLEAR LAST IMAGE - The last image scanned by the currently
active account is deleted. Press the C/CA key again, followed
by the Enter key, to delete the next-to-last scanned image. This
process can be repeated until all desired images are removed
from the hard disk. It may take a few minutes longer to clear a
scanned photo or an image with color.
NOTE: It is not possible to skip images. For example, it is not possible
to leave the last image scanned, but delete the next -to-last image
scanned. Photo and Color mode scans may take a few minutes to clear.
• CLEAR ALL IMAGES - All images stored under the currently
active account are deleted.
Managing the file system
The file system stores images in directories on the internal hard disk
drive. The images are stored in the Directory specified by the user when
entering the SCAN mode. The default directory is "images". Managing
the file system requires the System Administrator password.
The FILE SYSTEM option of the SYSTEM ADMINISTRATION menu
enables the System Administrator to perform a number of file system
management functions. They are:
• Listing the number of images stored under each directory and
the percentage of total hard disk space consumed by each
account
• Deleting all of the images scanned under any directory
86 Scanning to the Network (SCAN mode) DocuWide 6030/6050
Page 89

• Deleting all of the images currently stored on the hard disk.
Refer to "File System" in the "Main Menu" section of this manual for
complete information about the above functions.
Xerox 6030/6050 Wide Format Copy System Scanning to the Network (SCAN mode) 87
Page 90

Main Menu
Enter
Exit
Previous
%
Main Menu
The Main Menu provides options for configuring the system, obtaining
system information, performing system administration functions, and
running system diagnostics.
When you access the Main Menu, a menu containing the following submenus is displayed:
• CONFIGURATION - Enables you to configure the settings for a
variety of system options. These include localization, the SCAN
SYSTEM Control Panel, copy options, scan options for Normal,
Line and Photo modes (and Color, if enabled), timers, the power
saver timeout, and SCAN SYSTEM control for Copy and Scan
modes.
• SYSTEM INFORMATION - Enables you to obtain information
about the system components, display the SCAN SYSTEM fault
list, print configuration pages, and view user account information.
• SYSTEM ADMINISTRATION - Enables the system administrator
to perform job accounting, file system management, security,
and change password functions. Access to this menu requires
an administrator's password.
• DIAGNOSTICS - Enables the Customer Service Engineer and/or
the operator to run a number of system diagnostic routines.
To access the Main Menu:
1. Press the Menu key.
READY TO COPY
INSERT DOCUMENT
AUTO
100.0
Menu
88 Main Menu DocuWide 6030/6050
Next
1
Mode
Page 91

CONFIGURATION
The MAIN MENU screen is displayed. The black arrows indicate that the
menu list contains more items than are visible. The selected option is
highlighted.
MAIN MENU
SYSTEM INFORMATION
SYSTEM ADMINISTRATION
2. Press the Previous or Next key to scroll through the list options.
3. When the desired option is highlighted, press the Enter key to
select the option.
Configuration menu
The CONFIGURATION option of the Main Menu provides a sub-menu of
the following choices:
• LOCALIZATION - Sets the display language and units of
measurements.
• CONTROL PANEL - Controls whether the beeper is used for the
key click and invalid entry beeps. Also allows selection of the
font display style and the default operating mode.
• COPY OPTIONS - Sets the choices for standard media series,
custom media formats, custom reduction/enlargement values,
and imaging parameters.
• IMAGE ENHANCEMENTS - Enhances the appearance of a
color scanned images in particular color halftones, Scanning
speed BEST IQ and FASTEST, and Dynamic Background
Removal. The FASTEST selections requires the Turbo III
• TIMERS - Sets the values for the Feature, Printer Interrupt, and
File Deletion timers.
• POWER SAVER - Sets the number of hours of inactivity after
which the system goes into Power Saver mode.
• SCAN SYSTEM CONTROL - Sets the choices for the operation
of the SCAN SYSTEM for both copying and scan -to-file. Auto
Scan, Doc ument Return, and Mode (Manual Width, Auto Width,
To access the CONFIGURATION menu:
1. Press the Menu key. The MAIN MENU screen is displayed.
Xerox 6030/6050 Wide Format Copy System Main Menu 89
2. Press the Enter key to select CONFIGURATION. The
CONFIGURATION menu screen is displayed. The black arrows
indicate the menu contains more options than are visible. The
selected option is highlighted.
Page 92

LOCALIZATION
CONFIGURATION
LOCALIZATION
CONTROL PANEL
COPY OPTIONS
3. Press the Previous or Next key to scroll through the list of
options.
4. When the desired option is highlighted, press the Enter key to
select the options. The menu or screen for the selected option is
displayed.
The LOCALIZATION option of the CONFIGURATION menu sets the
language in which messages are displayed. It also controls whether
measurements are displayed in English or met ric units.
To set the display language or units:
1. Press the Menu key. The MAIN MENU screen is displayed.
2. Press the Enter key to select CONFIGURATION. The
CONFIGURATION menu screen is displayed.
3. Press the Enter key to select LOCALIZATION. The
LOCALIZATION screen is displayed. Below is an example of the
LOCALIZATION screen.
LOCALIZATION
LANGUAGE:
ENGLISH
DISPLAY UNITS:
4. Press the Previous or Next key to highlight LANGUAGE or
DISPLAY UNITS.
5. Press the Enter key to select the highlighted option.
6. Press the Previous or Next key to highlight the desired setting
for the option.
The choices for LANGUAGE are ENGLISH, SPANISH, FRENCH,
ITALIAN, GERMAN, or PORTUGUESE. ENGLISH is the default setting.
The choices for DISPLAY UNITS are INCHES or MM (MILLIMETERS).
INCHES is the default setting.
7. Press the Enter key to select the highlighted setting.
8. Repeat steps 4 through 6 to change the remaining setting, if
desired.
90 Main Menu DocuWide 6030/6050
Page 93

9. Press the Exit key to return to the CONFIGURATION menu
screen.
CONTROL PANEL
The CONTROL PANEL option of the CONFIGURATION me nu controls
whether the beeper is used for the key click and invalid entry beeps. It
also allows selection of the font display style and the default mode of
operation for the WIDE FORMAT COPY SYSTEM.
To set the beeper, text style or default operating mode:
1. Press the Menu key. The MAIN MENU screen is displayed.
2. Press the Enter key to select CONFIGURATION. The
CONFIGURATION menu screen is displayed.
3. Press the Next key to select CONTROL PANEL.
4. Press the Enter key to select CONTROL PANEL. The
CONTROL PANEL screen is displayed. Below is an example of
the CONTROL PANEL screen.
CONTROL PANEL
BEEPER:
TEXT:
DEFAULT MODE:
5. Press the Previous or Next key to highlight BEEPER, TEXT
MODE or DEFAULT MODE.
6. Press the Enter key to select the highlighted option.
ENABLED
NORMAL
COPY
7. Press the Previous or Next key to highlight the desired setting
for the option.
The choices for BEEPER are ENABLED or DISABLED. ENABLED is
the default setting. The Initialization Beep and the Fault Beep are not
affected by this setting and cannot be turned off.
The choices for TEXT are NORMAL or BOLD. NORMAL is the default
setting.
The choices for DEFAULT MODE are COPY or SCAN. COPY is the
default setting.
NOTE: The DEFAULT MODE setting will not be displayed unless the
Scan To Net feature is enabled. SCAN mode is an option on the 8825
and 8850 Digital Solutions. To order this feature, contact XEROX
Representative.
8. Press the Enter key to select the highlighted setting.
9. Repeat steps 5 through 8 if you wish to change another setting.
10. Press the Exit key to return to the CONFIGURATION menu
screen.
Xerox 6030/6050 Wide Format Copy System Main Menu 91
Page 94

COPY OPTIONS
The COPY OPTIONS option of the CONFIGURATION menu provides a
sub-menu of the following choices:
• MEDIA SERIES - Sets the standard media sizes for preset
output formats. Table 5 on the below shows the standard media
series and the sizes associated with them.
• CUSTOM MEDIA FORMATS - Sets the custom media sizes for
preset output formats.
• CUSTOM R/E PRESETS - Sets the reduction/enlargement ratios
• IMAGING - Sets the imaging options.
To access the COPY OPTIONS menu:
1. Press the Menu key. The MAIN MENU screen is displayed.
2. Press the Enter key to select CONFIGURATION. The
CONFIGURATION menu screen is displayed.
3. Press the Next key until COPY OPTIONS is displayed. The
COPY OPTIONS menu screen is displayed. The black arrows
indicate that the menu contains more options than are visible.
The selected option is highlighted.
COPY OPTIONS
MEDIA SERIES
CUSTOM MEDIA FORMATS
CUSTOM R/E PRESETS
4. Press the Previous or Next key to scroll through the list of
options.
5. Press the Enter key to select the highlighted option. The screen
for the selected option is displayed.
92 Main Menu DocuWide 6030/6050
Page 95

Table 5. Media sizes
Choose Series To Display
Sizes
ANSI A 8.5 x 11 inches (215.9 x 279.4 mm)
B 11 x 17 inches (279.4 x 431.8 mm)
C 17 x 22 inches (431.8 x 558.8 mm)
D 22 x 34 inches (558.8 x 863.6 mm)
E 34 x 44 inches (836.6 x 1117.6 mm)
ARCH A 9 x 12 inches (228.6 x 304.8 mm)
B 12 x 18 inches (304.8 x 457.2 mm)
C 18 x 24 inches (457.2 x 609.6 mm)
D 24 x 36 inches (609.6 x 914.4 mm)
E 36 x 48 inches (914.4 x 1219.2 mm)
30 30 x 42 Inches (76.2 x 106.7 mm)
ISO A (JIS A) A4 210 x 297 mm
A3 297 x 420 mm
A2 420 x 594 mm
Dimensions
(width x length)
MEDIA SERIES
A1 594 x 841 mm
A0 841 x 1189 mm
ISO B (JIS B) B4 250 x 353 mm
B3 353 x 500 mm
B2 500 x 707 mm
B1 707 x 1000 mm
The MEDIA SERIES option controls which standard media series are
displayed when Preset is selected from the Output Format portion of the
SCAN SYSTEM Control Panel.
You can select one or more media series to be displayed. Refer to Table
5 above for a listing of the sizes associated with each media series.
To enable/disable a media series:
1. Press the Menu key. The MAIN MENU screen is displayed.
2. Press the Enter key to select CONFIGURATION. The
CONFIGURATION menu screen is displayed.
3. Press the Next key until COPY OPTIONS is highlighted.
4. Press the Enter key to select COPY OPTIONS. The COPY
OPTIONS menu screen is displayed.
Xerox 6030/6050 Wide Format Copy System Main Menu 93
Page 96

5. Press the Enter key to select MEDIA SERIES. The MEDIA
SERIES screen is displayed. Below is an example of the MEDIA
SERIES screen.
MEDIA SERES
CUSTOM MEDIA
FORMATS
ANSI
ISO A
ARCH ISO B
JIS B
6. Press the Previous or Next key to highlight a media series.
7. Press the Enter key to ENABLE or DISABLE the highlighted
media series. A check mark appears in the box to the left of the
series when the series is enabled.
The factory default setting is ENABLED for the ANSI media series and
DISABLED for all others.
8. Repeat steps 6 and 7 for each media series you wish to enable
or disable.
9. Press the Exit key to return to the COPY OPTIONS menu
screen.
The CUSTOM MEDIA FORMATS option controls which custom media
formats are displayed when Preset is selected from the Output Format
portion of the SCAN SYSTEM Control Panel. You can specify up to six
custom media formats. To use the SCAN SYSTEM CONTROL, MODE:
PRODUCTIVITY: CUSTOM mode the custom sizes must be entered in
the CUSTOM MEDIA FORMATS.
To specify a custom media format:
1. Press the Menu key. The MAIN MENU screen is displayed.
2. Press the Enter key to select CONFIGURATION. The
CONFIGURATION menu screen is displayed.
3. Press the Next key until COPY OPTIONS is highlighted.
4. Press the Enter key to select COPY OPTIONS. The COPY
OPTIONS menu screen is displayed.
5. Press the Next key to highlight CUSTOM MEDIA FORMATS.
6. Press the Enter key to select CUSTOM MEDIA FORMATS. The
CUSTOM MEDIA FORMATS screen is displayed.
The first "0.0" in each "0.0 x 0.0" format represents the width. The
second "0.0" represents the length.
NOTE: The formats are expressed in the units of measurement selected
for the machine. Refer to "Localization" in the "Main Menu" sec tion for
further information.
94 Main Menu DocuWide 6030/6050
Page 97
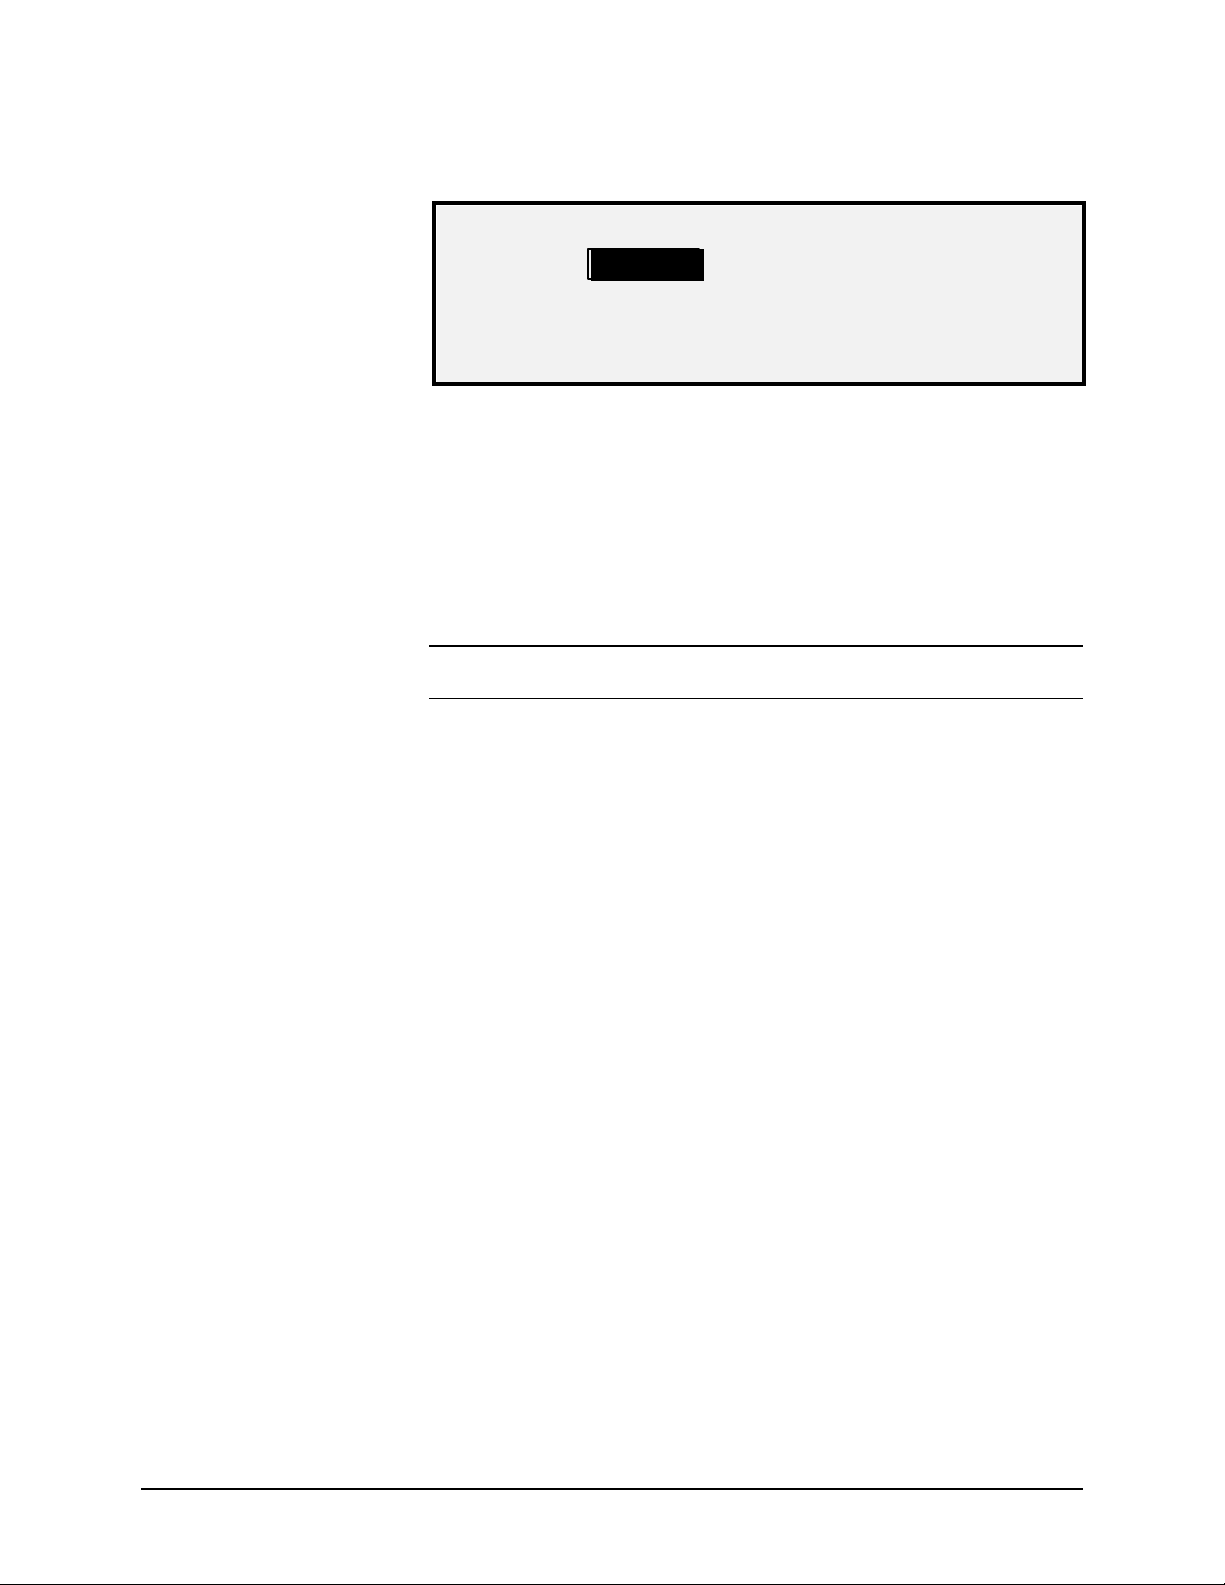
Below is an example of the MEDIA SERIES screen. In the example, the
display units have been set to inches.
CUSTOM MEDIA FORMATS (IN)
0.0 X 0.0
0.0.X 0.0
0.0.X 0.0
0.0 X 0.0
0.0 X 0.0
7. Press the Previous or Next key to highlight the desired field.
8. Use the numeric keypad to enter the value for the highlighted
field.
9. Widths in excess of 36 inches (914 mm) or less than 11 inches
(297 mm) are not valid.
10. Press the Enter key to confirm the value.
11. Repeat steps 7 through 9 until all desired formats are defined.
0.0.X 0.0
CUSTOM R/E PRESETS
NOTE: Any custom form ats that are not defined are automatically set to
zero and are not displayed elsewhere.
12. Press the Exit key to return to the COPY OPTIONS menu
screen.
The CUSTOM R/E PRESETS option controls which
reduction/enlargement ratios are displayed when Preset is selected from
the Reduction/Enlargement portion of the SCAN SYSTEM Control Panel.
You can specify up to six reduction/enlargement presets.
To specify a reduction/enlargement preset:
1. Press the Menu key. The MAIN MENU screen is displayed.
2. Press the Enter key to select CONFIGURATION. The
CONFIGURATION menu screen is displayed.
3. Press the Next key until COPY OPTIONS is highlighted.
4. Press the Enter key to select COPY OPTIONS. The COPY
OPTIONS menu screen is displayed.
5. Press the Next key until CUSTOM R/E PRESETS is highlighted.
6. Press the Enter key to select CUSTOM R/E PRESETS. The
CUSTOM R/E PRESETS screen is displayed. Below is an
example of the CUSTOM R/E PRESETS screen.
Xerox 6030/6050 Wide Format Copy System Main Menu 95
Page 98

CUSTOM R/E PRESETS
100.0% 100.0%
100.0% 100.0%
100.0% 100.0%
7. Press the Previous or Next key to highlight the value you wish
to change.
8. Use the numeric keypad to enter the desired value. The valid
value range is from 25 to 400%.
NOTE: Duplicate values are not displayed in the Preset
Reduction/Enlargement list. You can remove a preset value from the list
by setting the value to 100.0%.
9. Press the Enter key to confirm the value.
10. Repeat steps 7 through 9 for each value you wish to change.
11. Press the Exit key to return to the COPY OPTIONS menu
screen.
IMAGING
The IMAGING option allows you to perform the following functions:
• Enable or disable automatic image rotation. If AUTO ROTATE is
enabled, the scanned image will be electronically rotated, if
necessary, to better fit the specified output format.
• REDUCTION LINE PRESERVATION
To enable/disable the imaging options:
1. Press the Menu key. The MAIN MENU screen is displayed.
2. Press the Enter key to select CONFIGURATION. The
CONFIGURATION menu screen is displayed.
3. Press the Next key until COPY OPTIONS is highlighted.
4. Press the Enter key to select COPY OPTIONS. The COPY
OPTIONS menu screen is displayed.
5. Press the Next key until IMAGING is highlighted.
6. Press the Enter key to select IMAGING. The IMAGING screen
is displayed. Below is an example of the IMAGING screen.
96 Main Menu DocuWide 6030/6050
Page 99

IMAGING
AUTO-ROTATE
4
REDUCTION LINE PRESERVATION
7. Press the Previous or Next key to highlight the desired option.
8. Press the Enter key to enable or disable the highlighted option.
A check mark appears in the box to the left of the option when
the option is enabled.
The factory default setting is disabled for AUTO-ROTATE.
9. Repeat steps 7 and 8 to enable or disable REDUCTION LINE
PRESERVATION, if desired.
10. Press the Exit key to return to the COPY OPTIONS menu
screen.
IMAGE ENHANCEMENTS
The IMAGE ENHANCEMENT feature settings are used to enhance the
appearance of color scanned images, particularly halftone color originals
( for example, maps).
This feature will greatly enhance the printing of a color sample using the
Color Scan to Print feature key.
To enable the IMAGE ENHANCEMENT features, perform the following:
1. Press the Enter key to select CONFIGURATION. The
CONFIGURATION menu screen is displayed.
2. Press the Next key until IMAGE ENHANCEMENT is highlighted.
3. Press the Enter key to select IMAGE ENHANCEMENT. The
IMAGE ENHANCEMENT menu screen is displayed.
4. Press the Next key to highlight COLOR IQ.
5. Press the Enter key to select COLOR IQ. The COLOR IQ screen
is displayed.
IMAGE ENHANCEMENT
IMAGE ENHANCEMENT
COLOR IQ:
COLOR IQ: SRGB
SRGB
NORMAL MODE: BEST IQ
4DYNAMIC BACKGROUND REMOVAL
6. Press the Next key to select the enhancement option you want:
• NONE: scanned color has no color correction applied.
• SRGB: scanned colors will be converted to the SRGB color
space
Xerox 6030/6050 Wide Format Copy System Main Menu 97
Page 100

• ADAPTIVE CONTRAST: scanned colors are first converted
to the SRGB color space, then enhanced using an adaptive
contrast algorithm. The adjustment changes the images
white point, black point,
NOTE: Further color halftone image enhancement can be achieved
when printing by enabling the Error Diffusion Raster Halftone Method in
the AccXES Print Server Web PMT. The setting is found on the
Processing Defaults page. Select Error Diffusion from the Raster
Halftone Method pull -down menu.
7. Press the Enter key the select the enhancement setting.
8. Press the Next key to select NORMAL MODE then press the
Enter key to select Normal Mode.
9. Press the Previous of Next to scroll through the settings BEST
IQ and FASTEST then press the Enter key to select the setting.
BEST IQ is the default
10. Press the Next key to select DYNAMIC BACKGROUND
SUPPRESSION. Then press the Enter key to enable/disable
DYNAMIC BACKGROUND REMOVAL. Disabling the DYNAMIC
BACKGROUND REMOVAL enables the STATIC
BACKGROUND REMOVA L. DYNAMIC BACKGROUND
REMOVAL is the default and should be used for most document
types
TIMERS
11. Press the Enter key to confirm the selection.
12. Press the Exit key to return to the CONFIGURATION menu.
The TIMERS option of the CONFIGURATION menu allows you to set the
values for the time-out functions. Pressing any key or scanning a
document resets the timers.
The timers are as follows:
• FEATURE - Controls how long the current feature parameters
remain in effect after the last key press, scan completion, or
insertion of a document into the SCAN SYSTEM. The
FEATURE timer can be set between 0 and 99 minutes. The
factory default is 5 minutes. A value of 0 means that the feature
will never time out.
NOTE: To prevent images from being lost, feature time-outs will not
occur during the sets build process.
• PRINTER INTERRUPT - Controls how long the Printer remains
in the interrupted state with no interruption at the SCAN
SYSTEM Control Panel. This timer pertains to print jobs that
have been interrupted to allow a copy job to process. The
allowed range is 1 to 99 minutes. The factory default is 1
minute.
• FILE DELETION - Specifies the maximum amount of time a
scanned image file remains on the file system before being
deleted. This timer pertains only to files scanned when the
98 Main Menu DocuWide 6030/6050
 Loading...