

Page 1

XEROX
Xerox MRP Family
4215/MRP, 4219/MRP, 4220/MRP, 4230/MRP
Coax Command Reference
May 1995
720P12761
Page 2

Xerox Corporation
701 S. Aviation Boulevard
El Segundo, CA 90245
© 1994 and 1995 by Xerox Corporation. All rights reserved.
Copyright protection claimed includes all forms and matters of
copyrightable material and information now allowed by statutory
or judicial law or hereinafter granted, including without limitation,
material generated from the software programs which are
displayed on the screen, such as icons, screen displays, looks,
etc.
Printed in the United States of America
Publication number: 720P12761
Xerox® and all Xerox products mentioned in this publication are
trademarks of Xerox Corporation. Products and trademarks of
other companies are also acknowledged.
Changes are periodically made to this document. Changes,
technical inaccuracies, and typographic errors will be corrected in
subsequent editions.
This document was created on the Xerox 6085 Professional
Computer System using VP software. The typeface is Optima.
Page 3
Installation caution
Safety
Notices
Your Xerox 4220/MRP And 4230/MRP printers are not customer
installable. Only a Xerox service representative should install the
equipment.
CAUTION: This equipment generates, uses, and can radiate radio
frequency energy, and if not installed and used in accordance
with the installation requirements, may cause interference to
radio communications.
U.S.A.
Your printer has been tested and found to comply with the limits
for a Class A computing device pursuant to Subpart J of Part 15
of FCC rules, which are designed to provide reasonable
protection against such interference when operated in a
commercial environment. Operation of this equipment in a
residential area is likely to cause interference. In such cases, the
user at his or her own expense is required to correct the
interference.
Canada
This digital apparatus does not exceed the Class A limits for radio
noise emissions from digital apparatus as set out in the radio
interference regulations of the Canadian department of
communications.
Ce present appareil numerique n’emet pas de bruits
radioelectriques depassant les limites applicables aux appareils de
Classe A prescitees dans le reglement sur le brouillage
radioelectrique edicte par le ministre des communications du
Canada.
XEROX MRP FAMILY COAX COMMAND REFERENCE iii
Page 4
NOTICES
Laser safety
Europe: 50 Hz, 220 - 240 V equipment
This equipment has been tested and certified in conformance
with European commission directive 82/499/ECC and VDE
0871/0875, Class A, relating to radio frequency interference.
CAUTION: In order to allow this equipment to operate in
proximity to Industrial, Scientific and Medical (ISM) equipment,
the external radiation from ISM equipment may have to be
limited or special mitigation measures taken.
Your pirnter complies with appropriate safety standards.
Specifically regarding lasers, the equipment complies with laser
product performance standards set by governmental,
international, and national agencies as a Class 1 laser product. It
does not emit hazardous light; the beam is totally enclosed
during all phases of customer operation and maintenance.
WARNING: Use of controls or adjustments or performance of
procedures other than those specified herein may result in
hazardous radiation exposure.
LUOKAN 1 LASERLAITE
KLASS 1 LASER APPARAT
VAROITUS: LAITTEEN KÄYTTÄMINEN MUULLA KUIN TÄSSÄ
KÄYTTÖHJEESSA MAINITULLA TAVALLA SAATTAA ALTISTAA
KÄYTTÄJÄN TURVALLISUUSLUOKAN 1. YLITTÄVÄLLE
LASERSÄTEILYLLE
VARNING
: OM APPARATEN ANVÄNDS PÅ ANNAT SÄTT ÄN I
DENNA BRUKSANSVISNING SPECFICERADE, KAN ANVÄNDAREN
UTSÄTTAS FÖR O SYNLIG LASERSTRÄLNING, SOM ÖVERSKRIDER
GRÄNSEN FÖR LASERKLASS 1.
iv XEROX MRP FAMILY COAX COMMAND REFERENCE
Page 5
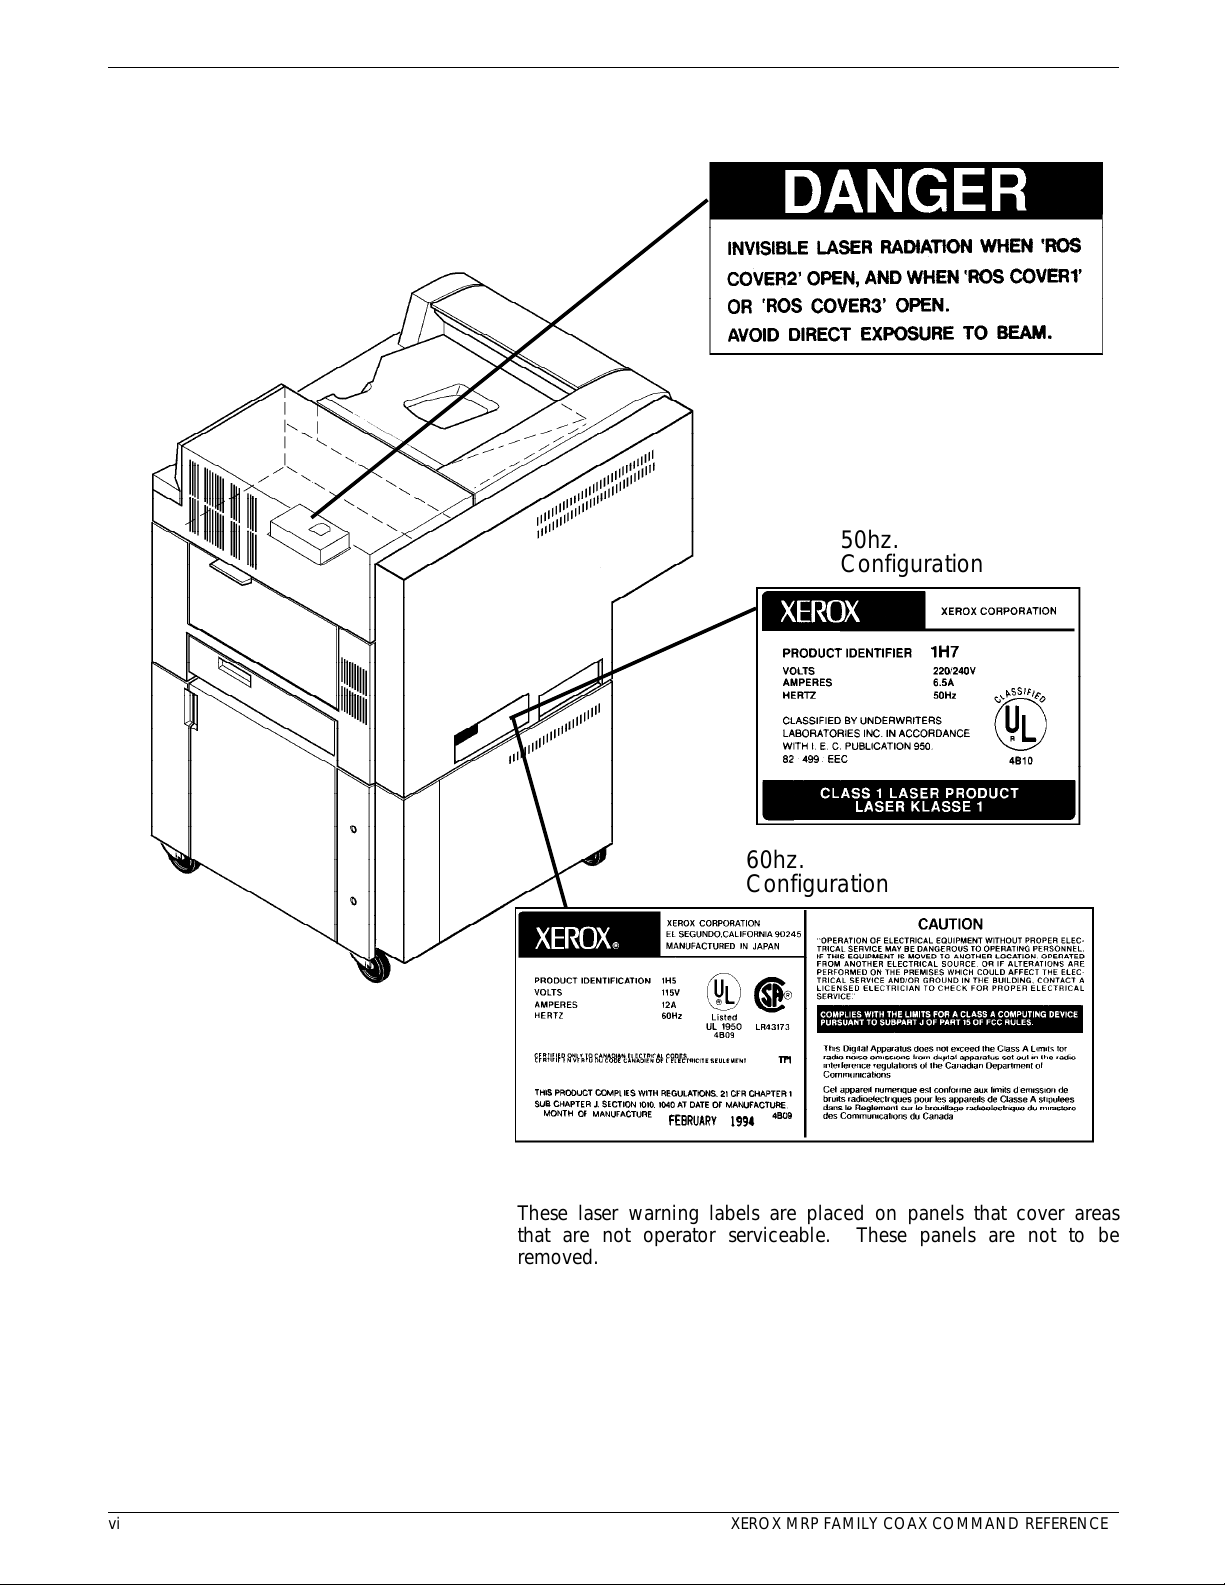
DANGER-invisible laser
radiation
when open and interlock
defeated for service.
NOTICES
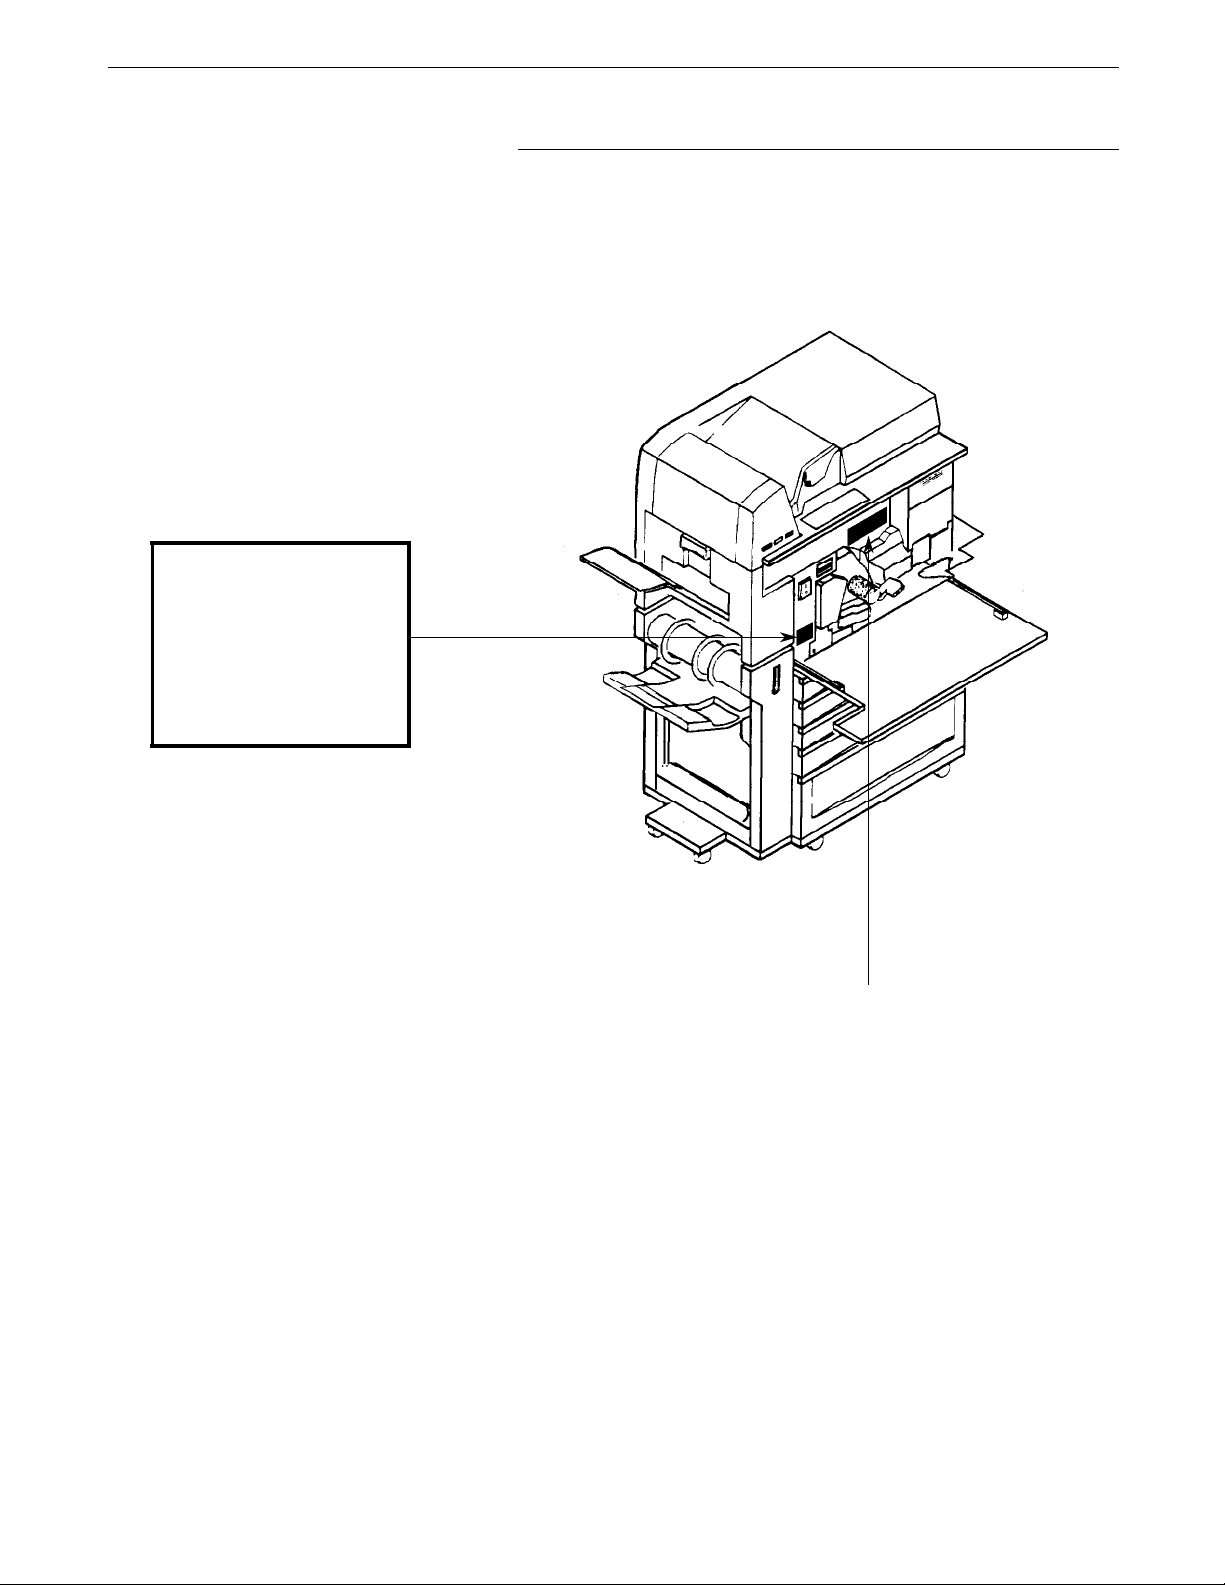
Warning labels
There are several user accessable Laser Safety Warning labels
located on the printer. These are as shown on the next two
pages.
AVOID DIRECT EXPOSURE TO
BEAM.
Instructions for safe service are
in SERVICE MANUAL.
Page 6
NOTICES
aaaaaaaaaaaaaaaaaaaaaaa
a
a
a
a
a
a
a
a
a
a
a
a
a
a
a
a
aaaaaaaaaaaaaaaaaaaaaaaaa
a
a
a
a
a
a
a
a
a
a
a
aaaaaaaaaaaaaaaaaaaaaaa
50hz.
aaaaaaaaaaaaaaaaaaaaaaa
aaaaaaaaaaaaaaaaaaaaaaa
aaaaaaaaaaaaaaaaaaaaaaa
Configuration
aaaaaaaaaaaaaaaaaaaaaaa
aaaaaaaaaaaaaaaaaaaaa
60hz.
aaaaaaaaaaaaaaaaaaaaa
aaaaaaaaaaaaaaaaaaaaa
aaaaaaaaaaaaaaaaaaaaa
Configuration
aaaaaaaaaaaaaaaaaaaaa
aaaaaaaaaaaaaaaaaaaaa
aaaaaaaaaaaaaaaaaaaaa
aaaaaaaaaaaaaaaaaaaaa
a
a
a
a
a
vi XEROX MRP FAMILY COAX COMMAND REFERENCE
These laser warning labels are placed on panels that cover areas
that are not operator serviceable. These panels are not to be
removed.
Page 7
Operational safety
NOTICES
Your Xerox equipment and supplies are designed and tested to
meet strict safety requirements. These requirements include
safety agency examination, approval, and compliance with
established environmental standards.
Follow these notes to ensure safe operation of your equipment.
Do this
Always connect equipment to a properly grounded power source
receptacle. If in doubt, have the receptacle checked by a
qualified electrician.
WARNING: Improper connection of the equipment grounding
conductor can result in electrical shock.
Always place equipment on a floor with adequate strength for
the weight of the machine.
Always have your Xerox service representative move or relocate
the equipment.
Always use materials and supplies specifically designed for your
Xerox equipment.
WARNING: Use of unsuitable materials may result in poor
performance and can possibly create a hazardous condition.
Always use a Xerox specified cordset with the Equipment Leakage
Circuit Interrupter/Residual Current Device (ELCI/RCD).
Do not do this
Never use an extension cord with the ELCI/RCD.
Never use the ELCI/RCD where water may enter the casing.
Never attempt any maintenance function that is not specifically
described in your Xerox MRP family documentations.
Never remove any covers or guards that are fastened with screws
unless otherwise instructed. There are no operator-serviceable
areas within these covers.
Never override or “cheat” electrical or mechanical devices.
Never operate the equipment if you notice unusual noises or
odors. Disconnect the power cord from the power source
receptacle and call Xerox service to correct the problem.
U.S. only: If you need any additional safety information
concerning the equipment or if you need Xerox supplied
materials, call the following toll-free number: 1-800-828-6571.
XEROX MRP FAMILY COAX COMMAND REFERENCE vii
Page 8

NOTICES
Approvals and certification
60 Hz, 115 V Listed by Underwriters Laboratories (UL), UL1950. Meets CSA
standards, C22.2 NO 950.
50 Hz, 220 - 240 V UL classified to IEC 950
The CE marking applied to this product symbolises Rank Xerox
Declaration of Conformity with the following applicable
Directives of the European Union as of the dates indicated:
January 1, 1995: Council Directive 73/23/EEC amended by
Council Directive 93/68/EEC, approximation of the laws of the
member states related to low voltage equipment.
January 1, 1995: Council Directive 89/336/EEC, approximation of
the laws of the member states related to electromagnetic
compatibility.
A full declaration, defining the relevant Directives and referenced
standards can be obtained from your Rank Xerox representative.
Safety feature
Your printer is equipped with an Equipment Leakage Circuit
Interrupter/Residual Current Device (ELCI/RCD). This safety
device protects you if an electric outlet supplying power to the
printer is improperly wired.
U.S. configuration of ELCI/RCD
1 Window
2 Reset button.
viii XEROX MRP FAMILY COAX COMMAND REFERENCE
Page 9

International configuration of ELCI/RCD
1 Window
2 Reset button.
NOTICES
If power to the printer is interrupted, follow these steps:
1. Locate the safety device, using the U.S. or International
Configuration (refer to the appropriate illustration).
2. Check to see if a red flag displays in the window of the
safety device.
3. If the red flag does not display, press and release the black
Reset button.
The red flag displays and power is restored to the system.
If power is not restored by this procedure or if the device
interrupts power to the machine again, call your Xerox service
representative.
XEROX MRP FAMILY COAX COMMAND REFERENCE ix
Page 10

Page 11

Table of contents
Notices iii
Installation caution iii
Safety iii
Laser safety iv
Operational safety vii
Introduction xix
About this manual xix
Conventions xix
1. Overview and printer setup 1-1
Emulated printers 1-1
Features and compatibilities 1-3
MRP Family user interface interaction with coax interface 1-3
Printer setup 1-3
Print Language Setup - HP LaserJet Emulation Mode 1-4
Printing 132 characters by 66 lines landscape with Xerox 3816
font (FONT0204) 1-4
Configuring the Coax interface card 1-6
Page size 1-7
Print language 1-7
Printer address and emulation 1-7
Checking the interface configuration 1-7
FSL cross reference for the coax configuration page 1-9
Printing of blank pages after downloading configuration and font data 1-10
MRP Family delete current job capability 1-10
2. DSC and SCS data stream commands 2-1
DSC control codes 2-1
Command summary and comparison 2-2
DSC command descriptions 2-3
Carriage Return (CR) 2-3
End of Message (EM) 2-3
Form Feed (FF) 2-3
New Line (NL) 2-3
Null (NUL) 2-4
Reserved codes 2-4
XEROX MRP FAMILY COAX COMMAND REFERENCE xi
Page 12

TABLE OF CONTENTS
SCS data stream structure 2-5
Command summary 2-5
Supported SCS commands 2-6
SCS command comparison 2-6
Command descriptions 2-7
Back Space (BS) 2-7
Bell (BEL) 2-8
Carriage Return (CR) 2-8
Enable Print (ENP) 2-8
Form Feed (FF) 2-8
Graphic Escape (GE) 2-9
Horizontal Tab (HT) 2-9
Inhibit Print (INP) 2-9
Interchange Record Separator (IRS) 2-10
Line Feed (LF) 2-10
New Line (NL) 2-10
Page Presentation Media (PPM) 2-11
Set Attribute (SA) 2-12
Set Graphic Error Action (SGEA) 2-13
Set Horizontal Format (SHF) 2-14
Set Line Density (SLD) 2-16
Set Print Density (SPD) 2-17
Set Vertical Format (SVF) 2-18
Transparent (TRN) 2-20
Vertical Channel Select (VCS) 2-20
Vertical Tab (VT) 2-21
3. Function Selection via Line (FSL) commands 3-1
Setting levels 3-1
Storing and reading settings 3-1
Actions at power up 3-2
Function Selection via Line (FSL) 3-2
FSL escape character 3-3
Types of FSL escape character 3-3
Using FSL escape character 3-3
FSL types 3-5
General syntax of an FSL command 3-5
FSL commands 3-5
Command descriptions 3-8
ESC—Single Paired Hex Transparent 3-9
ESC-ESC—Multiple Paired Hex Transparent 3-9
xii XEROX MRP FAMILY COAX COMMAND REFERENCE
Page 13

TABLE OF CONTENTS
T1—Offline Hex Dump (PCIA Dump) 3-10
T2—Online Hex Dump 3-10
T3—Online ASCII Hex Dump 3-10
T4—Printout Settings 3-10
T5—Printout Character Set 3-11
T6—Cancel Online ASCII Hex Dump 3-11
W—Print Bar Code 3-11
X0—Set Printer in Hold Mode 3-11
X1—Store Settings in Permanent Storage 3-11
X2—Restore Settings from Permanent Storage 3-12
X3—Restore Factory Default Settings 3-12
X4—Restore Settings from Permanent Storage 3-12
Y1—Set IBM Buffer Size 3-12
Y2—Set Default LPI 3-13
Y3—Set Default CPI 3-14
Y4—Set Default Line Spacing (single/double) 3-14
Y5—Set Default Maximum Page Length (MPL) 3-15
Y6—Set Default Maximum Print Position (MPP) 3-16
Y7—Set Case (mono, dual) 3-16
Y8—Set LU1 Language 3-17
Y9—Set Default Print Quality 3-18
Y10—Set Page Format 3-19
Y11—Set Default Paper Path 3-20
Y12—Set Default Paper Size 3-22
Y13—Set Wrap/Cut Option at Physical Paper Size 3-23
Y14—Enable Graphic Option 3-23
Y19—Set Simplex / Duplex 3-23
Y25—FF Before Local Copy 3-25
Y26—FF After Local Copy 3-26
Y27—Non-SCS Print Image 3-28
Y28—Non-SCS, CR at MPP + 1 3-29
Y29—Non SCS, NL at MPP + 1 3-30
Y30—Non-SCS, Valid FF Followed by Data 3-31
Y31—Non-SCS, Valid FF at End of Print Buffer 3-32
Y32—Non-SCS, FF Valid 3-33
Y33—Non-SCS, Automatic Function at End of Job 3-34
Y34—Last LF on Page Sent as FF 3-35
Y36—Suppress IBM Control Code 3-35
Y37—IBM Printer Emulation Select 3-36
Y38—IBM Communication Feature (Query, EAB) 3-37
XEROX MRP FAMILY COAX COMMAND REFERENCE xiii
Page 14

TABLE OF CONTENTS
Y44—Suppress CR and SP to Same Position 3-37
Y46—Set IRQ Timer 3-38
Y47—ESC-Mode Selection 3-39
Y48—Set Permanent Escape 3-40
Y49—Restrict Access of Temporary and Permanent Settings 3-40
Y50—FF After Time Elapse 3-41
Y51—User Strings at Power Up 3-41
Y57—User-defined String Before Local Copy 3-42
Y58—User-defined String After Local Copy 3-42
Y59—Bar Code Definition 3-43
Y60—Font Link for GFIDs 3-45
Y61—Setup for User-defined Strings 3-47
Y62—Setup for IBM-defined Strings 3-48
Y71—Create Translate Table 3-52
Y72—Reset Translate Table 3-52
Y73—Select Translate Table 3-52
Y74—Define Symbol Set String 3-53
Y75—Overwrite Translate Table 3-53
Y76—Create APL Translate Table 3-54
Y77—Reset APL Translate Table 3-55
Y78—Select APL Translate Table 3-55
Y80—Overwrite APL Translate Table 3-56
Y88—Define Page Offset 3-57
Y89—Enable Page Offset 3-57
Y90—Define User Escape String 3-58
Y91—GFID/Font Select Setup 3-59
Y92—Point Size Strings 3-61
Y93—Attribute Strings 3-61
Y94—Typeface Strings 3-61
Y96—GFID Select 3-62
Y98—Enable Automatic Page Orientation (APO) Support 3-62
Y100—Printer Share String and Timer 3-63
Y119—Enable/disable automatic paper size configuration 3-64
Y120—Setting Printout at Power Up 3-64
Y249—Enter Engineering Mode 3-64
Y253—Allow passwords 3-65
Z—Send User-defined Strings 3-65
Page layout functions 3-65
Placing commands in the data stream 3-65
Page Orientation algorithm 3-66
xiv XEROX MRP FAMILY COAX COMMAND REFERENCE
Page 15

TABLE OF CONTENTS
Logical Page Size 3-68
4. Font support and selection 4-1
Supported fonts 4-1
Included fonts 4-1
Global Font Identifiers (GFIDs) 4-3
GFID to PCL font mapping 4-3
Print density to GFID mapping 4-4
Font selection via FSL in coax 4-5
Font selection using printer resident PCL fonts 4-5
Font selection using the 3812/3816 compatibility font set 4-5
Procedures for selecting fonts 4-5
Selecting non-Computer Output Reduction (COR) fonts 4-5
Selecting COR fonts 4-6
Character sets 4-7
5. Error handling 5-1
IBM error types 5-1
Recoverable printer errors 5-2
FSL error messages 5-2
Recoverable errors 5-2
Nonrecoverable hardware errors 5-3
6. Configuration and sysgen samples 6-1
Coax printers line configurations 6-1
Sysgen samples 6-3
Sample IO Gen for the 3174/3274—non SNA controller 6-4
Sample VTAM parameter for local non-SNA 3270 terminal
and printer 6-4
Sample VTAM parameter for local SNA 3270 terminal
and printer 6-4
Sample NCP Gen—Group, Line, PU, and LU
definitions—3274-61C 6-5
Sample NCP Gen—Group, Line, PU, and LU
definitions—3276-C 6-6
JES/328X print facility parameters 6-6
Sample mode table entries for 3278-2 terminals
(by control unit type) 6-7
Sample mode table entries for 3287 printers
(all control units) 6-7
XEROX MRP FAMILY COAX COMMAND REFERENCE xv
Page 16

TABLE OF CONTENTS
7. Configuration and Resource Utility (MVS) 7-1
Installing your Configuration and Resource Utility 7-1
Invoking the configuration and Resource Utility 7-6
Managing fonts 7-6
Loading fonts 7-7
Accessing the Font List screen 7-8
Managing forms 7-8
Loading Xerox forms 7-9
Accessing the Form List screen 7-9
Managing lists of resources 7-9
Loading lists of resources 7-10
Accessing the List Manager screen 7-10
Downloading ASCII files 7-10
VPS 6.2 transparency 7-11
Configuration Description List 7-11
Accessing the Configuration Description List screen 7-11
Creating a configuration file 7-13
Creating the User-created FLS 7-14
Modifying and loading a configuration file 7-45
Deleting or copying a configuration file 7-15
Configuration in the VM environment 7-15
Configuration and Resource Utility components 7-16
Selecting functions 7-16
Accesing the MVS ISPF Primary Option Menu 7-17
Invoking the Configuration adn Resource Utility 7-18
Create Configuration Description 7-19
Saving a Creat Configuration Descriiption 7-21
Change Configuration Description 7-21
Saving a Change Configuration Descriiption 7-23
Handling error messages 7-23
Clist code listing 7-23
Listing configuration description 7-23
Creating configuration descriptions 7-24
Changing configuration descriptions 7-24
Loading configuration descriptions 7-24
Loading fonts 7-25
Appendices
A. Font and code set tables A-1
B. DSC option defaults B-1
xvi XEROX MRP FAMILY COAX COMMAND REFERENCE
Page 17

TABLE OF CONTENTS
C. Command summary C-1
D. Coax communications buffer D-1
Communications buffer D-1
Printer Output Area D-2
Contol Unit Output Area D-4
Orders D-7
E. IBM GFID to PCL fonts attribute E-1
F. Helpful hints F-1
G. Query Replies G-1
H. Related Publications H-1
I. Forms Utility for the coax environment I-1
Glossary GLOSSARY–1
Index INDEX–1
XEROX MRP FAMILY COAX COMMAND REFERENCE xvii
Page 18

Page 19
About this manual
Introduction
The Xerox MRP Family Coax Command Reference, intended as a
learning tool and as a reference guide, provides the user, host
system programmer, and the System Administrator with a
comprehensive reference to printing on the Xerox MRP Family
coax printers.
The procedures presented in this manual assume that you have a
basic knowledge and understanding of IBM computer systems,
especially the IBM 3270 Information Display System in the coax
environment.
Become familiar with the contents and conventions in this
“Introduction” chapter before using this manual.
Conventions
This manual uses conventions in text and procedures to help you
recognize different types of information.
Text conventions
This manual uses the following text conventions throughout.
CAUTION: Cautions are associated with equipment safety.
WARNING: Warnings are associated with the safety of people.
N Notes are hints that help you perform a task or understand the
text.
italics Items are italicized for the following reasons:
• Document and library names (for example, the Xerox MRP
Family Printer Language Reference for PCL 5 and PostScript)
XEROX MRP FAMILY COAX COMMAND REFERENCE xix
Page 20

INTRODUCTION
• Variable information (for example, password)
• For emphasis.
X Represents hexadecimal (HEX) code. For example: X'05' or X'25'
MB Megabyte.
KB Kilobyte.
GSM Grams per one square meter of paper.
type When instructed to type information, do not press the Enter key.
enter “Enter” is used to describe a two-step process of keying in data
and pressing the Enter key (for example, enter print the
README file requires typing the data, printing the README file,
and pressing the Enter key).
bold Bold text is used for characters you enter (for example, enter
\psfax\install\a), and for command syntax.
asterisk (*) Default menu options are followed by an asterisk.
<UPPERCASE> Uppercase in angle brackets is used for keys that do not have
icons (for example, press <ESC>).
menus, modes, options, and commands These have downstyle capitalization (for example, Configuration
menu, Duplex mode, Symbol Set option, and Set Attribute
command).
index notations The use of lowercase letters f, i, and t in the index section
denote figure, illustration, and table, respectively (for example, 61f, 7-2i, 2-2t).
screen representations Illustrations and screen representations contained within this
manual may differ slightly from what actually appears on your
screen.
Procedure conventions
This guide uses the following conventions within printer control
panel procedures.
A function key, when referred to in the main text of this manual,
is identified by its name followed by the icon representing the
key.
Clear/C
Last Page/
L
Main Menu/M
Off-Line/O
Pause/P
Reset/R
Scroll Next/2
Scroll Previous/1
Test Mode/T
A function key, specified in a numbered step-by-step example, is
identified by the icon in the left margin and the associated key
name in the text of the numbered step. For example:
R 1. Press the Reset key.
xx XEROX MRP FAMILY COAX COMMAND REFERENCE
Page 21

INTRODUCTION
222 Indicates that this key must be pressed three times.
Window messages Reference to messages displayed at the control panel appear in
text like this:
PLEASE WAIT...
FINISHING CURRENT JOB
Procedure conventions—personal computer (PC)
Keyboard key A keyboard key name is boldface with downstyle capitalization.
For example: Press the Tab key.
Key+key A plus sign used between two key names indicates that these
keys must be pressed at the same time. For example: Press the
Alt+A means that you should press and hold down the Alt key
while you press the A key.
FILENAMES Names of files are displayed in uppercase italics.
Type When instructed to type information, do not press the Enter key.
Enter When instructed to enter information, type the information and
press the Enter key.
XEROX MRP FAMILY COAX COMMAND REFERENCE xxi
Page 22

Page 23

Emulated printers
1. Overview and printer setup
This chapter describes the operation of the Xerox MRP Family
printers internal interfaces in a coax environment.
Refer to the “Overview” chapter in your Xerox MRP Printer
Operator Guide for detailed descriptions of the features,
operating environment, hardware and software requirements of
your MRP Family printer.
Your Xerox printer coax interface provides compatibility with
several IBM printers. Its internal coax connectivity provides
superior performance and support for the vast majority of data
processing and office automation applications running on IBM
mid-range systems.
Your Xerox coax printer emulates existing IBM printers with no
changes to your present applications or procedures. The internal
coax connectivity allows you to enable the data streams of the
Data Stream Compatibility (DSC), Systems Network Architecture
(SNA) Character String (SCS), or Intelligent Printer Data Stream
(IPDS) while still processing Printer Control Language (PCL) 5 or
PostScript Level 2 concurrently through serial or parallel ports.
XEROX MRP FAMILY COAX COMMAND REFERENCE 1-1
Page 24
OVERVIEW AND PRINTER SETUP
Printer (Model) Type Speed CPI LPI Character sets
Table 1-1. Xerox printer coax emulations
3287 (1,2) Dot-matrix 80/120 cps
(models1/2)
3268 (2, 2C) Dot-matrix Up to 340
cps
3262 (3, 13) Band printer Up to 650
lpm
3812/3816 (1, 2)
Model 2-IPDS
4028 (NS1) Laser (300
Laser (240
dpi)
dip)
Up to 12/24
ppm
Up to 10
ppm
4214 (1) Dot-matrix Up to 200
cps
4245 (D12, D20) Band printer 1,200/2,000
lpm
(D12/D20)
6262 (D12, D14,
D22)
Band printer 1,200/1,400/
2200 lpm
(D12/D14/
D22)
10 3, 4, 6, 8 Various
10, 16.7 3, 4, 6, 8 Various
10 3, 4, 6, 8 Depends on band
mounted: 48—128
characters
10, 12, 15,
17
3, 4, 6, 8 User selectable with
61 standard fonts
n/a n/a Various fixed pitch
and typographic
with 32 resident
5, 10, 12,
3, 4, 6, 8 Various
15, 16.7
10 3, 4, 6, 8 Depends on band
mounted: 48—142
characters
10 3, 4, 6, 8 Depends on band
mounted: 48—192
characters
The following functions are not supported by your Xerox MRP
Family coax printers:
• Compression or compaction
• Color
• Full IBM A Programming Language (APL) character sets
• Function management headers (supported with IPDS)
• Katakana character set
• Graphical Data Display Manager (GDDM) (supported with
IPDS).
1-2 XEROX MRP FAMILY COAX COMMAND REFERENCE
Page 25

Features and compatibilities
OVERVIEW AND PRINTER SETUP
Your Xerox coax printers support the following features and
compatibility, and have these capabilities:
• Control of coax setup using a set of Host Utilities. These
utilities provide a high-level user interface to the set of
Function Selection via Line (FSL) commands that properly
customize the coax interfaces.
• Enables HP PCL 5 and PostScript Level 2 over all interfaces.
• Complete set of 3816 compatible fonts are provided with the
printer on a 9-track tape.
• Emulates the IBM coax printers shown in Table 1-1.
• U.S. or European settings using dipswitches
• Backwards compatibility with Xerox 3270 HS interface
• Automatic input sharing between coax and all other printer
interface ports
• Concurrent support of Systems Network Architecture (SNA)
Character String (SCS), Data Stream Compatibility (DSC),
3270 data streams (LU1), Intelligent Printer Data Stream
(IPDS), PCL 5, and PostScript Level 2
• Support for downloading new interface firmware.
• Hexadecimal (HEX) dump, ASCII HEX dump, and HEX dump
Printer Communication Interface Area (PCIA) dump to aid in
the debugging of coax interface problems.
The Xerox coax interface is designed to upgrade with an
Intelligent Printer Data Stream (IPDS) module. The support for
IPDS is done by plugging an IPDS-module on top of the
interface.
MRP Family user interface interaction with coax interface
The MRP Family coax interface communicates to the printer
controller in PCL. The following information clarifies printer
setup and user interface changes.
Printer setup
Default “Input Tray” and “Output Destination” settings from the
UI have no effect on the coax interface. For all jobs from the
coax interface, PCL commands are sent specifying a paper tray,
paper size, and output destination.
At installation, the default tray is #1 (PCL source 1), paper size is
letter or A4 depending on the ST1 jumper setting on the
interface card, and the output destination is PCL destination 1,
which defaults to the top tray. You may change the default
paper tray and destination by using an FSL Y11 command.
Details on this command for the coax environment are included
in this document. The other interfaces of the machine are
unaffected. Any embedded language commands override the
user interface settings.
XEROX MRP FAMILY COAX COMMAND REFERENCE 1-3
Page 26

OVERVIEW AND PRINTER SETUP
If coax jobs are printed from Tray 5, set the “Tray 5 Size Setup”
option to a size supported by the Xerox MRP Family PCL
emulation only. This also applies to the manual settings of the
other paper trays. The 11 standard size paper stocks and
envelopes are documented in the "Print language setup menu"
section of the System Administrator Guide.
Refer to the Xerox MRP Family System Administrator Guide for a
description of the parameters in the printer setup.
Print Language Setup - HP LaserJet Emulation Mode
The “Font” selection does not determine the default font for
coax printing. The interface cards send PCL font characteristics
that best match the IBM fonts and select an internal PCL font or
3816 emulation font accordingly. The default font is changed
using specific FSL commands described in this manual.
For the duplex capability and setup functions, refer to the Xerox
MRP Family System Administrator Guide. If banner sheets are
enabled, job data may print on the back of the banner sheets or
vice versa.
There are three methods to change the input paper tray. Refer
to the “Function Selection via Line (FSL) commands” chapter.
The “Input Tray to Command Assignment“ selection maps the
PCL paper source command numbers (not tray numbers) to
other trays. This allows you to map most of the PCL source
commands sent by the interface cards to select a paper tray that
is different than the default. An example is to change the default
paper feed from Tray 1 to the high-capacity feeder Tray 4.
However, you can no longer access input Tray 1 for jobs from
coax interface or in PCL. In addition, the printer PCL5 driver
does not appear to function correctly when you try to use it.
The preferred method is to utilize the Configuration and
Resource Utilities for selecting a default tray.
Printing 132 characters by 66 lines landscape with Xerox 3816 font (FONT0204)
1. Download the Xerox 3816 font named "FONT0204".
2. Create a configuration description for a 132 character MPP
and a 66 line MPL. Refer to Chapter 3 for more information
on setting MPP and MPL.
3. Create a user-defined FSL file/member that contains one of
the following:
For 8.5" x 11" paper use:
&&??@@Y96,204@
&&??@@Y62, 104, 1B, 28, 32, 30, 32, 30, 34, 58, 1B, 26, 6C, 31, 6F, 35, 2E, 34 35, 43@
&&??<space>
1-4 XEROX MRP FAMILY COAX COMMAND REFERENCE
Page 27

OVERVIEW AND PRINTER SETUP
For A4 paper use:
&&??@@Y96,204@
&&??@@Y62, 104, 1B, 28, 32, 30, 32, 30, 34, 58, 1B, 26, 6C, 31, 6F, 35, 2E, 33, 30, 43@
&&??<space>
This FSL sequence defines the PCL code that selects FONT0204
as the default landscape font and set the vertical motion index to
avalue that will allow for 66 lines on the page.
There is no need to put any FSL into the user data stream.
XEROX MRP FAMILY COAX COMMAND REFERENCE 1-5
Page 28

OVERVIEW AND PRINTER SETUP
Configuring the Coax interface card
Figure 1-1 illustrates the top view, and figure 1-2 illustrates the
side view of the coax interface card. You should never attempt
to remove the interface card from the printer motherboard. Your
service representative configures the coax interface card to your
specifications at installation. This illustration and subsequent
jumper setting descriptions are provided only for your
information.
Figure 1-1. Coax interface card (top view)
ST1 sets the default paper size
ST2 sets the default print language
Figure 1-2. Coax interface card (side view)
1 Test button
2 CU LED (if light is not on, printer is not connected)
3 Parallel share port (reserved for Xerox use)
4 Coax connector
1-6 XEROX MRP FAMILY COAX COMMAND REFERENCE
Page 29
Page size
aaaaaaaaa
a
a
a
a
a
a
a
a
a
a
a
a
a
aaaaaaaaaaa
a
a
a
a
a
a
a
a
a
a
a
a
a
OVERVIEW AND PRINTER SETUP
ST1
Print language
aaaaaaaaa
aaaaaaaaa
aaaaaaaaa
aaaaaaaaa
aaaaaaaaa
aaaaaaaaa
aaaaaaaaa
ST2
a
a
a
a
a
a
a
Printer address and emulation
aaaaaaa
aaaaaaa
aaaaaaa
aaaaaaa
aaaaaaa
aaaaaaa
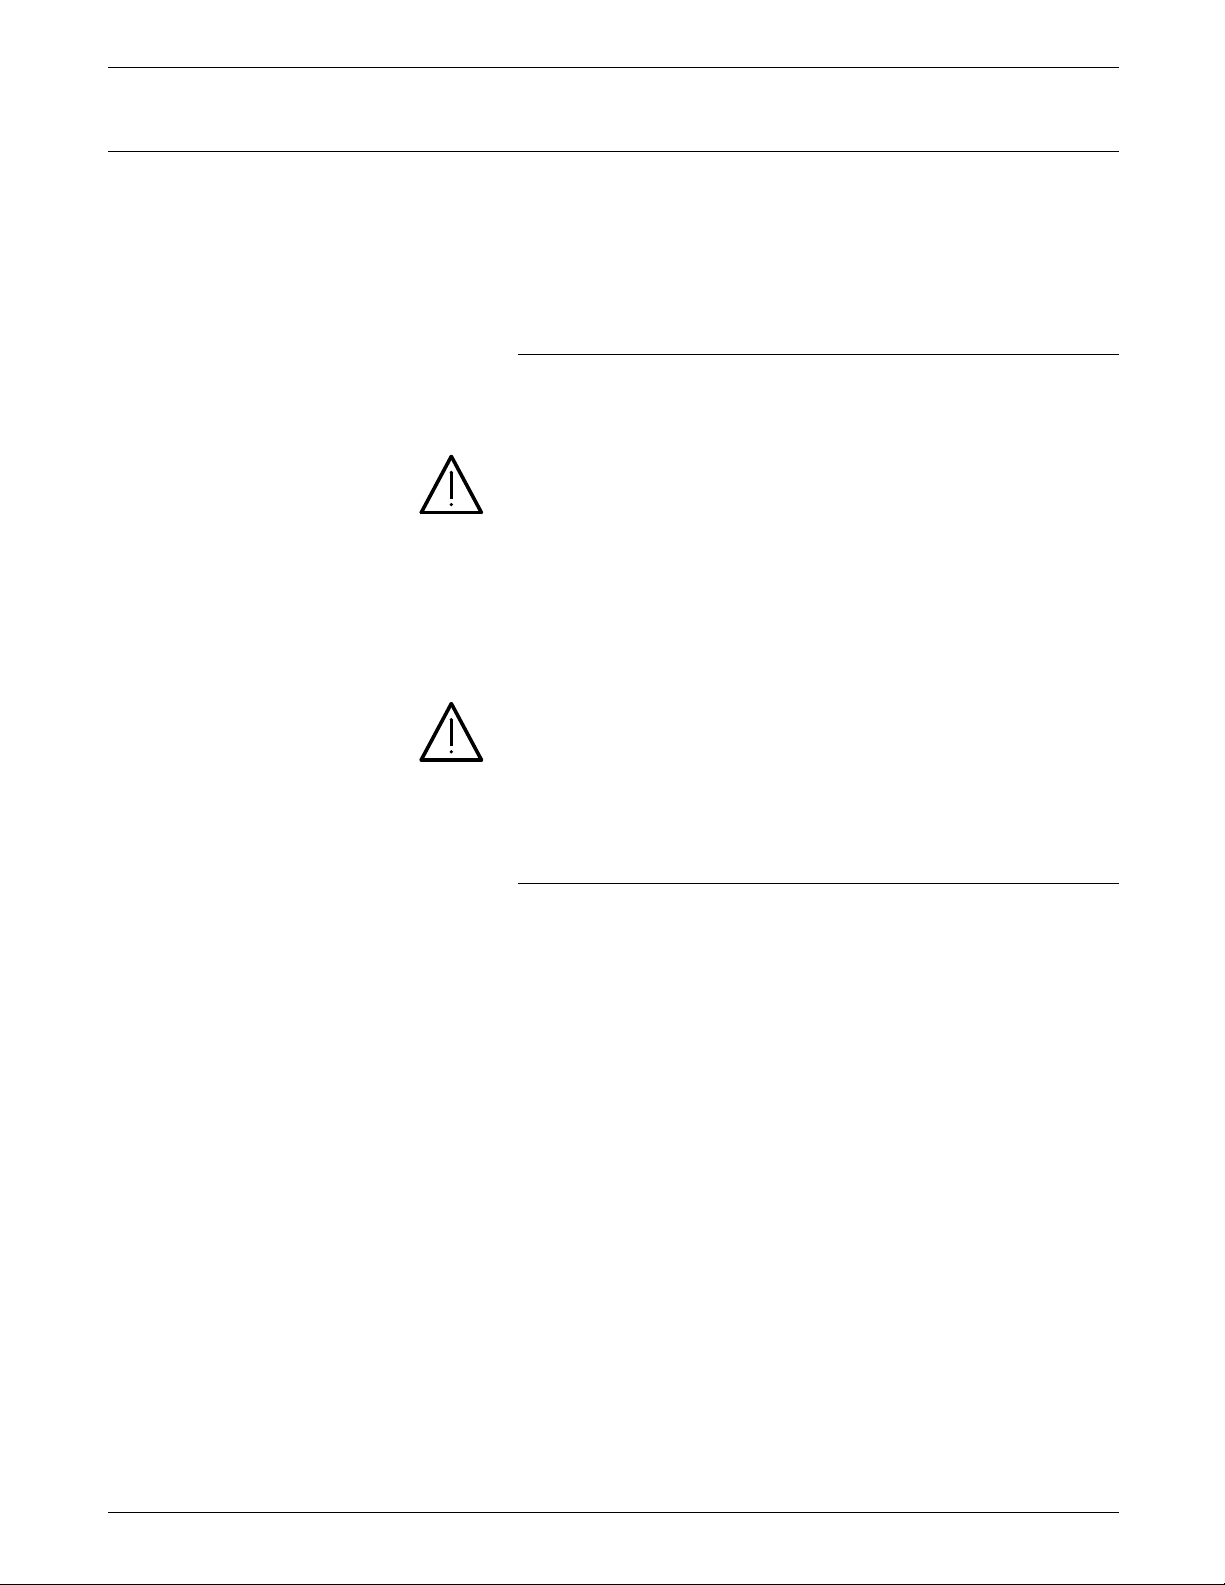
The default page size is set with a 2-pin jumper (ST1). The
a
a
jumper is turned OFF by placing the jumper shunt over only 1
a
a
a
pin, as shown in the illustration at left. The jumper is turned ON
a
by covering both pins. Turning the jumper OFF sets the page
size default to U. S. (8.5x11). Turning the jumper ON sets the
page size default to European A4 (8.27x11.69).
This figure shows the location of the page size jumper on the
coax interface card. DO NOT move the jumper shunt. The
jumper should be changed only by your service representative.
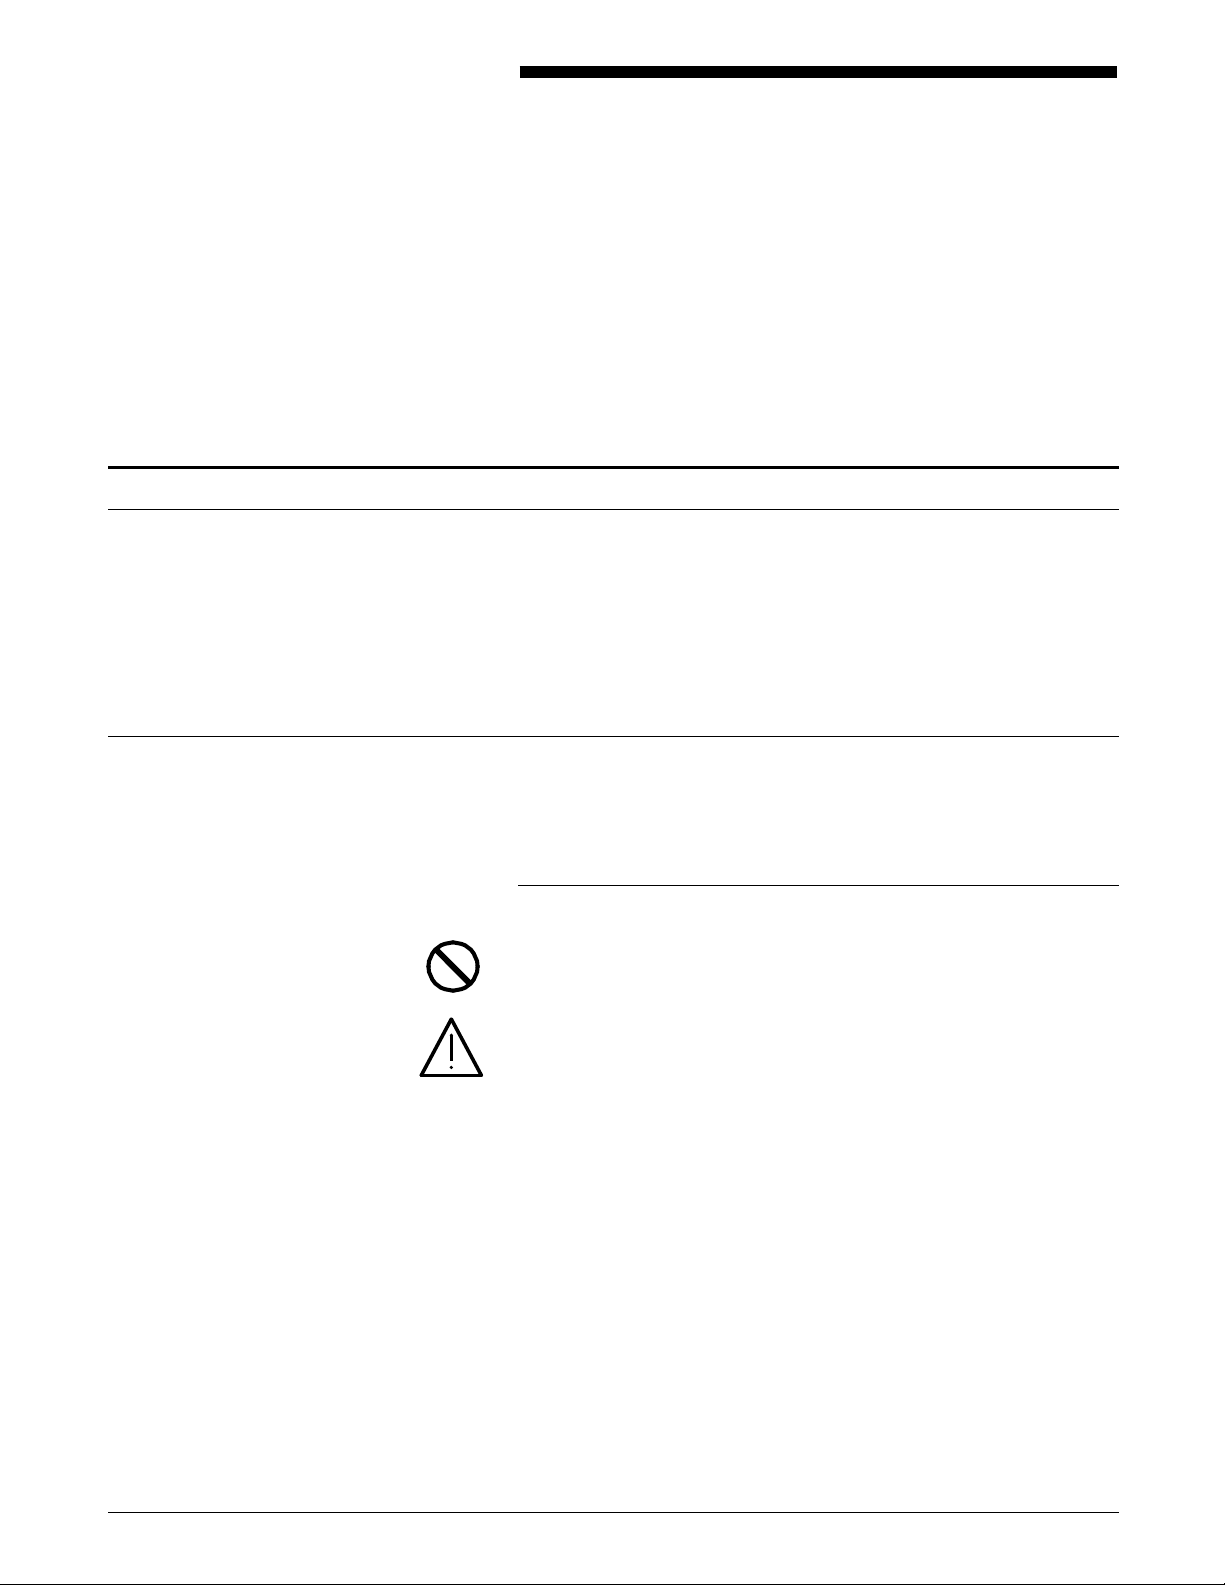
The default print language is determined by the placement of a
shunt over a 3-pin jumper (ST2). The illustration at left shows the
jumper configuration. The printer will work properly only with
the jumper in the standard configuration. The shunt should
always be placed over the two pins closest to the edge of the
interface card. DO NOT move the jumper shunt. The jumper
should be changed only by your service representative. This
figure shows the location of the print language jumper on the
coax interface card
Coaxial default settings for the printer emulation can only be set
through the FSL Function. Refer to Chapter 3 for instructions
and a complete list of coax printers the interface can emulate.
Checking the interface configuration
You can check the configuration of your interface by using one
of the following methods:
• Printing the Interface Configuration Report from the Utilities
• Using the Function Selection via Line (FSL) command T4—
• Pressing the test button on the interface card (refer to Figure
Refer to the “T2—Online Hex Dump” and “T4—Printout Settings”
sections in the “Function Selection via Line (FSL) commands”
chapter for information on how to use these FSL function
commands.
For a description of the procedures for printing the coax
Interface Configuration Report from the control panel through
the Utilities menu, refer to “ Interface Configuration Report”
Menu of the User Interface. (Refer to that section in the
“Utilities menu” chapter of the Xerox MRP Family System
Administration Guide.)
Printout Settings (in non-IPDS only)
1-2).
XEROX MRP FAMILY COAX COMMAND REFERENCE 1-7
Page 30

OVERVIEW AND PRINTER SETUP
section of the “Utilities menu” chapter of the Xerox MRP Family
System Administration Guide (refer to Figure 1-3 example).
Figure 1-3. Sample of a Coax Interface Configuration Report
1-8 XEROX MRP FAMILY COAX COMMAND REFERENCE
Page 31

OVERVIEW AND PRINTER SETUP
FSL cross reference for the coax configuration page
The default settings on the coax configuration page are printed
using references to the FSL (Function Select via Line) command
numbers. A list of the items that are printed on the
configuration page is shown in table 1-2. Next to each item is an
abbreviated configuration command name in parentheses.
Table 1-2. Command numbers and names
Func # 1 set to 4 (IBM buffer size) Func # 32 set to 0 (Non-SCS valid FF)
Func # 2 set to 6 (Lines per inch) Func # 33 set to 0 (Non-SCS A.F, at end of job)
Func # 3 set to 10 (Characters per inch) Func # 34 set to 1 (Last LF as FF)
Func # 5 set to 62 (Max page length) Func # 36 set to 0 (Suppress IBM ctrl code)
Func # 6 set to 132 (Max print line) Func # 37 set to 1 (Printer Emulation)
Func # 7 set to 1 (Set case) Func # 38 set to 1 (Communication feature)
Func # 8 set to 0 (Set LU1 language) Func # 44 set to 1 (Suppress CR & SP)
Func # 10 set to 0 (Set page format) Func # 46 set to 12 (Set IRQ timer)
Func # 11 set to 2 (Default paper path) Func # 47 set to 1 (ESC mode selection)
Func # 12 set to 3 (Default paper size) Func # 49 set to 0 (Restrict access)
Func # 13 set to 1 (Set wrap/Cut option) Func # 50 set to 0 (FF after timeout)
Func # 14 set to 1 (Enable graphic option) Func # 73 set to 0 (Select translate table)
Func # 19 set to 0 (Set simplex/duplex) Func # 78 set to 1 (Select APL translate table)
Func # 25 set to 0 (FF before local copy) Func # 79 set to 0 (not used)
Func # 26 set to 1 (FF after local copy) Func # 89 set to 0 (Enable page offset)
Func # 27 set to 0 (Non-SCS print image) Func # 98 set to 1 (Enable APO)
Func # 28 set to 0 (Non-SCS CR at MPP+1) Func # 110 set to 1 (not used)
Func # 29 set to 0 (Non-SCS NL at MPP+1) Func # 111 set to 0 (not used)
Func # 30 set to 1 (Non-SCS valid FF+data) Func # 112 set to 0 (not used)
Func # 31 set to 1 (Non-SCS valid FF at end) Func # 113 set to 1 (not used)
Func # 119 set to 2 (Enable Auto paper size
configuration)
Func # 120 set to 1 (settings at power up)
FSL Y4, Set Default Line Spacing (Line Spacing - Single, Double),
can be changed, but does not show up on the configuration
report.
FSL Y9, Active GFID, appears on the bottom half of the
configuration page.
For more information on these FSL commands, refer to the
“Function Select via Line commands” chapter. This chapter
includes detailed information on the definition and use of the FSL
commands.
For more information on the use of the Coax Configuration and
Resource Utility, refer to the “Coax Utility” chapter in this
manual.
XEROX MRP FAMILY COAX COMMAND REFERENCE 1-9
Page 32

OVERVIEW AND PRINTER SETUP
Printing of blank pages after downloading configuration and font data
Your MRP Family usually prints a blank page after a configuration
description or a font is downloaded from the Configuration and
Resource Utility.
This blank page is required to properly invoke the commands
that reconfigure the printer or store the fonts.
MRP Family delete current job capability
If you want to return to the main menu while a job is printing,
the user interface provides you with the capability of deleting the
current job before doing so (refer to the Xerox MRP Family
System Administrator’s Guide). By responding yes, you only
delete that portion of the job that was received by the printer.
Any outstanding pages at the host are not deleted and may be
sent by the host to the printer once you place the printer back
into print mode. In the coax and twinax interfaces in particular,
you do not have the capability of deleting a job from the host
that is currently being sent to the printer.
1-10 XEROX MRP FAMILY COAX COMMAND REFERENCE
Page 33

2. DSC and SCS
data stream commands
The emulated IBM printers support a range of data stream
commands. Some commands are ignored by certain models,
while others are implemented within the feature restrictions
imposed by the particular printer.
The data stream commands described in this chapter control the
formatting of the printed data. Your Xerox MRP Family coax
printers support the following types of commands:
• Data Stream Compatibility (DSC)
• SNA (Systems Network Architecture) Character String (SCS).
At the beginning of each section is a table summarizing the
commands in hexadecimal order and a comparison table showing
how the commands are supported for each emulation. The
descriptions of the commands are presented alphabetically.
DSC control codes
Remember PCL 5 emulation and PostScript Level 2 are supported using
transparencies. Refer to the “Transparent (TRN)” command
section for detailed information on using this command.
DSC control codes have different meanings in unformatted and
formatted modes:
• In unformatted mode, the line length and carriage movement
is controlled by New Line (NL), Carriage Return (CR), and End
of Message (EM) control codes. EM terminates buffers.
• In formatted mode, the control codes NL, CR, and EM are
ignored. Lines are filled to the maximum print position
(MPP) or maximum line print; then an implicit new line is
performed.
Form Feed (FF) is valid in DSC mode provided its position is
valid. The positional attributes of FF apply to both formatted and
unformatted modes of operation.
XEROX MRP FAMILY COAX COMMAND REFERENCE 2-1
Page 34

DSC AND SCS DATA STREAM COMMANDS
Command summary and comparison
Table 2-1 is a summary of DSC commands that the Xerox coax
printer handles for the various printers emulated. Refer to the
“Function Selection via Line (FSL) commands” chapter to check
the commands corresponding to the DSC options.
• = Supported as described in this manual.
Blank = Not supported
Table 2-1. DSC command summary and comparison
DSC Command
00
Null (NUL)
01
End of Message
(EM)
02
Form Feed (FF)
03
New Line (NL)
04
Reserved
05
Carriage Return
(CR)
06
Reserved
07
Reserved
3262 3268 3287 3812/3816 4028 4245 6262
••• • •••
••• • •••
••• • •••
••• • •••
••• • •••
Remember End of Message (EM) terminates buffers.
2-2 XEROX MRP FAMILY COAX COMMAND REFERENCE
Page 35

DSC command descriptions
Carriage Return (CR)
End of Message (EM)
DSC AND SCS DATA STREAM COMMANDS
The descriptions of the DSC commands, shown in hexadecimal,
are listed alphabetically.
05
Moves the print position to the left margin of the current line in
an unformatted print field. In a formatted print field or
unformatted nonprint field, this control code is printed as a
space character. In a formatted nonprint field, it is printed as a
null character.
05 Control sequence of a Carriage Return command
01
Form Feed (FF)
New Line (NL)
In an unformatted print field, this control code terminates the
buffer. In a formatted print field or unformatted nonprint field,
this control code is printed as a space character. In a formatted
nonprint field, it is printed as a null character.
01 Control sequence of an End Of Message
command
02
Moves the print position to the top margin of the next form.
This movement occurs in both print and nonprint fields, and
formatted or unformatted modes.
02 Control sequence of a Form Feed command
03
Moves the print position to the first position of the next line in
an unformatted print field. In a formatted print field or
unformatted nonprint field, this control code is printed as a
space character. In a formatted nonprint field, it is printed as a
null character.
03 Control sequence of a New Line command
XEROX MRP FAMILY COAX COMMAND REFERENCE 2-3
Page 36

DSC AND SCS DATA STREAM COMMANDS
Null (NUL)
Reserved codes
00
This control code does not cause any printer function. In
unformatted mode, the printer treats this code as a space for
both print and nonprint fields. In formatted print or nonprinted
fields, a null character is printed.
00 Control sequence of a Null command
04
06
07
These control codes in an unformatted print field, unformatted
non-print field or a formatted print field are printed as a space
character. In a formatted nonprint field, they are printed as a null
character.
04
06
07
Control sequence of a Stop command
Control sequence of a Space or a Null command
2-4 XEROX MRP FAMILY COAX COMMAND REFERENCE
Page 37

SCS data stream structure
Command summary
DSC AND SCS DATA STREAM COMMANDS
The SNA Character String (SCS) has a relatively simple structure
consisting of a 1-byte hexadecimal control code followed by the
data to be printed. Multiple control codes can be inserted into
SCS by printing applications in a specific order to achieve certain
types of output.
The SCS mode can also be referred to as SNA LU1 mode.
Table 2-2 lists the hexadecimal SCS commands in alphanumeric
order.
Table 2-2. Coax commands
Code Name
04vv Vertical Channel Select (VCS)
05 Horizontal Tab (HT)
08gg Graphic Escape (GE)
0B Vertical Tab (VT)
0C Form Feed (FF)
0D Carriage Return (CR)
14 Enable Print (ENP)
15 New Line (NL)
16 Back Space (BS)
1E Interchange Record Separator (IRS)
24 Inhibit Print (INP)
25 Line Feed (LF)
28ttvv Set Attribute (SA)
2BC1nnhhlmrmht1...tn Set Horizontal Format (SHF)
2BC2nnvvvtmbmvt1..tn Set Vertical Format (SVF)
2BC6nnld Set Line Density (SLD)
2BD2nn2900cp Set Print Density (SPD)
2BD2nn48xxxxxxsddo
ddxxxxxxxx
2F Bell (BEL)
35nn Transparent (TRN)
XEROX MRP FAMILY COAX COMMAND REFERENCE 2-5
Page Presentation Media (PPM)
Page 38

DSC AND SCS DATA STREAM COMMANDS
Supported SCS commands
SCS command comparison
Table 2-3 shows the commands in hexadecimal, and presented
alphabetically, supported by the different emulations for Systems
Network Architecture (SNA) Character String (SCS).
Table 2-3 shows how your Xerox coax printers handle the SCS
commands for the IBM coax printer emulations shown.
• = supported as described in this manual
Blank = not supported
A = accepted but results in no operation, or ignored.
Table 2-3. SCS coax commands
SCS command 3262 3268
Back Space (BS)
••• • ••
16
Bell (BEL)
A A A A A A Ignored
2F
Carriage Return (CR)
••• • ••
0D
Enable Print (ENP)
A A A A • A No operation
14
Form Feed (FF)
••• • ••
0C
Graphic Escape (GE)
• • • • • • 3262 and 6262
08gg
Horizontal Tab (HT)
• • • • • • Adjust with
05
Inhibit Print (INP)
A A A A • A No operation
24
Interchange Record Separator (IRS)
• • • • • • NL will be
1E
3287
4214
3812/16
4028
4245 6262 Comment
are for APL
printing
spaces
performed.
Line Feed (LF)
••• • ••
25
New Line (NL)
••• • ••
15
Null (NUL)
••• • ••
00
2-6 XEROX MRP FAMILY COAX COMMAND REFERENCE
Page 39

DSC AND SCS DATA STREAM COMMANDS
Table 2-3. SCS coax commands (continued)
SCS command 3262 3268
Page Presentation Media (PPM)
2BD2nn48xxxxxxsddoddxxxxxxxx
Set Attribute (SA)
• • • • For APL, color
28ttvv
Set Graphic Error Action (SGEA)
2BC803grop
Set Horizontal Format (SHF)
••• • ••
2BC1nnhhlmrmht1....tn
Set Line Density (SLD)
••• • ••
2BC6nnld
Set Print Density (SPD)
•••
2BD2nn2900cp
Set Vertical Format (SVF)
••• • ••
2BC2nnvvvtmbmvt1......tn
Transparent (TRN)
• • • • • • Data is sent
35nn
Vertical Channel Select (VCS)
• • • • • • Supported, but
04vv
3287
4214
3812/16
4028
•
4245 6262 Comment
and underline
•
according to
FSL Y37.
adjust with LFs
in 3287.
Vertical Tab (VT)
0B
Command descriptions
Back Space (BS)
• • • • • • Adjust with LFs.
The section provides an alphabetical listing of the data stream
commands.
16
Moves the print position left by the current character width,
ignoring the left margin, unless this movement exceeds the left
edge of the physical page. In this case, the print position moves
to column one on the left edge.
16 Control sequence of a Back Space command
XEROX MRP FAMILY COAX COMMAND REFERENCE 2-7
Page 40

DSC AND SCS DATA STREAM COMMANDS
Bell (BEL)
Carriage Return (CR)
2F
Turns on the attention indicator to show that operator action is
required and sounds the alarm if it is not disabled. The printer
stops and waits for operator attention. (This command is
currently accepted but ignored.)
2F Control sequence of a Bell command
0D
Moves the print position to the first position on the same line. If
already at the first position, this command is ignored. The print
position is moved to the effective left margin of those printers
which support the Set Horizontal Margin command.
Enable Print (ENP)
Form Feed (FF)
0D Control sequence of a Carriage Return command
14
This command is used in conjunction with the Inhibit Print (INP)
command. Any printable characters between INP and Enable
Print (ENP) commands are translated to spaces. SCS control
codes between INP and ENP can cause unpredictable results.
N Note: Only the 4245 emulation carries out the actions described
above; all other emulations ignore this command.
14 Control sequence of an Enable Print command
0C
Moves the print position to the top line and left margin of the
next form as specified by the Set Vertical Format (SVF) command.
If this is not specified by the SVF command, the maximum print
line is assumed to be one and the print position moves to the
left margin of the next line.
0C Hexadecimal (HEX) value of a Form Feed
command
2-8 XEROX MRP FAMILY COAX COMMAND REFERENCE
Page 41

Graphic Escape (GE)
DSC AND SCS DATA STREAM COMMANDS
Remember • For the 3812 emulation, if the maximum page length is set to
1, the Form Feed command causes a new line to occur. Any
other page length causes the printer to eject the current
page on receipt of a form feed.
• You should not use the New Line command when moving
the print position from one form to the next.
08gg
Allows A Programming Language (APL) characters to be sent in a
SCS data stream. Each APL character in the data stream is
preceded by a GE.
08 Control sequence of a Graphic Escape command
gg Single-byte character between X'40' and X'FE'
that defines the APL code point for the character.
When GE is supported and is followed by another control code
(X'00' through X'3F' and X'FF'), the two bytes (08gg) are treated
as one invalid SCS command and cause a single “function not
supported” response to the application program. X'00' through
X'3F' are unprintable.
Horizontal Tab (HT)
Inhibit Print (INP)
05
Moves the print position to the right one tab stop setting. If no
tab stop is detected or the last tab stop is to the left of the
current print position, a movement to the right by one space is
executed, and an error code 2 appears. If an HT is requested
after passing the right margin, a new line is created and a space
is printed at the left margin.
05 Control sequence of a Horizontal Tab command
24
This command is used in conjunction with the Enable Print (EP)
command. Printable characters between INP and ENP are
translated to blanks. SCS control codes between INP and ENP
can cause unpredictable results.
N Note: Only the 4245 emulation carries out the actions described
above. All other emulations ignore this command.
24 Control sequence of an Inhibit Print command
XEROX MRP FAMILY COAX COMMAND REFERENCE 2-9
Page 42
DSC AND SCS DATA STREAM COMMANDS
Interchange Record Separator (IRS)
Line Feed (LF)
1E
Moves the print position to the first position on the next line. If
the current position is at the end of a page, the print position
moves to the first line of the next page.
The print position moves to the effective left margin of those
printers that support the Set Horizontal Margin command (all
coax emulations). A new line is performed using this command.
1E Control sequence of an Interchange Record
Separator command
The IRS command has the same function as the New Line (NL)
command.
25
New Line (NL)
Moves the print position to the same horizontal position on the
next line. If the print position is the last line of the page, LF
moves it to the first line of the next page.
25 Control sequence of a Line Feed command
15
Moves the print position to the first position on the next line. If
the current position is at the end of a page, the print position
moves to the first line of the next page.
The print position moves to the effective left margin of those
printers that support the Set Horizontal Margin command (all
coax emulations).
15 Control sequence of a New Line command
The NL command has the same function as the Interchange
Record Separator (IRS) command.
Since the Set Horizontal Margin (SHM) command is not actually
supported in coax, a default is used to set the right and left
margins.
2-10 XEROX MRP FAMILY COAX COMMAND REFERENCE
Page 43
Page Presentation Media (PPM)
DSC AND SCS DATA STREAM COMMANDS
2BD2nn48xxxxxxsddoddxxxxxxxx
Specifies the presentation media device settings of the printer.
PPM specifies the source paper tray, the output tray offset, and
the output tray.
2B Control sequence prefix of a Page Presentation
Media command
D2 Command class for a Page Presentation Media
command
nn Number of bytes in the command string
including the byte count
Valid values are X'04'—X'0C.' Other values cause
an error code 3. The default is X'02.'
48 Control type for a Page Presentation Media
command
xxxxxx Three-byte number that is not used and reserved
for future use.
sd One-byte number that selects input trays used
for paper or envelopes.
Valid values for this parameter are:
X'00' = uses current form setting, and
causes no change of paper tray.
X'01' = Selects paper tray 1.
X'02' = Selects envelope (bypass tray).
Attempts to feed from non-installed paper tray
cause an error type 1.
do One-byte number that specifies the output tray
offset. Valid parameter is X'00' = No offset.
Any other value causes the output tray to offset.
dd One-byte number specifying the output tray.
As there is only one output tray, dd is also used
to specify whether to offset the output tray.
The output tray is offset if the parameter is
changed from its value in the last PPM.
If two or more indications to offset the output
tray are received, only the first is used.
xxxxxxxx Four-byte number that is not used.
Remember If any of the above parameters are invalid, an error code 4
occurs. Refer also to the FSL command “Y9—Set Default Print
Quality” section in the Function Selection via Line (FSL)
commands chapter.
XEROX MRP FAMILY COAX COMMAND REFERENCE 2-11
Page 44

DSC AND SCS DATA STREAM COMMANDS
Set Attribute (SA)
28ttvv
SA specifies an attribute associated with subsequent characters in
the data stream. The codes remain valid until a new SNA chain
begins or a new SA code changes the value of the character
attribute. This command is used for APL, color, and underline.
28 Control sequence prefix of a Set Attribute
command
tt One-byte number that defines the command as
follows:
X'00' = Reset
X'41' = Extended highlighting
X'42' = Color
X'43' = Character Set
X'00' = Reset enables attributes to reset to
defaults.
vv One-byte number which clarifies tt as follows:
Extended highlighting definitions:
X'00' = Normal (default)
X'F1' = Blink (accept)
X'F2' = Reverse Video (accept)
X'F4' = Underline (supported)
The receipt of Blink and Reverse Video
parameters cause underlining to be disabled on
all emulations other than the coax 3812
emulation.
Color definitions:
X'00' = Black (default)
X'F1' = Blue (prints black)
X'F2' = Red (prints black)
X'F3' = Pink (prints black)
X'F4' = Green (prints black)
X'F5' = Turquoise (prints black)
X'F6' = Yellow (prints black)
X'F7' = Black (supported)
Character Set definitions:
X'00' = Default character set
X'F1' = APL character set (supported)
X'40'—X'FE' = Local character set identifier
(ignored except for X'F1.')
Remember Any invalid sequence is reported to the host as an invalid SCS
command.
2-12 XEROX MRP FAMILY COAX COMMAND REFERENCE
Page 45

Set Graphic Error Action (SGEA)
DSC AND SCS DATA STREAM COMMANDS
2BC803grop
Defines the action to be taken when a character in the data
stream is not in the currently selected character set and cannot
be printed (an unprintable graphic character).
2B Control sequence prefix of a Set Graphic Error
Action command
C8 Command class for a Set Graphic Error Action
command
03 Number of bytes in the command string
including the byte count
gr One-byte number specifying the graphic to be
substituted.
If the code is not printable, it is substituted by a
space (40) and no error is reported.
op A one-byte number specifying the unprintable
character error option. This can only be X‘01‘
meaning no stop, no status.
Any other value causes an invalid parameter
error.
Remember • This command, although not currently supported by the
4220/MRP or 4230/MRP, is supported only by the 4245 coax
emulation.
• If the SGEA function is not used, then unprintable graphic
characters are replaced with a hyphen (X'60') or, for the 4245
emulation, a space (X'40'). An invalid SGEA setting does not
change the current setting.
XEROX MRP FAMILY COAX COMMAND REFERENCE 2-13
Page 46

DSC AND SCS DATA STREAM COMMANDS
Set Horizontal Format (SHF)
2BC1nnhhlmrmht...tn
Defines the maximum number of characters per line, left margin,
right margin, and horizontal tabs. It activates the auto new line
function.
2B Control sequence prefix of a Set Horizontal
Format command
C1 Command class for a Set Horizontal Format
command
nn Number of bytes in a command including nn.
Valid values are 01 to FF.
If nn equals 01, the maximum print position
defaults to the user selected value, the left
margin defaults to column 1, the right margin
defaults to MPP, and the tab values are cleared.
These settings represent the printer default state.
A value of X'00' causes a SCS parameter check
and default values to be installed.
hh A one-byte number specifying the maximum
horizontal print position in characters per line.
Valid values for hh are printer dependent.
The 3812 emulation accepts a maximum value of:
X'8C' (140 decimal) - when the CPI is 10
X'A8' (168 decimal) - when the CPI is 12
X'D2' (210 decimal) - when the CPI is 15
X'DF' (223 decimal) - when the CPI is 17
The 3268 emulation accepts maximum values of
X'84' (132) when 10 character per inch (CPI) is
selected and X'DC' (220) when 16 CPI is
selected.
For all other emulations, the maximum value of
hh is X'84' (132) as these emulations support
only 10 cpi.
A value of X'00' causes the default value to be
used.
If the hh value is not valid, defaults for this and
all other parameters are selected and a SCS
parameter check occurs.
The default value for MPP (hh) is set at the
printer.
Continuing on next page
2-14 XEROX MRP FAMILY COAX COMMAND REFERENCE
Page 47

DSC AND SCS DATA STREAM COMMANDS
lm
(continued)
A one-byte number that specifies the column
value of the left most print position.
If lm is a positive number but less than the
maximum print position (MPP), the value is
adopted as the left margin setting.
If lm is X'00' or nn is less than X'03,' defaults are
used for the left margin.
If lm is greater than MPP, defaults are used for
the left margin and horizontal tabs and a SCS
parameter check occurs.
LM defaults to column 1 if not given, so default
= X'01.'
rm A one-byte number that specifies the column
value of the right most print position.
If rm is a positive number greater than or equal
to lm, but less than the maximum print position
(MPP), the value is accepted but not used.
If rm is less than lm or greater than MPP, defaults
are used for the right margin and horizontal tabs
and a SCS parameter check occurs.
RM defaults to MPP if not given, so default =
maximum print position.
ht1...tn One-byte number that sets the column number
for horizontal tabs.
Tab values are valid if they are less than the
maximum print position (MPP) and greater than
or equal to lm.
If this is not the case, no tabs are set and a SCS
parameter check occurs.
If a tab value is zero it is not set.
The first tab value is lm and the default is a tab at
each character space from the left margin.
Remember • This command must be initialized by a new line or a carriage
return or the old values are used.
• The maximum number of tabs is 251.
• If the command is received on a page boundary, the page
dimensions are recalculated, possibly changing the page
orientation.
XEROX MRP FAMILY COAX COMMAND REFERENCE 2-15
Page 48

DSC AND SCS DATA STREAM COMMANDS
Set Line Density (SLD)
2BC6nnld
Defines the vertical space required for one print line (Lines Per
Inch or LPI) overriding those set at the control panel.
2B Control sequence prefix of a Set Line Density
command
C6 Command class for a Set Line Density command
nn Number of bytes in the command string
including the byte count
Valid values are 01 and 02.
If nn equals 01, ld defaults to the value set at the
printer, except for the 3287 emulation, which
defaults to 6 LPI.
If nn equals 02, the ld parameter is used.
ld Line density or the distance moved for a single
line of vertical spacing.
Valid values for this parameter for each emulation
and the correlation between LPI and the ld
values are:
00 = 6 LPI 3262, 3268, 3287, 3812, 4245,
6262
09 = 8 LPI 3262, 3268, 3287, 3812, 4245,
6262
0C = 6 LPI 3262, 3268, 3287, 3812, 4245,
6262
12 = 4 LPI 3262, 3268, 3287, 3812, 6262
18 = 3 LPI 3262, 3268, 3287, 3812, 6262
Remember An invalid value for nn or ld causes all emulations to use a
default of 6 LPI and an invalid SCS parameter check to occur.
The exceptions to this are the 3262, 4245, and 6262 emulations,
which use the previously defined LPI value.
2-16 XEROX MRP FAMILY COAX COMMAND REFERENCE
Page 49

Set Print Density (SPD)
DSC AND SCS DATA STREAM COMMANDS
2BD2nn2900cp
Defines the number of characters to print per horizontal inch
(CPI) or characters per line (CPL).
2B Control sequence prefix of a Set Print Density
command
D2 Command class for Set Print Density
nn Number of bytes in a command string including
the byte count
Valid nn are:
02 = default value for CPI applies.
04 = CPI is defined by cp.
Any other values cause the default value of CPI,
that is set at the printer, to be used and an
invalid SCS parameter check occurs.
29 Control type for Set Print Density command
00 One-byte number which must be X'00.'
cp One-byte number expressed in hexadecimal that
specifies a CPI value for the emulations as
follows:
00 = 10 CPI 3812, 3268, 6262
0A = 10 CPI 3812, 3268, 6262
0C = 12 CPI 3812
0F = 15 CPI 3812
10 = 16.6 CPI 3812, 3268
11 = 17.1 CPI 3812, 3268
Default = X'00.'
An invalid cp parameter causes the CPI default
to be set at the printer, and results in an invalid
SCS parameter check.
Font Titan 17M is equal to 16.67 characters per
inch. The value of 16.67 is used when calculating
orientation.
Refer to the “Y3—Set Default CPI” section of the “Function
Selection via Line (FSL) commands” chapter for the FSL command
that impacts this SCS command.
XEROX MRP FAMILY COAX COMMAND REFERENCE 2-17
Page 50

DSC AND SCS DATA STREAM COMMANDS
Set Vertical Format (SVF)
2BC2nnvvvtmbmvt1...tn
Specifies the maximum number of lines per page, top margin,
bottom margin, and vertical tabs. The first 12 tabs specify the
Vertical Channel Select stops. On processing this command, the
current line becomes logical line one, except on the 3812
emulation where it causes a form feed.
2B Control sequence prefix of a Set Vertical Format
command
C2 Command class for a Set Vertical Format
command
nn Number of bytes in the command string
including the byte count
Valid values are 01—FF.
If nn equals 01, the defaults used are the page
length and bottom margin set at the printer, 1
for top margin, and no tabs set.
A value of 00 causes a SCS parameter check and
default values to be used.
vv One-byte number that specifies the maximum
number of lines per page or maximum print
length (MPL).
Valid maximum values for vv, shown in
hexadecimal (decimal), are emulation dependent
as follows:
3262 = 7F (127 decimal)
3268 = 7F (127 decimal)
3287 = 66 (102)
3812 = 2A (42) at 3 lpi, 38 (56) at 4 lpi,
54 (84) at 6 lpi, 70 (112) at 8 lpi
4245 = 7F (127 decimal)
6262 = 7F (127 decimal)
A value of 00 causes the default values set at the
printer to be used.
If the vv value is not in range, a SCS parameter
check results and default value set at the printer
is used.
Continuing on next page
2-18 XEROX MRP FAMILY COAX COMMAND REFERENCE
Page 51

DSC AND SCS DATA STREAM COMMANDS
tm
(continued)
A one-byte number that specifies the first print
line of the page
If tm is a positive number, but less than or equal
to the maximum page length (MPL), the value is
adopted as the top margin setting.
If tm is X'00' or nn is less than 3, defaults are
used for the top margin.
If tm is greater than MPL, defaults are used for
the top margin, bottom margin, and vertical tabs,
and a SCS parameter check results.
Default = 1
bm A one-byte number that specifies the last print
line of the page.
If bm is a positive number greater than or equal
to tm, but less than or equal to the maximum
page length (MPL), the value is adopted as the
bottom margin.
If bm is X'00' or nn is less than 4, the bottom
margin defaults to MPL.
If bm is less than tm or greater than MPL,
defaults are used for the bottom margin and
vertical tabs. An SCS parameter check results.
Default = maximum lines per page.
vt1...tn One-byte value that sets line number values for
both Vertical Tabs (VT) and Vertical Channel
Select (VCS) functions.
Tab values are valid if they are less than bm and
greater than or equal to tm; if this is not the
case, a SCS parameter check occurs.
If an error is found, tab processing stops and the
tab values last set remain unchanged.
If a tab value is zero, it sets no tab or channel
value.
tm is always the first tab value.
Default = each line from the top margin.
Remember • If this command is received at a page boundary, and only
when the Automatic Page Orientation (APO) is enabled, the
page dimensions are recalculated, possibly changing the page
orientation.
• The maximum number of tabs that can be set is 251.
XEROX MRP FAMILY COAX COMMAND REFERENCE 2-19
Page 52

DSC AND SCS DATA STREAM COMMANDS
Transparent (TRN)
Remember Data is sent according to Function Selection via Line (FSL) Y37—
35nn
Indicates the start of a transparent data stream. Since you define
the data within a transparent stream, the printer does not scan
the SCS data for control codes. A hyphen is substituted,
however, for all codes below X'40.'
35 Control sequence prefix of a Transparent
command
nn Number of bytes following this command not to
be checked for printed data stream commands
Valid values for nn range from 0—FF.
IBM Printer Emulation Select command. Refer to the “Y37—IBM
Printer Emulation Select” section in the “Function Selection via
Line (FSL) commands” chapter for more information on this FSL
command.
Vertical Channel Select (VCS)
04vv
Allows the movement of the paper to a specific line number.
This is achieved by using the top margin and the first 11 tab
settings from the Set Vertical Format command to specify 12
vertical channels. The first channel is always the top margin,
even if no tabs have been set.
04 Control sequence prefix of a Vertical Channel
Select command
vv Byte that selects the channel where you want to
move the print position.
The correlations between valid values and the
channel selection are:
7A = 10
7B = 11
7C = 12
81 = 1
82 = 2
83 = 3
84 = 4
85 = 5
86 = 6
87 = 7
88 = 8
89 = 9
A Vertical Channel Select (VCS) command is interpreted as a one
Line Feed (LF) command. This means that if you want to print
2-20 XEROX MRP FAMILY COAX COMMAND REFERENCE
Page 53

DSC AND SCS DATA STREAM COMMANDS
starting in line 4, you must enter four VCS commands.
Unprintable characters appear on the paper as spaces.
There are two different 3268 and 4214 emulations. When using
the first 3268 and 4214 emulations, the system sends the number
of Line Feed commands required by the selected Vertical Format
command. This means you can instruct the printer to start
printing in line 4 with only one VCS command.
When using the second 3268 and 4214 emulations, you send the
commands below the interface. You can do this by transmitting
a file to the printer, or by entering the commands on your screen
and making a local copy (print screen). You can also do it using
shareport on the interface.
Vertical Tab (VT)
Remember
• This command adjusts with line feeds (LFs).
• This command is not supported for the 3287 emulation and
causes a line feed.
• All values, except channel one, must be specified before use;
otherwise, the VCS command is treated as a Line feed. If the
channel selected is less than or equal to the current page
position, the print position moves to the correct line on the
next page.
• Channel 1 is always top-of-form, while the other eleven
channels are taken as the first eleven tab stops from the Set
Vertical Format (SVF) command.
0B
Moves the print position vertically down to the next tab stop
setting, which is set by the Set Vertical Format command. If no
vertical tab stops are below the current print position, a vertical
tab results in a line feed. If a vertical tab is requested with the
print position below the bottom margin, it results in a move to
the top margin of the next page.
0B Control sequence of a Vertical Tab command
Remember This command adjusts with line feeds (LFs).
XEROX MRP FAMILY COAX COMMAND REFERENCE 2-21
Page 54

Page 55

3. Function Selection via Line (FSL) commands
This chapter describes the Function Selection via Line (FSL)
commands. FSL sequences are special escape sequences which
download settings to the printer. The command allows you to
set up default interfaces or change default settings. FSL
commands access the value-added features (like duplex
emulation, paper tray selections, etc.) of the Xerox MRP Family
coax printers.
When your settings are downloaded to the temporary memory
area by means of the FSL functions, you can save the settings for
future use. This is done by saving the contents of the temporary
memory in the permanent memory. Once they are saved, the
interface will read the settings each time power is turned on, or
when a special command in the data stream requests it. This
chapter shows you how.
Setting levels
Storing and reading settings
FSL parameter values are stored in nonvolatile memory (NVM).
Once set, the parameters can also be saved in permanent
memory by using FSL commands.
Three levels of hierarchies exist in the coax interface at any time:
• The factory default area
• The permanent memory area
• The temporary memory area.
The settings stored in the temporary memory are the highest
priority. When the coax interface operates, it always checks the
temporary memory to determine the appropriate values.
When settings are restored to factory default, the permanent
memory and the temporary memory are cleared and the
permanent memory is set to factory defaults.
Table 3-1 shows the commands that allow you to store new
settings, override the temporarily defined settings by clearing
temporary memory, or restore the settings to factory defaults.
XEROX MRP FAMILY COAX COMMAND REFERENCE 3-1
Page 56

FUNCTION SELECTION VIA LINE (FSL) COMMANDS
Actions at power up
Table 3-1. Memory Exchange Settings
Syntax Function
<Esc>X1 Saves the temporarily defined settings in the
permanent memory.
<Esc>X2 Restores the settings from permanent
storage.
<Esc>X3 Restores the settings to factory default
settings.
<Esc>X4 Restores the settings to power up defaults,
and reads the permanent memory.
When data is sent to the coax interface, the following happens:
Function Selection via Line (FSL)
• The permanent memory area is checked to determine
whether it contains data. If the data is valid, normal
operation is started using the settings just read.
• If the permanent memory area is unreadable, it is cleared.
The factory defaults are loaded, and an error message is sent
to the printer explaining the action taken in a printer error
message. (Refer to the “Error handling” chapter.) Operation
then starts on the basis of the factory default settings.
• The interface checks the printer. If the printer is
malfunctioning, the coax interface will try to print a message.
Function Selection via Line (FSL) sequences are special escape
sequences that download settings to the printer.
The FSL structure has been designed for use in connection with
printer emulations that do not provide direct access to the
facilities. You should avoid using the FSL functions completely, if
the host system and the selected printer emulation give you
direct access to the facilities. In such cases, the parameters are
selected through printer files overriding the FSL values.
If you use the FSL functions to change printer settings, remember
to reset the printer so you always start using and changing the
printer on the same basis.
The FSL function has the following feature:
• Convenient short functions
• Portable applications
• Emulates IBM front panel settings
• Setup for IBM application support
• Macro functions.
3-2 XEROX MRP FAMILY COAX COMMAND REFERENCE
Page 57

FSL escape character
FUNCTION SELECTION VIA LINE (FSL) COMMANDS
The coax interface for the Xerox MRP Family is managed by
special escape sequences sent to the printer using the FSL
commands. FSL escape sequences are command sequences
preceded by a user-defined escape character. When an FSL
escape character appears in the data stream, the printer interprets
the characters following it as a command string and not as
characters to be printed.
When you have defined an escape character, you can configure
the interface according to your needs.
When a character has been defined as an escape character, you
cannot use it as a normal character and print it. However, you
do not need to have an escape character defined permanently.
When it has served its purpose, it can be removed.
The escape character described in this chapter is different from
the printer escape character and the IBM escape character and
cannot be used for sending native printer commands or system
commands.
Types of FSL escape character
Temporary (&&??n)
Permanent
This section describes how to configure and manage the coax
interface controller for the 4220/MRP and 4230/MRP by the use
of escape sequences.
The factory defaults of the printer suffice for most uses, and in
most cases, system software controls the facilities described in
this chapter.
FSL escape characters are either temporary or permanent. Their
functionalities are as follows:
• Changes the interface set-up.
• Activates any FSL function.
• Sends transparent data.
• Stores and retrieves interface settings.
The syntax, &&??@, for instance, defines @ as the temporary
escape character. The five-character syntax is sent to the printer
from the host system. This escape character is not defined
permanently, and is lost when the printer is powered off.
• Has the same functionalities as a temporary escape character.
• Remains active at power on.
Use FSL function Y48 to select a permanent escape character that
immediately saves the settings in the permanent memory. Refer
to the “Y48—Permanent Escape” section for further description.
Using FSL escape character
You may define this character by sending the following character
sequence from the host:
&&??@
XEROX MRP FAMILY COAX COMMAND REFERENCE 3-3
Page 58

FUNCTION SELECTION VIA LINE (FSL) COMMANDS
Where @ is the single character used as the interface escape
character and must be in the range X'40' to X'FF.' If a value of
X'40' (space character) is used, then the current interface escape
character is reset and no interface escape character is defined.
For example, to define the interface escape character as '@', the
following sequence must be sent:
&&??@
Remember
Format of FSL escape sequences
format 1 @Y48, n1@ Selects the permanent escape character.
format 2 @W1,string1234@ Sends user strings defined using FSL Y59.
format 3 @T3 Selects Online ASCII hexadecimal (Hex)
• The interface escape character for the remainder of this
chapter is '@'.
• You should reset the interface escape character when you are
not using the Special Features of the 4220/MRP or 4230/MRP
coax interface by sending &&?? <blank> or &&??
<space>.
• The 4220/MRP or 4230/MRP coax interface does not pass the
interface escape character. Therefore, both the interface and
the printer escape character must be different. Only the
interface escape character is covered in this document.
Valid escape sequences must be in one of the following formats:
dump.
format 4 @Z1 Sends user string 1 to printer where
Remember Do not use the following as escape characters as they have
Removing FSL escape character
Temporary Use the following syntax, &&?? <blank>or &&?? <space>.
Permanent 1. Set Function Y48 to “00” (no escape character).
encountered.
special functions assigned:
• Comma (,)
• Semicolon (;)
• Colon (:)
• Apostrophe (’)
• Hex numbers (0-9, A-F, a-f)
• Signs (+ -)
• FSL function identifiers (L, S, T, W, X, Y, Z, &, ?)
Follow these steps to remove an escape character:
2. Define a new temporary escape character (
&&??n).
3-4 XEROX MRP FAMILY COAX COMMAND REFERENCE
Page 59
FSL types
General syntax of an FSL command
FUNCTION SELECTION VIA LINE (FSL) COMMANDS
3. Save the setting using the command <ESC> <X1>.
All FSL commands begin with a leading escape character:
• T—Test functions
• W—Bar Code printing
• X—Memory exchange
• Y—Setup functions
• Z—Sending of user strings.
Only FSL command types W and Y end with a trailing escape
character.
The general syntax of an FSL command is as follows:
<ESC> <FSL type> <function no.>, <parameter> <ESC>
Between the leading and the trailing escape characters, all blanks
and IBM control codes are ignored. Thus, you could insert
blanks to make the strings easier to read. The escape sequence
specifies the function you wish to activate and the value that
should be attached to the function.
FSL commands
Table 3-2. FSL Commands
FSL Command name
ESC Special Transparent Feature (Single Paired
Hex Transparent
ESC-ESC Special Transparent Feature (Multiple Paired
Hex Transparent
T1 Offline Hex Dump (PCIA Dump)
T2 Online Hex Dump
T3 Online ASCII Hex Dump
T4 Printout Settings
T5 Printout Character Set
T6 Cancel Online ASCII Hex Dump
W Print Bar Code
X0 Set Printer in Hold Mode
X1 Store Settings in Permanent Storage
X2 Restore Settings from Permanent Storage
X3 Restore Factory Default Settings
XEROX MRP FAMILY COAX COMMAND REFERENCE 3-5
Page 60

FUNCTION SELECTION VIA LINE (FSL) COMMANDS
Table 3-2. FSL Commands (continued)
FSL Command name
X4 Restore Settings from Permanent Storage
Y1 Set IBM Buffer Size
Y2 Set Default LPI
Y3 Set Default CPI
Y4 Set Default Line Spacing (single/double)
Y5 Set Default Maximum Page Length (MPL)
Y6 Set Default Maximum Print Position (MPP)
Y7 Set Case (mono, dual)
Y8 Set LU1 Language
Y9 Set Default Print Quality
Y10 Set Page Format
Y11 Set Default Paper Path
Y12 Set Default Paper Size
Y13 Set Wrap/Cut Option at Physical Paper Size
Y14 Enable Graphic Option
Y19 Set Simplex / Duplex
Y25 FF Before Local Copy
Y26 FF After Local Copy
Y27 Non-SCS Print Image
Y28 Non-SCS, CR at MPP + 1
Y29 Non-SCS, NL at MPP + 1
Y30 Non-SCS, Valid FF Followed by Data
Y31 Non-SCS, Valid FF at End of Print Buffer
Y32 Non-SCS, FF Valid
Y33 Non-SCS, Automatic Function at End of Job
Y34 Last LF on Page Sent as FF
Y36 Suppress IBM Control Code
Y37 IBM Printer Emulation Select
Y38 IBM Communication Feature, (Query, EAB)
3-6 XEROX MRP FAMILY COAX COMMAND REFERENCE
Page 61

FUNCTION SELECTION VIA LINE (FSL) COMMANDS
Table 3-2. FSL Commands (continued)
FSL Command name
Y44 Suppress CR and SP to Same Position
Y46 Set IRQ Timer
Y47 ESC-Mode Selection
Y48 Set Permanent Escape
Y49 Restrict Access of Temporary and Permanent
Settings
Y50 FF After Time Elapse
Y51 User Strings at Power Up (PWO)
Y57 User-defined String Before Local Copy
Y58 User-defined String After Local Copy
Y59 Bar Code Definition
Y60 Font Link for GFIDs
Y61 Setup for User-defined Strings
Y62 Setup for IBM-defined Strings
Y71 Create Translate Table
Y72 Reset Translate Table
Y73 Select Translate Table
Y74 Define Symbol Set String
Y75 Overwrite Translate Table
Y76 Create APL Translate Table
Y77 Reset APL Translate Table
Y78 Select APL Translate Table
Y80 Overwrite APL Translate Table
Y88 Define Page Offset
Y89 Enable Page Offset
Y90 Define User Escape String
Y91 GFID/Font Select Setup
Y92 Point Size Strings
Y93 Attribute Strings
XEROX MRP FAMILY COAX COMMAND REFERENCE 3-7
Page 62
FUNCTION SELECTION VIA LINE (FSL) COMMANDS
Table 3-2. FSL Commands (continued)
FSL Command name
Y94 Typeface Strings
Y96 GFID Select
Y98 Enable Automatic Page Orientation (APO)
Support
Y100 Printer Share String and Timer
Y119 Enable Auto Paper Size Configuration
Y120 Setting Printout at Power Up
Y249 Enter Engineering Mode
Y253 Allow Passwords
Z Send User-defined String
Command descriptions
Common command features
This section provides an alphanumeric listing of FSL commands.
Each command shows syntax, usage, and data information. Only
data information that gives you values and descriptions is
explained, isolated from the rest of the text, and put in a box for
easy reading. Examples are given only when further clarification
of a command is needed.
@ Leading escape character
, Comma is used as a command delimiter. (A
blank can also be used.)
< > Brackets represent required parameter.
[ ] Square brackets are used for optional command
characters.
{ } Curly brackets are used for required characters.
: Colon is used as a separator (marks end of
string).
; Semi-colon is used as a separator (marks next
consecutive position)
* Factory default
@ Trailing escape character
All command functions start with a defined leading escape
character. Command functions, W and Y, also end with a
3-8 XEROX MRP FAMILY COAX COMMAND REFERENCE
Page 63
ESC—Single Paired Hex Transparent
Example @1B&11H
FUNCTION SELECTION VIA LINE (FSL) COMMANDS
defined trailing escape character. Commas are used as
delimiters, and are not expressly explained for each command.
@<HEX>@<HEX> . . . @<HEX>
Sends hexadecimal (HEX) codes transparently to the printer. This
function is also used to execute user-defined macros (refer to
FSL Y90).
<HEX> Pair of hexadecimal values
Valid values are:
0—9
A—F
a—f.
The leading escape character of this string command tells the
interface that the following characters should be treated as a pair
of hexadecimal codes.
ESC-ESC—Multiple Paired Hex Transparent
@@<HEX> <HEX> . . . <HEX>@
Sends hexadecimal (HEX) codes transparently to the printer.
<HEX> Pair of hexadecimal values
Valid values are:
0—9
A—F
a—f.
Between the two leading and the trailing escape
characters, all spaces, 3270 control codes, and
commas are ignored. They may be inserted in
the data stream to make it more readable. Only
the characters 0—9, A—F, and a—f are allowed.
Any other characters may give unpredictable
results.
The last hex character is ignored if an uneven
number of hex-characters is received.
ascii Data in plain text
Depending on the values you select when using FSL function
Y47—ESC Mode Selection, do the following:
• If FSL Y47 = 1 or 2, use @@<HEX> <HEX> . . .
<HEX>@ or @@<HEX>’ apostrophe ascii’@
• If FSL Y47 = 3, use @@<HEX> <HEX> . . . <HEX>@@
or @@ ! ascii ascii@@.
XEROX MRP FAMILY COAX COMMAND REFERENCE 3-9
Page 64

FUNCTION SELECTION VIA LINE (FSL) COMMANDS
Example @@1B 5C 31 32@
T1—Offline Hex Dump (PCIA Dump)
T2—Online Hex Dump
When using the @@ ! ascii ascii @@ syntax, an escape character
(X'1B') substitutes the character “!.”
The two leading escape characters of this command string tells
the interface that the following characters should be treated in
pairs as hexadecimal codes, until the next escape character in the
data stream is registered.
@T1
Selects Offline Hexadecimal Dump, Printer Communications
Interface Area (PCIA) Dump, on the coax interface.
This function will only dump the buffer containing the command
sequence.
@T2
T3—Online ASCII Hex Dump
T4—Printout Settings
Selects Online Hexadecimal Dump on the coax interface.
The current buffer contents are printed, and the next buffer
contents will be dumped.
The Online Hex Dump can also be activated using the test
button on the rear panel of the printer. Pressing the button
results in a settings printout and the configuration utility LED
indicator will start flashing approximately 10 seconds. The dump
is terminated by pressing the button again. (Refer also to the
T4—Printout Settings command.)
@T3
Selects Online ASCII Hexadecimal Dump.
Test 3 will be cancelled if you apply test 6 (T6).
@T4
Prints the current settings, and selects Test 4 print out.
Although you should readily use this FSL command to print the
current settings of your printer, you may also activate a settings
printout by pressing the test key on the rear panel of your
printer. Refer to the “Setting the printer emulation”section in the
“Configuring the coax interface card” chapter in this manual for
detailed procedure.
Since pressing the button while the LED is flashing brings the
interface to Online Hex Dump mode (T2), refer also to the T2—
Online Hex Dump command.
The settings printout is also available as a power up feature by
using the FSL Y120—Setting Printout at Power Up command.
3-10 XEROX MRP FAMILY COAX COMMAND REFERENCE
Page 65

T5—Printout Character Set
T6—Cancel Online ASCII Hex Dump
W—Print Bar Code
FUNCTION SELECTION VIA LINE (FSL) COMMANDS
@T5
Prints the character sets.
@T6
Stops Online ASCII Hexadecimal Dump.
Applying test 6 will cancel test 3 (T3).
@Wn,data@
Converts data to bar code.
n Number from 1 to 8 indicating the bar code
number
Example @W1,string 1234@ prints “string 1234” as a bar code, if the bar
X0—Set Printer in Hold Mode
Remember
data Data must not exceed one line. Each character
must be valid for actual type, and the number of
characters must be required for the specific
code.
The upper left corner of the bar code will be in
the position of the leading escape character.
When the bar code has been printed, the printer
cursor will be located after the trialing escape
character, and printing will continue from this
point.
code definition 1 has been defined previously with function Y59.
@X0 [display_data]@
Sets the coax interface in Hold mode by command sent using
the line.
Page 66

FUNCTION SELECTION VIA LINE (FSL) COMMANDS
X2—Restore Settings from Permanent Storage
@X2
Restores nonvolatile memory (NVM) to random access memory
(RAM). The printer will be updated with the escape strings,
according to these settings. This command saves all current
settings in NVM including the interface escape character.
X3—Restore Factory Default Settings
@X3
Restores factory default settings in Random Access Memory
(RAM).
Function X3 overwrites the contents of RAM that results in a loss
of settings contained in RAM. This function only affects the used
port, and reads factory default into temporary memory. This
function causes the saved software setup commands to be
overwritten by the factory default commands, effectively resetting
the RAM.
X4—Restore Settings from Permanent Storage
@X4
Restores NVM to RAM, and reads permanent memory into
temporary memory. This function causes any unsaved settings to
be overwritten by the currently saved commands. The printer is
updated with the escape strings according to these settings.
(@X2 equivalent @X4.)
Y1—Set IBM Buffer Size
@Y1, n@
Changes default buffer size. It selects the buffer size the printer
uses to print the contents of a terminal screen in DSC mode.
This type of operation is usually done when you want to copy
the contents of a terminal screen, or the host computer sends
data to the printer and the terminal at the same time. This
function also affects the buffer size if it is done in the SCS
mode. The factory default setting is 3440.
n Valid parameters are:
1 for 960 characters
2 for 1920 characters
3 for 2560 characters
4* for 3440 characters
5 for 3564 characters.
Remember This function should not be set during normal operation. Once
programmed, the new value should be stored with the X1
function. Be sure to switch the printer off for 10 seconds before
you switch it on again.
3-12 XEROX MRP FAMILY COAX COMMAND REFERENCE
Page 67

Y2—Set Default LPI
FUNCTION SELECTION VIA LINE (FSL) COMMANDS
For consistent operation, configure your 4220/MRP or 4230/MRP
coax interface to match the buffer size required by your host
system.
This command only takes effect the next time that the printing
system is initialized and the settings have been saved in nonvolatile memory (NVM).
Refer to the “Features” function of the Printer Output Area (table
D-2) in the “Coax communications buffer” appendix.
Example @Y1, 5@ sets the buffer size to 3564 characters.
@Y2, n@
Selects current and default values for lines per inch (LPI) that are
used at power up. LPI is used for calculating top margins.
n Valid parameters are:
0 for No LPI setup sent to printer
3 for 3 LPI
4 for 4 LPI
6* for 6 LPI
8 for 8 LPI.
The factory default setting is 6 lines per inch. If zero (0) is
selected, calculation is performed on 6 LPI. LPI from the host
overrides the default.
This function emulates a front panel switch on an IBM printer:
3 = 6 LPI and double space
4 = 8 LPI and double space.
However, if FSL function Y4 is set at 2 for double spacing, then
LPI is as follows:
3 = 3 LPI
4 = 4 LPI
6 = 3 LPI
8 = 4 LPI.
If 3 or 4 is set by this command, FSL function Y4 is ignored (refer
to the “Y4—Set Default Line Spacing” section).
This function has immediate effect on default LPI.
Example @Y2, 8@ sets the printer to 8 LPI.
XEROX MRP FAMILY COAX COMMAND REFERENCE 3-13
Page 68

FUNCTION SELECTION VIA LINE (FSL) COMMANDS
Y3—Set Default CPI
@Y3, n@
Selects the default value for characters per inch (CPI) that is used
at power up. The factory default setting is 10 characters per
inch.
n Valid parameters are:
10* for 10 CPI
12 for 12 CPI
15 for 15 CPI
16 for 16.7/17.1 CPI
20 for 20 CPI
27 for 27 CPI.
Changes in the default value cause immediate changes in the
current value. This function emulates a front panel switch on an
IBM printer. In SCS mode, this function is read at power up, or
when a system command to read the operator panel value is
received.
The link between FSL Y3 and the strings to select a font is given
by the Font Link for GFIDs—Y60. This function links the CPI
selection to a GFID. The GFID can be modified by the use of FSL
Y91 through Y94. You could also use FSLY62, but you have to
define all the CPI, LPI, and orientation strings. Refer to the
individual FSL sections for detailed information.
Refer also to the “Set Print Density (SPD)” section of the “DSC
and SCS data stream commands” chapter for the SCS command
that impacts this FSL function.
This function has immediate effect on default CPI.
Example @Y3,15@ sets the printer to 15 CPI (the printer uses the GFID
linked to 15 CPI).
Y4—Set Default Line Spacing (single/double)
@Y4,n@
Selects the default line spacing. This command controls the
power up default value for the number of line feeds that are
generated when a new line character is processed.
n Valid parameters are:
1* for single space
2 for double space.
Changes in the default values cause immediate changes in the
current value. It has immediate effect. This function is only
included for compatibility reasons. Refer to the “Y2—Set Default
LPI” section because if you set FSL Y2 to 3 (for 3 LPI) or 4 (for 4
LPI), this Y4 function is ignored.
3-14 XEROX MRP FAMILY COAX COMMAND REFERENCE
Page 69

Example @Y4, 2@ sets the protocol converter to double space default.
Y5—Set Default Maximum Page Length (MPL)
@Y5,n@
Selects current and default form length. It selects the power up
default value for the Maximum Page Length (MPL) in units of
single line spaces.
n Valid parameters are:
This function emulates a front panel switch on an IBM printer.
When set to 000, no vertical formatting is done, and no form
feed is generated at bottom of form (BOF).
FUNCTION SELECTION VIA LINE (FSL) COMMANDS
000—255 Indicates the maximum number of
lines allowed on a page before a
form feed is generated
automatically.
62* Factory default for US (letter)
66* Factory default for EUR (A4)
If MPL is not at top of form (TOF), then form feed (FF) is
performed. The printer ejects paper, and printing is at TOF on
the next page. If the page is empty, FF is suppressed, no paper
ejects, and the printer prints at TOF on the current page. Refer
to the “Form Feed (FF)” section in the “DSC and SCS data stream
commands” chapter for additional information on the FF
command.
Remember When operating in the SCS mode, the form length or MPL can
be downloaded from the host. FSL Y5 function has immediate
effect on the printer, unless form length has been downloaded
from the host, and the value is used when selecting default in
SCS mode.
If the setting stored in RAM for Y5 is 255, the value of Y5
(Maximum Print Lines) will be computed for the user as part of
the automatic configuration logic. The value for Y5 is computed
based on information from Y10 (Portrait/Landscape) and Y11
(Active Tray). The automatic configuration logic computed value
will be take effect if the user has stored a value other than 255
into RAM using FSL X1.
You may disable the Automatic Papersize Configuration logic by
using FSL Y119 (See the FSL Y119 command for more
information.)
Example @Y5, 50@ sets the page length to 50 lines.
XEROX MRP FAMILY COAX COMMAND REFERENCE 3-15
Page 70
FUNCTION SELECTION VIA LINE (FSL) COMMANDS
Y6—Set Default Maximum Print Position (MPP)
@Y6, n@
Selects current and default maximum print position (MPP) in
characters from the left margin. The factory default setting is
132.
n Valid parameters are:
This function emulates a front panel switch on an IBM printer. It
has an immediate effect.
MPP and the current position are not changed by changing
characters per inch (CPI).
Remember When set at 000, no horizontal formatting is done; no new line
(NL) is generated by the interface at MPP even if MPP is defined
by the data stream.
000—255 Set MPP in number of characters
Default setting is 132.
Y7—Set Case (mono, dual)
Refer to the “Set Print Density (SPD)” section of the “DSC and
SCS data stream commands” chapter for additional information
on this SCS command that impacts this FSL Y6 function.
Example @Y6, 80@ sets MPP to 80 characters.
@Y7, n@
Selects mono case or dual case as the power-up default setting
for the printer. The factory default setting is dual case.
n Valid parameters are:
0 Mono case (left to right)
1* Dual case (left to right)
2 Right to left (Dual case)
3 Left to right (Dual case).
In mono case, printing is in upper case characters only. Printing
in dual case includes upper and lower case characters. This
function can only be overridden from the system if you use value
0 or 1.
On the PCL/IPDS platform, values 2 and 3 are supported as Left
to Right (dual case). Y7 is used only in DSC LU3 mode and
ignored in SCS mode.
3-16 XEROX MRP FAMILY COAX COMMAND REFERENCE
Page 71

Y8—Set LU1 Language
FUNCTION SELECTION VIA LINE (FSL) COMMANDS
@Y8, n@
Selects the LU1 language translate table at power up, and has
effect as soon as it is received.
The factory default setting is 00. If the conversion table is not
loaded, then 01 is used as default.
n Valid parameters are:
00* Download LU1 language from 3174
control unit or 3274 (configuration
support C or D only)
1 English (U.S.) EBCDIC
3 Austria/Germany
4 Belgium
5 Brazilian
6 Canadian (French)
7 Danish/Norwegian
8 Danish/Norwegian (Alternate)
9 Finnish/Swedish
10 Finnish/Swedish (Alternate)
11 French
12 French (Use 11 French.)
13 Austrian/German (Alternate)
14 International
15 Italian
16 Japanese (English)
19 Spanish
20 Spanish (Alternate)
21 Spanish speaking
22 English (UK)
23 Norwegian (Use 7 Danish/Norwegian.)
24 Swedish (Use 9 Finnish/Swedish.)
25 EBCDIC WT (Use 1 English (U.S.)
EBCDIC.)
26 Norwegian Alt (Use 8 Danish/Norwegian
Alternate.)
27 Swedish Alt (Use 10 Finnish/Swedish
Alternate.)
28 Portuguese
30 French 105-character
31 Swiss-German/Swiss-French
32 Swiss-French (Use 31 Swiss-German/
Swiss French.)
40 Spanish Data Text/Extension
If the number is not defined in the printer, it is ignored. The
code point for the FSL ESC character is not reset after using this
function. This causes problems if the FSL ESC character is
national dependent.
The codepoint for the FSL Single Paired Hex Transparent, ESC
character, is not reset after using this FSL function Y8. This may
cause problems if the FSL ESC character is national dependent.
If n is not defined in the printer, FSL Y8 is ignored.
XEROX MRP FAMILY COAX COMMAND REFERENCE 3-17
Page 72

FUNCTION SELECTION VIA LINE (FSL) COMMANDS
Example @Y8, 30@ sets the printer language to French 105 character set.
Y9—Set Default Print Quality
@Y9, n@
Selects current and default font under the Page Presentation
Media SCS command.
Refer to the “qq” parameter of the Page Presentation Media
(PPM) command in the “Page Presentation Media (PPM)” section
of the “DSC and SCS data stream commands” chapter for
detailed information on this parameter that specifies the print
quality.
n Valid values for this parameter are:
0 No Print Quality command sent to printer
1* Draft quality
2 Near letter quality
3 Letter quality
4—65534 (See notes.)
Notes:
• Use 0 with Impact Printers only. 0 is ignored
by all other printers.
• Values 1 to 3 are passed to a GFID selection,
that can also be defined using FSL Y91
through Y94.. If no parameters are defined in
the Y62—Setup for IBM-defined Strings
command, nothing is sent to the printer.
(Refer to the Y62 command for additional
information.)
• Values greater than 3 are paired to FSL 96.
Example @Y9, 2@ sets the printing at near letter quality.
3-18 XEROX MRP FAMILY COAX COMMAND REFERENCE
Page 73

Y10—Set Page Format
FUNCTION SELECTION VIA LINE (FSL) COMMANDS
@Y10, <n1>, {n2}@
Selects an exact or scaled page format on page boundary.
If no value is entered for n2, the n1 value is used for all trays.
Refer also to FSL Y62 command that affects this function.
n1 Valid values are:
0* Portrait (No compression or scaling)
1 Landscape (No compression or scaling)
2 COR (as IBM 3812). If the interface is in
User mode, the n string = 24, defined in
FSL Y62 command, is sent.
3 Use LPI and MPL to calculate the Vertical
Motions Index (VMI). Also called fit to
page in portrait. If the interface is in
User mode, the n string =25, defined in
FSL Y62 command, is sent.
4 Compressed portrait format for 3287
compatible printing within an 8" x 11"
page area
5 Compressed portrait for 3287 compatible
printing within an 8" x 12" page area
6 Compressed landscape for 3287
compatible printing within an 13.2" x
8.5" page area
7 Compressed landscape for 3287
compatible printing using a page width of
13.2" with fixed line spacing (LPI)
8 Compressed portrait for 3287 compatible
printing using a page length of 11" with
fixed character spacing (CPI)
9 Compressed portrait for 3287 compatible
printing using a page length of 12" with
fixed character spacing (CPI)
n2 Values for n2 are:
1 Ignored
2* Tray 1
3 Tray 3
4 Manual feeder
5 Tray 2
6 Tray 4
7-255 Reserved for optional feeder.
(20) (Reserved)
If the code is placed as the first printable character on the page,
the changed format is effective as soon as the printer receives
the command. If the command is placed at any other position
on the page, the change is effective on the next page.
XEROX MRP FAMILY COAX COMMAND REFERENCE 3-19
Page 74

FUNCTION SELECTION VIA LINE (FSL) COMMANDS
Example @Y10, 1@ selects landscape format with no scaling.
Y11—Set Default Paper Path
Only n1 = 0 or 1 is supported for envelope feeder. (Refer to
related FSL function Y11.)
If n1 is greater than 3 (n1>3), then FSL Y62—Setup for IBMdefined Strings command is not used.
@Y11, <n1>, {n2}@
Selects the default input paper tray, or links an input tray to an
output paper tray.
Utility
FSL
Y11, n1
PCL parameter to
Esc&I#H
4220/MRP
4230/MRP
N/A N/A 0 Current Tray Not Supported
TRAY1 2 1 Paper Tray Tray 1
TRAY2 5 3 Manual-Envelope Tray 2
TRAY3 3 4 Lower Tray Tray 3
TRAY4 6 5 Paper Deck Tray 4
TRAY5 4 2 Manual-Paper Tray 5**
N/A N/A 6 Envelope Feeder Tray 5**
Utility
FSL
Y11, n1
PCL parameter to
Esc&I#H
4215/MRP and
4219/MRP
N/A N/A 0 Current Tray Current Tray
UPPER 2 1 Paper Tray Upper Tray
MIDDLE 1 7 Undefined Middle Tray
LOWER 3 4 Lower Tray Lower Tray
MAN-PAP 4 2 Manual-Paper Manual Tray-Paper
MAN-ENV 5 3 Manual-Envelope Manual Tray-
Envelope
N/A N/A 6 Envelope Feeder Not Supported
** Cannot be changed. Other printer trays can be remapped at
the user interface.
If the code is placed as the first printable character on the page,
the changed format is effective as soon as the printer receives
the command. If the command is placed at any other position
on the page, the change is effective on the next page.
The n1 parameter produces a PCL5 sequence that selects the
proper input paper tray. The table provides a cross reference
3-20 XEROX MRP FAMILY COAX COMMAND REFERENCE
Page 75
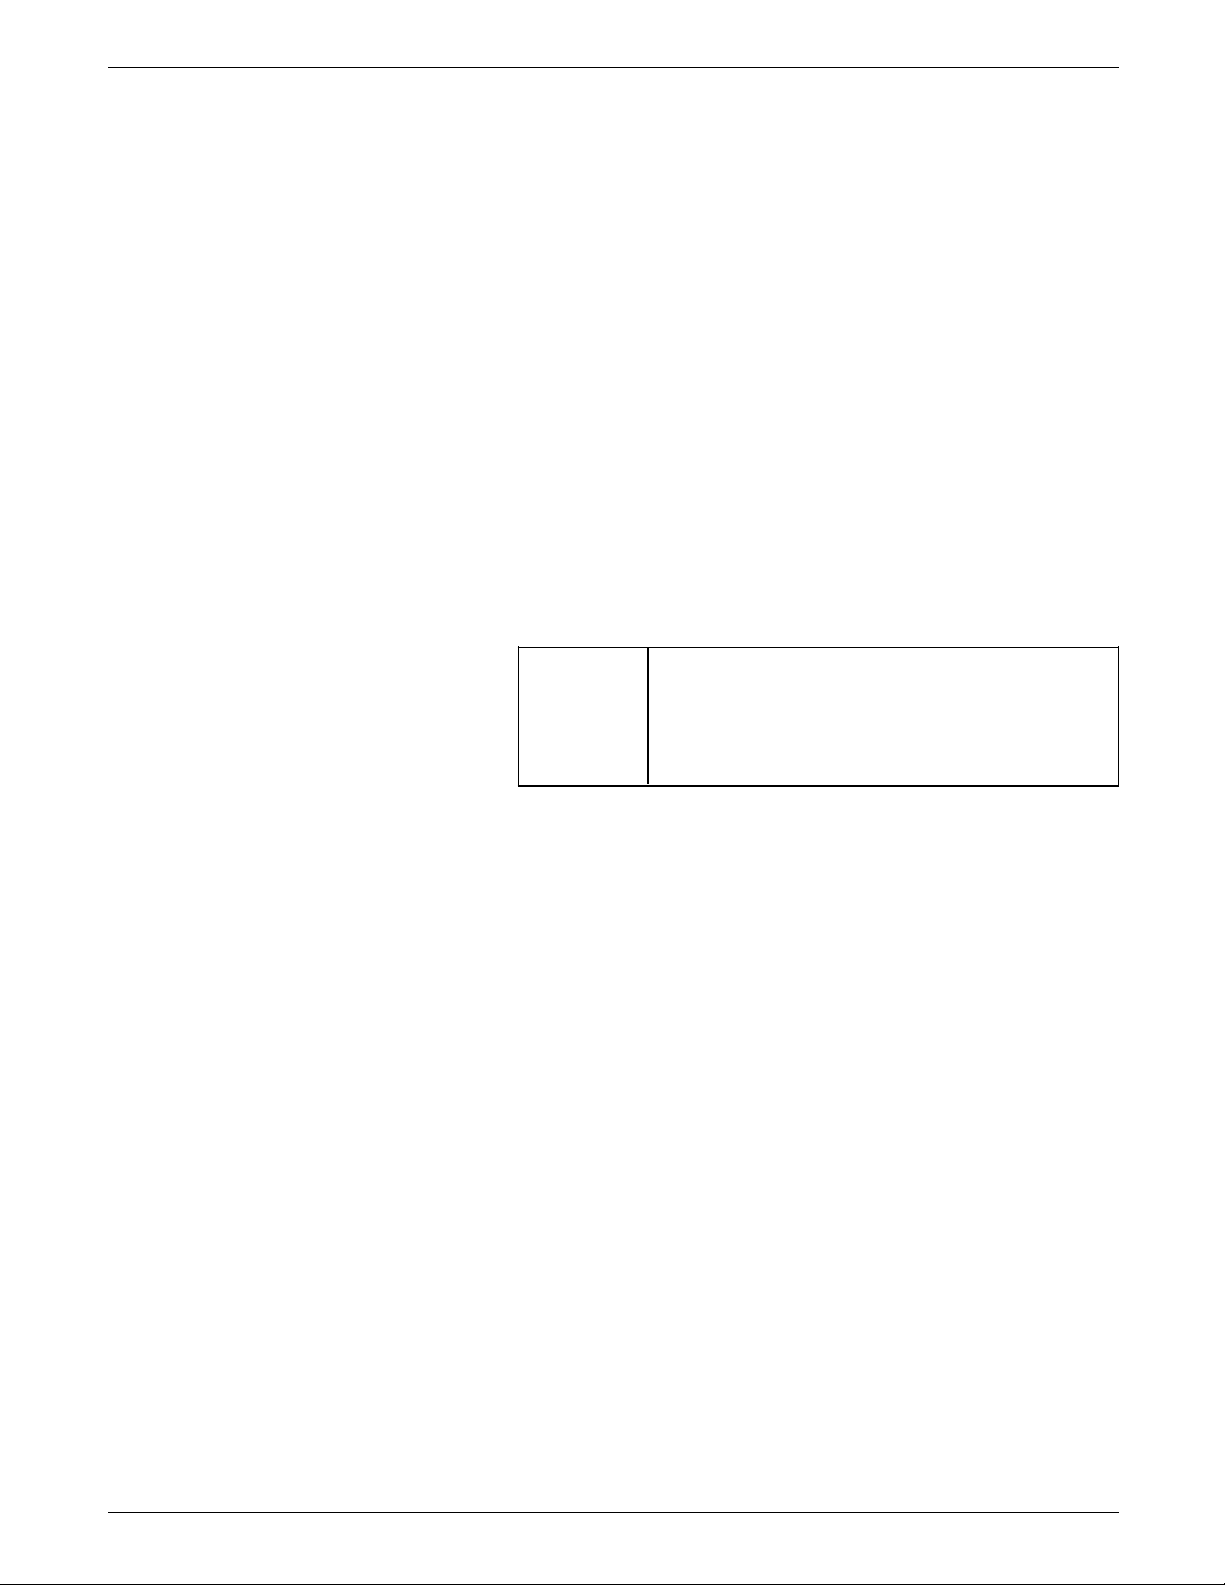
FUNCTION SELECTION VIA LINE (FSL) COMMANDS
that shows how to access the paper trays of all MRP family
printers.
When selecting the n2 parameter, linkage is set up between the
input tray specified in n1 and the output tray specified in n2.
The only values supported for n2 are 1 and 2.
When you select an output tray via the Y11 command, keep in
mind that the coax interface uses PCL5 commands to make this
selection. Therefore, an n2 value of 1 produces a PCL5
command that selects output destination 1. You must use the
MRP user interface to map the output destination to the
command as described in the Xerox MRP Family System
Administrator Guide. The diagram on page 3-2 shows you how
to access this menu.
Use the menu to select any one of the three available output
destinations: Top Tray, Face-Up Tray, or High-Capacity Stacker (if
installed). Output destination 2 is fixed to the Face-Up Tray and
cannot be changed. Therefore, an n2 parameter of 2 always links
to the Face-Up Tray.
The table below shows valid numbers for n2 when using the
4220/MRP or 4230/MRP.
n2 Values for n2 are:
0 Default destination selected from UI
1 Top tray or High-Capacity Stacker,
depending on mapping
2* Face-up tray
Example 1 @Y11,3@ selects paper from the lower tray (Tray 2).
Example 2 @Y11, 2, 2@ results in paper from input tray 1 ejecting in output
tray 2.
Remember The utilities only support the n1 Input Tray Selection parameter.
They do not support the n2 Output Tray Selection parameter at
this time.
Remember Since the SCS Page Presentation Media (PPM) command impacts
this FSL function, refer to the “Page Presentation Media (PPM)”
section in the “DSC and SCS data stream commands” chapter for
detailed information.
XEROX MRP FAMILY COAX COMMAND REFERENCE 3-21
Page 76
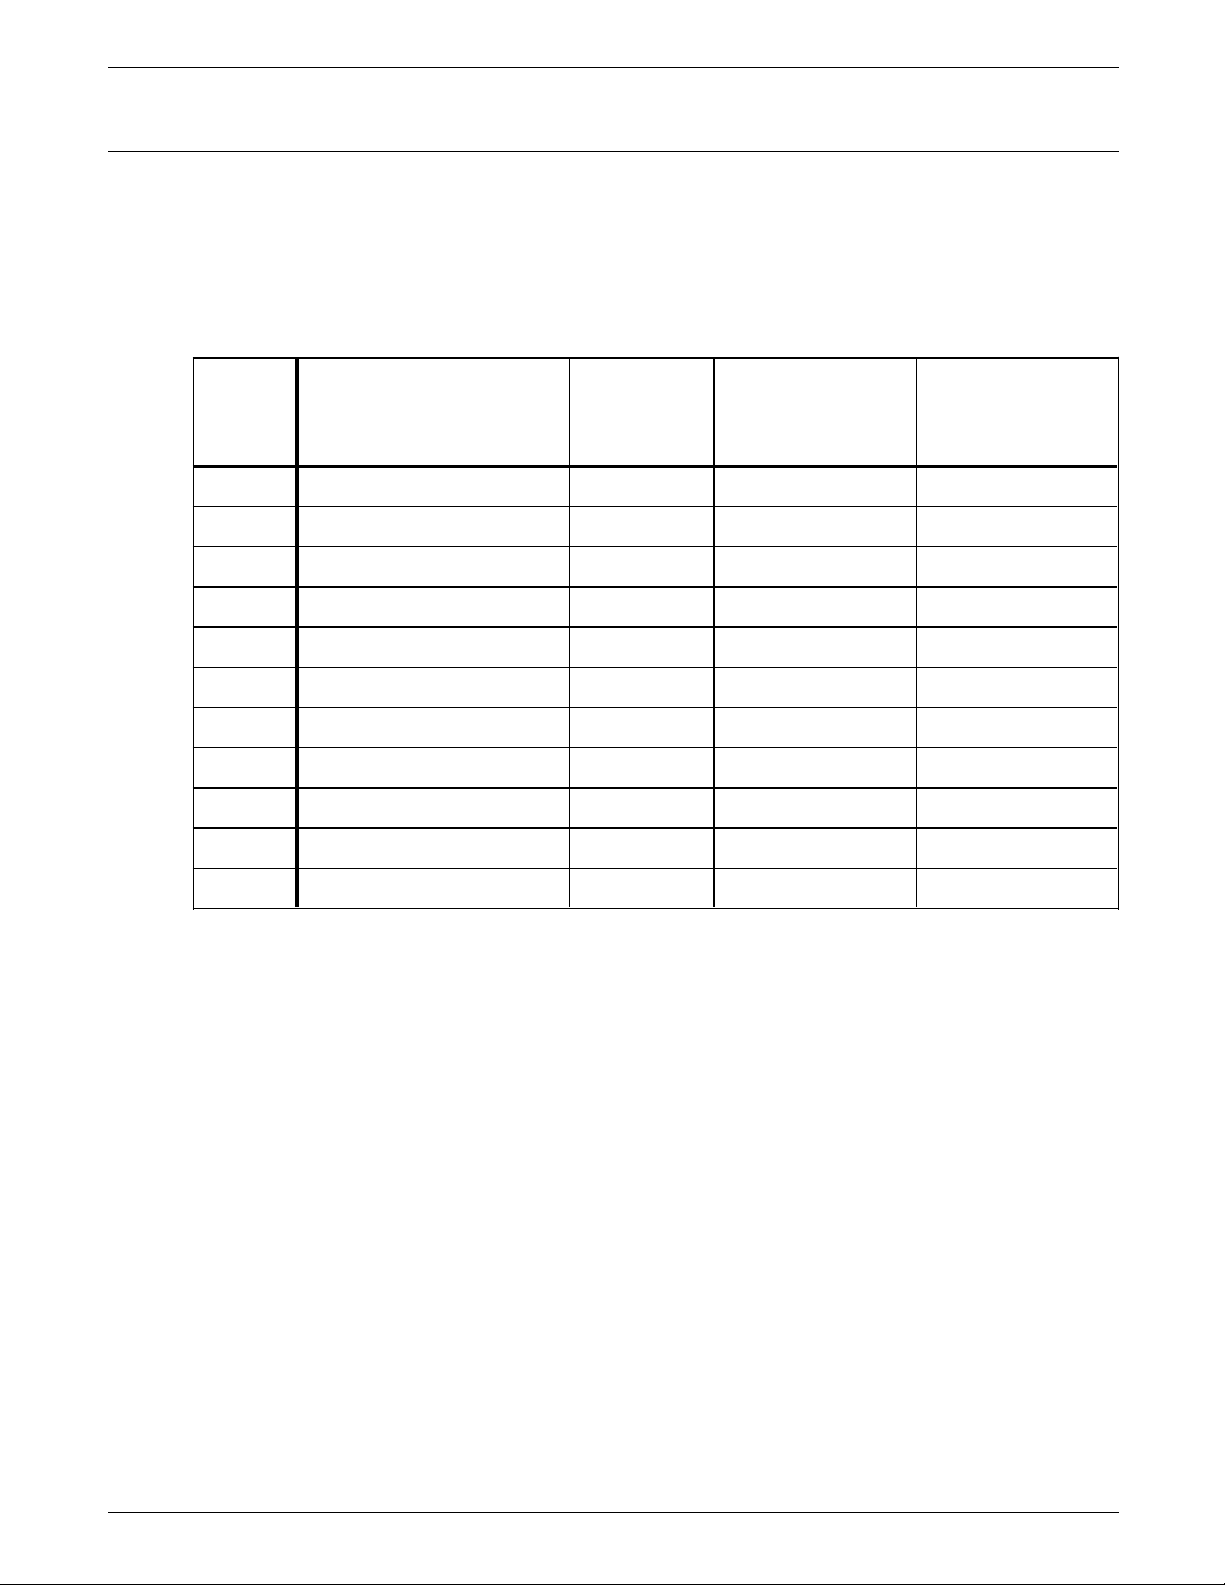
FUNCTION SELECTION VIA LINE (FSL) COMMANDS
Y12—Set Default Paper Size
@Y12, n1 [,n2]@
Selects paper size. As with FSL Y11, a PCL5 command selects
the proper paper size. The table lists the supported paper sizes
and illustrates how they map to PCL5 for the MRP family of
printers. Also, the table identifies whether the AS/400 Utility
provides access to the paper size or whether the user-created
FSL must be used.
Utility FSL parameter
PCL
parameter
to Esc&I#A
4215/MRP and
4219/MRP
4220/MRP
4230/MRP
Yes 1 A4 26 A4 Tray, Manual Tray 1-5
Yes 2 Legal 3 Legal Tray, Manual Tray 1-5
Yes 3 Letter 2 Letter Tray, Manual Tray 1-5
Yes 4 Executive 1 Manual Tray 1-3, 5
Yes 5 Monarch Envelope 80 Manual Tray 5
Yes 6 Business 10 Envelope 81 Manual Tray 5
Yes 7 DL Envelope 90 Manual Tray 5
Yes 8 C5 Envelope 91 Manual Tray 5
Yes 10 A3 27 A3 Tray, Manual Tray 1-3, 5
Yes 11 Ledger 6 Ledger Tray, Manual Tray 1-3, 5
N/A 16 B5 Envelope 100 Not Supported Not Supported
Example @Y12, 2@ sets the page size to legal.
Remember The setting for Y12 is not necessary. It is overwritten if Y119 is
enabled. The Automatic Papersize Configuration logic enabled
by Y119 overwrites any setting you provide to Y12.
Remember On the 4215/MRP and 4219/MRP, the size of the manual feed is
set to the default paper size. When the manual feed tray is used
for other sizes:
1. Disable Y119
2. Use the Y12 command to define the paper size for the
manual feed tray.
Remember If paper trays are not installed in the 4215/MRP or 4219/MRP, the
sizes defined for the missing trays are either letter or A4.
Remember For firmware release S11 116.010 and beyond, the values for Y12
(paper size) will be computed automatically for the user. You no
longer need to include a Y12 command to inform the interface
of the size of paper that is loaded in a tray. Previous versions of
the interface card would format data according to the paper size
3-22 XEROX MRP FAMILY COAX COMMAND REFERENCE
Page 77
defined in Y12, which could be different from what actually was
loaded. In the new releases, the system detects the actual size
loaded in the tray and automatically formats for that size paper.
Y13—Set Wrap/Cut Option at Physical Paper Size
@Y13, <n1> [ , n2]@
Sets print line overflow action. If no value is entered for n2, the
n1 setting values are valid for all supported trays.
n1 Values for n1 are:
FUNCTION SELECTION VIA LINE (FSL) COMMANDS
0 Lines exceeding the available print
area are wrapped at the paper edge.
Overflow data prints on the next line,
and not count as lines, when the
printer calculates the maximum print
lines or length (MPL).
1* Lines are truncated at paper edge.
Overflow data is not printed.
No guarantee for vertical formatting is given if n1
= 0. If n1 = 1 is selected, data exceeding the
maximum print position is lost.
n2 Values for n2 are:
1 Ignored
2* Input tray 1
3 Input tray 3
4 Manual feeder
5 Input tray 2
6 Input tray 4
7—255 Optional feeder
The default is selected for all trays.
This function wraps and cuts on the physical paper (A4, letter,
etc.) and NOT on the logical paper (MPL x MPP). If n2 is not
set, default is selected for all trays.
Example @Y13, 1@ selects lines exceeding maximum print position to be
truncated, or cut off.
Remember When using FSL Y13 Set Wrap/Cut Option on the 4219/MRP or
the 4215/MRP, first enable the Line Wrap option from the PCL5
Setup User Interface menu. Refer to the Printer Setup Menu in
chapter 2 of the Xerox 4219/MRP 4215/MRP Operator Guide for
instructions on how to access this menu.
XEROX MRP FAMILY COAX COMMAND REFERENCE 3-23
Page 78
FUNCTION SELECTION VIA LINE (FSL) COMMANDS
Y14—Enable Graphic Option
@Y14, n@
Enables connection of IBM 3812 Page Printer using the ida 3812
software. It also enables the use of ida 820 Advanced Funtion
Printing (AFP) software package.
n1 Values for n1 are:
0 Disable Graphics
1* Enable Graphics
No guarantee for vertical formatting is given if n1
= 0. If n1 = 1 is selected, data exceeding the
maximum print position is lost.
Refer to the “Helpful hints” appendix for recommended settings
to obtain a specific IBM printer emulation.
Refer also to the “Printer Type and Character Set,” “Features,”
and “PS Characteristics” functions in table D-2 of the “Printer
Output Area” section in the “Coax communications buffer”
appendix.
Remember It is important not to set this function during normal operation.
Y19—Set Simplex / Duplex
Once programmed, the new value should be stored.
@Y19, n@
Selects duplex printing.
Printing on both sides of a paper is enabled with long-edge
binding or short-edge binding (tumble).
n Values for n are:
0 Simplex printing (printing on one side of
the paper)
1 Long-edge binding duplex
2 Short-edge binding duplex
Long-edge and short-edge bindings are printed
in both portrait and landscape.
Orientation of the printing (landscape or portrait) should be
selected in the software controlling the printing, for example,
word processing programs.
Do not use a different page format on the front and the back
side of a paper or the binding edge might have an unpredictable
result.
To make sure that all pages have been ejected while printing in
duplex, set FSL function Y19 to “0“ simplex printing at the end of
3-24 XEROX MRP FAMILY COAX COMMAND REFERENCE
Page 79
Y25—FF Before Local Copy
FUNCTION SELECTION VIA LINE (FSL) COMMANDS
the document you wish to print in duplex. This is especially
important if the document has an uneven number of pages.
N Note: The duplex setting cannot be saved in Permanent Storage
with the X1 command.
If you share a printer with other users, it is important that you
remember to set function 19 to simplex printing again. If you
forget this, the documents of the other users will also be printed
in duplex, and a page may contain your print job on one side
and the print job of another user on the other side.
Example &&??@ @Y19, 1@ @Y10,1@ prints a document in long-edge
landscape.
&&??@ defines “@” as the escape character.
@Y19, 1@ sets long-edge binding, duplex printing.
@Y10,1@ sets orientation to landscape.
@Y25, n@
Selects a form feed (FF) to be performed before local copy. This
function determines the print position before an Operator
Initiated Local Copy (print screen function).
n Values for n are:
0* No Form Feed Before Local Copy
1 Form Feed Before Local Copy is
performed.
If n = 0 is selected, no automatic form feed is performed
(default). If n = 1 is selected, an automatic form feed is
performed unless a Form Feed command was the last command
received, which means the printer is set to print at position 1 of
the first line of the next page. Refer to the illustration given in
the example.
XEROX MRP FAMILY COAX COMMAND REFERENCE 3-25
Page 80

FUNCTION SELECTION VIA LINE (FSL) COMMANDS
Example @Y25, 1@ sets Form Feed Before Local Copy.
Y26—FF After Local Copy
Same print line
Next print line
Next print line
Last print line
Print position
1 2 3
OFF
ON
MPP+1
Start of
buffer
Present form
Page boundary
Next form
@Y26, n@
Selects a form feed to be performed after local copy. It
determines the print position after a Local Copy (print screen
function).
The default is 0 for non-page printers, and 1 for page printers.
n Values for n are:
0 No Form Feed Before Local Copy
1 Form Feed Before Local Copy is
performed.
If n = 0 is selected, the printer defaults to Automatic Form Feed
at the end of the print buffer setting, or FSL Y33—Non SCS,
Automatic Function at End of Job command. If n = 1 is
selected, an automatic form feed is performed unless a Form
Feed command was the last command received, which means
the printer is set to print at position 1 of the first line of the next
page. Refer to the illustration given in the example.
Remember This option corresponds with the IBM 3268 RPQ SC9508 and the
IBM 3287 RPQ MC3750.
3-26 XEROX MRP FAMILY COAX COMMAND REFERENCE
Page 81

FUNCTION SELECTION VIA LINE (FSL) COMMANDS
Example @Y26, 1@ sets Form Feed After Local Copy.
Same print line
Next print line
Next print line
Last print line
Print position
1 2 3
o
OFF
ON
MPP+1
End of buffer
Present form
Page boundary
Next form
XEROX MRP FAMILY COAX COMMAND REFERENCE 3-27
Page 82

FUNCTION SELECTION VIA LINE (FSL) COMMANDS
Y27—Non-SCS Print Image
@Y27, n@
Implements an IBM Request for Price Quotation (RPQ), and
Compatibility modes for other converters. This function specifies
how nulls are handled. The factory default is always for Null Line
Suppression.
n Values for n are:
0* Sets:
• Null line suppression in Local Copy
• Null line suppression in NON SCS print
• Formatted print in Local Copy
• Formatted print in NON SCS print.
1 Sets:
• Null line suppression in Local Copy
• Null line suppression in NON SCS print
• Formatted print in Local Copy
• Formatted print in NON SCS print.
2 Sets:
• Null line suppression in Local Copy
• True Screen image in NON SCS print
• Formatted print in Local Copy
• Un-Formatted print in NON SCS print.
3 Sets:
• True Screen image in Local Copy
• True Screen image in NON SCS print
• Un-Formatted print in Local Copy
• Un-Formatted print in NON SCS print.
4 Sets:
• Null line suppression in Local Copy
• Null line suppression in NON SCS print
• Formatted print in Local Copy
• Formatted print in NON SCS print.
5 Sets:
• Null line suppression in Local Copy
• Null line suppression in NON SCS print
• Un-Formatted print in Local Copy
• Formatted print in NON SCS print.
6 Sets:
• Null line suppression in Local Copy
• Null line suppression in NON SCS print
• Formatted print in Local Copy
• Un-Formatted print in NON SCS print.
7 Sets:
• Null line suppression in Local Copy
• Null line suppression in NON SCS print
• Un-Formatted print in Local Copy
• Un-Formatted print in NON SCS print.
This option corresponds with the IBM 3268 RPQ SC9505, the
IBM 3287 RPQ SC3741, and the IBM 4214 OPT 18=2.
3-28 XEROX MRP FAMILY COAX COMMAND REFERENCE
Page 83

Y28—Non-SCS, CR at MPP + 1
FUNCTION SELECTION VIA LINE (FSL) COMMANDS
The n values 0 and 3 correspond to IBM parameters. The values
4 through 7 are implemented for compatiblity purposes with
other protocol converters.
This function is available in DSC LU3 mode, a non-SCS operation.
@Y28, n@
Implements an IBM RPQ and takes effect as soon as the
command is received. This function controls the printer action
when a carriage return (CR) occurs at the MPP+1.
n Values for n are:
0* Next character position is 1st Print
Position on next line, when a Carriage
Return (CR) is registered at MPP+1.
1 Next character position is 1st Print
Position on current line, when a Carriage
Return (CR) is registered at MPP+1.
This option only affects NON SCS printing, and corresponds with
the following:
• IBM 3268 RPQ SC9501
• IBM 3287 RPQ S30219
• IBM 4214 OPT 15=1.
Example @Y28, 1@ sets the printer to stay on current line when a
Carriage Return (CR) is received at MPP+1.
Same print line
Next print line
Next print line
Last print line
Print position
1 2 3
ON
OFF
MPP+1
o Carriage
return here
Present form
Page boundary
Next form
XEROX MRP FAMILY COAX COMMAND REFERENCE 3-29
Page 84

FUNCTION SELECTION VIA LINE (FSL) COMMANDS
Y29—Non-SCS, NL at MPP + 1
@Y29, n@
Implements an IBM RPQ and takes effect as soon as the
command is received. This function controls how many lines are
skipped when a New Line (NL) occurs at MPP+1.
n Values for n are:
0* Next character position is 1st Print
Position two lines down, when a New
Line (NL) is received at MPP+1.
1 Next character position is 1st Print
Position on next line, when a New Line
(NL) is received at MPP+1.
This option only affects DSC LU3 mode, a NON SCS printing,
and corresponds with the following:
• IBM 3268 RPQ SC9502
• IBM 3287 RPQ S30219
• IBM 4214 OPT 15=1.
Example @Y29, 0@ sets the printer to advance two lines when a NL is
received at MPP+1.
Same print line
Next print line
Next print line
Last print line
Print position
1 2 3
ON
OFF
MPP+1
o New Line
here
Present form
Page boundary
Next form
3-30 XEROX MRP FAMILY COAX COMMAND REFERENCE
Page 85

Y30—Non-SCS, Valid FF Followed by Data
@Y30, n@
Implements an IBM RPQ and takes effect as soon as the
command is received. This function determines the first print
position after the Form Feed (FF) command has been executed.
The default is product dependent. PCL platform has a default of
1. If n = 0 is selected, the printer is set to print at position 2 of
the first print line of the next page. If n = 1 is selected, the
printer is set to print at position 1 of the first print line of the
next page.
FUNCTION SELECTION VIA LINE (FSL) COMMANDS
n Values for n are:
0* Next print position is the 2nd Print
Position (PP) on the next form, when a
valid FF, which is not positioned at the
end of the IBM print buffer, is received.
1* Next character position is the 1st Print
Position on the next form, when a valid
FF, which is not positioned at the end of
the IBM print buffer, is received.
This option only affects DSC LU3 mode, a NON SCS printing,
and corresponds with the IBM 3268 RPQ SC9503 and the IBM
3287 RPQ N/A.
Example @Y30, 1@ sets the printer to advance to 1st Print Position (PP)
on the next form.
Print position
1 2 3
Same print line
Next print line
Next print line
Last print line
ON OFF
MPP+1
o Form feed
here
Present form
Page boundary
Next form
XEROX MRP FAMILY COAX COMMAND REFERENCE 3-31
Page 86

FUNCTION SELECTION VIA LINE (FSL) COMMANDS
Y31—Non-SCS, Valid FF at End of Print Buffer
@Y31, n@
Implements an IBM RPQ and takes effect as soon as the
command is received. This function determines the print line
position when a Form Feed command is the last command in the
print buffer, or is immediately followed by an end of message
code.
n Values for n are:
0* Next character position is the 1st Print
Position (PP) on the 2nd line on the next
form, when a valid FF positioned at the
end of the IBM print buffer, is received.
1* Next character position is the 1st Print
Position on the next form, when a valid
FF, which is not positioned at the end of
the IBM print buffer, is received.
The default is product dependent. PCL platform has a default of
1. If n = 0, (default) is selected, it automatically adds a new line
to a Form Feed command at the end of the print data. The
printer is set to print at position 1 of the second line of the next
page. If n = 1 is selected, it executes only a Form Feed
command. The printer is set to print at position 1 of the first
print line of the next form. This option is ignored if Automatic
Form Feed at End of Buffer (Y33) is ENABLED or Form Feed After
Local Copy (Y26) is ENABLED.
This option corresponds with the IBM 3268 RPQ SC9504 and the
IBM 3287 RPQ SC3749.
Example @Y31, 1@ sets the printer to advance to 1st PP and 1st line on
the next form.
Print position
1 2 3
Same print line
Next print line
Next print line
MPP+1
o Form feed
code here
Present form
Last print line
ON
OFF
3-32 XEROX MRP FAMILY COAX COMMAND REFERENCE
Page boundary
Next form
Page 87
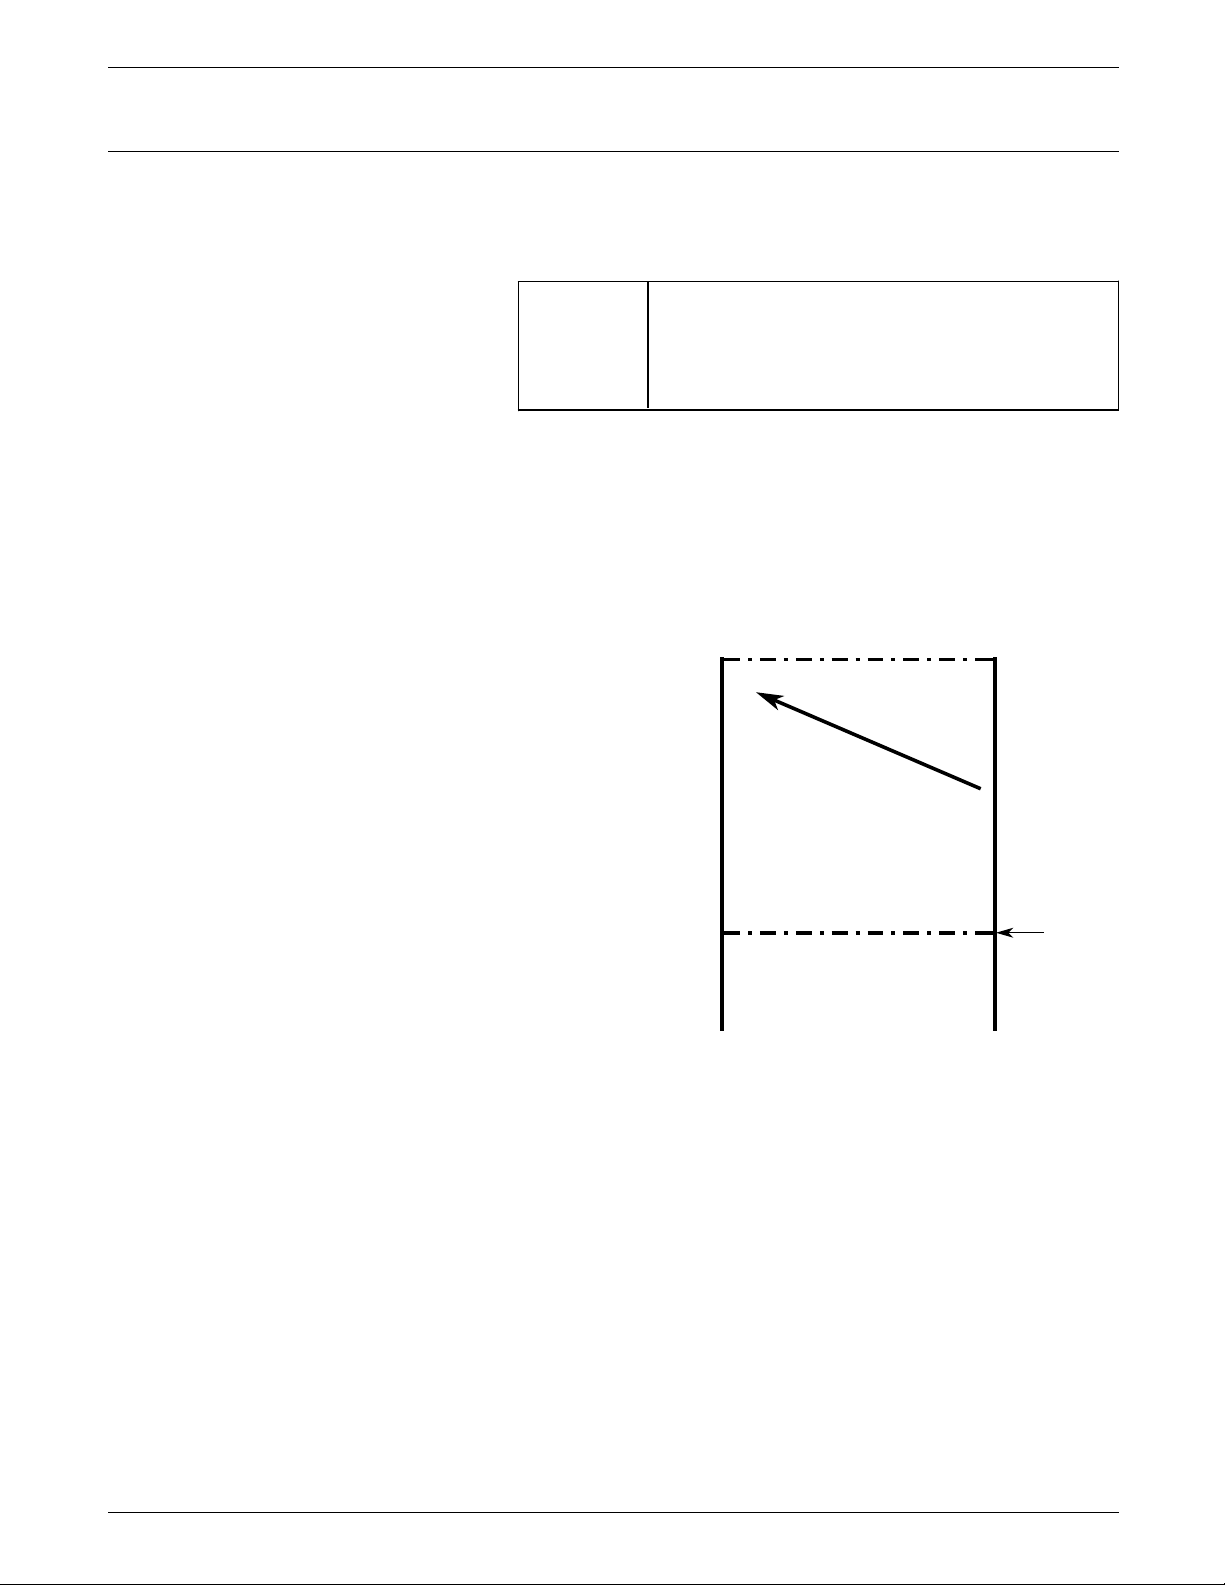
Y32—Non-SCS, FF Valid
FUNCTION SELECTION VIA LINE (FSL) COMMANDS
@Y32, n@
Implements an IBM RPQ. This function determines when the
position of the Form Feed command affects its execution.
n Values for n are:
0* FF valid only at 1st Print Position in line
or at Position MPP+1.
1 FF valid anywhere it occurs.
This option only affects DSC LU3 mode, a NON SCS printing,
and corresponds with the IBM 3268 RPQ SC9506, IBM 3287 RPQ
N/A, and the 4214 OPT 19=1.
Example @Y32, 1@ selects FF to be valid anywhere it occurs.
Same print line
Next print line
Next print line
Last print line
Print position
1 2 3
o OFF
ON
MPP+1
Present form
Form feed
code here
Page boundary
Next form
XEROX MRP FAMILY COAX COMMAND REFERENCE 3-33
Page 88

FUNCTION SELECTION VIA LINE (FSL) COMMANDS
Y33—Non-SCS, Automatic Function at End of Job
@Y33, n@
Implements an IBM RPQ and takes effect as soon as the
command is received. This function determines the print
position after the print buffer is completed or after an end of
message is received. Settings different from the factory default is
NOT recommended.
n Values for n are:
0* A New Line (NL) is automatically
executed when the printing of a buffer is
completed unless the last command
executed was a Form Feed (FF), New Line
(NL), or a Carriage Return (CR).
1 A Form Feed is automatically executed
when the printing of a buffer is
completed, unless the last command
executed was a FF.
If n = 0, (default) is selected, on completion of the print buffer,
an Automatic New Line is performed unless the last command
executed was a Form Feed, or the last print position is at
position 1. If Form Feed is the last character in the buffer, the
end of printer buffer options (Y31) is checked.
If n = 1 is selected, on completion of the print buffer, an
Automatic Form Feed is performed unless Form Feed was the last
command in the buffer. The printer is set at print position 1 of
the first line of the next page.
This option only affects NON SCS printing, and corresponds with
the IBM 3268 RPQ SC9507, and the IBM 3287 RPQ SC3740.
Example @Y33, 1@ sets the printer to automatically issue a FF at the end of
a print buffer.
Same print line
Next print line
Next print line
Print position
1 2 3
o
OFF
MPP+1
End of Buffer
Present form
Last print line
ON
3-34 XEROX MRP FAMILY COAX COMMAND REFERENCE
Page boundary
Next form
Page 89

Y34—Last LF on Page Sent as FF
FUNCTION SELECTION VIA LINE (FSL) COMMANDS
@@Y34, n@
Decides whether the last line feed on a page should be sent as a
Form Feed or a line feed. This option, when enabled, counts the
number of lines and generates a form feed when the line count
equals the page length. Calculations are based on the page
length, which can be set at the printer and overridden by the
appropriate IBM command when operating in the SCS mode.
n Values for n are:
0* No (option disabled)
1* Yes (option enabled), counts the lines
when you use Function Y5—Set Default
Page Length (MPL); and SCS Set Vertical
Format (SVF) command.
The default is product dependent. Use 0 as the default for non
page printers. Use 1 as the default for page printers, and when
printing in duplex, and in conjunction with pending page layout
(page boundary) select. All Line Feeds preceding this Form Feed
command are suppressed.
Example @Y34, 1@ sends last LF as FF.
Y36—Suppress IBM Control Code
@Y36, n@
Suppresses all or some IBM control codes sent from the host
system.
n Values for n are:
0* Respect all IBM control codes
1 Suppress all IBM control codes.
2 Suppress SCS pitch and line density
commands (CPI and LPI). This value is
reserved and is used only because of
compatibility with old products.
If you decide to select n = 1, Suppress IBM control codes, you
need to format documents by the sending of transparent control
codes.
XEROX MRP FAMILY COAX COMMAND REFERENCE 3-35
Page 90

FUNCTION SELECTION VIA LINE (FSL) COMMANDS
Y37—IBM Printer Emulation Select
@Y37, n@
Selects IBM printer emulation.
n Values for n are:
0 3287/4214 emulation
1* 3268 emulation
2 3268 emulation. All values X'00'—X'3F'
are sent transparently with the exception
of valid SCS codes (refer to Table 2-3).
4 Transparent mode
Table 4-3. Valid SCS codes
Code Command name EBCDIC (Hex)
VCS Vertical Channel Select
1
04
HT Horizontal Tab 05
GE Graphic Escape 08
VT Vertical Tab 0B
FF Form Feed 0C
CR Carriage Return 0D
ENP Enable Print 14
NL New Line 15
BS Back Space 16
IRS Interchange Record Separator 1E
INP Inhibit Print 24
LF Line Feed
2
25
SA Set Attribute 28
ESC SCS escape character
2B
(SHF, SVF, SLD, SCD)
BEL Bell 2F
TRN Transparent 35
1
In 3287 emulation, VCS commands are sent as Line Feeds.
Unprintable characters appear as spaces.
2
In 3268 emulation, as many LFs as required by the Select
Vertical Format (SVF) command in use are sent. Unprintable
characters appear as hyphens (-).
3-36 XEROX MRP FAMILY COAX COMMAND REFERENCE
Page 91

Example @Y37, 0@ sets 3287 VCS emulation.
Refer to the “Helpful hints” appendix for recommended settings
to obtain a specific IBM printer emulation.
Y38—IBM Communication Feature (Query, EAB)
@Y38, n@
Enables query reply.
n Values for n are:
This function is only read at power up.
FUNCTION SELECTION VIA LINE (FSL) COMMANDS
0 Extended Attribute Buffer (EAB) but No
Query Reply
1* EAB and Query Reply enabled
2 No Query Reply and No EAB support
Example @Y38, 0@ disables query reply.
Refer to the “Helpful hints” appendix for recommended settings
to obtain a specific IBM printer emulation.
Refer also to the “Query replies” appendix that explains in detail
the available Query Replies available on the interface.
For this FSL Y38 function, refer to the “Printer Features,”
“Features,” and “Extended ID” functions of the Printer Output
Area (table D-2) in the “Coax communications buffer” appendix.
Y44—Suppress CR and SP to Same Position
@Y44, n@
Selects suppression of Carriage Returns (CRs) and Spaces (SPs).
This function should be set to 1 if font downloading or escape
sequences are being sent without the Special Transparent
Feature, Multiple Paired Hex Transparent (ESC ESC) notation.
n Values for n are:
0 No suppression
1* Suppression.
This function is used when transparent data to the printer is
needed (font-download, overlays, etc.).
Example @Y44, 1@ selects suppression of CRs and Spaces to the same
position.
XEROX MRP FAMILY COAX COMMAND REFERENCE 3-37
Page 92

FUNCTION SELECTION VIA LINE (FSL) COMMANDS
Y46—Set IRQ Timer
@Y46, n1 [, n2] [, n3]@
Sets Intervention Required (IRQ) time, Hold Time Out, and Busy
Time Out. This function takes effect as soon as the command is
received.
n1 Values for n1 are:
000 Never send IRQ
001 to 255 Send IRQ after n1 x 5 seconds if
printer error
12* Send IRQ after 1 minute
n2 Values for n2 are:
000 Never send Hold Time Out
001 to 255 Send Hold Time Out after n2 x 5
seconds if printer is in Stop
mode.
120* Send hold time out after 10
minutes.
n3 Values for n3 are:
000 Never send Busy Time Out
001 to 255 Send Busy Time Out after n3 x 5
seconds if printer is busy.
120* Default, send busy time out
after 20 minutes.
This function allows you to define the period of time between an
event that has occurred requiring operator intervention and the
sending of an IRQ timeout response to the host. The factory
default is 12, which is one minute.
If the printer is put into a not ready state for more than 10
minutes, an IRQ occurs independent of this setting except when
‘no IRQ’ is selected.
The IRQ timeout is rounded up to the nearest minute.
Example @Y46, 036@ sets IRQ time for printer errors to 3 minutes.
3-38 XEROX MRP FAMILY COAX COMMAND REFERENCE
Page 93
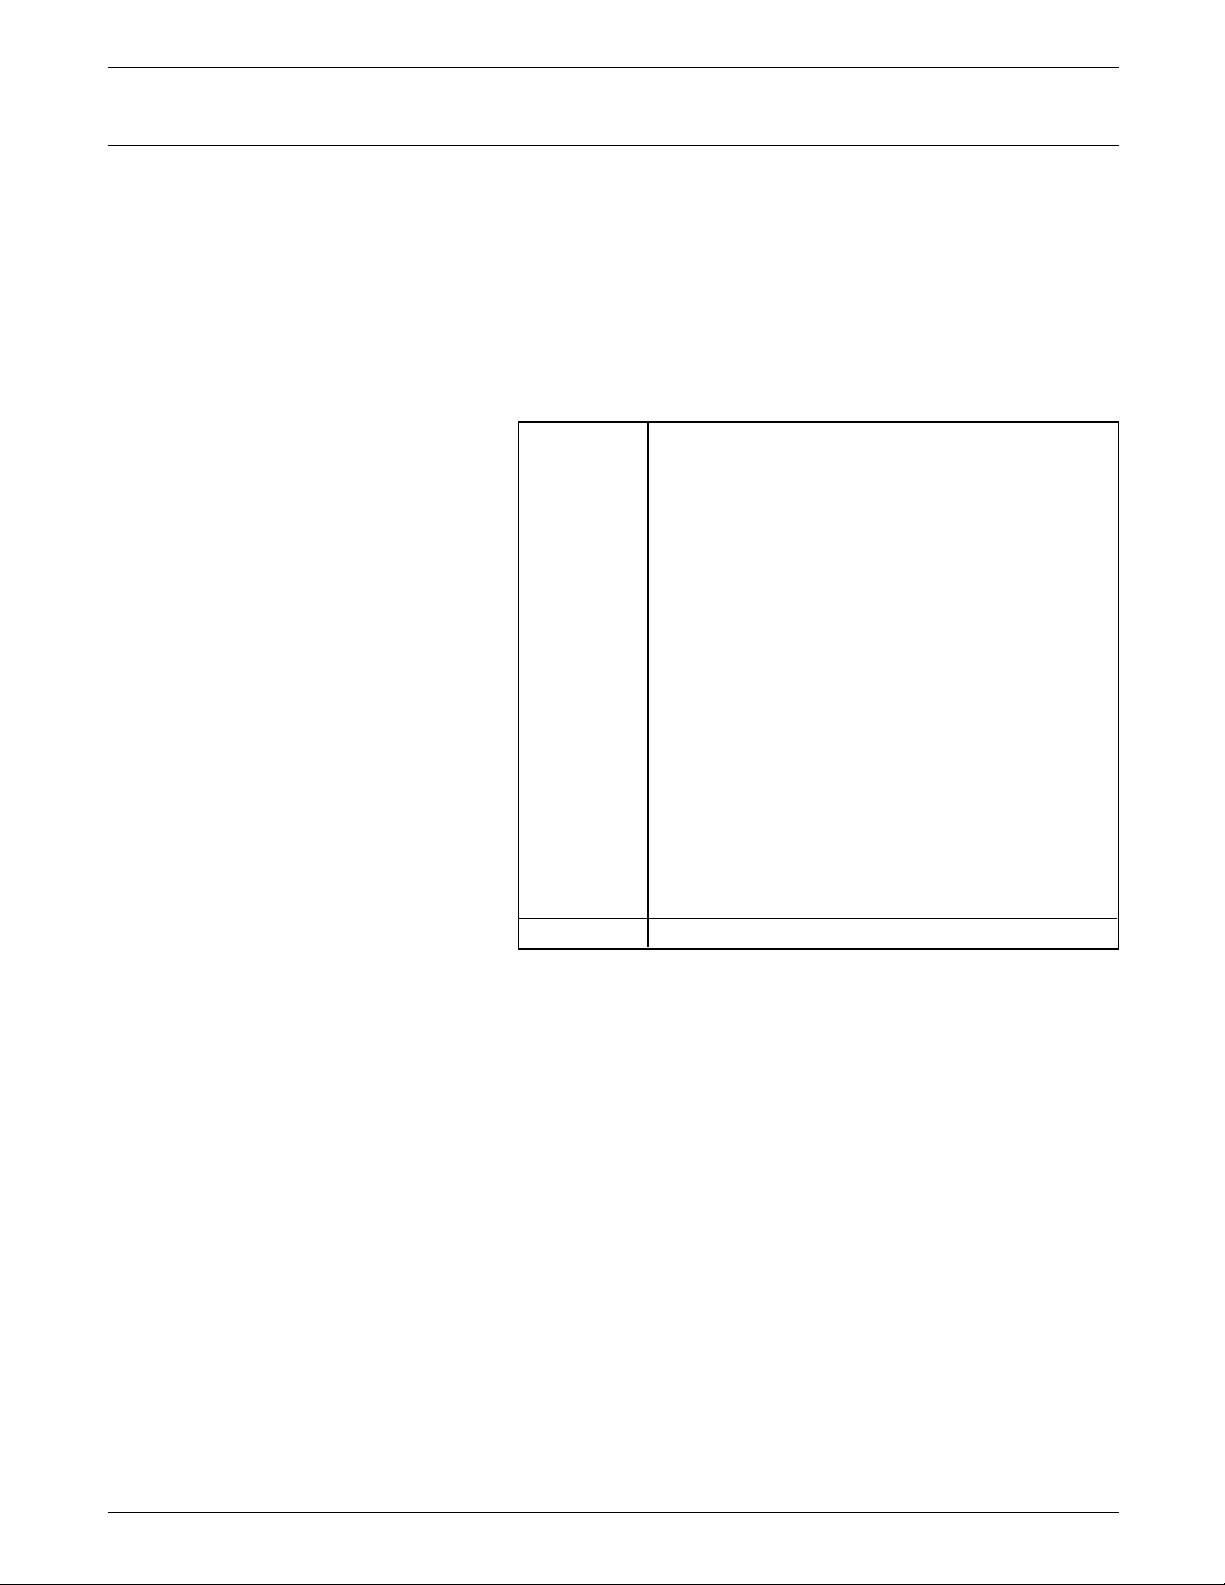
Y47—ESC-Mode Selection
FUNCTION SELECTION VIA LINE (FSL) COMMANDS
@Y47, n
or
@@!ascii ascii@
Sends hexadecimal (HEX) codes transparent to the printer, and
selects Tel-a-graf support. This function takes effect as soon as it
is received.
ASCII mode is definition PCL 5 and PostScript Level 2 commands
sent directly to the printer.
n Valid values are:
1* @'XX' sent as 'XX'
@@'XX' sent as 'XX'
@@!ascii ascii@ sent as ascii.
2 Tel-a-graf support
@@'XX' sent as 'XX'
@@!ascii ascii@ sent as ascii.
3 @'XX' sent as 'XX'
@@'XX' sent as 'XX'
@@!ascii ascii@ sent as ascii.
@, @-@, @ sets Filter mode On
@, @=@, @ sets Partial Filter mode On
@,@+@,@ sets Filter mode Off
In Tel-a-graf mode, the first two decimal digits
after the escape character are used to determine
the length of the string used.
Filter mode is a special compatible feature for
replacing protocol converters. The filter-modes
suppress control codes or text.
ASCII Data in plain text
Example 1 @Y47,2@ selects a Tel-a-graf support.
Example 2 @02 41 42 sends HEX codes 41 42 to the printer.
Example 3 @@’1B’&11H@
This is another example of a command string. An apostrophe (’)
is used to enter ASCII mode.
Between the two leading and the trailing escape characters, all
spaces, 3270 control codes, and the apostrophe character is
ignored, They may be inserted in the data stream to make it
more readable.
XEROX MRP FAMILY COAX COMMAND REFERENCE 3-39
Page 94
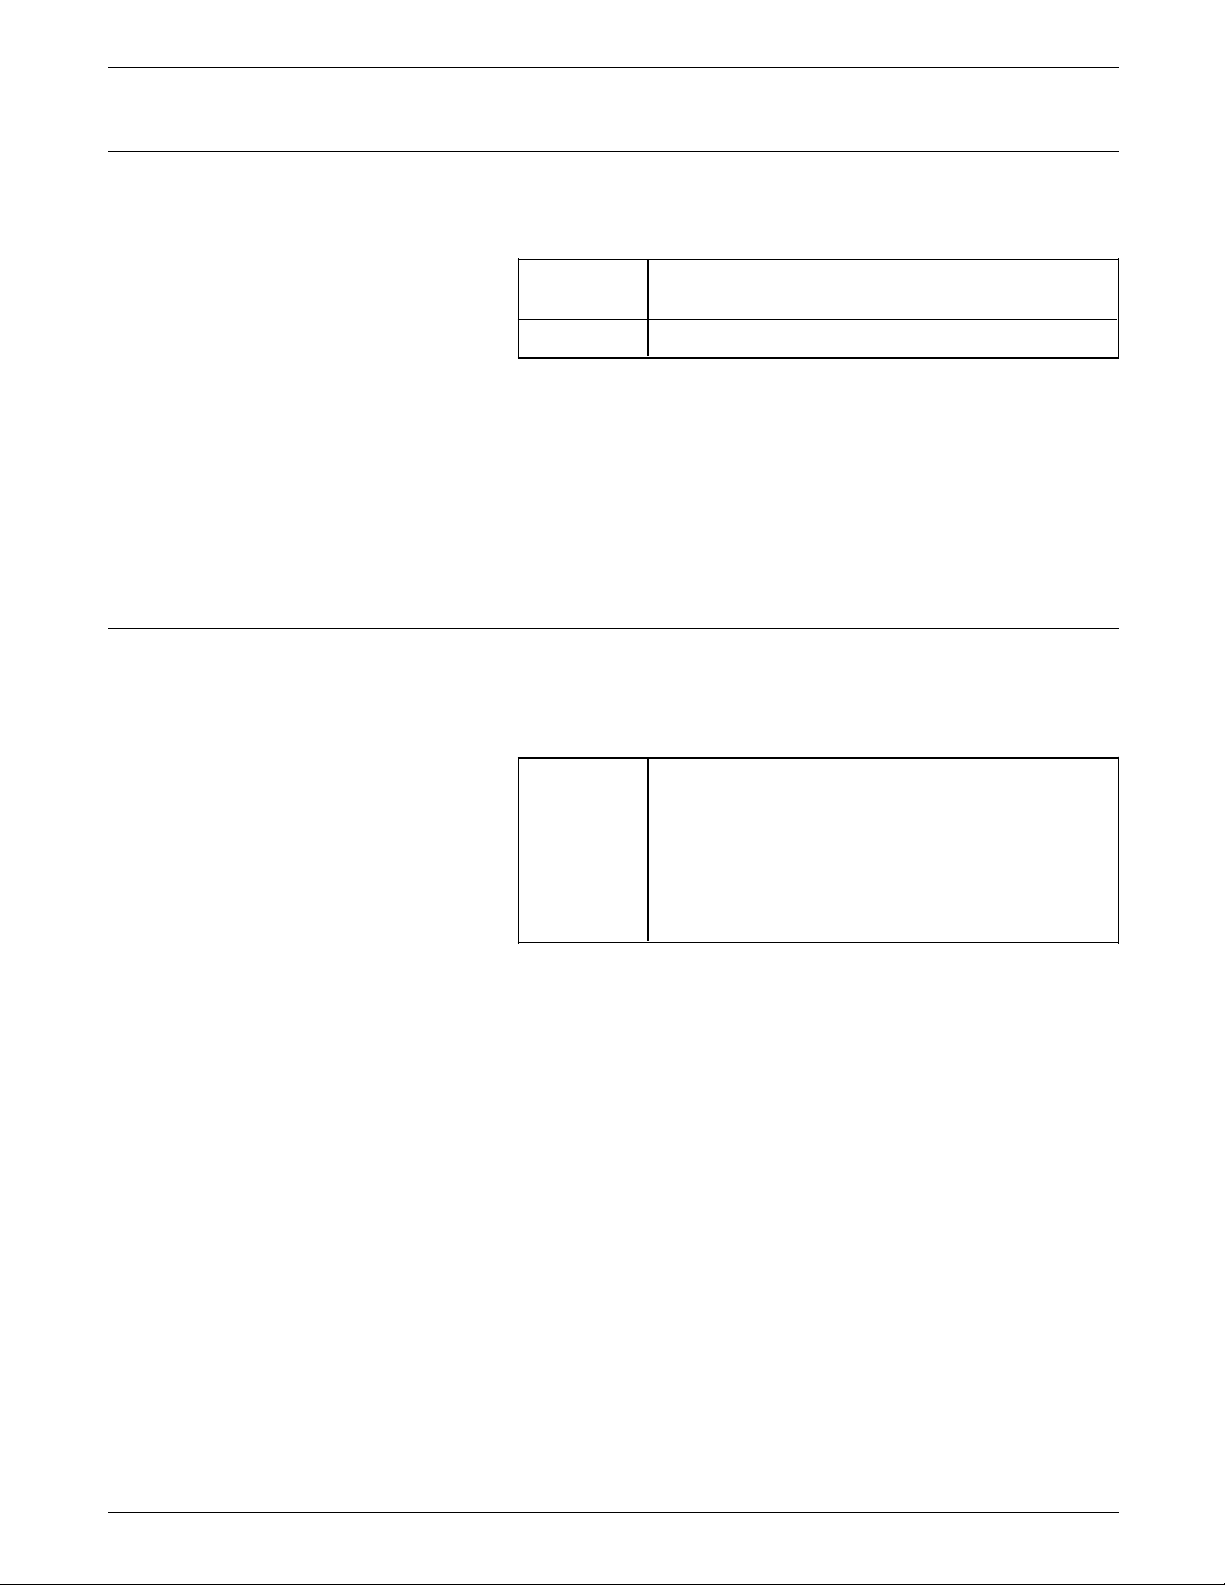
FUNCTION SELECTION VIA LINE (FSL) COMMANDS
Y48—Set Permanent Escape
@Y48, ’n1’@ or @Y48,<xx>@
Selects the permanent escape character.
n1 or
<xx>
Character for permanent escape character
selected from the LU3 character table
xx = 0* No escape character
Example 1 @Y48, ‘>’@ sets the character > as permanent escape
character. Subsequent FSL escape strings will then require > as
escape character.
Example 2 @Y48, ‘ ’@, @Y48, 00@ clears the permanent escape character.
No permanent escape character is used.
Y49—Restrict Access of Temporary and Permanent Settings
@Y49, n1 ‘password’@
Locks the settings stored in the temporary and permanent
memory areas by disabling Function Selection via Line (FSL).
n Values for n are:
0* Unlock FSL functions.
1 Lock the settings in temporary and
permanent memory areas.
2 Lock the settings in permanent memory
only.
When n =1 is selected, use n = 0 to enable FSL again. Refer to
examples 1 and 2. Various levels (0, 1, and 2) are available,
depending on your needs.
Note This FSL must be used with the Y249 and Y253 functions. Y249
is needed to enter engineering mode, and Y253 is needed to
allow passwords.
Example 1 @Y249, FOREST@
@Y253, 1@
@Y49, 1, JET@ locks both the temporary and permanent
memory areas with the password “JET” (if it has been installed).
Example 2 @Y249, FOREST@
@Y253, 1@
@Y49, 0, JET@ unlocks the memory areas again.
3-40 XEROX MRP FAMILY COAX COMMAND REFERENCE
Page 95

Y50—FF After Time Elapse
FUNCTION SELECTION VIA LINE (FSL) COMMANDS
@Y50, n@
Flushes the page if unprinted data remains in the print buffer for
a specified elapsed time. This function has effect as soon as the
command is received.
n Values for n are:
0* Do not flush page
1 to 255 Flush page after x seconds.
Make sure that this function is set to a value longer than is
required for the system to generate and send the next buffer. In
general, the host application generates a termination form feed
and you need not change this function.
In Duplex mode, a command for select next page will be issued.
Example @Y50, 10@ sends Form Feed after 10 seconds if data remains in
print buffer.
Y51—User Strings at Power Up
Remember • The string has to be defined in function Y61—Setup for User-
Example @Y51, 2, 5@ sends user strings 2 and 5 to the printer after FSL
@Y51, <string number>@
Specifies the user strings that should be sent at power up.
0 to 7 One or more strings stated in the form (n1), (n2),
. . . .(nx) in ascending order.
defined Strings before it is sent by function Y51.
• The interface may overwrite some of the settings set in the
user string at power up.
• The user string should not conflict with the IBM setup string
defined in function Y62
• The strings are sent in ascending order.
Y61 defines the string.
XEROX MRP FAMILY COAX COMMAND REFERENCE 3-41
Page 96

FUNCTION SELECTION VIA LINE (FSL) COMMANDS
Y57—User-defined String Before Local Copy
@Y57, <string number>@
Sets up the printer before local copy.
0 to 7 One or more strings indicated on the form (n1),
This function only affects operator initiated local copy, and not
host initiated copy. This function only affects local copy from
CUT screen terminals, and not from DFT terminals.
CUT screens are screen dumps in non-SCS, while Distributed
Function Terminal (DFT) screens are new screen dump in SCS.
This function is only used due to compatibility with older
products.
Example @Y57, 3, 5@ sends user strings 3 and 5 to the printer before
local copy.
(n2), . . . .(nx) in ascending sequence.
Y58—User-defined String After Local Copy
@Y58, <string number>@
Sets up the printer after local copy.
This function only affects operator initiated local copy, and not
host initiated copy. This function only affects local copy from
CUT screen terminals, and not from DFT terminals. These strings
are defined by Y61—Setup for User-defined Strings.
This function is only used due to compatibility with older
products.
Example @Y58, 2, 4@ sends user strings 2 and 4 to the printer after local
copy.
0 to 7 One or more strings indicated on the form (n1),
(n2), . . . .(nx) in ascending sequence.
3-42 XEROX MRP FAMILY COAX COMMAND REFERENCE
Page 97

Y59—Bar Code Definition
FUNCTION SELECTION VIA LINE (FSL) COMMANDS
@Y59, <Def. no.>, <Bar code type>, <Height>
{,<Expansion>}@
Defines the bar code generated by function Wn. Up to eight bar
codes are defined and selected for use with function W—Print
Bar Code.
<Def. no.> Numeric value from 1 to 8 specifying the bar
code number
<Bar Code
type>
Bar Code type is a 2-digit number. The valid
values for the first digit are:
3X Bar code with no alphanumeric characters
printed under the bar code
2X Bar code with alphanumeric characters
printed under the bar code. Text will be
printed with the resident font in 10 CPI.
The valid values for the second digit are:
X2 EAN 89, EAN13 & UPC-A
7 data: check digit 8 is included. EAN8
8 data: check digit 8 is check digit. EAN8
11 data: check digit 12 is included. UPC-A
12 data: check digit 13 is included. EAN13
13 data: check digit 13 is checked. EAN13
X3 2 of 5 interleaved
X4 2 of 5 industrial
X5 Codabar
X6 MSI, check digit must be supplied by the
system.
X8 Plessey, check digit must be supplied by
the system.
X9 3 of 9, Both fine and medium are
supported depending on expansion.
<Height> Bar code height in lines, value from 1—255 (using
9 LPI).
<Expansion> Horizontal expansion factor that selects values
from 1 to 32. This value is optional. Default is 1.
The expansion resolution is enhanced where the
integer expansion factor can be added by a
fraction of 1 to 7. (Example, expansion = 2.3)
XEROX MRP FAMILY COAX COMMAND REFERENCE 3-43
Page 98

FUNCTION SELECTION VIA LINE (FSL) COMMANDS
Remember • The bar code definition must be sent BEFORE the W—Bar
UPC and EAN (X2) • If 7 characters are received, an EAN8 checkdigit is calculated
Code Printout command is used.
• Many bar codes include checkdigits.
• Text under the bar code is printed with the resident font.
• As soon as the bar code is defined, it can be activated.
• Start, stop, and center codes are generated automatically.
Bar code types (second digit) explained
and generated.
• If 8 characters are received, an EAN8 checkdigit is calculated
and compared to the 8th digit.
•
Page 99

FUNCTION SELECTION VIA LINE (FSL) COMMANDS
• You must insert the checkdigit for this code as it is not
uniquely specified.
• Start, stop, and center codes are generated automatically.
Y60—Font Link for GFIDs
3 of 9 (X9)
• Have alphanumeric characters, automatic checking, and
variable length with no checkdigits.
• You may insert the start and stop codes, but if you choose
not to do the insertion of the start and stop codes, these
codes are generated automatically. Both the start code and
the stop code are represented by an asterisk (*).
Example @Y59, 1, 29, 9, 2@ @W1, LaserJet@
This example defines bar code 1 to be a 3 of 9 bar code,
numeric, and alphanumeric characters with text printed under the
bar code, followed by the W command that sends data to the
printer.
The bar code height is 9 lines in 9 lpi = 1"
Expansion is set to 2.
@Y60, n1, n2@
Assigns a font, specified by its Global Font Identifier (GFID), to
the pitch value selection in Function Y3—Set Default CPI, or from
the system.
n1
n2
Values for n1 = Pitch, and n2 = GFID are:
n1 = Pitch n2 = GFID
0 CPI Nothing is defined.
5 CPI 244
10 CPI 11
12 CPI 80
15 CPI 223
17.1 (16.1)
CPI 253
PROPORTIONAL 1412
13.3 CPI 204
20 CPI 281
27 CPI 290
If the pitch is also defined in function Y62—Setup for IBMdefined Strings, then function Y3 refers to the value in function
Y62 and ignores function Y60. The link between the pitch and
GFID exists as soon as function Y60 is received.
Default is dependent on the type of printer.
Refer to the GFID Table 3-3 for the equivalent Pitch.
XEROX MRP FAMILY COAX COMMAND REFERENCE 3-45
Page 100

FUNCTION SELECTION VIA LINE (FSL) COMMANDS
Refer also to the FSL “Y3—Set Default CPI” section.
Table 3-3. GFID = Pitch equivalence
GFID Pitch
1—65 10 CPI
66—153 12 CPI
154—200 Proportional Spaced Mode
(PSM)
201—210 13.3 CPI
211—239 15 CPI
240—246 5 CPI
247—257 17.1 CPI (16.7 CPI)
258—259 18 CPI
260—273 8.55 CPI
274—279 17.1 CPI
280—284 20 CPI
285—289 25 CPI
290—299 27 CPI
400—65535 Typographic
You must specify a GFID when you specify a pitch or the
protocol converter selects one of the printer GFID defaults.
Special fonts are selected in Computer Output Reduction (COR),
depending on the current CPI and font width.
Table 3-4 shows original pitch and selected pitch.
3-46 XEROX MRP FAMILY COAX COMMAND REFERENCE
 Loading...