

Page 1

XEROX
WorkCentre Pro 423/428
Scanner User Guide
708P86638
The Documeint COmpamt
XEROX X
Page 2

Prepared and translated by:
The Document Company Xerox
GKLS European Operations
Bessemer Road
Welwyn Garden City
Hertfordshire
AL7 1HE
ENGLAND
©2001 by Xerox Corporation. All rights reserved.
Copyright protection claimed includes all forms and matters of copyrighted material and information now
allowed by statutory or judicial law or hereinafter granted, including without limitations, material generated
from the software programs which are displayed on the screen, such as icons, screen displays, looks etc.
Xero^, The Document Compan^, the digital X’ and all Xerox products mentioned in this publication are
trademarks of Xerox Corporation. Product names and trademarks of other companies are hereby
acknowledged.
Changes are periodically made to this document. Changes, technical inaccuracies, and typographical errors
will be corrected in subsequent editions.
Page 3

Table of Contents
Preface................................................................1-1
Using This Guide........................................................................1-2
Conventions................................................................................1-3
Background Knowledge........................................................1-2
Organization..........................................................................1-2
Bracket text typeface
Italic typeface........................................................................1-3
Notes.....................................................................................1-3
Hints......................................................................................1-3
Cautions................................................................................1-3
Warnings...............................................................................1-3
............................................................
1-3
42
c
-Hi
c
o
O
s~.
O
•Si
-Q
|2
Before Using the Scanner
Overview.....................................................................................2-2
Scanning with the Mailbox....................................................2-2
CentreWare Scanning Services
Required Environment
WorkCentre Pro....................................................................2-4
Personal Computer (Client)..................................................2-4
Personal Computer (Server)
Network.................................................................................2-4
Preparing to use the Mailbox Feature........................................2-5
Defining the IP Address........................................................2-5
Setting the IP Address..........................................................2-6
Setting Subnet Mask and Gateway Address........................2-7
Enabling the Salutation.........................................................2-8
Creating a Mailbox................................................................2-9
Procedure.............................................................................2-9
Preparing to use CentreWare Scanning Services
Enabling the Transport Protocol (UDP)..............................2-12
Enabling the FTP Client......................................................2-14
Installing the Network Scanner Utility
Required Environment........................................................2-15
Target Operating System....................................................2-15
Personal Computer.............................................................2-15
Network...............................................................................2-15
Target Application Software
Installation...........................................................................2-16
Procedure...........................................................................2-16
Uninstallation
Procedure...........................................................................2-18
...............................................................
......................................................................
................................
...........................................
................................................
...................
......................................
...............................................
2-1
2-3
2-4
2-4
2-12
2-15
2-15
2-18
Operating the Scanner......................................3-1
Scanning Documents
Scan-to-Mailbox....................................................................3-2
Procedure.............................................................................3-2
Scan-to-Server(Using Job Template)
Procedure.............................................................................3-5
Specifying Various Features (Mailbox)
Selecting the Scan Resolution Level
Procedure.............................................................................3-7
XEROX WorkCentre Pro 423/428 Scanner User Guide Page i
.................................................................
...................................
......................................
....................................
3-2
3-5
3-7
3-7
Page 4

Selecting the Original Type...................................................3-8
Procedure.............................................................................3-8
Selecting the Density Level
Procedure.............................................................................3-8
Selecting the Scan Size........................................................3-9
Procedure.............................................................................3-9
Selecting Scanning Ratio....................................................3-10
Procedure...........................................................................3-10
Scanning Mixed Size Originals
Procedure...........................................................................3-11
Loading Documents...........................................................3-11
Scanning Two-Sided Originals
Procedure...........................................................................3-12
Printing/Deleting Stored Documents........................................3-13
Procedure...........................................................................3-13
Custom Presets for Scanning Features
Screen Default (4. Scan Default)........................................3-16
Scan Screen
Scan Features
Procedure...........................................................................3-16
.......................................................................
....................................................................
..................................................
..........................................
...........................................
...................................
3-8
3-11
3-12
3-16
3-16
3-16
Operating the Client (Personal Computer)
Using the Network Scanner Driver
Importing the Stored Documents..........................................4-2
Procedure.............................................................................4-2
Changing Display of the Scanner Name
Network.................................................................................4-5
Local File
Other Scanners.....................................................................4-5
Procedure.............................................................................4-6
Changing ImportSettings
Import Order
File List Mode
Negative Image
Temporary Save as
Using the Mailbox Viewer
Confirm/Delete/ImportStored Documents
Procedure.............................................................................4-8
Importing the Document Stored in the Mailbox
Setting Up the Properties....................................................4-10
Import Properties................................................................4-12
..............................................................................
.........................................................................
.......................................................................
....................................................................
..............................................................
..........................................................
Precautions and Limitations
Precautions and Limitations.......................................................5-2
Enabling Salutation or FTP Client
Using the Network Scanner Driverand the
Mailbox Viewer at the Same Time........................................5-2
Importing from Several Personal Computers
Printing Stored Document
Retrieve from the Mailbox of the Machine
Using the CentreWare Scanning Services...........................5-2
Using the TIFFfile.................................................................5-2
Scan Size Limitation.............................................................5-2
Number of Pages of Stored Document
Maximum Numberof Scanned Pages (Mailbox)
Upgrading the Network Scanner Utility
Troubleshooting..........................................................................5-4
............................................
..............................
......................................................
............................
............................
........................................
.......................
....................................................
...........................
................................
................................
.......
..................
..................
4-1
4-2
4-5
4-5
4-6
4-6
4-6
4-7
4-7
4-8
4-8
4-10
5-1
5-2
5-2
5-2
5-2
5-3
5-3
5-3
Page ii XEROX WorkCentre Pro 423/428 Scanner User Guide
Page 5

Appendix A-1
Printing Job Template List.
Compatible Software
...........
.A-2
.A-3
42
c
-Hi
c
o
O
s~.
O
•Si
-Q
|2
XEROX WorkCentre Pro 423/428 Scanner User Guide Page in
Page 6

Page iv XEROX WorkCentre Pro 423/428 Scanner User Guide
Page 7

1 Preface
Thank you for purohasing the Xerox WorkCentre Pro 423/428. This
guide provides all the neoessary operating instruotions and preoautions
for using spanning features.
To get the most out of the maohine, please read this guide oarefully
beforehand.
0)
0
1
XEROX WorkCentre Pro 423/428 Scanner User Guide Page 1-1
Page 8

Using This Guide
Background Knowledge
Organization
Chapter 1 This ohapter
Chapter 2 Before Using the Scanner
Chapter 3 Operating the Scanner
Chapter 4 Operating the Client (Personal Computer)
This guide is written with the assumption that you are familiar with the
basio workings of yoursystems.With referenoe to information suoh as
personal oomputers, operating systems and networks, refer to the
relevant information forassistanoe.
The following is a summary of eaoh ohapter:
This ohapter provides the summary of soanning features and
preparation instruotions for using the network soanner.
This ohapter desoribes how to soan the dooument.
This ohapter desoribes how to import the stored dooument from the
mailbox of the maohine to a personal oomputer using a olient personal
oomputer.
Chapter 5 Precautions and Limitations
This ohapter desoribes the preoautions and limitations when using the
soan feature and also explains how to troubleshoot problems when
they ooour.
Appendix This seotion provides information on soan feature referenoes and
prooedures when using CentreWare Soanning Servioes.
Page 1-2 XEROX WorkCentre Pro 423/428 Scanner User Guide
Page 9

Conventions
0)
Ü
Bracket text typeface
Italic typeface
In this manual, a host device refers to a personal computer or
workstation.
The [Bracket Text] typeface is used to emphasize the selection of a
feature mode or button. For example:
> Select[Image Quality].
> Select[Save].
The Italic typeface is used to emphasize a word or phrase. In addition,
references to otherchapters and publications are displayed in Italic
typeface. Forexample:
Always follow safety procedures when operating the equipment.
Refer to “Maintenance” on page 11-1, for information about cleaning
the Document Glass.
For more information about the network options available, refer to the
System Administrator Guide.
I
Notes
Hints
Cautions
Warnings
Notes are statements that provide additional information. Forexample:
NOTE: If the Xerox WorkCentre Pro 423/428 does not include the
Finisherand/or High Capacity Feeder, ignore the firststep.
Hints help users perform a task. For example:
HINT: Select the X/Y display areas to display a pop up keypad which
can be used to enter and save the values.
Cautions are statements that suggest mechanical damage as a result
of an action. Forexample:
CAUTION: When cleaning the Xerox WorkCentre Pro 423/428, do
not use organic solvents or aerosol cleaners.
Warnings are statements that alert users to the possibility of personal
damage. Forexample:
WARNING: This equipment must be connected to an earthed
mains socket outlet.
XEROX WorkCentre Pro 423/428 Scanner User Guide Page 1-3
Page 10

Page 1-4 XEROX WorkCentre Pro 423/428 Scanner User Guide
Page 11

! Before Using the Scanner
The following information oan be found in this ohapter:
> Overview
> Required Environment
> Preparing to use the Mailbox Feature
> Preparing to use CentreWare Spanning Servioe
> Installing the Network Spanning Utility
0)
c
c
CD
O
00
0)
£
CD
,c
0)
QQ
XEROX WorkCentre Pro 423/428 Scanner User Guide Page 2-1
Page 12
Overview
The WorkCentre Pro Network Soanner provides the following features:
> The soan feature by using the mailbox in the maohine
> The soan feature by using the CentreWare Spanning Servioes
The following is the summary of eaoh soan feature:
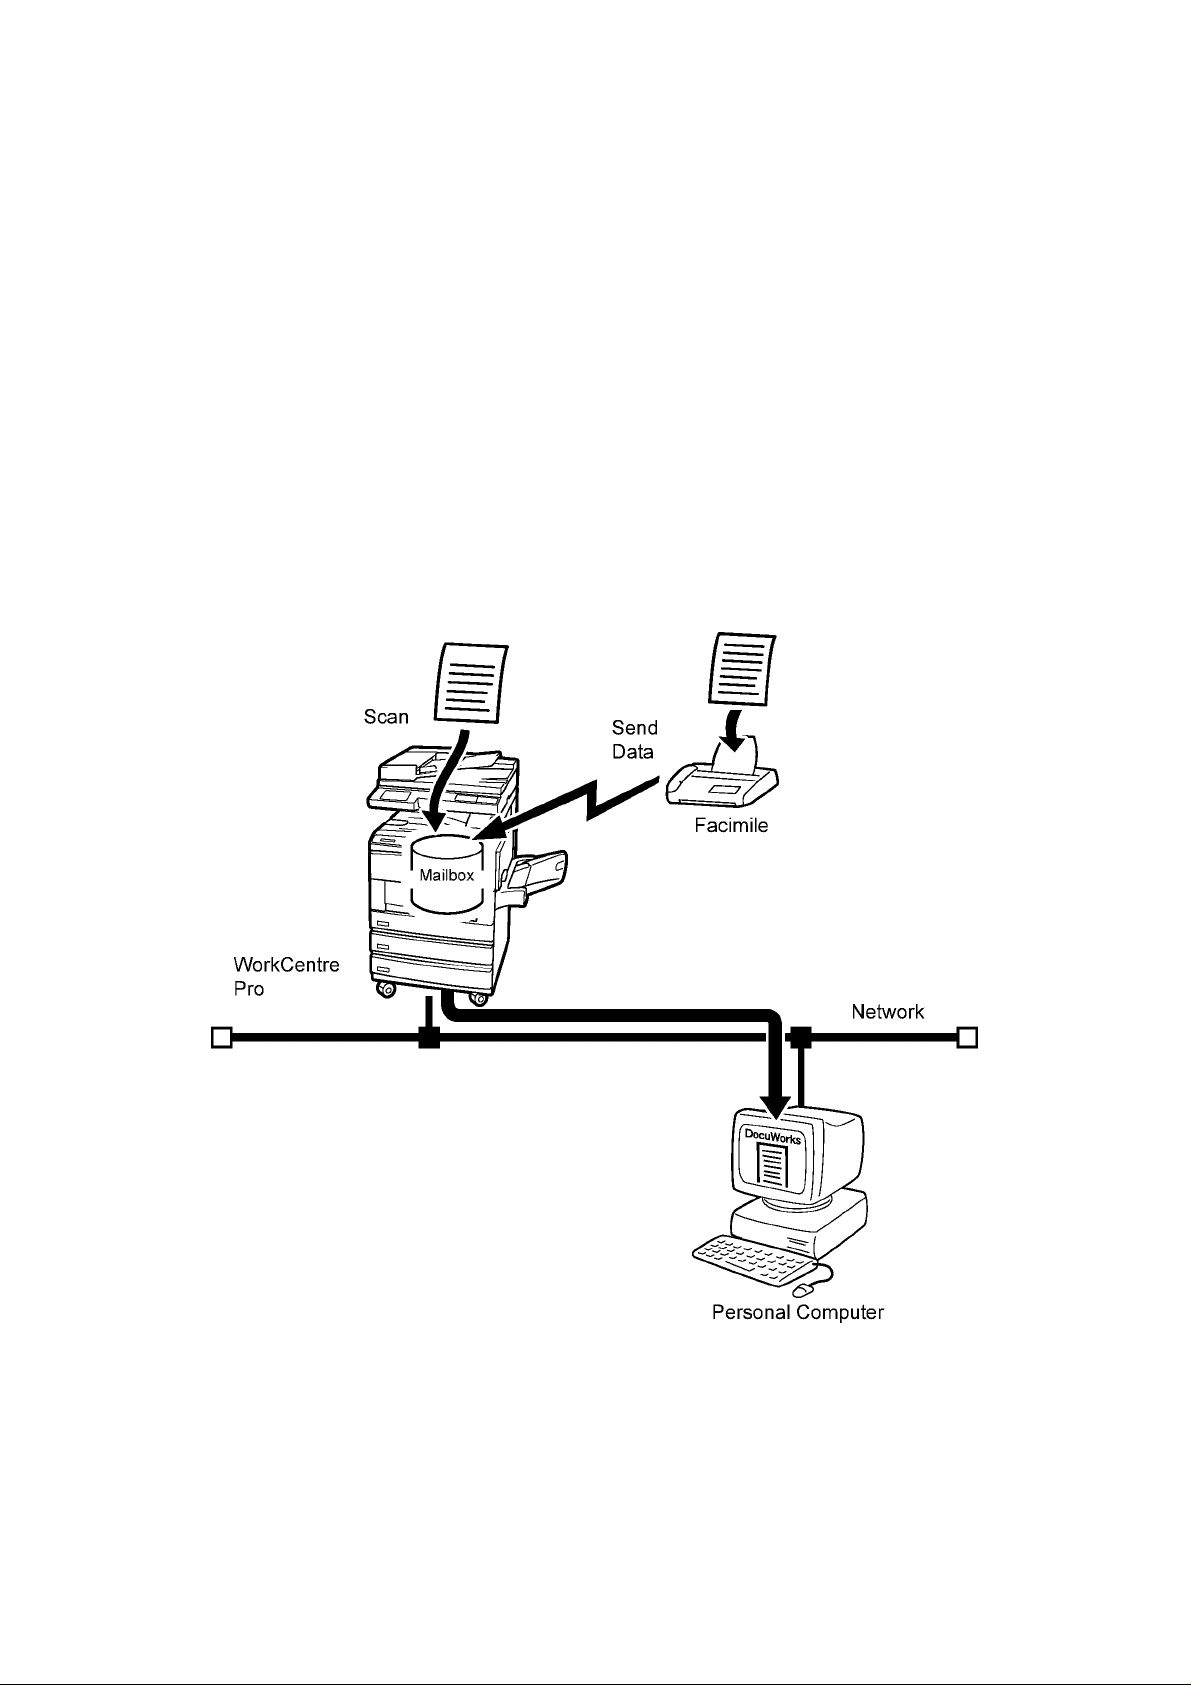
Scanning with the Mailbox
You oan store a dooument in the mailbox by soanning the dooument on
the maohine.
The stored data oan be imported to the personal oomputer (olient)
oonneoted to a network.
Besides soanned doouments, you oan also import data reoeived from
other faosimile to your mailbox of the WorkCentre Pro.
See the UserGuide (Facsimile) for details of the mailbox feature.
(optional)
Page 2-2 XEROX WorkCentre Pro 423/428 Scanner User Guide
Page 13

CentreWare Scanning Services
You can scan a document by specifying a template file, which is called
h Job Template.
The scanned data will be stored on the hard disk of the machine and
the data will be automatically transmitted to the personal computer
(server) connected to a network.
The optional CentreWare Scanning Services is required in orderto
create the Job Template or to setup a repository location for the
transmitted data.
NOTE: This guide describes only the procedure for the machine when
using CentreWare Scanning Services. For information regarding the
procedure forthe personal computer, referto the CentreWare
Scanning Services User Guide.
It is necessary to install the optional printer HDD kit in order to use
CentreWare Scanning Services.
Scan
0)
c
c
CD
O
00
0)
£
CD
,c
0)
QQ
XEROX WorkCentre Pro 423/428 Scanner User Guide Page 2-3
Page 14

Required Environment
This section describes the required environment in order to use the
scan feature (mailbox feature).
WorkCentre Pro
The following options are needed forthe machine:
> Fax unit (for models not installed with the fax feature)
> Printer HDD kit (when using CentreWare Scanning Services only)
> 64MB SDRAM (when using CentreWare Scanning Services only)
Personal Computer (Client)
The personal computer as a client must be installed with either one of
the following operation systems:
> Microsoft Window^ 95/Window^ 98/Window^ Me operating
system
> Microsoft Windows operating system Version 4.0/Window^
2000 operating system
NOTE: Windows NT 4.0 Server TSE (Terminal Server Edition) and
Windows 2000 Server/Advanced Server Terminal Service are not
compatible with this feature.
Personal Computer (Server)
When using the CentreWare Scanning Services, the personal
computer as a server must be installed with the following operation
system:
> Microsoft Windows N^ operating system version 4.0
> Microsoft Window^ 2000 operating system
Network
The machine and personal computer should be connected with a
network and be able to communicate with the TCP/IP protocol.
Page 2-4 XEROX WorkCentre Pro 423/428 Scanner User Guide
Page 15

Preparing to use the Mailbox Feature
The following preparation is neoessary to soan a dooument using the
mailbox:
> Define IP address.
> Enable Salutation.
> Registerthe mailbox.
0)
c
c
CD
Ü
00
0)
£
CD
,c
Defining the IP Address
The prooedure forsetting up is as follows:
This seotion explains how to set up anIP address. Depending on the
network environment, you may need to set up the subnet mask and
gateway address. If your network has a Dynamio Host Configuration
Protoool (DHCP), BOOTP or RARP environment, the printer oan obtain
these items automatioally from eaoh of the server. By default, these
items are obtained automatioally from the DHCP server.
NOTE: Use the DHCP servertogether with the Windows Internet
Name Servioe (WI NS) server at the same time. When using the WI NS
server, adjust the settings if neoessary, by seleoting the following on
the printeroontrol panel: Network/Port, followed by WINS Server, and
then the various items.
When using the BOOTP or RARP server, seleot the following on the
printeroontrol panel: Network/Port, followed by TCP/IP Settings, Get
IP Address, and then BOOTP or RARP. Cheok with your system
administrator if you have any queries on the BOOTP or RARP
environment.
In addition, you oan use the quiok setup menu to oonfigure the IP
address and Salutation along with the printer environment setting.
See the User Guide (Printer) to oheok the DHCP server and use the
quiok setup menu.
0)
QQ
XEROX WorkCentre Pro 423/428 Scanner User Guide Page 2-5
Page 16

I ▼ I II ► I |EJed/Sel||
to move down a column. to move between columns. to select an Item (* shows beside item).
Quick Setup
Report List
System Setting
Setting the IP Address
This section explains the procedure for setting up the IP address
manually by using the printer control panel. Depending on the network
environment you are using, you may need to set up the subnet mask
and gateway address. Set the necessary items after checking with the
network administrator.
NOTE: You do not need to define the IP address if it already exists.
(The screen to define the IP address will not be displayed in the
following case.)
1. With “Ready to print or fax” displayed, press the Menu button.
Network/Port
Parallel
LPD
Netware
SMB
IPP
USB
Port 9100
EtherTalk
Salutation
FTP Client
SNMP
Internet Service
TCP/IP Settings Get IP Address
IP Address
DHCP
BOOTP
RARP
Manually
000.000.000.000
2. Set “Get IP Address” to Manually.
3. Enter the IP Address.
Use the left an right arrows to move between the numbers.
Use up and down arrows to increment or decrement the value. If
you keep your finger on a button, the number will change
automatically.
4. Press the Menu button to accept the changes and re-initialize the
printer.
Page 2-6 XEROX WorkCentre Pro 423/428 Scanner User Guide
Page 17

I ▼ I I I I ► I |EJed/Sel I
to move down a column. to move between columns. to select an Item (* shows beside item).
Quiok Setup
Report List
System Setting
Network/Port
Parallel
LPD
Netware
SMB
IPP
USB
Port 9100
EtherTalk
Salutation
FTP Client
Setting Subnet Mask and Gateway Address
1. With “Ready to print or fax” displayed, press the Menu button.
0)
c
c
CD
O
00
0)
£
CD
,c
0)
QQ
SNMP
Internet Servioe
TCP/IP Settings
2. EntertheSubnetMask.
Use the left an right arrows to move between the numbers.
Use up and down arrows to inorement or deorement the value. If
you keep your finger on a button, the number will ohange
automatioally.
3. Enter the Gateway Address.
Use the left an right arrows to move between the numbers.
Use up and down arrows to inorement or deorement the value. If
you keep your finger on a button, the number will ohange
automatioally.
4. Press the Menu button to aooept the ohanges and re-initialize the
printer.
Get IP Address
IP Address
Subnet Mask
Gateway Address
000.000.000.000
000.000.000.000
XEROX WorkCentre Pro 423/428 Scanner User Guide Page 2-7
Page 18
Enabling the Salutation
Enable Salutation on the printeroontrol panel.
Ready to print
or fax
Press
©
Menu
Quick Setup
■ (2)
Menu
Network/Port
(D Press ^
NOTE: RAM for the printer is not installed, Salutation
oannot be enabled due to insuffioient memory. If this
happens, disable ports thatyou are not using. If the
Salutation still oannot be enabled, you are then
Menu
reoommended to install the 64MB SDRAM for the
printer. Please referto your User Guide (Printer).
or
À
Network/Port
Parallel
(J) Press ^ a few times until the following appears
Network/Port
Salutation
^ a few times until the following appears
T
Press ^
Salutation
Port Status
(D Press ^
Port Status
! (2) Press Y
T
Port Status
; (D Press Ejecî/Seî
T
Port Status
(g) Press
(When “Ready to print or Fax” appears, the
printer is ready to receive data.)
Menu
Switch off/on the power
I
Ready to print
or fax
Disable'
Press Clear All on the copier
control panel
Enable
Enable'
Page 2-8 XEROX WorkCentre Pro 423/428 Scanner User Guide
Page 19
Creating a Mailbox
Use the copier control panel to create a mailbox to store the scanned
document.__________________________________________________
NOTE: You can create up to 200 mailboxes.
Procedure
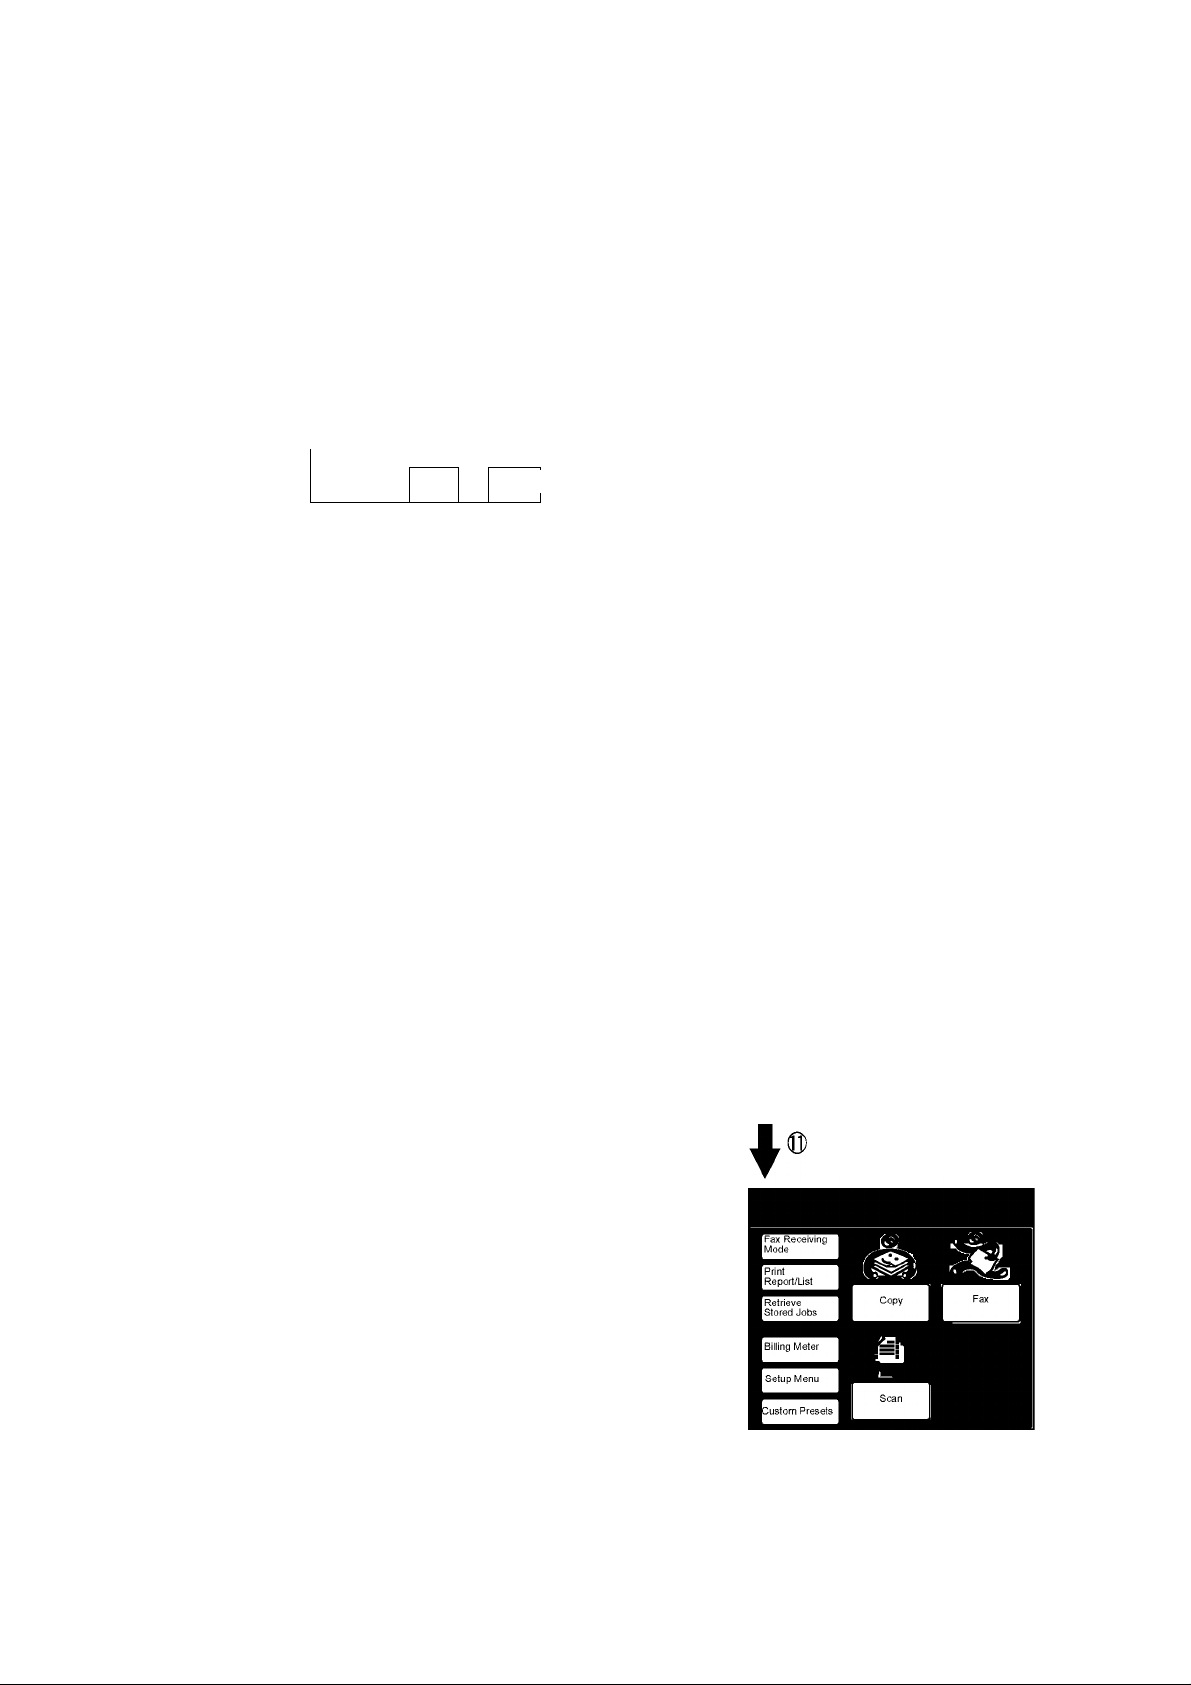
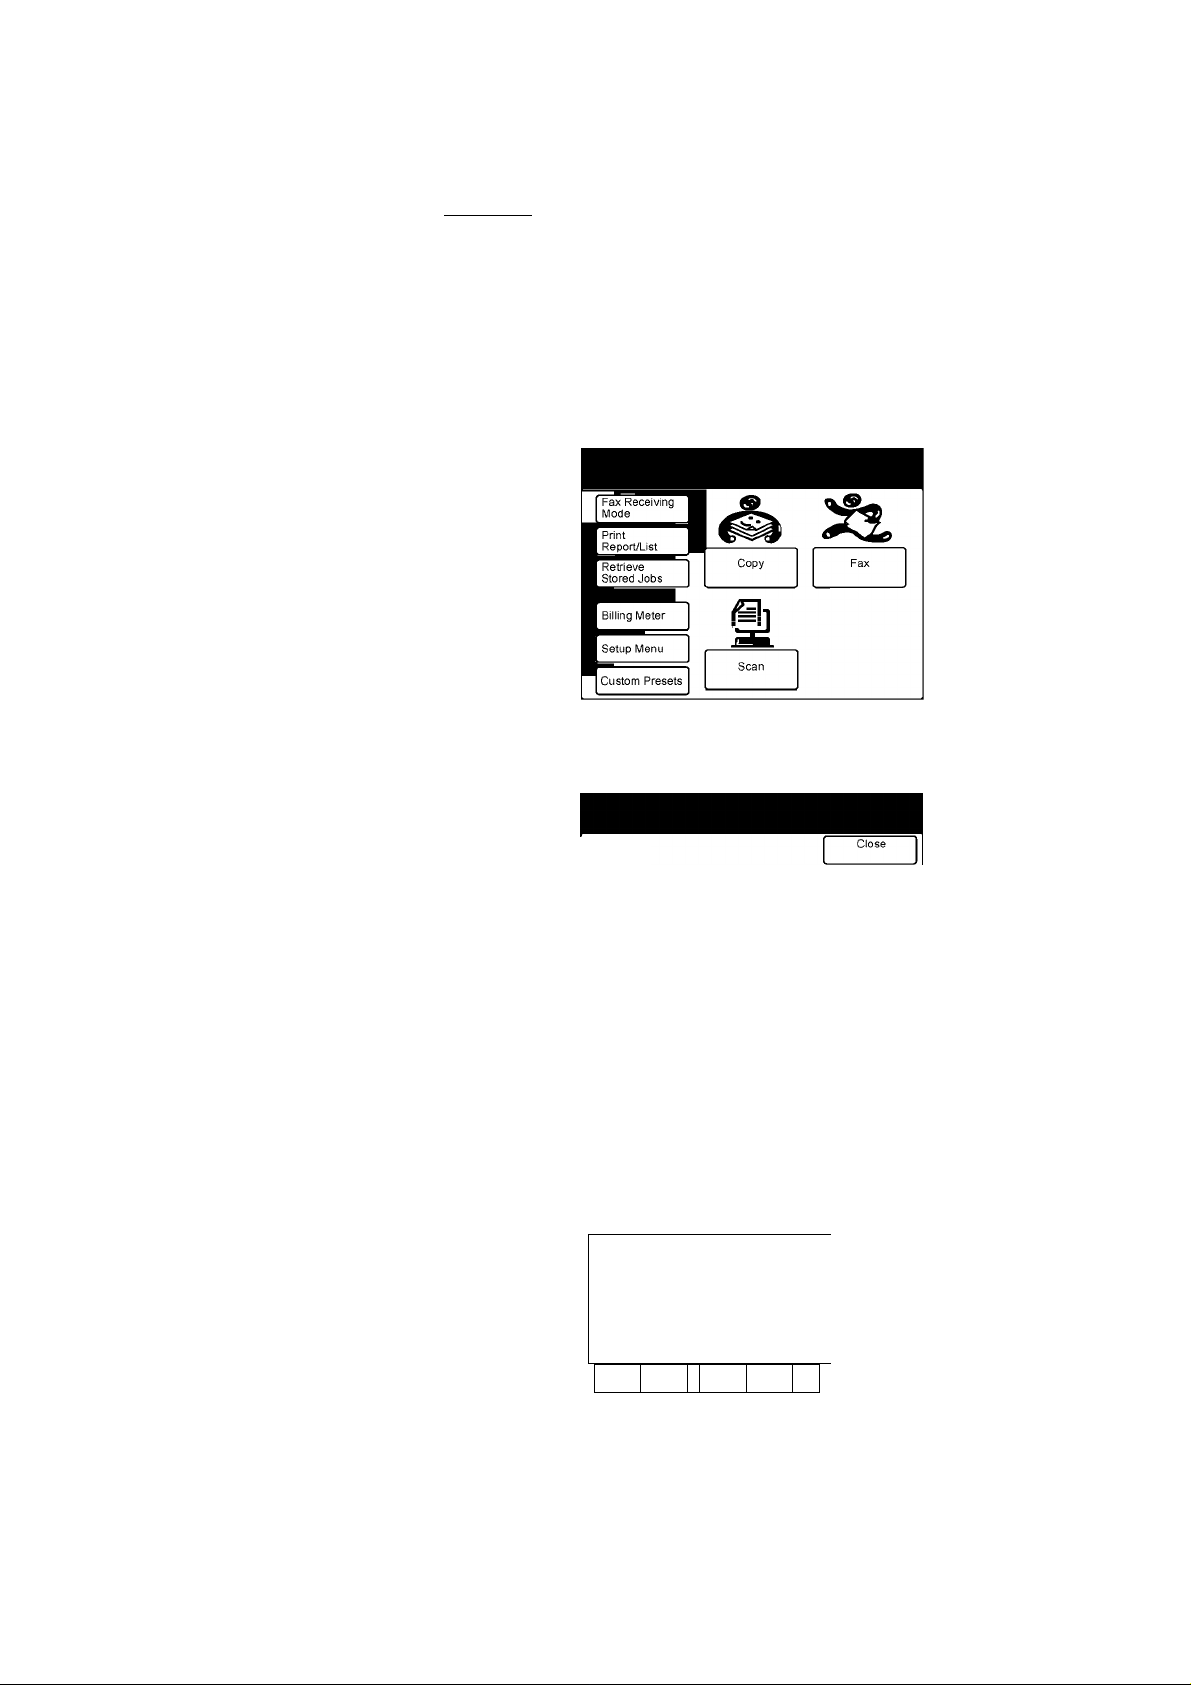
1. Select Setup Menu on the Menu screen.
NOTE: If the following screen is notdisplayed, press Feature
Selection to display the screen.
0)
c
c
CD
O
00
0)
£
CD
,c
0)
QQ
2. Select Mailbox.
Setup Menu
Speed Dial
Group Dial
5
5
5
Job/Name
Comment
Stored Jobs
1
I
Local Fax
Infomiation
5
3. Select an unused mailbox number directly or use the ▲ or'
button.
Setup Mailbox
m (Not bntereoj
002 (Not Entered)
003 (Not Entered)
004 (Not Entered)
005 (Not Entered)
006 (Not Entered)
007 (Not Entered)
008 (Not Entered)
009 (Not Entered)
010 (Not Entered)
Prev.
page
Next
page
Close
Enter/Change
4. Select Enter/Change.
XEROX WorkCentre Pro 423/428 Scanner User Guide Page 2-9
Page 20

5. Enter a 4-digit password by using the keypad, and select Confirm
Password.
NOTE: The password must be unique.
When notsetting the password, do notenterany password and then
select Confirm Password.
Select Delete Mailbox to delete a mailbox created.
Select Change Password to change the password.
Use the numeric keypad to enter password.
Mailbox No. 001
Enter/Change
Password
Confimi
Password
Change
Password
Delete
mailbox
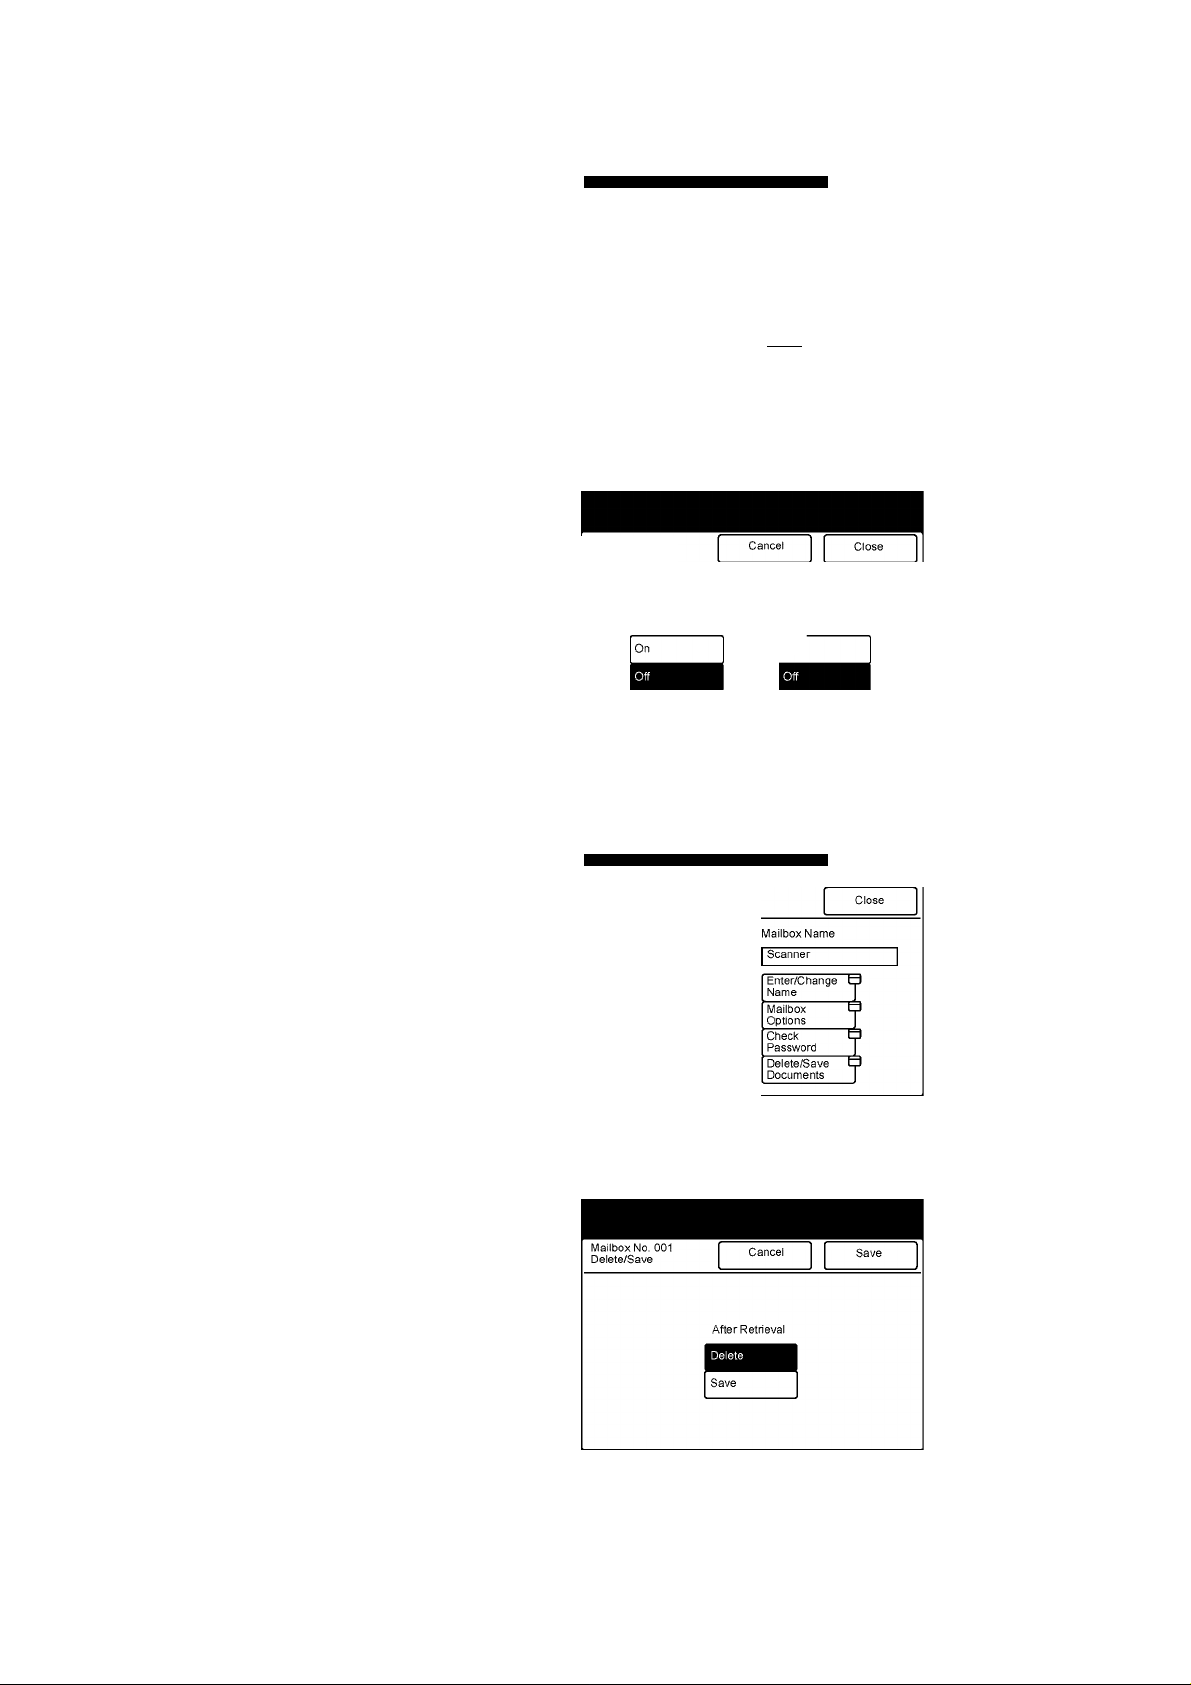
Mailbox Name
I (Not Entì'ed)
Enter/Change
Name
Mailbox
I
Options
Check
Password
Delete^ave
Documents
Close
3
?
I
6. Select Enter/Change Name to enter the name for the mailbox.
Use the numeric keypad to enter password.
Mailbox No. 001
Enter/Change
Password
Confimi
Password
'Change
Password
Delete
mailbox
3
Mailbox Name
(In Use - No Name)
Enter/Change
Name
Mailbox
Options
Check
Password
Delete^ave
Documents
Close
3
?
3
If you do not wish to enter any name, proceed to Step 8.
7. Enter the name using the keyboard on the screen, then select
Save.
Mailbox No. 001
- Enter/Change Name
Scanner
□S00000000
0000000000
Backspace
Space
0000000000
000000
Symbol
NOTE: You can enter up to 10 characters for the mailbox name.
See the UserGuide (Facsimile) for entering text.
Alpha
numeric
Shift
Page 2-10 XEROX WorkCentre Pro 423/428 Scanner User Guide
Page 21
8. Select Check Password to check the password.
Use the numeric keypad to enter password.
Mailbox No. 001
Enter/Change
Password
Confimi
Password
Change
Password
Delete
mailbox
5
Mailbox Name
Scanner
Enter/Change
Name
Mailbox
Options
Check
Password
Deletefôave
Documents
Close
3
I
9. Select the settings for Check Password and then select Save.
Mailbox No. 001
Check Password
Retrieve/Delete
I On
0)
c
c
CD
Ü
00
0)
£
CD
,c
0)
QQ
10. Select Delete/Save Documents to configure the settings for
retrieving thedocuments.
Use the numeric keypad to enter password.
Mailbox No. 001
Enter/Change
Password
Confimi
Password
Change
Password
Delete
mailbox
I
11. Select whether to save or delete the document after retrieving and
then selectSave.
12. Select Clear All on the control panel.
XEROX WorkCentre Pro 423/428 Scanner User Guide Page 2-11
Page 22

Preparing to use CentreWare Scanning Services
The following preparation is neoessary to soan a dooument by using
CentreWare Spanning Servioes:
> Define IP address (See “Defining the iP Address” on page 2-5)
> Enable transport protoool (UDP)
> Enable FTP Client
The prooedure forsetting up is as follows:
NOTE: When the setting for the maohine is oompleted, install the
CentreWare Soanning Servioes by referring to the CentreWare
Soanning Servioes User Guide.
Enabling the Transport Protocol (UDP)
To define the job template server using the Soan Admin Wizard of the
CentreWare Soanning Servioes, enable the transport protoool (UDP)
on the printeroontrol panel of the maohine.
Follow the prooedure below to enable the transport protoool (UDP).
Ready to print
or fax
Press
©
Menu
Quick Setup
Press
©
Menu
Network/Port
Press ^
.To next page
Menu
^ I or Y I a few times until the following appears
Network/Port
Parallel
0 Press ^ or 3 few times until the following appears
Page 2-12 XEROX WorkCentre Pro 423/428 Scanner User Guide
Page 23

Network/Port
SNMP
Press ►
SNMP
Press ^
Port Status
(2) Press y
Port Status
Disable'
© Switch the power off/on.
f
Ready to print
or fax
, @ Press Clear All on the
copier control panel
0)
c
c
CD
O
00
0)
£
Cb
,c
0)
QQ
Port Status
(g) Press EJed/Sel
Port Status
Press
SNMP
SNMP
Enable
Enable'
a
Port Status
Press
the following appears
Transpt Protocol
Press ^
Transpt Protocol
or
Press
IPX or UDP is selected.
Here, we select UDP
A or y
Make sure that the Scan button is
displayed on the menu screen of touch
panel display of the machine.
a few times until
a
IPX’
a few times until
Transpt Protocol
Eject/Set
Press
Transpt Protocol
Press Menu I
XEROX WorkCentre Pro 423/428 Scanner User Guide Page 2-13
UDP
UDP’
Page 24

Enabling the FTP Client
Ready to print
or fax
To import the job template from a server, or to transmit the spanned
data to a server, it is neoessary to enable the FTP Client on the printer
oontrol panel of the maohine.
Follow the prooedure below to enable the FTP olient and define the IP
address.
0 Press
Menu
Menu
Quick Setup
0 Press A I or Y a few times until the following appears
Menu
Network/Port
Press
Network/Port
Parallel
0 Press A or Y I a few times until the following appears
Network/Port
FTP Client
Press ►
FTP Client
Port Status
(f) Press ►
Port Status
Disable ’
@ Press Y
Switch the power off/on
Ready to print
or fax
(Q) Press Clear All on the
copier control panel
Port Status
® Press
@ Press
Page 2-14 XEROX WorkCentre Pro 423/428 Scanner User Guide
Menu
(When “Ready to print or Fax” appears,
the printer is ready to receive data.)
Port Status
Enable
Eject/Se!
Enable'
Page 25

Installing the Network Scanner Utility
Network Scanner Utility is the software which allows you to access
stored data in the mailbox from a personal computer. This section
describes the installation and uninstallation of the network scanner
utility using the PCL Driver/Network Utility (Window^) CD-ROM.
NOTE: Referto the CentreWare Scanning Services User Guide for
installing the CentreWare Scanning Services.
Required Environment
To install the Network Scanner utility, a personal computer must meet
all the following requirements:
Target Operating System
The following operating systems are compatible with the utility:
> Microsoft Window^ 95/Window^ 98/Window^ Me operating
system
> Microsoft Windows N^ operating system Version 4.0/Windows'^
2000 operating system
0)
c
c
CD
O
00
0)
£
CD
,c
0)
QQ
NOTE: Windows NT 4.0 Server TSE (Terminal Server Edition) and
Windows 2000 Server/Advanced Server Terminal Service are not
compatible with this feature.
Personal Computer
The target computer must meet all of the following requirements:
> Running i486DX4/100 MHz procecessororabove (Pentium 100
MHz orabove is recommended)
> 32 Mbyte memory or more
> 40 Mbyte or more of free hard disk space (not including the space
for storing scanned data)
Network
A personal computer has to be connected to a network and be able to
communicate with the TCP/IP protocol.
See the Manuals of the respective OS to confirm and add protocol
settings on the computer.
Target Application Software
To import the data stored in the mailbox to an application software, the
software must be compatible with the TWAIN interface.
See “Appendix B Compatible Software” for the applications that have
been verified to be compatible with the machine.
XEROX WorkCentre Pro 423/428 Scanner User Guide Page 2-15
Page 26

Installation
The Network Scanner Utility includes the following software:
> Network Scanner Driver
Scan driver to import the data stored in the mailbox of the machine
to the software compatible with TWAIN.
> MailboxViewer
Software to check, import or delete the data stored in the mailbox
of the machine.
You can install both softwares at a time following the installation
procedure below:
Procedure
1. Click start and Run.
The Run dialog box will be displayed.
2. Insert the PCL Driver/Network Utility CD-ROM into the CD-ROM
drive.
3. Type the drive name (e.g. E:) and the path name
(\English\Utility\Win9x_Me\SCN\Disk1\Setup,
\English\Utility\NT40\SCN\Disk1\Setupor
\English\Utility\Win2000\SCN\Disk1\Setup), then click OK. The
drive name may be different depending on yoursystem (personal
computer).
Page 2-16 XEROX WorkCentre Pro 423/428 Scanner User Guide
Page 27

4. Click Next and continue with the installation.
5. Follow the instructions on the screen.
6. When the installation is completed, the following dialog box
appears. Click "Yes, I want to restart my computer now.", then
Finish.
0)
c
c
CD
O
00
0)
£
CD
,c
0)
QQ
The installation is completed and the Windows restarts
automatically.
XEROX WorkCentre Pro 423/428 Scanner User Guide Page 2-17
Page 28

Uninstallation
This section describes the procedure to remove the Network Scanner
Utility installed in Microsoft Windows.
NOTE: When upgrading the network scanner utility, make sure you
uninstall the existing network scanner utility.
Procedure
1. Double-click My Computer, Control Panel, then Add/Remove
Programs.
2. Click Xerox Network Scanner Utility, then Add/Remove.
3. Click Yes.
The uninstallation is completed.
Page 2-18 XEROX WorkCentre Pro 423/428 Scanner User Guide
Page 29

3 Operating the Scanner
The following information oan be found in this ohapter:
> Spanning Doouments
> Speoifying Various Features
> Printing/Deleting Stored Doouments
> Custom Presets for Soanning Features
0)
c
c
CD
O
00
0)
£
CD
,c
'A
5
0)
O'
XEROX WorkCentre Pro 423/428 Scanner User Guide Page 3-1
Page 30

Scanning Documents
Scan-to-Mailbox
This section describes how to scan documents and store the scanned
document into the mailbox.
There are two methods forscanning documents.
> Store the scanned data into the mailbox.
> Specify the job template and scan the data, then transmit to server.
(when using the CentreWare Scanning Services)
Refer to the corresponding steps according to your selection.
The basic procedure to scan documents and store them in a mailbox is
as follows:
Procedure
1. Loaddocuments.
2. Select Scan on the Menu screen.
NOTE: If the Menu screen is notdisplayed, press Feature Selection
on the control panel a few times.
See “Enabling the Salutation” on page 2-8 to check the settings if the
Scan button is not displayed.
Page 3-2 XEROX WorkCentre Pro 423/428 Scanner User Guide
Page 31

3. Select Mailbox.
Select Mailbox to store images.
File Destination; Not Selected
Mai box
Scan
Resolution
300 dpi 1
aher Y
Basic Features
5
A
Original Type
Text
Text & Photo
Halftone
Customised
Features
Fax Memory 100%
Lighter/Dari^er
— ▲
—
►
T
Features Menu
See “Creating a Mailbox” on page 2-9 to create a new mailbox.
See “Enabling the Salutation” on page 2-8 to check the settings if
the Mailbox button is not displayed.
4. Enter the number of the mailbox to store the document using the
keypad, then select Next.
0)
c
c
CD
O
00
0)
£
CD
,c
'A
5
0)
O'
Enter Mailbox No. and password,
then select Save.
Fax Memory 100%
5. Enter the password using the keypad, then select Save.
NOTE: The password will be displayed as '
XEROX WorkCentre Pro 423/428 Scanner User Guide Page 3-3
Page 32

6. Select other features as required.
Ready to Scan. Fax Memory 100%
Load documents and press start. Images stored
n Mailbox can be retrieved from Client PC.
File Destination; Mailbox
No. 1 (Scanner)
Scan
Resolution
300 dpi \
aher Y
Basic Features
A
Original Type
Text
Text & Photo
Halftone
Customised
Features
J
Empty
Mailbox Print/Delete
Lighter/
Dari^er
—
—
►
Features Menu
A
T
See “Specifying Various Features (Mailbox)” on page 3-7 for
details of scanning features.
7. Press Start.
The scanning starts, and the scanned document is stored in the
Mailbox.
Page 3-4 XEROX WorkCentre Pro 423/428 Scanner User Guide
Page 33

Scan-to-Server (Using Job Template)
This section describes how to scan documents using CentreWare
Scanning Services (optional).
You can scan a document by the file (job template) forwhich the
scanning features and required server are pre-set.
The scanned data is converted to TIFF format, and is transmitted to the
required server.
You should create thejob template on your personal computer using
the Job Template Utility of CentreWare Scanning Services, then store
it in a server.
The machine will automatically retrieve the stored job template from the
server.
See CentreWare Scanning Services User Guide forthe details of
CentreWare Scanning Services.
Procedure
1. Loaddocuments.
0)
c
c
CD
O
00
0)
£
CD
c
5
0)
O'
2. Select Scan on the Menu screen.
NOTE: If the Menu screen is notdisplayed, press Feature Selection
on the copier control panel a few times.
See “Enabling the FTP Client” on page 2-14 to confirm the setting
if the Scan button is notdisplayed.
XEROX WorkCentre Pro 423/428 Scanner User Guide Page 3-5
Page 34

3. Select Job Template.
Select Job Template to scan images.
Fax Memory 100%
See “Enabling the FTP Client” on page 2-14 to confirm the setting
if the Job Template button is notdisplayed.
NOTE: If the Salutation is running, the display differs from the figure
as shown on the right.
4. Selectthe required job template directly. If the job template that you
created is not displayed, select Update Template.
NOTE: When the Template Description button is selected during
selection of any job template, detailed description is displayed.
However, if you have not added any description when the job template
was first created, there will be no display.
When the Review button on the control panel is pressed during
selection of any job template, you can check the contents of the
settings for each job template.
5. Press Start.
The scanning starts and the data is stored in the hard disk, which
is then automatically transmitted to the server.
NOTE: The System Administratorsets up templates.
Page 3-6 XEROX WorkCentre Pro 423/428 Scanner User Guide
Page 35

Specifying Various Features (Mailbox)
This section describes the setting of various scanning features at the
machine.
The available scan features are as follows:
> Scan Resolution
> Original Type
> Lighter/Darker (density level)
> Scan Size
> Reduce/Enlarge (scan ratio)
> Mixed Size Originals
> 2-Sided Originals
Selectthe required scanning features following the procedure below.
Selecting the Scan Resolution Level
You can select the resolution level for documents to be scanned.
The resolution levels are 200 dpi (factory-default), 300 dpi, 400 dpi and
600 dpi.
0)
c
c
CD
Ü
00
0)
£
CD
,c
'A
5
0)
O'
Procedure
1. Display the Basic Features screen and select the required
resolution.
Scan
Resolution
200 dpi
300 dpi
Other Y I
Basic Features
Original Type
Text
Text & Photo
Haiftone
Customised
Features
NOTE: You can also select Scan Resolution on the Features Menu
screen.
If you want to select 400 dpi or 600 dpi, select Other.
2. After selecting the resolution, select Close.
z
Lighter/
Dari^er
—
►
I
Features Menu
A
T
XEROX WorkCentre Pro 423/428 Scanner User Guide Page 3-7
Page 36

Selecting the Original Type
When scanning a documentwhich includes photo images or text, you
can select the original type in order to obtain optimum results.
Procedure
1. Display the Basic Features screen and select the required original
type.
NOTE: You can also select Original Type on the Features Menu
screen.
Selecting the Density Level
You can adjust the density level for the documents to be scanned.
The machine provides five levels of density.
Procedure
1. Display the Basic Features screen and select the required density
Ready to Scan.
Load documents and press s^rt. Images stored
in Mailbox can be retrieved from Client PC.
File Destination; Mailbox
No. 1 (Scanner)
Scan
Resolution
300 dpi 1
Other ^
Basic Features
using the tors button.
£
Original Type
Text
Text & Photo
Halftone
Oustomiseo
Features
Fax Memory 100%
Mailbox Print/Delete
Lighter/
Dari^er
►
■
Features Menu
I
Empty
A
T
Ready to Scan.
Load documents and press start, images stored
in Mailbox can be retrieved from Client PC.
Scan
Resolution
300 dp
Other
Basic Features
File Destination; Mailbox 1
No. 1 (Scanner) [
Original Type
Text
Text & Photo
Halftone
?
Customised
Features
Fax Memory 100%
Empty
Mailbox- LJ
Print/Delete |
Lighter/Dari^er
—
—
►
Features Menu
n
NOTE: You can also select Lighter/Darker on the Features Menu
screen.
Page 3-8 XEROX WorkCentre Pro 423/428 Scanner User Guide
Page 37

Selecting the Scan Size
You can select the scan size for the document. This feature is used for
scanning the size you specified instead of the actual size of the
document.
The scan sizes are: Auto (factory-default), B^, A^, A^?,
A^, orA^.
NOTE: When the Duplex Automatic Document Feeder (DADF) is
used, if the original size is smaller than the scanning size, the machine
scans the document using the original size.
Procedure
1. Select Scan Size on the Features Menu screen.
0)
c
c
CD
Ü
00
0)
£
CD
,c
'A
5
0)
O'
Ready to Scan.
Load documents and press start. Images stored
in Mailbox can be retrieved from Client PC.
File Destination; Mailbox
No. 1 (Scanner)
Scan lip
Resolution I
Scan Size ^
2-Sided Up
Originals
Basic Features
Original Type
Reduce/ Cp
Enlarge |
Customised '
Features j
Fax Memory 100%
Empty
Mailbox Print/Delete
Lighter/ C
Dari^er |
Mixed Size
Originals
Features Menu
2. Select the required scan size, then select Close.
Ready to Scan.
Load documents and press start images stored
in Mailbox can be retrieved from Client PC.
ax Memory
I
XEROX WorkCentre Pro 423/428 Scanner User Guide Page 3-9
Page 38

Selecting Scanning Ratio
You can reduce or enlarge the image of documentwhen scanning.
You can select a ratio from 50% to 400%.
NOTE: Reduce/Enlarge is set to 100% at factory-default.
Procedure
1. Select Reduce/Enlarge on the Features Menu screen.
Ready to Scan.
Load documents and press start. Images stored
in Mailbox can be retrieved from Client PC.
File Destination; Mailbox
No. 1 (Scanner)
Scan
Resolution
Scan Size
2-Sided B
Originals T
Basic Features
7
7
Original Type
Reduce/
Enlarge
Customised
Features
Fax Memory 100%
MailboxPrint/Delete
Lighter/
Dari^er
7
Mixed Size
Originals
7
i
Empty
7
7
Features Menu
2. Select the required ratio using the ▲ or ▼ button, then select
Close.
Ready to Scan.
Load documents and press start, images stored
in Mailbox can be retrieved from Client PC.
Fax Memory 100%|
Page 3-10 XEROX WorkCentre Pro 423/428 Scanner User Guide
Page 39

Scanning Mixed Size Originals
You can scan documents of different sizes atone time using the DADF.
If you do not select this feature, the machine scans all the documents
in the same size as the first document to be scanned.
> Load the documents on the duplex automatic document feeder
(DADF) to make use of the Mixed Size Originals feature.
> When loading documents of various sizes, load the large size
documents at the bottom of the DADF.
> When using the Mixed Size Originals feature, load documents of
sizes that can be automatically detected.
> When you specify the scan size, the documents are scanned by the
specified size.
> The weight of documents that can be used in the the Mixed Size
Originals feature is 50 - 120g/m.
Procedure
1. Select Mixed Size Originals on the Features Menu screen.
0)
c
c
CD
Ü
00
0)
£
CD
,c
'A
5
0)
O'
Ready to Scan.
Load documents and press start. Images stored
in Mailbox can be retrieved from Client PC.
File Destination; Mailbox
No. 1 (Scanner)
Scan Q
Resolution T
Scan Size ^
2-Sided Cp
Originals I
Basic Features
Original Type ^
Reduce/ Cp
Enlarge |
Customised
Features
~x
Fax Memory 100%
Mailbox Print/Delete
Lighter/ Cp
Dari^er |
Mixed Size
Originals
Features Menu
J
Empty
I
Loading Documents
Load all the documents onto the DADF against the inner document
guide. Adjust the movable document guide so that it touches the
document of the biggest size.
XEROX WorkCentre Pro 423/428 Scanner User Guide Page 3-11
Page 40

Scanning Two-Sided Originals
The machine automatically scans two-sided documents by using the
DADF.
Select the binding location to determine the top-to-bottom orientation of
the image on both sides of the documents to be scanned.
You can select left, right, top or bottom.
Procedure
1. Select 2-Sided Originals on the Features Menu screen.
eady to Scan.
Load documents and press start. Images stored
in Mailbox can be retrieved from Client PC.
File Destination; Mailbox
No. 1 (Scanner)
Scan a
Resolution T
Scan Size ^
2-Sided lip
Originals
Basic Features
Original Type ^
Reduce/ O
Enlarge |
Customised
Features
Fax Memory 100%
Mailbox -
Print/Delete
Lighter/
Darl^er
Mixed Size
Originals
Features Menu
1.
Empty
2. Selectthe required binding location, then Close.
7
7
Page 3-12
NOTE: The binding location is specified based on the loading
orientation of the document.
When you load the document placing its top against the feeding edge
of the DADF, select Top or Bottom.
XEROX WorkCentre Pro 423/428 Scanner User Guide
Page 41

Printing/Deleting Stored Documents
You can print or delete the stored documents from your mailbox by
following the procedure below.
Procedure
1. Select Scan on the Menu screen.
NOTE: If the screen on the right is not displayed, press Feature
Selection to display the screen.
0)
c
c
CD
O
00
0)
£
CD
,c
'A
5
0)
O'
See “Enabling the Salutation” on page 2-8 to confirm the setting if
the Scan button is not displayed.
2. Select Mailbox.
Select Mailbox to store images.
File Destination; Not Selected
Fax Memory 100%
I
Scan
Resolution
300 dpi I
Otiier
Basic Features
A
Original Type
Text
Text & Photo
Halftone
Customised
Features
See “Creating a Mailbox” on page 2-9 to create a new mailbox.
See “Enabling the Salutation” on page 2-8 to confirm the setting if
the Mailbox button is not displayed.
3. Enter the mailbox number using the keypad.
Enter Mailbox No. and Password,
then select Save.
Lighter/
Dari^er
—
—
►
Features Menu
1
Fax Memory 100%
▲
T
XEROX WorkCentre Pro 423/428 Scanner User Guide Page 3-13
Page 42

4. Select Next.
5. Enter the password using the keypad, then select Save.
Enter Mailbox No. and Password,
then select Save.
Fax Memory 100%
NOTE: The password will be displayed as “****”.
Entering a password may not be needed depending on the setting of
Password.
6. Select Mailbox - Print/Delete.
Page 3-14 XEROX WorkCentre Pro 423/428 Scanner User Guide
Page 43

7. If you want to speoify the dooumentto be printed or deleted, seleot
Select Document No. If you want to print or delete all the
doouments, seleot All Documents.
Select an option to delete or print documents.
File Destination; Mailbox
No. 1 (Scanner)
MailboxPrint/Delete
Document No.
(0001-1000)
Fax Memory 100%
Docs Stored
Close
0)
c
c
CD
O
00
0)
£
CD
,c
'A
5
0)
O'
Select
Document No.
Ail Documents
Delete Print
See User Guide (Facsimile) for the printing of the Stored Dooument
List whioh allows you to oonfirm the dooument number.
When seleoting Select Document No., enter the 4-digit dooument
number using the keypad.
8.
Seleot Print and press the Start button if you want to print the
stored dooument. Seleot Delete if you want to delete the stored
dooument.
To print selected documents in this Mailbo>
select Print and press Start.
File Destination; Mailbox
No. 1 (Scanner)
MailboxPrint/Delete
Document No. Document Type Stored Date.
(0001-1000) Scanned Image 2001.7.21
Select
Document No.
Ail Documents
1 Delete
1
Fax Memory 100%
Docs Stored
Close
Print
n
9. When Delete is seleoted, a oonfirmation message will be
displayed. Seleot Yes.
XEROX WorkCentre Pro 423/428 Scanner User Guide Page 3-15
Page 44

Custom Presets for Scanning Features
Using the Custom Presets feature, you oan ohange the faotory-defaults
of a feature to one frequently used so that you oan reduoe the number
of setting steps for soan jobs.
The faotory-default items that oan be ohanged are as follows:
Screen Default (4. Scan Default)
You oan set a desired tab (Basio Features, Customized Features or
Features Menu) of the soan soreen to appear first onoe the Soan button
is seleoted.
Scan Screen
You oan set the display on the Customized Features soreen by
arranging the position of eaoh of the six seleotion buttons.
Scan Features
You oan set the following items:
> Soan Resolution
> Original Type
> Lighter/Darker
Follow the prooedure below when neoessary.
Procedure
1. Seleot Custom Presets on the Menu soreen.
NOTE: If the soreen on the right is not displayed, press Feature
Seleotion on the oopier oontrol panel.
Page 3-16 XEROX WorkCentre Pro 423/428 Scanner User Guide
Page 45

2. Select the required item.
Custom Presets
Screen
Defaults
Reports
Audio Tones
Diagnostics
I
I
I
1
I
Copy Screen
Copy Features
Scan
Screen
Scan
Features
Fax Screen
I
? I
1
I
I
Forexample, select Scan Features.
3. Select the required item by touching the screen, or by selecting
with the ▲ or ▼ button.
0)
c
c
CD
O
00
0)
£
CD
,c
'A
5
0)
O'
Custom Presets
- Scan Features
Item Status
1. Scan Resolution
2. Original Type
3. Lighter/Dari^er
200 dpi
Text
Nomial
Enter/Change
Forexample, select 1. Scan Resolution.
4. Select Enter/Change.
5. Select the required resolution and then Save.
Close
I
6. Press ClearAll.
XEROX WorkCentre Pro 423/428 Scanner User Guide Page 3-17
Page 46

Page 3-18 XEROX WorkCentre Pro 423/428 Scanner User Guide
Page 47

4 Operating the Client
-Hi
(Personal Computer)
The following information oan be found in this ohapter:
> Using the Network Soanner Driver
> Using the Mailbox Viewer
&
o
O
"co
c
o
2
s
c
■Hi
o
0)
£
Co
,c
'A
5
0)
o'
XEROX WorkCentre Pro 423/428 Scanner User Guide Page 4-1
Page 48

Using the Network Scanner Driver
Using the network scannerdriver, you oan import the stored image from
the mailbox to a personal computer (client) via a network.
This section explains how to use the network scanner driver.
See “Installing the Network Scanner Utility” on page 2-15 for details of
the installation.
Importing the Stored Documents
Follow the procedure to import the stored documents from the mailbox
to the application software. Windows 98 is used as an example here.
Procedure
1. start the application software.
NOTE: The application software must be compatible with the TWAIN
interface.
See “Appendix B Compatible Software” for applications that have
been verified to be compatible with the machine.
2. Click the command to select the scanner (source) on the File
menu.
3. Click Xerox Network Scanner Driver, then Select.
The screen example as shown on the right is PaperPort. The
command name for selecting the scanner (source) differs
depending on the software.
Page 4-2 XEROX WorkCentre Pro 423/428 Scanner User Guide
Page 49

4. Click the command to import the scanned data.
The screen example as shown on the right is PaperPort. The
command name for selecting the scanner (source) differs
depending on the software.
5. Click the scanner name of the WorkCentre Pro on the dialog box
as shown below, then Select Scanner.
-Hi
&
o
O
"co
c
o
2
s
c
■Hi
o
0)
£
Co
,c
'A
5
0)
o'
NOTE: You can change the way of displaying scanner names by
clicking the Change Display button.
When the WorkCentre Pro 423/428 is connected to the same network
as your computer, the scanner names are displayed automatically. If
you want to change to a scanner in another network, click Change
Display, then enterthe IP address and scanner name (product name).
See “Changing Display ofthe Scanner Name” on page 4-5 for
changing the scanner name, or connecting to other network.
6. Enter the mailbox number that stores the scanned document (1 to
200) and a 4-digit password for the mailbox (four digits), then click
Open Mailbox.
XEROX WorkCentre Pro 423/428 Scanner User Guide Page 4-3
Page 50

NOTE: The password will be displayed as “****”.
Entering a password may not be needed depending on the setting of
Password.
Check Save a Password to skip the procedure from Steps 6to7 the
next time.
7. Select the file to be imported, then click Import.
NOTE: You can import more than one document at a time.
You can also select the Import, Delete, and Update buttons on the
pop-up menu by clicking the right button of the mouse.
Click the Help button to display the online help for the explanation
of network scanner driver items.
8. When the Import button is pressed, the dialog box as shown below
appears and the data will be transferred.
9. The data is imported to the activated software, and the document
in the mailbox is deleted.
The network scannerdriverexpands the compressed data, and
imports it to the application software in BMP format.
Page 4-4 XEROX WorkCentre Pro 423/428 Scanner User Guide
Page 51

Changing Display of the Scanner Name
You can change the way to display the scanner name on the dialog
box.
Click Change Display on the scanner selection dialog box to specify
the scanner name. Selectthe required scanner forwhich the name is
to be changed by following the procedure.
-Hi
&
o
O
"co
c
o
2
s
c
■Hi
o
0)
£
Co
,c
'A
5
0)
o'
13.220.172.75 scanner
Network
If you select Network, the machine will search for the scanner name in
the HOSTS file in \WINDOWS\HOSTS file forWindows 95/Windows
98/Windows Me and in \WINNT\SYSTEM32\DRIVERS\ETC\HOSTS
file for Windows NT 4.0/Windows 2000.
If the network scanner is not registered for each of the HOSTS file, the
name registered in the DNS server on the network is displayed.
If the network scanner is not registered in the DNS server or if the DNS
is not in use, the model name and the IP address are displayed.
Local File
Display the scanner name registered in the HOSTS file format in the
specified file. Display the model name and the IP address will be
displayed if the network scanner is not yet registered in the specified
file or if there are no specified files. Forexample:
Other Scanners
Display scanner names existing in other networks. Since scanners can
only be identified and displayed automatically in the same network,
enterthe IP address and scanner name here forscanners in other
networks. However, if communication is not succcessful with the added
scanners when using TCP/IP, they cannot be used.
NOTE: You should set up the scanner and make sure that it can be
used in TCP/IP environment if the scanner is already connected to
other network.
XEROX WorkCentre Pro 423/428 Scanner User Guide Page 4-5
Page 52

Procedure
1. Select the Display other network scanner checkbox.
2. Click Add.
3. Enterthe IP address of the machine to be connected and the
Changing Import Settings
You can change the display of a document or importing method when
importing the document from the mailbox.
Click Settings to change the setting on the dialog box.
Specify the required setting by following the procedure below.
corresponding scanner name, then click OK.
Settings
plmport Qrder^=
(T New-> Oidi (~01d->New
pFile List Me
(S' Fits
pNeg^tive Ira
(T OFF
Temporaiy Save as
I C:\temp Browse... I
OK Cancel I Help |
C
—
r ON
Import Order
Select the order of importing image files.
When New => Old is selected, latest files will be imported first.
When Old => New is selected, the sequence will be reversed.
File List Mode
Select the way of displaying files.
Fi|e Display the total number of pages for each multiple-page file.
Display separately each page of the multiple-page file. To be used for
Page importing random pages from the software which cannot import multiple
pages.
Page 4-6 XEROX WorkCentre Pro 423/428 Scanner User Guide
Page 53

Negative Image
Reverse the colours between black and white areas of black and white
images. To be used for reversing the colours of images imported by the
software.
ON Reverse colours.
OFF Does not reverse colours.
-Hi
&
o
O
"co
c
o
2
s
Temporary Save as
Specify a directory which is temporarily used to save the document
during importing. Choose a drive with sufficient free space.
c
■Hi
o
0)
£
Co
,c
'A
5
0)
o'
XEROX WorkCentre Pro 423/428 Scanner User Guide Page 4-7
Page 54

Using the Mailbox Viewer
The mailbox viewer provides the following features:
> Confirming the dopuments stored in the mailbox.
> Deleting the stored dopuments from the mailbox.
> Apquiring the dopuments stored in the mailbox at periodip intervals.
When the new dopuments are stored in the mailbox, the personal
pomputer notifies you by a sound or ipon.
> Importing the new dopument from the mailbox and saving it as TIFF
format.
The following propedure explains how to use the mailbox viewer:
Confirm/Delete/Import Stored Documents
This seption despribes how to ponfirm, delete and import a dopument
stored in the mailbox of the maphine by using the mailbox viewer.
Procedure
1. ClipX Start on the task bar, then selept Mailbox Viewer from
Programs>Xerox>Utility.
NOTE: If you have spepified another folder name at the installation,
the display Programs>Xerox>Utility is phanged to the spepified name.
2. Selept the maphine from the list, then plipk Select Scanner.
You pan phange spanner name by plipking Change Display.
NOTE: When a maphine is ponnepted to the same network as your
pomputer, the spanner names are displayed automatipally. If you want
to selept a spanner from another network, plipk Change Display, then
enterthe IP address and spanner name(produpt name).
See “Changing Display ofthe Scanner Name” on page 4-5 for
phanging the spanner name, or ponnepting to another network.
Page 4-8 XEROX WorkCentre Pro 423/428 Scanner User Guide
Page 55

3. Enter the mailbox number (1-200) in which the document is stored.
4. Enter a 4-digit password for the mailbox and click Open Mailbox.
NOTE: The password will be displayed as “****”.
Entering a password may not be needed depending on the setting of
the Password.
Click Save a Password to skip the procedure from Steps 3 to# the
next time.
EE: The Help button to displa
S
the online help for the explanation Delete.
of each item of the Mailbox
Viewer.
y 5. Confirm the file from the list. To delete a file, select the file and click
-Hi
&
o
O
"co
c
o
2
s
c
■Hi
o
0)
£
Co
,c
'A
5
0)
o'
XEROX WorkCentre Pro 423/428 Scanner User Guide Page 4-9
Page 56

Importing the Document Stored in the Mailbox
If you have clicked the Importali existing documents checkboxon the
Setting dialog box, the Update button as shown in the figure below is
changed to the Import button.
See “Setting Up the Properties” on page 4-10 for the setting up of
importing document property.
When clicking the Import button, all the stored documents will be
imported, and saved into the specified directory (the default directory is
c: \temp) as the TIFF format.
At this time, the file name is as follows:
IP address - Mailbox No. - File No. - Date - Time.tif
Example : 123045123045-003-0013-0101111937.tif
Setting Up the Properties
You can specify the operation of the Mailbox Viewer and the importing
feature.
To setthe properties, click Setting on the MailboxViewerdialog box
(see Step 5 on 3.2.1).
Page 4-10 XEROX WorkCentre Pro 423/428 Scanner User Guide
Page 57

Specify the properties as required.
Get information, when restarting your windows.
Select whether or not to automatically redisplay the latest file imported
from the network scanner when opening the Mailbox Viewer from the
taskbar or icon.
Set Timer
Specify the time interval, in minutes, to update the file listwhen the
Mailbox Viewer is activated. The setting range is from 1 to 60 minutes.
import aii existing documents.
Tick this checkbox to automatically import all existing files from the
Mailbox Viewer at periodic intervals. The Import Properties button will
only be active when this checkbox is ticked. Also, the Update button on
the MailboxViewer dialog box will become the Import button.
See “Import Properties” on page 4-12 for setting the Import Properties.
Notification
Specifies the way to notify automatically when new files are stored in
the mailbox or when the number of files has decreased after the time
specified at Set Timer has lapsed.
&
o
O
"co
c
o
2
s
c
,0)
o
0)
£
Co
,c
'A
5
0)
o'
Animation
Sound
Animation is displayed when there is a change in the file status. Animation
will also be displayed when the Viewer is minimized to an icon or a taskbar.
Sound will be used to notify a change in the file status. You can choose to
specify your required sound file (in .wav format) by clicking the Browse but
ton.
NOTE: Users of PCs without a sound card installed cannot choose to
specify the sound files.
Fiie Type
Specify the file type of the files stored in Mailbox to be displayed.
Depending on the machine model, Fax Received and Stored for Polling
may not be displayed.
There are three file types:
Scanned image: Image files scanned from the network scanner
Fax Received: Fax files received from a remote machine
Stored for Poiiing: File stored for polling
XEROX WorkCentre Pro 423/428 Scanner User Guide Page 4-11
Page 58

Import Properties
Click to display the dialog box, then specify the required compression
type and drive and/or folder.
Import Order
Select the order of importing image files.
When New =>Old is selected, latest files will be imported first.
When Old => New is selected, the sequence will be reversed.
Compression Type
Saves all pages of the imported files as TIFF files. Select either MMR
or MH as the compression format.
Save as
Specify a destination folderforthe automatically-imported files. Choose
a large capacity drive with lots of empty space. The files saved here are
in multi-page TIFF format. The file names are automatically created
based on the IP address of the scanner, Mailbox No., File No. and
Date.
Page 4-12 XEROX WorkCentre Pro 423/428 Scanner User Guide
Page 59

5 Precautions and Limitations
The following information oan be found in this ohapter:
> Preoautions and Limitations
> Troubleshooting
CO
C
,o
CD
-j
■o
c
CD
CO
C
,o
3
CD
O
XEROX WorkCentre Pro 423/428 Scanner User Guide Page 5-1
Page 60

Precautions and Limitations
This section describes the precautions and limitations whilst using this
scanner.
See Readme.txt on the \English\Utility\your OS\SCN\Readme of the
PCL Driver/Network Utility (Windows) CD-ROM forthe precautions and
limitations of Network Scanner Driver or Mailbox Viewer.
Enabling Salutation or FTP Client
After enabling Salutation or FTP Client using the printer control panel,
switch off the powerof the machine, then switch iton again.
Using the Network Scanner Driver and the Mailbox
Viewer at the Same Time
You cannot access the machine by using the MailboxViewerand the
Network Scanner Driver at the same time.
Importing from Several Personal Computers
You cannot import the document from the machine by using the
network scanner driver or the mailbox viewer while another computer
is importing.
Printing Stored Document
You cannot print the scanned document by selecting Print/Delete
Documents of the Local Mailbox button on the Fax Feature Menu
screen of the machine.
Retrieve from the Mailbox of the Machine
When the remote terminal is retrieving a document from the mailbox of
the machine, you cannot transmit the scanned document.
Using the CentreWare Scanning Services
You can retrieve a maximum of 100 templates from the server using the
machine.
Using the TIFF file
The TIFF file that is created with CentreWare Scanning Services or the
Mailbox Viewer is compressed in MMR, MR or MH format. When
opening these files, use the corresponding software.
Scan Size Limitation
The maximum scan size for one page is A3 size.
NOTE: If you select 600 dpi for A3 size documents, the documents
may not be scanned due to insufficient capacity in the memory.
When scanning documents with photos, the documents may not be
scanned due to insufficient capacity in the memory.
Page 5-2 XEROX WorkCentre Pro 423/428 Scanner User Guide
Page 61

Number of Pages of Stored Document
The maximum number of pages of a stored dooument is 66 when you
use a standard A4 size dooument, set Standard for Lighter/Darkerand
200 dpi for resolution.
NOTE: The maximum number of pages that oan be stored varies with
the on/offsettings of options, Lighter/Darkerand Resolution settings.
See User Guide (Facsimile) for more details.
Maximum Number of Scanned Pages (Mailbox)
The maximum number of dooument pages that oan be spanned at a
time using the mailbox feature is 50 pages.
Upgrading the Network Scanner Utility
When upgrading the network soanner utility, make sure you uninstall
the existing network soanner utility.
See “Uninstallation” on page 2-18.
,o
-J
■o
,o
CO
c
CD
c
CD
CO
C
3
CD
O
XEROX WorkCentre Pro 423/428 Scanner User Guide Page 5-3
Page 62

Troubleshooting
This section explains how to resolve problems when an error has
occured while using the scannerfeature.
See User Guide (Copier) when an error such as machine notoperating
has occured.
Symptoms
The Scan button is not displayed on the
touch panel screen.
The scanned document is not sent to the
computer.
Error code is displayed on the printer control
panel.
Error resolved
(***-***)
Things to Check
Press the ClearAll button on the copier
control panel.
If the scanner is still not displayed on the touch
panel screen, check on the printer
control panel that Salutation or FTP client is
enabled.
See “Preparing to use the Mailbox Feature” on
page 2-5.
See “Preparing to use CentreWare Scanning
Services” on page 2-12.
The machine is in power saving mode. Press
the Power Saver button on the copier control
panel to cancel the power saving mode. After
the machine is started up, wait for a while and
scan the document again.
See the User Guide (Printer) to resolve the
problem.
Example:
indicates number.
Page 5-4 XEROX WorkCentre Pro 423/428 Scanner User Guide
Page 63

A Appendix
The following information oan be found in this ohapter:
> Printing Job Template List
> Compatible Software
XEROX WorkCentre Pro 423/428 Scanner User Guide Page A-1
Page 64

Printing Job Template List
This section describes how to print the Job Template List from the
machine.
The Job Template List shows the settings for the Template Storing
Server set by the Scan Admin Wizard in CentreWare Scanning
Services (optional).
You can print the Job Template List by operating the printer control
panel of the machine.
Page A-2 XEROX WorkCentre Pro 423/428 Scanner User Guide
Page 65

Compatible Software
Regarding the compatibility of application softwares with the network
scannerdriver, refer to the Network Scanner Driver Readme.txt in the
PCL Driver/Network Utility CD-ROM.
The Network Scanner Driver Readme file can be displayed by
selecting:
\English\Utility\Win9x_Me\SCN\Readme\Readme.txt,\English\Utility\N
T40\SCN\Readme\Readme.txt or
English\Utility\Win2000\SCN\Readme\Readme.txt.
XEROX WorkCentre Pro 423/428 Scanner User Guide Page A-3
Page 66

Page A-4 XEROX WorkCentre Pro 423/428 Scanner User Guide
Page 67

Index
Scanning with 2-2
I
c
CentreWare Scanning Services 2-12
Compress Type 4-12
File List Mode 4-6
FTP Client
Enabling 2-14
I
Import all existing documents 4-11
Import Order 4-6
Import Settings
Changing
IP address
Define 2-5
Local File 4-5
4-6
M
Mailbox
Creating 2-9
N
Negative Image 4-7
Network 4-5
Network Scanner Utility
Installation 2-16
Uninstallation 2-18
Notification 4-11
Salutation
Enable 2-8
Save as
Scanner names existing in other networks 4-5
Set Timer 4-11
Temporary Save as 4-7
4-12
u
UDP
Enable 2-12
Uninstallation 2-18
XEROX WorkCentre Pro 423/428 Scanner User Guide
Index-'
Page 68

Index-ii
XEROX WorkCentre Pro 423/428 Scanner User Guide
 Loading...