

Page 1
Xerox 4213 Laser Printer
User Guide
rrrr XEROX
720P40010
June 1992
Page 2

Rank Xerox Limited
Parkway
Marlow
Buckinghamshire S17 1YL
England
© 1992 by Rank Xerox Limited. All rights reserved.
Copyright protection claimed includes all forms and matters of
copyrightable material and information now allowed by statutory
or judicial law or hereinafter granted, including without limitation,
material generated from the software programs which are
displayed on the screen such as styles, templates, icons, screen
displays, looks, etc.
June 1992
720P40010
Printed in the EEC.
Xerox®, Rank Xerox®, 4213 and all Xerox products mentioned in
this publication are trademarks of Xerox Corporation and Rank
Xerox Limited. Other company trademarks are also
acknowledge.
Centronics and all Centronics products mentioned in this
publication are trademarks of Centronics Data Computer
Corporation.
Data Products and all Data Products products mentioned in this
publication are trademarks of Hewlett-Packard Company.
IBM and all other IBM products mentioned in this publication are
trademarks of International Business Machines.
Hewlett-Packard and HP are registered trademarks of HewlettPackard Company.
Microsoft is a U.S. registered trademark of Microsoft
Corporation.
PostScript® and all PostScript products mentioned in this
publication are trademarks of Adobe Systems.
PostScript font trademarks: Times, Helvetica, New Century
Schoolbook, and Palatino are registered trademarks of Linotype
Corporation.
ITC Avant Garde Gothic, ITC Zapf Chancery, ITC Zapf Dingbats,
and ITC Bookman are registered trademarks of International
Typeface Corporation.
WordPerfect is a registered trademark of WordPerfect
Corporation.
Changes are periodically made to this document. Technical
updates will be included in subsequent editions.
–––––––––––––––––––––––––––––––––––––––––––––––––––––––––––––––––––––––––––––––––––––––––––––––––––––––––––––––––––––––––––––
Page 3

European EME regulations
Laser safety
The Xerox 4213 laser printer meets the requirements of EN55022
Class B.
WARNING: Use of controls, adjustments or performance of
procedures other than those specified herein may result in a
hazardous radiation exposure.
This product will produce ozone during normal operation. The
ozone produced is dependent on copy volume and is heavier
than air. Providing the proper environmental parameters as
specified in Xerox installation procedures will ensure that
concentration levels meet safe limits.
The 4213 has an ozone filter built into the print cartridge.
The following note is to meet the local requirements of Finland
and Sweden.
LUOKAN 1 LASERLAITE
KLASS 1 LASER APPARAT
Operational safety
VAROITUS:
LAITTEEN KÄYTTÄMINEN MUULLA KUIN TÄSSÄ
KÄYTTÖOHJEESSA MAINITULLA TAVALLA SAATTAA ALTISTAA
KÄYTTÄJÄN TURVALLISUUSLUOKAN 1. YLITTÄVÄLLE
LASERSÄTEILYLLE.
VARNING:
OM APPARATEN ANVÄNDS PÅ ANNAT SÄTT ÄN I DENNA
BRUKSANSVISNING SPECFICERADE, KAN ANVÄNDAREN
UTSÄTTAS FÖR O SYNLIG LASERSTRÄLNING, SOM ÖVERSKRIDER
GRÄNSEN FÖR LASERKLASS 1.
Your Xerox equipment and supplies were designed and tested to
meet strict safety requirements. These include safety agency
examination, approval, and compliance with established
environmental standards.
XEROX 4213 LASER PRINTER USER GUIDE iii
Page 4

Notice
WARNING: Improper connection of the equipment grounding
conductor can result in electrical shock.
Attention to the following notes ensures the continued safe
operation of your equipment.
Never use a multi-plug adaptor to plug multiple power plugs into
the same outlet.
Never attempt any maintenance function that is not specifically
described in this guide.
Never operate the equipment if you notice unusual noises or
odours. Disconnect the power cord from the power source
receptacle and call your Xerox customer service engineer to
correct the problem.
If you need any additional safety information concerning the
equipment or Xerox supplied materials, call your RX sales
representative.
Specifications described in this publication are subject to change
without notice. Use of some features may be limited by your
hardware or software configuration. Consult your sales
representative for details.
iv XEROX 4213 LASER PRINTER USER GUIDE
Page 5

Related publications
Title
Xerox 4213 Laser Printer Programmer Reference
Xerox 4213 Laser Printer Quick Reference Guide
Xerox Coax/Twinax Option (XCTO) Programmer Reference
Helpful Facts About Paper
Xerox 4213 XES Quick Reference Card
PostScript Language Reference Manual, 1985, Adobe Systems
Incorporated, Addison-Wesley Publishing Company, Inc., Sixth
printing April, 1987
PostScript Language Design, 1988, Adobe Systems Incorporated,
Glenn C. Reid, Addison-Wesley Publishing Company, Inc., Sixth
printing April, 1988
PostScript Language Tutorial and Cookbook, 1985, Adobe
Systems Incorporated, Addison-Wesley Publishing Company, Inc.,
Fifth printing March, 1987
XEROX 4213 LASER PRINTER USER GUIDE v
Page 6

Page 7
Table of contents
European EME regulations iii
Laser safety iii
Operational safety iii
Notice iv
Related publications iv
Introduction xv
Conventions used in this guide xv
Variances xvi
1. Installation 1-1
Installation planning 1-1
Environmental conditions 1-1
Operating environment 1–1
Environmental conditions to avoid 1–2
General cautions 1-2
Cautions while printing 1-2
Cautions for maintenance and inspection 1-3
Cautions for the power cord 1-3
Space requirements 1-3
Power requirements 1-5
Installation procedure 1-5
Unpack and confirm the parts 1-6
Install the developer and toner cartridges 1-11
Connect the printer to the host 1-15
Connect the power cord 1-16
Install the paper trays 1-18
Print a configuration sheet 1-20
XEROX 4213 LASER PRINTER USER GUIDE vii
Page 8

TABLE OF CONTENTS
2. Overview 2-1
Features 2-1
Options 2-2
Downloadable fonts 2-2
Font cartridges 2-2
Host interface options 2-2
Emulation options 2-2
Additional paper trays 2-2
High capacity feeder 2-2
Printer components 2-3
Control panel 2-7
3. Using the 4213 menus 3-1
Menu maps of the 4213 3-1
Main Menu map 3-2
Printer configuration at the Main Menu 3-4
Accessing the Main Menu 3–4
Saving the printer configuration as defaults 3–4
Resetting the printer configuration to factory defaults 3–6
Main Menu items 3-7
Printer language 3–7
Emulation 3–8
Adjustable Paper Size 3–8
Configuration Sheet 3–9
Chime 3–10
Output Offset 3–10
Auto Continue 3–11
Host Interface 3–11
Baud Rate 3–12
Parity 3–12
viii XEROX 4213 LASER PRINTER USER GUIDE
Page 9

TABLE OF CONTENTS
Flow Control 3–12
Metered Data (Parallel Centronics) 3–13
Main Menu map (level 1 headings) 3–13
Printer configuration examples 3-14
A. Changing the default printer emulation 3-15
B. Changing the host interface setting 3-16
The XES submenu map 3-17
Emulation configuration 3-19
Changing the XES emulation configuration at the Main Menu 3-19
Accessing the Main Menu and selecting XES 3–20
Selecting the XES emulation configuration options 3–20
Saving the XES emulation configuration 3–21
Emulation settings for XES 3-22
XES emulation items 3-23
Number of Copies 3–23
Tray Sequence 3–23
2-sided Print Mode 3–24
Font Number Selection 3–26
Data Encoding 3–26
Line Ending 3–27
Font Rotation 3–27
Summary Sheet 3–28
Page Buffers 3–28
Language 3–30
Format Margins 3–30
Format Defaults 3–31
The LJ2D submenu map 3-31
Changing the LJ2D emulation configuration
at the Main Menu 3-33
XEROX 4213 LASER PRINTER USER GUIDE ix
Page 10

TABLE OF CONTENTS
Accessing the Main Menu and selecting LJ2D 3–33
Selecting the LJ2D emulation configuration options 3–34
Saving the LJ2D emulation configuration 3–34
Resetting the LJ2D emulation configuration 3–35
Emulation settings for LJ2D 3-36
LJ2D emulation items 3-36
Number of Copies 3–37
Tray Sequence 3–37
2-Sided Print Mode 3–38
Font Number Selection 3–39
Paper Size 3–40
Orientation 3–41
Form Length 3–42
Page Buffers 3–42
Symbol Set 3–42
Emulation configuration examples 3-44
A. Changing the current emulation from XES to LJ2D 3-45
B. Temporarily placing the printer in 2-sided
printing mode for XES 3-46
C. Changing the tray sequencing mode for XES and LJ2D 3-47
Test Menu 3-48
Test Menu map 3-48
Making selections at the Test Menu 3-49
Accessing the Test Menu 3–49
Selecting Test Menu options 3–49
Test Menu items 3-50
Configuration sheet 3–50
Font Status Sheet 3–50
Start Data Monitor Mode 3–51
Stop Data Monitor Mode 3–51
x XEROX 4213 LASER PRINTER USER GUIDE
Page 11

TABLE OF CONTENTS
Reset Menu 3-52
Reset Menu map 3-52
Making selections at the Reset Menu 3-52
Accessing the Reset Menu 3–53
Selecting the Reset Menu options 3–53
Reset Menu items 3-53
Emulation Reset (LJ2D and XES) 3–53
Recall Factory Defaults 3–54
Recall User Defaults 3–54
Save Defaults 3–54
Consumables Menu 3-55
Consumables Menu map 3-55
Accessing and displaying the Consumables Menu 3-55
Consumables Menu items 3-56
Reorder Cartridges (A, B, or C) 3–56
Insert Tray (1 or 2) 3–56
Add Paper to Tray (1, 2 or feeder) 3–57
4. Printing with the 4213 4-1
Printing a configuration sheet 4-1
Printing a configuration sheet manually 4-1
Reading the configuration sheet 4-4
Printing a font status sheet 4-8
Selecting the emulation 4-8
Printing an XES font status sheet 4-8
Reading the XES font status sheet 4-8
Printing the LJ2D font status sheet 4-10
Reading the LJ2D font status sheet 4-11
Selecting fonts 4-14
Selecting a default font 4-15
Saving your font selection as the default font 4-16
Font characteristics 4-17
XEROX 4213 LASER PRINTER USER GUIDE xi
Page 12

TABLE OF CONTENTS
Sending a print job 4-18
Printing a full page of graphics 4-18
Last page is not ejected 4-18
2-sided printing 4-19
To return to the 1-sided printing mode 4-20
Printing from the bypass tray 4-20
Handling special papers in the bypass slot 4-21
How to use the bypass tray 4-21
Selecting the bypass tray at the printer 4-21
Setting the paper size at the Main Menu for XES 4-23
Setting the paper size at the LJ2D submenu 4-25
Using the bypass tray 4-26
Feeding paper through the bypass slot 4-26
When the manual print job is finished 4-27
Preventing manual feed problems 4-27
Printing on envelopes 4-28
Setting the envelope size at the LJ2D submenu 4-30
Selecting a landscape font for LJ2D 4-31
Using the bypass tray for envelopes 4-33
When the envelope print job is finished 4-36
Recommended image area for envelopes 4-36
Printing with transparencies 4-38
5. Care and maintenance 5-1
Paper: Important information 5-1
Label restrictions 5-2
Improper paper types 5-3
Paper curl in paper loading 5-4
Finding the paper curl 5-4
Paper loading 5-5
Changing or adding paper procedure 5-6
Handling special papers in paper trays 5-8
Handling special papers in the bypass tray slot 5-9
Paper storage 5-10
Clearing a paper jam and resuming the job 5-10
xii XEROX 4213 LASER PRINTER USER GUIDE
Page 13

TABLE OF CONTENTS
Paper jam error codes 5-11
CLEAR PAPER PATH - 0820 5-11
CLEAR PAPER PATH - 0821 5-13
CLEAR PAPER PATH - 0822 5-15
CLEAR PAPER PATH - 0823 5-18
CLEAR PAPER PATH - 0824 5-19
CLEAR PAPER PATH - 0826 and 0827 5-21
CLEAR PAPER PATH - 0830 5-24
CLEAR PAPER PATH - 0831 5-27
CLEAR PAPER PATH - 0832 5-31
CLEAR PAPER PATH - 0833 5-34
CLEAR PAPER PATH - 0834 5-35
CLEAR PAPER PATH - 1020, 1021, 1022, 1023, and 1024 5-35
CLEAR PAPER PATH - 1025 and 1026 5-38
Print cartridge replacement procedures 5-41
Task 1. Cleaning the corotron 5-42
Task 2. Replacing the print cartridge 5-47
Task 3. Replacing the fuser wick 5-49
Replacing the toner cartridge 5-52
Toner cartridge replacement procedure 5-52
Replacing the developer cartridge 5-56
Developer cartridge replacement procedures 5-57
Adjusting the print density 5-63
Cleaning the printer 5-64
6. Troubleshooting 6-1
Introduction 6-1
Types of problems 6-1
Deterioration in print quality 6-1
Incomplete graphic data 6–1
Character line limit 6–5
Paper transport problems 6-6
Printer operation problems 6-9
XEROX 4213 LASER PRINTER USER GUIDE xiii
Page 14
TABLE OF CONTENTS
7. Supplies: ordering information 7-1
Downloadable fonts 7-1
Downloading fonts 7-2
Font cartridges 7-3
Installing the font cartridges 7-3
Memory upgrades 7-10
Interface cable ordering information 7-11
PC compatible computers 7-12
AT compatible computers 7-12
Data set/modem and null modem 7-12
Paper tray ordering information 7-13
Supplies 7-14
Ordering supplies 7-14
Appendices
A. Options for the 4213 A-1
A1. Adjustable tray A1-1
A2. High capacity feeder A2-1
A3. Xerox Coax/Twinax option A3-1
A4. PostScript emulation A4-1
A5. SIMM kit installation and removal instructions A5-1
A6. Multi Media Feeder A6-1
Glossary GLOSSARY-1
Index INDEX-1
Updates
xiv XEROX 4213 LASER PRINTER USER GUIDE
Page 15

Conventions used in this guide
Introduction
The 4213 Laser Printer User Guide identifies the requirements for
installation and discusses printing preparations and procedures,
with examples for those procedures. It provides information on
configuring your printer to suit your individual environment.
Conventions used in this guide are as follows:
• WARNING: Warnings are associated with the safety of
people.
• Caution: Cautions are associated with equipment safety.
• Note designates important information that should be noted
before performing an operation or procedure.
• Keys pressed on the keyboard are shown by the applicable
symbol:
Menu
—A
—B Test
—C Last Page
—D Select
—H Online
—G Reset buttons.
• Names of display screens and menus are shown in initial
capitals (for example, Main Menu).
• The terms 4213, printer, and 4213 laser printer are
interchangeable.
• The message display items are shown in all uppercase letters.
• Titles of books and related publications are italicised.
XEROX 4213 LASER PRINTER USER GUIDE xv
Page 16

INTRODUCTION
Variances
• The symbol points to actions and options that do not have
numbers available within the Main Menu and submenu maps.
• In the index, the use of the lowercase “i” denotes an
illustration, the lowercase “f” means a figure and the
lowercase “t ”refers to a table.
The following differences exist between the 4213 and 4045
Model 150 laser printers:
• Pages may break differently on the two printers.
• To match rotation on the 4213, the 4045 must have an
XGRAPH cartridge installed.
• Set the page buffer to “FULL” to correctly print complex
pages.
• In XES mode, the underline character prints at the baseline
on the 4045; on the 4213, this prints under the character
descender.
xvi XEROX 4213 LASER PRINTER USER GUIDE
Page 17

Installation planning
1. Installation
This chapter identifies the requirements for installation. The
following material is discussed:
• Installation requirements
• Checklist for contents
• Installation procedures
• Power up.
To help you determine the best possible location for your new
4213 laser printer, this section contains information on the
following topics:
• Environmental conditions
• Space requirements
• Power requirements.
Environmental conditions
Temperature 10
Your printer has certain environmental requirements you must
accommodate. These requirements, as well as environmental
conditions you should avoid, are listed in this section.
Operating environment
Consider the required operating environment listed below when
planning the location of your printer. Your printer operates more
efficiently when the following environmental conditions are
maintained:
o
C to 32oC (50°F to 90°F)
Humidity 15 to 85% relative humidity
Altitude Up to 6,560 feet above sea level (2000 metres).
XEROX 4213 LASER PRINTER USER GUIDE 1-1
Page 18

INSTALLATION
General cautions
Environmental conditions to avoid
You should avoid the following environmental conditions as you
plan the location of your printer:
• Direct sunlight
• Rapid temperature changes
• Direct air flow
• Heat-emitting devices
• High temperature or humidity
• Dust dirt, or poor ventilation
• Volatile gas or liquids
• Do not put anything on the printer, such as: a flower vase, or
a filled cup or glass. Water inside the printer unit not only
results in malfunction, but also causes damage to the printer.
• Do not drop paper clips or staples inside the printer unit.
This can cause a short-circuit or malfunction.
Cautions while printing
• Do not apply mechanical shocks to the printer.
• Do not use flammable aerosol products near the printer.
• Do not disassemble or modify the printer
• Never open covers which you are not intended to open.
• Make sure the area is well ventilated, if the location of the
printer is in a closed or crowded room.
• Turn off the power and unplug the power cable immediately
in you perceive smoke or an abnormal sound or odour.
• While printing, do not turn off the power or open the top
cover or any of the doors. A paper jam or malfunction will
occur.
1-2 XEROX 4213 LASER PRINTER USER GUIDE
Page 19

Cautions for maintenance and inspection
For your personal safety, you should always keep the following
cautions and directions in mind when you perform normal printer
maintenance:
• There are high voltage areas and high temperature areas
• See chapter 5, “Care and maintenance,” for paper jam
• Do not perform any operation other than those stated in this
Cautions for the power cord
For your personal safety, you should always keep in mind the
following cautions and directions when handling the power cord:
• Before you plug in or unplug the cord, turn off the printer
INSTALLATION
inside the printer.
clearance, maintenance and inspection of the printer, and
replacement of consumable supplies.
manual. Any modification to the printer can cause a
malfunction or damage.
power.
Space requirements
Printer dimensions Printer dimensions with paper trays:
• To plug in or unplug the cord, hold the plug instead of the
cord.
WARNING: Do not touch the plug, connector, or cord with
wet hands.
• Periodically check that the following situations are stable:
— The power cord is plugged firmly into the AC outlet and
the AC inlet on the printer.
— The power cord generates no abnormal heat.
— The power cord has no worn places.
Allow enough open space around the printer to make operation,
supply replacement, and maintenance possible.
Height: 48.45 cm (19.5 inches)
Width: 52 cm (20.8 inches)
Depth: 49.25 cm (19.7 inches).
XEROX 4213 LASER PRINTER USER GUIDE 1-3
Page 20

INSTALLATION
Printer weight Approximately 84.7 pounds (38.12 kg), with customer
replaceable unit (CRU) cartridges and empty paper trays.
Floor space requirements Figure 1-1 shows the minimum floor space requirements for the
printer with the bypass tray.
Figure 1-1. Space requirements around printer
The dimensions of the printer with the bypass tray are:
• A = 48.25 cm (19.3 inches)
• B = 10 cm (04.0 inches)
• C = 40 cm (16.0 inches)
• D = 61 cm (24.4 inches)
• E = 133.25 cm (53.3 inches)
• F = 120.25 cm (48.1 inches)
1-4 XEROX 4213 LASER PRINTER USER GUIDE
Page 21
Power requirements
INSTALLATION
Keep the following points in mind as you secure the power
supply for your printer:
• Use only the AC power cord supplied with the machine.
• Avoid the use of a multi-plug adaptor to plug multiple power
plugs into the same outlet.
• Make sure that the total electrical current does not exceed
the required safety standards, if equipment other than the
printer is plugged into the same outlet.
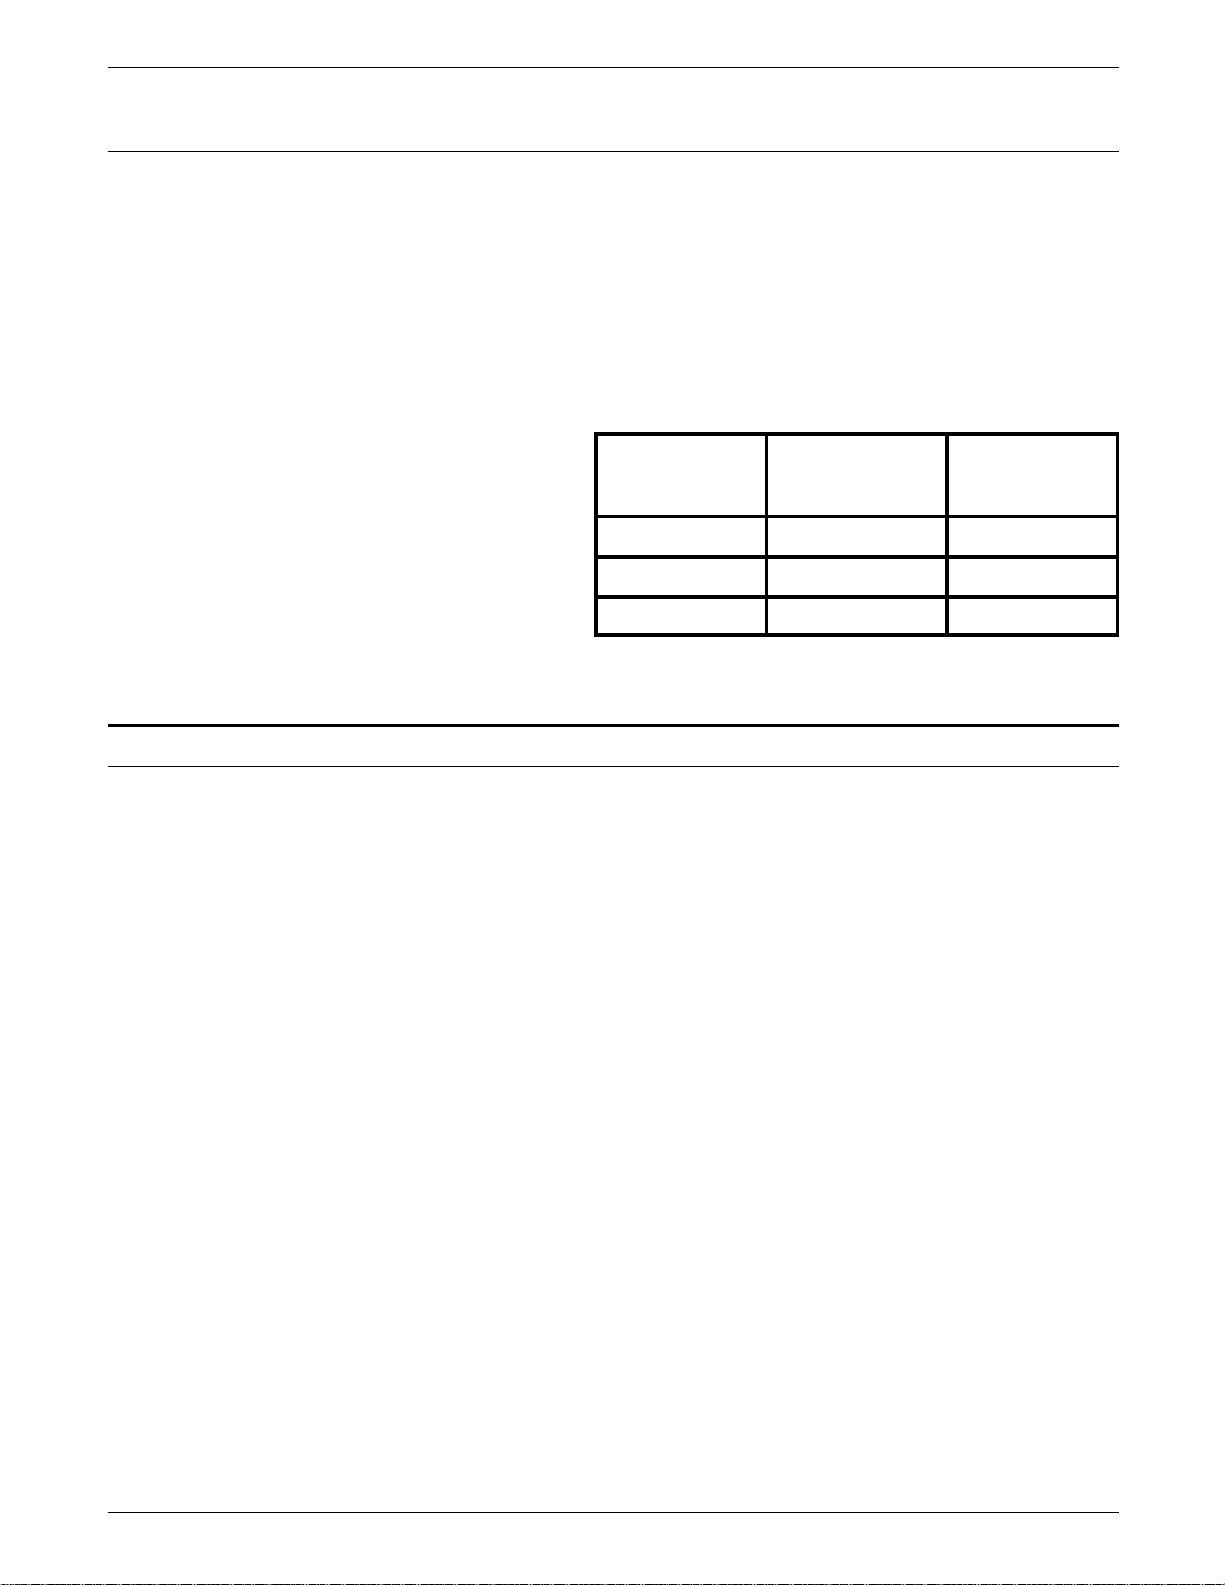
Table 1-1. Power requirements
Installation procedure
Voltage
(Frequency)
Multinational
(50/60 Hz)
US/Canada
(50/60 Hz)
Minimum 198 108
Normal 220 - 240 115
Maximum 264 132
This section contains step by step instructions for the following
tasks relating to the installation of your 4213 laser printer:
• Unpack and confirm the parts.
• Place the printer in its permanent location.
• Install the developer (C) and the toner cartridges (B).
• Connect the 4213 laser printer to the host.
Note: You must provide your own interface cable.
• Connect the power cord. (May be in a separate container)
• Install the paper trays.
• Print a configuration sheet.
XEROX 4213 LASER PRINTER USER GUIDE 1-5
Page 22

INSTALLATION
Unpack and confirm the parts
The Xerox 4213 package includes the following:
• One 4213 Laser Printer
• Two paper trays
• One developer cartridge and one toner cartridge (packaged
together)
• Installation instructions
• The power cord and User Documentation are supplied in a
seperate container.
Follow these steps when unpacking the printer:
1. Open the carton.
2. Remove the two spacers located at the front and rear of the
4213 laser printer.
1-6 XEROX 4213 LASER PRINTER USER GUIDE
Page 23

INSTALLATION
3. Remove the printer and components from the box. The print
cartridge and the fuser wick are installed at the factory.
Note: Refer to step 4 for handling the printer.
XEROX 4213 LASER PRINTER USER GUIDE 1-7
Page 24

INSTALLATION
The contents of the box are as follows:
• A = Printer
• B = Rear spacer
• C = Power cord (supplied in a seperate container)
• D = Paper trays
• E = Front spacer
• F = Toner and Developer cartridges.
4. Take the printer out of the carton with the help of another
person, and place it on a firm, flat surface while you confirm
receipt of all parts.
WARNING: Due to the weight of the printer (approximately
35 kg or 77 lbs), it should be lifted by two people.
5. Make sure you have all the parts shown.
1-8 XEROX 4213 LASER PRINTER USER GUIDE
Page 25

INSTALLATION
• Save the carton and other packing materials in case you
need to transport the printer. Power cord may be
included.
• Call your sales representative if any part is missing.
XEROX 4213 LASER PRINTER USER GUIDE 1-9
Page 26

INSTALLATION
6. Move the printer to its permanent location at this time.
Place the printer in the location chosen according to the
conditions described in the “Installation planning” section of
this chapter. Again, ensure that two people lift the printer.
1-10 XEROX 4213 LASER PRINTER USER GUIDE
Page 27

Install the developer and toner cartridges
1. Remove the developer cartridge (C) and toner cartridge (B)
2. Open the top cover by lifting the top cover access handle.
INSTALLATION
from the box.
Caution: Do not leave the top cover open for more than ten
minutes or the light will damage the shiny, blue surface of the
print cartridge (A).
XEROX 4213 LASER PRINTER USER GUIDE 1-11
Page 28

INSTALLATION
3. Remove and discard the packaging tape which holds the
print cartridge in position.
4. Remove the developer cartridge (C) from the package.
5. Hold the developer cartridge over a piece of paper in the
event any residual toner is present, and gently remove the
protective strip sealing the cartridge.
Caution: Failure to remove the protective strip before inserting
the developer cartridge will damage the printer.
1-12 XEROX 4213 LASER PRINTER USER GUIDE
Page 29

INSTALLATION
Caution: Avoid touching the roller of the developer cartridge.
Damage to the roller surface can cause print defects.
6. Align the developer cartridge with the slot in the top cover
of the printer so that the tongue along the slot fits into the
groove along the edge of the cartridge. Push the cartridge
slightly into the slot.
7. Slide the cartridge into the cavity to make sure that it is fully
seated.
8. Remove the protective wrap from the toner cartridge (B).
XEROX 4213 LASER PRINTER USER GUIDE 1-13
Page 30

INSTALLATION
9. Hold the toner cartridge horizontally and shake it sideways
and backwards vigorously to loosen and distribute the toner.
10. Hold the toner cartridge horizontal and level with the slot of
the developer cartridge in the top cover.
11. Slide the cartridge into the slot, while at the same time,
carefully removing the protective strip sealing the cartridge.
Make sure the cartridge is partially in before you break the
seal.
Make sure the toner cartridge is fully seated in the cartridge
slot.
WARNING: Be careful when you pull the protective strip to
prevent spilling the toner. Pull slowly and avoid jerking the
cartridge. Do not break the seal if the cartridge is completely
pulled out from the printer.
1-14 XEROX 4213 LASER PRINTER USER GUIDE
Page 31

Connect the printer to the host
INSTALLATION
12. Close the top cover by pushing it down firmly until it latches
into place and is flush with the cover.
The 4213 laser printer is configured for parallel interface when it
is shipped.
Note: If you want to change the printer configuration to serial
interface, refer to the “Main Menu,” section in the “Using the
4213 Menus” chapter.
1. Connect a computer interface cable (purchased separately)
to the appropriate connector, either serial (RS232C) or
parallel (Centronics) on your computer. Attach the other
end of the cable to the appropriate serial or parallel
connector on the printer.
XEROX 4213 LASER PRINTER USER GUIDE 1-15
Page 32

INSTALLATION
Connect the power cord
Make sure the AC power from the outlet meets the conditions in
the “Power requirements” section of this chapter.
1. Remove the power cord from the package.
2. Make sure the power switch (located at the back of the
printer) is set to the off (O) position.
1-16 XEROX 4213 LASER PRINTER USER GUIDE
Page 33

INSTALLATION
3. Connect the power cord to the AC outlet, at the back of
the printer.
4. Push the cord up under the tabs to secure it along the back
of the printer. The power cord is the disconnect device for
this equipment. Ensure that installation is near the outlet
and is easily accessible.
5. Plug the power cord into a proper AC wall outlet.
XEROX 4213 LASER PRINTER USER GUIDE 1-17
Page 34

INSTALLATION
Install the paper trays
6. Switch the printer power on by pressing the power switch
to the on (I) position. READY XES appears on the control
panel message display after diagnostics are run
(approximately 75 seconds).
Note: The yellow Warning light is lit and remains lit until
the two paper trays are installed, and paper is loaded, at
least, in the upper paper tray.
1. Remove the two paper trays from the packages.
Note: Perform steps 2 to 6 for each paper tray.
2. Flip back the paper tray cover.
Note: Cover cannot be removed from the paper tray.
1-18 XEROX 4213 LASER PRINTER USER GUIDE
Page 35

INSTALLATION
3. Push down on the metal plate until it clicks into place.
4. Gently tap the stack of paper on a firm surface to align the
edges of the sheets. Up to 250 sheets of 20-lb or 80-gsm
paper may be loaded at one time.
5. Load paper into the tray, curl side up for best performance.
• Do not load paper above the MAX line on the inside of
the paper tray
• Ensure that the paper stack is below the paper snubbers.
Close the paper tray cover.
XEROX 4213 LASER PRINTER USER GUIDE 1-19
Page 36

INSTALLATION
Print a configuration sheet
6. Place the filled paper tray all the way into the empty tray
slot. Make sure the end of the paper tray with the snubbers
go in first. Push it gently into position until it clicks into
place.
Note: Make sure that the paper tray is correctly seated.
When the paper tray is not completely and correctly
inserted, the configuration sheet may display an incorrect
tray code which can cause a problem in your print job.
The yellow Warning indicator light is no longer lit after the paper
trays are installed. The message display shows that the printer is
online and ready to accept data sent from your computer. The
green online indicator light is lit. The Xerox Escape Sequences
(XES) printer command is the default printer emulation at power
up.
Note: Refer to the “Using the 4213 Menus” chapter if your
applications require a different default printer emulation.
To review the configuration settings in place for the printer and
the XES emulation, you should print a Configuration Sheet.
To print the Configuration Sheet, press and release the following
buttons in the sequence shown:
H 1. Online takes the printer off line (the green online indicator
light is not lit).
B 2. Test accesses the Test Menu.
D 3. Select prints the Configuration Sheet.
H 4. Online puts the printer back online (the green online
indicator light is lit).
1-20 XEROX 4213 LASER PRINTER USER GUIDE
Page 37

INSTALLATION
5. The Configuration Sheet exits into the output tray.
The information on the Configuration Sheet is explained in the
“Reading the Configuration Sheet” section of the “Printing with
the 4213” chapter.
Installation of your 4213 laser printer is now complete.
XEROX 4213 LASER PRINTER USER GUIDE 1-21
Page 38

Page 39

Features
2. Overview
The 4213 prints high-quality documents and is compatible with
most software packages available for use with MS DOS
computers.
This chapter provides an overview of the following:
• Features
• Options
• Components.
The features of the Xerox 4213 laser printer are listed below:
• Prints up to 13 1-sided pages per minute.
• Prints up to 11 2-sided images per minute in 2-sided mode
• Has 0.5 megabytes (MB) of memory, expandable to 10.5 MB.
• Prints 300 x 300 spots per inch (dpi).
• Output tray holds up to 500 sheets of 80-gsm paper.
• Has serial and parallel computer interfaces.
• Has a menu-driven set up.
• Has two slots for additional font cartridges.
• Has two resident emulations:
— Hewlett-Packard LaserJet series IID (LJ2D)
— Xerox 4045/4046 with additional commands (XES)
• Has four resident fonts for XES.
• Has 42 resident fonts for LJ2D.
XEROX 4213 LASER PRINTER USER GUIDE 2-1
Page 40

OVERVIEW
Options
Downloadable fonts
• Prints on the following materials:
— 60 to 90 gsm (16-lb to 24-lb) paper
— Standard and nonstandard sized paper
— 80-gsm (20-lb) preprinted business forms
— Envelopes
— Transparencies
— Labels
— Letterheads
— Drilled paper.
The following options are available to further enhance the
capabilities of your 4213 laser printer. For detailed information
regarding these options, refer to chapter 7, “Supplies: ordering
information.”
The LJ2D and XES resident emulations support downloadable
fonts which are stored on floppy disks. These fonts can be
copied to the printer from your computer.
Font cartridges
Host interface options
Font cartridges increase the number of typefaces and sizes the
4213 laser printer can print. Font cartridges are small plug-in
modules that contain a range of fonts. An extensive font library
and customised fonts are available through your local Rank Xerox
representative.
The 4213 laser printer can be modified to allow the Xerox Coax
or Twinax host interface customer installable board to extend the
communications capabilities of the printer to attach to IBM
compatible mini computers and mainframes and provide
emulations of common IBM printers.
2-2 XEROX 4213 LASER PRINTER USER GUIDE
Page 41

PostScript options
Additional paper trays
High capacity feeder
OVERVIEW
The 4213 printer can be equipped with the PostScript page
description language. Contact your Rank Xerox representative
for further information.
Additional paper trays are available in the following sizes:
• Letter: European, 216 by 279 mm (U.S., 8.5 by 11 inches)
• A4: European, 210 by 297 mm (U.S., 8.27 by 11.69 inches)
• Legal: European, 216 by 356 mm (U.S., 8.5 by 14 inches)
• Adjustable: European, 182 to 216 mm wide, 254 to 356 mm
long (U.S., 7.25 to 8.5 inches wide, 10 to 14 inches long).
An optional high capacity feeder (HCF) is available. The HCF
feeds through the manual bypass slot and (when the HCF is
installed, a single sheet can be fed) holds up to 1,500 sheets of
either A4 or letter size paper. The manual bypass remains
available with the HCF installed.
Multi Media Feeder
A Multi Media Feeder can be purchased as an accessory for your
4213 printer.
The MMF can act as a feed source for the following media:
• Up to 75 envelopes
• 170 sheets of 90 gsm or 80 sheets 160 gsm A4 size
• Up to 75 sheets of label stock
• Media size ranges are: width, 100 to 216 mm; length, 190 to
297 mm.
XEROX 4213 LASER PRINTER USER GUIDE 2-3
Page 42

OVERVIEW
Printer components
The following section identifies the major components of the
printer.
Figure 2-1. Front and left side view of the 4213
1. Control panel: Consists of a printer mimic display, four
indicator lights, six buttons and a message display. Refer to
figure 2-5.
2. Top cover access handle: Allows access to the toner,
print, or developer cartridge, and paper jammed in the main
paper path.
3. Top cover or output tray:
sequence to the output tray with the printed side down.
4. Top cover:
developer cartridge, and when removing paper jammed in
the main paper path.
5. Paper trays: Two input paper trays, each holding up to 250
sheets of 80-gsm or 20-lb paper.
Raises when replacing the toner, print, or
Pages are delivered, in
2-4 XEROX 4213 LASER PRINTER USER GUIDE
Page 43

OVERVIEW
6. Left cover access handle: Allows access to paper jammed
in the fuser area.
7. Left cover: The left cover, located above the paper trays, is
lowered to remove paper jammed in the fuser area.
8. Re-feed baffle:
The refeed baffle, located inside the printer
in front of the fuser area, is raised to free paper jammed in
the fuser area. The refeed baffle must be manually lowered
before closing the left cover.
Figure 2-2. Front and right side view of the 4213
XEROX 4213 LASER PRINTER USER GUIDE 2-5
Page 44

OVERVIEW
1. Bypass slot: Allows the feeding of nonstandard sized paper,
heavy stock, labels, envelopes, and transparencies into the
printer.
2. Bypass tray:
Lowers for manual feed. The feed guide,
located on the left of the tray, positions the paper being fed.
3. Right cover: Allows you to clear paper jammed in the paper
tray areas.
4. Font cartridge slots: Accepts additional 4213 font and
emulation cartridges.
5. Output tray or sensor: Pages exit the printer onto the
output tray from this area. It senses when the output tray is
full.
Figure 2-3. Rear and left side view of the 4213
2-6 XEROX 4213 LASER PRINTER USER GUIDE
Page 45

OVERVIEW
1. Left cover access handle: Allows access to paper jammed in
the fuser area.
2. Left cover: The left cover, located above the paper trays, is
lowered to access the refeed baffle in order to remove paper
jammed in the fuser area.
3. Power switch: Turns the printer on and off.
4. Power cord receptacle: Connects the power cord to the
printer.
5. Power cord holding hooks: Secures the power cord along
the back of the printer.
6. Parallel and serial ports: When connecting your host
computer to the printer, either the parallel (Centronics) port
or the serial (RS232C) port is used to connect the interface
cable.
7. Exhaust fan vent: Provides ventilation for the exhaust fan.
Figure 2-4. Internal view (top cover is raised)
XEROX 4213 LASER PRINTER USER GUIDE 2-7
Page 46

OVERVIEW
1. Top cover: Raises when replacing the toner, print, or
developer cartridge, and when removing paper jammed in
the main paper path.
2. Serial number: Is the unique identification number for this
printer. The serial number is located inside the top cover.
3. Print cartridge: Contains a photosensitive “print drum” or
“photoreceptor” used in the printing process. This cartridge
is a customer replaceable unit (CRU).
4. Toner cartridge: Contains the toner supply for the printer.
This cartridge is a CRU.
5. Developer cartridge: Contains the magnetic roll which puts
the toner onto the photoreceptor. The developer cartridge
has a slot which holds the toner cartridge. This cartridge is a
CRU.
6. Transfer corotron assembly: Charges the photoreceptor to
produce images in the printing process.
7. Print density control knob: Adjusts the print quality. Turn
the control knob clockwise for darker printing, and
counterclockwise for lighter printing.
Control panel
Figure 2-5 shows the control panel. The control panel consists
of a printer mimic, message display area, six buttons and four
indicator lights.
2-8 XEROX 4213 LASER PRINTER USER GUIDE
Page 47

Figure 2-5. Control panel
1. Printer mimic: Assists in fault location
OVERVIEW
2. Message display: The two sixteen-character lines of the
message display report error messages, printer status codes,
and menu options. Using this display and the buttons on the
control panel allow you to set and select printing features
and functions.
3. Indicator lights: Table 2-1 identifies and explains the
meaning of the indicator lights above the buttons on the
control panel.
4. Buttons: Table 2-2 identifies and explains the meaning of
the six buttons on the control panel.
XEROX 4213 LASER PRINTER USER GUIDE 2-9
Page 48

OVERVIEW
Table 2-1. Indicator lights
Indicator Meaning Action
Last Page The yellow last page indicator blinks
1
when a print job is processing.
Remains steady when there is data
present in the print buffer.
Warning The yellow warning indicator is lit
when operator attention is needed
2
Fault The orange fault indicator is lit when
operator attention is required before
3
the printer will resume operation.
Online The green online indicator is lit when
4
the printer is online and ready to
accept data. Light is off when the
printer is off line. In off line mode,
you can access the set up menu, test
menu, or reset menu. Green online
light may blink when it is in the
transitional state.
No action is necessary unless this light
remains on after the printer has stopped
printing. In this case, the last page of the
job is still in the buffer and must be printed
manually. Press the Last Page C button to
print the remaining page.
Press the Select D button to access the
Consumables Menu. The status message in
the display defines the operator action
required. For example:
REORDER
CARTRIDGE-A 0901
The status message in the message display
defines the operator action required. For
example:
CLEAR PAPER PATH
0830
Use the Online H button to toggle between
online and off line status.
2-10 XEROX 4213 LASER PRINTER USER GUIDE
Page 49

OVERVIEW
Printer control
panel buttons The 6 printer control panel buttons perform several functions,
depending upon the printer mode. The printer can be in either
online, off line or in menu mode.
The following is an explanation of the printer modes:
• Online or print mode (ready-to-accept data)
• Off line mode (not communicating with the host computer)
• Menu mode (the configuration menu and other menus have
been entered).
The online indicator is lit when the printer is online or in the
print mode. The online indicator light is not lit when the printer
is off line or in the menu mode. The buttons may function
differently, depending on which mode the printer is in.
When the printer is online it is ready to accept print instructions
from your computer.
When the printer is off line, it is not in communication with your
computer. Buttons are used in the off line mode to check the
status of the printer and to choose, reset, or clear temporary
data.
Buttons are used in the menu mode to step through the
configuration menu and to select options.
Table 2-2 is an overview of the buttons on the control panel and
their functions.
XEROX 4213 LASER PRINTER USER GUIDE 2-11
Page 50

OVERVIEW
Table 2-2. Control panel buttons
Printer modes
Button name
Online
H
Reset
G
Last Page
C
Select
D
Online Off line Menu
The Online button toggles the
printer status between online
(ready-to-accept-data) and off
line.
Has no function in the online
mode.
Pressing the Last Page button
prints any data remaining in the
printer when the Last Page
indicator light remains on and
LAST PAGE appears in the
message display.
When the Warning indicator
light is lit, pressing the Select
button accesses the
Consumables Menu. This
menu reports those
consumables that are low and
will soon need replacement,
and other warning conditions.
Low paper may also cause this
light to appear.
Pressing the Reset button in
the off line mode accesses the
Reset Menu.
Has no function in the off line
mode.
Has no function in off line
mode.
The Online button exits from
menu mode and returns the
printer to online status.
Has no function in the menu
mode.
Last Page causes the menu to
move to the right to display the
next option on the same menu
level. When the last option on
the same menu level is
displayed, pressing this key
again causes the menu to wrap
around back to the first option
on the menu level.
The Select button acts as an
Enter button and is used to
select the displayed menu
option.
2-12 XEROX 4213 LASER PRINTER USER GUIDE
Page 51

Table 2-2. Control panel buttons (continued)
Printer modes
OVERVIEW
Button name
Menu
A
Test
B
Online Off line Menu
Has no function in online
mode.
Has no function in online
mode.
When the Menu button is
pressed and released, the top
level of the Main Menu is
displayed.
Pressing the Test button in the
off line mode accesses the Test
Menu. The Test Menu contains
the options to print a
configuration sheet and a font
status sheet, and to start and
stop data monitor mode.
The Menu button causes the
menu to move up to display
the next higher menu level or
go to off line from the top level
of main menu.
The Test button causes the
menu to move down to display
the next lower menu level.
Note: Pressing and holding the Last Page C button and the
Reset G button while you power on the printer, displays the
customer accessible codes. These codes allow you to display
the total print count and review and modify certain printer
configurations.
XEROX 4213 LASER PRINTER USER GUIDE 2-13
Page 52

Page 53

Menu maps of the 4213
3. Using the 4213 menus
This chapter provides the following information:
• Menu maps of the 4213 menus
• Control panel buttons
• Main Menu map
• Printer configuration at the Main Menu
• Printer configuration examples
• The XES submenu map
• Emulation configuration
• The LJ2D submenu map
The 4213 has four menus which you can access from the control
panel:
• The Main Menu (which includes the following submenus)
— XES (Xerox Escape Sequences) emulation submenu
— LJ2D (Hewlett-Packard LaserJet series IID) emulation
submenu
• The Test Menu
• The Reset Menu
• The Consumables Menu.
The maps are included as an overview of the menus and to
illustrate the different options within each menu.
XEROX 4213 LASER PRINTER USER GUIDE 3-1
Page 54

USING THE 4213 MENUS
Main Menu map
A When the printer is off line, pressing the Menu button displays
the 4213 Main Menu. The Main Menu is made up of top level
menu headings and up to three of the lower and associated level
menu headings and options.
3-2 XEROX 4213 LASER PRINTER USER GUIDE
Page 55

aaaaa
a
a
a
a
a
MAIN MENU
aaaaaaa
a
a
a
a
aaaaa
a
a
a
a
a
a
a
aaaaa
a
a
a
a
a
aaaaaaa
a
a
a
a
USING THE 4213 MENUS
PRINTER EMULATION ADJ CHIME OUTPUT AUTO HOST
C
LANGUAGE PAPER CONFIG OFFSET CONTINUE INTERFACE
aaaaa
C
aaaaa
SIZE SHEET
C
aaa
aaa
C
aaa
>PWR ON DISABLED
C C
a
a
a
>PWR ON ENABLED
C
>DISABLED *
aaa
C
aaa
C
a
a
>DISABLED *
>ENABLED
aaaaa
C
aaaaa
>ENABLED
>DISABLED*
C XES * LJ2D
OPTION
C
>ONCE
>CONTINUOUS
C
SERIAL * PARALLEL PARALLEL
CENT DPROD
I/F OPTION
XES MENU LJ2D MENU
METERED DATA
aaa
a
aaa
a
C
aaa
a
C
>ENGLISH *
>FRANCAIS
ADJ-A ADJ-B BYPASS
TRAY TRAY
C
>DISABLED *
>ENABLED
>ESPANOL
>ITALIANO
>DEUTSCH
>LETTER *(ADJ-A, ADJ-B)
>A4
BAUD PARITY FLOW
C C
RATE CONTROL
>215 X 315
>210 X 330
C
>8 X 13
> 8.5 X 13
>LEGAL
>B4* (BYPASS)
>8 X 10
>EXECUTIVE
>215 X 275
>9600 *
C
>19200
C
>DTR *
>XON/XOFF
>1200
>2400
>4800
C
>8 BIT NONE *
>7 BIT ODD
>7 BIT EVEN
This symbol indicates the Test B button.
>7 BIT MARK
>7 BIT SPACE
>8 BIT ODD
Note: Factory default settings are in boldface type and asterisked. Under
>8 BIT EVEN
the Adjustable Paper Size menu item, letter is the factory default for trays
ADJ-A and ADJ-B. B4 is only available in the Bypass tray and is the factory
default setting in this tray.
XEROX 4213 LASER PRINTER USER GUIDE 3-3
Page 56

USING THE 4213 MENUS
Printer configuration at the Main Menu
Once the physical components of the printer are connected, the
printer software may be set up, or configured, to meet the needs
of your office. The printer configuration options affect the whole
system and are set through the Main Menu.
Note: Your machine is pre-configured with User Defaults which
provide parallel interface at power up. If this does not meet your
requirements, you can change the printer configuration to your
own user defaults.
Accessing the Main Menu
Use the following buttons at the printer control panel:
H 1. Press the Online button to take the printer off line. (The
green Online indicator light is not lit.)
A 2. Immediately press and release the Menu button to display
the first Main Menu heading in the top level menu.
The display reads:
MAIN MENU
PRINTER LANGUAGE
By configuring your printer, you are establishing your own default
settings. There are two types of changes to the system
configuration:
• Permanent settings which remain unchanged even through a
power off and on cycle
• Temporary settings remain current until a software command
to change the setting is received, or the printer is switched
off.
Saving the printer configuration as defaults
You must exit the Main Menu and access the Reset Menu to save
your selections as the default configuration for the printer.
3-4 XEROX 4213 LASER PRINTER USER GUIDE
Page 57

USING THE 4213 MENUS
1. There are two ways to exit the Main Menu:
A • Press the Menu button until OFF LINE appears in the
message display.
or
H • Press the Online button. The printer is online. (The green
online indicator light is lit.)
H Press the Online button again to take the printer off line.
(The green online indicator light is not lit.)
Use the following buttons to save your selections as the printer
default configuration:
G 2. Press the Reset button to access the Reset Menu. The
display reads:
RESET MENU
EMULATION RESET
C 3. Press the Last Page button until the display reads:
RESET MENU
SAVE DEFAULTS
D 4. Press the Select button to save the printer configuration as
the default configuration.
H 5. Press the Online button to put the printer back online. (The
green online indicator light is lit.)
Note: The changes made to the printer configuration are not in
effect until you place the printer online. You must use the SAVE
DEFAULTS option to save any changes made to the printer
configuration settings, if you wish these settings to be permanent
and active each time the system is switched on. Otherwise,
when your system is switched off and then on again, the system
configuration returns to the configuration that was previously
saved.
XEROX 4213 LASER PRINTER USER GUIDE 3-5
Page 58

USING THE 4213 MENUS
Resetting the printer configuration to factory defaults
To reset the system configuration options back to the factory
defaults, access the Reset Menu and use the following buttons:
H 1. Press the Online button to take the printer off line. (The
green online indicator light is not lit.)
G 2. Press the Reset button to access the Reset Menu. The
display reads:
RESET MENU
EMULATION RESET
C 3. Press the Last Page button until the display reads:
RESET MENU
RECALL FACTORY DEFAULTS
D 4. Press the Select button to reset the configuration to the
factory defaults.
H 5. Press the Online button to put the printer back online. (The
green online indicator light is lit.)
Some of the printer configuration options deal with the print
functions. They are:
• Printer language
• Emulation
— Xerox Escape Sequences (XES)
— HP LaserJet series IID (LJ2D)
• Adjustable paper size settings for trays and bypass
• Automatic printing of the Configuration Sheet
• Chime
• Output offset
• Automatic continue.
Other system configuration options configure the type of
interface between your host computer and printer. Your options
are either parallel (Centronics or Data Products) computer
interface, serial computer interface, or an interface option (such
as, Xerox Coax/Twinax).
3-6 XEROX 4213 LASER PRINTER USER GUIDE
Page 59

Main Menu items
USING THE 4213 MENUS
The options available for serial interface are:
• Serial baud rate
• Serial parity
• Flow control.
The option available for parallel Centronics interface is metered
data.
Note: While in the Main Menu and the LED indicator tells you of
an error or fault message, you may have the option to continue
with the menu in use and wait until going off line to look at the
display message.
The Main Menu items are described in detail on the following
pages.
Note: Below each menu item description is an example of the
message display with the factory default for the item written in
boldface type followed by an asterisk. The options for each
menu item are listed in parentheses following the example of the
message display. In the following example, disabled is the
factory default for Auto Continue:
AUTO CONTINUE
DISABLED* (DISABLED or ENABLED)
Printer language
The language item selection determines which of the five
languages available will be used for the message display and the
Configuration Sheet.
The options for the language menu item are listed below, as they
appear in the message display:
PRINTER LANGUAGE
ENGLISH* (ENGLISH, FRANCAIS, ESPANOL, ITALIANO or
DEUTSCH)
XEROX 4213 LASER PRINTER USER GUIDE 3-7
Page 60

USING THE 4213 MENUS
Emulation
The Emulation menu item selects which emulation is to be used
as the current emulation. Selecting a new emulation here effects
an immediate switch to the chosen emulation.
You must save your selection at the Reset Menu if you want to
keep the current default emulation in effect at the time you
switch on the 4213 laser printer.
The Emulation menu item options are listed below as they appear
in the message display:
EMULATION
XES* (XES, LJ2D or “Option”)
Notes
• Any additional emulations installed through a board appear as
option selections on the menu.
• Each of the printer emulations can be configured to meet
specific printing needs and system requirements. Changes
are made through the emulation submenu. The emulation
defaults you set at the menu are in effect each time the
selected emulation is used. Emulation configurations are
discussed in the section “Emulation configuration” later in
this chapter.
Adjustable Paper Size
The Adjustable Paper Size menu item allows you to identify the
paper size being fed through the manual bypass slot or placed in
the optional adjustable paper tray. Appendix A, “Options for the
4213,” contains more information on setting the paper size for
the optional adjustable tray.
The options in the Adjustable Paper Size menu are listed below
as they appear in the message display:
ADJ. PAPER SIZE
ADJUSTABLE A, ADJUSTABLE B or BYPASS
3-8 XEROX 4213 LASER PRINTER USER GUIDE
Page 61

USING THE 4213 MENUS
The lower level paper size selections for the bypass slot and the
adjustable tray are listed below as they appear in the message
display:
ADJUSTABLE A
LETTER* (8 X 10, EXECUTIVE, 215 X 275, LETTER, A4, 215 X
315, 210 X 330, 8 X 13, 8.5 X 13 or LEGAL)
ADJUSTABLE B
LETTER* (8 X 10, EXECUTIVE, 215 X 275, LETTER, A4, 215 X
315, 210 X 330, 8 X 13, 8.5 X 13 or LEGAL)
BYPASS
B4* (8 X 10, EXECUTIVE, 215 X 275, LETTER, A4, 215 X 315,
210 X 330, 8 X 13, 8.5 X 13, LEGAL or B4)
Configuration Sheet
The Configuration Sheet lists all the system and default emulation
configuration variables. This menu item allows you to choose
whether or not you automatically receive the Configuration Sheet
each time the printer is switched on, and whether you want to
enable the Power Saver Mode.
The Configuration Sheet menu item options are listed below as
they appear in the message display:
CONFIG SHEET
PWR ON DISABLED* (PWR ON DISABLED or PWR ON
ENABLED)
The 4213 enters into the power saver mode if this feature is
enabled (PWR ON ENABLED), and the 4213 has been inactive for
a length of time equal to or greater than 2 hours and 8 minutes.
The following message then appears in the message display:
POWER SAVER ON
The 4213 leaves the Power Saver mode for any 1 of the
following:
• a page is ready to be printed
• an emulation switch command has been received via the data
stream, or
• a door on the printer has been opened and closed.
XEROX 4213 LASER PRINTER USER GUIDE 3-9
Page 62

USING THE 4213 MENUS
When any of the conditions above occur, the following message
appears in the message display for a short time.
PLEASE WAIT
Soon, the message
READY
appears, and the 4213 is ready to print.
Notes
• 2 hours and 8 minutes is the maximum amount of time (and
the factory preset default) for the 4213 to be inactive before
entering the Power Saver mode (if this feature is enabled).
• Only a qualified service representative can change this factory
preset default.
Chime
The Chime menu item determines whether the audible tone will
sound. If enabled, the chime is heard one time or repeats
continuously any time an internal fault requiring operator
intervention occurs in the printer.
If a warning condition exists, the 4213 may sound only one long
beep. The chime options apply only to fault conditions.
The Chime menu item options are listed below as they appear in
the message display:
CHIME
ONCE* (DISABLED, CONTINUOUS or ONCE)
Output Offset
The Output Offset menu item determines whether or not
offsetting in the output tray is allowed. When Output Offset is
disabled, no offsetting is allowed, even if the job asks for it.
Emulation commands to offset the output are ignored. Disabling
output offset allows more sheets to be stacked in the output
tray.
If this item is enabled and when the job asks for it, the individual
job is offset from the previous job in the output tray. This
function is regulated by the offset commands for the emulation.
3-10 XEROX 4213 LASER PRINTER USER GUIDE
Page 63

USING THE 4213 MENUS
The options in the Output Offset menu are listed below as they
appear in the message display:
OUTPUT OFFSET
DISABLED* (DISABLED or ENABLED)
Auto Continue
The Auto Continue menu item allows you to choose whether the
printer continues printing automatically when a communication
error occurs.
If the Auto Continue option is disabled, the printer pauses and
does not resume printing when an error occurs.
If the Auto Continue option is enabled, the printer logs the
errors and then automatically continues printing.
If the printer is shared by many users, you may not want the
inconvenience of a paused print job.
The Auto Continue menu item options are listed below as they
appear in the message display:
AUTO CONTINUE
DISABLED* (DISABLED or ENABLED)
Host Interface
Through the Host Interface menu, select serial (RS232C) or
parallel (Centronics or DataProducts) interface when
communicating with your host computer.
Serial and parallel Centronics communication uses special
communication parameters. Refer to your host computer
software manuals for details and make sure your computer and
the 4213 laser printer are using identical settings for each of the
serial and parallel Centronics parameters.
The optional interface connection, Xerox Coax/Twinax, is
available for the 4213 laser printer. Refer to appendix A,
“Options for the 4213,” for more information on this interface
option.
XEROX 4213 LASER PRINTER USER GUIDE 3-11
Page 64

USING THE 4213 MENUS
The Host Interface menu item options are listed below as they
appear in the message display:
HOST INTERFACE
SERIAL* (SERIAL, PARALLEL CENT, PARALLEL DPROD)
Baud Rate
The Baud Rate is the rate at which the information is sent from
the host computer to the printer. Baud rate is measured in bits
per second (bps).
The transmission rate must always match the setting specified in
your host computer user manual.
The Baud Rate menu item options are listed below as they
appear in the message display:
BAUD RATE
9600* (1200, 2400, 4800, 9600 or 19200) manual for your
host computer to see if seven-bit or eight-bit data is used,
and select the same number of data bits.
Parity
The parity on the printer must match the setting recommended
in the user manual for your host computer.
The options in the Serial Parity menu are listed below as they
appear in the message display:
PARITY
8 BIT NONE* (7 BIT ODD, 7 BIT EVEN, 7 BIT MARK, 7 BIT
SPACE, 8 BIT ODD, 8 BIT EVEN or 8 BIT NONE)
Flow Control
The Flow Control menu item regulates the flow of data to the
printer for the serial connection. The communication protocols
chosen must be compatible with your host computer.
The Flow Control menu item options are listed below as they
appear in the message display:
FLOW CONTROL
DTR* (XON/XOFF or DTR)
3-12 XEROX 4213 LASER PRINTER USER GUIDE
Page 65

MAIN MENU
USING THE 4213 MENUS
Metered Data (Parallel Centronics)
The Metered Data menu item applies to parallel Centronics
interface only. When using metered data with a personal
computer, printer time out messages do not appear on the
screen; therefore, this mode should be used if the host cannot
wait indefinitely for a response.
The options in the Metered Data menu are listed below as they
appear in the message display:
METERED DATA
DISABLED* (DISABLED or ENABLED)
Main Menu map (level 1 headings)
PRINTER
LANGUAGE
Procedure: Online plus Menu accesses level 1.
Legend: [Right Arrow] moves right on the same level.
EMULATION CHIME
OUTPUT
OFFSET
ADJ. PAPER SIZE CONFIG
AUTO
CONTINUE
For the menu choices available with each of the level 1 headings,
refer to the Main Menu Map at the beginning of this chapter.
SHEET
HOST
INTERFACE
XEROX 4213 LASER PRINTER USER GUIDE 3-13
Page 66

USING THE 4213 MENUS
Printer configuration examples
The examples provided in this section illustrate the step by step
procedures for changing the system configuration. Examples
include:
A. Changing the default printer emulation
B. Changing the host interface setting
Note: In each of the following examples only one setting is
changed in order to demonstrate the procedures for changing a
specific default setting. When you are making printer
configuration changes using the Main Menu, you can make one
or many changes to the default settings before exiting the menu
and saving the configuration.
3-14 XEROX 4213 LASER PRINTER USER GUIDE
Page 67

A. Changing the default printer emulation
This example shows you how to change the default printer
emulation from XES to LJ2D.
H Press the Online button to take the printer off line.
USING THE 4213 MENUS
A
C
B
C
D
A
G
C
D
H
Press the Menu button to access the Main Menu.
Press the Last Page button until the display reads EMULATION.
Press the Test button to display the available emulation headings. The display reads XES.
Press the Last Page button until the display reads LJ2D.
Press the Select button to select LJ2D as the current emulation. An asterisk appears next to
your selection.
Press the Menu button until OFF LINE appears in the message display.
To save LJ2D as the default emulation:
Press the Reset button to access the Reset Menu.
Press the Last Page button until the display reads SAVE DEFAULTS.
Press the Select button to select the option.
Press the Online button to put the printer back online. LJ2D is the default emulation, in place
immediately and each time the printer is switched on.
XEROX 4213 LASER PRINTER USER GUIDE 3-15
Page 68

USING THE 4213 MENUS
B. Changing the host interface setting
This example shows you how to change the host interface
setting from serial interface to parallel Centronics.
H
A
C
B
C
D
A
G
C
D
H
Press the Online button to take the printer off line.
Press the Menu button to access the Main Menu.
Press the Last Page button until the display reads HOST INTERFACE.
Press the Test button to display the host interface options. The display reads SERIAL.
Press the Last Page button until the display reads PARALLEL CENT.
Press the Select button to select PARALLEL CENT. An asterisk appears next to your selection.
Press the Menu button until OFF LINE appears in the message display.
To save parallel Centronics as the default interface:
Press the Reset button to access the Reset Menu.
Press the Last Page button until the display reads SAVE DEFAULTS.
Press the Select button to select the option.
Press the Online button to put the printer back online. Parallel Centronics is the default
interface, in place each time the printer is switched on.
3-16 XEROX 4213 LASER PRINTER USER GUIDE
Page 69

The XES submenu map
USING THE 4213 MENUS
C B This XES submenu is accessed from the Main Menu. Press the
Last Page button to scroll to XES emulation menu. Press the Test
button at the EMULATION heading to display this submenu. The
XES submenu is made up of top level menu headings and up to
two of the associated lower level menu headings and options.
Refer to “Control panel buttons” section in this chapter to help
you move through the different menu levels.
XEROX 4213 LASER PRINTER USER GUIDE 3-17
Page 70

USING THE 4213 MENUS
XES
COPIES 2-SIDED DATA LINE SUMMARY LANGUAGE FORMAT
TRAY FONT EN- ENDING FONT SHEET PAGE FORMAT DEFAULTS
SEQ MODE SELECT CODING ROTATION BUFFERS MARGINS
C >01 * 99
(01*)
C
>TRAY 1 *
C
>TRAY 2
>TRAY 1-2
>TRAY 1 *
C
>TRAY 2
This symbol indicates that all choices in the box are accessed
C
with the Last Page button.
C
>001-512
(003 *)
>DISABLED *
>BOOK BINDING
>PAD BINDING
C
>BYPASS
(with High Capacity Feeder)
>HCF
>TRAY 1-2
>HCF-TRAY 1
>HCF-TRAY 2
>HCF-TRAY 1-2
>BYPASS
C
>ASCII *
>EBCDIC-SNA
>EBCDIC-DSC
>IBM PC
>ISO 6937
C >DISABLED *
>ENABLED
>NONE*
>AUTO CR
>AUTO LF
C
C
>DISABLED *
>ENABLED
>PARTIAL *
>1 FULL
>2 FULL
>1 FULL LONG
>2 FULL LONG
C
C
>US ENGLISH *
>UK ENGLISH
>FRENCH
>DUTCH
>SPANISH
>ITALIAN
>DANISH
>NORWEGIAN
>FINNISH
C
>US*
>EUROPE
DEFAULT*COVERRIDEE
>LEFT 0000-9999
>RIGHT 0000-9999
>TOP 0000-9999
>BOTTOM 0000-9999
>GERMAN
>SWEDISH
>BELGIUM
>FR. CAN.
>PORTUG.
>LATIN AM
>CARTRIDGE 1
>CARTRIDGE 2
This symbol indicates the Test B button.
Note: Factory default settings are in boldface type and asterisked.
3-18 XEROX 4213 LASER PRINTER USER GUIDE
Page 71

Emulation configuration
USING THE 4213 MENUS
The 4213 laser printer emulates the Xerox Escape Sequence
mode and the HP Laserjet series IID (LJ2D) printers. Optional
emulations are available for the 4213 laser printer. Refer to
appendix A, “Options for the 4213,” for information on
configuring the optional emulations.
The emulation submenus allow you to change options in each
emulation.
There are two types of emulation configuration changes which
can be done:
• Permanent settings remain unchanged even through a power
off/on cycle.
• Temporary settings remain current until the setting is
changed at this submenu, a software command is received,
or the printer is switched off.
Notes
• Any additional emulations installed appear as option
emulations at the Main Menu.
• The options you select as defaults apply to the selected
emulation only. To change the options for an emulation, first
display the emulation heading at the Main Menu, step
through the options and select the options you want as the
defaults for the emulation. Then save the emulation
configuration at the Reset Menu.
• Each printer is shipped with factory default emulation
configurations. Factory defaults refer to the emulation
configurations in place when you receive your printer. You
have the choice, however, to set your own user defaults in
order to configure each emulation to operate within your
unique office environment. If your software sends MCK
commands to the printer for you, you can leave the
emulation settings at their factory defaults. Your software
overrides the menu configurations you set.
Changing the XES emulation configuration at the Main Menu
The submenus in the emulation list configuration options for the
resident emulations. All of the printer emulations may be
selected through the Main Menu and then set up individually to
conform to your printing needs.
XEROX 4213 LASER PRINTER USER GUIDE 3-19
Page 72

USING THE 4213 MENUS
This section shows which buttons on the control panel are used
for accessing the Main Menu, advancing to display the emulation,
and, if applicable, selecting emulation configuration options.
If necessary, refer to “Control panel,” in chapter 2, “Overview,”
for a diagram showing the location of the control panel buttons.
Accessing the Main Menu and selecting XES
Use the following buttons at the printer control panel:
H 1. Press the Online button to take the printer off line. (The
green online indicator light is not lit.)
A 2. Immediately press and release the Menu button to display
the first Main Menu heading in the top level menu.The
display reads:
MAIN MENU
PRINTER LANGUAGE
C 3. Press the Last Page button. The display reads:
MAIN MENU
EMULATION
B 4. Press the Test button. The display reads:
EMULATION
XES*
C D 5. If XES is not the currently selected emulation, first press the
Last Page button until XES is displayed; then, press the Select
button to select it. An asterisk appears next to your
selection.
Selecting the XES emulation configuration options
6. After selecting XES as the current emulation, use the
following buttons on the control panel to move through the
different menu levels:
B • Use the Test button to move to the next lower menu
level.
C • Use the Last Page button to move the display to the right
to show the menu options/headings at the same level.
When you display the last heading/option available for
the menu item, pressing this button again will wrap
around to show the first heading/option in the list.
3-20 XEROX 4213 LASER PRINTER USER GUIDE
Page 73

USING THE 4213 MENUS
D • Use the Select button before you initiate changes to numeric
entries, such as, COPIES, FONT SELECT, and OVERRIDE
FORMAT MARGINS.
A • Use the Menu button to move to the next higher menu
level. (If pressed continuously, you exit the Main Menu and
the printer is in the off line mode.)
D • Use the Select button to select a displayed option. When an
option is selected, an asterisk (*) appears next to the option
in the display.
D Note: The asterisk does not appear when Select is pressed
to select numeric entries, such as, COPIES, FONT SELECT,
and OVERRIDE FORMAT MARGINS.
7. Use either one of the following buttons to exit the menu:
A • Use the Menu button repeatedly, until you exit the Main
Menu. The printer is in the off line mode. The online
indicator light is not lit.
H • Use the Online button to exit the menu. The printer is in
the online mode. The online indicator light is lit.
Note: You must access the Reset Menu to save your selected
options if you want to keep the current default setting and
emulation each time the printer is switched on.
Saving the XES emulation configuration
You must exit the Main Menu and access the Reset Menu to save
your selections as the default configuration for the XES
emulation.
1. There are two ways to exit the Main Menu:
A • Press the Menu button until OFF LINE appears in the
message display.
or
H • Press the Online button. The printer is online. (The
green online indicator light is lit.)
H Press the Online button again to take the printer off line.
(The green online indicator light is not lit.)
XEROX 4213 LASER PRINTER USER GUIDE 3-21
Page 74

USING THE 4213 MENUS
Use the following buttons to save your selections as the XES
default configuration:
G 2. Press the Reset button to access the Reset Menu. The
display reads:
RESET MENU
EMULATION RESET
C 3. Press the Last Page button until the display reads:
RESET MENU
SAVE DEFAULTS
D 4. Press the Select button to save the emulation configuration
as the default configuration.
H 5. Press the Online button to put the printer back online. (The
green online indicator light is lit.)
Note: Changes to the emulation configuration are not in effect
until you place the printer online. You must use the SAVE
DEFAULTS option to save any changes made to the emulation
configuration settings, if you wish these settings to be permanent
and active each time the system is switched on. Otherwise,
when your system is switched off and then on again, the system
configuration returns to the configuration that was previously
saved.
Emulation settings for XES
The following items in the XES emulation menu may be set
permanently or temporarily:
• Number of copies
• Tray sequence mode
• 2-sided print mode
• Font number selection
• Data encoding
• Automatic line feed
• Font rotation
• Summary sheet
• Page buffers
• Language translation table
• Margins
• Format defaults.
3-22 XEROX 4213 LASER PRINTER USER GUIDE
Page 75

XES emulation items
USING THE 4213 MENUS
The following section describes the XES emulation menu items
and their corresponding options.
Note: Below each description of the emulation submenu item
is an example of the message display with the factory default for
the item written in boldface type followed by an asterisk. The
options for each menu item are listed in parentheses following
the example of the message display. In the following example,
disabled is the factory default for 2-sided print mode:
2-SIDED
DISABLED* (DISABLED, BOOK BINDING, or PAD BINDING)
An asterisk does not appear for numeric entries, such as, the
COPIES, FONT SELECT, or OVERRIDE FORMAT MARGINS.
Number of Copies
The Number of Copies menu item selects the number of copies
for each page printed. When you want more than one copy
printed, use this menu to select the number of copies required.
This would normally be a temporary change, and not saved to
memory.
Note: The printer does not collate the copies.
The Number of Copies menu item options are listed below as
they appear on the message display:
COPIES 01 (01 to 99)
Note: Most application software automatically sends a reset
printer command before the start of each job. Resetting the
printer clears the memory of the printer and makes sure that the
number of copies is set to the previously saved default, usually
one.
Tray Sequence
The Tray Sequence menu item allows you to switch automatically
to another tray when the active tray is empty. The Tray
Sequence menu item selects the order in which trays are used as
the paper source. For example:
• Single tray selection: Paper is fed from one tray only.
XEROX 4213 LASER PRINTER USER GUIDE 3-23
Page 76

USING THE 4213 MENUS
• Two-tray sequence selection: Paper is fed from the first tray.
When the first tray is empty, paper is fed from the second
tray. Paper is fed from the second tray only until the first tray
is refilled or replaced, then it feeds again from the first tray.
• Three-tray sequence selection: Paper is fed from the first
tray. When the first tray is empty, paper is fed from the
second tray. The second tray is the feed tray until the first
tray is refilled or replaced. The third tray is the feed tray only
if the first and second trays are empty or out of the printer.
If you select a multiple tray sequence, you should have the same
paper size trays and the same paper size and type installed in the
selected paper trays. The printer will switch to the other paper
tray when the first tray is empty.
The options in the Tray Sequence menu are listed below as they
appear on the message display:
TRAY SEQ
TRAY 1* (TRAY 1, TRAY 2, HCF, TRAY 1-2, HCF-TRAY 1,
HCF-TRAY 2, HCF-TRAY 1-2 or BYPASS)
Note: HCF refers to the optional High Capacity Feeder. Under
Tray Sequence mode, HCF, HCF-Tray 1, HCF-Tray 2, and HCFTray 1-2 are not displayed if HCF is not installed as an option.
2-sided Print Mode
The 2-Sided Print Mode menu item, when enabled, allows you to
select the page format for 2-sided printing.
The guidelines governing book binding are:
• Portrait orientation, with space provided on the left side,
long edge of page 1 and the right side, long edge of page 2
(front and back of the same page) to allow for binding.
• Landscape orientation, with space provided on the left side,
short edge of page 1 and the right side, short edge of page
2 (front and back of the same page) to allow for binding.
3-24 XEROX 4213 LASER PRINTER USER GUIDE
Page 77

USING THE 4213 MENUS
aaa
a
a
a
a
a
a
a
a
a
a
a
a
a
a
a
a
a
a
a
a
a
a
a
a
a
a
a
a
a
a
a
a
a
aaa
aaa
aaa
aaa
aaa
aaa
aaa
aaa
aaa
aaa
aaa
aaa
aaaaaaaaaaaaaaaaaaaaaaa
a
a
a
a
aaaaaaaaaaaaaaa
a
a
a
a
a
a
a
a
a
a
a
a
a
a
a
a
a
a
a
a
a
a
a
a
a
a
a
a
a
a
a
a
a
a
Portrait Landscape
The guidelines governing pad binding are:
• Portrait orientation, with space provided on the top, short
edge of page 1 and the bottom, short edge of page 2 (front
and back of the same page) to allow for binding.
• Landscape orientation, with space provided on the top, long
edge of page 1 and the bottom, long edge of page 2 (front
and back of the same page) to allow for binding.
aaaaaaaaaaaaa
aaaaaaaaaaaaa
a
a
aaaaaaaaaaaaaaaaaaaaa
aaaaaaaaaaaaaaaaaaaaa
Portrait Landscape
The first printable data on a page determines page orientation.
The 2-Sided Print Mode menu item options are listed below as
they appear on the message display:
2-SIDED
DISABLED* (DISABLED, BOOK BINDING or PAD BINDING)
If you are sending 2-sided commands from the data
Note:
stream, you must set this to DISABLED.
XEROX 4213 LASER PRINTER USER GUIDE 3-25
Page 78

USING THE 4213 MENUS
Font Number Selection
The menu item in the Font Number Selection allows you to
select any font on the XES font status sheet.
The font number is part of the font code listed on the font status
sheet for the current emulation. The font numbers listed on the
status sheet are assigned by the printer.
These font numbers may change each time:
• A different font cartridge is installed
• Downloaded fonts are loaded or deleted
Note:
Font assignment numbers on downloaded fonts may or
may not be consecutive. The numbers are only meant to be
identifiers and a gap does not imply anything is missing.
The options in the Font Number Selection menu are listed below
as they appear on the message display:
FONT SELECT 003 (001 to 512)
Data Encoding
The Data Encoding menu item selects the XES data set to match
the character codes generated by your host computer.
If you have no downloaded fonts, (fonts would be lost with this
procedure) follow these steps:
1. Change the encoding menu item.
2.. Save the defaults (stay off line).
3. Power the printer off then back on again.
If you have downloaded fonts, follow these steps:
1. Change the encoding menu item.
2. Save the defaults (stay off line).
3. Recall the user defaults.
4. Go on line, then go off line.
5. Go to the XES emulation and enter it.
6. Go on-line.
Data encoding becomes effective when the power is turned
Off/On, when the next Reset command ( E+X ) is received, or
automatically if there is no data in the machine.
If any information remains in the printer when the Data
Encoding change is made (the Last Page indicator is lit),
nonsense characters will be printed, and your printer could lockup.
3-26 XEROX 4213 LASER PRINTER USER GUIDE
Page 79

USING THE 4213 MENUS
The options in the Data Encoding menu are listed below as they
appear on the message display:
DATA ENCODING
ASCII* (ISO 6937, ASCII, EBCDIC-SNA, EBCDIC-DSC or IBM
PC)
Line Ending
The Line Ending menu item, if enabled, does the following:
• AUTO CR - automatically adds a carriage return (CR)
character when it receives a line feed (LF) character.
Check the user manual for your host computer or application
software to see if a carriage return is sent automatically at the
end of each line.
If the characters are being printed on top of one another
Note:
at the far right of the page, your host computer is probably not
sending an automatic carriage return. In this case, select AUTO
CR and the printer will insert a carriage return.
• AUTO LF - automatically adds a line feed (LF) character when
it receives a carriage return (CR) character.
Check the user manual for your application software to see if
a line feed is sent automatically at the end of each line.
If lines are being printed on top of one another, your
Note:
host computer is probably not sending automatic line feeds. In
this case, select AUTO LF and the printer will insert a line feed.
The Line Ending menu item options are listed below as they
appear on the message display:
LINE ENDING
NONE* (AUTO CR, AUTO LF or NONE)
Font Rotation
The Font Rotation menu item rotates a font 90 degrees. This
feature changes the orientation of a downloaded font from
portrait to landscape or landscape to portrait. (This is useful for
downloadable fonts in 2700 II format).
XEROX 4213 LASER PRINTER USER GUIDE 3-27
Page 80

USING THE 4213 MENUS
The options in the Font Rotation menu are listed below as they
appear in the message display:
FONT ROTATION
DISABLED* (DISABLED or ENABLED)
Summary Sheet
The Summary Sheet menu item designates whether or not an XES
information sheet prints at the end of each job, when a job error
occurs. Refer to the Xerox 4213 Laser Printer Programmer
Reference for a list of the error codes that may appear on the
summary sheet.
The options in the Summary Sheet menu are listed below as they
appear in the message display:
SUMMARY SHEET
DISABLED* (DISABLED or ENABLED)
Page Buffers
The following items in the Page Buffer menu determine if partial
or full buffers are used for page assembly:
• PARTIAL - Band buffers used in 2 pieces or bands of 32 scan
lines alternately built and imaged during page imaging.
Partial buffer requires less memory and produces the fastest
output. Partial buffer is the most efficient mode for most
print jobs and requires no added or optional memory.
• 1 FULL - One full page buffer guarantees imaging for 1-sided
printing because complete assembly of the image in memory
is done before imaging and printing begins. This mode
reduces the possibility of complex errors and have some
impact on the speed performance of the printer. A full
buffer requires 1.1 MB of memory. Page sizes involve:
— 8 x 10
— Executive
— 215 x 275
— Letter
—A4
3-28 XEROX 4213 LASER PRINTER USER GUIDE
Page 81

USING THE 4213 MENUS
• 2 FULL - Two full page buffers guarantee imaging for 2-sided
printing because complete assembly of the image in memory
is done before imaging and printing begins. Two full buffers
require 2.2 MB of memory. Page sizes involve (2 pages
each):
— 8 x 10
— Executive
— 215 x 275
— Letter
—A4
• 1 FULL LONG - One full long page buffer guarantees imaging
for 1-sided printing because complete assembly of the image
in memory is done before imaging and printing begins. This
mode reduces the risk of complexity errors at the possible
cost in speed of printing. A full long buffer requires 1.4 MB
of memory. Page sizes involve:
— 215 x 315
— 210 x 330
— 8 x 13
— 8.5 x 13
— Legal
• 2 FULL LONG - Two full long page buffers guarantee imaging
for 2-sided printing because complete assembly of the image
in memory is done before imaging and printing begins. Two
full long buffers require 2.8 MB of memory. Page sizes
involve (2 pages each):
— 215 x 315
— 210 x 330
— 8 x 13
— 8.5 x 13
— Legal
The options in the Page Buffers menu are listed below as they
appear on the message display:
PAGE BUFFERS
PARTIAL* (PARTIAL, 1 FULL, 2 FULL, 1 FULL LONG or 2
FULL LONG)
Note: Buffer overflow in the XES or LJ2D emulation may result in
overprinting if the 4213 is not configured correctly. When this
happens, the next page printed contains unexpected material.
XEROX 4213 LASER PRINTER USER GUIDE 3-29
Page 82

USING THE 4213 MENUS
Language
The Language menu item determines which language is used in
the printed output. The language translation table selection
ensures the correct national character mappings are in use.
The Language menu item options are listed below as they appear
on the message display:
LANGUAGE
U.S. ENGLISH* (U.S. ENGLISH, U.K. ENGLISH, FRENCH,
DUTCH, SPANISH, ITALIAN, DANISH, NORWEGIAN,
FINNISH, GERMAN, SWEDISH, BELGIUM, FRENCH
CANADIAN, PORTUGUESE, LATIN AMERICAN, CARTRIDGE 1
(translate table within cartridge 1, U.S. English if no cartridge
or table in cartridge) or CARTRIDGE 2 (translate table within
cartridge 1, U.S. English if no cartridge or table in cartridge))
Format Margins
When in the XES emulation, this menu item allows you to select
whether or not the emulation will use default margins, or not to
have any margins at all. If this item is set to DEFAULT, the
previously defined default margins for the paper size in the paper
trays are in place. Refer to Xerox 4213 Laser Printer Escape
Sequences Reference for detailed information on margins.
If this item is set to OVERRIDE, the top, bottom and left margin
are set to 0; the right margin is set to the width of the paper.
Text prints to the four edges of the paper. The horizontal and
vertical tabs start from the paper edge. New margin values for
page formatting can be set through the OVERRIDE option.
Values are entered in pixels (1/300 inch) based upon page origin
(0,0) at the upper left corner.
The options in the Format Margins menu are listed below as they
appear on the message display:
FORMAT MARGINS
DEFAULT* (DEFAULT or OVERRIDE)
3-30 XEROX 4213 LASER PRINTER USER GUIDE
Page 83

The LJ2D submenu map
USING THE 4213 MENUS
The lower level Override Margins selections are listed below as
they appear on the message display:
LEFT 0 (0000-9999)
RIGHT 0 (0000-9999)
TOP 0 (0000-9999)
BOTTOM 0 (0000-9999)
Format Defaults
When in the XES emulation, this menu item allows you to
determine the built-in defaults, based on either U. S. or European
values (such as, letter versus A4).
The XES emulation has four built-in fonts:
• Titan10iso-P
• Titan12iso-P (The default font for Europe is Titan12iso-P.)
• XCP12.5iso-L
• XCP14iso-L (The default font for U.S. is XCP14iso-L.)
B C This LJ2D submenu is accessed from the Main Menu. Press the
Test button at the EMULATION heading. Press the Last Page
button to move you to LJ2D emulation or until this submenu is
displayed. The LJ2D submenu is made up of top level menu
headings and up to three associated but lower level menu
headings and options. Refer to “Control panel buttons” section
in this chapter to help you move through the different menu
levels.
XEROX 4213 LASER PRINTER USER GUIDE 3-31
Page 84

USING THE 4213 MENUS
LJ2D
COPIES 2-SIDED PAPER FORM PAGE SYMBOL
TRAY FONT SIZE ORIENTATION LENGTH BUFFERS SET
SEQ MODE NUMBER
C
> 01 *-99
C
>TRAY 1-2 *
C
>TRAY 1-2 *
>BYPASS
>TRAY 1
>TRAY 2
(with High Capacity
Feeder)
>HCF-TRAY 1
>HCF-TRAY 2
>HCF-TRAY 1-2
>BYPASS
>TRAY 1
>TRAY 2
This symbol indicates that all choices in the box
C
are accessed with the Last Page button.
C
>HCF
>DISABLED *
C >01-512
(01 *)
>LONG BINDING
>SHORT BINDING
C
>LETTER *
>LEGAL
>EXEC
>A4
>COMM 10
This symbol indicates the Test B button.
Note: Factory default settings are in boldface type and
asterisked.
C
>MONARCH
>DL
>C5
>PORTRAIT *
>LANDSCAPE
C
>005-128
C
(060 *)
>ROMAN-8 *
>ECMA94
>PC8
>PC8DN
>PC850
>GERMAN
>SPANISH
C
>LEGAL
>ISO2
>ISO4
>ISO6
>PARTIAL *
(with added
memory)
>1 FULL
>2 FULL
>1 LONG
>2 LONG
>ISO10
>ISO11
>ISO14
>ISO15
>ISO16
>ISO17
>ISO21
>ISO25
>ISO57
>ISO60
>ISO61
>ISO69
>ISO84
>ISO85
3-32 XEROX 4213 LASER PRINTER USER GUIDE
Page 85

Changing the LJ2D emulation configuration at the Main Menu
The emulation submenus list configuration options for the
resident emulations. All of the printer emulations may be
selected through the Main Menu and then set up individually to
conform to your printing needs.
This section shows which buttons on the control panel are used
for accessing the Main Menu, advancing to display the emulation,
and, if applicable, selecting emulation configuration options.
If necessary, refer to “Control panel,” in chapter 2, “Overview,”
for a diagram showing the location of the control panel buttons.
Accessing the Main Menu and selecting LJ2D
Use the following buttons at the printer control panel:
H 1. Press the Online button to take the printer off line. (The
green online indicator light is not lit.)
A 2. Immediately press and release the Menu button to display
the first Main Menu heading in the top level menu. The
display reads:
USING THE 4213 MENUS
MAIN MENU
PRINTER LANGUAGE
C 3. Press the Last Page button. The display reads:
MAIN MENU
EMULATION
B 4. Press the Test button. The display reads:
EMULATION
XES*
C 5. Press the Last Page button to display LJ2D.
D 6. Press the Select button to select LJ2D. An asterisk appears
next to your selection.
XEROX 4213 LASER PRINTER USER GUIDE 3-33
Page 86

USING THE 4213 MENUS
Selecting the LJ2D emulation configuration options
7. After selecting LJ2D as the current emulation, use the
following buttons on the control panel to move through the
different menu levels:
B • Use the Test button to move to the next lower menu
level.
C • Use the Last Page button to move the display to the right
to show the menu options/headings at the same level.
When you display the last heading/option available for
the menu item, pressing this button again will wrap
around to show the first heading/option in the list.
D • Use the Select button before you initiate changes to
numeric entries, such as, COPIES, FONT NUMBER and
FORM LENGTH.
A • Use the Menu button to move to the next higher menu
level.
D • Use the Select button to select a displayed option.
When an option is selected, an asterisk (*) appears next
to the option in the display.
Note: The asterisk does not appear when the Select button
is used to select a numeric entry, such as, COPIES, FONT
NUMBER and FORM LENGTH.
8. Use either of the following buttons to exit the menu:
A • Use the Menu button repeatedly, until you exit the Main
Menu. The printer is in the off line mode. The online
indicator light is not lit.
H • Use the Online button to exit the menu. The printer is in
the online mode. The online indicator light is lit.
Note: You must access the Reset Menu to save your selected
options as the default setting to be in place each time the printer
is switched on.
Saving the LJ2D emulation configuration
You must exit the Main Menu and access the Reset Menu to save
your selections as the default configuration for the LJ2D
emulation.
3-34 XEROX 4213 LASER PRINTER USER GUIDE
Page 87

USING THE 4213 MENUS
1. There are two ways to exit the Main Menu:
A • Press the Menu button until OFF LINE appears in the
message display.
or
H • Press the Online button. The printer is online. (The
green online indicator light is lit.)
H Press the Online button again to take the printer off line.
(The green online indicator light is not lit.)
Use the following buttons to save your selections as the LJ2D
default configuration:
G 2. Press the Reset button to access the Reset Menu. The
display reads:
RESET MENU
EMULATION RESET
C 3. Press the Last Page button until the display reads:
RESET MENU
SAVE DEFAULTS
D 4. Press the Select button to save the emulation configuration
as the default configuration.
H 5. Press the Online button to put the printer back online. (The
green online indicator light is lit.)
Note: Changes to the emulation configuration are not in effect
until you place the printer online. You must use the SAVE
DEFAULTS option to save any changes made to the emulation
configuration settings, if you wish these settings to be permanent
and active each time the system is switched on. Otherwise,
when your system is switched off and then on again, the system
configuration returns to the configuration that was previously
saved.
Resetting the LJ2D emulation configuration
Resetting the printer clears the memory of the printer and
ensures that the emulation configuration defaults last saved are in
place at the beginning of each job.
Note: Most application software automatically sends a reset
printer command before the start of each job.
XEROX 4213 LASER PRINTER USER GUIDE 3-35
Page 88

USING THE 4213 MENUS
Emulation settings for LJ2D
To reset the emulation configuration back to the previously saved
default settings, access the Reset Menu and use the following
buttons:
H 1. Press the Online button to take the printer off line. (The
green online indicator light is not lit.)
G 2. Press the Reset button to access the Reset Menu. The
display reads:
RESET MENU
EMULATION RESET
D 3. Press the Select button to reset the emulation configuration
to the previously saved defaults.
H 4. Press the Online button to put the printer back online. (The
green online indicator light is lit.)
The following items in the LJ2D emulation menu may be set
permanently or temporarily:
• Number of copies
• Tray sequence mode
• 2-Sided print mode
• Font number selection
• Paper size
• Page orientation
• Form length (lines per vertical inch)
• Symbol set.
LJ2D emulation items
Note: Emulation Reset on the 4213 and the HPIID are the same,
with one exception. The HPIID deletes any text or data still in
the buffer when it resets itself. The 4213 adds a Form Feed and
prints any remaining text or data.
The following section describes the LJ2D emulation menu items
and their corresponding options.
3-36 XEROX 4213 LASER PRINTER USER GUIDE
Page 89

USING THE 4213 MENUS
Note: Below each description of the emulation submenu item is
an example of the message display with the factory default for
the item written in boldface type followed by an asterisk. The
options for each menu item are listed in parentheses following
the example of the message display. In the following example,
disabled is the factory default for 2-sided print mode:
2-SIDED
DISABLED* (DISABLED, LONG BINDING, or SHORT
BINDING)
An asterisk does not appear for numeric entries, such as the
COPIES, FONT NUMBER, or FORM LENGTH.
Number of Copies
The Number of Copies menu item selects the number of copies
of each page printed. When you want more than one copy
printed, use this menu to select the number of copies required.
This would normally be a temporary change, not saved to
memory.
Note: The printer does not collate the copies.
The Number of Copies menu item options are listed below as
they appear on the message display:
COPIES 01 (01 to 99)
Note: Most application software automatically sends a reset
printer command before the start of each job. Resetting the
printer clears the memory of the printer and makes sure that the
number of copies is set to the previously saved default, usually
one.
Tray Sequence
The Tray Sequence menu item allows you to switch automatically
to another tray when the active tray is empty. The Tray
Sequence menu item selects the order in which trays are used as
the paper source. For example:
• Single tray selection: Paper is fed from one tray only.
• Two-tray sequence selection: Paper is fed from the first tray.
When the first tray is empty, paper is fed from the second
tray. Paper is fed from the second tray only until the first tray
is refilled or replaced, then it feeds again from the first tray.
XEROX 4213 LASER PRINTER USER GUIDE 3-37
Page 90

USING THE 4213 MENUS
aaa
a
a
a
a
a
a
a
a
a
a
a
a
a
a
a
a
a
a
a
a
a
a
a
a
a
a
a
a
a
a
a
a
a
aaaaaaaaaaaaaaaaaaaaaaa
a
a
• Three-tray sequence selection: Paper is fed from the first
tray. When the first tray is empty, paper is fed from the
second tray. The second tray is the feed tray until the first
tray is refilled or replaced. The third tray is the feed tray only
if the first and second trays are empty or out of the printer.
If you select a multiple tray sequence, you should have the same
paper tray size and the same paper size and type installed in the
selected paper trays. The printer will switch to the other paper
tray when the first tray is empty.
The Tray Sequence menu item options are listed below as they
appear on the message display:
TRAY SEQ MODE
TRAY 1-2* (TRAY 1, TRAY 2, HCF, TRAY 1-2, HCF-TRAY 1,
HCF-TRAY 2, HCF-TRAY 1-2 or BYPASS)
Note: HCF refers to the optional High Capacity Feeder. Under
Tray Sequence Mode, HCF, HCF-Tray 1, HCF-Tray 2, and HCFTray 1-2 are not displayed if HCF is not installed as an option.
2-Sided Print Mode
The 2-Sided Print Mode menu item, when enabled, allows you to
select the page format for 2-sided printing.
The guidelines governing long binding are:
• Portrait orientation, with space provided on the left side,
long edge of page 1 and the right side, long edge of page 2
(front and back of the same page) to allow for binding.
• Landscape orientation, with space provided on the top, long
edge of page 1 and the bottom, long edge of page 2 (front
and back of the same page) to allow for binding.
a
a
a
a
a
a
a
a
a
a
a
a
a
a
a
a
a
a
a
a
a
a
a
a
a
a
a
a
a
a
a
a
a
a
Portrait Landscape
aaaaaaaaaaaaaaaaaaaaa
aaaaaaaaaaaaaaaaaaaaa
3-38 XEROX 4213 LASER PRINTER USER GUIDE
Page 91

USING THE 4213 MENUS
aaaaaaaaaaaaaaa
a
a
aaa
aaa
aaa
aaa
aaa
aaa
aaa
aaa
aaa
aaa
aaa
aaa
aaa
The guidelines governing short binding are:
• Portrait orientation, with space provided on the top, short
edge of page 1 and the bottom, short edge of page 2 (front
and back of the same page) to allow for binding.
• Landscape orientation, with space provided on the left side,
short edge of page 1 and the right side, short edge of page
2 (front and back of the same page) to allow for binding.
aaaaaaaaaaaaa
aaaaaaaaaaaaa
a
a
Portrait Landscape
Note: The first printable data placed on the page determines the
page orientation.
The 2-Sided Print Mode menu item options are listed below as
they appear on the message display:
2-SIDED
DISABLED* (DISABLED, LONG BINDING, or SHORT
BINDING)
Font Number Selection
The Font Number Selection allows you to select any font on the
LJ2D font status sheet.
The font number is part of the font code listed on the font status
sheet for the current emulation. The font numbers listed on the
status sheet are assigned by the printer.
These font numbers may change:
• Each time a different font cartridge is installed.
• Downloaded fonts are loaded.
Note:
Font assignment numbers on downloaded fonts may or
may not be consecutive. The numbers are only meant to be
identifiers and a gap does not imply anything is missing.
XEROX 4213 LASER PRINTER USER GUIDE 3-39
Page 92

USING THE 4213 MENUS
The Font Number Selection menu item options are listed below
as they appear on the message display:
FONT NUMBER 001 (001 to 512)
Paper Size
The image sent to the printer is placed on the page, according to
the size of the paper being fed.
You can change the paper size to another standard paper or
envelope size in one of three ways:
• If your application software allows you to select one of the
standard page or envelope sizes listed in table 3-1, the
selected paper size command is automatically sent to the
printer and the image is placed in the correct location on the
page.
• If your application software does not allow you to
automatically select the standard paper or envelope size, you
can send a paper size printer command to let the printer
know what paper size to expect. Refer to the 4213 Laser
Printer Programmer Reference for information on the LJ2D
paper size printer command.
• If your application software does not allow you to
automatically select one of the standard paper or envelope
size, you can select one of the sizes listed in table 3-1 at this
menu.
The Paper Size menu item options are listed below as they
appear on the message display:
PAPER SIZE
LETTER* (LETTER, LEGAL, EXEC, A4, COMM 10, MONARCH,
DL or C5)
Table 3-1 shows acceptable paper and envelope sizes.
3-40 XEROX 4213 LASER PRINTER USER GUIDE
Page 93

USING THE 4213 MENUS
aaaaaaa
a
aaaaaaa
a
aaaaaaa
a
aaaaaaa
a
aaaaaaa
a
aaaaaaa
a
aaaaaaa
a
aaaaaaa
a
aaaaaaa
a
aaaaaaaaa
a
aaaaaaaaa
a
aaaaaaaaa
a
aaaaaaaaa
a
aaaaaaaaa
a
aaaaaaaaa
a
aaaaaaaaa
a
aaaaaaaaa
a
aaaaaaaaa
a
Table 3-1. Paper and envelope size requests
Paper name Envelope name Size
Letter (216 x 279 mm)
8.5" x 11"
Legal (216 x 356 mm)
8.5" x 14"
Executive (184 x 267 mm)
7.25 "x 10.5"
A4 (210 x 297 mm)
8.27" x 11.69"
Business (Comm 10) (105 x 241 mm)
4.13" x 9.5"
Monarch (99 x 191 mm)
3.88" x 7.5"
International DL (110 x 220 mm)
4.33" x 8.66"
International C5 162 x 229 mm)
(6.38" x 9.02"
Orientation
The Orientation menu item allows you to print lines in portrait
(vertical) or landscape (horizontal) orientation on the page.
Portrait
Landscape
XEROX 4213 LASER PRINTER USER GUIDE 3-41
Page 94

USING THE 4213 MENUS
The Orientation menu item options are listed below as they
appear on the message display:
ORIENTATION
PORTRAIT* (PORTRAIT or LANDSCAPE)
Form Length
The Form Length menu item sets the number of text lines you
want to print on your page. The number of lines you set affects
the vertical (portrait) or horizontal (landscape) spacing of the text
lines.
The Form Length menu item options are listed below as they
appear on the message display:
: FORM LENGTH 060* (005, 006,...060,...128)
Page Buffers
The options in the Page Buffers menu are listed below as they
appear on the message display:
PAGE BUFFERS
PARTIAL* (PARTIAL, 1 FULL, 2 FULL, 1 FULL LONG or 2
FULL LONG)
Note: Buffer overflow in the LJ2D or XES emulation may result in
overprinting if the 4213 is not configured correctly. When this
happens, the next page printed contains unexpected material.
Symbol Set
When you select a symbol set for the LJ2D emulation, you are
selecting an unique subgrouping of all the available characters in
a font.
The options in the Symbol Set menu are listed below as they
appear in the message display:
SYMBOL SET
ROMAN-8* (Refer to table 3-2.)
3-42 XEROX 4213 LASER PRINTER USER GUIDE
Page 95

USING THE 4213 MENUS
Table 3-2. LJ2D resident symbol sets
Message display Symbol set Message display Symbol set
ROMAN-8 HP Roman-8 ISO14 ISO 14: JIS ASCII
ECMA94 ISO 100: ECMA-94 Latin 1 ISO15 ISO 15: Italian
PC8 PC-8 ISO16 ISO 16: Portuguese
PC8DN PC-8 (D/N) ISO17 ISO 17: Spanish
PC850 PC-850 ISO21 ISO 21: German
GERMAN HP German ISO25 ISO 25: French
SPANISH HP Spanish ISO57 ISO 57: Chinese
LEGAL Legal ISO60 ISO 60: Norwegian v1
ISO2 ISO 2 IRV ISO61 ISO 61: Norwegian v2
ISO4 ISO 4 United Kingdom ISO69 ISO 69: French
ISO6 ISO 6 ASCII ISO84 ISO 84: Portuguese
ISO10 ISO 10: Swedish/Finnish ISO85 ISO 85: Spanish
ISO11 ISO 11: Swedish: Names
XEROX 4213 LASER PRINTER USER GUIDE 3-43
Page 96

USING THE 4213 MENUS
Emulation configuration examples
The examples provided in this section illustrate step by step
procedures for changing the emulation configuration. Examples
include the following:
A. Changing the current emulation from XES to LJ2D
B. Temporarily placing the printer in the 2-sided mode for XES
C. Changing the tray sequencing mode for XES and LJ2D.
Note: In each of the following examples only one setting is
changed in order to demonstrate the procedures for changing a
specific default setting. When you are making emulation
configuration changes using the Main Menu, you can make one
or many changes to the default settings before exiting the menu
and saving the configuration.
3-44 XEROX 4213 LASER PRINTER USER GUIDE
Page 97

A. Changing the current emulation from XES to LJ2D
This example shows how to change the current printer emulation
from the default XES to LJ2D.
USING THE 4213 MENUS
H
A
C
B
C
D
H
H
G
C
Press the Online button to take the printer off line.
Press the Menu button to access the Main Menu.
Press the Last Page button until the display reads EMULATION.
Press the Test button to display the available emulation headings. The display reads XES*.
Press the Last Page button until the display reads LJ2D.
Press the Select button to select LJ2D as the current emulation. An asterisk appears next to
your selection.
Press the Online button to put the printer back online. LJ2D* is the current emulation, in
place until a command to change emulations is received, the emulation is changed using this
menu, the printer is reset, or the printer is switched off.
To reset XES as the current emulation:
Press the Online button to take the printer off line.
Press the Reset button to access the Reset Menu. The display reads EMULATION RESET.
Press the Last Page button until the display reads RECALL USER DFT..
D
H
Press the Select button to select the option.
Press the Online button to put the printer back online.
XEROX 4213 LASER PRINTER USER GUIDE 3-45
Page 98

USING THE 4213 MENUS
B. Temporarily placing the printer in 2-sided printing mode for XES
This example shows you how to change the printing mode to 2sided (book binding for XES).
H Press the Online button to take the printer off line.
A
C
B
B
C
B
C
D
H
Press the Menu button to access the Main Menu.
Press the Last Page button until the display reads EMULATION.
Press the Test button to display the available emulation headings. The display reads XES*.
Press the Test button to display the XES emulation configuration options. The display reads
COPIES 01.
Press the Last Page button until the display reads 2-SIDED.
Press the Test button to display the options for 2-sided printing. The display reads
DISABLED*.
Press the Last Page button until the display reads BOOK BINDING.
Press the Select button to select 2-sided printing in the book binding orientation.
Press the Online button to put the printer back online. 2-sided copies are received until a
command to change emulations is received, the emulation is changed using this menu, the
emulation is reset, or the printer is switched off.
To reset (disable) the 2-sided printing mode and set the print mode to 1-sided printing
for XES:
H
G
C
D
H
Press the Online button to take the printer off line.
Press the Reset button to access the Reset Menu. The display reads EMULATION RESET.
Press the Last button until the display reads RECALL USER DFT.
Press the Select button to select the option.
Press the Online button to put the printer back online.
3-46 XEROX 4213 LASER PRINTER USER GUIDE
Page 99

C. Changing the tray sequencing mode for XES and LJ2D
This example shows you how to change the tray sequencing
mode default settings from tray 1 to tray 1-2 for XES, and tray 1-2
to HCF-tray 1 for LJ2D.
To change the tray sequencing mode for XES:
USING THE 4213 MENUS
H
A
C
B
B
C
B
C
D
A
C
Press the Online button to take the printer off line.
Press the Menu button to access the Main Menu.
Press the Last Page button until the display reads EMULATION.
Press the Test button to display the available emulation headings. The display reads XES*.
Press the Test button to display the XES configuration headings. The display reads COPIES
01.
Press the Last Page button one time. The display reads TRAY SEQ MODE.
Press the Test button to display the tray sequencing options. The display reads TRAY 1.
Press the Last Page button until the display reads TRAY 1-2.
Press the Select button to select the option.
To change the tray sequencing mode for LJ2D:
Press the Menu button two times. The display reads EMULATION.
Press the Last Page button until the display reads LJ2D.
B
C
B
C
D
A
Press the Test button to display the LJ2D configuration headings. The display reads COPIES
01.
Press the Last Page button one time. The display reads TRAY SEQ MODE.
Press the Test button to display the tray sequencing options. The display reads TRAY 1.
Press the Last Page button until the display reads OPTIONAL.
Press the Select button to select the option.
Press the Menu button until OFF LINE appears in the message display.
Continue next page for procedures to save these tray sequencing settings.
XEROX 4213 LASER PRINTER USER GUIDE 3-47
Page 100

USING THE 4213 MENUS
Test Menu
Test Menu map
The Test Menu is used to manually print the following:
• Configuration Sheet
• Font Status Sheet.
The Test Menu is also used to start and stop data monitor mode.
Note: The Test Menu allows you to print a Configuration Sheet
or Font Status Sheet. Unlike the Main Menu or the Reset Menu,
a selection of a function from Test Menu can cause paper to start
moving. In the event of printing in the Test Menu, a fault such
as open door, tray empty, tray missing, and so forth, causes an
exit from the Test Menu into Off line mode. This allows the
error messages to be displayed. Also the mimic and alarm
becomes active. The LED indicator, however, tells you of the
machine status while in all menus.
B When the printer is off line, immediately pressing the Test button
displays the 4213 Test Menu. This menu has two options which
cause either a configuration sheet or a font status sheet to print.
The last two options start and stop the data monitor mode.
TEST MENU
>CONFIG SHEET >FONTS STATUS >START DM MODE >STOP DM MODE
3-48 XEROX 4213 LASER PRINTER USER GUIDE
 Loading...