

Page 1
Page 2

Microsoft, Windows, Windows NT, and Windows Server, Windows Vista, and Microsoft Network are
trademarks or registered trademarks of Microsoft Corporation in the U.S. and other countries.
NetWare is a registered trademark of Novell, Inc. in the United States and other countries.
Adobe, Acrobat, PostScript, and Adobe PostScript 3 are trademarks of Adobe Systems Incorporated.
EtherTalk, Macintosh, and Mac OS are registered trademarks of Apple Inc.
PCL, HP-GL, and HP-GL/2 are registered trademarks of Hewlett-Packard Corporation.
RSA, BSAFE are either registered trademarks or trademarks of RSA Security Inc. in the United States
and/or other countries.
RSA Security Inc. All right reserved.
All product/brand names are trademarks or registered trademarks of the respective holders.
Permission has been obtained from Microsoft Corporation for use of software screen shots.
For information on license, refer to About License.
The data saved in the hard disk of the machine may be lost if there is any problem in the hard disk.
Fuji Xerox is not responsible for any direct and indirect damages arising from or caused by such data
loss.
Fuji Xerox is not responsible for any breakdown of machines due to infection of computer virus or
computer hacking.
Important
1. This manual is copyrighted with all rights reserved. Under the copyright laws, this manual may not
be copied or modified in whole or part, without the written consent of the publisher.
2. Parts of this manual are subject to change without prior notice.
3. We welcome any comments on ambiguities, errors, omissions, or missing pages.
4. Never attempt any procedure on the machine that is not specifically described in this manual.
Unauthorized operation can cause faults or accidents. Fuji Xerox is not liable for any problems
resulting from unauthorized operation of the equipment.
An export of this product is strictly controlled in accordance with Laws concerning Foreign
Exchange and Foreign Trade of Japan and/or the export control regulations of the United States.
XEROX, THE DOCUMENT COMPANY, Ethernet, CentreWare, and the stylized X are registered
trademarks of Xerox Corporation. DocuWorks is a trademark of Xerox Corporation and Fuji Xerox Co.,
Ltd. All Xerox and Fuji Xerox product names are either registered trademarks or trademarks of Xerox
Corporation and Fuji Xerox Co., Ltd.
Page 3

Table of Contents
Table of Contents ........................................................................................................ 1
1 Before Using the Machine ........................................................................................ 9
Preface...................................................................................................................... 10
Types of Manuals ...................................................................................................... 11
Using This Guide....................................................................................................... 12
Organization of This Guide................................................................................... 12
Conventions.......................................................................................................... 13
Interface Cables ........................................................................................................ 15
Using the USB Interface ....................................................................................... 15
Using the Ethernet Interface ................................................................................. 15
Power Saver Mode.................................................................................................... 16
Changing the Power Saver Mode Change Interval............................................... 16
Customizing the Control Panel.................................................................................. 18
Table of Contents
Entering Text............................. ...... ................................. ..... ..... ............................... 22
2 Paper and Other Media ........................................................................................... 23
Paper Types .............................................................................................................. 24
Supported Paper Type.......................................................................................... 24
Loading Paper ........................................................................................................... 28
Loading Paper in the Trays 1 to 2......................................................................... 28
Loading Paper in the Trays 3 to 4......................................................................... 29
Loading Tab Paper in the Trays 3 to 4.................................................................. 30
Loading Paper in the Tray 5 (Bypass) .................................................................. 31
Loading Tab Paper in the Tray 5 (Bypass) ........................................................... 32
Loading Paper in the Tray 6 (HCF (A3 1 Tray)).................................................... 32
Loading Tab Paper in the Tray 6 (HCF (A3 1 Tray))............................................. 33
About Weight Switch Buttons for HCF (A3 1 Tray)............................................... 34
Improving the Paper Feeding Performance in Tray 6 (HCF (A3 1 Tray)) ............. 35
Loading Paper in the Trays 6 to 7 (HCF (A4 2 Tray))........................................... 36
Loading Paper in the Tray 8 (Interposer).............................................................. 36
Loading Tab Paper in the Tray 8 (Interposer)....................................................... 37
Changing the Paper Size........................................................................................... 38
Changing the Paper Size for the Trays 3 to 4....................................................... 38
Changing the Paper Size for the Tray 6 (HCF (A3 1 Tray)).................................. 39
Changing the Paper Size for the Tray 6 to 7 (HCF (A4 2 Tray))........................... 39
Changing the Paper Settings..................................................................................... 41
3 Maintenance............................................................................................................. 43
Replacing Consumables............................................................................................ 44
Replacing the Toner Cartridge......... ................................. ..... ...... ......................... 45
Replacing the Waste Bottle... ...... ................................. ..... ..... ............................... 47
1
Page 4

Replacing the Staple Cartridge..............................................................................49
Replacing the Booklet Staple Cartridge.................................................................50
Replacing the Staple Waste Container..................................................................51
Emptying the Punch Waste Container...................................................................52
Cleaning the Machine.................................................................................................54
Cleaning the Exterior ............................................. ...... ..... ................................. ....5 4
Cleaning the Document Cover and Document Glass............................................54
Cleaning the Film and Constant Velocity Transport Glass ....................................55
Cleaning the Document Feeder Rollers............................................ ...... ..... ..........56
Printing a Report/List..................................................................................................57
Deleting the Print Job with an Invalid User ID............................................................58
4 Machine Status.........................................................................................................59
Overview of Machine Status.......................................................................................60
Machine Information...................................................................................................61
General Information...............................................................................................61
Paper Tray Status..................................................................................................63
Print Reports..........................................................................................................63
Automatically Printed Reports/Lists. ................................. ..... ...... ..........................6 9
Overwrite Hard Disk...............................................................................................69
Print Mode .............................................................................................................70
Faults..........................................................................................................................73
Supplies......................................................................................................................74
Billing Information.......................................................................................................75
Billing Information ..................................................................................................75
User Account Billing Information............................................................................76
5 System Settings ............................ ..... ...... ................................ ...... ..... ...... ...............77
System Settings Procedure........................................................................................78
Step 1 Entering System Administration Mode .......................................................78
Step 2 Entering the System Administrator User ID and Passcode........................78
Step 3 Selecting [Tools].........................................................................................79
Step 4 Selecting an Item on the [Tools] Screen ....................................................79
Step 5 Setting a Feature........................................................................................80
Step 6 Exiting the System Administration Mode....................................................80
System Settings Menu List.........................................................................................81
Common Service Settings..........................................................................................90
Machine Clock/Timers ...........................................................................................90
Audio Tones...........................................................................................................92
Screen/Button Settings......... ...... ..... ................................. ..... ...... ..........................94
Paper Tray Settings...............................................................................................95
Image Quality.........................................................................................................97
Reports..................................................................................................................98
Maintenance ..........................................................................................................98
2
Page 5

Table of Contents
Watermark .......................................................................................................... 101
Secure Watermark.............................................................................................. 102
Image Log Control ..... ................................. ...... ..... ................................. ..... ...... . 104
Print Universal Unique ID.................................................................................... 105
Other Settings..................................................................................................... 106
Copy Service Settings ...................................................... ..... ..... ............................. 113
Copy Tab - Features Allocation .......................................................................... 113
Preset Buttons .................................................................................................... 114
Copy Defaults ..................................................................................................... 114
Copy Control....................................................................................................... 117
Original Size Defaults ......................................................................................... 119
Reduce/Enlarge Presets....... ...... ..... ................................. ..... ...... ....................... 120
Annotation - Create Comments .......................................................................... 120
Connectivity & Network Setup................................................................................. 121
Port Settings ....................................................................................................... 121
Protocol Settings................................................................................................. 125
Machine’s E-mail Address/Host Name ............................................................... 127
Proxy Server Settings ......................................................................................... 127
Outgoing / Incoming E-mail Settings................................................................... 128
Remote Authentication Server/Directory Service................................................ 130
Security Settings................................................................................................. 134
Other Settings..................................................................................................... 137
Print Service Settings .............................................................................................. 138
Allocate Memory ................................................................................................. 138
Delete Form ........................................................................................................ 140
Other Settings..................................................................................................... 140
Scan Service Settings ............................................................................................. 143
First Tab.............................................................................................................. 143
Scan Defaults...................................................................................................... 143
Scan to PC Defaults............................................................................................ 146
Original Size Defaults ......................................................................................... 146
Output Size Defaults........................................................................................... 146
Reduce/Enlarge Presets....... ...... ..... ................................. ..... ...... ....................... 146
Other Settings..................................................................................................... 146
E-mail Service Settings ........................................................................................... 149
E-mail Control ..................................................................................................... 149
Mailbox Service Settings ......................................................................................... 152
Job Flow Service Settings....................................................................................... 153
Stored Document Settings....................................................................................... 154
Web Applications Service Setup ............................................................................. 155
Server Setup....................................................................................................... 155
Web Browser Setup................................................................................................. 157
Setup....................................................................................................................... 159
Create Mailbox.................................................................................................... 159
3
Page 6

Stored Programming.. ...... ................................. ..... ...... ..... ................................. .. 16 1
Create Job Flow Sheet ........................................................................................161
Create Job Flow Sheet Keyword .........................................................................166
Add Address Book Entry......................................................................................166
Accounting................................................................................................................170
Create/View User Accounts.................................................................................170
Account Details...................................... ..... ...... ..... ................................. ..... ...... ..173
Reset User Accounts............ ...... ..... ...... ................................ ...... ..... ...... .............173
System Administrator's Meter (Copy Jobs)..........................................................174
Accounting Type.............. ..... ...... ................................. ..... ..... .............................. 17 4
Accounting Login Screen Settings............................... ..... ................................. .. 17 5
Authentication/Security Settings...............................................................................176
System Administrator Settings.............................................................................176
Authentication......................................................................................................177
Allow User to Disable Active Settings..................................................................186
Job Status Default ................................. ..... ................................. ..... ...... ..... ........186
Overwrite Hard Disk.............................................................................................186
6 CentreWare Internet Services Settings ................................................................189
Installation of CentreWare Internet Service s.................... ..... ..... ...... ........................19 0
Preparations ........................................................................................................190
Configuration on the Machine................................ ...... ..... ..... .............................. 19 0
Starting CentreWare Internet Services.....................................................................192
Setting Items Using CentreWare Internet Services..................................................193
7 Printer Environment Settings................................................................................197
Print Features Overview...........................................................................................198
Installation When Using USB Port............................................................................201
Step1 Preparations............... ...... ................................. ..... ..... .............................. 20 1
Step2 Configuration on the Machine ...................................................................201
Step3 Configuration on the Computer .................................................................202
CentreWare Internet Services Setting Items .......................................................202
Installation When Using TCP/IP (LPD/Port 9100)....................................................203
Step1 Preparations............... ...... ................................. ..... ..... .............................. 20 3
Step2 Configuration on the Machine ...................................................................203
Step3 Configuration on the Computer .................................................................204
CentreWare Internet Services Setting Items .......................................................204
Installation When Using NetWare ............................................................................206
Step1 Preparations............... ...... ................................. ..... ..... .............................. 20 6
Step2 Configuration on the Machine ...................................................................206
Step3 Configuration on the Computer .................................................................207
CentreWare Internet Services Setting Items .......................................................207
Installation When Using Microsoft Network (SMB)...................................................209
Step1 Preparations............... ...... ................................. ..... ..... .............................. 20 9
Step2 Configuration on the Machine ...................................................................209
4
Page 7

Table of Contents
Step3 Configuration on the Computer ................... ...... ................................ ...... . 210
CentreWare Internet Services Setting Items....................................................... 210
Installation When Using Internet Printing Protocol (IPP)......................................... 211
Step1 Preparations ............................................................................................. 211
Step2 Configuration on the Machine............................ ..... ................................. . 211
Step3 Configuration on the Computer ................... ...... ................................ ...... . 212
CentreWare Internet Services Setting Items....................................................... 212
Installation When Using EtherTalk .......................................................................... 213
Step1 Preparations ............................................................................................. 213
Step2 Configuration on the Machine............................ ..... ................................. . 213
Step3 Configuration on the Computer ................... ...... ................................ ...... . 214
CentreWare Internet Services Setting Items....................................................... 214
8 E-mail Environment Settings.. ...... ..... ...... ..... ................................. ..... ...... ..... ....... 215
E-mail Overview ...................................................................................................... 216
Preparations ............................................................................................................ 217
Installation Procedure.............................................................................................. 219
Step1 Enabling Port and Setting TCP/IP............................................................ 219
Step2 Configuring E-mail Environment............................................................... 220
CentreWare Internet Services Setting Items....................................................... 221
9 Scanner Environment Settings ............................................................................ 223
Scan Service Overview ........................................................................................... 224
Configuration of Scan to Mailbox............................................................................. 225
Step1 Enabling Port and Setting TCP/IP............................................................ 225
Step2 Registering a Mailbox............................................................................... 226
Step3 Configuring a Computer ........................................................................... 226
Configuration of Scan to PC.................................................................................... 227
Step1 Preparations ............................................................................................. 227
Step2 Enabling Port and Setting TCP/IP............................................................ 227
Step3 Configuration on a Computer ...................... ...... ..... ..... ............................. 228
Configuration of Network Scanning (Job Template Scanning)................................ 229
Step1 Enabling Port and Setting TCP/IP............................................................ 229
Step2 Configuring the SNMP Port ...................................................................... 230
Configuration of Job Flow Sheets............................................................................ 231
Step1 Enabling Port and Setting TCP/IP............................................................ 231
Step2 Configuring the SNMP Port ...................................................................... 232
Step3 Configuration on the Computer ................... ...... ................................ ...... . 232
10 Encryption and Digital Signature Settings.......................................................... 233
Encryption and Digital Signature Overvie w ...................................... ..... .................. 234
Encryption Features for Communication............................................................. 234
Encryption and Digital-Signature Features for Scan Files .................................. 235
Configuration of HTTP Communication Encryption................................................. 236
Installation Overview.. ...... ..... ................................. ...... ..... ................................. . 236
5
Page 8

Step1 Configuration on the Machine ...................................................................236
Step2 Configuration on a Computer ....................................................................237
Configuration of Encryption using IPSec..................................................................238
Installation Overview............................................................................................238
Step1 Import and Configuration of a Certificate...................................................238
Step2 Configuration on the Machine (Configuration of IPSec)............................239
Step3 Configuration on a Computer ....................................................................239
Configuration of E-mail Encryption/Digital Signature ...............................................240
Installation Overview............................................................................................240
Step1 Configuration on the Machine ...................................................................240
Step2 Configuration on a Computer ....................................................................241
Configuration of Scan File Signature (PDF/DocuWorks/XPS Signature).................243
Installation Overview............................................................................................243
Step1 Configuration on the Machine ...................................................................243
Step2 Installation Overview ............. ................................. ..... .............................. 24 4
11 Authentication and Account Administration.......................................................247
Overview of Authentication and Account Administration..........................................248
Overview of Authentication..................................................................................248
Overview of Account Administration....................................................................249
Authentication...........................................................................................................250
Users Controlled by Authentication .....................................................................250
User Role and Authorization Groups...................................................................250
Types of Authentication .......................................................................................251
Types of Accout Administration...........................................................................252
Relationships Between the Authentication and Accounting Modes.....................253
Services Controlled by Authentication......................................................................254
Overview..............................................................................................................254
Services Controlled by Authentication and Account Administration ....................254
Authentication for Job Flow Sheets and Mailboxes..................................................257
Overview..............................................................................................................257
When the Authentication Feature is not Enabled ................................................259
When the Authentication Feature is Enabled ......................................................261
Jobs Manageable by Account Administration ..........................................................264
Configuration for Authentication...............................................................................266
Step1 Enabling Authentictaion.................... ...... ..... ................................. ..... ...... ..266
Step2 Changing the Default Authorization Group Settings..................................268
Step3 Creating an Authorization Group....................... ..... ................................. ..26 8
Configuration for Account Administration.................................................................269
Step 1 Selecting an Accounting Type..................................................................269
Step 2 Registering User Information....................................................................269
12 Problem Solving.....................................................................................................271
Troubleshooting........................................................................................................272
6
Page 9

Table of Contents
Machine Trouble...................................................................................................... 273
Image Quality Trouble ............................................................................................. 278
Trouble during Copying ........................................................................................... 283
Unable to Copy ................................................................................................... 283
The Copy Result is Not What was Expected ...................................................... 284
Trouble during Printing ............................................................................................ 287
Unable to Print .................................................................................................... 287
The Print Result is Not What was Expected ....................................................... 288
Trouble during Scanning ......................................................................................... 289
Unable to Scan with the Machine ....................................................................... 289
Unable to Import Scanned Documents to the Computer.................................... 290
Unable to Send a Scanned Document over the Network (FTP/SMB) ................ 290
Unable to Send E-mail........................................................................................ 292
The Image is not What was Expected ................................................................ 292
Network-related Problems....................................................................................... 294
When using SMB ................................................................................................ 294
When using NetWare.......................................................................................... 295
When using TCP/IP ............................................................................................ 299
When using EtherTalk......................................................................................... 301
CentreWare Internet Services Problems ............................................................ 301
E-Mail Features Problems .................................................................................. 302
Internet/Intranet Connection Problems ............................................................... 303
IPv4 and IPv6 Connection Problems .................................................................. 305
Error Code............................................................................................................... 308
Other Errors........................................................................................................ 358
Paper Jams ............................................................................................................. 359
Paper Jams in the Trays 1 to 4........................................................................... 360
Paper Jams in the Transport Unit 4.................................................................... 360
Paper Jams in Duplex Module 3......................................................................... 361
Paper Jams in the Tray 5 (Bypass)..................................................................... 362
Paper Jams in Tray 5 (Bypass) with HCF (A3 1 Tray)........................................ 363
Paper Jams in the Tray 6 (HCF (A3 1 Tray))...................................................... 363
Paper Jams in the Trays 6 to 7 (HCF A4 2 Tray)) .............................................. 366
Paper Jams in the Tray 8 (Interposer) ................................................................ 369
Paper Jams Inside the Lower Left Cover............................................................ 370
Paper Jams Inside the Main Unit........................................................................ 371
Paper jams Inside the Finisher Left Cover.......................................................... 372
Paper jams Inside the Finisher Right Cover ....................................................... 374
Paper jams Inside the D3 Folder Unit................................................................. 377
Paper jams at the Output Area of the Finisher.................................................... 380
Paper jams in the Interface Module.................................................................... 381
Paper jams in the High Capacity Stacker ........................................................... 383
Document Jams....................................................................................................... 390
Stapler Faults .......................................................................................................... 393
7
Page 10

Staple Jams in the Staple Cartridge ....................................................................394
Staple Jams in the Booklet Staple Cartridge .......................................................395
Re-inserting the Staple Cartridge into the Cartridge Unit .........................................397
Correcting the Curl of Outputs (when Only a Finisher is Installed) ..........................399
Correcting the Curl of Outputs (when a High Capacity Stacker is Installed,
or a High Capacity Stacker and Finisher are Installed)............................................401
13 Appendix.................................................................................................................403
Specifications ...........................................................................................................404
Printable Area...........................................................................................................414
Standard Printable Area ......................................................................................414
Extended Printable Area......................................................................................414
Internal Fonts ...........................................................................................................415
Optional Components...............................................................................................417
ESC/P-K Emulation..................................................................................................419
Emulation.............................................................................................................419
Fonts....................................................................................................................420
Output Feature.....................................................................................................420
ESC/P-K Emulation Print Features......................................................................420
ESC/P-K Emulation Settings ...............................................................................421
Magnification Table..............................................................................................428
Paper Size and Number of Printable Characters.................................................432
PDF Direct Print .......................................................................................................434
PDF Direct Print Settings...... ...... ..... ...... ..... ................................. ..... ...... ..... ........434
PCL Emulation .........................................................................................................436
HP-GL2 Emulation ...................................................................................................439
Hard Clip Area .....................................................................................................443
Printable Area.................. ................................. ..... ...... ..... ................................. ..44 4
Auto Layout..........................................................................................................446
Notes and Restrictions .............................................................................................453
Notes and Restrictions on the Use of the Machine..............................................453
Notes and Restrictions in the Interrupt Mode ......................................................454
Notes and Restrictions for for Using E-mail Features..........................................455
Notes and Restrictions when Connecting with Internet Service Provider............455
Notes and Restrictions for Using SMB ................................................................457
Notes and Restrictions for Using TCP/IP.............................................................459
Notes and Restrictions for Using EtherTalk.........................................................460
Notes and Restrictions for Using Bonjour............................................................461
Notes and Restrictions for Using Scanner Features............................................461
Notes and Restrictions when Connecting to Internet or Intranet .........................462
Notes and Restrictions for IPv6 Connection........................................................463
Index...............................................................................................................................465
8
Page 11

1 Before Using the Machine
This chapter describes organization of this guide and conventions.
z
Preface .......................................................................................................10
z
Types of Manuals .......................................................................................11
z
Using This Guide ........................................................................................12
z
Interface Cables..........................................................................................15
z
Power Saver Mode .....................................................................................16
z
Customizing the Control Panel...................................................................18
z
Entering Text ... ...... ................................. ..... ...... ..... ................................. ...22
Page 12

1 Before Using the Machine
Preface
Before Using the Machine
1
Thank you for selecting 4127/4112 (hereafter referred to as “the machine”).
This guide explains how to operate the machine and the precautions that must be
followed du ring oper ati on. To get the m ost out of the mach ine and to use it effe cti vel y,
be sure to read this guide before use.
This guide aimed toward machine administrators, provides maintenance information
like how to r eplace consumables, instructions on configurin g your networ k
environment, and troubleshooting procedures.
This guide assumes that an operator has a basic knowledge of the operating
environment of the personal computer in use, networking environments, and how to
operate a personal computer. For information on the environment of the personal
computer in use, basic knowledge of networking environments, and how to operate a
personal computer, refer to the manuals provided with the personal computer,
operating system, and network system.
After reading this guide, be sure to keep it handy for quick reference. It will be useful in
case you forget how to perform operations or if a problem occurs with the machine.
Refer to the User Guide for copy/print/scan operating procedures. For information
about optional accessories for the printer functionality, also refer to the guide provided
with each optional accessory.
10
In this manual, safety instructions are preceded by the symbol .
Always read and follow the instructions before performing the required procedures.
The equipment is certified by NEMKO in compliance with [IEC60950-1 (AS/NZS
3260)]. The equipment is manufactured under an ISO 9001 Quality System. The
equipment is also certified in compliance with applicable standards by various
national bodies.
The equipment was tested and is certified by the New Zealand Ministry of Commerce
in conformance with CISPR publ. 22 (AS/NZISS CISPR22:2002) which relates to
radio frequency interference regulations, and also complies with the Australian
Communication Authority requirements.
NOTE: Machines intended for use in South Korea and Taiwan have been certified
separately in compliance with their requirements.
Any unauthorized alteration, which includes the addition of new functions or the
connection of external devices, may impact this certification.
Contact your local Xerox representative for a list of approved accessories.
Page 13

Types of Manuals
Types of Manuals
We provide the following guides for optimum usage of the machine.
Included Manuals
Several manuals are included with this product. They are referred to as accompanying
manuals.
These accompanying manuals include descriptions on configurations and operation of
the product.
The following manuals are included with the machine.
User Guide
Describes all the necessary steps for copy/print/scan.
Administrator Guide (this guide)
Aimed toward machine administrators, as a guide to setting up the network
environment and to solving problems that may occur with the machine.
Quick Reference Guide
Introduces the basic operations of the machine, as well as daily management and
maintenance.
Manual (HTML)
A guide for installing print drivers, configuring the printer environment, etc. This manual
is included in the CD-ROM of the Driver CD Kit.
Before Using the Machine
1
Guides for Optional Accessories
Optional accessories are also available for the machine. User Guides are provided with
the optional accessories exclusively for 4127/4112. These User Guides are referred to
as "guides for optional accessories". Guides for optional ac cessories are provided in
two forms, as printed or as On-line Help.
Guides for optional accessories describe all the necessary steps for operating optional
accessories and installing software.
11
Page 14

1 Before Using the Machine
Using This Guide
Before Using the Machine
This guide aimed toward machine administrators, provides maintenance information
like how to r eplace consumables, instructions on configurin g your networ k
environment, and troubleshooting procedures.
Organization of This Guide
This guide consists of the following chapters.
1 Before Using the Machine
Describes organization of this guide and conventions.
1
2 Paper and Other Media
Describes t he ty pe s of pa per th at can be us e d on th e ma c hi ne an d ho w t o lo a d pape r
in trays.
3 Maintenance
Describes how to replace consumables and to clean the machine.
4 Machine Status
Describes how to check the faults that occurred on the machine and to print various
reports/lists.
5 System Settings
Describes how to configure the system settings.
6 CentreWare Internet Services Settings
Describes how to use CentreWare Internet Services.
7 Printe r Environment Settings
Describes how to set up the printer’s operating environment.
8 E-mail Environment Settings
Describes the configuration to use the E-mail features on the machine.
9 Sc anne r Environment Settings
Describes the configuration to use the scan services on the machine.
10 Encryption and Digital Signature Settings
Describes the configuration to utilize the encryption and digital signature on the
machine.
11 Authentication and Account Administration
Describes t he authoriz ation feature for restricting use of the machine, as well as the
administration feature for monitoring usage statuses for each feature using the
authorization feature.
12
12 Problem Solving
Describes troubles that may occur with the machine and their solutions.
Page 15

13 Appendix
Describes the machine specifications, optional accessories, and cautions/restrictions.
Conventions
z
z
z
Using This Guide
Before Using the Machine
The screen images and illustrations that are used in this guide are based on the
machine configuration with the various options. Some of the items in the screen
images may not be displayed or there may be features that cannot be used
depending on the machine configuration.
In this document, "Computer" refers to a personal computer or workstation.
The following terms are used in this guide:
Important : Indicates important information that you should read.
Note : Indicates additional information on operations or features.
z
The following symbols are used in this guide:
" " : • A cross-reference included in this guide.
: • Refers to names of CD-ROM, features, and touch screen
messages and input text.
[ ] : • Refers to folders, files, applications, button or menu names
displayed in the touch screen.
• The names of menus, commands, windows, or dialog boxes
displayed on the computer screen and their buttons and
menu names.
< > button : Indicates a hardware button on the computer.
< > key : Indicates a key on the keyboard of the computer.
> : • Indicates a path to a certain item within a procedure on the
control panel.
Example: When you see the procedure "select [Tools] >
[Setup] > [Create Mailbox]", this means that you need to
select [Tools], select [Setup], and then select [Create
Mailbox].
• Indicates a path to a certain item within a procedure on a
computer.
Example: When you see the procedure "to search for files
and folders, click [Start] > [Search] > [For Files or Folders]",
this means that you need to click [Start], click [Search], and
then click [For Files or Folders] in order to search for files and
folders.
1
• The reference is indicated in the following manner:
"Refer to "5 System Settings" > "Common Service Settings"
> "Audio Tone" in the Administrator Guide."
The sentence above means that you need to refer to the
section "Audio Tone", which can be found under "Common
Service Settings" in chapter 5 System Settings of the
Administrator Guide.
z
Orientation of documents or paper is described in this guide as follows:
, ,Long Edge Feed (LEF):Loading with one of the long edges of the document or
paper.
13
Page 16

1 Before Using the Machine
, ,Short Edge Feed (SEF):Loading with one of the short edges of the document
or paper.
Before Using the Machine
1
LEF Orientation
Paper feed direction
SEF Orientation
Paper feed direction
14
Page 17
Interface Cables
Interface Cables
When connecting the machine directly to a computer, use either the parallel interface
or USB inter face. When co nnecting to a network, us e the Ethernet interface.
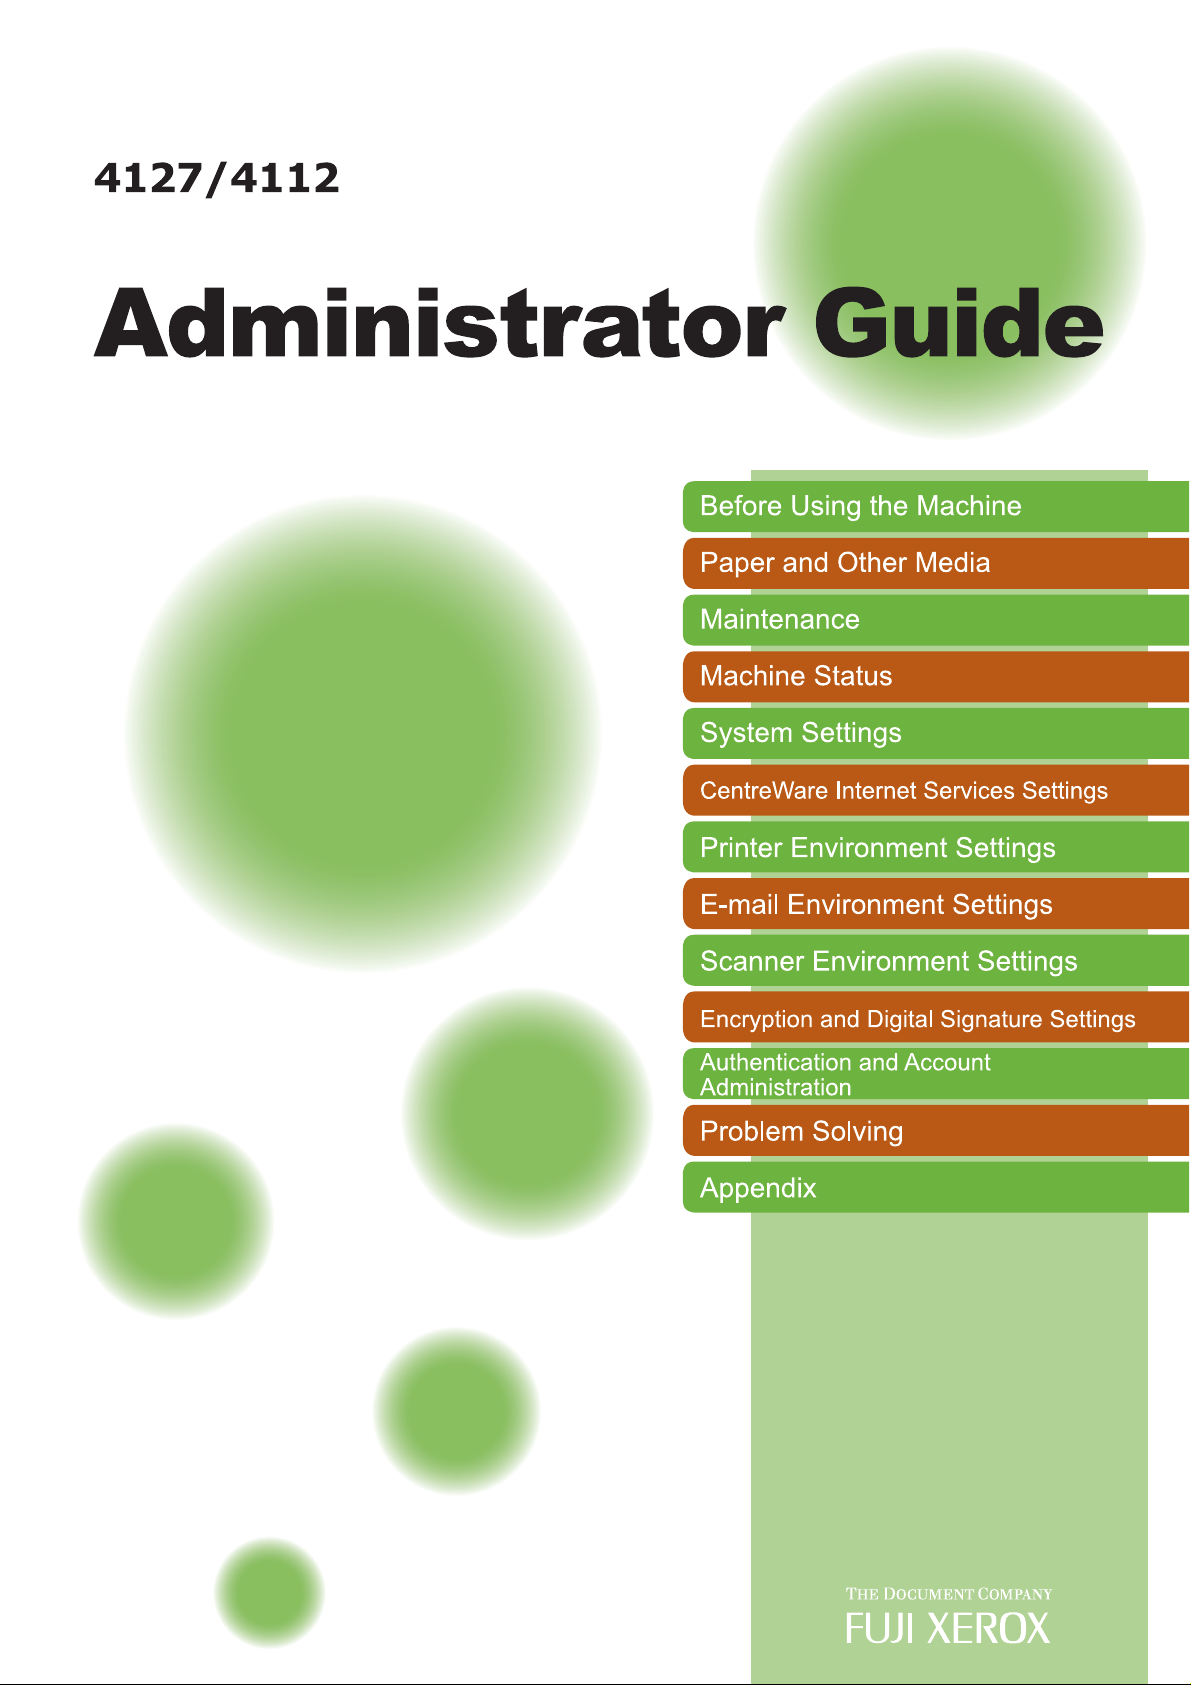
Using the USB Interface
The USB interface supports USB 2.0.
This section describes the installation pro cedure for the USB inter face.
1 Ensure that the machine is off.
2 Connect the USB interface cable to the USB
2.0 interface connector on the side of the
machine.
3 Connect the other end of the USB interface
cable to a com puter.
4 Switch on the machine.
5 Restart the computer.
For details of setting items, refer to "Installation When Using USB Port" (P.201)
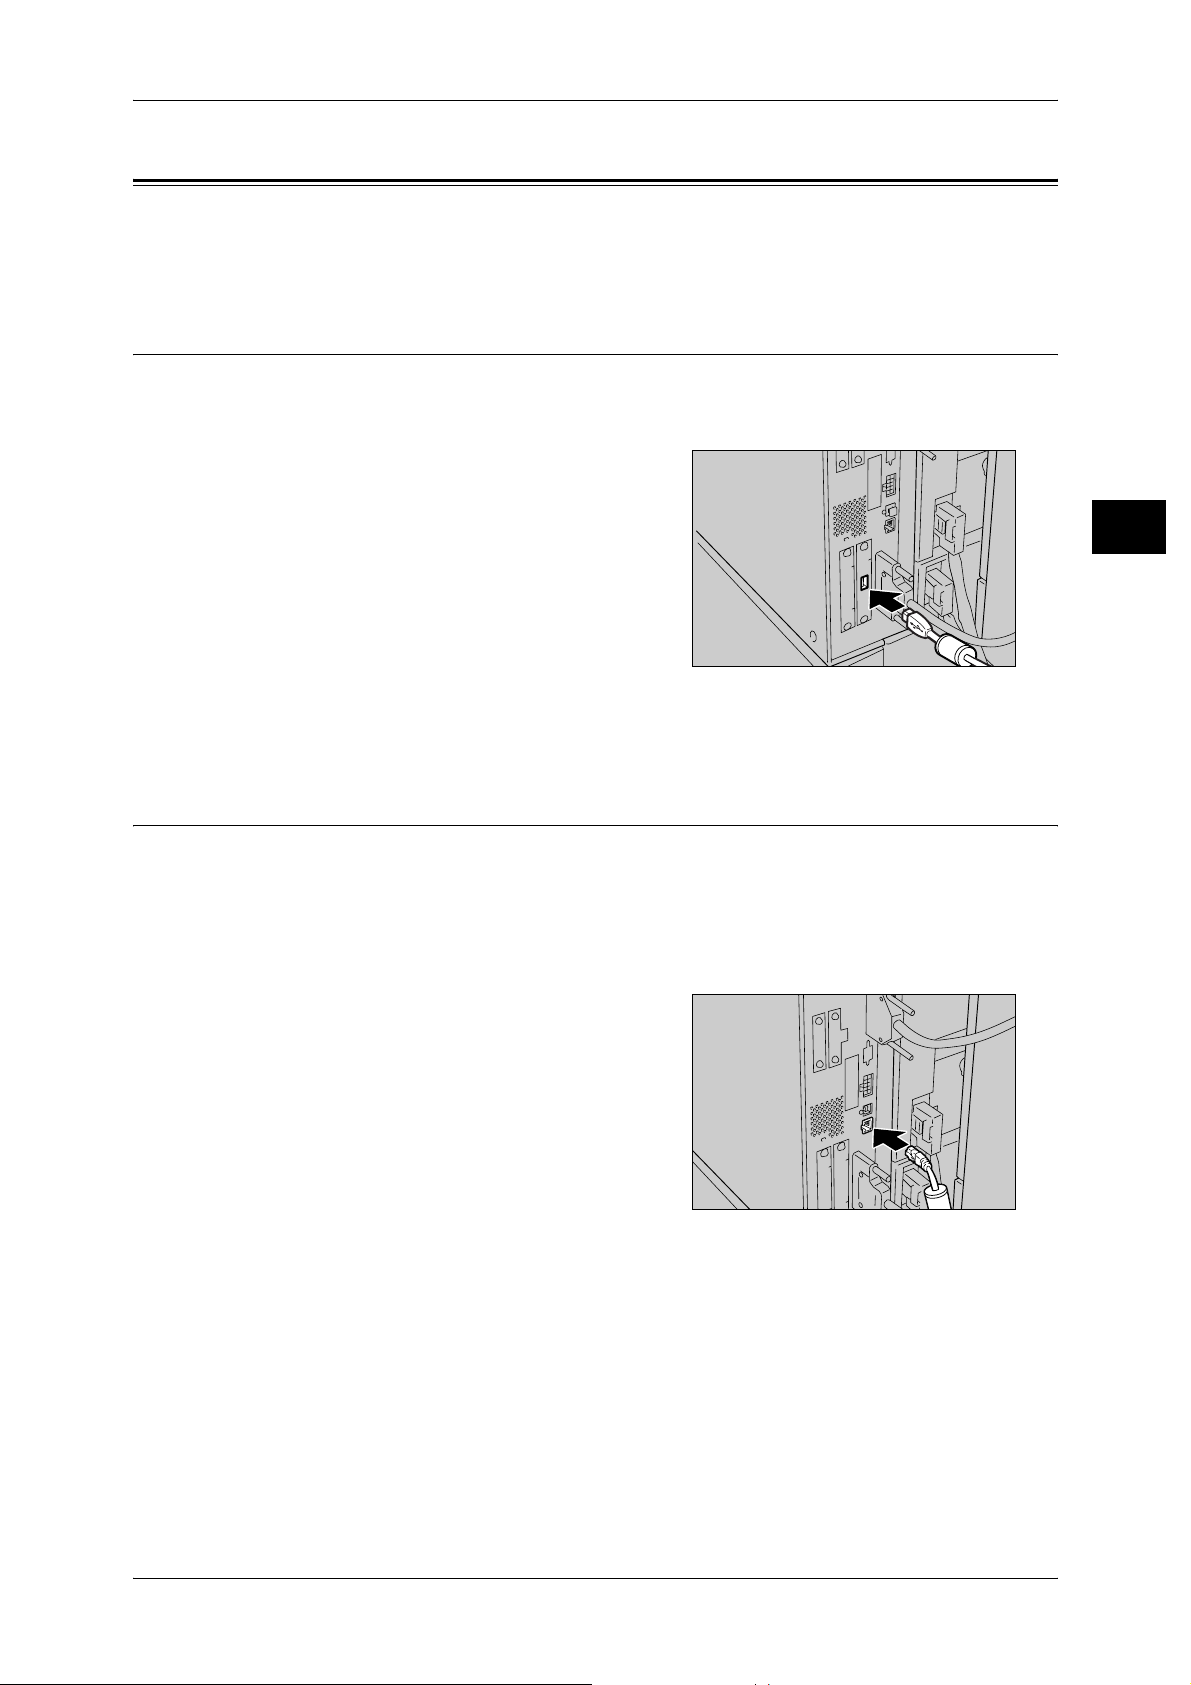
Using the Ethernet Interface
Before Using the Machine
1
The Ethernet interface supports the following 2 types.
z
100BASE-TX
z
10BASE-T
This section describes the installation procedure for the Ethernet interface.
1 Ensure that the machine is off.
2 Connect the network cable to the Ethernet
interface connector.
Note • Prepare a network cable suita ble for you r
network connection. When changing the
network cable, consult our customer
engineers.
3 Switch on the machine.
15
Page 18
1 Before Using the Machine
Power Saver Mode
Before Using the Machine
1
The machine is installed with a Power Saver feature that will automatically cut off the
electricity to the machine if no copy or print data is received for a certain duration.
The Power Saver feature has two modes: [Low Power mode] and [Sleep mode].
The machine enters the Low Power mode after the preset time has elapsed if the
machine is left unused for a fixed period of time.
The machine then enters the Sleep mode if a further preset time elapses.
Low Power Mode
In this mode, the power to the control panel and fuser unit is lowered to save power.
The touch screen goes out, and the <Energy Saver> button on the control panel lights.
To use the machine, press the <Energy Saver> button. The <Energy Saver> button
goes out to indicate that the Power Saver feature is cancelled.
Sleep Mode
In this mode, the power is lowered more than in the Low Power mode.
The touch screen goes out, and the <Energy Saver> button on the control panel lights.
To use the machine, press the <Energy Saver> button. The <Energy Saver> button
goes out to indicate that the Power Saver feature is cancelled.
Changing the Power Saver Mode Change Interval
The procedure for setting the Power Saver feature is as follows.
To activate the Power Saver feature, set both the times until the activation of Low
Power Mode and Sleep Mode.
Note • The time to activation of Low Power Mode and Sleep Mode can each be specified in 1
minute increments, from 1 to 240 minutes.
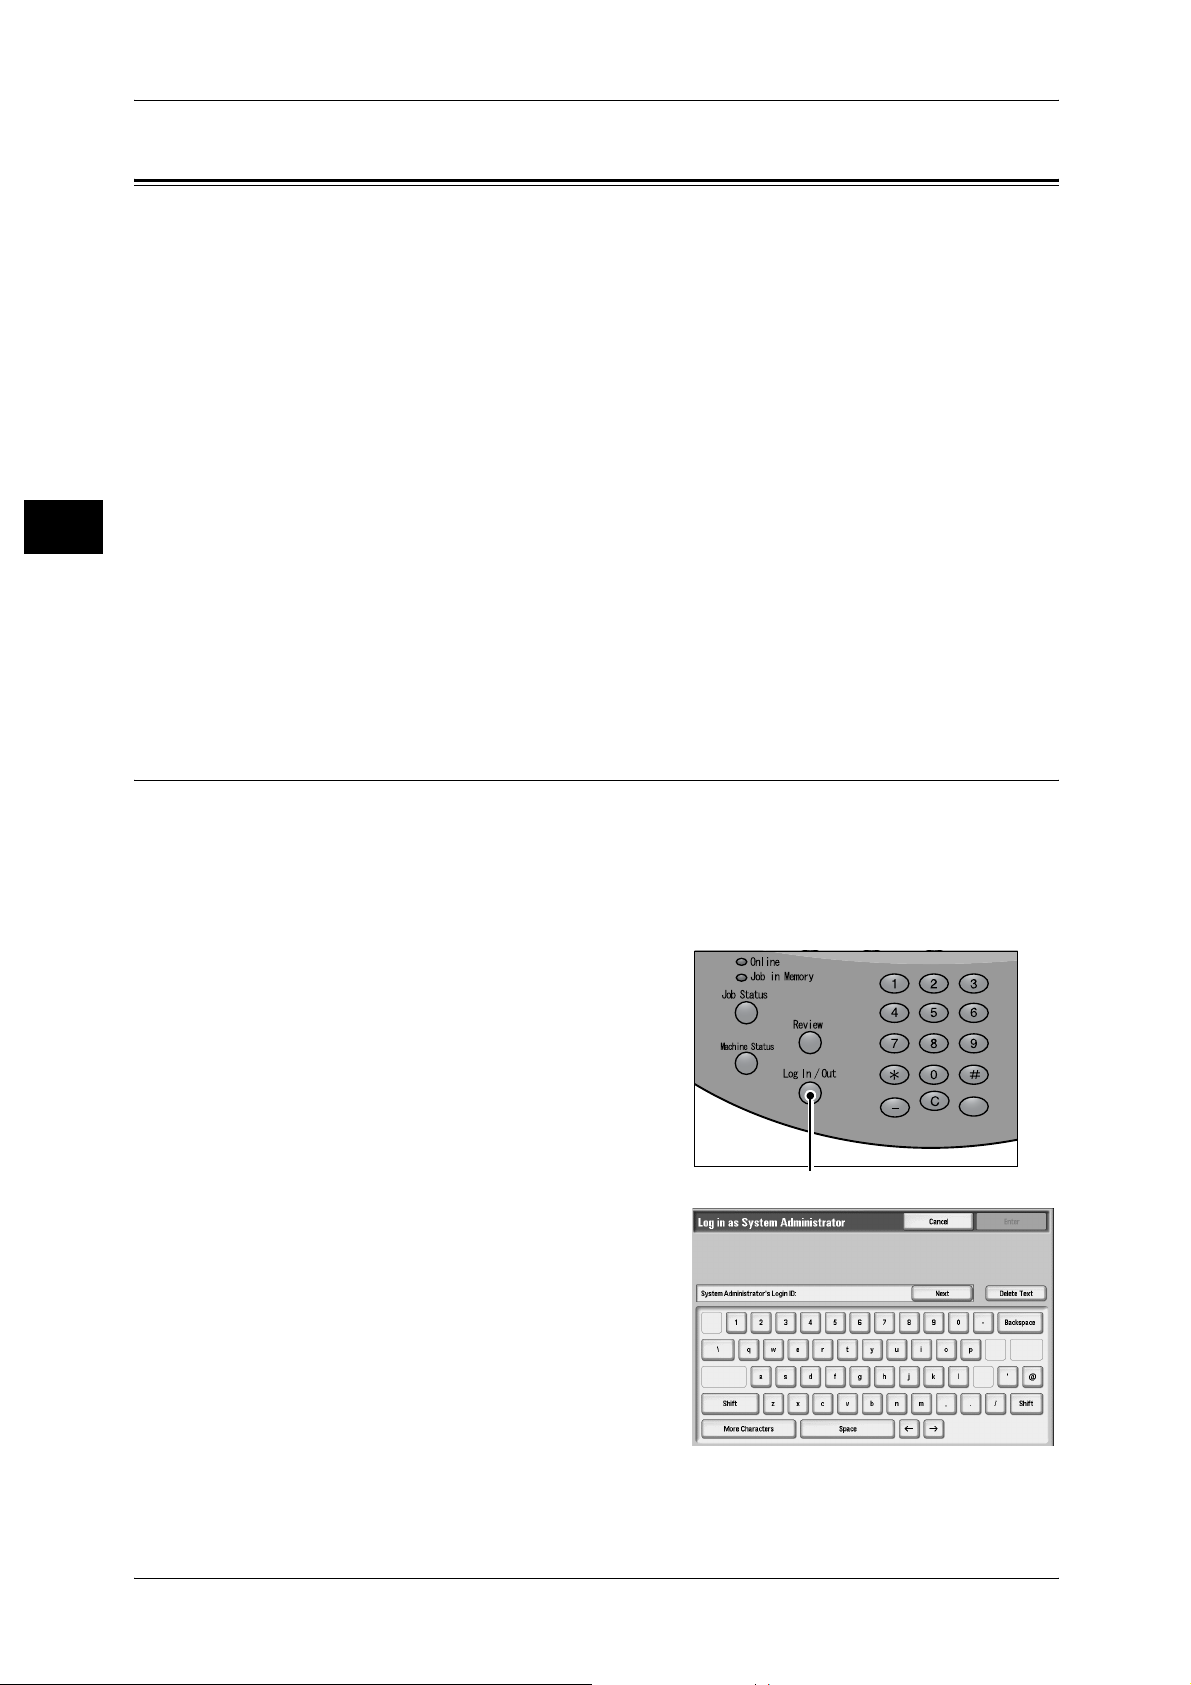
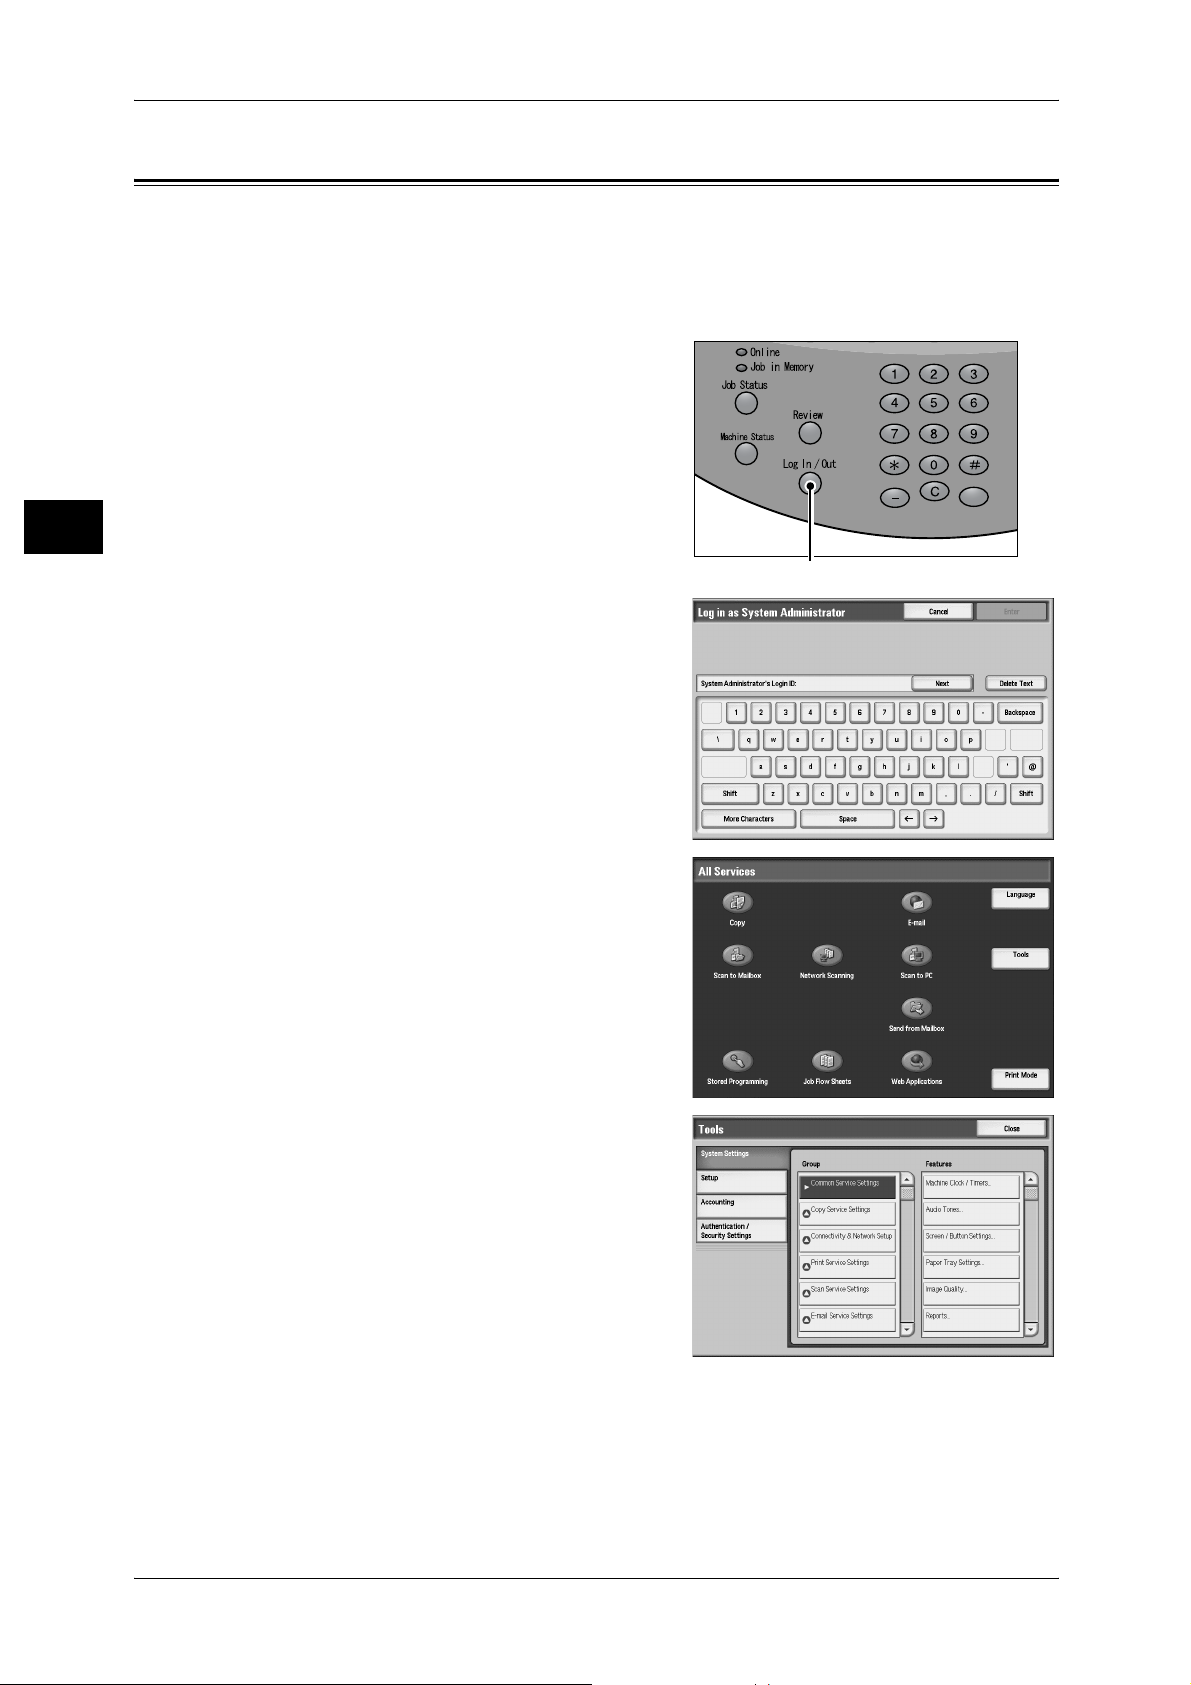
Press the <Log In/Out> button.
1
2 Enter the Administrator ID with the numeric
keypad or the keyboard displayed, and
select [Enter].
Note • The default Administrator ID is "11111".
When using the Authentication feature, a
passcode is required. The default
passcode is "x-admin".
<Log In/Out>button
16
Page 19
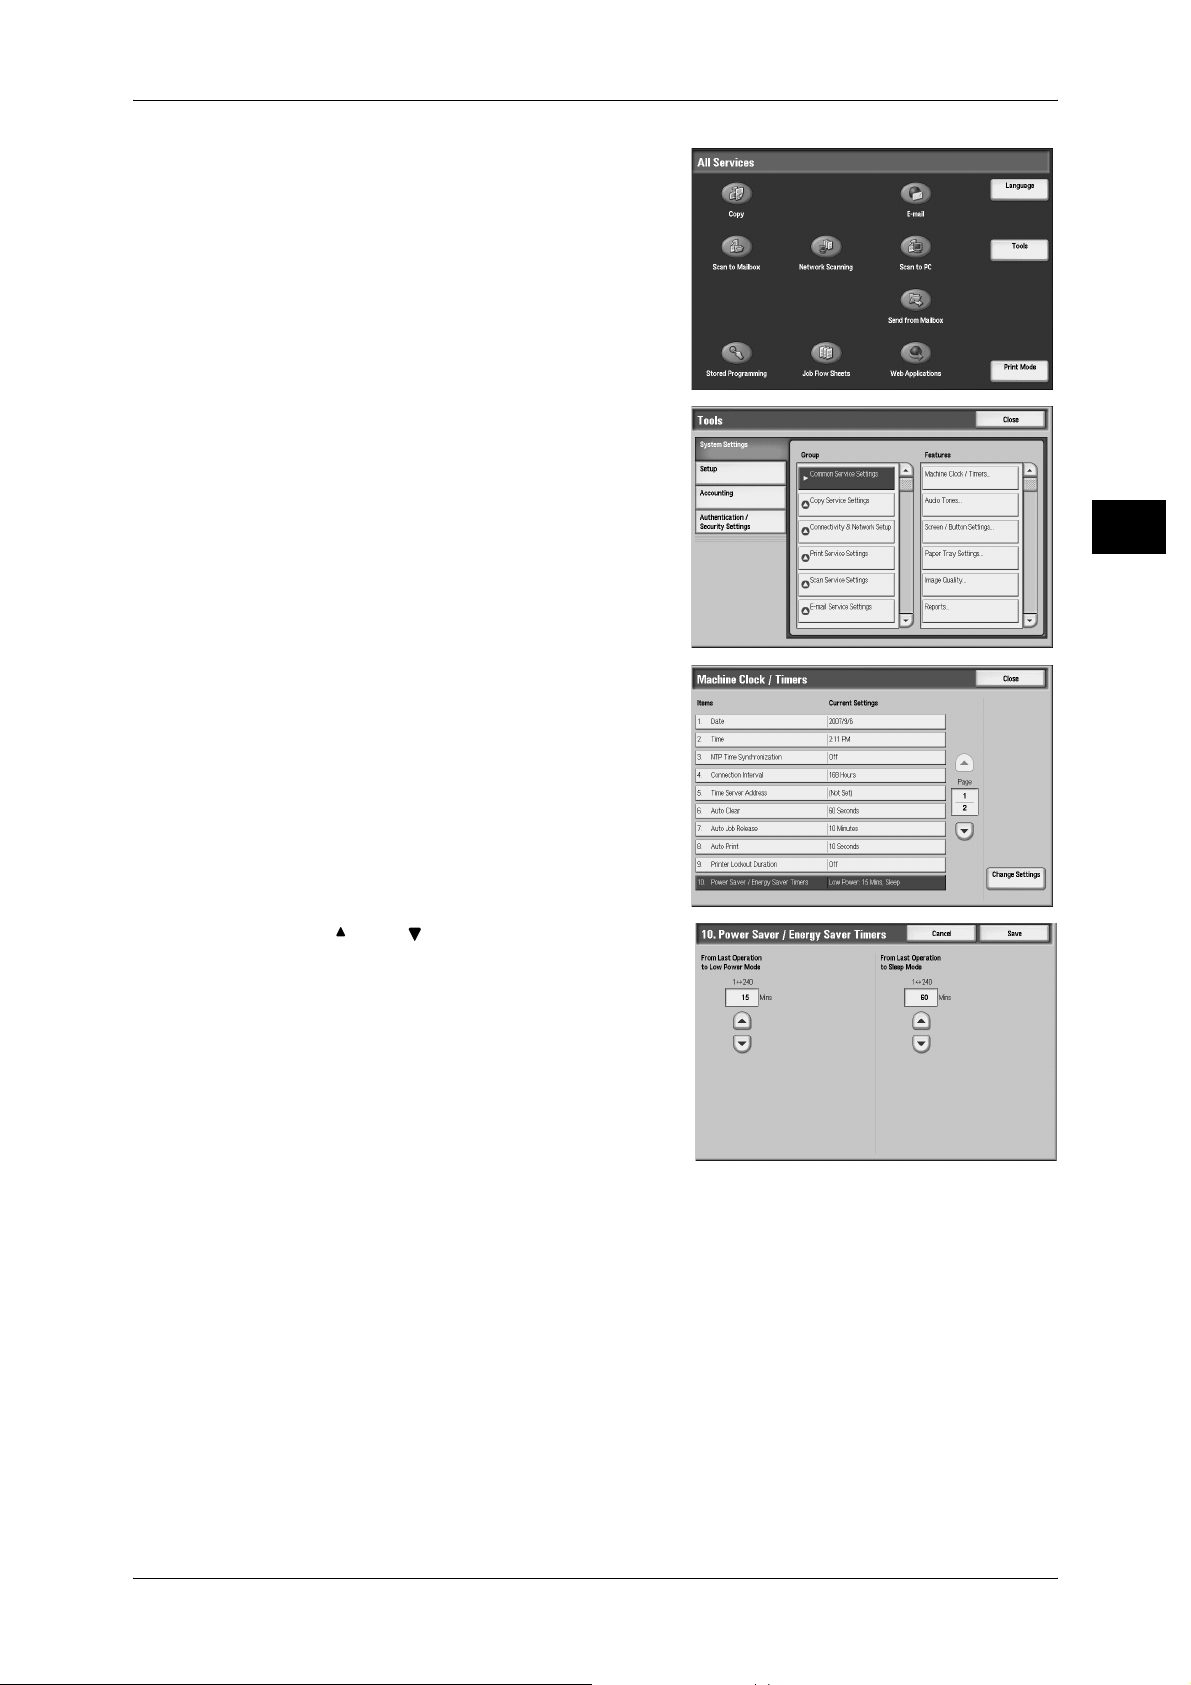
3 Select [Tools].
4 Select [Machine Clock/Timers].
Power Saver Mode
Before Using the Machine
1
5 Select [Power Saver/Energy Saver Timers],
and select [Change Settings].
6 Using [ ] and [ ], configure a power saver
mode migration time from 1 to 240 minutes,
in 1 minute increments.
From Last Operation to Low Power Mode
Set the time to move to the [Low Power Mode] after the last operation.
Note • The default for [From Last Operation to Low Power Mode] is [15] minutes. The Low Power
Mode cannot be disabled.
From Last Operation to Sleep Mode
Set the time to move to the [Sleep Mode] after the last operation.
Note • The defau lt for [From La st Operation to Sleep Mode] is [60] minutes. Configure th e [From
Last Operation to Sleep Mode] time to be longer than the [From Last Operation to Low
Power Mode] time.
7 Select [Save].
8 Select [Close] repeatedly until the [System Settings] screen is displayed.
9 Select [Close] to display the [All Services] screen.
17
Page 20
1 Before Using the Machine
Customizing the Control Panel
Before Using the Machine
1
Use the following procedure to select the screen to be displayed when the machine is
turned on or exited from the Power Saver mode, to select the screen to be displayed
after Auto Clear, to assign features to <Custom> buttons, and to select the features to
be displayed on the [All Services] screen.
1 Press the <Log In/Out> button.
<Log In/Out>button
2 Enter the Administrator ID with the numeric
keypad or the keyboard displayed, and
select [Enter].
Note • The default Administrator ID is "11111".
When using the Authentication feature, a
passcode may be requir ed . The de fau l t
passcode is "x-admin".
3 Select [Tools].
4 Select [Screen/Button Settings].
18
Page 21
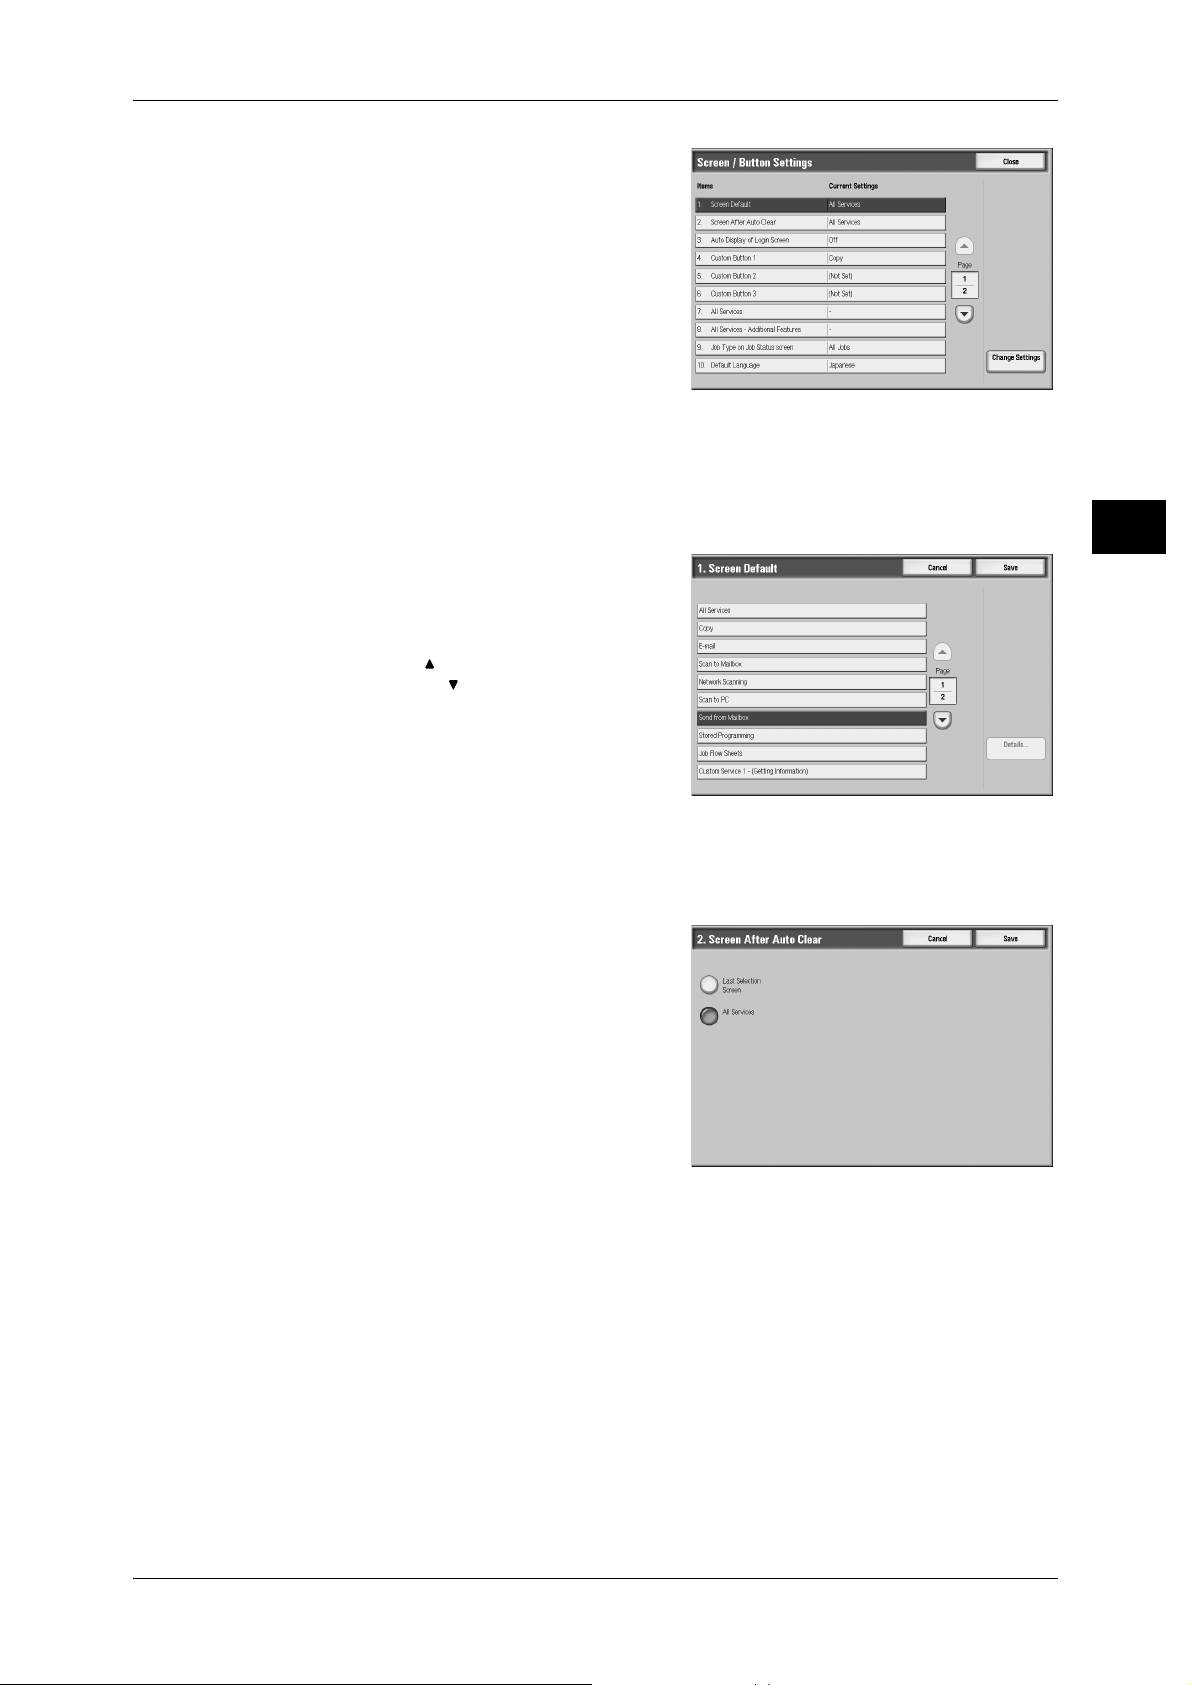
5 Select the item to be set or changed.
Setting the Initial Screen
Set the screen to be displayed after turning the machine on or exiting the Power Saver
mode. This section describes how to set the [Send from Mailbox] screen as the initial
screen, as an example.
1 Select [Screen Default], and select [Change
Settings].
2 Select [Send from Mailbox].
Note • Select [ ] to return to the previous
screen or [ ] to move to the next screen.
Customizing the Control Panel
Before Using the Machine
1
Setting the Screen to be displayed afte r Auto Clea r
Set the screen to be displayed after Auto Clear. You can select from [Last Selection
Screen] and [All Services].
1 Select [Screen After Auto Clear], and select
[Change Settings].
2 Select [Last Selection Screen] or [All
Services].
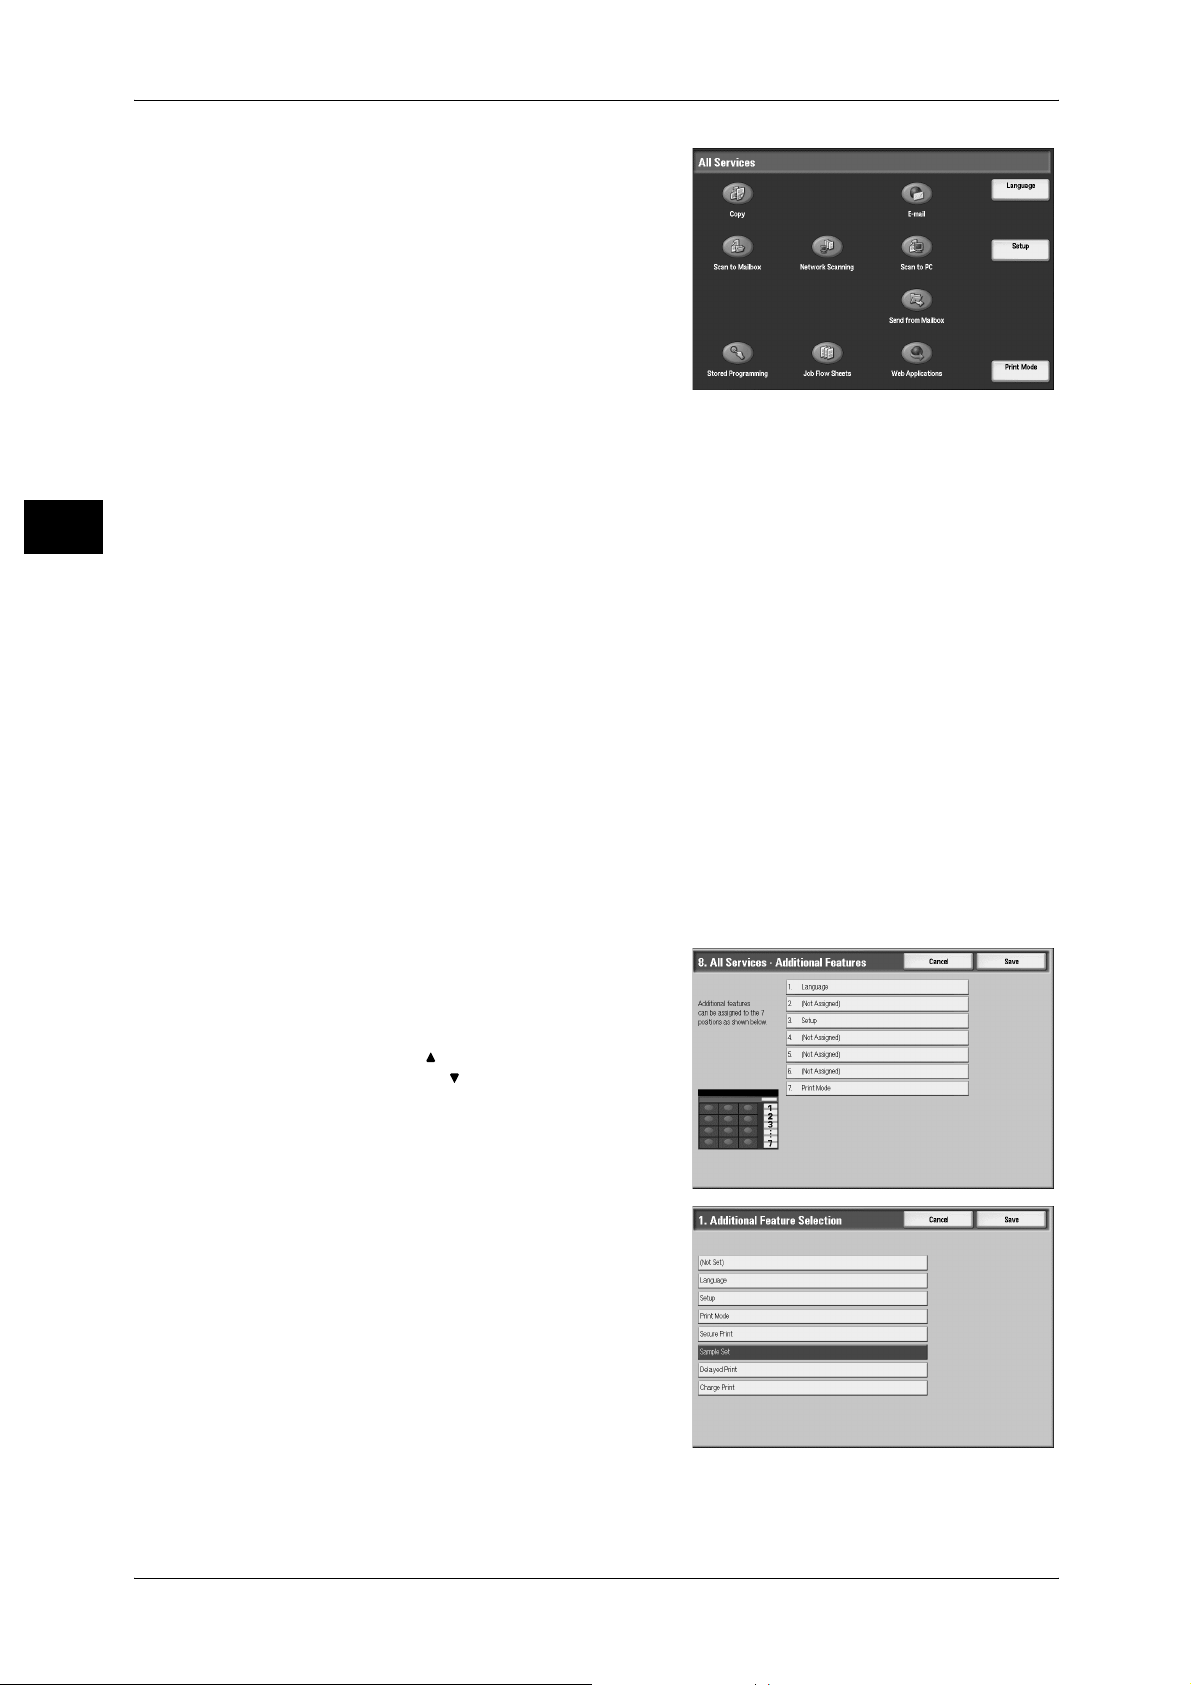
Customizing the [All Services] Screen
By selecting features and their positions, you can customize the [All Services] screen
that is displayed when you press the <All Services> button on the control panel.
The following are the factory default features displayed on the [All Services] screen.
Note • Unsupported features will not be displayed on the screen. Abnormal features will be grayed
out on the screen.
19
Page 22
1 Before Using the Machine
Before Using the Machine
1
z
Copy
z
E-mail
z
Scan to Mailbox
z
Network Scanning
z
Scan to PC
z
Send from Mailbox
z
Stored Programming
z
Job Flow Sheets
z
Web Applications
z
Language
z
Setup
z
Print Mode
All Services
You can select a service button. Service buttons are the oval buttons in the [All
Services] screen.
If you select [Not Set], the selected button position will remain empty.
All Services - Additional Features
You can select an additional feature button. Additional features appear in the [All
Services] screen as rectangular buttons.
If you select [Not Set], the selected button position will remain empty.
The following is the procedure to change the [Language] button displayed at the upper
right corner of the [All Services] screen to the [Sample Set] button, as an example.
1 Select [All Services - Additional Features],
and select [Change Settings].
2 Select [Language].
Note • Select [ ] to return to the previous
screen or [ ] to move to the next screen.
3 Select [Sample Set].
Note • The layout of buttons in this screen is
corresponding to the layout of those on
the [All Services] screen.
• You cannot assign the same feature to
more than one button.
20
Page 23
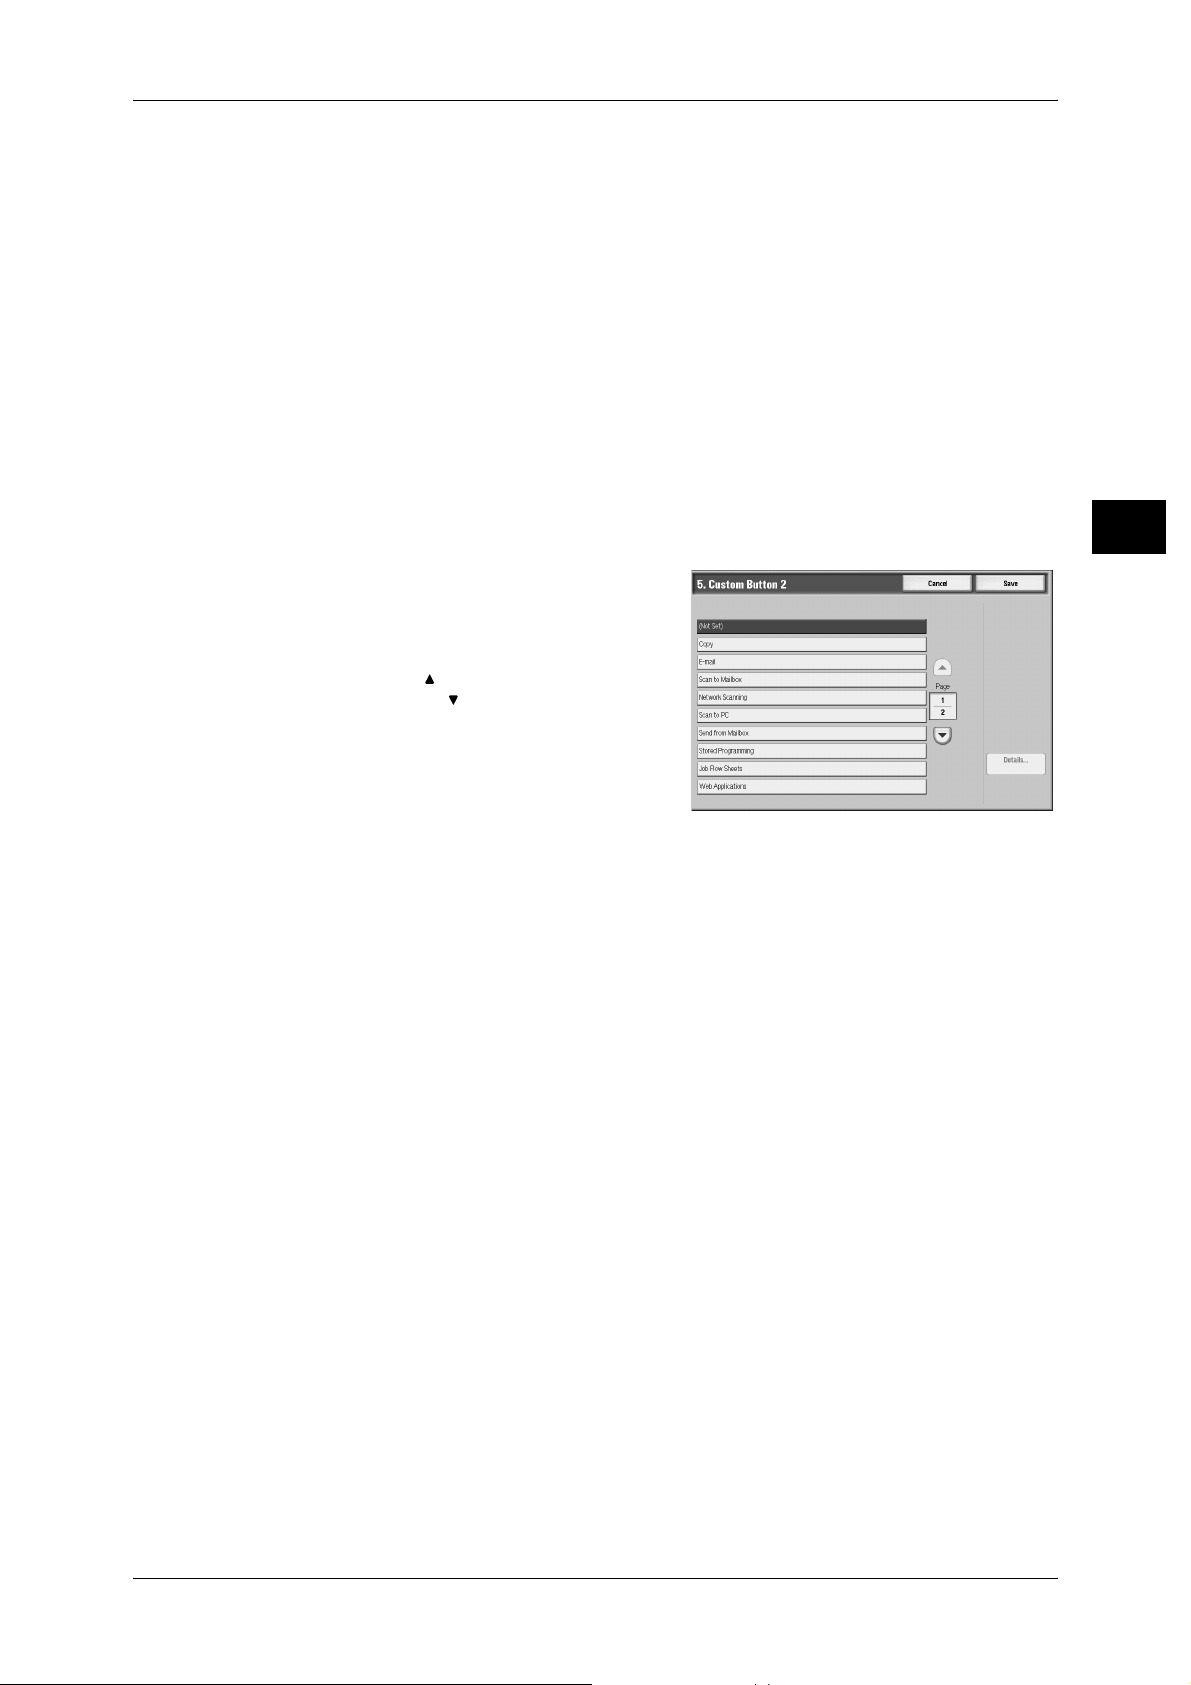
Assigning Features to <Custom> Buttons
Assign features to the <Custom> buttons on the control panel: Custom 1 to Custom 3.
By assigning features to the <Custom> buttons, you can switch to the features without
returning to the [All Services] screen. If you do not want to assign any feature to a
button, select [Not Set].
By factory defaults, [Copy] is assigned to the <Copy> button and no feature is assigned
to the <Custom 2> or <Custom 3> button. The features assigned to the buttons are
selected from the features displayed on the [All Services] screen and [Language].
Attach the labels included in this product when you have changed the assignment. If
you have used a feature for which no label is provided, use a blank label and write down
the feature using a permanent marker, and then attach the label to the appropriate
button.
The following is the procedure to assign [Send from Mailbox] to the <Custom 2> button,
as an example. The same procedure can be used for the <Custom 3> button.
1 Select [Custom Button 2], and select
[Change Settings].
2 Select [Send from Mailbox].
Note • Select [ ] to return to the previous
screen or [ ] to move to the next screen.
Customizing the Control Panel
Before Using the Machine
1
Changing the Feature Screen
You can customize the screen layouts for the following features listed on the [All
Services] screen.
z
Copy
z
E-mail
z
Scan to Mailbox
z
Network Scanning
z
Scan to PC
For information on how to change the settings, refer to "Copy Tab - Features Allocation" (P.113), and
"First Tab" (P.143).
21
Page 24
1 Before Using the Machine
Entering Text
Before Using the Machine
1
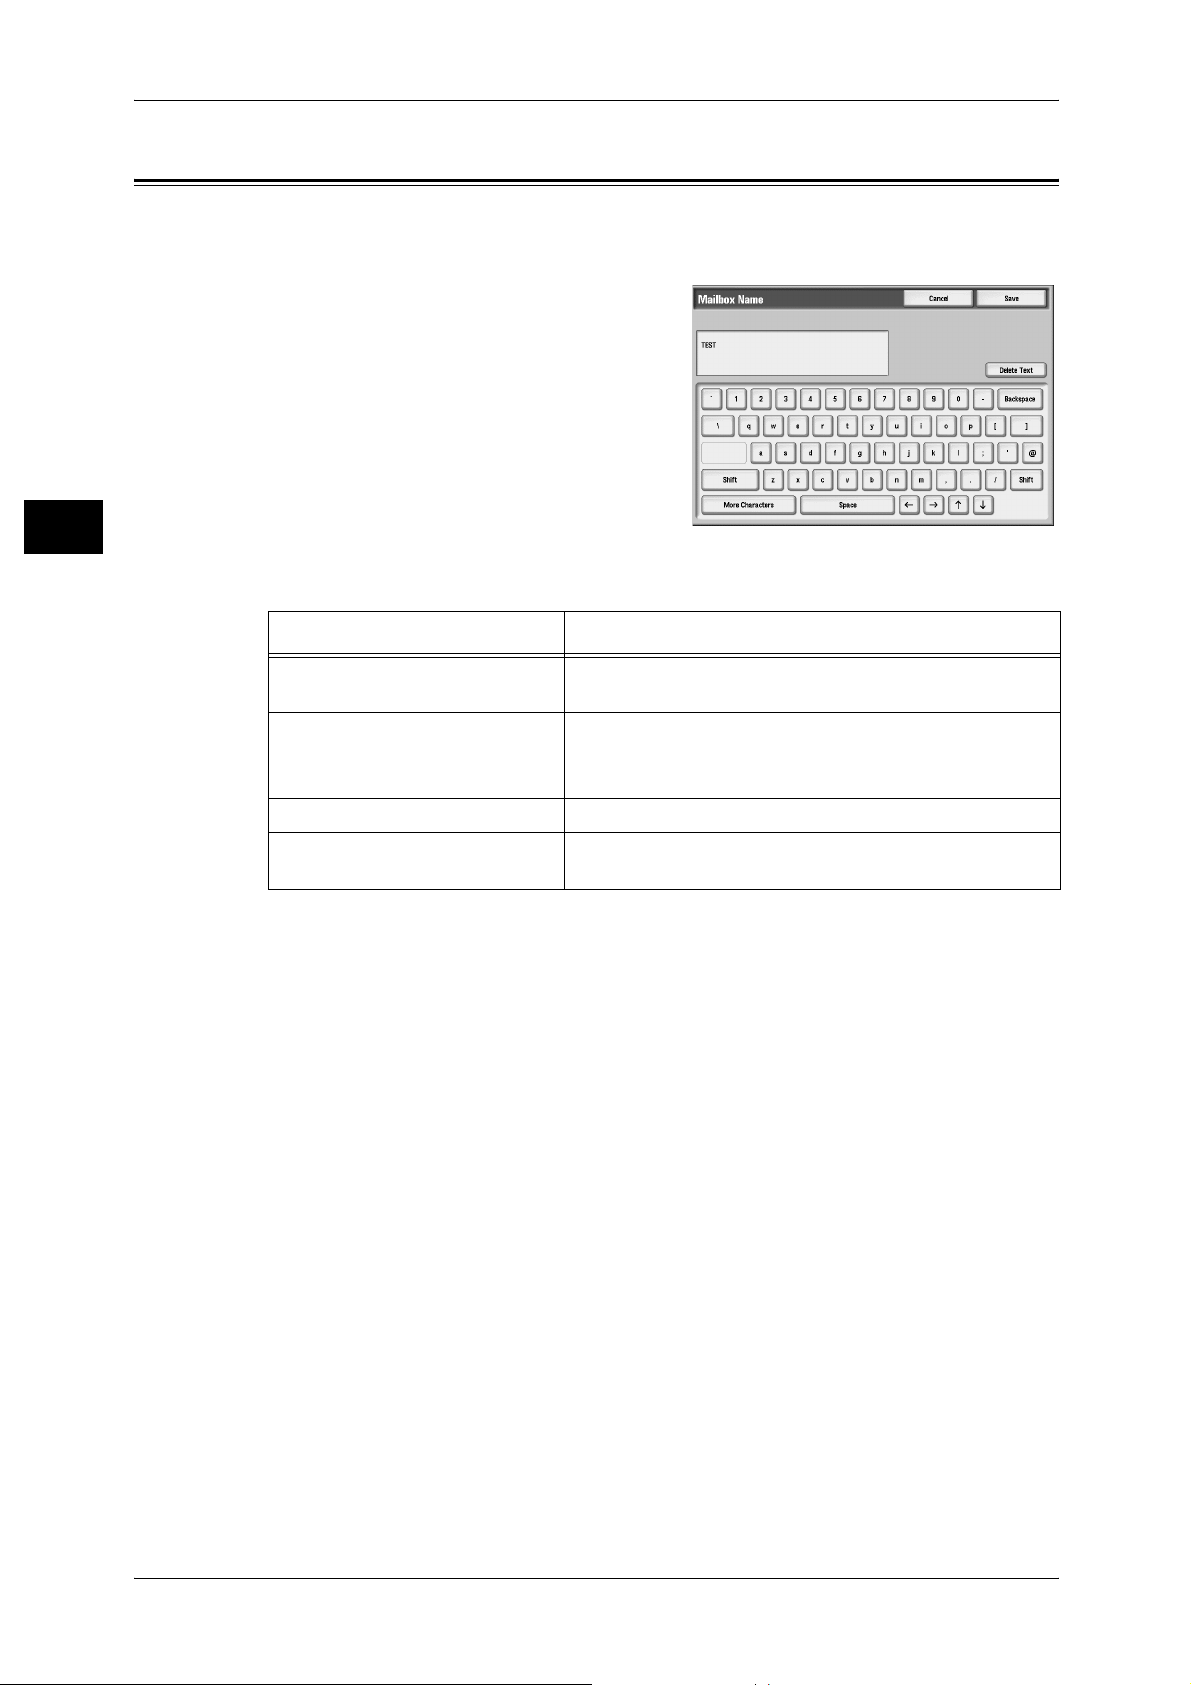
During operations, a screen for entering text sometimes appears. This section
describes how to enter text.
You can enter the following characters: numerals, letters, and symbols.
Item Description
Entering letters and numerals If you select [Shift], uppercase letters appear. To return to
the lowercase letters, select [Shift] again.
Entering symbols Select [Symbol].
Note • Depending on the keyboard, the [Symbol] button
may be displayed as [More Characters].
Entering a space Select [Space].
Deleting characters Select [Backspace]. You can delete one character at a
time.
22
Page 25

2 Paper and Other Media
This chapter describes the types of paper that can be used on the machine,
precautions when handling paper, and how to load paper in trays.
z
Paper Types .... ...... ..... ................................. ...... ..... ..... ...............................24
z
Loading Paper ............................................................................................28
z
Changing the Paper Size............................................................................38
z
Changing the Paper Settings......................................................................41
Page 26
2 Paper and Other Media
WARNING
Paper Types
This section describes the kinds of paper available for this machine.
Use of inappropriate paper may result in paper jams, cause reduced print quality,
malfunctions and other trouble. To make full and effective use of the machine's
Paper and Other Media
performance, we recommend using only paper recommended by Fuji Xerox.
If you want to use paper not recommended by Fuji Xerox, contact our Customer
Support Center.
Do not use conductive paper such as carbonic paper or coated paper. When paper
jam occurs, it may cause short-circuit and eventually a fire accident.
Important • The printed image may fade due to moisture such as water, rain or vapor. For more
2
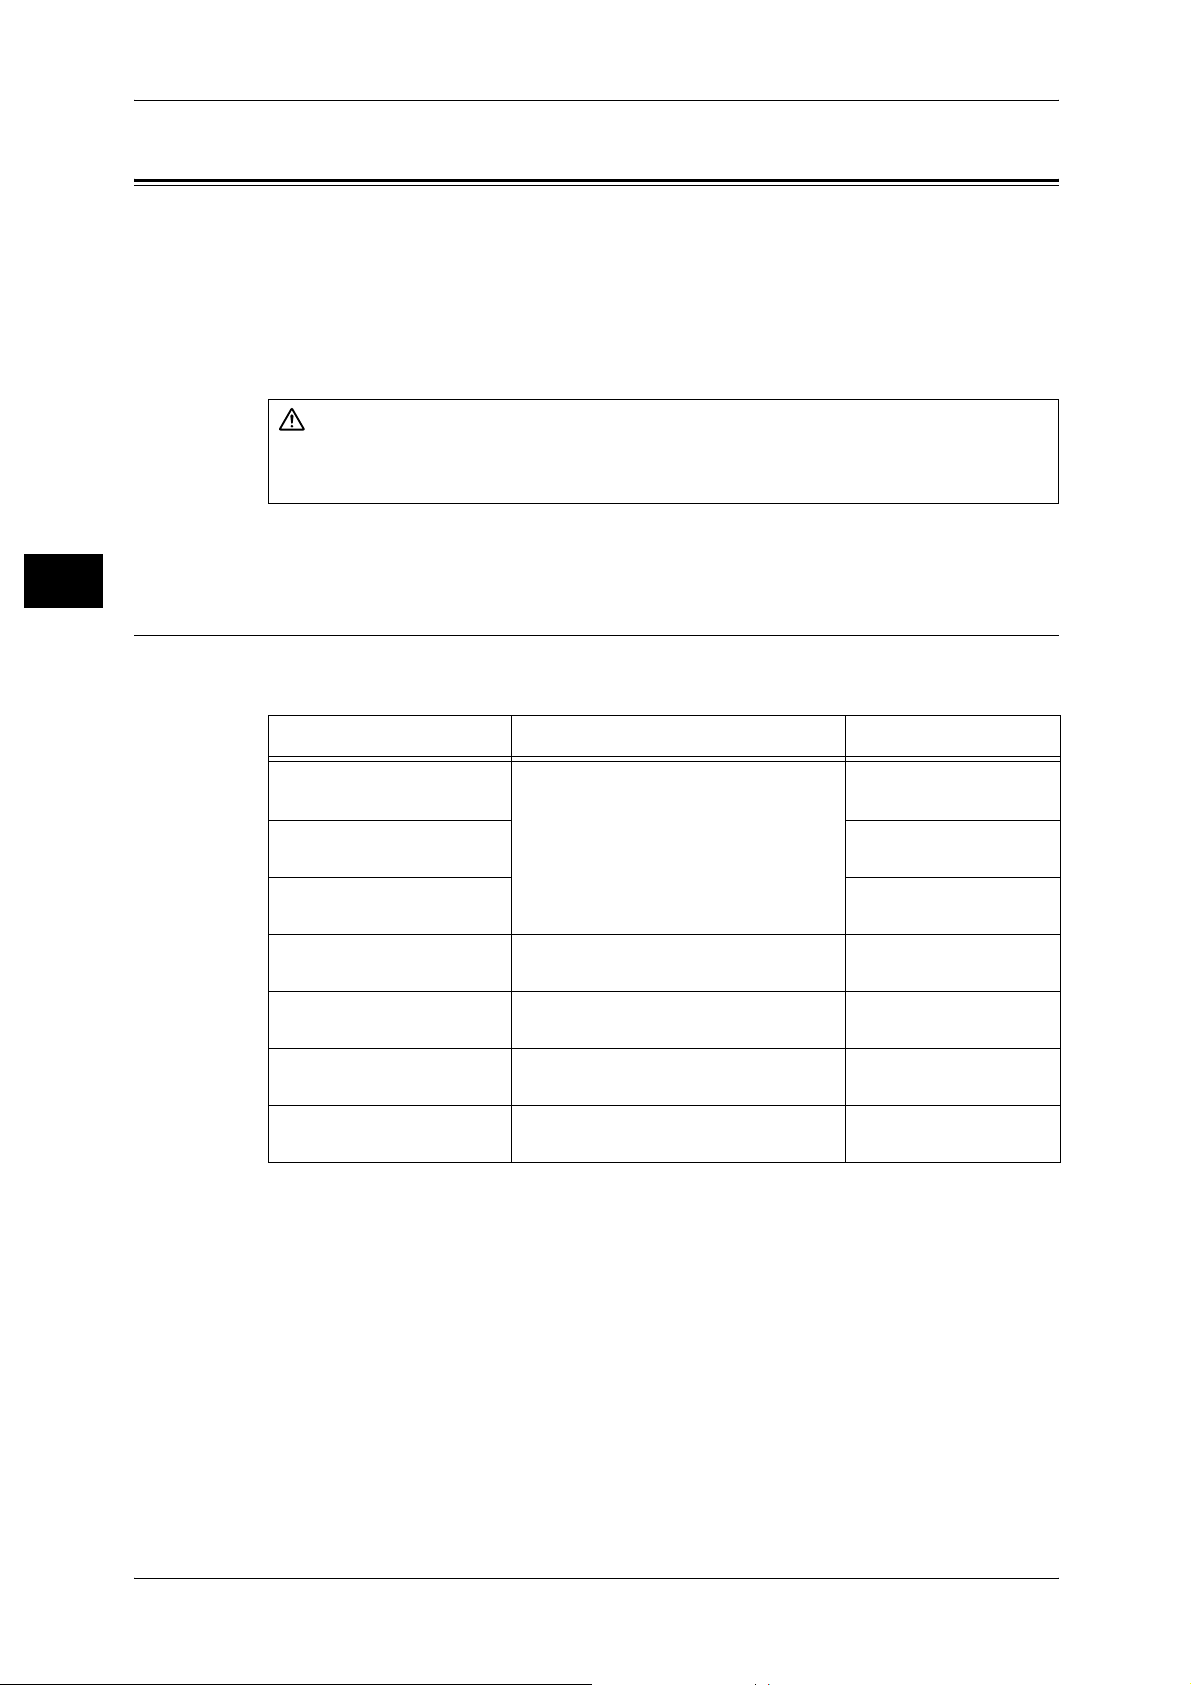
Supported Paper Type
When using commonly used paper (known as printable paper) for copying or printing,
make sure that it complies with the following specifications.
information, contact our Customer Support Center.
Paper tray Weight Loadable quantity
Tray 1 52 to 216 g/m
Ream Weight: 45 - 186 kg
Tray 2 1,600 sheets
Tray 3 to 4 550 sheets
Tray 5 (bypass) 52 to 253 g/m
Ream Weight: 45 - 217 kg
Tray 6 to 7 (HCF (A4 2
Tray)) (optional)
Tray 6 (HCF (A3 1 Tray))
(optional)
Tray 8 (Interposer)
(optional)
52 to 216 g/m
Ream Weight: 45 - 186 kg
52 to 253 g/m
Ream Weight: 45 - 217 kg
60 to 220 g/m
Ream Weight: 52 - 189 kg
2
2
2
2
2
1,100 sheets
(80 g/m2)
(80 g/m
(80 g/m2)
Up to 27mm 250 sheets
(80 g/m2)
2,000 sheets
(80 g/m2)
2,000 sheets
(80 g/m2)
200 sheets
(80 g/m2)
2
)
24
Page 27
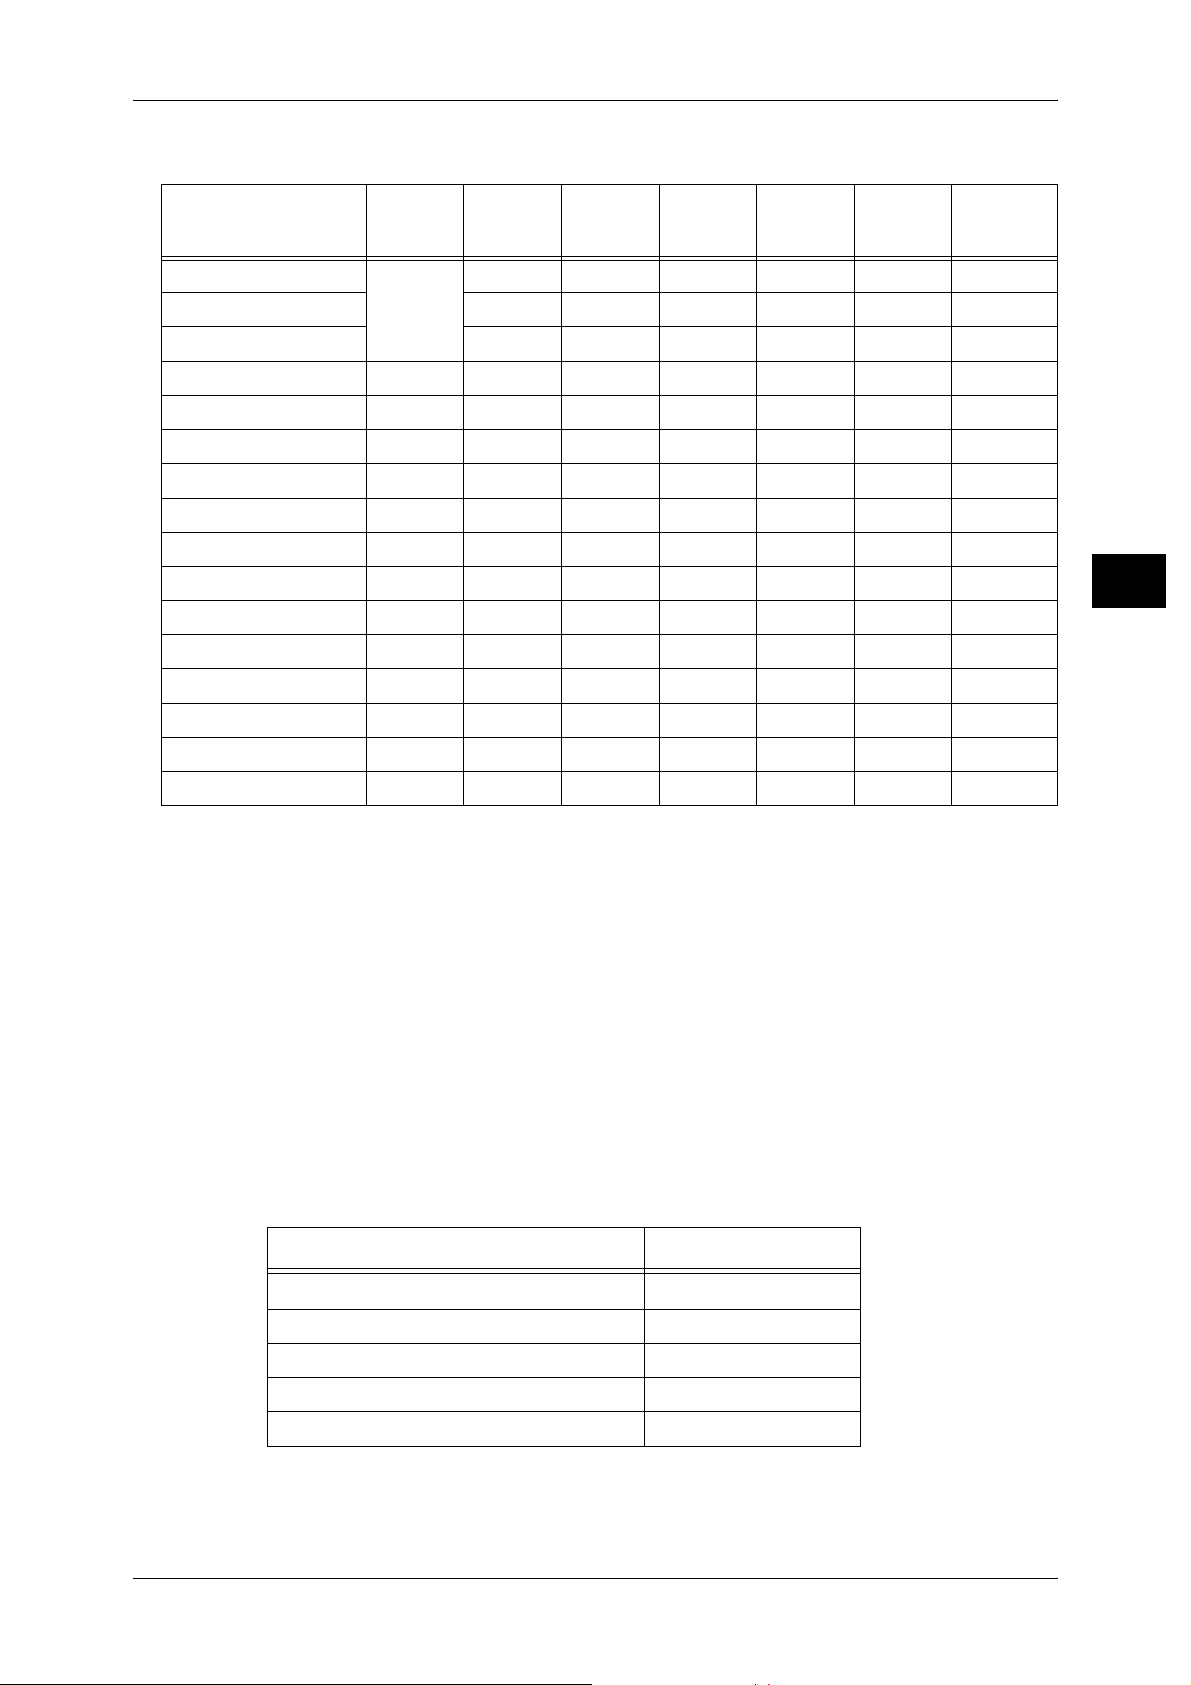
The following table lists the paper types supported for each paper tray.
Paper Types
Paper Type
Plain Paper
Recycled Paper
Plain Pape r (Side 2)
Transparency Labels 1 106 - 216
Labels 2 217 - 253
Lightweight 52 - 63
Heavyweight 1
Heavyweight 2
Tab Stock 1
Tab Stock 2
Hole Punche d 64 - 105
Coated Paper 1 106 - 105
Coated Paper 1A 106 - 135
Coated Paper 1B 136 - 216
Coated Paper 2 217 - 253
*
Weight
2
)
(g/m
64 - 105
106 - 216
217 - 253
106 - 216
217 - 253
Tray 1-2 Tray 3-4
Tray 5
(Bypass)
Tray 6-7
(HCF (A4
2 Tray))
Tray 6
(HCF (A3
1 Tray))
Tray 8
(Interposer)
OOOOOO
OOOOOO
OOOOOO
XXOXOX
XXOXOX
XXOXOX
OOOOO X
OOOOOO
XXOXOX
XOOXOO
XXOXOX
OOOOOO
XXXXOX
XXXXOX
XXXXOX
XXXXOX
Paper and Other Media
2
Standard
*: Plain Paper (Side 2) means the paper already printed on the one side (i.e., scrap paper).
O: Available
X: Not available
Important • Printing with paper whose type or si ze differs fr om the paper sp ecified by the print driv er, or
printing from a tray not supporting the loaded paper can result in paper jams. To ensure
correct printing, select the correct paper size, paper type, and paper tray.
2
Note • Weight mea ns a weight of 1 m
• Ream weight means weight of 1,000 sheets of paper in duodecimo size (788 x 1,091 mm).
• When copying with a non-standard size paper from the Tray 5 (bypass), you must manually
enter the paper size. If you use non-standard size paper often, you can preset the size on
the machine. Then the preset size appears under [Standard Sizes] in the [Tray 5 (Bypass)]
screen. For more information, refer to "Tray 5 (Bypass) - Paper Size Defaults" (P.96).
of a paper sheet.
Recommended paper
Paper GSM
FX P Paper 64 g/m
Blue Wrap 80 g/m
FXK-X 75 g/m
GA37(PackageOrange) 70 g/m
Business 80 g/m
2
2
2
2
2
25
Page 28
2 Paper and Other Media
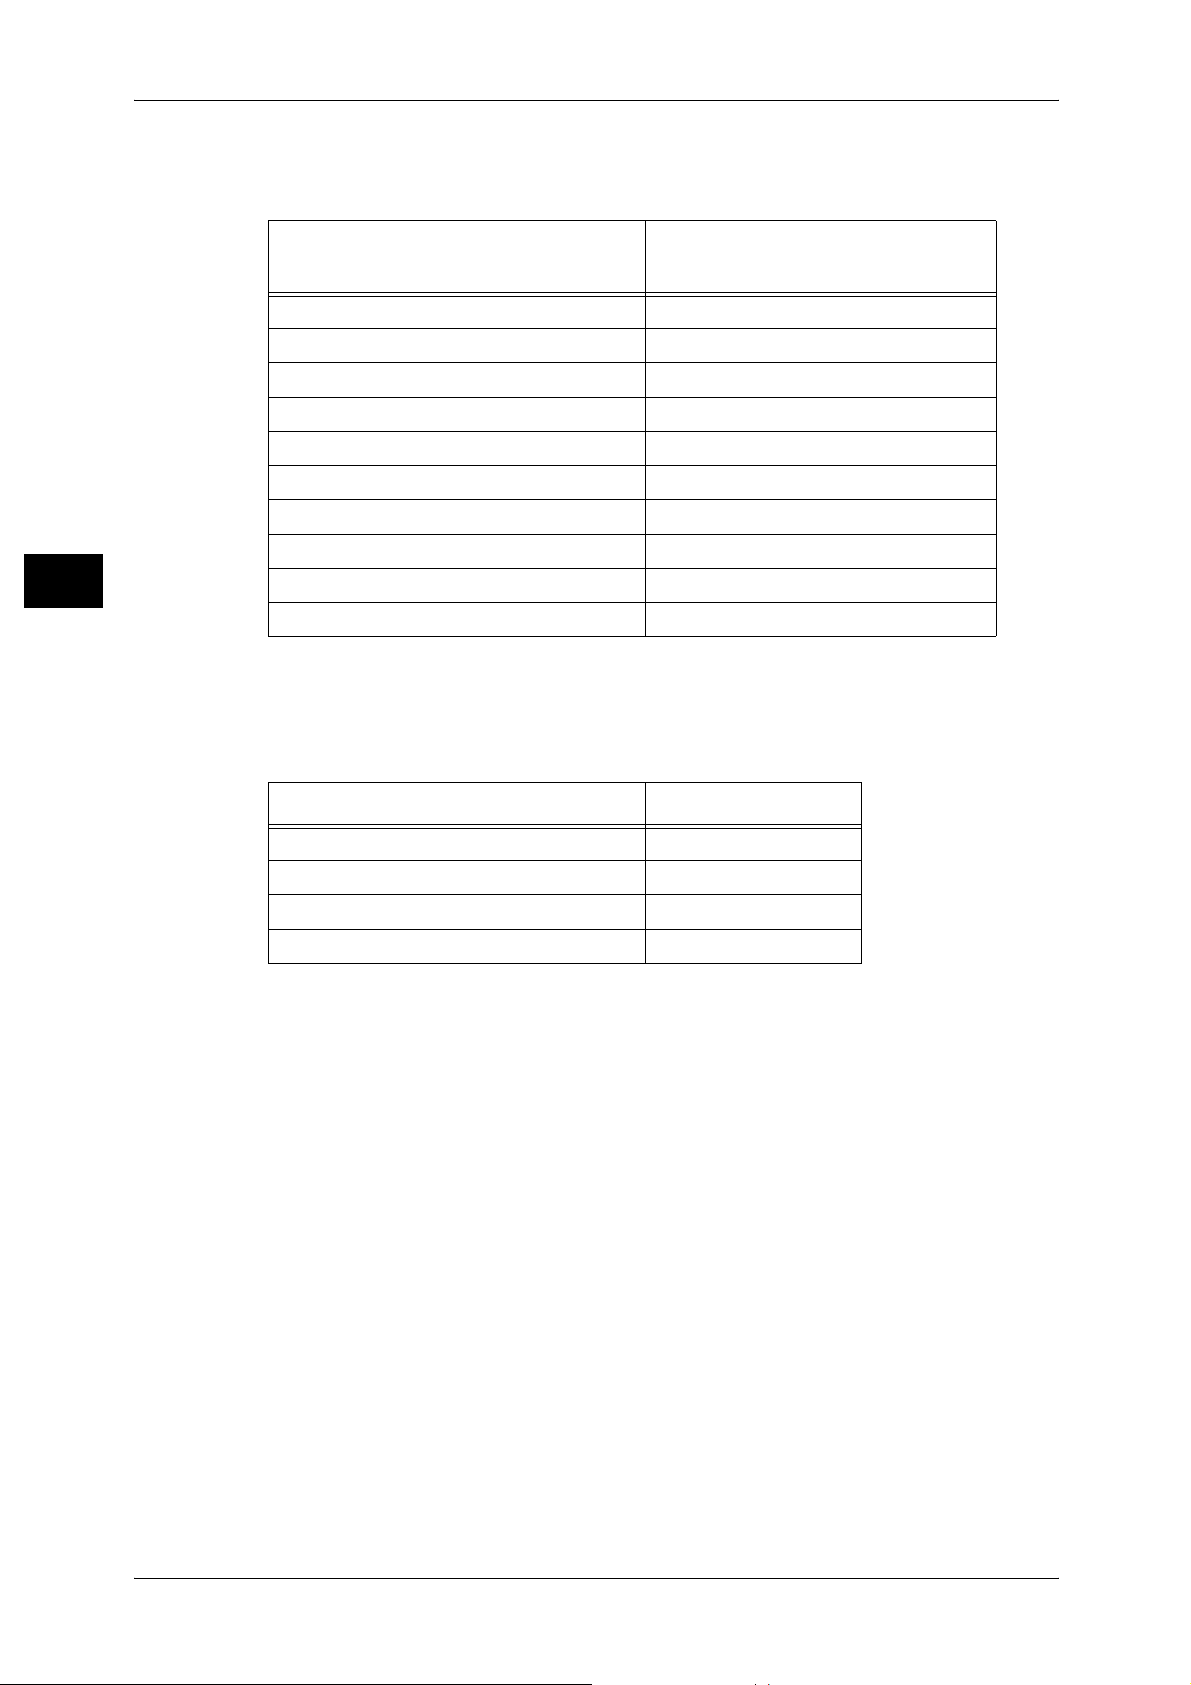
Usable paper
Paper stock that can be used
Paper and Other Media
2
Special Media
Paper
Purple Wrap 80 : Plain paper
Green Wrap recycled 80 : Plain paper
Multipurpose75 75 : Plain paper
Business (3R91820) 80 : Plain paper
No.6N Green Stripe 70 : Plain paper
Xerox No.1 80 : Plain paper
060L99081/060L99082 80 : Plain paper
Xtra 75 : Plain paper
Xtra 80 : Plain paper
Solution 75 : Plain paper
(Unit : g/m
GSM
2
) and Paper type
Copy or print can be made on the following paper by using tray 5 (bypass). These
papers are called Special Media. The types of the special media that can be used are
as follows.
Paper Paper Type
Labels 3R97408 Label
Tabs Index
Label 3R96296 Label
TransparencyType C (OHP) OHP
Note • For more information about other heavyweight or special media, contact our Customer
Support Center.
When making copies, refer to "3 Copy" in the User Guide. When printing, refer to the online help.
Storing and Handling Paper
Please keep the following points in mind when storing paper
z
Store paper inside a cabinet or other dry place. Paper that has absorbed moisture
can cause paper jams and image quality defects.
z
After opening a package of paper, wrap up the remaining paper to store it. It is
recommended that you include moisture prevention packets.
z
Paper should be stored flat to prev ent bends or warping.
Please adhere to the following when setting paper into the tray
z
Align the stack of paper neatly before setting it in the tray.
z
Do not use paper that is folded, creased, or heavily warped.
z
Do not use waved or curled paper.
z
Do not load paper of mixed size together into the tray.
26
Page 29

Paper Types
z
Transparency paper and label paper can cause paper jams, and multiple sheets can
be fed to the printer at once. Be sure to carefully fan these types of paper.
z
When continuously outputting onto transparencies, transparency sheets may
sometimes stick to each other. Remove transparencies from the output tray every 20
or so sheets, and fan them to cool them down.
Paper and Other Media
2
27
Page 30

2 Paper and Other Media
Loading Paper
This section describes how to load paper.
Types of paper loaded in trays
Paper and Other Media
2
The machine automatically detects the size and orientation of loaded paper in trays.
You need to set a paper type, however. Normally, each of the trays is set to plain paper.
When loading paper other than plain paper in trays, change the paper type settings.
Paper can also be named and set as user-defined paper. Up to five paper types can be
set as user-defined paper.
For information on changing the paper type in trays, refer to "Changing the Paper Settings" (P.41).
Automatic Tray Selection
If you set paper source on the [Paper/Output] tab to [Paper Tray] in the PCL print
driver's properties screen when making prints, the machine automatic all y sele cts the
corresponding paper tray according to the size and orientation of the document to print.
This is called [Automatic Tray Selection].
When making copies, automatic tray selection is active if [Auto Paper] is selected for
[Paper Supply]. If the machine detects two or more corresponding trays in the
automatic tray selection, the machine gives higher priority to the tray having the highest
[Paper Type Priority] set at [Paper Tray Settings]. During automatic tray selection, trays
whose [Paper Type Priority] setting is set to [Auto Paper Off] are not targeted in the
automatic tray selection. Also, if the [Paper Type Priority] setting is exactly the same,
the tray priority is determined by [Paper Tray Priority].
Note • The Tray 5 (bypass) cannot be selected in the automatic tray selection.
• When the machine runs out of paper during copying or printing, select the tray containing the
paper of the same size and ori entation that was being used for copying or printing, and
continue copying or printing (Auto Tray Switch feature). During this operation, a tray
containing paper of type whose [Paper Ty pe Priori ty] setting is set to [Au to Paper O ff] cannot
be switched to.
For information about setting [Paper Type], [Paper Type Priority], [Paper Tray Priority], and setting the
paper substitute feature, refer to "Paper Tray Settings" (P.95). The same settings can also be made from
CentreWare Internet Services.
Adding paper
When the machine runs out of paper during copying or printing, a message is displayed
on the control panel display. Add paper according to the displayed instructions.
Copying or Printing is automatically resumed when paper is added.
Note • Fan the paper well before loading paper in a tray. It prevents paper from sticking to each
other and reduces paper jams.
Loading Paper in the Trays 1 to 2
The following describes the procedure for loading paper in the Trays 1 to 2.
When the machine runs out of paper during copying or printing, a message is displayed
on the control panel display. Add paper according to the displayed instructions.
Copying or printing is automatically resumed when paper is added.
Note • Before loading paper in a tray, fan the paper well. It prevents paper from sticking to each
other and reduces paper jams.
28
Page 31

1 Pull out the tray towards you until it stops.
CAUTION
CAUTION
When pulling out the paper tray,
do it slowly. If pulled out with too
much force, the tray can hit and
injure your knees.
Important • While the machine processes a job, do
not pull the tray out that the job uses.
2 Load and align the edge of the paper against
the left edge of the tray with the side to be
copied or printed on facing down.
Important • Do not load paper exceeding the
maximum fill line. It might cause paper
jams or machine malfunctions.
3 Push the tray in gently until it comes to a
stop.
Loading Paper
Paper and Other Media
M A X
2
Loading Paper in the Trays 3 to 4
Following describes the procedure for loading paper in the Trays 3 to 4.
Note • Before loading paper in a tray, fan the paper well. It prevents paper from sticking to each
other and reduces paper jams.
For information on changing the paper size and orientation, refer to "Changing the Paper Size for the
Trays 3 to 4" (P.38).
1 Pull out the tray towards you until it stops.
When pulling out the paper tray,
do it slowly. If pulled out with too
much force, the tray can hit and
injure your knees.
Important • While the machine processes a job, do
not pull the tray out that the job uses.
• Do not add a new stack of paper on top of the remaining paper in the tray, in order to prevent
paper jams or any othe r troubl es. First , remove the remai ning pape r in the tra y, then loa d the
new stack of paper.
2 Load and align the edge of the paper against
the left edge of the tray with the side to be
copied or printed on facing down.
Important • Do not load paper exceeding the
maximum fill line. It might cause paper
jams or machine malfunctions.
• Do not place any paper or things in the
empty space on the right side of the Tray
3 or 4. It may cause paper jams or
machine malfunctions.
M A X
29
Page 32

2 Paper and Other Media
CAUTION
• Make sure that the pap e r guide is adjusted to the size of the paper loaded.
3 Push the tray in gently until it comes to a stop.
Loading Tab Paper in the Trays 3 to 4
Paper and Other Media
Following describes the procedure for loading tab paper in the Trays 3 to 4.
Important • Tab paper cannot be loaded on the Trays 1, 2, 6 (HDF (A4 2 tray)), and 7 (HDF (A4 2 tray)).
• Tab paper can be used only for [Tab Margined Shift], Covers, and Separators.
Note • Before loading paper in a tray, fan the paper well. It prevents paper from sticking to each
other and reduces paper jams.
1 Pull out the tray towards you until it stops.
2
When pulling out the paper tray,
do it slowly. If pulled out with too
much force, the tray can hit and
injure your knees.
Important • While the machine processes a job, do
not pull the tray out that the job uses.
2 Push the paper guid e levers, and slid e them
to their new positions to accommodate the
size of index paper.
3 Make sure that the levers are positioned
correctly, and release them.
4 Load and align the edge of the tab paper
against the right edge of the tray with the
side to be copied or printed on facing down.
Important • Do not load paper exceeding the
maximum fill line. It might cause paper
jams or machine malfunctions.
• Do not place any paper or things in the
empty space on the right side of the Tray.
It may cause pap er jams or machine
malfunctions.
Note • When copying or printi ng on multiple set of tab p ape r of a set with which tab p os i tio ns d iff er,
load each tab paper with the side to be copied or printed on facing down to set the first paper
coming on top.
M A X
30
Page 33

5 Move the two paper guide levers while
holding thei r gri ps s o th at th ey li ghtl y con tac t
the edges of the paper.
6 Push the tray in gently until it comes to a
stop.
Loading Paper in the Tray 5 (Bypass)
When printing or copying with paper sizes or types that cannot be set in the Trays 1 to
4, 6, and 7, use the Tray 5 (Bypass).
The following describes how to load paper into the Tray 5 (Bypass).
To make detailed instructions for printings, specify the instructions using the [Tray/
Output] tab in the print driver. When doing this, also specify the type of paper to load.
Note • When adding paper to tray 5 (by pas s), remove any paper rem ain ing in th e tra y, add it to the
bunch of papers to be added, then load all of the paper into the tray at once.
• Before loading paper in a tray, fan the paper well. It prevents paper from sticking to each
other and reduces paper jams.
Loading Paper
Paper and Other Media
2
1 Open the Tray 5 (bypass) as necessary.
Note • If necessary, extend the extension flap.
The extension flap can b e extended in
two stages. When pulling out the
extension flap, do it gently.
2 Hold the center of the paper guides and slide
them to the desired paper size.
3 Load paper with the side to be copied or
printed on facing up, and insert the paper
lightly along the paper guide until it comes to
a stop.
Important • D o not load mixed paper types into the
tray.
• Do not load paper exceeding the
maximum fill line. It might cause paper
jams or machine malfunctions.
4 When loading a non-standard paper size on
the Tray 5 (bypass), move the paper guides to accommodate the paper.
31
Page 34

2 Paper and Other Media
CAUTION
Loading Tab Paper in the Tray 5 (Bypass)
Following describes the procedure for loading tab paper in the Tray 5.
Important • Tab paper cannot be loaded on the Trays 1, 2, 6 (HDF (A4 2 tray)), and 7 (HDF (A4 2 tray)).
• Tab paper can be used only for [Tab Margined Shift], Covers, and Separators.
Note • Before loading paper in a tray, fan the paper well. It prevents paper from sticking to each
Paper and Other Media
other and reduces paper jams.
1 Open the Tray 5 (bypass).
Note • If necessary, extend the extension flap.
The extension flap can be extended in
two stages. When pulling out the
extension flap, do it ge ntly.
2
2 Hold the center of the paper guides and slide
them to the desired paper size.
3 Load the paper all the way into the tray from
the bottom edge first, with the side to be
copied or printed facing up and with the tab
portion to the left.
Important • Do not load paper exceeding the
maximum fill line. It may cause paper
jams or machine malfunctions.
Loading Paper in the Tray 6 (HCF (A3 1 Tray))
Following describes the procedure for loading paper in the Tray 6 (HCF (A3 1 Tray))
(optional).
Note • Before loading paper in a tray, fan the paper well. It prevents paper from sticking to each
other and reduces paper jams.
For information about changing the paper size and orientation, refer to "Changing the Paper Size for the
Tray 6 (HCF (A3 1 Tray))" (P.39).
1 Pull out the Tray 6 towards you until it stops.
When pulling out the paper tray,
do it slowly. If pulled out with too
much force, the tray can hit and
injure your knees.
32
Page 35

Important • While the machine is processing a job, do not pull out the tray.
CAUTION
• Do not add a new stack of paper on top of the remaining paper in the tray, in order to prevent
paper jams or any othe r troubl es. First , remove the remai ning pape r in the tra y, then loa d the
new stack of paper.
2 Remove any paper loaded in the tray.
Loading Paper
3 With the side to be copied or printed on
facing up, load approximately 50 to 100
sheets of paper in the tray and align the
edges of the paper in the arrow direction (1).
Hold the long-side paper guide and slide it to
the desired paper size (2).
Important • Do not load paper exceeding the
maximum fill line. It might cause paper
jams or machine malfunctions.
4 With the side to be copied or printed on
facing up, load the remaining paper and
align the edges of the paper in the arrow
direction (1). Hold the short-side paper guide
on the left side and slide it to the desired
paper size (2).
Important • If the number of sheets is 100 or les s, t he
paper guides touch too tightly against the
paper, causing the paper to deform and
resulting in paper jams.
• Position the guides correctly to match the paper size. If the position of the guide is not
correct, the paper may not be fed properly and cause paper jams.
5 Push the tray in gently until it comes to a stop.
Paper and Other Media
2
Loading Tab Paper in the Tray 6 (HCF (A3 1 Tray))
Following describes the procedure for loading tab paper in the Tray 6 (HCF (A3 1 Tray))
(optional).
Important • Tab paper can not be loaded on the Trays 1, 2, 6 (HDF (A4 2 tray )), and 7 (HDF (A4 2 tray)).
• Tab paper can be used only fo r [Tab Margined Sh ift], Covers, and Separators.
Note • Before loading paper in a tray, fan the paper well. It prevents paper from sticking to each
other and reduces paper jams.
For information about changing the paper size and orientation, refer to "Changing the Paper Size for the
Tray 6 (HCF (A3 1 Tray))" (P.39).
1 Pull out the Tray 6 towards you until it stops.
When pulling out the paper tray,
do it slowly. If pulled out with too
much force, the tray can hit and
injure your knees.
Important • While the machine is processing a job, do
not pull out the tray.
• Do not add a new stack of paper on top of the remaining paper in the tray, in order to prevent
paper jams or any othe r troubl es. First , remove the remai ning pape r in the tra y, then loa d the
new stack of paper.
33
Page 36

2 Paper and Other Media
CAUTION
Paper and Other Media
2
2 Remove any paper loaded in the tray.
3 With the side to be copied or printed on
facing up, load approximately 50 to 100
sheets of paper in the tray and align the
edges of the paper in the arrow direction (1).
Hold the long-side paper guide and slide it to
the desired paper size (2).
Important • Do not load paper exceeding the
maximum fill line. It might cause paper
jams or machine malfunctions.
• When you load tab paper, p lace the pap er
with its drilled side to the right.
4 With the side to be copied or printed on
facing up, load the remaining paper and
align the edges of the paper in the arrow
direction (1). Hold the short-side paper guide
on the left side and slide it to the desired
paper size (2).
Important • If the number of sheets is 100 or less, the
paper guides touch too tightly against the
paper, causing the paper to deform and
resulting in paper jams.
• Position the guides correctly to match the paper size. If the position of the guide is not
correct, the paper may not be fed properly and cause paper jams.
5 Push the tray in gently until it comes to a stop.
About Weight Switch Buttons for HCF (A3 1 Tray)
This section describes the weight switch buttons.
The HCF (A3 1 Tray) has wei ght switch buttons desig ned for helping feed paper
heavier than 2536 g/m
2
.
As 4127/4112 only support paper types weighing 52 to 253 g/m
need to change the original settings of weight switch buttons.
In case the weig ht s wit ch b utto ns a re mo ved for s ome reas on, slid e th e b utton ba ck t o
their original positions according to the following procedure.
Important • To avoid causing paper jams or malfunctions, make sure the buttons are in the correct
positions before using the HCF (A3 1 Tray).
1 Pull out the Tray 6 towards you until it stops.
When pulling out the paper tray,
do it slowly. If pulled out with too
much force, the tray can hit and
injure your knees.
2
, you do not gene rall y
Important • While the machine is proce ssing a job, do
not pull out the tray.
34
Page 37

2 Switch both buttons to the appropriate
CAUTION
weight group.
Loading Paper
3 Push the tray in gently until it comes to a
stop.
Weightswitch
buttons
Improving the Paper Feeding Performance in Tray 6 (HCF (A3 1 Tray))
This section describes how to improve the paper feeding performance.
If images are skewed even when paper is loaded correctly, use the following procedure
so that the paper can be fed more accurately.
Important • If any of the following types of paper is loaded in the tray, performing the procedure in this
section may cause the paper to be fed improperly, resulting in paper jams.
- Plain - Special 1 - Recycled - Special 1 - Transparency
- Heavyweight 1 - Special 1 - Heavyweight 2 - Special 1 - Coated 1 (64 - 105 g/m²)
- Coated 1A (106 - 135 g/m²) - Coated 1B (136 - 216 g/m²) - Coated 2 (217 - 253 g/m²)
- Labels 1 (106 - 216 g/m²) - Labels 2 (217 - 253 g/m²) - Plain (Side 2) - Special 1
- Tab Stock 2 (217 - 253 g/m²)
1 Pull out the Tray 6 towards you until it stops.
When pulling out the paper tray,
do it slowly. If pulled out with too
much force, the tray can hit and
injure your knees.
Paper and Other Media
2
2 While the machine is processing a job, do not pull out
the tray.
Slide the lever on top of the long-side paper
guide to the right until it stops.
Important • To return the lever to its original position,
slide it to the left until it stops.
3 If the paper feeding performance is not
improved after Step 2, slide the lever on the
right front side towards the back of the
machine until it stops.
Important • To return the lever to its original position,
slide it towards you until it stops.
4 Push the tray in gently until it comes to a
stop.
35
Page 38

2 Paper and Other Media
CAUTION
Loading Paper in the Trays 6 to 7 (HCF (A4 2 Tray))
Following describes the procedure for loading paper in the Trays 6 to 7 (HCF (A4 2
Tray)) (optional).
When the machine runs out of paper during copying or printing, a message is displayed
on the control panel display. Add paper according to the displayed instructions.
Paper and Other Media
Copying or printing is automatically resumed when paper is added.
Note • Before loading paper in a tray, fan the paper well. It prevents paper from sticking to each
other and reduces paper jams.
For information about changing the paper size and orientation, refer to "Changing the Paper Size for the
Tray 6 to 7 (HCF (A4 2 Tray))" (P.39).
1 Pull out the Tray towards you until it stops.
When pulling out the paper tray,
do it slowly. If pulled out with too
2
much force, the tray can hit and
injure your knees.
Important • While the machine is proce ssing a job, do
not pull out the tray.
2 Load paper against the right edge of the tray
with the side to be copied or printed facing
up.
Important • Do not load paper exceeding the
maximum fill line. It might cause paper
jams or machine malfunctions.
3 Push the tray in gently until it comes to a stop.
Loading Paper in the Tray 8 (Interposer )
Following describes the procedure for loading paper in the Tray 8 (Interposer)
(optional).
Interposer allows you to load paper (blank, copied paper, etc.), which will only be used
as separators and covers, so that the machine does not output on the paper loaded in
this tray.
Note • When adding paper to inter poser, rem ove any p aper rema ining in the tray, add it to th e stack
of paper to be added, then load all of the paper into the interpos er at once.
1 Hold the center of the paper guides and slide
them to the desired paper size.
M A X
36
Page 39

2 Load the paper, neatly aligning all edges.
Important • Do not load paper exceeding the
maximum fill line. It might cause paper
jams or machine malfunctions.
Loading Tab Paper in the Tray 8 (Interposer)
Following describes the procedure for loading tab paper in the Tray 8 (Interposer)
(optional).
1 Hold the center of the paper guides and slide
them to the desired paper size.
Loading Paper
Paper and Other Media
2
2 If the paper is already printed on, load the
paper with the printed side facing up and
with the tab side to be fed first.
Important • Do not load paper exceeding the
maximum fill line. It might cause paper
jams or machine malfunctions.
A
A
37
Page 40

2 Paper and Other Media
CAUTION
Changing the Paper Size
The following describes how to change the paper size for the Trays.
Note • If you need t o change the pa per size for tr ays 1 and 2, co ntact our Customer Support
Center.
Paper and Other Media
For information about paper size, refer to"Paper Size Settings" (P.106).
For a description of how to make copies on non-standard size paper, refer to "3 Copy" > "Copy" >
"Papaer Supply (Selecting the Paper for Copying)" in the User Guide. For a description of how to print
to non-standard size paper, refer to the print driver’s online help.
• The paper types for the Trays are preset. Normally, plain paper is set. When replacing the
loaded paper with other types of paper, change the paper type settings to match the type of
paper to be loaded to maintain print quality.
For information about changing the paper types, refer to
.
(P.41)
• When setting a non-standard paper size, you must register the paper size. For information
about registering paper sizes, refer to "Paper Tray Attributes" (P.95).
2
Changing the Paper Size for the Trays 3 to 4
"Changing the Paper Settings"
Following describes how to change the paper size for the Trays 3 to 4.
1 Pull out the Tray 3 towards you until it stops.
When pulling out the paper tray,
do it slowly. If pulled out with too
much force, the tray can hit and
injure your knees.
Important • While the machine processes a job, do
not pull the tray out that the job uses.
2 Remove any paper loaded on the tray.
3 While pinching the two guide levers, move
them to the size of the new paper.
4 When the paper guides are positioned
correcyly, release them.
38
5 Align the paper stack and load it into the tray.
Important • Do not load paper exceeding the
maximum fill line. It might cause paper
jams or machine malfunctions.
• Do not place any paper or things in the
empty space on the right side of the Tray
3 or 4. It may cause paper jams or
machine malfunctions.
6 Push the tray in gently until it comes to a
stop.
Note • Affix the paper size label to the front of the paper tray.
M A X
Page 41

Changing the Paper Size for the Tray 6 (HCF (A3 1 Tray))
CAUTION
Following describes how to change the paper size for the Tray 6 (HCF (A3 1 Tray)).
1 Pull out the Tray 6 towards you until it stops.
Changing the Paper Size
When pulling out the paper tray,
do it slowly. If pulled out with too
much force, the tray can hit and
injure your knees.
Important • While the machine is processing a job, do
not pull out the tray.
• Do not add a new stack of paper on top of the remaining paper in the tray, in order to prevent
paper jams or any othe r troubl es. First , remove the remai ning pape r in the tra y, then loa d the
new stack of paper.
2 Remove any paper loaded in the tray.
3 With the side to be copied or printed on
facing up, load approximately 50 to 100
sheets of paper in the tray and align the
edges of the paper in the arrow direction (1).
Hold the long-side paper guide and slide it to
the desired paper size (2).
Important • Do not load paper exceeding the
maximum fill line. It might cause paper
jams or machine malfunctions.
4 With the side to be copied or printed on
facing up, load the remaining paper and
align the edges of the paper in the arrow
direction (1). Hold the short-side paper guide
on the left side and slide it to the desired
paper size (2).
Important • If the number of sheets is 100 or les s, t he
paper guides touch too tightly against the
paper, causing the paper to deform and
resulting in paper jams.
• Position the guides correctly to match the paper size. If the position of the guide is not
correct, the paper may not be fed properly and cause paper jams.
Paper and Other Media
2
5 Push the tray in gently until it comes to a stop.
Changing the Paper Size for the Tray 6 to 7 (HCF (A4 2 Tray))
Following describes how to change the paper size for the Trays 6 and 7 (HCF (A4 2
Tray)).
Note • When changing the paper size to non-standard size loaded in trays 6 and 7, contact your
Customer Support Center. If doing so, it never returns to the original setting.
39
Page 42

2 Paper and Other Media
CAUTION
Paper and Other Media
2
1 Pull out the tray towards you until it stops.
When pulling out the paper tray,
do it slowly. If pulled out with too
much force, the tray can hit and
injure your knees.
Important • While the machine processes a job, do
not pull the tray out that the job uses.
2 Remove any paper loaded on the tray.
3 Loose the screw on the right to remove your
side and the other side guide.
4 Attach the guides according to the hole of
the paper size to change, and tighten the
screws.
5 Load and align the edge of the paper against
the right edge of the tray with the side to be
copied or p rinted faci ng up.
Important • Do not load paper exceeding the
maximum fill line.Doing so might cause
paper jams or machine trouble.
6 Push the tray in gently until it comes to a
stop.
Note • Affix the paper size label to the front of
the paper tray.
M A X
40
Page 43

Changing the Paper Settings
The following describes how to change the paper type for Trays and how to set image
quality processing by individual paper type.
Note • Users can name User1 to User5 display ed in the paper type. For information on how to set
names to User1 to User5, refer to "Custom Paper Name/Color" (P.95).
• The [Setup] screen, which can be displayed by selecting [Setup] in the [All Services] screen,
allows you to change the paper type setting without entering the System Administration
mode, if you have con figu red th e setti ngs to do so i n adva nce. F or mo re info rmati on, refer t o
"Customize Paper Supply Screen" (P.96)
1 Press the <Log In/Out> button.
Changing the Paper Settings
Paper and Other Media
2
2 Enter the Administrator ID with the numeric
keypad or the keyboard displayed, and
select [Enter].
Note • The default Administrator ID is "11111".
When using the Authentication feature, a
passcode is required. The default
passcode is "x-admin".
3 Select [Tools].
4 Select [Paper Tray Settings].
<Log In/Out>button
41
Page 44

2 Paper and Other Media
Paper and Other Media
2
5 Select [Paper Tray Attributes].
6 Select the paper tray whose paper type
setting is to be changed at [Items], and
select [Change Settings].
7 Select [Change Settings].
8 Select the [Paper Type], [Paper Size], and
[Paper Color] to be set and then select
[Save].
• Select [ ] to return to the previous
screen or [ ] to move to the next screen.
9 Select [Confirm].
10 Select [Close] repeatedly until the [Tools]
screen is displayed.
11 Select [Close] to display the [All Services]
screen.
42
Page 45

3 Maintenance
This chapter describes how to replace consumables, clean the machine, print a
report/list, and delete the print job with an invalid User ID.
z
Replacing Consumables.............................................................................44
z
Cleaning the Machine.................................................................................54
z
Printing a Report/List ..................................................................................57
z
Deleting the Print Job with an Invalid User ID ............................................58
Page 46

3 Maintenance
WARNING
CAUTION
Replacing Consumables
The machine is provided with t he following cons umables and peri odical replacem ent parts.
We recommend the use of the following co nsumables as they have b een manufac tured to
meet the specifi cat io ns of t he m achine .
Maintenance
3
Type of Consumables/
Periodical Replacement Parts
Toner cartridge CT200554 1 unit/box
Waste Bottle CWAA0552 1 unit/box
Staple cartridge for booklet maker finisher
XC
Staple cartridge for 100 sheets XF CWAA0677 5,000 staples × 4 sets/box,
Note • We recommend that you always have spare consumables/periodical replacement parts
available.
z
Use a broom or a wet cloth to wipe off spilled toner. Never use a vacuum cleaner
Product
Code
CWAA0501 5,000 staples × 4 sets/box
Quantity/Box
Staple Waste Container × 1
unit/box
for the spills. It may catch fire by electric sparks inside the vacuum cleaner and
cause explosion. If you spill a large volume of toner, contact your local Fuji Xerox
representative.
z
Never throw a toner cartridge into an open flame. Remaining toner in the cartridge
may catch fire and cause burn injuries or explosion.
If you have a used toner cartridge no longer needed, contact your local Fuji Xerox
representative for its disposal.
z
Keep the drum cartridges and toner cartridges out of the reach of children. If a child
accidentally swallows toner, spit it out, rinse mouth with water, drink water and
consult a physician immediately.
z
When replacing the drum cartridges and toner cartridges, be careful not to spill the
toner. In case of any toner spills, avoid contact with clothes, skin, eyes and mouth
as well as inhalation.
z
If toner spills onto your skin or clothing, wash it off with soap and water.
If you get toner particles in your eyes, wash it out with plenty of water for at least
15 minutes until irritation is gone. Consult a physician if necessary.
If you inhale toner particles, move to a fresh air location and rinse your mouth with
water.
If you swallow toner, spit it out, rinse your mouth with water, drink plenty of water
and consult a physician immediately.
Handling consumables/periodical replacement parts
z
Do not store boxes for consumables/periodical replacement parts upright.
z
Do not unpack consumables/periodical replacement parts before use. Avoid storing
consumables/periodical replacement parts in the following locations:
- In extreme temperature and humidity
44
Page 47

Replacing Consumables
- Near heat-generating devi ce s
- In direct sunlight
- In dusty locations
z
Use consumables/periodical replacement parts only as directed on their packages.
z
We recommend always having spare consumables/periodical replacement parts
available.
z
When calling our Customer Support Center to order consumables/periodical
replacement parts, have the product codes ready.
z
Use of consumables/periodical replacement parts not recommended by Fuji Xerox
can impair machine quality and perfor mance. Use only consumables/periodical
replacement parts recommended by Fuji Xerox.
Checking the status of consumables
The status of consumables can be checked on the [Supplies] screen.
For information about consumables, refer to "Supplies" (P.74).
Maintenance
Replacing the Toner Cartridge
The machine comes with a toner cartridge. The machine will display the following
messages when the toner cartridge is empty. Follow the messages and replace the
toner cartridge as necessary.
Message
Black Toner [K1] Cartridge
needs to be replaced soon.
Black Toner [K1] Cartridge
needs to be replaced.
*1 The page yield after each message is displayed is for when A4 paper LEF is used. The value is an
estimate and varies depending on the conditions such as the print content, dot coverage (area
coverage), paper size, paper type, copy/print density, output image type, and the machine usage
environment.
Important • When replacing the toner cartridge, toner may spill and soil the floor. We recommend laying
paper on the floor beforehand.
• The use of toner cartridges not re commended by Fuji Xerox may impair quality and
performance. Use only toner cartridges recommended by Fuji Xerox.
• When the remaining amount of toner becomes small, the machine may stop during printing
and displa y a message. If this happen s, replace the toner cartridge to continue copying or
printing.
• Replace toner cart ridges while the machine is on.
• If a partially used toner cartridg e is us ed , a message appears and th e nu mb er of pages that
you can copy or print displayed on the screen may differ considerably.
Page yield after the
message is displayed
Approx. 5,000 pages Replace the toner cartridge
-
*1
with a new one.
Solution
3
45
Page 48

3 Maintenance
WARNING
Maintenance
1 Make sure that the machine has stopped,
and open the toner cover.
2 Turn the toner cartridge to the left until it
aligns with the unlock mark.
3
3 Pull out the toner cartridge slowly while
holding its bottom with one hand.
Never throw a toner cartridge into
an open flam e. Remaining toner
in the cartridge may catch fire
and cause burn injuries or
explosion.
If you have a used toner cartridge
no longer needed, contact your
local Fuji Xerox representative
for its disposal.
Important • Pull out the toner cartridge gently. Otherwise, toner may fly out of the cartridge.
4 Remove the new cartridge from the box and
shake if from side to side to even out the
toner inside.
5 Hold the cartridge with the arrow mark facing
up.
46
Page 49

6 Push the cartridge in slowly until it stops and
turn it to the lock mark.
7 Close the toner cover.
Replacing the Waste Bottle
Replacing Consumables
The machine comes with a waste bottle. The machine will sound an alarm and display
the message "Please order a Waste Toner Container." approximately 18,000 pages
before the waste bottle is full. When this message appears, order a new waste bottle.
The machine will stop when the waste bottle ends its life.
Note • The above value "18,000 pages" is based on when copies are made at 6% area coverage
using A4 size paper. The value is for reference only and will vary depending on the
conditions such as the print conten ts, dot cov erage (ar ea cove rage) , paper si ze, paper typ e,
copy/print density, output image type, and machine usage environment.
Important • W hen replacing the waste bottle, toner may spill and soil the floor. We recommend laying
paper on the floor beforehand.
• Proper disposal of unwant ed wa ste bottle is required. Toner cartridge containe rs sh ould not
be opened with force and must be returned to our Customer Support Center.
• The use of waste bottles not recommended by Fuji Xerox may impair quality and
performance. Use only waste bottles recommended by Fuji Xerox for the machine.
• Replace the waste bo ttle while th e machine is on.
• When replacing the waste bottle, be careful not to spill the toner. In case of any toner spills,
avoid contact with skin and clothing, as well as inhalation and contact with eyes and mouth.
• In case of any toner spills onto your skin and clothing, wash with soap and water.
• Should toner particles get into your eyes, flush with plenty of water for at least 15 minutes
until the irritations gone. If necessary, seek medical treatment from a doctor.
• If toner particles are inhaled, move to a location with fresh air and gargle with plenty of
water.
• Should toner be swallowed, spit it out, rinse mouth with water and drink plenty of water.
Consult a physician immediately.
• Keep toner container out of reach of children. Should toner be swallowed, spit it out, rinse
mouth with w ater and drink plenty of wat er. Consult a physician immediately.
Maintenance
3
1 Make sure that the machine is not in
operation, and open the front cover.
47
Page 50

Maintenance
WARNING
3
3 Maintenance
2 Open the waste bottle cover and then push
the lever.
3 Pull out the waste bottle half-way from the
machine.
4 Hold the center top part on the waste toner
bottle and remove the bottle from the
machine.
5 Use both hands, carefully put the used
waste bottle into a supplied plastic bag.
Never throw a toner waste bottle
into an open flame. Remaining
toner in the toner waste bottle
may catch fire and cause burn
injuries or explosion.
If you have a used toner waste
bottle no longer needed, contact
your local Fuji Xerox
representative for its disposal.
Important • Place the used waste bottle into the special bag and then close it firmly using ring rubber
provided with the bag. If the zipper is left open, the toner may leak out during disposal.
6 Hold the center top part of the waste toner
container and push it in all the way into the
machine.
Important • When inser ting the waste bottle, do not
grip the handle of the bottle.
7 Close the waste bottle cover.
8 Close the front cover.
Note • A message will be displayed and the
machine will not operate if the front cover of the finisher is even slightly open.
48
Page 51

Replacing the Staple Cartridge
When the staple cartridge needs to be replaced, a message appears on the touch
screen. When this message appears, replace the staple cartridge.
Important • The use of staple cartridges not recommended by Fuji Xerox may impair quality and
performance. Use only staple cartridges recommended by Fuji Xerox for the machine.
Note • To order a staple cartridge, contact our Customer Support Center.
1 Make sure that the machine is not is
operation, and open the right cover of the
Finisher.
2 Hold the R1 at the position shown in the
figure.
Replacing Consumables
Maintenance
3
3 Pull out the unit.
4 Hold the positions indicated by an arrow to
remove the staple cartridge from the unit.
5 Push a new staple cartridge into the unit.
49
Page 52

3 Maintenance
6 Push the removed unit back to the original
position.
7 Close the right cover of the finisher.
Note • A message will be disp layed and the machine will not opera te if th e rig ht co ver o f the finis her
is even slightly open.
Maintenance
Replacing the Bo oklet Staple Cartridge
When the machine is equipped with a Finisher and the booklet staple cartridge needs
to be replaced, a message appears on the touch screen. When this message appears,
replace the booklet staple cartridge.
3
Important • The use of staple cartridges not recommended by Fuji Xerox may impair quality and
performance. Use only staple cartridges recommended by Fuji Xerox for the machine.
Note • To order a staple cartridge, contact our Customer Support Center.
1 Make sure that the machine is not in
operation, and open the right cover of the
Finisher.
2 While pushing the lever to the right, pull the
staple cartridge unit out of the machine.
3 Hold the staple cartridge by the tabs on both
sides and lift the cartridge out of the unit.
R3
R2
50
Page 53

4 While holding the tabs of the new staple
CAUTION
cartridge, push the cartridge into the unit.
5 Push the staple cartridge unit into its original
position.
Replacing Consumables
Maintenance
6 Close the right cover of the finisher .
Note • A message will be displayed an d the machine will no t operate if th e front cov er of the fini sher
is even slightly open.
Replacing the Staple Waste Container
When the staple waste container becomes full, a message appears on the touch
screen. Replace the staple waste container according to the message.
Be careful not to get injured by waste staples when detaching a staple dust box.
Important • Replace the staple waste container while the power is on.
• A staple waste container is included in a Staple Cartridge for 100 sheets XF.
1 Make sure that the machine has stopped,
and open the right cover of the finisher.
3
2 Move the lock lever, shown in the figure,
leftward to the position.
51
Page 54

3 Maintenance
Maintenance
3 Hold “R5” as shown in the figure and remove
the staple waste container from the machine.
4 Put the used staple waste container into a
supplied plastic bag.
Important • Do not disassemble the container and
return it to our Customer Support Center.
3
5 Hold the new staple waste container by “R5”
and push it into the machine.
Important • To prevent injury, do not put your fingers
on top of the container.
6 Push "R5" until the lock lever moves to the
position.
7 Close the right cover of the finisher.
Note • A message will be disp layed and the machine will not opera te if th e rig ht co ver o f the finis her
is even slightly open.
Emptying the Punch Waste Container
When the punch waste container becomes full, a message appears on the touch
screen. Discard the scraps according to the message.
If you take the punch waste container out of the machine, make sure to empty it
completely. If it is reinstalled with some scraps remaining, it may become full before the
message appears again, and this can cause machine breakdown.
Important • When emptying the punch waste container, make sure that the machine is switched on. If
not switched on, the machine will not recognize that the punch waste container has been
emptied.
52
Page 55

1 Make sure that the machine has stopped,
and open the right cover of the finisher.
2 Pull out the punch waste container "R4"
towards you.
Replacing Consumables
Maintenance
3 Discard all the scraps.
4 Insert the empty punch waste container all
the way into the machine.
5 Close the right cover of the finisher.
Note • A message will be displaye d and the machin e will not ope rate if the ri ght cover of the finisher
is even slightly open.
3
53
Page 56

3 Maintenance
WARNING
CAUTION
Cleaning the Machine
The following describes how to clean the machine.
The cleaning instructions will be explained individually for various parts of the machine:
the machine exterior, document cover/document glass, film/constant velocity transport
glass, and document feeder roller.
When cleaning this product, use the designated cleaning materials exclusive to it.
Other cleaning materials may result in poor performance of the product. Never use
aerosol cleaners, or it may catch fire and cause explosion.
Maintenance
When cleaning this product, always switch off and unplug it. Access to a live machine
interior may cause electric shock.
3
Cleaning the Exterior
The following describes how to clean the exterior of the machine.
Important • Always switch the power off and unplug the power cord before cleaning any part of the
machine. Cleaning the machine with the power on may cause an electric shock.
• Do not use benzene, paint thinner, or other volatile liquids or spray insect repellent on the
machine as they might discolor, deform, or crack covers.
• Cleaning the machine with an excessive amount of water may cause the machine to
malfunction or damage documents during copying.
1 Wipe the exterior with a firmly wrung soft
cloth moistened with water.
Important • Do not use cleaning agents other than
water or neutral detergen t.
Note • If dirt does not come off easily, gently
wipe it with a soft cloth moistened with a
small amount of neutral detergent.
2 Wipe off any excess water with a soft cloth.
Cleaning the Document Cover and Document Glass
If the document cover and document glass are dirty, streaks or smears may appear on
copies and the machine may not properly detect document sizes.
To ensure clean copies at all times, clean the document cover and the document roller
about once a month.
Important • Do not use ben zene, paint thinner, or other organic sol vents. Doing so might damage paint
or coating on plastic parts.
• Cleaning the machine with an excessive amount of water may cause the machine to
malfunction or damage documents during copying.
54
Page 57

1 Wipe the document cover with a soft cloth
guide
moistened with water to remove any dirt and
then wipe it with a soft, dry cloth.
Important • Do not use cleaning agents other than
water or neutral detergent.
Note • If dirt does not come off easily, gently
wipe it with a soft cloth moistened with a
small amount of neutral deterge nt .
2 Wipe the document glass with a soft cloth
moistened with water to remove any dirt, and
then wipe it with a soft, dry cloth.
Important • Do not use cleaning agents other than wa ter or neutral detergent.
Note • If dirt does not come off easily, gently wipe it with a soft cloth moistened with a small amount
of neutral detergent.
Cleaning the Film and Constant Velocity Transport Glass
Cleaning the Machine
Maintenance
Dirt or smudges on the film or constant velocity transport glass can cause streaks or
smears on outputs.
To ensure clean copies at all times, clean the machine monthly.
Important • Do not use benzene, paint thinner, or other organic solvents. Doing so might damage paint
or coating on plastic parts.
• Cleaning the machine with an excessive amount of water may cause the machine to
malfunction or damage documents during copying.
1 With a soft cloth moistened with water, wipe
the film, constant velocity transport glass,
and guide, and then wipe off the excess
water with a soft dry cloth.
Important • Do not use cleaning agents other than
water or neutral detergent.
Note • If dirt does not come off easily, gently
wipe it with a soft cloth moistened with a
small amount of neutral deterge nt .
2 Open the shoo t shown in the f igure by
pinching its lever, and wipe the document
feeder glass with a soft cloth moistened with
water. Then, wipe the excess water with a
soft dry cloth.
Important • Do not push the narrow glass strip
strongly since it is easy to damage the
film around the optical glass surface.
• Do not us e cleaning agents other than
water or neutral detergent.
Note • If dirt does not come off easily, gently wipe it with a soft cloth moistened with a small amount
of neutral detergent.
film
constant velocity
transport glass
shoot
document
feeder glass
3 Wipe the document glass with a soft cloth moistened with water to remove any dirt,
and then wipe it with a soft dry cloth
3
4 Push the center-left side of the document cover to close the belt area until it clicks into
place.
55
Page 58

3 Maintenance
Cleaning the Document Feeder Roll er s
Dirt or smudges on the document feeder rollers can cause paper jams or streaks or
smears on outputs.
To ensure clean copies at all times, clean the document feeder roller about once a
month.
Important • Do not use ben zene, paint thinner, or other organic sol vents. Doing so might damage paint
or coating on plastic parts.
• Cleaning the machine with an excessive amount of water may cause the machine to
malfunction or damage documents during copying or printing.
1 Hold the handle on the top cover of the
Maintenance
document feeder and lift it open until it stops.
Note • When you fully open the cover , it en ters a
fixed position. Open the cover gently.
3
2 While turning the rollers, wipe them with a
soft cloth moistened with water.
Important • Do not use cleaning agents other than
water or neutral detergen t.
• Use a cloth firmly wrung to prevent water
drops from falling into the machine. If
water gets into the mach ine, it may c ause
machine malfunction.
Note • If dirt does not come off easily, gently
wipe it with a soft cloth moistened with a
small amount of neutral detergent.
3 Close the top cover of the document feeder until it clicks into place.
4 Close the left cover of the document feeder until it clicks into place.
56
Page 59

Printing a Report/List
This section describes how to print a report/ list.
Note • The items displayed vary depending on the optional features installed.
• When the <Job in Memory> ind icator i s lit, you can co nfirm the do cuments stored to memory
in the [Stored Documents List].
For information about report/list types, refer to "Print Reports" (P.63).
1 Press the <Machine Status> button.
2 Select [Print Reports].
Note • If [Print Reports Button] unde r [Reports] is
set to [Disabled], the [Print Reports]
button appears on ly in [User Mode] of th e
System Adm inistratio n mode. For
information on [Reports], refer to
"Reports" (P.98).
Printing a Report/List
Maintenance
<Machine Status>button
3
3 Select a report or list yo u want to print and
press the <Start> button.
57
Page 60

3 Maintenance
Deleting the Print Job with an Invalid User ID
All the print jobs that have a User ID regardless whether it is valid User ID or not are
stored with the Private Charge Print feature. To minimize the unnecessary print jobs,
specify how long print jobs can be saved for, so that they can be automatically deleted
after a specified period of time. Or the system administrator can manually delete them.
The following describes how to delete documents that have an invalid User ID stored
with the Private Charge Print feature.
For details on how to specify a duration of how long the print jobs are kept, refer to "Stored Document
Settings" (P.154).
Maintenance
3
1 Press the <Log In/Out> button.
2 Enter the user ID with the numeric keypad or
the keyboard displayed, and select [Enter].
3 Press the <Job Status> button.
4 Select the [Secure Print Jobs & More] tab.
5 Select [Private Charge Print].
6 Select the User ID to be deleted.
7 Select the document to be deleted, and then
select [Delete].
58
Page 61

4 Machine Status
This chapter describes the features for checking the machine status.
z
Overview of Machine Status.......................................................................60
z
Machine Information ...................................................................................61
z
Faults..........................................................................................................73
z
Supplies......................................................................................................74
z
Billing Information .................. ................................. ..... ...... .........................75
Page 62

4 Machine Status
Overview of Machine Status
You can check machine status and the number of printed pages on the screen. You
can also print various reports/lists to check the job history, settings and registered
information.
1 Press the <Machine Status> button.
Machine Status
The [Machine Status] screen offers the following features.
<Machine Status>button
4
Machine Information
You can check the machine configuration, paper tray status, and hard disk overwriting
status. You can check or set print modes. You can also print various reports/lists to
check the job history, settings and registered information.
For more information, refer to "Machine Information" (P.61).
Faults
You can check the faults that occurred on the machine.
For more information, refer to "Faults" (P.73).
Supplies
You can check the status of consumables.
For more information, refer to "Supplies" (P.74).
Billing Information
You can check the number of pages printed by meter or user.
For more information, refer to "Billing Information" (P.75).
60
Page 63

Machine Information
On the [Machine Information] screen, you can check the machine configuration and
paper tray status. You can change settings for the print mode. You can also print
various reports/lists to check the job history, settings and registered information.
The following shows the reference section for each item.
General Information...................................................................................................................61
Paper Tray Status .......................................................................................................................63
Print Reports............................... ..... ................................ ...........................................................63
Automatically Printed Reports/Lists..........................................................................................69
Overwrite Hard Disk.................................................................................................................. 69
Print Mode........................................... ................................. ......................................................70
1 Press the <Machine Status> button.
2 On the [Machi ne Information] screen
displayed, you can check the machine
status.
Machine Information
Machine Status
General Information
On the [General Information] screen, you can check the serial number of the machine,
machine configuration, and software version.
1 Check the machine information in a screen displayed.
Web Site
Indicates how to make maintenance and operating enquiries.
Machine Serial Numbe r
Indicates the serial number of the machine.
Current System Software
Indicates the current system software.
IP Adrress
4
Indicates the IP adrress of the machine.
Machine Configurati on
Displays the [Machine Configuration] screen.
Software Version
Displays the [Software Version] screen.
61
Page 64

4 Machine Status
[Machine Configuration] Screen
You can check the machine configuration.
1 Select [Machine Configuration].
2 Check the machine configuration in a screen
displayed.
Note • Select [ ] to return to the previous
Machine Status
On the [Machine Configuration] screen, you can check the following items.
screen or [ ] to move to the next screen.
z
z
z
z
4
z
z
z
z
Note • [Output Device] indicates whether or not a finisher (optional) is installed. If Finisher is
[Software Version] Screen
You can check the software version.
1 Select [Software Version].
2 Check the software version in a screen
displayed.
Configuration Code
Document Feeder
Paper Tray
High capacity paper tray
Tray 8 (Interposer)
Output Device
High Capacity Stacker
Folder
installed, it is display ed as "F in ish er" .
z
Booklet Maker
z
Waste Bottle
z
Hard Disk
z
Page Memory Size
z
System Memory Size
z
Image Compression Kit
z
PostScript
z
ESC/P
z
HP-GL/2
z
PCL
z
PDF
z
XPS
z
KS5843
z
KSSM
z
KS5895
z
USB
62
On the [Machine Configuration] screen, you can check the following items.
z
Controller ROM
z
Controller + PS ROM
z
IOT ROM
z
HCF ROM
z
Finisher D ROM
z
I I T ROM
z
I I T Option ROM
z
ADF ROM
z
SJFI
z
SSMI
Page 65

Paper Tray Status
You can check the paper trays set on the machine. On the screen, you can check the
following items.
z
Status
z
% Full (Amount of paper remaining)
z
Paper Size
z
Paper Type
1 Select [Paper Tray Status].
2 Check the paper trays in a screen displayed.
Machine Information
Machine Status
Print Reports
This section describes how to print a report/ list.
Note • The items displayed vary depending on the optional features installed.
1 Select [Print Reports].
2 Select the report/list to be output.
Note • The image shown right is the screen
Job Status
1 Select [Job Status].
Note • To display the [Job Status] screen, select the <Machine Status> button, and then select
2 Select the report/list to be output.
3 Press the <Start> button.
4
displayed by selecting [Us er Mode] in the
System Administration mode.
[Machine Information] > [Print Reports] > [Job Status].
63
Page 66

4 Machine Status
Job History Report
Error History Report
Copy Reports
You can check job results. The data for the latest 200 jobs is printed.
Clearing The [Include Children Jobs] check box prints the related jobs (such as job flow
jobs) on one line. Selecting this check box prints each related job on each line.
You can als o automatica lly print a [Job History Report] every 50 jobs.
For information about the Auto Print setting, refer to "Reports" (P.98). The Auto Print feature prints the
results of all jobs.
You can print error information about the machine. The latest 50 errors are printed.
Machine Status
4
Printer Reports
1 Select [Copy Reports].
Note • To display the [Copy Service S ettings] screen , select th e <Machine Status> b utton, an d then
select [Machine Information] > [Print Reports] > [Copy Repors].
2 Select [Configuration Report].
3 Press the <Start> button.
Configuration Report
You can check the hardware configuration,
network information, and print and copy
settings of the machine.
Note • The content of [Configurati on Report] is
identical whether it is printed from [Copy
Reports], [Printer Reports], or [Scan
Reports].
1 Select [Printer Reports].
Note • To display the [Print Reports] screen, select the <Machine Status> button, and then select
[Machine Information] > [Print Reports] > [Print Reports].
2 Select the list to be printed.
64
3 Press the <Start> button.
Note • The items d isplayed va ry depending on
the options installed.
Configuration Report
Allows you to check the h ardware conf iguration, network information, and print and
copy settings of the machine.
Note • The content of [Configurati on Re po rt] is iden tical whether it is printed from [Copy Reports],
[Printer Reports], or [Scan Reports].
PCL Settings List
Prints the settings for the PCL virtual printer.
Page 67

Machine Information
PCL Macro List
Prints the list of forms registered for PCL.
PDF Settings List
Prints the settings configured in the PDF printer mode.
TIFF / JPEG Settings List
Prints the settings configured in the TIFF and JPEG printer mode.
TIFF/JPEG Logical Printers List
Prints the list of logical printers created in the TIFF and JPEG printer mode.
TIFF and JPEG logical printers are configured on CentreWare Internet Services. For more information,
refer to the online help of CentreWare Internet Services.
PostScript Logical Printers List
Prints the list of logical printers created in PostScript.
PostScript logical printers are configured on CentreWare Internet Services. For more information, refer
to the online help of CentreWare Internet Services.
ESC/P Settings List
Machine Status
Prints the settings configured in the ESC/P-K emulation mode.
ESC/P Logical Printers List
Prints the stored programming settings configured in the ESC/P-K emulation mode.
ESC/P User Defined List
Prints the information on forms, logos, and patterns that can be used in the ESC/P-K
emulation mode.
HP-GL/2 Settings List
Prints the settings for the HP-GL, HP-GL/2 and HP-RTL emulation modes.
HP-GL/2 Logical Printers List
Prints the stored programming settings for the HP-GL, HP-GL/2, and HP-RTL
emulation modes.
Font List
Prints the list of fonts available on the machine.
Note • Printed information depends on the installed options.
PCL Font List
Prints the fonts available in PCL.
4
PostScript Font List
Scan Reports
1 Select [Scan Reports].
Prints the fonts available in PostScript.
Note • To display the [Scan Reports] screen, select the <Machine Status> button, and then select
[Machine Information] > [Print Reports] > [Scan Reports].
65
Page 68

4 Machine Status
Machine Status
2 Select the list to be printed.
3 Press the <Start> button.
Reports
You can print the [Configuration Report], [Scan Configuration Report], and [Domain
Filter List]. Select the list to be printed, then press the <Start> button.
z
Configuration Report
You can check the hardware configuration, network information, and print and copy
settings of the machine.
Note • The content of [Configurati on Re po rt] is iden tical whether it is printed from [Copy Reports],
[Printer Reports], or [Scan Reports].
z
Scan Configuration Report
4
You can check the settings configured for the scan features.
z
Domain Filter List
You can check the permitted domains registered for domain filtering.
Job Template List
You can print the settings for the server where the job templates, which are created
using scan service setting tools, are stored.
Address Book
You can check the settings for the address numbers.
When you specify a range of address numbers, the list of settings for the specified
address numbers will be printed. Each page contains the settings information on 50
address numbers.
If you select [Address Book], the screen for specifying a range of address numbers is
displayed. Select a range of numbers, and press the <Start> button.
1 Select [Address Book].
2 Specify a range of addr ess numbers to be
printed.
3 Press the <Start> button.
Mailbox List
66
Prints the list of mailbox settings and the procedure for saving documents to mailboxes.
Note • [Mailbox List] appears when the System Administration mode is selected.
Page 69

1 Select [Mailbox List].
Note • To display the [Mailbox List] screen, select the <Machine Status> button, and then select
2 Select a range of mailbox numbers to be
printed.
3 Press the <Start> button.
Job Counter Report
Prints the counter report for each feature.
Note • [Job Coun ter Report] appears when the S ystem Administration mode is selected.
1 Select [Job Counter Report].
Note • To displ ay the [Job Cou nter Report] screen, sel ect the <Machine Status> button, and then
2 Select [Job Counter Report].
[Machine Information] > [Print Reports] > [Mailbox List].
select [Machine Information] > [Print Reports] > [Job Counter Report].
Machine Information
Machine Status
4
3 Press the <Start> button.
Auditron Reports
You can print an auditron report by user. Note that the content on the screen differs
depending on whether the Account Administration feature is enabled.
Note • [Auditron Reports] appears when the System Administ ration mode is selected.
When the Account Administration feature of each service is set to [Off]
When the Account Administration feature of each service is set to [Off], the following
screen appears, allowing you to print a printer meter report.
1 Select [Auditron Reports].
Note • To displ ay the [Auditron Reports] screen, select t he <Machine Status> button, and then
select [Machine Information] > [Print Reports] > [Auditron Reports].
67
Page 70

4 Machine Status
Machine Status
4
2 Select [Meter Report (Print Jobs)].
3 Press the <Start> button.
Meter Report (Print Jobs)
You can check the total printed pages and the total sheets used for each client (job
owner). The number of print pages is counted for each of color and monochrome.
[Meter Report (Print Jobs)] counts pages from the time at which the data has been
initialized.
When the Account Administration feature is set to [On]
When the Account Administration feature is set to [On], the following screen appears.
The auditron report for each user organized by each service can be printed for the services of
which the Account Administration feature is set to [On].
For information on enabling the Account Administration feature for each service, refer to "Accounting"
(P.170).
1 Select [Auditron Reports].
Note • To display the [Auditron Reports] screen, select the <Machine Status> button, and then
select [Machine Information] > [Print Reports] > [Auditron Reports].
2 Select the auditron report to be printed.
3 Select a range of user numbers to be
printed.
Note • Selecting [Select All] selects all
users.
4 Press the <Start> button.
Auditron Report (Copy Jobs)
You can check the total number of pages copied on the machine, and the numbers of
color and monochrome print pages. If the maximum limit is set for the number of pages
or colors that can be scanned, you can also view the limit value. [Auditron Report (Copy
Jobs)] counts pages from the time at which the data has been initialized.
Note • [No.] displayed on the report is the No. (User Administration Number) registered for the
Authentication and Account Administration feature.
Auditron Report (Print Jobs)
68
You can check the total printed pages and the total sheets used for each client (job
owner). The number of print pages is counted for each of color and monochrome.
[Auditron Report (Print Jobs)] counts pages from the time at which the data has been
initialized.
Note • [No.] displayed on the report is the No. (User Administration Number) registered for the
Authentication and Account Administration feature.
Page 71

Auditron Report (Scan Jobs)
You can check the total number of pages, and the numbers of color and monochrome
pages scanned on the machine. If the maximum limit is set for the number of pages or
colors that can be scanned, you can also view the limit value. [Auditron Report (Scan
Jobs)] counts pages from the time at which the data has been initialized.
Note • [No.] displayed on the report is the No. (User Administra tio n Number) reg i st ere d for the
Authentication and Account Administration feature.
Automatically Printed Reports/Lists
Some reports/lists relating to the scan service can only be printed automatically. This
section describes reports/lists that can be printed automatically.
Transmission Report - Undelivered
Printed when a transmission of transferring the scanned data to the computer on the
network, or sending the scanned data by e-mail has failed. You can check a reduced
image of the scanned data and its transmission result.
Set whether to print out the Transmission Report - Undelivered automatically from the
system administrator mode.
For information on specifying whether or not to have the report printed automatically, refer to "Scan
File Transfer Report" (P.98).
Machine Information
Machine Status
4
Transmission Report
Printed when a transmission of transferring the scanned data to the computer on the
network, or sending the scanned data by e-mail ha s succeeded. You can check a
reduced image of the scanned data and its transmission result.
Set whether to print out the Transm ission Report - Undelivered aut omatically from
the system administrator mode.
For information on how to automatically print out the transmission report, refer to "Scan File Transfer
Report" (P.98).
Job Flow Error Report
You can check the errors caused in the job flow. The date and time when the error
occurred and the error codes are recorded.
For information on specifying whether or not to have the report printed automatically, refer to "Job Flo w
Error Report" (P.98).
Overwrite Hard Disk
You can check the overwriting status of the hard disk. The indication "Overwriting"
shows that the overwriting is in progress. "Standby" shows the completion of the
overwriting process.
Note • This feature does no t a ppe ar for some models. A n o ptional package is n ec es sar y. F or more
information, contact our Customer Support Center.
• [Overwrite Hard Disk] appears only when [Overwrite Hard Disk] is enabled in [System
Settings]. For more information, refer to "Overwrite Hard Disk" (P.186).
1 Select [Overwrite Hard Disk].
69
Page 72

4 Machine Status
2 Check the overwriting status of the hard disk.
Print Mode
Machine Status
4
You can change and register each setting in the print mode.
Note • The items displayed vary depending on the options installed.
1 Select [Print Mode].
2 Select [Off-line] or [On-line].
Off-line
The printer cannot accept data. Any data being sent is cancelled and not printed.
On-line
The printer can accept data.
3 Select a printer language.
4 Select the item to be set.
Retrieve Programming
You can retrieve and use settings registered in the memory.
1 Select [Retrieve Programming].
70
Page 73

2 Select the memory number to be used.
Factory Defaults
Custom Settings
Programming
Machine Information
You can use the factory default settings.
The numbers stored in the memory appear.
You can check or change the values set for the print mode item numbers.
For information on item numbers that can be set in the each emulation mode menus, refer to "Appendix"
(P.403).
For information on KS/KSSM emulation mode, refer to the User Guide for th e Korean model. For
information on the ESCPK emulation mode, refer to the User Guide for the Traditional Chinese model
or Simplified Chinese model.
1 Select [Programming].
2 Enter the feature number to be set in [Item
Number] using the numeric keypad.
3 Select [Confirm] as necessary.
4 Select [Change Value].
5 Enter [New Value] using the numeric
keypad.
6 Select [Save].
Machine Status
4
Item number
Enter the item number of the feature to be set.
Current Value
When you enter [Item Number], the currently set value appears.
New Value
Enter a new value.
Store/Delete Programming
For ESC/P-K, HP-GL/2 emulations, you can register settings in the memory.
You can register up to 20 print modes for ESC/P-K and HP-GL/2 emulations.
71
Page 74

4 Machine Status
1 Select [Store/Delete Programming].
2 Select [Store Current Selections] or [Delete].
3 Select the memory number to be stored or to
Store Current Selections
Delete
be deleted.
Stores the current selections. If you select a
number already stored, its settin gs wi ll be
overwritten with the new settings. The
overwritten settings cannot be restored.
Machine Status
Default Programming
4
1 Select [Default Programming].
2 Select [Factory Defaults] or [Custom
3 When you select [Custom Settings], select
Password
When you select [Delete] and then select the number to be deleted, the number will be
deleted.
Important • The deleted numbers cann ot be restored.
You can start the printer using the settings stored in the memory as default settings.
Settings].
the memory number to be used.
Factory Defaults
You can use the factory default settings.
Custom Settings
The numbers stored in the memory appear.
For PDF emulation, if a password is set for PDF files, set the password here in
advance. P DF file s can be p rinted on ly when t heir passw ord matc hes the p assword s et
here.
You can use up to 32 characters for the password.
72
1 Press [Password].
2 Enter a password of up to 32 characters, and select [Save].
Page 75

Faults
Faults
This section describes how to check the information of errors that occurred on the
machine.
The error history report shows the latest 50 errors. The items displayed include the date
and time, error code, and error category.
The following describes how to print the error history report.
1 Press the <Machine Status> button.
2 Select the [Faults] tab.
3 Select [Error History Report] .
4 Press the <Start> button.
Note • You can also access the [Error History
Report] from the [Print Reports] on the
[Machine Information] screen.
• If [Print Report Button] under [Reports] is
set to [Disabled], the [Error History
Report] button does not appear on the
screen. For information on [Reports],
refer to "Reports" (P.98).
Machine Status
4
73
Page 76

4 Machine Status
Supplies
Machine Status
4
You can check the status of consumables on the [Supplies] screen. The status of
consumables is shown as "OK", "Replace Soon (Order Now)", or "Replace Now".
The following describes the procedure for checking the status of consumables.
For information on replacing consumables, refer to "Maintenance" (P.43).
1 Press the <Machine Status> button.
2 Select the [Supplies] tab.
Note • Select [ ] to return to the previous
screen or [ ] to move to the next screen.
On the [Supplies] screen, you can check the
following items.
Note • The items displayed vary depending on the options installed.
• [Staple Cartridge] and [Hole Punch Waste Container] appears when finisher is installed on
the machine.
• [Booklet Staple Cartridge] appears when the booklet finisher is installed.
• [Staple Waste Container] appears when the booklet finisher is installed.
z
Toner Cartridge
z
Drum Cartridge
z
Waste Toner Container
z
Cleaning Cartridge
z
Staple Cartridge [R1]
Important • If using a partly consumed toner cartridge (such as a toner cartridge removed from another
4127/4112 unit), the status shown may not match the actual remaining amount. When
replacing toner cartri dges, we recommend you use new one s.
z
Booklet Staple Cartridge [R2]
z
Booklet Staple Cartridge [R3]
z
Staple Waste Container [R5]
z
Hole Punch Waste Container [R4]
74
Page 77

Billing Information
On the [Billing Information] screen, you can check the number of printed pages for each
meter or user.
The following shows the reference section for each item.
Billing Information.......................................................... ........................................................... 75
User Account Billing Information..............................................................................................76
1 Press the <Machine Status> button.
2 Select the [Billing Information] tab.
Billing Information
Machine Status
Billing Information
You can confirm the total number of copies and printed pages by individual meters. The
meters are classified by color mode.
1 Select [Billing Information].
2 Confirm the total number of copies and
printed pages in a screen displa yed .
Serial Number
Displays the serial number of the machine.
Meter 1
Number of pages copied and printed.
Meter 2
4
Number of pages copied.
Meter 3
Number of pages printed.
75
Page 78

4 Machine Status
User Account Billing Information
You can check the number of pages printed in monochrome and colors for each user.
When the Account Administration feature is enabled, you can check the billing meters
for the currently authenticated user IDs.
For information on the Account Administration feature, refer to "Accounting" (P.170).
1 Press the <Log In/Out> button.
To check the billing meter of a currently authenticated user ID
1) Using the numeric keypad or the
keyboard displayed, enter the user ID of a
user whose billing meter needs to be
Machine Status
checked, and select [Enter].
Note • Enter the passcode if required.
2) Press the <Machine Status> button.
3) Proceed to Step 2.
To check the system administrator meter
4
1) Using the numeric keypad or the keyboard displayed, enter the user ID to enter the
System Administration mode, and select [Enter].
Note • Enter the passcode if required.
2) Press the <Machine Status> button.
3) Proceed to Step 2.
2 Select the [Billing Information] tab.
3 Select [User Account Billing Information].
4 Select the meter to be checked.
76
Meter (Copy Jobs)
Displays the number of pages copied.
Meter (Scan Jobs)
Displays the number of pages scanned.
Meter (Print Jobs)
Displays the number of pages printed.
Page 79

5 System Settings
Each feature of the machine is set to the factory default (initial) settings, but you
can customize these settings. To change the settings, enter the System
Administration mode, and use the [System Settings] screen.
This chapter explains the features that can be changed, and the procedures to
change the settings.
z
System Settings Procedure ............................................... ..... ...... ..............78
z
System Settings Menu List.........................................................................81
z
Common Service Settings ..........................................................................90
z
Copy Service Settings ............................ ..... ...... ..... ................................. .113
z
Connectivity & Network Setup..................................................................121
z
Print Service Settings ...............................................................................138
z
Scan Service Settings...............................................................................143
z
E-mail Service Settings.............................................................................149
z
Mailbox Service Settings ..........................................................................152
z
Job Flow Service Settings ........................................................................153
z
Stored Document Settings........................................................................154
z
Web Applications Service Setup...............................................................155
z
Web Browser Setup..................................................................................157
z
Setup ........................................................................................................159
z
Accounting................................................................................................170
z
Authentication/Security Settings...............................................................176
Page 80

5 System Settings
System Settings Procedure
To make or change the system settings, it is necessary to enter the System
Administration mode.
This section describes the basic procedures for system settings. The following shows
the reference section for each procedure.
Step 1 Entering System Administration Mode ...........................................................................78
Step 2 Entering the System Administrator User ID and Passcode .............................................78
Step 3 Selecting [Tools]..............................................................................................................79
Step 4 Selecting an Item on the [Tools] Screen..........................................................................79
Step 5 Setting a Feature ..............................................................................................................80
Step 6 Exiting the System Administration Mode........................................................................80
System Settings
Step 1 Entering Syste m Administration Mode
Press the <Log In/Out> button.
1
5
<Log In/Out>button
Step 2 Entering the System Administrator U ser ID and Passco de
To enter System Administration mode, enter the system administrator User ID. If
[Passcode Policy] in [Authentication/Security Settings] is activated, the passcode
needs to be entered.
It is recommended to change the system administrator user ID and passcode immediately after installing
the machine. For more information, refer to "System Administrator Settings" (P.176).
2 Enter the Administrator ID with the numeric
keypad or the keyboard, and select [Enter].
Note • The default System Administrator Login
ID is "11111". When using the
Authentication feature, a passcode is
required. Select [next] and en ter the
passcode. The default passcode is "xadmin".
• The machine displays the following
message if the system administr ation
login failed:
"Login failed. Re-enter U ser Details and
select Confirm."
• The machine displays the following message if the authentication failed more than the
specified number of times:
"You have made the maximum number of attempts to access the system. Access denied."
78
Page 81

Step 3 Selecting [Tools]
Select [Tools].
1
Step 4 Selecting an Item on the [Tools] Screen
System Settings Procedure
Tools
In the [Tools] screen, select an item to be set.
For the items that can be selected in the system settings, refer to "System Settings Menu List" (P.81).
1 Select the item to be set.
You can set or change the default values.
Common Service Settings
Allows you to configure the settings relating to the machine itself.
For more information, refer to "Common Service Settings" (P.90) .
Copy Service Settings
Allows you to configure the co py feature defaults, co py operation con trol, button indications ,
and so on.
For more information, refer to "Copy Service Settings" (P.113).
Connecti vity & Network Setup
System Settings
5
Allows you to configure the ports, protocols, and so on.
For more information, refer to "Connectivity & Network Setup" (P.121).
Print Service Settings
Allows you to configure the memory settings, print operation control, and so on.
For more information, refer to "Print Service Settings" (P.138).
Scan Service Settings
Allows you to configure the scanner feature defaults, button indications, and so on.
For more information, refer to "Scan Service Settings" (P.143).
E-mail Service Settings
Allows you to configure the e-mail defaults, address search settings, and so on.
For more information, refer to "E-mail Service Settings" (P.149 ).
79
Page 82

5 System Settings
System Settings
Mailbox Service Settings
Allows you to set how to delete documents stored in mailboxes.
For more information, refer to "Mailbox Service Settings" (P.152).
Job Flow Service Settings
Allows you to configure the settings relating to job flows.
For more information, refer to "Job Flow Service Settings" (P.153).
Stored Document Settings
Allows you to set how to delete print documents stored in the machine.
For more information, refer to "Stored Document Settings" (P.154).
Web Applications Service Setup
Allows you t o configure an access destination server.
For more information, refer to "Web Applications Service Setup" (P.155).
Web Browser Settings
Allows you to configure the settings relating to web browser.
For more information, refer to "Web Browser Setup" (P.157).
Setup
5
You can create mailboxes and job flow sheets, and can create and change an address
book (address numbers).
For more information, refer to "Setup" (P.159).
Accounting
You can register machine users and configure the settings for account administration.
For more information, refer to "Accounting" (P.170).
Authentication/Security Settings
You can configure the authentication and security settings.
For more information, refer to "Authentication/Security Settings" (P.176).
Step 5 Setting a Feature
Select any feature from [Group].
1
2 Set the feature.
3 After setting the feature, select [Save].
Step 6 Exiting the S ystem Administratio n Mode
When the settings are completed, select [Close] until the [All Services] screen
1
appears.
2 Press the <Log In/Out> button.
3 Select [Cancel].
80
Page 83

System Settings Menu List
The following table shows a list of the items that can be set. Note that the items
appearing depend on the configuration of the machine.
System Settings
Common Service Settings
System Settings Menu List
Machine Clock/Timers (P.90)
Audio Tones (P.92)
Screen/Button Settings (P.94)
Paper Tray Settings (P.95)
Image Quality (P.97)
z
Date (P.90)
z
Time (P.90)
z
NTP Time Synchronization (P.91)
z
Connection Interval (P.91)
z
Time Server IP Address (P.91)
z
Auto Clear (P.91)
z
Auto Job Release (P.91)
z
Auto Print (P.91)
z
Printer Lockout Duration (P.91)
z
Power Saver/Energy Saver Timers (P.92)
z
Time Zone (P.92)
z
Daylight Savings (P.92)
z
On-Demand Print Duration (P.92)
z
Control Panel Select Tone (P.92)
z
Control Panel Alert Tone (P.93)
z
Base Tone (P.93)
z
Machine Ready Tone (P.93)
z
Job Complete Tone 1, 2 (P.93)
z
Fault Tone (P.93)
z
Auto Clear Alert Tone (P.93)
z
Alert Tone (P.93)
z
Out of Paper Warning Tone (P.93)
z
Low Toner Alert Tone (P.93)
z
Stored Programming Tone (P.93)
z
Screen Default (P.94)
z
Screen After Auto Clear (P.94)
z
Auto Display of Login Screen (P.94)
z
Custom Buttons 1 to 3 (P.94)
z
All Services (P.94)
z
All Services - Additional Features (P.94)
z
Job Type on Job Status Screen (P.94)
z
Default Language (P.94)
z
Reconfirm E-mail Recipient (P.94)
z
Custom Paper Name/Color (P.95)
z
Paper Tray Attributes (P.95)
z
Customize Paper Supply Screen (P.96)
z
Paper Tray Attributes on Setup (P.96)
z
Paper Tray Attributes During Loading (P.96)
z
Paper Tray Priority (P.96)
z
Paper Type Priority (P.96)
z
Tray 5 (Bypass) - Paper Size Defaults (P.96)
z
Auto Tray Switching Control (P.97)
z
Image Quality (P.97)
System Settings
5
81
Page 84

5 System Settings
System Settings
5
Reports (P.98)
Maintenance (P.98)
Watermark (P.101)
Secure Watermark (P.102)
Image Log Control (P.104)
Print Universal Unique ID (P.105)
Other Settings (P.106)
z
Print Reports Button (P.98)
z
Job History Report (P.98)
z
Scan File Transfer Report (P.98)
z
2 Sided Report (P.98)
z
Job Flow Error Report (P.98)
z
Initialize Hard Disk (P.98)
z
Delete All Data (P.99)
z
Software Options (P.99)
z
Alignment Adjustment Settings (P.99)
z
Finisher Adjustment (P.100)
z
Date Format (P.101)
z
Default Watermark Effect (P.101)
z
Default Watermark (P.101)
z
Font Size (P.101)
z
Background Pattern (P.102)
z
Density (P.102)
z
Watermark/Background Contrast (P.102)
z
Force Watermark - Copy Job (P.102)
z
Force Watermark - Client Print (P.102)
z
Force Watermark - Mailbox Print (P.102)
z
Custom Watermark 1 to 3 (P.102)
z
Print this Sample List (P.102)
z
Secure Watermark Control (P.102)
z
Digital Codes Settings (P.103)
z
Force Secure Watermark (P.103)
z
Secure Watermark Defaults (P.103)
z
Secure Watermark Effect (P.103)
z
Image Log Control (P.104)
z
Image Log Target (P.104)
z
Image Log Generation (P.104)
z
Image Log Transfer (P.105)
z
Print Universal Unique ID (P.105)
z
Print Position (P.105)
z
Print Position Adjustment (P.105)
z
Print Position (Side2) (P.105)
z
Offset Stacking (Right Middle Tray) (P.106)
z
Offset Stacking (Stacker - Stacker Cart) (P.106)
z
High Capacity Stacker Stop Timing (P.106)
z
Auto Job Promotion (P.106)
z
Default Print Paper Size (P.106)
z
Paper Size Settings (P.106)
z
Millimeters/Inches (P.110)
z
Keyboard Input Restriction (P.110)
z
Operation of Up/Down Buttons (P.110)
z
Display Consumables Screen (P.110)
z
Data Encryption (P.110)
z
Encryption Key for Confidential Data (P.111)
z
Service Rep. Restricted Operation (P.112)
z
Software Download (P.112)
z
Document Feeder Tray Elevation (P.112)
z
Estimated Job Time (P.112)
z
Restrict Recipient Selection Method (P.112)
z
Restrict User to Edit Address Book (P.112)
82
Page 85

Copy Service Settings
Copy Tab - Features Allocation (P.113) -
z
Preset Buttons (P.114)
Copy Defaults (P.114)
Paper Supply - Button 2 - 5 (P.114)
z
Reduce/Enlarge - Button 3 - 5 (P.114)
z
Paper Supply (P.114)
z
Reduce/Enlarge (P.114)
z
Original Type (P.114)
z
Lighten/Darken (P.115)
z
Sharpness (P.115)
z
Background Suppression (P.115)
z
2 Sided Copying (P.115)
z
Mixed Sized Originals (P.115)
z
Edge Erase - Top Edge (P.115)
z
Edge Erase - Bottom Edge (P.115)
z
Edge Erase - Left Edge (P.115)
z
Edge Erase - Right Edge (P.115)
z
Center Erase/Binding Erase (P.115)
z
Edge Erase - Side 2 (P.115)
z
Image Shift - Side 1 (P.115)
z
Image Shift - Side 2 (P.115)
z
Image Rotation (P.116)
z
IImage Rotation - Rotation Direction (P.116)
z
Original Orientation (P.116)
z
Multiple-Up (P.116)
z
Copy Output (P.116)
z
Uncollated - Separators Tray (P.116)
z
Output Destination (P.116)
z
Output Orientation (P.116)
z
Sample Job (P.116)
z
Annotations - Stored Comment (P.116)
z
Annotations - Comment on Side 1, 2 (P.116)
z
Annotations - Comment - Font Size (P.116)
z
Date Stamp - Position on Side 1, 2 (P.116)
z
Date Size (P.117)
z
Page Numbers - Style (P.117)
z
Page Numbers - Position on Side 1, 2 (P.117)
z
Page Numbers - Font Size (P.117)
z
Bates Stamp - Number of Digits (P.117)
z
Bates Stamp - Position on Side 1, 2 (P.117)
z
Bates Stamp -Font Size (P.117)
z
Tab Margin Shift - Shift Value (P.117)
z
Booklet Creation - Cover Tray (P.117)
z
Covers - Front Cover Tray, Back Cover Tray
(P.117)
z
Insert Separators - Separator Tray (P.117)
System Settings Menu List
System Settings
5
83
Page 86

5 System Settings
System Settings
5
Copy Control (P.117)
z
Memory Full Procedure (P.117)
z
Maximum Stored Pages (P.118)
z
2 Sided Scanning Options (P.118)
z
Auto Paper Off (P.118)
z
Mixed Sized Originals - 2 Sided Copy (P.118)
z
Fine-tune 100% (P.118)
z
Pseudo-Photo Gradation Mode (P.118)
z
Original Type - See-Through Paper (P.118)
z
Output Orientation - Reverse Order (P.118)
z
Output Orientation - Auto (Single Sheet) (P.119)
z
Annotations - Comment Density (P.119)
z
Comment Position - Top Left, - Top Center, - Top
Right, - Left Center, - Center, - Right Center, Bottom Left, - Bottom Center, and - Bottom Right
(P.119)
z
Date Position - Top Left, - Top Center, - Top
Right, - Left Center, - Center, - Right Center, Bottom Left, - Bottom Center, and - Bottom Right
(P.119)
z
Page Number Position - Top Left, - Top Center, Top Right, - Left Center, - Center, - Right Center,
- Bottom Left, - Bottom Center, and - Bottom
Right (P.119)
z
Bates Stamp - Top Left, - Top Center, - Top
Right, - Left Center, - Center, - Right Center, Bottom Left, - Bottom Center, and - Bottom Right
(P.119)
z
Quantity Display (P.119)
z
Maximum Number of Sets (P.119)
z
Sample Output to Stacker - Top Tray (P.119)
Original Size Defaults (P.119) Reduce/Enlarge Presets (P.120) Annotation - Create Comments (P.120) -
Connectivity & Network Setup
z
Port Settings (P.121)
USB (P.121)
z
LPD (P.122)
z
NetWare (P.122)
z
SMB (P.122)
z
IPP (P.122)
z
EtherTalk (P.123)
z
Bonjour (P.123)
z
Port9100 (P.123)
z
SNMP (P.123)
z
FTP Client (P.123)
z
Receive E-mail (P.123)
z
Send E-mail (P.123)
z
E-mail Notification Service (P.123)
z
UPnP Discovery (P.123)
z
WSD (P.124)
z
Internet Service (HTTP) (P.124)
z
SOAP (P.124)
z
WebDAV (P.124)
84
Page 87

System Settings Menu List
Protocol Settings (P.125)
Machine’s E-mail Address/Host Name
(P.127)
Proxy Server Settings (P.127)
Outgoing / Incoming E-mail Settings
(P.128)
Remote Authentication Server/Directory
Service (P.130)
Security Settings (P.134)
Other Settings (P.137)
z
Ethernet Settings (P.125)
z
TCP/IP - IP Mode (P.125)
z
IPv4 - IP Address Resolution (P.125)
z
IPv4 - IP Address (P.125)
z
IPv4 - Subnet Mask (P.126)
z
IPv4 - Gateway Address (P.126)
z
IPv4 - IP Filter (P.126)
z
IPv6 Address Manual Configuration (P.126)
z
Manually Configured IPv6 Address (P.126)
z
Manually Configured IPv6 Address Prefix
(P.126)
z
Manually Configured IPv6 Gateway (P.126)
z
Automatically Configured IPv6 Address (P.126)
z
IPv6 - IP Filter (P.127)
z
E-mail Address (P.127)
z
Machine Name (P.127)
z
Host Name (P.127)
z
Domain Name (P.127)
z
Use Proxy Server (P.127)
z
Proxy Server Setup (P.128)
z
Addresses to Bypass Proxy Server (P.128)
z
HTTP Proxy Server Name (P.128)
z
HTTP Proxy Server Port Number (P.128)
z
HTTP Proxy Server Authentication (P.128)
z
HTTP Proxy Server Login Name (P.128)
z
HTTP Proxy Server Password (P.128)
z
HTTPS Proxy Server Name (P.128)
z
HTTPS Proxy Server Port Number (P.128)
z
HTTPS Proxy Server Authentication (P.128)
z
HTTPS Proxy Server Login Name (P.128)
z
HTTPS Proxy Server Password (P.128)
z
POP3 Server Settings (P.128)
z
SMTP Server Settings (P.129)
z
Domain Filter (P.130)
z
Authentication System Setup (P.130)
z
Kerberos Server Settings (P.130)
z
LDAP Server/Directory Service (P.131)
z
SMB Server Settings (P.133)
z
SSL/TLS Settings (P.134)
z
S/MIME Settings (P.134)
z
PDF/DocuWorks/XPS Signature Settings
(P.135)
z
IPSec Settings (P.135)
z
IEEE 802.1x Settings (P.136)
z
Certificate Revocation Retrieval Settings (P.136)
z
E-mail Receive Protocol (P.137)
z
Output Destination for E-mail (P.137)
System Settings
5
85
Page 88

5 System Settings
Print Service Settings
System Settings
5
Allocate Memory (P.138)
z
PostScript Memory (P.138)
z
ESC/P Form Memory (P.138)
z
Receiving Buffer - USB (P.138)
z
Receiving Buffer - LPD (P.139)
z
Receiving Buffer - NetWare (P.139)
z
Receiving Buffer - SMB (P.139)
z
Receiving Buffer - IPP (P.139)
z
Receiving Buffer - EtherTalk (P.139)
z
Receiving Buffer - Port 9100 (P.140)
Delete Form (P.140) -
z
Other Settings (P.140)
Print Area (P.140)
z
Substitute Tray (P.140)
z
Paper Type Mismatch (P.141)
z
Unregistered Forms (P.141)
z
Print User ID (P.141)
z
Banner Sheet (P.141)
z
Banner Sheet Tray (P.142)
z
PostScript Paper Supply (P.142)
z
PostScript Font Absence (P.142)
z
PostScript Font Substitution (P.142)
z
XPS Print Ticket Processing (P.142)
z
LPD Print Queue (P.142)
Scan Service Settings
First Tab (P.143)
Scan Defaults (P.143)
z
Feature in 2nd Column (P.143)
z
Reduce/Enlarge - Buttons 2, 3 (P.143)
z
Color Scanning (P.143)
z
Original Type (P.144)
z
File Format (P.144)
z
Optimize PDF For Fast Web View (P.144)
z
Thumbnail - Outgoing E-mail (P.144)
z
Thumbnail - Scan to PC (P.144)
z
Lighten/Darken (P.144)
z
Contrast (P.144)
z
Sharpness (P.144)
z
Background Suppression (P.144)
z
Shadow Suppression (P.144)
z
Color Space (P.144)
z
Original Orientation (P.145)
z
Resolution (P.145)
z
Mixed Sized Originals (P.145)
z
Edge Erase (P.145)
z
Edge Erase - Top & Bottom Edges (P.145)
z
Edge Erase - Left & Right Edges (P.145)
z
Center Erase/Binding Erase (P.145)
z
Quality/File Size (P.145)
z
E-mail Subject (P.145)
z
Searchable Text (P.145)
z
Language To Identify (P.145)
z
Searchable - Text Compression (P.145)
86
Scan to PC Defaults (P.146) Original Size Defaults (P.146) Output Size Defaults (P.146) -
Page 89

Reduce/Enlarge Presets (P.146) Other Settings (P.146)
z
Memory Full Procedure (P.147)
z
Maximum Stored Pages (P.147)
z
2 Sided Scanning Options (P.147)
z
Saturation (P.147)
z
Background Suppression Level (P.147)
z
Shadow Suppression Level (P.147)
z
Color Space (P.147)
z
TIFF Format (P.147)
z
Image Transfer Screen (P.147)
z
Searchable - Page Orientation (P.148)
E-mail Service Settings
z
E-mail Control (P.149)
Maximum E-mail Size (P.149)
z
Maximum Address Entries (P.149)
z
Incoming E-mail Print Options (P.149)
z
Print Error Notification E-mail (P.149)
z
Response to Read Receipts (P.150)
z
Read Receipts (P.150)
z
Print Delivery Confirmation Mail (P.150)
z
Max Number of Pages per Split Send (P.150)
z
Allow Casual Users to Edit From Field (P.150)
z
Allow Guest Users to Edit Field (P.150)
z
Allow to edit From if Search found (P.150)
z
Allow to edit From if Search failed (P.151)
z
E-mail Sending When Search Failed (P.151)
z
Add Me to "To" Field (P.151)
z
Add Me to "CC" Field (P.151)
z
Edit E-mail Recipients (P.151)
System Settings Menu List
System Settings
5
Mailbox Service Settings
-
Stored Document Settings
-
Web Applications Service Setup
Server Setup (P.155)
z
Documents Retrieved By Client (P.152)
z
Print & Delete Confirmation Screen (P.152)
z
Mailbox Document Expiration Date (P.154)
z
Stored Document Expiration Date (P.154)
z
Print Job Confirmation Screen (P.154)
z
Minimum Passcode Length for Stored Job
(P.154)
z
URL (P.155)
z
Server Name (P.155)
z
Description (P.155)
z
Use User ID (P.155)
z
User ID (P.156)
z
Password (P.156)
z
Machine/Authentication Notification (P.156)
z
Notify User Authorization Information (P.156)
z
Delete All Settings (P.156)
87
Page 90

5 System Settings
Web Browser Setup
System Settings
5
Setup
-
Create Mailbox (P.159)
Create Job Flow Sheet (P.161)
z
Web Applications Version (P.157)
z
Delete Persistent Cookie Upon Closing (P.157)
z
Clear Cache Upon Closing (P.157)
z
Use JavaScript (P.157)
z
Use Cache (P.157)
z
Check for Newer Version (Cache) (P.157)
z
Accept Cookies (P.157)
z
Use TLS1.0 (P.157)
z
Use SSL2.0 (P.157)
z
Use SSL3.0 (P.158)
z
Secure & Non-secure Site Warning (P.158)
z
Warn if Forms Submit is re-directed (P.158)
z
When SSL Certificate Verfication Fails (P.158)
z
Enable File Printing (P.158)
z
Check Mailbox Passcode (P.159)
z
Mailbox Name (P.160)
z
Delete Documents After Retrieval (P.160)
z
Delete Expired Documents (P.160)
z
Link Job Flow Sheet to Mailbox (P.160)
z
Create (P.162)
z
Edit/Delete (P.162)
z
Search by Name (P.162)
z
Search by Keyword (P.162)
z
Select Keyword (P.162)
z
Sheet Filtering (P.162)
z
Name (P.163)
z
Description (P.163)
z
Keyword (P.163)
z
Send as E-mail (P.163)
z
Transfer via FTP (1), Transfer via FTP (2)
(P.164)
z
Transfer via SMB (1), Transfer via SMB (2)
(P.165)
z
Print (P.165)
z
Edit/Delete (P.166)
88
Create Job Flow Sheet Keyword (P.166) -
z
Add Address Book Entry (P.166)
Address Type (P.168)
z
E-mail Address (P.168)
z
Name (P.168)
z
Surname (P.168)
z
Given Name (P.168)
z
Custom Item 1 (P.168)
z
Custom Item 2 (P.168)
z
Custom Item 3 (P.168)
z
S/MIME Certificate (P.169)
z
Transfer Protocol (P.169)
z
Server Name/IP address (P.169)
z
Shared Name (SMB Only) (P.169)
z
Save In (P.169)
z
User Name (P.169)
z
Password (P.169)
z
Port Number (P.169)
Page 91

Accounting
System Settings Menu List
Create/View User Accounts (P.170)
Account Details (P.173) Reset User Accounts (P.173) System Administrator's Meter (Copy Jobs)
(P.174)
Accounting Type (P.174) Accounting Login Screen Settings (P.175) -
Authentication/Security Settings
System Administrator Settings (P.176)
Authentication (P.177)
z
User ID (P.171)
z
User Name (P.171)
z
Passcode (P.171)
z
E-mail Address (P.171)
z
Account Limit (P.171)
z
User Role (P.172)
z
Reset Account (P.172)
z
Reset Total Impressions (P.172)
-
z
System Administrator’s Login ID (P.176)
z
System Administrator’s Passcode (P.176)
z
Login Type (P.177)
z
Access Control (P.177)
z
Create/View User Accounts (P.178)
z
Account Details (P.181)
z
Reset User Accounts (P.181)
z
Create Authorization Groups (P.182)
z
User Details Setup (P.182)
z
Maximum Login Attempts (P.183)
z
Passcode Policy (P.183)
z
Charge/Private Print Settings (P.184)
System Settings
5
Allow User to Disable Active Settings (P.186) Job Status Default (P.186) Overwrite Hard Disk (P.186) -
89
Page 92

5 System Settings
Common Service Settings
In [Common Service Settings], you can make settings relating to the machine’s
common features. The following shows the reference section for each item.
Machine Clock/Timers................................................................................................................90
Audio Tones................................................................................................................................92
Screen/Button Settings................................................................................................................94
Paper Tray Settings.....................................................................................................................95
Image Quality..............................................................................................................................97
Reports........................................................................................................................................98
Maintenance................................................................................................................................98
Watermark.................................................................................................................................101
Secure Watermark.....................................................................................................................102
System Settings
1 On the [Tools] screen, select [System Settings].
Image Log Control....................................................................................................................104
Print Universal Unique ID........................................................................................................105
Other Settings............................................................................................................................106
For the method of displaying the [Tools] screen, refer to "System Settings Procedure" (P.78).
2 Select [Common Service Settings].
5
3 Select the item to be set or changed.
Machine Clock/Timers
You can set the clock time, or the time intervals until the power saver or reset features
take effect.
Date
Set the date in the system clock of the machine. The date set here is printed on lists and
reports.
1 Select [Date], and select [Change Settings].
2 Select the date format.
3 Select Ye ar/Month/Day.
Time
90
Set the time in the system clock of the machine, using 12-hour or 24-hour format.
The time set here is printed on lists and reports.
1 Select [Time], and select [Change Settings].
Page 93

2 Select the display format.
3 When [12 Hour Clock] is selected, select
[AM] or [PM].
4 Set the hours and minutes.
NTP Time Synchronization
You can obtain the time from a time server (NTP: Network Time Protocol), to synchronize the
machine time to the server time.
If you connect to a time server, select [On] for [NTP Time Synchronization], and set the IP
address of the time server in [Time Server IP Address].
Connection Interval
Select the time interval at which a connection is made to the time server.
Select an interval from 1 to 500 hours in 1 hour increments.
Time Server IP Address
Common Service Settings
System Settings
Set the IP address of the time server from which the time is obtained, using values 0 to 255.
Note • For IPv4, enter the add ress in th e format " xxx.xxx .xxx.xxx ", wh ere "xxx" is a nume ric value i n
Auto Clear
If a given time period elapses with no operation, the machine automatically returns to the
initial screen.
When [On] is selected, specify a value between 30 and 900 seconds, in 1 second increments.
In order not to set this feature, select [Off].
Note • Even if [Off] is selected, when there is no operation for 1 minute on the screen waiting for a
Auto Job Release
If an error occurs (document or paper jams, running out of paper, etc.) during copying or
scanning, the machine cancels the active job and starts the next job after a given period of
time. In that case, jobs that can be activated are limited to those that only use parts of the
machine not affected by the error.
When [On] is selected, specify a value between 4 and 99 minutes, in 1 minute increments. In
order not to set this feature, select [Off].
Auto Print
the range of 0 to 255.
• For IPv6, enter the address in the format "xxxx:xxxx:xxxx:xxxx:xxxx:xxxx:xxxx:xxxx", where
"xxxx" is a hexadecimal value.
job command after scanning, the machine cancels t he waiting condition and s tarts to
process the scanned documents.
5
Set the time period to start the next print job after finishing a copy operation.
When [On] is selected, specify a value between 1 and 240 seconds, in 1 second increments.
If you select [Off], printing starts immediately after the machine is ready.
Printer Lockout Duration
The machine disables to print during a given period of time.
If you selected [On], specify a starting time and an ending time to disable printing, in one
minute increments.
Note • A job which has already been activated before the starting time will be printed continuously
even after the starting time elapses.
91
Page 94

5 System Settings
Power Saver/Energy Saver Timers
System Settings
• The print-disabled condition is cancelled when you operate using the control panel after the
ending time.
• To enable printing during the printer lockout duration, select a job under [Current and
Pending Jobs] on the [Job Status] screen, and then select [Promote Job].
The machine is provided with the Low Power and Sleep modes as the power saving mode.
When a specified period of time has elapsed, the machine switches to these modes in the
following order to reduce power consumption.
Last operation on the machine J Low Power mode J Sleep mode
For more information, refer to "Power Saver Mode" (P.16).
Note • There is no setting to disable switching to the Low Power mode or the Sleep mode.
From Last Operation to Low Power Mode
Specify a time period between the last operation and entering the Low Power mode in the
range from 1 to 240 minutes, in 1 minute increments.
Note • Configure the [From Last Operation to Sleep Mode] time to be longer than the [From Last
Operation to Low Power Mode] time.
From Last Operation to Sleep Mode
Specify a time period between the last operation and entering the Sleep mode from 1 to 240
minutes, in 1 minute increments.
Time Zone
5
Daylight Savings
On-Demand Print Duration
Audio Tones
Set the time difference from GMT.
With this feature enabled, the machine automatically adjusts the current time when daylight
savings time starts and ends. Specify the start and end dates of daylight savings time
periods.
Specify the duration for the machine to receive a print job from web applications. Unless the
machine receives full data of the print job within the specified period of time, the machine
does not process the print job.
Specify the duration within the range of 0 to 255 minutes in 1-minute increments. If you
specify [0], it means that no time limitation is set on the machine for receiving data.
Note • When instructing a print job that contains a large amount of data, or when instructing a print
job which contents take a while to be processed, transmission may be timed out before the
machine receives the last pag e of the p rint job. I f transm ission is timed out, t he rec eived data
of the print job is canceled. Consider the machine usage environment when you specify the
duration time.
Select whether or not to sound an alarm, for example when a job ends or a fault occurs.
Control Panel Select Tone
Select the sound to be made when a button displayed on the screen is correctly selected.
You can select the volume from [Soft], [Normal], and [Loud]. To disable the sound, select
[Off].
92
Page 95

Control Panel Alert Tone
Select the sound to be made when a button that cannot be selected is selected, or an error
occurs.
You can select the volume from [Soft], [Normal], and [Loud]. To disable the sound, select
[Off].
Base Tone
For a button that toggles (changes setting each time it is pressed), set the sound to be made
when in the home position. The machine makes this sound when it exits the Interrupt mode.
You can select the volume from [Soft], [Normal], and [Loud]. To disable the sound, select
[Off].
Machine Ready Tone
Set the sound for when the machine is ready to copy or print, after powering on, for example.
You can select the volume from [Soft], [Normal], and [Loud]. To disable the sound, select
[Off].
Job Complete Tone 1, 2
Select the sound to be made when a job is completed normally.
You can select the volume from [Soft], [Normal], and [Loud]. To disable the sound, select
[Off].
You can select the target jobs.
Common Service Settings
System Settings
Fault Tone
Select the sound to be made when an error termination occurs.
You can select the volume from [Soft], [Normal], and [Loud]. To disable the sound, select
[Off].
Auto Clear Alert Tone
Select the sound to be made at 5 seconds before automatically returning to the i nitial screen,
when the auto clear feature is enabled.
You can select the volume from [Soft], [Normal], and [Loud]. To disable the sound, select
[Off].
Alert Tone
Select the sound to be made when a fault such as a paper jam occurs, and the fault is left
unattended to.
You can select the volume from [Soft], [Normal], and [Loud]. To disable the sound, select
[Off].
Out of Paper Warning Tone
Select the sound to be made when a job is suspended due to running out of paper in a tray.
You can select the volume from [Soft], [Normal], and [Loud]. To disable the sound, select
[Off].
Low Toner Alert Tone
5
Select the sound to be made when the toner cartridge needs to be replaced.
You can select the volume from [Soft], [Normal], and [Loud]. To disable the sound, select
[Off].
Stored Programming Tone
Select the sound to be made while a stored program is registered.
You can select the volume from [Soft], [Normal], and [Loud].
It is not possible to disable this sound.
93
Page 96

5 System Settings
Screen/Button Settings
Set screens and buttons.
Screen Default
Set the features displayed on the screen that appears after turning the machine on or
canceling the Power Saver mode.
For more information, refer to "Customizing the Control Panel" (P.18).
Screen After Auto Clear
Set the screen displayed after Auto Clear.
For more information, refer to "Customizing the Control Panel" (P.18).
Auto Display of Login Screen
System Settings
5
When the authentication feature is used, set whether or not to automatically display the login
screen after turning the machine on or canceling the Power Saver mode.
Custom Buttons 1 to 3
You can assign features such as Copy and E-mail to the custom buttons on the control panel:
Custom Button 1 to Custom Button 3.
To leave a feature unassigned, select [Not Set].
For more information, refer to "Customizing the Control Panel" (P.18).
Note • The operation settings can be registered in the [Stored Programming] screen. For
information on Stored Programming, refer to "7 Stored Programming" in the User Guide.
• The default setting of [Custom Button 1] is [Copy].
All Services
Set the layout of service buttons that appear on the [All Services] screen when pressing the
<All Services> button on the control panel.
All Services - Additional Features
Set the layout of additional feature buttons that appear on the [All Services] screen when
pressing the <All Services> button on the control panel.
Job Type on Job Status Screen
Select the job types to be shown on the [Completed Jobs] screen of the [Job Status] screen
that is displayed when the <Job Status> button on the control panel is pressed.
Default Language
You can select the language displayed on the machine.
There are two ways of selecting the language: set in the System Administration mode, and
set by ordinary users.
z
Setting in the System Administration mode
The language set here is the standard language that is retained even when the machine is
powered off and on.
z
Setting by ordinary users
The language setting in [Language] in the [All Services] screen is lost when the machine is
powered off.
Reconfirm E-mail Recipient
You can reconfirm E-Mail Recipient when sending the e-mail.
Select from [Confirmation Not Required], [Always Reconfirm Recipient], and [Reconfirm if
Multiple Recipients].
94
Page 97

Paper Tray Settings
Set the items relating to the paper and trays, including the types and precedence of
paper loaded in the trays.
Custom Paper Name/Color
Assign custom names to User 1 to User 5. The following paper types are available as the
custom paper: plain paper, bond paper, and recycled paper. You can use letters, numerals,
and symbols of up to 24 characters for each name.
For example, you can use a name showing its usage, such as "Color" for colored paper, and
"Covers" for bond paper.
For information about how to enter characters, refer to "Enterin g Text " (P.22).
Paper Tray Attributes
You can set Paper Type and Size for paper loaded in trays and Auto Paper Select.
For more information, refer to "Changing the Paper Settings" (P.41).
Change Settings
Press this button, if you change the paper size, paper color, and paper type for the tray.
When you load non-standard size paper in the tray, select [Custom Size], and specify the
width and height.
When you load standard size paper in the tray, select [Auto Size Detect].
Important • A djust the paper guides to the paper size to prevent paper jams or errors. If the machine
does not detect trays, use the Tray 5 (Bypass).
z
Paper Type
You can select the paper type for trays.
For information about paper types available on the machine, refer to "Supported Paper Type" (P.24 ).
z
Papser Size
When using Trays 3, 4, 6 and 7, you can load both standard size paper and non-standard
size paper.
When you load non-standard size paper in the Trays 3 and 4, set the size in the X (width)
direction within the range 182 to 488 mm and in the Y (height) direction within the range 140
to 330 mm in 1 mm increments.
When you load non-standard size paper in the Trays 6 and 7 (HCF (A4 2 Tray)) set the size
in the X (width) direction within the range 182 to 241 mm and in the Y (height) direction within
the range 297 to 330 mm in 1 mm increments.
When you load non-standard size paper in the Trays 6 (HCF (A3 1 Tray)) set the size in the
X (width) direction within the range 182 to 488 mm and in the Y (height) direction within the
range 210 to 330 mm in 1 mm increments.
Note • The sizes of paper loaded in Trays 1 and 2 cannot be changed.
z
Paper Color
The paper color can be set if you select [Enabled] for [Paper Color] under [Customize Paper
Supply] Screen.
Common Service Settings
System Settings
5
95
Page 98

5 System Settings
Customize Paper Supply Screen
Paper Tray Attributes on Setup
System Settings
Paper Tray Attributes During Loading
Allows you to customize items displayed on the [Paper Supply] screen.
Paper Color
Select [Enabled] or [Disabled]. Selecting [Enabled] allows you to set and display paper
colors.
z
After selecting a paper tray under [Paper Tray Attributes], you can select the paper color.
z
You can display paper colors on the [Paper Supply] screen which appears when you select
[Copy] > [Paper Supply] > [More...].
Other Attributes
Select [Disabled], [Size Detection], or [Auto Paper Select]. Selecting [Size Detection] or [Auto
Paper Select] allows you to display the [Size Detection] button on the [Paper Supply] screen
which appears when you select [Copy] > [Paper Supply] > [More...].
Select whether [Paper Tray Attributes] is displayed in the [Setup] screen or not.
Select whether the [Change Settings] screen ([Paper Tray Attributes] screen) for the target
tray is displayed or not when pulling out or inserting the tray.
Tray 5 (Bypass) cannot be selected.
5
Paper Tray Priority
Set the paper tray priority sequence for automatic tray selection.
Automatic tray selection means that a tray containing the appropriate paper is automatically
selected by the machine for copying or printing.
You can select the Trays 1 to 4, 6, and 7. The Tray 5 (Bypass) cannot be selected.
Paper Type Priority
Set the paper type priority sequence for automatic tray selection.
Automatic tray selection means that a tray containing the appropriate paper is automatically
selected by the machine for copying or printing.
You can set plain paper, recycled paper, side 2 paper, and custom paper 1 to 5.
The paper type priority setting takes precedence over the paper tray priority settings.
If different paper types appear in the same priority sequence, the paper selection is
determined by paper tray priority sequence. Selecting [Auto Paper Off] for a paper type
prevents its paper tray from being used by automatic tray selection.
For information about the tray priority sequence, refer to "Paper Tray Priority" (P.96).
Tray 5 (Bypass) - Paper Size Defaults
Set the paper sizes shown in the [Tray 5 (Bypass)] screen for [Paper Supply] when copying
with the Tray 5 (Bypass).
You can assign 20 paper sizes to the Tray 5 standard size buttons 1 to 20.
If you frequently use non-standard size paper for copying, assigning the paper size to a
button will save your time to specify the size each time. It is also convenient to set the
commonly used paper sizes toward the top.
96
A/B Series Size
You can select from sizes of A and B series.
Inch Size
You can select from sizes of inch series.
Others
You can select from other sizes.
Page 99

Custom Size
You can enter any size. Set the width (X) within the range 148 to 488 mm, and the height (Y)
within the range 100 to 330 mm in 1 mm increments.
Auto Tray Switching Control
Set the method of auto tray switching when running out of paper loaded in the tray selected.
Auto Tray Switching
You can select from [Always Enable], [Enable during Auto Paper Select], or [Enable for Same
Paper Type/Color].
Targeted Paper Type (Copy Jobs)
You can target some paper types according to the settings in [Paper Tray Priority] or only one
paper type.
Targeted Paper Color (Copy Jobs)
You can target all paper colors or only one paper color.
Note • The machine does not switch the tray automatically in the following cases:
- The Tray 5 (Bypass) is selected.
- The tray containing paper other than plain p aper, recy cled paper, side 2 paper, or C ustom1
to Custom 5 paper is selected.
- The tray containing paper th at is s et as [ Auto Paper Off] in [Paper Type P riority] is selec ted.
Common Service Settings
System Settings
Image Qual ity
You can set the image quality and calibration settings.
Image Quality
You can select the image quality processing method when the machine is scanning an
original.
Photo & Text Recognition
Select a level which is used for the machine to determine text or photos. This setting is used
when you select [Photo & Text] for [Original Type] on the [Image Quality] screen.
Selecting [More Text] makes it easier for very fine print to be recognized as text.
Selecting [More Photo] makes it easier for newspaper and advertisement halftone images to
be recognized as photos.
Background Suppression (Black Copy)
Set the method of background suppression to be used when making monochrome copies.
Set how the machine detects the density of and deletes the background color.
Select [High Speed] to sample a section of the original and detect the background color.
Select [High Quality] to conduct a pre-scan, and sample the whole document to detect the
background color.
Important • When you select [High Quality], and if [Corner Shift] is selected in [Image Shift] and a ratio
Background Suppression (Scan Jobs)
Set the method of background suppression to be used for scan operations.
Set how the machine detects the density of and deletes the background color.
Select [High Speed] to sample a section of the original and detect the background color.
Select [High Quality] to conduct a pre-scan, and sample the whole document to detect the
background color.
Important • When using the document feeder, the machine detects the background color with [High
5
not greater than 60% in [Reduce/Enlarge] is set, a part of an image may not be printed or
blank paper may be output.
Speed], even when [High Quality] is sel ected. H owever, [High Qual ity] is available if Scan ner
Kit (optional) is installed.
97
Page 100

5 System Settings
Image Enhancement
Select whether or not to carry out image enhancement. If you select [On], copy data is
smoothed, to give a smoother appearance.
Reports
These settings relate to printing reports.
Print Reports Button
Select whether or not to permit printing reports only in [User Mode] of the System
Administration mode. Selecting [Disabled] displays the [Print Reports] and [Error History
Report] buttons only in the System Administration mode, under [Machine Status] > [Machine
Information].
For information on [Print Reports], refer to "Print Reports" (P.63).
System Settings
5
Job History Report
You can select whether or not to automatically print a [Job History Report] when a total of 50
jobs have been processed. All jobs are automatically listed on the printed report.
Scan File Transfer Report
Select whether or not to print the report for scanned data transmission results, such as when
transferring to the computer on the network, or when transferring using e-mail.
No Report
Does not print the report regardless of the data transmission result.
Print Report
Automatically prints the transmission report when the data transmission is successful, and
automatically prints the transmission report (undelivered) when the data transmission fails.
Print when delivery fails
Prints the transmission report (undelivered) when the data transmission fails.
2 Sided Report
When printing a report/list, select whether to print 1-sided or 2-sided.
Note • This feature does n ot appear for some mo de ls. An optional pack age is necessary. F or more
information, contact our Customer Support Center.
Job Flow Error Report
Select whether or not to automatically print a [Job Flow Error Report].
Maintenance
You can initialize the hard disk or delete data recorded in the machine.
Initialize Hard Disk
Initializes the hard disk.
Data deleted by initialization includes supplementary fonts and HP-GL/2 form.
Note • The secure print documents and logs are not erased.
98
 Loading...