

Page 1
Step-by-Step Instructions
(PRINT this set of instructions to follow every time you refill your cartridge)
Xerox 8R7638/ 8R7659/ 4004 Cartridges
Xerox Xj4C/ Document Work Centre 450C/ 4004/ Home
Work Centre Printers/Texas Instruments Micromarc Printers
Items needed: gloves, #2 refill station, hand-drill, Flat aluminum plugs, dye-based
black ink, paper towels, review hints & tips and check list
Bottle Seal: Unscrew lid on ink bottle. Puncture silver seal with needle top
making a small hole in the center of seal. Tightly screw on dispensing tip. Rinse
dispenser tip before using dispenser tip with another color. Rinse tip with water
until the water runs clear. Pull plastic tip cover off of tip of syringe to pour ink.
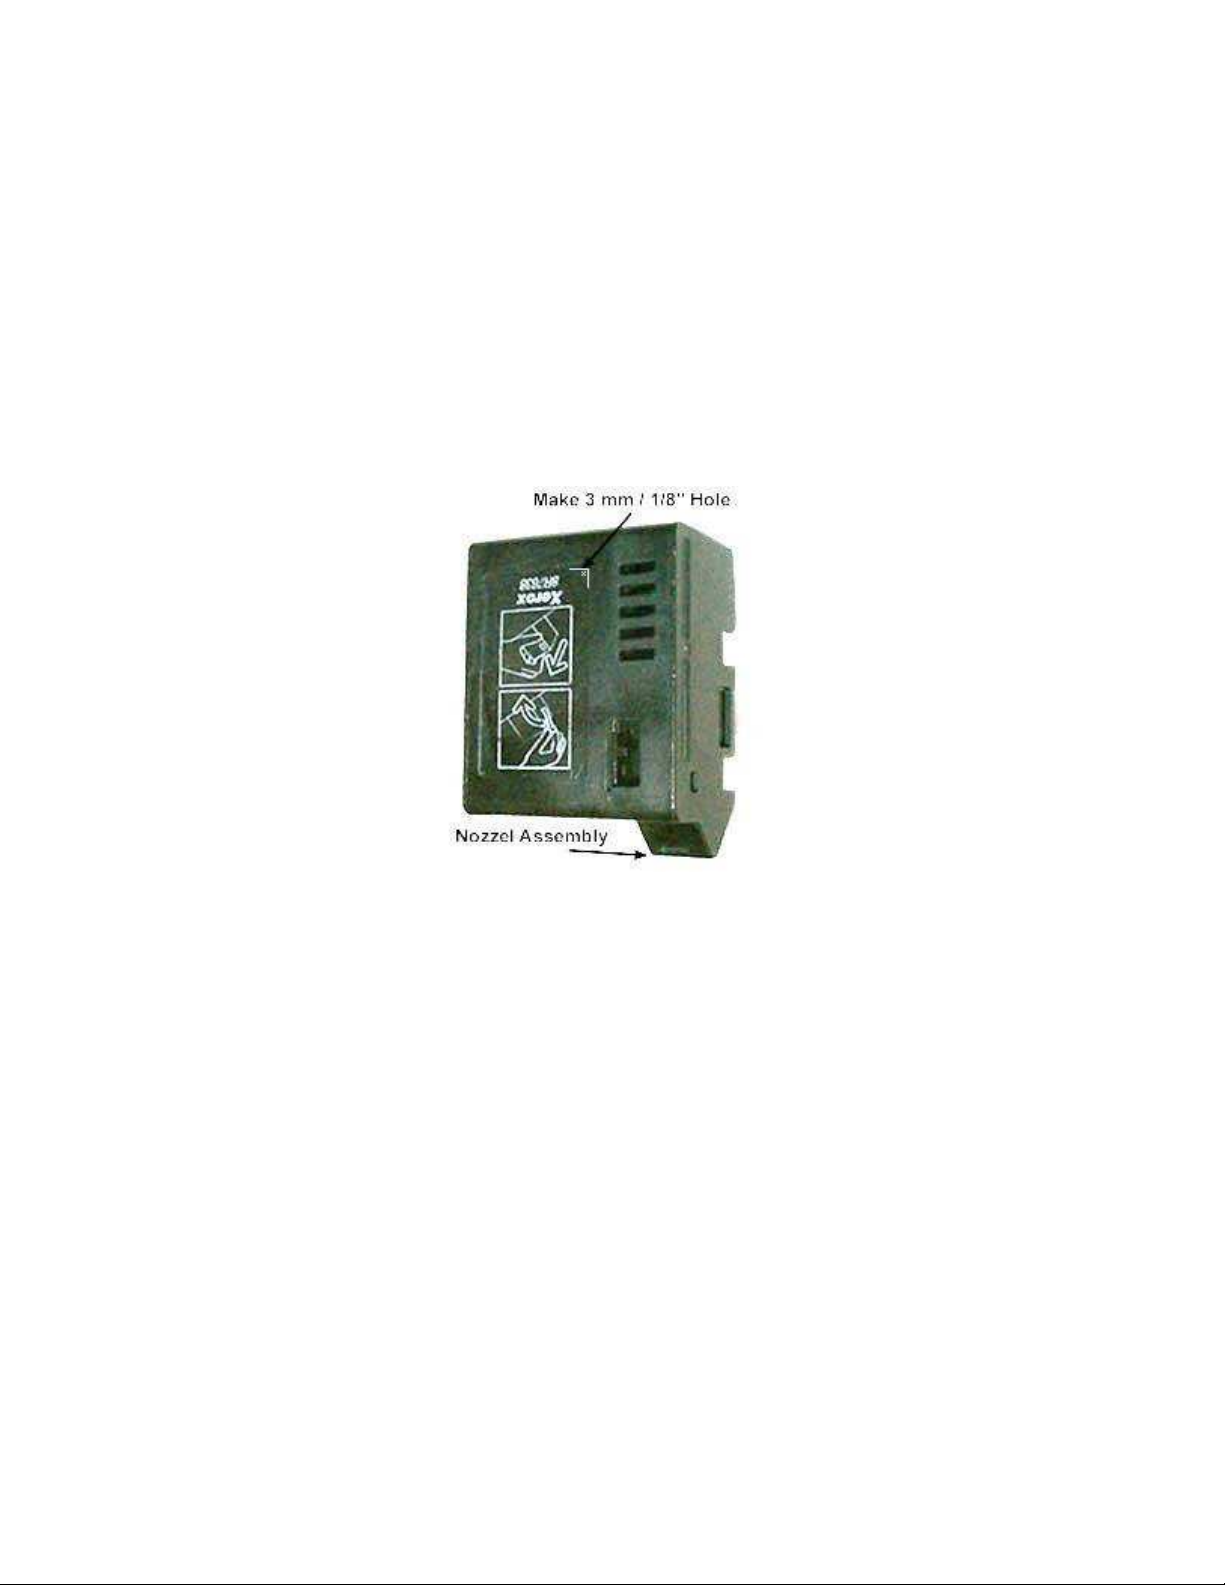
1. Make a filling hole on the front of the cartridge 1/2" from the top using the thumb drill
provided.
2. Insert the Black Dye filling needle through the hole and push towards the center of the
cartridge. The cartridge contains felt. Stop inserting the syringe when the needle touches
the felt. The needle is in as far as it can go.
3. Slowly inject up to 20 ml. of ink or until ink appears at the filling hole.
4. Seal the filling hole with the aluminum tape provided.
5. Xerox_8R7638 Check the ink flow by gently pressing a dry paper towel against the
Page 2

printhead. You should see a line or dot of Black ink. If not, gently press a warm, wet
paper towel against the printhead until the black is visible.
6.) When black is visible on paper towel, place cartridge back into the printer and run 1
to 2 print tests. Or print 2 pages at this test site
http://www.inkonline.net/support/blackinktest Black ink test
For best results, leave cartridge in printer for 8 hours after refilling so the ink can
saturate the entire sponge.
Note: Empty cartridges should be refilled immediately.
To Clean the Printhead
Clean the printhead only if the cartridge doesn't print or prints in streaks.
1. Follow the directions in the printer manual.
2. If that doesn't work, here's a quick and easy method to try next:
o Turn on the hot water faucet and let the water get good and hot.
o Stick just the copper printhead under the hot water for 3 to 5 seconds.
o Remove the printhead and dry with a tissue.
o Re-insert in the printer and run the printhead cleaning routine.
o Print 2 pages. You should get dilute print for a half page or so and then
good quality printing.
3. If this doesn't work, soak only the printhead in simmering water for up to 2 hours.
You may add up to 50 percent ammonia for tough clogs.
 Loading...