

Page 1
Page 2

2
Copyright
This documentation is protected by law. All rights, especially the right of duplication,
circulation, and translation are reserved.
No part of this publication may be reproduced in form of copies, microfilms or other
processes, or transmitted into a language used for machines, especially data
processing machines, without the express written consent of the publisher.
All copyrights reserved.
All other product names are trademarks of the corresponding manufacturers. Errors in
and changes to the contents as well as program modifications reserved.
Copyright © Xara Group Ltd., 1994 – 2012. All rights reserved.
Xara is a registered trademark of Xara Group Ltd.
Xara Group Ltd. is an affiliate company of MAGIX AG.
MAGIX is a registered trademark of MAGIX AG.
Other mentioned product names may be registered trademarks of the respective
manufacturer.
This product uses MAGIX patent pending technology.
Xara is a registered trademark of Xara Group Ltd.
Xara Group Ltd. is an affiliate company of MAGIX AG.
MAGIX is a registered trademark of MAGIX AG.
Other mentioned product names may be registered trademarks of the respective
manufacturer.
PANTONE® Colors displayed here may not match PANTONE-identified standards.
Consult current PANTONE Color Publications for accurate color. PANTONE® and
other Pantone, Inc. trademarks are the property of Pantone, Inc. ©Pantone, Inc., 2012.
Pantone, Inc. is the copyright owner of color data and/or software which are licensed
to MAGIX Software GmbH to distribute for use only in combination with MAGIX
Page & Layout Designer 2013. PANTONE Color Data and/or Software shall not be
copied onto another disk or into memory unless as part of the execution of MAGIX
Page & Layout Designer 2013.
www.xara.com
Page 3

Contents 3
Contents
Copyright 2
Introduction to MAGIX Page & Layout Designer 2013 11
Welcome to MAGIX Page & Layout Designer 2013 11
Page & Layout Designer terminology 12
Getting Help 14
Support 15
Document info 16
About MAGIX Page & Layout Designer 2013 17
Tooltips 17
Getting Started 18
Program Layout 18
Objects On The Page 19
Object Based Design 19
Drawing Tools 20
The Selector Tool 26
Right-click menus 27
Using Templates & Clipart 27
Theme Colors 30
Photos 34
Text 36
Page Size 38
Layers 39
Saving & Exporting Your Work. 39
Document handling 40
Starting a new document 40
Opening an existing document 40
Selected document and title bar 41
Control bars 41
InfoBar 42
Main toolbar 42
Rulers 42
The status line 43
The indicators 43
X/Y co-ordinates 43
Page 4

4
Normal/full screen modes 44
Opening a second window 44
Changing the zoom value 44
Sliding the document within the window 46
Changing the page size 46
Multi-page Documents 49
Saving the document 55
Closing the document 55
Automatic Backups 56
On-screen grid 58
Rulers 59
Measurement units 60
View quality slider 62
The constrain key 63
Galleries 64
The Name Gallery 73
Naming objects 75
Undo and Redo 77
Drawing Lines and Shapes 78
Drawing a line or shape 78
The Freehand & Brush Tool 78
Editing lines/shapes with the Freehand & Brush Tool 80
The Straight Line & Arrow tool 82
The Shape Editor tool 83
Extending the line 85
Adding a new point handle 85
Selecting multiple point handles 86
Deleting points 87
Moving point handles—Shape Editor Tool 87
Smoothing a line 88
Constraining the line 88
Changing curves 89
Changing a straight line to a curve (and vice versa) 90
Joining lines 90
Splitting a shape 91
Changing the line width (thickness) 92
Variable width lines 93
Line Gallery 93
Brushes 96
www.xara.com
Page 5

Contents 5
Selecting Objects 98
The Selector Tool 98
Selecting objects 99
Double-click shortcuts to tools 102
Object Handling 103
Moving objects 103
Removing objects from the document 106
Duplicating and cloning 107
Moving objects forward and backwards 108
Rotating objects 110
Scaling (resizing) objects 112
Flipping objects 114
Snapping 114
Guide Objects and Guidelines 119
Grouping and ungrouping objects 120
Editing inside groups 121
Other types of groups 123
Soft Groups 123
Alignment 124
Copying Styles: Paste Attributes 128
ClipView 128
Repeating Objects 129
Shape Handling 133
Closing a shape 133
Joining shapes 134
Combining shapes 135
Creating regular polygons (the Quickshape Tool) 137
Creating stars (polygons with indented sides) 139
Editing stars 140
Creating rectangles and squares 141
Creating circles and ellipses 141
Making shapes editable 142
Distorting Objects 143
Stretching and squashing objects 143
Skewing objects 143
The Mold Tool 144
Feathering 148
Page 6

6
Page & Layer Gallery 149
The Page & Layer Gallery 149
Pages 152
Layers 152
Layer Operations 154
Special Layers 156
Hiding Layers and Objects 156
Locking Layers and Objects 157
Solo Mode 157
Show All & Unlock All 157
Moving Objects Between Layers 158
Color Handling 159
The color line 159
Applying fill & line colors by drag & drop 161
Editing an object’s color 162
The Color Editor in detail 163
Specifying colors in the Color Editor 164
The color models 165
Colors on the screen and on the printer 165
Local colors and Theme colors 166
Theme color schemes 166
Creating your own color schemes 167
Creating new named colors 167
Editing named colors 168
Normal colors, Tints, Shades and Linked colors 170
Creating a Tint, Shade or Linked color 171
The Color Gallery 173
PANTONE® Colors 174
Text Handling 178
The Text Tool 178
The Font Menu 180
Simple text 181
Text in a column 182
Text areas 183
Text along a curve 185
Editing text 186
Spell checker 187
Find & Replace 188
www.xara.com
Page 7

Contents 7
Synchronising text across multiple text objects 189
Tabs, Margins and Indents 189
Repelling text objects 192
Anchored Graphics 194
Embedding Graphics 197
Applying text attributes 197
Text Styles 203
Indents and Outdents 206
Copying text appearances 207
Copying/Pasting formatted text (RTF) 207
Seeing fonts in use 208
Changing text into editable shapes 208
The Fonts Gallery 208
Fonts and PDF 210
Document Font embedding 211
Adding Hyperlinks 211
Fills 213
The Fill Tool 213
Changing the colors in a fill 215
Moving the start or end handle of the fill 216
Bitmap fills 216
Fractal fills 218
Multi-stage color graduations 219
The Fill Gallery 220
Transparency 222
Applying flat transparency 223
Applying graduated transparency 223
Multi-stage graduated transparency 223
Transparency types 224
Enhance 226
Profile 227
Bitmaps 227
Handle/resolution 228
Applying transparency to several objects 228
Bevels 229
The Bevel Tool 229
Applying a bevel 229
Modifying a bevel 229
Page 8

8
Removing a bevel 232
Shadows 233
The Shadow Tool 233
Applying a shadow 233
Changing the shadow color or fill effect 235
Converting shadows to shapes 235
Removing a shadow 236
Copying shadows onto other objects 236
Contours 237
The Contour Tool 237
Contouring objects 237
Converting contours to shapes 240
Removing a contour 241
Blends 242
Blends 242
Using the Blend Tool 242
Removing blends 248
Photo Handling 249
Introduction 249
Photo Objects 249
Photo Groups 249
Importing Photos 250
Photo resolution 254
Zero-memory Copies 254
The Bitmap Gallery 255
Embedded JPEG files 257
Blending & Merging photos 258
Photo display quality 259
Saving & Exporting Photos 260
Photo Edit Attributes 261
Editing the outline of Photos 262
Cropping photos 263
Screenshots 263
Coloring photos 265
Integration with external Photo Editors 266
Resize, rotate and position a photo within its frame 267
Horizon Straighten 268
www.xara.com
Page 9

Contents 9
Viewing a scaled photo at its full size 269
Making a photo its full size 269
Optimizing Photos and Bitmaps 270
Converting objects or drawings to bitmaps 273
Photo Documents 273
Editing Photo Files 274
The Photo Tools 276
Using the Photo Tools 276
Common photo functions 276
Enhance Tool 277
Clip Tool 280
3D Extrude Tool 282
Extruding a shape 282
Extrude Tool InfoBar 282
Copying 3D extrude attributes 285
Printing 286
Show print borders 286
Selecting and setting up a printer 286
The print dialog box 287
Print Options: Output tab 289
Print Options: Print Layout tab 291
Imagesetting 293
Spot colors 293
On screen printer plate previews 293
Imagesetting dialog 294
Separations dialog 297
Overprinting 299
Printing on all plates 301
Printing & color separating: technical details 301
Importing and Exporting 304
General notes on exporting and importing 304
Import and Export Supported File Formats 305
Importing files 307
Exporting files 309
PDF Export 314
JPEG, PNG, GIF and BMP export dialog overview 333
Other bitmaps Export dialog box 338
Page 10

10
Working with Templates 340
Replacing photos 340
Adjusting a photo in its frame 341
Editing photos 341
Changing text 342
Changing colors 343
Adding Pages 344
Customizing Page & Layout Designer 345
Changing the blank template document 345
Options in the Utilities menu 345
General tab 346
Grid and Ruler tab 348
Internet tab 349
Mouse tab 351
Page Size tab 353
Backups Tab 354
Photo Editing 355
Tune-ups tab 356
Units tab 357
View tab 358
Control bars 360
Menus and Keyboard Shortcuts 364
Introduction 364
File menu 364
Edit menu 366
Arrange menu 370
Utilities menu 373
Share Menu 375
Window menu 376
Help menu 378
Key shortcuts 380
Integrated key shortcut utility 384
Index 389
www.xara.com
Page 11
Introduction to MAGIX Page & Layout Designer 2013 11
Introduction to MAGIX Page & Layout Designer 2013
Welcome to MAGIX Page & Layout Designer 2013
MAGIX Page & Layout Designer 2013 is the ideal solution for creating a successful
business image. You can design your own company logo, create marketing and
advertising material, and present your business in the best possible light. This
program makes it simple to impressively market your products or services using
flyers, posters, brochures, newsletters and more. Professional templates help you get
amazing results in no time and can be easily customized to fit your own unique image.
Enjoy the advantages of this flexible software solution for layout and print and save
time, effort and money in the process.
MAGIX Page & Layout Designer 2013 contains a vast selection of high-quality,
customizable design templates for the perfect business image: business cards,
stationery, invitations, menus, appointment cards and much more. With the program
you can make your own affordable advertising material: flyers, posters, brochures,
coupons, create sales-boosting media for successful e-commerce like sales mailings,
PDF documents or add company logos and lettering to promotional material: e.g
cups, pens, keychains etc. It's easy to do it all yourself and save money. To do this, no
previous experience is required!
Page 12

12
All functions are on one screen: Quick layout design, convenient text and image
editing tools and print-ready proofs are all at your fingertips.
Features
• Comprehensive template catalog with license-free designs for all your business
needs: Business documents, presentations and much more.
• Quick formatting of text blocks and large amounts of text: Format your headers,
text blocks or footnotes and easily transfer the formatting to other texts. A
uniform design doesn't get any easier!
• Includes text flow around shapes and images, multilingual spell check,
expandable user dictionary, support for all installed fonts with a live preview as
well as a find and replace function.
• Magic Snap (quick arrange): Arranging elements of all kinds (photos, graphics,
text, etc.) with absolute precision is now even easier and faster.
• Create company logos, extract images and enjoy the advantages of integrated
photo editing.
• Complete PDF workflow from input to creation and output.
• Galleries for a better overview: Flexible organization and full control thanks to the
Page & Layer gallery and the Bitmap Gallery displays all of the graphics that have
already been used. It's the ideal feature for multipage documents.
• Complete file support for all standard formats: Easy import of text files, graphics
and photos.
• Print-ready output: High-quality output thanks to PDF/X, support of CMYK and
PANTONE color separation, spot colors, print color scale previews and much
more.
Page & Layout Designer terminology
This section describes some of the terminology used in Page & Layout Designer.
Document
You can think of a document as a conventional sheet of paper (or a couple of it). Like
a sheet of paper, you can draw lines and curves, place objects like shapes, cliparts and
photos and write text (and erase them later). You can save the document for later use
by storing it on disk or printing it.
Page
This is the white area in the document. You can place objects on the page margin, on
the page, or overlapping both. However, only objects on the page are printed. A
document can contain one or several single pages or double page spreads. A double
page is like two separate sheets of paper placed next to each other.
www.xara.com
Page 13
Introduction to MAGIX Page & Layout Designer 2013 13
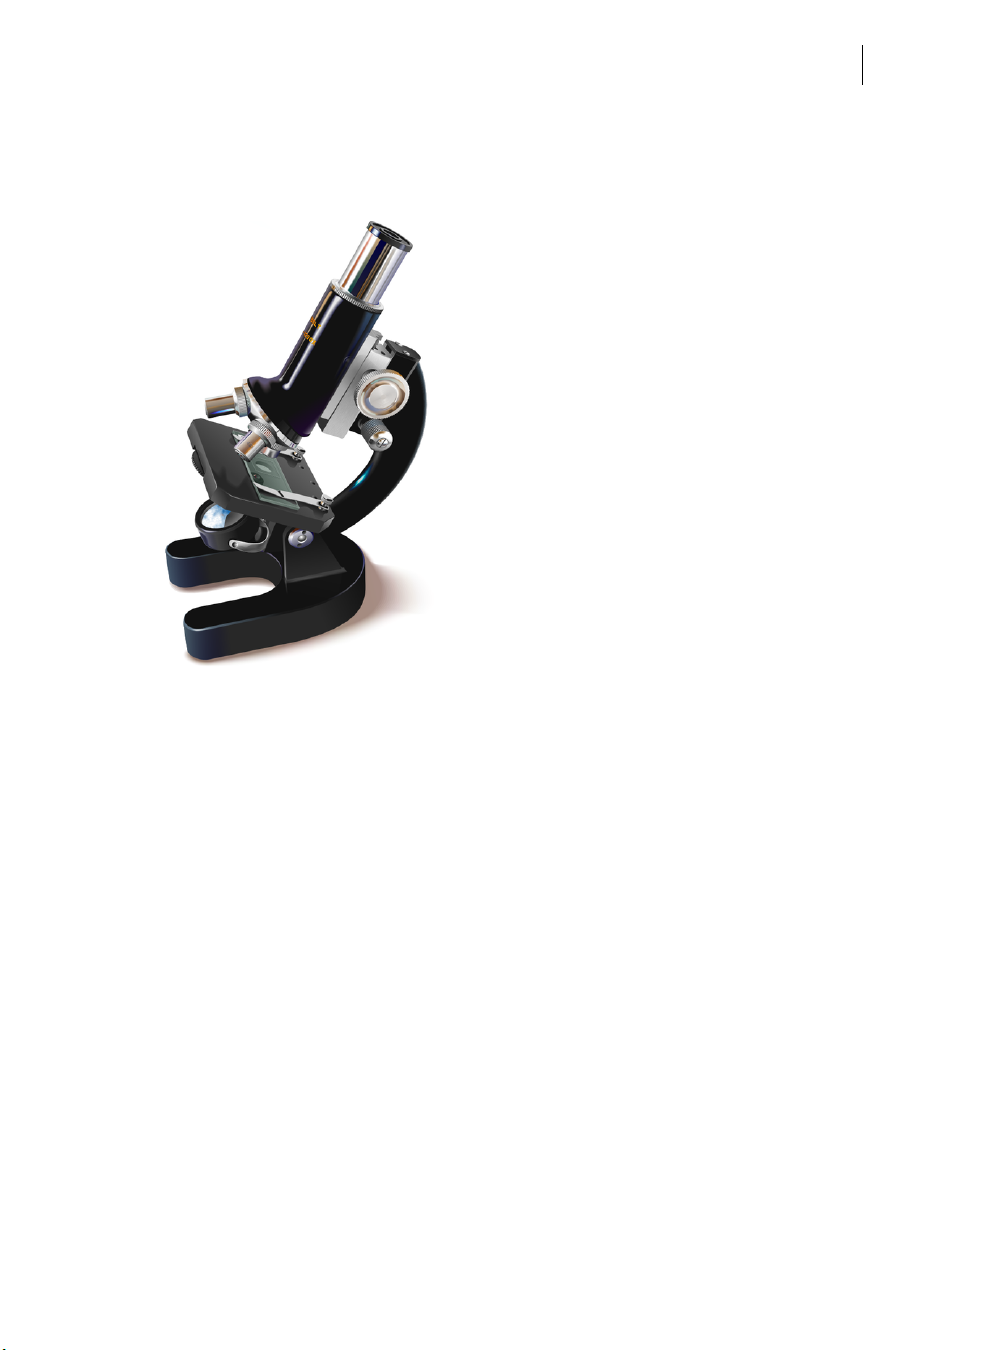
Lines, shapes, and objects
A line can be straight, curved or a mixture
of both. A line must have a start and an
end, thus it is always open. You can apply
a thickness and color to a line.
These are all lines
A shape is a solid or closed object. The
difference between a line and a shape is
that a shape has no start or end. Because
a shape is a closed object, you can fill it
These are all shapes
with a color or leave it empty with no
color. You can apply a thickness and color
to the line around the shape.
In postscript terminology, a shape is a closed path. Page & Layout Designer
sometimes uses "shape" as shorthand for "line or shape".
Object is a general term. This manual
uses it where the same information
applies to lines, shapes, bitmaps and
text. For example, moving a line is
These are all objects
exactly the same as moving a shape,
moving a bitmap or moving text.
Many operations in Page & Layout Designer apply equally to a single object or a
collection of objects. "Object" can refer both to one object and to several objects.
Attributes are the characteristics of objects such as line width and pattern, colors and
so on.
Bars
There are three types of bars: the MAIN TOOLBAR, the INFOBAR, and then various other
button bars which are sometimes just referred to as control bars, e.g. the
GALLERY
button bar.
Attributes
The various characteristics that define the appearance of objects on the page, such as
color, line width, fill style etc are all called
ATTRIBUTES of the object.
The Attributes of objects can be copied and pasted between different objects using
the Paste Attributes (on page 128) menu command.
Page 14

14
Getting Help
If you need some help using this program, here are some sources of information that
may be of use:
• Program help - Choose "
HELP" menu to open MAGIX Page & Layout Designer 2013 Help (containing
"
hundreds of pages of information).
• Status bar - Try reading the text on the status bar at the bottom of the main
MAGIX Page & Layout Designer 2013 window. It always describes what actions
are currently possible and what they will do (even during drags), and helps you
learn to use the MAGIX Page & Layout Designer 2013 tools. It also gives details
of what buttons and controls do as you move the pointer over them. See Status
Bar for more details.
• ToolTips - If you hold the mouse pointer over a button or control for a short
while, then small message appears telling you what it does.
• Menus - If you want to know what a menu item does, highlight it and press "F1".
• Dialog boxes - If you want to know what a dialog box does or how to use it, click
HELP.
• Movies - Use the menu option "
MAGIX PAGE & LAYOUT DESIGNER 2013 HELP" from the
HELP" > "MOVIES".
www.xara.com
Page 15

Getting Help 15
Support
Dear MAGIX customer,
Our aim is to provide convenient, fast and solution-focused support at all times. To
this end, we offer a wide range of services:
• Unlimited web support:
As a registered MAGIX customer, you have unlimited access to web support
offered via the convenient MAGIX service portal on http://support.magix.net,
including an intelligent help assistant, high-quality FAQs, patches and user
reports that are constantly updated.
The only requirement for use is product registration on www.xara.com
• The online community - on-the-spot support and a platform for exchange:
MAGIX customers have free and unlimited access to the online community at
www.magix.info, which includes approx. 120,000 members and offers the
opportunity to ask members questions concerning MAGIX products as well as
use the search function to search for specific topics or answers. In addition to
questions & answers, the knowledge pool includes a glossary, video tutorials and
a discussion forum. The multiple experts, found round-the-clock on
www.magix.info guarantee quick answers, which sometimes come within
minutes of a question being posted.
• Email support for MAGIX products:
For every new MAGIX product you will receive, as of date purchase, 12 months of
email based customer service.
Premium email support:
For priority support, or if you want the MAGIX support team to help with nonMAGIX related harware problems you can purchase an Premium email support
ticket. The ticket is for a specific problem, and is valid until it is solved, it is not
restricted to an email.
Please note: To be able to use the Premium email support and free product email
support via the Internet, you have to register your MAGIX product using the serial
number provided. This can be found on the CD case of your installation CD or on the
inside of the DVD box.
• Additional telephone service:
Besides the large number of free customer service offers, we also offer a feebased telephone customer service available to customers that have purchased
from Magix. Here you can find a summary of our technical support telephone
numbers:
http://support.magix.net (on page 218)/
Europe): MAGIX Development Support, P.O. Box 20 09 14, 01194 Dresden,
Mail (
Germany
Page 16

16
Mail (North America): MAGIX Customer Service, 1105 Terminal Way #302, Reno,
NV 89502, USA
Please make sure you have the following information at hand:
• Program version
• Configuration details (operating system, processor, memory, hard drive, etc.),
sound card configuration (type, driver)
• Information regarding other audio software installed
MAGIX Sales Department
You can reach the MAGIX Sales Department workdays for help with the following
questions and problems:
• Orders
• Product consulting (pre-purchase)
• Upgrade requests
• Returns
Europe
Monday - Friday, 09:00-16:00 GMT
U.K.: 0203 3189218
Denmark: 699 18149
Sweden: 0852500858
Finland: 09 31581630
Norway: 0210 30665
North America
9 am to 4 pm EST Mon-Fri
Phone: 1-305-722-5810
Document info
"FILE -> DOCUMENT INFO" displays information about the selected document such as
its size and any fonts or plug-ins used. This is a good way to find out if you are
missing a required font or plug-in that could prevent the document from displaying
correctly.
Anything you type into the comment field is stored as part of the file. This comment is
displayed whenever you display the document info dialog box.
www.xara.com
Page 17
Getting Help 17
About MAGIX Page & Layout Designer 2013
Choose "HELP" > "ABOUT MAGIX PAGE & LAYOUT DESIGNER 2013". This displays general
information about the program. If you contact the support, you may be asked for this
information.
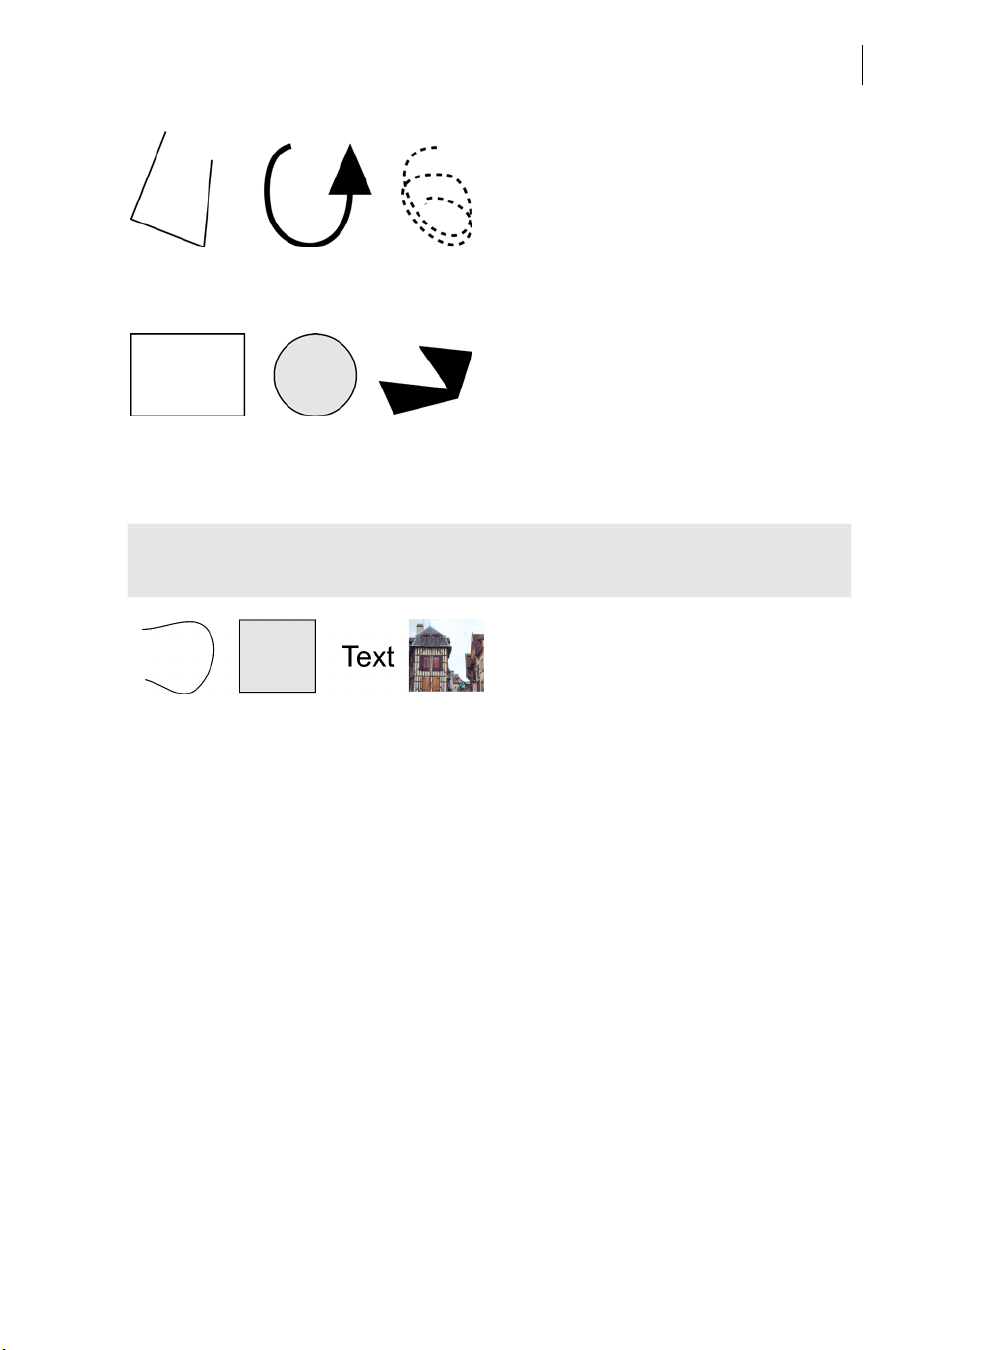
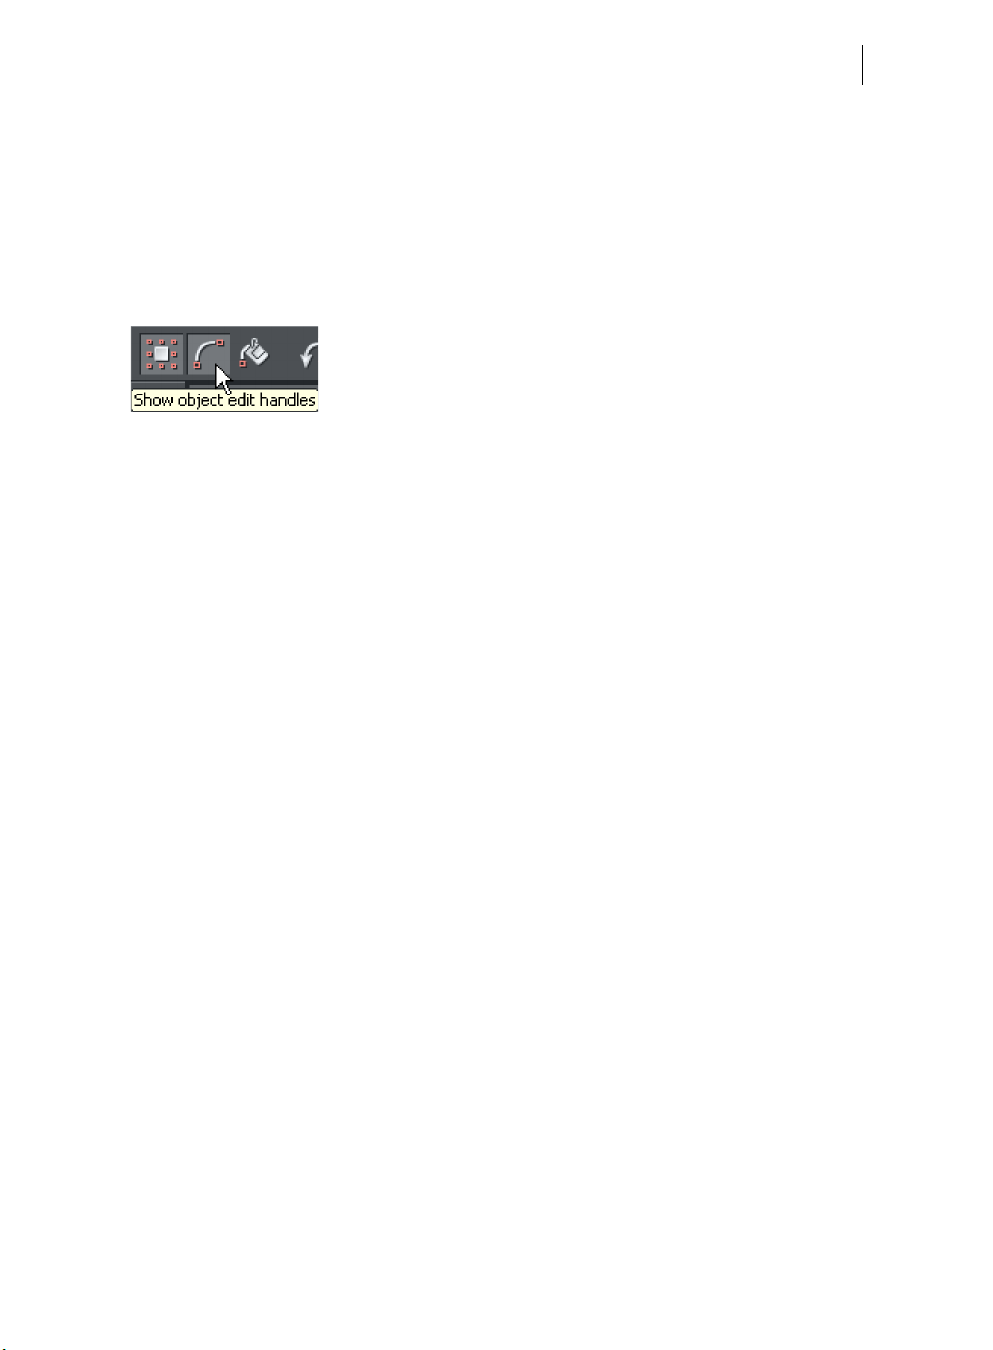
Tooltips
When you move over a button, the tooltip tells you the
function of the button.
Page 18
18
Getting Started
This section gives an overview of the main functionality of Page & Layout Designer.
Later sections go into more detail about each tool.
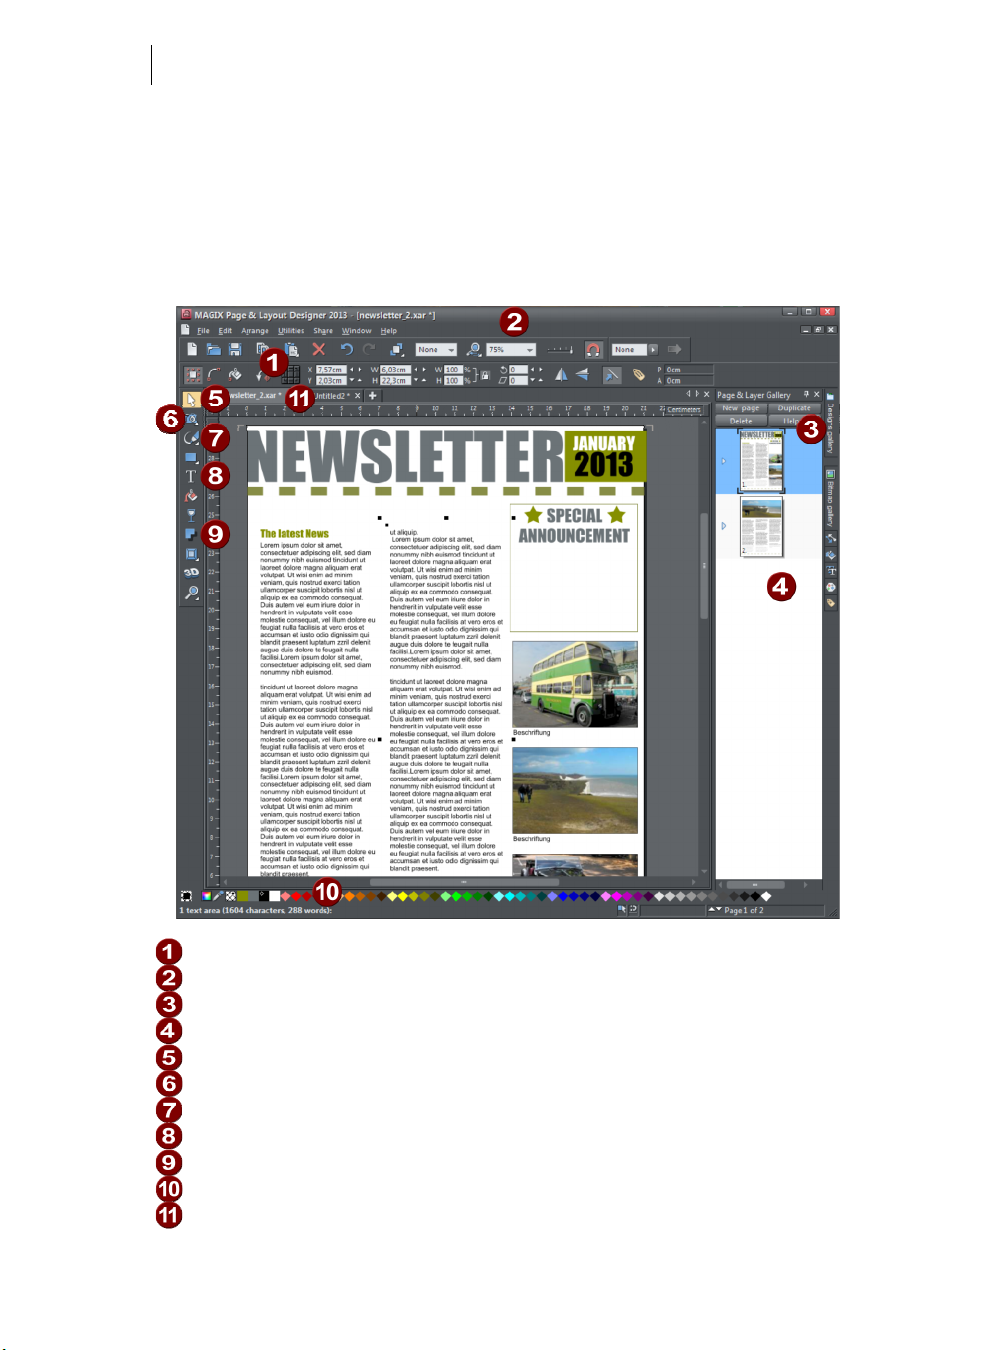
Program Layout
Info Bar - changes with each tool
Zoom
Designs Gallery
Page & Layer Gallery
Selector Tool
Photo Editing Tool
Drawing tools
Text Tool
Shadow Tool
Color line
Tabs for all open documents - icon identifies document type.
www.xara.com
Page 19

Getting Started 19
Objects On The Page
Whether you customize a template or create your own graphics from scratch, you
can rotate, resize and position anything on the page, anywhere you like. You can
easily resize the page to be any required size and add new pages as required. Certain
features, such as changing color schemes, work across all pages simultaneously.
These are the basic types of page element:
• Text: Using the
TEXT TOOL you can create anything from single word headings to
columns of text or even blocks of text that flow from one block into another. You
can also create bulleted or numbered lists. The
TEXT TOOL InfoBar provides
controls over the font, size, line spacing and more. You can resize text either by
using the
SELECTOR TOOL or by selecting the text in the usual fashion and
choosing alternative point or pixel sizes. Perhaps surprisingly you can even rotate
text by any angle, and by using
REPEL TEXT UNDER (right click an object to see this
option) you can automatically flow text around objects on the page, such as
photos.
• Graphics: Any type of logo or heading on your page is graphic. Page & Layout
Designer is a vector graphics program which means you can edit the shape,
rotate and resize your graphic objects with no loss of quality (unlike pixel photo
editing tools such as Photoshop).
• Photos: You can drag and drop photos directly from your camera or File Explorer
window onto the page, rotate, enhance and crop it. Replacing existing photos in
templates is as easy as drag and drop - and you can alter the size and angle of
photos 'inside' their frame very easily.
Object Based Design
All the types of elements are collectively referred to as objects.
One of the unique benefits of Page & Layout Designer is that you have complete
freedom to place any object anywhere on the page, and your document will faithfully
reproduce this.
The SELECTOR TOOL can be used to select any object on the page, and to move
(just drag it), resize and rotate the objects.
You can adjust the stacking order (that is whether an object appears in front or
behind others on the page) using the
ARRANGE. With the SELECTOR TOOL you can resize objects by dragging on the corner
ARRANGE menu options or right click and choose
resize handles. You can rotate any object by dragging just inside the corner selection
handles.
To add some text to your design, select the
the page and start typing.
TEXT TOOL and click anywhere on
Page 20
20
You can also create text columns, by clicking and dragging horizontally in the Text
Tool, or text boxes by dragging horizontally. See the Text section (on page 36) below
for more detail
reference of te
s and the Chapter Text Handling (on page 178) for a complete
xt functions of MAGIX Page & Layout Designer 2013
You can use the drawing tools to create rectangles, rounded
rectangles, circles and ellipses, and just about any shape you like
using the
more detail.
SHAPE EDITOR TOOL. See the Drawing tools section for
Stacking Order
All objects on the page are placed one on top of another. The most recently drawn or
created object is always on top, that is, in front of any others. You can adjust the
stacking position by right clicking and choosing
ARRANGE or using the ARRANGE menu
options.
For example, when you draw a new rectangle it always appears to cover all the
objects behind it. By right clicking and choosing
ARRANGE" > "PUT TO BACK") the object is moved behind everything
menu "
ARRANGE or pressing "Ctrl + B" (or the
else. Similarly "Ctrl + F" brings any selected object to the top, that is, in front of
everything else.
There is an added complication: layers. All objects are collected into named layers,
and each layer can be turned on or off to show or hide everything on that layer. See
the Layers section for more detail.
PAGE & LAYER GALLERY allows you to easily see and adjust the stacking order of
The
objects and layers. Objects are listed in order from front to back in the gallery. See
Page & Layer Gallery (on page 149) for details.
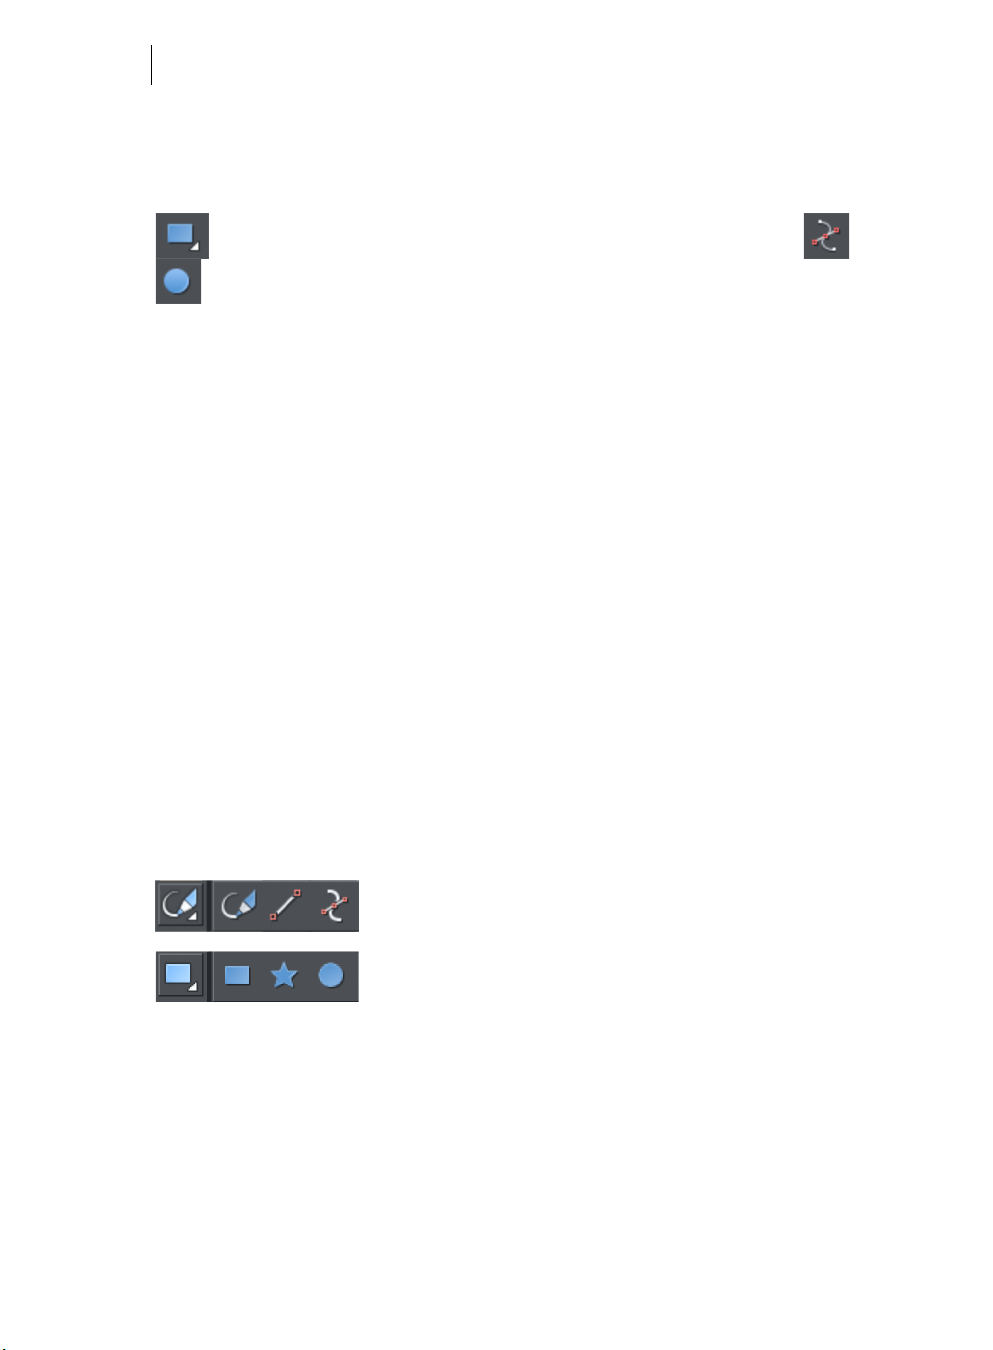
Drawing Tools
Page & Layout Designer provides all the graphics tools you need to create just about
any graphical object on your page, as well as a range of pre-designed graphical
elements in the Designs Gallery. There are several basic drawing tools that let you
create rectangles, ellipses, regular polygons stars or any shape you like.
www.xara.com
Page 21
Getting Started 21
Page & Layout Designer provides vector drawing tools, which means you can resize,
edit the outline shape and re-color with no loss of quality. You can zoom in to see
almost infinite detail, and all edits can be undone. For details on drawing
rectangles/squares, circles/ellipses and other shapes, see Drawing Lines and Shapes
and Shape Handling.
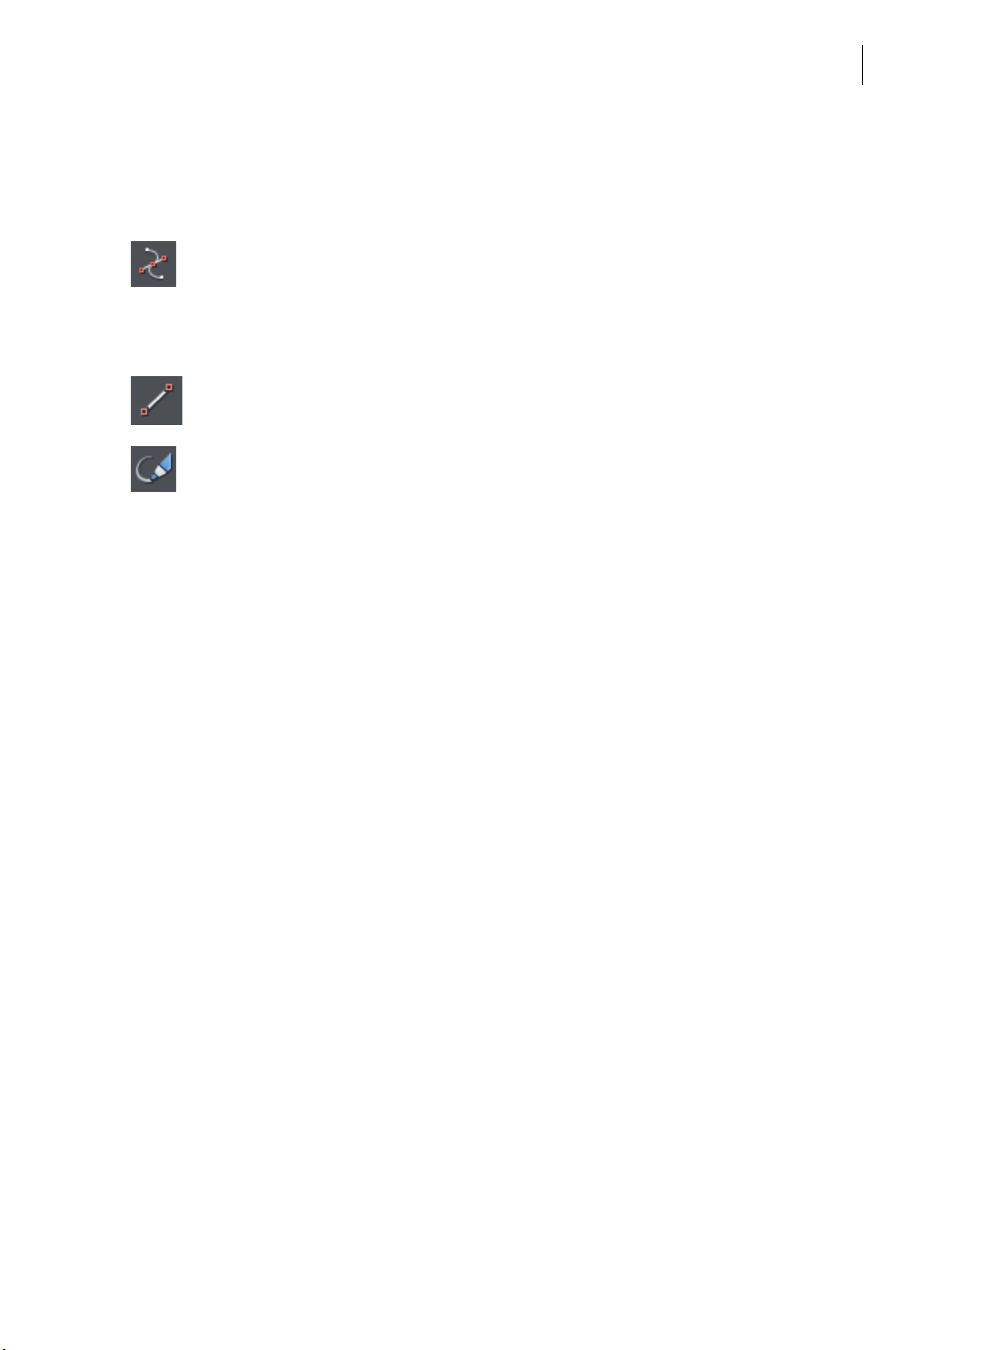
The SHAPE EDITOR TOOL allows you to create detailed vector based shapes,
and also to edit the outline of any shape.
Refer to the section
"THE SHAPE EDITOR TOOL" (on page 83) to learn how to use this
very powerful tool.
STRAIGHT LINE & ARROW TOOL adds arrow heads and tails to any type of
The
line as well as drawing single lines.
Shapes are an important part of any drawing, the other essential element
that we’ve ignored until now is freehand drawing. Click on the
TOOL. See the FREEHAND & BRUSH TOOL (ON PAGE 78) for more
BRUSH
FREEHAND &
information.
Current attributes
An ‘attribute’ is some characteristic of an object which you can modify in MAGIX
Page & Layout Designer 2013. For example a shape’s attributes include its color, its
outline width and its outline color.
As mentioned above you can change the attributes of an object after you’ve drawn it,
by selecting it and then changing its fill color, line width, or any of its other attributes.
But MAGIX Page & Layout Designer 2013 also keeps track of the ‘current’ attributes,
which are the attributes that get applied to newly drawn objects as they are created.
Setting current attributes manually
If, for example, you want the next rectangle you draw to be red, make sure you have
nothing selected (press "Esc" or click an empty part of the page) and then click red on
the color line. You’ve now set the current fill color attribute to red. Now when you
draw a new shape, it will be filled red. You can set other current attributes the same
way – by first making sure nothing is selected before changing the attribute’s value.
Setting current attributes automatically
By default, MAGIX Page & Layout Designer 2013 automatically updates the current
attributes for you, to match the object you last drew, or last selected. So for example if
you draw a rectangle and then make it green, the next shape you draw will also be
green. If you have a blue rectangle in your design and you wish to draw another one
just like it, first select the blue rectangle (this makes its attributes current) and then
the next shape you draw will also be blue. So by simply clicking an object, you set the
current attributes to match that object.
Page 22

22
This allows you to use existing objects as a ‘palette’ of available styles. Click an object
to select it, then draw new objects in that style.
You can turn off this behavior in the
OPTIONS" dialog. Select the GIVE NEW OBJECTS MOST RECENT ATTRIBUTES checkbox.
"
GENERAL TAB (on page 346) of the "UTILITIES" >
Now the current attributes will only change when you set them manually, as
described above.
Attribute groups
Many designs consist of a combination of closed filled shapes and open shapes (lines
where the start and end points are not coincident). Normally it wouldn’t be desirable
to have the attributes of an open shape used for a closed shape, nor vice-versa.
Therefore the attributes for open and closed shapes are kept separate – these are
known as attribute groups. Setting the values of one group does not affect the other
group. So for example, selecting a filled rectangle with no outline will not change the
current line width to zero for open shapes.
For the same reasons, text attributes make up a third attribute group. The text
attribute group is only set when you select text objects, or when you set the attributes
manually while in the text tool.
Exempt attributes
Some attributes do not get set as current automatically even when ‘Give new objects
most recent attributes’ is on. This is because some attributes can cause problems if
they become current.
For example if you applied a 10 pixel feather to a large object (to blur the edges) and
then drew a new 10 pixel sized shape, that new shape would be invisible if the feather
attribute was copied to it, due to the amount of feathering!
Other attributes can adversely affect the way designs export, or significantly increase
the time taken to render the design and so should not be applied unnecessarily.
Examples of attributes which are copied automatically:
• Fill colors, fill styles, line width, line color, line style, line join style, line endcap
style, arrow heads/tails, text font, text font size, text margins.
Examples of attributes which are not copied automatically:
• Feather, transparency, shadow, bevel, contour, 3D extrude, live effects.
Resetting current attributes
You can reset all current attribute groups instantly by pressing "Esc" when you have
no objects selected. If you have objects selected, pressing "Esc" clears the selection,
so just press "Esc" again to reset the current attributes back to their default values.
www.xara.com
Page 23
Getting Started 23
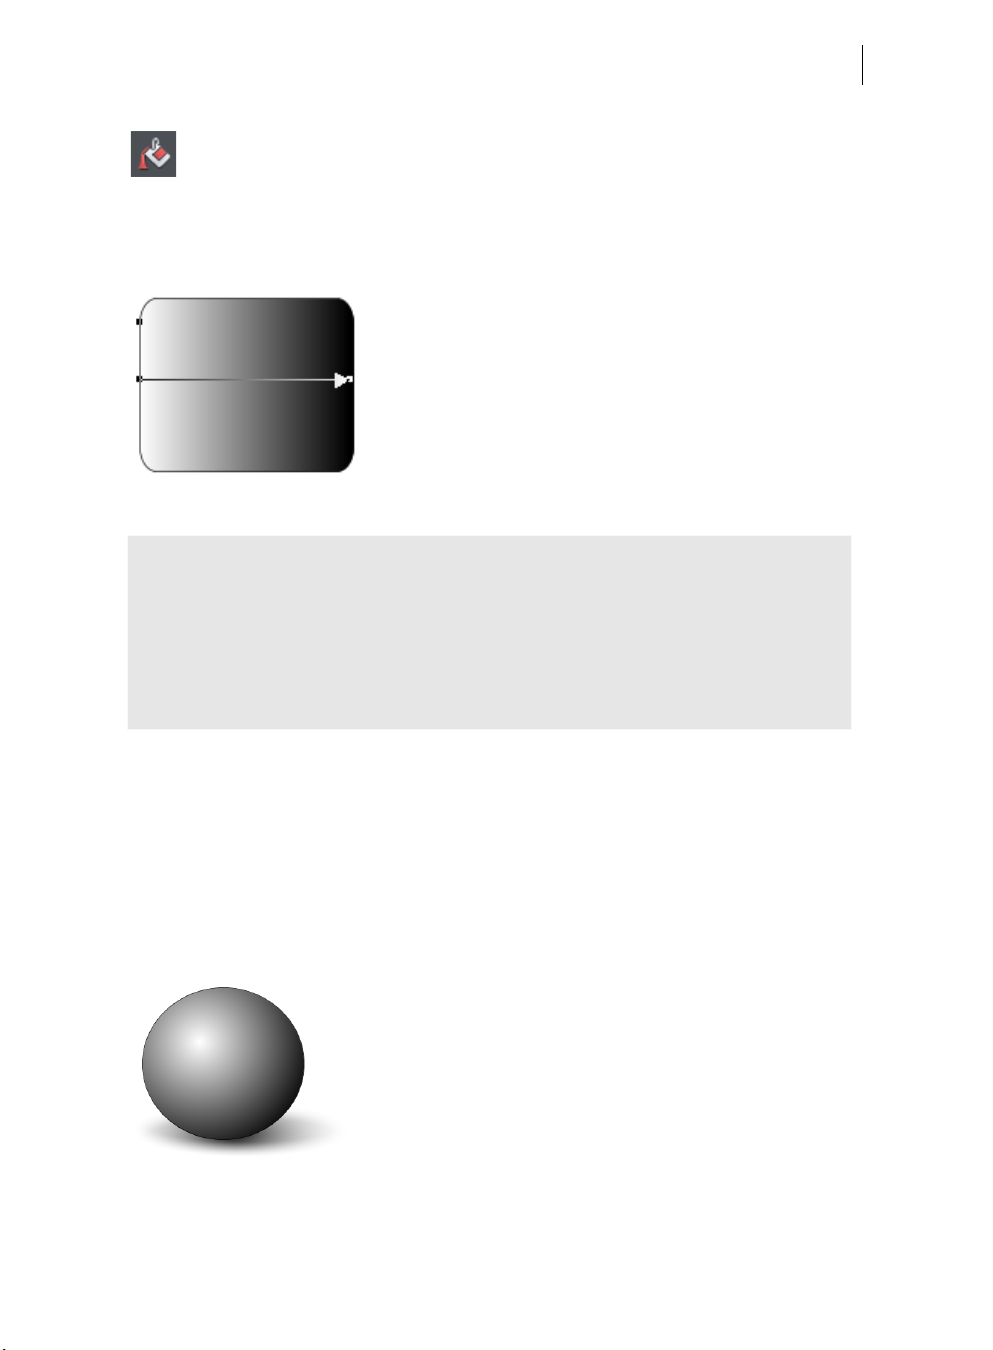
Fill Tool
You can easily put a graduated color fill onto a shape using this tool
(and a lot more besides). Select the tool and just drag across your
object.
The fill arrow can be adjusted by dragging the ends to alter the direction, angle and
extent of the graduation.
Rounded rectangle with a graduated fill.
Note: If you drag with the FILL TOOL across a grouped item, such as a text panel,
then everything in the group takes on the same fill style. To overcome this you must
first select just the item you want to fill. You can do this several ways. A single click
on the item with the FILL TOOL will select just that item, as will a click in the
SELECTOR TOOL with the "Ctrl" key pressed (this is called 'select inside' because it
selects just the one item inside the group). Now when you drag it will fill only the
selected object.
To edit the start or color of the fill just drag and drop a color from the color line onto
the shape, or you can select the end of the Fill Arrow in the
FILL TOOL and use the
Color Editor ("Ctrl + E").
You can create a multi-stage graduated fill by making sure the fill arrow is visible
(select it with the
FILL TOOL), now just drag a color from the Color Line and carefully
drop it on the arrow line where you want the new color. You can now drag this fill
point, or select "Ctrl + E" to adjust the color using the Color Editor. There are different
fill styles, for example this is a circle with a circular fill.
The shadow is another ellipse with a graduated color fill and feathered (see below).
Page 24

24
Transparency Tool
You can adjust the transparency of any graphic or photo to make it see-through. More
than this, Page & Layout Designer supports graduated transparency. It works very like
the graduated color fill. In the Transparency tool just drag across your shape and you
can see the transparency fades. You can adjust the degree of transparency of each
end of the fill arrow, by clicking on either end of the arrow, and adjusting the
Transparency slider. See Transparency (on page 222) for more information.
Feather
This is a graphical term for blending the edges of objects. Page & Layout Designer
provides a feather control that enables any object, graphics, text or photo to be
feathered - giving it a blurred edge that blends with the background. The Feather
control is not a tool on the left, but one of the controls on the top bar. Try it on your
rectangle shape. Select the shape and then click this Feather control on the right of
the top bar.
The shadow below the ball drawing above has a feathered edge. Combining all of
these controls you can very quickly produce amazing layered graphics for your design,
all directly in Page & Layout Designer without needing any other graphics tools.
This is an example of a rounded rectangle with
grad color, grad transparency and feathered
edges with some text placed on top of it.
This has a graduated color fill, light to dark green
going left to right. It also has a vertical graduated
transparency fading from top to bottom. The
feather gives it a soft edge. It takes a couple of
seconds to create such an image, and it's
automatically converted to the right graphic
when you save your design.
Shadow Tool
A very popular graphics effect is to create a soft drop-shadow under a graphic or
some text. This serves to lift the object away from the background.
www.xara.com
Page 25
Getting Started 25
The SHADOW TOOL lets you add a soft shadow to any object, text, graphics or
photo. Select the
SHADOW TOOL and just drag on the object. You can adjust the
shadow blur and transparency using InfoBar controls.
Some text with a soft shadow.
To adjust the position of an existing shadow, go into the SHADOW TOOL and drag on
the shadow.
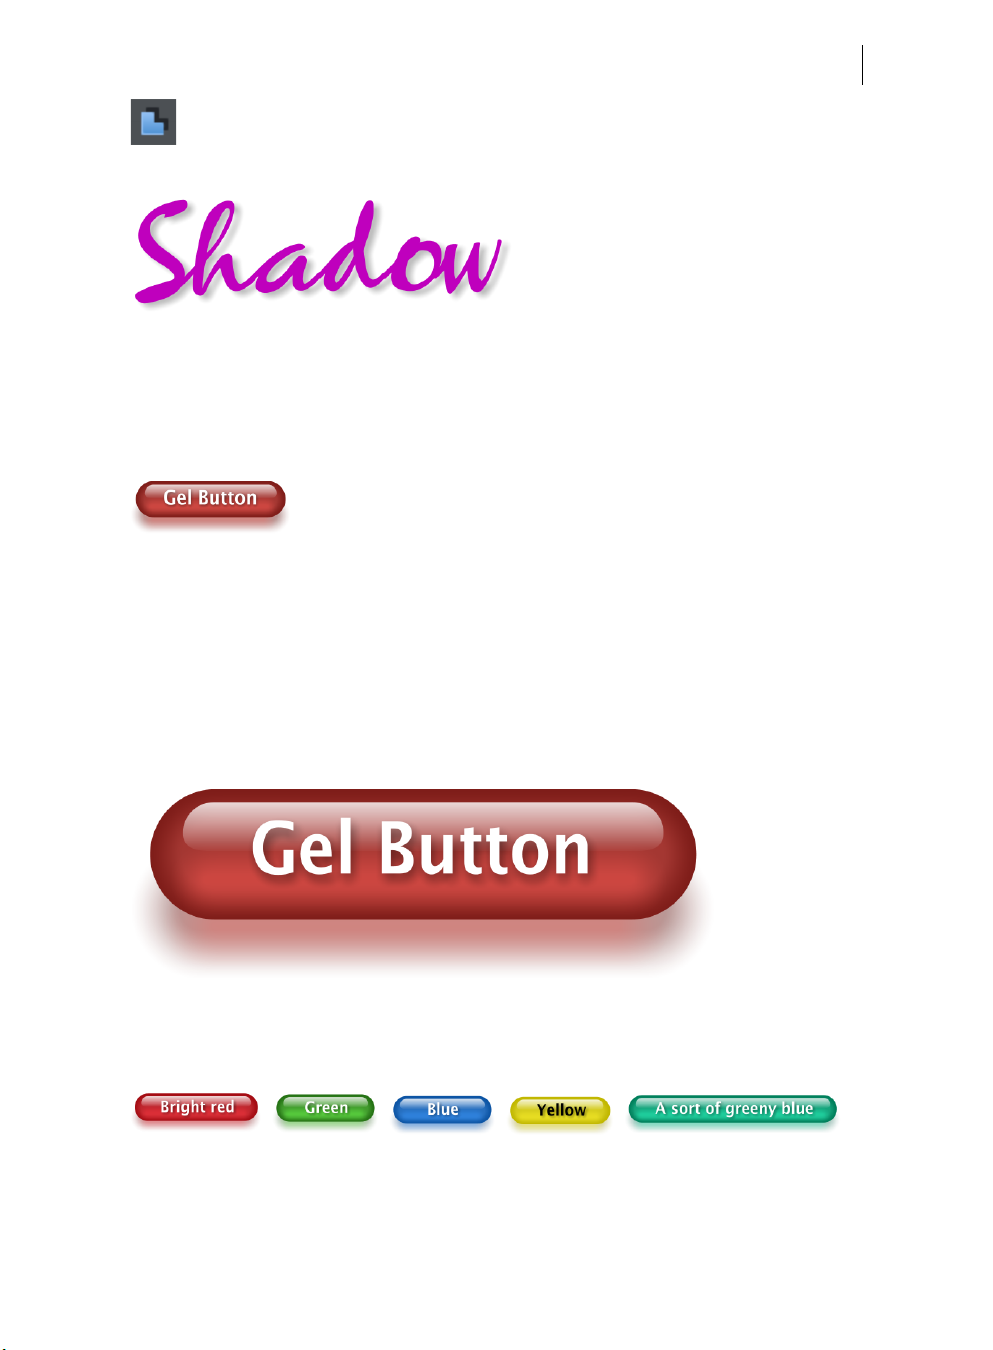
Example Graphics
This button combines many of the features described above - it's drawn by combining
just a few feathered shapes, and using graduated transparency (the white reflection
effect). The text has a slight soft shadow and the button has a glow shadow. The
whole thing is grouped. (You do not need to draw this button as it's provided in the
Button category of the
DESIGNS GALLERY).
The huge benefit of vector graphics, compared to 'bitmap' graphics created in pixel
editing software such Photoshop, is that you can re-color, edit, rotate, and resize the
button with no loss of quality. Make it huge and it remains pin sharp:
On top of that you can re-color using the Named Color system, and it will even
stretch as required - everything in Page & Layout Designer remains non-destructive
(which means you can always edit it, with no loss of quality).
Something that would take skill and time to produce using alternative graphics
software, is trivially easy in Page & Layout Designer.
Page 26
26
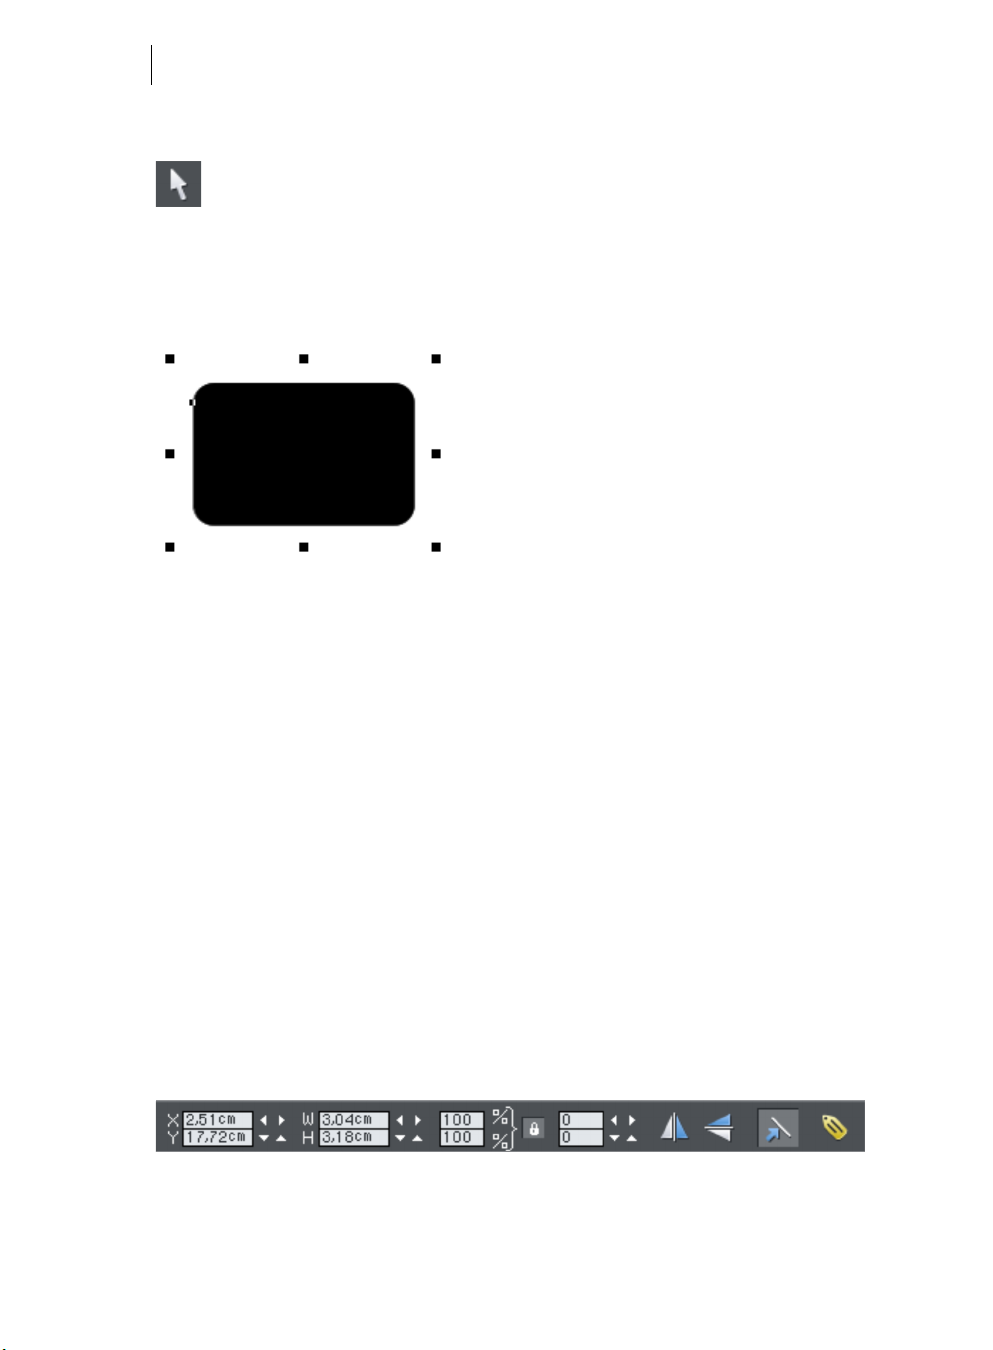
The Selector Tool
This tool is a general purpose tool that allows you to select, move, resize and
rotate all objects on your page.
You can do all these things by just dragging on the objects on the page, or on the
selection handles around the object, or you can enter precise numeric values. The
selected object is shown with 8 handles around the outside, and the status line at the
bottom of the screen also tells you what is selected.
Drag on any corner handle to resize an object. Drag just inside the corner handles to rotate.
Nudging Objects
The arrow keys can be used to nudge the selected object, one pixel at a time. If you
hold "Shift", it nudges objects 10 pixels at a time.
Rotating Objects
There are two ways to rotate an object. Either click on the object a second time, so
the selection handles change to show rotation handles, which you can then drag on to
rotate the object. Or, when it's showing the square selection handles, move the
mouse pointer just inside the corner handles until you see the mouse pointer change
to a rotation indicator - you can then also drag to rotate the selected object.
Unusually you can rotate just about anything in Page & Layout Designer, including
photos, headings, even blocks of text.
InfoBar
When an object is selected, the InfoBar - just above your document - shows all the
relevant controls for the current tool. This bar changes depending on which tool is
selected. This is the InfoBar in the
The InfoBar, just above your document, shows controls for the selected tool.
SELECTOR TOOL:
www.xara.com
Page 27

You can enter numeric values into any field. e.g. to reduce the size of an object by
20% you can enter 80% into the W field (which is a % size). The little padlock
selects whether both the width and height change together.
Getting Started 27
Copying Objects
You can use the usual "EDIT" > "COPY" ("Ctrl + C") and "EDIT" > "PASTE" ("Ctrl + V")
options or right click an object and choose
item is drag on it with the right mouse button.
You can also copy and paste a page anywhere in your document from the current
document or another document – see Copying and pasting (on page 52) pages.
COPY, but a really quick way to copy any
Right-click menus
When you right-click any object in the MAGIX Page & Layout Designer 2013
workspace, a drop-down menu lists useful operations that are relevant to the object
clicked on. For example, if you right-click a rectangle you've drawn previously, the
drop-down menu allows you to perform actions only relevant to a rectangle.
If you right-click a photo, however, some of the menu options that appear apply only
to photos, while others are similar to the actions you can perform on a rectangle. The
object-specific operations are listed towards the top of the right-click menu's list, e.g.,
in the case of a rectangle the first three actions above apply only to rectangles.
You can also right click both the page and pasteboard to see a menu of page- and
pasteboard-related operations you can apply.
If you select more than one object and right-click, the menu lists actions specific to
multiple objects, such as group, align and combine, as well as the common operations
such as cut, copy and delete. Similarly if you right-click objects that you have
previously grouped, actions specific to a group are displayed.
It's recommended that you right-click any object or multiple objects in the workspace
to access the menu specific to those objects. Once you've done this a few times you
will know which actions you can quickly perform with right-click menus.
Using Templates & Clipart
Open the Designs Gallery by clicking the DESIGNS GALLERY tab in the Galleries
bar (or use "
This shows folders containing collections of template designs and clipart. Browse
through the folders and double click to open any file as a new document or drag and
drop designs and widgets onto your page.
FILE" > "NEW FROM DESIGNS GALLERY").
Page 28
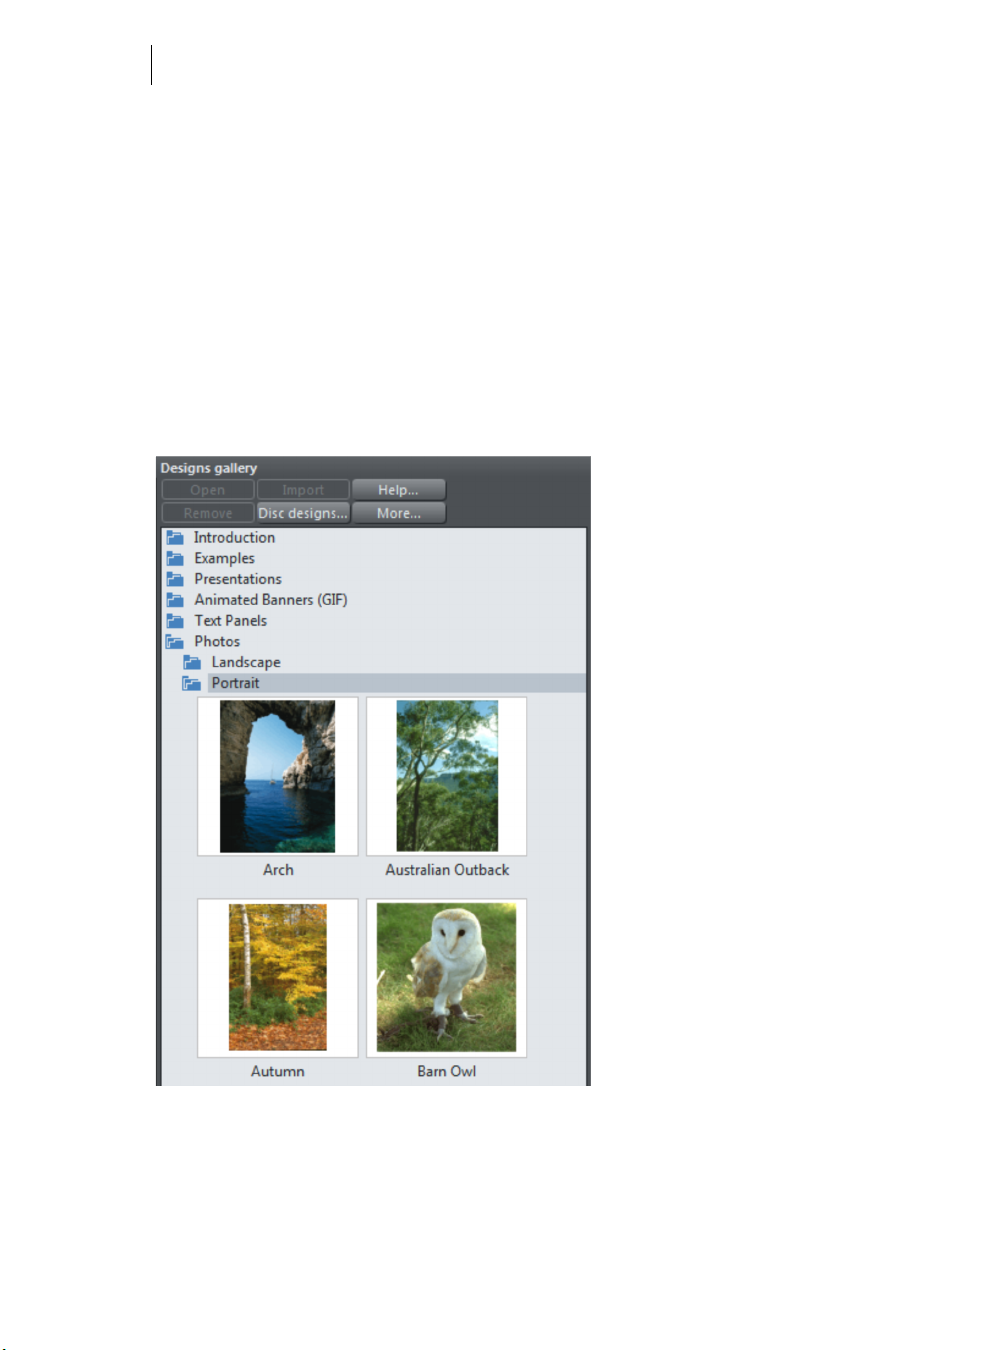
28
The Designs Gallery
The Designs Gallery contains thousands of professionally designed graphics and
templates. This includes small pieces of graphical ‘clipart’ you can drag onto any page
design, whole page templates or complete multi-page templates for newspapers,
flyers, brochures, calendars, etc.
Opening the Gallery
By default the Designs Gallery is available as a flyout near the top right corner of the
MAGIX Page & Layout Designer 2013 window. Just hold your mouse pointer over the
"DESIGNS GALLERY" tab to make it appear. When you move the mouse pointer away it
closes again, or you can make it stay open by ‘docking it’ by clicking the ‘pin’ icon at
the top of the gallery.
Or choose "
FILE" > "NEW FROM DESIGNS GALLERY".
See Document Handling (on page ) for more information on using galleries generally.
Gallery folders
If you are online, the gallery is automatically updated with any available new and
modified content each time you start the program.
www.xara.com
Page 29
Getting Started 29
To open a folder in the gallery, click the folder icon, or double click on the folder name.
To open a design as a new document, double click on the design thumbnail. To import
a design into your current open document, drag it from the gallery onto your page. If
it’s a whole page template, a new page will be added to your document, after the
currently selected page.
If you are running a trial version of the program, folders shown in red can be
previewed only (that is, you can view the design thumbnails inside these folders, but
not open or import the designs). When you purchase the program online ALL the
contents of red folders become immediately available to you and the folders turn blue
to indicate this.
If you are running the full unlocked program, you may see additional red folders
appear at the bottom of the gallery. These are additionally available folders of designs
that you can preview and then use immediately when you buy online. Double click on
an item in a red folder to see purchase options. Additional content that you have
already purchased appears in blue folders, just as the main gallery content does.
You can also right-click on a thumbnail and choose
IMPORT TO NEW PAGE to force any
design to be imported onto a new page in your document. The gallery also contains
color scheme files, which allow you to change the color of your design (drag and drop
onto your page, or just double click to apply the scheme).
Adding New Pages To Your Document
You can drag any template design from the DESIGNS GALLERY onto your page. If this is
a page template, it will add a new page to your document, after first asking if you
want to match any color changes. If you drag a clipart item, heading or photo object,
this gets added onto the page where you dropped it, and again you will be asked if you
want to match any color changes you've made.
Your imported graphic is just another object on the page, and can be re-positioned,
resized and rotated using the Selector tool as usual.
To add a new page of the same design, the easiest way is to use the duplicate
Or use the option under the
page option in the page flyout bar on the top bar.
EDIT > PAGES menus. This replicates the current page
below. You can then just delete or edit the elements as required. You can add a new
blank page by selecting the menu
EDIT > PAGES > NEW PAGE.
Or you can copy and paste an existing page in the same or another document. Rightclick an empty part of a page and choose
right-click a page and choose
PASTE > PAGE (or press "Ctrl + V").
COPY PAGE. In the destination document
The page on the clipboard is added as a new page immediately following the current
page. The pasted page adopts the page size of the document it’s pasted into (as long
ALL PAGES IN DOCUMENT THE SAME checkbox is enabled in FILE > PAGE
as the
OPTIONS
). Page layers and attributes and all the objects on the page are also pasted.
Page 30
30
You can delete pages using the same
click a page and choose
You can also use the
pages.
CUT PAGE.
PAGE & LAYER GALLERY (on page 149) to add, delete or duplicate
EDIT > PAGES menu or the flyout bar. Or right
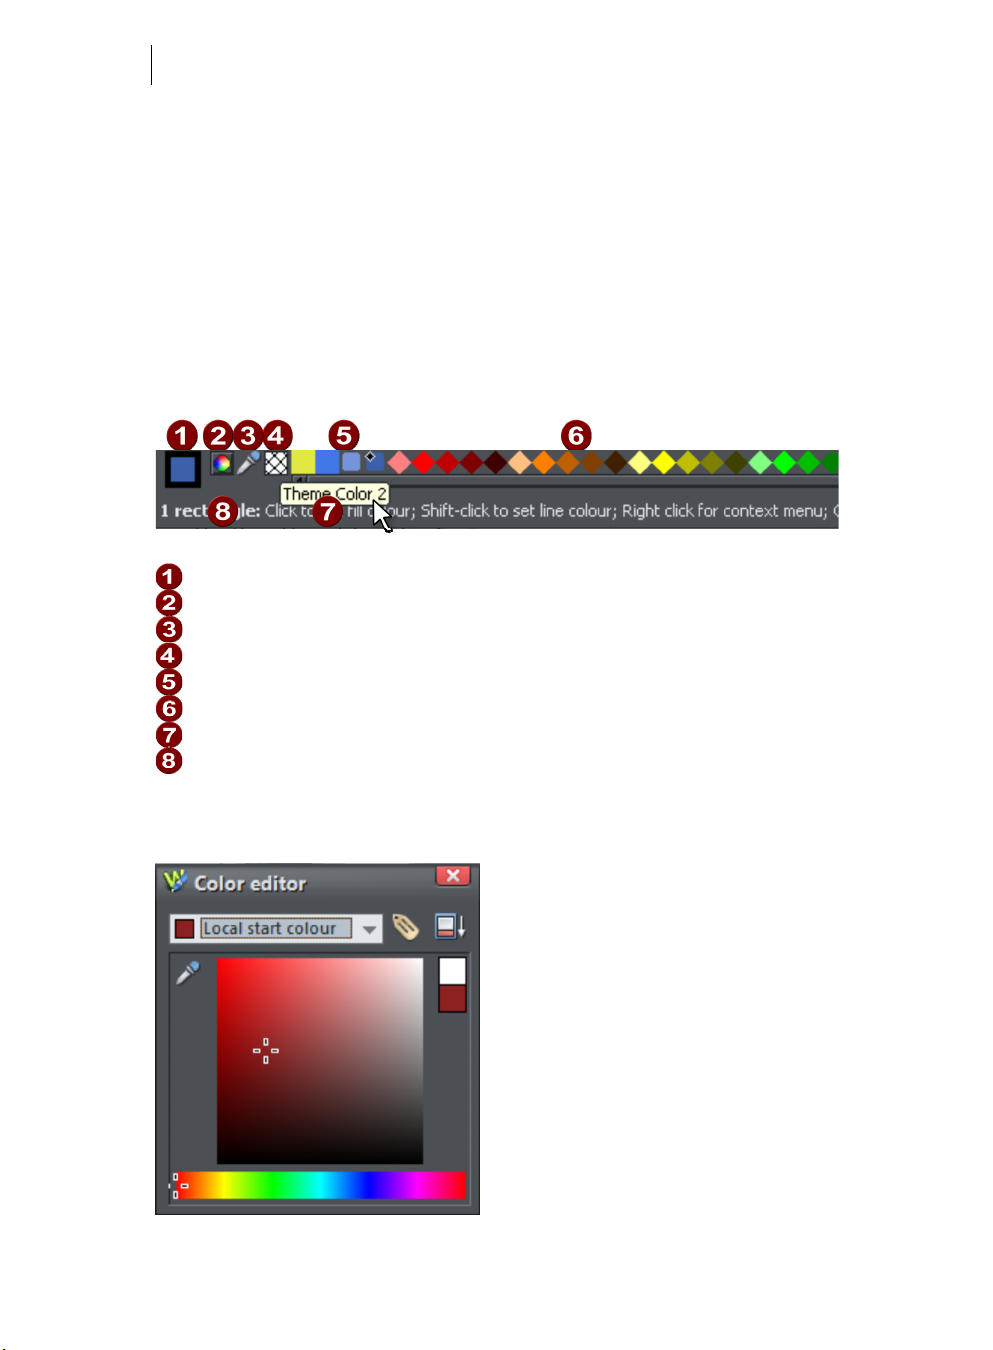
Theme Colors
Most templates use a small set of theme colors, and various shades of those theme
colors (also referred to as 'Named colors'). If you don’t like the provided colors you
can edit the named colors individually yourself almost as 'Named Colors' appear on
the left side of the Color Line along the bottom of the window easily.
Current Outline and Fill Color
Color Editor
Eye dropper color picker
‘No color’ patch.
Named ‘Theme’ Colors and Linked Colors
Fixed palette of standard colors
Hold pointer over a color to see its name
Status line. Shows what is selected, and provides hints
Simply right-click on any of the Named Colors and select the Edit option (if you hover
the mouse pointer over the color you will see a tooltip name).
www.xara.com
Page 31

When editing a color you can drag the eye dropper to pick colors off screen,
Getting Started 31
even from other open windows
Select the color to edit: Fill color/Line color of the selected object or any of the
named theme colors
Click the label icon to create a Named Color
Click to show extended color controls
Previous Color
Actual color
Drag here to select any shade of the selected hue
Drag here to select any hue
The Color Editor provides easy way of choosing any color. Click the Extended
Controls to enter RGB values.
Note that when you change a Theme Color in this way, all the related shades used
throughout the document will change as well.
Coloring Shapes
You can fill any drawn shape with a color, either by dragging the color from the Color
Line and dropping it on to the shape, or by first selecting the object and then clicking
on the Color Line.
Alternatively right click the shape and choose FILL COLOR or click the small Color
Editor icon (or press "Ctrl + E") to display the Color Editor, where you can set any
color you like.
You can give drawn objects a graduated color fill using the
FILL TOOL (ON PAGE 213).
Coloring Imported Clipart
When you import a clipart graphic by dragging from the DESIGN GALLERY, using the
FILE" > "IMPORT" option, or dragging a .web or .xar file onto your page, you will
"
usually be asked whether you want to match the colors. If you select not to, then any
named colors used in this graphic will be added to the Color Line. Clicking on any
color on the Color Line will give you the option to edit the color.
Coloring Photos
If you try to color a photo it turns it into a 'contoned' photo. For example, to make any
photo black and white, right click and choose "
CONTONE" > "MAKE BLACK AND WHITE"
or select it and click on the white color patch on the end of the Color Line. You can set
the light or dark color to be any two colors, not just white and black - right click,
choose "
CONTONE" > "LIGHT" and click a color in the Color Editor.
Note: If the photo is inside a group, as many of the photo objects in the templates or
clipart are, then you will have to select the photo inside (on page 100) the group
Page 32

32
first. You can do this by holding "Ctrl" down when clicking on the object in the
SELECTOR TOOL. Another way of directly selecting the photo is to click on it in the
PHOTO TOOL.
Page Background Color
To set the page background color, right click a page, choose CHANGE PAGE
BACKGROUND
and click a color in the COLOR EDITOR. Alternatively you can drag a color
from the Color Line over the page and drop it on an empty part of the page.
To set a repeating background texture, drag the photo or bitmap onto your
document. Open the Bitmap Gallery, scroll to the photo you just loaded, click
on it to select it, and then click the Background button on the gallery.
Creating your own Named Colors
If you want to use a color many times throughout a document, you can create your
own named color by clicking the Name label on the top of the Color Editor. This color
will now appear on the Color Line.
Click the label icon to create a Named Color
The power of a named color is that when you edit it later (right click the color in the
Color Line, select
EDIT) all objects using this color are instantly changed.
Linked shades
You can create colors that are lighter or darker shades of another color, so that when
you alter the 'parent' color, all the lighter and darker shades change to match the new
hue. For example a graduated color shade on a button, such as this:
This is a simple rounded rectangle with a graduated color
fill created with the
FILL TOOL. In the FILL TOOL you can
click on the either end of the arrow to set the color.
www.xara.com
Page 33

Getting Started 33
If you create the main green color as a named color, and then make a lighter or darker
shade of the color, as a linked shade, when you now edit the named color the shades
change as well, so you get simple re-coloring of complex shaded objects.
To create a linked shade, open the extra controls in the Color Editor and select the
NORMAL COLOR' drop-down menu and choose 'SHADE OF ANOTHER COLOR'.
'
Click this button to reveal the extra controls.
You can now select any light or darker shade of the parent color. The cross marks
the parent color.
SHADE from this drop-down list and then the parent color.
Select
You can also create a Linked Shade that appears on the Color Line (so you can easily
apply it to other objects). When you select to create a new Named Color you can
choose to make this a linked 'Shade of another color'.
Page 34

34
Photos
You can replace any photo by dragging and dropping it from your File Explorer onto
any photo in Page & Layout Designer. If you drop it onto the background then it is
imported and placed on the page where you dropped it. All imported photos are
shown as 500 pixels wide, but you can of course change this to be any size in the
usual way with the
SELECTOR TOOL.
Drag and drop your photo over any existing picture to replace it. Drop onto the background to
import as a new photo
When you replace an existing photo, the FILL TOOL is selected and a pair of fill
arrows are shown at right angles on the photo.
This is because the photo is really a fill inside a shape. You can drag on the picture to
re-position it, or drag on the ends of the fill arrows to resize and rotate the picture
inside its outline shape.
www.xara.com
Page 35

Drag on photo to re-position inside its frame. Drag on end of arrows to resize and rotate.
Getting Started 35
The Photo Tool
The Photo Tool provides a range of ways to enhance and crop any photo.
To crop a photo, just drag across the photo while in the ENHANCE PHOTO TOOL.
You can adjust the crop edges by dragging on the crop handles around the
outside of the photo.
Or use the CLIP TOOL for more control over crops.
See the section on Photo Handling for background information on the advanced way
in which MAGIX Page & Layout Designer 2013 handles photos, and the section on
the Photo tool to find out how to use the Photo tool.
Photo Resolution
Page & Layout Designer always stores the full resolution image (unless you chose to
import reduced resolution images when asked during import, as mentioned above).
This means you can resize or crop your image as required with no loss of quality.
If you want to size a photo, or any object, to a specific size, just enter the required size
into the
SELECTOR TOOL InfoBar width or height fields.
When you drop a photo on the page (assuming you're not replacing an existing
photo), it's sized to be 500 pixels wide. But if you want this to be exactly 200 pixels
wide, just enter 200px into the W size field of the
SELECTOR TOOL. You can enter it
in any unit, e.g., entering 2in will make it 2 inches wide.
Page 36

36
Text
You can edit the text by selecting the TEXT TOOL and clicking on the text.
You have all the usual word processing facilities, and can paste text from the system
clipboard. Double click will select a word, triple click will select a whole line - which
can be useful for selecting all the text in a button. As usual the InfoBar provides a wide
range of controls for this tool. Alternatively you can right click within text and choose
ADVANCED TEXT PROPERTIES.
The font menu displays a list of fonts and is split into three sections. The top section
shows fonts already used in the document, the next section shows web safe fonts,
and finally the lower section shows all fonts installed on your computer.
The three sections of the font menu. In this example the font selected is showing the available
bold and italic variants. Not all fonts have such variants.
www.xara.com
Page 37

Getting Started 37
The font menu offers live font selection. As you traverse the menu, the selected text
changes font allowing you to immediately preview what the font will look like in the
document.
Creating New Text Objects
There are three types of text object - a single line of text, a column of text or a
rectangular text area. To create a simple line of text, select the
TEXT TOOL and then
you can click anywhere on the background and start typing. To create a column click
and drag horizontally on the background, and then start typing. You can adjust the
column width at any time. To create a text area, click and drag diagonally. You can
adjust the width and height of a text area by clicking and dragging on it in the
.
TOOL
TEXT
Bulleted and numbered lists
Use the bullet and numbered list buttons on the TEXT TOOL info bar to quickly enter
bulleted or numbered lists. You can right click on a numbered list and choose
PROPERTIES…
from the context menu to change the numbering scheme for your list.
LIST
You can also use any graphic as the bullet or number in your list. See the Text Tool
chapter (on page 178) for more information.
Soft Shadows, Color Filled Text, Transparent Text
You can apply any of these effects using the appropriate tools, e.g., if you drag across
some text in the
SHADOW TOOL it will give it a soft shadow.
FILL TOOL it will give it a graduated color, or if you drag on it with the
Text Repel Around Objects
If you right click on an object like a photo and select the menu option 'REPEL TEXT
UNDER (ON PAGE 192)'
' you can make text flow around the object that is on top of the
text.
Many of the objects, such as photos, side panels, buttons and headings used in the
templates from the
DESIGNS GALLERY are automatically repelling - the text will always
flow around these objects as you drag them around.
Repelling objects only repel text that is behind the object - so you may have to 'bring
to front' the object in order for the repel to work ("Ctrl + F"). Alternatively if you only
want an object to repel text within an individual layer (on page 39), you can prevent
text that is below that layer from being rep
perations in the
All o
TEXT TOOL are live - the text re-formats and re-flows as you
elled - see Layer Properties (on page 155).
adjust the column width or move repelling objects around.
Note: You can now also repel text around anchored objects (on page 38).
Page 38

38
Anchored Objects
If you want a graphical object to appear next to a particular part of a block of text, you
can anchor the object to the text so it moves with it.
Right click the object and choose
ANCHOR TO TEXT. Using the SELECTOR TOOL click
and drag the anchor symbol that appears in the top left of the object to the location in
the text where you would like the object anchored. Now if you edit or move the text,
the anchored object moves with the anchor point.
Spell Checker
On the TEXT TOOL InfoBar is a button that selects the spell checker options and
language. If you select
CHECK SPELLING AS YOU TYPE this will also mark all
unrecognized words with a red dotted underline. Right click on any marked
word to be presented with suggested alternatives.
Embedded Fonts
Page & Layout Designer stores the character shapes of all the fonts used in your
document. This means if you give someone else your Page & Layout Designer file, or
transfer the file to another computer they will see exactly what you see, even if the
correct fonts are not installed on that computer. But this only embeds the characters
that are used in the document (it's not a full font that is included). So on computers
with the fonts missing, any text that is added in the missing fonts may be missing the
correct character shapes.
Text Tip: There are a lot of shortcuts available in the TEXT TOOL. Refer to
the reference section on keyboard shortcuts (on page 382) to see them all. One
useful one for experimenting with page layouts, "Ctrl + Shift + L", inserts a block of
random pseudo Latin.
Page Size
You can set any page size you like by selecting the PAGE SIZE tab of the OPTIONS
DIALOG
The dialog offers a range of commonly used page sizes in the drop-down list. Or
Choose the custom option to enter any other page size.
Attention: If you plan to print your design in a printing company please put attention to the Bleed
setting as well!
(right click > "Page Options" or choose Page Options from the File menu).
www.xara.com
Page 39

Getting Started 39
Layers
As mentioned earlier all objects have a stacking order on the page - from the
backmost to the frontmost item.
These objects are stacked over each other.
In addition, all items can be placed into named layers. Each layer can have any
number of objects, and has the ability to be turned on or off. When the layer is turned
off all objects on that layer become invisible.
The layers are controlled from the PAGES & LAYER GALLERY on the Galleries bar
to the right of the workspace.
Saving & Exporting Your Work.
Use the SAVE or SAVE AS menu options to save your work in progress. This saves a file
with the .xar extension, which is the native file format for Page & Layout Designer. If
you want to edit or update your document in future, you must save a .xar file this way
and use it to do further updates, even if you've also exported it to different standard
file formats.
To export your document, right click and choose
choose the file format you want to export to from the list of formats shown. Use JPEG
for exporting photos, PNG for graphics, and usually PDF is best if you want to print or
distribute print work.
See the Importing & Exporting (on page 304) chapter for information on these and
many other export formats s
upported by MAGIX Page & Layout Designer 2013.
EXPORT or use "FILE" > "EXPORT" and
Page 40

40
Document handling
Starting a new document
Choose FILE > NEW
This opens a sub menu with several pre-defined but blank template documents to
start from. You’ll find a range of blank templates under the
creating them.
Primarily, there are two different types of documents in MAGIX Page & Layout
Designer 2013.
Icon Document type Menu option Use for..
Print
Photo
A4 PORTRAIT
A4 LANDSCAPE
US LETTER
BLANK PHOTO
Creating drawings, DTP and text
documents (single or multi-page)
that you want to print or perhaps
export as PDF documents.
If you load a JPEG photo into
MAGIX Page & Layout Designer
2013 it’s loaded as a photo
document. Photo documents are
used where the purpose of the
document is only to edit or produce
a photo.
FILE > NEW menu for
Choosing the first entry
Designer default template.
Clicking the NEW button on the STANDARD control bar (shortcut
"Ctrl + N") also creates a document based on the default template.
When your new document opens, its tab is added to the top of the workspace with an
icon showing which type of document it is.
You can save your own templates with the "File" > "Save Template" command – see
Changing the template document (on page 345) for details.
A4 PORTRAIT creates a document based on the Page & Layout
Opening an existing document
To open an existing document:
• Drag & drop a file. Select the file in Windows Explorer or on your desktop, and
drag it over an existing open document to import it into that document, or any
other part of the Page & Layout Designer window to open the document.
• Or double click a Page & Layout Designer file.
www.xara.com
Page 41

• Or to open a recently used file, select it from "FILE" > "OPEN RECENT"
• Or select "
The open dialog will be displayed. The dialog allows multiple file selection, "Ctrl +
click" to select several files or "Shift + click" to select a range of files.
If
SHOW PREVIEW in the upper right corner is checked, the selected file is shown in an
even bigger preview (this does not work for a multiple file selection).
FILE" > "OPEN" (shortcut "Ctrl + O").
• Or click the OPEN button on the standard control bar.
As in Explorer windows, you can switch the file display to a detailed or
thumbnail view with this button
Document handling 41
Selected document and title bar
You can have more than one file open at a time in Page & Layout Designer, which
displays all open documents as tabs at the top of the workspace.
The current document is displayed in the workspace and its name is highlighted gray
in the document tabs. The current document type is indicated in the top left corner of
the Page & Layout Designer window, next to the menu options. The current document
receives all input. Any unsaved changes in a document are indicated with a star after
the file name.
Document tabs show all open documents, with the current document tab highlighted gray.
Control bars
These contain buttons that you can use to operate Page & Layout Designer. You can
customize control bars in several ways, such as re-ordering, creating, and hiding bars.
The default window shows the standard button bar with commonly used buttons:
You can customize the standard control bar in the same way as other control bars.
Those icons with a triangle indicator in the bottom right corner have "fly-out bars" on
them. Hold the mouse pointer over these icons and you’ll see the fly-out bar appear,
with more icons.
For information on customizing control bars, refer to "Customizing Page & Layout
Designer (on page 360)".
Page 42

42
InfoBar
This is a special control bar. Its contents change when you select different tools.
InfoBars specific to certain tools are described in their relevant chapters.
You cannot customize the InfoBar.
The InfoBar for the Selector Tool
Main toolbar
This is a control bar that initially contains all the tools available in Page &
Layout Designer (see left). You can customize the toolbar, or move tools
to other control bars.
Some of the toolbar icons have a small triangle indicator in the bottom
right corner. This indicates that there is a flyout bar containing more tool
icons. Hold your mouse pointer over the icon to see the flyout bar appear.
Rulers
You can then move the mouse pointer over each icon in the bar to see a
tooltip indicating what each one does. Click on a tool to select it (some
tools have keyboard shortcuts, too).
For information on customizing control bars, refer to "Customizing Page &
Layout Designer (on page 360)".
You can hide the rulers, change their zero point (origin), and
use them to create guidelines. For more information, see
Rulers (on page 59).
www.xara.com
Page 43

Document handling 43
The status line
Selected objects
Available options
Indicators
Mouse pointer X-Y
This appears at the bottom of the window. The status line tells you about the selected
objects, available options, live drag/snapping indicators, and the X/Y position of the
pointer.
The indicators
These appear on the right of the status line:
Live drag indicator
This indicator shows whether live drag is active or not (it is active by default).
Double click the indicator to toggle live drag on/off. When active, if you
reposition, resize, or rotate an object, the whole object moves (not just an
outline), making it far easier to judge the effect of your edits in real time.
Drawing in the
ELLIPSE TOOLS is also live with this option on. If your computer is unable to
cope with a particularly complex document, it will automatically turn active
drag off to ensure editing remains fast and efficient.
FREEHAND, STRAIGHT LINE, QUICKSHAPE, RECTANGLE and
Snapped indicator
This indicator is active when
OBJECTS
to see potential snapping paths and points relative to other objects and the
button (shown left) to toggle off and on. Snap to objects allows you
SNAP TO OBJECTS is enabled. Click the SNAP TO
page center and edges by showing blue snapping lines for snapping paths and
red dots for points as you drag an object. For more information on snapping,
refer to "Object Handling".
X/Y co-ordinates
Page & Layout Designer shows measurements relative to the bottom left corner of the
page area or spread. However, this is configurable. For more information refer to
"Object Handling (on page 103)".
Page 44

44
Normal/full screen modes
In normal screen mode part of the window is occupied by the title bar, menu bar, and
scroll bars. This can be inconvenient if you want the maximum possible editing area.
Page & Layout Designer has a second screen mode, fullscreen, which displays a more
streamlined screen. You can configure each screen mode as you wish. For example,
each can have its own configuration of the control bars. The configuration is
remembered and applies whenever you swap between screen modes.
Normal/full screen is controlled by "
choose
To display the menu bar in full screen mode, move the pointer to the top of the
screen.
FULL SCREEN ("8" on the numeric keypad).
WINDOW" > "FULL SCREEN" or right click and
Opening a second window
You may want to open a second window onto the same document to:
• Get an enlarged or reduced view of the document;
• Show another part of the document;
• Have two views of the same area at different quality settings (quality settings are
described later.)
Choose "
windows open on the same document.
WINDOW" > "NEW VIEW" to open another window. You can have several
Changing the zoom value
It’s often useful to enlarge your view of the document to examine details or reduce
your view to get an overall impression. Scalings above 100% show an enlarged view
(similar to looking through a magnifying glass); below 100% a reduced view. The only
change is your view of the document; the size of the document itself and the objects
in it are unchanged (changing the document size is described later). To change the
zoom value you can use either the
ZOOM TOOL, mouse, or control bars.
Some shortcuts are available for quick setting of zoom values: The plain numeric keys
(1, 2, 3, 4) set the zoom to between 100% and 400%. The number 5 key sets it to
50%.
Using the Zoom Tool
To zoom:
• Select the
ZOOM TOOL from the Main Toolbar.
www.xara.com
Page 45

Document handling 45
• Or press "Alt + Z" to toggle between the current tool and the ZOOM TOOL.
• Or press and hold down "Alt + Z" to temporarily swap to the
ZOOM TOOL (release
"Alt + Z" to return to the previous tool).
• Or press "Shift + F7" to select the
ZOOM TOOL.
Changing the zoom value using the mouse
If you have a mouse wheel:
• Hold "Ctrl" and scroll your mouse wheel to change the zoom level.
You can also configure a mouse button to zoom in or out. Furthermore, you can
change the mouse wheel action between scrolling and zooming in
"OPTIONS" > "MOUSE TAB (ON PAGE 351)"
"MOUSE"
tab. The opposite action is available then by pressing "Ctrl".
or right click and choose "PAGE OPTIONS" >
"UTILITIES" >
Alternatively, select the
ZOOM TOOL, and
• Click to zoom in (enlarge).
• "Shift + click" to reduce the zoom value (to see more of the document).
• Drag the mouse diagonally to create a rectangle. When you release the mouse
button, the area within the rectangle is enlarged to fit the window.
Changing the zoom using the zoom InfoBar/control bar
There is a flyout bar on the standard toolbar which gives you quick access to zoom
functions, without having to go into the
ZOOM TOOL icon on the main toolbar.
ZOOM TOOL. There is also a flyout bar on the
Hold the mouse pointer over the zoom icon on the standard toolbar to see the
flyout bar.
To change the zoom:
Shortcut "Ctrl + R". Click the PREVIOUS ZOOM button. This is the zoom value
before the current setting. Using this button lets you flip zoom in and out on
the document. This is useful for switching between examining an area in detail
and an overall view. The previous zoom value is stored for each window. You
can swap between windows and the previous zoom values are retained.
Shortcut "1" Click the Zoom to 100% button. The zoom factor is changed to
100%.
Shortcut "Ctrl + Shift + J". Click the ZOOM TO DRAWING button. The window
shows all the objects in the document.
Shortcut "Ctrl + Shift + P". Click the ZOOM TO PAGE button. The window shows
the entire page or pair of pages.
Page 46

46
Shortcut "Ctrl + Shift + Z". Click the ZOOM TO SELECTION button. The selected
object or objects fill the window.
Type a value into the text box. Press "" to implement
the change, or select preset zoom values including
those above (page, drawing, selected, previous) in the
drop-down menu.
Sliding the document within the window
The quickest and easiest way to move around the document is to use the middle
mouse button (normally the mouse wheel) if you have one. Click and hold the middle
button down and then move the mouse. Release the button to return to your previous
tool.
To move the document within the window you can also:
• Use the scroll bars and arrows at the side of the window.
• Use the mouse wheel to scroll the document up and down ("Shift + mouse
wheel" for left and right)
• Or select the PUSH TOOL from the main toolbar ("H").
• Or press the space bar or "Alt + X" to toggle between the current tool and the
PUSH TOOL.
• Or press and hold down the space bar or "Alt + X" to temporarily switch to the
PUSH TOOL (release key(s) to return to the previous tool). You can then use the
mouse to drag the document around in the window.
The
PUSH TOOL InfoBar is the same as the ZOOM TOOL InfoBar (described above).
Displaying the scroll bars is optional. Choose "WINDOW" > "BARS" > "SCROLLBARS" to
turn them off.
You can change the mouse wheel action between scrolling and zooming in
"UTILITIES" > "OPTIONS" > "MOUSE" or right click and choose "PAGE OPTIONS" >
"MOUSE". The opposite action is available then by pressing "Ctrl".
Changing the page size
You can change the size of the current page to a standard size:
1. Right click the page and choose PAGE OPTIONS -> PAGE SIZE (on page 38) tab or
choose "
UTILITY -> OPTIONS".
www.xara.com
Page 47

2. Choose the required paper size.
Document handling 47
"Customizing Page & Layout Designer (on page 345)" has full details of the options
dialog box.
Paper size
You can either choose the CUSTOM option from the paper size list and then enter the
width and height, or choose a standard size.
Attention: If you plan to print your design in a printing company please put attention
to the Bleed setting as well!
Orientation
• Portrait orientation displays the longest sides vertically.
• Landscape orientation displays the longest sides horizontally. If you entered a
custom page size, landscape turns the page sideways.
Page 48

48
Outer margin
This lets you set the width of the pasteboard around the page or spread.
Bleed
To produce format filling print results printing shops use a larger format paper and
crop it to the target format after it has been printed. Due to mechanical tolerances
inaccuracies can happen while this process. For this reason, printing shops
recommend including an additional "safe area" around the actual print motif. This is
often referred to as the "bleed". This ensures that no important content is cropped
and that no white borders appear on the edges if the motif background is not white or
a background pattern is used.
Without this "bleed" area a mechanical error during cropping can lead to white
borders or image elements that are too close to the edge may be cut.
The bleed area is set in the Page area of the Page Options (on page 353) and in the
program it is displayed as a red rectangle around the page. Normally this bleed area is
1-3mm wide. When a PDF is exported for the print shop the final page size of the PDF
will appear based on the page size settings plus the bleed area beyond the actual
page. For example, an A4 page (29.7 x 21cm) with a 2mm bleed area will result in a
format of 30.1 x 21.4cm.
The exact value depends on the print shop and can most often be found on a
corresponding information page on the print shop's website. Some online print shops
also request a file format that already contains the bleed area. Here is an example: For
a flyer in A6 format (14.8 x 10.5cm) the shop may request a file format of 15 x 10.7cm.
This corresponds to a value of 1mm for the bleed area beyond the actual page.
Make sure that the rectangle that contains the background pattern or color extends
beyond the page borders at least to the end of the bleed area. It is also important to
www.xara.com
Page 49

make sure that all important page elements are a safe distance from the page borders.
This distance should have at least the size of the bleed area.
The background image was extended to the end of the bleed area (red frame) and the header
was made smaller. If a cropping error does occur, the background will still cover the entire format
and the heading will not be affected.
Document handling 49
Double page spread
Your illustration may run across two
facing pages in a multi-page publication.
This is called a "double-page spread".
Single page Double page spread
Multi-page Documents
MAGIX Page & Layout Designer 2013 supports multi-page documents to make DTP
projects simple.
You can easily create documents that are comprised of many pages, for example
newsletters, PDF eBooks, brochures or small magazines.
By default when you open or create a new document, Page & Layout Designer shows
documents in multiple page view. Right click a page and deselect
to show only one page at once.
MULTIPLE PAGE VIEW
Page 50

50
Double page spreads in multi-page documents
Your illustration may run across two
facing pages. This is called a doublepage spread.
Single Double page
You can have single pages or double-page spreads in your multi-page document, as
illustrated above, but only one or the other within a document.
To switch between single or double-page spreads, right click the page and choose
"
PAGE OPTIONS", and then check or uncheck the "DOUBLE-PAGE SPREAD" option.
If you change from a double-page spread to single pages in an existing document,
your spreads will be split into single pages. Similarly, converting to a double-page
spread will cause the pages in your document to be "paired up" into spreads.
The result of converting a double page spread document to individual pages, and then back
again.
www.xara.com
Page 51

Document handling 51
Note: it is possible for objects to overlap the pages of a spread (i.e. on pages 1 and 2
in the illustration above) but not over separate pages or spreads (i.e. 1 and 3; if you
did want to do this, you would need to copy the object from page1 and paste it on to
page 3 so that it appears there as well).
The current page
If you click a page in a multi-page document it will become the current page.
The current page is relevant when inserting, duplicating, or moving pages as
described in the following sections.
The current page in the document is shown by indicators on the page’s
corners.
Adding page numbers
To insert page numbers into your document - use the TEXT TOOL to click in your
document page at the place you want the page number to appear. Right click and
select "Insert". Then choose from one of the available number formats. As you add
pages to your document the page numbers will update incrementally.
It’s common to place a page number on every page in a document. It’s a good idea to
make this page number a Repeating Object (on page 129), so you can move or
change the style of the n
umber on one page and have those changes applied to all
pages automatically. After inserting the page number on one page, select it using the
SELECTOR TOOL and then select "Arrange" > "Repeat on all pages", to place it in the
same position on all pages. You can still delete the number from some pages if you
don’t want the number to appear on every page.
Inserting pages into your document
Right click a page and choose NEW PAGE or NEW DOUBLE PAGE SPREAD. A new blank
page is inserted after the page.
or
Right click a page and choose
DOUBLE PAGE SPREAD
. A duplicate of the current page is inserted after the page.
DUPLICATE CURRENT PAGE or DUPLICATE CURRENT
Page 52

52
The new page will be the
same as the original page,
including its size and
orientation, and will include
all its content so that you
can use it as a template for
new content.
You can also use the Menu
items under "
In addition, the standard toolbar has a flyout bar which allows you to add, duplicate
and delete pages quickly.
Hold the mouse pointer over each icon in the bar to see a tooltip for each available
operation. You can add a new blank page, duplicate the current page or delete the
current page.
EDIT" > "PAGES"
Copying and pasting pages
You can copy and paste whole pages in the current document or paste pages to
another document. This copies the page dimensions, layers and other page attributes
in addition to all the objects on the page.
To copy the current page, clear any current selection by pressing Esc or by clicking on
an empty part of the page or pasteboard. The status line says "No objects selected".
Right click an empty part of a page and choose
COPY PAGE (or press "Ctrl + C"). When
you paste a copied page, it is added immediately following the current page. To paste
use "Ctrl + V" or right click the page and choose
PASTE > PAGE from the context
menu.
Note: If the document into which you paste a page has the ALL PAGES IN DOCUMENT
THE SAME option enabled in FILE > PAGE OPTIONS, the dimensions of the pasted page
will be overridden by the page dimensions of the document. So the new page will be
given the same dimensions as all the other pages in the document.
New page from template
To insert a new page into your document using a pre-designed template, open
DESIGNS GALLERY, drag your chosen page template thumbnail, and drop it
the
onto your document. The new page is added immediately following the page
that you drop on.
www.xara.com
Page 53

Document handling 53
Duplicate a page
To create a copy of the current page after the page, right click the page and choose
DUPLICATE CURRENT PAGE".
"
You can also use this toolbar button:
The new page will be the
same as the original page,
including its size and
orientation, and will include
all its content so that you can
use it as a template for new
content.
You can also duplicate a page using the
Page & Layer Gallery and click the
PAGE & LAYER GALLERY. Select the page in the
DUPLICATE button. The new page is added after the
current page.
Moving pages within the document
If you wish to change the order of pages in your document you can do so.
Right click a page and choose
PAGE/DOUBLE PAGE SPREAD DOWN"
You can also change the order of pages in the PAGE & LAYER GALLERY.
Click the
PAGES button in the PAGES & LAYER GALLERY so it shows a simple list of
"MOVE PAGE/DOUBLE PAGE SPREAD UP" or "MOVE
.
pages. Then you can drag and drop pages up and down in the gallery to change the
page order.
Alternatively, to move the current page:
• Choose "Edit" > "Pages" > "Move page up" or right click and choose Move page
up to swap the current page with the one previous to it.
• Choose "Edit" > "Pages" > "Move page down" or right click and choose Move
page down to swap the current page with the one after it.
These options will be grayed-out of if you are on the first or the last page of the
document respectively.
Page 54

54
Removing pages from your document
To delete the current page from your document right click and choose "DELETE
CURRENT PAGE/DOUBLE PAGE SPREAD"
part of the page and choose
CUT PAGE.
or to cut the current page, right click an empty
Or select the page in the
PAGES & LAYER GALLERY and click the DELETE button. The
current page and all its content will be deleted. In the case of a spread, the entire
spread will be deleted along with its content.
Navigating between pages
As well as the usual methods of moving through your document (such as scrollbars
and the mouse wheel), there are also some other ways to navigate through the pages
using the set of keys to the right of your keyboard:
Page up: Moves up the document. The amount moved depends on your zoom level.
The further you are zoomed out the bigger the move.
Ctrl + Page up: Go to and center on the previous page.
Page down: Moves down the document. The amount moved depends on your zoom
level. The further you are zoomed out the greater the move.
Ctrl + Page down: Go to and center on the next page.
Or click the up or down arrow on the status line:
The status line is also useful for knowing what page(s) you are currently viewing.
Note: All of these movements are relative to the page you are viewing, not the
current page.
The PAGE & LAYER GALLERY also makes it easy to go to find a specific page in your
document. Click the
PAGES button in the gallery, so it shows a simple list of pages.
Then as you click on each page in the gallery, the document view is scrolled
automatically to show that page.
Pages with different sizes and layers
You can choose whether the pages in your document should be all the same size or
not, and whether or not all pages should have the same layers. See the Document
section (on page 354) on the
click a page and choose
PAGE SIZE tab of the UTILITIES->OPTIONS dialog or right
"PAGE OPTIONS".
www.xara.com
Page 55

Document handling 55
Page & Layer Gallery
You can also use the PAGE & LAYER GALLERY to conveniently manage the pages in
your document. It allows you to view, add, duplicate, delete, re-order and rename
pages all from a single view. For more information see
page 149).
PAGE & LAYER GALLERY (on
Saving the document
This section covers saving in Page & Layout Designer’s own format (native format).
Refer to Importing and Exporting (on page 304) for details of exporting in other
formats.
e recommend that you always save documents regularly. A complicated document
W
may represent many hours of work and power failures or computer crashes always
happen at just the wrong moment. Make sure you have the automatic backup facility
turned on, so that regular backups are taken of your open documents as you work.
See the Automatic Backups (on page 56) section below for details.
Save option (on the File menu)
("Ctrl + S", or click the SAVE button on the standard control bar.)
This provides a quick way to save a document using the same file name. The option is
disabled unless the document has unsaved changes, i.e. you have made changes, but
haven't saved them to disk.
For a new document that has not been saved to disk, this option acts like "Save as"
(described below).
Save as (on the File menu)
This opens a dialog box letting you save the document under a different name or to a
different directory. This option is useful for making backups of Page & Layout
Designer documents.
Save all (on the File menu)
This acts like a series of SAVE or SAVE AS commands to save all currently open files.
Closing the document
To close the document:
• Choose "
• Or press "Ctrl + F4", or "Ctrl + W".
• Or click the smaller, lower X of the two in the top right hand corner.
FILE" > "CLOSE".
Page 56

56
Automatic Backups
MAGIX Page & Layout Designer 2013 will optionally save regular backup copies of
your open documents while you work.
To turn automatic backups on or off, open the "
choose the
BACKUPS tab.
UTILITIES" > "OPTIONS" dialog and
Backup open documents
To turn backups on select this checkbox and choose how often you would like
backups to be taken. The suggested period is 10 mins, which means each open
document will be backed up if it’s more than 10 mins since the last backup of that
document was taken (or since the document was created or opened).
Note that once the configured period since the last backup has expired, the next
backup is only saved when the program has been idle for at least 15 secs. This is to
avoid interrupting your work as much as possible and to avoid backing up the
document while it is being actively modified. In normal use it’s unlikely that there
won’t be regular inactive periods of 15 secs or more, allowing a backup to be taken
soon after it is due. But note that if you are actively editing for an extended period of
time it could be significantly longer than the configured backup period before the next
backup runs.
The Automatic Backup facility does not save modifications to open ‘edit inside’ subdocuments. Only the parent main document is saved when a scheduled backup runs,
in its current state without the unsaved group edits. For this reason it's recommended
that you save ‘edit inside’ edits back to the parent document regularly.
When a backup is taken, you’ll see the save progress bar appear at the bottom of the
MAGIX Page & Layout Designer 2013 window while the save is completed.
www.xara.com
Page 57

Document handling 57
Backup location
User the BROWSE button if you want to change the folder where your backups are
stored.
You can access the backup documents saved here at any time using the "
OPEN RECENT" > "BACKUPS" menu option. This opens a file dialog onto your backup
"
FILE" >
folder so that you can browse, open, or delete any of your backup files.
Revisions
By default up to 10 revisions of each design are kept in your backups folder, but you
can choose to change this number in the revisions field. Older revisions in excess of
the number chosen are deleted automatically. Each backup file is named using the
name of the document from which it is taken, suffixed by the date and time at which
the backup was taken.
Warning: Note that if you have multiple documents that share the same filename in
different folders on your computer, their backups will also share the same names in
the backups folder. Therefore try and use unique filenames for your designs to avoid
the backups of one design overwriting another with the same name.
Untitled documents
Documents that you have created and not saved are backed up using the name
"Untitled" followed by a number and the date/time. This name and number
corresponds to those shown in the titlebar when you are editing new unsaved
documents.
Warning: Since all new unsaved documents are named Untitled1, Untitled2, etc.
backups of these documents are likely to be overwritten relatively quickly. Therefore
you should always save important documents with a unique name of your choice, so
that you can easily identify backups of that document in the backups folder.
Backup open documents on program close
The Backups tab in the Options dialog also allows you to turn on AUTOMATIC BACKUP
AND RESTORE
. When this option is on, when the you close MAGIX Page & Layout
Designer 2013 you will not be prompted to save any modified documents that you
have open. Instead all open documents are backed up to the backups folder and the
program closes. Then when you next start the program, the same documents are
automatically reloaded so that you can continue working where you left off.
Note that if you have any "Edit inside" sub-document views open, these are silently
closed and saved back to the main document when the program is closed, and the
main document is backed up. The ‘edit inside’ sub-document views are not re-opened
on next program start. See editing inside groups (on page 121).
Page 58

58
Recovering from abnormal program closures
If you have automatic backups turned on and the program closes abnormally
(perhaps due to a power failure for example) the program should detect this when it
is next restarted. It will then offer you the chance to restore the most recent backup
version of each document that was open at the time of the last backup.
Abnormal closure will not be detected if no automatic backup completed since the
last normal program closure.
Backups on system shut down
If you shut down Windows without first closing the program, all open documents are
backed up to the backup folder even if ‘Backup open documents on program close’ is
not turned on. This allows system shutdown to proceed without MAGIX Page &
Layout Designer 2013 interrupting it by prompting you about unsaved or modified
documents. On next program startup you’ll be asked whether or not you want to
restore the documents that were open at the time of the system shut down.
Recovering backups
You can access your document backups using the "FILE" > "OPEN RECENT" >
BACKUPS" menu option. This opens a file dialog onto your backup folder so that you
"
can browse, open, or delete any of your backup files. It’s a good idea to use this file
dialog to clear out any old unwanted backups periodically.
Note that when you load a backup document, it is not automatically associated with
the design file from which the backup was taken. It’s treated as an independent
document in its own right. Therefore if you decide to keep a backup document you
should use "
FILE" > "SAVE AS" to save it elsewhere with a suitable name.
On-screen grid
To help you lay out your document, Page & Layout Designer can display a grid on the
screen (the grid appears only on the screen; it is never exported or printed.) The grid
helps you align objects (similar to using graph paper as a drawing aid).
Right click and choose
on/off or choose "
SNAP TO GRID".
"
The grid points then act like magnets, and as you move objects, they snap to the
nearest grid point. The type of grid (isometric/rectangular), the 0,0 point (the origin),
and spacing of grid points is controlled by the
options dialog box. Any changes you make apply only to the selected document.
Magnetic object snapping is a very powerful way of accurately aligning lines, points
and the edges of objects to any other object so they exactly touch.
"SHOW GRID/GUIDES" > "SHOW GRID" to turn display of the grid
SNAP TO" > "SNAP TO GRID". You can also choose "WINDOW" >
GRID & RULERS TAB (on page 348) of the
www.xara.com
Page 59

Document handling 59
You can even use this to align the centers of objects, or align objects to the center of
the page, or align them horizontally and vertically anywhere in the middle of the page
or edge of the page.
To toggle object snapping, click the SNAP TO OBJECTS button or right click and
choose "
SNAP TO GRID".
"
SNAP TO" > "SNAP TO OBJECTS". You can also choose "WINDOW" >
Refer to Object Handling for details on snapping to grid and snapping to objects.
Rulers
Rulers are turned off by default. To turn them on:
• Right click and choose
"SHOW GRID/GUIDES" > "SHOW RULERS" to turn display of
the grid on/off.
• Press "Ctrl + Shift + R".
• Or select "
WINDOW" > "BARS" > "SHOW RULERS".
Page & Layout Designer uses rulers to:
• Control text margins, tabs and indents (on page 189) in the
TEXT TOOL.
• Let you know which part of the page you are viewing;
• Show the current pointer X/Y position;
• Apply guidelines. If "
WINDOW" > "SNAP TO GRID" is active, guidelines snap to
divisions on the ruler. For more information on guidelines, refer to the guides &
guidelines section in "Object Handling".
As you create or scale objects, you can use the rulers to check their size. You can also
more accurately use the
SELECTOR TOOL (see "Selecting objects (on page 98)" for
more information).
Rulers are displayed at the left and top of the window. A dotted line on each ruler
follows the current pointer position.
The units and number of divisions on the rulers are the same as those set for
customizing the on-screen grid. These are set using the Grid & Ruler Tab (on page
348) of the options dialog box. The current units and any
scaling factor are displayed
on the right hand end of the top ruler.
Displaying/hiding rulers
Right click and choose "SHOW GRID/GUIDES" > "SHOW RULERS" ("Ctrl + Shift + R") to
turn rulers on/off. Any change applies to the current window and subsequent
windows you open. It does not affect other open windows.
Page 60

60
Changing the ruler zero points
It is often easier to measure objects if you align the origin (0,0) point of the rulers
with the object. To move the origin (0,0) point, drag the square at the intersection of
the two rulers.
You can drag vertically or horizontally along the rulers
or over any part of the Page & Layout Designer editing
window. As you do, a dotted line will outline the new
position.
This also moves the grid origin so that divisions on the
ruler always align with the grid.
You can also move the zero point under the
Options dialog.
GRID & RULER tab (on page 348) of the
Measurement units
You can define the units in which to display measurements. The default display units
are:
• points (1/72 of an inch) for text and line widths;
• centimeters for most measurements.
You can enter dimensions in the other units by using a suffix or prefix (dependent on
the unit type). For example, 2.5in for 2.5 inches. You can enter dimensions using two
units. For example, 2pi 4pt for a dimension of 2 picas, 4 points. Note that units
entered will be converted and displayed in your default unit.
Millipoints
A millipoint is 1/1,000th of a point (1/72,000th of an inch). All Page & Layout
Designer measurements are stored internally in millipoints and then converted to the
appropriate units when displayed. Dimensions other than millipoints are rounded if
necessary. If you want to work in exact units without rounding, display measurements
in millipoints.
"Customizing Page & Layout Designer (on page 345)" has full details of the options
dialog box.
Options dialog box
Measurement units for the selected document are controlled by the Options dialog.
Choose
UNITS".
"UTILITIES -> OPTIONS" or right click a page and choose "PAGE OPTIONS ->
www.xara.com
Page 61

Document handling 61
Changing the default display units
Display the options dialog box. If necessary, click the units tab.
Font units are used for
text sizes.
Page units are used for
other measurements.
Creating a new unit
You may want to specify measurements in units not provided as standard. For
example, racecourses are measured in furlongs (220 yards). Or a financial diagram
may use US$.
Display the
OPTIONS dialog box. If necessary, click the UNITS tab.
1. Click NEW UNIT. The unit properties window will appear:
2. Type in the unit name (e.g. US dollars). This name appears in menus.
3. Type in the ABBREVIATION ($). This is used when entering or displaying the
units.
4. Select PREFIX ($ 12.34) or SUFFIX (12.34 $ ) as appropriate. Page & Layout
Designer must be able to relate the new unit to an existing unit. Type the
relationship into the "
IS EQUIVALENT TO" field. For example, if you had used
furlongs, then 1 furlong is equivalent to 220 yards.
For units that do not relate to distance (for example US$), type in an appropriate
scaling factor. For example, 10US$ as equivalent to 10 millimeters.
Deleting a unit
You can only delete a unit you have created, not a standard unit.
Display the
OPTIONS dialog box. If necessary, click the UNITS tab.
Page 62

62
1. Choose the unit you want to delete from the UNIT DEFINITION list.
2. Click DELETE UNIT.
Applying a scaling factor
For example, you may want to specify dimensions in kilometers when drawing a map.
You can apply a 1:10,000 scaling factor to kilometers. A line 10cm long on the map is
reported as a dimension of 1km.
1. Choose "Utilities -> Options". If necessary, click the SCALING tab.
2. Select USE SCALE FACTOR.
3. Type in the appropriate scaling. For example, 10cm to 1km.
Alternatively, type 1 into the drawing field and 10,000 into the real-world field.
Deleting a scaling factor
This is similar to applying scaling:
1. Choose "Utilities -> Options". If necessary, click the SCALING tab.
2. Deselect "USE SCALE FACTOR".
3. Click "OK".
View quality slider
This slider (on the STANDARD
control bar) affects how the
document appears on the screen. It
has no effect on the actual
There are 5 different quality settings:
document or on printing.
www.xara.com
Page 63

OUTLINE ONLY. This is now fully anti-aliased for higher quality screen display.
OUTLINE WITH BLEND STEPS.
FULL COLOR (no anti-aliasing).
HIGH QUALITY (full anti-aliasing and image smoothing)
VERY HIGH QUALITY Bi-cubic photo display considerably improves the quality of
Document handling 63
scaled down photos.
The default quality level is
VERY HIGH QUALITY which means the document is
displayed on screen exactly as it will be printed (except that the monitor is lower
resolution than a printer.) Anti-aliasing gives a much smoother and more accurate
screen display, especially when displaying small details. However, one of the
consequences is that sometimes objects can look slightly blurred.
FULL COLOR shows the document colored, but with anti-aliasing turned off.
On the
OUTLINE setting only the outlines of the shapes appear (they are drawn as wire
frames). This makes it easier to select objects hidden behind other objects.
OUTLINE WITH BLEND STEPS is particularly useful for seeing outlines of the various
steps of a blend.
You can also change these settings with "WINDOW ->
QUALITY". There are toolbar buttons available for the
five quality settings on the Window toolbar (on page
360).
Refer to "Blends (on page 242)" for more on how the quality setting affects the
display of
blends.
The constrain key
The "Ctrl" key has a special function in Page & Layout Designer. It constrains the
action of the current operation in some way. For example, normally you can rotate an
object to any angle. But in Page & Layout Designer,if you hold down "Ctrl" while you
rotate an object, the rotation is constrained to a subset of the possible angles. By
default the object will rotate only to multiples of 45 degrees plus any rotations where
a significant straight edge in the object becomes vertical or horizontal.
The black line on the left can be rotated
to any angle within the circle. On the
right is the same line, but with "Ctrl" held
down it can only be rotated to the
positions indicated.
Similarly, constraining a rectangle creates a perfect square and constraining an ellipse
creates a perfect circle. Release "Ctrl", and they will not be constrained.
The constrain angle feature is defined in
OPTIONS -> GENERAL -> ANGLE CONSTRAINT
(on page 347) .
Page 64

64
Galleries
MAGIX Page & Layout Designer 2013 uses galleries to provide convenient access to
external libraries of content like templates, fonts, colors, clip-art, line attributes, and
bitmaps/photos. This section of the manual gives general information on features
which are common to multiple galleries. Individual sections of this manual describe
features specific to a particular gallery.
When you create a new Page & Layout Designer document, the following gallery tabs
are displayed in the gallery bar to the right of the workspace in the following default
order.
Designs
Page & Layer
Bitmap
Line
Fill
Font
Color
Name
Some galleries view objects held in libraries external to the document:
FONTS, DESIGNS, FILL.
Other galleries relate to objects in the document, or options for those objects:
COLOR, BITMAP, LINE, PAGE & LAYER, NAME.
www.xara.com
Page 65

Document handling 65
Displaying a gallery
To display a gallery:
1. Click or hover the mouse pointer over the vertical tab for the gallery to the right
of the workspace (the gallery bar). The gallery opens automatically. When you
move the mouse pointer away from the gallery, it automatically closes.
2. To keep a gallery open while you work, click the Auto Hide (pin) button in its
top right corner. The Auto Hide button changes so the pin points downwards
to indicate that the gallery is now ‘pinned’ to the workspace.
3. To close a ‘pinned’ gallery, see Closing a Gallery.
Unpinned: gallery closes when you move the mouse pointer away from
the gallery.
Pinned: gallery stays open when you move the mouse pointer away, and
can also be moved and docked (on page 65) elsewhere.
Note: By default the Line, Fill, Fonts, Color and Name Gallery do not display their
title, just their individual icons, until they have been opened. Page & Layout Designer
always displays the title of the last gallery that you have viewed.
Moving and docking a gallery
You can ‘detach’ any gallery from the gallery bar and move it to a more convenient
location anywhere in the workspace. You can also dock the gallery (or a gallery group,
see Grouping Galleries) in the top, bottom, left or right of the workspace.
You can move a gallery anywhere in the workspace
Page 66

66
To move a gallery:
1. Open a gallery and click the Auto Hide button to pin the gallery. The button
changes to a downward-pointing pin to indicate that the gallery can be moved
and pinned elsewhere.
2. Click and drag on the gallery’s title bar to move it around. You can either leave
the gallery ‘free floating’ anywhere in the workspace or dock it in a new location.
If you move any of the following galleries, the others accompany it as a group. Access
an individual gallery by clicking its tab at the bottom of the group or click and drag a
gallery tab to move it away from the group.
• Bitmap
• Line
• Fill
• Font
• Color
• Name
When you click and drag on a dockable gallery’s title bar, a number of arrows appear
on the workspace, indicating where you can dock the gallery.
Dragging a gallery causes docking arrows to appear in the center, top, bottom, left and right of
the workspace. Dock the gallery by dragging it to an arrow.
www.xara.com
Page 67

Example of a gallery that has been docked to the left of the workspace
To dock a gallery:
Document handling 67
1. Click and drag the gallery to the arrow pointing towards the location where
you want to place the gallery. For example, if you want the gallery at the top of
the screen, move it to the upward pointing arrow at the top of the workspace.
2. When the mouse pointer reaches the arrow, a gray transparent box highlights
the gallery’s new location.
3. Let go of the mouse button to dock the gallery. Now when you close or ‘auto
hide’ the gallery, its tab will be displayed in the new location.
4. Hover over or click its tab to reopen the gallery.
Note: To move all galleries back to their default position, choose CONTROL BARS from
the WINDOW menu, click GALLERIES then RESET.
Grouping galleries
You can also group galleries and move the whole group to a new location if, for
example, you are working primarily with 2 or 3 galleries that you want to be close to
each other and easily accessible.
Page 68

68
Example of a gallery group with gallery tabs at the bottom - click and drag to add a gallery to or
remove a gallery from the group.
To group galleries:
• Disable the
AUTO HIDE button (pin) on one of the following galleries: Bitmap, Line,
Fill, Font, Color and Name gallery.The gallery is automatically grouped with the
other five galleries, displayed as tabs at the bottom of the group. Click on a tab to
open a gallery in the group.
To group a gallery with one previously docked:
• Click and drag the second gallery to the four arrows in the workspace center. Let
go of the mouse when you are over the arrow pointing towards the previously
moved (first) gallery. The second gallery is now grouped with the first.
To add a gallery to an existing group:
1. Click and drag a gallery group over the center of the 4 docking arrows in the
center of the workspace. When you subsequently click and drag the gallery
www.xara.com
Page 69

Document handling 69
you want to add over the group you want to add it to, the four docking arrows
now appear in the center of the gallery group.
2. Drag the gallery to the center of the arrows within the group. The gallery is
added to the group and its tab displayed at the bottom of the group. When you
dock a gallery group, all galleries within the group are also docked.
To remove a gallery from the group, click its tab and drag to move it away. When you
auto hide or close a gallery group, all gallery tabs in the group are displayed in the
workspace border nearest to the last docking location.
Using galleries
To fold or unfold a section in a gallery:
• Click the
FOLD/UNFOLD icon.
• Or double click the title strip.
• Or right click a section to display a pop-up menu. Select
FOLD/UNFOLD section.
The pop-up menu also has options to scroll to the previous section or next
section.
This illustration shows the gallery is unfolded. Other galleries are similar.
Page 70

70
The buttons along the top depend on the gallery (e.g.
BITMAP GALLERY.) However, most galleries have these buttons:
the
APPLY applies the selected item in the gallery. Click on an item to select it.
MORE opens a menu where you can then choose:
•
FIND is described later in searching for an item name.
•
SORT is described later in re-ordering items in a gallery.
•
PROPERTIES provides control over size of the icons and amount of information
FILL and TRANSP are specific to
displayed in the gallery.
ADD (clipart, fill, and fonts galleries) is described later in adding to a gallery.
•
•
REMOVE (clipart, fill, and fonts galleries) is described later in deleting sections
from a gallery.
Selecting items
To select an item:
• Click an item to select it.
• Or click an item, then "Shift + click" on another item; all items in between the two
points will be selected.
• Or "Ctrl + click" to add that item to the selection.
Re-ordering items in the gallery
In some galleries, "MORE" > "SORT" opens a dialog box. You can sort by name and,
depending on the gallery, by other criteria. The primary key controls the initial sort.
For some sort parameters such as file type or name length, there may be two or more
files with the same type or name length. These files can be further sorted using the
secondary key.
Searching for an item name
You can search, for example, for all names containing the word red:
1. Choose "MORE" > "FIND".
2. Type "red" into the text box.
3. Select "SEARCH NAMES & KEYWORDS" to search
only the item names, e.g. file, color, etc., or
SEARCH ALL INFORMATION" to search the names
"
and keywords available in some galleries.
Adding to a gallery
You may want to add extra items to these galleries (DESIGNS, FILL & FONTS galleries
only). To do this:
www.xara.com
Page 71

Document handling 71
1. Copy the files you want to add into a new directory (folder) using the
Windows Explorer.
- For the DESIGNS GALLERY these files can be any of a wide range of vector or
bitmap file types.
- For the FILL GALLERY they can be any of the bitmap formats supported by
Page & Layout Designer (listed in importing and exporting (on page 304)).
- For the FONTS GALLERY they can be Adobe Type 1 or TrueType fonts.
2. In the appropriate gallery, click the "DISC DESIGNS/FILLS/FONTS" button. This
opens a dialog box.
3. Use the dialog box to select the directory you want to add.
4. Click "ADD". This creates a new section in the gallery.
If you later want to add more items to the folder:
1. Copy the new files into the existing folder.
2. In the gallery, click "DISC DESIGNS/FILLS/FONTS". This opens a dialog box.
3. Use the dialog box to select the folder you want to add.
4. Click "UPDATE" to update the section in the gallery.
Deleting sections from a gallery
To delete a section from a gallery (CLIPART, FILL & FONTS galleries only):
1. Click on the title strip of the section or sections you want to delete.
2. Click "REMOVE".
If you later want the section again, add its folder to the gallery (described earlier).
Closing a gallery
By default a gallery’s AUTO HIDE button is enabled (i.e., the gallery’s AUTO HIDE button
in the top right corner is unpinned), so that the gallery closes automatically when you
move the mouse pointer away from it.
However if you have disabled the
AUTO HIDE button (pinned the gallery), you have to
close the gallery manually.
To close a free-floating gallery, click the
CLOSE button in the top right of the gallery.
The gallery closes and its tab is displayed in the gallery bar.
To close a docked gallery, click the
AUTO HIDE (pin) or CLOSE button in the top right of
the gallery. The gallery closes and its tab is displayed in the workspace border where
you docked it.
To re-open the gallery, hover over or click on its tab.
Page 72

72
Note: To remove a gallery completely, choose GALLERIES from the UTILITIES menu
and choose the gallery you want removed.
Moving content from previous versions of MAGIX Page & Layout Designer 2013
Sometimes when MAGIX Page & Layout Designer 2013 is updated from one version
to another, some content is dropped from the Designs Gallery to make space for new
content. If you discover that some content you liked and used is missing from the
latest version of the program, you can import it from an installation of an earlier
version.
Designs Gallery content is installed into the "Clipart" folder of the main program
folder. Eg. C:\Program Files\MAGIX\MAGIX Page & Layout Designer 2013\Clipart\
The sub-folder names inside the Clipart folder loosely correspond to the names of the
categories as they appear in the Designs Gallery.
So before uninstalling an older version of the program, you may want to copy out
some of the Designs Gallery content and then add to the Designs Gallery in the latest
version of the program. Follow these steps:-
1. Identify the location of the old Clipart folder and the decide which sub-folders
inside it you want to keep.
2. Copy the sub-folders to a convenient location on your machine.
3. Select the "Disc designs…" button in the Designs Gallery and in the dialog that
appears navigate to the sub-folder. If you want to add the "food" folder for
example, you need to navigate right into the food folder, before clicking Add in
the dialog.
4. All the items in the folder are added to a new category in your gallery. Repeat
the above process for each folder of content that you want to add.
5. Once you’ve copied out all the folders you want and have added them to your
Designs Gallery, you can uninstall the old version of the program if it is no
longer required.
You can following a similar process to that above to copy fills and fonts from previous
versions to the Fill and Font galleries. Fills are installed into a "Fills" folder in the
program folder and fonts in a "Fonts" folder.
Removing a gallery from the workspace
By default, when you close a gallery, Page & Layout Designer returns it to the gallery
bar so that you can reopen it by hovering the cursor over its icon or tab. However you
can configure Page & Layout Designer to remove any gallery from the workspace if
it’s not needed.
To remove unwanted galleries from the workspace, do one of the following:
www.xara.com
Page 73

Document handling 73
• Choose GALLERIES from the UTILITIES menu and choose the gallery you want
removed. The selected gallery disappears from your workspace. If you want to
reinstate a gallery, choose
GALLERIES from the UTILITIES menu and choose the
gallery you want to reinstate.
• Choose
available control bars to find
Galleries toolbar. Click
CONTROL BARS from the WINDOW menu and scroll down the list of
GALLERIES. Click the GALLERIES box to show the
CLOSE. In the Galleries toolbar that is now displayed above
the workspace, you can toggle display of a gallery by clicking its toolbar button.
Restoring the default control bars/galleries
Choose "WINDOW" > "CONTROL BARS" and click RESET to restore the control bar setup
to the default setting.
The Name Gallery
The NAME GALLERY gives you information about the current document, and is an easy
way to manage the various elements of your document. It lists:
• Names – you can name objects using either the
DIALOG
(via NAMES BUTTON in the SELECTOR TOOL).
NAME GALLERY or the NAMES
• Fonts used – if you have text in your document, then the used fonts will be listed.
• Bitmaps used – a list of bitmaps currently used.
• Colors used – The
USED COLORS section of the NAME GALLERY lists the colors used.
• Styles used – Use this section of the gallery to select text on the current page that
uses a given style.
Note: In the case of multi-page documents, the Name Gallery lists the items usage
by the current page. All Names are shown anyway, because a Name can be present
in the document without actually using it. In the case a Name is not applied to an
object on the page, the little selection circle (see below) is not present before the
Name.
To display the NAME GALLERY:
• Choose "
• Or click the
UTILITIES -> NAME GALLERY" ("Ctrl + Shift + F9"),
NAME GALLERY button on the GALLERIES bar.
Page 74

74
With the commands on the buttons you manipulate names, for some commands to
work, a name, a property like color or font and/or an object has to be selected:
•
APPLY is used to give names to objects.
•
NEW opens the NAMES dialog (on page 75) to apply a new or existing name to the
selected object(s).
DELETE deletes a name from the NAME GALLERY and from any objects using that
•
name.
INTERSECT selects the objects that have all the selected items (name, font, bitmap
•
or color).
REMOVE deletes a name from any objects using that name, but do not delete it
•
from the
•
RENAME changes the name shown in the NAME GALLERY.
•
REDEFINE changes which objects use a name.
•
MORE reveals some more options:
NAME GALLERY.
- SELECT selects (in the document) the objects that have any of the selected
items (name, font, style, bitmap or color).
- EXPORT exports the selected named objects.
- HELP shows the according help article
Batch Export
You can do a batch export of all objects with a name applied. Just select the names
(multiple selection is possible with the Shift and Ctrl key) and choose
MORE > EXPORT.
A click on the arrow displays a dialog box that lets you select the file name,
destination folder and file format to export in. By default the file name is the same as
the name in the Name Gallery. Note that clicking "
APPLY" just stores the selected
www.xara.com
Page 75

Document handling 75
options, and that it doesn't save a bitmap; do this by exporting the image with the
MORE > EXPORT option.
(Extension displayed depends on the file format chosen.) Click the box to open
the according "Export dialog (on page 333)" to specify more details. Click
APPLY" to store the selected options.
"
Object Selection and Name Gallery
When you select an object or several objects on the page, its name and other
properties, like named color, font and style (text objects) are shown highlighted in the
Name Gallery with a half or full red circle:
indicates that there are other objects or copies of this object with the according
name or property.
indicates the selected object/s are the only occurrences of the name or other
property on the page. This is useful if you want to be sure of selecting all
occurrences of a named object or e.g. a specific font used.
The other way around you can also select objects using the
NAME GALLERY. By
clicking in the circle to the left of an item in the gallery you will select some or all
occurrences of the object with that property.
As above, means there are other occurrences of this named object that were not
selected, typically because they are locked and so are not selectable.
means all occurrences of this name are selected.
If there is no selection circle is before a name, that is because this name is not applied
to any object on the page.
With the
INTERSECT and SELECT command you can use a combination of Name gallery
items to select objects by. Intersect selects objects that use all of the chosen items,
e.g. chosing the red color and the Arial font selects all text objects that are red and
using the Arial font. With the
SELECT command (you'll find it under the MORE...
button) you select objects that use any of the chosen items, given the above example
this would be any object that is red or using the Arial font.
Naming objects
You can apply names to any object in MAGIX Page & Layout Designer 2013
using the “Apply, remove or inspect names of objects” button on the
infobar. Alternatively right click an object and choose NAMES from the
TOOL
context menu.
SELECTOR
Naming is a general mechanism which has a variety of uses, some of which are
described below. Most commonly names are used to form loose sets of objects.
Example uses of names
Page 76

76
• Record information about the objects, e.g. what they are used for;
• Select the objects. This is particularly useful if the objects are widely separated in
the drawing or in a complicated drawing. One click and you can select just those
objects that share a name;
• For linked stretching where one named object can automatically stretch another
named object. For example, changing the text over a colored background shape
can automatically change the size of the shape.
This dialog is modeless, so you can change the selection while the dialog is displayed.
It shows the names for the current selection. The text field at the top of the dialog
shows you how many objects are currently selected.
Adding names
To add a name to an object, select the object and open the NAMES dialog using the
button on the
Type the new name into the
SELECTOR TOOL infobar or right click on the object and choose NAMES...
APPLY NAME field, or use the drop down list on the same
field to select a name which is already used elsewhere in the current document. Click
ADD. You should see the name appear in the NAMES APPLIED list.
Names applied
The NAMES APPLIED field shows you the names applied to the current selection. If
more than one object is selected, a list of names is only shown if all objects in the
selection have exactly the same set of names applied. Otherwise “<many>” is
displayed, indicating that there are differences in terms of the names applied to
different objects in the selection.
To remove a name from the selected object(s), click the name in the
list to select it and then click the
REMOVE button.
NAMES APPLIED
www.xara.com
Page 77

Undo and Redo
The undo command
"UNDO" cancels the effects of the last operation. To undo an operation:
Document handling 77
• Click
• Or choose "
UNDO on the standard control bar.
EDIT" > "UNDO" (the exact wording tells you what the next undo step
is, i.e. undo scale).
• Or press "Ctrl + Z".
• Or press the comma key (in any tool except the
TEXT TOOL).
You can repeat the undo command to step back through the sequence of previous
operations.
The redo command
Redo cancels the last undo command. To redo the last operation:
• Click the
• Or choose "
REDO button on the standard control bar.
EDIT" > "REDO" (the exact wording tells you what the next redo step
is, i.e. redo scale).
• Or press "Ctrl + Y".
• Or press the period (full stop) key (in any tool except the
TEXT TOOL).
You can only redo immediately after undo. You cannot redo after changing the
document (for example, by moving or adding an object).
Page 78

78
Drawing Lines and Shapes
Drawing a line or shape
You can use any of these tools to draw lines and shapes:
FREEHAND & BRUSH TOOL ("F3").
• The
• The
STRAIGHT LINE & ARROW TOOL
• The
SHAPE EDITOR TOOL ("F4").
The
FREEHAND & BRUSH TOOL is the easiest way to draw simple lines, curves, and
shapes, and it acts rather like a pencil.
The
STRAIGHT LINE & ARROW TOOL is best if you want to draw single segment straight
lines, or add arrow heads and tails to any types of lines.
The
SHAPE EDITOR TOOL is best for drawing precise curves and lines. It is also the
main tool to edit lines and shapes.
Note: Although it is not in the Drawing Tools toolbar, you can also use the PEN
to create precise shapes. It has limited functionality and works like the
TOOL
line tool of other drawing programs. To use the
from the WINDOW menu and click the BUTTON PALETTE checkbox. Then
BARS
click the
PEN TOOL icon in the Button Palette.
PEN TOOL, choose CONTROL
The Freehand & Brush Tool
You can use this tool to draw in a freehand manner, as you would with a
pencil. It can also be used to create brush strokes, which is described later.
And it includes the option to draw variable width lines using a compatible
pressure sensitive drawing device such as a graphics tablet. While using this
tool the status line provides reminders on how to use the tool.
1. Position the pointer where you want the line to start.
2. Press and hold down the mouse button. (or draw with your graphics tablet or
other connected device).
3. As you drag the pointer around the document, your line is drawn in real time.
4. Release the mouse button to terminate the line.
After you’ve drawn a freehand line you
can control how smooth the curve is
(i.e. how many control points) by
Smoothing Re-fit Indicator
adjusting the smoothing control slider
on the InfoBar.
www.xara.com
Page 79

Drawing Lines and Shapes 79
Low values make the line follow your mouse movement more closely by creating
more control points, and higher values produce smoother curves with fewer control
points.
Low values are less smooth Higher values produce a smoother curve
You can change the smoothing at any time until you make further edits to the line
(the re-fit indicator on the InfoBar tells you when you can still change the smoothing.)
Erasing while drawing
Before you release the mouse button you can erase part of the line by holding "Shift".
The pencil icon reverses so the eraser at
the end is downwards. You can now
erase back along the line. Release "Shift”
and you can continue drawing.
Drawing straight segments in the Freehand Tool
While drawing a freehand line hold down "Alt", move the pointer to a new position
and release "Alt" to draw a straight line. You can continue drawing a line or hold down
"Alt" again to draw another straight segment. Remember, you can use "Ctrl" to
constrain the angle of the line. If you only want to draw lots of single segment straight
lines, use the
STRAIGHT LINE TOOL described below.
Extending a line
Make sure the line is selected (a single click on the shape or line in the FREEHAND &
TOOL will do this). Now if you move over the end of the line, a small + sign next
BRUSH
to the pencil icon will indicate you can just draw to add a new freehand section to the
line.
Joining two lines
Select both lines, ("Shift + click" on the second line to add it to the selection) and you
can now just draw from the end of one line to an end of the other. A small + sign next
to the pencil icon (appearing after a pause) indicates you are over the end.
Closing a freehand shape (to create a filled shape)
If you connect the start and end of a line, then it becomes a filled shape. You can now
alter the fill color by dragging colors from the Color Line or using the Color Editor.
Page 80

80
Editing lines/shapes with the Freehand & Brush Tool
You cannot directly modify shapes created by the Quickshape, Rectangle, or Ellipse
Tools. First convert them to editable shapes using "ARRANGE" > "CONVERT TO
EDITABLE SHAPES". See "Shape handling (on page 142)" for more information.
You can use the FREEHAND & BRUSH TOOL to edit lines (or outlines of shapes) by
simply redrawing the section of line you want to replace. For example:
To edit the object:
Select the object that you wish to edit.
Move the freehand pencil over a part of the line. A ~ shows
when the pencil is in position.
Draw the required line, then move the freehand pencil over to
the second point of the existing line. Again, a ~ shows when
the pencil is in position.
Release the mouse button, and the section of line is replaced.
Sketch Mode
This option is useful if you are rapidly sketching lots of separate lines close to
each other, perhaps using a drawing tablet.
Hold the mouse pointer over an existing line, or end point, and you’ll notice that there
is a short pause before the mouse pointer changes to indicate that the line will be
edited or extended. This pause means you can still edit existing lines if you want, but
you won’t do so unintentionally when you actually mean to sketch new lines.
www.xara.com
Page 81

Drawing Lines and Shapes 81
Trace mode
Trace mode helps you to draw lines which follow visible edges in photo images. For
most photos it’s best to turn smoothing down from the default value, so that the line
more closely follows complex edges with less smoothing of the line as you draw.
Trace mode on/off
Turn on trace mode using the toggle button on the infobar. Draw with the
Freehand tool over a photo and you should see that the line tries to follow
edges in the image.
You can also turn trace mode on and off while you are actively drawing a line, by
pressing the
T key. The mouse pointer changes to indicate whether trace mode is on
or off.
Commit points
You’ll often notice as you draw along an edge in a photo that sometimes the last few
pixels of the line you’ve drawn will ‘jump’ around as it searches for different routes.
You can ‘commit’ the edge at any time by pressing the
SPACE BAR when a correct
route has been found. Then continue and trace mode will find more routes between
the last commit point and the mouse pointer. Commit points are automatically added
for you every 50 screen pixels.
Cutting out objects from photos
To cut out part of a photo you can either draw an ordinary shape over the top of the
photo and then use the combine shapes operations in the
ARRANGE menu to cut the
photo with the shape (see the Shape Handling chapter (on page 135) for details).
Page 82

82
Once you’ve cut out a piece of a photo, it’s often a good idea to apply a small amount
of feather to blur the edge slightly.
Brush styles
The FREEHAND & BRUSH TOOL can also be used to apply different brush stroke styles
along the path of the line. Instead of being a solid, fixed-width line, you can change it
to be a variable-width line, or one of a near-infinite range of fancy brush styles, like
airbrush, felt tip marker, and many more.
The Straight Line & Arrow tool
This tool makes it easy to draw single segment straight lines and to add arrow heads
and tails to any lines in a way that is much easier and more powerful than doing the
same thing with the
Drawing & editing straight lines
Simply click and drag on the page to draw a straight line. You can click on any existing
line to select it, and once selected you can click-drag on either end to move the end of
the line around.
LINE GALLERY.
Adding arrowheads & tails
The infobar has two dropdown lists on the left which allow you to choose an arrow
head or tail style for each end of the selected line.
Arrow head
Arrow tail
Arrow head/tail size
Reverse path
The slider on the infobar allows you to change the size of the arrow head and tail on
the current selected line. Or you can enter a percentage value into the size text field to
the right of the slider.
Enter a value less than 100% to reduce the size of the arrowhead (and tail), or greater
than 100% to increase. Although the slider only takes the size value up to a maximum
of 800%, you can enter percentage values larger than this into the size text field.
www.xara.com
Page 83

Drawing Lines and Shapes 83
Reverse path
Press the REVERSE PATH button on the infobar to switch around the head and
tail of the selected line.
The Shape Editor tool
The SHAPE EDITOR TOOL is the main tool used for both creating precise
curves, lines, and shapes, as well as editing or altering lines and shapes.
Add/Change/Edit Indicator
Make curve
Make line
Smooth join
Sharp join
Break at points
Delete points
Reverse paths
Positions of handles
Smoothing
The InfoBar, shown above, provides a wide range of controls as well as precise
numeric control.
All lines and shapes in MAGIX Page & Layout Designer 2013 are made from a
sequence of curve and line sections. Curves are sometimes called "Bézier" curves
after the mathematician who first described them.
Although this section describes the SHAPE EDITOR
SELECTOR
TOOL if you have the SHOW EDIT OBJECT
, you can also edit lines and shapes using the
TOOL
handles button selected on the SELECTOR TOOL
InfoBar.
Page 84

84
The sections or segments of a line are marked by small black point handles. You can
drag, add and delete these handles to manipulate the shape of the line or outline.
Some objects such as quickshapes, rectangles, ellipses, and text have to be converted
into editable shapes before you can use the
"ARRANGE" > "CONVERT TO EDITABLE SHAPE" menu ("Ctrl + Shift + S") to do this.
SHAPE EDITOR TOOL on them. Select the
To draw a straight line segment
Using the SHAPE EDITOR Tool, start a straight line:
1. Click where you want to start the line. You can start a line at either end; you
don’t have to work left to right, or top-to-bottom. This creates a point handle,
and is displayed as a red square to indicate that it is the selected handle.
2. If necessary select the MAKE LINE button on the InfoBar ("L"). This ensures the
next click will draw a straight line segment.
Either click where you want the next point
handle to be, or click and drag, and then
release the mouse button when the line is
correct. This creates a line segment and
selects the new end point handle.
Mixing curved and straight lines
To create an object which is a mixture of straight and curved segments, just switch
between the
MAKE CURVE and MAKE LINE buttons as you create the object (you can
also press "L" or "C" on the keyboard.)
Note: You can also use the keyboard shortcut "X" to create a Cusp Join or "S" to
create a Smooth Join while using the
SHAPE EDITOR TOOL. These affect the way two
line segments come together. A Cusp Join creates 2 independent Bezier control
handles that you can edit separately. With a cusp join, you can create a sharp angle. A
Smooth Join creates a symmetrical join that works like a see saw. If you drag one
Bezier control handle down, the opposing control handle goes up.
To draw a curved line segment:
This is similar to starting a straight line (described above).
1. Click where you want to start the line.
2. If necessary select the MAKE CURVE button (shortcut "C".)
www.xara.com
Page 85

Drawing Lines and Shapes 85
3. Either click or drag (as described for straight lines) to create a second point
handle, and a curve segment will be added to the line.
A curve segment has CURVE HANDLES associated
with the selected point handle. You can drag these
to adjust the angle and radius of the curve.
Extending the line
Make sure an end point handle is the selected handle (red outline) and then just click
again to add a new line or curve section. Each successive click places a new point
handle and draws a new line segment to the selected point handle.
This applies also to SHAPE EDITOR and PEN TOOLS. To use the PEN TOOL, choose
CONTROL BARS from the WINDOW menu and click the BUTTON PALETTE checkbox, or
press "Shift + F5" on your keyboard.
Adding a new point handle
The SHAPE EDITOR TOOL has three modes, depending on whether no point handles are
selected (a click will start a new line), an end handle is selected (a click will add a new
section), or one or more other point handles are selected (you can drag or change the
handles).
The InfoBar shows the current mode.
• NEW: Click to start a new line,
•
ADD: Click to extend the line,
•
CHANGE: Drag or delete point handles to change.
This applies to the SHAPE EDITOR TOOL only.
To the end of a line:
Make sure the line is selected, then:
1. If necessary, click on the end point
to select it.
Page 86

86
2. Position the pointer and click to
add a new section.
To the middle of a line:
Make sure the line is selected, then;
1. Click on the line to add a new point handle
into the line
2. Drag the point handle to the required
position.
To the start of a line:
If the end point is selected, clicking on the start point closes the shape (this is
described in "Closing a shape (on page 133)” ). To add a new control handle to the
start of a line:
1. Finish the line using "Shift + click".
2. Click on the start handle.
3. Position the pointer and click.
Selecting multiple point handles
You may want to select several point handles to delete them, move them as a group,
or change a region of points to curved or straight lines. To do this:
1. Select one point handle in the normal way by clicking on it.
2. "Shift + click" the other point handles to select them ("Shift + click" also
deselects.)
- Or "Ctrl + Shift + click" on a point handle to select all point handles on the
line.
- Or drag the mouse pointer diagonally to create a selection rectangle. All point
handles in the rectangle are selected.
- Or "Shift + drag" diagonally to create a selection rectangle. This adds all
points within the rectangle to those already selected.
3. If the line has one or more selected point handles:
- End moves the selection to the end of the line.
- Home moves the selection to the start of the line.
- Tab moves the selection to the next point handle towards the end.
- "Shift + Tab" moves the selection to the next point handle towards the start.
The start and end points are significant when applying arrows (on page 93).
www.xara.com
Page 87

Drawing Lines and Shapes 87
Deleting points
Select the point handle(s) as described above and either click the
DELETE POINTS button (SHAPE EDITOR TOOL InfoBar), or press "Del".
Moving point handles—Shape Editor Tool
You can move one or more selected handles:
• Drag the handles using the mouse.
• Or use the arrow keys on the keyboard.
Or to move a single handle, type new values into the text boxes on the InfoBar (see
below).
Using the text boxes on the InfoBar
The center pair of text
boxes always shows the
X/Y co-ordinates of the
selected point.
The surrounding X/Y fields show the co-ordinates of the curve handles on either side
of the selected point.
X/Y co-ordinates are relative to the bottom left corner of the page. You can change
this in the "Grid and ruler" (on page 348) tab in the options dialog.
If the selected
length and angle of the line. You can adjust either by entering a new value and
pressing return.
point is on the end of a straight line section, the left fields show the
Page 88

88
Length and angle for straight line
Position of selected point
Position of curve handle
Smoothing a line
Imported shapes or shapes from tracers may have unnecessary points on a line. Lines
with too many points can be unwieldy and can slow down rendering. MAGIX Page &
Layout Designer 2013 can smooth the line to remove unnecessary points.
Select all the points on the part of the line you want to smooth (see above). Drag
selecting around the region in the
select a large number of points.
Drag the smoothing slider on the end of the
SHAPE EDITOR InfoBar.
SHAPE EDITOR TOOL is probably the easiest way to
Tip: to make sure important points are not deleted, make sure they are not selected
("Shift+ click" on a selected point deselects it).
Constraining the line
When dragging a point handle, holding down the
constrain key ("Ctrl") will constrain the movement to
multiples of the constrain angle (controlled from the
OPTIONS dialog, GENERAL tab). When dragging a curve
handle the angle is constrained.
www.xara.com
Page 89

Drawing Lines and Shapes 89
Changing curves
Using the curve handle
Dragging the curve handle will adjust the curvature of the adjoining curve segments.
Move the curve handle towards or away from the point
handle to pull the curve in the required direction.
Dragging the line segment
You can also change the curve by dragging the line segment between points.
Notice the difference between dragging the line to change its shape, and clicking on
the line to add a new point handle. Dragging a straight line segment changes it to a
curved line segment.
Making sharp corners
Normally, MAGIX Page & Layout Designer 2013 draws a smooth curve through a
point handle. For this, the two curve handles either side of a point handle are linked.
Moving either curve handle also moves the other.
Sometimes you will want a sharp corner, and to achieve this, you need to unlink the
curve handles:
1. Double click the point handle,
2. Or select the point handle and either:
Click the CUSP JOIN button, or press "Z".
You can now move each curve handle independently.
Making smooth curves
To convert a sharp join into a smooth curve:
1. Double click the point handle,
2. Or select the point handle and either:
Page 90

90
Click the SMOOTH JOIN button, or "S".
The two curve handles become linked and move to opposite sides of the point handle.
This may change the shape of the curve.
Balancing curves
Balancing makes the two curve handles the same distance from the point handle,
which gives smoother, more symmetrical curves. To balance a curve, select the point
handle, then drag one of the curve handles with "Shift" held down. As you drag one
curve handle the other one will move to be exactly opposite it and the same distance
from the point handle.
Changing a straight line to a curve (and vice versa)
1. Select the point handles at both ends of a line segment. For several line
segments select all bordering point handles.
2. Click the Make curve or Make line button on the InfoBar, or press "L"
or "C" (these shortcuts only work in the Shape Editor Tool).
After changing the line type, you may need to move the curve handles for a smooth
transition between curved and straight line segments.
You can select several line segments and convert them all. The point handles at both
ends of the segment must be selected.
Joining lines
You can only join lines if both are selected (the point handles are shown on both
lines):
Using the
you are already in the
SELECTOR Tool, hold down "Shift" and click on the lines to select them (if
SHAPE EDITOR Tool, you can press "Alt + S" to temporarily go
www.xara.com
Page 91

Drawing Lines and Shapes 91
into the SELECTOR Tool, "Shift + click" to select the second line, then "Alt + S" again to
return to the
SHAPE EDITOR Tool).
Selecting objects is described fully in "Selecting objects (on page 98)".
Once both objects are selected, in the SHAPE EDITOR TOOL or the PEN TOOL, drag the
end handle of one line over the end of the other line. As you drag the mouse pointer
will show a + symbol to indicate that the lines will be joined..
If the ends of the two lines are already very close to each other (but not joined), then
you can either zoom in or drag the end point away, and then back again so it’s over
the end point, and you see the + sign to indicate a join will occur.
To create a filled shape, drag the other two end handles together. Because you join
the end handles, you can only join lines and not shapes. Shapes are closed objects and
so have no end handles.
There’s more information on this in "Shape handling (on page 133)".
Notes:
• To use the PEN TOOL, choose CONTROL BARS from the WINDOW menu and click the
BUTTON PALETTE checkbox, or press "Shift + F5" on your keyboard.
• You can also use the
• There is an
ARRANGE > JOIN SHAPES menu option which joins two or more shapes
FREEHAND & BRUSH TOOL (described earlier) to join lines.
into one single shape, even if they are separated on the page. This makes
overlapping areas transparent. For example, joining an object with a smaller circle
on top this way, produces an object with a circular hole in it.
Splitting a shape
If you want to split (break) a line or shape: Either select an existing point handle on
the line or outline of the shape, or create a new one where you want to break the line.
Just click on the line in the
Click on the
BREAK AT POINTS button, or press "B".
SHAPE EDITOR TOOL (see above).
Page 92

92
If you split a line, there is no visible change. However, if you move the point handle,
then only part of the line moves. If you split a shape, it changes to being a line. Any fill
disappears.
Note: "Slice shapes" (part of "ARRANGE" > "COMBINE SHAPES") also lets you split
shapes into two separate shapes. This is described in "Shape handling (on page
136)".
Changing the line width (thickness)
To change the line thickness or the outline thickness of a shape, first select the object
or objects:
Type a new line width into the text box on the
or choose the default line thickness from the menu.
Line thickness is traditionally measured in points, abbreviated to pt. 1 point is 1/72nd of
an inch (about 0.3mm), which is slightly less than the thickness of one screen pixel
when viewed at 100% zoom.
You can use any of Page & Layout Designer’s standard measurement units.
You can enter the thickness value in any unit, and MAGIX Page & Layout Designer
2013 will convert it to the correct number of Points. E.g. you can enter 0.5cm, and you
will get a line half a centimeter thick, but it will show just over 14pt in the line width
field.
If you have no object selected and you change the line thickness value, this changes
the default for all new lines.
Note: A zero width line is a special case, and should not normally be used. This
draws a line one device-pixel wide. The actual size will therefore depend on the
device the drawing is displayed on. On a monitor screen one pixel is clearly visible
and is never shown anti-aliased. On devices such as printers and particularly on
image setters, which have a much higher resolution, the line is almost invisible (zero
width lines in imported files are converted to 0.25pt).
STANDARD control bar
www.xara.com
Page 93

Drawing Lines and Shapes 93
Variable width lines
From the FREEHAND & BRUSH TOOL InfoBar you can select a drop-down menu that
shows a selection of alternative variable line thickness profiles. As you move the
mouse over the selection, an enlarged preview is shown on the right.
Selecting one of the styles will change the line (or outline of a shape) from being a
constant thickness line, to a variable thickness. This is great for creating pen and ink
style artwork, and is often used in the creation of cartoons.
The line width dropdown still should be used to change the overall thickness of the
line.
To restore a constant line width, select the top left corner item from the menu.
The special "
has a custom profile as a result of being drawn with a pressure sensitive device, with
the pressure sensitivity drawing option turned on.
PRESSURE" profile in the dropdown menu is used to indicate when a line
Line Gallery
The LINE GALLERY can be used to apply a range of line styles or attributes, such as
brush strokes, dash patterns, arrow heads, and more.
To display the
• Choose "
• Or click the
LINE GALLERY:
UTILITIES" > "LINE GALLERY"
LINE GALLERY tab on the GALLERIES tab.
Page 94

94
LINE GALLERY is split into sections. To open or close any section, click on the small
The
folder icon in the gallery window.
Line Width
Join type
Line cap
To apply any line style or attribute from the gallery you can:
• Drag and drop the required style from the gallery onto the shape or line.
• Or double click on the required style in the gallery.
• Or select the style and then click the
APPLY button.
Line width
The text box at the top of the gallery duplicates that on the standard control bar.
Brush strokes
There are several sections that show a selection of various brush styles.
Dash pattern
This section provides a selection of line dash styles.
www.xara.com
Page 95

Drawing Lines and Shapes 95
Arrowheads
The best way to apply an arrowhead is to use the STRAIGHT LINE & ARROW TOOL (on
page 82), as described earlier in this chapter. However you can also use the lin
e
gallery. Drag and drop the arrowhead from the gallery onto the appropriate end of the
line.
Alternatively, to apply an arrowhead:
• Double click on the arrowhead in the gallery.
• Or select the required arrowhead and click
APPLY.
Page & Layout Designer has two types of arrowhead designs: beginning and end. If
the line already has a beginning arrowhead, applying an end arrowhead automatically
places it at the opposite end of the line.
If the line has no arrowheads, and you use the
APPLY button or double click a style to
apply it, then the arrowhead will be placed at the end of the line.
The size of the arrow head is related to the thickness of the line. Thicker lines have
proportionally larger arrowheads.
If you hold "Ctrl" down and double click an arrow head or tail style, it will apply it to
the other end of the line.
For general information about galleries see document handling (on page 64).
Change join type
This control on the top of the LINE GALLERY sets the style of corners.
To change an existing line, select the line.
To change the current join type, deselect all lines.
Select the required type from the menu.
Change line cap
This control at the top of the LINE GALLERY sets the style of the ends of the line.
Page 96

96
To change an existing line, select the line.
To change the default line cap, deselect all lines.
Select the required type from the menu.
Brushes
Brush strokes control the appearance of lines (for example, to apply an air-brush
effect).
Select a brush preset
Select a preset for a stroke shape/pressure profile
Using an existing brush
To use an existing brush type for a line:
1. Click to select an existing brush. Click on the arrow to display a preview
window of the default set of brush designs and previously created custom
brushes (if available) from all open documents.
2. If required, select a stroke shape to change the appearance of the line (and to
also mimic using a pressure-sensitive tablet).
3. Draw the line as required, and it will use your chosen brush and stroke shape.
You can also select an existing line in the document then go through the above
process to change its appearance.
You can also browse different brush types using the
LINE Gallery (on page 95).
Creating a new brush
To create a new brush type:
1. Design your desired brush in Page & Layout Designer then select it.
2. Click CREATE BRUSH.
3. Give your brush an appropriate name.
You can then draw with your new brush straight away. The new brush is listed in the
brushes preview window.
www.xara.com
Page 97

Drawing Lines and Shapes 97
Brushes are stored in the document. If you want to re-use a brush in another
document, you have to load the document containing your custom brush first. Only
the default brushes are always available.
Editing a brush
To access advanced editing options for a brush:
1. Select the brush that you wish to edit.
2. Click EDIT BRUSH.
Here you can alter:
• SPACING: Gap between the objects
in the brush.
OFFSET: Distance between the
•
original line and the objects in the
brush.
SCALING: Size of objects in the
•
brush.
ROTATION: Rotation of the objects
•
in the brush as they follow the line.
TRANSPARENCY: Transparency of
•
the brush.
FILL PROPERTIES: Miscellaneous
•
options, including color options.
Transparency is described in "Transparency (on page 222)" and colors are described
in "Color handling (on page 159)".
If you use a pressure-sensitive graphics tablet, the transparency and scaling options
allow you to configure the brush’s sensitivity levels. If you do not have a pressuresensitive graphics tablet, you can mimic the effects using brush shapes (on page 93).
Save your edit
s with the
SAVE button, with the SAVE AS NEW button a new brush is
created.
Attention: Although you can edit a default brush, you can not save the edits into this
brush for use beyond this session. The default brushes are always restored on the
start of the program. If you want to edit one of the default brushes, for use at a
further time, then you have to save it as a new one.
Page 98

98
Selecting Objects
The Selector Tool
The SELECTOR Tool is the main tool for selecting, moving, scaling, and rotating
objects. It is typically used more than any other tool and is the central tool for
manipulating documents.
The Selector tool infobar - left side
Show bounds
Show edit handles
Show fill handles
Show rotation handles
Rotation center
Position of selection
Dimensions of selection
% size controls
Lock aspect ratio
The Selector tool infobar - right side
Rotate & Shear
Flip horizontal
Flip vertical
Scale line widths
Apply, remove or inspect names of objects
Perimeter and area indicator
To use the
• Click on the
• Or press "Alt + S", "V", or "F2".
When switching to the
other composite object type, the parent object (group) becomes selected instead.
SELECTOR Tool:
SELECTOR Tool on the MAIN TOOLBAR.
SELECTOR TOOL, if there are objects selected inside a group or
www.xara.com
Page 99

Selecting Objects 99
The InfoBar
All the buttons on the InfoBar are described in the following sections except:
•
SHOW EDIT HANDLES which is described in "Drawing lines".
•
SHOW FILL HANDLES which is described in "Fills".
•
APPLY, REMOVE OR INSPECT NAMES OF OBJECTS which is described in "Document
handling (on page 75)".
The first two buttons let y
ou edit the outlines and fills of objects without the need to
switch tools.
Alt + S
Because the SELECTOR TOOL is the most used tool, there is an additional shortcut that
lets you switch to the
SELECTOR TOOL to perform a selection or other operation, and
quickly switch back to the previous tool. If you are using another tool, you can easily
switch to the
• Press and release "Alt + S" to switch to the
SELECTOR TOOL:
SELECTOR TOOL. Press again to return
to the previous tool.
Selecting objects
To select a single object, click on any visible part of the object.
Change object selection
Once an object is selected, you can use the following keys to change the selection:
• End selects the back object.
• Home selects the front object.
• "Tab" selects the next object towards the back.
• "Shift + Tab" selects the next object towards the front.
Front and back objects are described in "Object handling (on page 103)".
Marquee selection
To select multiple objects, press and hold down the mouse button. Dragging the
mouse draws a selection rectangle, by default all objects wholly within the selection
rectangle are selected.
If you have an object in the way which is preventing you from drawing a rectangle
because you end up moving the object, hold down "Shift" while dragging out the
selection rectangle.
By default, dragging a selection rectangle selects only those objects which are
completely inside the rectangle. This behavior can be changed so it's compatible with
Page 100

100
the way selection works in other applications, whereby the objects touching the
rectangle outline also become selected. Hold down "
CTRL" while dragging to include
those objects touching the selection rectangle in the selection.
The "
UTILITIES -> OPTIONS" (on page 346) dialog (General Tab) enables you to
change the default setting for marquee selection. So you can choose to have objects
touching the selection rectangle selected, without having to hold down "Ctrl" during
the drag. In this case, holding "Ctrl" down while dragging selects only the objects
wholly inside the rectangle.
Extend Selection
To select additional objects:
• "Shift + click" on them.
• Or "Shift + drag" the mouse pointer. This draws a selection rectangle and adds
objects within the rectangle to the selection.
Select under
Hold down "Alt" to select objects hidden by other objects. By "Alt + clicking" you can
step through several overlapping objects.
Select inside
Groups and blends are described later. Text stories are described in "Text handling
(on page 178)". Molds are described in "Distorting objects (on page 143)".
You can select an object that’s inside a group or other container object by holding
down "Ctrl" while you click on it. This is called selecting inside. The object you click on
will always become selected, even if it’s deep down inside several levels of nested
groups. When you have such deep nesting of groups, sometimes you may want to
select one of the nested groups (a group inside another group). If you hold down the
"Alt" and "Ctrl" keys while you click you can do this easily. The first such click will
select the top level group (just as an unmodified click does). Click again and the next
group down in the hierarchy will be selected instead. Continue clicking to ‘drill down’
into the group structure until the group you want becomes selected.
Note that some operations are not permitted with select inside. For example, you are
not permitted to delete the end object of a blend (because the blend would then be
meaningless).
Marquee selection does not work for select inside, because "Ctrl" is used to toggle the
two marquee selection modes.
Scribble Selection
In the Selector Tool, drag with "Alt" held down and instead of dragging a box, a
freehand line is draw. Every object that is touched by the line becomes selected.
Hence you can drag the mouse around the page, touching all the objects that you
www.xara.com
 Loading...