


Welcome to
MAGIX 3D Maker is the Number 1 tool for creating stunning, professional-quality still and animated 3D
text and graphics, such as logos, titles, headings and buttons. MAGIX 3D Maker can produce both still
and animated graphics that are anti-aliased and optimized for the best possible on-screen appearance,
and exported in all the popular formats such as GIF, PNG, AVI and Flash. 3D can add impact to any
message but typically these sort of results are very difficult to achieve and require complex 3D software.
But MAGIX 3D Maker is so simple to use you will be creating high quality images, animations, movie
sequences and even animated screensavers in seconds.
Note: This program is identical with the program Xara 3D 6. In addition, it contains an option to export
transparent title animations for use in MAGIX slideshow and video editing programs (MAGIX Xtreme
Photostory on CD & DVD, MAGIX Movies on CD & DVD or MAGIX Movie Edit Pro).
Last changed: 8/21/2008
Page 1

Support
UK:
0905 118 0888 (25p/min)
(open Monday to Friday 9:00 - 16:00 GMT)
Denmark:
077345695
(open Monday to Friday 10:00 - 17:00 CET)
Finland:
0942597819
(open Monday to Friday 10:00 - 17:00 CET)
Norway:
021543223
(open Monday to Friday 10:00 - 17:00 CET)
Sweden:
0852507027
(open Monday to Friday 10:00 - 17:00 CET)
If you experience any problems with your software, please get in touch with our support team:
Support website: http://support.magix.net
This website will lead you to the MAGIX user service page, which, among other things, contains the
following free offers:
FAQs (frequently asked questions) and general tricks and tips. In most cases you'll find the
solution to your problem here. If not, use the Email support form:
E-mail support form. Via the special form you inform our support staff about your system. This
information is used to solve your problems quickly and competently. Simply fill out and send with
a mouse-click!
Support forum: You are not alone. Perhaps other users had a similar problem and can help you
solve yours. Our support staff are also regular contributors.
Download section: Updates, improvements and patches are likewise offered free of charge via
download Many problems you may experience are well-known to us, and which can be solved
by downloading the latest patch. Besides patches, there are also wizards for checking and
optimizing your system
Links: In the links list you will find the contact addresses of all the most important hardware
manufacturers.
You can also reach our support team by telephone:
Email: info@magix.net
Please have the following information at hand:
Program version
Configuration details (operating system, processor, memory, hard drive...)
Sound card configuration (type, driver)
Information regarding other audio software installed
Further assistance on using MAGIX 3D
Maker
If you can't find the answer in this manual, the Help menu has several options:
Use menu "Help > Play Movie" to watch a program introduction movie.
MAGIX 3D Maker Support links to our support website (support.xara.com) which includes
comprehensive FAQs.
MAGIX 3D Maker Forum links to the TalkGraphics discussion forums (www.talkgraphics.com)
where you can ask other MAGIX 3D Maker users for advice or suggestions.
Page 2

Further assistance on using MAGIX 3D Maker
If you can't find the answer in this manual, the Help menu has several options:
Use menu "Help > Play Movie" to watch a program introduction movie.
MAGIX 3D Maker Support links to our support website (support.xara.com) which includes
comprehensive FAQs.
MAGIX 3D Maker Forum links to the TalkGraphics discussion forums (www.talkgraphics.com)
where you can ask other MAGIX 3D Maker users for advice or suggestions.
Page 3

Working with MAGIX 3D
In this chapter
The MAGIX 3D Maker window
Getting started
Maker
This section describes the basics of using MAGIX 3D Maker. Later sections provide more details of the
various dialog boxes and toolbars and how to perform particular actions.
Page 4

The MAGIX 3D Maker window
Display of the toolbars and Status Bar is optional. The Window menu lets you select which to display.
Standard toolbar: This provides common editing functions such as load and save. For more details see
The standard toolbar
.
Text toolbar:_This provides quick access to the main text editing options such as font and size. For
more details see The text toolbar
.
Time line: (Not displayed by default. Select Time line on the Window menu.) This provides greater
control over animations. It lets you start, stop, pause and step through animations. For more details of the
Time line see The time line. For more details of creating animations see Create animations
.
Preview area: The main part of the window shows a preview of your graphic as you create it. You can
edit the graphic by, for example, dragging on a shadow to move the shadow, or dragging on the graphic
to change the extrude or bevel
.
Options toolbar:
This provides short cuts to the different options available. These are:
Animation options
Bevel options
Color options
Design options
Extrusion options
Shadow options
Text options
Texture options
Option bars: Each bar contains settings for the options listed above. They can be accessed by clicking
on the required bar or by clicking the required button on the options toolbar above. For more details see
Option bars
. You can move and dock the option bars, or remove it completely.
Design toolbar: Offers shortcuts to the different design types of: text only, button, board, board with
Page 5

holes and border. For more details see Design options
.
Status bar: This provides feedback on available editing options and also shows you the current size and
rotation angles of the 3D graphic. For more details see The status bar
.
Page 6

Getting started
Traditional 3D programs are notoriously difficult to use and understand. This is not the case with
MAGIX 3D Maker. MAGIX 3D Maker is so simple to use, literally anyone can produce high quality still
and animated 3D graphics in minutes.
Typically the first step is to enter your own text which you can do by just deleting the default text with the
regular Delete key and typing your own. You can position the image in three dimensions by simply
dragging it on screen (as long as you don't have a background texture, in which case use the scroll bars).
You can also drag the shadow to the required position, and dragging on the graphic itself can change the
extrude or bevel
. Select a font of your choice from the drop-down list in the text toolbar. You will likely also want to
customize it, which you can do by clicking any of the option bars on the right hand side of the window
(the buttons on the options toolbar also open these). Any changes you make are reflected instantly on the
image, making it easy and fun to experiment.
Creating animations is just as easy. The animation options offers a wide range of different animation types
from simple rotation of the image to multi-page animations with alternating animation types per character.
And if you don't want to create your own headings you can simply copy one that's already been created
(there are over 700 on the CD) by using the design picker (under design options) to copy some or all of
the attributes of an existing file to the current heading, or use the animation picker to copy animation
settings.
When you're happy with the results, you can export either a static image or an animation or movie in any
of the most popular file formats. You can even create an animated screensaver either for use on your
own computer or for distribution to other people.
Page 7

How To ...
In this chapter
Open a new document
Change the text
Rotate and position the graphic
Light the graphic
Color the graphic
Resize the graphic
Add bevels & extrude
Select characters
Add shadows
Create animations
Save and export
Importing 2D objects
Apply the style of an existing graphic
Create buttons, boards, boards + holes and borders
Create screensavers
Create Flash files
Customize
This section describes using MAGIX 3D Maker to create quality 3D headings or buttons and then
exporting static or animated files. In these descriptions we use 'graphic' as shorthand for the text or shape
shown in the MAGIX 3D Maker window.
Page 8

Open a new document
Click New on the File menu. This loads the default graphic. You can replace this default graphic with
your own — see Customizing MAGIX 3D Maker
.
Page 9

Change the text
You can also display the text cursor. Select the show/hide
cursor button on the standard toolbar.
The easiest way of changing the text is to delete the existing text (using Backspace) and then typing in the
wording you want.
You can then use the arrow keys on the keyboard to move the cursor in the text and to select part of the
text — for more information on this, see select characters
.
To change the font or apply affects such as increasing the space between characters, you can use the
options in the text toolbar
.
Alternatively you can use the text options dialog box
to select and change text and apply affects. This is often easier when you have several lines of text such
as in multi-page animations.
Page 10

Rotate and position the graphic
The easiest way to rotate the graphic is simply to drag on it in the MAGIX 3D Maker window or drag
on the background if you don't have a background texture (don't drag on the shadow — this moves the
shadow). This lets you rotate the graphic horizontally, vertically or around its center line. Otherwise, use
the scroll bars.
Status bar
The Status bar shows the current angles (horizontal, vertical and rotation around the center line.)
Rotate options
Vertically only
Shift-drag on the window
or use the up/down arrow keys (1º rotation)
or use Ctrl and the up/down arrow keys (15º rotation)
Horizontally only
Ctrl-drag on the window
or use the left/right arrow keys (1º rotation)
or use Ctrl and the left/right arrow keys (15º rotation)
Rotate the graphic around its center line
Ctrl+Shift-drag on the window
or use Shift and the up/down arrow keys (1º rotation)
or use Shift+Ctrl and the up/down arrow keys (15º rotation)
To cancel any rotation: (graphic is face-on) press Alt+Home
(You cannot use the arrow keys when the text cursor is displayed. Click the show/hide cursor button
again to remove the cursor.)
Positioning options
Normally the graphic is centered in the window. Alt-drag moves the graphic off-center. To return the
graphic to the center of the window press Alt+Home (this also cancels any rotation.)
Page 11

Status bar
The Status bar shows the current angles (horizontal, vertical and rotation around the center line.)
Rotate options
Vertically only
Shift-drag on the window
or use the up/down arrow keys (1º rotation)
or use Ctrl and the up/down arrow keys (15º rotation)
Horizontally only
Ctrl-drag on the window
or use the left/right arrow keys (1º rotation)
or use Ctrl and the left/right arrow keys (15º rotation)
Rotate the graphic around its center line
Ctrl+Shift-drag on the window
or use Shift and the up/down arrow keys (1º rotation)
or use Shift+Ctrl and the up/down arrow keys (15º rotation)
To cancel any rotation: (graphic is face-on) press Alt+Home
(You cannot use the arrow keys when the text cursor is displayed. Click the show/hide cursor button
again to remove the cursor.)
Positioning options
Normally the graphic is centered in the window. Alt-drag moves the graphic off-center. To return the
graphic to the center of the window press Alt+Home (this also cancels any rotation.)
Page 12

Rotate options
Vertically only
Shift-drag on the window
or use the up/down arrow keys (1º rotation)
or use Ctrl and the up/down arrow keys (15º rotation)
Horizontally only
Ctrl-drag on the window
or use the left/right arrow keys (1º rotation)
or use Ctrl and the left/right arrow keys (15º rotation)
Rotate the graphic around its center line
Ctrl+Shift-drag on the window
or use Shift and the up/down arrow keys (1º rotation)
or use Shift+Ctrl and the up/down arrow keys (15º rotation)
To cancel any rotation: (graphic is face-on) press Alt+Home
(You cannot use the arrow keys when the text cursor is displayed. Click the show/hide cursor button
again to remove the cursor.)
Positioning options
Normally the graphic is centered in the window. Alt-drag moves the graphic off-center. To return the
graphic to the center of the window press Alt+Home (this also cancels any rotation.)
Page 13

Positioning options
Normally the graphic is centered in the window. Alt-drag moves the graphic off-center. To return the
graphic to the center of the window press Alt+Home (this also cancels any rotation.)
Page 14

Light the graphic
Three colored lights create the highlights and shadows on the graphic. You can change the positions and
colors of each light. The fourth light (shown striped) controls the position of the shadow — see shadows
.
To display the lights:
click the 'light bulb' button
or choose Display lighting on the View menu
To change the color of a light, display the color options
dialog box by
double-clicking on the light
or choosing Light color 1, 2, 3 on the View menu.
To move a light just drag it. To move a light from in front of the object to behind it (or from behind to in
front) keep dragging the light left or right.
Page 15

Color the graphic
You can color the graphic either by changing the colors of the graphic or by changing the light colors
or both.
If you are creating a graphic and you want two or more colors on the text, it is easier to use pale colored
lights and to color the text. (The default text of X3D Version 6 is an example of this: the X3D is pale
gray, the Version light blue and 6 dark blue. The light shining on the face of the text is an orange cream
color.)
The colors you see depend on the overlap of the lights, their colors and the graphic colors. The colors
are also influenced by whether the graphic has a matt or gloss surface (selected in extrusion options
.)
The graphic can have different colors on the faces (front and back) and on the sides. You can change the
color or texture on a per-character basis.
An example of an incut bevel with white face color and dark gray sides and bevel
Bevels display the color of the sides. Using square, round or triangular-faced or incut bevels can give the
effect of two colors on the face of the graphic.
You can also use textures to color the sides or faces. You can import any BMP. GIF, ICO, JPEG or
PNG file as a texture. Texture options let you scale, move or rotate the texture. Color options
let you tint a texture (an effect similar to placing a colored film over the texture.)
Page 16

Resize the graphic
The easiest way to resize larger graphics is to resize the MAGIX 3D Maker window by dragging the
corners or sides.
For smaller graphics this can make the MAGIX 3D Maker window too small and you cannot see all the
buttons. To avoid this, choose Display frame on the Window menu or click the display frame button (
Standard Tool Bar
). This displays the graphic in a smaller frame which you can resize independently of the main MAGIX
3D Maker window.
An advantage of the frame is that you can set it to a specific size. Use Frame size on the Window
menu. When you save an X3D file when using the frame, MAGIX 3D Maker remembers the frame size
and always opens the graphic at that size.
To make the exported image the same size as the frame area, select Current window size and uncheck
Crop in the Export dialog box
.
Alternatively you can fix the graphic size using Font size on the Text toolbar. Choose any value except
Fit to width
.
Page 17

Add bevels & extrude
When the cursor changes to the bevel tool you can click and
drag the bevel to the required size.
You will see the cursor appear when altering the extrude.
The bevel is the decorative transition between the faces and the sides of the graphic. The extrude is the
depth of the sides.
Bevel designs range from a simple angled or rounded bevel on the corner to complex rippled bevels that
run the length of the sides. Bevels are always applied to the sides of the graphic, not to the faces. The
result is to make the graphic larger and, with larger bevel sizes, text characters can merge into each other.
This also has an effect when the faces and sides are different colors — the bevel takes the side color. To
alter the bevel, hover you mouse over the edge of the text while holding the shift key.
Bevel options
let you have more advanced control, like choosing a bevel style. For small extrude values there may not
be enough space to display the complete bevel (depending on the bevel design.)
To change the extrude depth, just click and drag on the side of the text.
Extrude options
gives you more advanced control over the extrusion, and whether the graphic is matt or gloss.
You can also choose the surface, either Gloss (reflective) or Matt
(non-reflective.) The surface affects the entire "feel" of the graphic. Gloss (shown left below) creates
shiny, metallic effects; matt (shown right) more subtle, toned-down graphics. When swapping between
the two surfaces, you often need to move the lights to get the best results for that surface.
Page 18

Select characters
First step is to display the text cursor. Click the show/hide
cursor button on the standard toolbar:
Almost all MAGIX 3D Maker attributes (such as colors, bevels, textures, animation types) can be
applied character-by-character. (The exceptions are the shadow, the lighting and some animation types.)
Before you can apply an attribute to a character or block of characters, you must first select that
character or block.
Then:
Use the arrow keys on the keyboard to move the cursor.
Shift+left/right arrow keys selects the character on the left or right.
Ctrl+Shift+left/right arrow keys selects all the characters from the cursor to the left or right of the
line.
Ctrl+A selects all characters.
Ctrl+P selects all characters on the current page (for multi-page animations.)
When you have a selected character or block any changes you make apply only to that character or
block.
Page 19

Add shadows
To move the shadow, either drag the shadow — the cursor
will look like this when you hover over the shadow and can
drag:
Or display the lights. A fourth light (shown striped) controls the
shadow position—drag that light.
A shadow behind the graphic gives an impression of the graphic floating above the surface and adds
realism.
To create a shadow, open the Shadow options dialog box and check Shadow
.
To change the color of the shadow
either double-click on the shadow or shadow light—this opens Color options ready to edit the
shadow color
or choose Shadow color on the View menu
or click Color options and choose Shadow from the drop-down list.
To change the shadow transparency, use Transparency in Shadow options
. Real shadows are usually semi-transparent and the shadow looks better when you can see some of the
background behind the shadow.
To change the shadow blur, use Blur
in shadow options. Real shadows do not have sharp edges (no blur) and you can use blur to soften the
edges. Large blur values are useful for creating "halo" effects. Move the shadow directly behind the
graphic and give the shadow a bright color to emphasize it.
Shadow styles
Shadow options have two styles of shadow:
Style 1
is a simple offset copy of the graphic. Artistically this is incorrect but looks 'right' for static images.
Style 2
is artistically correct and looks best with animations where the eye is more aware of the shadow shape.
Shadows and Flash vector format
Flash vector format does not support shadows. If you want your graphic to have a shadow, use a
different export format such as GIF or bitmap Flash.
Page 20

Shadow styles
Shadow options have two styles of shadow:
Style 1
is a simple offset copy of the graphic. Artistically this is incorrect but looks 'right' for static images.
Style 2
is artistically correct and looks best with animations where the eye is more aware of the shadow shape.
Shadows and Flash vector format
Flash vector format does not support shadows. If you want your graphic to have a shadow, use a
different export format such as GIF or bitmap Flash.
Page 21

Shadows and Flash vector format
Flash vector format does not support shadows. If you want your graphic to have a shadow, use a
different export format such as GIF or bitmap Flash.
Page 22

Create animations
You can easily create animated graphics using MAGIX 3D Maker. You have the option of either a
single image (single page) or a sequence of images (multi-page).
To create a single page animation, just create the image in the regular way then display Animation
options and choose the required options.
To create a multi-page animations, create the first image. Then press Ctrl+Enter to start a new
page and create the image for that page.
Alternatively you can use Text options. Click Insert page break
to start a new page.
Continue until you have created as many pages as you want. Then display Animation options
and choose the required settings.
These options apply only to multi-page animations:
Step animation
Overlap pages for Pulsate animations
Animation options and file format
MAGIX 3D Maker can save animations in several different formats: AVI, ANI, Flash SWF and
animated GIF. Some options in the Animation dialog box are not supported by all file formats. Pause is
supported by all formats except AVI movies. Loop
is supported only by animated GIF format (other formats play continuously.)
To preview an animation
Select the start/stop animation button on the standard toolbar.
To preview the animation in real-time, MAGIX 3D Maker displays a reduced-quality image. You have
greater control over quality when exporting to disk.
Editing the text for multi-page animations
Unless you have the cursor displayed, new text is added to the page currently displayed in the MAGIX
3D Maker window. This can make editing slightly tricky. Either stop the animation and edit the text or
use Text options
.
The time line
Displaying the Time line
lets you step through an animation, frame-by-frame, or pause, stop or run the animation.
You can export an individual frame by pausing the animation at the frame you want and using Export on
the View
menu.
Applying animation effects to selected text
The animation style applies to all characters (see notes below) but you can apply most attributes of the
animation to just a selected character or block of characters. For example, for a Rotate
animation, you could have some characters rotating in a different plane to the others.
Notes:
Rotate, Swing and Pulsate animation styles have two versions, 1 animates all characters as a group and 2
animates each character individually. You can mix versions by selecting part of the text and selecting the
other version (1 or 2.)
Page 23

Fade, Step and Typewriter animation styles: you cannot apply different settings to a selected area.
Tips for creating animations
Animations can create large file sizes, which are slow to download over the Internet. To keep animations
small we suggest:
Make the image as small as possible by selecting the Crop option on export.
Select Front face only for Rotate animations.
Have no more than about 20 frames per animation. (The fewer the better for keeping the size
down.)
For multi-page animations avoid having too many pages.
When exporting try selecting 16 colors (4-bit) with no dithering and optimized palette. When
images are animating, the banding is far less obvious than with a static image.
When exporting GIFs (animated or static) that have a complex background, try exporting them
as transparent GIFs.
Rotating the lights changes the file size only slightly.
For Flash animations, Fade or Step animations create much smaller files than the other animation
styles. For multi-page Pulsate animations, overlapping the pages creates smaller animations.
Don't get carried away! For example using loads of textures can create very large animation files.
Turning the shadow off can reduce file size.
When exporting select to optimize 'per frame'.
For tips when saving as a Flash SWF file see Tips for creating flash files.
Page 24

Animation options and file format
MAGIX 3D Maker can save animations in several different formats: AVI, ANI, Flash SWF and
animated GIF. Some options in the Animation dialog box are not supported by all file formats. Pause is
supported by all formats except AVI movies. Loop
is supported only by animated GIF format (other formats play continuously.)
To preview an animation
Select the start/stop animation button on the standard toolbar.
To preview the animation in real-time, MAGIX 3D Maker displays a reduced-quality image. You have
greater control over quality when exporting to disk.
Editing the text for multi-page animations
Unless you have the cursor displayed, new text is added to the page currently displayed in the MAGIX
3D Maker window. This can make editing slightly tricky. Either stop the animation and edit the text or
use Text options
.
The time line
Displaying the Time line
lets you step through an animation, frame-by-frame, or pause, stop or run the animation.
You can export an individual frame by pausing the animation at the frame you want and using Export on
the View
menu.
Applying animation effects to selected text
The animation style applies to all characters (see notes below) but you can apply most attributes of the
animation to just a selected character or block of characters. For example, for a Rotate
animation, you could have some characters rotating in a different plane to the others.
Notes:
Rotate, Swing and Pulsate animation styles have two versions, 1 animates all characters as a group and 2
animates each character individually. You can mix versions by selecting part of the text and selecting the
other version (1 or 2.)
Fade, Step and Typewriter animation styles: you cannot apply different settings to a selected area.
Tips for creating animations
Animations can create large file sizes, which are slow to download over the Internet. To keep animations
small we suggest:
Make the image as small as possible by selecting the Crop option on export.
Select Front face only for Rotate animations.
Have no more than about 20 frames per animation. (The fewer the better for keeping the size
down.)
For multi-page animations avoid having too many pages.
When exporting try selecting 16 colors (4-bit) with no dithering and optimized palette. When
images are animating, the banding is far less obvious than with a static image.
When exporting GIFs (animated or static) that have a complex background, try exporting them
as transparent GIFs.
Rotating the lights changes the file size only slightly.
Page 25

For Flash animations, Fade or Step animations create much smaller files than the other animation
styles. For multi-page Pulsate animations, overlapping the pages creates smaller animations.
Don't get carried away! For example using loads of textures can create very large animation files.
Turning the shadow off can reduce file size.
When exporting select to optimize 'per frame'.
For tips when saving as a Flash SWF file see Tips for creating flash files.
Page 26

To preview an animation
Select the start/stop animation button on the standard toolbar.
To preview the animation in real-time, MAGIX 3D Maker displays a reduced-quality image. You have
greater control over quality when exporting to disk.
Editing the text for multi-page animations
Unless you have the cursor displayed, new text is added to the page currently displayed in the MAGIX
3D Maker window. This can make editing slightly tricky. Either stop the animation and edit the text or
use Text options
.
The time line
Displaying the Time line
lets you step through an animation, frame-by-frame, or pause, stop or run the animation.
You can export an individual frame by pausing the animation at the frame you want and using Export on
the View
menu.
Applying animation effects to selected text
The animation style applies to all characters (see notes below) but you can apply most attributes of the
animation to just a selected character or block of characters. For example, for a Rotate
animation, you could have some characters rotating in a different plane to the others.
Notes:
Rotate, Swing and Pulsate animation styles have two versions, 1 animates all characters as a group and 2
animates each character individually. You can mix versions by selecting part of the text and selecting the
other version (1 or 2.)
Fade, Step and Typewriter animation styles: you cannot apply different settings to a selected area.
Tips for creating animations
Animations can create large file sizes, which are slow to download over the Internet. To keep animations
small we suggest:
Make the image as small as possible by selecting the Crop option on export.
Select Front face only for Rotate animations.
Have no more than about 20 frames per animation. (The fewer the better for keeping the size
down.)
For multi-page animations avoid having too many pages.
When exporting try selecting 16 colors (4-bit) with no dithering and optimized palette. When
images are animating, the banding is far less obvious than with a static image.
When exporting GIFs (animated or static) that have a complex background, try exporting them
as transparent GIFs.
Rotating the lights changes the file size only slightly.
For Flash animations, Fade or Step animations create much smaller files than the other animation
styles. For multi-page Pulsate animations, overlapping the pages creates smaller animations.
Don't get carried away! For example using loads of textures can create very large animation files.
Turning the shadow off can reduce file size.
When exporting select to optimize 'per frame'.
For tips when saving as a Flash SWF file see Tips for creating flash files.
Page 27

Editing the text for multi-page animations
Unless you have the cursor displayed, new text is added to the page currently displayed in the MAGIX
3D Maker window. This can make editing slightly tricky. Either stop the animation and edit the text or
use Text options
.
The time line
Displaying the Time line
lets you step through an animation, frame-by-frame, or pause, stop or run the animation.
You can export an individual frame by pausing the animation at the frame you want and using Export on
the View
menu.
Applying animation effects to selected text
The animation style applies to all characters (see notes below) but you can apply most attributes of the
animation to just a selected character or block of characters. For example, for a Rotate
animation, you could have some characters rotating in a different plane to the others.
Notes:
Rotate, Swing and Pulsate animation styles have two versions, 1 animates all characters as a group and 2
animates each character individually. You can mix versions by selecting part of the text and selecting the
other version (1 or 2.)
Fade, Step and Typewriter animation styles: you cannot apply different settings to a selected area.
Tips for creating animations
Animations can create large file sizes, which are slow to download over the Internet. To keep animations
small we suggest:
Make the image as small as possible by selecting the Crop option on export.
Select Front face only for Rotate animations.
Have no more than about 20 frames per animation. (The fewer the better for keeping the size
down.)
For multi-page animations avoid having too many pages.
When exporting try selecting 16 colors (4-bit) with no dithering and optimized palette. When
images are animating, the banding is far less obvious than with a static image.
When exporting GIFs (animated or static) that have a complex background, try exporting them
as transparent GIFs.
Rotating the lights changes the file size only slightly.
For Flash animations, Fade or Step animations create much smaller files than the other animation
styles. For multi-page Pulsate animations, overlapping the pages creates smaller animations.
Don't get carried away! For example using loads of textures can create very large animation files.
Turning the shadow off can reduce file size.
When exporting select to optimize 'per frame'.
For tips when saving as a Flash SWF file see Tips for creating flash files.
Page 28

The time line
Displaying the Time line
lets you step through an animation, frame-by-frame, or pause, stop or run the animation.
You can export an individual frame by pausing the animation at the frame you want and using Export on
the View
menu.
Applying animation effects to selected text
The animation style applies to all characters (see notes below) but you can apply most attributes of the
animation to just a selected character or block of characters. For example, for a Rotate
animation, you could have some characters rotating in a different plane to the others.
Notes:
Rotate, Swing and Pulsate animation styles have two versions, 1 animates all characters as a group and 2
animates each character individually. You can mix versions by selecting part of the text and selecting the
other version (1 or 2.)
Fade, Step and Typewriter animation styles: you cannot apply different settings to a selected area.
Tips for creating animations
Animations can create large file sizes, which are slow to download over the Internet. To keep animations
small we suggest:
Make the image as small as possible by selecting the Crop option on export.
Select Front face only for Rotate animations.
Have no more than about 20 frames per animation. (The fewer the better for keeping the size
down.)
For multi-page animations avoid having too many pages.
When exporting try selecting 16 colors (4-bit) with no dithering and optimized palette. When
images are animating, the banding is far less obvious than with a static image.
When exporting GIFs (animated or static) that have a complex background, try exporting them
as transparent GIFs.
Rotating the lights changes the file size only slightly.
For Flash animations, Fade or Step animations create much smaller files than the other animation
styles. For multi-page Pulsate animations, overlapping the pages creates smaller animations.
Don't get carried away! For example using loads of textures can create very large animation files.
Turning the shadow off can reduce file size.
When exporting select to optimize 'per frame'.
For tips when saving as a Flash SWF file see Tips for creating flash files.
Page 29

Applying animation effects to selected text
The animation style applies to all characters (see notes below) but you can apply most attributes of the
animation to just a selected character or block of characters. For example, for a Rotate
animation, you could have some characters rotating in a different plane to the others.
Notes:
Rotate, Swing and Pulsate animation styles have two versions, 1 animates all characters as a group and 2
animates each character individually. You can mix versions by selecting part of the text and selecting the
other version (1 or 2.)
Fade, Step and Typewriter animation styles: you cannot apply different settings to a selected area.
Tips for creating animations
Animations can create large file sizes, which are slow to download over the Internet. To keep animations
small we suggest:
Make the image as small as possible by selecting the Crop option on export.
Select Front face only for Rotate animations.
Have no more than about 20 frames per animation. (The fewer the better for keeping the size
down.)
For multi-page animations avoid having too many pages.
When exporting try selecting 16 colors (4-bit) with no dithering and optimized palette. When
images are animating, the banding is far less obvious than with a static image.
When exporting GIFs (animated or static) that have a complex background, try exporting them
as transparent GIFs.
Rotating the lights changes the file size only slightly.
For Flash animations, Fade or Step animations create much smaller files than the other animation
styles. For multi-page Pulsate animations, overlapping the pages creates smaller animations.
Don't get carried away! For example using loads of textures can create very large animation files.
Turning the shadow off can reduce file size.
When exporting select to optimize 'per frame'.
For tips when saving as a Flash SWF file see Tips for creating flash files.
Page 30

Tips for creating animations
Animations can create large file sizes, which are slow to download over the Internet. To keep animations
small we suggest:
Make the image as small as possible by selecting the Crop option on export.
Select Front face only for Rotate animations.
Have no more than about 20 frames per animation. (The fewer the better for keeping the size
down.)
For multi-page animations avoid having too many pages.
When exporting try selecting 16 colors (4-bit) with no dithering and optimized palette. When
images are animating, the banding is far less obvious than with a static image.
When exporting GIFs (animated or static) that have a complex background, try exporting them
as transparent GIFs.
Rotating the lights changes the file size only slightly.
For Flash animations, Fade or Step animations create much smaller files than the other animation
styles. For multi-page Pulsate animations, overlapping the pages creates smaller animations.
Don't get carried away! For example using loads of textures can create very large animation files.
Turning the shadow off can reduce file size.
When exporting select to optimize 'per frame'.
For tips when saving as a Flash SWF file see Tips for creating flash files.
Page 31

Using the animation picker
A quick way of creating an animation is to copy the settings
from an existing X3D file.
Choose Import animation on the File
menu. This opens the animations folder, which contains ready-made animations in a wide variety of
styles. This short cuts the creation of animations. For each of the ready-made animations, the file name
gives you information about the animation type.
The preview in the animation picker shows how the current graphic would look with the animation
settings of the selected file.
Click Open
to apply those settings to the current graphic.
Page 32

Save and export
MAGIX 3D Maker has two basic save and exporting options:
Save as an X3D format file. You can reload an X3D file for further editing in the future.
Export in another format (see File Formats for a full list of supported formats.) You cannot
reload exported files into MAGIX 3D Maker and edit them. (Although you can load BMP, GIF,
ICO, JPEG and PNG format files as textures.)
To save in X3D format—use Save or Save as on the File menu. (To reload an X3D file use Open on
the File
menu.)
To export a static image—use Export on the File
menu.
To export an animation—use Export animation on the File
menu.
To export a screensaver—use Export screensaver on the File menu. (More on screensavers
.)
When exporting, a dialog box will appear with a variety of options. Most of the options in this dialog box
are specific to the file format (GIF, AVI and so on.) Common to all formats are options to set the graphic
size:
Current window size:
Either export the current window or frame area (crop off) or the cropped area (crop on.)
Crop: Export just the area with the graphic. "Crop" ignores just the offset from the center caused by
displacing the graphic by Alt + dragging it. (see rotate and position the graphic
)
User defined:
Lets you specify (in pixels) the area to export. This area can be bigger or smaller than the window or
frame size.
Exporting movies and screensavers
You can also export you MAGIX 3D Maker-design as an AVI video file. (The same thing is happen
when you export it as a screen saver)
Clicking AVI options when exporting a movie or screen saver will allow you to choose from any of the
AVI codecs
on your computer. Use the default setting or a codec of your choice. For some codecs you can also set
the quality percentage and how often key frames are set, and you can click configure for more options.
Page 33

Exporting movies and screensavers
You can also export you MAGIX 3D Maker-design as an AVI video file. (The same thing is happen
when you export it as a screen saver)
Clicking AVI options when exporting a movie or screen saver will allow you to choose from any of the
AVI codecs
on your computer. Use the default setting or a codec of your choice. For some codecs you can also set
the quality percentage and how often key frames are set, and you can click configure for more options.
Page 34

General info on AVI videos
The AVI format (Audio Video Interleaved) isn't actually a proper video format! It's rather a so-called
container where very general conventions can be specified like audio and video data and sent to a
program. The exact memory format of the files is specified via the codec (coder/dec
oder). A codec compresses audio/video files into its own private format with which only the codec can
work and decodes the files on playback again.
This means that an AVI file created on your computer can only
be loaded/played on computer B if this computer has the same codec installed.
Many codecs (for example, Intel Indeo
? video) have now become standard components of the Windows installation, others, such as the popular
DivX codec are not. If you create an AVI file with such a codec and you wish to use it other computers,
install the corresponding codec on them as well.
On older video editing cards certain codecs that function only with the hardware of the corresponding
cards can be problematic. This type of AVI can only
be used on the computer on which they were created. Avoid using this type of codec when possible.
Exporting transparent title animations for movies
If you plan to use a MAGIX 3D Maker animation as title in a MAGIX slide show or movie editing
program like MAGIX Movie Edit Pro, often the title should not stand alone, but should play on top of a
movie introduction scene.
With the standard AVI export an animation is exported with a solid background, covering the movie
behind it. To play it on top a movie, you'll need a video effect (called chroma keying or blue screen) to
remove the background, which is not always working perfectly.
Therefore, use for such purposes the export of the animation as CFX file. This is a special file format
used in MAGIX movie editing and slide show programs. It contains, besides a reference to the exported
AVI file, all transparency information that allows you to blend you animation perfectly with the movie.
To export you animation as a .cfx file choose the file format "MAGIX CFX (*.cfx)" in the "Export
Animation" dialog.
The transparent titles consist of the .cfx file and the according AVI file which contains the animation
movie, the .cfx file contains the the background transparency information. All AVI files are stored in
Documents and Settings\<User>\Local Settings\Application Data\Xara\MAGIX 3D Maker\AVI_CFX
(WIndows XP) or Users\<User>\AppData\Local\Xara\MAGIX 3D Maker\AVI_CFX (Windows
Vista). The files must not deleted or moved from there, otherwise the .cfx files will not work any more.
However, the .cfx files can be stored to the video project folder or anywhere else.
In the MAGIX slide show or video editing programs, the .cfx files has to be loaded via the Media Pool.
The Timeline Mode has to be active. Then you can drag the files into the timeline, they will be placed on
the title track automatically.
To use .cfx files in MAGIX programs, you need at least the following versions of the program: MAGIX
Movies on CD & DVD 6, MAGIX Xtreme Photostory on CD & DVD 6, MAGIX Movies2Go Version
2, MAGIX Movie Edit Pro 14.
Page 35

Exporting transparent title animations for movies
If you plan to use a MAGIX 3D Maker animation as title in a MAGIX slide show or movie editing
program like MAGIX Movie Edit Pro, often the title should not stand alone, but should play on top of a
movie introduction scene.
With the standard AVI export an animation is exported with a solid background, covering the movie
behind it. To play it on top a movie, you'll need a video effect (called chroma keying or blue screen) to
remove the background, which is not always working perfectly.
Therefore, use for such purposes the export of the animation as CFX file. This is a special file format
used in MAGIX movie editing and slide show programs. It contains, besides a reference to the exported
AVI file, all transparency information that allows you to blend you animation perfectly with the movie.
To export you animation as a .cfx file choose the file format "MAGIX CFX (*.cfx)" in the "Export
Animation" dialog.
The transparent titles consist of the .cfx file and the according AVI file which contains the animation
movie, the .cfx file contains the the background transparency information. All AVI files are stored in
Documents and Settings\<User>\Local Settings\Application Data\Xara\MAGIX 3D Maker\AVI_CFX
(WIndows XP) or Users\<User>\AppData\Local\Xara\MAGIX 3D Maker\AVI_CFX (Windows
Vista). The files must not deleted or moved from there, otherwise the .cfx files will not work any more.
However, the .cfx files can be stored to the video project folder or anywhere else.
In the MAGIX slide show or video editing programs, the .cfx files has to be loaded via the Media Pool.
The Timeline Mode has to be active. Then you can drag the files into the timeline, they will be placed on
the title track automatically.
To use .cfx files in MAGIX programs, you need at least the following versions of the program: MAGIX
Movies on CD & DVD 6, MAGIX Xtreme Photostory on CD & DVD 6, MAGIX Movies2Go Version
2, MAGIX Movie Edit Pro 14.
Page 36

Importing 2D objects
For use as a board or border design
You can import a 2D object by for use as a board, board with holes or border design (if you are in text
only mode, you will automatically be switched to a button design type when importing). To do this, just
click the design picker button under design options or select Import design from the File
menu. Supported file formats are WMF, EMF and Xara's WEB and XAR files (Xara Webster can
export shapes as a WEB file, while Xara Xtreme can export as either).
For use as a text character
You can also import 2D objects to use a character in your text. To do this, click Import on the File
menu. Supported file formats are WMF, EMF and Xara's WEB and XAR files (Xara Webster can
export shapes as a WEB file, while Xara Xtreme can export as either). Showing the text cursor (Ctrl-E)
will allow you to choose the correct place to import the object. As it is then a text object, you can color
and animate it as you would with normal text.
Copying from Xara Xtreme Pro
You can design your own shapes in Xara Xtreme Pro then easily import them into MAGIX 3D Maker.
This is a quick and simple way of importing 2D shapes, and is a combination of both methods outlined
above. If you are in text design mode, the shape will be used as a text character. If you are creating a
board, board with holes or border design the object will be used as the design's overall shape.
In Xara Xtreme copy the object you wish to use (Ctrl-C, or select Edit then Copy). Then switch to
MAGIX 3D Maker and paste the object (Ctrl-V, or select Edit then Paste
). If you wish, you can then copy your finished 3D design and easily paste it back into Xara Xtreme for
use in your Xara Xtreme documents.
Page 37

For use as a board or border design
You can import a 2D object by for use as a board, board with holes or border design (if you are in text
only mode, you will automatically be switched to a button design type when importing). To do this, just
click the design picker button under design options or select Import design from the File
menu. Supported file formats are WMF, EMF and Xara's WEB and XAR files (Xara Webster can
export shapes as a WEB file, while Xara Xtreme can export as either).
For use as a text character
You can also import 2D objects to use a character in your text. To do this, click Import on the File
menu. Supported file formats are WMF, EMF and Xara's WEB and XAR files (Xara Webster can
export shapes as a WEB file, while Xara Xtreme can export as either). Showing the text cursor (Ctrl-E)
will allow you to choose the correct place to import the object. As it is then a text object, you can color
and animate it as you would with normal text.
Copying from Xara Xtreme Pro
You can design your own shapes in Xara Xtreme Pro then easily import them into MAGIX 3D Maker.
This is a quick and simple way of importing 2D shapes, and is a combination of both methods outlined
above. If you are in text design mode, the shape will be used as a text character. If you are creating a
board, board with holes or border design the object will be used as the design's overall shape.
In Xara Xtreme copy the object you wish to use (Ctrl-C, or select Edit then Copy). Then switch to
MAGIX 3D Maker and paste the object (Ctrl-V, or select Edit then Paste
). If you wish, you can then copy your finished 3D design and easily paste it back into Xara Xtreme for
use in your Xara Xtreme documents.
Page 38

For use as a text character
You can also import 2D objects to use a character in your text. To do this, click Import on the File
menu. Supported file formats are WMF, EMF and Xara's WEB and XAR files (Xara Webster can
export shapes as a WEB file, while Xara Xtreme can export as either). Showing the text cursor (Ctrl-E)
will allow you to choose the correct place to import the object. As it is then a text object, you can color
and animate it as you would with normal text.
Copying from Xara Xtreme Pro
You can design your own shapes in Xara Xtreme Pro then easily import them into MAGIX 3D Maker.
This is a quick and simple way of importing 2D shapes, and is a combination of both methods outlined
above. If you are in text design mode, the shape will be used as a text character. If you are creating a
board, board with holes or border design the object will be used as the design's overall shape.
In Xara Xtreme copy the object you wish to use (Ctrl-C, or select Edit then Copy). Then switch to
MAGIX 3D Maker and paste the object (Ctrl-V, or select Edit then Paste
). If you wish, you can then copy your finished 3D design and easily paste it back into Xara Xtreme for
use in your Xara Xtreme documents.
Page 39

Copying from Xara Xtreme Pro
You can design your own shapes in Xara Xtreme Pro then easily import them into MAGIX 3D Maker.
This is a quick and simple way of importing 2D shapes, and is a combination of both methods outlined
above. If you are in text design mode, the shape will be used as a text character. If you are creating a
board, board with holes or border design the object will be used as the design's overall shape.
In Xara Xtreme copy the object you wish to use (Ctrl-C, or select Edit then Copy). Then switch to
MAGIX 3D Maker and paste the object (Ctrl-V, or select Edit then Paste
). If you wish, you can then copy your finished 3D design and easily paste it back into Xara Xtreme for
use in your Xara Xtreme documents.
Page 40

Apply the style of an existing graphic
Use the animation picker (Import animation on the File
menu.)
Use the style picker (Import style on the File
menu.) Like the animation picker, you can browse through files
and see how they affect the current graphic.
Sometimes you want to create a graphic that is similar to an existing graphic (either one you created or
one of the samples supplied with MAGIX 3D Maker.) For example, you might like the look of one of
the samples but are not sure how to create the effect. MAGIX 3D Maker makes it easy to copy either
the animation options or selected options from another graphic.
Copy the animation options
As you click on file names, the preview shows you how the current graphic looks with the animation
settings of the selected file. When you find the the animation effect you want, just click Open
to update the current graphic.
This just changes the animation settings—it does not change options such as wording, bevel, extrusion,
and so on. To copy these, see the following section.
Copy selected options
Unlike the animation picker, you can select which options to copy from the selected file. You could for
example copy both the lighting and the position (angles) from the selected file. You can copy any
combination of options from the file, including the animation settings.
Page 41

Copy the animation options
Use the animation picker (Import animation on the File
menu.)
Use the style picker (Import style on the File
menu.) Like the animation picker, you can browse through files
and see how they affect the current graphic.
As you click on file names, the preview shows you how the current graphic looks with the animation
settings of the selected file. When you find the the animation effect you want, just click Open
to update the current graphic.
This just changes the animation settings—it does not change options such as wording, bevel, extrusion,
and so on. To copy these, see the following section.
Copy selected options
Unlike the animation picker, you can select which options to copy from the selected file. You could for
example copy both the lighting and the position (angles) from the selected file. You can copy any
combination of options from the file, including the animation settings.
Page 42

Copy selected options
Use the style picker (Import style on the File
menu.) Like the animation picker, you can browse through files
and see how they affect the current graphic.
Unlike the animation picker, you can select which options to copy from the selected file. You could for
example copy both the lighting and the position (angles) from the selected file. You can copy any
combination of options from the file, including the animation settings.
Page 43
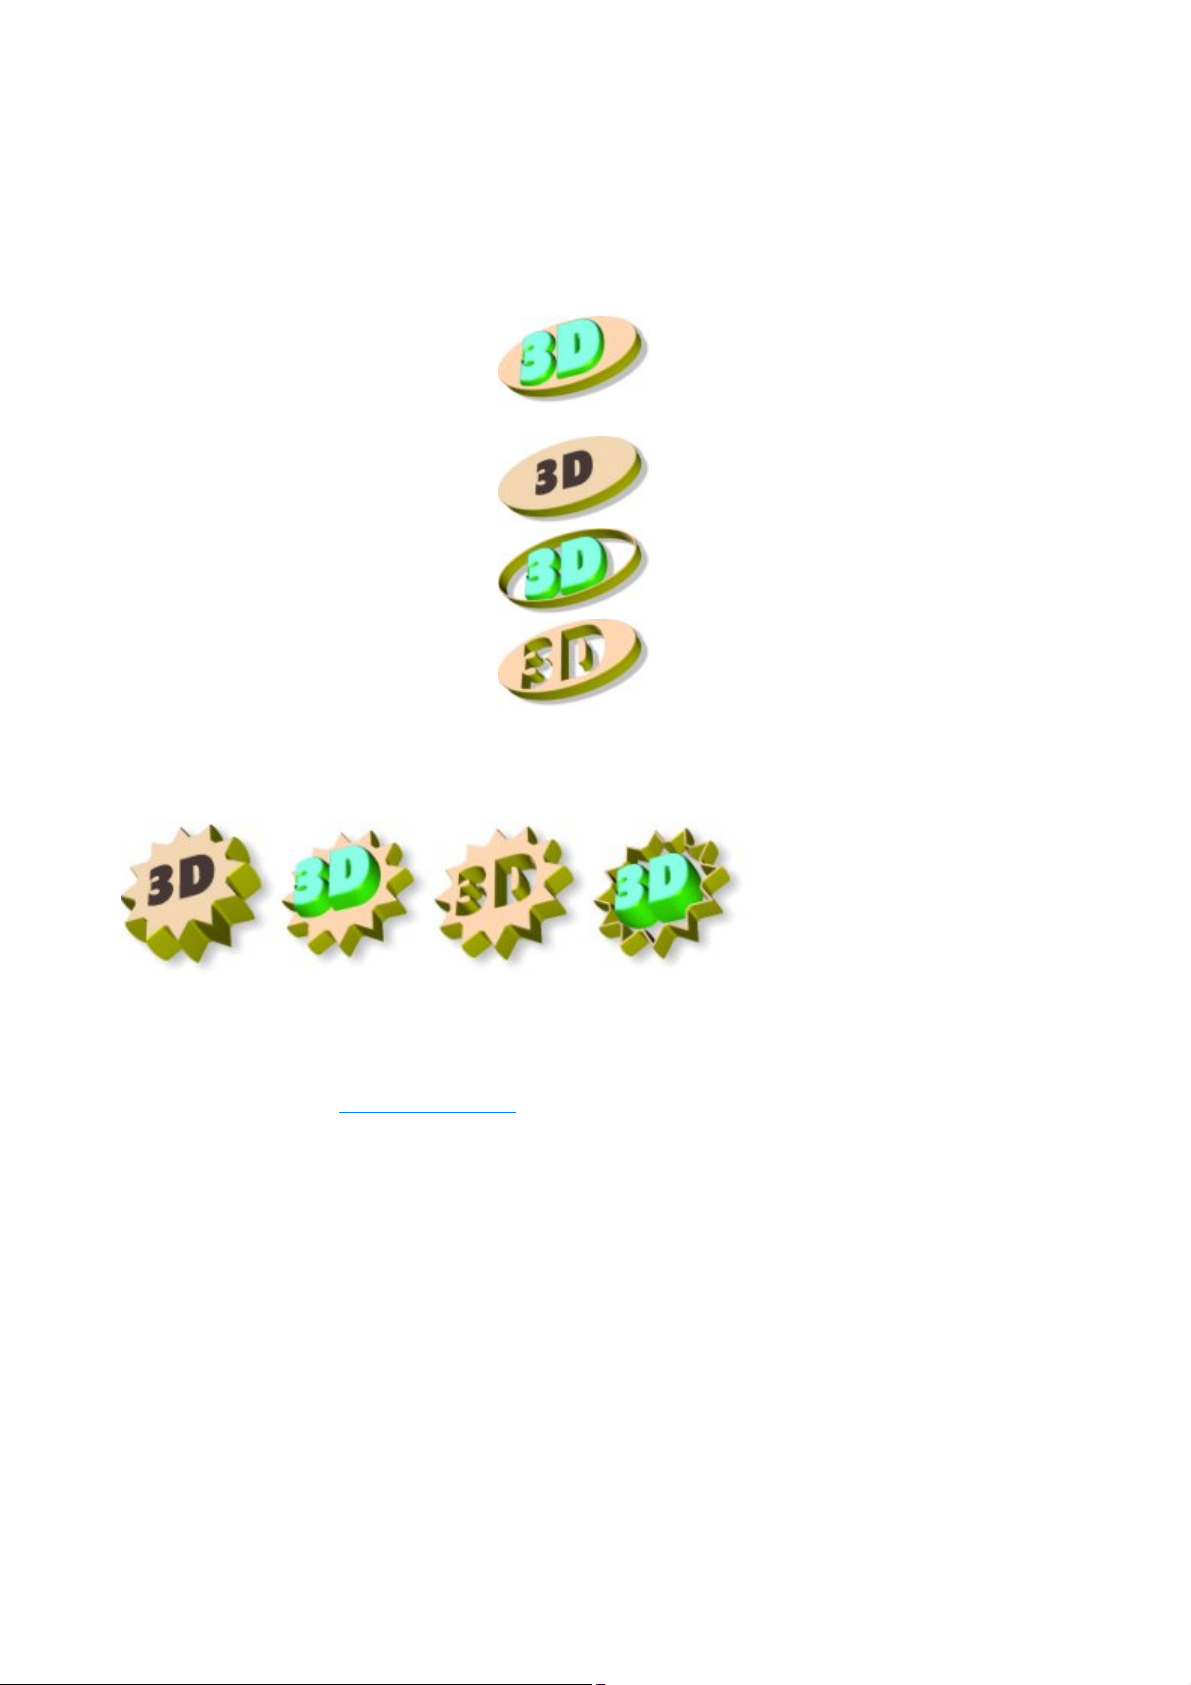
Create buttons, boards, boards + holes and
Boards.
Sit your heading on a solid board, so
the text extrudes from a solid
background.
Button.
Creates a button with the text flat on its
surface.
Borders.
Adds a border around your heading,
giving it more impact.
Board and holes.
As if you'd taken a saw to your board,
to give an impression of a cut-out
image.
borders
There are four different design types:
You can either use one of MAGIX 3D Maker's predefined design shapes or import a shape from
another X3D file. The great thing is that one shape can be used with any of the design types above. One
design—four totally different combinations.
A design takes its values (bevel, lighting and so on) from the current graphic but you can of course select
new values if required.
Steps to creating a design:
Create the text you want the design to show. Animated designs can show multi-page
1.
messages—see Creating animations for details.
Click one of the predefined shapes on the design toolbar on the bottom left of your screen, or
2.
open designs options and choose a design type from there.
If you want to import a shape, click design picker. By default this displays the designs folder (in
3.
the same folder as where you installed MAGIX 3D Maker) but you can browse to and choose
any X3D, XAR or WEB file. If the file contains a text message, the first letter is used as the
design shape.
Change the value in Stretch to make the design wider or narrower.
4.
For predefined design shapes you can control the corner radius. Uncheck Corners for the
5.
default radius.
If necessary, edit the design in the regular way, for example by changing the bevel, extrusion or
6.
colors.
You can create interesting design shapes using symbolic fonts such as Geotype (supplied with MAGIX
3D Maker.) Create a graphic with just the character you want to use as the design shape. Save the
graphic as an X3D file. You can then use that X3D file as an imported design shape in the future if you
save it to the designs folder.
Page 44

You can also use your own drawn design shapes. Import the shape as a metafile (or, if you are using
Xara X1 or later, just copy the shape and paste it into MAGIX 3D Maker) and export in X3D format to
the designs folder.
Page 45

Create screensavers
Screensavers protect the monitor screen from being burnt by a static image when the computer is not
being used and allow for a unique looking computer. Using MAGIX 3D Maker you can create a custom
screensaver either for use on your own computer or for distribution to other people.
Screensavers are always animated (because they need to show a moving image to avoid burning the
screen.) We suggest:
Use a dark-colored background, not white or other light colors.
Don't use light-colored text in areas that show little movement.
To create a screensaver:
Create the animation in the regular way (see tips) or select from one of the sample screensaver
1.
animations in the Sample, Screensavers folder.
Choose Export screensaver on the File menu.
2.
MAGIX 3D Maker screensavers are effectively movies within a sceensaver. (See also Exporting
3.
movies and screensavers for AVI options). There are a number of preset options. Low is one
third of your current screen resolution, medium is half, high is three thirds and full is your full
screen resolution. You can also choose from a number of standard resolutions by choosing other.
We recommend selecting a value half the screen area. (For example 512x384 for a 1024x769
screen area.) This should give a good quality image without creating a large file size.
Choose either:
4.
Install—this saves the screensaver and installs it as the default screensaver. The default
o
folder is your Windows system folder—this is the best folder to use. We recommend this
option as it is easier than manually installing a screensaver.
Save—this saves the screensaver but does not install it as the default screensaver.
o
Enter a name for the screensaver file.
5.
Click Save.
6.
Because MAGIX 3D Maker has to generate each frame of the animation, this process can take a few
minutes.
Previewing a screensaver file
Browse to the screensaver (SCR) file.
1.
Right-click on the file. This pops-up a menu.
2.
Click Test to preview.
3.
Using a screensaver file
If, in step 4, you installed the new screensaver as the default, everything is already set up for you. No
further action is necessary.
If you saved the screensaver to the Windows system folder:
Click Start on the Taskbar. If you are using Windows XP, go to step 3.
1.
Choose Settings.
2.
Choose Control Panel. Double-click Display.
3.
Click the ScreenSaver tab.The screensaver drop-down list shows all screensavers in the system
4.
folder.
Choose the screensaver you want.
5.
Click OK to make the selected screensaver the default.
6.
If you saved the screensaver to a different folder:
Browse to the screensaver file.
1.
Right-click on the file. This pops-up a menu.
2.
Click Install to select the screensaver. Then click OK to make the screensaver the default.
3.
Page 46

Tips
To create a smooth screensaver animation it's recommended you create an animation with a fast
animation speed (15–20 frames per second) and between 50 and 100 frames in each cycle.
Windows stretches the animation to fill the screen. If you want the text to partially fill the screen,
select a point size, such as 72pt from the text size drop down, instead of fit to width.
For ideas on creating screensavers look in the screensavers folder (in samples). This folder
contains a wide range of examples.
Page 47

Previewing a screensaver file
Browse to the screensaver (SCR) file.
1.
Right-click on the file. This pops-up a menu.
2.
Click Test to preview.
3.
Using a screensaver file
If, in step 4, you installed the new screensaver as the default, everything is already set up for you. No
further action is necessary.
If you saved the screensaver to the Windows system folder:
Click Start on the Taskbar. If you are using Windows XP, go to step 3.
1.
Choose Settings.
2.
Choose Control Panel. Double-click Display.
3.
Click the ScreenSaver tab.The screensaver drop-down list shows all screensavers in the system
4.
folder.
Choose the screensaver you want.
5.
Click OK to make the selected screensaver the default.
6.
If you saved the screensaver to a different folder:
Browse to the screensaver file.
1.
Right-click on the file. This pops-up a menu.
2.
Click Install to select the screensaver. Then click OK to make the screensaver the default.
3.
Tips
To create a smooth screensaver animation it's recommended you create an animation with a fast
animation speed (15–20 frames per second) and between 50 and 100 frames in each cycle.
Windows stretches the animation to fill the screen. If you want the text to partially fill the screen,
select a point size, such as 72pt from the text size drop down, instead of fit to width.
For ideas on creating screensavers look in the screensavers folder (in samples). This folder
contains a wide range of examples.
Page 48

Using a screensaver file
If, in step 4, you installed the new screensaver as the default, everything is already set up for you. No
further action is necessary.
If you saved the screensaver to the Windows system folder:
Click Start on the Taskbar. If you are using Windows XP, go to step 3.
1.
Choose Settings.
2.
Choose Control Panel. Double-click Display.
3.
Click the ScreenSaver tab.The screensaver drop-down list shows all screensavers in the system
4.
folder.
Choose the screensaver you want.
5.
Click OK to make the selected screensaver the default.
6.
If you saved the screensaver to a different folder:
Browse to the screensaver file.
1.
Right-click on the file. This pops-up a menu.
2.
Click Install to select the screensaver. Then click OK to make the screensaver the default.
3.
Tips
To create a smooth screensaver animation it's recommended you create an animation with a fast
animation speed (15–20 frames per second) and between 50 and 100 frames in each cycle.
Windows stretches the animation to fill the screen. If you want the text to partially fill the screen,
select a point size, such as 72pt from the text size drop down, instead of fit to width.
For ideas on creating screensavers look in the screensavers folder (in samples). This folder
contains a wide range of examples.
Page 49

Tips
To create a smooth screensaver animation it's recommended you create an animation with a fast
animation speed (15–20 frames per second) and between 50 and 100 frames in each cycle.
Windows stretches the animation to fill the screen. If you want the text to partially fill the screen,
select a point size, such as 72pt from the text size drop down, instead of fit to width.
For ideas on creating screensavers look in the screensavers folder (in samples). This folder
contains a wide range of examples.
Page 50

Create Flash files
Flash format is often used on web pages, especially for animations. There are two formats for Flash
files:
Bitmap format: the advantage of this is that you can use any MAGIX 3D Maker options,
including shadows.
Vector format: the advantage is that you can enlarge vector objects without losing quality. The
disadvantage is that some MAGIX 3D Maker options are not supported by Flash. Select
display as Flash on the view menu to dim or hides unsupported options.
Alternatively you can export the Flash file with unsupported features converted to bitmaps. This can
create large files and loses the scalability of vector files. Note that you cannot export shadows in Flash
vector format.
Tips for creating flash files
Flash is not ideal for 3D graphics such as those created in MAGIX 3D Maker. You will often find that
you can create smaller files using other formats such as GIF. This is especially true of animations. If you
want to create Flash animations, we suggest:
Step or fade animations produces smaller files than other styles.
Avoid bevels. Some bevels are better than others but typically bevels make files five to ten times
larger.
Use sans serif fonts such as Arial (serif fonts have small features at the end of strokes within
letters).
Page 51

Tips for creating flash files
Flash is not ideal for 3D graphics such as those created in MAGIX 3D Maker. You will often find that
you can create smaller files using other formats such as GIF. This is especially true of animations. If you
want to create Flash animations, we suggest:
Step or fade animations produces smaller files than other styles.
Avoid bevels. Some bevels are better than others but typically bevels make files five to ten times
larger.
Use sans serif fonts such as Arial (serif fonts have small features at the end of strokes within
letters).
Page 52

Customize
You can customize MAGIX 3D Maker by either changing the default graphic or by docking or
undocking dialog boxes or toolbars.
With the Window
menu item "Customize..." you can you can add icons to a menu or the standard toolbar, customize the
right click menus available in the main working area and even create you own custom menu. You can
also chnage the keyboard shortcuts there.
Note: if you experience a problem with your windows or toolbars at any time, or wish to return them to
their standard layout, click the Wndow menu then select Reset user interface
.
Changing the default template
If you want MAGIX 3D Maker to start-up showing a different image:
Create the image you want to use as the starting (default) image.
1.
Choose Save as default on the File menu.
2.
To restore the original default document, delete Default.x3d in the system folder. This is in the same
folder as where you installed MAGIX 3D Maker.
Docking and undocking dialog- boxes and toolbars
To give you freedom in how you use the program, you can undock and move toolbars and windows and
position them where you wish. This is particularly useful if you have two monitors, so you could for
example put your windows on one screen and keep the other monitor dedicated to the MAGIX 3D
Maker workspace.
Moving toolbars
There are five toolbars: standard, design, options, text and time line. You can turn these on and off via
the Window
menu.
You can drag them around the screen by clicking and holding them (see the image above) and dragging.
If you drag a toolbar to an edge of the program it will dock there. You can also just drag the toolbar out
elsewhere on the screen, and it will undock entirely.
Option bars
The option bars can be found to the right of the screen when you first start MAGIX 3D Maker. Rather
than opening and closing endless windows, most of MAGIX 3D Maker's settings are contained here.
You can easily switch between the tabs to access the different features.
You can turn this entire panel off or on via the window menu. You can also tailor how you use them as
follows:
To undock an option bar.
Just click and drag one of the options (where it says color options, extrusion options etc.) out of its
current location. The window will undock, and you can position where you require. You can do this with
as many of the windows as you wish.
Page 53

If you find the window is redocking when you don't want to, hold the Ctrl key while moving it.
To redock an option bar.
Just drag the window back to the panel options bar at the right of your screen, and the window will
redock.
Pinning an option bar open.
After undocking a window, by default it will minimize once you move your mouse away from it. As soon
as you move your mouse back, it will expand. To get the window to remain open, just click the little pin
icon at the top right of the window. Click again to return to the auto-hide format.
Removing or reopening an option bar.
Once undocked, you can click the X icon in the top right hand corner of that window to close it.
Page 54

Changing the default template
If you want MAGIX 3D Maker to start-up showing a different image:
Create the image you want to use as the starting (default) image.
1.
Choose Save as default on the File menu.
2.
To restore the original default document, delete Default.x3d in the system folder. This is in the same
folder as where you installed MAGIX 3D Maker.
Docking and undocking dialog- boxes and toolbars
To give you freedom in how you use the program, you can undock and move toolbars and windows and
position them where you wish. This is particularly useful if you have two monitors, so you could for
example put your windows on one screen and keep the other monitor dedicated to the MAGIX 3D
Maker workspace.
Moving toolbars
There are five toolbars: standard, design, options, text and time line. You can turn these on and off via
the Window
menu.
You can drag them around the screen by clicking and holding them (see the image above) and dragging.
If you drag a toolbar to an edge of the program it will dock there. You can also just drag the toolbar out
elsewhere on the screen, and it will undock entirely.
Option bars
The option bars can be found to the right of the screen when you first start MAGIX 3D Maker. Rather
than opening and closing endless windows, most of MAGIX 3D Maker's settings are contained here.
You can easily switch between the tabs to access the different features.
You can turn this entire panel off or on via the window menu. You can also tailor how you use them as
follows:
To undock an option bar.
Just click and drag one of the options (where it says color options, extrusion options etc.) out of its
current location. The window will undock, and you can position where you require. You can do this with
as many of the windows as you wish.
If you find the window is redocking when you don't want to, hold the Ctrl key while moving it.
To redock an option bar.
Just drag the window back to the panel options bar at the right of your screen, and the window will
redock.
Pinning an option bar open.
After undocking a window, by default it will minimize once you move your mouse away from it. As soon
as you move your mouse back, it will expand. To get the window to remain open, just click the little pin
icon at the top right of the window. Click again to return to the auto-hide format.
Removing or reopening an option bar.
Once undocked, you can click the X icon in the top right hand corner of that window to close it.
Page 55

Docking and undocking dialog- boxes and toolbars
To give you freedom in how you use the program, you can undock and move toolbars and windows and
position them where you wish. This is particularly useful if you have two monitors, so you could for
example put your windows on one screen and keep the other monitor dedicated to the MAGIX 3D
Maker workspace.
Moving toolbars
There are five toolbars: standard, design, options, text and time line. You can turn these on and off via
the Window
menu.
You can drag them around the screen by clicking and holding them (see the image above) and dragging.
If you drag a toolbar to an edge of the program it will dock there. You can also just drag the toolbar out
elsewhere on the screen, and it will undock entirely.
Option bars
The option bars can be found to the right of the screen when you first start MAGIX 3D Maker. Rather
than opening and closing endless windows, most of MAGIX 3D Maker's settings are contained here.
You can easily switch between the tabs to access the different features.
You can turn this entire panel off or on via the window menu. You can also tailor how you use them as
follows:
To undock an option bar.
Just click and drag one of the options (where it says color options, extrusion options etc.) out of its
current location. The window will undock, and you can position where you require. You can do this with
as many of the windows as you wish.
If you find the window is redocking when you don't want to, hold the Ctrl key while moving it.
To redock an option bar.
Just drag the window back to the panel options bar at the right of your screen, and the window will
redock.
Pinning an option bar open.
After undocking a window, by default it will minimize once you move your mouse away from it. As soon
as you move your mouse back, it will expand. To get the window to remain open, just click the little pin
icon at the top right of the window. Click again to return to the auto-hide format.
Removing or reopening an option bar.
Once undocked, you can click the X icon in the top right hand corner of that window to close it.
Page 56

Moving toolbars
There are five toolbars: standard, design, options, text and time line. You can turn these on and off via
the Window
menu.
You can drag them around the screen by clicking and holding them (see the image above) and dragging.
If you drag a toolbar to an edge of the program it will dock there. You can also just drag the toolbar out
elsewhere on the screen, and it will undock entirely.
Option bars
The option bars can be found to the right of the screen when you first start MAGIX 3D Maker. Rather
than opening and closing endless windows, most of MAGIX 3D Maker's settings are contained here.
You can easily switch between the tabs to access the different features.
You can turn this entire panel off or on via the window menu. You can also tailor how you use them as
follows:
To undock an option bar.
Just click and drag one of the options (where it says color options, extrusion options etc.) out of its
current location. The window will undock, and you can position where you require. You can do this with
as many of the windows as you wish.
If you find the window is redocking when you don't want to, hold the Ctrl key while moving it.
To redock an option bar.
Just drag the window back to the panel options bar at the right of your screen, and the window will
redock.
Pinning an option bar open.
After undocking a window, by default it will minimize once you move your mouse away from it. As soon
as you move your mouse back, it will expand. To get the window to remain open, just click the little pin
icon at the top right of the window. Click again to return to the auto-hide format.
Removing or reopening an option bar.
Once undocked, you can click the X icon in the top right hand corner of that window to close it.
Page 57

Option bars
The option bars can be found to the right of the screen when you first start MAGIX 3D Maker. Rather
than opening and closing endless windows, most of MAGIX 3D Maker's settings are contained here.
You can easily switch between the tabs to access the different features.
You can turn this entire panel off or on via the window menu. You can also tailor how you use them as
follows:
To undock an option bar.
Just click and drag one of the options (where it says color options, extrusion options etc.) out of its
current location. The window will undock, and you can position where you require. You can do this with
as many of the windows as you wish.
If you find the window is redocking when you don't want to, hold the Ctrl key while moving it.
To redock an option bar.
Just drag the window back to the panel options bar at the right of your screen, and the window will
redock.
Pinning an option bar open.
After undocking a window, by default it will minimize once you move your mouse away from it. As soon
as you move your mouse back, it will expand. To get the window to remain open, just click the little pin
icon at the top right of the window. Click again to return to the auto-hide format.
Removing or reopening an option bar.
Once undocked, you can click the X icon in the top right hand corner of that window to close it.
Page 58

Reference Section
In this chapter
The Toolbars
The Option Bars
File Formats
Keyboard Shortcuts
This section provides details of the toolbars and windows in MAGIX 3D Maker in their default state,
and describes the function of each option. It is possible to customize the toolbars, for example by adding
extra buttons. See Customize MAGIX 3D Maker for details on customizing. The previous section, How
to...
, describes how to use these options to create 3D graphics.
Page 59

The Toolbars
New
—open a new graphic, displaying the default MAGIX 3D
Maker graphic ready for customizing.
Open
—open an existing X3D file. Or import a drawn shape in EMF,
WEB, WMF or XAR format and extrude the shape.
Save
—save the graphic in X3D format. MAGIX 3D Maker can
reload X3D files for future editing. (MAGIX 3D Maker cannot
edit exported files.)
Export bitmap
(if MAGIX 3D Maker shows a static image) – export the
graphic in BMP, CUR, Flash SWF, GIF, ICO, JPG or PNG
format for use on the web or in another program.
Animation picker
—opens the animation picker. An easy way to copy the
animation settings from an existing X3D file to the current
graphic.
Style picker
—opens the style picker. An easy way to import selected
settings (such as colors or bevel) from an existing X3D file.
Undo
—if you make a mistake, click undo to correct that mistake.
MAGIX 3D Maker has multi-level undo so you can discard a
sequence of changes—great for experimenting.
Redo
—if you click undo too many times, click redo to restore each
change in sequence.
Show/hide cursor—display a cursor in the text. This lets you
select and change characters in the middle of the text. (See
select characters
)
Start/stop animation
—preview the animation within MAGIX 3D Maker (and you
can still edit the design while it's moving).
Show/hide lighting
—display the three lights that shine on the faces of the graphic.
You can then drag the lights to change the lighting.
The standard toolbar
Many of these are standard Windows options such as load and save.
To display or hide this toolbar, Use Standard toolbar on the Window
menu.
Options
Page 60

Note: if the graphic has a shadow, a fourth, striped light that
creates the shadow is also shown.
Display as Flash
—Flash vector format does not support all MAGIX 3D Maker
features (such as shadows and some bevel types). Selecting
Display as Flash shows only options compatible with Flash
vector format.
Show/Hide Frame
—this displays the graphic in a small window (the Frame) within
the main MAGIX 3D Maker window. The advantage of the
Frame is that MAGIX 3D Maker remembers its size when you
save the file. Opening the file in the future displays the Frame at
that same size. It is also useful for small graphics because you do
not have to make the main window tiny.
The options toolbar
Play—preview the animation in the MAGIX 3D Maker
window. This is the same as clicking Start/Stop animation on
the Standard
Toolbar.
Pause
—pause the animation at the current frame. Click again to
restart the animation at the next frame.
Stop
—halts the animation. This is the same as clicking Start/Stop
animation on the Standard Toolbar.
Rewind
—display the first frame (frame 1) in the animation.
This gives short cuts for the main editing dialog boxes in MAGIX 3D Maker. The Option Bars
section describes these dialog boxes in detail.
To display or hide this toolbar, use Options toolbar on the Window
menu.
The text toolbar
These options duplicate options in the Text options dialog box. See the description of the Text options
dialog box
for details.
To display or hide this toolbar, use Text toolbar on the Window
menu.
The time line
These options let you step through or play animations. You can also pause the animation at any
intermediate frame and then export that frame as a static image.
To display or hide the time line, use Time line on the Window
menu.
Options
Page 61

Back
—display the previous frame in the animation.
Forward
—display the next frame in the animation.
Fast forward
—display the last frame in the animation
Time line
This section shows the size in pixels of the editing
window.
This section shows the rotation angles (vertical window
axis, horizontal window axis and horizontal text axis).
For more information on rotation see Rotate and
position the graphic
.
(Only shown when the MAGIX 3D Maker isn't
maximized.) Click and drag this to resize the MAGIX
3D Maker window.
—when the animation is playing, this displays progress through the animation.
Or you can drag the slider to move to a particular point in the animation.
The status bar
This gives you information about the graphic and currently available options. When the window isn't
maximized you can click and drag the bottom right hand corner to resize the window.
To display or hide the status bar, use Status bar on the Window
menu.
Options
The left-hand section gives you information about editing options (when the mouse is over the editing
window) or button functions (when the mouse is over a button).
Page 62

The standard toolbar
New
—open a new graphic, displaying the default MAGIX 3D
Maker graphic ready for customizing.
Open
—open an existing X3D file. Or import a drawn shape in EMF,
WEB, WMF or XAR format and extrude the shape.
Save
—save the graphic in X3D format. MAGIX 3D Maker can
reload X3D files for future editing. (MAGIX 3D Maker cannot
edit exported files.)
Export bitmap
(if MAGIX 3D Maker shows a static image) – export the
graphic in BMP, CUR, Flash SWF, GIF, ICO, JPG or PNG
format for use on the web or in another program.
Animation picker
—opens the animation picker. An easy way to copy the
animation settings from an existing X3D file to the current
graphic.
Style picker
—opens the style picker. An easy way to import selected
settings (such as colors or bevel) from an existing X3D file.
Undo
—if you make a mistake, click undo to correct that mistake.
MAGIX 3D Maker has multi-level undo so you can discard a
sequence of changes—great for experimenting.
Redo
—if you click undo too many times, click redo to restore each
change in sequence.
Show/hide cursor—display a cursor in the text. This lets you
select and change characters in the middle of the text. (See
select characters
)
Start/stop animation
—preview the animation within MAGIX 3D Maker (and you
can still edit the design while it's moving).
Show/hide lighting
—display the three lights that shine on the faces of the graphic.
You can then drag the lights to change the lighting.
Note: if the graphic has a shadow, a fourth, striped light that
creates the shadow is also shown.
Display as Flash
Many of these are standard Windows options such as load and save.
To display or hide this toolbar, Use Standard toolbar on the Window
menu.
Options
Page 63
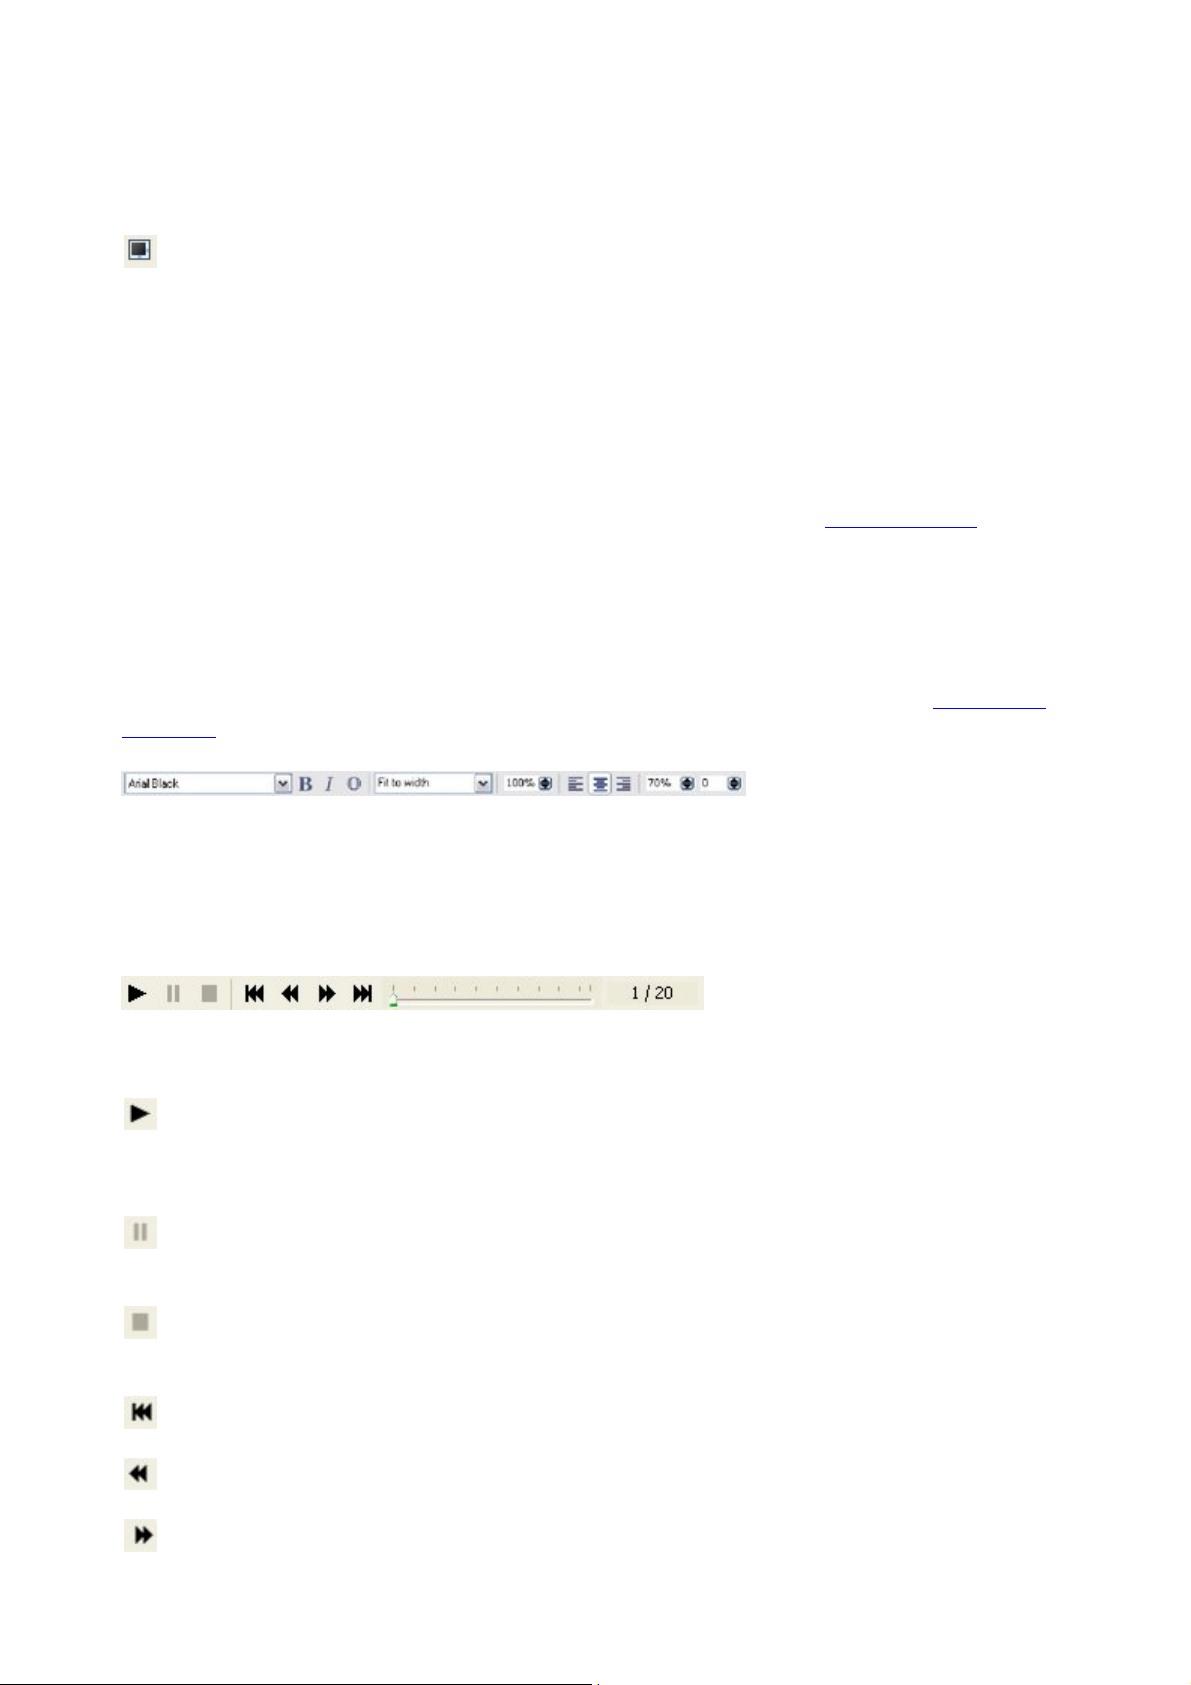
—Flash vector format does not support all MAGIX 3D Maker
features (such as shadows and some bevel types). Selecting
Display as Flash shows only options compatible with Flash
vector format.
Show/Hide Frame
—this displays the graphic in a small window (the Frame) within
the main MAGIX 3D Maker window. The advantage of the
Frame is that MAGIX 3D Maker remembers its size when you
save the file. Opening the file in the future displays the Frame at
that same size. It is also useful for small graphics because you do
not have to make the main window tiny.
The options toolbar
Play—preview the animation in the MAGIX 3D Maker
window. This is the same as clicking Start/Stop animation on
the Standard
Toolbar.
Pause
—pause the animation at the current frame. Click again to
restart the animation at the next frame.
Stop
—halts the animation. This is the same as clicking Start/Stop
animation on the Standard Toolbar.
Rewind
—display the first frame (frame 1) in the animation.
Back
—display the previous frame in the animation.
Forward
This gives short cuts for the main editing dialog boxes in MAGIX 3D Maker. The Option Bars
section describes these dialog boxes in detail.
To display or hide this toolbar, use Options toolbar on the Window
menu.
The text toolbar
These options duplicate options in the Text options dialog box. See the description of the Text options
dialog box
for details.
To display or hide this toolbar, use Text toolbar on the Window
menu.
The time line
These options let you step through or play animations. You can also pause the animation at any
intermediate frame and then export that frame as a static image.
To display or hide the time line, use Time line on the Window
menu.
Options
Page 64

—display the next frame in the animation.
Fast forward
—display the last frame in the animation
Time line
This section shows the size in pixels of the editing
window.
This section shows the rotation angles (vertical window
axis, horizontal window axis and horizontal text axis).
For more information on rotation see Rotate and
position the graphic
.
(Only shown when the MAGIX 3D Maker isn't
maximized.) Click and drag this to resize the MAGIX
3D Maker window.
—when the animation is playing, this displays progress through the animation.
Or you can drag the slider to move to a particular point in the animation.
The status bar
This gives you information about the graphic and currently available options. When the window isn't
maximized you can click and drag the bottom right hand corner to resize the window.
To display or hide the status bar, use Status bar on the Window
menu.
Options
The left-hand section gives you information about editing options (when the mouse is over the editing
window) or button functions (when the mouse is over a button).
Page 65

The options toolbar
Play—preview the animation in the MAGIX 3D Maker
window. This is the same as clicking Start/Stop animation on
the Standard
Toolbar.
Pause
—pause the animation at the current frame. Click again to
restart the animation at the next frame.
Stop
—halts the animation. This is the same as clicking Start/Stop
animation on the Standard Toolbar.
Rewind
—display the first frame (frame 1) in the animation.
Back
—display the previous frame in the animation.
Forward
—display the next frame in the animation.
Fast forward
—display the last frame in the animation
This gives short cuts for the main editing dialog boxes in MAGIX 3D Maker. The Option Bars
section describes these dialog boxes in detail.
To display or hide this toolbar, use Options toolbar on the Window
menu.
The text toolbar
These options duplicate options in the Text options dialog box. See the description of the Text options
dialog box
for details.
To display or hide this toolbar, use Text toolbar on the Window
menu.
The time line
These options let you step through or play animations. You can also pause the animation at any
intermediate frame and then export that frame as a static image.
To display or hide the time line, use Time line on the Window
menu.
Options
Time line
—when the animation is playing, this displays progress through the animation.
Or you can drag the slider to move to a particular point in the animation.
The status bar
This gives you information about the graphic and currently available options. When the window isn't
Page 66

maximized you can click and drag the bottom right hand corner to resize the window.
This section shows the size in pixels of the editing
window.
This section shows the rotation angles (vertical window
axis, horizontal window axis and horizontal text axis).
For more information on rotation see Rotate and
position the graphic
.
(Only shown when the MAGIX 3D Maker isn't
maximized.) Click and drag this to resize the MAGIX
3D Maker window.
To display or hide the status bar, use Status bar on the Window
menu.
Options
The left-hand section gives you information about editing options (when the mouse is over the editing
window) or button functions (when the mouse is over a button).
Page 67

The text toolbar
Play—preview the animation in the MAGIX 3D Maker
window. This is the same as clicking Start/Stop animation on
the Standard
Toolbar.
Pause
—pause the animation at the current frame. Click again to
restart the animation at the next frame.
Stop
—halts the animation. This is the same as clicking Start/Stop
animation on the Standard Toolbar.
Rewind
—display the first frame (frame 1) in the animation.
Back
—display the previous frame in the animation.
Forward
—display the next frame in the animation.
Fast forward
—display the last frame in the animation
These options duplicate options in the Text options dialog box. See the description of the Text options
dialog box
for details.
To display or hide this toolbar, use Text toolbar on the Window
menu.
The time line
These options let you step through or play animations. You can also pause the animation at any
intermediate frame and then export that frame as a static image.
To display or hide the time line, use Time line on the Window
menu.
Options
Time line
—when the animation is playing, this displays progress through the animation.
Or you can drag the slider to move to a particular point in the animation.
The status bar
This gives you information about the graphic and currently available options. When the window isn't
maximized you can click and drag the bottom right hand corner to resize the window.
To display or hide the status bar, use Status bar on the Window
menu.
Options
The left-hand section gives you information about editing options (when the mouse is over the editing
Page 68

window) or button functions (when the mouse is over a button).
This section shows the size in pixels of the editing
window.
This section shows the rotation angles (vertical window
axis, horizontal window axis and horizontal text axis).
For more information on rotation see Rotate and
position the graphic
.
(Only shown when the MAGIX 3D Maker isn't
maximized.) Click and drag this to resize the MAGIX
3D Maker window.
Page 69

The time line
Play—preview the animation in the MAGIX 3D Maker
window. This is the same as clicking Start/Stop animation on
the Standard
Toolbar.
Pause
—pause the animation at the current frame. Click again to
restart the animation at the next frame.
Stop
—halts the animation. This is the same as clicking Start/Stop
animation on the Standard Toolbar.
Rewind
—display the first frame (frame 1) in the animation.
Back
—display the previous frame in the animation.
Forward
—display the next frame in the animation.
Fast forward
—display the last frame in the animation
This section shows the size in pixels of the editing
window.
This section shows the rotation angles (vertical window
axis, horizontal window axis and horizontal text axis).
For more information on rotation see Rotate and
position the graphic
.
These options let you step through or play animations. You can also pause the animation at any
intermediate frame and then export that frame as a static image.
To display or hide the time line, use Time line on the Window
menu.
Options
Time line
—when the animation is playing, this displays progress through the animation.
Or you can drag the slider to move to a particular point in the animation.
The status bar
This gives you information about the graphic and currently available options. When the window isn't
maximized you can click and drag the bottom right hand corner to resize the window.
To display or hide the status bar, use Status bar on the Window
menu.
Options
The left-hand section gives you information about editing options (when the mouse is over the editing
window) or button functions (when the mouse is over a button).
Page 70

(Only shown when the MAGIX 3D Maker isn't
maximized.) Click and drag this to resize the MAGIX
3D Maker window.
Page 71

The status bar
This section shows the size in pixels of the editing
window.
This section shows the rotation angles (vertical window
axis, horizontal window axis and horizontal text axis).
For more information on rotation see Rotate and
position the graphic
.
(Only shown when the MAGIX 3D Maker isn't
maximized.) Click and drag this to resize the MAGIX
3D Maker window.
This gives you information about the graphic and currently available options. When the window isn't
maximized you can click and drag the bottom right hand corner to resize the window.
To display or hide the status bar, use Status bar on the Window
menu.
Options
The left-hand section gives you information about editing options (when the mouse is over the editing
window) or button functions (when the mouse is over a button).
Page 72

The Option Bars
This section covers
Animation options
Bevel options
Color options
Design options
Extrusion options
Shadow options
Text options
Texture options
These option bars, which as standard are on the right hand side of the MAGIX 3D Maker window,
provide the main editing functions (except rotating the graphic). Just click the relevant bar to bring up its
options. You can also click the buttons on the Options toolbar or use keyboard short cuts
to open and close these options (except Text options). (You cannot close the Text options dialog box
using the button or keyboard short cut.)
Page 73

Animation options
Frames per cycle
For single-page animations, this is the number of frames in the animation. For multi-page animations, this
is the number of frames for which each page is displayed. Reducing the number of frames makes the file
size smaller but can give jerky animations.
Frames per second
This controls the speed of the animations. A low speed can give jerky animations. High speeds can also
give jerky animation if the program displaying the animation cannot keep up with the animation speed.
Pause & loop
These options apply only to animated GIFs, Flash animations and (pause only) screensavers. They do
not apply to AVIs. Pause introduces a delay after the first frame. Loop gives you the option of running
the animation once only (Loop=1), continuously (uncheck the option) or a specified number of times.
Some browsers interpret values above 1 as 'play continuously'—this is a feature of the browser not
MAGIX 3D Maker.
Style
This selects the type of animation. As you select different Styles, this dialog box changes to show only
options relevant to that animation type.
Rotate, Swing and Pulsate animations have two options: 1 animates the entire graphic as a single block, 2
animates each character separately.
Rotate
: lets you rotate either the text or the lights or both. You can select the rotation plane and direction. With
Front face only checked you see only the front of the text; when unchecked you see both the front and
back of the text. Checking Front face only produces smaller animations because you never see the back
of the text.
Swing:
gives a pendulum effect with the text swinging to and from. You can select amount of swing (the
Angle—default 180º) and the rotation plane and direction.
Pulsate:
gives the effect of the text pulsating in the selected axis. Shrink+grow and Grow+shrink apply when
either you have a pause in the animation or the animation does not loop continuously. For an animation
that loops continuously, without a pause, these options have the same effect. Overlap pages applies to
multi-page animations. The effect is that each page appears out of the previous page. With this option
unchecked, you see each page separately. Apart from creating some great animation effects, overlapped
animations create small file sizes.
Ripple:
gives the effect of the text rippling in the selected axis. You can select the amplitude of the ripple and its
axis.
Fade:
Page 74

the size of the text does not change but the text fades in or out from the background. Fade is especially
useful for Flash animations as it produces smaller file sizes than other animation styles.
Step:
applies only to multi-page animations. Displays each page in sequence.
Typewriter:
displays each character in sequence as if someone was typing the character on a keyboard.
Pulse:
animates each character in sequence, making it either bigger (Size above 100%) or smaller (Size below
100%.)
Wave
(for Rotate 2, Swing, Pulsate and Ripple animations only—not available for buttons.) Adds a rippling
wave along the text. The animation effect moves in a horizontal or vertical direction across the text or
down the lines.
Animation picker
Lets you import the animation properties from another MAGIX 3D Maker file. This imports only
animation properties—it has no effect on the wording, colors or lighting.
If you can't work out how to recreate the animation you see in another example, you can just copy that
animation using the animation picker.
Page 75

Bevel options
The bevel is the join between the sides and face of the graphic or button.
Apply to:
If you are using a board, board + holes or border design then you can choose whether to apply these
bevel settings to just the text, the board/border or both.
Bevel types:
This lists the different bevel designs available to you.
Miter/Round:
This has an effect on sharp corners or serifs on text. Miter squares off corners, Round creates smooth,
rounded corners.
Depth:
This is the size of the bevel.
Flash file format does not support some bevel types or round corners. Selecting Display as flash on
the View
menu removes unsupported bevel types from the list and dims miter/round.
Page 76

Color options
Here you can alter the colors of the faces and sides of the graphic, the lights, the shadow and the
background. If you use a texture, you can tint the texture. For more information see Color the graphic
.
Color list
This dropdown lists which parts of the graphic you can recolor. Each item can be a separate color; the
front and back faces of a graphic can be a different color to the sides, for example.
Texture
You can use a texture to pattern the faces of the text, the sides or as a background. If your web page
uses a background texture, we recommend using the same texture in MAGIX 3D Maker—this helps the
graphic to blend seamlessly into the web page, even if you intend to export as a transparent GIF. Use the
Texture options dialog box to change the texture.
Tint (Dimmed unless Texture
checked).
This lets you tint a face or sides texture; this is similar to laying a colored film on top of that texture. You
cannot tint background textures as they need to be the same as they appear on the web page.
Color panels
These let you select the color to use. The lower strip selects the basic hue, the upper panel the shade.
HSV/RGB
This selects how to display the color values. You can define the same range of colors using either
option—use the color system you prefer.
Hex
Web page colors are often defined as two hex digits (range 00–FF). Displaying the colors using hex
digits can make it easier to match colors. Alternatively type six hex digits (range 000000–FFFFFF) into
the # field—many Internet color charts show colors in this format.
Flash file format does not support textures or shadows. Selecting Display as Flash on the View menu
dims the Texture checkbox and removes Shadow
from the color list.
Page 77

Design options
Text
Creates the text only
Button
Creates a button with the text flat on its surface.
Borders
Adds a border around your text, giving it more
impact.
Boards
Sit your text on a solid board, so the text
extrudes from a solid background.
Board and holes
As if you'd taken a saw to your board, to give an
impression of a cut-out image.
You can make a text message or shape into an instant design using these options. See Create buttons,
boards, boards + holes and borders
for more information on creating designs.
Design type
(left drop-down list)
Choose from a number of different designs:
You can also easily switch between these design types using the design toolbar
.
Shape
(right dop-down list)
Lets you choose from a range of predefined button shapes.
Stretch:
This controls the width to height ratio. 100% is equal width and height. Above 100% makes the button
wider.
Corners:
Buttons can have square or rounded corners. With the check box selected (for rounded corners) type in
a value for the corner radius.
Size
(dimmed for text only designs): Lets you resize the text in relation to the button, board or border.
X-Y
(dimmed for text only designs): Lets you move the text in relation to the button, board or border.
Angle
(dimmed for text only designs): Lets you change the angle of the text in relation to the button, board or
border.
Design picker
You can import a design shape from any existing X3D file. This one design can then be used with any of
the design types listed above. One design = four different combinations. For text graphics, you import the
first character as the design shape. So, for the default graphic of X3D, you would import the X as the
button shape. See Importing 2D objects
.
Flash file format does not support buttons. Selecting Display as Flash on the View
Page 78

menu dims all button options.
Page 79

Extrusion options
You will see the cursor change to this:
The extrude is the depth of the sides. You can change the extrude by clicking and dragging on the side of
the text.
These extrusion options offer greater control over extrusion.
Apply to:
If you are using a board, board + holes or border design then you can choose whether to apply these
extrusion settings to just the text, the board/border or both.
Outline:
Creates a hollow graphic. The difference between outline and turning off the front/back face is that
outlined graphics have thick sides and the bevel appears on both inside and outside edges of the side.
Turning off display of the faces creates wafer-thin sides and the bevel appears on only the outer edge.
Depth:
Controls the size (depth) of the sides.
Matt/Gloss:
Lets you give the graphic either a non-reflective or shiny surface.
Front face (
Dimmed for buttons): Selecting this makes the face of the graphic transparent so you see inside the sides.
For shallow angles (text almost face-on) you can see through to the back of the graphic.
Back face:
Similar to Front face but makes the back of the graphic transparent.
All options in this dialog box are available in Flash vector format.
Page 80

Shadow options
This gives you control over the optional shadow displayed behind the graphic. See Add shadows
for more details of using shadows.
Shadow
Check this Shadow
option you want a shadow.
Style:
Style 1 is a blurred copy of the graphic. This looks 'correct' for simple drop shadows (the most common
type.) Style 2 is a true shadow and looks best in animations where the eye is more aware of the shape of
the shadow.
Transparency:
Controls how much of the background shows through the shadow.
Blur:
Controls how sharp or blurred the shadow appears. Shadows always look best with some blur (real-life
shadows are never sharp-edged.)
The Flash vector file format does not support shadows and so you cannot export shadows in this format.
Page 81

Text options
Bold:
Make the text Bold.
Italic:
Make the text Italic.
Outline: This duplicates outline in the Extrude
options
(described earlier.)
Font size:
Dimmed unless there is a selected area of text. Lets
you make the selected characters smaller (below
100%) or larger (above 100%) than other
characters.
Aspect ratio:
Lets you compress (below 100%) or expand (above
100%) character width. Values below 80% or above
120% can distort the text—this depends on the font
used.
Justification:
(also known as alignment.) Has no effect for a single
line of text. For multiple lines you can align the
left-hand edges, the centers or the right-hand edges of
the lines.
Line spacing:
Has no effect for a single line of text. For multiple
lines this alters the spacing between the lines. Line
spacing always applies to the entire line. If you have a
selected area of text, any changes apply only to the
line or lines containing the selection.
Tracking:
This controls the spacing between characters.
Negative values move the characters closer together,
positive values move them apart.
Baseline shift:
This duplicates many of the controls on the Text toolbar. If there is a selected area of text, any changes
apply only to the selected characters.
Options at the top of this dialog box (left–right)
Page 82

Dimmed unless there is a selected area of text.
Positive values raise the selected characters above
other characters. Negative values lower the selected
characters.
Kerning:
Dimmed when there is a selected area of text. This
controls the spacing between the pair of characters
either side of the cursor. This is similar to tracking
except that kerning applies to a pair of characters.
Tracking applies to either all characters or the
characters in the selected area.
Page break:
This is used when creating multi-page animations to
separate each page. You can type a page break
character from the keyboard using Ctrl+Enter.
Font list
This displays all the TrueType fonts installed on your computer, including those installed with MAGIX
3D Maker. Selecting a font name previews the text in that font.
More
Click this to display the character map and a list of available character sets.
Character map:
This shows you the characters in the current character set. Most fonts do not include every possible
character—missing characters appear as either a blank or a small rectangle. Click on a character for an
enlarged view. Double-click on a character to inset it into the text.
Character sets:
Windows has two types of font: Regular, which has 256 characters, and Unicode fonts, which have many
more characters arranged into separate sets of 256 characters. A typical Unicode font might include
several different versions of Latin characters (Regular, Central European, Baltic) plus Cyrillic and Greek
alphabets.
The U
button is dimmed for regular fonts.
For Unicode fonts, unchecking U
lists the basic character sets. Not all fonts include every character set; available sets are shown with > to
the left of the character set name. (The > depends on information contained in the font—this is not always
accurate.)
Checking U
lists the different types of character (such as Arrows) in the font. Again > shows available character
types.
Right-click menu
Right-clicking on the text preview pops-up a menu:
Zoom to fit
—scale the text to fit in the window
Zoom in
—enlarge your view of the text
Zoom out
—show more of the text
These options change your view of the text. They have no effect on the actual text size.
All options in this dialog box are available in Flash vector format.
Page 83

Texture options
This dialog box lets you apply and change textures applied to any part of the graphic or used as a
background behind the graphic. You cannot resize or rotate background textures as they need to be
identical to the texture used on your web page.
Drop-down list:
This lets you select which parts of the graphic or the background you want to add a texture to or change
the texture of.
Texture:
Check this to add a texture to the selected part of the graphic or background. Uncheck to use plain color
(no texture) on that area.
Tint
(dimmed for Background): You can use the color editor to tint a texture; this is similar to laying a colored
film on top of that texture.
Size
(dimmed for Background): Lets you resize the texture. Increasing the size can make obvious the
individual pixels that make up the texture although this can create some interesting effects.
X-Y:
Lets you move the texture horizontally or vertically.
Angle
(dimmed for Background): Lets you rotate the texture.
Load a texture:
Opens a dialog box where you can preview and choose which texture to load from either your hard disk
or other source.
Flash vector file format does not support textures. Selecting Display as Flash on the View menu dims all
options.
Page 84

File Formats
MAGIX 3D Maker can load and save/export in a variety of formats. This section describes the different
formats and where you would use them. See How To ...
for details of loading and saving files.
ANI
—Export only (animated cursors)
Animated cursors are usually 16x16, 32x32 or 48x48 pixels although custom sizes are allowed. Using
ANI files requires some programming knowledge as they are used internally in programs.
AVI
—Export only (animations)
A popular animation format but with fewer options than animated GIFs or Flash (SWF) animations.
BMP
—Export only
You can export 3D graphics for use in other programs. MAGIX 3D Maker can export in a range of
color depths. Some programs might not be able to load all variations.
CFX—Export only
This is a special file format used in MAGIX movie editing and slide show programs. It allows you to
save an animation with a transparent background for the use as title overlay. See Exporting transparent
title animations for movies
CUR
—Export only (animated cursor)
Cursors are usually 16x16, 32x32 or 48x48 pixels although custom sizes are allowed. Using CUR files
requires some programming knowledge as they are used internally in programs.
EMF
—Load only (metafile format)
You can load shapes in this format and extrude the shape.
GIF
—Export only
(static) – GIF files are often used on web pages. This format has a maximum of 256 colors. All browsers
can display GIF files.
(animations) – probably the most useful animation format.
ICO
—Export only (icons)
Icons are usually 16x16, 32x32 or 48x48 pixels although custom sizes are allowed.
JPG
—Export only (JPEG)
Originally developed for photographs, this format is useful for graphics with subtle color changes. All
browsers can display JPG files.
PNG
—Export only
Similar to GIF format but can produce smaller files and can display more colors. Modern browsers and
many other programs can display PNG files.
SCR
—Export only (Windows screensaver)
Lets you create your own custom screensaver. See Create screensavers
for tips.
SWF
—Export only
(Flash—bitmap format, static or animations) -– Flash is often on web sites, especially for animations.
Page 85

Bitmap format lets you use all MAGIX 3D Maker features, including shadows.
(Flash—vector format, static or animations) – the advantage of vector format is that you can scale up a
graphic without losing quality. However not all MAGIX 3D Maker features are supported by Flash
vector format. For the smallest file size select Display as Flash on the View
menu. This disables all unsupported features. Alternatively you can export unsupported features as
bitmaps within the vector file. The drawback is that you may lose quality when enlarging the graphic.
Flash vector files cannot include shadows.
WEB
—Load only
These are files created in Xara Webster and is an alternative format to XAR files. See XAR format,
below, for details.
WMF
—Load only (Windows metafile)
This is an alternative to EMF (see above). We recommend using EMF format where possible.
X3D
—Load/Save
MAGIX 3D Maker's native format. You can load X3D files for editing the source graphic. We suggest
always saving your work in X3D format as this lets you edit the file in the future.
XAR
—Load only
These are files created in CorelXARA, Xara Xtreme or Xara Webster. You can load drawn shapes in
this format and extrude them to create 3D shapes.
You can also import BMP, GIF, ICO, JPG/JPEG and PNG files for use as textures on the faces of the
3D graphic or as a background.
Page 86

Keyboard Shortcuts
Ctrl+A
Select entire heading
Ctrl+B
Bold text
Ctrl+C
Copy
Ctrl+E
Display/hide cursor
Ctrl+F
Display as Flash
Ctrl+H *
Display/hide hotspot (for cursors)
Ctrl+I
Italic
Ctrl+L
Select line
Ctrl+M
Edit comment-comments are saved in X3D files
and let you add notes to files
Ctrl+N
New document
Ctrl+O
Open existing X3D file
Ctrl+P
Select entire page (for multi-page animations)
Ctrl+R
Display/hide frame
Ctrl+S
Save in X3D format
Ctrl+T
Display/hide text toolbar
Ctrl+U
(When cursor displayed) force character to
right of cursor to upper-case
(When there is a selected character or
characters) force all characters in the selection
to upper-case
(Otherwise) no effect
Ctrl+V
Paste
Ctrl+W
(When cursor displayed) swap the case of the
character to right of cursor
(When there is a selected character or
characters) swap the case of all characters in
the selection
(Otherwise) no effect
Ctrl+X
Cut
Ctrl+Y
Redo (undo the last Undo)
Ctrl+Z
Undo last action
Ctrl+Enter
Insert new page character
Ctrl+Space
Start/stop animation
Ctrl+Tab
Display/hide lights
Ctrl+Add (+) on
numeric keypad
Increase perspective
Ctrl+Subtract (-)
on numeric
keypad
Decrease perspective
Ctrl+Multiply (*)
on numeric
Reset perspective
*—options disabled when Display as Flash selected
Page 87

keypad
Ctrl+Home
Move cursor to start of page
Ctrl+End
Move cursor to end of page
Ctrl+PageUp
Move to first page in a multi-page animation
Ctrl+PageDown
Move to last page in a multi-page animation
F5
Kern left 5/1000ths of an em
Ctrl+F5
Kern left 50/1000ths of an em
F6
Kern right 5/1000ths of an em
Ctrl+F6
Kern right 50/1000ths of an em
Ctrl+Shift+A
Open animation picker
Ctrl+Shift+B *
Open design picker
Ctrl+Shift+C *
Open texture picker to choose a text (faces &
sides) texture
Ctrl+Shift+D *
Open texture picker to choose a side texture
Ctrl+Shift+E
Open export bitmap dialog box
Ctrl+Shift+G *
Open texture picker dialog box to choose a
background texture
Ctrl+Shift+I
Import EMF/WMF metafile or WEB/XAR
format file
Ctrl+Shift+K *
Open texture picker dialog box to choose a
face (front or back) texture
Ctrl+Shift+O
Select/deselect outline text
Ctrl+Shift+S *
Open color options to edit shadow color
Ctrl+Shift+U
(When cursor displayed) force character to
right of cursor to lower-case
(When there is a selected character or
characters) force all characters in the selection
to lower-case
(Otherwise) no effect
Ctrl+Shift+W
Display as wire-frame
Ctrl+Shift+X
Export animation
Ctrl+Shift+Y
Import style
Ctrl+Shift+Home
Select to start of text
Ctrl+Shift+End
Select to end of text
Alt+1
Open color options to edit light 1 color
Alt+2
Open color options to edit light 2 color
Alt+3
Open color options to edit light 3 color
Alt+A
Open animation options
Alt+B
Open bevel options
Alt+C
Open color options to edit text color
Alt+D
Open color options to edit side color
Alt+E
Open extrude options
Alt+G
Open color options to edit background color
Alt+K
Open color options to edit front & back color
Alt+L
Display/hide time line
Page 88

Alt+Q
Open quality settings
Alt+R
Open Frame size dialog box
Alt+S
Open shadow options
Alt+T
Open text options
Alt+U
Open design options
Alt+X
Open texture options
Alt+Home
Cancel rotation (graphic is face-on)
Page 89

Copyright Information
This documentation is protected by law. All rights, especially the right of duplication, circulation, and
translation are reserved.
No part of this publication may be reproduced in form of copies, microfilms or other processes, or
transmitted into a language used for machines, especially data processing machines, without the express
written consent of the publisher.
All copyrights reserved.
All other product names are trademarks of the corresponding manufacturers. Errors in and changes to
the contents as well as program modifications reserved.
Xara Group Ltd. is an affiliate company of MAGIX AG.
This product uses MAGIX patent pending technology.
Copyright © Xara Group Ltd., 1994-2008. All rights reserved.
Trademarks
MAGIX is a registered trademark of MAGIX AG.
Windows and FrontPage are either trademarks or registered trademarks of Microsoft Corporation in the
United States and/or other countries. TrueType is a trademark of Apple Computer, Inc. registered in the
US and other countries. Macromedia, Flash and Dreamweaver are either trademarks or registered
trademarks of Adobe Systems Incorporated, in the United States and/or other countries.
Frankfurter Venetian, Geotype, Greek Diner, Haxton, Russel Write, Steppes, Bouton International,
Huxley Titling and Whimsy fonts kindly provided by Gary David Bouton, see www.theboutons.com
Other fonts are from a collection created by Fontbank Inc., which can be purchased from our web site
www.buyfonts.com
Many of the WMF symbols on the CD are letters from EFF fonts — Creatures, Chess, Symphony,
Picturesque, Birdie and ArrowPi — which are some of the variety of quality fonts from the EFF range
which can be purchased from our web site www.buyfonts.com
Other WMF symbols are courtesy of James Parry or come from the Publish Art CD produced by Ekits.
Details about this graphical resource can be found at: ekitsonline.com
or from jim@ekitsonline.com
Still more WMF symbols were produced from Gary David Bouton's symbolic fonts Geotype, Haxton
and Sympols. GeoType and Haxton are included on this CD, Sympols can be downloaded from Gary's
site www.theboutons.com
Other mentioned product names may be registered trademarks of the respective manufacturer.
Page 90

Trademarks
MAGIX is a registered trademark of MAGIX AG.
Windows and FrontPage are either trademarks or registered trademarks of Microsoft Corporation in the
United States and/or other countries. TrueType is a trademark of Apple Computer, Inc. registered in the
US and other countries. Macromedia, Flash and Dreamweaver are either trademarks or registered
trademarks of Adobe Systems Incorporated, in the United States and/or other countries.
Frankfurter Venetian, Geotype, Greek Diner, Haxton, Russel Write, Steppes, Bouton International,
Huxley Titling and Whimsy fonts kindly provided by Gary David Bouton, see www.theboutons.com
Other fonts are from a collection created by Fontbank Inc., which can be purchased from our web site
www.buyfonts.com
Many of the WMF symbols on the CD are letters from EFF fonts — Creatures, Chess, Symphony,
Picturesque, Birdie and ArrowPi — which are some of the variety of quality fonts from the EFF range
which can be purchased from our web site www.buyfonts.com
Other WMF symbols are courtesy of James Parry or come from the Publish Art CD produced by Ekits.
Details about this graphical resource can be found at: ekitsonline.com
or from jim@ekitsonline.com
Still more WMF symbols were produced from Gary David Bouton's symbolic fonts Geotype, Haxton
and Sympols. GeoType and Haxton are included on this CD, Sympols can be downloaded from Gary's
site www.theboutons.com
Other mentioned product names may be registered trademarks of the respective manufacturer.
Page 91
 Loading...