

Xanboo XWT380 Quick Manual

THERMOSTAT
v1.0
I 2
PRODUCT DESCRIPTION ///
The XWT380 Thermostat is an innovative system designed to work with a home gateway enabling
remote access and operation of your HVAC system. The XWT380 Thermostat offers state of the
art performance and professional level reliability at cost effective prices. The fully optimized
418 MHz radio subsystem offers optimal range coverage allowing the Thermostat to be placed
virtually anywhere.
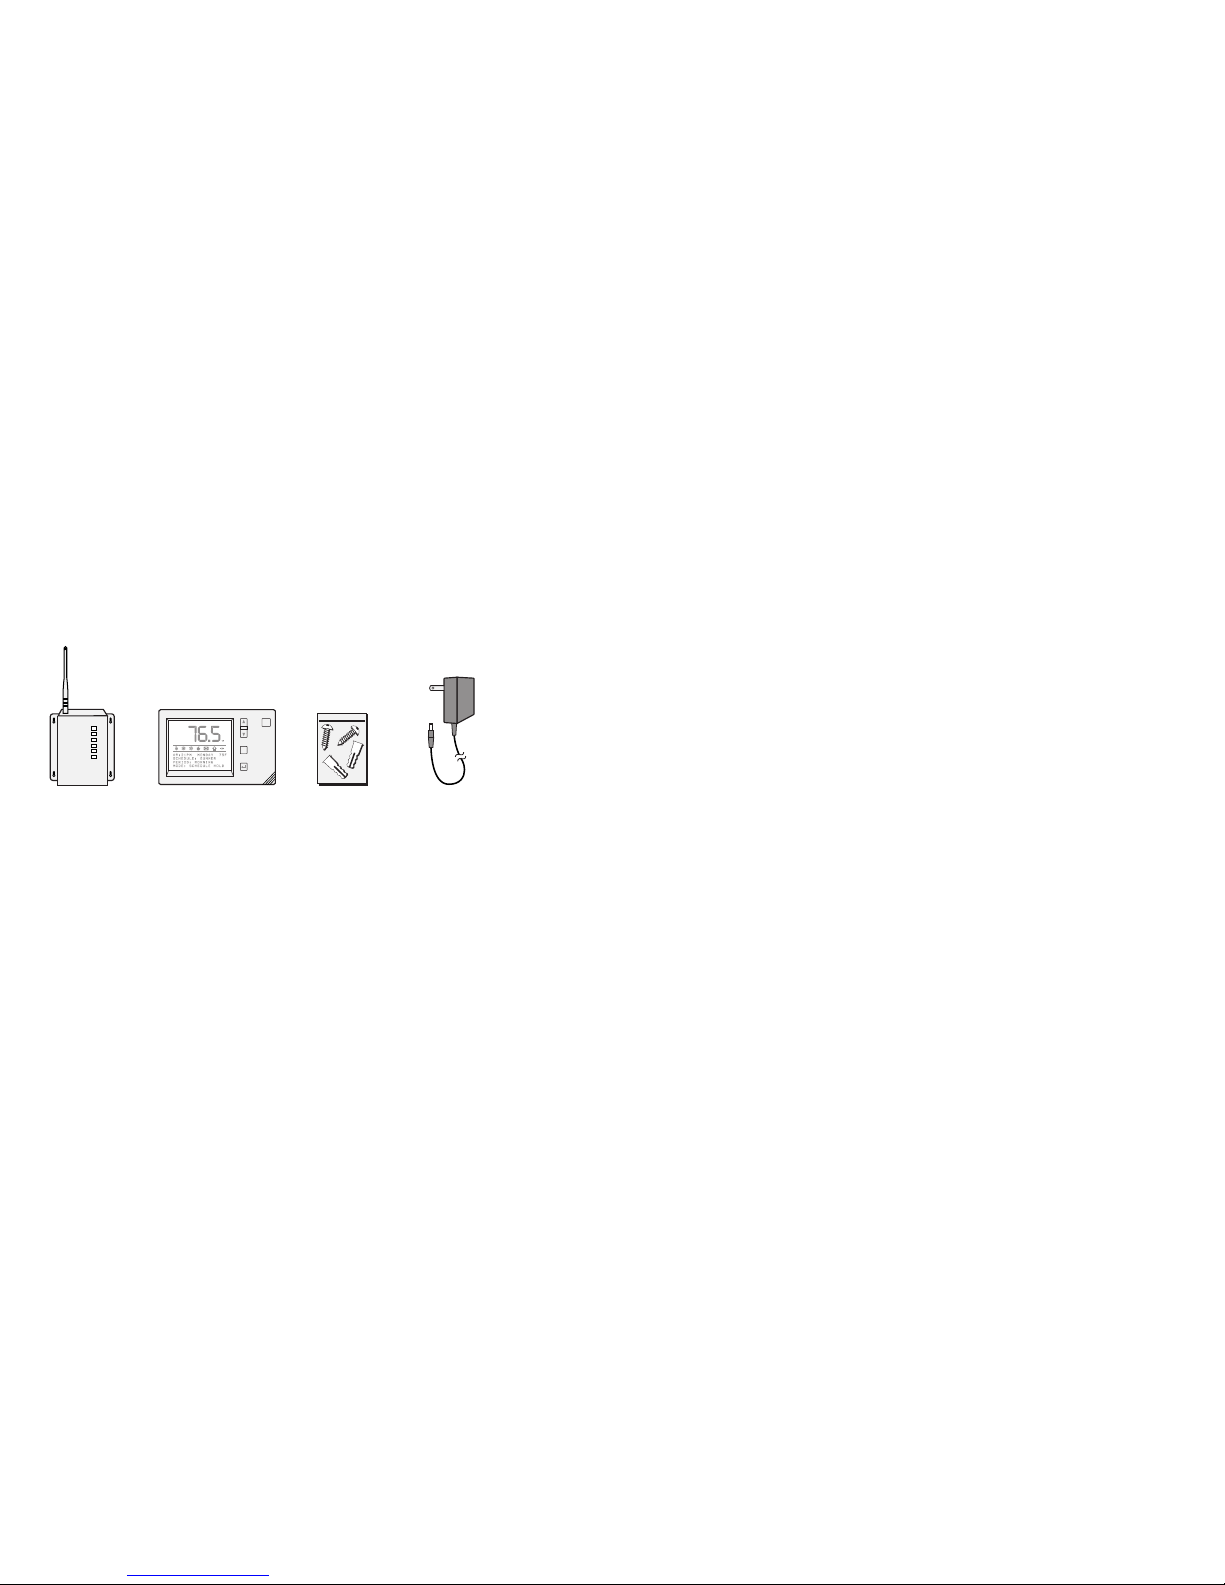
PACKAGE CONTENTS ///
■
(1) Thermostat Base Unit
■
(1) Thermostat Display Unit
■
(1) 24 VAC Power Supply
■
(1) Wall Mounting Kit
■
(1) Installation Guide
INSTALLATION ///
The system is comprised of the Thermostat display and user interface which replaces your old
Thermostat, and the base unit which should be installed adjacent to the HVAC System.
This installation must be performed by a qualified HVAC engineer. Be sure to read the complete system
installation and operational manual.
The installer should ensure that all local wiring regulations and good practice are adhered to.
THERMOSTAT BASE UNIT
WALL MOUNTING THE THERMOSTAT DISPLAY UNIT ///
INSTALLATION
Before installing this unit:
1. Read all of the installation instructions carefully.
2. Read the User’s Manual carefully.
3. Ensure that this product is suitable for your application.
4. Ensure that wiring complies with all codes and ordinances.
5. Disconnect power to the control transformer of the HVAC to prevent electrical shock
and damage to equipment.
LOCATION
XWT380 Thermostat display unit is designed to replace your old thermostat.
However, in order to ensure accurate and reliable operation, please check that the following
criteria are met:
1. Ensure that the Thermostat is mounted between 5 and 5.5 ft above the floor level and
is at least 2 feet away from an outdoor wall.
2. Ensure that the Thermostat is located in an area where there is adequate air circulation.
3. Ensure that the Thermostat display is not mounted in an area in direct sunlight, or in
the path of heat generated by nearby appliances.
4. Ensure that it is not mounted on an outdoor wall, near a fireplace, or in the path of any air ducts.
REMOVING THE OLD THERMOSTAT
1. Disconnect the power to the control transformer.
2. Remove the cover to the existing Thermostat.
3. Disconnect the wires going to each terminal on the Thermostat.
4. Remove the existing plate or base from the wall if applicable.
WALL MOUNTING KIT 24 VAC POWER SUPPLYTHERMOSTAT DISPLAY UNIT
MODE
3 4
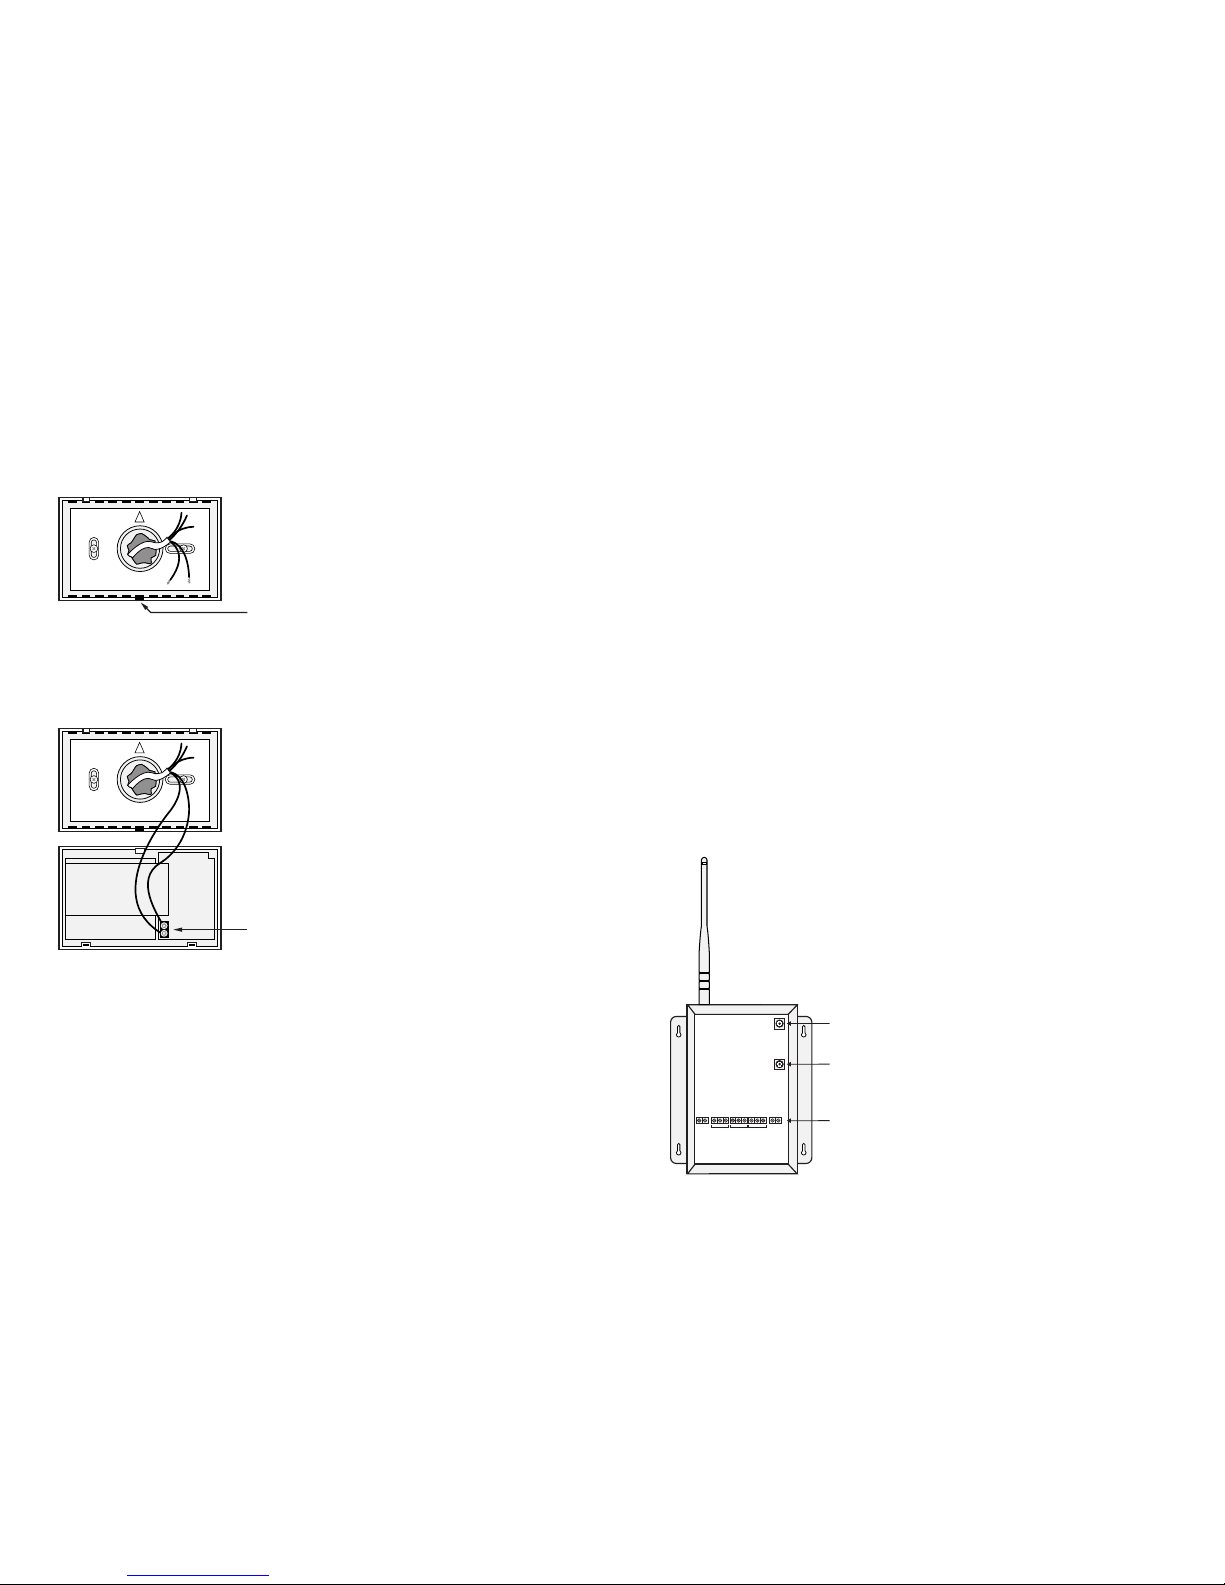
INSTALLING THE DISPLAY UNIT
1. Press the small tab on the bottom center of the display unit with a small screwdriver and
separate the front from the base.
2. Mount the base part on the wall, using suitable screws for the mounting surface.
Ensure the arrow points up.
3. Connect any two wires to the display unit’s terminal block situated on the back. It does not matter
which color goes to which screw terminal.
4. Make a note of the colors of these two wires as you will need to connect the same two wires to
the base unit at the other end.
5. Upon completion of wiring the thermostat, push all excess wiring into the hole in the wall.
If there is a large hole in the wall, plug the hole with suitable filler or foam to ensure an
accurate temperature reading by the Thermostat display unit.
6. Engage the upper tabs of the display unit with the counterparts on the base and press the
bottom gently in until you feel it click into place. Do not use excessive force. Ensure you do not
have excessive wire looped inside the enclosure.
NOTE: Be sure that the Thermostat temperature sensor has not been damaged during installation.
BASE UNIT INSTALLATION ///
CAUTION
This installation must be performed by a qualified HVAC engineer. Be sure to read the complete
system installation and operational manual before you begin this installation.
IF WORKING WITH GAS CENTRAL HEATING UNIT ENSURE THE GAS VALVE IS SHUT OFF.
BE SURE TO DISCONNECT THE POWER TO THE CONTROL TRANSFORMER
Do not short gas valve, fan, heat relay, or cool relay. This may damage the Base unit.
DO NOT ATTEMPT TO HOOK UP TO LIVE CIRCUITS
An accidental connection to a component on the circuit board could cause damage to
the Base unit and may be dangerous.
INSTALL THE BASE UNIT AT POINT NEAR THE HVAC UNIT AND CONVENIENT FOR ACCESS
Please also ensure that you mount the unit in a position that gives you easy access to the old
thermostat wiring going to the HVAC’s control system.
1. Mount the unit vertically about on a wall as high as convenient (5.5 to 6 ft).
2. Remove the front cover by removing four (4) small screws on each side of the base unit.
BACK OF DISPLAY UNIT
FRONT OF DISPLAY UNIT (REAR VIEW)
BASE UNIT INTERNALS FOR INSTALLATION
HEAT COOL FAN
DISCOVERY BUTTON
RESET BUTTON
TERMINAL BLOCKS
SMALL TAB
SCREW TERMINALS
 Loading...