

World Dryer ABC-300HS Installation Manual

Diaper Changing Station
ABC-300HS Horizontal Surface Mounting Stainless Steel
Clad Stainless Steel Changing Station Installation Instructions (Surface Mount)
Instructions d’installation de la station à langer plaquée d’acier inoxydable (Installation en surface)
Instrucciones para instalar la estación para cambiar pañales con revestimiento de acero inoxidable
(montada en superficie)
WARNING
• Failure to follow these warnings and the
installation instructions could result in
serious injury or death.
• Read all instructions before installing
diaper changing station. Keep these
instructions. DO NOT discard.
AVERTISSEMENT
• Le non respect de ces avertissements
et instructions d’installation peut
entraîner des blessures graves ou la mort.
• Lisez attentivement toutes les instructions
avant d’installer la station à langer.
Conservez ces instructions. NE les jetez PAS.
World Dryer Corporation
5700 McDermott Drive
Berkeley, IL 60163 U.S.A.
800-323-0701
www.worlddryer.com
• El no seguir estas advertencias y las
instrucciones para la instalación podría
causar lesiones graves o la muerte.
• Lea todas las instrucciones antes de
instalar la estación para cambiar pañales.
Guarde estas instrucciones. NO las deseche.
ADVERTENCIA
68-10343 rev 01
INSTALLATION INSTRUCTIONS
ADULT INSTALLATION REQUIRED.
A
B
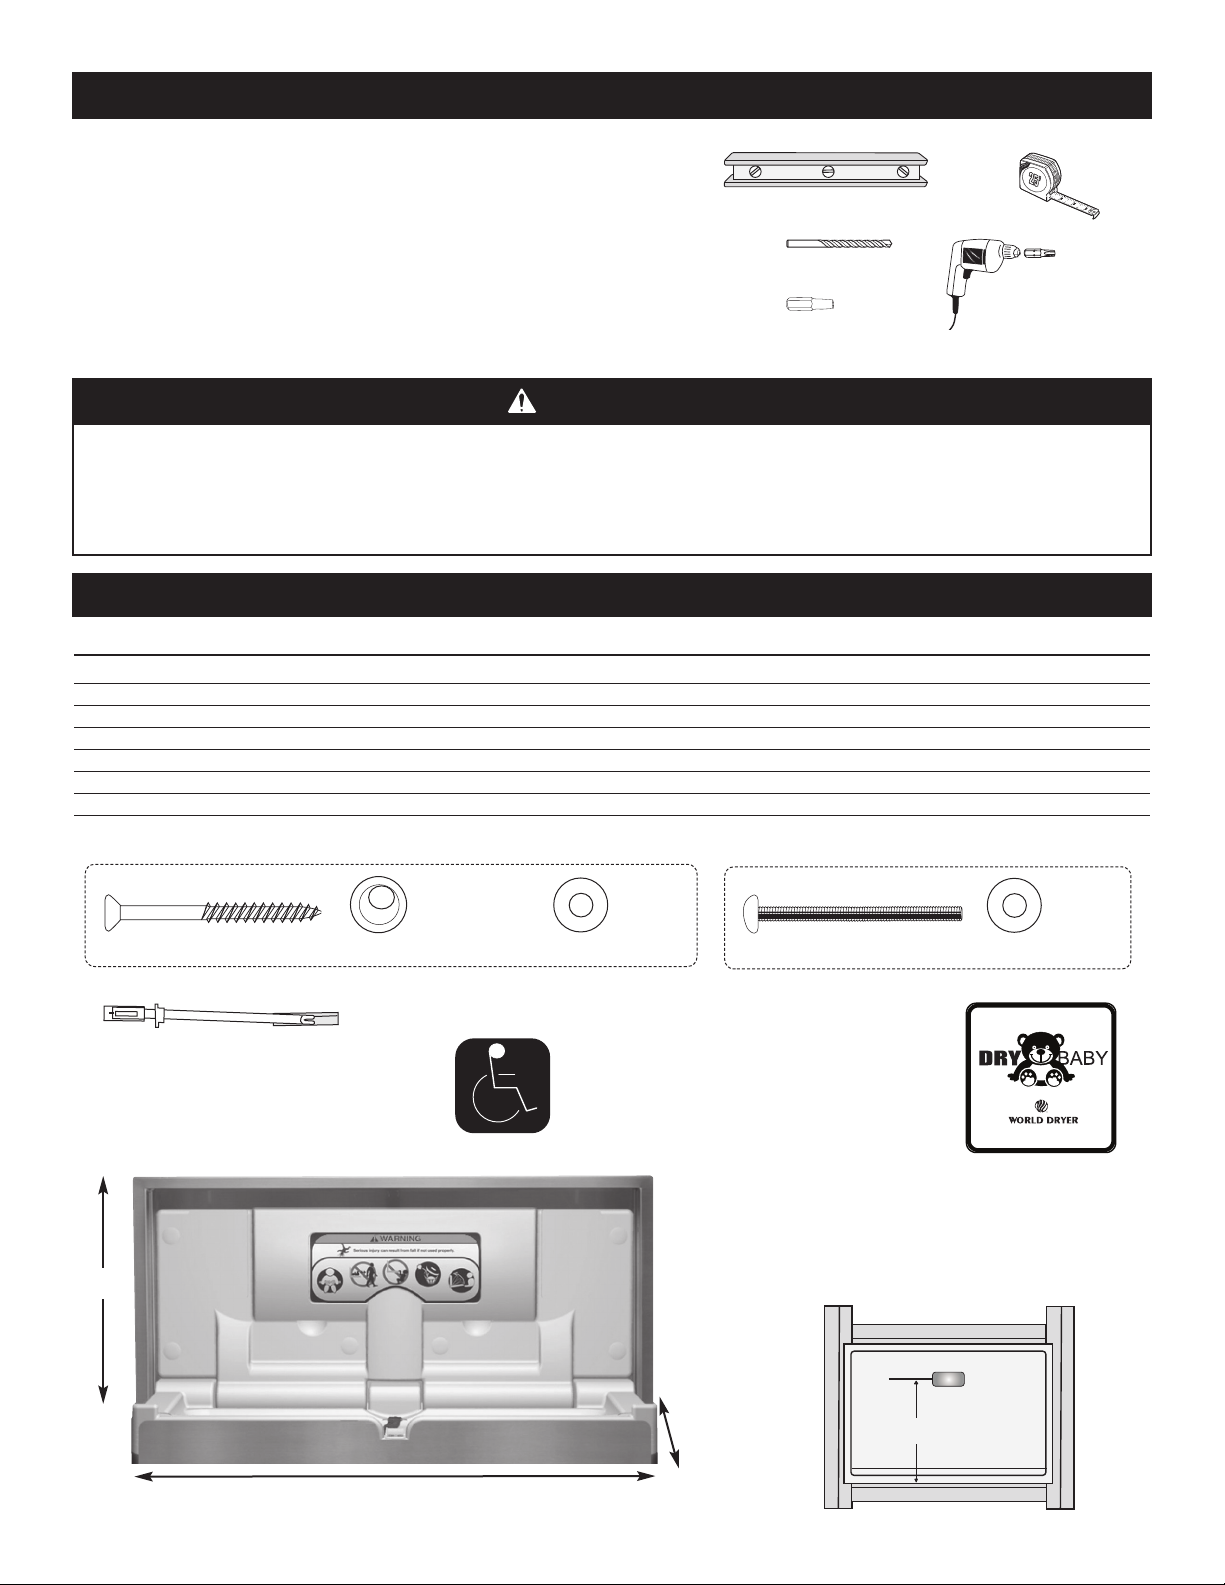
TOOLS REQUIRED:
Level (A)
Measuring tape (B)
C
D
Power drill with 3/16”, 1/2” and 1/8” masonry bit (C)
Power screwdriver with bull nose phillips bit (D)
Truss head spanner bit (E)
E
• READ ALL INSTRUCTIONS BEFORE ASSEMBLY OF DIAPER CHANGING STATION.
• Unpack carton and identify all parts.
WARNING
This changer has six (6) recess mounting holes.
•
The diaper changing station is no stronger than the anchors or walls to which they are attached and, therefore,
•
MUST be firmly secured in order to support the weight they are intended to support. Contact an architect or building
contractor if any questions.
A stud MUST be located and used for at least one side of the diaper changing station.
•
PARTS LIST
Parts Description Quantity
Hardware for installation:
3” x 1/4” Wood Screws 4
3/4” Finishing Washers 4
3” x 1/4” Machine Screws 2
3/4” Flat Washers 4
Toggle Anchors 2
Door / Wall Plate 1
3” x 1/4” Wood Screws
Toggle Anchors
21-3/8”
542 mm
For Wood Studs:
3/4” Finishing Washers
A.D.A. Compliance:
3/4” Flat Washers
4.4.1 Maximum Protruding Objects
4.2.5 Forward Reach
4.2.6 Parallel Approach
4.27.4 Operation
Compliant when properly installed.
3” x 1/4” Machine Screws
17-3/16”
(436 mm)
For Use With Toggle Anchors:
3/4” Flat Washers
www.worlddryer.com
Door / wall plate to be
mounted on outside of
restroom door.
18"
(457 mm)
34-3/4” (883 mm)
(Door)
1
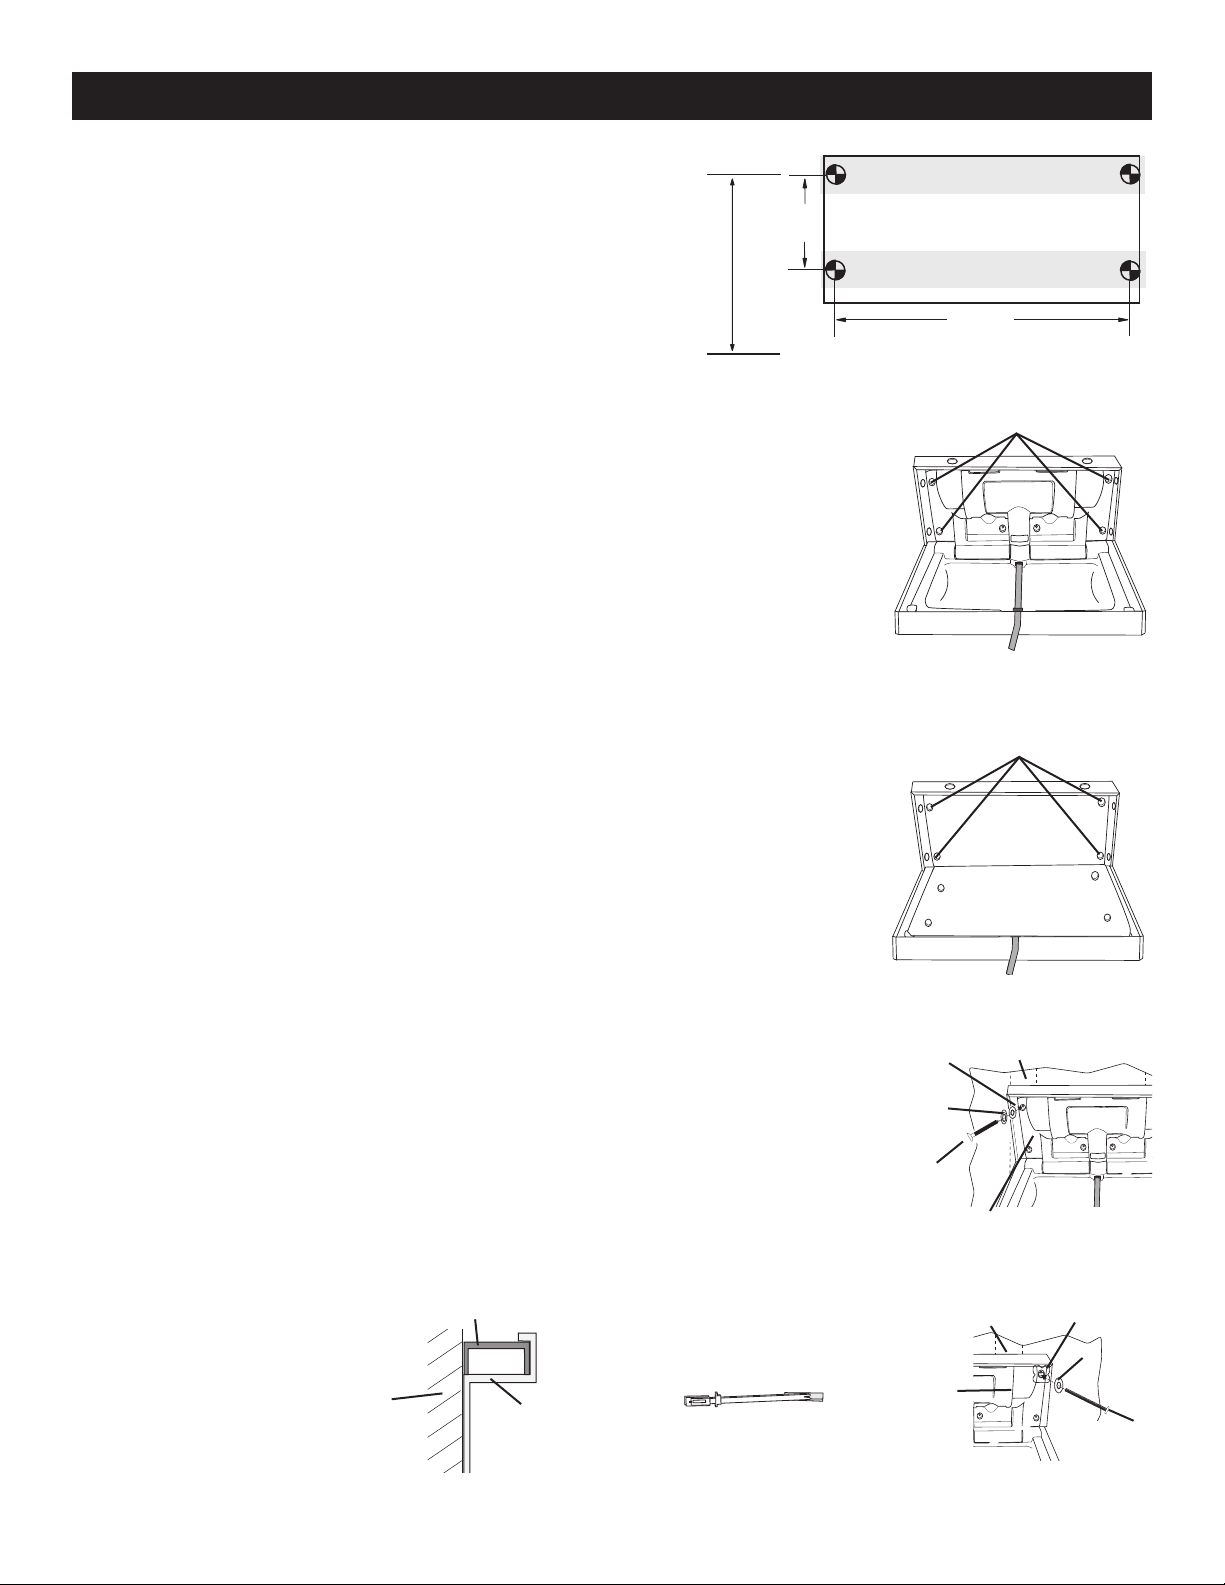
INSTALLATION
8
1
/
4
(
2
1
0
m
m
)
o
n
c
e
n
t
e
r
3
2"
(813 mm)
o
n center
T
o p
F
or A. D. A.
C
ompliance
45”
(114 cm)
A
. F. F
Recommended Blocking:
Wood double stud blocking is necessary. Contact an architect
and building official to make sure the blocking is adequate and
complies with building codes (Fig. a).
Fig. a
1. Remove and discard Truss Head Spanner screws from unit back (Fig. b).
2. Locate wood stud where left side of changing station will be mounted to
the wall.
3. For A. D. A. compliance, measure up 45” (114 cm) from the floor and mark
the wall. This locates the position for the top left attachment hole.
NOTE: Mark on wall MUST be in center of wood stud.
4. Lay top section of changing station down on changing station bed (Fig. c) and
align hole in top left corner of changing station with mark on wall and hold in place.
5. Using a level and measuring tape, mark the remaining three (3) holes. After marking
holes, set changing station down on ground.
6. Use a power drill and appropriate bit to drill four (4) holes in the wall. This may require
2 people.
NOTE 1: For wood studs:
- If finished wall surface is tile or masonry over wood studs, use
a 7/32” masonry bit for the pilot hole until you hit the wood
stud, then change to 1/8” bit.
- Use wood screws, finishing washers and flat washers (Fig. d).
NOTE 2: For use with toggle anchors:
- If finished wall surface has wood studs that are not 16” on center,
has metal studs, or has an underlying surface of concrete block,
use 1/2” bit.
- Use machine screws and flat washers (Fig. e).
- For holes NOT located in a wood stud, toggle anchors MUST be
used (Fig. f). See “Using Toggle Anchors” section.
7. Rotate plastic top section back up so that mounting hardware goes through
the plastic as well as the metal back (Fig. b).
NOTE: This unit incorporates a finishing collar that seats behind the changer’s
outside flange. Center the collar as the unit is being tightened against the wall
(Fig. g).
8. Align holes in changing station with drilled holes and secure top left corner of changing
station to wall stud using the appropriate screw and washer. Continue to secure the
three (3) remaining corners using the appropriate screws and washers as described
in Note 1 or Note 2.
Flat
Washer
Finishing
Washer
Wood
Screw
Changing
Truss Head
Spanner Screws
Fig. b
Surface-Mount
Holes
Fig. c
Wood Stud
Fig. d
Station
Collar
Wood Stud
Toggle
Anchor
Flat
Wall
Unit
Fig. f
Changing
Station
Fig. g
Washer
Machine
Screw
Fig. e
2
 Loading...