

Page 1
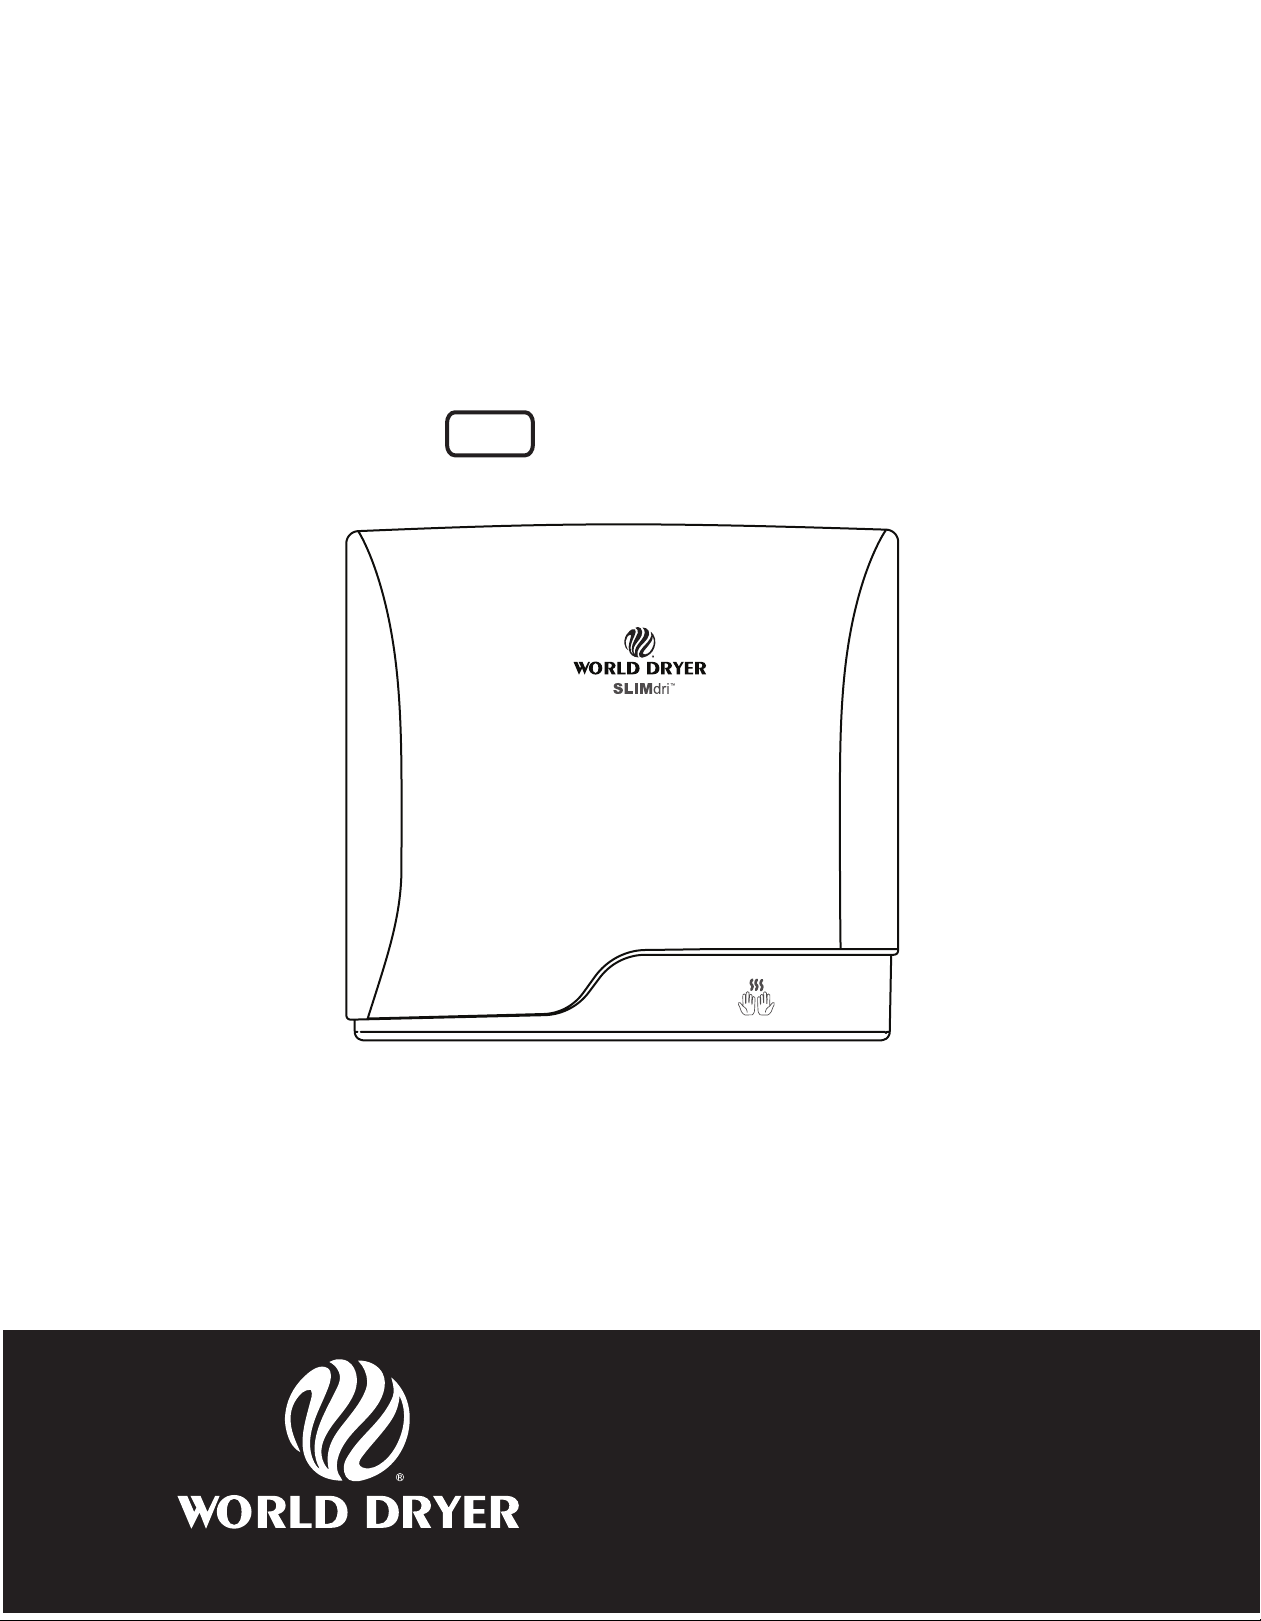
SLIMdri
™
Surface-Mounted ADA Compliant Hand Dryer
All “L48-” Series
Please read and save these instructions. Read carefully before attempting to assemble, install, operate or service
the product described. Protect yourself and others by observing all safety information. Failure to comply with
instructions could result in personal injury and/or property damage. Retain instructions for future reference.
World Dryer Corporation
5700 McDermott Drive
Berkeley, IL 60163 U.S.A.
800-323-0701
www.worlddryer.com
1
Page 2
Description
World warm air hand dryer is a surface-mounted ADA (American Disabilities Act) compliant dryer powered by a universal
brush motor, and delivers up to 950 watts of drying power. The dryer incorporates an integrated heating element with
options for operation with, or without, heated air. An infrared sensor is used to automatically activate the dryer. These
models are intended for use in commercial, industrial, ofce and public facility environments.
Electrical Specications
Table 1
Models Type Electrical Inputs Rated Amperage Rated Watts Certications
L48-XXX Automatic 230 VAC, 50/60 Hz 4.1 A 950
General Safety Information
This appliance is not intended for use by young children or persons with physical, sensory or mental disabilities
unless adequately supervised by a responsible person to ensure they can use the appliance safely. Young children
should be supervised to ensure they do not play with the appliance.
DANGER Failure to disconnect the power source before installation or servicing can result in serious
injury or death from electric shock.
• Always disconnect the power source before servicing or installing the hand dryer.
DANGER Failure to properly ground this unit could result in severe electrical shock and/or death.
• This hand dryer must be properly grounded earthed or safe operation. An identied ground connection point is
supplied on the hand dryer’s wall base.
• We recommend GFCI protection in wet or damp locations or as required by local code.
WARNING Risk of re, personal injury or property damage are possible if local codes, or safety
recommendations are not followed.
• Installation and servicing should only be performed by qualied electrical technicians.
• Use only the electrical power (voltage and frequency) specied for the model hand dryer being installed. See
Table 1 - Electrical Specications.
• Connect the hand dryer to the nearest suitable distribution panel. The xed wiring must include a disconnection
means complying with local wiring codes.
• To limit a voltage drop, and insure efcient operation, use No.12 AWG (14 mm2) wire or larger as required by
local electrical codes.
• Always connect to a branch circuit with circuit breaker or fuse protection with an electrical rating greater than the
model hand dryer’s rated amperage shown in Table 1 - Electrical Specications.
• To avoid a hazard due to inadvertent resetting of the thermal cutout, the hand dryer must not be supplied through an
external switching device, such as a timer, or connected to a circuit that is regularly switched on and off by the utility.
• Each automatic model hand dryer must have a dedicated circuit.
• Route all eld wiring away from moving parts within the hand dryer.
CAUTION Improper mounting could result in personal injury or property damage.
• Follow the mounting height recommendations in Table 2.
• On a stud wall, one side of the hand dryer should be mounted to an existing stud.
Unpacking
1. Remove all packing material. Recycling is recommended.
2. Carefully remove the hand dryer from the shipping carton, using care not to drop the appliance.
3. Inspect carefully for any damage that may have occurred during transit. Check for any loose, missing or damaged
parts. If the hand dryer is damaged, promptly inform the dealer where you purchased it.
2
Page 3
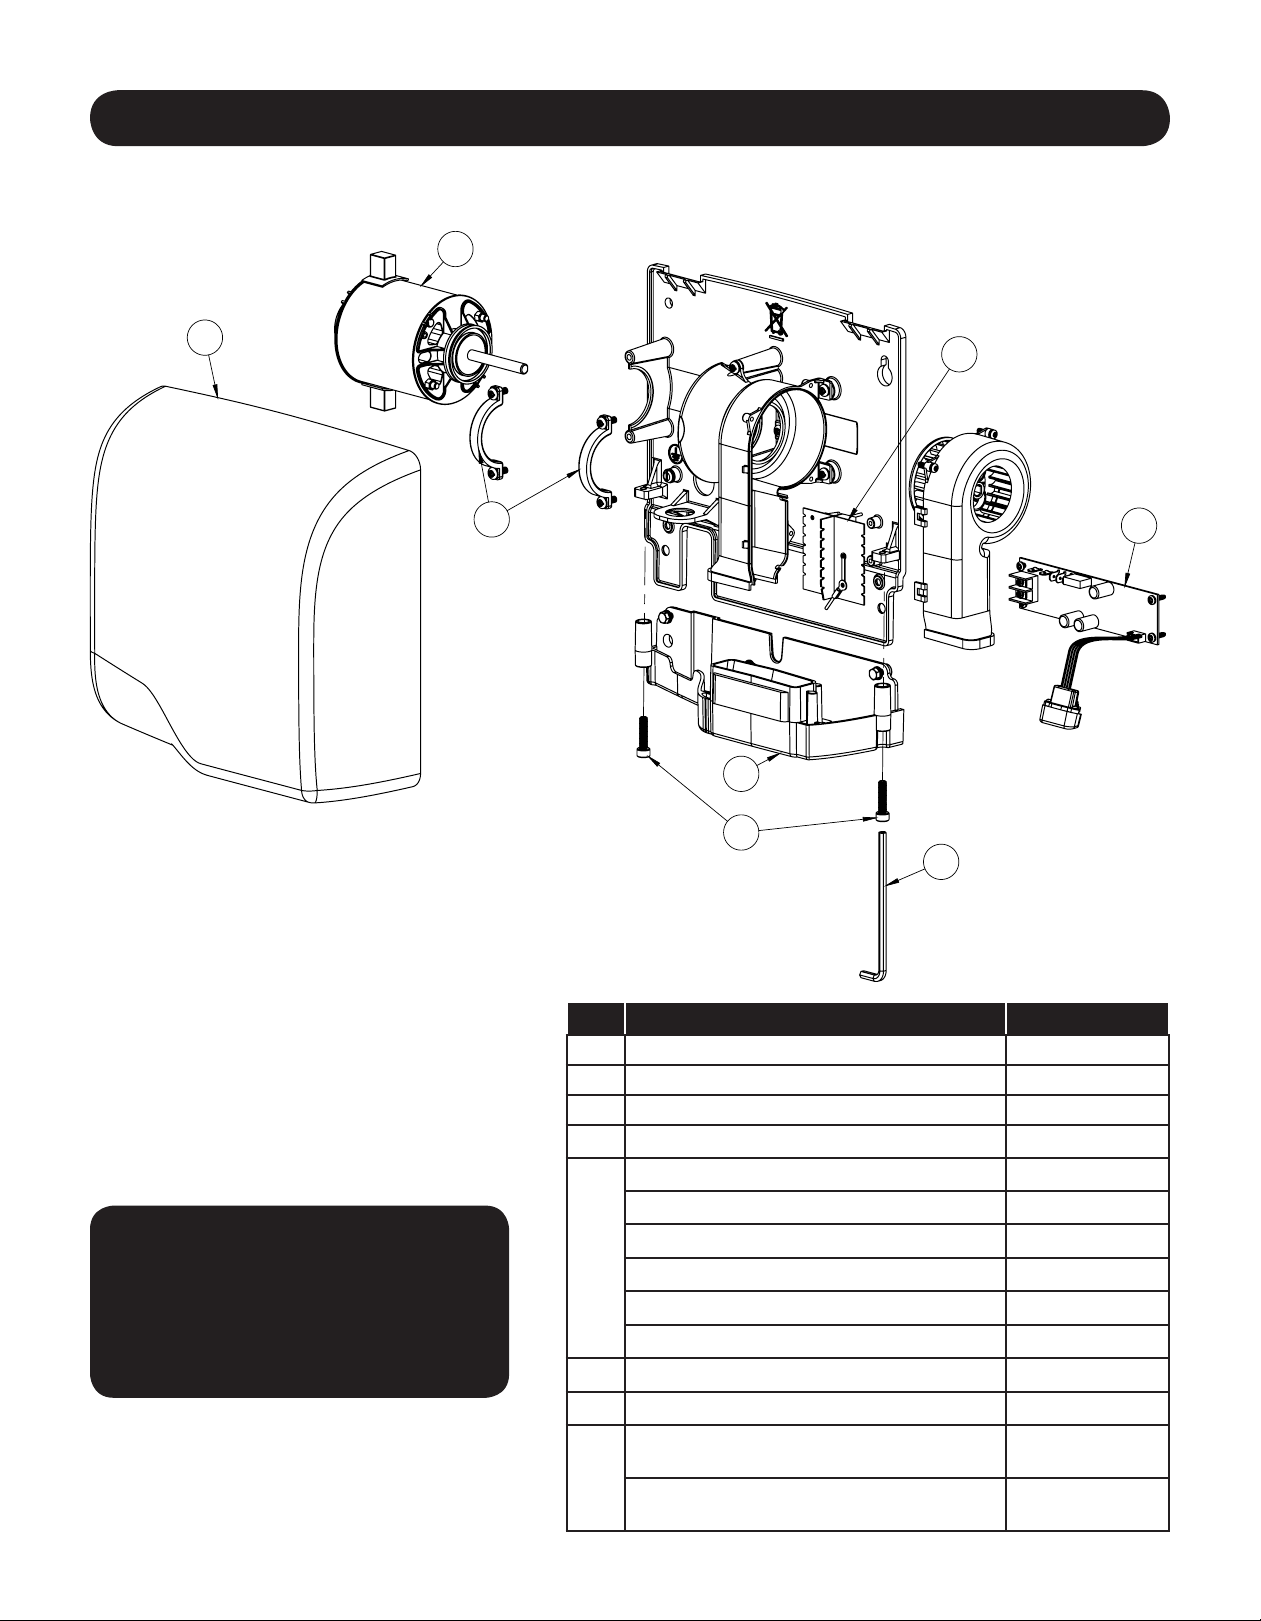
Parts List
Repair Parts List For SLIMdri™ Hand Dryer
2
5
3
8
6
4
1
7
All kits include fasteners needed for
installation.Part Number for Cover Assy.
(Reference Number 5) varies with model
number for hand dryer.
For Repair Parts, visit www.WorldDryer.com
Please provide following information:
- Model number
- Serial number
- Part description and number shown in
parts list
Description Part Number
#
1 Kit, Dryer Controls 16-10130K
2 Kit, Motor 32-230(A)K
3 Kit, Motor Clamps 33-10082K
4 Kit, Heating Element 21-10144K
Cover Assy - Alum - White 20-L974
Cover Assy - Alum - Polished Chrome 20-L970
Cover Assy - Alum - Brushed Chrome 20-L971
5
Cover Assy - Cast Iron - Porcelain Enamel 20-L976
Cover Assy - Stainless Steel (Polished) 20-L972
Cover Assy - Stainless Steel (Brushed) 20-L973
6 Kit, Security Screws 46-04022K
7 Wrench, Security 56-10092
Kit, Bottom Tray / Grill - ( Models L-972,
L-973, L-976)
8
Kit, Bottom Tray / Grill - ( Models L-970,
L-971 and L-974)
3
28-10078K
28-10088K
Page 4

Installation
1. Disconnect the power source.
2. Using Table 2 to determine the recommended mounting height, select a mounting location for the hand dryer where
no reective surfaces or objects (such as a hand basin) are directly under the infra-red sensor eye. The infra-red
sensor eye is visible from the bottom of the dryer. The minimum mounting distance from bottom of the dryer to a
reective surface is 18 in (46 cm). When two or more dryers are installed, they should be spaced apart 24 in (61
cm)
3. Use the security hex key supplied to turn the cover mounting screws clockwise to remove the cover from the dryer.
4. Using the mounting template provided, mark locations for the 4 mounting bolt holes on the wall.
5. Fasten the base to the wall, using the type of bolts recommended in Table 3
6. Each dryer must have its own dedicated circuit.
7. Connect the dryer to the nearest suitable distribution panel.
8. Replace cover, turn screws counter-clockwise making certain not to over-tighten.
IMPORTANT: Consult local and general regulations before performing dryer installation. Ensure the electrical
network is not overloaded. Always connect to a dedicated branch circuit with circuit breaker or fuse protection and an
electrical rating greater than the model hand dryer’s rated amperage shown in Table 1 - Electrical Specications.
Table 2
Recommended Mounting Heights from Floor to Dryer Bottom Edge in. (cm.)
Men’s washrooms 46 (117)
Women’s washrooms 44 (112)
Children’s washrooms, ages 4-7 32 (81)
Children’s washrooms, ages 7-10 36 (91)
Children’s washrooms, ages 10-13 40 (102)
Children’s washrooms, ages 13-17 44 (112)
Handicap Mounting Height 37 (94)
Table 3
Type of Wall Type of Bolt Minimum Bolt Length
Hollow Tile, Lath, Wall Board or Metal
Cement, Brick, or Tile Covered Cement or Brick 1/4” (M6) Stud Type Expansion Bolts 3” (76mm)
Stud Wall with wood Backing No 16 (M8) Wood Screws 23/4” (70mm)
1/4” (M6) screw Type or Wing Type
toggle Bolts
Dependent on wall
thickness
Adjusting Heating Element Controls
The dryer can be operated with the heating element “ON” or “OFF”.
Note: The factory setting for the heating element is “ON”.
4
Page 5

The heating element control is located on the printed circuit board inside the dryer.
To adjust heating element controls:
1. Disconnect the power source.
2. Use the security hex key supplied to turn the cover mounting screws clockwise to remove the cover from the dryer.
3. Locate the heating element control switch on the printed circuit board (see Fig. 1)
4. Position the heating element control switch to “ON” or “OFF” as desired.
5. Reassemble the dryer cover using the security hex key supplied to turn the cover mounting screws counter-clockwise
and tighten until snug. Do not over tighten.
Fig. 1
Heater Options
On / Off
Maintenance and Cleaning Instructions
IMPORTANT: The dryer may collect lint and debris that is naturally present in the air. Excessive build up of lint
and debris can damage the motor and heating element. The dryer should be cleaned on a routine schedule to
maintain the dryer in good operating condition With light to moderate wash room trafc, cleaning once a year is
recommended. If wash room trafc is high, cleaning every 6 months is recommended.
To clean the hand dryer:
1. Disconnect the power source.
2. Use the security hex key supplied to turn the cover mounting screws clockwise to remove the cover from the dryer.
3. Use a soft-medium bristle paint brush to clean lint, dust and debris from the air intake slots, and the motor’s exterior.
4. After cleaning, reassemble the dryer cover using the security hex key supplied to turn the cover mounting screws
counter-clockwise and tight until snug. Do not over tighten.
Troubleshooting Chart
Sensor obstruction. Check sensor lens for foreign material.
No power to the unit. Look directly at sensor lens for LED light. If LED light is "OFF", check
incoming power supply is "ON". Check electrical connections.
Dryer fails to start.
Dryer will not shut off.
Faulty Circuit Board (PCB) If LED light is "ON". Place hands under sensor. Listen for PCB relay
"Click.". If no "Click" is heard, replace the PCB.
Motor brushes or motor
needs replacement.
Loose electrical connections
Faulty circuit board (PCB) Replace dryer controls.
If incoming power supply is conrmed "ON" and LED light is not
visible, replace the PCB.
Check incoming power supply connections are secure.
Replace circuit board (PCB)
5
Page 6
After power to dryer is switched
"ON", dryer runs for approximately
30 seconds, then will not restart.
Dryer "Ghosts" (starts with no
hands present.)
Dryer air too cold.
Dryer air too hot.
Sensor obstruction or sensor lens
scratched or damaged.
Mounted too close to counter or
object.
Electrical noise from incoming
power supply or nearby infrared
actuated device.
Faulty circuit board (PCB) Replace circuit board (PCB)
Heater control switch is in the
""OFF"" position.
Faulty circuit board (PCB) Place hands under sensor. Listen for PCB relay "Click.". If no
Faulty heating element If PCB Relay "Click" is heard and dryer continues to blow cold
Excessive lint / debris build up See Maintenance and Cleaning Instructions (pg 5)
Check sensor lens for foreign material or dirt. Clean lens with
soft damp cloth and mild cleaning agent. If sensor lens is
damaged or scratched, replace sensor.
Relocate the object or dryer according to installation
instructions to a minimum 18” above any reective surface and
at least 24” from an adjacent hand dryer.
Conrm dryer base is securely grounded.
Conrm dryer is on a dedicated circuit.
Check if any nearby infrared actuated device is triggering dryer.
Re-position heater control switch to "ON".
"Click" is heard, replace the PCB.
air, replace heating element.
Dryer air output is too slow.
Excessive Noise or Vibration
Excessive lint / debris build up See Maintenance and Cleaning Instructions (pg 5)
Loose mounting screws. Conrm dryer is securely mounted to wall and motor mounts to
dryer base are tight and secure.
Foreign material in fan housing or
dryer outlet.
Check and remove any foreign material in fan housing or dryer
outlet air slot.
Limited Warranty
World LIMITED TEN – YEAR WARRANTY. World Warm Air Hand Dryer, Model covered in this manual, is warranted by World Dryer Corporation to the
original user against defects in workmanship or materials under normal use for 10 years after date of purchase for all components except motor brushes (3 years),
motor (5 years) and sensor (5 years). Any part which is determined to be defective in material or workmanship and returned to an authorized service location, as World
designates, shipping costs prepaid, will be, as the exclusive remedy, repaired or replaced at World’s option. For limited warranty claim procedures, see PROMPT
DISPOSITION below. This limited warranty gives purchasers specic rights from jurisdiction to jurisdiction.
LIMITATION OF LIABILITY. To the extent allowable under applicable law, World’s liability for consequential and incidental damages is expressly disclaimed.
World’s liability in all events is limited to and shall not exceed the purchase price paid.
WARRANTY DISCLAIMER. World has made a diligent effort to provide product information and illustrate the products in this literature accurately; however,
such information and illustrations are for the sole purpose of identication, and do not express or imply a warranty that the products are MERCHANTABLE, or FIT FOR
A PARTICULAR PURPOSE, or that the products will necessary conform to the illustrations or descriptions. Except as provided below, no warranty or afrmation on
fact, expressed or implied, other than as stated in the “LIMITED WARRANTY” above is made or authorized by World.
PRODUCT SUITABILITY. Many jurisdictions have codes and regulations governing sales, construction, installation, and/or use of products for certain purposes,
which may vary from those in neighboring areas. While World attempts to assure that the products comply with such codes, it cannot guarantee compliance, and cannot be responsible for how the product is installed or used. Before purchase and use of a product, review the product application, and all applicable national and local
codes and regulations, and be sure that the product, installation, and use will comply with them.
Certain aspects of disclaimers are not applicable to consumer products; e.g., (a) some jurisdictions do not allow the exclusion or limitation of incidental or consequential damages, so the above limitation or exclusion may not apply to you; (b) also, some jurisdictions do not allow a limitation on how long an implied warranty lasts,
consequentially the above limitation may not apply to you; and (c) by law, during the period of this Limited Warranty, and implied warranties of implied merchantability
or tness for particular purpose applicable to consumer products purchased by consumers, may not be excluded or otherwise disclaimed.
Manufactured by World Dryer Corporation, Berkeley, Illinois 60163 U.S.A.
PROMPT DISPOSITION. World will make a good faith effort for prompt correction or other adjustment with respect to any product which proves to be defective
within limited warranty. For any product believed to be defective within limited warranty, rst write or call dealer from whom the product was purchased. Dealer will
give additional directions. If unable to resolve satisfactorily, write to World at address below, giving dealer’s name, address, date, and number of dealer’s invoice, and
describing the nature of defect. Title and risk of loss pass to buyer on delivery to common carrier. If product was damaged in transit to you, le claim with carrier.
5700 McDermott Drive
Berkeley, IL 60163 U.S.A.
800-323-0701
www.worlddryer.com
6
68-10143 Rev01
 Loading...