

Page 1
Type 179
WHITE-RODGERS
Operator: Save these instructions for future use!
FAILURE TO READ AND FOLLOW ALL INSTRUCTIONS CAREFULLY BEFORE
INSTALLING OR OPERATING THIS CONTROL COULD CAUSE PERSONAL
INJURY AND/OR PROPERTY DAMAGE.
These room thermostats are specially designed to control
combination heating and cooling equipment that operates on
line voltage.
These controls are suitable for fans or water solenoids on
heating/cooling convectors or any similar application that requires a heavy duty room thermostat with single pole, double
throw (SPDT) switch action.
NOTE
If in doubt about whether your wiring is millivolt, line, or low
voltage, have it inspected by a qualified heating and air conditioning contractor or electrician.
Do not exceed the specification ratings.
All wiring must conform to local and national electrical codes and
ordinances.
This control is a precision instrument, and should be handled
carefully. Rough handling or distorting components could cause
the control to malfunction.
This control has been accurately calibrated at the factory. Any
attempt to calibrate this control will void the White-Rodgers
warranty.
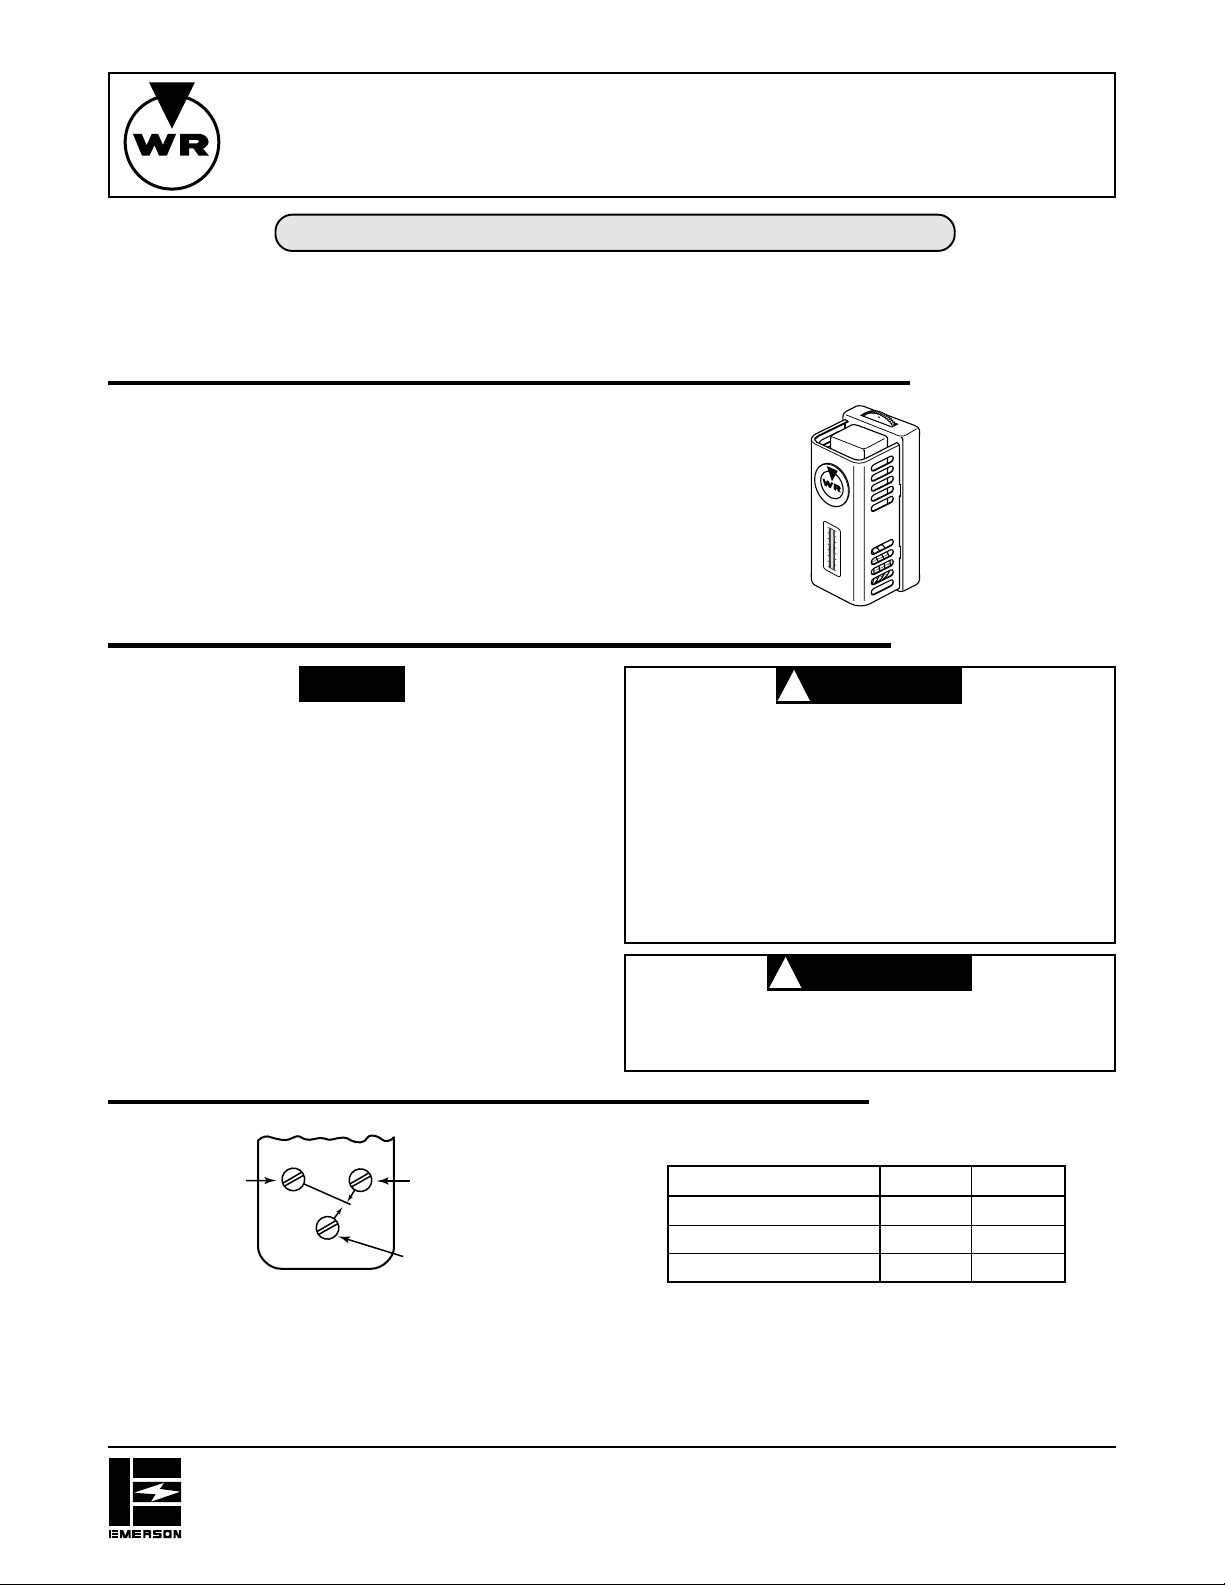
SPDT Heating/Cooling Room Thermostat
INSTALLATION INSTRUCTIONS
DESCRIPTION
W
H
I
T
E
-
R
S
O
R
D
E
G
90
70
80
50
60
40
PRECAUTIONS
CAUTION
!
To prevent electrical shock and/or equipment damage
disconnect electric power to system at main fuse or
circuit breaker box until installation is complete.
Label all wires prior to disconnection when servicing
controls. Wiring errors can cause improper and dangerous operation.
Following installation or replacement, follow appliance manufacturer’s recommended installation and/
or service instructions to insure proper operation.
WARNING
!
Do not use on circuits exceeding specified voltage.
Higher voltage will damage control and could cause
shock or fire hazard.
White
Blue
Open on rise
of temperature
Close on rise
of temperature
Red
Common
These controls have a single pole, double throw (SPDT) snap
action switch. The top left-hand terminal (red) is the common
terminal. The top right-hand terminal (blue) has open-on-rise
switch action. The bottom center terminal (white) has close-onrise switch action.
WHITE-RODGERS DIVISION
EMERSON ELECTRIC CO.
9797 REAVIS ROAD
Printed in U.S.A.
ST. LOUIS, MISSOURI 63123-5398
Electrical Rating
A.C. Motor Rating
Full Load Current
Locked Rotor Current
Non-Inductive
SPECIFICATIONS
120 VAC 240 VAC
7.4 A
44.5 A
24 A
PART NO. 37-0885B
3.7 A
22.2 A
20 A
Replaces 37-0885A
0017
Page 2
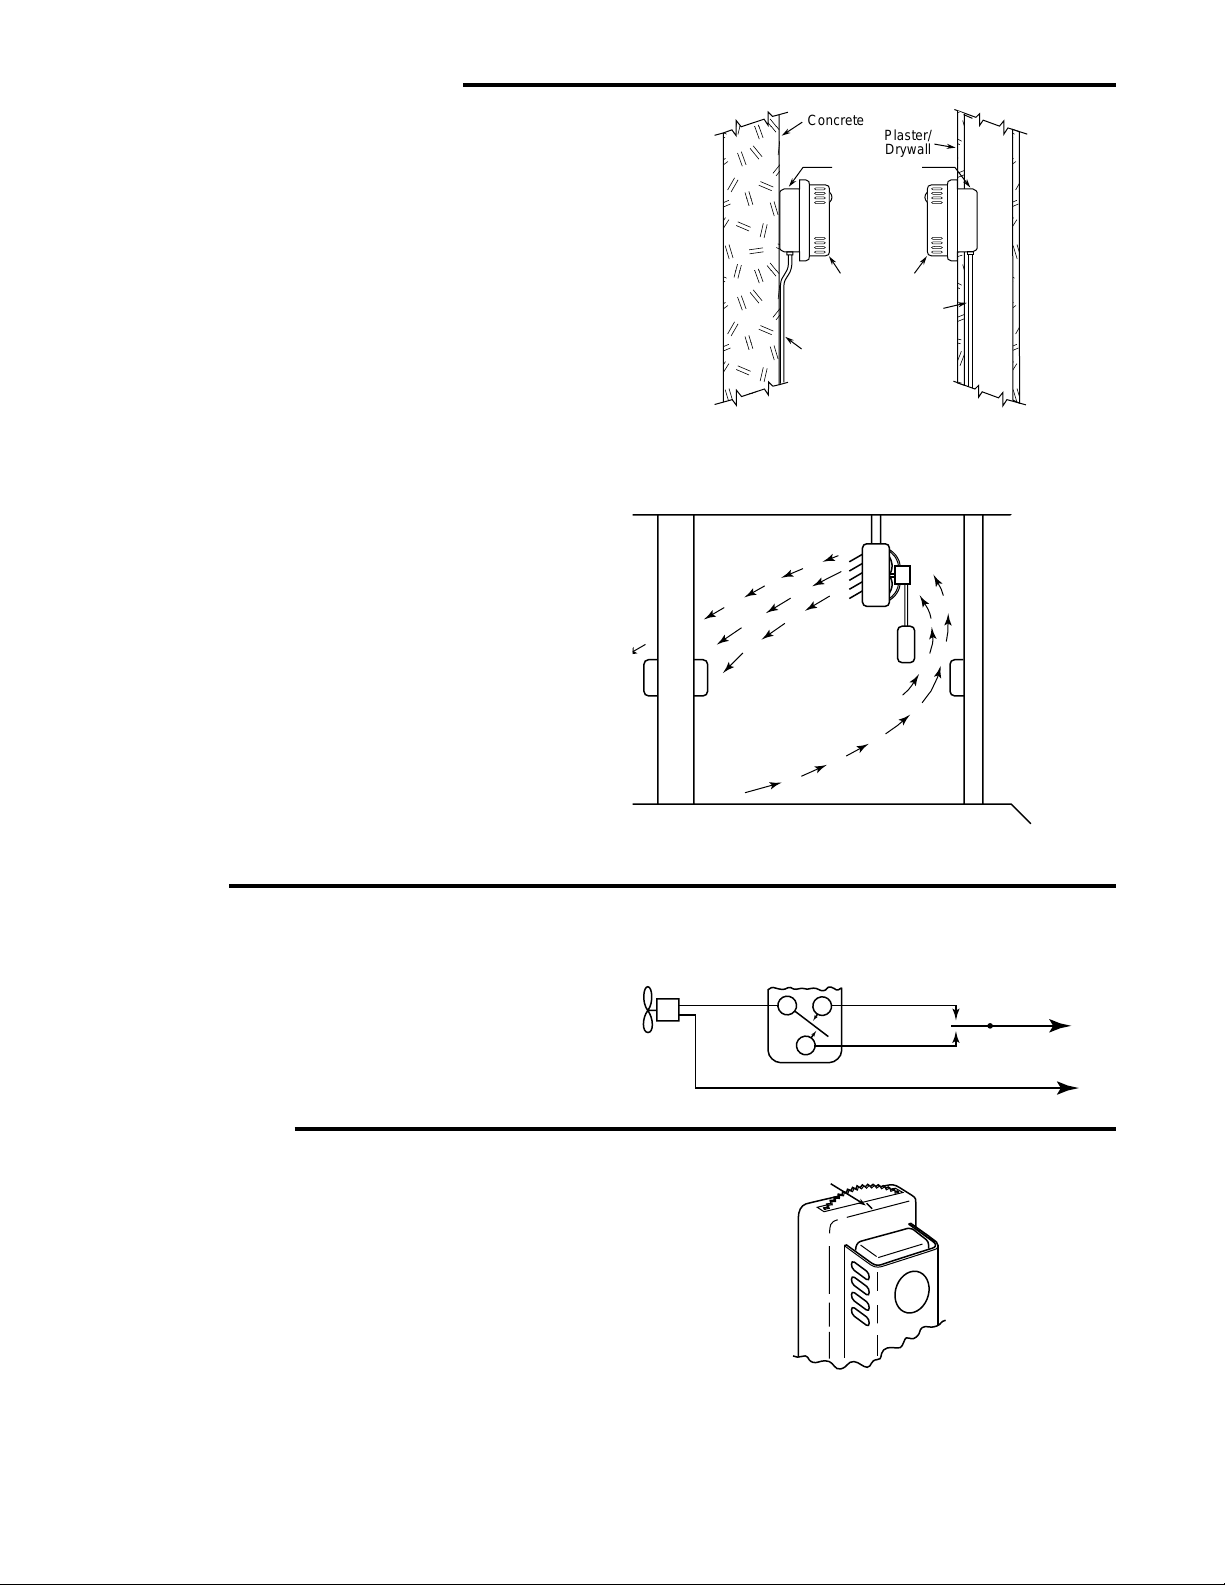
THERMOSTAT LOCATION
Floor
Return Air
DC A
B
Post
Ceiling
Unit
Partition wall
or post directly
behind unit
Figure 2
Proper location of the heavy duty room thermostat is very
important to insure acceptable performance. The following
general rules will help determine proper location:
1. It is very important to be sure that the thermostat is in an
area where air circulates around it freely.
2. Never install the thermostat on or near an outside wall.
3. Do not locate the thermostat near windows or doors, or in any
drafty area.
4. Don’t install the thermostat where it will be affected by “false”
heat sources (such as direct sunlight, a stove or any appliance exhaust, steam lines, etc.).
5. Mount the thermostat on a post or a partioning wall, but be
sure that there are no pipes, duct work or heat sources in that
wall or directly behind it.
6. If the electrical conduit leads into a cooler or warmer room,
plug the hole around the wires with fire-resistant insulation to
prevent drafts.
If the thermostat is used with unit heaters, the following suggestions for locating the thermostat may be helpful (see fig. 2).
1. Position A in fig. 2 is acceptable if the thermostat is close
enough to the unit heater so that the return air to the heater
flows over the thermostat.
2. Position B is acceptable if it is not necessary to make
frequent adjustments of the dial setting.
3. Position C is acceptable if it is sufficiently far from the heater
that air flowing over the thermostat is not much above the
average room temperature.
4. Position D is not acceptable because the post may prevent
air from circulating over the thermostat.
Concrete
Conduit
along wall
WALL INSTALLATION
The mounting plate for this thermostat has two
5
/16”apart for attaching the control on a
holes 3
standard switch box.
Plaster/
Drywall
Junction Box
Themostat
Conduit
inside wall
Figure 1
WIRING
All wiring should be done in accordance with local and national electrical codes and ordinances.
Follow the wiring instructions provided by the heating/cooling
equipment manufacturer. If none are offered, a typical circuit
application is shown at right.
OPERA TION
To set the thermostat, simply move the dial so that the indicating
line on the case points to the desired temperature setting on the
dial.
Fan or Water
Solenoid
Room
Thermostat
R
B
W
Indicating
Line
Manual
Switch
Heating
Cooling
80
70
60
Line
 Loading...