


E z
m
(I) 0
0
m
r
0 (0
Cb (0
z
0 -I
C
C)
0
z
w
0 0
I |
0 |
|
POLARIZED
PLUG CAUTION
To |
reduce the risk of |
has |
a polarized plug |
electric |
shock, |
this |
applianc |
|
(one |
blade is |
wider |
than t |
|
|
||||
other). |
This |
one way. If |
|
reverse |
the |
plug |
will |
|
fit |
in |
a |
polarized |
|||
the |
plug |
does |
not |
fit |
fully |
in |
|||
|
|||||||||
plug. |
If |
it |
stifl |
does |
not |
fit, |
|||
|
|
||||||||
outlet |
on |
the outl€ |
|
contact |
|
qualified |
electrician to |
install |
|||
not |
change |
the |
plug |
in any |
|
the |
proper |
way. |
|
outlet.
C
SEWING |
MACHINE |
Record in |
space provided |
below the Serial |
|||||||
and |
Model |
No. |
of this appliance. |
|
|||||
The |
Serial |
|
No. |
is |
located |
Rear |
of |
arm. |
|
The |
Model |
|
No. |
is |
located |
Rear |
of |
arm. |
|
Serial |
No. |
|
1919 |
|
|
|
|
||
Model |
No. |
|
|
|
|
|
|||
|
|
|
|
|
|
|
|
||
Retain |
these numbers for |
future reference. |
|||||||
No.
IMPORTANT SAFETY INSTRUCTIONS
When using an electrical appliance, basic safety precautions should always be followed, including the following:
Read all instructions before using (this appliance).
DANGER——To reduce the risk of electric shock:
An appliance should never be left unattended when plugged in. Always unplug this appliance from the electric outlet immediately after using and before cleaning.
WARN ING ——To reduce the risk of burns, fire, electric shock, or injury to persons:
1. Do not allow to be used as a toy. Close attention is necessary when this appliance is used by or near children.
2.Use this appliance only for its intended use as described in this manual. Use only attachments recommended by the manufacturer as contained in this manual.
3.Never operate this appliance if it has a damaged cord or plug, if it is not working properly, if it has been dropped or damaged, or dropped into water. Return the
appliance to the nearest authorized dealer or service center for examination, repair, electrical or mechanical adjustment.
4. Never operate the appliance with any air openings blocked, Keep ventilation open ings of the sewing machine and foot controller free from the accumulation of lint, dust, and loose cloth.
5.Never drop or insert any object into any opening.
6.Do not use outdoors.
7.Do not operate where aerosol (spray) products are being used or where oxygen is
being administered.
8.To disconnect, turn all controls to the off (“0”) position, then remove plug from
outlet.
9.Do not unplug by pulling on cord. To unplug, grasp the plug, not the cord.
DANGER
1.Always unplug before relamping. Replace bulb with same type rated 15 watts.
2.Do not reach for an appliance that has fallen into water. Unplug immediately.
3. Do not place or store appliance where it can fall or be pulled into a tub or sink. Do not place in or drop into water or other liquid.
WARNING
1.Keep fingers away from all moving parts. Special care is required around the sewing machine needle.
2.Always use the proper needle plate. The wrong plate can cause the needle to break.
3.Do not use bent needles.
4.Do not pull or push fabric while stitching. It may deflect the needle causing it to
break.
5. Switch the sewing machine off (“0’) when making any adjustments in the needle area, such as threading needle, changing needle, threading bobbin, or changing presser foot, etc.
6.Always unplug sewing machine from the electrical outlet when removing covers lubricating, or when making any other user servicing adjustments mentioned in the instruction manual.
7.Never operate on a soft surface such as a bed or couch where the air openings may be blocked.
SAVE THESE INSTRUCTIONS
|
|
|
|
|
|
CONTENTS |
|
||||
1. |
NAMES OF |
PARTS |
|
|
|
|
|
||||
2. |
ACCESSORIES |
|
|
|
|
|
|
||||
3. |
BEFORE SEWING |
|
|
|
|
|
|||||
|
Detachable |
Extension Table |
|
|
|||||||
|
Connecting |
Foot Controller |
and |
Power |
Cord |
||||||
|
Setting |
Spool Pins |
|
|
|
|
|||||
|
Changing |
Foot |
|
|
|
|
|
||||
|
Changing |
Needle |
|
|
|
|
|
||||
|
Bobbin |
Winding |
|
|
|
|
|
||||
|
Inserting |
Bobbin |
|
|
|
|
|
||||
|
Adjusting |
Lower |
Tension |
|
|
|
|||||
|
Darning |
Plate |
|
|
|
|
|
||||
|
Threading |
Upper |
Tension |
|
|
|
|||||
|
Drawing |
Up |
Lower |
Tension |
|
|
|||||
|
Foot Pressure |
|
|
|
|
|
|||||
|
Fabric, |
Thread and |
Needle |
Table |
|
|
|||||
4. |
STARTING |
TO |
SEW |
|
|
|
|
|
|||
|
Turning |
a |
Square |
Corner |
|
|
|
||||
|
Pattern |
Selection |
Dial |
|
|
|
|||||
|
Starting |
to |
Sew |
|
|
|
|
|
|||
|
Double Presser Foot Lifter |
|
|
|
|||||||
|
Reverse |
Sewing |
|
|
|
|
|
||||
|
Cloth Guide |
|
|
|
|
|
|
||||
|
Adjusting |
Thread |
Tension |
|
|
|
|||||
5. |
STRAIGHT |
SEWING |
|
|
|
|
|
||||
6. |
ZIGZAG |
SEWING |
|
|
|
|
|
||||
|
Thread |
Tension for |
Zigzag Stitch |
|
|
||||||
7. |
MAKING |
BUTTONHOLES |
|
|
|
||||||
|
Determine |
Length |
|
|
|
|
|
||||
|
Left |
and |
Right Side |
Balance |
of Buttonhole |
||||||
|
Cutting |
Buttonholes |
|
|
|
|
|||||
|
Corded |
Buttonholes |
|
|
|
|
|||||
8. |
OVERCASTING |
|
|
|
|
|
|
||||
9. |
BLIND HEM |
STITCH |
|
|
|
|
|
||||
|
Elastic |
Blind |
Hem |
Stitch |
|
|
|
||||
10. |
SHELL STITCHING |
|
|
|
|
|
|||||
11. |
MENDING |
|
|
|
|
|
|
|
|
|
|
|
Mending |
a Rip |
|
|
|
|
|
||||
12. |
STRETCH |
STITCHING |
|
|
|
|
|||||
|
Adjusting |
Stretch |
Stitch Balance |
|
|
||||||
13. |
STRETCH |
SEAMS |
|
|
|
|
|
||||
|
Straight |
Stretch Stitching |
|
|
|
||||||
|
Rick-Rack |
Stretch |
Stitching |
|
|
|
|||||
14. |
LAPPED |
SEAM |
SEWING |
|
|
|
|||||
15. |
BRIAR STRETCH |
|
|
|
|
|
|||||
16. |
OVERLOCKING |
|
|
|
|
|
|
||||
17. |
SEWING |
ON |
BUTTONS |
|
|
|
|
||||
18. |
ZIPPER |
SEWING |
|
|
|
|
|
||||
19. |
ROLL HEMMING |
|
|
|
|
|
|||||
20. |
QUILTING |
|
|
|
|
|
|
|
|
|
|
21. |
EMBROIDERY |
|
|
|
|
|
|
||||
22. |
MAINTENANCE |
|
|
|
|
|
|
||||
|
Cleaning |
|
|
|
|
|
|
|
|
||
|
Oiling |
|
|
|
|
|
|
|
|
|
|
23. |
TROUBLE |
CHART |
|
|
|
|
|
||||
|
Changing |
|
Light Bulb |
|
|
|
|
||||
1 |
|
|
3 |
|
4 |
|
4 |
|
5 |
|
6 |
|
7 |
|
8 |
1 |
9 |
2 |
|
1 |
3 |
1 |
3 |
14 |
|
1 |
5 |
15 |
|
1 |
6 |
17 |
|
1 |
7 |
18 |
|
1 |
9 |
1 |
9 |
1 |
9 |
20 |
|
20 |
|
21 |
|
21 |
|
21 |
|
22 |
|
22 |
|
24 |
|
25 |
|
25 |
|
26 |
|
27 |
|
28 |
|
29 |
|
30 |
|
30 |
|
31 |
|
31 |
|
32 |
|
32 |
|
32 |
|
33 |
|
34 |
|
34 |
|
35 |
|
36 |
|
37 |
|
38 |
|
39 |
|
40 |
|
40 |
|
41 |
|
42 |
|
43 |
|
1- |
a; |
a |
I- |
|
|||
|
m |
||
|
|
|
1.
NAMES
OF
PARTS
|
1 |
|
2 |
|
3 |
|
4 |
|
5 |
|
6 |
|
7 |
|
8 |
|
9 |
10 |
|
11 |
|
12 |
|
1 |
3 |
Thread |
guide |
for bobbin |
winding |
|||
Pressure Regulator |
|
|
||||
Take-up |
lever |
|
|
|
||
Face cover |
|
|
|
|
||
Upper |
thread |
tension |
dial |
|||
|
||||||
Thread |
guide |
for upper |
threading |
|||
Presser |
foot |
thumb screw |
||||
Presser |
foot |
|
|
|
|
|
Free arm |
|
|
|
|
||
Shuttle |
|
cover |
|
|
|
|
Spool |
pins |
|
|
|
|
|
Pattern |
|
selection |
dial |
|
|
|
Reverse |
|
|
||||
sewing |
lever |
(button) |
||||
|
|
|
|
|
||
14 |
Bobbin |
winding |
spindle |
|
|
15 |
Bobbin |
winding |
stopper |
||
16 |
Handwheel |
|
|||
|
|
|
|||
|
|
|
|
||
17 |
Stop motion |
knob |
|
||
1 8 |
Adjuster for |
buttonhole |
stitch balance |
||
19 |
Switch* |
|
|
||
|
|
|
|||
20 |
Socket |
|
|
|
|
21 |
Thread |
guide |
for |
upper |
threading |
22 |
Handle |
|
|
|
|
|
|
|
|
||
23 |
Presser |
foot |
lifter |
|
|
24 |
|
|
|||
Thread |
cutter |
|
|
||
|
|
|
|||
25 |
Feed dog |
|
|
|
|
|
|
|
|
||
26. |
Needle |
plate |
|
|
|
and
stretch
stitch
balance
*Specifications
vary from
country
to
country.
—2—
2. ACCESSORIES
tonhole foot
Button sewing foot
Zipper foot
Buttonhole cutter
Darning plate
Bobbins (3 pcs)
Straight stitch foot
*
%Olt hemming foot
*
Quilting guide
*ø—
Cloth guide
*iii
*Option accessory.
—3—
Ordinary needles |
4 |
3 ocs |
Bat ooint needle |
(1 |
pc |
Screw dnvers
IsmallI
a rqe
Oiler
Felts (2 pcs.)
Accessories are stored in built-in compartment at front of exten sion table
3.
BEFORE
SEWING
Machine
is
stored
in
flat-bed
style
which
makes
your
work
easier
in
ordinary
sewing
Detachable
Extension
Table
Siide table is used as
off and the |
machine |
a free-arm |
model |
Free-arm
is
convenient
to
sew
or
embroider; of T-shirts,
trousers, |
sleeves, |
blouses, |
etc. |
cuffs
Do |
vice-versa of |
above |
|
|
|||
attach |
extension |
table. |
|
steps
to
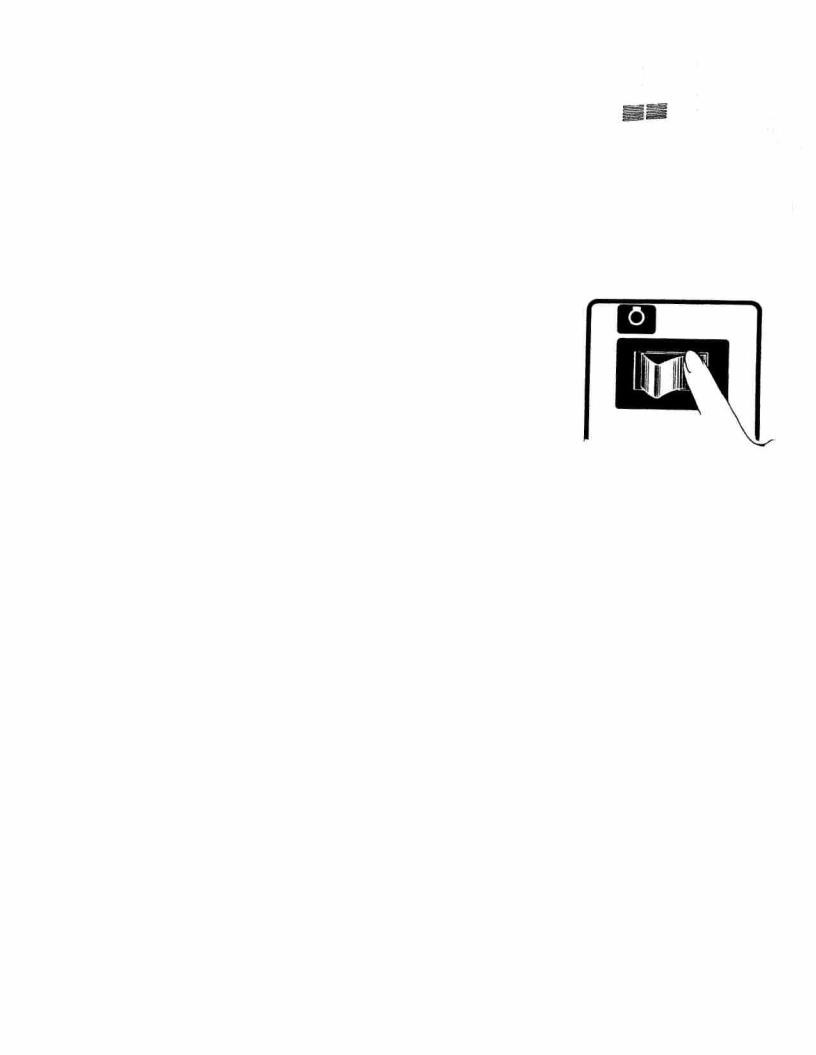
To |
|
of accessory |
|
|
open lid |
||
it |
open, |
as |
illustrated. |
|
|||
box,
push
—4—
The more you press foot con troher, the faster the machine runs.
—6-—
•
A
Changing Foot
Raise presser foot lifter .
Set needle in the highest position by turning handwheel towards you .
Snap-on |
Presser Foot: |
Push the |
lever |
® |
in |
the |
arrow |
|
|
||||||
direction so that |
the presser foot |
will |
||||
|
||||||
come off. |
|
|
|
|
|
|
Position a |
new foot with |
the |
pin |
( |
||
right under the groove of the |
holder. |
|||||
Lower the |
presser |
foot |
lifter |
to |
|||
that the |
foot |
will |
be |
automatically |
|||
snapped |
on. |
|
|
|
|
|
|
When you fail to catch the foot, push |
|||||
the |
lever |
in |
the |
arrow |
direction |
slightly. |
|
|
|
|
|
Screw-snap |
Presser |
Foot: |
|
|
Remove |
foot |
holder |
by loosening |
|
screw with screwdriver. |
|
|||
Replace |
screw-snap |
type |
presser |
|
foot and |
tighten screw. |
|
||

/
Changing Needle |
|
|
|||||
Set |
needle |
in |
the |
highest |
|||
position |
by turning |
handwheel |
|||||
towards |
you. |
|
|
||||
|
|
|
|
||||
Loosen |
needle |
clamp screw and |
|||||
take |
out |
||||||
needle. |
|
|
|
|
|||
|
|
|
|
|
|||
With |
flat side |
away |
from |
you, |
|||
insert |
a new |
needle |
into |
groove |
|||
|
|||||||
of needle bar. |
|
|
|
|
|
||
Push |
needle |
into |
clamp |
until it |
|||
reaches stopper |
|
and |
tighten |
||||
needle |
clamp |
|
|
||||
screw |
firmly. |
|
|||||
Proper needle straight shaft
sharp
Always use a |
straight needle with |
|||||
a sharp |
point. |
|
|
|
||
point |
|
|
|
|
|
|
Using defective |
or |
worn needles |
||||
not only |
causes |
stitch |
skipping, |
|||
breakage |
of |
needles or |
snapping |
|||
of thread: it |
||||||
also |
can |
damage |
||||
hook and |
needle |
|
||||
plate. |
|
|||||
—8—

Bobbin Winding |
|
||
Set |
needle in the highest position |
||
by |
turning |
handwheel |
towards |
you |
|
|
|
Open shuttle |
cover. |
|
|
I—
Open take it
latch out.
of
bobbin
case
and
Close |
latch of |
bobbin case |
bobbin |
comes |
out easily. |
and
I-
—9—

/
r
Push |
back to |
fold |
handle |
Pull |
out spool |
pin. |
|
Put |
a |
spool on |
spool |
pin. |
|
|
Draw |
|
thread |
from |
spool |
pin |
|
through |
thread |
guide |
and |
pre |
||
tension |
device, |
following numb |
||||
ers |
(I |
and . |
|
|
|
|
|
|
|
|
|
|
|
j
Wind |
thread |
clockwise |
around |
||||
bobbin |
several times. |
|
|
||||
Push |
bobbin |
on |
to |
spindle. |
|
||
Holding |
handwheel |
with |
your |
left |
|||
hand |
disengage |
handwheel |
by |
||||
unscrewing stop |
motion |
knob. |
|||||
|
|
|
|
||||
—10—
 Loading...