


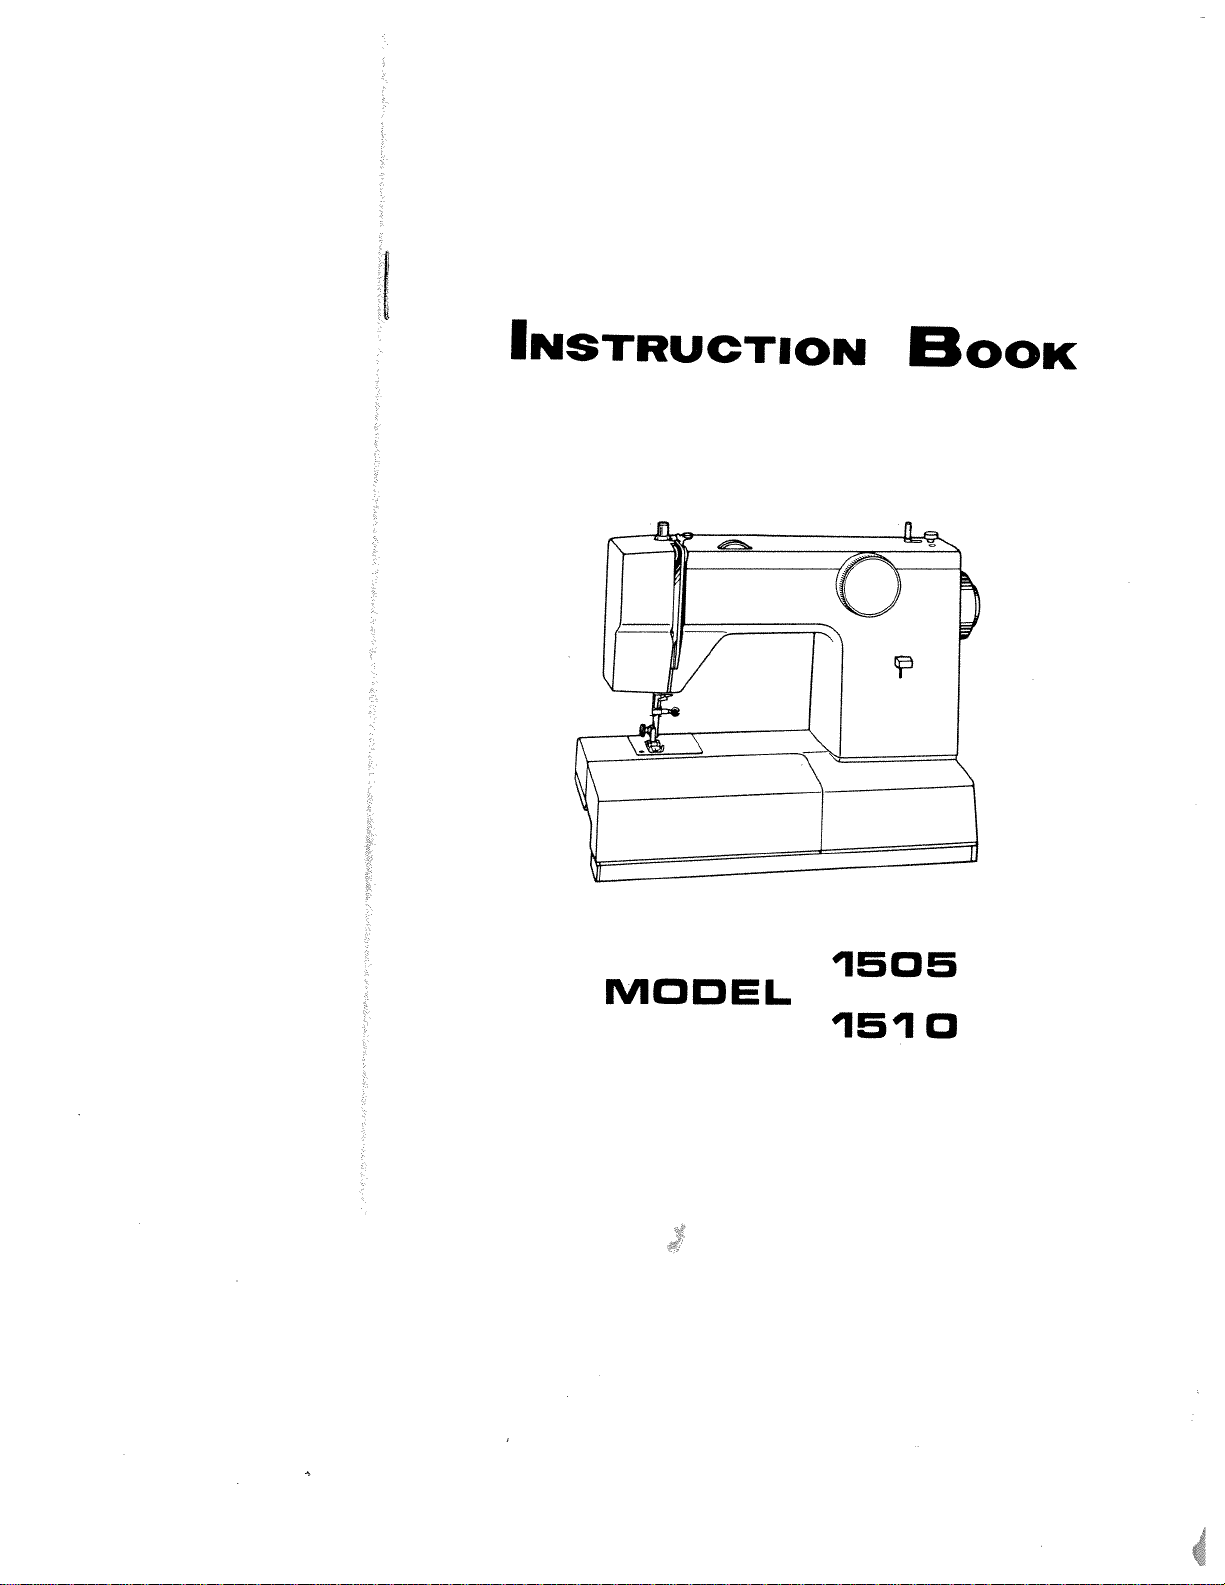
1510
C
C
m
r
z
0
-I
C
0
0
z
w
0
0
--
(flu’
SEWING
MACHINE
Record
in
space
provided
below
the
Serial
No.
and
Model
No.
of
this
appliance.
The
Serial
No.
is
located
Rear
of
arm.
The
Model
No.
is
located
Rear
of
arm.
Serial
No.
Model
No.1505,
1510
Retain
these
numbers
for
future
reference.
CONTENTS
1.
NAMES
OF
PARTS
1
2.
ACCESSORIES
3
3.
BEFORE
SEWING
4
Detachable
Extension
Table
4
Connecting
Foot
Controller
and
Power
Cord
5
Setting
Spooi
Pins
6
Changing
Foot
7
Changing
Needle
8
Bobbin
Winding
9
Inserting
Bobbin
12
Adjusting
Lower
Tension
13
Darning
Plate
13
Threading
Upper
Tension
14
Drawing
Up
Lower
Tension
15
Foot
Pressure
15
Fabric,
Thread
and
Needle
Table
16
4.
STARTING
TO
SEW
17
Turning
a
Square
Corner
1
7
Pattern
Selection
Dial
18
Starting
to
Sew
19
Double
Presser
Foot
Lifter
1
9
Reverse
Sewing
19
Cloth
Guide
20
Adjusting
Thread
Tension
20
5.
STRAIGHT
SEWING
21
6.
ZIGZAG
SEWING
21
Thread
Tension
for
Zigzag
Stitch
21
7.
MAKING
BUTTONHOLES
22
Determine
Length
22
Left
and
Right
Side
Balance
of
Buttonhole
24
Cutting
Buttonholes
25
Corded
Buttonholes
25
8.
OVERCASTING
26
9.
BLIND
HEM
STITCH
27
Elastic
Blind
Hem
Stitch
28
10.
SHELL
STITCHING
29
11.
MENDING
30
Mending
a
Rip
30
12.
STRETCH
STITCHING
31
Adjusting
Stretch
Stitch
Balance
31
13.
STRETCH
SEAMS
32
Straight
Stretch
Stitching
32
Rick-Rack
Stretch
Stitching
32
14.
LAPPED
SEAM
SEWING
33
15.
BRIAR
STRETCH
34
16.
OVERLOCKING
34
17.
SEWING
ON
BUTTONS
35
18.
ZIPPER
SEWING
36
19.
ROLL
HEMMING
37
20.
QUILTING
38
21.
EMBROIDERY
39
22.
MAINTENANCE
40
Cleaning
40
Oiling
41
23.
TROUBLE
CHART
42
Changing
Light
Bulb
43
we
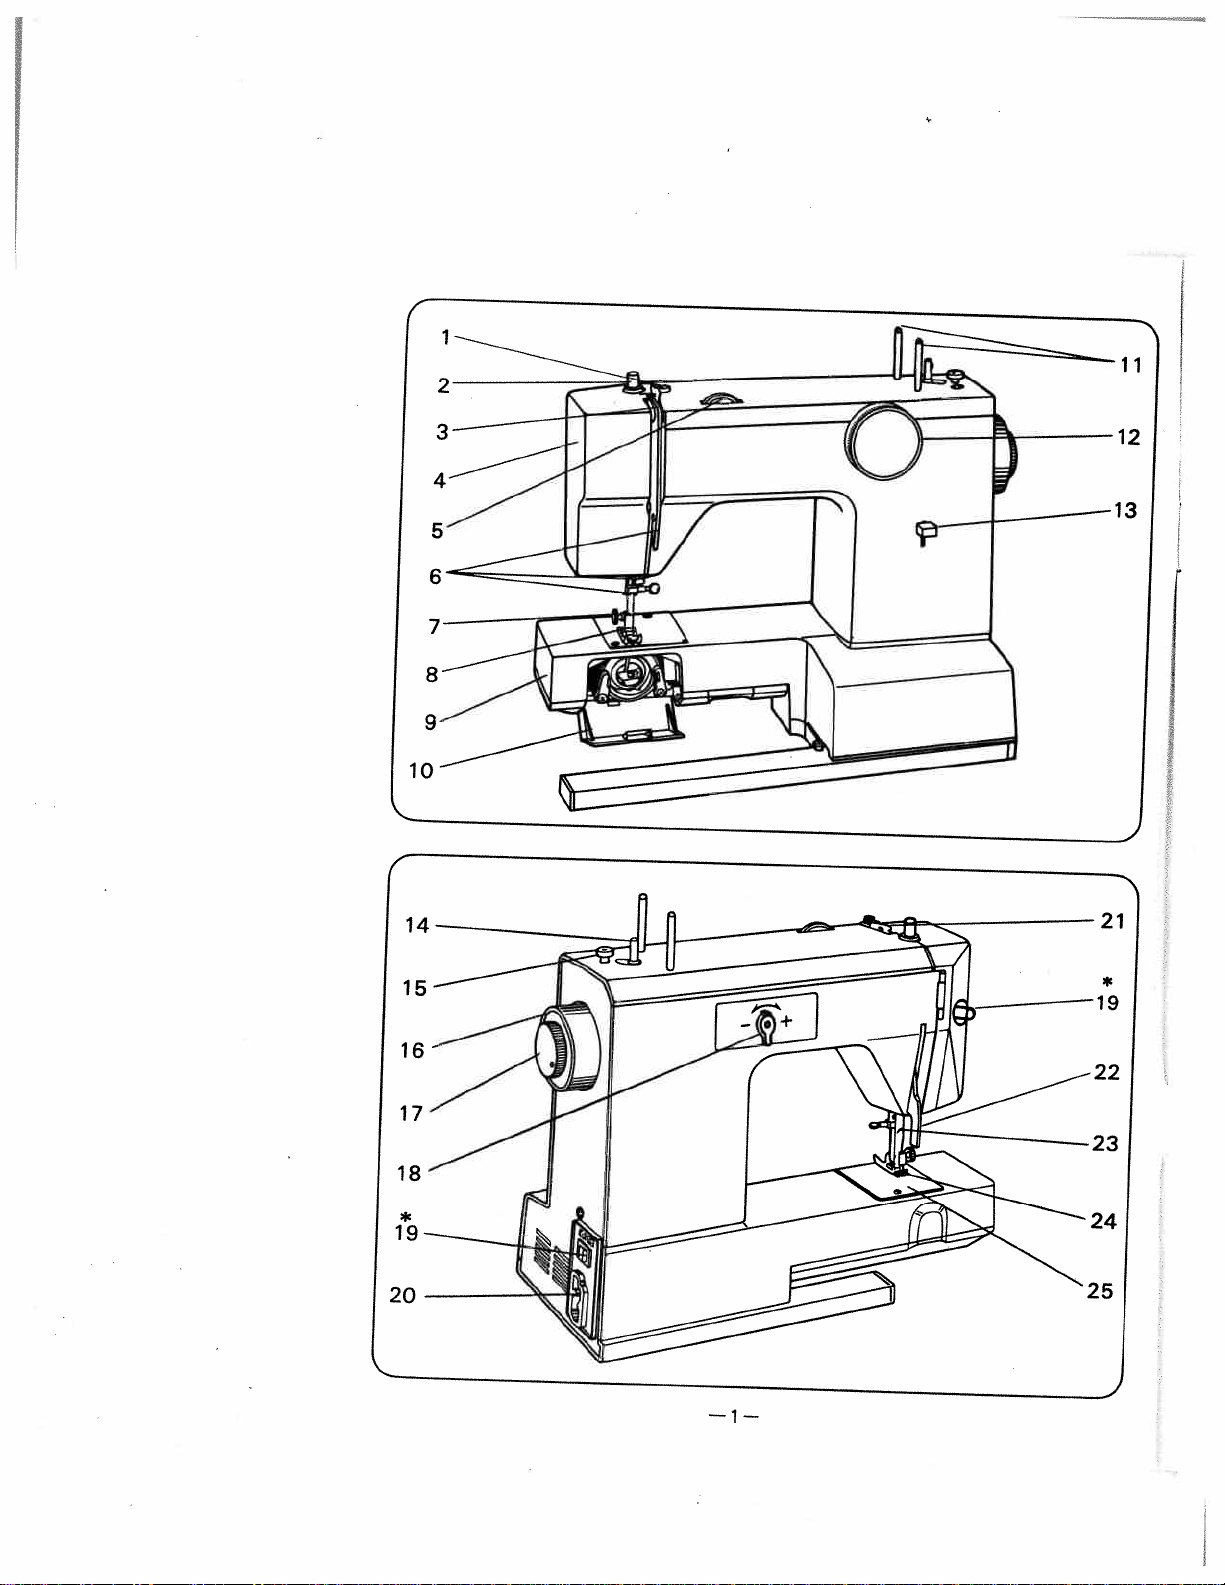
1.NAMES
OF
PARTS
1
Thread
guide
for
bobbin
winding
2
Pressure
Regulator
3
Take-up
lever
4
Face
cover
5
Upper
thread
tension
dial
6
Thread
guide
for
upper
threading
7
Presser
foot
thumb
screw
8
Presser
foot
9
Free
arm
10
Shuttle
cover
11
Spooi
pins
12
Pattern
selection
dial
1
3
Reverse
sewing
lever
14
Bobbin
winding
spindle
1
5
Bobbin
winding
stopper
16
Handwheel
1
7
Stop
motion
knob
18
Adjuster
for
buttonhole
stitch
balance
and
stretch
stitch
balance
1
9
Switch
*
20
Socket
21
Thread
guide
for
upper
threading
22
Presser
foot
lifter
23
Thread
cutter
24
Feed
dog
25
Needle
plate
*Specifications
vary
from
country
to
country.
—2—
*
0
0
z
C)
C)
0
C)
C,
m
CI)
CI)
0
m
Cl,
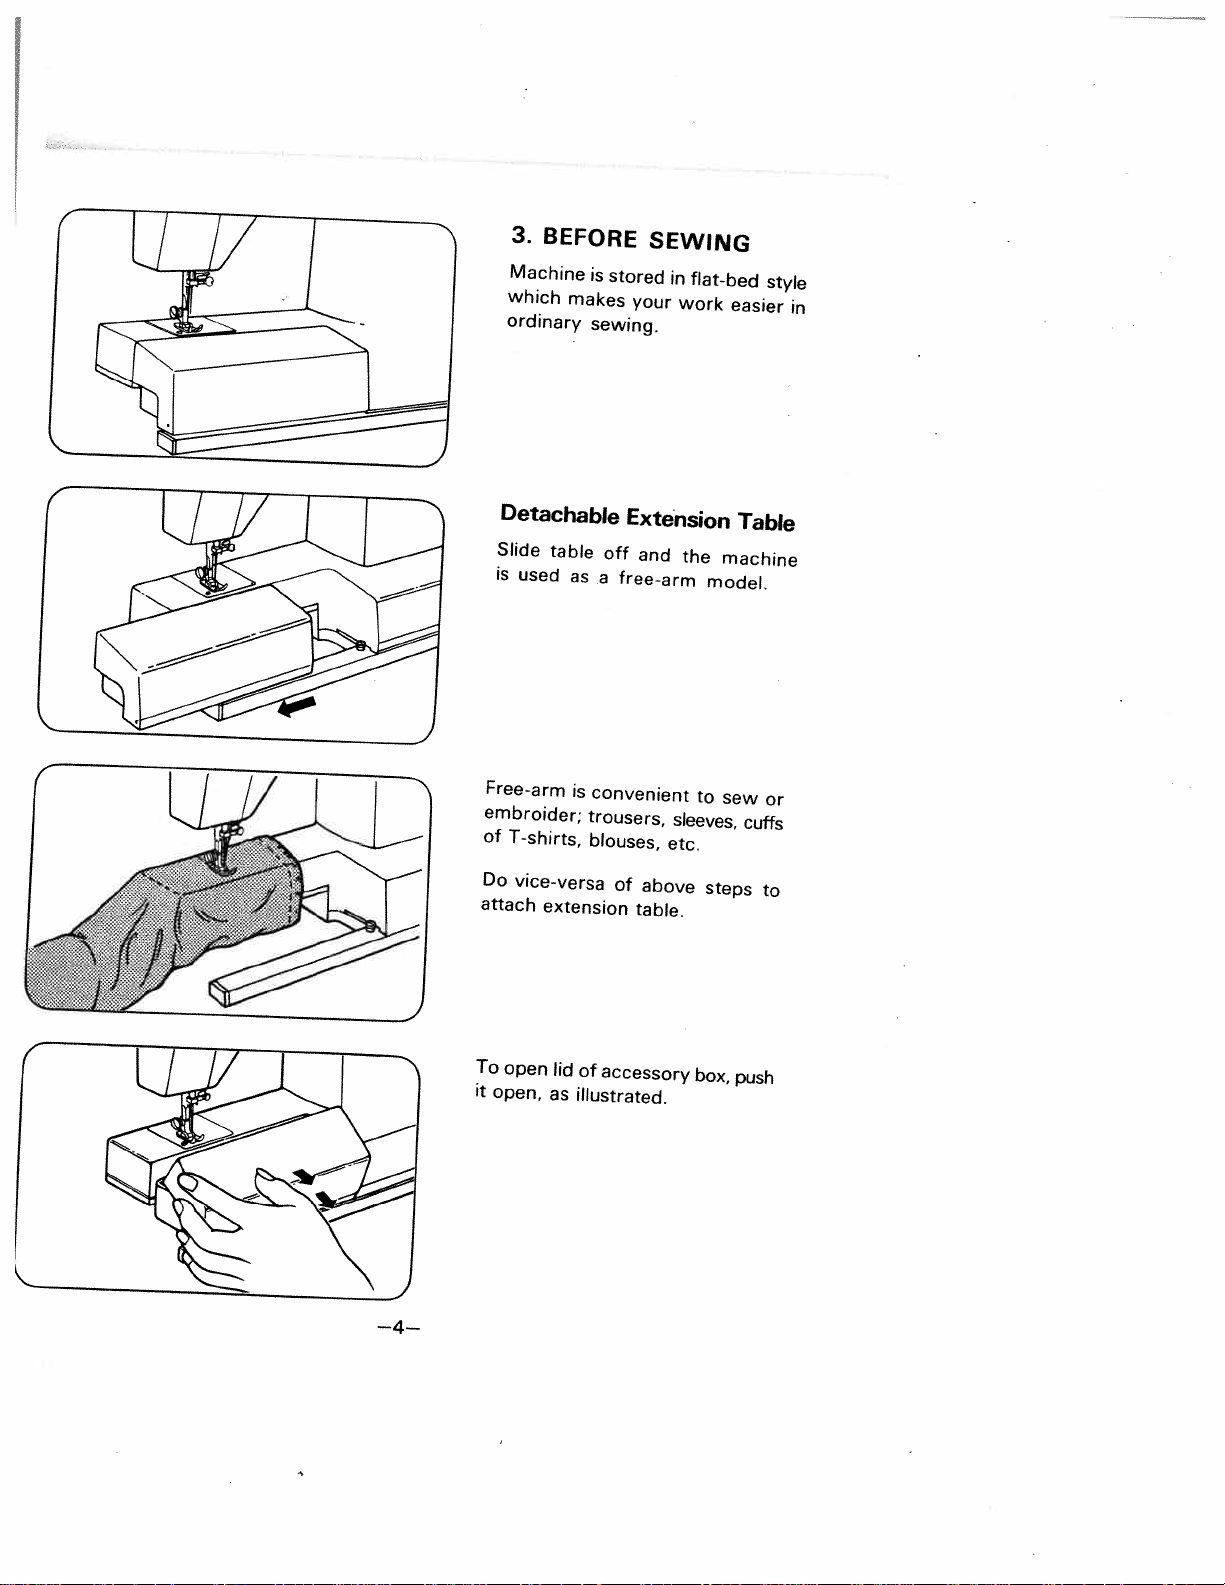
Slide
table
off
and
the
machine
is
used
as
a
free-arm
model.
Free-arm
is
convenient
to
sew
or
embroider;
trousers,
sleeves,
cuffs
of
T-shirts,
blouses,
etc.
Do
vice-versa
of
above
steps
to
attach
extension
table.
To
open
lid
of
accessory
box,
push
it
open,
as
illustrated.
3.
BEFORE
SEWING
Machine
is
stored
in
flat-bed
style
which
makes
your
work
easier
in
ordinary
sewing.
Detachable
Extension
Table
—4—
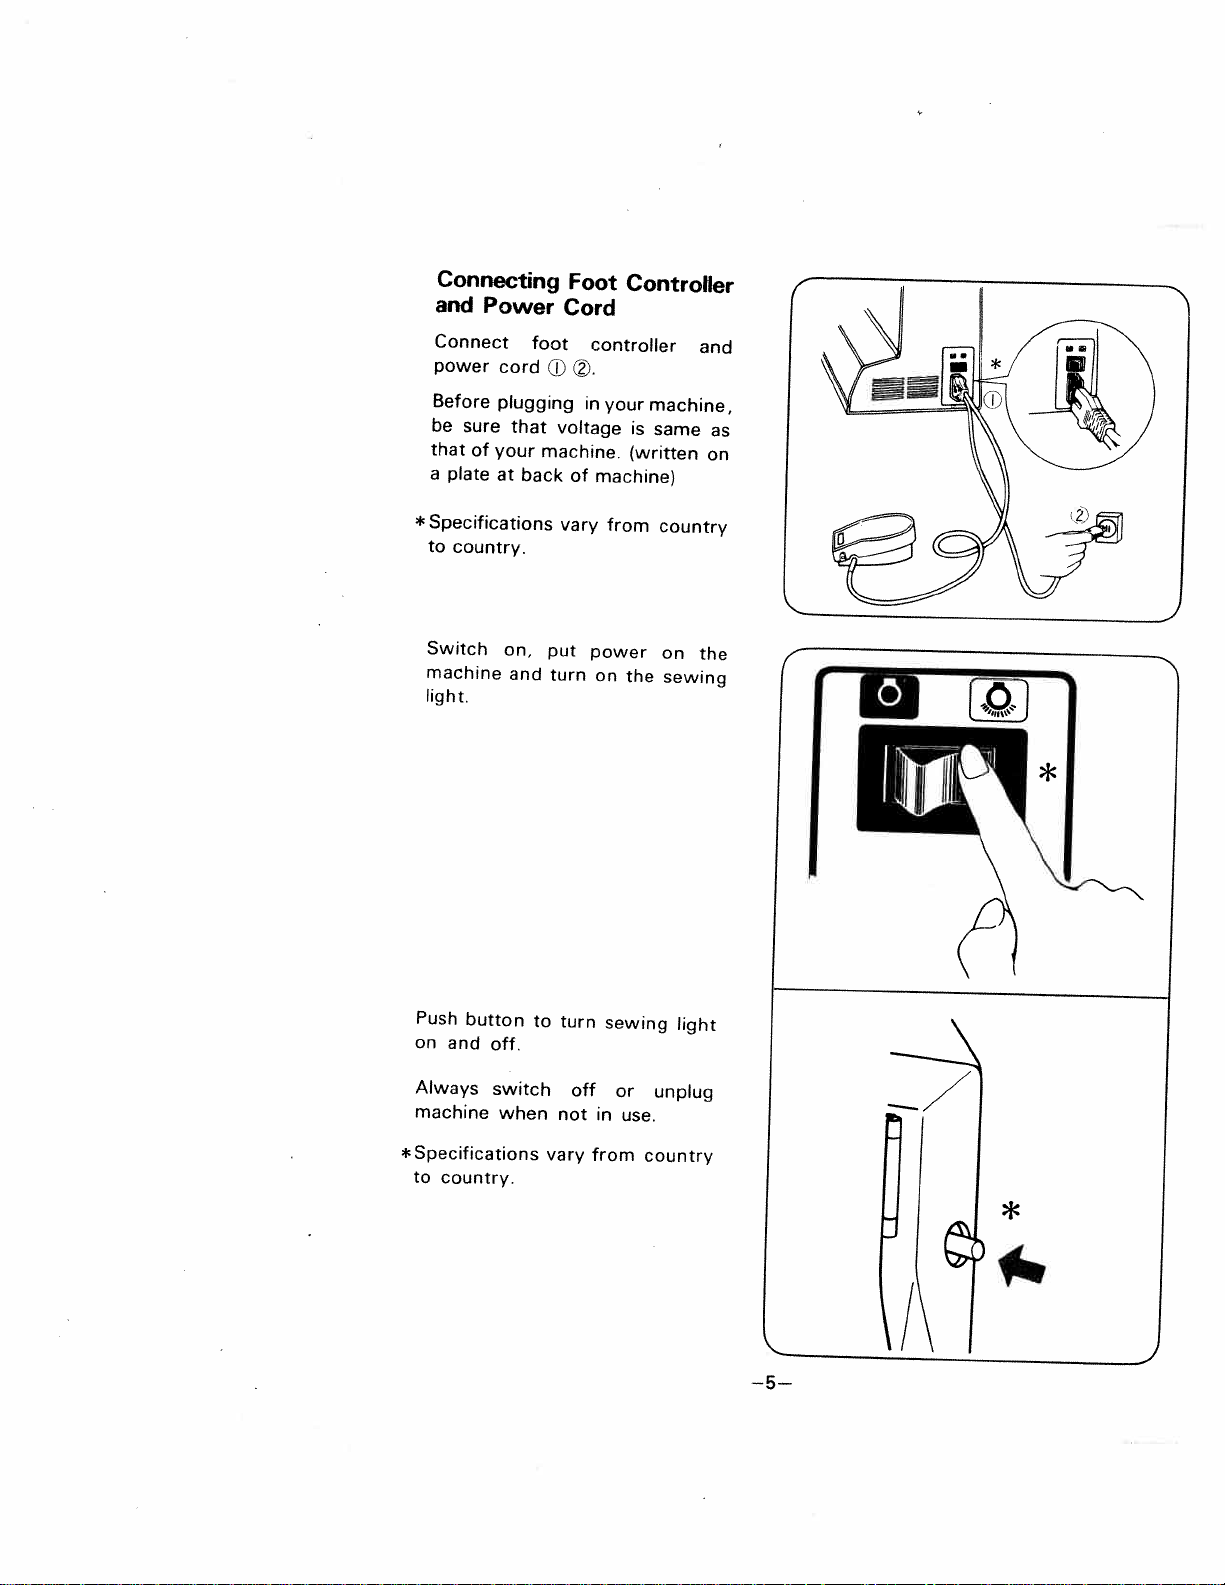
Connecting
Foot
Controller
and
Power
Cord
Connect
foot
controller
and
power
cord
ED
.
Before
plugging
in
your
machine,
be
sure
that
voltage
is
same
as
that
of
your
machine.
(written
on
a
plate
at
back
of
machine)
*Specifications
vary
from
country
to
country.
Switch
on,
put
power
on
the
machine
and
turn
on
the
sewing
light.
Push
button
to
on
and
off.
turn
sewing
light
Always
switch
off
or
unplug
machine
when
not
in
use.
*Specifications
vary
from
country
to
country.
*
—5—
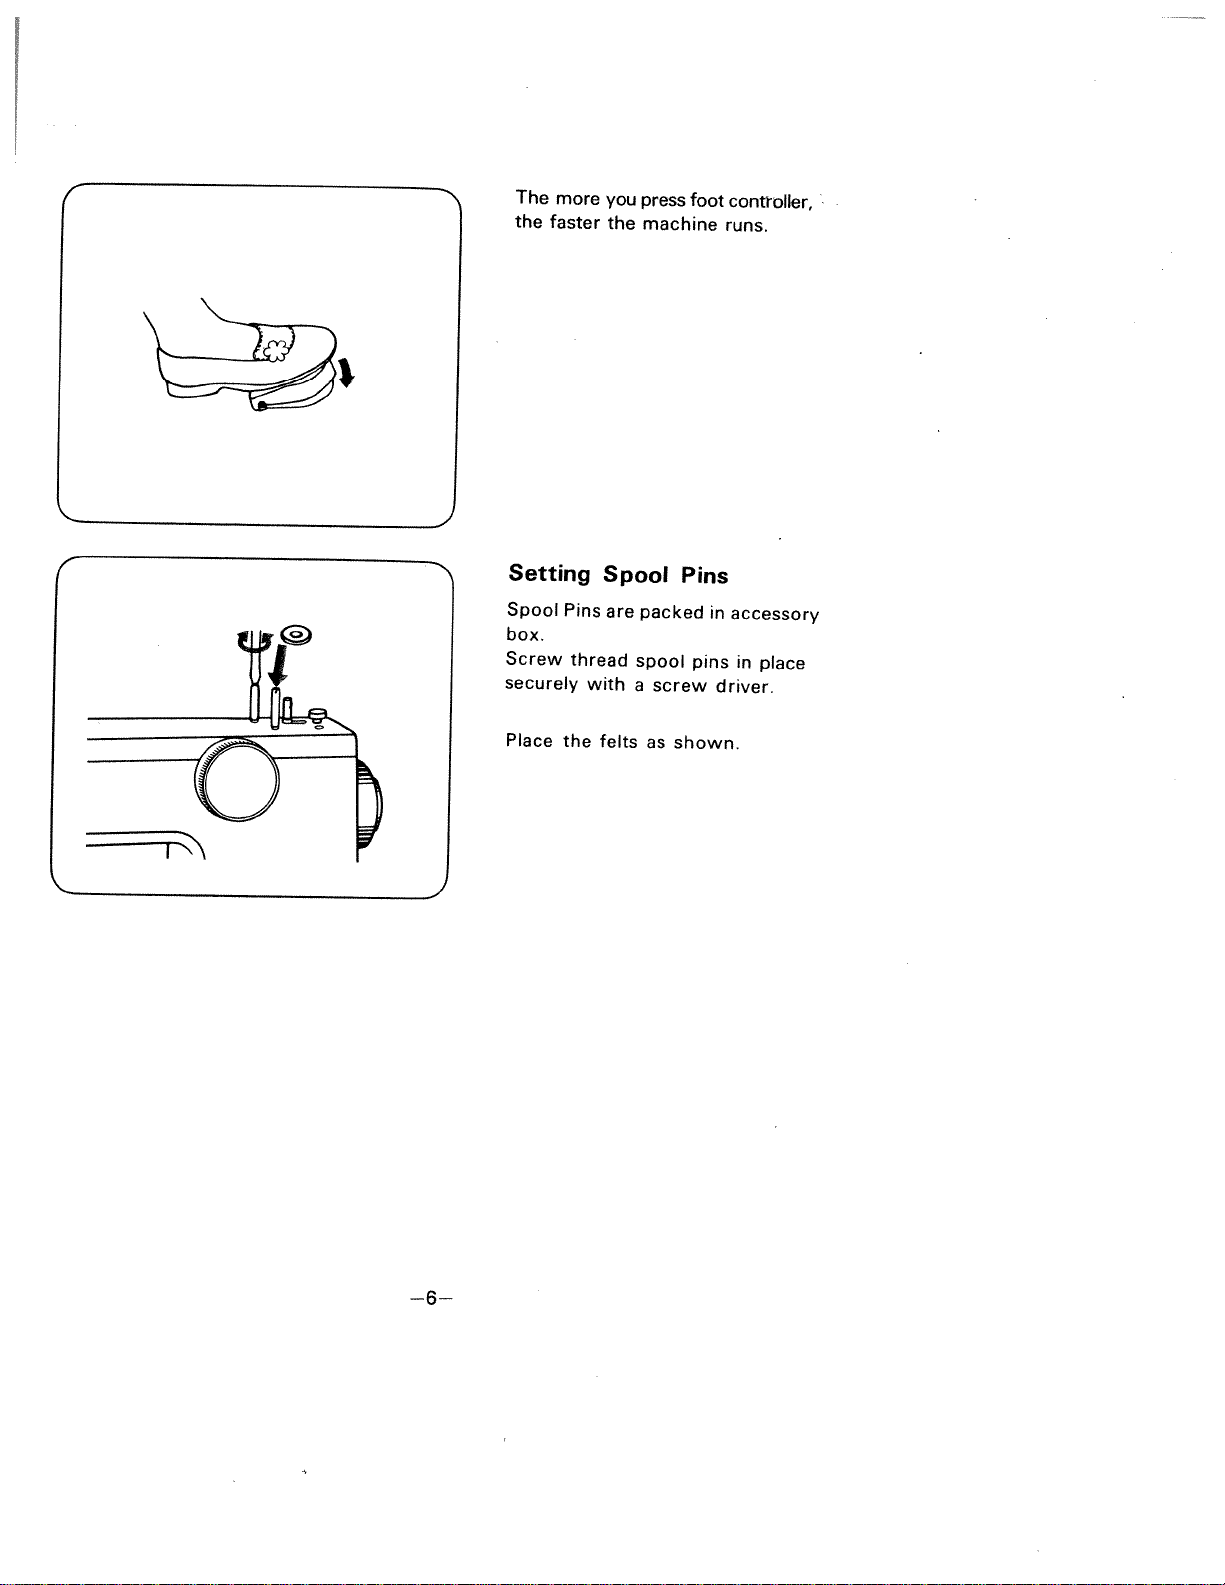
The
more
you
press
foot
controller,
the
faster
the
machine
runs.
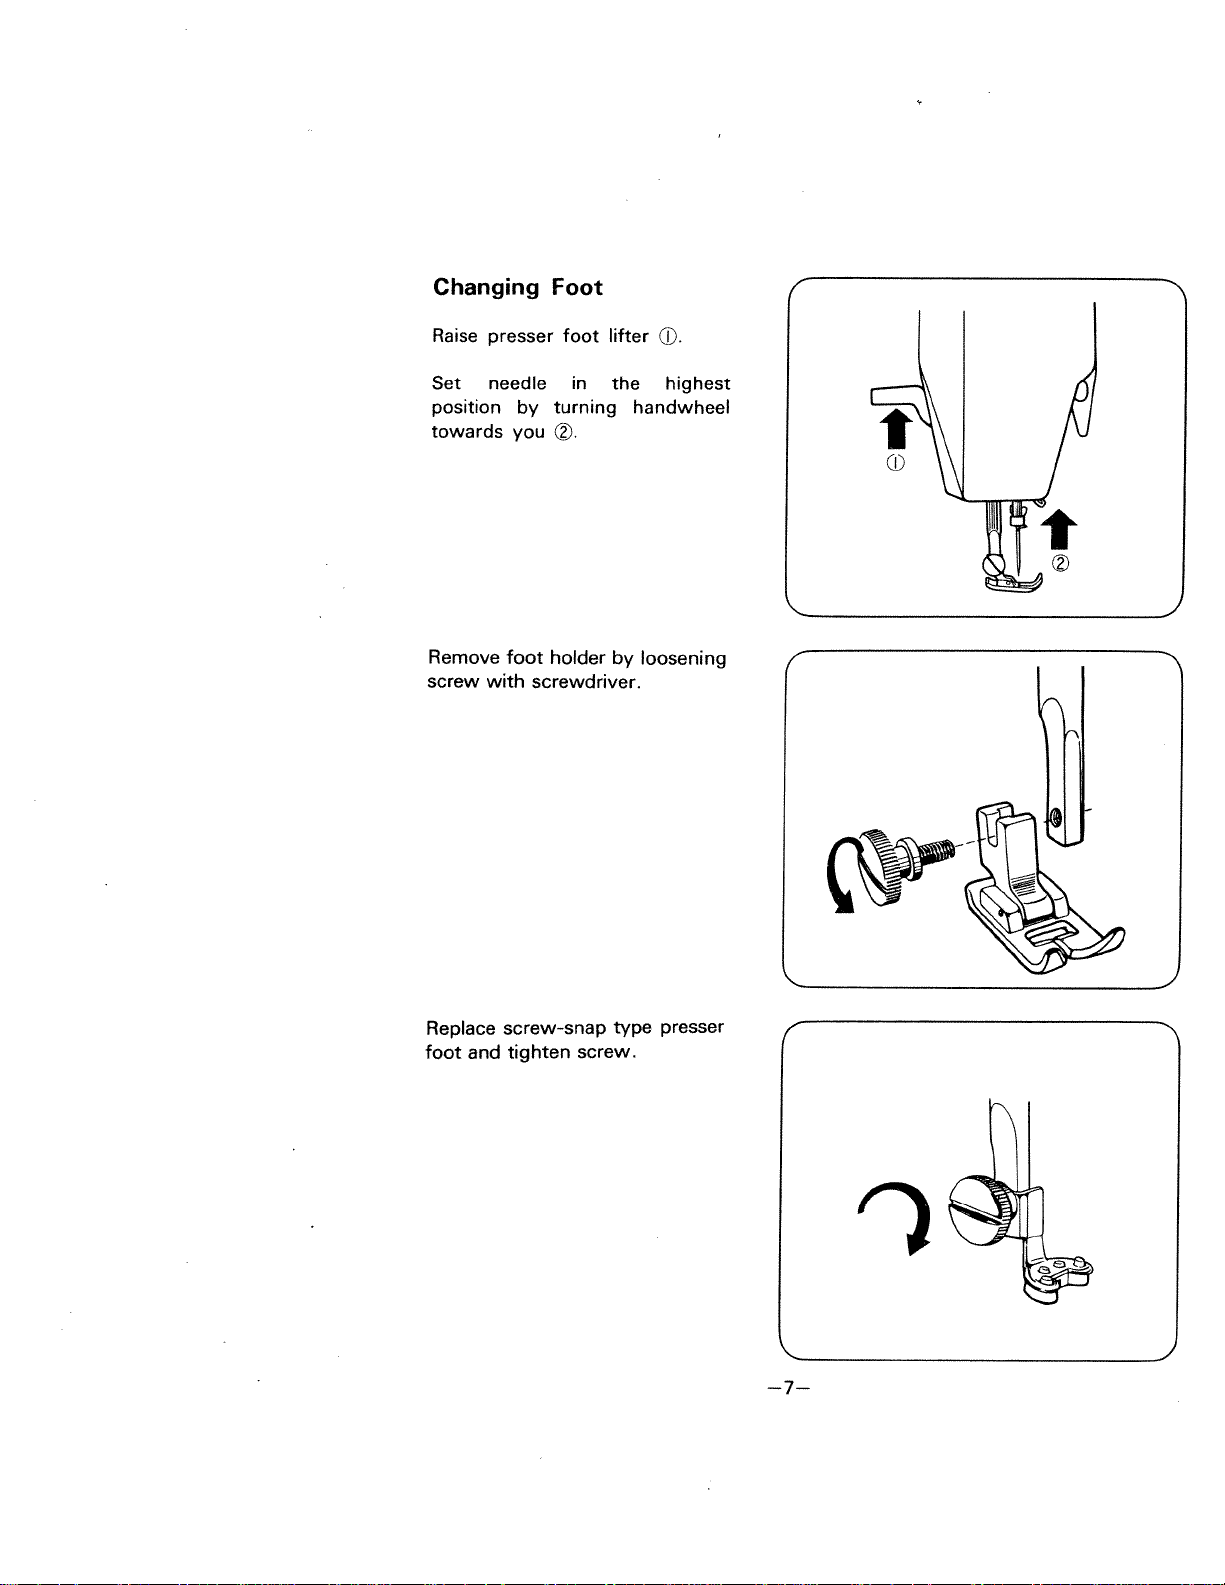
Setting
Spool
Pins
Spool
Pins
are
packed
in
accessory
box
Screw
thread
spool
pins
in
place
securely
with
a
screw
driver.
Place
the
felts
as
shown.
—6—
Changing
Foot
I
Set
needle
position
by
towards
you
in
the
highest
turning
handwheel
Remove
foot
holder
by
loosening
screw
with
screwdriver.
Replace
screw-snap
type
presser
foot
and
tighten
screw.
—7—-
Raise
presser
foot
lifter
D.
4
9
Changing
Needle
Set
needle
position
by
towards
you.
Loosen
needle
clamp
screw
and
take
out
needle.
With
flat
side
away
from
you,
insert
a
new
needle
into
groove
of
needle
bar.
Push
needle
into
clamp
until
it
reaches
stopper
®
and
tighten
needle
clamp
screw
firmly.
Always
use
a
straight
needle
with
a
sharp
point.
Using
defective
or
worn
needles
not
only
causes
stitch
skipping,
breakage
of
needles
or
snapping
of
thread;
it
also
can
damage
hook
and
needle
plate.
in
the
highest
turning
handwheel
Proper
needle
straight
shaft
sharp
point
I
—8—
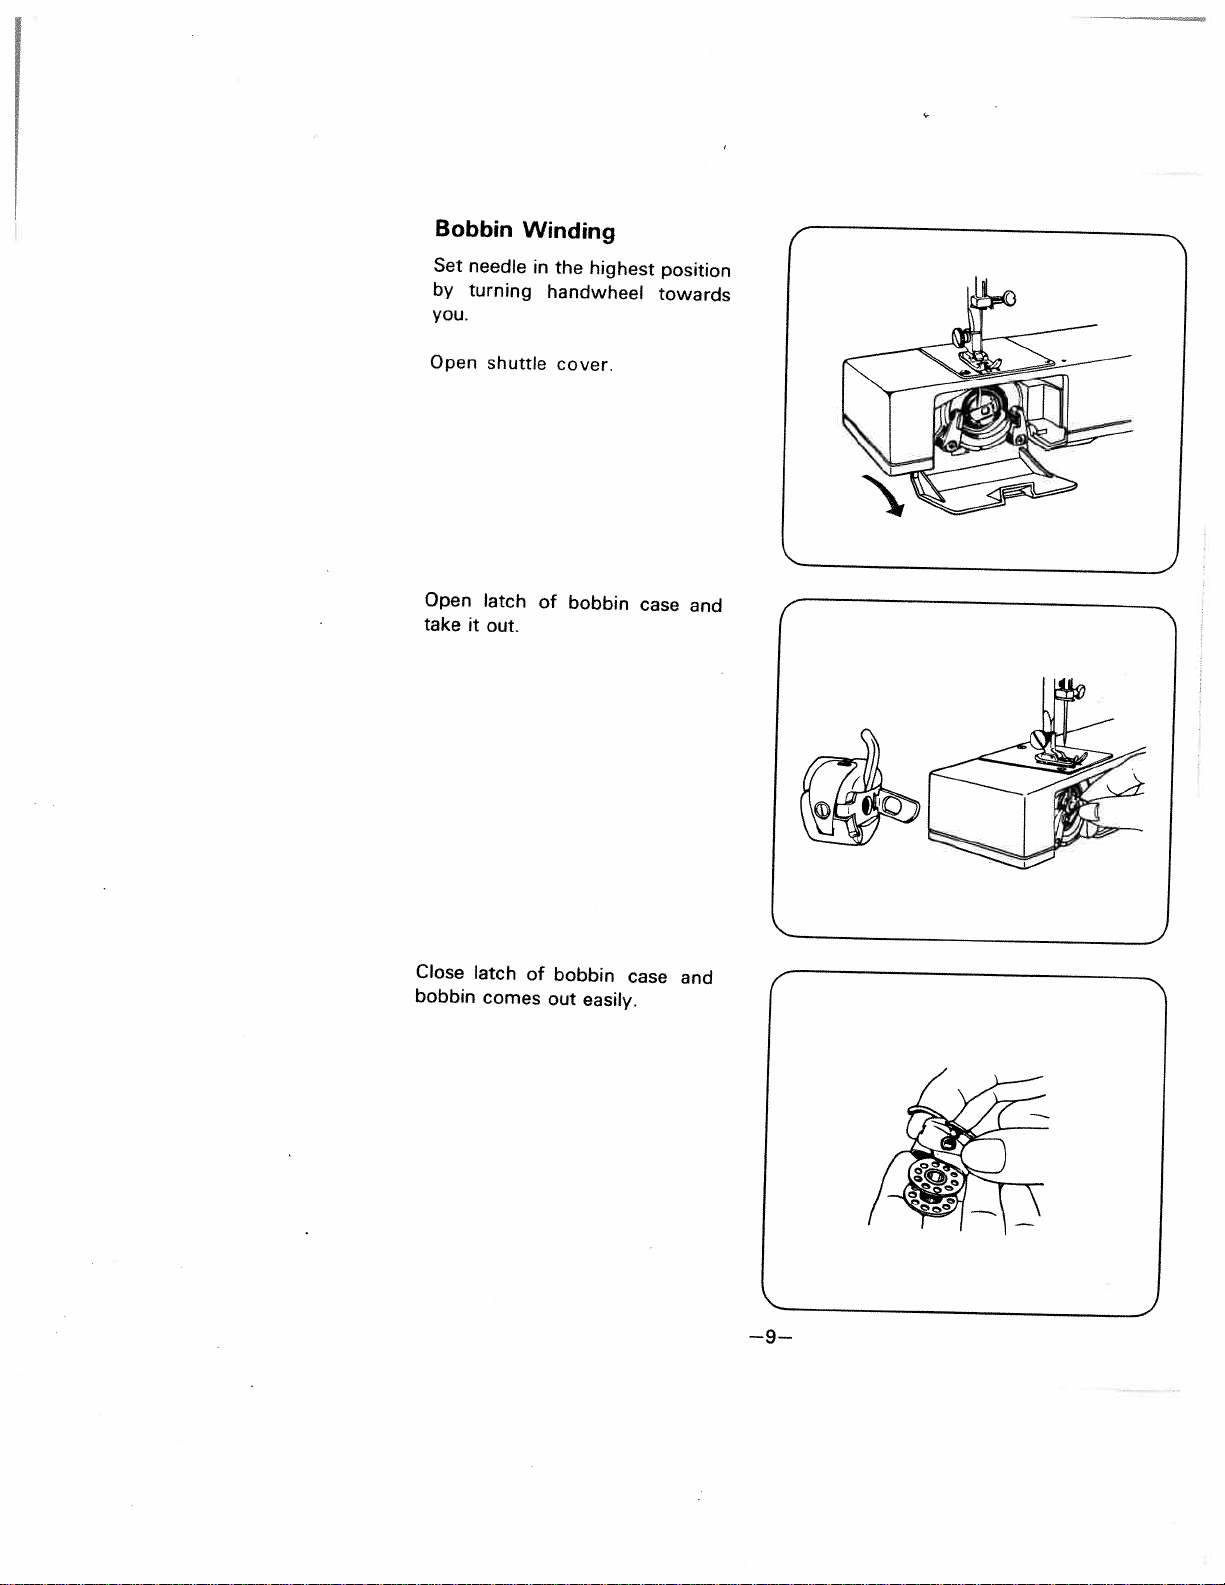
Bobbin
Winding
Set
needle
in
the
highest
position
by
turning
handwheel
towards
you.
Open
shuttle
cover.
Open
latch
of
bobbin
case
and
take
it
out.
Close
latch
of
bobbin
case
and
bobbin
comes
out
easily.
—9—
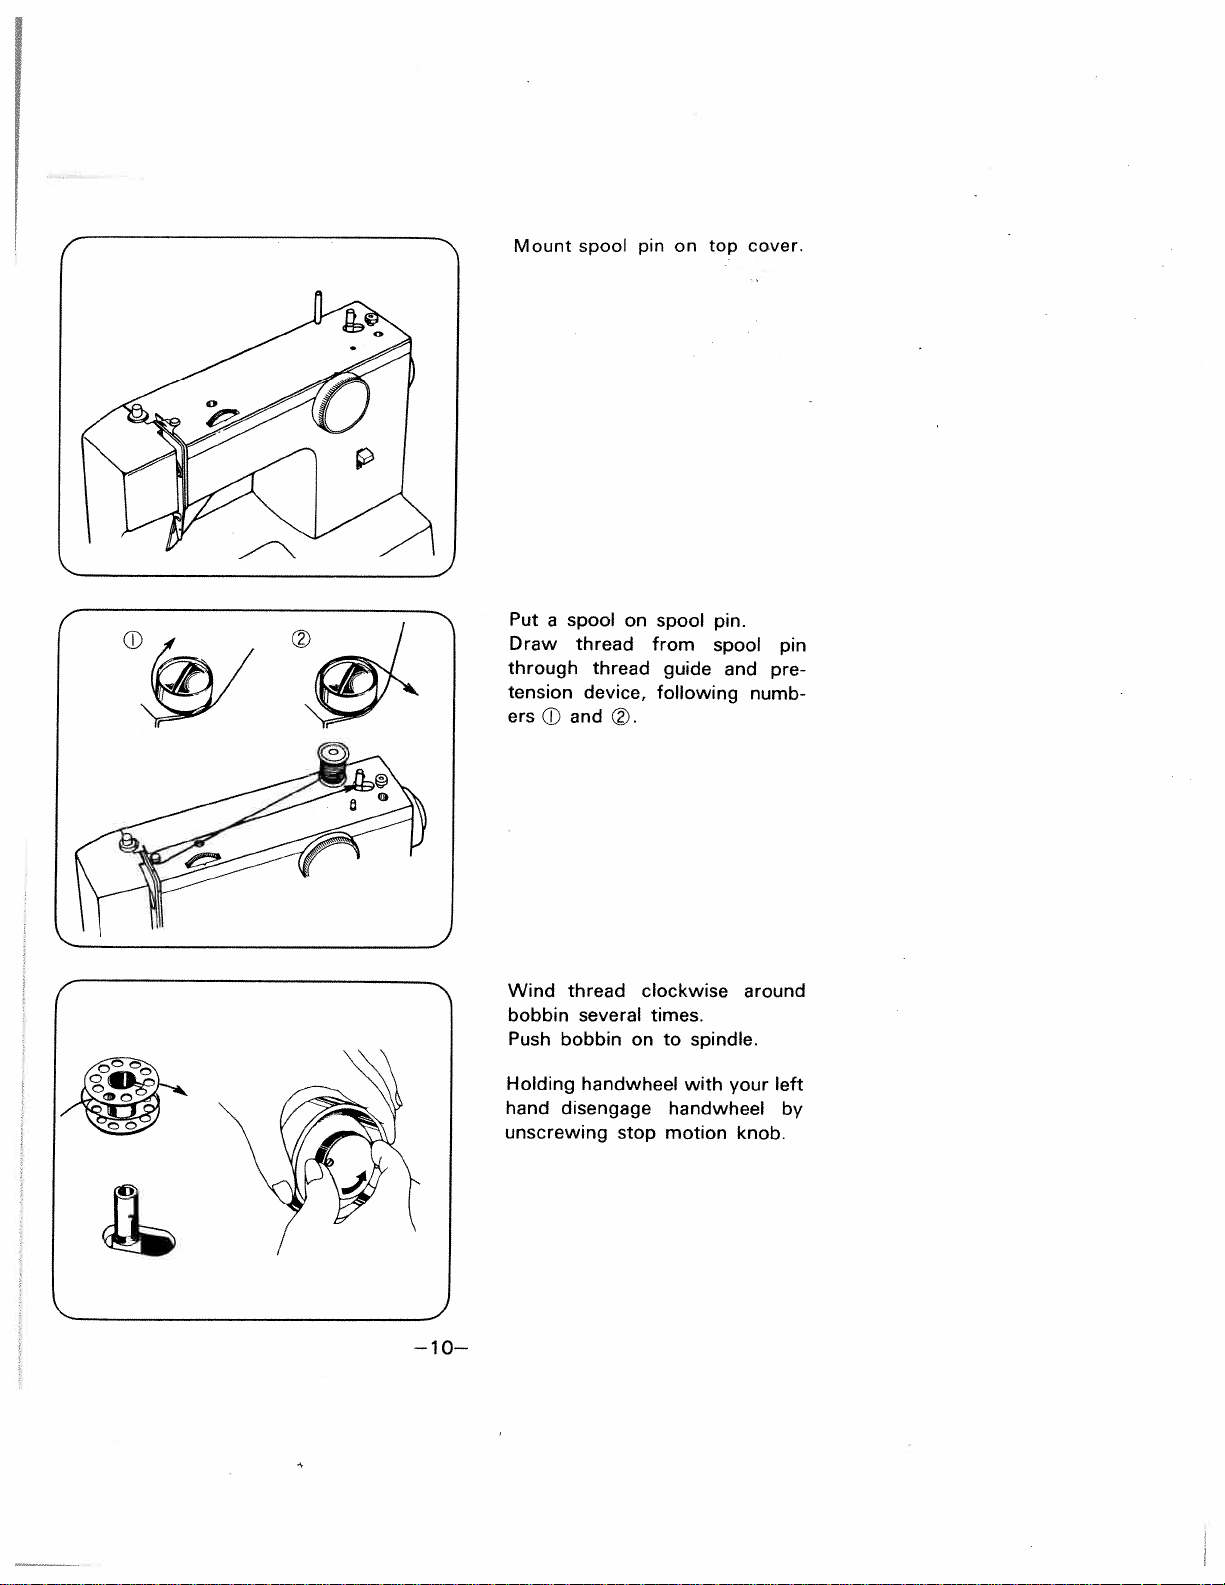
Mount
spool
pin
on
top
cover.
Put
a
spool
on
spool
pin.
Draw
thread
from
spool
pin
through
thread
guide
and
pre
tension
device,
following
numb
ers
D
and
Wind
thread
clockwise
around
bobbin
several
times.
Push
bobbin
on
to
spindle.
Holding
handwheel
with
your
left
hand
disengage
handwheel
by
unscrewing
stop
motion
knob.
©
‘4
J
—10—
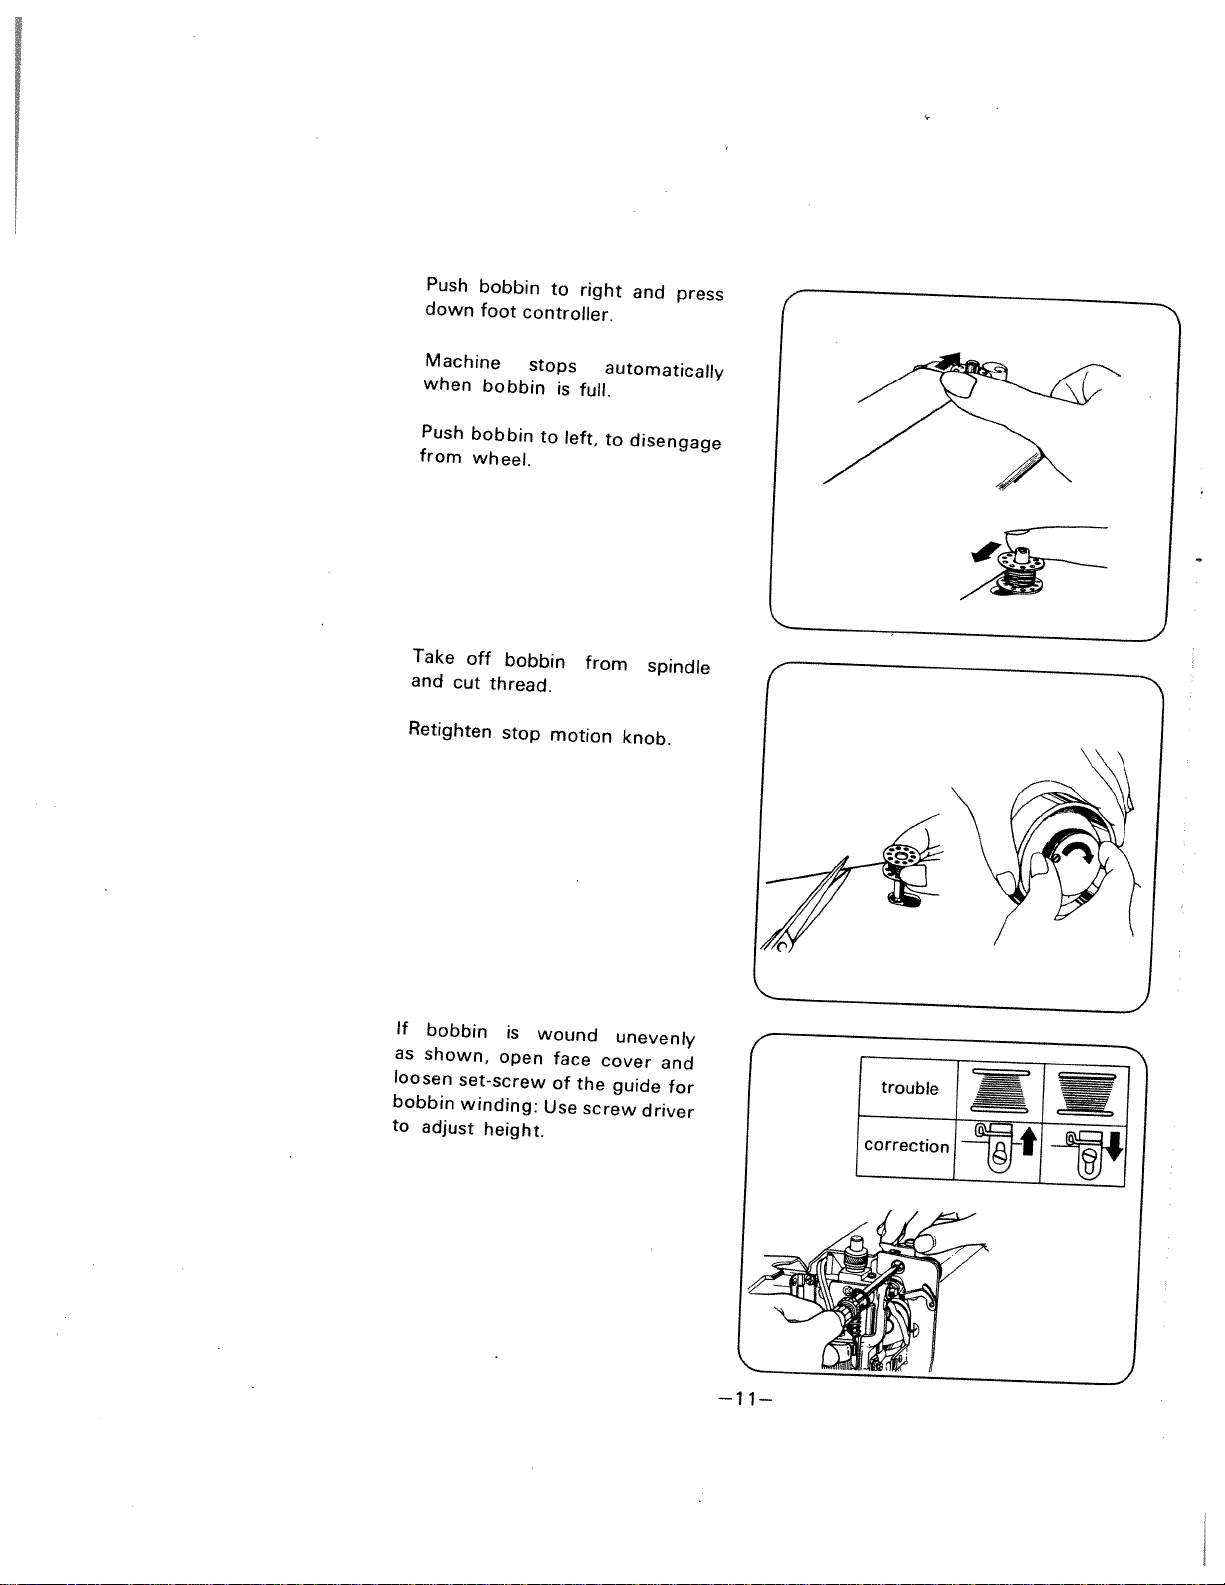
Push
bobbin
to
right
and
press
down
foot
controller.
Machine
stops
automatically
when
bobbin
is
full.
Push
bobbin
to
left,
to
disengage
from
wheel.
Take
off
bobbin
from
spindle
and
cut
thread.
Retighten
stop
motion
knob.
If
bobbin
is
wound
unevenly
as
shown,
open
face
cover
and
loosen
set-screw
of
the
guide
for
bobbin
winding:
Use
screw
driver
to
adjust
height.
—11—
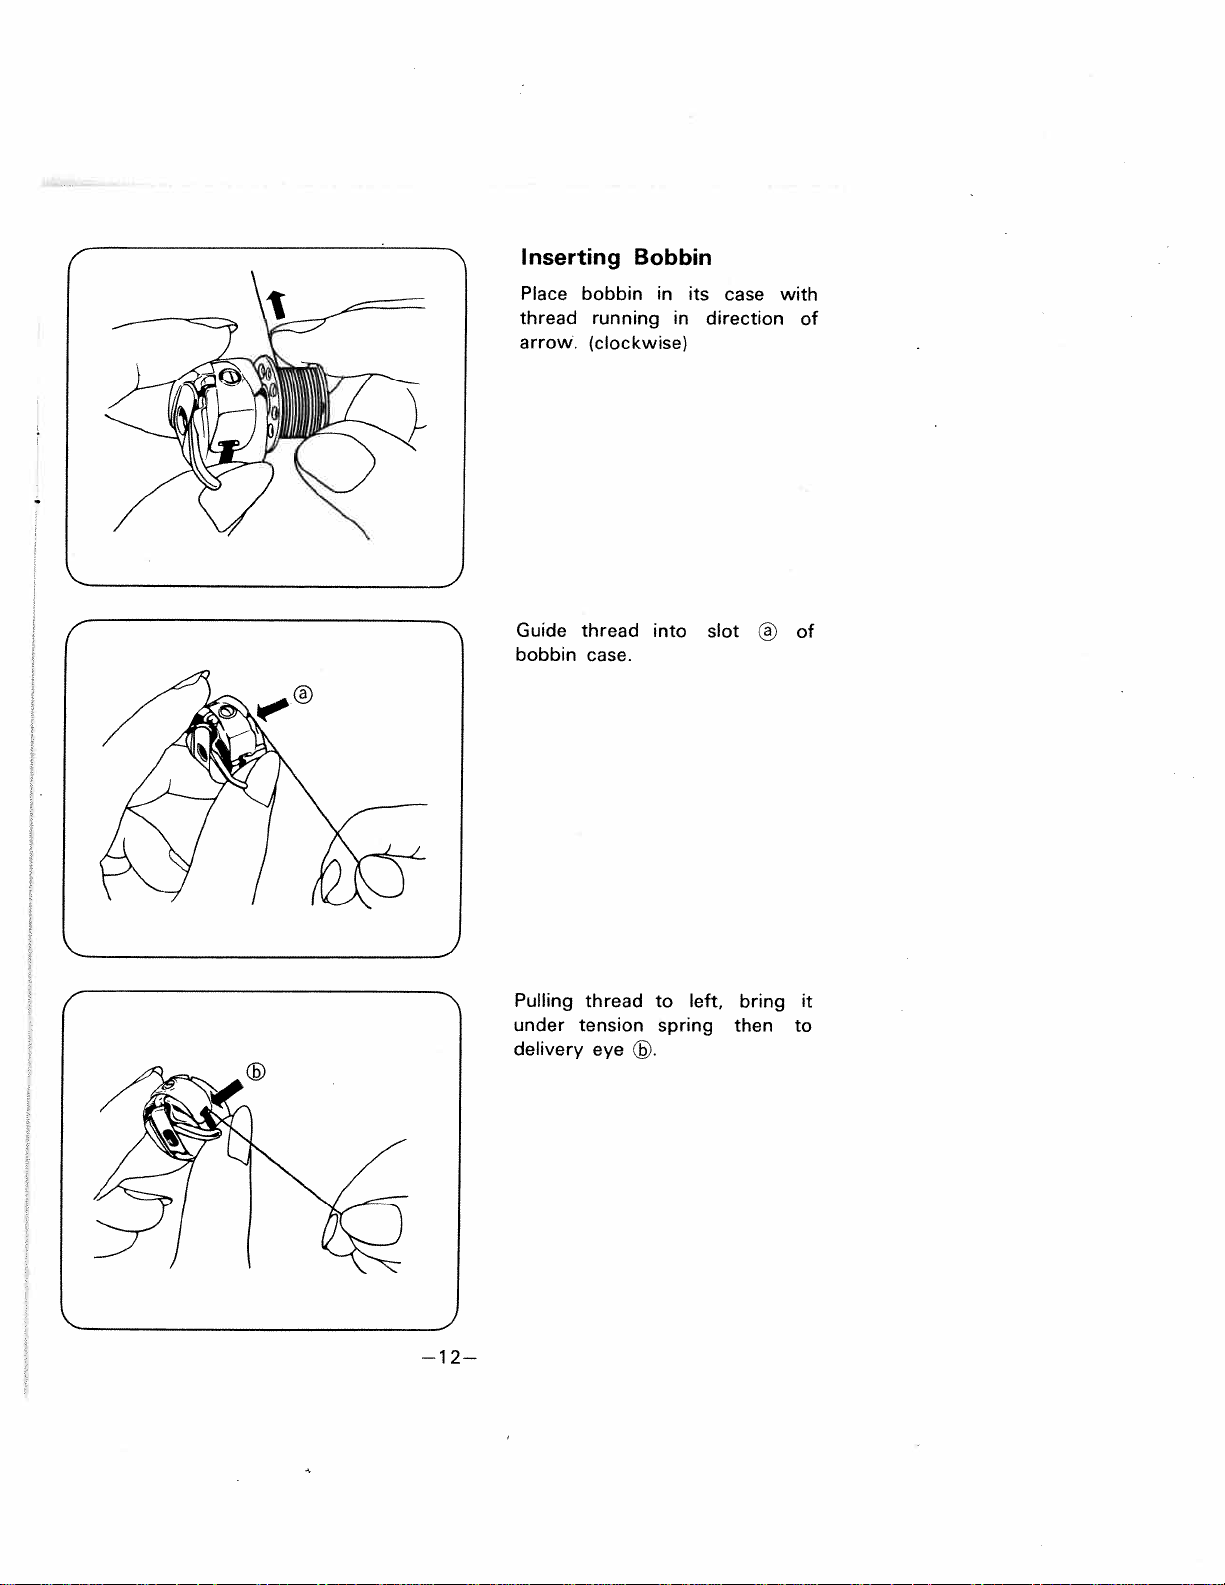
Inserting
Bobbin
Place
bobbin
in
its
case
with
thread
running
in
direction
of
arrow.
(clockwise>
Guide
thread
into
slot
®
of
bobbin
case.
Pulling
thread
to
left,
bring
it
under
tension
spring
then
to
delivery
eye
®.
I
—12—
 Loading...