


EH050FXVN00
Whirlpool EH050FXVN00, EH070FXAN00, EH150FXVN00, EH070FXVN00, EH220FXVN00 Manual
...
%h
01
Freezer
Guide
4”^
Contents
Important Safety
Instructions. .......................
How To Get The Most
From Your Freezer.
.................
Freezing tips
......................
Energy saving tips
..................
Packaging materials and techniques
How To Freeze Food
................
How to freeze fruits
.................
How to freeze vegetables
............
Getting fruits and vegetables
ready for the freezer
..............
How to freeze meats, poultry,
game and fish
...................
How to freeze cooked food,
dairy products and baked goods
....
Food Storage.
......................
Loading unfrozen food
..............
Storing frozen food
.................
Food storage chart
.................
Cleaning Your Freezer.
.............
Cleaning a chest freezer
............
Cleaning an upright freezer
..........
Cleaning chart .....................
Vacation And Moving Care.
.........
Common Freezer Problems.
........
01989 Whirlpool Corporation
Page
2
. 3-5
3
3
3
. 6-23
6
7
9
16
20
24-25
. 24
. 24
. 25
. 26-28
26
26
27
29
30-31
Your Whirlpool freezer provides convenience
while helping you save time and money. This
freezer guide is designed to help you enjoy max-
imum benefit from your new Whirlpool freezer.
The following pages are filled with important
information on safety, freezing different kinds of
foods packaging, and food storage times, as
well as helpful hints for saving energy and solving
common freezer problems.
The Use and Care Guide for your specific
freezer model is a companion booklet. It gives
detailed information about your freezer’s features
and shows how to use them safely and correctly.
Using these two booklets together will help you
understand your new Whirlpool freezer and use
it effectively.
Important Safety
Instructions
Be sure to read and follow the “Important Safety
Instructions” in this book and in your Use and Care
Guide before using your new freezer. Both of these
sections provide important safety information
that you need to know for safe freezer operation.
l
To prevent accidental suffocation, do not
let children near a junked or abandoned
freezer. Children can be hurt or trapped in
old freezers. The lid/door on discarded
freezers should be locked shut with a lock
and chain, securely tied down with a
heavy rope, or removed.
l
To prevent injury or entrapment, do not let
children near the freezer when the door
or lid is blocked open. The lid or door can
close accidentally.
l
To prevent fire, install your freezer
away from flammable materials such as
gasoline. The heat released from the
condenser can ignite a flammable
substance.
l
Before changing the light bulb, prevent
shock by always disconnecting the
freezer from its electrical source. Either
unplug the freezer from the outlet or turn
off the electricity at the circuit breaker or
fuse leading to the freezer’s outlet.
How
To Get The Most From
Your
Freezer
Freezing tips
l
Freeze foods when in season and at peak of
freshness.
l
Freeze no more than 3 Ibs. of food per cu. ft.
(.05 kg per liter) of freezer capacity. Do not place
too many items of unfrozen food in the freezer
at one time. This slows down the rate of freezing
and lowers food quality. Make sure food items
are frozen solid (about 24 hours) before putting
more unfrozen food in the freezer.
l
Try to freeze food items in meal-size portions.
Smaller portions freeze faster and thaw more
quickly.
l
Do not put hot foods into the freezer. Let foods
become cool enough to touch (set containers in
ice water or plunge foods like vegetables into
cold water just after blanching). When cool, package properly, seal, label, date and freeze. Do not
take a casserole from the oven and put it right
into the freezer. This slows the rate of freezing
and lowers food quality.
If your freezer has been off for any reason:
l
Foods that still have ice crystals present can be
safely frozen a second time. However, the quality
will not be quite as good. Do not refreeze fish or
shellfish that have started to thaw. Cook at once.
l
Cook fully thawed food as quickly as possible.
It can then be frozen again. Do not cook fully
thawed fish or shellfish. Throw it away. Do not
keep fully thawed foods at room temperature for
long. They can spoil quickly.
l
In upright freezers, spread food items out in a
single layer for fastest freezing. In chest freezers,
place items next to the coldest walls and spread
in a single layer. After freezing, stack items for
best use of space. Do not put unfrozen food
items directly on top of frozen ones.
l
Rotate food items to use oldest items first. Move
older frozen items forward. Place new items to
the rear or on the bottom. Keep a checklist of
food items near the freezer. Update it every time
you add or remove food.
Energy saving tips
l
Check door or lid gaskets for tightness of seal:
hold a dollar bill between cabinet and door, close
door and pull on bill. There should be some
resistance while pulling the bill out. If freezer has
a lock, keeping it locked helps ensure door
closure and a good seal.
l
Level freezer properly to assure a good door seal.
l
Do not install freezer next to or near a heat source
such as a range, water heater, furnace, etc.
l
Set temperature control at mid setting. This set-
ting is designed to maintain temperatures at or
near 0°F (- 17.6%) in normal room conditions.
l
Keep power saving control on LO or OFF when
humidity is low (for freezers with this feature).
l
Do not open door/lid too often or for too long at
one time. Try to remove all your items at one
time. Keep freezer filled.
l
Set up your freezer storage so food items will be
easy to find. Select a separate area for meats,
vegetables, fruits and short-term storage items
like baked goods or leftovers. This saves time
spent looking for frozen items.
l
Do not let frost build up to more than
l/4”
(6mm)
thick on manual defrost models. A heavy build-up
of frost will cause the freezer to run more.
l
Clean condenser coils often (vertical freezers
only).
Packaging materials &
techniques
Proper packaging is the key to top-quality frozen
foods. Poor packaging can lead to freezer burn,
making foods appear dried out, with a white or
gray color.
Wrapping or packaging material should be:
1. vapor-proof or non-porous to assure that odors
and flavors will not be transferred from food to
food or ice cubes in your freezer.
2. moisture-proof to seal in natural moisture and
help maintain quality.
3
How To Get The Most From Your Freezer
Continued
Use freezer tape to seal freezer wrap or suitable
plastic wrap. Freezer tape is made with a special
adhesive designed to stick at low temperatures.
Use a water-proof marking pen to label package
contents and the date frozen.
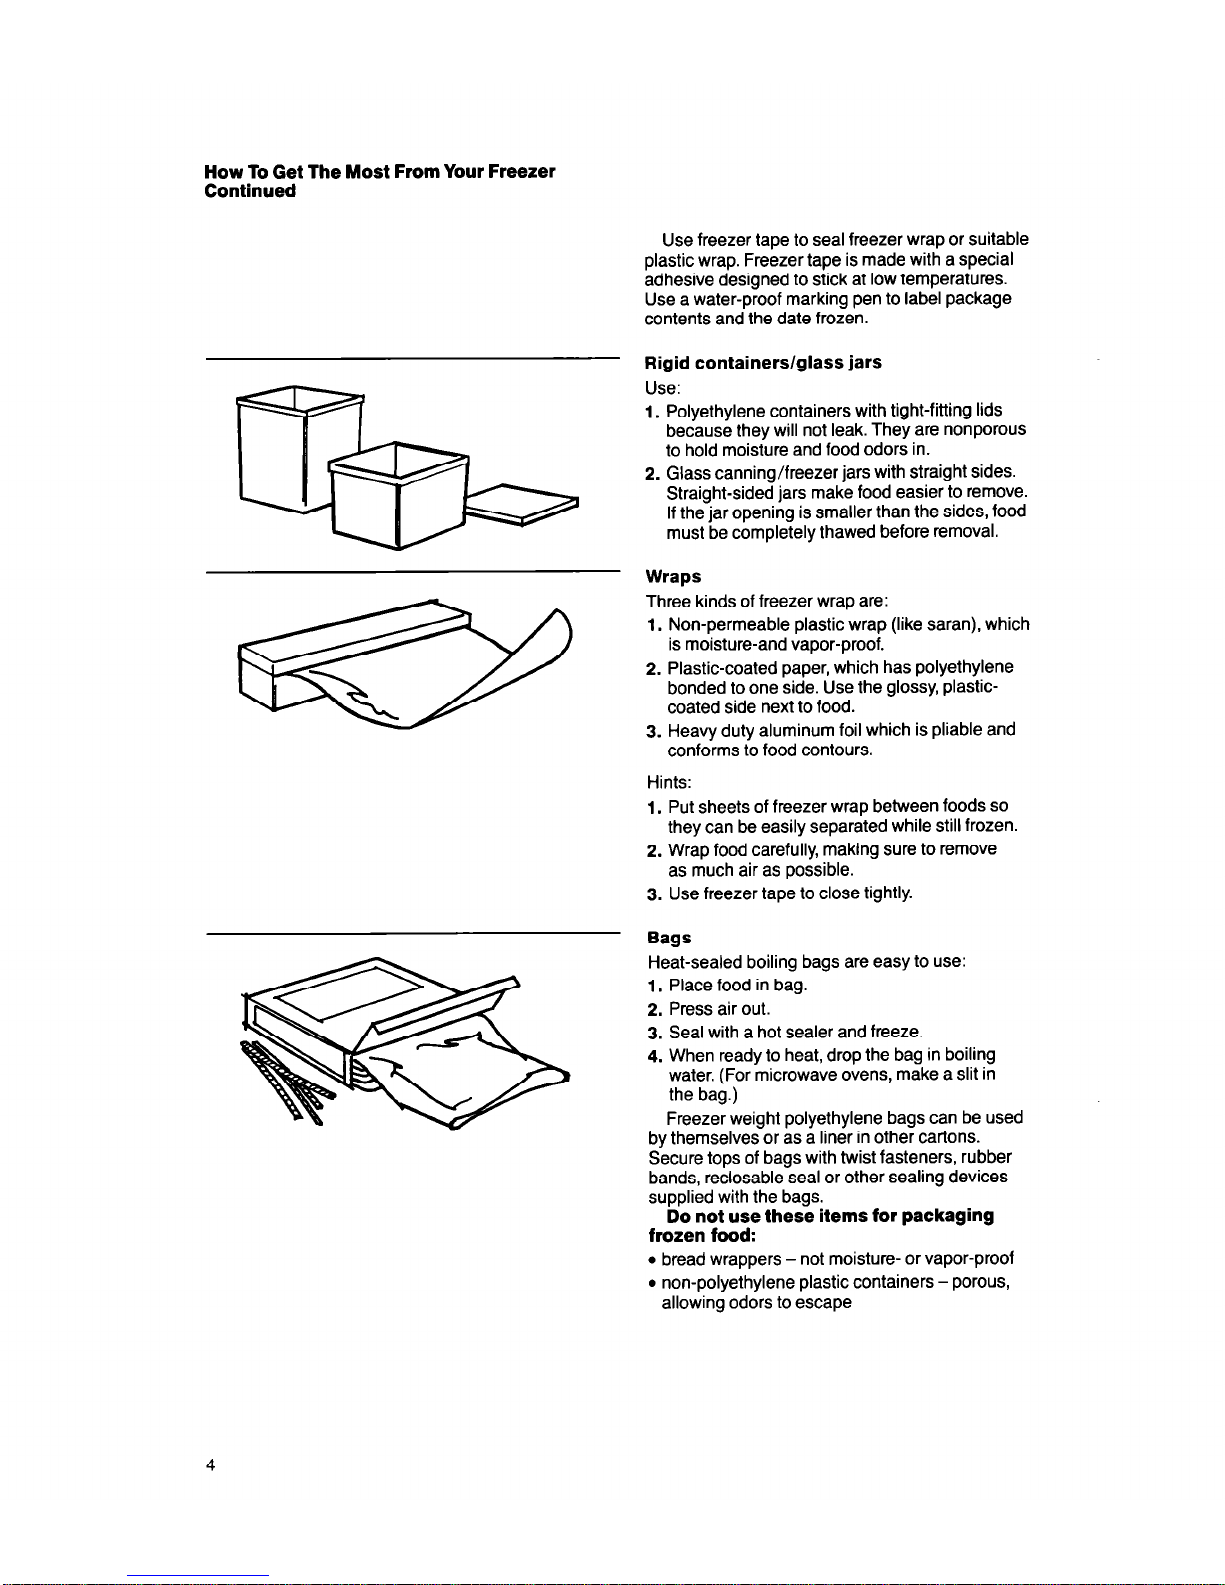
Rigid containers/glass jars
Use:
c
1. Polyethylene containers with tight-fitting lids
because they will not leak. They are nonporous
to hold moisture and food odors in.
2. Glass canning/freezer jars with straight sides.
Straight-sided jars make food easier to remove.
If the jar opening is smaller than the sides, food
must be completely thawed before removal.
Wraps
Three kinds of freezer wrap are:
1. Non-permeable plastic wrap (like Saran), which
is moisture-and vapor-proof.
2. Plastic-coated paper, which has polyethylene
bonded to one side. Use the glossy, plasticcoated side next to food.
3. Heavy duty aluminum foil which is pliable and
conforms to food contours.
Hints:
1. Put sheets of freezer wrap between foods so
they can be easily separated while still frozen.
2. Wrap food carefully, making sure to remove
as much air as possible.
3. Use freezer tape to close tightly.
Bags
Heat-sealed boiling bags are easy to use:
1. Place food in bag.
2. Press air out.
3. Seal with a hot sealer and freeze.
4. When ready to heat, drop the bag in boiling
water. (For microwave ovens, make a slit in
the bag.)
Freezer weight polyethylene bags can be used
by themselves or as a liner in other cartons.
Secure tops of bags with twist fasteners, rubber
bands, reclosable seal or other sealing devices
supplied with the bags.
Do not use these items for packaging
frozen food:
l
bread wrappers - not moisture- or vapor-proof
l
non-polyethylene plastic containers - porous,
allowing odors to escape
l
thin, non-polyethylene plastic wraps-not
moisture- or vapor-proof
l
containers without tight lids - moisture
can escape
l
waxed paper - no sealing ability, not moisture- or
vapor-proof
l
wax coated freezer wrap-won’t protect against
freezer burn
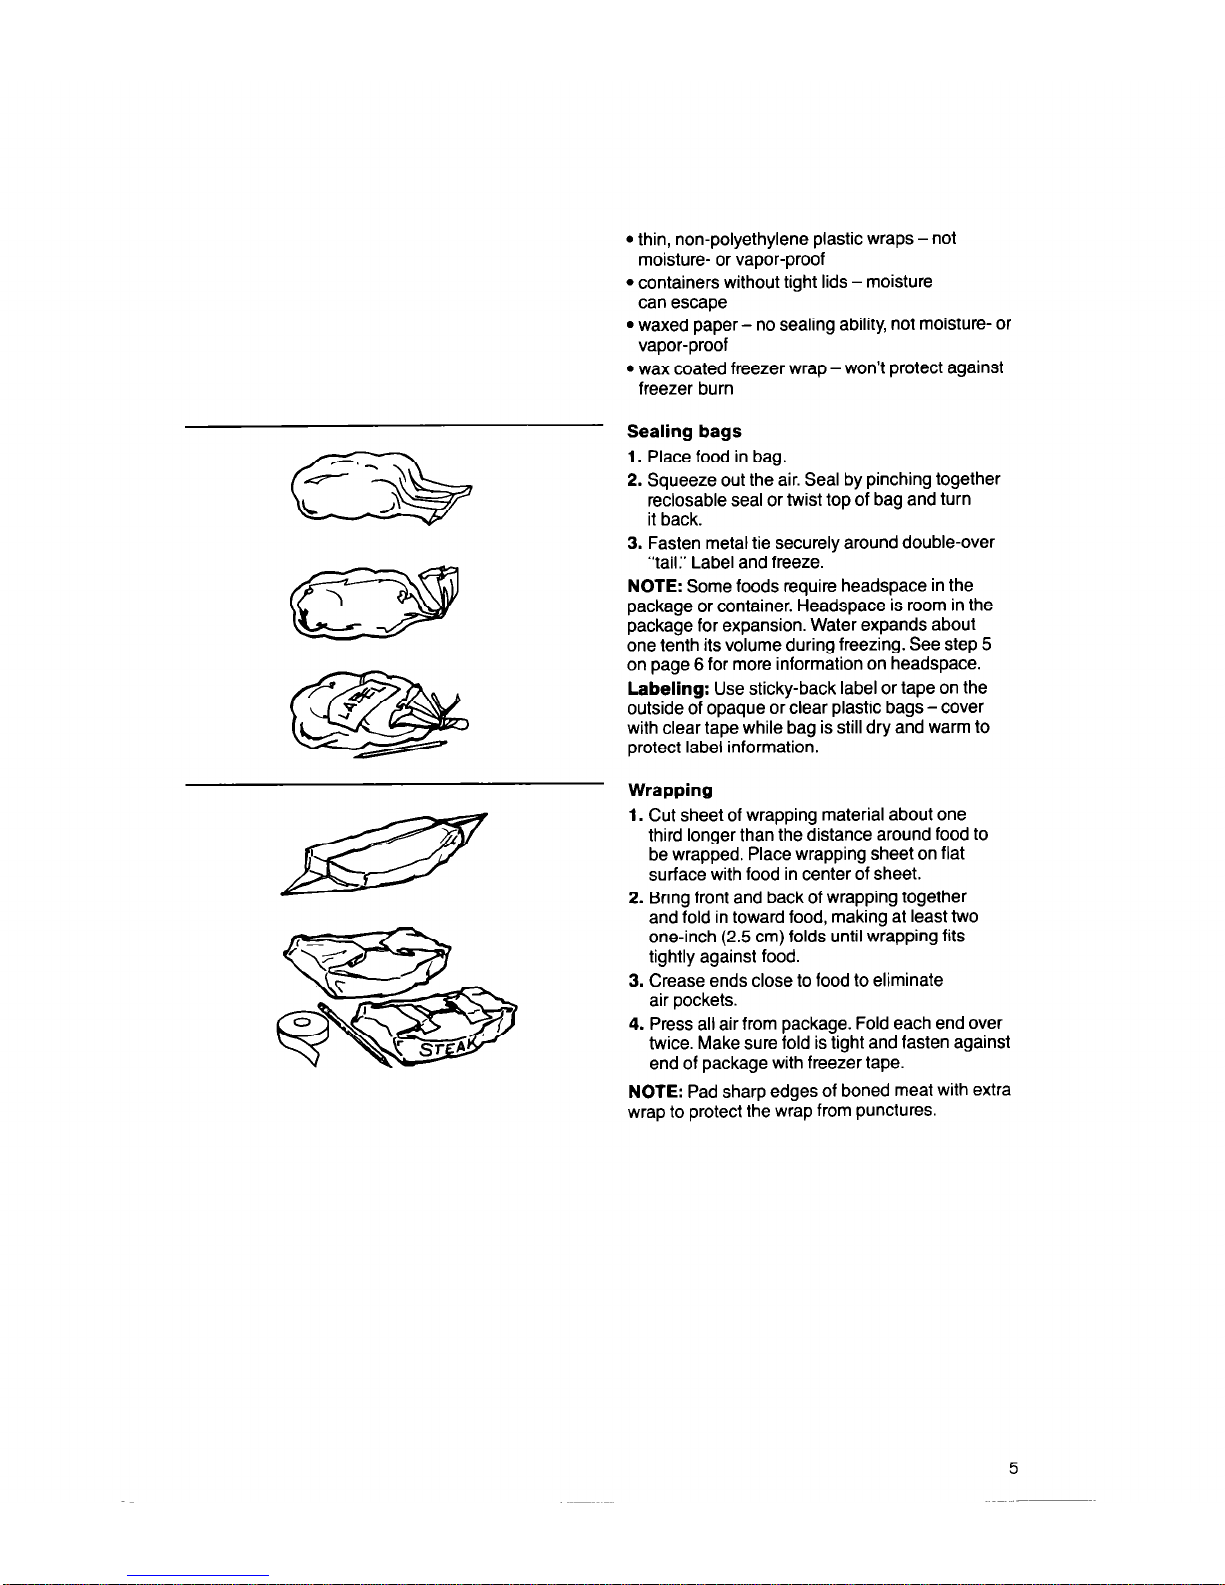
Sealing bags
1. Place food in bag.
2. Squeeze out the air. Seal by pinching together
reclosable seal or twist top of bag and turn
it back.
3. Fasten metal tie securely around double-over
“tail:’ Label and freeze.
NOTE: Some foods require headspace in the
package or container. Headspace is room in the
package for expansion. Water expands about
one tenth its volume during freezing. See step 5
on page 6 for more information on headspace.
Labeling: Use sticky-back label or tape on the
outside of opaque or clear plastic bags - cover
with clear tape while bag is still dry and warm to
protect label information.
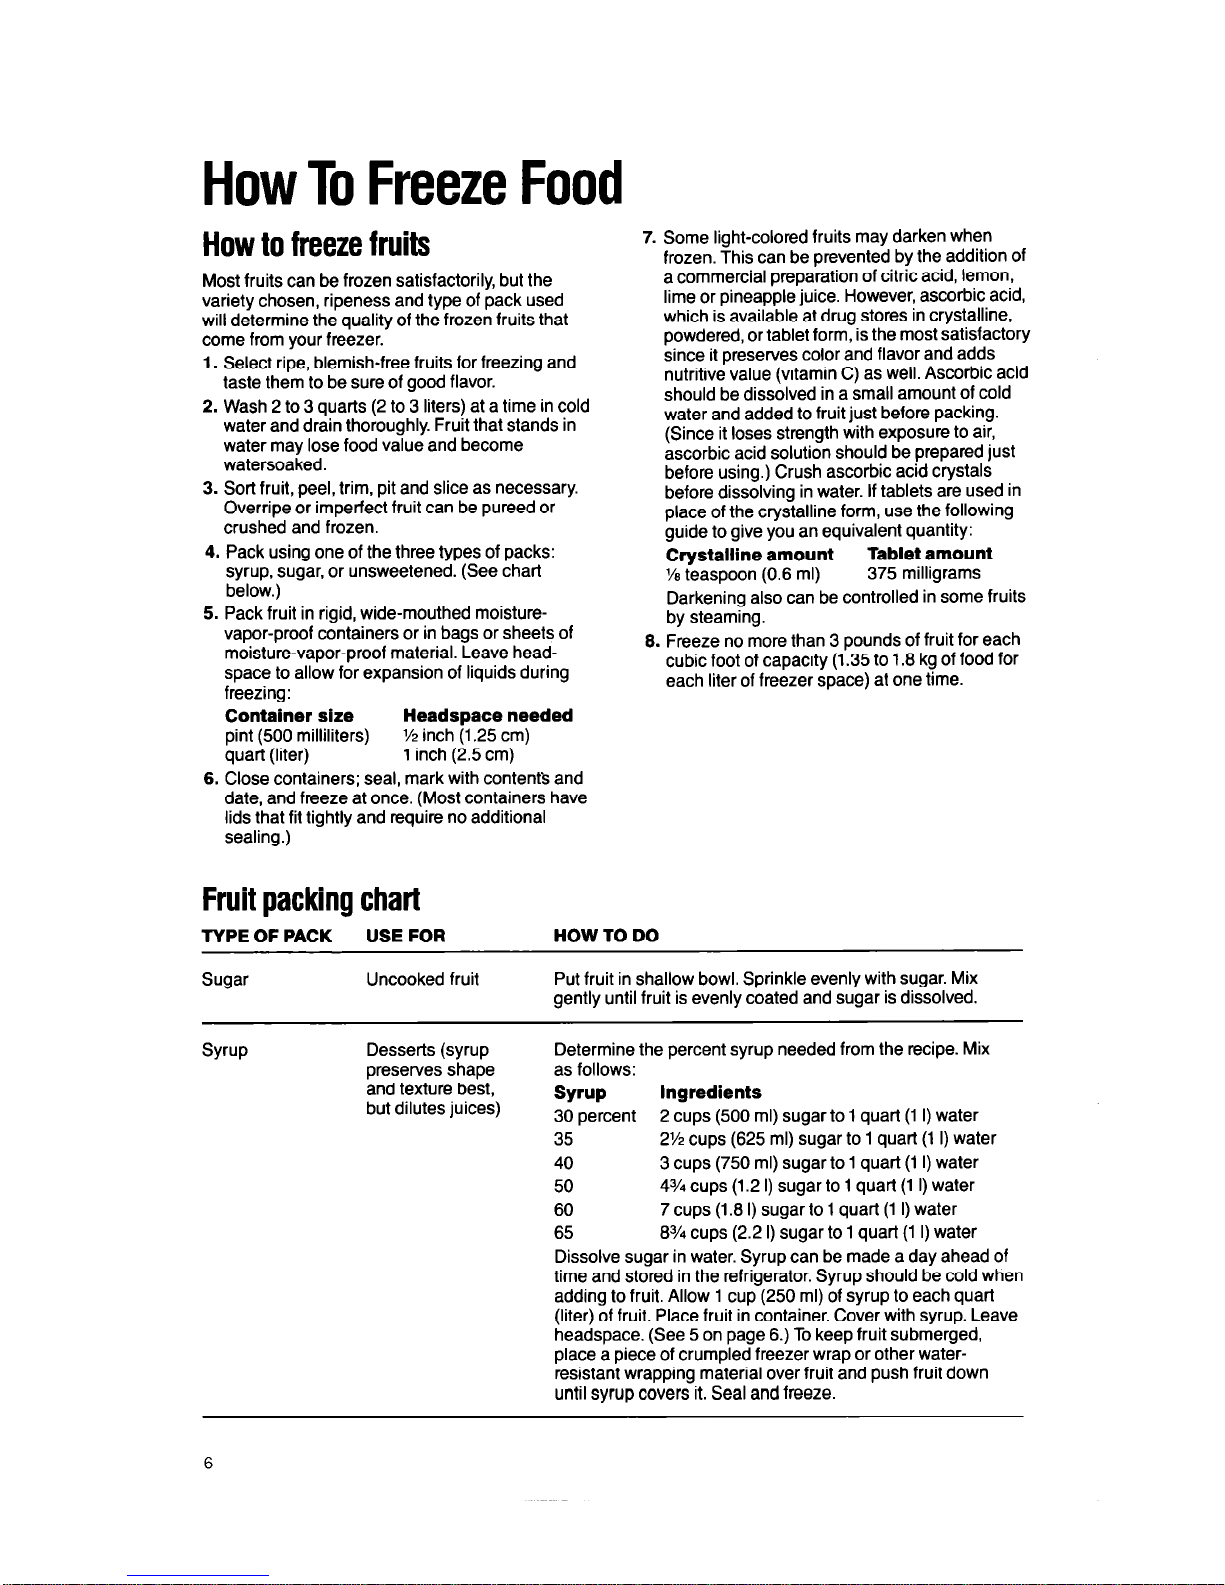
Wrapping
1. Cut sheet of wrapping material about one
third longer than the distance around food to
be wrapped. Place wrapping sheet on flat
surface with food in center of sheet.
2. Bring front and back of wrapping together
and fold in toward food, making at least two
one-inch (2.5 cm) folds until wrapping fits
tightly against food.
3. Crease ends close to food to eliminate
air pockets.
4. Press all air from package. Fold each end over
twice. Make sure fold is tight and fasten against
end of package with freezer tape.
NOTE: Pad sharp edges of boned meat with extra
wrap to protect the wrap from punctures.
5
How To Freeze Food
How to freeze fruits
Most fruits can be frozen satisfactorily, but the
variety chosen, ripeness and type of pack used
will determine the quality of the frozen fruits that
come from your freezer.
1. Select ripe, blemish-free fruits for freezing and
taste them to be sure of good flavor.
2. Wash 2 to 3 quarts (2 to 3 liters) at a time in cold
water and drain thoroughly. Fruit that stands in
water may lose food value and become
watersoaked.
3. Sort fruit, peel, trim, pit and slice as necessary.
Overripe or imperfect fruit can be pureed or
crushed and frozen.
4. Pack using one of the three types of packs:
syrup, sugar, or unsweetened. (See chart
below.)
5. Pack fruit in rigid, wide-mouthed moisturevapor-proof containers or in bags or sheets of
moisture-vapor-proof material. Leave headspace to allow for expansion of liquids during
freezing:
Container size Headspace needed
pint (500 milliliters) % inch (1.25 cm)
quart (liter)
1 inch (2.5 cm)
6. Close containers; seal, mark with contents and
date, and freeze at once. (Most containers have
lids that fit tightly and require no additional
sealing.)
Fruit packing chart
TYPE OF PACK USE FOR HOW TO DO
7. Some light-colored fruits may darken when
frozen. This can be prevented by the addition of
a commercial preparation of citric acid, lemon,
lime or pineapple juice. However, ascorbic acid,
which is available at drug stores in crystalline,
powdered, or tablet form, is the most satisfactory
since it preserves color and flavor and adds
nutritive value (vitamin C) as well. Ascorbic acid
should be dissolved in a small amount of cold
water and added to fruit just before packing.
(Since it loses strength with exposure to air,
ascorbic acid solution should be prepared just
before using.) Crush ascorbic acid crystals
before dissolving in water. If tablets are used in
place of the crystalline form, use the following
guide to give you an equivalent quantity:
Crystalline amount
Tablet amount
l/e teaspoon (0.6 ml)
375 milligrams
Darkening also can be controlled in some fruits
by steaming.
8. Freeze no more than 3 pounds of fruit for each
cubic foot of capacity (1.35 to 1.8 kg of food for
each liter of freezer space) at one time.
Sugar
Uncooked fruit Put fruit in shallow bowl. Sprinkle evenly with sugar. Mix
gently until fruit is evenly coated and sugar is dissolved.
Syrup
Desserts (syrup
preserves shape
and texture best,
but dilutes juices)
Determine the percent syrup needed from the recipe. Mix
as follows:
Syrup
Ingredients
30 percent 2 cups (500 ml) sugar to 1 quart (1 I) water
35
2% cups (625 ml) sugar to 1 quart (1 I) water
40
3 cups (750 ml) sugar to 1 quart (1 I) water
50
4% cups (1.2 I) sugar to 1 quart (1 I) water
60
7 cups (1.8 I) sugar to 1 quart (1 I) water
65 8% cups (2.2 I) sugar to 1 quart (1 I) water
Dissolve sugar in water. Syrup can be made a day ahead of
time and stored in the refrigerator. Syrup should be cold when
adding to fruit. Allow 1 cup (250 ml) of syrup to each quart
(liter) of fruit. Place fruit in container. Cover with syrup. Leave
headspace. (See 5 on page 6.) To keep fruit submerged,
place a piece of crumpled freezer wrap or other water-
resistant wrapping material over fruit and push fruit down
until syrup covers it. Seal and freeze.
6
TYPE OF PACK
USE FOR HOW TO DO
Unsweetened
Special diets
Prepare fruit. Pack in either of two ways:
-
cranberries
1. With water containing ascorbic acid. Use crumpled freezer
-currants
- gooseberries
wrap to keep fruit submerged in water. Seal and freeze.
- rhubarb
2. Without liquid, spreading out in individual layers on shallow
-figs
pan to freeze. Pack into containers (works best with most
berries as well as figs, pineapples, plums, grapes, and
rhubarb). Seal and freeze.
How to freeze vegetables
Vegetables (like broccoli or corn) that are
ordinarily served cooked can be frozen satisfactorily. Salad greens, tomatoes and others that are
to be served raw should not be frozen since they
lose their crispness when thawed.
1. Freeze only fresh, high-quality vegetables
picked when barely mature, before they’ve had
a chance to become starchy. Vegetables are
best frozen no more than 2 to 3 hours after they
have been picked.
2. Prepare vegetables just as you do for the table,
washing them carefully in cold water. Sort or cut
into appropriate sizes for packaging.
3. The most important step in freezing vegetables
is blanching or scalding. Boiling water, steam
or microwave cooking is used to stop enzyme
action, ripening, or maturing. Blanching also
helps vegetables retain color, stabilizes vitamin
content and aids in vitamin retention. Since
blanched vegetables are partially cooked they
require very little cooking when they come from
the freezer.
4. After cooling, pack vegetables in moisturevapor-proof containers, such as: rigid containers
with flared sides for ease in filling; wide-mouthed
glass jars; or freezer bags. For protection and
stacking ease place bags and irregularly shaped
packages in folding paper-board cartons, or
freeze vegetables in single layer on trays,
packing in polyethylene bags after freezing.
5. Leave headspace to allow for expansion. If
recipe doesn’t specify, follow this rule of thumb:
Container size Headspace needed
pint (500 ml)
‘/2 inch (1.25 cm)
quart (liter)
lY2
inch (3.8 cm)
Close container and seal according to
manufacturer’s directions. Freeze at once.
6. Freeze no more than 3 pounds of vegetables
for each cubic foot of capacity (1.35 to 1.8 kg of
food for each liter of freezer space) at one time.
Do not freeze:
l
Lettuce, celery, or raw carrot sticks-they
become limp.
l
Potatoes-they become mushy.
l
Fresh tomatoes-their high water content
causes the tomatoes to collapse when thawed.
How To Freeze Food
Continued
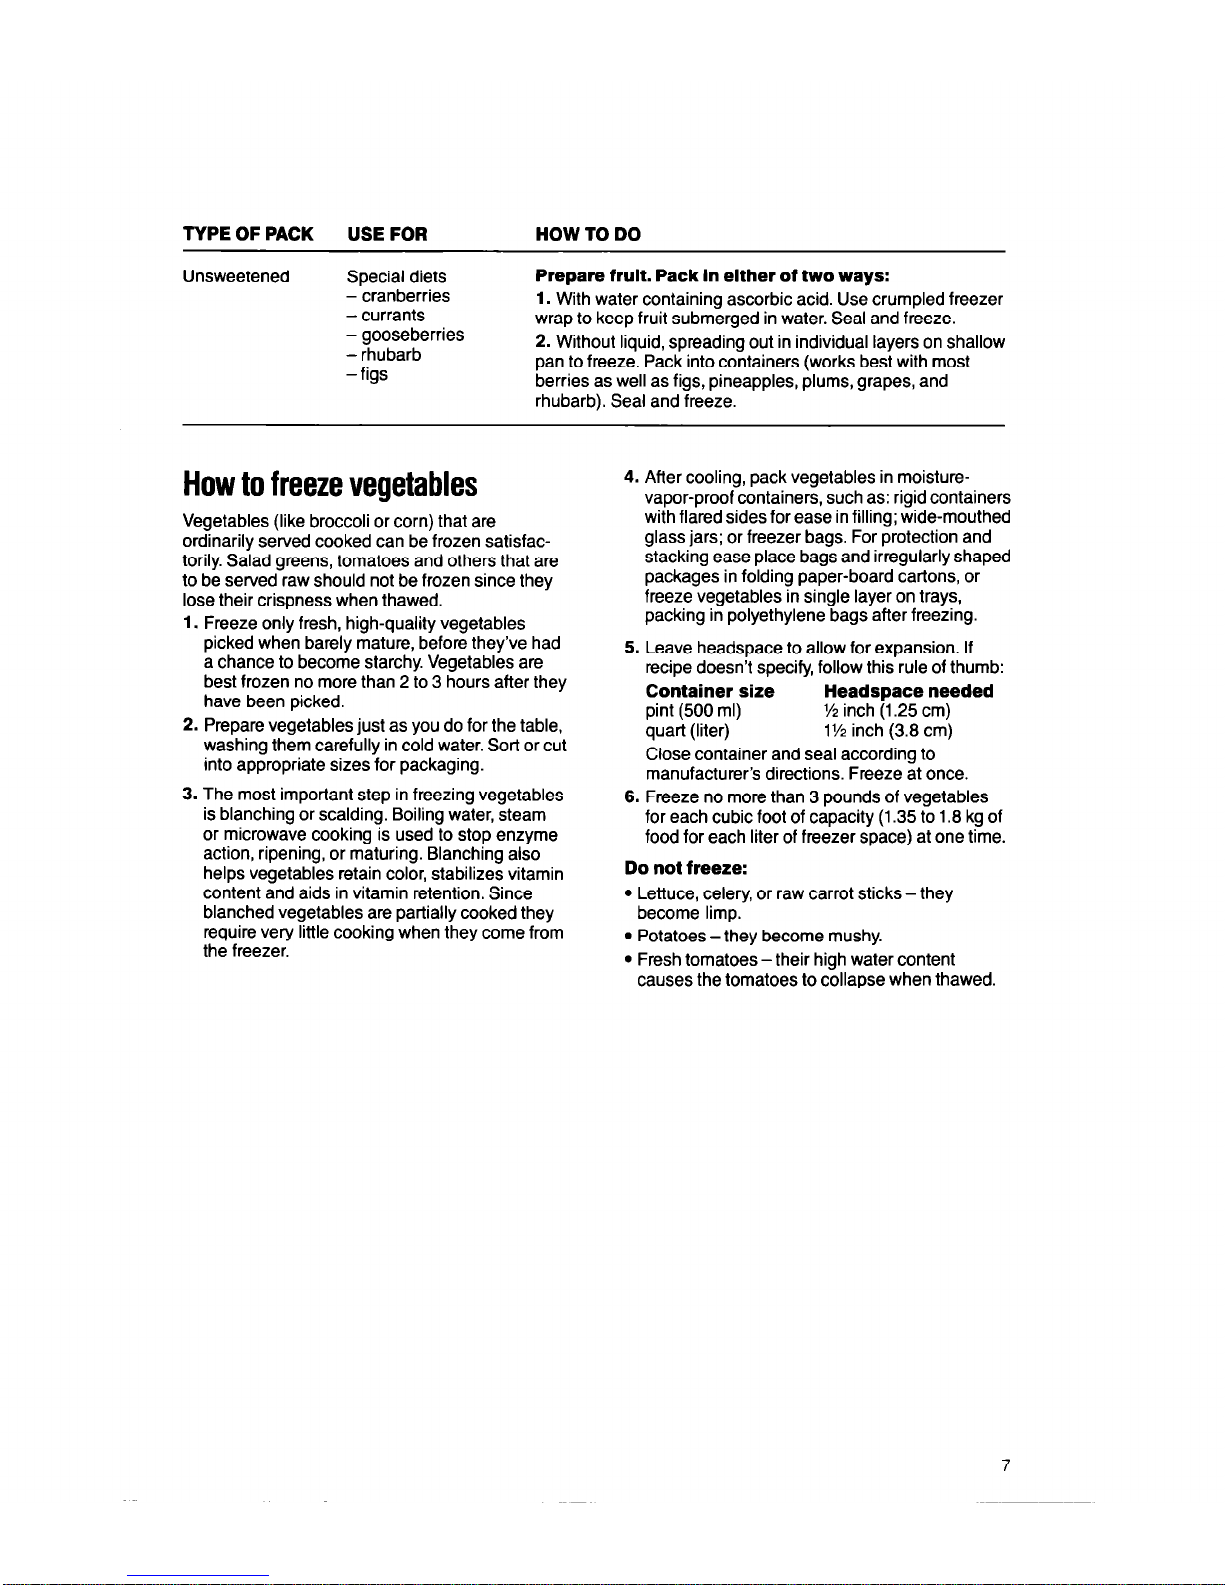
Blanching in boiling water is suitable for
most vegetables.
1. Bring 4 quarts (4 I) of water to boil in a large
kettle.
2. Place no more than 1 pound (450 g) of
vegetables in a wire basket and immerse
in boiling water.
3. Cover kettle with lid and start timing at once.
4. When recommended blanching time has
elapsed, cool vegetables quickly in ice water.
Allow the same time for cooling as for blanching.
To be sure vegetables have cooled, break one
in half and check center. Drain well and pat dry.
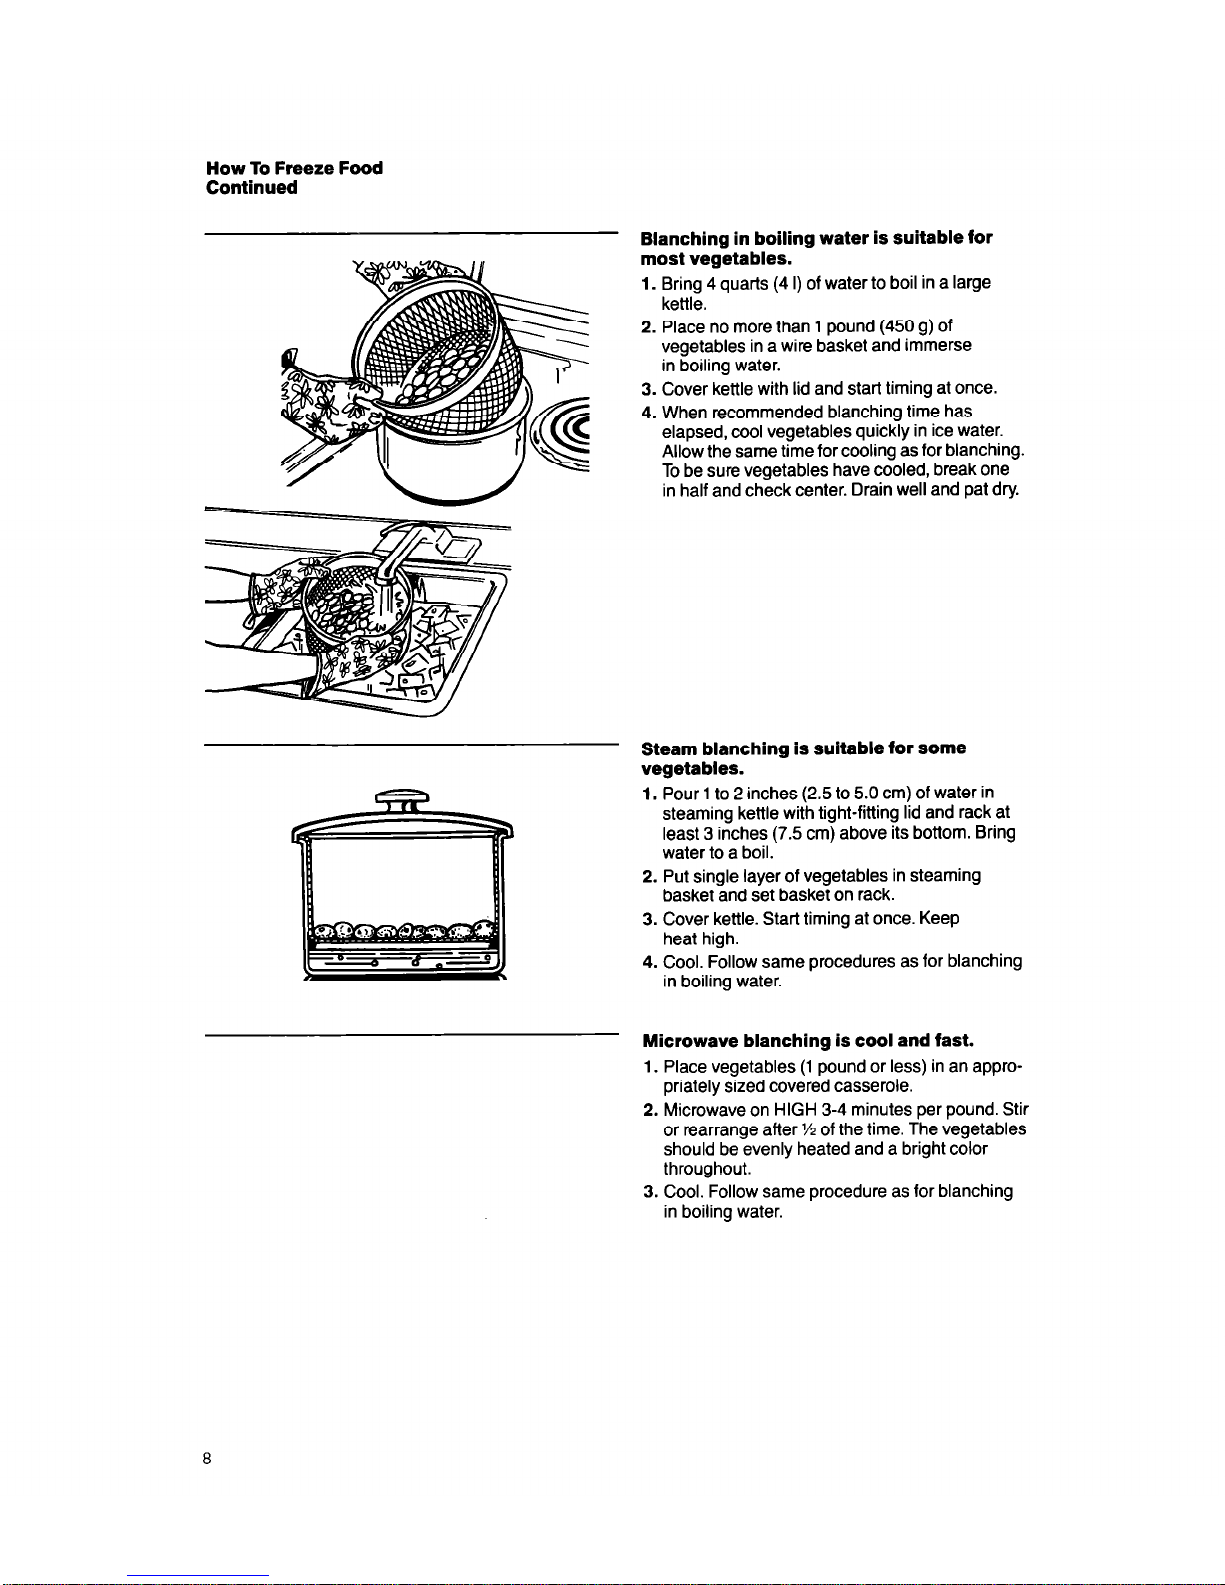
Steam blanching is suitable for some
vegetables.
1. Pour 1 to 2 inches (2.5 to 5.0 cm) of water in
steaming kettle with tight-fitting lid and rack at
least 3 inches (7.5 cm) above its bottom. Bring
water to a boil.
2. Put single layer of vegetables in steaming
basket and set basket on rack.
3. Cover kettle. Start timing at once. Keep
heat high.
4. Cool. Follow same procedures as for blanching
in boiling water.
Microwave blanching is cool and fast.
1. Place vegetables (1 pound or less) in an appro-
priately sized covered casserole.
2. Microwave on HIGH 3-4 minutes per pound. Stir
or rearrange after % of the time. The vegetables
should be evenly heated and a bright color
throughout.
3. Cool. Follow same procedure as for blanching
in boiling water.
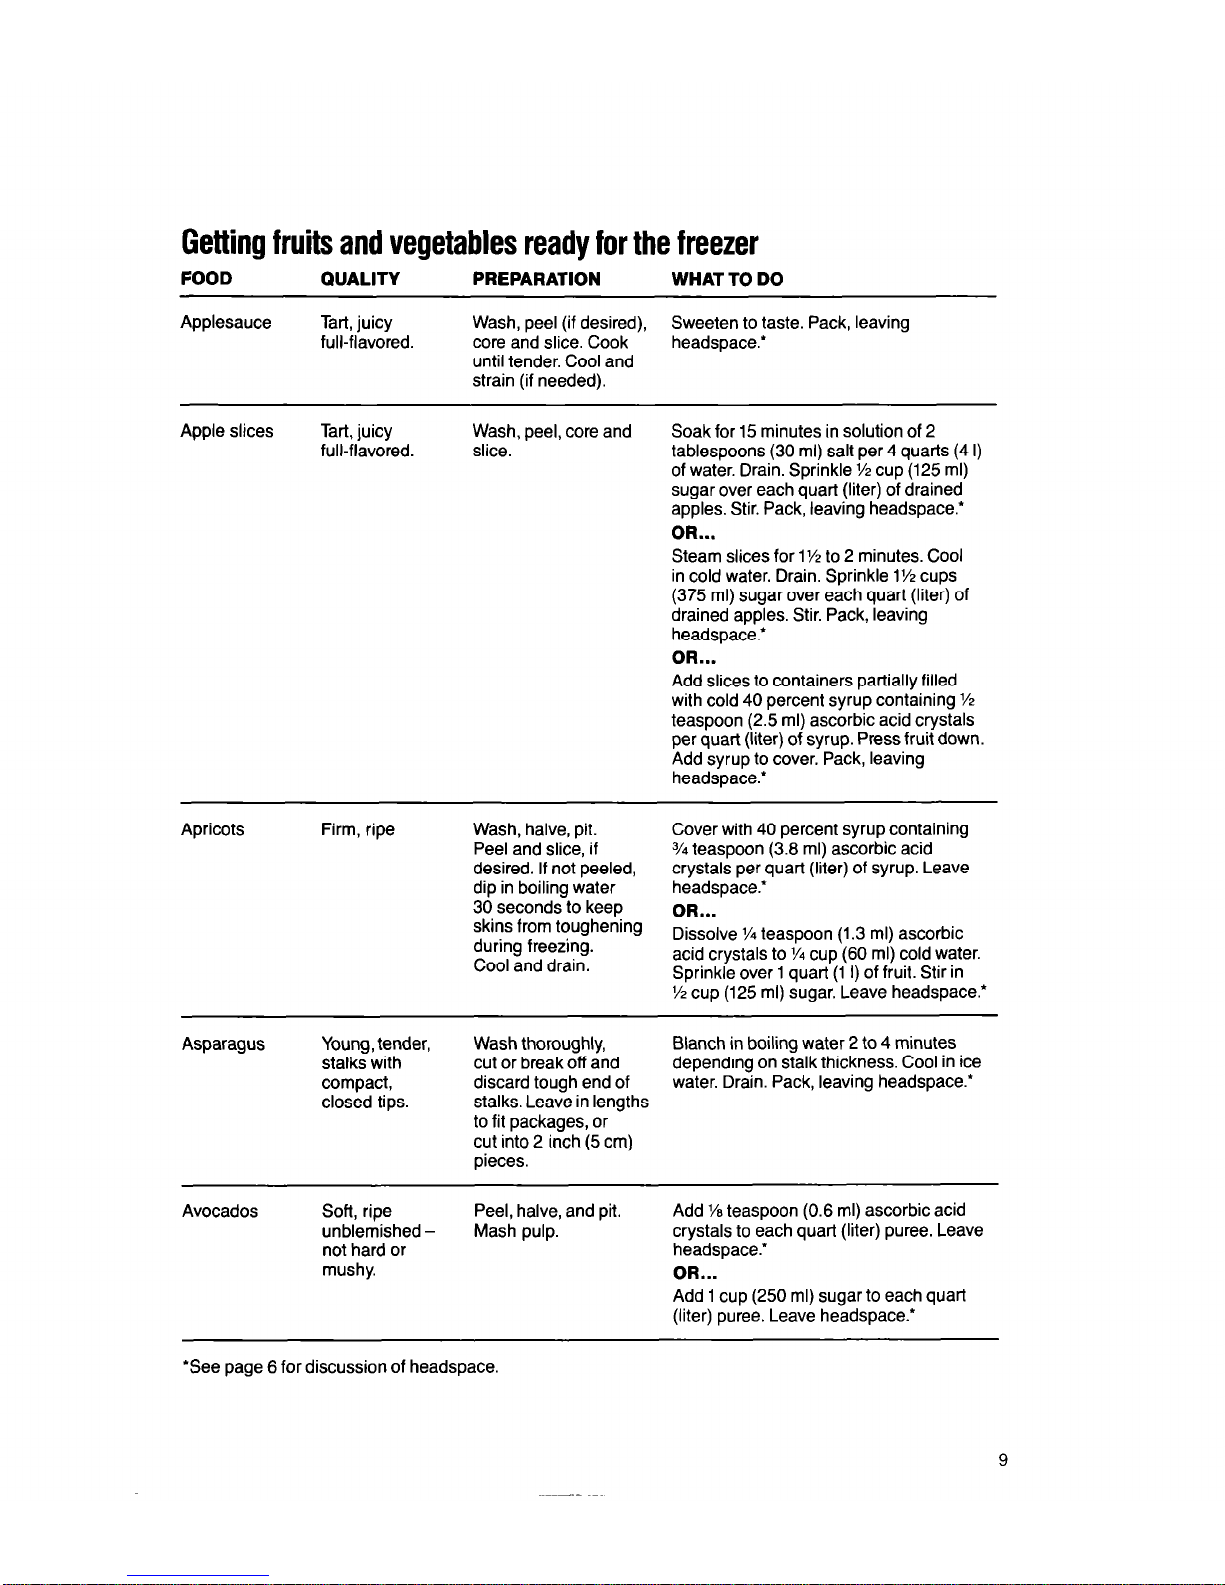
Getting fruits and vegetables ready for the freezer
FOOD QUALITY PREPARATION
WHAT TO DO
Applesauce Tar-t, juicy
full-flavored.
Wash, peel (if desired), Sweeten to taste. Pack, leaving
core and slice. Cook headspace.’
until tender. Cool and
strain (if needed).
Apple slices
Tart, juicy
Wash, peel, core and
full-flavored. slice.
Soak for 15 minutes in solution of 2
tablespoons (30 ml) salt per 4 quarts (4 I)
of water. Drain. Sprinkle % cup (125 ml)
sugar over each quart (liter) of drained
apples. Stir. Pack, leaving headspace’
OR...
Steam slices for 1% to 2 minutes. Cool
in cold water. Drain. Sprinkle
1%
cups
(375 ml) sugar over each quart (liter) of
drained apples. Stir. Pack, leaving
headspace.’
OR...
Add slices to containers partially filled
with cold 40 percent syrup containing
'12
teaspoon (2.5 ml) ascorbic acid crystals
per quart (liter) of syrup. Press fruit down.
Add syrup to cover. Pack, leaving
headspace.*
Apricots Firm, ripe
Wash, halve, pit.
Peel and slice, if
desired. If not peeled,
dip in boiling water
30 seconds to keep
skins from toughening
during freezing.
Cool and drain.
Cover with 40 percent syrup containing
3?4 teaspoon (3.8 ml) ascorbic acid
crystals per quart (liter) of syrup. Leave
headspace’
OR...
Dissolve ‘/4 teaspoon (1.3 ml) ascorbic
acid crystals to ‘/4 cup (60 ml) cold water.
Sprinkle over 1 quart (1 I) of fruit. Stir in
l/2 cup (125 ml) sugar. Leave headspace.*
Asparagus
Young, tender,
stalks with
compact,
closed tips.
Wash thoroughly,
Blanch in boiling water 2 to 4 minutes
cut or break off and
depending on stalk thickness. Cool in ice
discard tough end of
water. Drain. Pack, leaving headspace.’
stalks. Leave in lengths
to fit packages, or
cut into 2 inch (5 cm)
pieces.
Avocados
Soft, ripe
unblemished not hard or
mushy.
Peel, halve, and pit.
Mash pulp.
Add ‘/e teaspoon (0.6 ml) ascorbic acid
crystals to each quart (liter) puree. Leave
headspace:
OR...
Add 1 cup (250 ml) sugar to each quart
(liter) puree. Leave headspace.’
*See page 6 for discussion of headspace.
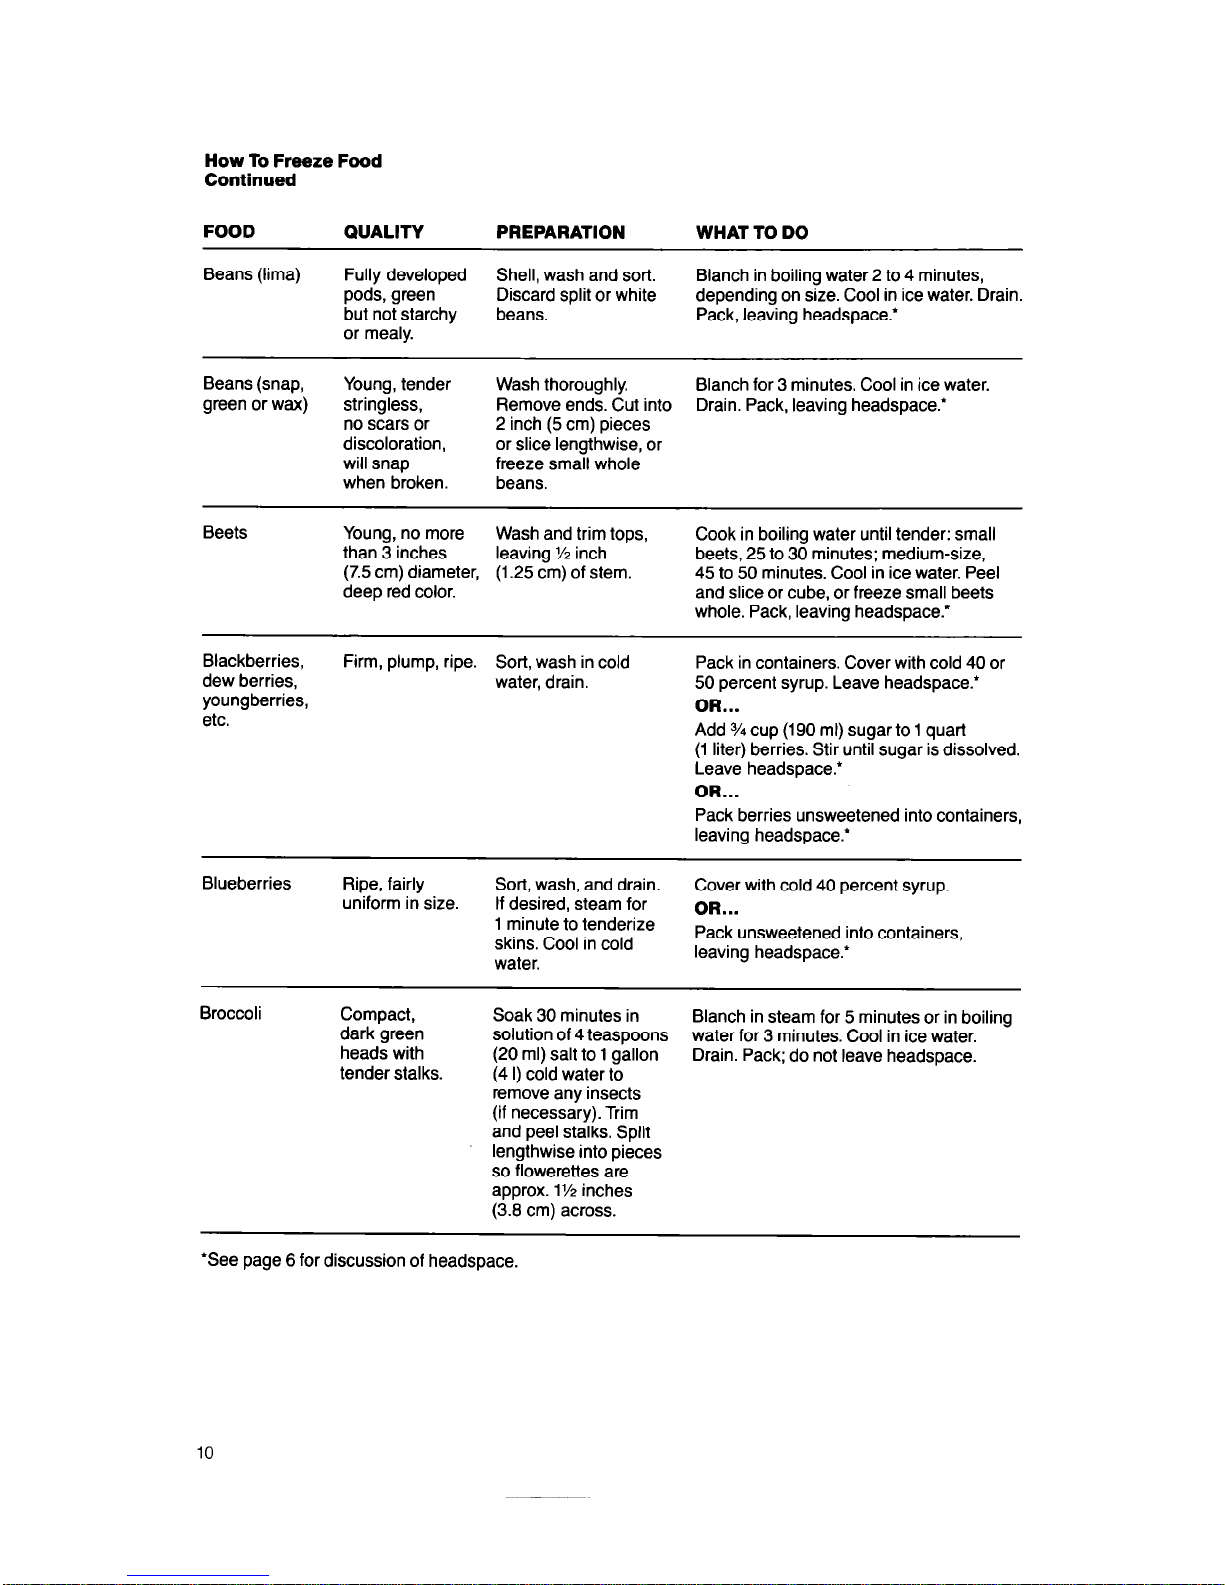
How To Freeze Food
Continued
FOOD QUALITY
PREPARATION WHAT TO DO
Beans (lima) Fully developed Shell, wash and sort.
Blanch in boiling water 2 to 4 minutes,
pods, green
Discard split or white
depending on size. Cool in ice water. Drain.
but not starchy beans.
Pack, leaving headspace’
or mealy.
Beans (snap,
green or wax)
Young, tender
Wash thoroughly. Blanch for 3 minutes. Cool in ice water.
stringless,
Remove ends. Cut into
Drain. Pack, leaving headspace.’
no scars or 2 inch (5 cm) pieces
discoloration, or slice lengthwise, or
will snap freeze small whole
when broken.
beans.
Beets Young, no more Wash and trim tops, Cook in boiling water until tender: small
than 3 inches leaving % inch
beets, 25 to 30 minutes; medium-size,
(7.5 cm) diameter,
(1.25 cm) of stem.
45 to 50 minutes. Cool in ice water. Peel
deep red color. and slice or cube, or freeze small beets
whole. Pack, leaving headspace.’
Blackberries,
dew berries,
youngberries,
etc.
Firm, plump, ripe.
Sort, wash in cold
Pack in containers. Cover with cold 40 or
water, drain.
50 percent syrup. Leave headspace.’
OR...
Add % cup (190 ml) sugar to 1 quart
(1 liter) berries. Stir until sugar is dissolved.
Leave headspace’
OR...
Pack berries unsweetened into containers,
leaving headspace’
Blueberries
Ripe, fairly
uniform in size.
Sort, wash, and drain.
If desired,
Steam
for
1 minute to tenderize
skins. Cool in cold
water.
Cover with cold 40 percent syrup.
OR---
Pack unsweetened into containers,
leaving headspace.’
Compact,
dark green
heads with
tender stalks.
Soak 30 minutes in
Blanch in steam for 5 minutes or in boiling
solution of 4 teaspoons
water for 3 minutes. Cool in ice water.
(20 ml) salt to 1 gallon
Drain. Pack; do not leave headspace.
(4 I) cold water to
remove any insects
(if necessary). Trim
and peel stalks. Split
lengthwise into pieces
so flowerettes are
approx.
1%
inches
(3.8 cm) across.
‘See page 6 for discussion of headspace.
10
 Loading...