

Whirlpool Dh40g0, Dh40h0, Dh40j0, Dh40j1, Ad25tj0 Owner's Manual
...
Dehumidifier
Use & Care Guide
Contents
Safety information
Electrical requirements
Installing dehumidifier
Operating dehumidifier
Removing and emptying water bucket
Water level float and automatic shutoff
Caring for your dehumidifier
If you need assistance or service
Narranty
...................................
...................................
................................
................................
................................
...................
............................
.....................
...................
Part No. 1182182 Rev. A
2
3
4
5
.6-7
.8
9
.lO-11
Back Cover
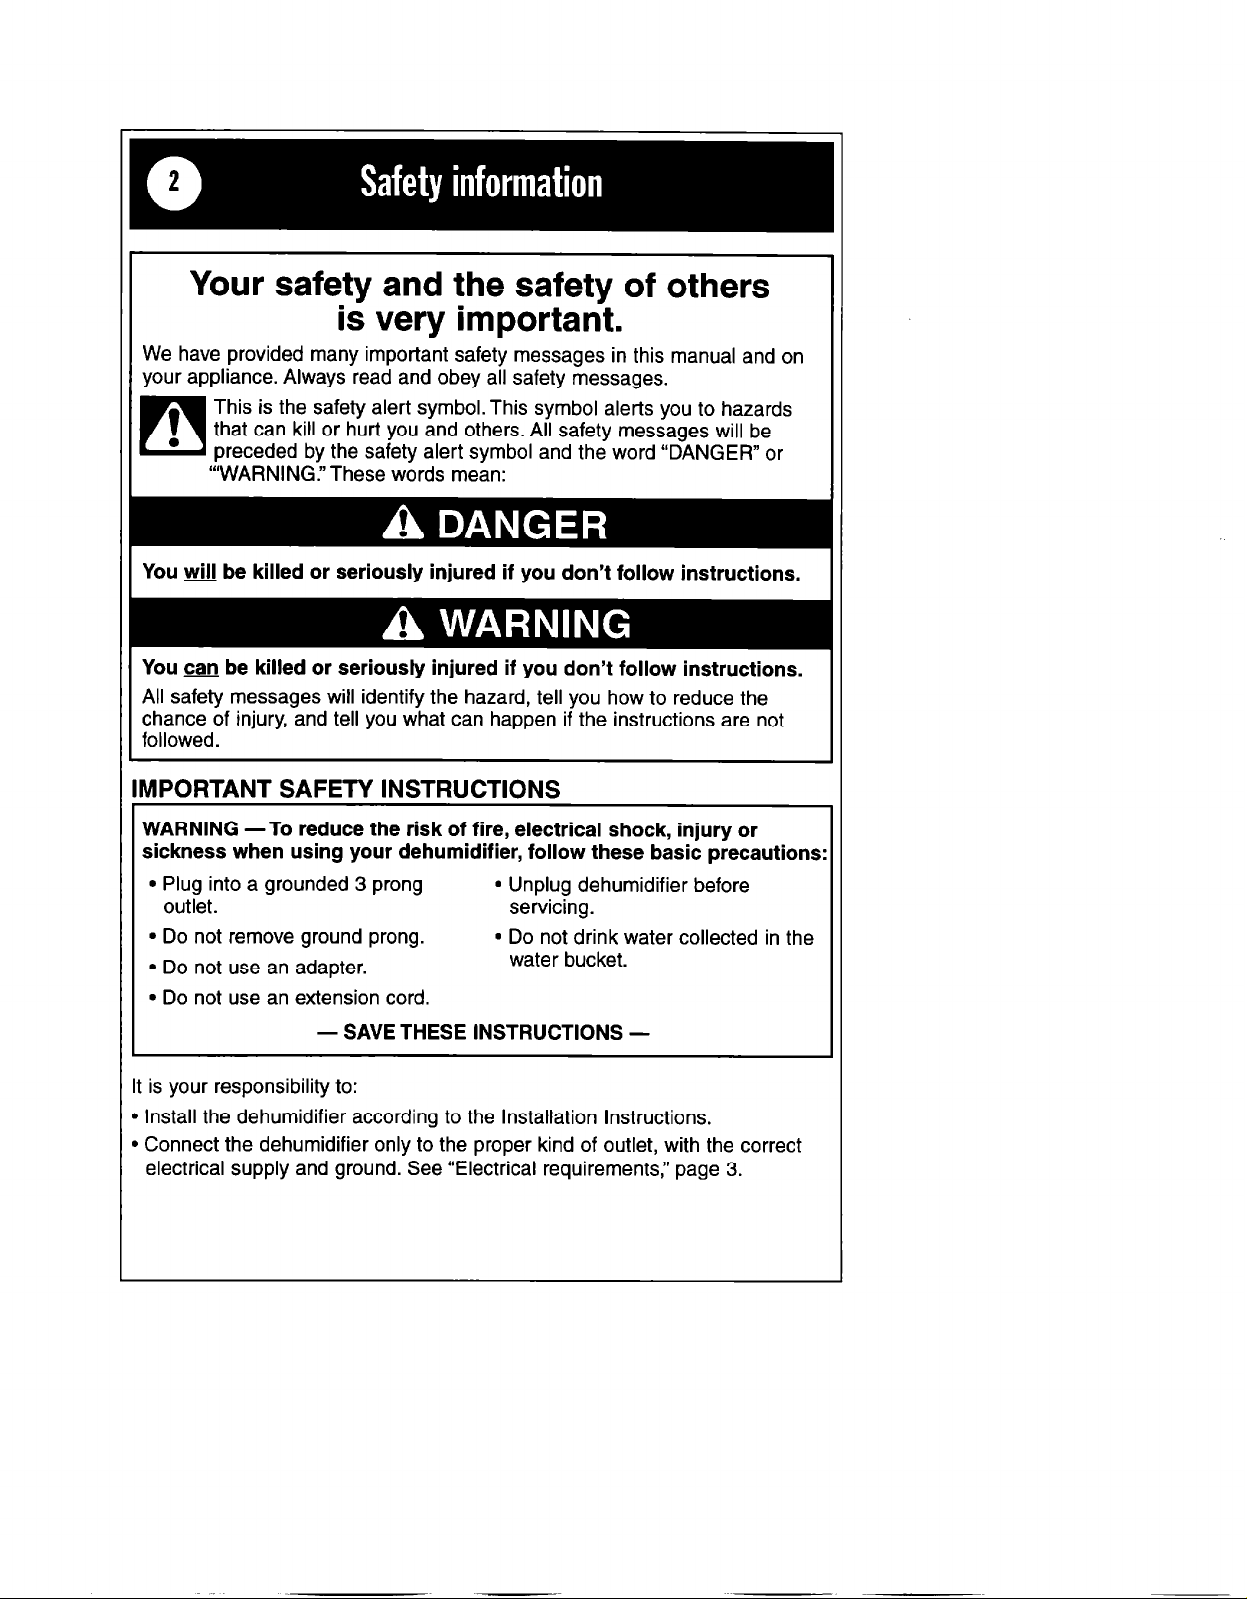
Your safety and the safety of others
is very important.
We have provided many important safety messages in this manual and on
your appliance. Always read and obey all safety messages.
This is the safety alert symbol. This symbol alerts you to hazards
that can kill or hurt you and others. All safety messages will be
t
l
q
You @Jl be killed or seriously injured if you don’t follow instructions.
You can be killed or seriously injured if you don’t follow instructions.
All safety messages will identify the hazard, tell you how to reduce the
chance of injury, and tell you what can happen if the instructions are not
followed.
IMPORTANT SAFETY INSTRUCTIONS
WARNING -To reduce the risk of fire, electrical shock, injury or
sickness when using your dehumidifier, follow these basic precautions
l
l
. Do not use an adapter.
l
preceded by the safety alert symbol and the word “DANGER” or
“‘WARNING.“These words mean:
Plug into a grounded 3 prong
outlet. servicing.
Do not remove ground prong.
Do not use an extension cord.
. Unplug dehumidifier before
l
Do not drink water collected in the
water bucket.
- SAVE THESE INSTRUCTIONS -
It is your responsibility to:
l
Install the dehumidifier according to the Installation Instructions.
l
Connect the dehumidifier only to the proper kind of outlet, with the correct
electrical supply and ground. See “Electrical requirements,” page 3.
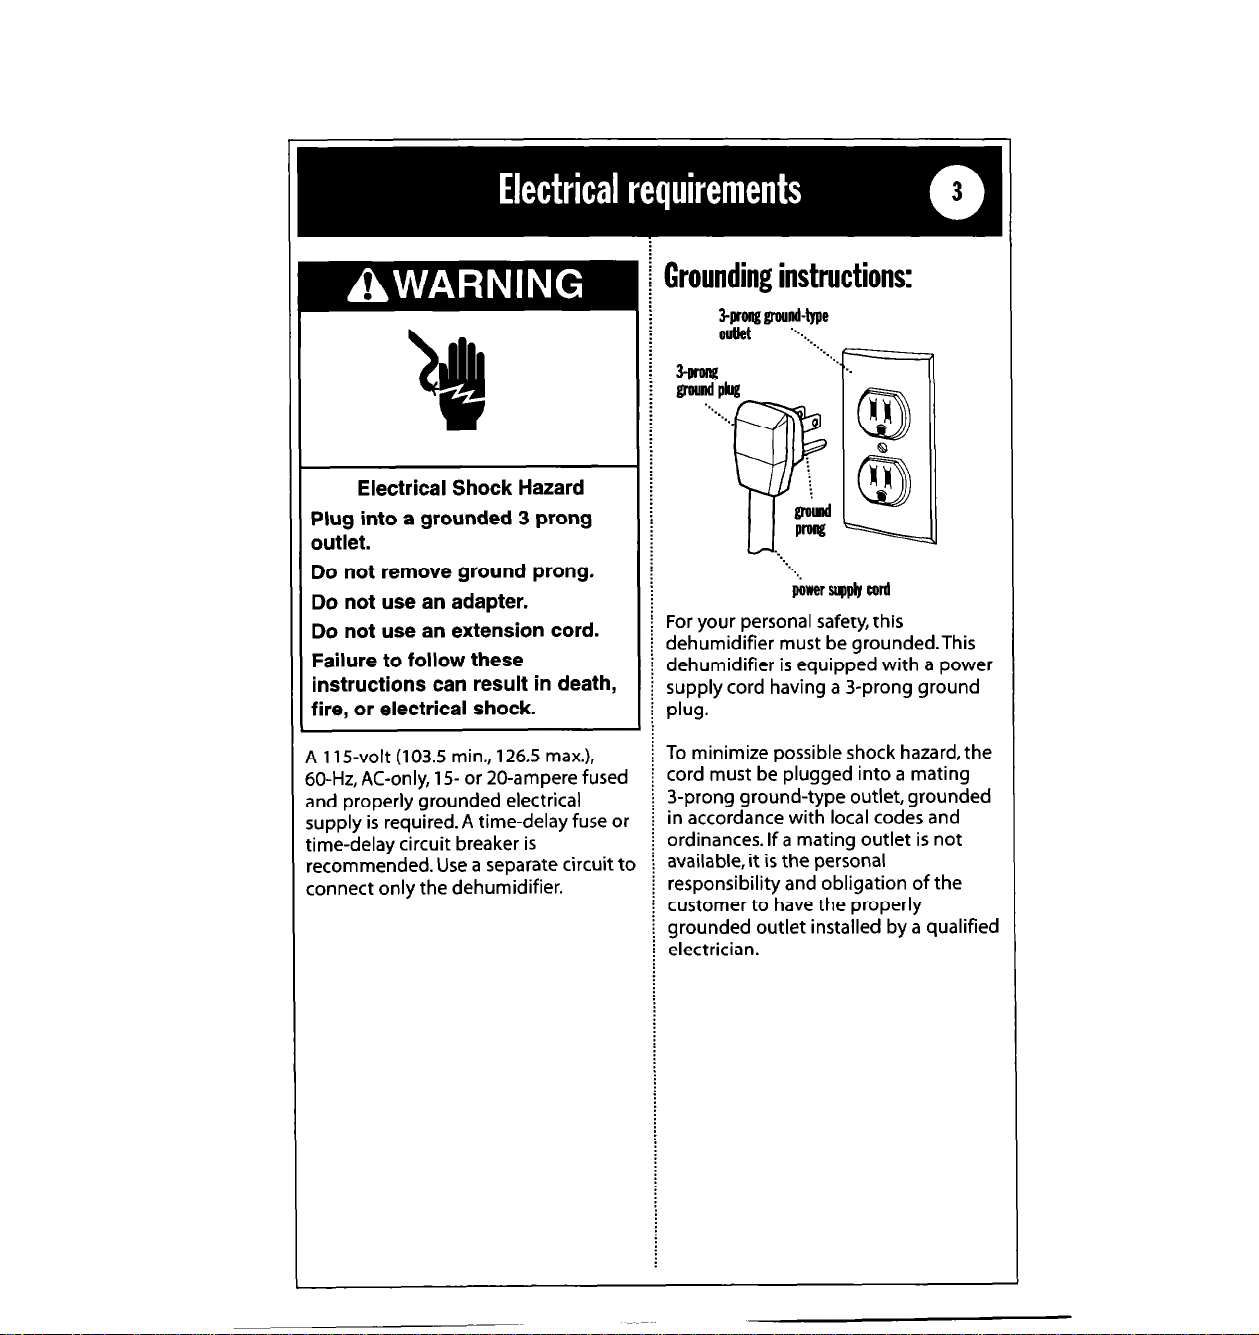
Electrical Shock Hazard
Plug into a grounded 3 prong
outlet.
Do not remove ground prong.
Do not use an adapter.
Do not use an extension cord.
Failure to follow these
instructions can result in death,
fire, or electrical shock.
Grounding instructions:
B=d Pllrg
‘...
. . . .
For your personal safety, this
dehumidifier must be grounded.This
dehumidifier is equipped with a power
supply cord having a 3-prong ground
plug.
4 115-volt (103.5 min., 126.5 max.),
jO-Hz, AC-only, 15- or 20-ampere fused
rnd properly grounded electrical
upply is required. A time-delay fuse or
ime-delay circuit breaker is
,ecommended. Use a separate circuit tc
:onnect only the dehumidifier.
To minimize possible shock hazard, the
cord must be plugged into a mating
3-prong ground-type outlet, grounded
in accordance with local codes and
ordinances. If a mating outlet is not
available, it is the personal
responsibility and obligation of the
customer to have the properly
grounded outlet installed by a qualified
electrician.

Good air circulation is needed
for best performance-allow
at least 12-l 8 inches (30.5 -
45.7 cm) of air space on all
sides of the dehumidifier.
Install dehumidifier on a level floor strong enough to support the
dehumidifier with a full bucket of water.
Keep all outside doors,
windows and other
openings closed when
operating dehumidifier.
Humid outdoor air will
increase dehumidifier
workload.
65”
(18.3°c)
Install your dehumidifier in an area
where the temperature will not fall
below 65°F (18.3”C). Lower temper3tures will cause ice to form on coils.
If ice forms on coils, some dehumidifiers
will continue to run. Some
dehumidifiers have a de-icer feature
that will automatically shut the
compressor off when ice forms. (Fan
continues to run.) Unplug either type of
dehumidifier until ice melts and room
temperature rises.
EMPTY/ADJUST BUCKET light:
If this light is on, the dehumidifier
not running.This
light indicates that
you need to check:
l
If the bucket is full,
empty bucket
and replace.
l
If the bucket is not in position,
remove bucket and replace. Make
sure the bucket fits all the way into
the dehumidifier and the light is off,
or dehumidifier will not run.
. .
. .
0.
. . . .
. .
. .
. .
. .._
‘.
. .
. .
is
DRYNESS CONTROL:
This controls the amount of moisture in
the room.Turn the control knob
clockwise for more drying.Turn the
control knob counterclockwise for less
drying.Turn control knob to”NORMAL”
to maintain average humidity
conditions.
NOTE:
the Dryness Control clockwise to
“DRYEST” to remove extra moisture
from the furnishings as well as the
room air.
For the first few days of use, turn
FAN SPEED:
Some models: this controls fan
operation. Use desired setting.
HIGH
- for faster moisture removal.
LOW
- for slower moisture removal.

Sickness Hazard
Do
not drink water collected in water bucket.
Doing so can result in sickness.
Bucket styles:
Bucket method:
2. Carry bucket to a large sink or tub.
Pull bucket forward and remove. :
Go to Step 2.
1. Lift bucket from bottom. Pull bucket
forward and remove. Go to Step 2.
;
3. Pour water through opening into a
:
sink or tub.
i
4. Replace bucket completely and
! check that EMPTY/ADJUST BUCKET
i light is off.
i
i
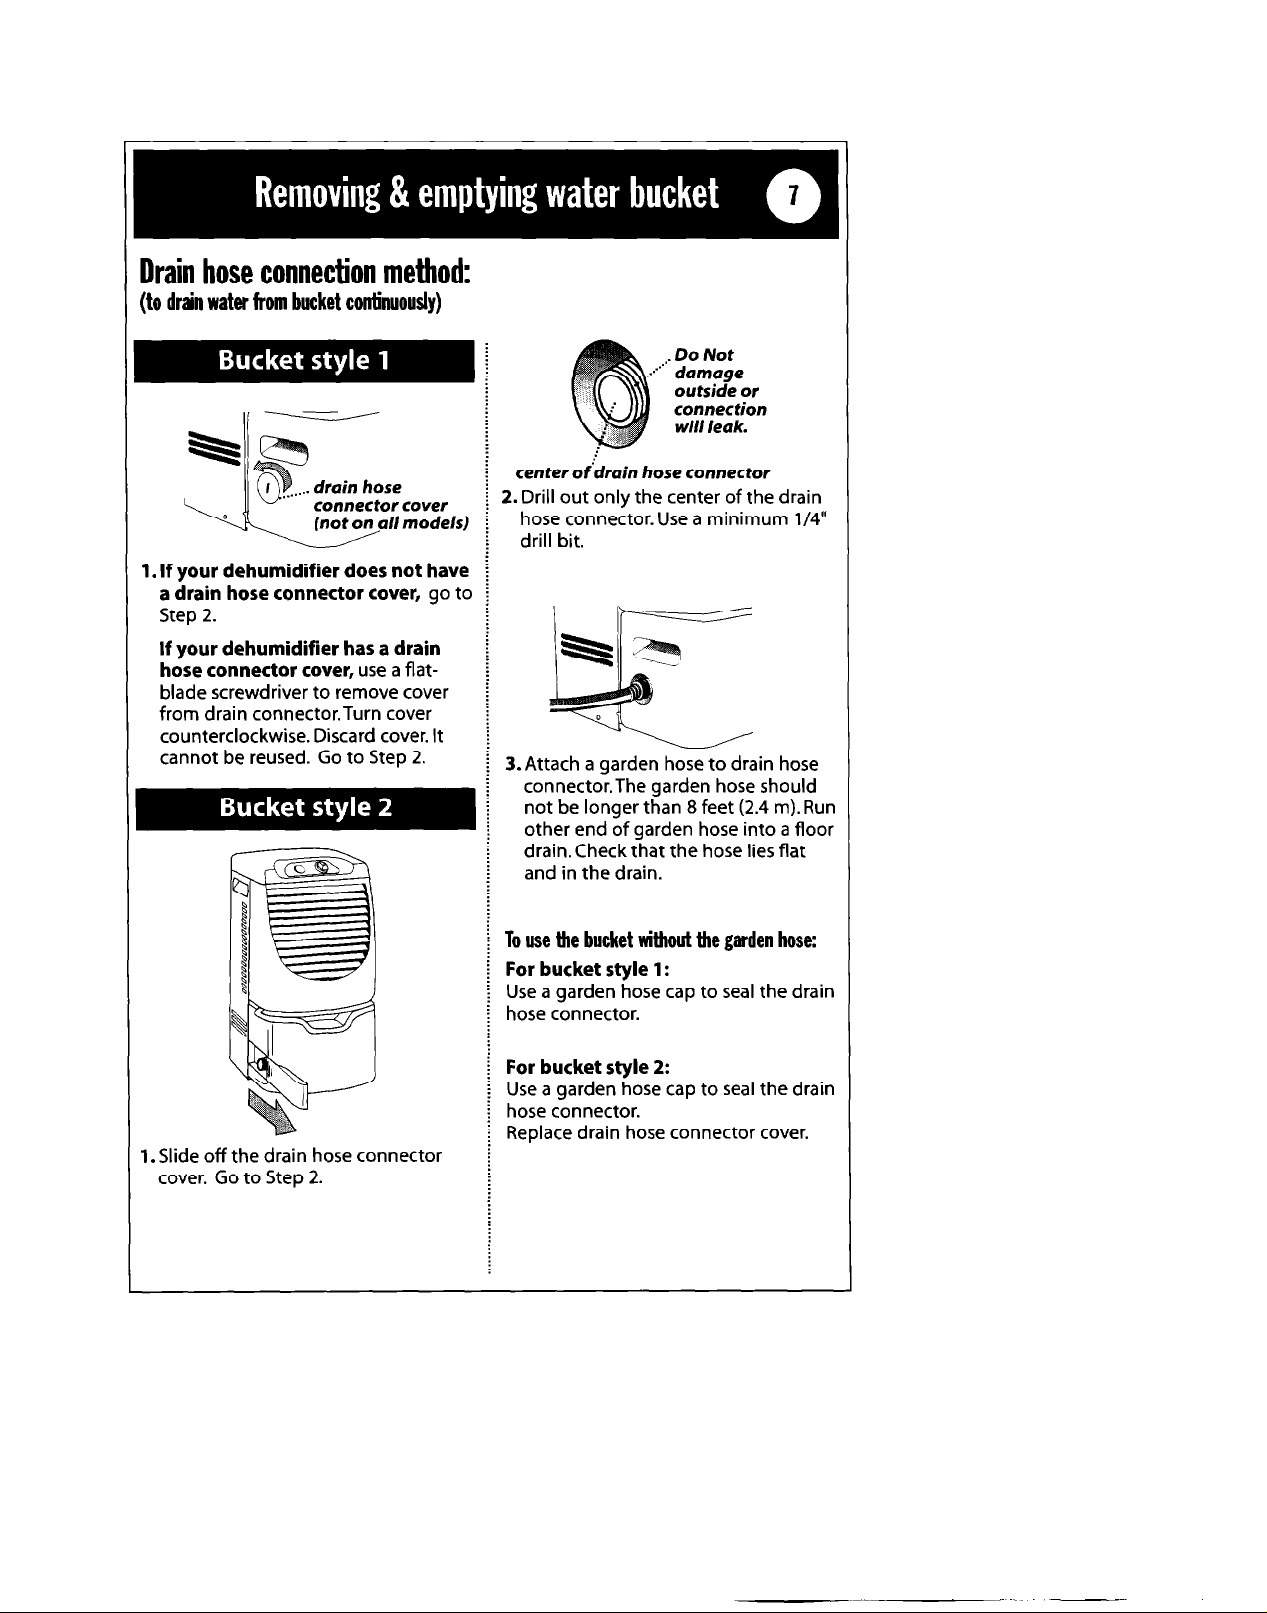
Drain hose connection method:
(to drain water from bucket continuously)
center of’drain hose connector
2. Drill out only the center of the drain
1. If your dehumidifier does not have
a drain hose connector cover, go
Step 2.
If your dehumidifier has a drain
hose connector cover,
blade screwdriver to remove cover
from drain connector.Turn cover
counterclockwise. Discard cover. It
cannot be reused. Go to Step 2.
use a flat-
to
3. Attach a garden hose to drain hose
. . Do Not
X’ damage
outside or
connection
will leak.
hose connector. Use a minimum l/4”
drill bit.
connector.The garden hose should
not be longer than 8 feet (2.4 m). Run
other end of garden hose into a floor
drain. Check that the hose lies flat
and in the drain.
1.
Slide off the drain hose connector
cover. Go to Step 2.
To use the bucket without the garden hose:
For bucket style 1:
Use a garden hose cap to seal the drain
hose connector.
For bucket style 2:
Use a garden hose cap to seal the drain
hose connector.
Replace drain hose connector cover.
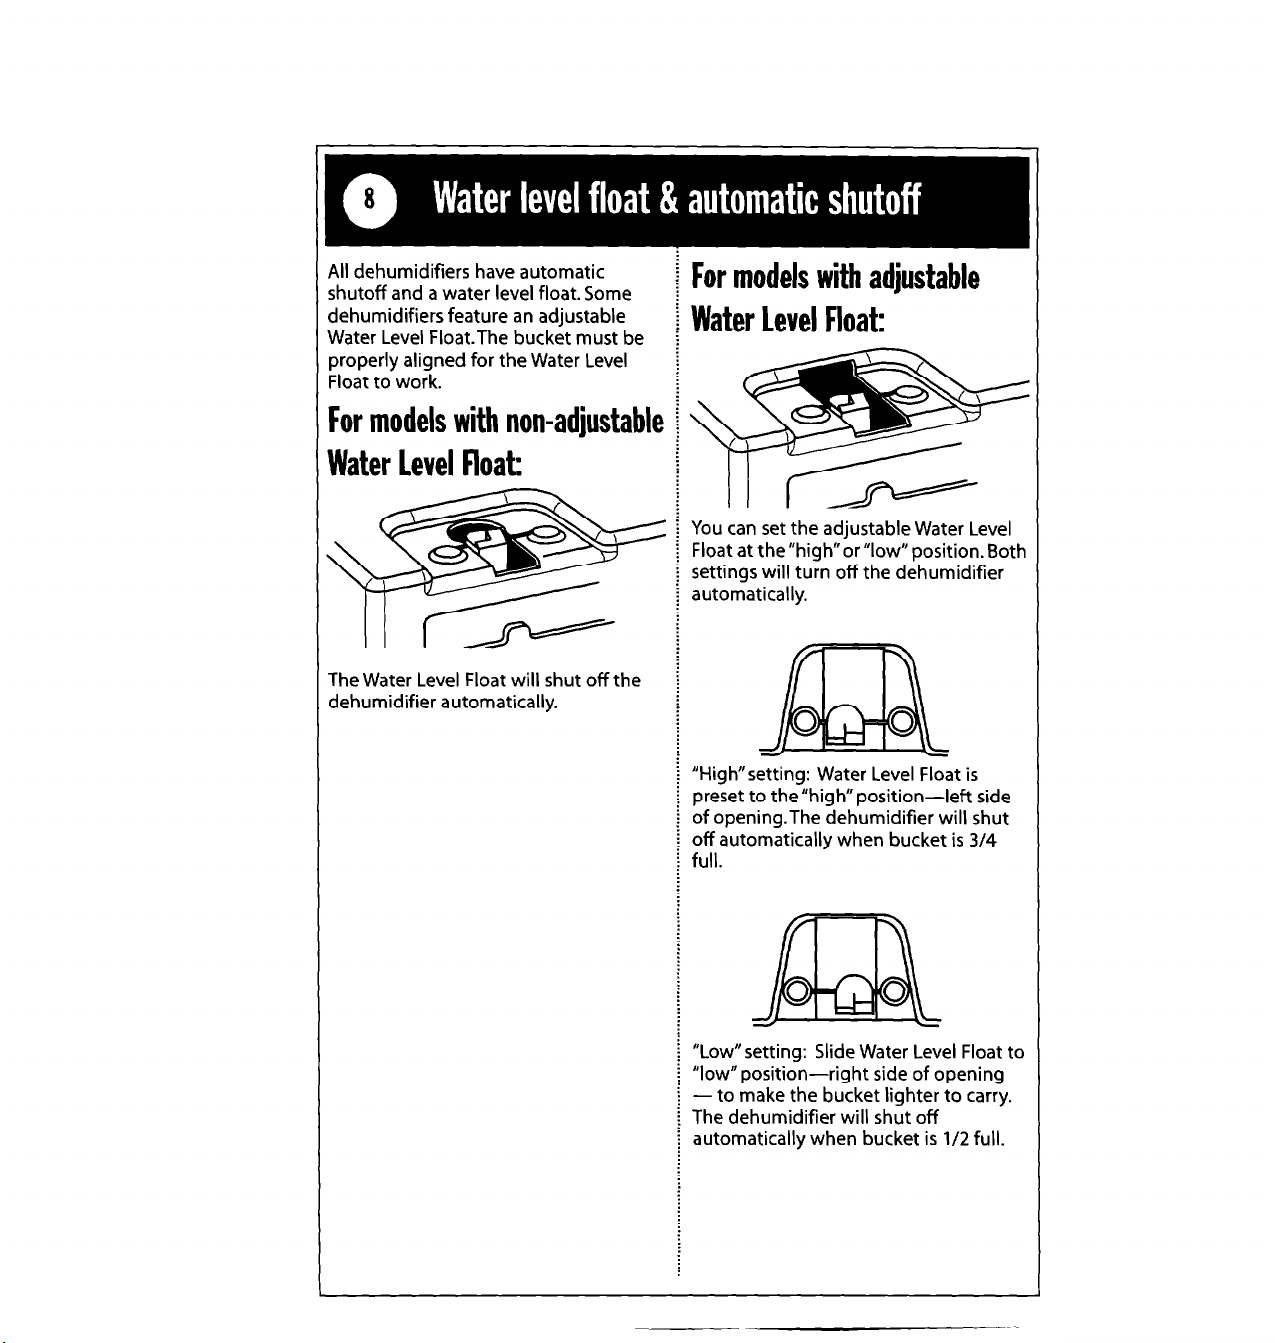
411 dehumidifiers have automatic
shutoff and a water level float. Some
dehumidifiers feature an adjustable
water Level Float.The bucket must be
properly aligned for the Water Level
Float to work.
For models with adjustable
Water level Float:
For models with non-adjustable
Water level float:
\\
You can set the adjustable Water Level
Float at the”high”or “low” position. Both
settings will turn off the dehumidifier
automatically.
The Water Level Float will shut off the
dehumidifier automatically.
“High”setting: Water Level Float is
preset to the”high” position-left side
of opening.The dehumidifier will shut
off automatically when bucket is 3/4
full.
\
\
“Low” setting: Slide Water Level Float to
“low” position-right side of opening
-to make the bucket lighter to carry.
The dehumidifier will shut off
automatically when bucket is l/2 full.
 Loading...