

Whirlpool 5VGI6FARAF, 5VMFI267AA Owner's Manual
A29161501W

Table of Contents
REFRIGERATOR SAFETY.....................................................................3
Proper Disposal of Your Old Refrigerator...........................................4
INSTALLATION INSTRUCTIONS .........................................................5
Unpack the Refrigerator......................................................................5
Before Use .....................................................................................
Location Requirements.......................................................................6
Handle Removal and Replacement....................................................
Remove and Replace Doors and Hinges ..........................................
Connect the Water Supply..................................................................
Adjust the Doors .................................................................................
REFRIGERATOR U
SE ...........................................................................8
Opening and Closing Doors................................................................8
Table des matières
SÉCURITÉ DU RÉFRIGÉRATEUR......................................................
Mise au rebut adéquate de votre ancien réfrigérateur
INSTRUCTIONS D’INSTALLATION....................................................
Déballage du réfrigérateur
Avant utilisation .
...............................................................................17
................................................................
Exigences d'emplacement................................................................18
Démontage et réinstallation des poignées........................................1
Démontage et réinstallation des portes et charnières......................1
Raccordement à la canalisation d'eau..............................................
Réglage des portes...........................................................................19
UTILISATION DU RÉFRIGÉRATEUR.................................................
Ouverture et fermeture des portes
....................................................
.....................
.....5
16
17
19
19
15
17
19
Using the Controls..............................................................................8
Crisper Humidity Control ....................................................................9
Ice Maker and Ice Storage Bin ...........................................................
Water and Ice Dispensers.................................................................
Water Filtration System.......................................
..............................11
REFRIGERATOR CARE ...................................................................... 1
6
7
.
7
7
Cleaning ............................................................................................1
Changing the Light Bulb.....................................................
..............12
TROUBLESHOOTING .........................................................................13
Refrigerator Operatio
n ......................................................................1
Temperature and Moisture ...............................................................1
Ice and Water....................................................................................1
Utilisation des commandes...............................................................
Réglage de l’humidité dans le bac à légumes..................................2
Machine à glaçons et bac d’entreposage à glaçons.........................2
Distributeurs d'eau et de glaçons......................................................2
Système de filtration d'eau................................................................2
8
9
Nettoyage..........................................................................................2
Changement de l’ampoule d’éclairage .............................................2
ENTRETIEN DU RÉFR
IGÉRATEUR...................................................23
DÉPANNAGE .......................................................................................2
9
10
2
2
3
3
4
20
1
1
2
3
3
4
4
Fonctionnement du réfrigérateur ......................................................24
Température et humidité...................................................................25
Glaçons et eau..................................................................................2
5
ﺕﺎﻳﻮﺘﺤﻤﻟﺍ ﻝﻭﺪﺟ
5.....................................................................................ﻢﻜﺤﺘﻟﺍ ﺭﺍﺭﺯﺃ ﻡﺍﺪﺨﺘﺳﺍ
6.....................................................................ﺕﺍﻭﺮﻀﺨﻟﺍ ﺝﺭﺩ ﺔﺑﻮﻃﺭ ﻲﻓ ﻢﻜﺤﺘﻟﺍ
6.......................................................................ﺞﻠﺜﻟﺍ ﻦﻳﺰﺨﺗ ﻕﻭﺪﻨﺻﻭ ﺞﻠﺜﻟﺍ ﻊﻧﺎﺻ
7........................................................................................ﺞﻠﺜﻟﺍﻭ ﻩﺎﻴﻤﻟﺍ ﺎﻋﺯﻮﻣ
8..........................................................................................ﻩﺎﻴﻤﻟﺍ ﺢﻴﺷﺮﺗ ﻡﺎﻈﻧ
9. ..............................................................................................ﺔﺟﻼﺜﻻﺑ ﺔﻳﺎﻨﻌﻟﺍ
9. ...................................................................................................ﻒﻴﻈﻨﺘﻟﺍ
9. ...................................................................................ﺓءﺎﺿﻹﺍ ﺡﺎﺒﺼﻣ ﺮﻴﻴﻐﺗ
10.............................................................................
10............................................................................................ﺔﺟﻼﺜﻟﺍ ﻞﻴﻐﺸﺗ
10................................................................................
11...............................................................................................ﻩﺎﻴﻤﻟﺍﻭ ﺞﻠﺜﻟﺍ
ﺎﻬﺣﻼﺻﺇﻭ ﻝﺎﻄﻋﻷﺍ ﻑﺎﺸﻜﺘﺳﺍ
ﺔﺑﻮﻃﺮﻟﺍﻭ ﺓﺭﺍﺮﺤﻟﺍ ﺔﺟﺭﺩ
1....................................................................................................ﺔﺟﻼﺜﻟﺍ ﺔﻣﻼﺳ
1..........................................................................ﺔﻤﻳﺪﻘﻟﺍ ﺔﺟﻼﺜﻟﺍ ﻦﻣ ﻢﻴﻠﺴﻟﺍ ﺺﻠﺨﺘﻟﺍ
2................................................................................................
2..............................................................................ﺔﺟﻼﺜﻟﺍ ﻦﻣ ﻒﻴﻠﻐﺘﻟﺍ ﺩﺍﻮﻣ ﺔﻟﺍﺯﺇ
2................................................................................................
ﺐﻴﻛﺮﺘﻟﺍ ﺕﺍﺩﺎﺷﺭﺇ
ﻡﺍﺪﺨﺘﺳﻻﺍ ﻞﺒﻗ
3..................................................................................... ﺐﻴﻛﺮﺘﻟﺍ ﻥﺎﻜﻣ ﺕﺎﺒﻠﻄﺘﻣ
3..................................................................................
4...................................................................
ﺎﻬﺒﻴﻛﺮﺗ ﺓﺩﺎﻋﺇﻭ ﺕﻼﺼﻔﻤﻟﺍﻭ ﺏﺍﻮﺑﻷﺍ ﻚﻓ
4........................................................................................
4................................................................................................
ﻪﺒﻴﻛﺮﺗ ﺓﺩﺎﻋﺇﻭ ﺾﺒﻘﻤﻟﺍ ﻚﻓ
ﻩﺎﻴﻤﻟﺍ ﺭﺪﺼﻣ ﻞﻴﺻﻮﺗ
ﺏﺍﻮﺑﻷﺍ ﻂﺒﺿ
5..................................................................................................ﺔﺟﻼﺜﻟﺍ ﻡﺍﺪﺨﺘﺳﺍ
5........................................................................................
ﺎﻬﻗﻼﻏﺇﻭ ﺏﺍﻮﺑﻷﺍ ﺢﺘﻓ
2
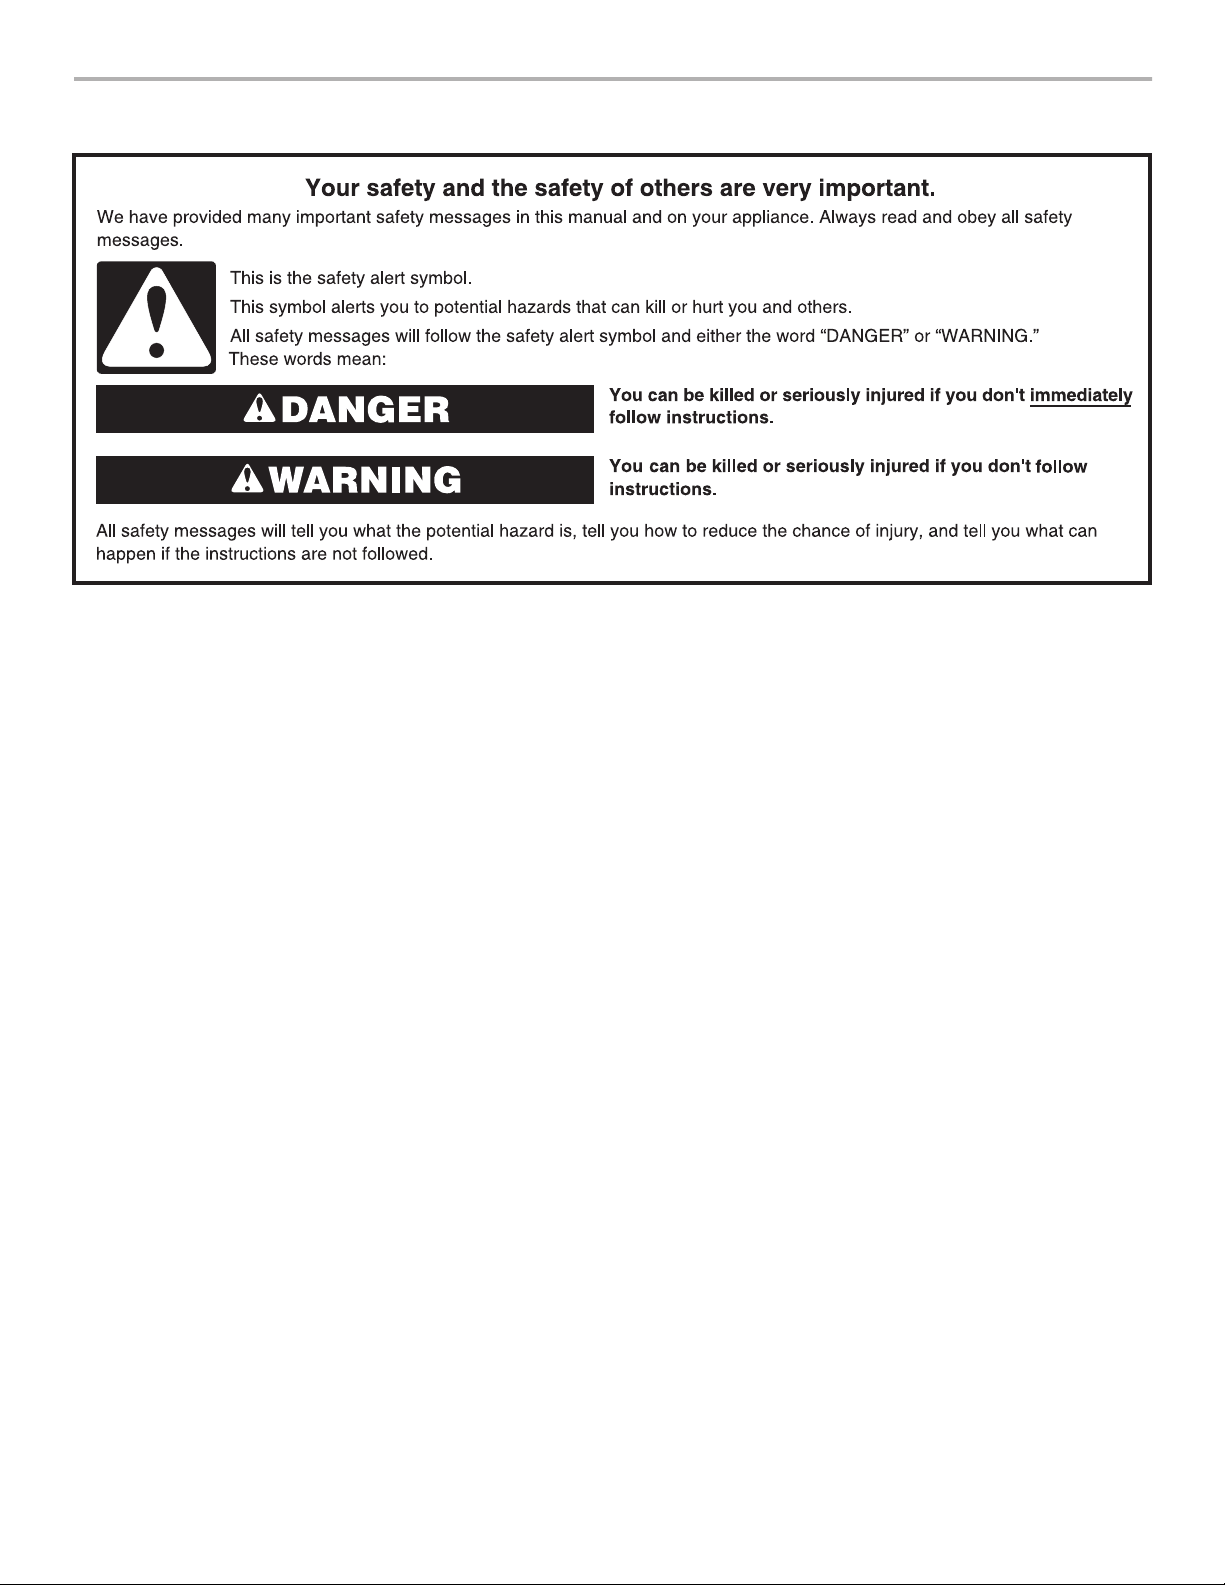
REFRIGERATOR SAFETY
3
IMPORTANT SAFETY INSTRUCTIONS
WARNING:
■
Plug into a grounded (earthed) outlet.
■
Do not remove ground prong.
■
Do not use an adapter.
■
Do not use an extension cord.
■
Disconnect power before servicing.
■
Replace all parts and panels before operating.
■
Remove doors from your old refrigerator.
■
Use nonflammable cleaner.
■
Do not use mechanical, electrical or chemical means other
than those recommended by the Manufacturer to speed up
the defrost process.
■
Do not store or use petrol, flammable liquids or gas in the
vicinity of this or other electrical appliances. The fumes can
cause fires or explosions.
■
Do not store explosive substances such as aerosol cans
with a flammable propellant in this refrigerator.
■
Do not use or place electrical devices inside the refrigerator
compartments if they are not of the type expressly
authorized by the Manufacturer.
■
Use two or more people to move and install refrigerator.
To reduce the risk of fire, electric shock, or injury when using your refrigerator, follow these basic precautions:
SAVE THESE INSTRUCTIONS
■
Disconnect power before installing ice maker (on ice maker
kit ready models only).
■
A qualified service technician must install the water line and
ice maker.
■
Use a sturdy glass when dispensing ice (on some models).
■
Do not eat ice cubes or ice lollies immediately after taking
them out of the freezer since they may cause cold burns.
■
Do not swallow the contents (non-toxic) of the ice packs (in
some models).
■
This appliance is not intended for use by persons (including
children) with reduced physical, sensory or mental
capabilities, or lack of experience and knowledge, unless
they have been given supervision or instruction concerning
use of the appliance by a person responsible for their safety.
■
To avoid the risk of children becoming trapped and
suffocating, do not allow them to play or hide inside the
refrigerator.
■
If the power supply cord is damaged, it must be replaced by
the manufacturer or its service agent or a similarly qualified
person in order to avoid a hazard.
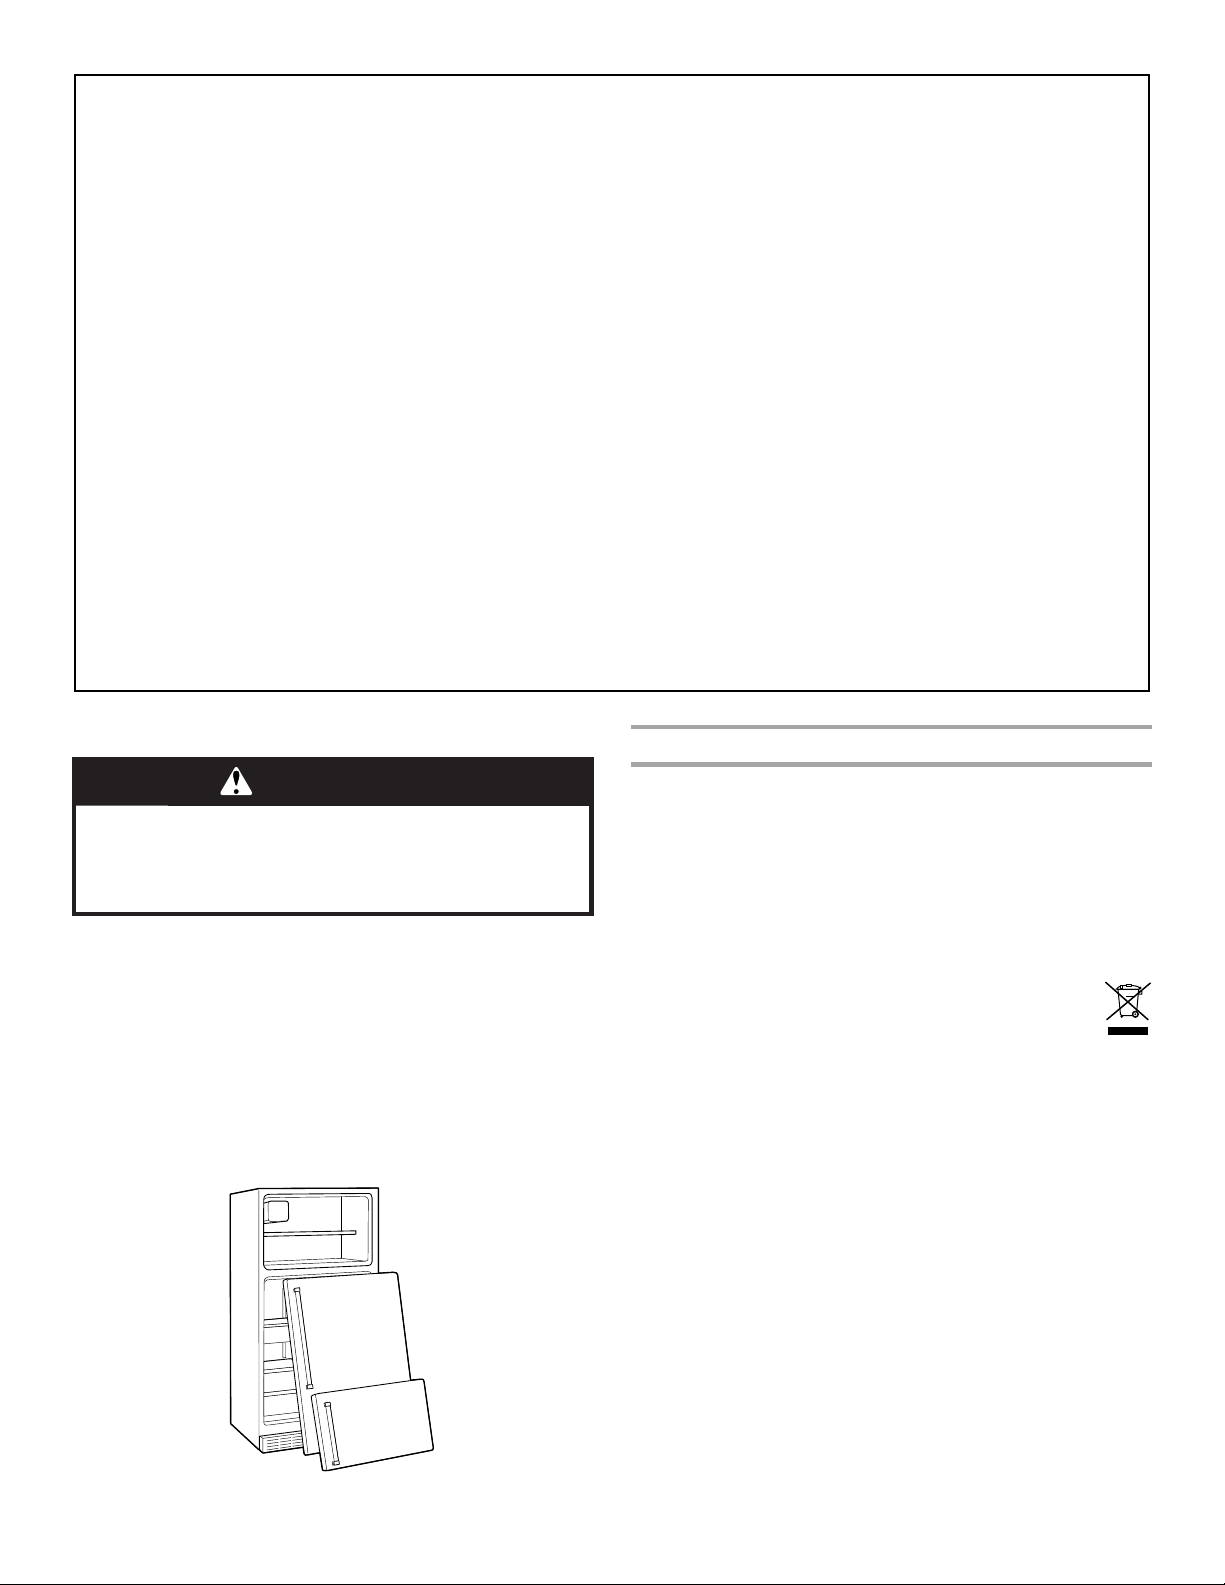
Proper Disposal of Your Old Refrigerator
WARNING
Suffocation Hazard
Remove doors from your old refrigerator.
Failure to do so can result in death or brain damage.
IMPORTANT: Child entrapment and suffocation are not problems
of the past. Junked or abandoned refrigerators are still dangerous
– even if they will sit for “just a few days.” If you are getting rid of
your old refrigerator, please follow these instructions to help
prevent accidents.
Before You Throw Away Your Old Refrigerator or Freezer:
■ When scrapping the refrigerator, make it unusable by cutting
off the power cable.
■ Take off the doors so that children cannot climb inside and
become trapped.
■ Leave the shelves in place so that children may not easily
climb inside.
Scrapping and Disposal
IMPORTANT: Scrap the refrigerator in compliance with local
regulations on waste disposal, taking it to a special collection
centre; do not leave the refrigerator unattended even for a few
days, since it is a potential source of danger for children.
■ The appliance is manufactured using recyclable material. This
appliance is marked in compliance with European Directive
2002/96/EC on Waste, Electrical and Electronic Equipment
(WEEE). By ensuring the correct disposal of this appliance,
you can help prevent potentially negative consequences for
the environment and the health of persons.
■ This symbol on the appliance, or on the accompanying
documents, indicates that this appliance should not
be treated as domestic waste but must be taken to a
special collection centre for the recycling of electrical
and electronic equipment.
■ For further information on the treatment, recovery and
recycling of this product, contact your competent local office,
the household waste collection service or the shop where you
purchased the appliance.
■ This appliance does not contain CFCs. The refrigerant circuit
contains R134a (HFC) or R600a (HC) (see the rating plate
inside the appliance).
■ Appliances with Isobutane (R600a): Isobutane is a natural gas
without environmental impact, but is flammable. Therefore,
make sure the refrigerant circuit pipes are not damaged.
■ This product may contain Fluorinated Greenhouse Gases
covered by the Kyoto Protocol; the refrigerant gas is inside a
hermetically sealed system. Refrigerant gas: R134a has a
Global Warming Potential of (GWP) 1300.
4
Declaration of Conformity
■ This appliance has been designed for preserving food and is
manufactured in compliance with Regulation (CE) No. 1935/
2004.
■ This appliance has been designed, manufactured and
marketed in compliance with:
INSTALLATION INSTRUCTIONS
Unpack the Refrigerator
IMPORTANT: A qualified engineer must unpack and connect the
refrigerator in accordance with these installation instructions.
WARNING
Excessive Weight Hazard
Use two or more people to move and install
refrigerator.
Failure to do so can result in back or other injury.
Remove the Packaging
■ Remove tape and glue residue from surfaces before turning
on the refrigerator. Rub a small amount of liquid dish soap
over the adhesive with your fingers. Wipe with warm water
and dry.
■ Do not use sharp instruments, rubbing alcohol, flammable
fluids, or abrasive cleaners to remove tape or glue. These
products can damage the surface of your refrigerator. For
more information, see “Refrigerator Safety.”
■ Safety objectives of the “Low Voltage” Directive 2006/95/
CE (which replaces 73/23/CEE and subsequent
amendments).
■ The protection requirements of Directive “EMC” 2004/108/
EC.
Before Use
IMPORTANT:
■ To ensure best use of your refrigerator, read the operating
instructions which contain a description of the refrigerator and
other useful advice.
■ Wait at least 2 hours before turning on the refrigerator to
ensure that the refrigerant circuit is fully efficient.
Electrical Requirements
IMPORTANT: Installation and the electrical connection must be
carried out by a qualified technician according to the
manufacturers’ instructions and in compliance with the local
safety regulations.
■ The refrigerator is designed to operate on a separate
220-240 volt, 10 amp, 50/60 Hz cycle time.
■ Make sure the voltage specified on the rating plate
corresponds to that of your home.
■ It must be possible to disconnect the appliance from the
power supply by unplugging it or by means of a mains
two-pole switch installed upstream of the socket.
■ Power cable modification or replacement must be carried out
only by qualified personnel or by After-sales Service.
When Moving Your Refrigerator:
Your refrigerator is heavy. When moving the refrigerator for
cleaning or service, be sure to cover the floor with
cardboard or hardboard to avoid floor damage. Always pull
the refrigerator straight out when moving it. Do not wiggle or
“walk” the refrigerator when trying to move it, as floor
damage could occur.
■ After unpacking the refrigerator, make sure it is not damaged
and that the door closes properly. Any damage must be
reported to the dealer within 24 hours of delivery of the
refrigerator.
■ Dispose of/recycle all packaging materials. The
packing material which bears this symbol is 100%
recyclable. For disposal, comply with the local
regulations. Keep the packing materials (plastic bags,
polystyrene parts, etc.) out of the reach of children, as they are
a potential source of danger.
Clean Before Using
After you remove all of the packaging materials, clean the inside of
your refrigerator before using it. See the cleaning instructions in
“Refrigerator Care.”
Important information to know about glass shelves
and covers:
Do not clean glass shelves or covers with warm water when
they are cold. Shelves and covers may break if exposed to
sudden temperature changes or impact, such as bumping.
Tempered glass is designed to shatter into many small,
pebble-size pieces. This is normal. Glass shelves and covers
are heavy. Use both hands when removing them to avoid
dropping.
Food Storage
■ Use the refrigerator compartment only for storing fresh food
and the freezer compartment only for storing frozen food,
freezing fresh food and making ice cubes.
■ Do not store glass containers with liquids in the freezer
compartment because they may break.
■ Avoid storing unwrapped food in direct contact with internal
surfaces of the refrigerator or freezer compartments.
5
Location Requirements
WARNING
Temperature
This refrigerator is designed for operation in places where the
temperature comes within the following ranges, according to the
climatic class shown on the rating plate. The refrigerator may not
work properly if it is left for a long time at a temperature outside
the specified range.
NOTE: It is recommended that you do not install the refrigerator
near a heat source, such as an oven or radiator.
Climatic Class Amb. T. (°C) Amb. T. (°F)
Explosion Hazard
Keep flammable materials and vapors, such as
gasoline, away from refrigerator.
Failure to do so can result in death, explosion, or fire.
Install and level the refrigerator on a floor strong enough to hold its
weight and in a place suitable for its size and use.
IMPORTANT: This refrigerator is designed for indoor, household
and similar applications such as:
■ Staff kitchen areas in shops, offices and other working
environments.
■ Farmhouses and by clients in hotels, motels and other
residential type environments.
■ Bed and breakfast type environments.
Ventila tion
Install the refrigerator in a dry and well-ventilated place.
To ensure proper ventilation for your refrigerator, allow for a ¹⁄₂"
(1.25 cm) of space on each side and at the top. Allow for a 1"
(2.54 cm) space behind the refrigerator. If your refrigerator has an
ice maker, allow extra space at the back for the water line
connections. When installing your refrigerator next to a fixed wall,
leave a 3³⁄₄" (9.5 cm) minimum space between the refrigerator and
wall to allow the door to swing open.
NOTE: Keep the refrigerator ventilation openings clear.
SN From 10 to 32 From 50 to 90
N From 16 to 32 From 61 to 90
ST From 16 to 38 From 61 to 100
T From 16 to 43 From 61 to 110
Handle Removal and Replacement
Measure the door opening and the depth and width of the
refrigerator. Remove handles or doors, if necessary.
Refrigerator Door Handles
IMPORTANT: To avoid scratching the finish, do not press the
handles into the refrigerator when replacing them.
To remove the handle:
1. Grasp the lower part of the handle firmly, slide the handle up
and pull the handle straight out from the door.
2. Repeat Step 1 to remove the handle from the adjacent door.
To replace the handle:
1. Position the handle so that the large holes in the mounting
clips are down and align the holes with the door studs.
2. Rotate the handle so that the mounting clips are flat against
the door and slide the handle down to engage.
¹⁄₂" (1.25 cm)
3³⁄₄" (9.5 cm)
6
Freezer Drawer Handle
A
B
To remove the handle:
1. Slide the handle to the left to disengage the slots in the
mounting clip from the drawer studs, and pull it off of the
drawer.
To replace the handle:
1. Position the handle so that the large holes in the mounting
clips are aligned with the door studs.
2. Rotate the handle so that the mounting clips are flat against
the drawer and slide the handle toward the right to engage.
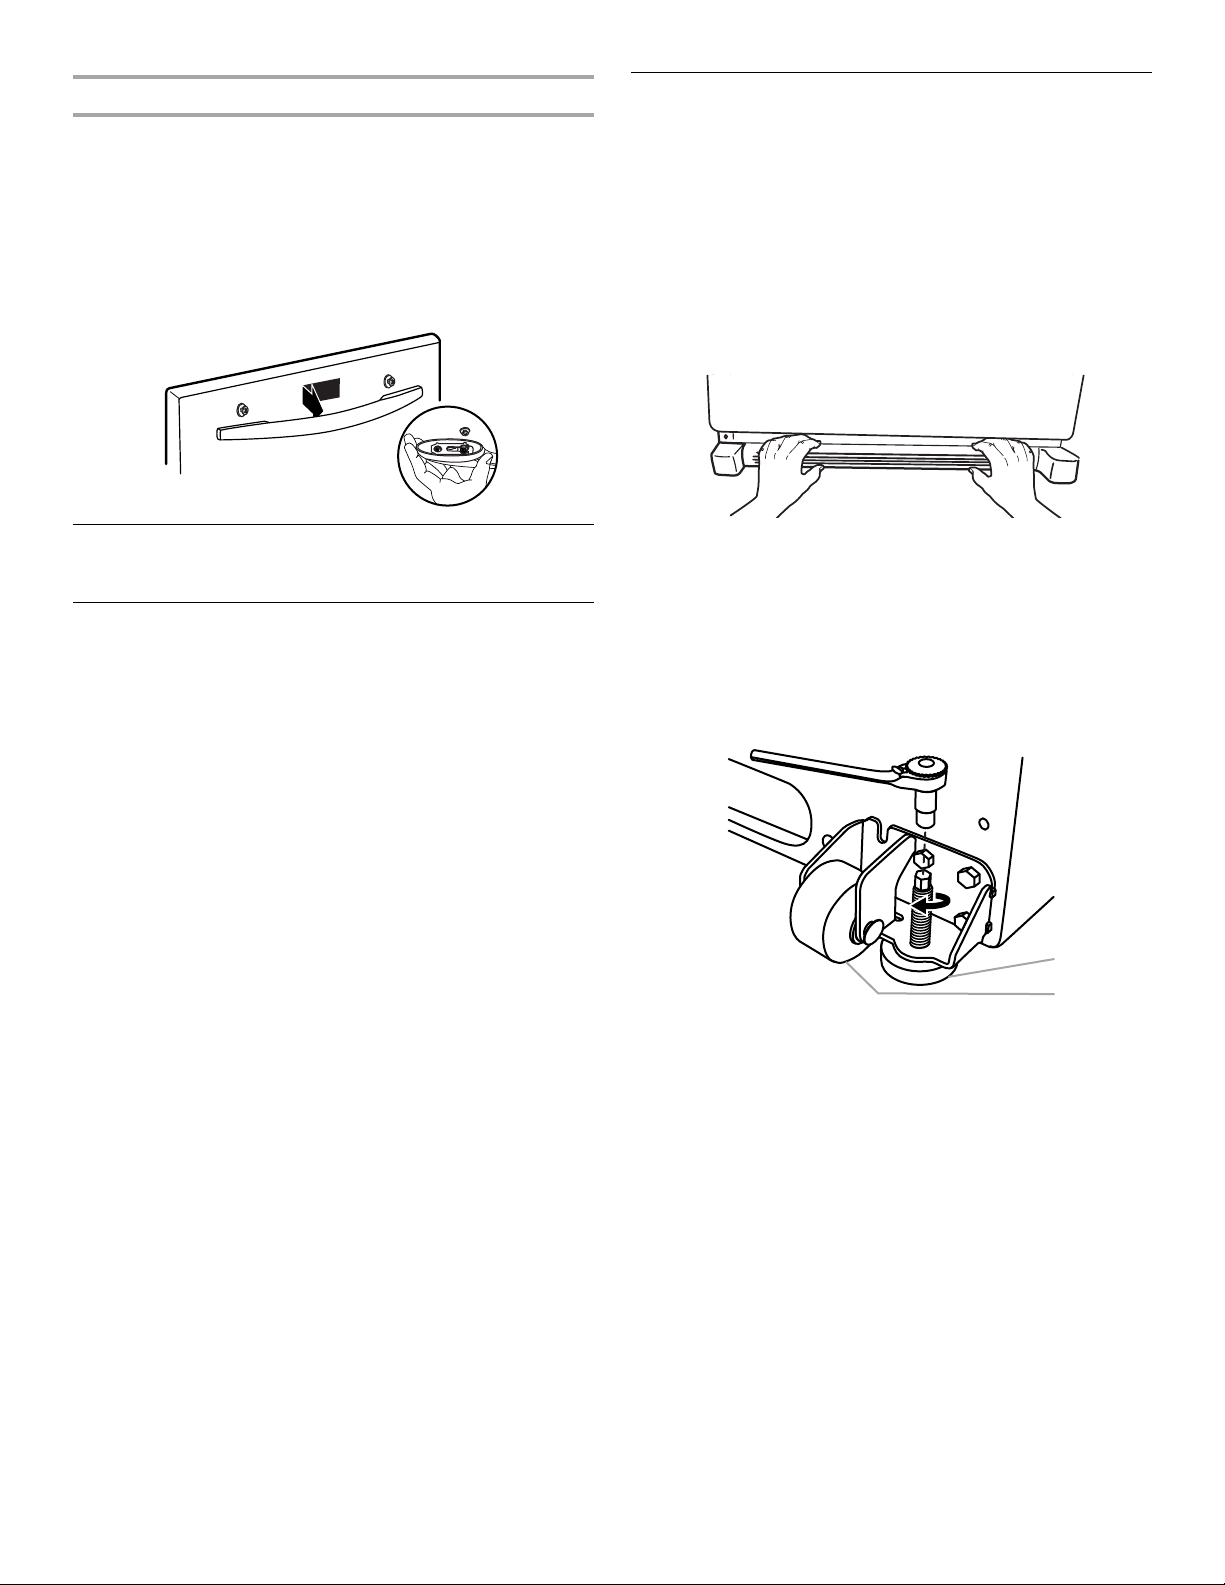
Adjust the Doors
IMPORTANT:
■ Your refrigerator has two adjustable, front leveling screws –
one on each side of the refrigerator base. If your refrigerator
seems unsteady or you want the door to close easier, use the
instructions below.
■ Before moving the refrigerator, raise the leveling screws so the
front rollers are touching the floor.
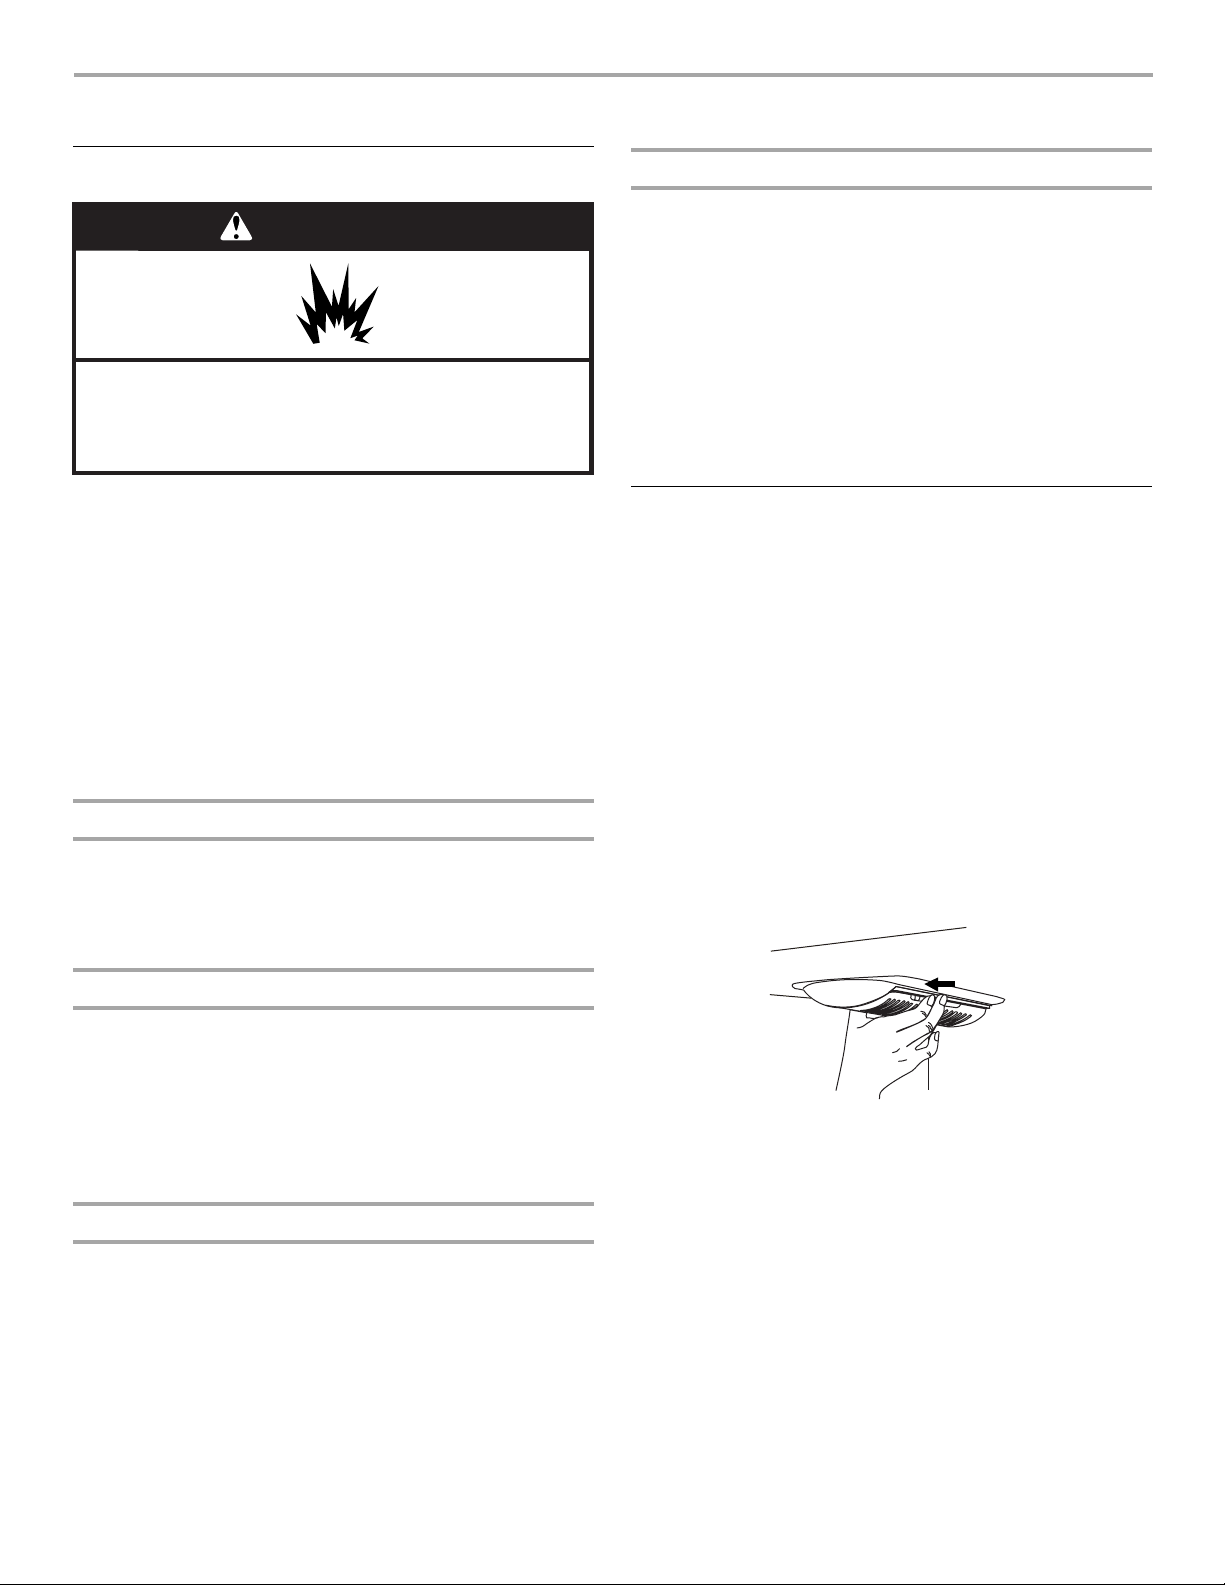
1. Remove the base grille. Grasp the grille firmly and pull it
toward you.
NOTE: Depending on your model, you may need to remove
two screws before removing the base grille.
Remove and Replace Doors and Hinges
IMPORTANT: Contact a qualified engineer to perform this task.
Connect the Water Supply
IMPORTANT: Contact a qualified engineer to perform this task.
■ Follow local water and electrical company connection
regulations.
■ Complete water supply connection before electrical supply
connections.
■ Use the pipe supplied with the new appliance; do not reuse
that of the previous appliance.
■ All appliances equipped with an automatic ice maker and
water dispenser must be connected to a water supply that
delivers only drinking water (with mains water pressure of
between 0.17 and 0.81 Mpa [1.7 and 8.1 bar]). Automatic ice
makers and/or water dispensers not directly connected to the
water supply must be filled with drinking water only.
2. Raise or lower the cabinet.
Using a ¹⁄₄" hex driver, turn the leveling screw on each side to
raise or lower that side of the refrigerator.
NOTE: Having someone push against the top of the
refrigerator takes some weight off the leveling screws. This
makes it easier to turn the screws. It may take several turns of
the leveling screw to adjust the tilt of the refrigerator.
■ To raise, turn the leveling screw clockwise.
■ To lower, turn the leveling screw counterclockwise.
¹⁄₄"
A. Leveling screw
3. Open the door again to make sure that it closes as easily as
you like. If not, tilt the refrigerator slightly more to the rear by
turning both leveling screws clockwise. It may take several
more turns, and you should turn both screws the same
amount.
4. Replace the base grille.
7

REFRIGERATOR USE
A
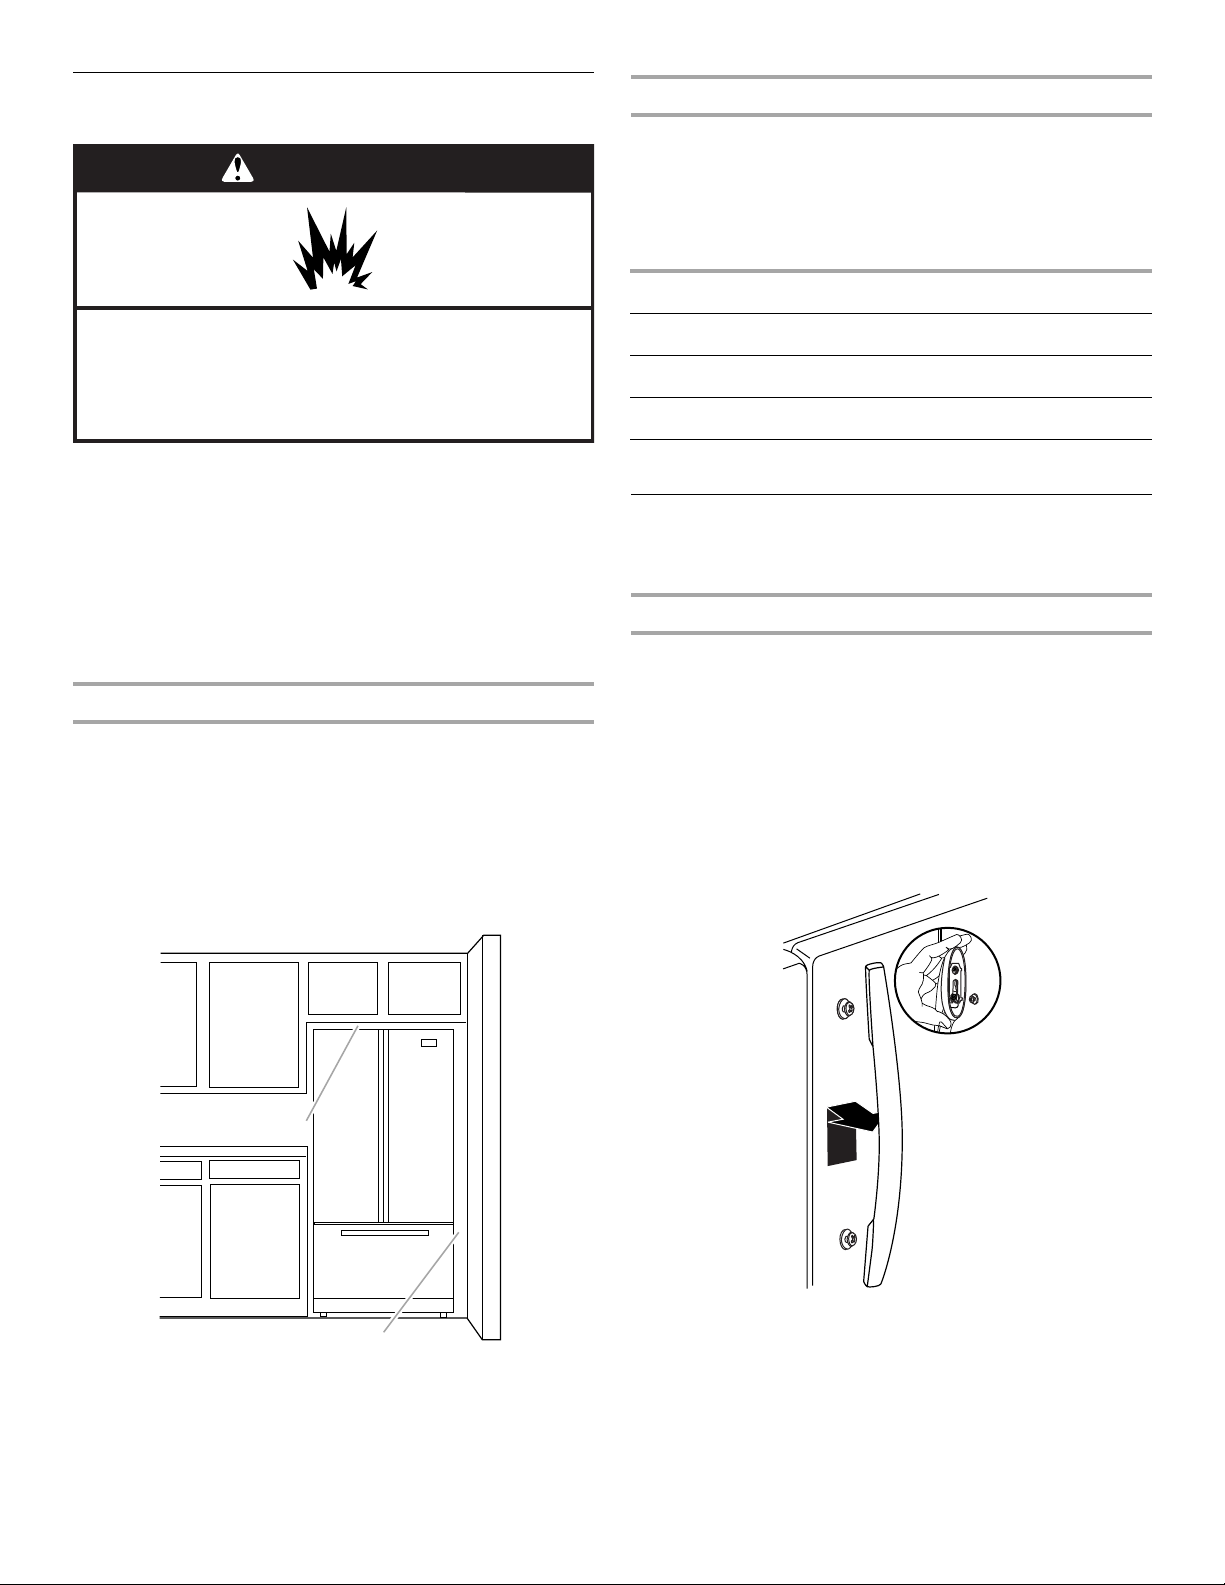
Opening and Closing Doors
There are two refrigerator compartment doors. The doors can be
opened and closed either separately or together.
There is a vertically-hinged seal on the left refrigerator door.
■ When the left side door is opened, the hinged seal
automatically folds inward so that it is out of the way.
■ When both doors are closed, the hinged seal automatically
forms a seal between the two doors.
A. Hinged seal
Adjusting the Controls
For your convenience, your refrigerator and freezer controls are
preset at the factory. When you first install your refrigerator, make
sure that the controls are still set to the “mid-settings.” The factory
recommended set points are 38°F (3°C) for the refrigerator and
0°F (-18°C) for the freezer.
IMPORTANT:
■ Wait 24 hours before you put food into the refrigerator. If you
add food before the refrigerator has cooled completely, your
food may spoil.
NOTE: Adjusting the set points to a colder than
recommended setting will not cool the compartments any
faster.
■ If the temperature is too warm or too cold in the refrigerator or
freezer, first check the air vents to be sure they are not
blocked before adjusting the controls.
■ The preset temperatures should be correct for normal
household usage. The controls are set correctly when milk or
juice is as cold as you like and when ice cream is firm.
■ Wait at least 24 hours between adjustments. Recheck the
temperatures before other adjustments are made.
To view and adjust the set points, press and hold the TEMP
button for 3 seconds. When adjust mode is activated, adjusting
information will appear on the display screen.
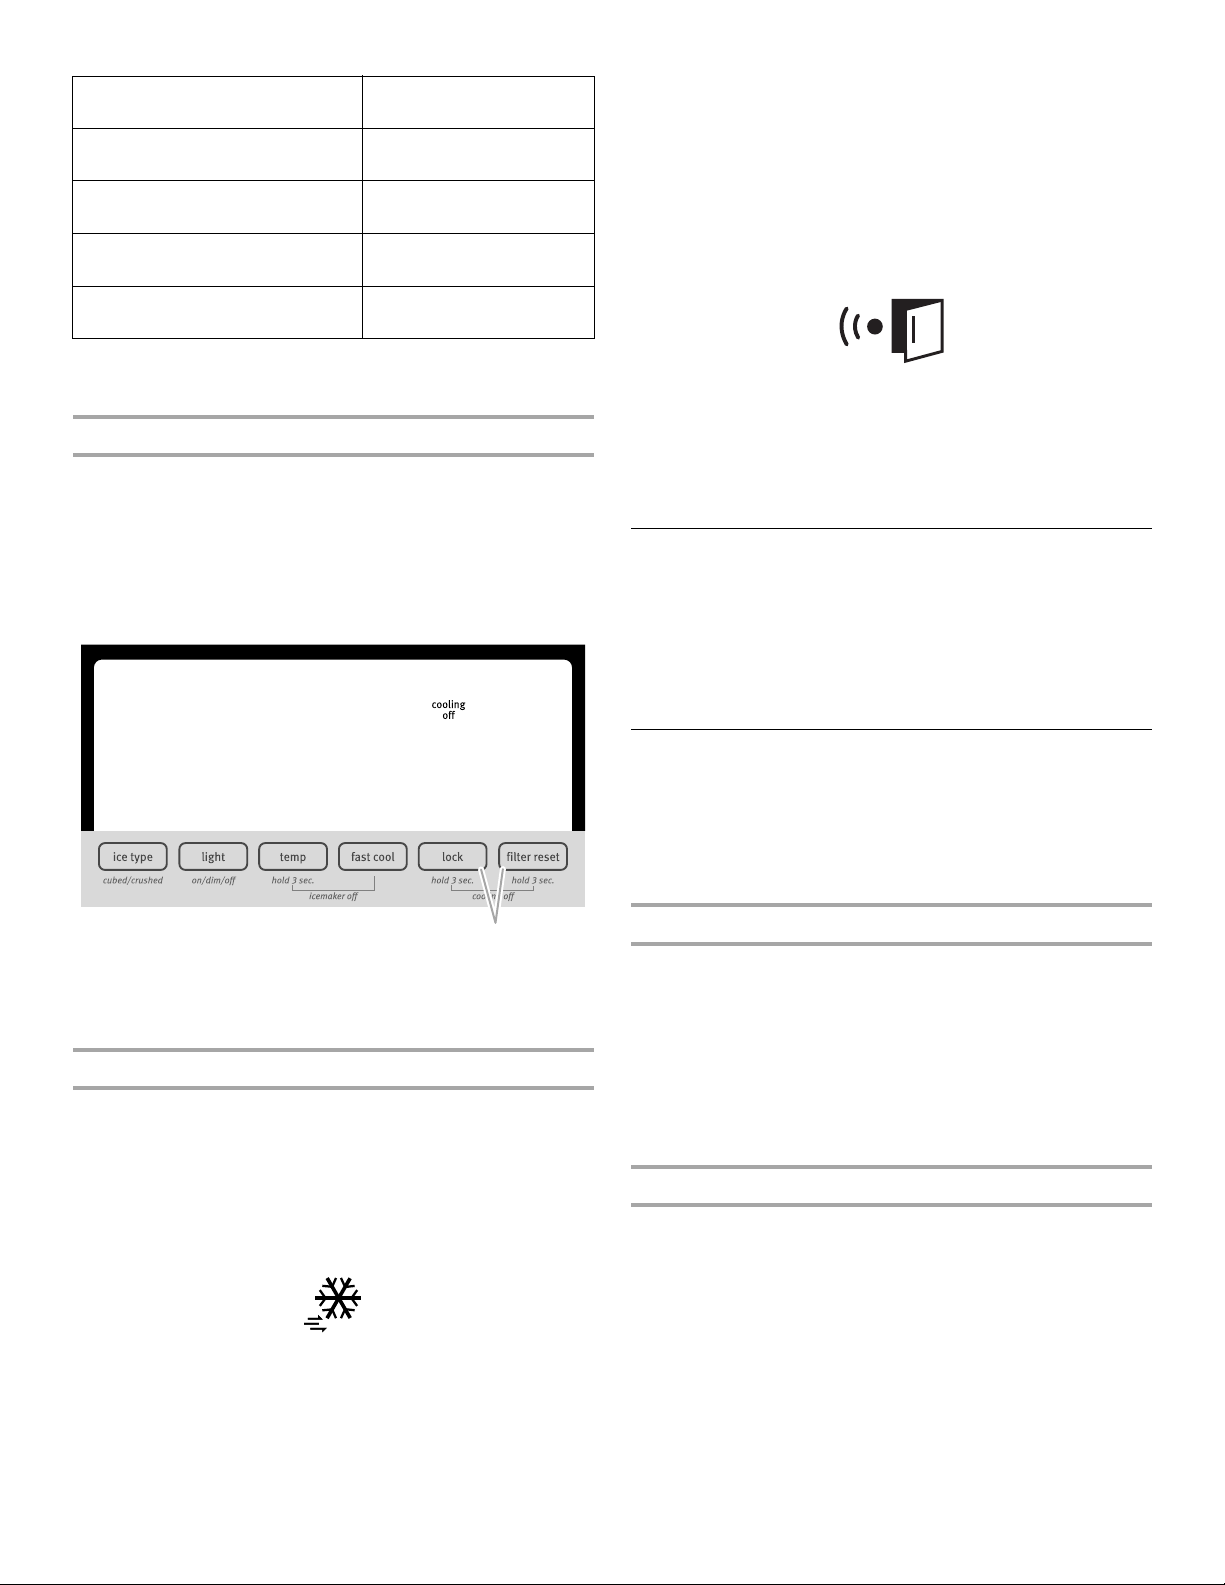
Using the Controls
The refrigerator and freezer controls are located on the dispenser
panel.
IMPORTANT: The display screen on the dispenser control panel
will turn off automatically and enter “sleep” mode when the
control buttons and dispenser levers have not been used for
2 minutes or more. While in “sleep” mode, the first press of a
control button will only reactivate the display screen, without
changing any settings. After reactivation, changes to any settings
can then be made. If no changes are made within 2 minutes, the
display will re-enter “sleep” mode.
■ Touch any control button on the dispenser panel to activate
the display screen. The home screen will appear as shown.
NOTE: To view Celsius temperatures, press the LIGHT button
when adjust mode is activated. To return the display setting to
Fahrenheit, press LIGHT again.
■ When adjust mode is activated, the display screen shows the
refrigerator set point and “FRIDGE” appears.
■ Press LOCK to raise the set point, or press FAST COOL to
lower the set point.
■ When you have finished viewing (and adjusting if desired) the
refrigerator set point, press TEMP to change the display to
show the freezer set point. When the zone has been changed,
“FREEZER” appears on the display screen.
■ Press LOCK to raise the set point, or press FAST COOL to
lower the set point.
■ When you have finished viewing (and adjusting if desired) both
the refrigerator and freezer set points, press FILTER to save
the settings.
NOTE: To exit without saving changes, press ICE TYPE at any
time while in adjust mode, or allow about 60 seconds of
inactivity and adjust mode will turn off automatically.
When adjusting temperature set points, use the following chart as
a guide.
8
CONDITION: TEMPERATURE
ADJUSTMENT:
REFRIGERATOR too cold REFRIGERATOR Setting
1° higher
REFRIGERATOR too warm REFRIGERATOR Setting
1° lower
FREEZER too cold FREEZER Setting
1° higher
FREEZER too warm /
Too little ice
FREEZER Setting
1° lower
The set point range for the refrigerator is 33°F to 45°F (0°C to
7°C). The set point range for the freezer is -5°F to 5°F (-21°C to
-15°C).
Cooling On/Off
Your refrigerator and freezer will not cool when cooling is
turned off.
■ To turn cooling off, press and hold the LOCK and FILTER
RESET buttons at the same time for 3 seconds. When cooling
is off, “cooling off” will appear on the display screen.
IMPORTANT: To avoid unintentionally locking the dispenser
or changing other settings, be sure to press both buttons at
exactly the same time.
Door Ajar Alarm
The Door Ajar Alarm feature sounds an alarm when the refrigerator
or freezer door is open for 5 minutes and the product cooling is
turned on. The alarm will repeat every 2 minutes. Close both
doors to turn it off. The feature then resets and will reactivate
when either door is left open again for 5 minutes.
NOTE: To mute the audible alarm while keeping the doors open,
such as while cleaning the inside of the refrigerator, press any
button on the control panel. The alarm sound will be temporarily
turned off, but the Door Ajar icon will still be displayed on the
dispenser control panel.
Water Filter Sta tus Light and F ilter Reset
The filter reset control allows you to restart the water filter status
tracking feature each time you replace the water filter. See “Water
Filtration System.”
■ Press and hold FILTER RESET for 3 seconds, until the
“Replace Filter” light turns off.
Crisper Humidity Control
You can control the amount of humidity in the moisture-sealed
crisper. Depending on your model, adjust the control to any
setting between FRUIT and VEGETABLES or LOW and HIGH.
FRUIT/LOW (open) for best storage of fruits and vegetables with
skins.
VEGET ABLES/HIGH (closed) for best storage of fresh, leafy
vegetables.
A
A. Press LOCK and FILTER RESET at the same time.
■ Press and hold LOCK and FILTER RESET for 3 seconds again
to turn cooling back on.
Additional Features
Fast Cool
The Fast Cool feature assists with periods of high refrigerator use,
full grocery loads, or temporarily warm room temperatures.
■ Press FAST COOL to set the freezer and refrigerator to the
lowest temperature setting. When the feature is on, the Fast
Cool icon will appear on the dispenser display screen. The
Fast Cool feature will remain on for 24 hours unless manually
turned off.
■ To manually turn off the Fast Cool feature, press FAST COOL
again or adjust the refrigerator temperature set point. The Fast
Cool icon will disappear when the feature is off.
NOTE: Setting the freezer to a colder temperature may make
some foods, such as ice cream, harder.
Ice Maker and Ice Storage Bin
IMPORTANT:
■ Flush the water system before turning on the ice maker. See
“Water and Ice Dispensers.”
■ The ice maker and storage bin are located in the upper left-
hand side of the refrigerator compartment.
T u rning the Ice Maker On/Off
The ice maker has an automatic shutoff. When the ice maker is
on, sensors will automatically stop ice production when the
storage bin is full. The ice maker will remain set to ON, and ice
production will resume when the bin is no longer full.
To manually turn off the ice maker, press TEMP and FAST COOL
at the same time and hold for 3 seconds until the “Ice Maker Off”
icon lights up. When the ice maker is set to OFF, it will stop
producing ice.
Pressing and holding TEMP and FAST COOL again for 3 seconds
turns on the ice maker and the “Ice Maker Off” icon disappears.
Removing and Replacing Ice Storage Bin
To Remove the Ice Storage Bin:
1. Hold the base of the storage bin and press the release button.
2. Pull out the storage bin.
To Replace the Ice Storage Bin:
IMPORTANT: It may be necessary to turn the auger driver, behind
the ice bin, counterclockwise to properly align the ice bin with the
auger driver. The ice storage bin must be locked in place for
proper ice dispensing.
9
1. Slide the ice bin into the guide rails located on either side of
the enclosure.
2. Push the ice bin in until resistance is felt. Raise the front
slightly and push the ice bin in until an audible “click” is heard.
A
A. Auger driver
Ice Production Rate
■ Allow 24 hours to produce the first batch of ice. Discard the
first three batches of ice produced.
■ The ice maker should produce approximately 8 to 12 batches
of ice in a 24-hour period.
■ To increase ice production, lower the freezer and refrigerator
temperature. See “Using the Controls.” Wait 24 hours
between adjustments.
NOTE: Setting the freezer to a colder temperature may make
some foods, such as ice cream, harder.
Cleaning, Sanitizing and Maintenance
IMPORTANT: Failure to follow the instructions regarding sanitizing
can compromise the hygienic safety of the water dispensed.
■ When using the refrigerator for the first time, and each time
the water filter is changed, flush the water system. Discard the
first 15 litres of water, equivalent to 6 to 7 minutes of
dispensing (not necessarily consecutive, but before initial
consumption) and discard the ice produced in the first
24 hours.
■ If the water dispenser has not been used for more than
5 days, it is advisable to clean the circuit and run off the first
litre of water.
■ Clean the ice bin regularly using only drinking water for
cleaning the ice bin.
■ The water filter must be changed when indicated on the
control panel or when the ice/water dispenser has not been
used for more than 30 days.
■ With each water filter replacement, sanitise the ice and /or
water dispensing system using a food grade disinfectant (with
sodium hypochlorite), which does not alter the characteristics
of the materials, or use the “Sanitising Kit” available from the
After-Sales Service. Rinse with at least 2 litres of water before
use.
■ Only original spare parts supplied by the manufacturer should
be used when replacing components in the ice and water
dispenser.
Flushing the Water System
Remember
■ The quality of your ice will be only as good as the quality of the
water supplied to your ice maker. Avoid connecting the ice
maker to a softened water supply. Water softener chemicals
(such as salt) can damage parts of the ice maker and lead to
poor quality ice. If a softened water supply cannot be avoided,
make sure the water softener is operating properly and is well
maintained.
■ Do not use anything sharp to break up the ice in the bin. This
can cause damage to the ice bin and dispenser mechanism.
■ Do not store anything in the ice storage bin.
Water and Ice Dispensers
NOTES:
■ The display screen on the dispenser control panel will turn off
automatically and enter “sleep” mode when the control
buttons and dispenser levers have not been used for
2 minutes or more. While in “sleep” mode, the first press of a
control button will only reactivate the display screen, without
changing any settings. After reactivation, changes to any
settings can then be made. If no changes are made within
2 minutes, the display will re-enter “sleep” mode.
■ The dispensing system will not operate when the refrigerator
door is open.
■ Allow 24 hours for the refrigerator to cool down and chill
water.
■ Allow 24 hours to produce the first batch of ice. Discard the
first three batches of ice produced.
1. Use a sturdy container to depress and hold the water
dispenser lever for 5 seconds, then release it for 5 seconds.
Repeat until water begins to flow.
2. Once water begins to flow, continue depressing and releasing
the dispenser lever (5 seconds on, 5 seconds off) until a total
15 litres has been dispensed. This will flush air from the filter
and water dispensing system, and prepare the water filter for
use. Additional flushing may be required in some households.
As air is cleared from the system, water may spurt out of the
dispenser.
The Water Dispenser
IMPORTANT: Dispense enough water every week to maintain a
fresh supply.
To Dispense Water:
1. Press a sturdy glass against the water dispenser lever.
2. Remove the glass to stop dispensing.
The Ice Dis pen ser
Ice dispenses from the ice maker storage bin in the freezer when
the dispenser lever is pressed. To turn off the ice maker, see “Ice
Maker and Storage Bin.”
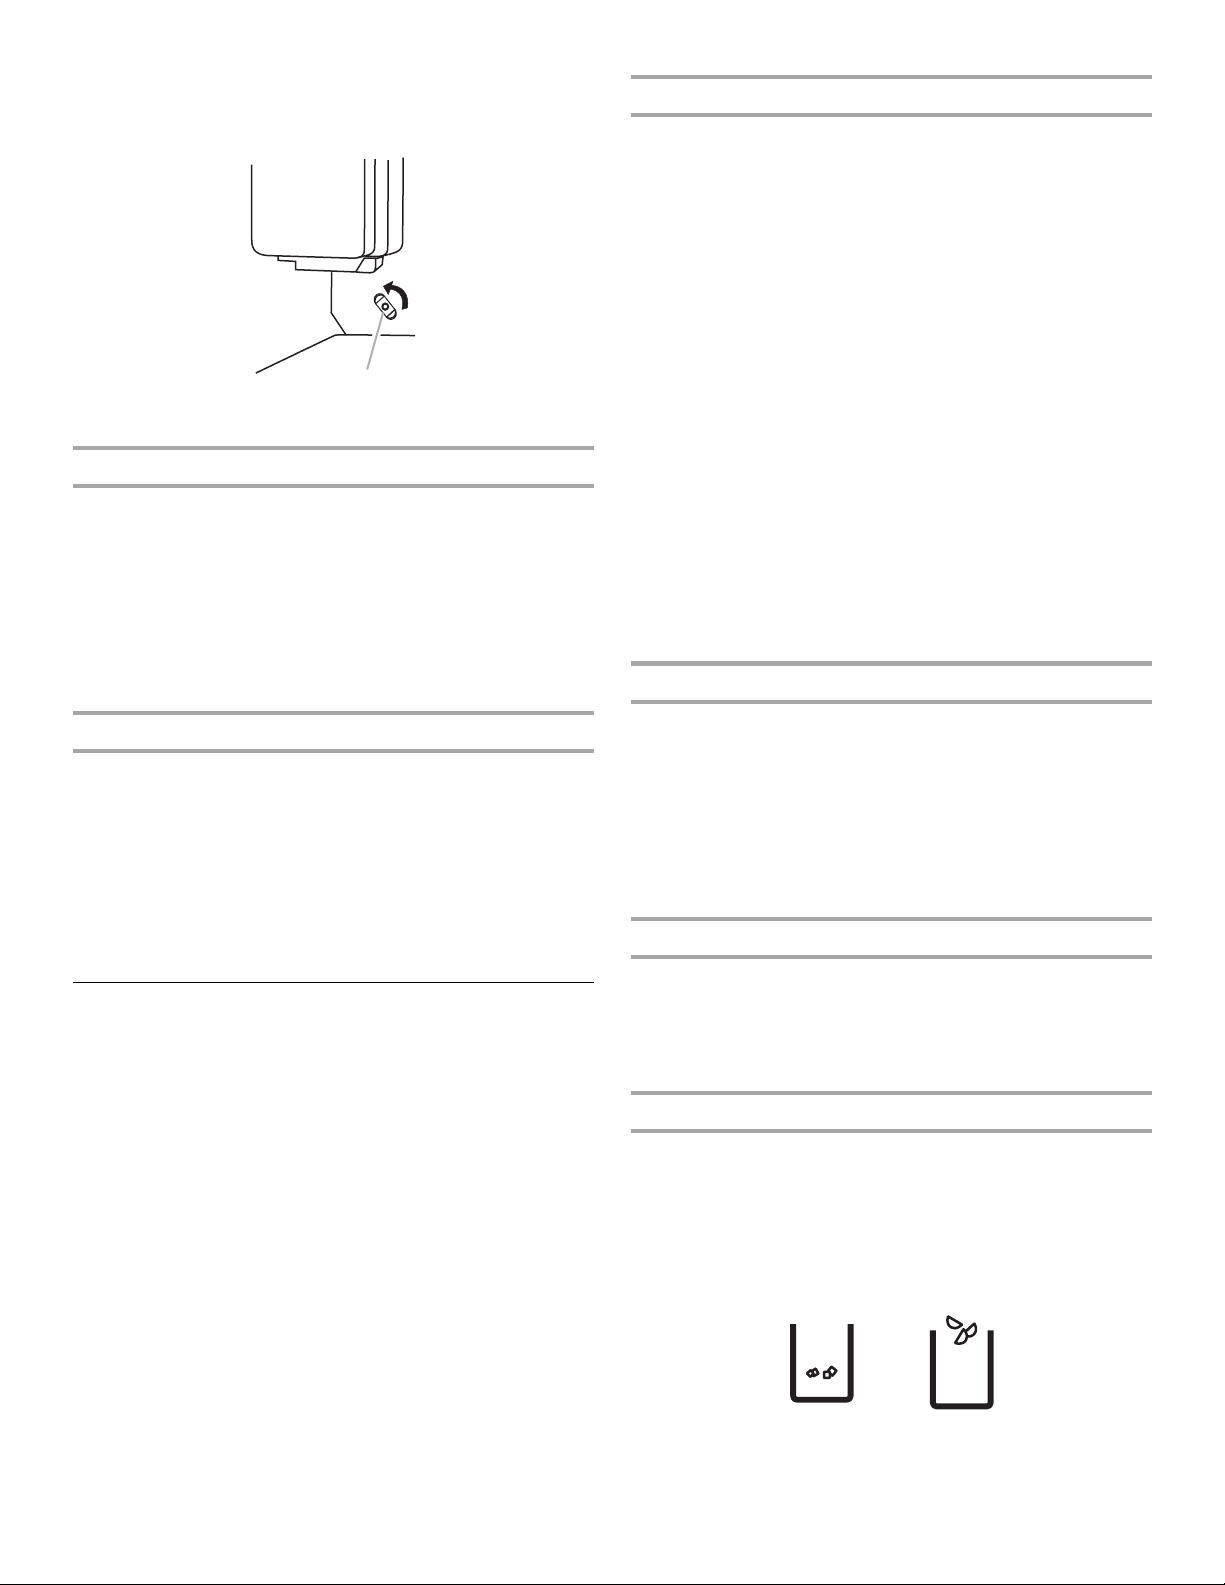
Your ice maker can produce both crushed and cubed ice. Before
dispensing ice, select which type of ice you prefer by pressing the
ICE TYPE button.
The display screen indicates which type of ice is selected.
10
CRUSHED CUBED

For crushed ice, cubes are crushed before being dispensed. This
may cause a slight delay when dispensing crushed ice. Noise
from the ice crusher is normal, and pieces of ice may vary in size.
When changing from crushed to cubed, a few ounces of crushed
ice will be dispensed along with the first cubes.
To Dispense Ice:
1. Make sure the desired type of ice is selected. To switch
between cubed and crushed, press ICE TYPE.
■ Press and hold LOCK for 3 seconds to lock the dispenser.
■ Press and hold LOCK a second time to unlock the dispenser.
The display screen indicates when the dispenser is locked.
WARNING
Cut Hazard
Use a sturdy glass when dispensing ice.
Failure to do so can result in cuts.
2. Press a sturdy glass against the ice dispenser lever. Hold the
glass close to the dispenser opening so ice does not fall
outside of the glass.
IMPORTANT: You do not need to apply a lot of pressure to the
lever in order to activate the ice dispenser. Pressing hard will
not make the ice dispense faster or in greater quantities.
3. Remove the glass to stop dispensing.
NOTE: Ice may continue to dispense for up to 10 seconds
after removing the glass from the lever. The dispenser may
continue to make noise for a few seconds after dispensing.
The Dispenser Light
When you use the dispenser, the light will automatically turn on.
If you want the light to be on continuously, you may choose either
ON or DIM. The display screen indicates which mode is selected.
LOCKED UNLOCKED
Water Filtration System
The water filter is located in the upper right-hand corner of the
refrigerator compartment.
Water Filter Sta tus Light
When a water filter has been installed in the refrigerator, the water
filter status lights help you know when to change your water filter.
■ The water filter status icon will change from Normal (blue
water) to Order (red waves) and “Order Filter” (orange) when
90% of the volume of water for which the filter is rated has
passed through the filter OR 5 months have passed since the
filter was installed.
■ The “Replace Filter” (red) icon illuminates and blinks
continuously during dispensing when the rated volume of
water has passed through the filter OR 6 months have passed
since the filter was installed. A new water filter should be
installed immediately when the Replace light is illuminated.
■ After 14 days at Replace Filter stage, the “Replace Filter” and
“water” icons will glow (red) at all times and blink
continuously during dispensing. Also, an alert chime will
sound three times following dispensing.
The disposable water filter should be replaced at least every
6 months. If the water flow to the water dispenser or ice maker
decreases noticeably before 6 months have passed, replace the
water filter more often.
Reset Water Filter Status
After changing the water filter, reset the water filter status. On the
display screen, press and hold FILTER RESET for 3 seconds. The
status light will change from Replace Filter (red) to Normal (white
waves and water drop) when the system is reset.
ON DIM
ON: Press LIGHT to turn the dispenser light on.
DIM: Press LIGHT a second time to select DIM mode. The
dispenser light will remain on, but at a lower intensity.
OFF: Press LIGHT a third time to turn the dispenser light off.
The dispenser lights are LEDs that cannot be changed. If it
appears that your dispenser lights are not working, see
“Troubleshooting” for more information.
The Dispenser Lock
The dispenser can be turned off for easy cleaning or to avoid
unintentional dispensing by small children and pets.
NOTE: The lock feature does not shut off power to the refrigerator,
to the ice maker, or to the dispenser light. It simply deactivates the
controls and dispenser levers. To turn off the ice maker, see “Ice
Maker and Storage Bin.”
Replacing the Water Filter
IMPORTANT: Air trapped in the water system may cause water
and filter to eject. Always dispense water for at least 2 minutes
before removing the filter or blue bypass cap.
1. To access the filter, press upward on the ribbed section of the
water filter cover.
2. Turn filter counterclockwise to remove.
3. Remove sealing label from replacement filter and insert the
filter end into the filter head.
4. Turn the filter clockwise until it stops. Snap the filter cover
closed.
5. Flush the water system. See “Water and Ice Dispensers.”
NOTE: The dispenser feature may be used without a water filter
installed. Your water will not be filtered. If this option is chosen,
replace the filter with the blue bypass cap.
11
REFRIGERATOR CARE
Cleaning
WARNING
Explosion Hazard
Use nonflammable cleaner.
Failure to do so can result in death, explosion, or fire.
Both the refrigerator and freezer sections defrost automatically.
However, clean both sections about once a month to avoid odor
buildup. Wipe up spills immediately.
IMPORTANT:
■ Because air circulates between all compartments, any odors
formed in one compartment will transfer to the other. You must
thoroughly clean all compartments to eliminate odors. To
avoid odor transfer and drying out of food, wrap or cover
foods tightly.
■ Do not use abrasive or harsh cleaners such as window sprays,
scouring cleansers, flammable fluids, cleaning waxes,
concentrated detergents, nail polish remover, bleaches or
cleansers containing petroleum products. Do not use paper
towels, scouring pads, or other harsh cleaning tools that may
scratch or damage the materials.
Clean the Interior
1. Unplug refrigerator or disconnect power.
2. Using a clean sponge or soft cloth and a mild detergent in
warm water, hand wash, rinse, and dry removable parts and
interior surfaces thoroughly.
3. Plug in refrigerator or reconnect power.
Clean the Condenser
There is no need for routine condenser cleaning in normal home
operating environments. If the environment is particularly greasy
or dusty, or there is significant pet traffic in the home, the
condenser should be cleaned every 2 to 3 months to ensure
maximum efficiency.
To clean the condenser:
1. Unplug refrigerator or disconnect power.
2. Remove the base grille.
3. Use a vacuum cleaner with a soft brush to clean the grille, the
open areas behind the grille and the front surface area of the
condenser.
4. Replace the base grille when finished.
5. Plug in refrigerator or reconnect power.
Changing the Light Bulb
IMPORTANT: The lamps used in the refrigerator are special
purpose lamps for household electrical appliances and they are
not suitable for household room illumination (Regulation (EC) 244/
2009).
NOTE: Not all appliance bulbs will fit your refrigerator. Be sure to
replace the bulb with an appliance bulb of the same size, shape,
and wattage (no greater than 40 watts).
■ The dispenser lights are LEDs that cannot be changed.
■ On some models, the interior lights are LEDs that cannot be
changed.
■ Some models may have LEDs in one compartment and an
appliance bulb in another compartment.
To Replace an Appliance Bulb:
1. Unplug refrigerator or disconnect power.
2. Remove the light shield(s), if necessary.
■ Squeeze both sides of the light shield while pulling
downward to remove.
Clean the Touch Screen Display on the Dispenser Panel
1. Make sure the refrigerator is unplugged or the power is
disconnected before wiping the screen, to avoid
unintentionally changing the settings.
2. Mix a solution of mild detergent in warm water. Dampen a soft,
lint-free cloth with the solution and gently wipe the screen.
NOTE: Do not spray or wipe liquids directly onto the screen,
or over-saturate the cloth.
3. Plug in refrigerator or reconnect power.
Clean the Exterior Surfaces
1. Unplug refrigerator or disconnect power.
2. Using a clean sponge or soft cloth and a mild detergent in
warm water, wash, rinse and thoroughly dry stainless steel
and painted metal exteriors.
3. Plug in refrigerator or reconnect power.
12
3. Replace burned-out bulb(s) with appliance light bulb(s) no
greater than 40 watts.
4. Replace the light shield(s) by inserting the tabs on the shield
into the liner holes and snap into place.
NOTE: To avoid damaging the light shield, do not force the
shield beyond the locking point.
5. Plug in refrigerator or reconnect power.
 Loading...