

UPRIGHT FREEZER
Use & Care Guide
CONGELATEUR
VERTICAL
Guide d’utilisation et d’entretien
ﻲﺳﺃﺮﻟﺍ ﺪﻤﺠﻤﻟﺍ
ﺔﻳﺎﻨﻌﻟﺍﻭ ﻡﺍﺪﺨﺘﺳﻻﺍ ﻞﻴﻟﺩ
W10443587B
Table of Contents
ﺕﺎﻳﻮﺘﺤﻤﻟﺍ ﻝﻭﺪﺟ........ 2
Table des matières
/
/

TABLE OF CONTENTS
FREEZER SAFETY ...................................................................... 3
INSTALLATION INSTRUCTIONS ...............................................4
Unpacking ................................................................................. 4
Opening Dimensions .................................................................4
Location Requirements .............................................................5
Electrical Requirements ............................................................ 5
Water Supply Requirements ..................................................... 6
Connect the Water Supply ........................................................6
Freezer Door .............................................................................7
Adjust the Door ....................................................................... 10
FREEZER USE ...........................................................................10
Ensuring Proper Air Circulation ...............................................10
Using the Control .................................................................... 10
Indicator Light ......................................................................... 11
Key Eject Lock ........................................................................11
Ice Maker ................................................................................11
TABLE DES MATIERES
SECURITE DU CONGELATEUR .............................................17
INSTRUCTIONS D’INSTALLATION ........................................18
Déballage ................................................................................ 18
Dimensions de l’ouverture .....................................................19
Emplacement d’installation ..................................................... 19
Spécifications électriques .......................................................20
Spécifications de l’alimentation en eau .................................20
Raccordement de la canalisation d’alimentation en eau ....... 21
Porte du congélateur ..............................................................22
Ajustement de la porte ............................................................ 25
UTILISATION DU CONGELATEUR .......................................... 25
Pour s’assurer d’une circulation d’air appropriée .................. 25
Utilisation de la commande ...................................................25
Témoin lumineux ..................................................................... 26
Serrure à éjection de clé ........................................................26
Machine à glaçons .................................................................26
FREEZER FEATURES ...............................................................11
Refrigerated Shelves ...............................................................11
Door Bin .................................................................................. 12
Storage Basket .......................................................................12
Storage Gate ...........................................................................12
FREEZER CARE ........................................................................12
Cleaning Your Frost-Free Freezer ........................................... 12
Base Grille ...............................................................................13
Defrosting and Cleaning Your Manual Defrost Freezer ...........13
Changing the Light Bulb .........................................................14
Power Interruptions .................................................................14
Moving Care ............................................................................14
TROUBLESHOOTING ............................................................... 14
ASSISTANCE OR SERVICE ......................................................16
CARACTERISTIQUES DU CONGELATEUR ............................27
Clayettes de réfrigération ....................................................... 27
Balconnet de porte .................................................................27
Panier d’entreposage .............................................................. 28
Barrière d’entreposage ...........................................................28
ENTRETIEN DU CONGELATEUR ...........................................28
Nettoyage du congélateur sans givre ....................................28
Grille de la base ......................................................................29
Dégivrage et nettoyage du congélateur
à dégivrage manuel ................................................................29
Remplacement de l’ampoule d’éclairage ..............................30
Pannes de courant électrique ................................................. 30
Déménagement ......................................................................30
DEPANNAGE ............................................................................. 31
ASSISTANCE OU SERVICE ......................................................33
ﺕﺎﻳﻮﺘﺤﻤﻟﺍ ﻝﻭﺪﺟ
11 .......................................................................................... ﺪﻤﺠﻤﻟﺍ ﺕﺍﺰﻴﻣ
11 .......................................................................................... ﺓﺩﺮﺒﻣ ﻑﻮﻓﺭ
12 .........................................................................................ﺏﺎﺒﻟﺍ ﻕﻭﺪﻨﺻ
12 ...........................................................................................ﻦﻳﺰﺨﺘﻟﺍ ﺔﻠﺳ
12 ......................................................................................... ﻦﻳﺰﺨﺘﻟﺍ ﺔﺑﺍﻮﺑ
12 .........................................................................................ﺪﻤﺠﻤﻟﺎﺑ ﺔﻳﺎﻨﻌﻟﺍ
12 ...................................................................ﻊﻴﻘﺼﻠﻟ ﻊﻧﺎﻤﻟﺍ ﻙﺪﻤﺠﻣ ﻒﻴﻈﻨﺗ
13 ...........................................................................................ﺓﺪﻋﺎﻘﻟﺍ ﺔﻜﺒﺷ
13 ...................................... ﺎﻳﻭﺪﻳ ﻊﻴﻘﺼﻟﺍ ﻞﻳﺰﻣ ﻙﺪﻤﺠﻣ ﻒﻴﻈﻨﺗﻭ ﻊﻴﻘﺼﻟﺍ ﺔﻟﺍﺯﺇ
14 ....................................................................................... ﺡﺎﺒﺼﻤﻟﺍ ﺮﻴﻴﻐﺗ
14 ......................................................................................ءﺎﺑﺮﻬﻜﻟﺍ ﻉﺎﻄﻘﻧﺍ
14 .....................................................................................ﻞﻘﻨﻟﺍ ءﺎﻨﺛﺃ ﺔﻳﺎﻨﻌﻟﺍ
14 .................................................................. ﺎﻬﺣﻼﺻﺇﻭ ﻝﺎﻄﻋﻷﺍ ﻑﺎﺸﻜﺘﺳﺍ
16 .................................................................................ﺔﻣﺪﺨﻟﺍ ﻭﺃ ﺓﺪﻋﺎﺴﻤﻟﺍ
2
3 ............................................................................................ ﺪﻤﺠﻤﻟﺍ ﺔﻣﻼﺳ
4 .......................................................................................ﺐﻴﻛﺮﺘﻟﺍ ﺕﺍﺩﺎﺷﺭﺇ
4 .....................................................................................ﺓﻮﺒﻌﻟﺍ ﻦﻣ ﺝﺍﺮﺧﻹﺍ
4 ...............................................................................................ﺔﺤﺘﻔﻟﺍ ﺩﺎﻌﺑﺃ
5 .........................................................................................ﻊﻗﻮﻤﻟﺍ ﺕﺎﺒﻠﻄﺘﻣ
5 .................................................................................. ﺔﻴﺋﺎﺑﺮﻬﻜﻟﺍ ﺕﺎﺒﻠﻄﺘﻤﻟﺍ
6 ................................................................................ﻩﺎﻴﻤﻟﺍ ﺭﺪﺼﻣ ﺕﺎﺒﻠﻄﺘﻣ
6 ................................................................................. ﻩﺎﻴﻤﻟﺍ ﺭﺪﺼﻣ ﻞﻴﺻﻮﺗ
7 ...............................................................................................ﺪﻤﺠﻤﻟﺍ ﺏﺎﺑ
10 .............................................................................................ﺏﺎﺒﻟﺍ ﻂﺒﺿ
10 ....................................................................................... ﺪﻤﺠﻤﻟﺍ ﻡﺍﺪﺨﺘﺳﺍ
10 ......................................................................ءﺍﻮﻬﻟﺍ ﻥﺍﺭﻭﺩ ﺔﻣﻼﺳ ﻥﺎﻤﺿ
10 ............................................................................... ﻢﻜﺤﺘﻟﺍ ﺡﺎﺘﻔﻣ ﻡﺍﺪﺨﺘﺳﺍ
11 ......................................................................................ﻲﺋﻮﻀﻟﺍ ﺮﺷﺆﻤﻟﺍ
11 ............................................................................................. ﻞﻔﻘﻟﺍ ﺡﺎﺘﻔﻣ
11 ............................................................................................. ﺞﻠﺜﻟﺍ ﻊﻧﺎﺻ
FREEZER SAFETY
Your safety and the safety of others are very important.
We have provided many important safety messages in this manual and on your appliance. Always read and obey all safety
messages.
This is the safety alert symbol.
This symbol alerts you to potential hazards that can kill or hurt you and others.
All safety messages will follow the safety alert symbol and either the word “DANGER” or “WARNING.”
These words mean:
You can be killed or seriously injured if you don't immediately
DANGER
WARNING
All safety messages will tell you what the potential hazard is, tell you how to reduce the chance of injury, and tell you what can
happen if the instructions are not followed.
IMPORTANT SAFETY INSTRUCTIONS
To reduce the risk of fire, electric shock, or injury when using your freezer, follow these basic precautions:
WARNING:
follow instructions.
can be killed or seriously injured if you don't
You
instructions.
follow
■
Plug into a grounded 3 prong outlet.
■
Do not remove ground prong.
■
Do not use an adapter.
■
Do not use an extension cord.
■
Disconnect power before servicing.
■
Replace all parts and panels before operating.
■
Use nonflammable cleaner.
■
Do not use mechanical, electric or chemical means other
than those recommended by this Manufacturer to speed up
the defrost process.
■
Do not use or place electrical devices inside the appliance
compartments if they are not of the type expressly
authorized by the Manufacturer.
■
Keep flammable materials and vapors, such as gasoline,
away from freezer.
SAVE THESE INSTRUCTIONS
Proper Disposal of
Your Old Freezer or Refrigerator
WARNING
Suffocation Hazard
Remove doors or lid from your old freezer or
refrigerator.
Failure to do so can result in death or brain damage.
■
Do not store explosive substances such as aerosol cans
with a flammable propellant in this appliance.
■
Use two or more people to move and install freezer.
■
This appliance is not intended for use by persons (including
children) with reduced physical, sensory or mental
capabilities or lack of experience and knowledge, unless
they have been given supervision or instruction concerning
use of this appliance by a person responsible for their
safety.
■
To avoid the risk of children becoming trapped and
suffocating, do not allow them to play or hide inside the
appliance.
■
Keep key away from children.
■
Remove doors or lid from your old freezer or refrigerator.
■
Disconnect power before installing ice maker (on ice maker
kit ready models only).
Before You Throw Away Your Old Freezer or Refrigerator:
■ Take off the doors or lid.
■ Leave the shelves in place so that children may not easily
climb inside.
IMPORTANT: Child entrapment and suffocation are not problems
of the past. Junked or abandoned freezers or refrigerators are still
dangerous ... even if they will sit for “just a few days.” If you are
getting rid of your old refrigerator or freezer, please follow these
instructions to help prevent accidents.
3
INSTALLATION INSTRUCTIONS
Unpacking
WARNING
Excessive Weight Hazard
Use two or more people to move and install freezer.
Failure to do so can result in back or other injury.
Before Using the Appliance
This appliance is intended to be used in household and similar
applications such as:
■ Staff kitchen areas in shops, offices and other working
environments
■ Farmhouses and by clients in hotels, motels and other
residential-type environments
■ Bed and breakfast type environments
Remove Packaging Materials
■ Remove tape and glue residue from surfaces before turning
on the freezer. Rub a small amount of liquid dish soap over
the adhesive with your fingers. Wipe with warm water and
dry.
■ Do not use sharp instruments, rubbing alcohol, flammable
fluids, or abrasive cleaners to remove tape or glue. These
products can damage the surface of your freezer. For more
information, see “Freezer Safety.”
Safeguarding the Environment
This product may contain Fluorinated Greenhouse Gases
covered by the Kyoto Protocol; the refrigerant gas is inside a
hermetically sealed system.
Refrigerant gas: R134A has a Global Warming Potential of
(GWP) 1300.
Opening Dimensions
Height dimensions are shown with the leveling legs extended to
the minimum height of ¹⁄₄" (6.35 mm) below the refrigerator.
NOTE: When the leveling legs are fully extended to 1" (25 mm)
below the refrigerator, add ³⁄₄" (19 mm) to the height dimensions.
FRONT VIEW
B
When Moving Your Freezer:
Your freezer is heavy. When moving the freezer for
cleaning or service, be sure to cover the floor with cardboard
or hardboard to avoid floor damage. Always pull the freezer
straight out when moving it. Do not wiggle or “walk” the
freezer when trying to move it, as floor damage could occur.
Clean Before Using
After you remove all of the packaging materials, clean the inside
of your freezer before using it. See the cleaning instructions in
“Freezer Care.”
Important information to know about glass shelves
and covers:
Do not clean glass shelves or covers with warm water when
they are cold. Shelves and covers may break if exposed to
sudden temperature changes or impact, such as bumping.
Tempered glass is designed to shatter into many small,
pebble-size pieces. This is normal. Glass shelves and covers
are heavy. Use both hands when removing them to avoid
dropping.
A
TOP VIEW
C
Model Dimension A Dimension B Dimension C
5VEV201*/
5VEV205*
5VE250* 70³⁄₄" (179.7 cm) 42" (106.7 cm) 29³⁄₄" (75.6 cm)
*Dimensions include 3" (7.2 cm) recommended air space at the
top and sides, plus 1" (2.54 cm) recommended air space at the
back.
69" (175.3 cm) 39" (99.1 cm) 26¹⁄₂" (67.3 cm)
4
Location Requirements
Electrical Requirements
WARNING
Explosion Hazard
Keep flammable materials and vapors, such as
gasoline, away from freezer.
Failure to do so can result in death, explosion, or fire.
IMPORTANT: Do not install the freezer near an oven, radiator, or
other heat source, nor in a location where the temperature will fall
below 40°F (5°C).
Check the strength of the floor before installing your freezer. It
should hold the weight of a freezer fully loaded with food.
Allow at least 3" (7.5 cm) of air space at the top and on both sides
of the freezer and 1" (2.5 cm) between the back of the freezer and
the wall. If the freezer is to be against a wall, leave extra space on
the hinge side so the door can open wider.
Keep the appliance ventilation openings free.
Do not damage the appliance refrigerant circuit pipes.
Install the appliance in a dry and well-ventilated place.
NOTE: Allow for a 3" (7.5 cm) clearance at the top and sides and
a ¹⁄₄" (0.64 cm) clearance between the appliances.
WARNING
Electrical Shock Hazard
Plug into a grounded 3 prong outlet.
Do not remove ground prong.
Do not use an adapter.
Do not use an extension cord.
Failure to follow these instructions can result in death,
fire, or electrical shock.
A 220/240 volt, 50/60 Hz, AC only, 10-amp fused and grounded
(earthed) electrical supply is required.
Before you move your freezer into its final location, it is important
to make sure you have the proper electrical connection.
It must be possible to disconnect the appliance from the power
supply by unplugging it or by means of a mains two-pole switch
installed upstream of the socket.
Recommended Grounding Method
It is recommended that a separate circuit serving only your
freezer be provided. Use an outlet that cannot be turned off by a
switch. Do not use an extension cord.
NOTE: Before performing any type of installation, cleaning, or
removing a light bulb, turn the Temperature Control to the OFF
position as shown and then disconnect the freezer from the
electrical source.
3" (7.5 cm)
3" (7.5 cm)
5
Water Supply Requirements
(on some models)
Read all directions before you begin.
IMPORTANT:
■ If you turn the freezer on before the water line is connected,
turn the ice maker OFF.
■ All installations must meet local plumbing code requirements.
■ Use plastic tubing and check for leaks. Install plastic tubing
only in areas where temperatures will remain above freezing.
Tools Needed: Flat-blade screwdriver, ⁷⁄₁₆" and ¹⁄₂" open-end
wrenches or two adjustable wrenches, ¹⁄₄" nut driver, drill bit and
a cordless drill.
NOTE: Your freezer dealer has a kit available with a ¹⁄₄" (6.35 mm)
saddle-type shutoff valve, a union, and plastic tubing. Before
purchasing, make sure a saddle-type valve complies with your
local plumbing codes. Do not use a piercing-type or ³⁄₁₆"
(4.76 mm) saddle valve which reduces water flow and clogs more
easily.
Water Pressure
A cold water supply with water pressure of between 30 and
120 psi (207 to 827 kPa) is required to operate the water
dispenser and ice maker. If you have questions about your water
pressure, see “Troubleshooting” or call a licensed, qualified
plumber.
Reverse Osmosis Water Supply
If a reverse osmosis water filtration system is connected to your
cold water supply, the water pressure to the system needs to be
a minimum of 40 to 60 psi (276 to 414 kPa).
If the water pressure to the reverse osmosis system is less than
40 to 60 psi (276 to 414 kPa), a booster pump can be inserted
into the small tubing that goes from the cold water line to the
reverse osmosis system.
If the water dispenser is still not dispensing water properly:
■ Check to see whether the sediment filter in the reverse
osmosis system is blocked. Replace the filter if necessary.
■ Allow the storage tank on the reverse osmosis system to refill
after heavy usage.
■ If your refrigerator has a water filter, it may further reduce the
water pressure when used in conjunction with a reverse
osmosis system. Remove the water filter.
If you have questions about your water pressure, refer to
“Troubleshooting” or call a licensed, qualified plumber.
Connect to Water Line
1. Unplug freezer or disconnect power.
2. Turn OFF main water supply. Turn ON nearest faucet long
enough to clear line of water.
3. Locate a ½" to 1¹⁄₄" (12.7 mm to 3.18 cm) vertical cold water
pipe near the freezer.
IMPORTANT:
■ Make sure it is a cold water pipe.
■ Horizontal pipe will work, but drill on the top side of the
pipe, not the bottom. This will help keep water away from
the drill and normal sediment from collecting in the valve.
4. Determine the length of plastic tubing you need. Measure
from the connection on the lower left rear of freezer to the
water pipe. Add 7 ft (2.1 m) to allow for cleaning. Use ¹⁄₄"
(6.35 mm) O.D. (outside diameter) plastic tubing. Be sure
both ends of plastic tubing are cut square.
5. Using a cordless drill, drill a ¹⁄₄" (6.35 mm) hole in the cold
water pipe you have selected.
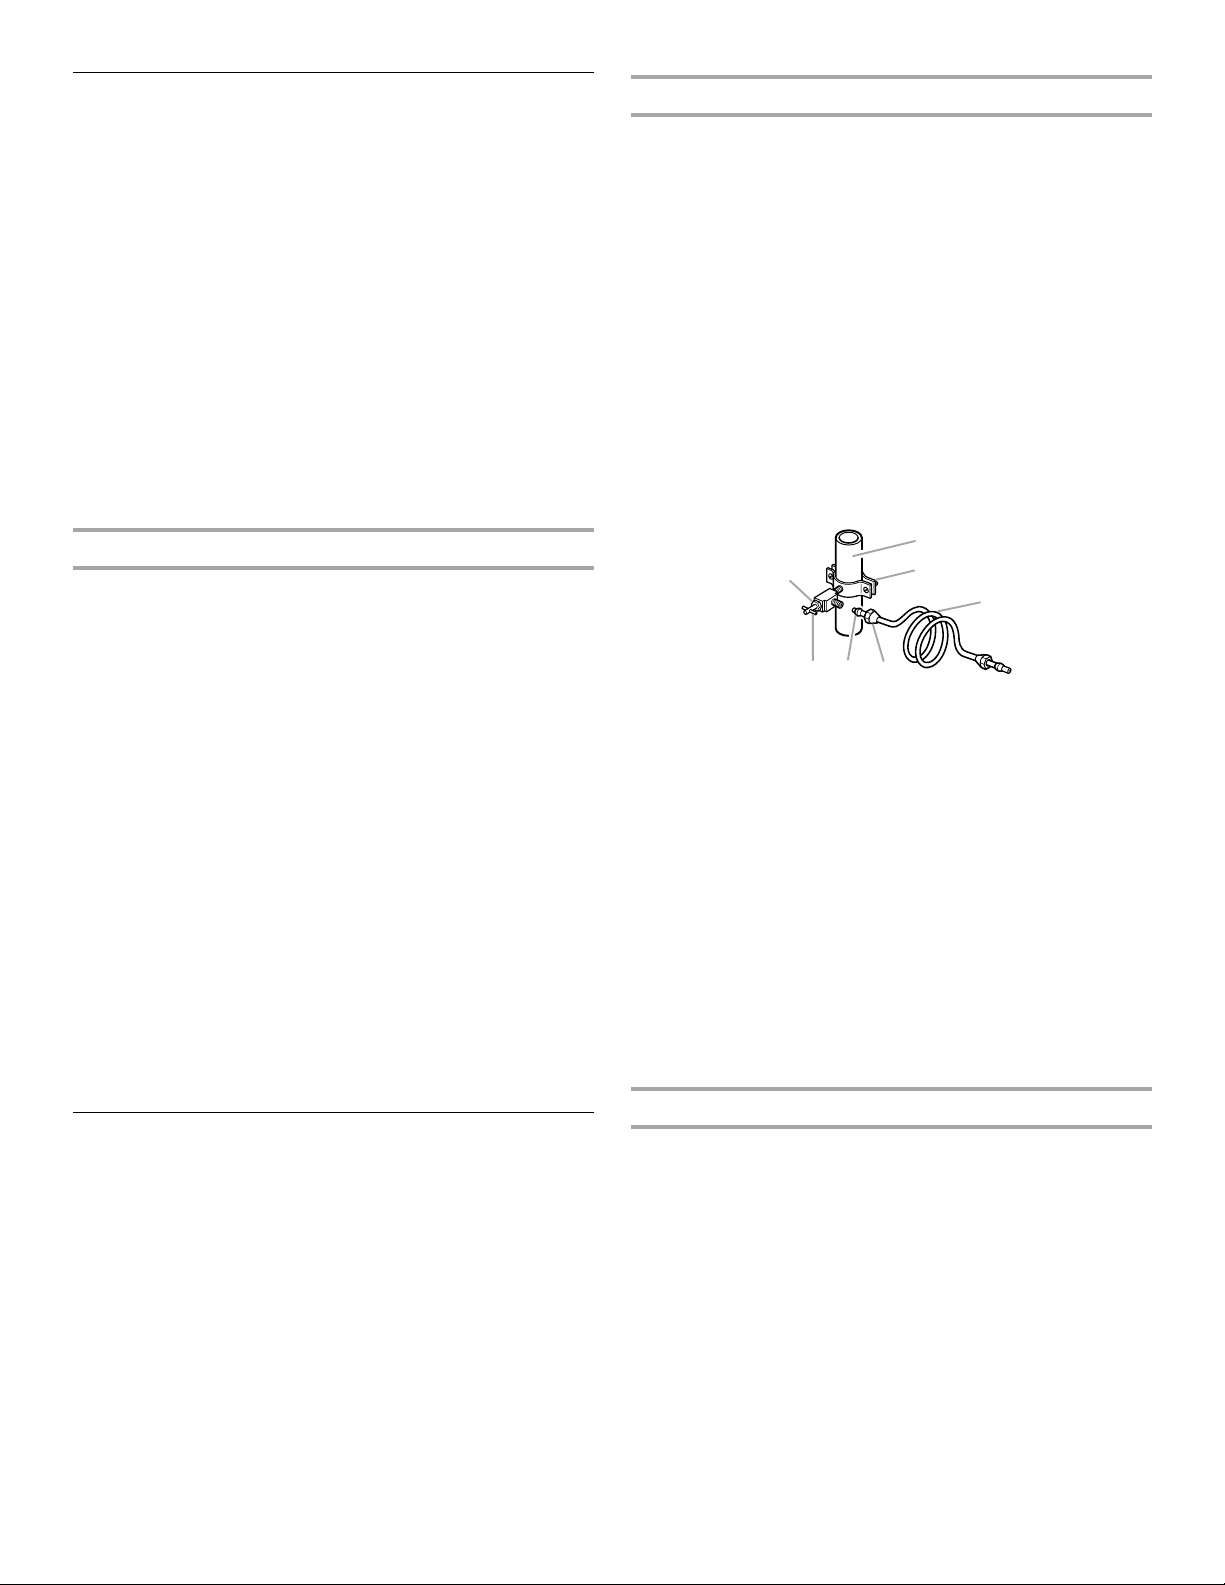
A
G
B
C
DEF
A. Cold water pipe
B. Pipe clamp
C. Copper tubing
D. Compression nut
E. Compression sleeve
F. Sh u tof f v al v e
G. Packing nut
6. Fasten the shutoff valve to the cold water pipe with the pipe
clamp. Be sure the outlet end is solidly in the ¹⁄₄" (6.35 mm)
drilled hole in the water pipe and that the washer is under the
pipe clamp. Tighten the packing nut. Tighten the pipe clamp
screws slowly and evenly so washer makes a watertight seal.
Do not overtighten or you may crush the plastic tubing.
7. Slip the compression sleeve and compression nut on the
plastic tubing as shown. Insert the end of the tubing into the
outlet end squarely as far as it will go. Screw compression nut
onto outlet end with adjustable wrench. Do not overtighten.
8. Place the free end of the tubing in a container or sink, and
turn ON the main water supply. Flush the tubing until water is
clear. Turn OFF the shutoff valve on the water pipe. Coil the
plastic tubing.
Connect to Freezer
Connect the Water Supply
(on some models)
NOTES:
■ All appliances equipped with an automatic ice maker and
water dispenser must be connected to a water supply that
only delivers drinking water (with mains water pressure of
between 0.21 and 0.83 Mpa (2.1 and 8.3 bar). Automatic ice
makers and/or water dispensers not directly connected to the
water supply must be filled with drinking water only.
■ For the water connection, use the pipe supplied with the new
appliance. Do not reuse that of the previous appliance.
6
1. Attach the plastic tube to the valve inlet using a compression
nut and sleeve as shown. Tighten the compression nut. Do
not overtighten.
2. Use the tube clamp on the back of the freezer to fasten the
tubing to the freezer as shown. This will help avoid damage to
the tubing when the freezer is pushed back against the wall.
3. Turn shutoff valve ON.
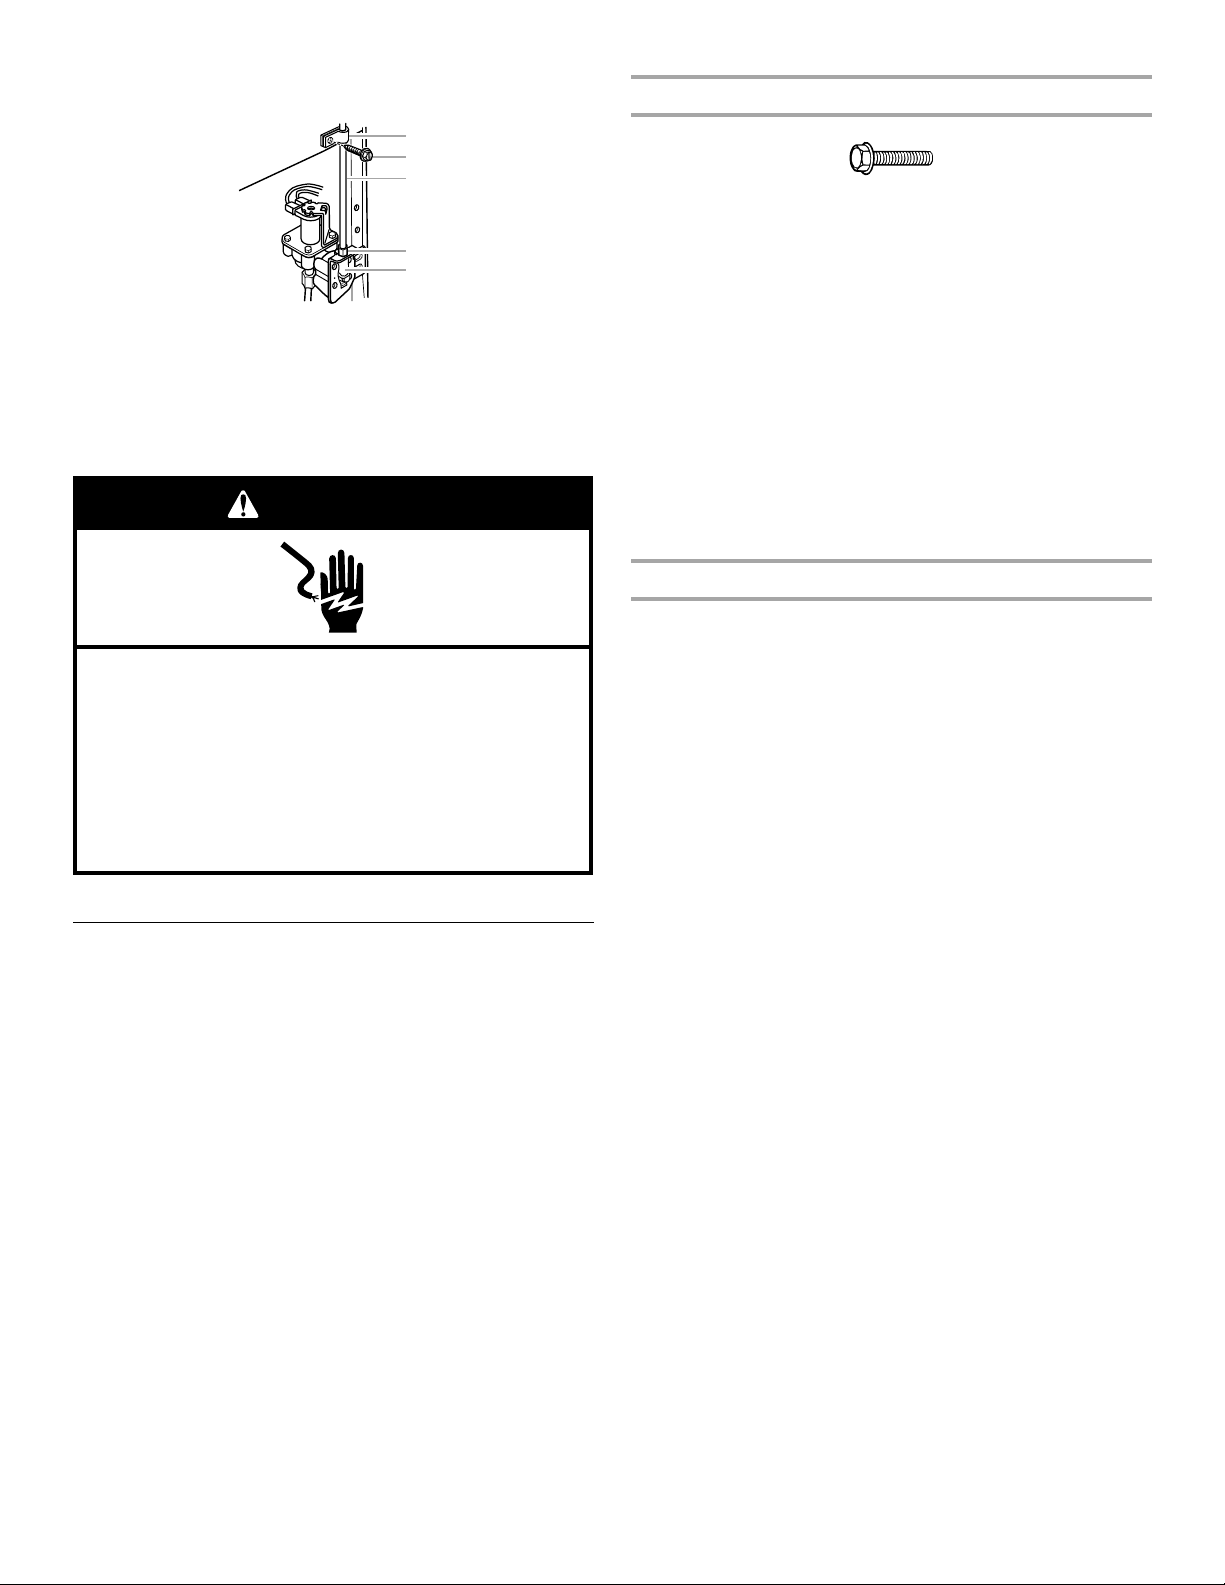
4. Check for leaks. Tighten any connections (including
C
connections at the valve) or nuts that leak.
A
B
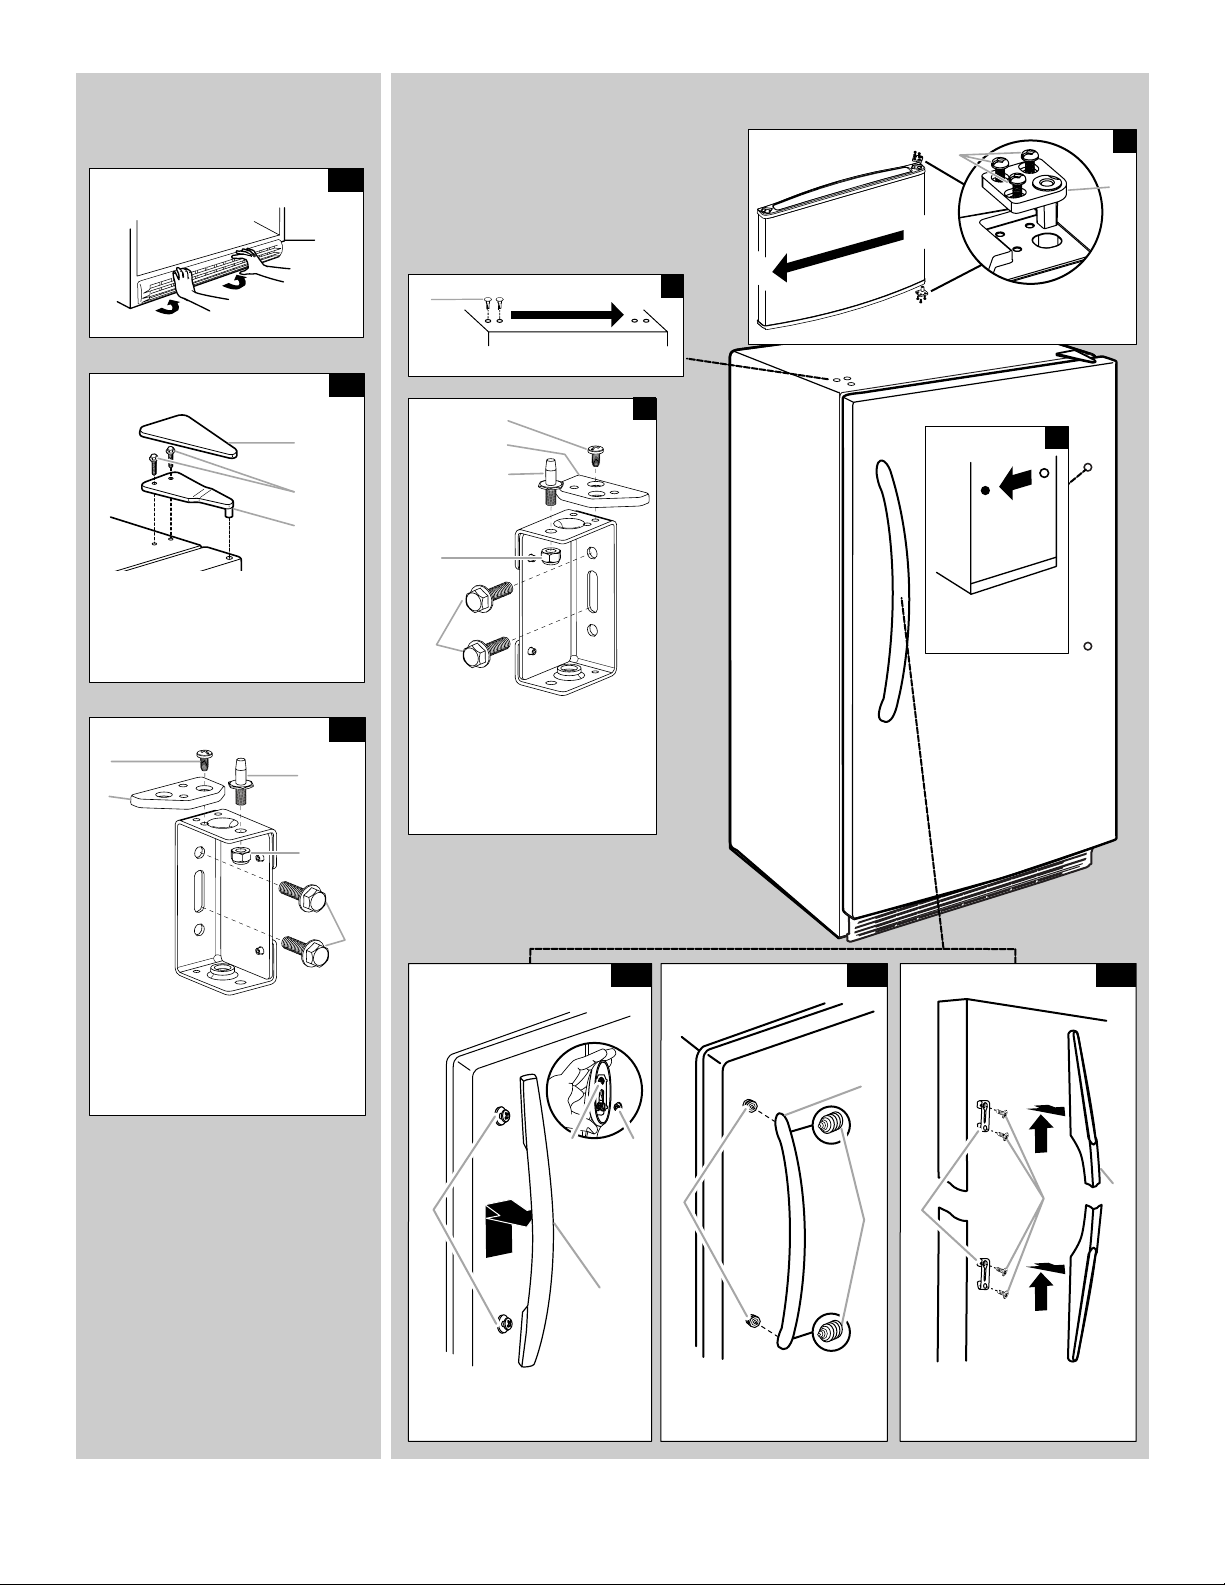
Remove Door and Hinges
⁵⁄₁₆
" hex-head hinge screw
D
E
A. Tube clamp
B. Tube clamp screw
C. Plastic tubing
5. The ice maker is equipped with a built-in water strainer. If
your water conditions require a second water strainer, install
it in the ¹⁄₄" (6.35 mm) water line at either tube connection.
Obtain a water strainer from your nearest appliance dealer.
D. Compression nut
E. Valve inlet
WARNING
Electrical Shock Hazard
Plug into a grounded 3 prong outlet.
Do not remove ground prong.
Do not use an adapter.
Do not use an extension cord.
Failure to follow these instructions can result in death,
fire, or electrical shock.
6. Plug into a grounded 3 prong outlet.
Freezer Door
Tools Needed: ⁵⁄₁₆" hex-head socket wrench, ⁵⁄₈" hex-head
socket wrench, ¹⁄₄" hex-head socket wrench, ¹⁄₂" hex-head socket
wrench, ³⁄₈" hex-head socket wrench, #2 Phillips screwdriver, flatblade screwdriver, ⁵⁄₁₆" open-end wrench, flat 2" putty knife.
IMPORTANT:
■ All graphics referenced in the following instructions are
included later in this section after “Final Steps.” The graphics
shown are for a right-hand swing door (hinges factory
installed on the right).
■ If you only want to remove and replace the door, see the
“Remove Door and Hinges” and “Replace Door and Hinges.”
■ Before you begin, turn the control OFF, and remove food and
adjustable door or utility bins from door.
1. Unplug freezer or disconnect power.
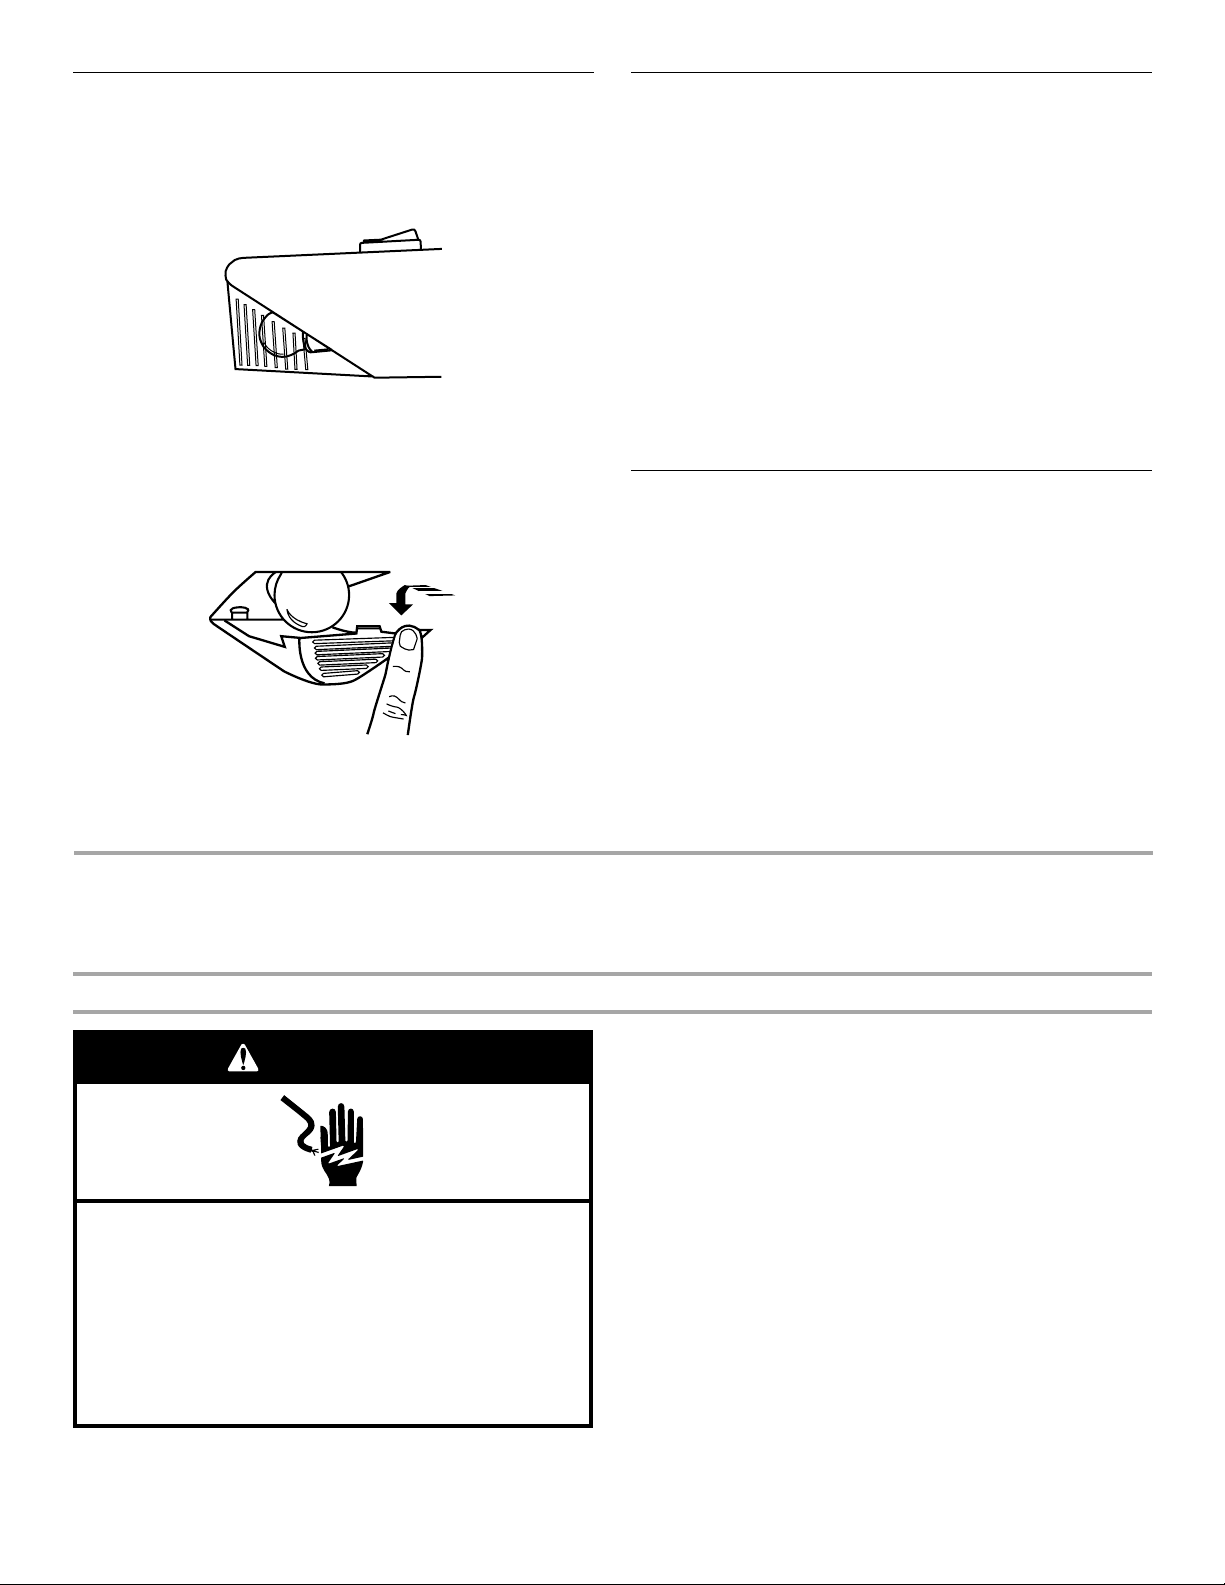
2. Open freezer door and remove base grille from the bottom
front of the freezer. See Base Grille Graphic 1A.
3. Close the freezer door and keep it closed until you are ready
to lift it free from the cabinet.
NOTE: Provide additional support for the door while the
hinges are being moved. Do not depend on the door magnets
to hold the door in place while you are working.
4. Remove the parts for the top hinge as shown in Top Hinge
Graphic 1B.
5. Lift the freezer door free from the lower hinge and cabinet and
set aside.
6. Remove 2 hex-head hinge screws and bottom hinge
assembly. See Bottom Hinge Graphic 1C.
Reverse Door (optional on some models)
IMPORTANT: If you want to reverse your door so that it opens in
the opposite direction, continue with “Reverse Door (optional on
some models)” instructions. If you are not reversing the door, see
“Replace Door and Hinges.”
Cabinet
1. Remove the cabinet hinge hole plugs from the cabinet top
and move them to the opposite side hinge holes as shown in
Graphic 2.
2. Remove the door stop screws from the Bottom Hinge
bracket. See Bottom Hinge Graphic 1C.
3. Remove the Hinge Pin Nut and Hinge Pin from the hinge
bracket.
4. Rotate the hinge bracket for installation on the opposite side
of the cabinet. See Graphic 3.
5. Reinstall the Hinge Pin Nut and Hinge Pin to the hinge
bracket. Hinge Pin must point “up” when hinge bracket is
installed to the cabinet.
6. Invert the door stop so that the countersunk holes line up
with the screw holes in the hinge assembly. See Graphic 3.
7. Reinstall the door stop screws. See Graphic 3.
8. Reinstall the hinge bracket to the cabinet with the 2 hex-head
hinge screws.
Door
1. Remove the 3 hinge leaf screws that fasten a hinge leaf to
both the top and bottom of the door. See Graphic 5.
2. Remove the hinge leaf from the top of the door and from the
bottom of the door, and transfer them to the opposite side.
3. Fasten the hinge leaf to the door using the hinge leaf screws
removed in Step 1.
7
Handle
Move the door handle from one side of the door to the other.
Style 1
1. Grasping the lower part of the handle firmly, slide it up and
pull the handle straight out from the door. See Graphic 1-1.
2. Using a ¹⁄₄" hex-head socket wrench, remove the grommets
from the door.
3. Reinstall the grommets on the opposite side of the door.
4. Position the handle so that the large holes in the mounting
clips are down and align the holes with the grommets.
5. Rotate the handle so that the mounting clips are flat against
the door and slide the handle down to engage.
Style 2
1. Loosen setscrews located on side of handle at each end. See
Graphic 1-2.
2. Remove handle from grommets.
3. Using a ¹⁄₄" hex-head socket wrench, remove the grommets
from the door.
4. Position the grommets on the opposite side of the door and
reinstall.
5. Position the handle over grommets on the opposite side of
the freezer door.
6. Ensure grommets are fitted into handle holes.
7. Tighten the upper and lower setscrews with hex key
provided. Do not overtighten setscrews.
Style 3
1. Slide the handle up and off the clips. See Graphic 1-3.
2. Using a flat-blade screwdriver, remove the screws from the
clips and remove the clips from the door.
3. Position the clips on the opposite side of the freezer door and
reinstall the screws.
4. Position handle over the clips.
5. Apply even pressure and push down to lock into place.
Replace Door and Hinges
NOTE: Graphic may be reversed if door swing is reversed.
1. Replace the parts for the bottom hinge as shown and tighten
screws. See Bottom Hinge Graphic 1C. Replace the freezer
door.
NOTE: Provide additional support for the door while the
hinges are being moved. Do not depend on the door magnets
to hold the door in place while you are working.
2. Assemble the parts of the top hinge as shown in the Top
Hinge Graphic 1B. Do not tighten the screws completely.
3. Line up the door so that the bottom aligns evenly with the
cabinet. Tighten all screws.
Final Steps
1. Check all holes to make sure that hole plugs and screws are
in place. Reinstall top hinge cover. See Top Hinge
Graphic 1B.
2. Replace the base grille. See Base Grille Graphic 1A.
WARNING
Electrical Shock Hazard
Plug into a grounded 3 prong outlet.
Do not remove ground prong.
Do not use an adapter.
Do not use an extension cord.
Failure to follow these instructions can result in death,
fire, or electrical shock.
3. Plug into a grounded 3 prong outlet.
4. Reset the control. See “Using the Control.”
5. Return all removable door parts to door and food to freezer.
8
Door Removal &
Replacement
Base Grille
1A
Door Swing Reversal (optional)
A
5
B
Top Hinge
A. Top Hinge Cover
3
/8" or
5
/8"
Hex-Head Hinge
B.
Screws (depending on model)
C. Top Hinge
Bottom Hinge
A
B
A
2
A. Hinge Leaf Screws
B. Hinge Leaf
A. Cabinet Hinge Hole Plugs
1B
A
A
B
C
D
E
1C
A. Door Stop Screws
B
C
B. Door Stop
C
D
C. Hinge Pin
D. Hinge Pin Nut
5
E.
/8"
Hex-Head Hinge Screws
3
6
Door Handle
Seal Screw
A. Door Stop Screws
B. Door Stop
C. Hinge Pin
D. Hinge Pin Nut
5
/8"
Hex-Head Hinge Screws
E.
E
Style 1
A
A. Grommet
B. Clip
C. Handle
1-1
B A
C
Style 2
A
A. Grommet
B. Handle
C. Setscrews
1-2
Style 3
B
A
C
A. Clips
B. Handle Screws
C. Handle
1-3
B
C
9
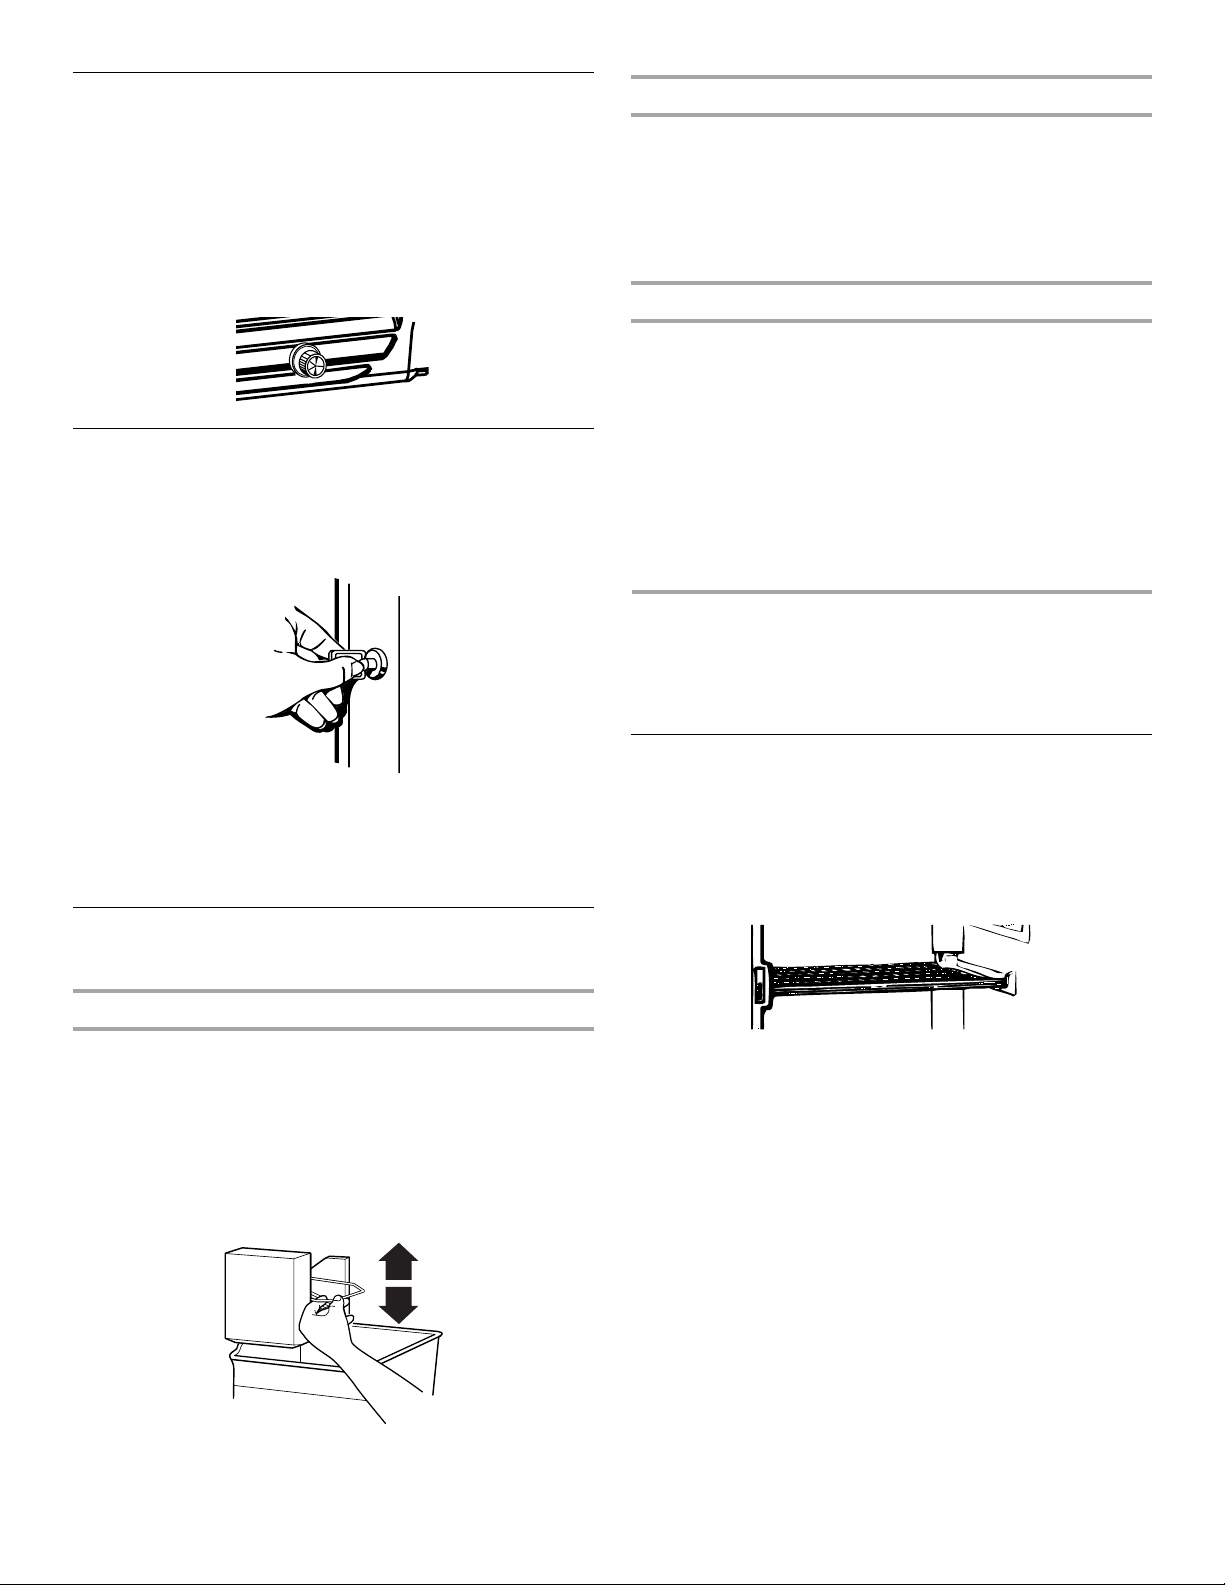
Adjust the Door
1. Adjust the front legs enough to lift the cabinet up off of the
floor.
NOTE: If your model is equipped with rollers, the front legs
should be lowered enough to lift the rollers off of the floor to
ensure the freezer does not roll forward when the door is
opened.
2. Place a leveling tool on top of the freezer first side to side,
then front to back. Turn leg counterclockwise to raise a
corner. Turn leg clockwise to lower a corner.
3. Repeat Step 2 until freezer is level.
4. After freezer is fully loaded with food, recheck with level as in
Step 2.
FREEZER USE
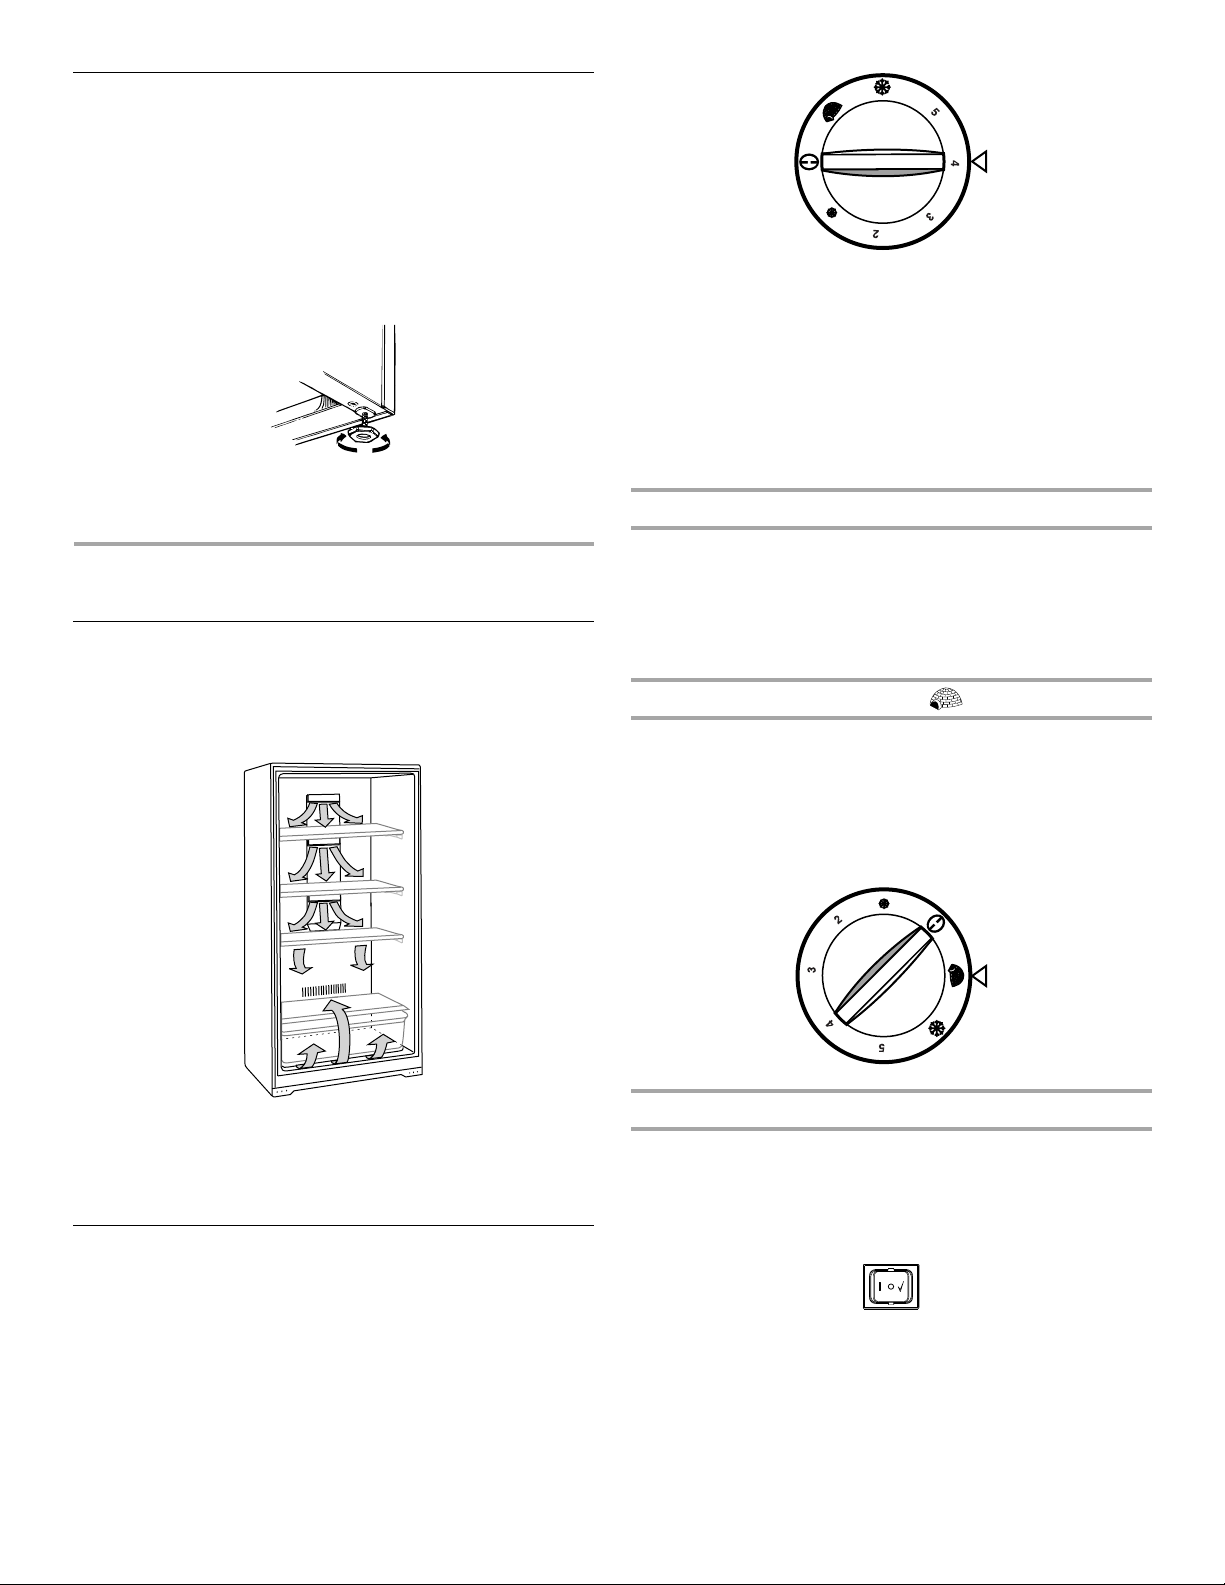
Ensuring Proper Air Circulation
In order to ensure proper temperature, you need to permit proper
airflow in the freezer. As shown in the illustration, cool air enters
through the freezer wall and moves down. The air then
recirculates through the vent near the bottom.
NOTE: When the freezer is first started, the compressor will run
constantly until the freezer is cooled. It may take up to 6 or
8 hours (or longer), depending on room temperature and the
number of times the freezer door is opened. After the freezer is
cooled, the compressor will turn on and off as needed to keep
the freezer at the proper temperature.
The outside of your freezer may feel warm. This is normal. The
freezer’s design and main function is to remove heat from
packages and air space inside the freezer. The heat is transferred
to the room air, making the outside of the freezer feel warm.
Adjusting Control
■ Turn control to a higher number for colder temperatures.
■ Turn control to a lower number for less cold temperatures.
NOTE: The small snowflake icon represents the number 1 or
the least cold setting. The large snowflake icon represents 6
or the coldest setting.
Fast Freeze (on some models)
This setting causes the freezer to run continuously, driving the
freezer temperature to the coldest possible temperature. To
activate, adjust the control knob to the igloo icon, which
represents the fast freeze setting. Use this feature just before
adding large amounts of unfrozen foods. For best food quality, do
not exceed 3 lbs (1,350 g) per cubic foot (28.32 L). Return to your
normal setting after 24 to 48 hours.
Do not block any of these vents with food packages. If the vents
are blocked, airflow will be restricted, and temperature and
moisture problems may occur.
IMPORTANT: To avoid odor transfer and drying out of food, wrap
or cover foods tightly.
Using the Control
Turn the freezer temperature control to 4. This setting is designed
to maintain the temperature at or near 0°F (-17.8°C) under normal
operating conditions.
Allow the freezer to cool 6 to 8 hours before filling with frozen
food. Let the freezer cool overnight before adding large amounts
of unfrozen food. Do not add more than 2 to 3 lbs (907 to 1,350 g)
of unfrozen food per cubic foot (28.32 L) of freezer space.
10
Temperature Alarm (on some models)
The temperature monitor alarm is located to the left of the
temperature control and sounds an audible alarm if the
temperature reaches 10°F (-12°C) or more above normal for the
selected setting.
The alarm is controlled by a three-position switch.
| The proper setting for normal freezer use. The alarm
is on, and the amber light will be illuminated.
0 Keeps the alarm from sounding when the freezer is
warm, such as during start-up or defrosting.
✔ Tests the alarm regardless of temperature.
Indicator Light
(on some models)
The indicator light assures you that your freezer is running. If the
indicator light is not glowing, immediately check for:
■ Power interruption.
■ An unplugged power cord.
■ An open circuit breaker or blown fuse.
■ A burned out indicator light.
Key Eject Lock
(on some models)
To lock or unlock the freezer, you must hold the key in the lock
while turning. The lock is spring loaded, so the key cannot be left
in the lock.
Ice Production Rate
The ice maker should produce approximately 7 to 9 batches of
ice in a 24-hour period. If ice is not being made fast enough, turn
the Temperature Control toward a higher (colder) number in half
number steps. (For example, if the control is at 3, move it to
between 3 and 4.) Wait 24 hours and, if necessary, gradually turn
the Temperature Control to the highest setting, waiting 24 hours
between each increase.
Remember
■ Allow 24 hours to produce the first batch of ice. Discard the
first three batches of ice produced.
■ The quality of your ice will be only as good as the quality of
the water supplied to your ice maker. Avoid connecting the
ice maker to a softened water supply. Water softener
chemicals (such as salt) can damage parts of the ice maker
and lead to poor quality ice. If a softened water supply cannot
be avoided, make sure the water softener is operating
properly and is well maintained.
■ Do not store anything on top of the ice maker or in the ice
storage bin.
FREEZER FEATURES
This manual covers several different models. The freezer you
have purchased may have some or all of the items listed. The
locations of the features may not match those of your model.
If the key is lost, contact your dealer for a replacement. Always
give the model and serial number of your freezer when requesting
a replacement key.
NOTE: Keep the key out of the reach of children. Do not keep the
key close to the freezer/refrigerator.
Ice Maker
(on some models)
To Turn the Ice Maker On/Off
NOTE: Do not force the wire shutoff arm up or down.
■ To turn the ice maker on, simply lower the wire shutoff arm.
NOTE: Your ice maker has an automatic shutoff. As ice is
made, the ice cubes fill the ice storage bin and the ice cubes
will raise the wire shutoff arm to the OFF (arm up) position.
■ To manually turn the ice maker off, lift the wire shutoff arm to
the OFF (arm up) position and listen for the click to make sure
the ice maker will not continue to operate.
Refrigerated Shelves
(on some models)
Your freezer is equipped with refrigerated interior shelves.
Packages in direct contact with the shelves will have the best
refrigeration. Fresh, unfrozen food packages should be stored
directly on the shelves and not on top of already frozen food
packages.
When placing the food packages in your freezer, please
remember:
■ The cabinet shelves have the best freezing capability. The
door shelves and the bottom of the cabinet have a slightly
less cold temperature. Therefore, packages sensitive to
temperature (meat, poultry, etc.) should not be placed on the
door shelves or the freezer bottom.
■ Leave some space between the food packages so that cold
air can pass over and around them.
11
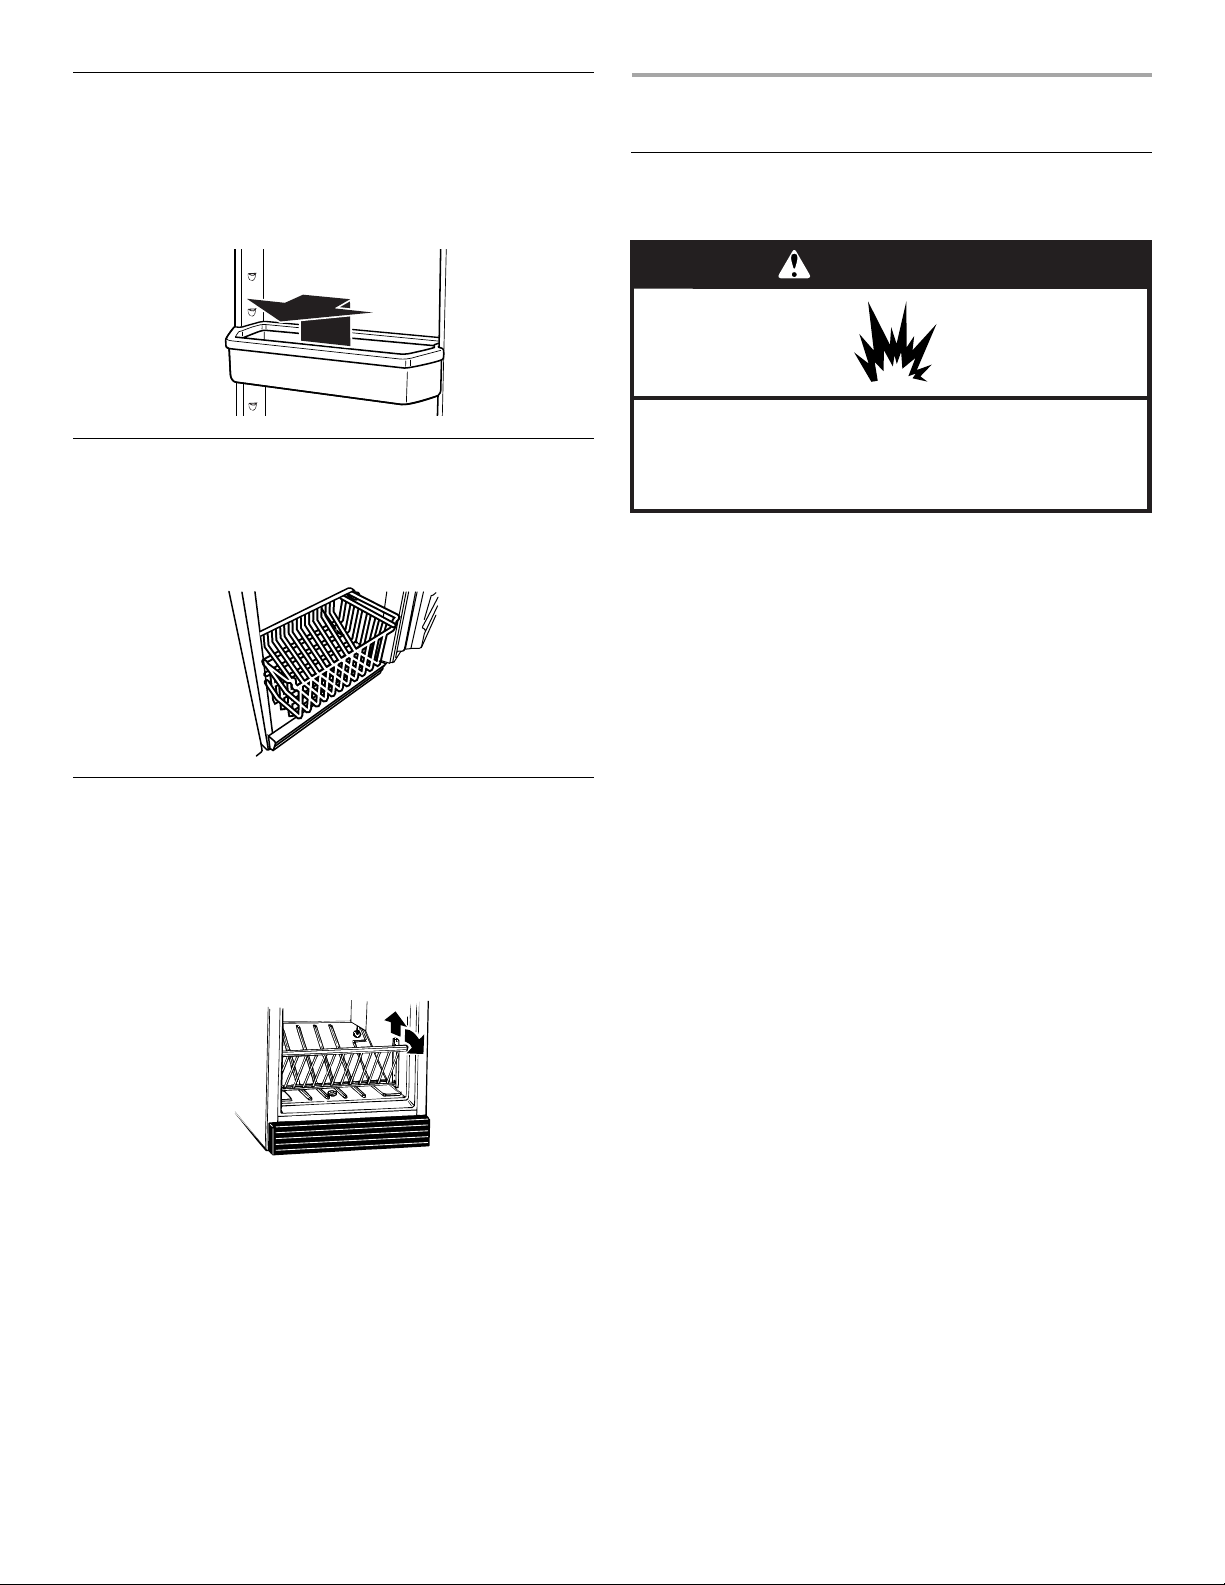
Door Bin
To Remove and Replace the Bin:
1. Remove the bin by tipping the front of the bin forward and
sliding out.
2. Replace the bin by sliding it in above the desired support
tilting it back into place.
Storage Basket
(on some models)
The slide out basket provides separate storage space for items
that are difficult to store on freezer shelves. To remove the
basket, pull out and lift up.
Storage Gate
(on some models)
To Lower and Raise the Storage Gate:
1. Lift the top of the gate up slightly, out of the supports. Pull the
gate forward and down.
2. Return the gate to the upright position. Lift the top of the gate
slightly to clear the supports. Lower the gate into the
supports.
FREEZER CARE
Cleaning Your Frost-Free Freezer
(on some models)
WARNING
Explosion Hazard
Use nonflammable cleaner.
Failure to do so can result in death, explosion, or fire.
Frost-free means that you will not have to defrost your freezer.
Frost is removed by air moving and collecting any moisture and
depositing it on the cooling coil. The cooling coil periodically
warms up enough to melt the frost, and it then flows down to the
drain pan (located behind the base grille) where it is evaporated.
Complete cleaning should be done at least once a year.
1. Unplug freezer or disconnect power.
2. Remove all frozen food. Wrap frozen food in several layers of
newspaper and cover with a blanket. Food will stay frozen for
several hours. You may also store frozen food in a cooler,
additional refrigerator-freezer, or in a cool area.
3. Wash the inside walls with a solution of mild detergent in
warm water or 2 tbs (26 mg) baking soda to 1 qt (0.95 L)
warm water.
■ Do not use abrasive or harsh cleaners such as window
sprays, scouring cleansers, flammable fluids, cleaning
waxes, concentrated detergents, bleaches or cleansers
containing petroleum products on plastic parts, interior
and door liners or gaskets. Do not use paper towels,
scouring pads, or other harsh cleaning tools. These can
scratch or damage materials.
4. Rinse well and wipe dry with a clean soft cloth.
5. Use the appropriate cleaning method for your exterior finish.
Painted metal: Wash exteriors with a clean sponge or soft
cloth and a mild detergent in warm water. Do not use abrasive
or harsh cleaners, or cleaners designed for stainless steel.
Dry thoroughly with a soft cloth.
Stainless steel finish: Wash with a clean sponge or soft
cloth and a mild detergent in warm water. Do not use abrasive
or harsh cleaners. Dry thoroughly with a soft cloth.
■ To keep your stainless steel refrigerator looking like new
and to remove minor scuffs or marks, it is suggested that
you use the manufacturer’s approved Stainless Steel
Cleaner and Polish.
IMPORTANT: This cleaner is for stainless steel parts only!
■ Do not allow the Stainless Steel Cleaner and Polish to
come into contact with any plastic parts such as the trim
pieces, dispenser covers or door gaskets. If unintentional
contact does occur, clean plastic part with a sponge and
mild detergent in warm water. Dry thoroughly with a soft
cloth.
6. Replace all frozen food.
7. Plug in freezer or reconnect power.
8. See “Using the Control.”
12
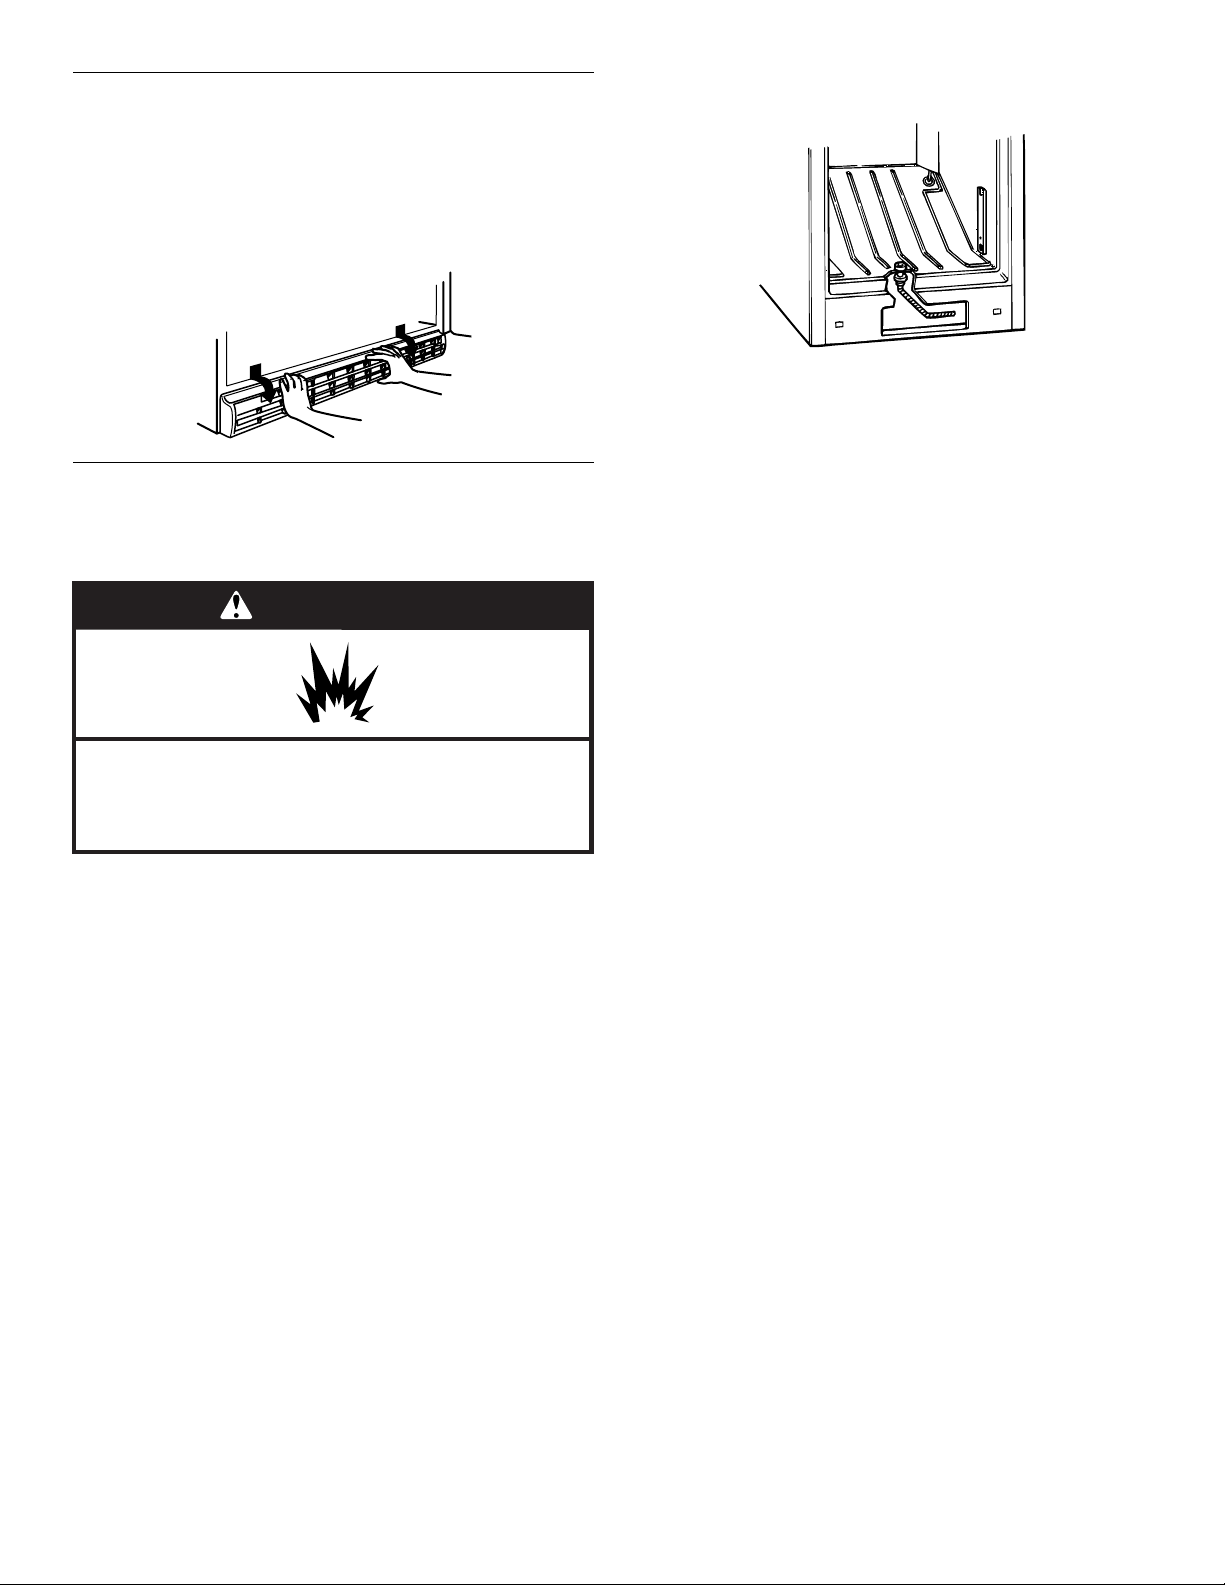
Base Grille
To Remove and Replace the Base Grille:
1. Open the freezer door and remove the base grille by pulling
down and out from the top.
2. Replace the base grille by putting the clips in the openings in
the refrigerator panel. Push in until the base grille snaps into
place.
Defrosting and Cleaning Your
Manual Defrost Freezer
(on some models)
WARNING
Explosion Hazard
Use nonflammable cleaner.
Failure to do so can result in death, explosion, or fire.
Defrost and clean your freezer when frost has built up to about
¹⁄₄" (6 mm) thickness. Complete defrosting and cleaning should
be done at least once a year. In high humidity areas, a freezer
may need more frequent defrosting and cleaning.
Do not use abrasive cleaners on your freezer. Do not use cleaning
waxes, concentrated detergents, bleaches, or cleaners
containing petroleum on plastic parts. Damage can occur.
NOTE: The drain cap must be removed before defrosting the
freezer and replaced securely afterward.
1. Unplug freezer or disconnect power.
2. Remove all frozen food. Wrap frozen food in several layers of
newspaper and cover with a blanket. Food will stay frozen for
several hours. You may also store frozen food in a cooler, an
additional refrigerator or freezer, or a cool area.
3. Remove base grille. See “Base Grille.”
4. Style 1–Models With a Drain System
Reach under the unit and pull the drain hose out through the
opening. The drain hose carries defrost water out of the
freezer, and through the area behind the base grille. Place a
large shallow pan under the drain hose. Remove the drain
cap inside freezer.
NOTE: Check the drain pan frequently to avoid water
overflow. Have a second pan handy for easier emptying.
Style 2–Models Without a Drain System
Remove water from the freezer bottom using a sponge or
baster and empty the water into a large pan.
5. Place pans of hot water in freezer with door open to speed
melting. Directing air from an electric fan into freezer will also
help. Do not place fan or any electrical device in freezer.
6. Use a plastic scraper to remove frost.
NOTE: Do not use an ice pick, knife, or other sharp-pointed
tool to defrost freezer. Damage can occur.
7. Wipe water from walls with a towel or sponge.
8. Wash the inside walls with a solution of mild detergent in
warm water or 2 tbs (26 mg) baking soda to 1 qt (0.95 L)
warm water. Do not use abrasive or harsh cleaners.
9. Rinse well and wipe dry with a clean soft cloth.
10. Use the appropriate cleaning method for your exterior finish.
Painted metal: Wash exteriors with a clean sponge or soft
cloth and a mild detergent in warm water. Do not use abrasive
or harsh cleaners, or cleaners designed for stainless steel.
Dry thoroughly with a soft cloth.
Stainless steel finish: Wash with a clean sponge or soft
cloth and a mild detergent in warm water. Do not use abrasive
or harsh cleaners, or cleaners designed for stainless steel.
Dry thoroughly with a soft cloth.
■ To keep your Stainless Steel refrigerator looking like new
and to remove minor scuffs or marks, it is suggested that
you use the manufacturer’s approved Stainless Steel
Cleaner and Polish.
IMPORTANT: This cleaner is for Stainless Steel parts only!
■ Do not allow the Stainless Steel Cleaner and Polish to
come into contact with any plastic parts such as the trim
pieces, dispenser covers or door gaskets. If unintentional
contact does occur, clean plastic part with a sponge and
mild detergent in warm water. Dry thoroughly with a soft
cloth. To order the cleaner, see “Accessories.”
11. For models with a drain system, you should replace the drain
hose, drain cap and base grille.
12. Replace all frozen food.
13. Plug in freezer or reconnect power.
14. See “Using the Control.”
13
Changing the Light Bulb
NOTE: Not all appliance bulbs will fit your freezer. Be sure to
replace the bulb with one of the same size, shape, and wattage.
Style 1
1. Unplug freezer or disconnect power.
2. Replace the light bulb with an appliance bulb of the same
wattage.
3. Plug in freezer or reconnect power.
Style 2
1. Unplug freezer or disconnect power.
2. Remove the light shield. From the front of the light shield,
push backward and down.
3. Replace the light bulb with an appliance bulb of the same
wattage.
4. Replace the light shield.
5. Plug in freezer or reconnect power.
Power Interruptions
If the power will be out for 24 hours or less, keep the door closed
to help food stay cold and frozen.
If the power will be out for more than 24 hours, do one of the
following:
■ Remove all frozen food and store it in a frozen food locker.
■ If a food locker is not available, consume or can perishable
food at once.
After the power is restored, unplug the freezer for 30 minutes, to
allow the refrigeration system to equalize. During this time keep
the door closed whenever possible.
REMEMBER: A full freezer stays cold longer than a partially filled
one. A freezer full of meat stays cold longer than a freezer full of
baked goods. If you see that food contains ice crystals, it may be
refrozen, although the quality and flavor may be affected. If the
condition of the food is poor, dispose of it.
Moving Care
When you are moving your freezer to a new home, follow these
steps to prepare it for the move.
1. Remove all frozen food.
2. Unplug the freezer.
3. Take out all removable parts, wrap them well, and tape them
together so they don’t shift and rattle during the move.
4. Clean the freezer thoroughly.
5. Tape the freezer shut and tape the electrical cord to the
cabinet.
When you get to your new home, refer to the “Installation
Instructions” and “Freezer Use” sections for information on
installation and setting the controls.
TROUBLESHOOTING
Try the solutions suggested here first to avoid the cost of an unnecessary service call...
Your freezer will not operate
WARNING
Electrical Shock Hazard
Plug into a grounded 3 prong outlet.
Do not remove ground prong.
Do not use an adapter.
Do not use an extension cord.
Failure to follow these instructions can result in death,
fire, or electrical shock.
■ Is the power supply cord unplugged? Plug into a grounded
3 prong outlet.
■ Has a household fuse blown or circuit breaker tripped?
Replace the fuse or reset the circuit breaker.
■ Is the Temperature Control turned to the OFF position?
See “Using the Control.”
■ Is the freezer defrosting (on some models)? Recheck to
see whether the freezer is operating in 30 minutes. Your
freezer will regularly run an automatic defrost cycle.
14
The lights do not work
WARNING
Electrical Shock Hazard
Plug into a grounded 3 prong outlet.
Do not remove ground prong.
Do not use an adapter.
Do not use an extension cord.
Failure to follow these instructions can result in death,
fire, or electrical shock.
■ Is the power supply cord unplugged? Plug into a grounded
3 prong outlet.
■ Is a light bulb loose in the socket or burned out? See
“Changing the Light Bulb.”
There is water in the defrost drain pan (on some models)
■ Is the freezer defrosting? The water will evaporate. It is
normal for water to drip into the defrost pan.
■ Is it more humid than normal? When it is humid, expect that
the water in the defrost pan will take longer to evaporate.
■ Is there enough air circulation space around the freezer?
See “Location Requirements.”
NOTE: If the problem is not due to any of the above,
remember that your new freezer will run longer than your old
one due to its high-efficiency motor.
The ice maker is not producing ice or not enough ice
(on some models)
■ Has the ice maker just been installed? Wait 72 hours for full
ice production to begin. Once your freezer is cooled, the ice
maker should produce 70-120 cubes every 24 hours.
■ Is the freezer temperature cold enough to produce ice?
Wait 24 hours after hookup for ice production. See “Using the
Control.”
■ Is the wire shutoff arm in the OFF (arm up) position?
Lower the wire shutoff arm to the ON (arm down) position.
See “Ice Maker.”
■ Is the water line shutoff valve to the freezer turned on?
Turn on the water valve. See “Connect the Water Supply.”
■ Does the ice maker mold have water in it or has no ice
been produced? Be sure your freezer has been connected to
a water supply and the supply shutoff valve is turned on. See
“Connect the Water Supply.”
■ Is an ice cube jammed in the ejector arm? Remove the ice
from the ejector arm with a plastic utensil. See “Ice Maker.”
■ Has a large amount of ice just been removed? Allow
24 hours for ice maker to produce more ice.
■ Is the control set correctly? If too little ice is produced, see
“Using the Control.”
NOTE: If not due to any of the above, there may be a problem
with the water line. Call for service.
The motor seems to run too much
■ Is there excessive frost or a package keeping the door
from closing? Defrost and clean the freezer, or move the
package so the door closes properly.
■ Is the room temperature hotter than normal? The motor
will run longer under warm conditions. At normal room
temperatures, your motor will run about 40% to 80% of the
time. Under warmer conditions, it will run even more.
■ Has a large amount of food just been added to the
freezer? Adding a large amount of food warms the freezer.
The motor normally will run longer to cool the freezer back
down.
■ Is the door opened often? The motor will run longer when
this occurs. Conserve energy by getting all items out at one
time, keeping food organized, and closing the door as soon
as possible.
■ Is the control set correctly for the surrounding
conditions? See “Using the Control.”
■ Is the door completely closed? Push the door firmly shut. If
it will not shut all the way, see “The door will not close
completely or is difficult to open” later in this section.
■ Are the condenser coils dirty (on some models)? This
blocks air transfer and makes the motor work harder. Clean
the condenser coils. See “Freezer Care.”
■ Is the door gasket sealed all the way around? Contact a
qualified person or a technician.
Off-taste, odor or gray color in the ice (on some models)
■ Are the plumbing connections new, causing discolored or
off-flavored ice? Discard the first few batches of ice.
■ Have the ice cubes been stored too long? Throw old ice
away and make a new supply.
WARNING
Explosion Hazard
Use nonflammable cleaner.
Failure to do so can result in death, explosion, or fire.
■ Do the freezer and ice bin need to be cleaned? See
“Freezer Care.”
■ Does the water contain minerals (such as sulfur)? A filter
may need to be installed to remove the minerals.
15
 Loading...