

Whirlpool 50-Hz, 220-240 User Manual
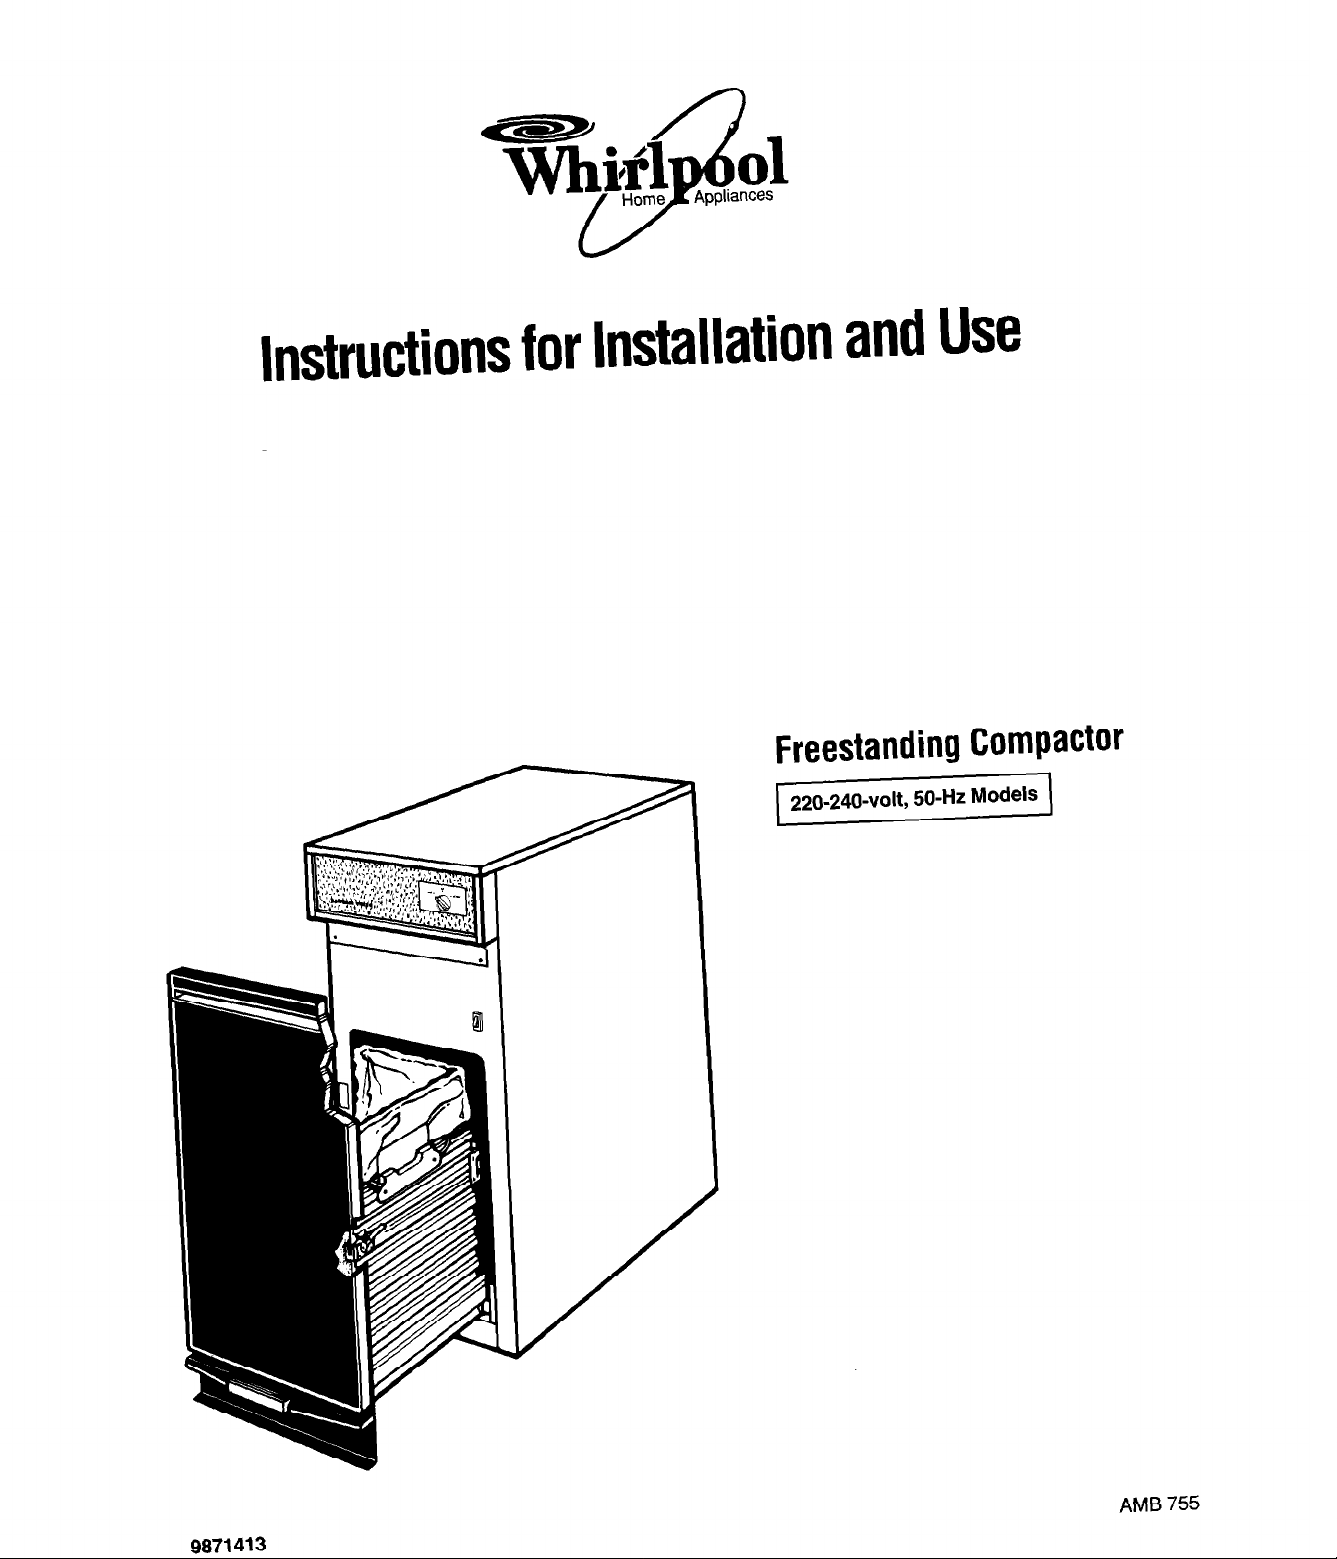
Instructions for Installation and Use
Freestanding Compactor
220-240~volt, 50-Hz Models
9871413
AMB 755
Contents
Page
Before Using the Compactor ...................................
Important Safety Instructions ..................................
Electrical Requirements .........................................
Precautions and general suggestions ....................
Installation Instructions..
Before you start ......................................................
Tools and materials needed for installation ............ 4
Now start ................................................................ 4
Adjusting the toe plate ............................................
Description of the Appliance ................................... 7
Using Your Compactor .............................................
Removing a filled bag ...........................................
Installing a new bag .............................................. 11
How Your Compactor Works .................................
Caring For Your Compactor.. .................................
Changing Your Compactor’s Colour
Troubleshooting Guide/Service .............................
Whirlpool Compactor Warranty
Thank you for buying a WHIRLPOOL* appliance.
Please complete the form below. Have this information
ready if you need service or call with a question.
. Copy model and serial numbers from plate (see
diagram on page 7) and purchase date from sales slip.
. Keep this book and sales slip together in a handy
place.
..........................................
..................... 15
.............................
10
12
13
15
15
Before Using the
1
Compactor
2
. After unpacking, make sure that the appliance is
2
2
3
3
6
5
undamaged and that the door opens and closes
properly. Any damage must be reported to your
retailer within 24 hours after delivery of the
appliance.
l The packaging box is recyclable and is marked with
the recycling symbol L’-JJ.
l The appliance is built with reusable material. When
scrapping, follow the local environment protection
disposal regulations. Do not dump the appliance.
Take it to the local disposal centre.
l Make sure that the installation and the electrical
connection are carried out by a qualified technician
according to the manufacturer’s instructions and
local safety regulations.
. Read “Important Safety Instructions” on page 2
before installing or using the compactor.
Model Number
Serial Number
Purchase Date
1
ImDortant Safetv Instructions
I
I
Electrical Requirements
1. A 230 volt 50Hz ac only 15 ampere fused electrical
supply is required.
2. A time delay fuse or circuit breaker is recommended.
It is also recommended that a separate circuit serving
only this appliance be provided.
3. Use a power point which cannot be turned off with a
switch or pull chain. Do not use an extension cable.
4. For your personal safety, the compactor must be
earthed. Check with a qualified technician if you are
not sure that the compactor is properly earthed.
lMPORTANT: Observe all governing codes and
ordinances.
Precautions and general suggestions
l Do not allow the compactor to be used as a toy, or to
run unattended at any time. Remove Key-knob when
not in use and store Key-knob out of reach of children.
l Do not compact:
- lighted cigarettes, cigars, or other hot or burning
items
- any container or aerosol can containing insecticide,
hair spray, paint, engine starting fluid or other poisonous, toxic, or explosive products
- volatile flammable materials such as oily rags,
thinner, etc., which would create a fire hazard or
explosion
l Never lift bag by the sides. Broken glass or other sharp
objects in the bag can cause injury.
l Before carrying out any maintenance or cleaning,
always unplug the appliance or disconnect the power
supply.
l Do not store or use gasoline or other flammable
vapours and liquids in the vicinity of this or any
other appliance. The fumes can create a fire
hazard or explosion.
2
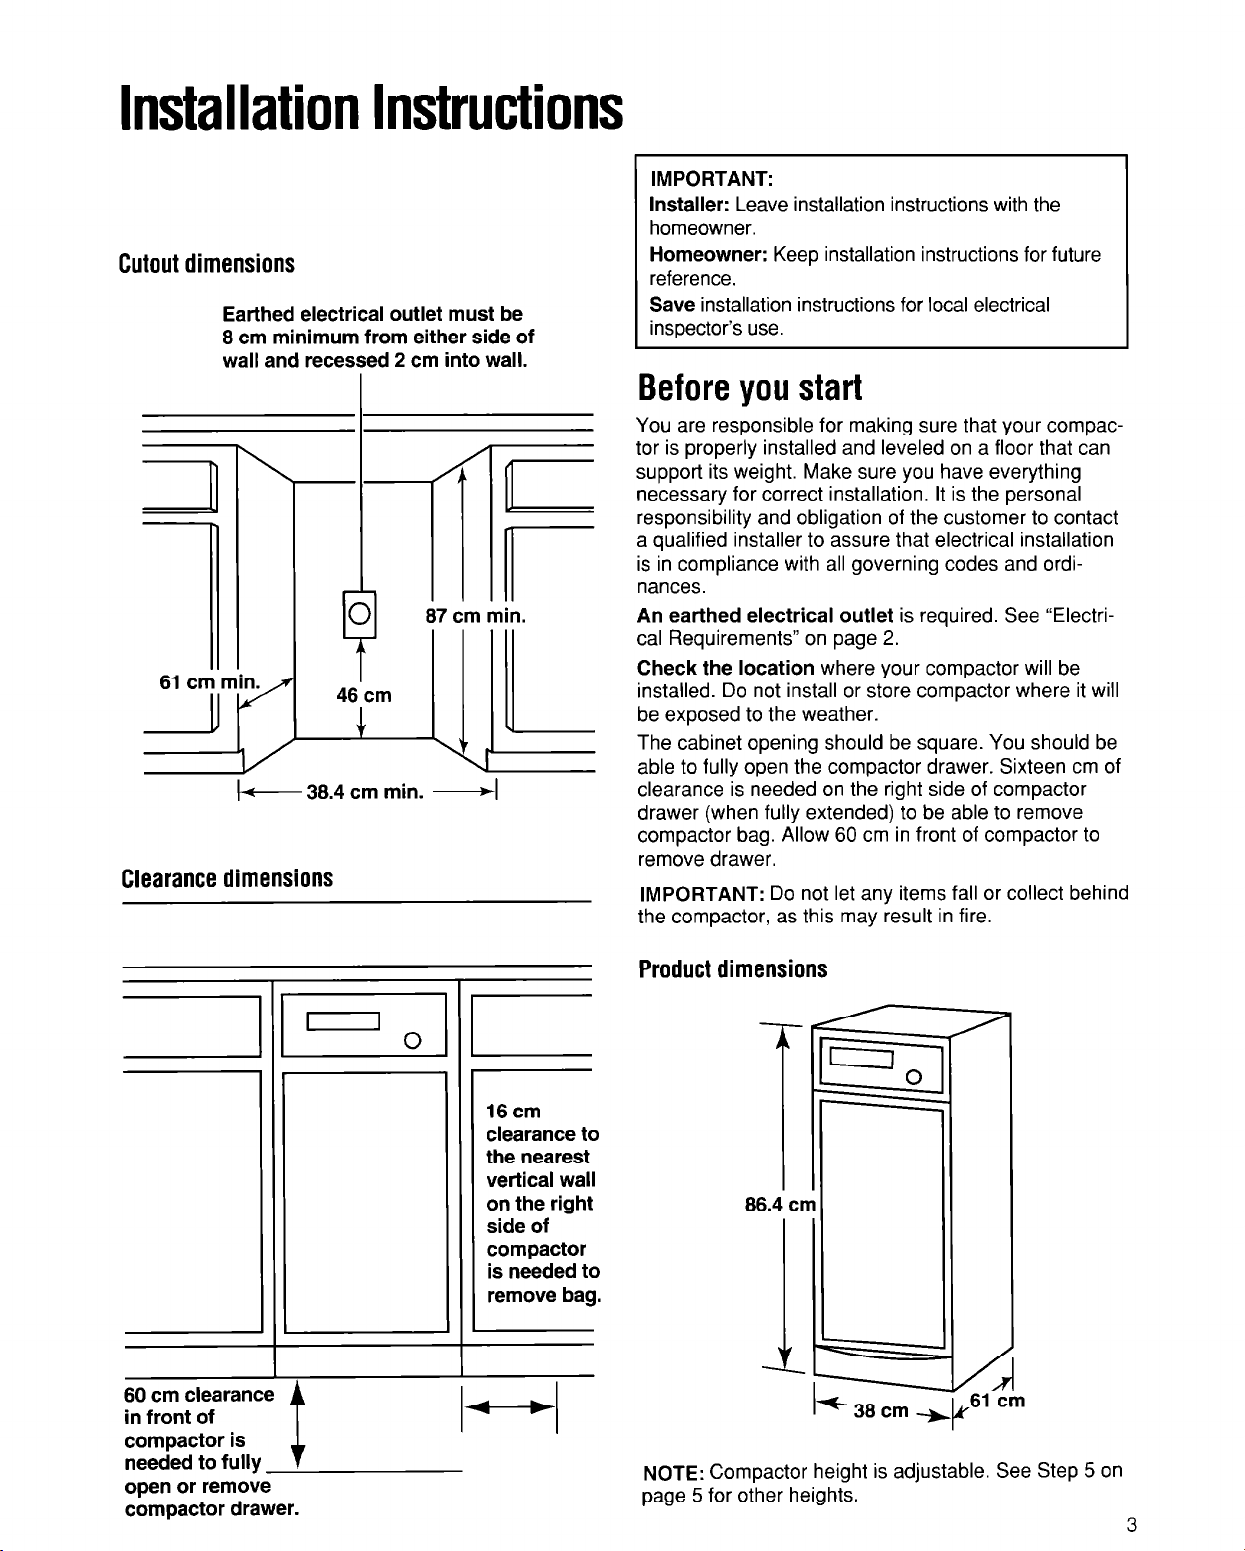
Installation Instructions
IMPORTANT:
Installer: Leave installation instructions with the
homeowner.
Cutout dimensions
Earthed electrical outlet must be
8 cm minimum from either side of
wall and recessed 2 cm into wall.
87 cm min.
b 38.4 cm min. -1
Clearance dimensions
Homeowner: Keep installation instructions for future
reference.
Save installation instructions for local electrical
inspector’s use.
Before you start
You are responsible for making sure that your compactor is properly installed and leveled on a floor that can
support its weight. Make sure you have everything
necessary for correct installation. It is the personal
responsibility and obligation of the customer to contact
a qualified installer to assure that electrical installation
is in compliance with all governing codes and ordinances.
An earthed electrical outlet is required. See “Electrical Requirements” on page 2.
Check the location where your compactor will be
installed. Do not install or store compactor where it will
be exposed to the weather.
The cabinet opening should be square. You should be
able to fully open the compactor drawer. Sixteen cm of
clearance is needed on the right side of compactor
drawer (when fully extended) to be able to remove
compactor bag. Allow 60 cm in front of compactor to
remove drawer.
IMPORTANT: Do not let any items fall or collect behind
the compactor, as this may result in fire.
60 cm clearance
in front of
compactor is
needed to fully
open or remove
compactor drawer.
Product dimensions
/
16cm
clearance to
the nearest
vertical wall
on the right
side of
compactor
is needed to
remove bag.
t
1-I
NOTE: Compactor height is adjustable. See Step 5 on
page 5 for other heights.
86.4 cm
I* 38 cm
n
Y
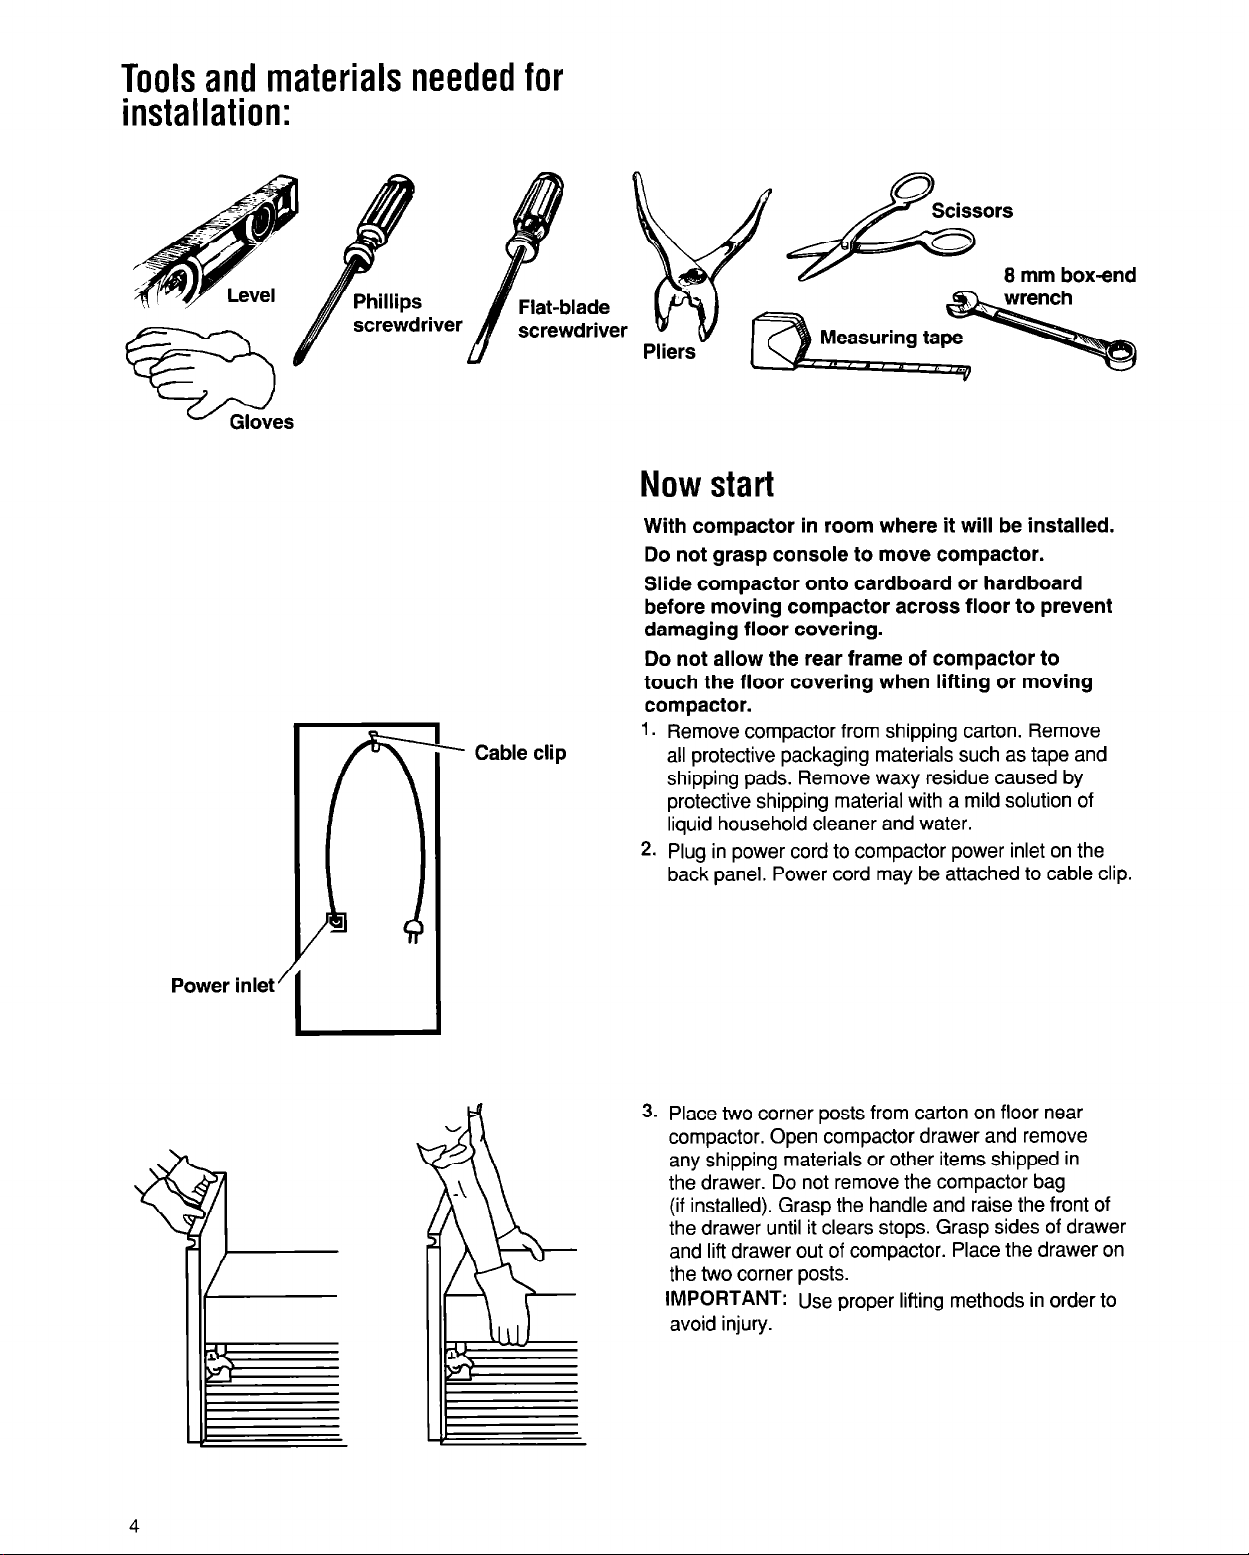
Tools and materials needed for
installation:
Wes
- Cable clip
8 mm boxend
u
Pliers
Now start
With compactor in room where it will be installed.
Do not grasp console to move compactor.
Slide compactor onto cardboard or hardboard
before moving compactor across floor to prevent
damaging floor covering.
Do not allow the rear frame of compactor to
touch the floor covering when lifting or moving
compactor.
1. Remove compactor from shipping carton. Remove
all protective packaging materials such as tape and
shipping pads. Remove waxy residue caused by
protective shipping material with a mild solution of
liquid household cleaner and water.
2. Plug in power cord to compactor power inlet on the
back panel. Power cord may be attached to cable clip.
Power inlet’
.(‘i
3. Place two corner posts from carton on floor near
compactor. Open compactor drawer and remove
any shipping materials or other items shipped in
the drawer. Do not remove the compactor bag
(if installed). Grasp the handle and raise the front of
the drawer until it clears stops. Grasp sides of drawer
and lift drawer out of compactor. Place the drawer on
the two corner posts.
IMPORTANT: Use proper lifting methods in order to
avoid injury.
4. Place the other two corner posts on the floor to the
side of the compactor. Grasp the sides of the compactor cabinet and put compactor on its side on top of the
corner posts. Remove the shipping base from the
bottom of compactor.
5. The rear wheels are preset for a cabinet opening
height of 86.4 cm (Position “A”). To adjust for other
heights, loosen screw just enough to clear stud from
hole in Position “A.” Move the rear wheel and stud to
Position “B” or “C” as needed.
Position B: 87.4 cm
Position C: 88.1 cm
Tighten screw. Repeat for other rear wheel.
Wheel bracket
assembly
Self-tapping
screw (pivot)
6. Place level inside on the floor of the cabinet. Check
that the compactor is level from front to back and
side to side. Adjust the leveling legs until the
,
compactor is level.
7. Move the compactor close to its final position.
Plug the power supply cable into a properly earthed
receptacle.
IMPORTANT: When moving or lifting the compactor,
use gloves to protect and cushion your hands.
8. Carefully move compactor into its final position. Check
that compactor is still level. (See Step 6.)
continued on next page
5
 Loading...