

Whirlpool 4LEC7646EN0 User Manual

Have questions about your dryer?
Check your Use and Care Guide for a toll-free number to call, or call your
dealer. The dealer is listed in the Yellow Pages of your phone directory
under "Appliances — Household — Major — Service and Repair."
When you call, you will need the dryer model number and serial number.
Both numbers are on the model/serial rating plate located in the door well
behind the dryer door and on front of opening.
Record the numbers here for handy reference:
Model No.
Serial No..
Moving dryer to a new location?
Check with a licensed electrician to confirm that supply voltage at new
home matches voltage specified on the model/serial rating plate.
Shut off electrical supply to dryer. Unplug
power supply cord and tape it securely to dryer.
(Or disconnect power supply cable from dryer.)
Slide dryer onto cardboard or hardboard
before moving it across the floor to
prevent damaging floor covering.
Electric Dryer
Part No. 3397625
IMPORTANT:
Read and save these instructions.
Installer: Leave Installation Instructions with homeowner.
Homeowner: Keep installation Instructions for future reference.
For best performance, install dryer according to
Installation Instructions. Failure to complete installation
as instructed could void warranty.
Save Installation Instructions for local electrical inspector's use.
Æ Home^K Appliances
10/9 (o
Before you start:
Check that you have everything necessary for
correct installation. Proper installation is your
responsibility.
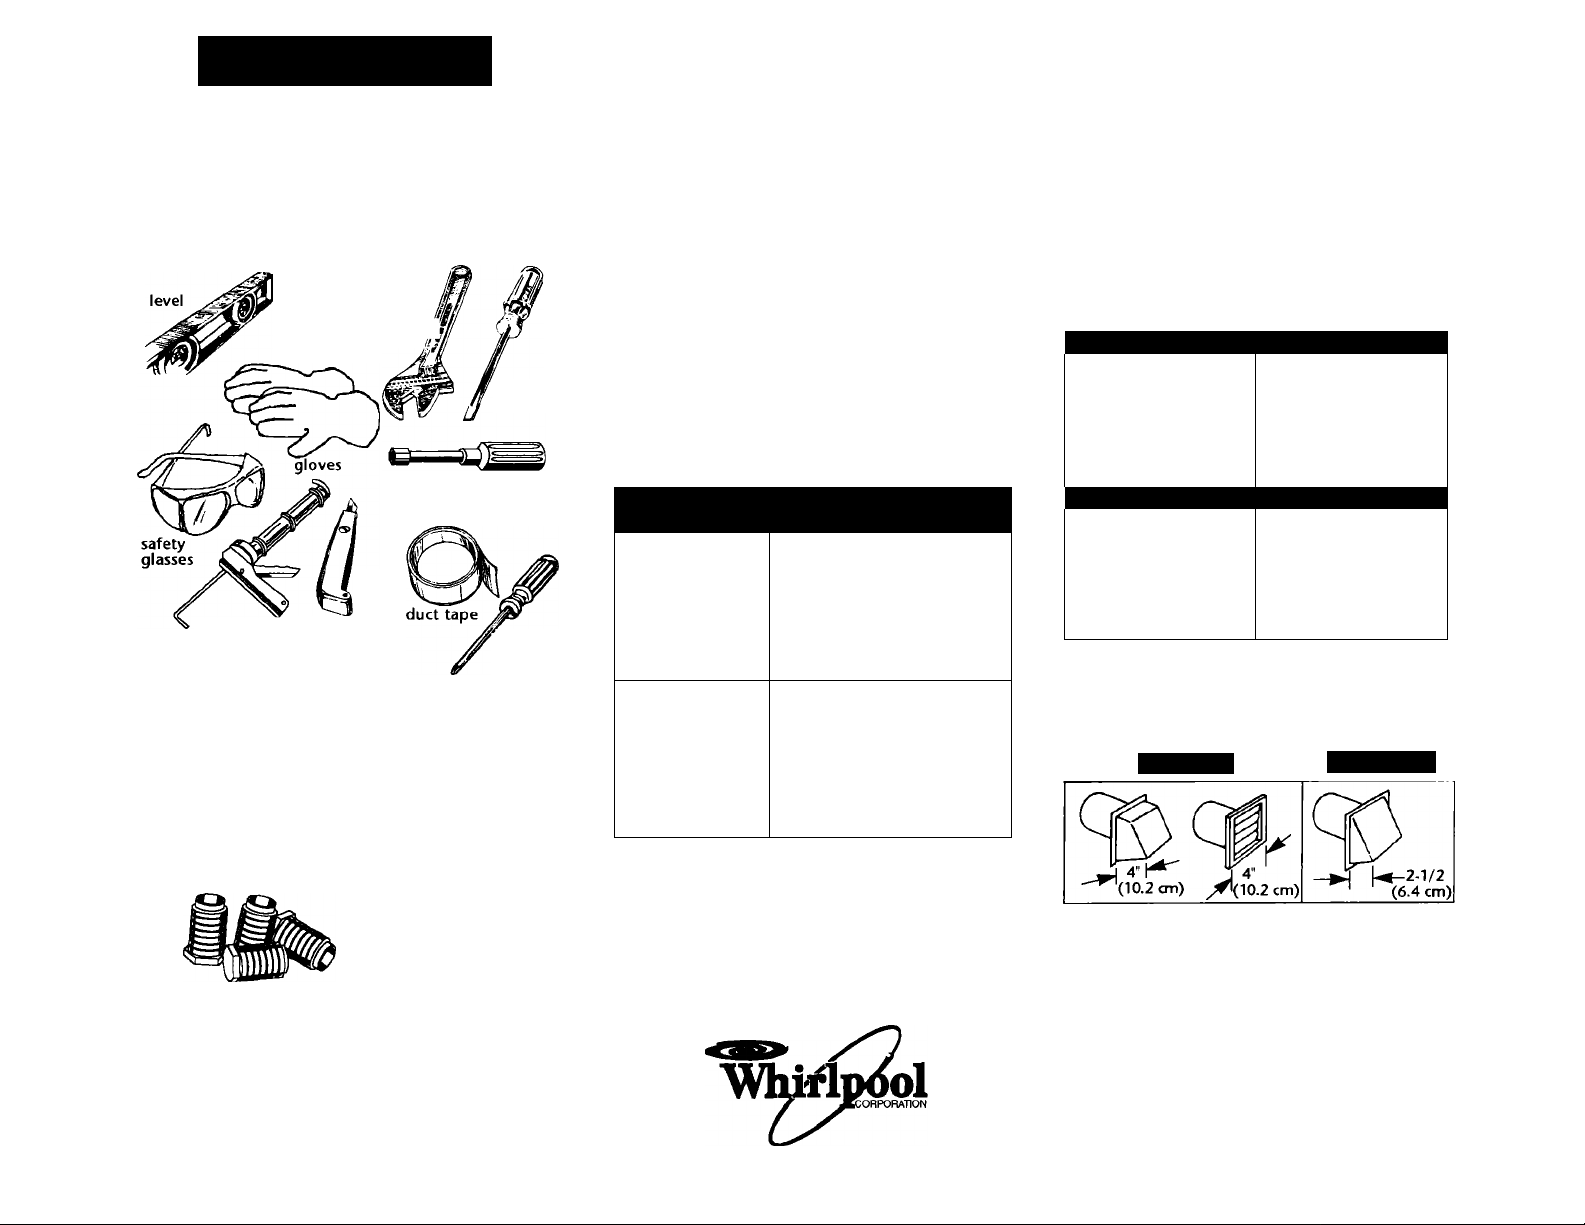
Tools needed for installation:
adjustable wrench
that opens to V
(shown) or 1"
hex-head iji
socket wrench ™
flat-blade
screwdriver
1/4"
nut driver (shown)
or socket wrench
knife
caulking
gun ana compound
Tools needed to change door swing;
• Phillips screwdriver
• soft cloth or towel
Phillips
screwdriver
Parts supplied for installation;
Remove parts package from dryer drum. Check that
all parts were included.
4 leveling legs
Parts needed for installation:
Check local codes and see electrical and venting requirements. Panels A and B, before purchasing parts.
Determine if you will need to purchase a power supply cord kit or power supply cable.
Electrical
If using a power supply cord:
Dryer power supply cord must be:
• U.L.-listed
• 220-volt minimum
• 30-ampere
• Type SRD or SRDT
• At least 4 feet (122 cm) long
The wires that connect to the dryer must end in
ring terminals or spade terminals with upturned
ends.
If your outlet
looks like this:
Choose this
power supply cord;
@
4-wire receptacle
(14-30R)
\^jJ
3-wire receptacle
(10-30R)
If connecting by direct wire:
Power supply cable must match power supply
(4-wire or 3-wire) and be:
• flexible armored or non-metallic sheathed
copper cable (with grounding wire).
• 10-CAUCE SOLID COPPER WIRE. (Do not use
aluminum.)
• at least 4 feet (122 cm) long.
4-wire power supply cord with
ring or spade terminals and
U.L.-listed strain relief
3-wire power supply cord with
ring or spade terminals and
U.L.-listed strain relief
Venting
Ductwork
Four-inch (10.2 cm) metal exhaust vent must be
used.
Preferred
rigid metal
DO NOT USE non-metal vent
No flexible plastic
Exhaust hood
Do Not use exhaust hoods with magnetic latches.
Preferred
Non-exhausted recessed installations:
require Exhaust Deflector Kit, Part Number 3391278*
Floors sloped greater than 1 inch (2.5 cm):
require Extended Dryer Feet Kit, Part No. 279810*
Acceptable
flexible metal
No flexible foil
Acceptable
Part No. 3397625
© 1996 Whirlpool Corporation
*Available for purchase from your dealer.
Prepared by Whirlpool Corporation, Benton Harbor, Michigan 49022
Printed in U.S.A.
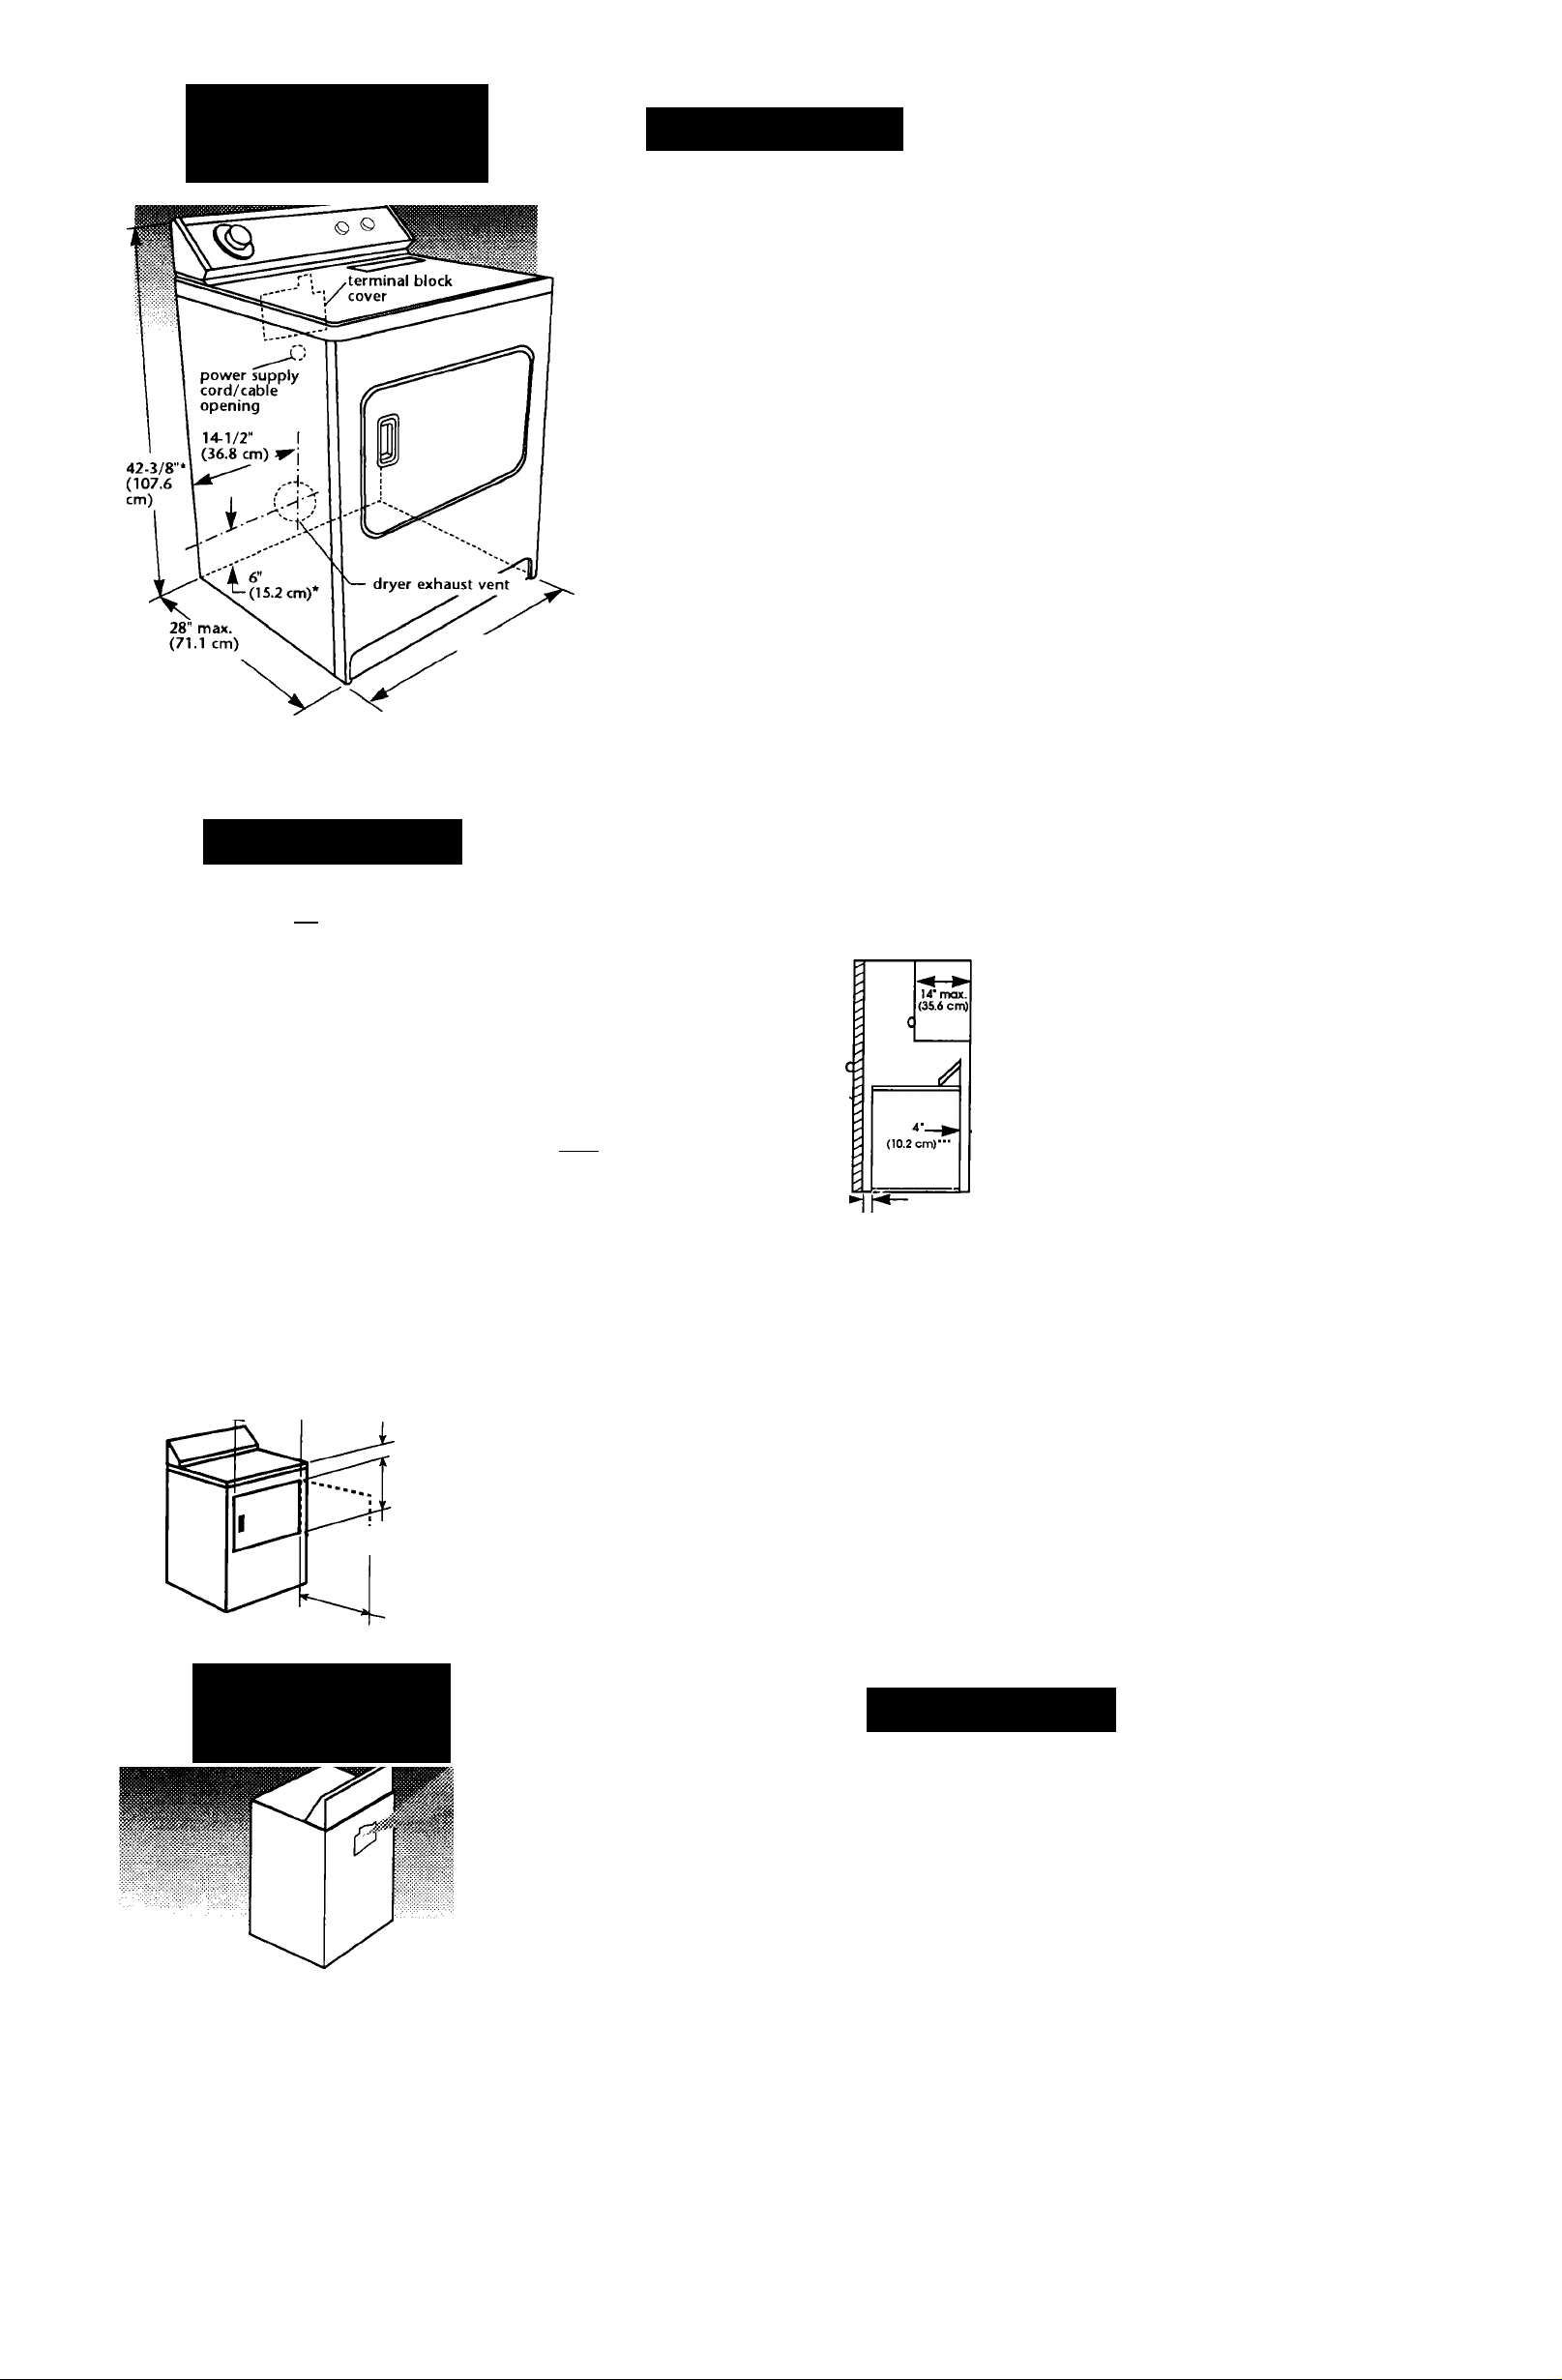
Dryer location
and dimensions
‘from floor
with dryer feet
extended 1
inch (2.5 cm)
29" (73.7 cm)
 WARNING
Explosion Hazard
Keep flammable materials and vapors away
from dryer.
Place dryer at least 18 inches above the
floor for a garage installation.
Failure to do so can result in death,
explosion, fire, or burns.
It is your responsibility to:—
l/'observe all governing codes and ordinances.
l/check code requirements: Some codes limit or
do not permit installation of clothes dryers in
garages, closets, mobile homes or sleeping
quarters. Contact your local building inspector.
I^comply with the installation specifications and
dimensions.
For proper drying performance
The location must provide:
l^Protection from weather and water: Do not store
or use dryer where it will be exposed to water and
weather.
t/Room temperature above 45°F (7.2°C): If room
temperature is below 45°F (7.2° C), automatic
cycles may not shut off.
l/level floor: Maximum slope under entire dryer
should not be more than 1 inch (2.5 cm). (If slope
is greater than 1" (2.5 cm), install Extended Dryer
Feet Kit, Part No. 279810.) Clothes may not tumble
properly and automatic sensor cycles may not
operate correctly if dryer is not level.
Sturdy floor to support dryer weight of 150
pounds (68 kg).
|/Exhaust to outdoors: To prevent large amounts of
lint and moisture from accumulating and to
maintain drying efficiency, exhaust dryer to
outdoors.
*/consider spacing requirements for companion
appliances.
Improperly install dryer.
immake sure you have everything necessary for
proper installation.
|/contact a qualified installer to insure that the
electrical installation meets all national and local
codes and ordinances.
Recessed area/closet installation
A WARNING
M
Fire Hazard
Exhaust dryer outside if instalied in a closet.
Use Exhaust Deflector Kit #3391278 if
installed in a recessed area.
Failure to foilow this instruction could
result in a fire.
NOTE: No fuel-burning appliances may be
installed in the same closet as a dryer.
• If codes permit, dryer may be installed in a
recessed area or closet using dimensions
shown.
• Dimensions are in inches and are the
minimum allowable.
• Additional spacing should be considered for
ease of installation and servicing. Companion
appliance spacing should also be considered.
Door clearance
Location must be large enough to fully open dryer door.
______________
48 sq. in.
(310 sq. cm)'
i
24 sq.m.
(155 sq. cm)'
T
** Minimum top and bottom air openings for closet door.
*** External exhaust elbow requires additional space.
CloseVconfined area installation
If a closet door is installed: The
minimum unobstructed air openings are
required. Louvered doors with equivalent
air openings are acceptable.
front view
i.
3" (7.6 cm)
t
closet
door
sicte view
i
3’ (7.6 cm)
r
___
I
T
(2.5 cm)
Recessed area installation
The dryer should be exhausted to the outside
for best performance.
If dryer is not exhausted outside, you must
install Exhaust Deflector Kit, Part No. 3391278,
available from your dealer.
front view
i
18’
(45.7 cm)
T
0" -
(0 cm)"
' Wall, door and floor molding may require
additional spacing.
0- 0"
(0 cm)"
JzaZ) H 3-7/8" (9.8 cm)
. 19-1/8'(48.6 cm)
Electrical
requirements
22-3/4" (57.8 cm)
ikWARNING
Electrical
Electrical ground (earth) is required on this
dryer.
Do Not ground (earth) to a gas pipe.
Do Not change the power supply cord plug.
If it does not fit the outlet, have a proper
outlet installed by a qualified electrician.
Do Not have a fuse in the neutral or
grounding circuit.
Do Not use an extension cord with this
dryer.
Shock Hazard
Do Not reuse old power supply cord.
Check with a qualified electrician to be sure
dryer is properly grounded (earthed).
, Do Not connect plug end of power supply
cord into a live receptacle before connecting
power supply cord to dryer terminal block.
Failure to follow these instructions could
result in death or serious injury.
Important: Observe all governing codes and
ordinances.
A two-wire, single phase, 220-volt, 60-Hz,
AC-only, electrical supply is required on a
separate 30-ampere circuit, fused on both sides
of the line. A time-delay fuse or circuit breaker is
recommended.
THE DRYER MUST BE CONNECTED WITH
COPPER WIRE ONLY.
The dryer may be connected directly to the
fused disconnect or circuit breaker box through
Panel A
If codes permit and a separate grounding (earthing) wire is used, it is recommended that a qualified
electrician determine that the grounding (earthing) path is adequate.
flexible, armored or non-metallic sheathed
copper cable. Allow two or three feet
(61 -91 cm) of slack in the line between the wall
and the dryer so that it can be moved if
servicing is ever necessary. A conduit connector
must be provided at each end of the power
supply cable (at the appliance and at the
junction box). Wire sizes (COPPER WIRE ONLY)
and connections must conform with the rating
of the appliance (30 amperes).
Grounding (earthing) instructions
This appliance must be connected to a
grounded (earthed) metal, permanent wiring
system; or an equipment-grounding (earthing
conductor must be run with the circuit
conductors and connected to the equipment
grounding (earthing) terminal or lead on the
appliance.
 Loading...