

Page 1
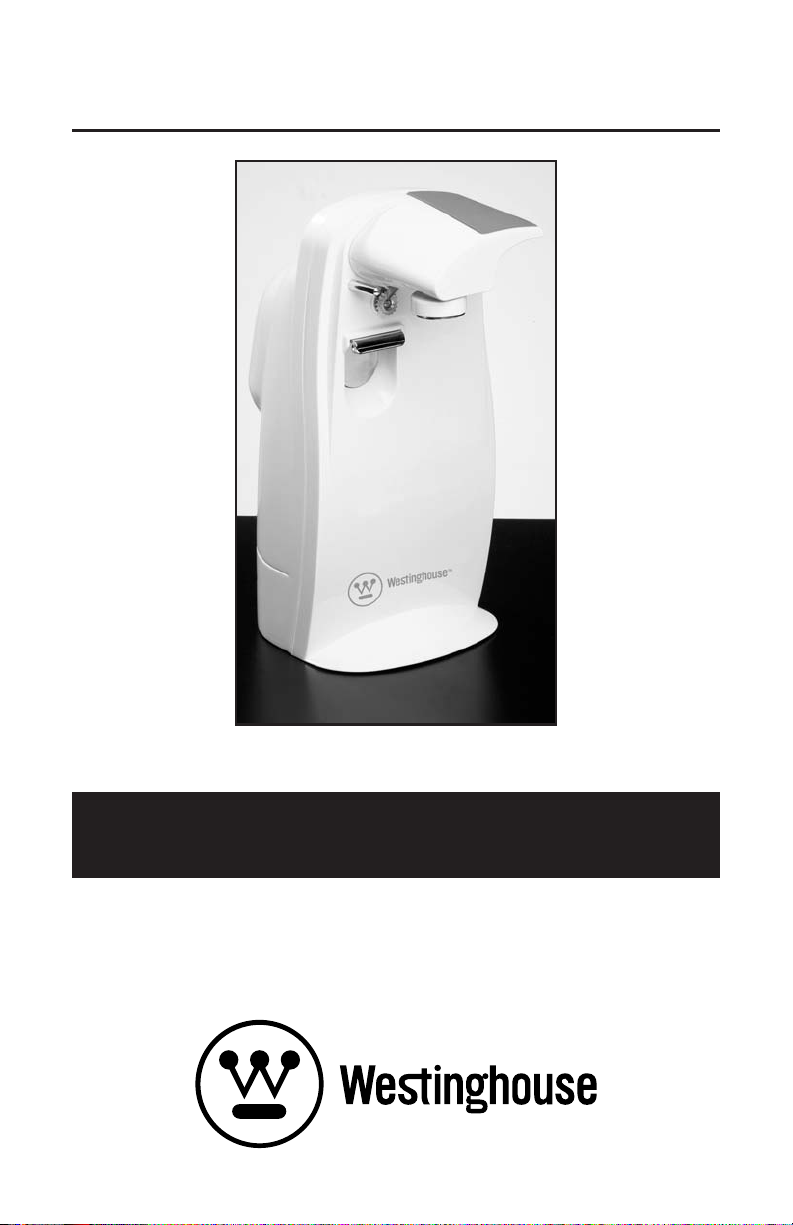
TALL CAN OPENER
MODEL WST2017ZE
OWNER’S MANUAL
Page 2

IMPORTANT SAFEGUARDS
When using electrical appliances, basic safety precautions should always be followed including the following:
1. Read all instructions.
2. To protect against risk of electrical shock do not put
cord, plugs, or appliance in water or other liquid.
3. Close supervision is necessary when any appliance
is used by or near children.
4. Unplug from outlet when not in use, before putting
on or taking off parts, and before cleaning.
5. Avoid contacting moving parts.
6. Do not operate any appliance with a damaged
cord or plug or after the appliance malfunctions, or
is dropped or damaged in any manner. Contact
Consumer Service for examination, repair or electrical or mechanical adjustment.
7. The use of attachments not recommended or sold
by the manufacturer may cause fire, electric shock
or injury.
8. Do not use outdoors.
9. Do not let cord hang over edge of table or counter.
10. Do not let cord contact hot surface, including the
stove.
11. Do not open pressurized (aerosol-type) cans.
12. Do not open cans of flammable liquids such as
lighter fluids.
SAVE THESE INSTRUCTIONS
For Household Use Only
2
Page 3

ADDITIONAL IMPORTANT
SAFEGUARDS
1. All users of this appliance must read and understand this Owner’s Manual
before operating or cleaning this appliance.
2. The cord to this appliance should be plugged into a 120V AC electrical
outlet only.
3. Do not leave this appliance unattended during use.
4. If this appliance begins to malfunction during use, immediately turn the
unit OFF and unplug the cord. Do not use or attempt to repair the malfunctioning appliance.
5. IF this appliance falls or accidentally becomes immersed in water, unplug it
immediately. Do not reach into the water! Do not use this appliance
after it has fallen into or becomes immersed in water.
6. To reduce the risk of injury to persons or property, never use this appliance
in an unstable position.
7. Do not use this appliance for other than its intended use.
3
Page 4

POLARIZED PLUG
This appliance has a polarized plug (one blade is wider than the other).
To reduce the risk of electric shock, this plug is intended to fit into a
polarized outlet only one way. If the plug does not fit fully in the outlet,
reverse the plug. If it still does not fit, contact a qualified electrician. Do
not attempt to modify the plug in any way.
SHORT CORD INSTRUCTIONS
A short power-supply cord (or detachable power-supply cord) is provided to reduce the risk resulting from becoming entangled in or tripping
over a longer cord.
Longer detachable power-supply cords or extension cords are available
and may be used if care is exercised in their use.
If a longer detachable power-supply cord or extension cord is used, (1)
the marked electrical rating of the cord set or extension cord should be
at least as great as the electrical rating of the appliance, and (2) the
cord should be arranged so that it will not drape over the countertop or
tabletop where it can be pulled on by children or tripped over
unintentionally.
ELECTRIC POWER
If the electrical circuit is overloaded with other appliances, your appliance may not operate properly. It should be operated on a separate
electrical circuit from other appliances.
IMPORTANT NOTES: To ensure continued efficient performance, keep the Cutting Blade clean. Can Opener should be
turned off for one minute after operating for 5 minutes.
4
Page 5

GETTING TO KNOW YOUR
WESTINGHOUSE WST2017ZE TALL
CAN OPENER & KNIFE SHARPENER
PRODUCT MAY VARY SLIGHTLY FROM ILLUSTRATION
1
2
3
4
6
5
9
1. Operating Lever (P/N 70631)
2. Guide Bar
3. Magnet
4. Geared Wheel
5. Cutting Blade
8
7
6. Bottle Opener
7. Base
8. Cord Storage
9. Knife/Scissors
Sharpener
5
Page 6

BEFORE USING FOR THE FIRST TIME
1. Carefully unpack Can Opener.
2. Make sure the Can Opener is unplugged. Wipe with a soft, clean
cloth or sponge. Never immerse the Can Opener in water or any
other liquid.
3. Attach the Operating Lever to the Can Opener. Carefully insert the
Operating Lever in the lifted position into the pivot slot and lower the
Operating Lever by rotating to the right. See Figure 1.
4. Plug Can Opener into electrical outlet and press down on the
Operating Lever to make sure it is operating properly.
CAUTION: Risk of personal injury. Keep hands from beneath
the Operating Lever where the Geared Wheel and Cutting
Blade are located.
This Can Opener is designed for food contact. DO NOT use to
open cans with other than food substances in them such as
paint, aerosols, etc.
Operating
Lever
Pivot
Slot
Figure 1
6
Page 7

OPERATING INSTRUCTIONS
TO USE CAN OPENER
1. Place Can Opener on level surface.
2. Plug the Can Opener into a 120V AC electrical outlet.
3. Raise the Operating Lever, place can beneath the Guide Bar and
against the Geared Wheel.
4. Press down on Operating Lever to pierce lid of can. This automatically starts the cutting action. Lightly support the can while it is being
opened. The Can Opener will continue to cut until the Lid is completely severed from the can.
5. Grasp the can, then raise the Operating Lever to release the can.
6. Carefully remove lid from the Magnet. USE CAUTION TO AVOID
INJURY FROM EDGE OF LID.
TO USE KNIFE SHARPENER
1. Place Can Opener on level surface.
2. Plug the Can Opener into a 120V AC electrical outlet.
3. Turn the unit around so that the Knife/Scissors sharpening slots are
facing you.
4. Select the appropriate sharpening slot. The upper vertical slot is for
sharpening the front edge of the knife blade and the lower vertical
slot is for sharpening the back edge of the knife blade.
5. Press down and hold the
Operating Lever. Insert the blade
into the slot and slowly draw the
blade to the right with a slow,
even motion, as shown in Figure
2. Alternate from one sharpening slot to the other until desired
sharpness is achieved.
NOTE: Blades to be sharpened
should be clean. Do not sharpen
knives that have serrated blades.
Figure 2
7
Page 8

OPERATING INSTRUCTIONS (Cont.)
TO USE SCISSORS SHARPENER
1. Place Can Opener on level surface.
2. Plug the Can Opener into a 120V
AC electrical outlet.
3. Turn the unit around so that the
Knife/Scissors sharpening slots are
facing you. The horizontal sharpening slot is designed especially for
scissors.
4. Press down and hold the Operating
Lever. Place one blade of the scissors
in the groove and slowly draw the
blade to the right with a slow, even motion. Repeat with the other
blade.
TO USE BOTTLE OPENER
1. Unplug appliance from electrical socket.
2. Place Can Opener on a level Surface. To
steady, position one hand on top of the
Can Opener.
3. Place bottle cap edge under Opener
Flange.
4. Apply downward pressure on bottle until
cap pops off.
NOTE: This bottle opener is not recommended for bottles having “Twist-Off” caps.
Figure 3
Figure 4
8
Page 9

USER MAINTENANCE INSTRUCTIONS
This Westinghouse WST2017ZE Can Opener requires little maintenance. It contains no user-serviceable parts. Any servicing requiring disassembly other than instructed below must be performed by a qualified
appliance repair technician.
CAUTION: Always unplug Can Opener from electrical outlet
when not in use and before cleaning. Never immerse Can
Opener, cord or plug in water or any other liquid.
CARE AND CLEANING
The Can Opener should be kept clean to avoid food contamination.
1. Unplug Can Opener.
2. To remove the Operating Lever hold the Can Opener facing you
and lift the Operating Lever upward, then gently pull toward you.
Exercise caution when removing, washing and replacing
the Operating Lever; Cutting Blade is sharp and can cause
injury.
3. Wash the Operating Lever in warm soapy water. To remove stubborn food spots, dab a small amount of dishwashing liquid onto a
small brush and gently scrub clean. Rinse well and allow to dry thoroughly before replacing it on the unit.
4. If necessary, wipe exterior surface of Can Opener with a soft, slightly
damp cloth or sponge. Do not allow water, or any other liquid,
to get into the unit.
CAUTION: Do not use scouring pads or any type of harsh
cleanser that may damage the surfaces or dull the Cutting
Blade.
5. Reattach the Operating Lever to the Can Opener. Carefully insert the
Operating Lever in the lifted position into the pivot slot and lower the
Operating Lever by rotating to the right.
TO STORE
1. Unplug the Can Opener and clean as instructed above.
2. Make sure all parts are dry and store appliance in its original box or
in a clean, dry location.
3. Never store with cord plugged in. Do not wrap cord tightly around
the appliance. Return cord to cord storage compartment.
9
Page 10

LIMITED ONE-YEAR WARRANTY
Warranty Coverage: This product is warranted to be free from defects in
materials or workmanship for a period of one (1) year from the original purchase date. This product warranty is extended only to the original consumer purchaser of the product and is not transferable. For a period of
one (1) year from the date of original purchase of the product, our Repair
Center will, at its option, either (1) repair the product or (2) replace the
product with a reconditioned comparable model. These remedies are the
purchaser's exclusive remedies under this warranty.
Warranty Service: To obtain warranty service, you must call our warranty
service number at 1-800-233-9054 for return instructions on how to deliver
the product, in either the original packaging or packaging affording an
equal degree of protection to the Repair Center specified below. You must
enclose a copy of your sales receipt or other proof of purchase to demonstrate eligibility for warranty coverage.
To return the appliance, ship to:
ATTN: Repair Center
708 South Missouri Street
Macon, MO 63552 USA
What Is Not Covered: This warranty does not cover damage resulting
from misuse, accident, commercial use, improper service or any other
damage caused by anything other than defects in material or workmanship
during ordinary consumer use. This warranty is invalid if the serial number
has been altered or removed from the product. This warranty is valid only
in the United States and Canada.
LIMITATION ON DAMAGES: THERE SHALL BE NO LIABILITY FOR
ANY INCIDENTAL OR CONSEQUENTIAL DAMAGES FOR BREACH OF
ANY EXPRESS OR IMPLIED WARRANTY OR CONDITION ON THIS
PRODUCT.
To contact us, please write to, call, or email:
Consumer Relations Department
PO Box 7366
Columbia MO 65205-7366 USA
1-800-233-9054
E-mail:
consumer_relations@toastmaster.com
DURATION OF IMPLIED WARRANTIES: EXCEPT TO THE EXTENT
PROHIBITED BY APPLICABLE LAW, ALL IMPLIED WARRANTIES AND
CONDITIONS, INCLUDING, WITHOUT LIMITATION, IMPLIED WARRANTIES AND CONDITIONS OF MERCHANTABILITY AND FITNESS
FOR A PARTICULAR PURPOSE OR USE ON THIS PRODUCT ARE LIMITED IN DURATION TO THE DURATION OF THIS WARRANTY.
Some jurisdictions do not allow the exclusion or limitation of incidental or
consequential damages, or allow limitations on how long an implied warranty lasts, so the above limitations or exclusions may not apply to you.
This warranty gives you specific legal rights and you may have other rights
under the laws of your jurisdiction.
For more information on our products, visit our website: www.maxim-toastmaster.com.
 Loading...