

Page 1
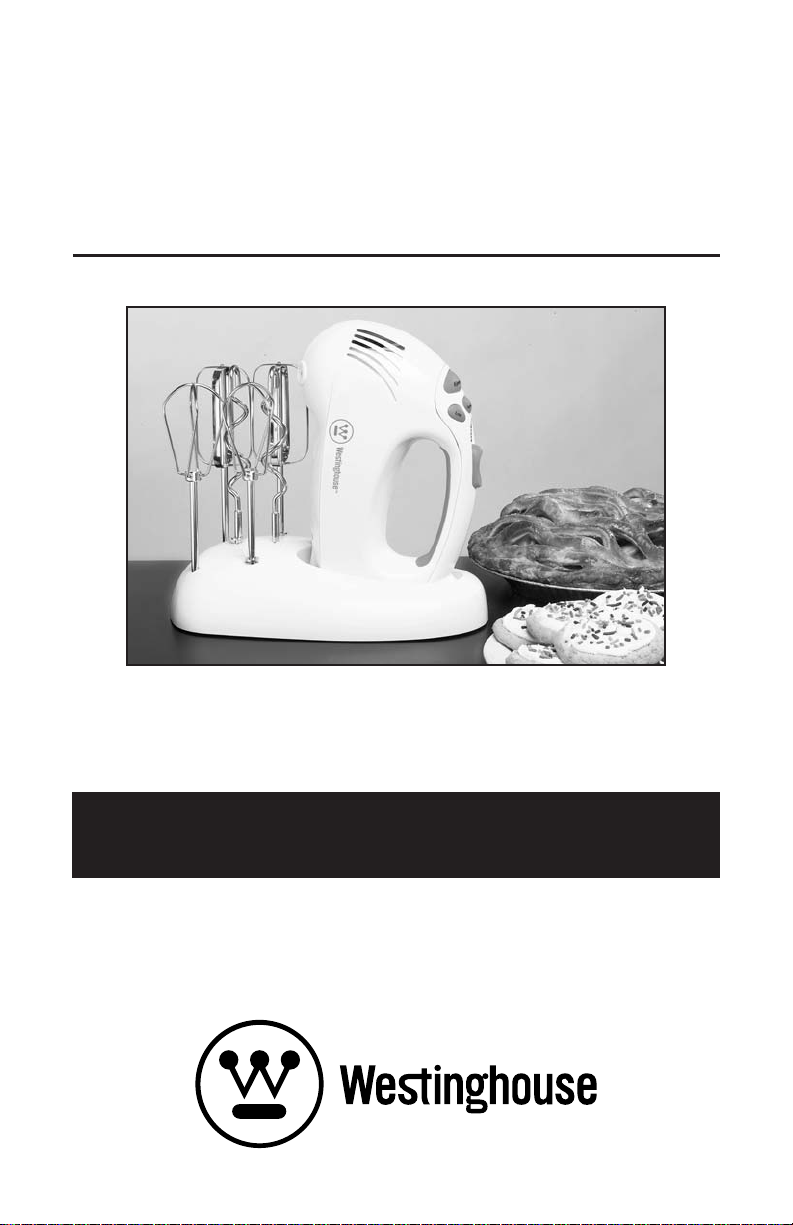
10-SPEED
HAND MIXER
CENTER
MODEL WST2011ZE
OWNER’S MANUAL
Page 2

IMPORTANT SAFEGUARDS
When using electrical appliances, basic safety precautions
should always be followed including the following:
1. Read all instructions.
2. To protect against risk of electrical shock do not put
cord, plugs, or appliance in water or other liquid.
3. Close supervision is necessary when any appliance is
used by or near children.
4. Unplug from outlet when not in use, before putting on
or taking off parts, and before cleaning.
5. Avoid contacting moving parts.
6. Do not operate any appliance with a damaged cord or
plug or after the appliance malfunctions, or is dropped
or damaged in any manner. Contact Consumer Service
for examination, repair or electrical or mechanical
adjustment.
7. The use of attachments not recommended or sold by
the manufacturer may cause fire, electric shock or
injury.
8. Do not use outdoors.
9. Do not let cord hang over edge of table or counter.
10. Do not let cord contact hot surface, including the stove.
11. Keep hands, hair, clothing, as well as spatulas and
other utensils away from beaters during operation to
reduce the risk of injury to persons, and/or damage to
the mixer.
12. Remove beaters and dough hooks from mixer before
washing.
SAVE THESE INSTRUCTIONS
For Household Use Only
2
Page 3

ADDITIONAL IMPORTANT
SAFEGUARDS
1. All users of this appliance must read and understand this Owner’s Manual
before operating or cleaning this appliance.
2. The cord to this appliance should be plugged into a 120V AC electrical
outlet only.
3. Do not leave this appliance unattended during use.
4. If this appliance begins to malfunction during use, immediately turn
the unit OFF and unplug the cord. Do not use or attempt to repair the
malfunctioning appliance.
5. IF this appliance falls or accidentally becomes immersed in water, unplug
it immediately. Do not reach into the water! Do not use this appliance
after it has fallen into or becomes immersed in water.
6. To reduce the risk of injury to persons or property, never use this appliance
in an unstable position.
7. Do not use this appliance for other than its intended use.
POLARIZED PLUG
This appliance has a polarized plug (one blade is wider than the other).
To reduce the risk of electric shock, this plug is intended to fit into a
polarized outlet only one way. If the plug does not fit fully in the outlet,
reverse the plug. If it still does not fit, contact a qualified electrician. Do
not attempt to modify the plug in any way.
ELECTRIC POWER
If the electrical circuit is overloaded with other appliances, your appliance may not operate properly. It should be operated on a separate
electrical circuit from other appliances.
PLASTICIZER WARNING
CAUTION: To prevent Plasticizers from migrating from the finish of the
countertop or tabletop or other furniture, place NON-PLASTIC coast-
ers or placemats between the appliance and the finish of the countertop
or tabletop. Failure to do so may cause the finish to darken, permanent
blemishes may occur or stains can appear.
3
Page 4

GETTING TO KNOW YOUR
WESTINGHOUSE WST2011ZE
10-SPEED HAND MIXER CENTER
PRODUCT MAY VARY SLIGHTLY FROM ILLUSTRATION
Turbo
Beater
Eject
Button
Motor
Housing
Boost-ofPower
Button
Speed
Control
Lever
Ventilation
ChromePlated
Beaters
Power
Supply
Cord
LOW/HIGH
Buttons
Easy-toHold
Handle
Polarized
Plug
Storage Caddy
(P/N 70643)
Storage Bag
(P/N 70996)
4
Page 5

BEATERS/DOUGH HOOKS
HEAVY-DUTY BEATERS:
Designed for all-purpose mixing. Cut through thick
or thin batters with ease.
(P/N 70640 - without Collar)
(P/N 70640C - with Collar)
WIRE BEATERS:
Spindly, thin Wire Beaters are ideal for whisking
sauces or whipping light, fluffy ingredients.
(P/N 70641 - without Collar)
(P/N 70641C - with Collar)
DOUGH HOOKS:
Spiral Dough Hooks are designed to mix or knead
heavier batters or bread dough. Hooks may also
be used for gently mixing pastry dough.
(P/N 70642 - without Collar)
(P/N 70642C - with Collar)
5
Page 6

BEFORE USING FOR THE FIRST TIME
1. Carefully unpack Hand Mixer.
2. Wash Beaters and Dough Hooks in warm, soapy water. Rinse well
and dry thoroughly.
3. Wipe Mixer with a soft, clean cloth or sponge.
Never immerse Motor Housing in water or any other liquid.
ATTACHING BEATERS/DOUGH HOOKS
Be sure the Mixer is unplugged.
NOTE: One Beater/Dough Hook has a
small, metal Washer-Ring (Collar) around
the top of the Stem. The Beater/Dough
Hook with the Washer-Ring is the one you
insert into the deeper of the two holes in
the Mixer.
1. Push the Beater or Dough Hook with
the Washer-Ring into the deeper hole.
Rotate the Beater until it locks into
position. (See Figure 1.)
2. Push other Beater or Dough Hook
(without Washer-Ring) into other Mixer
hole. Rotate the Beater until it locks
into position. (See Figure 2.)
3. After installing the Beaters or Dough
Hooks, gently pull on each Stem to be
sure they are secured properly.
CAUTION: Always unplug Mixer from outlet before installing
or removing Attachments.
Use either both Beaters or both Dough Hooks. Do not attempt
to use a Dough Hook with a Beater or mismatching Beaters
(one Heavy Duty with one Wire).
This could damage the Mixer.
WasherRing
Collar
Stem
deeper hole
Figure 1
Figure 2
REMOVING BEATERS
1. Slide Speed Control Lever to the OFF position.
2. Unplug appliance.
3. Push down on the Beater Eject Button to eject Beaters.
6
Page 7

OPERATING INSTRUCTIONS
1. Make sure the Mixer is unplugged and the Speed Control Lever is
in the OFF position.
2. Attach Beaters (see “ATTACHING BEATERS”).
3. Plug the Power Supply Cord into a 120V AC electrical outlet.
4. Place Beaters directly into container holding ingredients to be
mixed.
5. Select the speed setting that matches your mixing task. (See “SPEED
SETTINGS” for more information.)
6. After you have finished mixing, turn the Speed Control Lever to
OFF and unplug the appliance.
7. Raise the Mixer and press down on the Beater Eject Button to eject
the Beaters or Dough Hooks.
8. Scrape excess batter off the Beaters using a rubber or plastic
spatula. DO NOT strike Beaters on the rim of the bowl.
SPEED SETTINGS
Your Deluxe Hand Mixer has 10 different speed settings. Each setting
on the LOW and HIGH Buttons has 5 speeds/functions. Below is a
guide which details each speed setting and its usage. Please note that
the Turbo Boost-of-Power feature can be used at any speed setting by
depressing the Turbo Boost-of-Power Button. Resume previously selected
speed by releasing Turbo Boost-of-Power Button.
NOTE: DO NOT use Turbo Boost-of-Power feature for more
than 2 minutes at a time as the Motor may overheat and
damage the Mixer.
Speed Function Usage
LOW
1 Fold Use when you start mixing
2 Stir For combining liquids with dry ingredients
3 Mix For mixing batters and dough recipes
4 Blend For blending sauces/gravies and kneading dough
5 Combine For combining light mixtures; for fillings/puddings
HIGH
1 Beat For cake mixes and other light mixtures
2 Cream To cream ingredients for cookies
3 Mash For making mashed potatoes
4Fluff To whip light, fluffy mixtures
5 Whip For whipping cream and aerating eggs
7
Page 8

USER MAINTENANCE INSTRUCTIONS
This appliance requires little maintenance. It contains no user
serviceable parts. Do not try to repair it yourself. Any servicing requiring
disassembly other than cleaning must be performed by a qualified
appliance repair technician.
CARE AND CLEANING
NEVER IMMERSE MOTOR HOUSING IN WATER.
1. Be sure unit is unplugged.
2. Eject Beaters or Dough Hooks from unit and wash them in warm,
soapy water, rinse well and dry thoroughly. The Beaters and Dough
Hooks are dishwasher safe.
3. Wipe Motor Housing with a damp cloth or sponge.
STORAGE
Unplug unit; store in its box in a clean, dry place. Never store it while it
is hot or still plugged in. Never wrap cord tightly around the
appliance. Do not put any stress on the cord where it enters the unit,
as it could cause the cord to fray and break.
STORAGE CADDY AND STORAGE BAG
The space-saving Storage Caddy and Storage Bag both hold the Mixer
and its attachments and keeps them neatly out of the way, but conveniently accessible. The Storage Caddy or Storage Bag can be placed on
a counter top, or inside a cabinet or closet for neat storage.
8
Page 9

RECIPES
EASY CHOCOLATE BUNDT CAKE
1 package (12 oz.) chocolate
chip morsels margarine
1
⁄2cup water 2 cups sugar
1
⁄2cups cake flour 4 eggs
2
2teaspoons baking soda 1 cup buttermilk
1
⁄2teaspoon salt
Melt chocolate in water in a saucepan or microwave oven; allow to cool
slightly. Sift flour with baking powder and salt and set aside. Preheat
oven to 350˚. Grease and flour a 10-inch Bundt pan. Place butter and
sugar in a medium mixing bowl. Start blending at a low speed, increasing to a slightly higher speed.
Use Turbo Boost-of-Power Button when needed. Adding one egg at a
time, blend until the mixture is light and fluffy.
Slowly add chocolate to mixture and continue to beat on a high speed
until all the chocolate is blended into the mixture. Add flour mixture,
alternating with buttermilk, beginning and ending with flour mixture.
Blend at a slow speed just until smooth. Pour batter into pan and bake
for 35-40 min. or until a toothpick inserted in center of the cake comes
out clean. Cool. Frost with Vanilla or Chocolate Butter Cream Frosting
or top with powdered sugar.
Makes: 1 10-inch Bundt cake
1
⁄2cup butter or
VANILLA BUTTER CREAM FROSTING
1
⁄2cup butter or margarine, 3 cups 10x confectioners
softened sugar
2 teaspoon vanilla extract 4 Tablespoons cream
Place all ingredients in a large mixing bowl. Starting at the lowest
speed, begin incorporating sugar into other ingredients. Gradually
increase to a higher speed, and whip until frosting reaches a spreading
consistency. Add more sugar if mixture is too thin and more cream if it
is too thick.
Makes: 2 cups
Frosts: 1 Bundt cake or two 8-inch layers.
CHOCOLATE BUTTER CREAM FROSTING
Add 1⁄3cup cocoa and increase sugar to 31⁄2cups.
9
Page 10

LIMITED ONE-YEAR WARRANTY
Warranty Coverage: This product is warranted to be free from defects in
materials or workmanship for a period of one (1) year from the original purchase date. This product warranty is extended only to the original consumer purchaser of the product and is not transferable. For a period of
one (1) year from the date of original purchase of the product, our Repair
Center will, at its option, either (1) repair the product or (2) replace the
product with a reconditioned comparable model. These remedies are the
purchaser's exclusive remedies under this warranty.
Warranty Service: To obtain warranty service, you must call our warranty
service number at 1-800-233-9054 for return instructions on how to deliver
the product, in either the original packaging or packaging affording an
equal degree of protection to the Repair Center specified below. You must
enclose a copy of your sales receipt or other proof of purchase to demonstrate eligibility for warranty coverage.
To return the appliance, ship to:
ATTN: Repair Center
708 South Missouri Street
Macon, MO 63552 USA
What Is Not Covered: This warranty does not cover damage resulting
from misuse, accident, commercial use, improper service or any other
damage caused by anything other than defects in material or workmanship
during ordinary consumer use. This warranty is invalid if the serial number
has been altered or removed from the product. This warranty is valid only
in the United States and Canada.
LIMITATION ON DAMAGES: THERE SHALL BE NO LIABILITY FOR
ANY INCIDENTAL OR CONSEQUENTIAL DAMAGES FOR BREACH OF
ANY EXPRESS OR IMPLIED WARRANTY OR CONDITION ON THIS
PRODUCT.
To contact us, please write to, call, or email:
Consumer Relations Department
PO Box 7366
Columbia MO 65205-7366 USA
1-800-233-9054
E-mail:
consumer_relations@toastmaster.com
DURATION OF IMPLIED WARRANTIES: EXCEPT TO THE EXTENT
PROHIBITED BY APPLICABLE LAW, ALL IMPLIED WARRANTIES AND
CONDITIONS, INCLUDING, WITHOUT LIMITATION, IMPLIED WARRANTIES AND CONDITIONS OF MERCHANTABILITY AND FITNESS
FOR A PARTICULAR PURPOSE OR USE ON THIS PRODUCT ARE LIMITED IN DURATION TO THE DURATION OF THIS WARRANTY.
Some jurisdictions do not allow the exclusion or limitation of incidental or
consequential damages, or allow limitations on how long an implied warranty lasts, so the above limitations or exclusions may not apply to you.
This warranty gives you specific legal rights and you may have other rights
under the laws of your jurisdiction.
For more information on our products, visit our website: www.maxim-toastmaster.com.
 Loading...