

Page 1
Kuring and Bleaching Center
Kreativ Menu
Manuals
Instructions for Use
Please read this manual thoroughly
prior to first use
CAUTION: This device must only be
purchased by, or sold to, a licensed denti st.
Copyright Notice:
Copyright © 1999, Kreativ, Inc. All rights reserved. No part of this manual may
be reproduced without written permission from Kreativ, Inc.
Manufactured by
Kreativ, Inc. (USA)
9025 Balboa Avenue
San Diego, CA 92123
European Regulatory Manager
Welch Allyn LTD.
Navan, Co. Meath
Republic of Irelan d
Ph: 353-46-79060
990208 Rev D
Page 2

TABLE OF CONTENTS
1. INTRODUCTION AND GENERAL INFORMATION 3
NTRODUCTION
I
URPOSE OF THIS MANUAL
P
ENERAL INFORMATION AND FEATURES
G
URING LIGHT INSTRUMENT DRAWING
K
UNCTIONAL DESCRIPTION
F
PECIFICATIONS
S
2. SAFETY 8
ARNINGS
W
AUTIONS
C
RODUCT SAFETY LABELING
P
ECYCLING INSTRUCTIONS
R
10
3. SYSTEM UNPACKING, SETUP, AND OPERATIONAL VERIFICATION 11
NPACKING
U
ET-UP
S
PERATIONAL VERIFICATION
O
11
11
12
3
3
4
5
5
7
8
8
9
4. OPERATING INSTRUCTIONS 14
PERATION
O
URING MODE
C
LEACHING MODE
B
AMP CALIBRATION
L
ERIFY ON DEMAND
V
14
14
16
17
17
5. STERILIZATION & CLEANING 19
TERILIZATION
S
LEANING
C
19
20
6. PREVENTIVE MAINTENANCE AND TROUBLESHOOTING 21
REVENTIVE MAINTENANCE
P
HANGING THE LAMP
C
HANGING THE FUSES
C
ROUBLESHOOTING
T
URING LIGHT PARTS/ACCESSORIES
K
N-OFFICE POWER BLEACHING
I
ICRODENTISTRY PRODUCTS
M
21
22
23
23
25
25
25
7. WARRANTY, RETURNS AND ADJUSTMENTS 26
ETURNS AND ADJUSTMENTS
R
IMITED WARRANTY
L
TORAGE AND SHIPMENT
S
26
26
27
Page 2 990208 Rev D
Page 3

1. Introduction and General Information
Introduction
The Kreativ Kuring and Bleaching Center is a high-intensity, filtered light
source and optical delivery system. It produces curing light for photoactivated dental composites (400-505nm), and photo-activated bleaching
formulations (400-545nm) at four times the rate of conventional light
systems. The Kreativ Kuring Light cures photo-activated dental materials,
such as those used in direct restorations, sealants, bonding agents, and
primers.
Chapter
1
Every attempt has been made to make this manual a comprehensive
overview of the Kreativ Kuring Light system.
you read this manual thoroughly before you attempt to set up or use
the equipment
.
Purpose of this Manual
This manual should be thoroughly studied before installing and using the
equipment. Please call your nearest authorized Welch Allyn / Kreativ
service representative if you need additional information regarding
installation, operation, or service of the instrument.
Chapter One provides an overview of the system, and covers the use of the
manual, features of the Kreativ Kuring Light, specifications, and other
general information. Also included in this chapter is a functional
description of the unit, which includes a diagram of all user interfaces,
controls, and related items.
Chapter Two is a listing of all product Warnings and Cautions. Warnings
relate to issues that could be harmful to either the user or the patient, while
Cautions cover issues that could unnecessarily damage the equipment.
Please pay special attention to this chapter
It is very important that
.
Chapter Three covers the initial unpacking, set-up, and operational
verification of the unit. This section should also be referred to whenever
Page 3 990208 Rev D
Page 4

the unit is moved from one location to another or stored for extended
periods of time.
Chapter Four is an operational description of the Kreativ Kuring Light.
Chapter Five covers recommended methods of sterilizing and cleaning the
system.
Chapter Six provides preventive maintenance and troubleshooting
procedures. Also included is a replacement part and accessory list for reordering your supplies.
Chapter Seven is the warranty policy for the Kreativ Kuring Light.
General Information and Features
The Kreativ Kuring Light offers the benefit of a rapid cure at a lesser
entry, operation, and maintenance expense than an argon laser. Kreativ
has developed a light source that combines long life and high lumen output
within the spectral bandwidths required for both composite polymerization
and power bleaching.
The unit uses a proprietary lamp to produce energy in the visible spectrum.
This light energy is passed through special dichroic band-pass filters that
pass energy in either the 400-505nm (composite curing) or 400-545nm
(power bleaching) range. This custom filtering delivers the bandwidth of
light matching the response curve for the photo-initiators in photocured
dental material or bleach activation.
Other features of the Kreativ Kuring Light include:
Verify On Demand using the integrated front panel
•
Radiometer. This allows for quick and accurate verification of
the light output level prior to use
Lamp calibration using the front panel Radiometer. Calibration
•
is required after replacing the lamp
Microprocessor control for continuous output regulation,
•
system monitoring, and status notification
Detachable Curing Tip permits autoclave (super-heated, high-
•
pressure steam) sterilization
Three-digit LED readout for monitoring power output and
•
displaying the exposure time
Visual and audio signals indicating exposure time
•
Convenient footswitch control
•
Page 4 990208 Rev D
Page 5
Safety interlocks which prevent lamp operation if the Liquid
•
Light Guide is not properly installed or if the lamp access door
cover is not properly in place
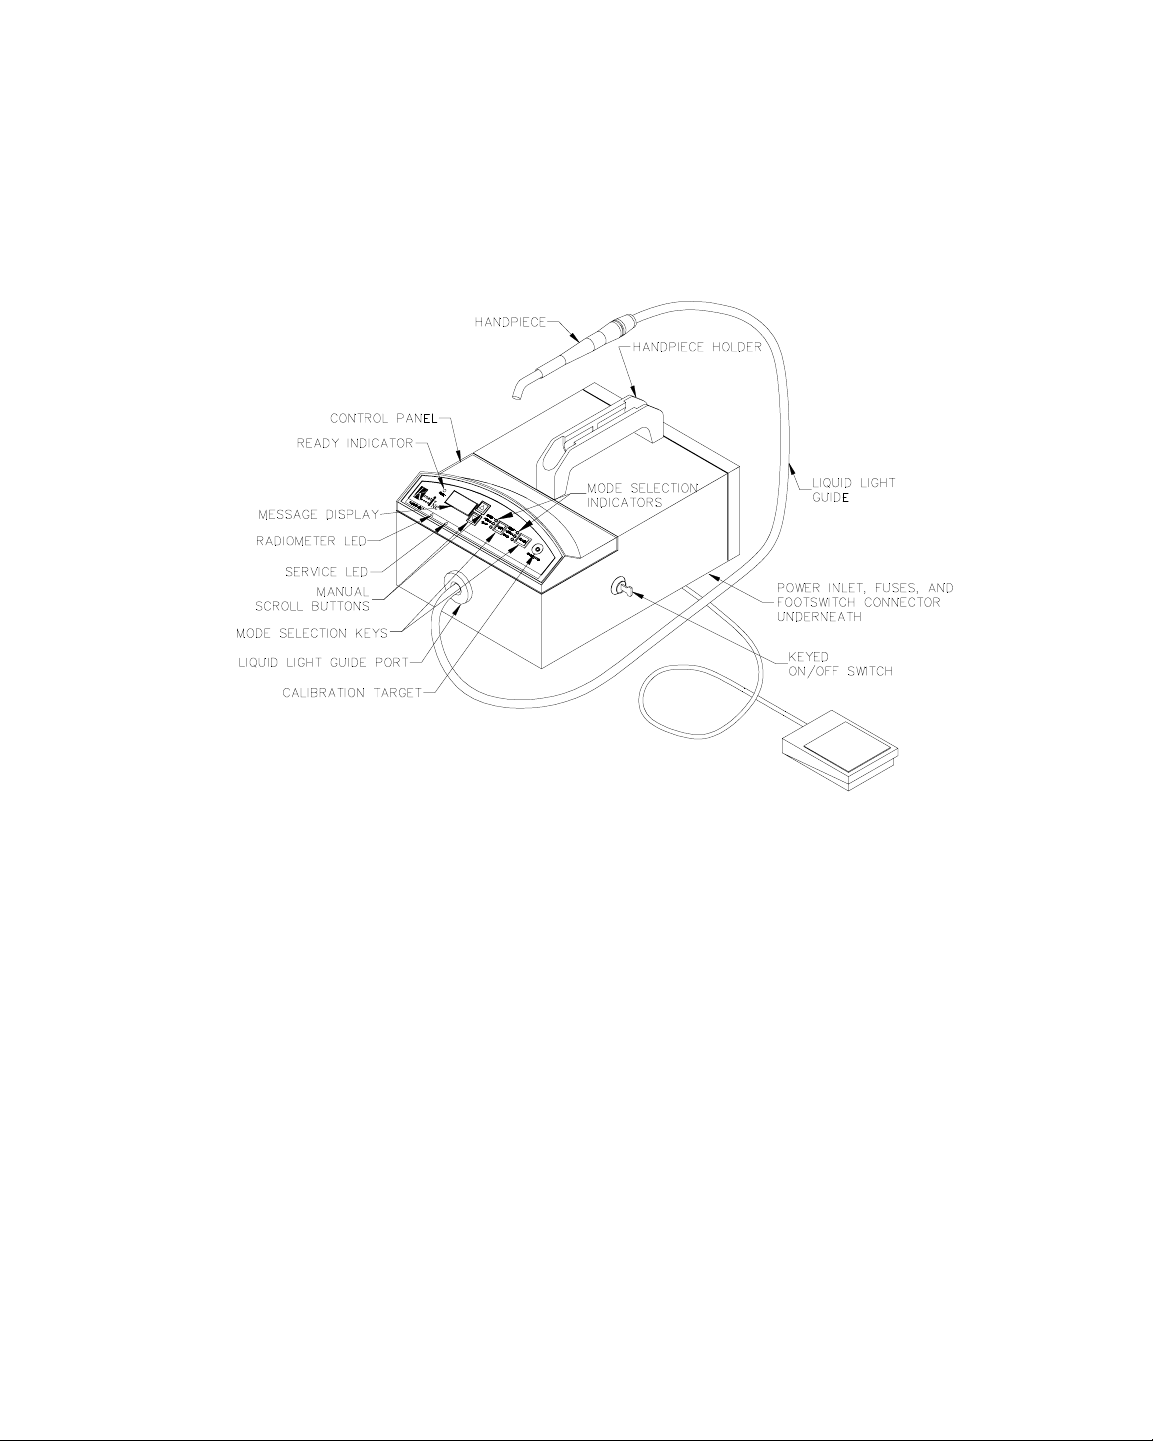
Kuring Light Instrument Drawing
Functional Description
Control Panel
with the user. Removability facilitates the replacement of the lamp.
Ready Indicator -
available for use.
Message Display –
various system messages to the user.
Radiometer LED –
Service LED –
section of this manual.
- This panel contains all modes of control and interface
Figure 1
Indicates when the unit is in “Ready” mode, and
Displays exposure time, lamp output power, and
This LED is lit to indicate the radiometer is in use.
If this LED is lit, please refer to the troubleshooting
Page 5 990208 Rev D
Page 6

Manual Scroll Keys
- These keys are used to enter the calibration mode.
Mode Selection Keys
- The keys allow the user to change the curing and
bleaching mode of the system.
Calibration Target
- This front panel window allows user verification
and calibration of the system. For best results, please read and follow the
calibration and verification instructions carefully.
Mode Selection Indicators
- These lights indicate the currently selected
curing or bleaching mode of the system.
Liquid Light Guide Port
- The Liquid Light Guide interconnects here.
Please ensure proper connection prior to using the system.
Footswitch –
The footswitch activates the Kuring lamp when the Ready
Indicator is lit.
Power Inlet, Fuses and Footswitch Connectors
- These connectors are
located underneath the system.
Keyed On/Off Switch
(indicated by the
l
- This switch must be in the “on” position
symbol, see page 9) for the system to be used.
Liquid Light Guide –
The Liquid Light Guide transmits the light energy
from the Kuring unit to the Handpiece. SPECIAL CARE SHOULD BE
TAKEN NOT TO KINK OR SHARPLY BEND THE LIQUID LIGHT
GUIDE. Refer to the appropriate section of this manual for care and
cleaning of the light guide.
Handpiece –
The Handpiece is used to direct the light output onto the
intended target.
Handpiece Holder
- This holds the Handpiece when not in use.
Page 6 990208 Rev D
Page 7
Specifications
For further technical information, please contact your nearest authorized
Welch Allyn / Kreativ service representative.
Power Input 100-240 V~, 50/60 Hz, 4-1.6 A
240 V Operation In the U.S. only, 240 Vac operation must be
Weight 6.35 kg (14 lbs.)
Dimensions 19.7cm H x 35.5cm L x 24cm W
Beam Delivery 1.7 meter (6’) Liquid Light Guide
with a center-tapped, single-phase supply
circuit.
(7.75” x 14” x 9.5”)
with detachable Handpiece and Curing Tip
Curing Power Output Approx. 0.25-1.40 W/cm
2
(depending on mode selection)
Available Output Spectrums
Curing Mode 400 – 505 nm
Bleaching Mode 400 – 545 nm
Operating Environmental Limitations
Temperature +10° C to 40° C (50° F to 104° F)
Humidity 10 % to 90 % non-condensing
Pressure 50 kPa to 106 kPa (7.25 to 15.37 psia)
Storage/Transport Environmental Limitations
Temperature +10° C to 50° C (50° F to 122° F)
Humidity 10 % to 90 % non-condensing
Pressure 50 kPa to 106 kPa (7.25 to 15.37 psia)
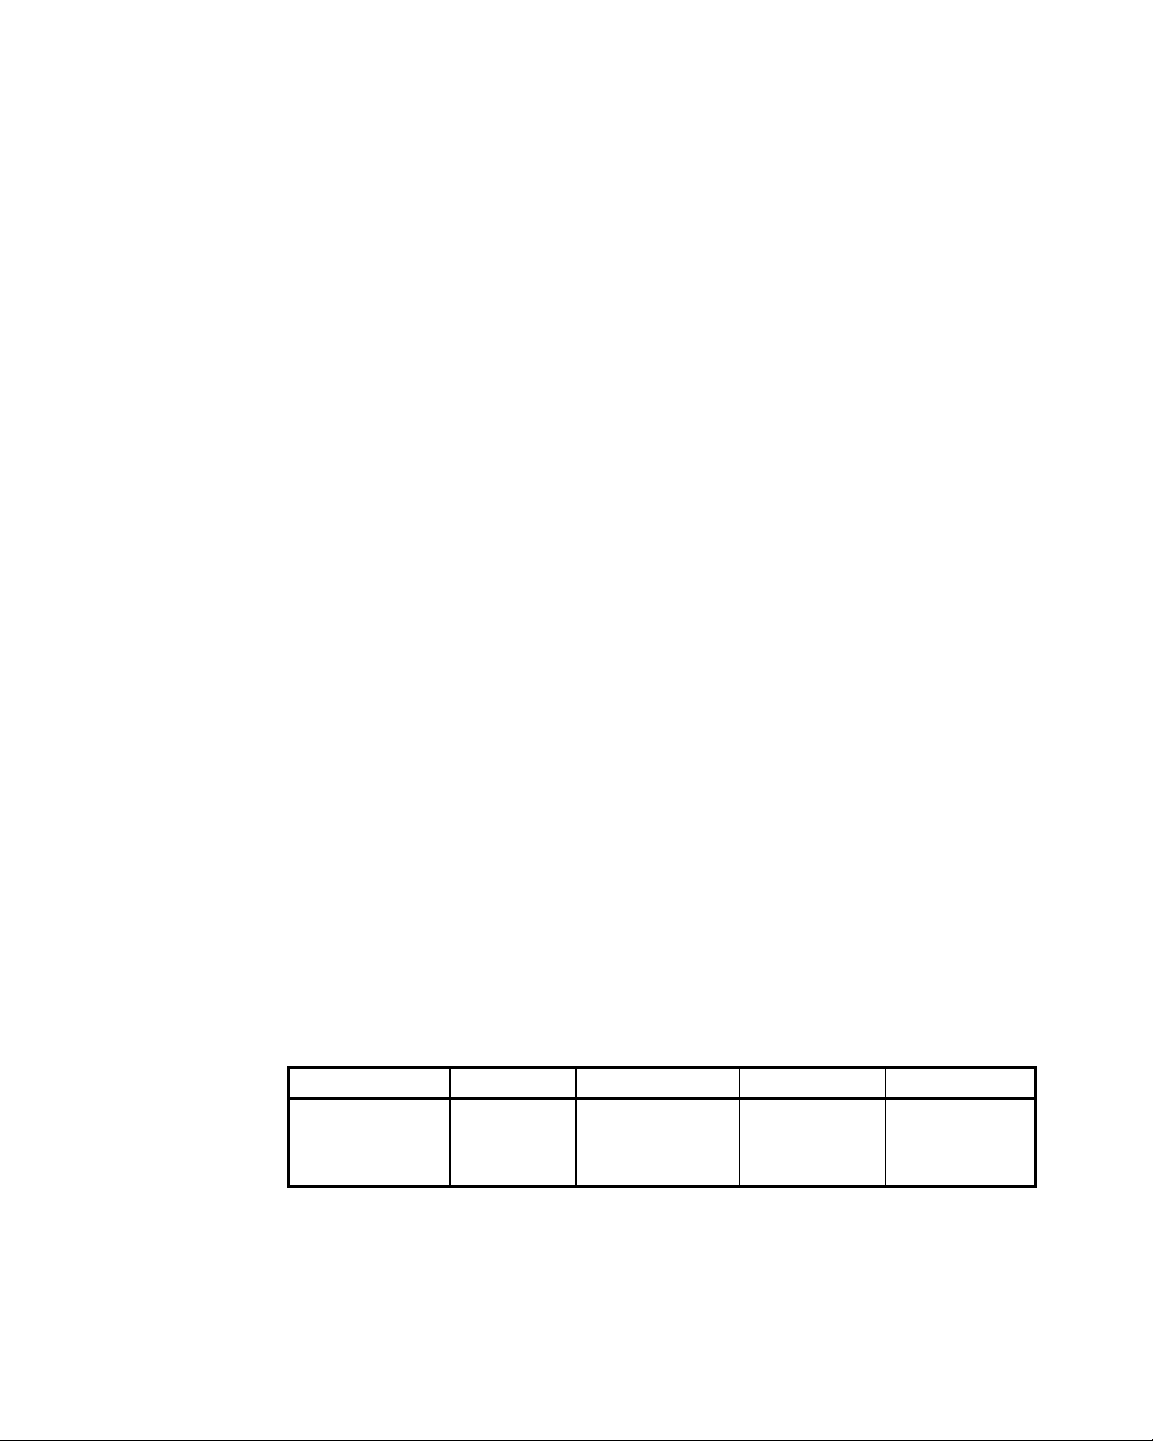
Electrical Fuses: Littelfuse, Slo Blo
Model Fuse Mfr. Mfr. P/N Kreativ P/N Fuse Rating
Kuring Light
Littelfuse Type 218-02.5 600101 5A, 250Vac
Domestic and
European
Page 7 990208 Rev D
Page 8

2. Safety
Warnings
Chapter
2
WARNING:
the Liquid Light Guide, or the end of the Curing Tip.
WARNING:
with the Kreativ Kure Light wavelength and power intensity, to provide
proper eye protection. Failure to follow these precautions can result in
temporary and/or permanent eye damage. All persons in the vicinity of the
Kure Light must wear safety eyewear.
WARNING:
from the Curing Tip. The light from this and other visible curing lamps is
absorbed in soft tissues, causing mild heat.
WARNING:
to heed this warning may result in equipment damage and/or personal
injury.
WARNING:
sharp. Handle with extreme care.
WARNING:
environment is free of flammable or dangerous chemicals, and that it is
safe to operate the Kure Light.
Do not look directly into the light exit window, the end of
Use only Kreativ safety goggles, which have been matched
Do not expose soft tissues unnecessarily to the direct output
Do not attempt to internally service the Kure Light. Failure
If the lamp or reflector breaks, the glass pieces are very
It is the user’s responsibility to determine that the operating
Cautions
WARNING:
Ensure that the output surface is smooth and even and free from sharp
edges. Never use a Curing Tip that has been damaged.
CAUTION:
supplied by Kreativ, and do not attempt to operate the unit with the Liquid
Light Guide removed.
Prior to every use, inspect the Curing Tip for damage.
Do not use any light guide other than the Liquid Light Guide
Page 8 990208 Rev D
Page 9
CAUTION:
bent. Do not bend tighter than a 6-inch radius. Do not autoclave the
Liquid Light Guide.
Protect the Liquid Light Guide from being crushed or tightly
CAUTION:
disinfecting or chemical autoclaving solutions (vapo-sterile or
formaldehyde based solutions) which can result in discoloration and
damage.
CAUTION:
unit off and remove the key.
CAUTION:
licensed dentist.
CAUTION:
alcohol before it is to be used to calibrate or verify light output levels.
CAUTION:
thoroughly for loose or damaged parts before using it again.
CAUTION:
held no closer than 2 cm (0.8”).
The Handpiece and Curing Tip should not be exposed to
To avoid unintentional activation when not in use, shut the
This device should only be purchased by, or sold to, a
Clean the front panel Radiometer target area with isopropyl
If the unit has been dropped, unplug and safety check it very
When curing Kreativ PowerBlock, the Curing Tip should be
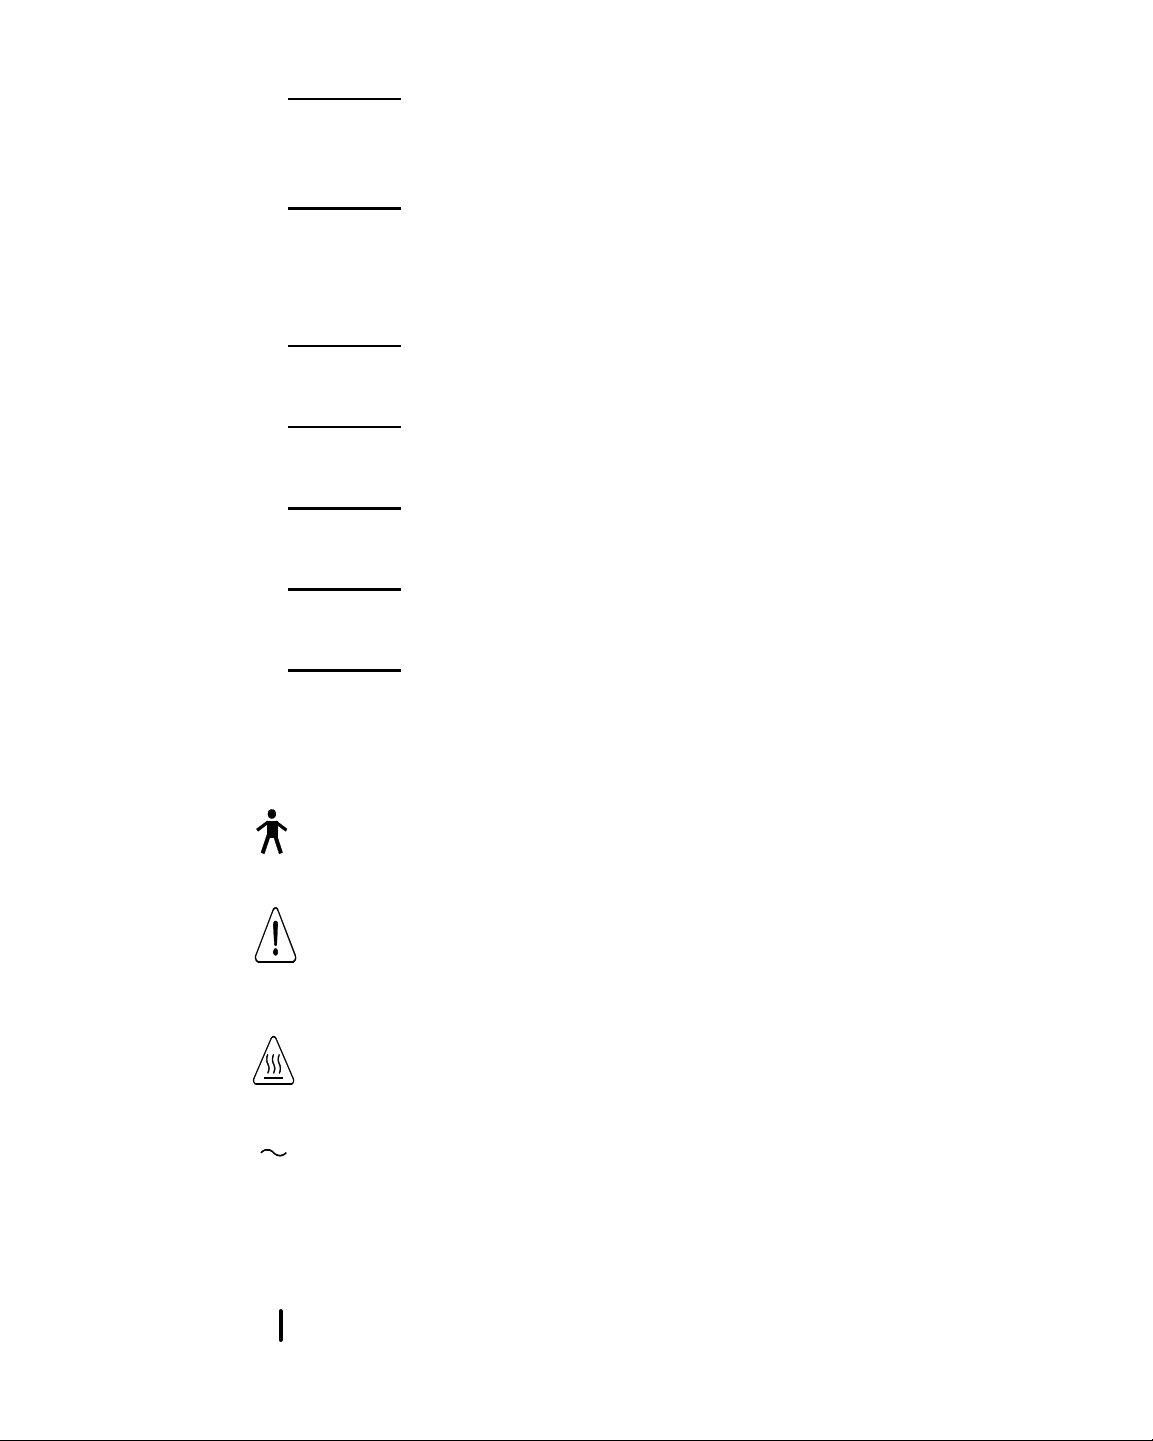
Product Safety Labeling
!
Type B equipment (defines the degree of protection against
electrical shock)
Refer to Operator’s Manual
Caution - Heat
Alternating Current (AC)
Off
On
Page 9 990208 Rev D
Page 10

Recycling Instructions
Device:
Bottom pan and top cover of the housing should be recycled as steel or
•
aluminum.
Plastic parts should be removed from the metal pads before recycling
•
(e.g., power inlet, footswitch connector, main switch, etc.)
All printed circuit boards should be recycled as electronic devices.
•
Accessories:
All spare parts should be recycled according to the instructions above.
•
Products that have been in contact with the patient need to be cleaned
•
and sterilized as described in this manual.
Packaging:
The carton, all other plastics, and inserts should be recycled
•
(cardboard, foam, polyethylene).
ALL RECYCLING MUST BE IN COMPLIANCE WITH THE
RELEVANT NATIONAL LAWS. GOVERNMENT AUTHORIZED
RECYCLING CENTERS MUST BE USED.
ENVIRONMENTAL RELEVANT MATERIALS:
COMPONENTS LIST OF MATERIALS
Enclosure and all brackets Steel, Aluminum
FR ABS, Delrin
Printed Circuit Boards Epoxy
FR4
Light Pipes Steel
Aluminum
Glass
Saline Solution
Fluoropolymer Tubing
THERE ARE NO HAZARDOUS MATERIALS PRESENT IN THIS PRODUCT.
Page 10 990208 Rev D
Page 11

Chapter
3
3.
System Unpacking, Setup, and Operational Verification
Unpacking
Set-up
Carefully remove the unit from the shipping container and inspect for
shipping damage. Should any sign of shipping damage be evident, please
contact your nearest authorized Welch Allyn / Kreativ service
representative immediately. Keep all shipping containers in the unlikely
event that the unit needs to be returned for repair.
WARNING:
with the wavelength and power intensity of the instrument to provide
proper eye protection. Failure to follow these precautions can result in
temporary and/or permanent eye damage. All persons in the vicinity of the
Kure Light must wear safety eyewear.
WARNING:
light exit window, the end of the Liquid Light Guide, or the end of the
Curing Tip.
Use only Kreativ safety goggles, which have been matched
To prevent damage to the eye, do not look directly into the
Verify receipt of all appropriate accessories using the checklist enclosed
with your Kuring Light.
Plug the footswitch cable connector into the bottom of the Kuring Light.
Plug the AC power cord into the bottom of the unit. It is important that
this is plugged in tightly to the Kuring Light. Plug the other end into a
properly grounded AC wall socket of the correct voltage. If a wall switch
activates the AC outlet, be sure this switch is “on” and the outlet has
power.
Clean the Liquid Light Guide and Handpiece. To do this, use isopropyl
alcohol on a cotton swab and clean both ends of the light guide. Be sure to
swab both the tip of the Handpiece as well as the internal window to
which the light guide couples.
Page 11 990208 Rev D
Page 12

Daily cleaning of the light guide and Handpiece is important for
Install the longer metal coupling of the Liquid Light Guide into the front
of the Kuring Light console. Be sure it is inserted all the way into the
console. Insert the shorter end of the light guide into the Handpiece.
When positioning the Kuring Light for use, be sure that it is positioned so
that the Liquid Light Guide is not subject to extreme bends. Whenever
possible, face the light guide output of the console towards the working
area, thus reducing the necessary bending of the light guide.
If the light guide is bent too severely it may be kinked and cause
Operational Verification
Once the unit has been set up, turn the unit on. The keyed power switch is
located on the side of the unit.
proper system performance
permanent damage.
.
Calibration
: When you first receive the unit, it is recommended that you
perform a lamp calibration. Calibration should be performed whenever
Verify On Demand indicates decreased output levels.
To perform a calibration:
1. Clean the Liquid Light Guide, Handpiece and the Radiometer Target
before attempting to calibrate. DO NOT use steri-shield sheaths when
calibrating.
2. Put on safety goggles.
3. Operate the unit for at least 1 minute to achieve proper operating
temperatures.
4. From the ready state (“On” is displayed), press either scroll key until
the “CAL” message appears.
5. Hold the flat tip of the Handpiece flush against the front panel
Radiometer Target.
6. Press the footswitch and hold it down. Notice that light output will
change color towards the end of the procedure. The lamp will
automatically turn off and the digital readout will display the word
“On”.
7. When the word “On” is displayed, calibration is complete.
Once calibration is complete, you can verify the light output of the system.
Page 12 990208 Rev D
Page 13

Verify On Demand
output of the light on a regular basis. It is recommended that you
- “Verify On Demand” is used to check the power
verify
light output at least once per day, and before every bleaching
procedure
.
To perform a verification:
1. Clean Liquid Light Guide and Handpiece. Do NOT use steri-shield
sheaths when performing the verification.
2. Put on safety goggles.
3. Turn the unit ON.
4. Verify On Demand can be used in any mode
except
Ramp.
5. From the ready state (“On” is displayed), depress the footswitch to
activate the lamp and wait five seconds.
6. After the lamp has been on for five seconds or more, move the tip of
Handpiece flush onto the calibration target. The output level will be
continuously read and displayed for 5 seconds, after which the
maximum value achieved during the reading will be displayed.
7. The following are nominal Watts/cm2 readings for each mode:
Kure Modes: Nominal (Useable Minimum)
Ramp Kure
Normal Kure 1.0 Watts/cm
Boost Kure 1.2 Watts/cm
Verify Not Available
2
2
(0.80 W/cm2 min.)
(1.00 W/cm2 min.)
Bleach Modes:
Comfort Bleach 1.0 Watts/cm
Normal Bleach 1.2 Watts/cm
Boost Bleach 1.4 Watts/cm
2
2
2
(1.00 W/cm2 min.)
(1.20 W/cm2 min.)
Once the light output meets the expected verification value, the system is
validated at normal levels and is ready to use.
Page 13 990208 Rev D
Page 14

4. Operating Instructions
Operation
Chapter
4
WARNING:
with the wavelength and power intensity of the instrument to provide
proper eye protection. Failure to follow these precautions can result in
temporary and/or permanent eye damage. All persons in the vicinity of the
Kuring Light must wear safety eyewear.
WARNING:
held no closer than 2 cm (0.8”).
Before each use, check the Curing Tip surface to ensure it is clean and
without damage or sharp edges. Verify proper light output using the
“Verify On Demand” feature. Light output should be at the nominal
values depending on the selected mode.
Place the Curing Tip within 4 mm (0.16”) of the restorative material,
sealant, primer, bonding agent, or bleach. Be sure to follow the specific
instructions included with the material to be photo-activated.
Your Kuring Light comes with two Handpieces with 8.0 mm Curing Tips.
Curing Mode
Use only Kreativ safety goggles, which have been matched
When curing Kreativ PowerBlock, the Curing Tip should be
Kreativ Inc., a subsidiary of Welch Allyn, offers a comprehensive line of
economical, easy to use, high quality MicroDentistry products designed
specifically for best results with the Kreativ Kuring and Bleaching Center
you now own.
Page 14 990208 Rev D
Page 15

We are proud of our line of restorative materials, sealants, primers,
bonding agents and PowerGel™ photo-specific bleach, and we encourage
all of our customers to try them. We are confident that you will appreciate
the difference. A complete list of our available MicroDentistry products is
included with your Kuring Light.
Consult the material manufacturer's instructions for the recommended
curing time.
Using the Mode Selection Keys, select the Mode you desire. Press the
footswitch to initiate the cycle. The unit will beep at the beginning and
every 5 seconds thereafter. The exposure time for the cycle is displayed in
seconds.
Normal Kure Mode
5 seconds
with the Kreativ Kuring Light equals
20 seconds
with a
conventional curing light.
Use the Kreativ Kuring Light for 5 seconds when the manufacturer's
recommendation is 20 seconds for the curing of a material. This timing is
achieved by releasing the footswitch when the first 5-second beep is heard.
10 seconds
with the Kreativ Kuring Light equals
40 seconds
with a
conventional curing light.
When the manufacturer's recommendation is 40 seconds for the curing of a
material, using the Kreativ Kuring Light for 10 seconds will equal a full
curing cycle. This timing is indicated by the second 5-second beep.
Boost Kure Mode
This mode increases the curing rate approximately 20% from Normal
Mode. This mode may be used when it is felt that extra power or faster
curing is required.
Ramp Kure™ Mode
This mode utilizes the microprocessor to “ramp’ the lamp power over a
specific time period. This type of curing process optimizes the physical
characteristics of the restoration by precisely controlling the rate of the
Page 15 990208 Rev D
Page 16

polymerization process. This reduces micro-gapping and shrinkage and
ensures the highest degree of polymerization possible.
Ramp Kure will work well with most common composites, but it has been
specifically programmed for Kreativ’s MicroFlow™ composite material.
Please contact your nearest authorized Welch Allyn / Kreativ service
representative for more information.
Bleaching Mode
Consult the manufacturer's directions for the appropriate activation time.
The Kreativ Kuring Light has wavelength limiting filters designed
specifically for photo-thermal accelerators, such as Kreativ’s PowerGel™
photo-specific bleach.
Kreativ PowerGel will give you the best bleaching results with your new
Kuring Light due to its photo-specific chemistry. It is the perfect
complement to your new Kuring Light.
Depress the footswitch to initiate the cycle. The unit will beep at the
beginning and every 60 seconds thereafter. The exposure time, in minutes
and seconds, is displayed.
Normal Bleach Mode
The Kreativ Kuring Light generally produces the same results as a
conventional visible light source in one-fourth (25%) of the time.
Boost Bleach Mode
This mode increases the light output power (i.e., photo-thermal energy)
approximately 20% above the Normal Bleach Mode. Use this mode when
extra power or faster activation is desired.
Comfort Bleach Mode
This mode provides a reduced lamp output from the Normal Bleach Mode.
This creates a slower photo-thermal activation of the bleach and may
increase the comfort of patients with certain types of sensitivity.
Page 16 990208 Rev D
Page 17

Lamp Calibration
Calibration
perform a lamp calibration. Calibration should be performed whenever
Verify On Demand indicates decreased output levels, or after replacing the
lamp.
To perform a calibration:
1. Clean the Liquid Light Guide, Handpiece and the Radiometer Target
before attempting to calibrate. DO NOT use steri-shield sheaths when
calibrating.
2. Put on safety goggles.
3. Operate the unit for at least 1 minute to achieve proper operating
temperatures.
4. From the ready state (“On” is displayed), press either scroll key until
the “CAL” message appears.
5. Hold the flat tip of the Handpiece flush against the front panel
Radiometer Target.
6. Press the footswitch and hold it down. Notice that light output will
change color towards the end of the procedure. The lamp will
automatically turn off and the digital readout will display the word
“On”.
: When you first receive the unit, it is recommended that you
7. When the word “On” is displayed, calibration is complete.
Once calibration is complete, you can verify the light output of the system.
Verify On Demand
Verify On Demand is used to check the power output of the light on a
regular basis. It is recommended that you
once per day, and before every bleaching procedure
To perform a verification:
1. Clean Liquid Light Guide and Handpiece. Do NOT use steri-shield
sheaths when performing the verification.
2. Put on safety goggles.
3. Turn the unit ON.
4. Verify on Demand can be used in any mode
verify light output at least
.
except
Ramp.
Page 17 990208 Rev D
Page 18

5. From the ready state (“On” is displayed), depress the footswitch to
activate the lamp and wait five seconds.
6. After the lamp has been on for five seconds or more, move the tip of
Handpiece flush onto the calibration target. The output level will be
continuously read and displayed for 5 seconds, after which the
maximum value achieved during the reading will be displayed.
7. The following are acceptable minimum Watts/cm2 readings for each
mode:
Kure Modes: Nominal (Useable Minimum)
Ramp Kure
Verify Not Available
Normal Kure 1.00 Watts/cm
Boost Kure 1.20 Watts/ cm
Bleach Modes:
Comfort Bleach 1.00 Watts/cm
Normal Bleach 1.20 Watts/cm
Boost Bleach 1.40 Watts/cm
2
2
2
2
2
(0.80 W/cm2 min.)
(1.00 W/cm2 min.)
(1.00 W/cm2 min.)
(1.20 W/cm2 min.)
Page 18 990208 Rev D
Page 19

5. Sterilization & Cleaning
Sterilization
Chapter
5
CAUTION:
autoclaving, as this will damage the light guide.
CAUTION:
prior to autoclaving.
CAUTION:
disinfecting or chemical autoclaving solutions (vapo-sterile or
formaldehyde based solutions) which can result in discoloration and
damage.
The Handpiece and Curing Tip can be protected from contamination and
patient contact with the steri-shield sheath. Discard the sleeve after each
use and replace it with a new one prior to next pati ent usage. Ensure that
the sleeve fits snugly over the output end of the Handpiece.
If the sheath has been jeopardized, or there is any patient contact above the
sheath, sterilization of the Handpiece must be performed using a
conventional dental autoclave. Placing the Handpiece in a sealed
autoclave bag is recommended.
PLEASE NOTE: The steri-shield sheaths do reduce light output. The
Curing Tips and Handpiece are autoclavable and may be used without a
sheath if desired, as long as proper asepsis standards are maintained.
The Liquid Light Guide should
The Handpiece should
The Handpiece and Curing Tip should
be subjected to ultrasonic cleaning
not
be subjected to
not
be exposed to
not
After the sterilization process, the input and output faces of the Curing Tip
should be examined for contamination and any sharp edges at the tip.
These faces may be cleaned by gently wiping with de-ionized water
followed by isopropyl alcohol, using a lint-free wipe or cotton swab.
Page 19 990208 Rev D
Page 20

Cleaning
CAUTION:
CAUTION:
CAUTION:
Always turn off the unit and unplug it prior to cleaning.
Do not use solvents or sharp instruments to clean the unit.
Never apply aerosol or pump sprays directly or near the
Kreativ Kuring Light. Airborne sprays can contaminate the optics.
The Liquid Light Guide, the Curing Tip, and the Handpiece should be
wiped with de-ionized water using a lint-free wipe or cotton swab,
followed by isopropyl alcohol between each use.
The front panel Calibration Target should be cleaned with isopropyl
alcohol before verifying the light output between patients.
Unit surfaces (except for light ports) may be cleaned with commercial
cleaning products, including mild, non-abrasive household cleaners.
Aerosol or pump sprays should not be used near the Kreativ Kuring Light.
Airborne sprays can contaminate the optics. If spray cleaners are used,
spray them onto a soft, clean cloth and use that as an applicator. Never
clean with harsh chemicals, abrasives, or detergents.
Page 20 990208 Rev D
Page 21

6. Preventiv e Maintenance and Troubleshooting
Preventive Maintenance
Chapter
6
WARNING:
any maintenance.
The Kreativ Kuring Light has been designed to be trouble-free and easy to
use. Standard cleaning procedures will keep your Kreativ Kuring Light
looking new for years to come. Periodic inspection of the power cord and
Liquid Light Guide is prudent. If any of these parts appear worn contact
your authorized Welch Allyn / Kreativ Service Center for replacement
parts.
Care should be taken to follow the cleaning and sterilization procedures in
Chapter 5. Deviation from these procedures can result in damage to
optical components, jeopardizing the unit’s performance.
Always turn off the unit and unplug it prior to performing
Figure 2
Page 21 990208 Rev D
Page 22

Changing the Lamp
WARNING:
If the lamp or reflector breaks, the glass pieces are very
sharp. Handle with extreme care.
CAUTION
: When handling the lamp do
touch the inside of the
not
reflector or the burner. Only touch the outside of the reflector.
Kreativ has developed the Light Source (lamp) to optimize light output
and minimize infrared energy delivered to the patient. Substitution of any
lamp other than those supplied by Kreativ will limit effectiveness, may
damage the system, and possibly deliver inappropriate energy levels to the
patient. In addition, the use of any lamp other than those supplied by
Kreativ will void any warranty.
To remove the old lamp
:
1. Allow the cooling fan to run for at least three minutes before
continuing.
2. Turn the unit off and unplug it.
3. Pull off the control panel as shown in Figure 2.
4. Turn the two thumbscrews holding the lamp door counterclockwise to
free the lamp door. Remove the lamp door.
5. Using the tip of one finger, pull back and up on the edge of the lamp
reflector (be sure it has cooled first). The lamp will be unseated and
released by the two retaining fingers.
6. Pull the lamp reflector and its connector out of the unit.
7. Unplug the lamp from its electrical connector.
To install the new lamp
CAUTION
: When handling the lamp do
:
touch the inside of the
not
reflector or the burner. Only touch the outside of the reflector.
1. Plug the lamp into the electrical connector, ensuring a firm fit.
Be
careful not to touch the inside of the reflector or the bulb portion of the
lamp (burner).
2. Find the tab on the edge of the reflector. This indicates the top of the bulb.
3. Slide the bulb down between the retaining fingers and the lamp mount,
being sure that the tab on the reflector remains positioned at the top.
4. The bulb will fit flat into the circular seat when installe d properly.
5. Ensure the lamp connecting wires are located away from the fan blades.
Page 22 990208 Rev D
Page 23

6. Replace the lamp door and retain with the thumbscrews (turn clockwise to
tighten).
7. Replace the control panel.
8. Plug the unit in and perform a Lamp Calibration Procedure (page 17),
then a Verify on Demand Procedure (page 17) to verify light output.
Changing the Fuses
To check/change the fuses
1. Turn the unit off and unplug it from the wall outlet.
2. Turn the unit over and remove the power cable from its socket
underneath the unit.
3. Nex t to the power cable socket is a fl at bl ack rectangular area. Usin g a
small flat blade screwdriver, pry this black rectangle away from the
unit.
4. The two (2) fuses are now free for inspection. If they appear damaged,
replace only with fuses of the same type and rating. See page 7 for
fuse specifications and part numbers to use when ordering.
5. Install by reversing the above procedure.
6. PLEASE NOTE: Frequent fuse blowing indicates a more serious
electrical problem. Please discontinue use, unplug the unit, and
contact your nearest authorized Welch Allyn / Kreativ service
representative.
(see Figure 2 on page 21):
Troubleshooting
The only user-serviceable parts in the Kreativ Kuring Light are the lamp
and AC fuses. The following table is intended to assist in communicating
with the your authorized Welch Allyn / Kreativ service representative.
CONDITION: THINGS TO DO:
Unit won’t power up
Check that power cord is plugged in
•
Check On/Off switch
•
Check fuses (see instructions)
•
Ensure that cable is plugged into the
•
Control Panel.
Page 23 990208 Rev D
Page 24

“E01” is displayed
Change the lamp (see instructions)
•
“E02” is displayed
“E03” is displayed
“E08” is displayed
“E11” is displayed
“E12” is displayed
“E14” is displayed
Verify the lamp access door is snapped in
•
place and the Liquid Light Guide is fully
plugged into its receptacle
Restart the unit; if problem continues,
•
replace lamp
Ensure that cable is securely plugged into
•
the Control Panel
Check that the fan is working; wait for cool
•
down, restart unit
Release footswitch and restart
•
Tip was not on Radiometer target before
•
footswitch was depressed; release
footswitch and start calibration over.
Tip was not left on Radiometer target long
•
enough during calibration; restart the unit
and leave the Tip in place until the
calibration is completed
“E15” is displayed
“E03”, “E06”, “E10”
during calibration
Any other “Error
Code”
Unit will not reach
“Ready” state
There is an optical filter selection error
•
during calibration. Be sure unit is in Kure
Normal mode, re-calibrate
Repeat calibration; be sure the Tip and the
•
Radiometer surface are clean
Ensure that no sheath is being used on the
•
tip during calibration
Be sure the Tip is centered on the
•
Radiometer window during calibration
Call your nearest authorized Welch Allyn /
•
Kreativ service representative.
Call your nearest authorized Welch Allyn /
•
Kreativ service representative.
Page 24 990208 Rev D
Page 25

Service LED is turned
on
Call your nearest authorized Welch Allyn /
•
Kreativ service representative.
Light Guide and
Curing Tip will not
connect properly
Light Guide ends or
the Curing Tip end
appear scratched or
damaged
•
•
Kuring Light Parts/Accessories
Description Reorder #
Replacement Lamp 170134
Handpiece Assembly 8mm 135001-2
Liquid Light Guide 1.7m 210098
Orange Safety Goggles 140016
Steri Shield Sheaths 140017
Safety Cone, 8mm Tip 210126
Call your nearest authorized Welch Allyn /
Kreativ service representative.
Call your nearest authorized Welch Allyn /
Kreativ service representative.
Tack Tips, 8mm 600160
Footswitch Assembly 180063
Fuse, 5 A, 250 V 600101
In-Office Power Bleaching
PowerGel™ Bleach, 2 arch kit 130102
PowerGel™ Bleach, 8 arch kit 140020
PowerBlock Gingival Barrier (4) 140026
Cheek Retractors, small 480064
Cheek Retractors, medium 480067
Cheek Retractors, large 480066
MicroDentistry Products
Please call your Welch Allyn / Kreativ sales representative for a complete
selection of our superior MicroDentistry products.
Page 25 990208 Rev D
Page 26

7. Warranty , Returns and Adjustments
Returns and Adjustments
Warranty claims must be made promptly and received by your nearest
authorized Welch Allyn / Kreativ service representative during the
warranty period. The liability of Kreativ Inc., under valid warranty claims,
is limited to repair or replacement at the purchaser’s authorized Welch
Allyn / Kreativ Service Center or the purchaser’s place of business, at the
option of the authorized service representative. If it is necessary to return
a product for repair or replacement, authorization for the return must first
be obtained from the authorized service representative
Chapter
7
All products returned for examination or warranty repair must be sent
insured via a means of transportation specified by the authorized service
representative.
Kreativ, Inc., or its authorized service representative claims the sole
responsibility for determining the cause of any instrument failure.
Limited Warranty
Kreativ Inc. warrants the equipment to be free from defects in material and
workmanship for a period of 12 months from the date of shipment.
Damage due to failure of customer to perform required user/preventive
maintenance is not warranteed. Certain components having limited life
expectancy (bulbs, handpieces and liquid light guides) are not warranteed
against normal wear and tear or customer damage. This limited warranty
applies only to the original purchaser / user of the equipment.
The foregoing limited warranty is exclusive and in lieu of all other
warranties, whether written, oral, or implied, and shall be purchaser’s sole
remedy and Kreativ’s sole liability under contract or warranty or otherwise
for the product.
Page 26 990208 Rev D
Page 27

Kreativ, Inc. disclaims any implied warranty of merchantability or fitness
for particular purposes. In no event shall Kreativ, Inc. be liable for any
incidental or consequential damages, or for any incidental or consequential
damages arising out of, or in connection with, the use or performance of
the product delivered hereunder.
Storage And Shipment
The Kreativ Kuring Light has been designed for long term usage in normal
dental office environments. If it is to be stored for any reason for a long
period, it should be covered to protect it from adverse conditions. The
area it is to be stored in should meet the Environmental Limitations
Transport and Storage Requirements indicated in the Specifications
section of Chapter 1.
The unit has been designed for shipment by normal commercial carriers.
Protective packaging should be used, and the original packing materials
should be reinstalled for shipment. Shipping instructions must be
followed closely. The customer will be responsible for damage resulting
from improper packing.
Page 27 990208 Rev D
 Loading...