Page 1

GE Inspection Technologies
Mobile hardness tester
with the double assignment.
Ultrasonics Ultrasonics
GE Inspection Technologies
Krautkramer MIC 20
When to choose which method?
The UCI method is recommended for testing fine-grained materials having almost
any shapes and sizes. It is especially used
whenever material properties have to be
determined within close tolerances. The
small UCI probes equipped with a Vickers
diamond are also a good choice for hardness testing on welded components, most
of all for the critical heat-affected zone.
Rebound hardness testing is mainly carried
out on large components having rough sur
surface structure, as well as on cast mate
rials of all kinds.
The MIC 20 consequently places the
complete range of applications at your
disposal. For example UCI testing:
• on ready-assembled machines
• in the heat-affected zone of a weld (e.g.
pipeline)
• on coatings (e.g. printing industry)
• on hardened surfaces (e.g. tooth flanks
-
or tooth gullet)
faces, on forgings having an inhomogeneous
Specifications and Accessories
Test methods
UCI method: hardness testing with an indenter
according to Vickers, evaluation of the test
indentation under load.
Rebound method according to the ASTM standard
specification A956: dynamic test method with a
ratio of rebound (Rp) and impact (Ip) speed with
hardness output in Leeb HL = 1000 Rp/Ip
UCI probes
To be selected according to application:
Handheld probes:
10 N (1 kgf) standard MIC 201-A
short MIC 201-AS
extended MIC 201-AL
50 N (5 kgf) standard MIC 205-A
short MIC 205-AS
extended MIC 205-AL
98 N (10 kgf) standard MIC 2010-A
Motor probes:
8.6 N (0.9 kgf) MIC 211
3 N (0.3 kgf) MIC 2103-A
1 N (0.1 kgf) MIC 2101-A
Rebound impact devices
To be selected according to application:
Ø 3 mm spherical tungsten carbide
metal tip Dyna D
Ø 5 mm spherical tungsten carbide
metal tip Dyna G
Diamond test tip Dyna E
Measuring ranges/conversions (UCI)
20-1740 HV / 76-618 HB / 41-105 HRB /
20.3-68.0 HRC / 255-2180 N/mm² (only with
98 N/10 kgf handheld probe)
Measuring ranges/conversions (rebound)
Depending on material group and impact device:
150-1000 HL / 75-1000 HV / 75-700 HB / 30100 HS / 35-100 HRB / 19-70 HRC /
250-2200 N/mm²
Display
Color display or color TFT display, 1/4 VGA,
5.7”, 115.2 mm x 76.8 mm / 4.5” x 3.0”
Diaolog languages
German, English (among others)
Conversion
Automatically according to DIN 50150,
ASTM E 140
Evaluation
Representation of test data as a curve, histogram,
or in tabular form; calculation of statistical data,
e.g.: average, standard deviation, range
Automatic instrument shutdown
After a user-selectable period of time with automatic saving of test data and instrument settings
Keyboard
Sealed membrane keypad with integrated touch
screen
For example rebound hardness testing:
-
• on motor units or machine parts made
of steel and cast aluminum alloys
• on solid, coarse-grained components
having a surface as rolled
• on large series parts during the produc
tion
• for material differentiation in material
depots
• on wrought copper alloys.
Operating time
With NiMH battery pack MIC 20-BAT approx.
4 hours in continuous operations
Battery charge indicator
Low-Batt indicator, instrument shutdown with
low voltage
Operating system
WinCE
Interfaces
RS 232 bidirectional, Ethernet 10 Mbit
Temperature ranges
Operation: 0 °C to 50 °C/-32 °F to 122 °F
Storage: -20 °C to 70 °C/-4 °F to 158 °F
Weight
Approx. 1.4 kg / 3.1 lbs (incl. MIC 20-BAT)
Size
78 mm x 215 mm x 180 mm /
3.1" x 8.5" x 7.1" (H x W x D)
Accessories
Transport case, large selection of guides and supports (UCI method), test attachments (rebound
method), hardness reference plates and blocks including certificate, NiMH battery, battery-powered
grinding set for surface treatment, printer cable,
application software, data transmission cable
More details on our extensive range of probes and
accessories on request.
Combined Hardness Tester
according to the UCI and Rebound Methods
-
We reserve the right to technical modifications without prior notice.
GEInspectionTechnologies.com
©2004 General Electric Company. All rights reserved.
GEIT-20026US (09/04)
Page 2

GE Inspection Technologies
Ultrasonics
One instrument two test methods
a thousand and one applications.
Static plus dynamic.
For the first time the Krautkramer MIC 20
combines the quasi-static UCI and the
dynamic rebound hardness testing methods: the MIC 20 now places "hardness
testing in a twin pack" at your disposal
with these two different physical methods
- and covers their complete application
range.
This makes the MIC 20 a universal instru
ment: you can use it to test fine-grained
materials having different masses and
shapes or heat treated surfaces (UCI
method), as well as large, coarse-grained
components, forgings, and cast materials
(rebound method).
The two methods.
The UCI method (Ultrasonic Contact
Impedance) determines the hardness of
a material on the basis of the size of the
test indentation left behind in the material by a Vickers diamond after applying
the test load.
In the case of the rebound method, an
impact body is impelled by spring force
against the test surface. The impact and
rebound velocities are each measured in
a non-contact mode; the hardness value
is calculated from these two values.
The MIC 20 automatically sets to the
corresponding method as soon as you
connect a UCI probe or a rebound impact
device.
The double benefits.
The two methods enable you to easily
measure the hardness of your test object
in a matter of seconds: place probe or impact device on the test object, and read
the measured value on the display. In this
way you can measure anywhere and in
any direction. We have used a patented
signal processing to also put this advantage into practice for the rebound hardness method.
In addition, the following applies to the
two test methods: easy and fast calibra
tion capability, presentation of the results
according to the usual hardness scales,
extremely easy handling in mobile use in
daily testing situations.
-
Hardness testing
can be easy.
The many years of experience that we
have…
of mobile hardness testing have left their
mark on this combined instrument. Possibility to use proven Krautkramer technology: the complete range of UCI handheld
and motor probes with different test loads
and oscillation rod lengths can be used
just like all rebound impact devices from
our product range. This ensures optimum
adaptation to the test task and material.
For you this also means: you can simply
extend the range of applications of your
MIC 20 that you have bought for a specific subsequent application: all you need
are the corresponding probes or impact
devices which you then connect - and
there you have another hardness tester.
Field-oriented ease of operation…
is characteristic of the MIC 20. You can
directly see the indicated measured value
according to the selected hardness scale
on the large color LCD or the color TFT
display. The graphic user interface shown
on the display is adapted to the known
Windows standard and is intuitively presented. You don't need any mouse for
the operation, merely a pen to touch the
touch screen and to set the functions. As
an alternative, you also have conventional
pushbuttons at your disposal for most
settings.
You will soon be able to cope with the
operating concept: three main menus
ensure easy access to the essential
functions - so there's no chance of getting
lost in a menu maze!
The MIC 20 makes for example the cali
bration easy for you. The setting parameters are then simply filed and recalled
by pressing a button or by a "click" in the
corresponding application case.
-
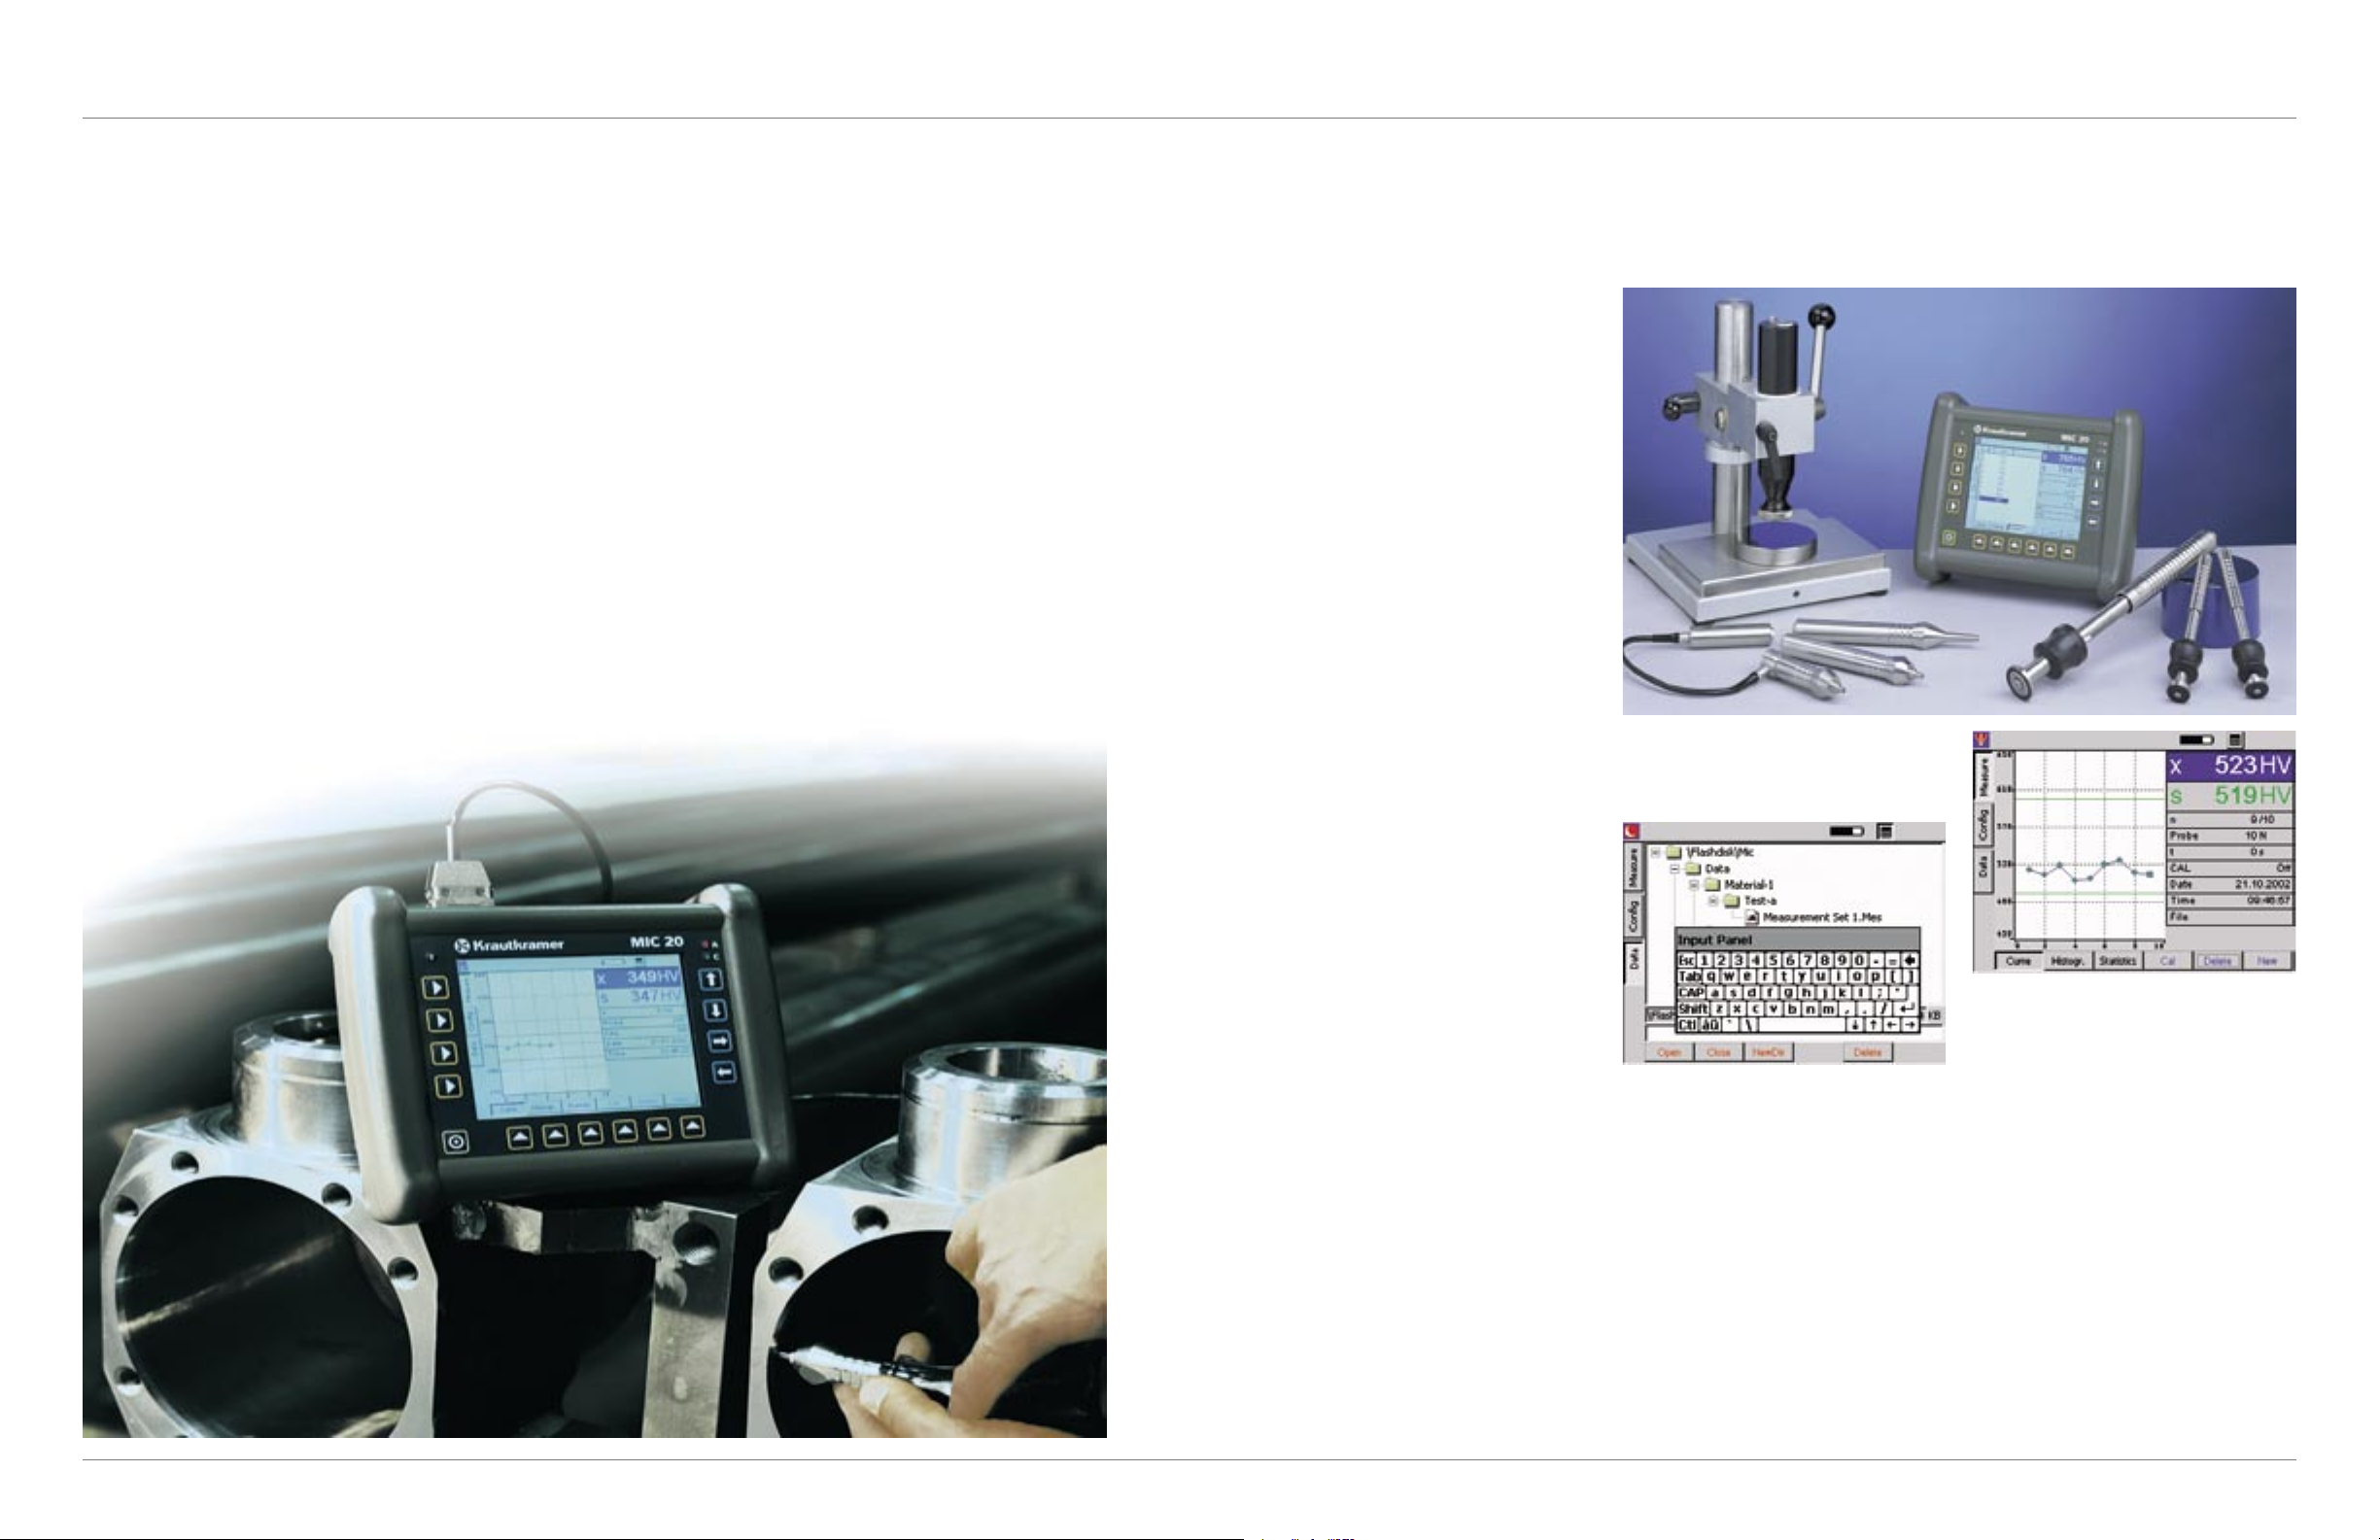
"Hardness testing as a twin pack":
The MIC 20 with a selection of rebound impact devices
and UCI probes, as well as with the quick support
including motorprobe.
A straightforward data memory enables
convenient and structured saving and
management of test results. The MIC 20
also presents the necessary functions for
your analysis: you can have your series
of measurements displayed as a curve,
histogram, or as a table with statistical
data. You can print the data either di
rectly on a printer or transfer them to the
PC by means of the application software
UltraDAT. You can use e.g. the Windows
standard applications for further processing, evaluation, and statistics.
-
The user-friendly display of the MIC 20: you will see all
information at a glance. To store your data, just create
different directories as required: the input of alphanu
merical data is no problem either.
-
The on-site use…
with the mobile and flexible MIC 20 will
certainly be something that you will like:
besides a mains connection, the instrument is operated by means of our rechargeable battery pack allowing internal
charging in the instrument. The display
is switched off after a certain period of
time and can be reactivated by touching
the touch screen. A complete shutdown
can also be triggered automatically after a
preset period of time - which ensures an
energy-saving operation.
 Loading...