

Page 1
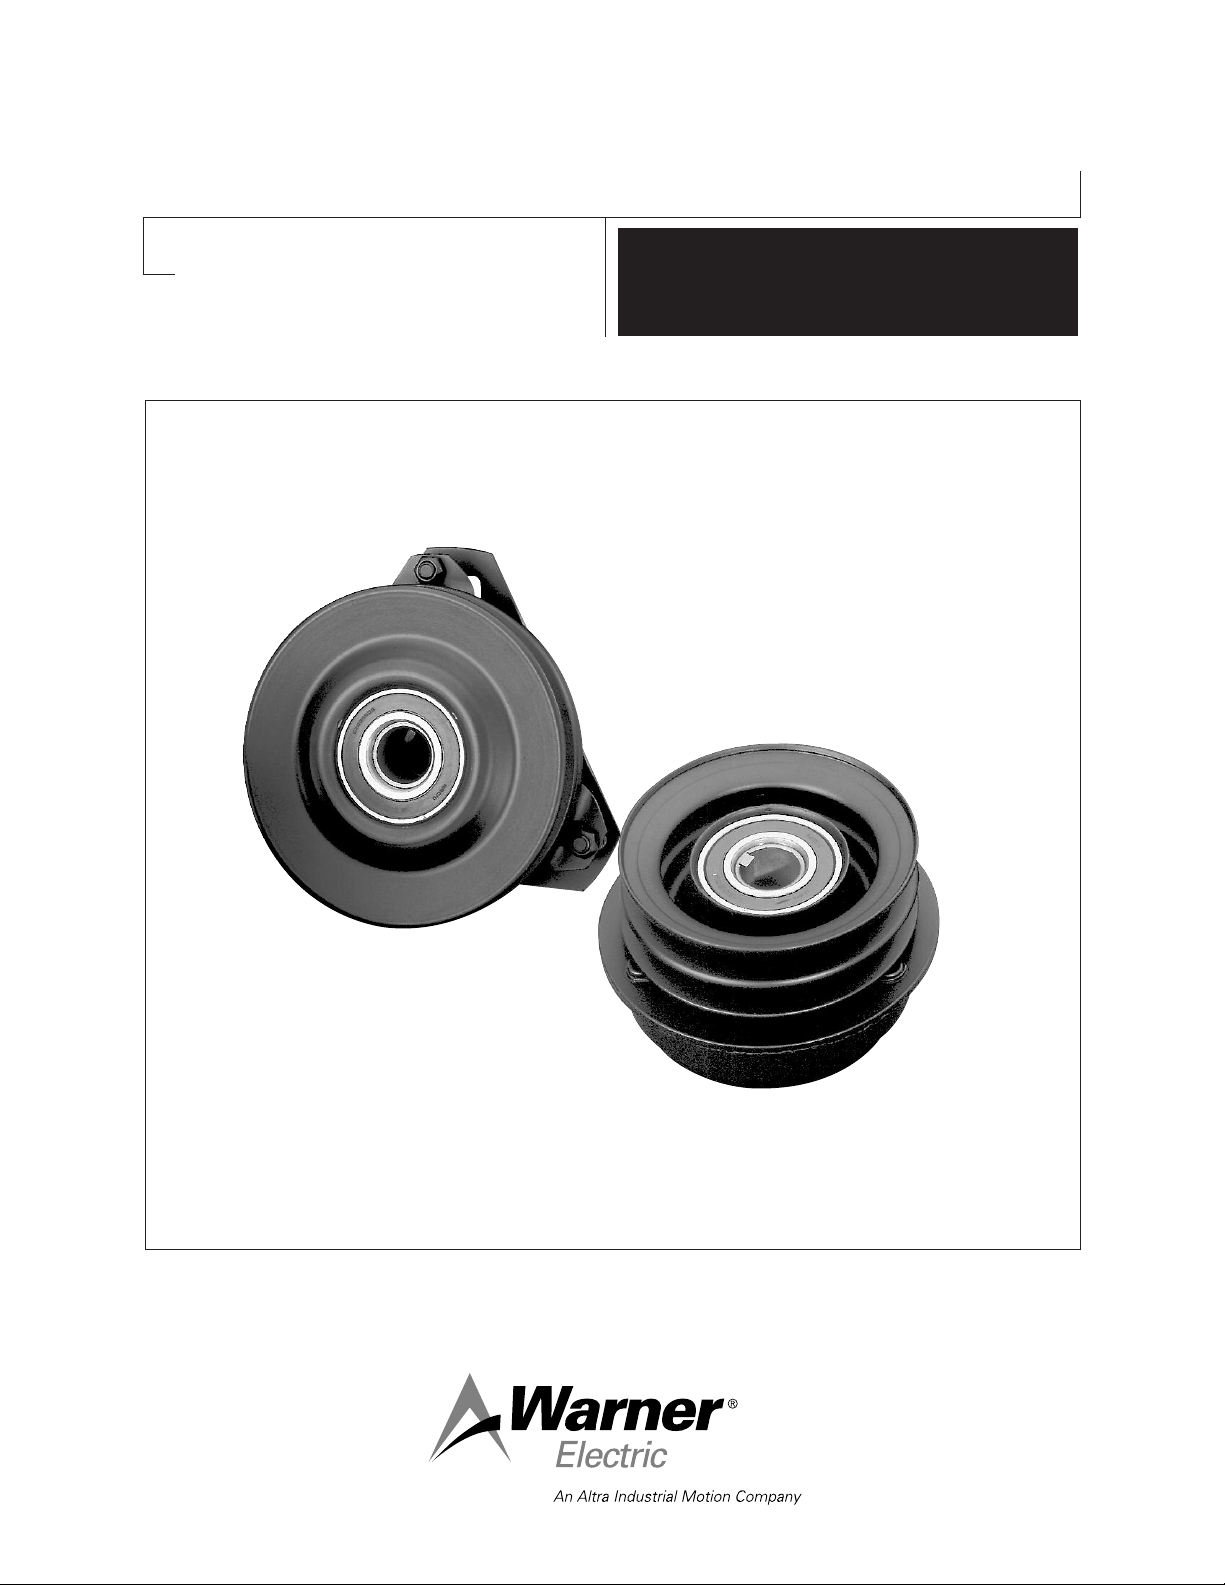
Garden Tractor Clutch
P-1097-6
819-0458
Troubleshooting and
Installation Guide
Page 2
Contents
Coil
Springs
Field
Rotor
Top V iew
from Pulley
Armature
Assembly
Sleeve
Armature
Face
Armature/Brake
Plate Contact
Surfaces
Brake
Plate
Airgap
Preset at
Factory
Airgap
Adjustment
Nuts
Armature/Spring
Rivet joints are
located in line with
the bearing stakes
Three, equally
spaced, bearing
staking punch
marks
Failure to follow these
instructions may result in product damage,
Terminology . . . . . . . . . . . . . . . . . . . . . . . . . . . 2
Troubleshooting Checklist . . . . . . . . . . . . . . . . 3
Electrical Evaluation. . . . . . . . . . . . . . . . . . . . . 4
Airgap Adjustment . . . . . . . . . . . . . . . . . . . . . . 6
Mounting . . . . . . . . . . . . . . . . . . . . . . . . . . . . . 11
Antirotation . . . . . . . . . . . . . . . . . . . . . . . . . . . 12
Antirotation Requirements . . . . . . . . . . . . . . . 13
Warranty . . . . . . . . . . . . . . . . . . . . . . Back Page
equipment damage, and serious or fatal
injury to personnel.
Bearing Mounted Electric Clutch/Brake Assemblies and Operation
Components
An electric clutch/brake or clutch consists of
three primary components:
1. Field Assembly
The clutch's "power" source contains the
coil which generates magnetic force. Most
common applications require a 12 volt DC
coil, although other voltages are available.
2. Rotor Assembly
Generally, the input of the clutch. Includes a
keyed hub which mates with the keyway in
the drive shaft. The rotor transmits torque
from the drive shaft to the output, or
armature assembly.
3. Armature Assembly
Generally, the output of the clutch. Also
contains the mechanical brake in a
clutch/brake assembly. The armature
transmits torque from the rotor to the
driven load.
The sleeve is a secondary component. This
sleeve serves as a spacer between the rotor
and the field assembly, and is also a support
for the field assembly bearing.
Warner Electric • 800-825-9050 P-1097-6 • 819-0458
2
Bearing Mounted Clutch/Brake Assembly
Page 3

Troubleshooting PTO Clutches and Clutch/Brakes
A. Clutch Symptom: Clutch will not Engage
Problem Possible Causes
Low voltage supply • Defective battery
• Faulty charging system
• Bad wiring or connectors
Rotor/armature airgap too large • Rotor/armature wear, readjust airgap
Zero voltage • Broken lead wire
• Open clutch coil, check coil resistance
• Faulty switch
• Blown Fuse
B. Clutch Symptom: Clutch Slips
Problem Possible Causes
Low voltage supply • Defective battery
• Faulty charging system
• Bad wiring or connectors
Overloaded clutch • Improperly sized clutch
Contaminated friction surfaces • Engine oil leak on clutch
Clutch loose on shaft • Loose mounting bolt
• Mounting bolt too long and bottoms
in shaft before clamping clutch
• Mounting washer too thin and deforms
when bolt is tightened
Clutch not mounted square • Mounting shoulder not square
• Clutch integral key hitting end of keyway
• Chamfer too small on spacer or ground
drive pulley
Broken rivet joints • Loose mounting, replace clutch
C. Clutch Symptom: Noisy Clutch
Problem Possible Causes
Failed bearing • Loose mounting
• Operating Temperature above 250° F
• Bearing Preloaded Axially
Adapter plate rattles against • Some noise is normal: to reduce noise
antiorotation pin level, isolate antirotation pin from
frame with rubber
Warner Electric • 800-825-9050 P-1097-6 • 819-0458
3
Page 4

A
C
DB
Meter
Meter
Instructions for Evaluating VX Series Clutches
Windows
Bearing Mounted Field Clutches (self-contained
clutch/brake package)
Clutch to be at room temperature - 70° F - for
this check.
Step 1. Measure Clutch Coil resistance
1. Turn engine and PTO switch off.
2. Disconnect clutch wire connection.
3. Select meter to check ohms.
4. Connect meter lead wires to the wires in the
clutch connector. (Figure 1)
5. If meter reads below 2.40 ohms or above
2.90 ohms, then the clutch has failed and
needs to be replaced.
Figure 1
If the meter reads between 2.40 and 2.90 ohms,
proceed to step 2.
Step 2. Measure Clutch Current Draw - 12
Volt System
1. Turn engine off.
2. Disconnect clutch wire connection.
3. Select meter to check amps (10 amp scale).
4. Connect one meter lead wire to one wire in
clutch connector at A. (Figure 2)
5. Connect the other meter lead wire to the
corresponding wire in the mating connector
at C. (Figure 2)
6. Connect a short wire from D to B in both
connectors. (Figure 2)
Figure 2
Figure 3
7. Turn PTO switch on.
Warner Electric • 800-825-9050 P-1097-6 • 819-0458
4
Page 5

8. If meter reads below 4.0 amps, the problem
would be in the electrical system leading to
the clutch (battery, relay, switch, etc.).
Burnishing Procedure for Electric
Clutch/Brake to be performed with mower
deck attached.
If the meter reads 4.0 amps or above, proceed
to Step 3.
Step 3. Check Air Gap Setting
1. Turn engine and PTO switch off.
2. Locate the three "windows" or "notches"
where the air gap is checked. (Figure 3)
3. With feeler gauge check gap at all three
locations (minimum of two).
4. Factory air gap setting is .005" - .023".
5. If gap doesn't fall between .005" - .023" then
reset using a .012" feeler gauge.
Changing the air gap is achieved by tightening
and/or loosening the three nuts.
If you find after completing Steps 1, 2 and 3
that:
1. Run at 50% throttle.
2. Engage and disengage the clutch 5 times.
(10 seconds on/10 seconds off).
3. Increase to 75% throttle.
4. Engage and disengage the clutch 5 times.
(10 seconds on/10 seconds off).
Note: All values taken at room temperature.
Voltage at 12 VDC. As temperature increases,
nresistance increases, and current decreases.
1. The resistance falls between 2.40 and 2.90.
2. The amp draw is 4.0 or above.
3. The air gap is between .005" and .023" or
reset to .012". Then the electric clutch is
within factory specifications and is not the
source of the problem.
Warner Electric • 800-825-9050 P-1097-6 • 819-0458
5
Page 6

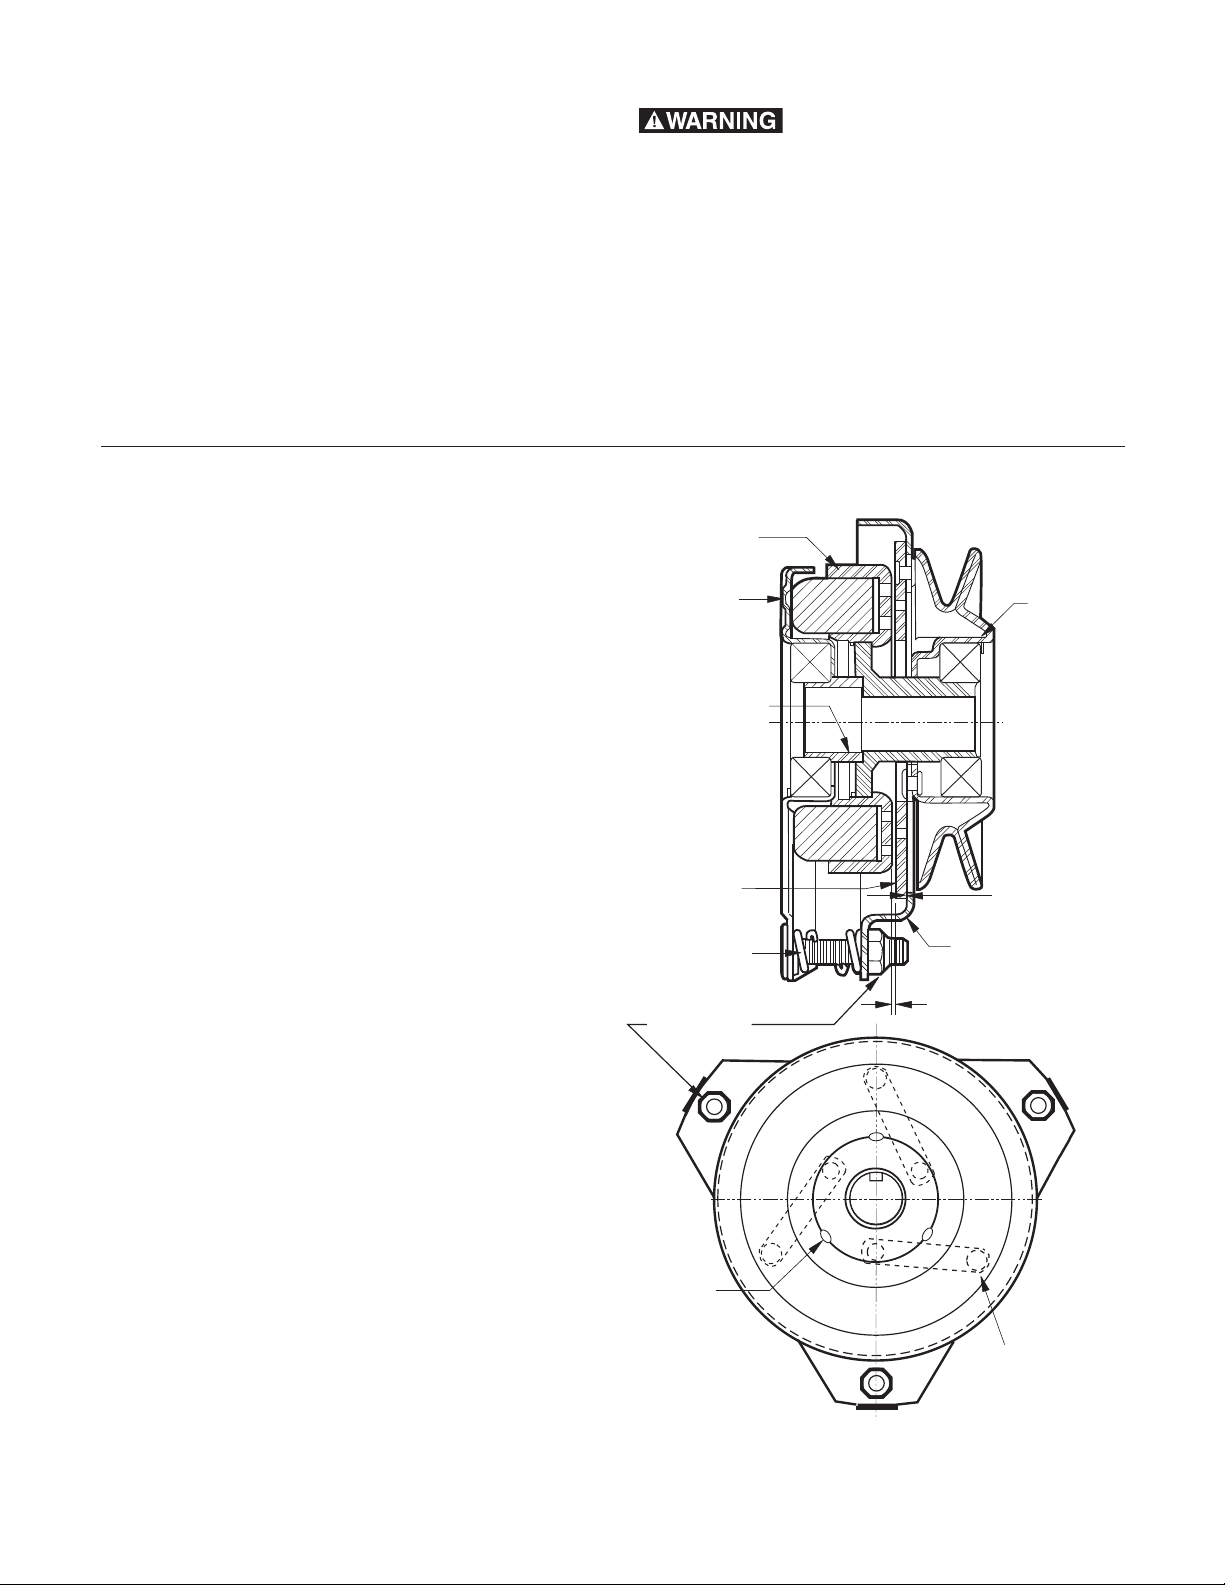
Airgap Adjustment
Top View
from Pulley
Armature/Spring
Rivet joints are located
on line with the bearing
stakes.
Airgap
Adjustment
Nuts
Three, equally
spaced, bearing
staking punch marks.
Windows
Brakeplate
Window
.012" Feeler
Gauge (3)
Required
Adjustment
Nut
G. Procedure for Airgapping Bearing
Mounted PTO Clutch/Brakes
Airgaps are preset at the factory and do NOT
require initial adjustment.
Bench setting:
1. Remove clutch from tractor.
2 Orient the clutch so it is viewed from the field
side.
3. Locate the three rivet joints in the armature
assembly which fasten the leaf springs to the
armature.
Figure 17
Location of Windows — Three Per Brakeplate
7. Insert a .012" feeler gauge through each
window, being careful to position the feeler
gauge between the rotor face and the
armature face.
Positioning Rivet Joints for Airgap Adjustment
4. Rotate the pulley until these three rivet joints
5. Do not disturb the orientation of the armature
6. Locate the three windows in the brakeplate,
Warner Electric • 800-825-9050 P-1097-6 • 819-0458
6
Figure 16
are located midway along the edge of the
triangular adapter, or halfway between each
stud. This prevents measuring the airgap over
a rivet joint.
assembly with respect to the field.
one at each stud.
Figure 18
Setting the Airgap
8. With all three feeler gauges in place, begin
to alternately tighten each nut an equal
amount.
9. Tighten each nut until the feeler gauges
begin to feel snug. Each gauge should
require an equal amount of force for
insertion and extraction.
10. Remove the feeler gauges. Turn the rotor
assembly to check for rotor/armature drag.
The rotor should turn freely.
Page 7

11. Due to dimensional variations, the airgap
between the rotor and armature may vary
on a clutch from .023/.005", even though
the gap at the three windows was set at
.012". This is an acceptable condition.
12. Using feeler gauges, check the airgap
through the three windows. If the airgap
does not fall between .023/.005", repeat the
above procedure. Remember: Never check
the airgap directly over a rivet joint.
Option 1: Setting on the engine crankshaft.
13. To help set the airgap, mount the
unairgapped unit directly to the engine
crankshaft, securing it to the shaft with the
appropriate bolt and washer with a
minimum thickness of .250". When going
from an unclamped state to a clamped
state, the clearance between the rotor and
armature is reduced about .002". A .012"
feeler gauge should still be used in the
clamped state. If a 3/8" diameter bolt is
used, tightening torque on the bolt should
be 340-45 lb.ft. Grade 8 bolt. If a 7/16"
diameter bolt is used, tightening torque on
this bolt should be 50-55 lb.ft. Grade 5 or 8
bolt.
14. As an alternative to mounting directly to the
crankshaft in setting the gap, an assembly
fixture consisting of a stub shaft with a
shoulder can also be used. This stub shaft
should duplicate the crankshaft dimensions.
Secure the clutch to this shaft as noted
above in Step 13.
Note: Care must be exercised when setting
the airgap with the clutch secured to the
shaft, as it is difficult to detect rotor/armature
drag when the engine is running.
Warner Electric • 800-825-9050 P-1097-6 • 819-0458
7
Page 8

Airgap Adjustment
Top View
from Pulley
Armature/Spring
Rivet joints are located
on line with the bearing
stakes.
Airgap
Adjustment
Nuts
Three, equally
spaced, bearing
staking punch marks.
Windows
Brakeplate
Window
.012" Feeler
Gauge (3)
Required
Adjustment
Nut
Locating the Rivet Joints
Warner Electric • 800-825-9050 P-1097-6 • 819-0458
8
Locating the Windows
Inserting the Feeler Gauges
Page 9

Crankshaft
Ground drive pulley or spacer
must be chamfered to clear this
radius on the crankshaft shoulder.
1.0"
Minimum shaft
engagement
1.340 Min Diameter
x .250 Min Thick
Washer
Ground
drive
pulley
Engine Face
Crankshaft
Shoulder
Note 2
Note 2
Failure to torque bolt
to requirements will
degrade clamping and
can allow the clutch to
separate from the
shaft, causing risk of
personal injury.
Thread size Torque required N-m
3/8-24" UNF* 40-45 lb.ft. 54-61
7/16-20" UNF** 50-55 lb.ft. 67-75
M 10 X 1.50 55-60 N-m 55-60
Note: All values are for dry (unlubricated) plated bolts,
please consult fastener manufacturer if any type of locking
element (thread lock compound, patch etc.) is to be used.
* 3/8 -24 UNF Grade 5 bolt is unacceptable
** 7/16-20 UNF Grade 5 or 8 bolt is acceptable
Mounting the Clutch/Brake
NOTE:
1. Proper bolt torque is critical.
2. Always bottom the clutch against a flat surface; never against a radius.
Warner Electric • 800-825-9050 P-1097-6 • 819-0458
9
Page 10

Antirotation Brackets
Suggested Configurations
(Figure 11)
1/4" x 5/8" Bent Flat
Steel Field Restraint
(Figure 13)
1/4" x 3/4" Rubber Stop
Field Restraint
(Figure 12)
5/16" Diameter Bent Steel
Rod Field Restraint
Wheel clearance
between brake/
clutch and steel
restraint 1/16”
required here.
(Figure 14)
1/8" x 3/4" Bent Flat
Steel Restraint
Warner Electric • 800-825-9050 P-1097-6 • 819-0458
10
Page 11

Antirotation Requirements
Axial motion parallel
to the shaft
must not be
restricted.
Field Bearing
Warning:
If axial motion
is restricted, this
bearing will be
improperly loaded
and may be subject
to failure.
Crankshaft
Centerline
Rotational Motion about the
centerline of the shaft must
be restricted, to prevent
tearing the lead wires out,
but not held rigidly.
Crankshaft
Centerline
Field restraint
slot
Do Not Restict the Field Assembly
Some movement is required
to prevent field bearing failure.
Warner Electric • 800-825-9050 P-1097-6 • 819-0458
11
Page 12

Warner Electric LLC
31 Industrial Park Road
815-389-3771
• Fax: 815-389-2582
• New Hartford, CT 06057
www.warnerelectric.com
P-1097-6 819-0458 8/11 Printed in USA
 Loading...