

Page 1

1-800-760-3844
Wagner Technical Service
http://www.wagnerspraytech.com
Or visit us on the world wide web!
Ou visitez notre site Web!
¡O visitenos en Internet!
Owner’’
1-800-760-3844
Wagner Technical Service
http://www.wagnerspraytech.com
Or visit us on the world wide web!
Ou visitez notre site Web!
¡O visitenos en Internet!
®
Owner
s manual:
s manual:
Read this manual for complete instructions
Read this manual for complete instructions
Guide d’utilisation :
Guide d’utilisation :
Manual del propietario:
Manual del propietario:
Français - Table des matières
Ce manuel contient des instructions détaillées
Ce manuel contient des instructions détaillées
Le este manual para obtener instrucciones completas
Le este manual para obtener instrucciones completas
English - Table of Contents
Safety Information . . . . . . . . . . . . . . . . . . . . . . . . . . . . . . . . . 2
Parts and Components . . . . . . . . . . . . . . . . . . . . . . . . . . . . . 3
Assembly . . . . . . . . . . . . . . . . . . . . . . . . . . . . . . . . . . . . . . . . 4
Painting . . . . . . . . . . . . . . . . . . . . . . . . . . . . . . . . . . . . . . . . . 5
Changing Accessories . . . . . . . . . . . . . . . . . . . . . . . . . . . . . . 5
Cleanup . . . . . . . . . . . . . . . . . . . . . . . . . . . . . . . . . . . . . . . 6-7
Optional Cleanup . . . . . . . . . . . . . . . . . . . . . . . . . . . . . . . . 8-9
Cleanup and storage tips . . . . . . . . . . . . . . . . . . . . . . . . . . 10
Maintenance . . . . . . . . . . . . . . . . . . . . . . . . . . . . . . . . . . . . 10
Troubleshooting . . . . . . . . . . . . . . . . . . . . . . . . . . . . . . . . . . 11
Registration card
Parts List . . . . . . . . . . . . . . . . . . . . . . . . . . . . . . . . . . . . 32-33
Warranty . . . . . . . . . . . . . . . . . . . . . . . . . . . . . . . . . . . . . . . 34
Monday through Friday, 8:00 am to 4:30 Central Time
. . . . . . . . . . . . . . . . . . . . . . . . . . . . . . . . . 11
Technical service hours:
Español - Tabla de Contenido
Consignes de sécurité . . . . . . . . . . . . . . . . . . . . . . . . . . . . . 12
Pièces et composants . . . . . . . . . . . . . . . . . . . . . . . . . . . . . 13
Assemblage
Peinture . . . . . . . . . . . . . . . . . . . . . . . . . . . . . . . . . . . . . . . . 15
Changement d’accessoires . . . . . . . . . . . . . . . . . . . . . . . . . 15
Nettoyage . . . . . . . . . . . . . . . . . . . . . . . . . . . . . . . . . . . . 16-17
Nettoyage facultatif. . . . . . . . . . . . . . . . . . . . . . . . . . . . . 18-19
Conseils concernant le nettoyage et le rangement . . . . . . . 20
Entretien . . . . . . . . . . . . . . . . . . . . . . . . . . . . . . . . . . . . . . . 20
Dépannage / Carte d’enregistrement du produit . . . . . . . . . 21
Liste des pièces . . . . . . . . . . . . . . . . . . . . . . . . . . . . . . . 32-33
Garantie
du lunde au vendredi, de 8 h à 4:30 h, heure normale du Centre
0506 • Form No. 0514825D
. . . . . . . . . . . . . . . . . . . . . . . . . . . . . . . . . . . . .
. . . . . . . . . . . . . . . . . . . . . . . . . . . . . . . . . . . . . . . .
Heures d’ouverture du Service technique :
14
34
Need Help?
Call us first for answers
fast.
Call Wagner toll-free if
you have any comments or
problems with this W
product.
agner
Información de seguridad . . . . . . . . . . . . . . . . . . . . . . . . . .22
Piezas y componentes . . . . . . . . . . . . . . . . . . . . . . . . . . . .23
Ensamblaje
Pintura . . . . . . . . . . . . . . . . . . . . . . . . . . . . . . . . . . . . . . . . .25
Cómo cambiar los accesorios . . . . . . . . . . . . . . . . . . . . . . .25
Limpieza . . . . . . . . . . . . . . . . . . . . . . . . . . . . . . . . . . . . .26-27
Limpieza opciónal . . . . . . . . . . . . . . . . . . . . . . . . . . . . . .28-29
Sugerencias de limpieza y almacenamiento . . . . . . . . . . . .30
Mantenimiento . . . . . . . . . . . . . . . . . . . . . . . . . . . . . . . . . . .30
Solución de problemas / Targeta de registro del producto . . . .31
Liste de piezas . . . . . . . . . . . . . . . . . . . . . . . . . . . . . . . .32-33
Garantía limitada
. . . . . . . . . . . . . . . . . . . . . . . . . . . . . . . . . . . . .
. . . . . . . . . . . . . . . . . . . . . . . . . . . . . . . . .
De lunes a viernes, de 8 a.m. a 4:30 p.m., Hora Central
Besoin d’aide?
Appelez-nous pour des
réponses rapidas.
Téléphonez à Wagner sans
frais d’appel si vous avez
des commentaires ou des
problèmes avec l’appareil.
Horario del servicio técnico:
¿Necesita Ayuda?
Llámenos primero para
obtener respuestas rápidas.
Llame a la línea gratuita de
Wagner si quiere hacer un
comentario o tiene problemas
con este producto de Wagner.
24
35
Page 2
Important Safety Information • Read all safety information before
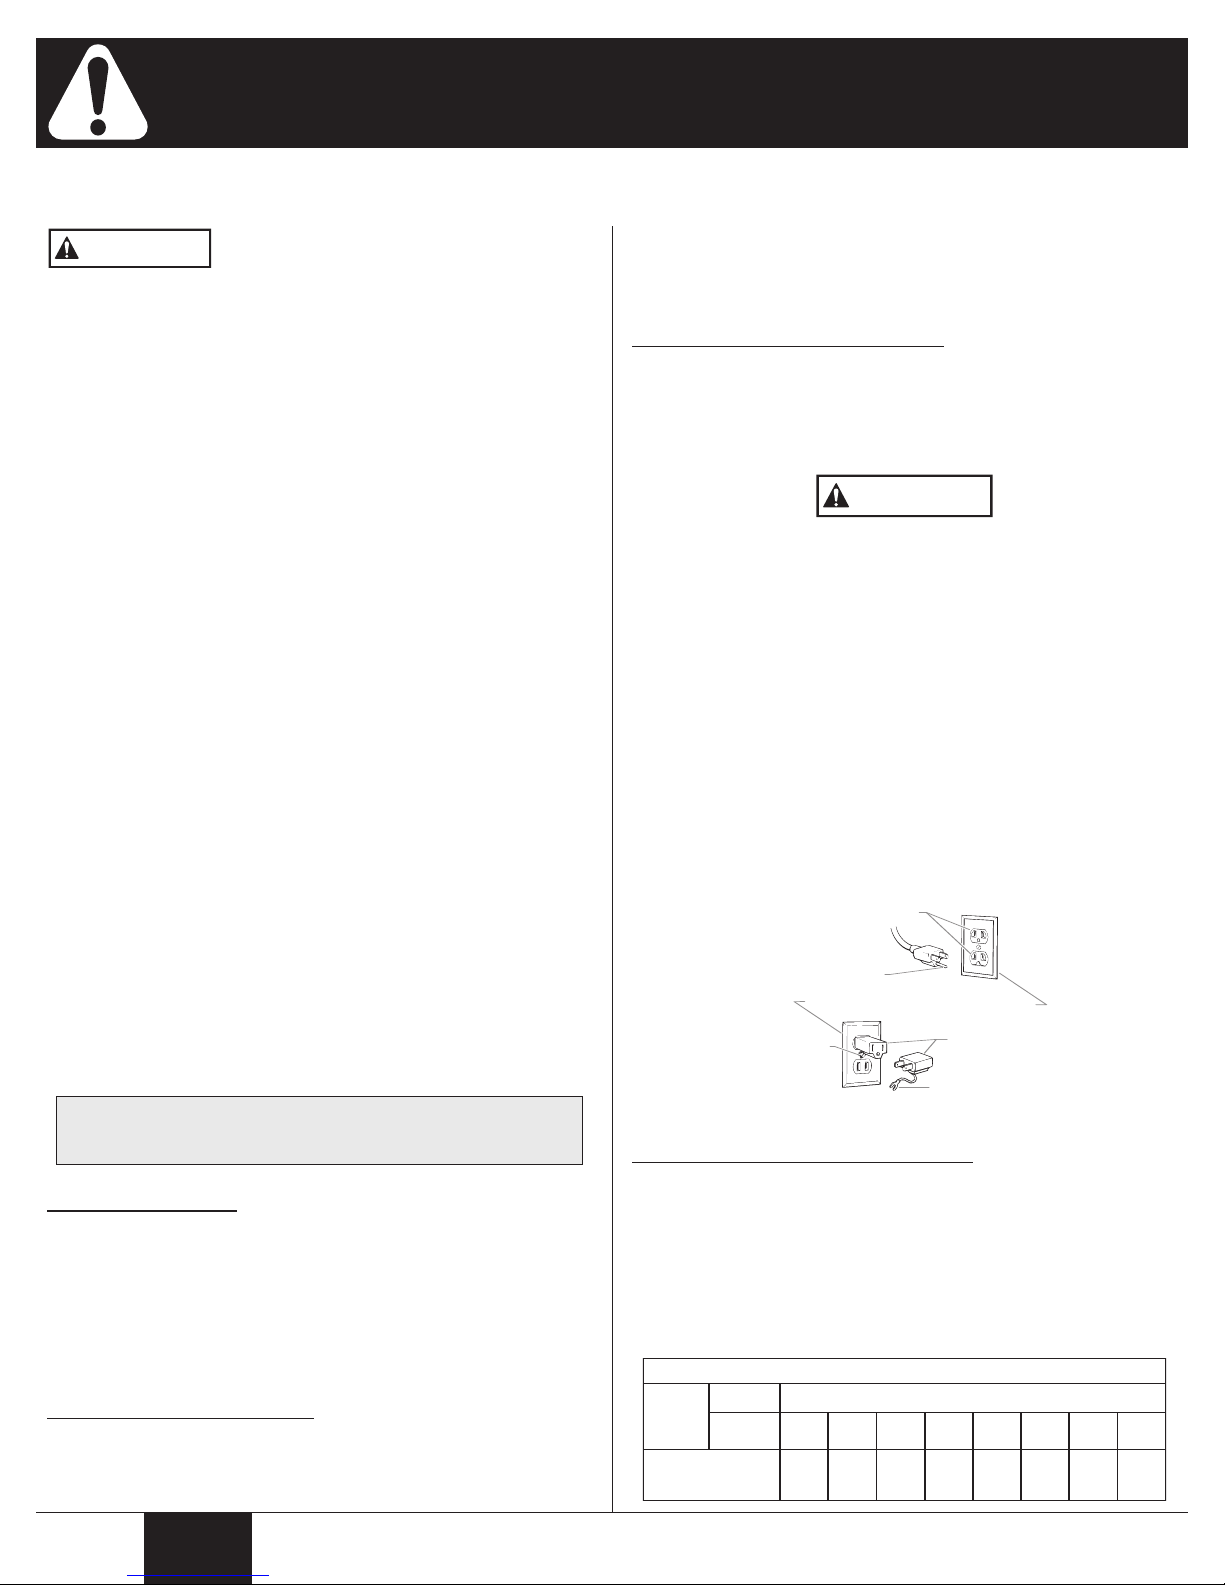
Grounded Outlet
Grounding Pin
Tab for Grounding Screw
Adapter
Metal Screw
Cover for grounded outlet box
WARNING
Minimum gauge for extension cords
Cord length (feet)Voltage
Ampere
rating
range
2 - 3
120V
25-50
100 150 200 250 300 400 500
18
16 14 14 12 12 10 10
WARNING
operating the equipment. Save these instructions
To reduce the risks of fire or explosion, electrical shock and the injury to persons, read and understand all instructions included in
his manual. Be familiar with the controls and proper usage of the equipment.
t
Indicates a hazardous situation which, if not
avoided, could result in death or serious injury.
HAZARD: EXPLOSION OR FIRE
Solvent and paint fumes can explode or ignite, causing property damage
and/or severe injury.
PREVENTION:
• Exhaust and fresh air introduction must be provided to keep the air
within the work area free from accumulation of flammable vapors.
• Avoid all ignition sources such as static electricity sparks, open flames,
pilot lights, hot objects, cigarettes, and sparks from connecting and
disconnecting power cords or working light switches.
• Fire extinguishing equipment must be present and in working order.
• Do not use materials with a flashpoint below 100° F (38° C). A fluid’s
flashpoint is the temperature at which vapors from the fluid could ignite
if exposed to a flame or spark. Consult your paint supplier for
information about a fluid’s flashpoint.
• Keep the unit in a well ventilated location away from the work area.
The pump contains arcing parts which emit sparks.
HAZARD: HAZARDOUS VAPORS
Paints, solvents, insecticides, and other materials may be harmful if
inhaled, causing severe nausea, fainting, or poisoning.
• Use a respirator or mask whenever there is a chance that vapors may
be inhaled. Read all instructions with the mask to insure that it will
provide the necessary protection against the inhalation of harmful
vapors.
HAZARD: GENERAL
May cause property damage or severe injury.
• Read all instructions and safety precautions before operating any
equipment. Never leave the unit running while unattended. Unplug
whenever not in use.
• Never immerse the unit into any liquid.
• Comply with all appropriate local, state and national codes governing
ventilation, fire prevention, and operation.
• This paint roller system is designed to be used with authorized parts
only. When using this system with parts that do not comply with the
minimum specifications and safety devices of the system manufacturer,
the user assumes all risks and liabilities.
• Before each use, check all hoses for cuts, leaks, abrasion or bulging of
cover or damage or movement of couplings. If any of these conditions
exist, call Customer Service. Never repair a paint hose, replace it with
a new one.
Use of oil-based paints must be limited to only those paints which can
be cleaned with mineral spirits. Latex paints can be cleaned with
soapy, lukewarm water. DO NOT use hot water when cleaning or
flushing the unit.
Grounding Instructions
This product must be grounded. In the event of an electrical short circuit,
grounding reduces the risk of electric shock by providing an escape wire for the
electric current. This product is equipped with a cord having a grounding wire
with an appropriate grounding plug. The plug must be plugged into an outlet
that is properly installed and grounded in accordance with all local codes and
ordinances.
Danger! Improper installation of the grounding plug can result in a
risk of electric shock.
If repair or replacement of the cord or plug is necessary, do not connect the
green grounding wire to either flat blade terminal. The wire with insulation
having a green outer surface with or without yellow stripes is the grounding
wire and must be connected to the grounding pin.
Check with a qualified electrician or serviceman if the grounding instructions
are not completely understood, or if you are in doubt as to whether the
product is properly grounded. Do not modify the plug provided. If the plug
will not fit the outlet, have the proper outlet installed by a qualified electrician.
This product is for use on a nominal 120 volt circuit and has a grounding plug
that looks like the plug illustrated below. A temporary adapter which looks like
the adapter illustrated in the figure below may be used to connect this plug to
a 2 pole receptacle as shown if a properly grounded outlet is not available.
The temporary adapter should be used only until a properly grounded outlet
as shown below can be installed by a qualified electrician. The green
colored rigid ear lug or the grounding wire extending from the adapter must
be connected to a permanent ground such as a properly grounded outlet
box cover. Whenever the adapter is used, it must be held in place by a
metal screw.
IMPORTANT
Additional warnings are contained on the tag molded to the
electrical cord of the unit. Be sure to read this tag before
operating the unit.
Specifications
Flow rate...........................10-12 oz. per minute
AC
Power source
Power requirement
Capability
General Description
This high performance power roller is a precision power tool used for both
interior and exterior painting and may be used with both water (latex) and oil
based paints.
...................
..........................
English
120 V
60 Hz current.
...........
Most oil and water based paints and stains. Do not
use with lacquers, lacquer thinners or any other
solvent with a flash point below 100° F (38°C).
Extension Cord Selection
If an extension cord is used, make sure that it is of the 3-conductor type with
NEMA connectors so a continuous grounding circuit is provided from the tool
to the power circuit receptacle. Make sure your extension cord is in good
condition. Also, be sure that the conductor size is large enough to prevent
excessive voltage drop which will cause loss of power and possible motor
damage to the unit. A 14 or 12 gauge cord is recommended.
If an extension cord is to be used outdoors, it must be marked with the suf
following the cord type designation. For example, SJTW
-A
W
that it is acceptable for outdoor use.
2
-A to indicate
fix
Page 3

c1
c2
c3
k1
m
j
k
i
m
l
n
o
h
b
a
c
d
e
f
g
Parts and components
Item Description
a) . . . . . . . . . . . . . . . . . . . . . . . . . . . . . . . .Roller arm
b) . . . . . . . . . . . . . . . . . . . . . . . . . . . . . . .Locking tab
c) . . . . . . . . . . . . . . . . . . . . . . . . . . . .Roller assembly
c1) . . . . . . . . . . . . . . . . . . . . . . . . . . . . . . .Roller cover
c2) . . . . . . . . . . . . . . . . . . . . . . . . . . . . . . . .Roller cap
. . . . . . . . . . . . . . . . . . . . . . . . . . . . . . . .
c3)
d) . . . . . . . . . . . . . . . . . . . . . . . . . . . . .Handle button
e) . . . . . . . . . . . . . . . . . . . . . . . . . . . . . .Roller handle
. . . . . . . . . . . . . . . . . . . . . . . . . . . . . . . .
f)
. . . . . . . . . . . . . . . . . . . . . . . . .
g)
Quick-release tabs
Roller core
Paint hose
Item Description
h) . . . . . . . . . . . . . . . . . . . . . . . . . . . . .Spatter shield
i) . . . . . . . . . . . . . . . . . . . . . . . . . . . . . . .Paint can lid
j) . . . . . . . . . . . . . . . . . . . . . . . . . . . . . .Suction tube
k) . . . . . . . . . . . . . . . . . . . . . .Quick-clean™ adapter
k1) . . . . . . . . . . . . . . . . . . . . .Quick-clean™ inlet plug
l) . . . . . . . . . . . . . . . . . . . . . . . . . . . . . . . . . . . .Base
m) . . . . . . . . . . . . . . . . . . . . . . . . . . . .Selector switch
. . . . . . . . . . . . . . . . . . . . . . . . . . . . . . .
n)
. . . . . . . . . . . . . . . . . . . . . . . . . . . . . . . . .Extension
o)
Power cord
3
English
Page 4

Title
(c)
(d)
(a)
(b)
(i)
(g)
(f)
(e)
(h)
Assembly
. Before using the unit, make sure the inlet plug is screwed
1
tightly into the Quick-clean™ adapter, or material will leak
rom the adapter opening.
f
3. Place paint can on the base so that the arrows on the lid
(c) and the base (d) line up.
. Tightly place the lid on the paint can. Align arrow
2
paint can handle
Tightly close latch on can strap. The paint can handle
4.
may now be used for transporting the unit (DO NOT move
the unit by pulling on the paint hose). Insert the suction
tube until it reaches the bottom of the can.
(b) as shown.
(a)a
nd
5. Assemble core (e), roller cover (f), and cap (g). Attach
assembly to arm, making sure the roller assembly snaps
into the locking tab
(h) as shown.
English
6. Attach spatter shield. Press the quick-release tabs
the handle and attach the arm to handle. When using the
extension, attach the arm to the extension, then attach the
extension to the handle.
4
(i) on
Page 5
Title
Painting
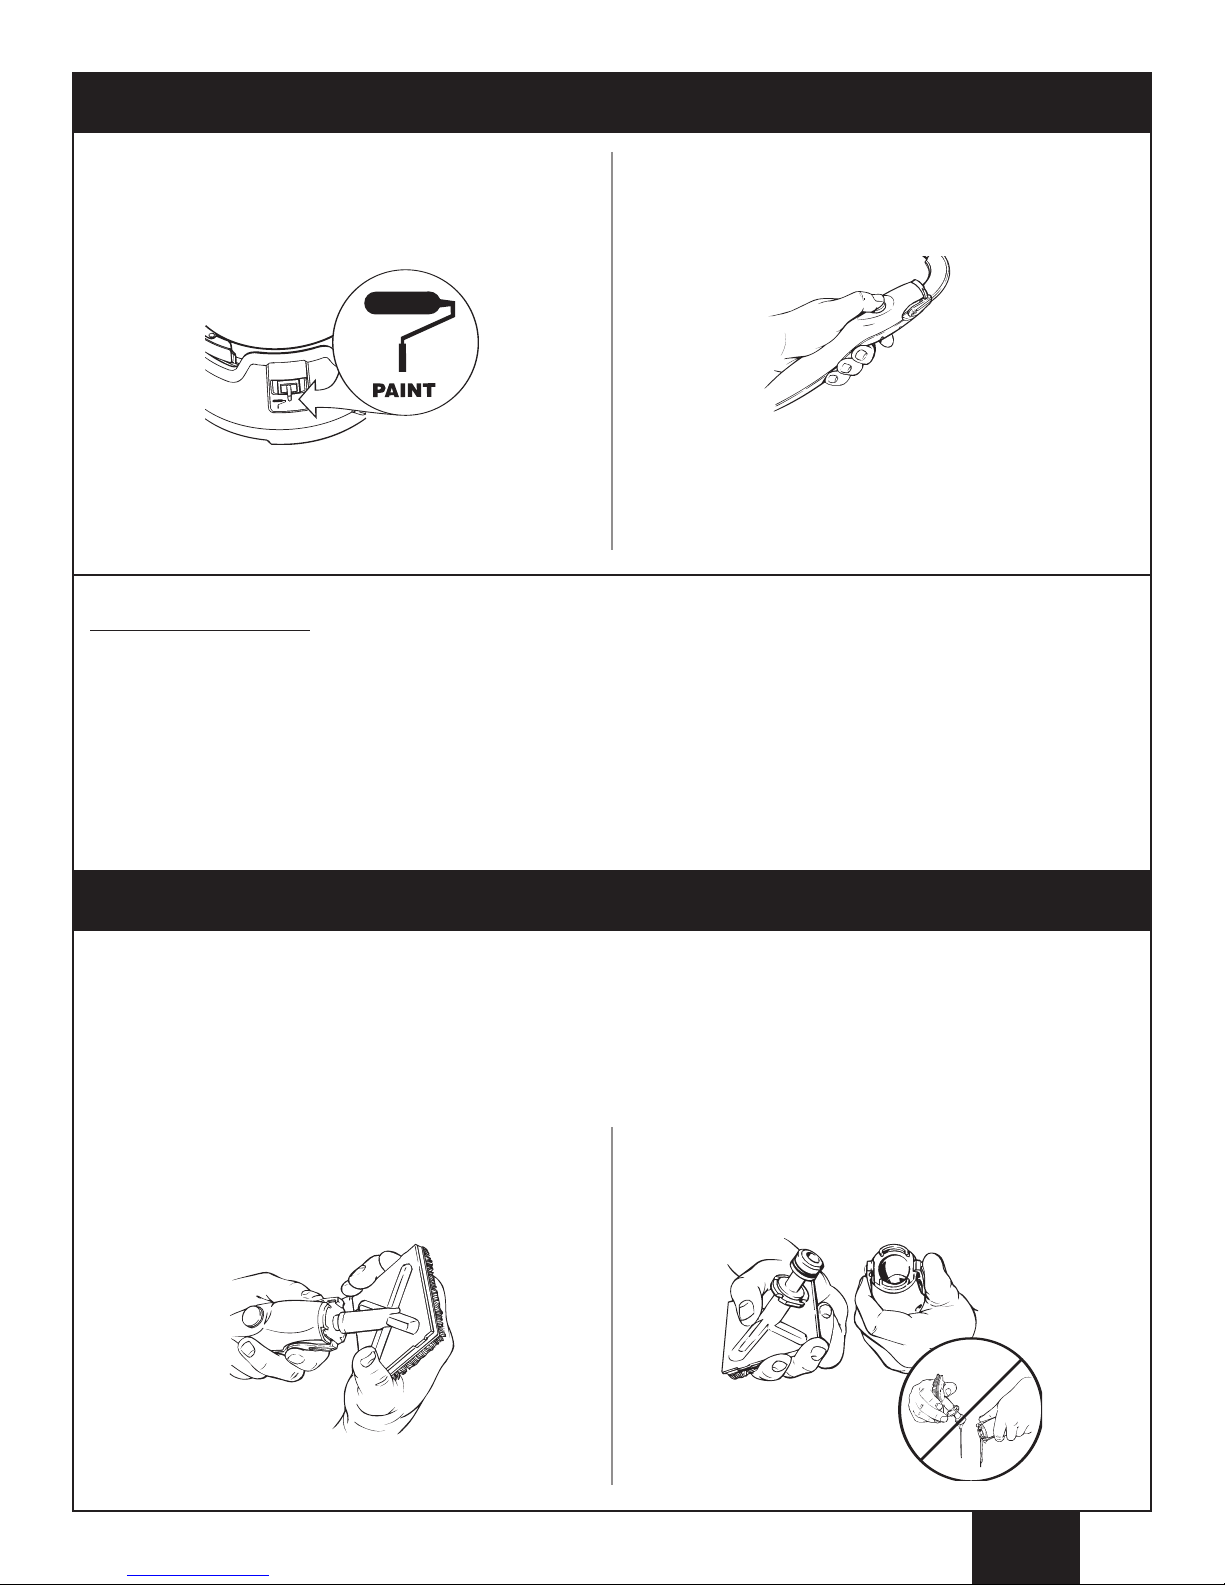
1. Plug in the power cord. Flip selector switch on base to
PAINT. No paint will flow until handle button is depressed.
PRESS and HOLD handle button until paint appears
2.
through the roller cover. When roller cover is saturated,
RELEASE the handle button and begin rolling. PRESS
nd RELEASE handle button as necessary for paint flow.
a
You may also prime your roller by flipping the selector
switch to CLEAN. The handle button will not need to be
pressed. T
paint appears through the roller cover.
urn the selector switch back to PAINT when
Helpful Painting Tips
• Practice controlling the paint flow while painting on a piece of scrap wood or cardboard. Do not overload the roller
with paint. An overloaded roller will slide, drip, and spatter excessively.
• When painting with the roller, make sure your woodwork, floor, and furnishings are sufficiently protected against any
drips or spatters.
• The spatter shield serves as a rest for the roller when the arm is not in use. Make sure the unit is turned OFF and
the roller cover is not saturated with paint when using the spatter shield for rest periods, or paint will drip and
accumulate in the spatter shield.
• During extended break periods, place your roller cover assembly in a plastic bag to keep it from drying out.
Changing Accessories
• When removing or changing any accessories from the roller handle, it is likely that some material will drip from the handle
and the accessory.
• Turn the unit OFF prior to removing any accessories or components, and make sure your floors and furnishings are
protected from dripping paint.
• To minimize dripping material from the handle and accessories, follow the steps below.
Press the quick-release tabs on the handle (or the
1.
extension).
Pull the handle and the accessory apart, making sure to
2.
keep the connecting ends pointed up.
5
English
Page 6

(a)
Cleanup - Purging the paint hose
When you are finished with your project, follow these steps to return any remaining material left in the hose back into its
container. These steps should be followed no matter what type of material you used.
Title
. Remove suction tube from paint can and place in bucket
1
of appropriate cleaning solution (warm, soapy water for
latex paints, mineral spirits for oil-based paints).
2. Remove spatter shield. Press locking tab
roller cover assembly into a bucket of the appropriate
cleaning solution.
(a) and drop
3. Insert thumb to first knuckle, PRY and PULL the cap from
the roller cover. Once the cap is removed,
core out the other end.
Make sure your floors and furnishings are protected from
dripping paint when removing or disassembling the roller
assembly
cleaning solution while you clean the unit.
. Drop the parts into a bucket of the appropriate
PUSH the
4. Remove lid and hold roller arm over paint can. Make sure
switch is turned to PAINT. Press and hold handle button to
pump paint through hose and into paint can. Release
handle button when cleaning solution reaches the paint can.
English
6
Page 7

(a)
Cleanup - Using the Quick-clean™ Feature
• Follow these steps ONLY if you used latex-based material AND you have an available garden hose.
• Make sure you have completed steps 1-4 in Cleanup - Purging the Paint Hose
Title
before using the Quick-clean™ feature.
1. Unplug the power cord. Remove the paint can from the
unit, and place the unit on its side with the Quick-clean ™
adapter facing up.
The unit should be placed on its side so material will not
leak from the Quick-clean
removed. Make sure your floors and furnishings are
protected with a drop cloth.
3. Hang the roller arm from an empty five-gallon bucket.
While holding the suction tube over the five-gallon bucket,
SLOWLY turn the garden hose ON. Let the water run
through the suction tube and out the roller arm holes until
the hose runs clear. Empty bucket as necessary.
™ adapter when the plug is
2. Remove the Quick-clean™ inlet plug from the Quickclean™ adapter. Insert a garden hose into the Quickclean™ adapter. Turn the Quick-clean™ adapter fitting
ounterclockwise to secure the hose. Make sure the
c
washer stays inside the fitting (a). Place the unit upright.
4. Turn the garden hose off. Remove suction tube from fivegallon bucket and replace the Quick-clean™ inlet plug.
Leave the arm hanging from the bucket.
5. Plug in the power cord. Flip selector switch to CLEAN.
Let unit run until all fluids have been purged from the end
of the paint hose. Turn the unit
power cord. Properly dispose of the cleaning solution.
OFF, and unplug the
6. Thoroughly clean the roller cover
the quick-release tabs and remove the roller arm from the
handle. Wipe any remaining paint with the appropriate
cleaning solution and a damp cloth
SUBMERGE ROLLER HANDLE!).
7
, core and cap. Press
(DO NOT
English
Page 8

Optional Cleanup - latex materials
Follow these steps ONLY if you used latex materials and do not have a garden hose available.
. Elevate roller arm and hang from an empty bucket. The
1
unit must be lower than the arm in order for air to be
ompletely purged from the paint hose
c
SUBMERGE ROLLER HANDLE).
*The empty bucket should be
larger than the cleaning bucket.
3. While unit is self-cleaning, thoroughly clean the roller
cover, core and cap.
DO NOT
(
. Flip selector switch to CLEAN (motor will run continuously
2
without the aid of the handle button). Run a minimum of
ne gallon of soapy, lukewarm water through the unit
o
(cleaning time may vary depending upon type of paint
used).
4. Remove suction tube from solution, raise
HANDLE, and run motor until all cleaning solution is
purged from the unit. Flip selector switch to OFF (O) and
unplug the power cord.
UNIT above
5. Press quick-release tabs and remove the roller arm from the roller handle. Remove any remaining paint with the appropriate
cleaning solution and a damp cloth
Switch the unit OFF (O) prior to removing any
accessories or components, and make sure your floors
and furnishings are protected from dripping paint.
(DO NOT SUBMERGE HANDLE!).
English
A light paint film residue may remain in the paint hose
after cleaning. This is normal and will not affect the
future performance of your unit.
8
Page 9

Optional Cleanup - oil-based materials
These steps should be followed for use with ONLY oil-based materials.
. Place roller arm and suction tube in a bucket of mineral
1
spirits.
2. Flip selector switch to
without the aid of the handle button). Recirculate one
quart of mineral spirits through the unit for approximately
10 minutes (cleaning time may vary depending upon type
of paint).
CLEAN (motor will run continuously
3. While unit is self-cleaning, thoroughly clean the roller
cover, core and cap with mineral spirits.
4. Repeat steps 1-5 in Optional Cleanup - Latex Paints
using a half gallon of warm, soapy water to complete the
cleaning process.
Steps 1-5 in Optional Cleanup - Latex Materials must
be repeated using warm, soapy water in order to purge
any remaining mineral spirits from the paint hose.
Unpurged mineral spirits can damage the paint hose
over time.
9
English
Page 10

(Extension)
(Handle)
Quick-
release
tabs
Connecting
area
Connecting
area
Quick-
release
tabs
(c)
(a)
(b)
(d)
(e)
Cleaning and Storage Tips
• Thoroughly cleaning your unit and its components is the best way to ensure the prolonged life of your unit.
• Keep water, paint, and other residues away from the handle button. A clogged handle button will affect the
performance of your unit.
• Be sure that your unit is free from all fluids before storage. After storing your unit in extreme cold temperatures,
allow unit to reach room temperature before using.
When storing your unit, be sure the paint hose is stored in a large loop without any kinks. If it is bent, it could be
•
amaged.
d
Maintenance
IMPORTANT
The areas on the roller handle and the extension indicated
below must be cleaned thoroughly and lubricated after each
use. ALL paint should be removed from the areas highlighted
in gray below, especially the quick-release tabs and all other
areas that connect with other parts. This can be done by
using the appropriate cleaning solution and an old toothbrush
(DO NOT SUBMERGE ROLLER HANDLE!).
In addition to thoroughly cleaning your unit after every use,
you must
b, c)
(e) indicated below. Use a thin layer of petroleum jelly to
lubricate the indicated areas.
NOTE - DO NOT attempt to remove the Quick-clean™ inlet
plug O-rings, and make sure not to lose the Quick-clean™
inlet washer.
CLEAN and LUBRICATE the areas on the arm (a,
, extension (d), and the Quick-clean™ inlet plug O-rings
English
10
Page 11

Troubleshooting
Problem
The pump will not run
Paint fails to load the roller.
The motor does not turn off.
There is paint leakage.
Cause
1. The power cord is unplugged, or no power in
outlet.
2. The handle button is not being depressed, and the
switch is not set to
3. There is a kink in the air hose.
1. The suction tube is not immersed in the paint.
2
. There is an obstruction in the suction tube.
3. The paint can is empty.
4. The O-rings on the Quick-clean™ inlet plug are
worn or dirty.
5. The Quick-clean™ plug is missing from the Quickclean™ adapter.
1. The switch is turned to
2. There is a kink in the air hose.
3. There is an air switch malfunction.
1. The seal on the roller arm is backwards.
2. The seal and cap were not properly cleaned.
3. The O-ring and the connecting area were not
cleaned properly.
4. Paint residue on connecting areas.
5. The O-rings are damaged or missing.
The roller cover is worn or damaged.
6.
7. The roller core or cap is worn or damaged.
8. The bearing areas on the roller arm are worn.
9. The pump tube is punctured.
The paint hose is damaged.
10.
11. The O-rings on the Quick-clean™ inlet plug are
worn or dirty.
12. The Quick-clean™ plug is missing from the Quickclean
™ adapter.
PAINT.
CLEAN.
Solution
1. Plug the power cord into 120V outlet.
2. Turn switch to
handle button.
3. Unkink the air hose
If unit still fails to run, call Customer Service.
1. Fully immerse the suction tube into the
p
aint.
2. Remove the obstruction.
3. Fill the paint can.
4. Properly clean and lubricate, or replace.
5. Install Quick-clean™ plug.
1. Turn switch to
2. Unkink the air hose.
3. Call Customer Service.
1. Turn the seal around.
2. Clean and properly lubricate.
3. Clean and properly lubricate (pg 10).
4. Clean connecting areas.
5. Replace the O-rings*
Replace the roller cover*.
6.
7. Replace the roller core or cap*.
8. Call Customer Service
9. Call Customer Service
Call Customer Service
10.
11. Properly clean and lubricate, or replace.
12. Install Quick-clean™ plug.
PAINT and depress
OFF.
Missing washer.
Water leakage from the Quickclean™ inlet fitting during
cleaning.
1.
* Replacement parts available by calling customer service
Have you tried the recommendations above and are still having problems? In the United States, to speak to a
customer service representative, call our Customer Service at 1-800-760-3844 Monday through Friday between 8:00
AM and 4:30 PM Central time.
Product Registration Card
Send in your product registration card or register online at www.wagnerspraytech.com. Proper registration will serve as proof of
purchase in the event your original receipt becomes misplaced or lost. Returning this card will expedite the processing of your
warranty. Be sure you write your unit’s date code on the card before sending it. The date code is located below the specification
label underneath the base of your unit (for example, S087R).
that best meet your needs and desires.
1. Replace.
The additional information will also help us to develop new products
11
English
Page 12

3
2
1
4
5
6
8
9
10
11
7
12
13
14
*For reference only
Inner
handle
(A)
(B)
15
16
M
anche
i
nterne
*À titre de référence seulement
*Sólo para referencia
Mango
interno
Parts List • Liste de pièces • Lista de piezas
English Français Español
32
Page 13

Parts List • Liste de pièces • Lista de piezas
Title
Item
Article
Articulo
1 0514113 Handle assembly Ensamble de manche Ensamblaje del mango 1
2, 3, 9* 0514112 O-ring and seal Joint torique et garniture Junta en forma de aro tórico y sello 1
4 0514150 Roller arm Bras de rouleau Brazo del rodillo 1
5 0155206 3/8” nap roller cover Manchon de rouleau, Cubierta para rodillo de 3/8” 1
6, 7* 0514118 Roller core and cap Manchon et capuchon Interior y tapa del rodillo 1
8 0514230 Spatter shield Pare-éclaboussures Protector contra salpicaduras 1
10* 0514140 14” extension Rallonge de 35,6 cm Extensión de 14” 1
11 0514221 Container lid Couvercle de récipient Tapa del recipiente 1
12, 13* 0514116 Strap assembly Bride de retenue Ensamblaje de la abrazadera 1
14 ------- Base Base Base 1
15 0514157 Quick-clean™ plug Ensemble de filtre Ensamblaje del tapón
16 9820307 Washer Rondelle Arandela 1
Part No.
Nº de piéce
Pieza No.
English Description
assembly d’entrée Quick-clean™ Quick-clean™ 1
Français Description
grain de 0,95 cm (3/8 po)
Español Descripción
Quantity
Quantite
Cantidad
Optional Accessories • Accessoires Optional • Accessorios Opciónal
Part No.
Nº de piéce
Pieza No.
0155206C 9” x 3/8” roller cover Manchon de rouleau 22,9 cm x 0,95 cm Cubierta del rodillo de 9” x 3/8”
0155208C 9” x 3/4” roller cover Manchon de rouleau 22,9 cm x 0,95 cm Cubierta del rodillo de 9” x 3/4”
0514026 3” x 3” trim pad Tampon à découper 7,6 cm2(3 po2) Almohadilla para bordes de 3” x 3”
0514028 Corner pad Tampon pour coins Almohadilla angular
0284001G GlassMask™ GlassMask™ GlassMask™
0284112 Cleanup kit Trousse de nettoyage Juego de limpieza
0513030 Trim It™ Trim It™ Trim It™
0284055A Swivel stain pad Tampon à teinture pivotant Almohadilla giratoria para tintes
0284058A Replacement stain pads Tampon à teinture de rechange Almohadillas de repuesto para tintes
0511112 Silky smooth roller Manchon doux et soyeux Rodillo liso suave
0514128 5 gallon paint adapter Adaptateur de peinture pour contenant Adaptador de pintura de 5 galones
0514145 18” extension Rallonge de 45 cm (18 po) Extensión de 18”
0284097 Anchor cloths Tissus d’ancrage Anchor cloths
0284035 Mask It™ Mask It™ Mask It™
0284091
0514033
0514139
0514195
0511110 Sponge roller Manchon d’éponge Rodillo de esponja
English Description
Coveralls
™
ouch Up
T
Replacement pump / hose kit
Replacement handle Manche de remplacement Mango de repuesto
Français Description
(9 x 3/8 po)
(9 x 3/4 po)
de 18, 9 litre (5 gallons)
Combinaison Cubre todo
™
ouch Up
T
Ensemble pompe/tuyau de remplacement
Español Descripción
Touch Up™
Kit de mangueras/bombas de repuesto
33
FrançaisEspañol
English
Page 14

TitleWarranty • Garantie
Wagner Two Year Limited Warranty - Keep on file - English
This product manufactured by Wagner Spray Tech Corporation (Wagner), is warranted to the original retail purchaser against defects
in material and workmanship for two years from date of purchase if operated in accordance with Wagner's printed recommendations
and instructions. This product is designed for home use only. If this product is used for professional/rental purposes, this warranty
applies only for 30 days from date of purchase.
This warranty does not cover damage resulting from improper use, accidents, user's negligence or normal wear. This warranty does
not cover defects or damages caused by service or repair performed by anyone other than a Wagner Authorized Service Center. This
warranty does not apply to accessories.
ANY IMPLIED WARRANTY OF MERCHANTABILITY OR FITNESS FOR A PARTICULAR PURPOSE IS LIMITED TO TWO YEARS
FOR HOME USE AND 30 DAYS FOR PROFESSIONAL/RENTAL USE FROM DATE OF PURCHASE.
WAGNER SHALL NOT IN ANY EVENT BE LIABLE FOR ANY INCIDENTAL OR CONSEQUENTIAL DAMAGES OF ANY KIND,
WHETHER FOR BREACH OF THIS WARRANTY OR ANY OTHER REASON.
If any product is defective in material and/or workmanship during the applicable warranty period, return it with proof of purchase,
transportation prepaid to any Wagner Authorized Service Center. Contact Wagner Technical Service at 1770 Fernbrook Lane,
Minneapolis, MN 55447. Wagner's Authorized Service Center will either repair or replace the product (at Wagner's option) and return
it to you, postage prepaid.
Some states do not allow limitations on how long an implied warranty lasts or the exclusion of incidental or consequential damages,
so the above limitation and exclusion may not apply to you.
This warranty gives you specific legal rights and you may also have other rights which vary from state to state
.
Garantie limitée de deux ans de Wagner – à conserver (version française)
Ce produit, fabriqué par Wagner Spray Tech Corporation (Wagner) est garanti auprès du premier acheteur contre tout défaut de
matériau ou de fabrication pendant deux ans à compter de la date d’achat lorsqu’il est utilisé conformément aux recommandations et
directives imprimées par Wagner. Ce produit est conçu pour un usage résidentiel seulement; s’il est utilisé à des fins
professionnelles ou de location, cette garantie ne devient valide que pour une période de 30 jours à compter de la date d’achat.
Cette garantie ne couvre pas l’usure normale, les dommages découlant d’un accident, d’une utilisation incorrecte ou de négligence.
La présente garantie ne couvre pas non plus les défectuosités ou les dommages résultant de l’entretien ou d’une réparation faite par
une personne qui n’est pas membre d’un centre d’entretien agréé de Wagner. La présente garantie ne s’applique pas aux
accessoires.
OUTE GARANTIE IMPLICITE DE QUALITÉ MARCHANDE OU D’ADAPTATION À UN USAGE PARTICULIER EST LIMITÉE À UNE
T
PÉRIODE DE DEUX
OU DE LOCATION, À COMPTER DE LA DATE D’ACHAT.
WAGNER NE SAURAIT EN AUCUN CAS ÊTRE TENUE RESPONSABLE DES DOMMAGES ACCESSOIRES OU INDIRECTS DE
QUELQUE NA
Si un produit est défectueux en ce qui concerne les matériaux ou la main-d’oeuvre pendant la période couverte par la garantie, vous
devez le retourner accompagné de la preuve d’achat, frais de port payés, à n’importe quel centre d’entretien agréé de W
connaître l’emplacement des centres d’entretien agréés de la société, communiquez avec le service technique de W
Fernbrook Lane, Minneapolis, MN 55447 USA. Le centre d’entretien agréé de W
discrétion de Wagner) et vous le retournera par la poste, frais de port payés.
ANS POUR L
TURE QUE CE SOIT, QU’ILS RÉSULTENT D’UN MANQUEMENT À LA PRÉSENTE GARANTIE OU AUTRE.
’UTILISATION DOMESTIQUE ET DE 30 JOURS POUR UNE UTILISATION PROFESSIONNELLE
agner. Pour
agner au 1770
agner réparera ou remplacera le produit (à la
Certaines provinces ne permettent pas l’exclusion ou la restriction des dommages consécutifs ou indirects ou les restrictions quant à
la durée d’une garantie implicite; les restrictions ou les exclusions mentionnées ci-dessus peuvent donc ne pas s’appliquer dans votre
cas.
La présente garantie vous confère des droits juridiques spécifiques, et vous pourriez également jouir d’autres droits selon votre
province.
34
Page 15

Garantía
Garantía Limitada de Dos Años de Wagner - Conservar en archivo - Español
Este producto fabricado por Wagner Spray Tech Corporation (Wagner) está garantizado al comprador minorista original ante todo
defecto de materiales y fabricación durante dos años a partir de la fecha de compra si dicho producto se hace funcionar en
onformidad con las recomendaciones e instrucciones impresas de Wagner. Este producto está diseñado solamente para uso
c
doméstico. Si este producto se utiliza con fines profesionales o de alquiler, la garantía tendrá validez sólo durante 30 días a partir de
la fecha de compra.
Esta garantía no cubre los daños resultantes del uso incorrecto, accidentes, negligencia del usuario o desgaste normal del producto.
Esta garantía no cubre defectos ni daños causados por el mantenimiento o la reparación realizada en cualquier lugar que no sea un
Centro de Servicio Autorizado de Wagner. Esta garantía no cubre los accesorios.
Toda garantía implícita de comercialización o idoneidad para un fin específico está limitada a dos años para el uso doméstico y a 30
días para el uso profesional o de alquiler a partir de la fecha de compra.
Wagner no será responsable bajo ninguna circunstancia de los daños incidentales o indirectos de cualquier clase por incumplimiento
de esta garantía o por cualquier otro motivo.
Si un producto presenta defectos de materiales o de fabricación durante el período de vigencia de la garantía, devuélvalo con el
comprobante de compra, con el flete de transporte prepagado, a cualquier Centro de Servicio Autorizado de Wagner. Póngase en
contacto con el Servicio Técnico de Wagner en 1770 Fernbrook Lane, Minneapolis, MN 55447. El Centro de Servicio Autorizado de
Wagner se encargará de la reparación o el reemplazo del producto (a criterio de Wagner) y lo enviará al comprador, con el flete de
transporte prepagado.
Algunos estados no permiten limitaciones en la vigencia de una garantía implícita ni la exclusión de daños incidentales o indirectos,
de manera que la limitación y la exclusión anteriores podrían no aplicarse a su caso.
Esta garantía le otorga derechos legales específicos, y usted también puede tener otros derechos que varían de un estado a otro.
35
Page 16

Wagner Spray Tech Corporation
1770 Fernbrook Lane
Plymouth, MN 55447
Telephone: 1-800-760-3844
www.wagnerspraytech.com
© 2004 Wagner Spray Tech. All rights reserved,
including right of production in whole or in part, in
any form. Printed in China.
U.S. Patent Number D 470 914
 Loading...