

Page 1

EN
Quick start guide
ES
FR
Microsoft® Windows® 7 SP1+, Vista® SP2+, XP SP3+ (32 & 64 bit)
Guía de arranque rápido
Guide de mise en route
www.wacom.com
Page 2
Installing Wacom sign | pro PDF
1 Close all open applications.
2 Connect your Wacom product to a free USB port of your computer.
3 Insert the Wacom sign | pro PDF installation CD into your computer.
4 Click “Start” and follow the on-screen prompts.
Starting Wacom sign | pro PDF
1 Click “Start” and choose “(All) Programs”
2 Select “Wacom sign | pro PDF” and open “Wacom sign | pro PDF”
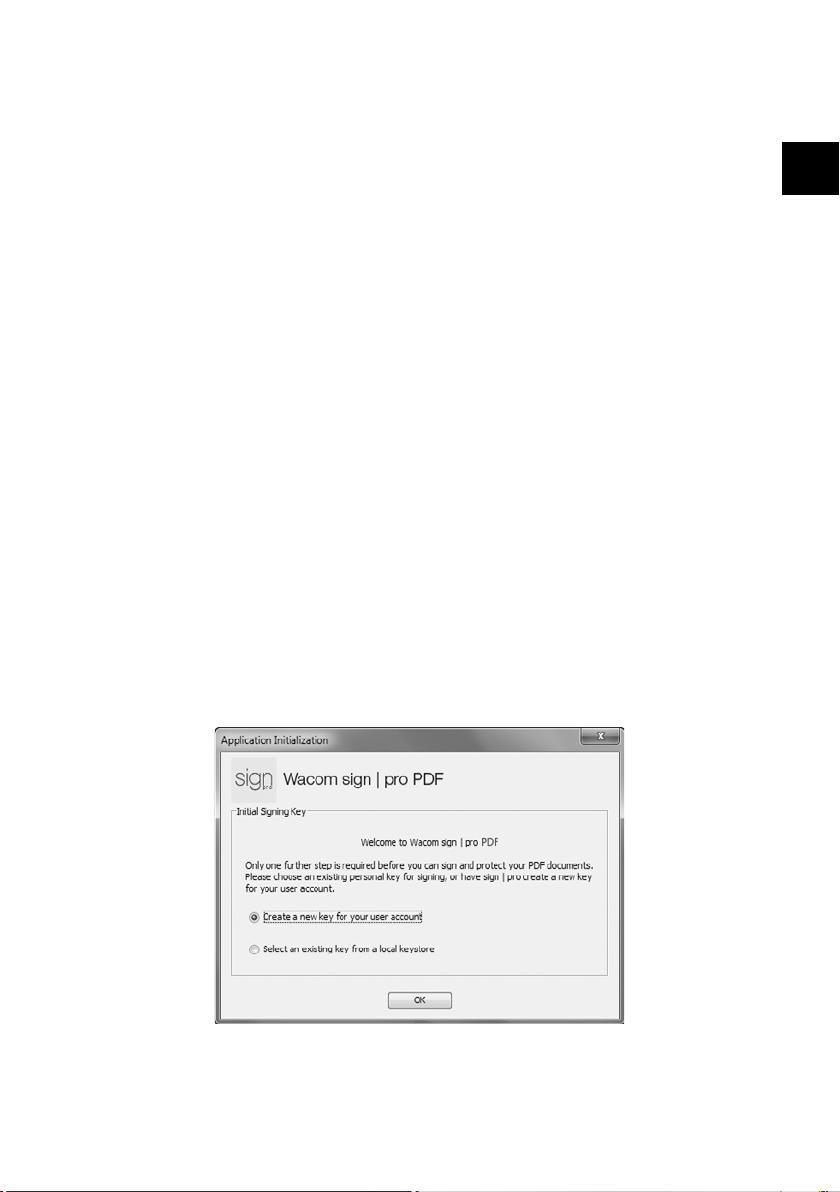
Signing keys
Signed PDF documents are protected by a signing key (digital certificate).
When you start Wacom sign | pro PDF for the first time, you must provide
the application with an existing key, or you can use Wacom sign | pro PDF to
create one for you.
EN
1
Page 3
1 If you don’t already have a signing key, simply click “OK”.
2 Enter a password to be used with the certificate.
3 If you would like to define more information, select the “Set parameters
for new key (optional)” checkbox and fill in the other information as
required.
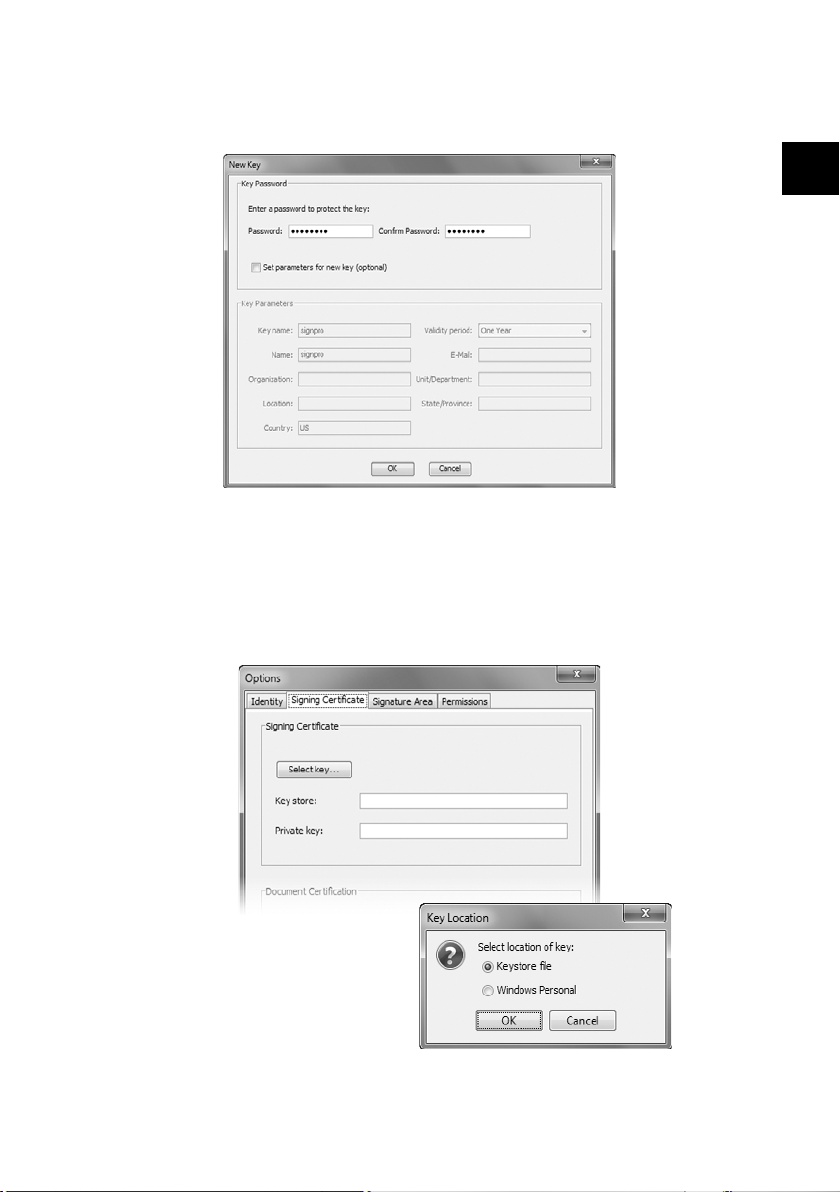
4 If you have chosen to use an existing key, click “Select key…”, and
then select the file containing the key you wish to use.
EN
2
Page 4
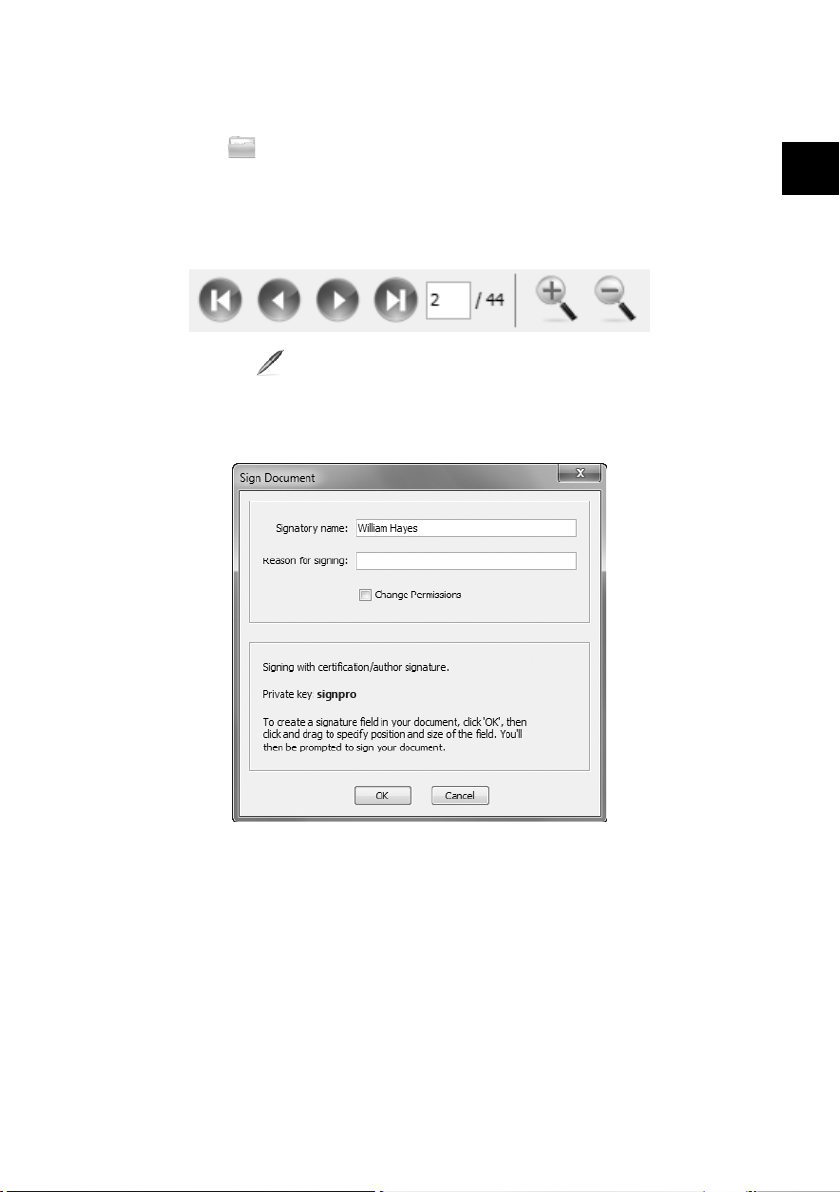
Signing an existing PDF document
1 Click the button on the Wacom sign | pro PDF toolbar then browse
to and open any PDF document.
2 Use the navigation and zoom buttons to review the document and go
to the place you want a signature to appear.
3 Click on the button.
4 Enter name of person signing as well as the reason for signing and
confirm your input by clicking “OK”.
EN
3
Page 5
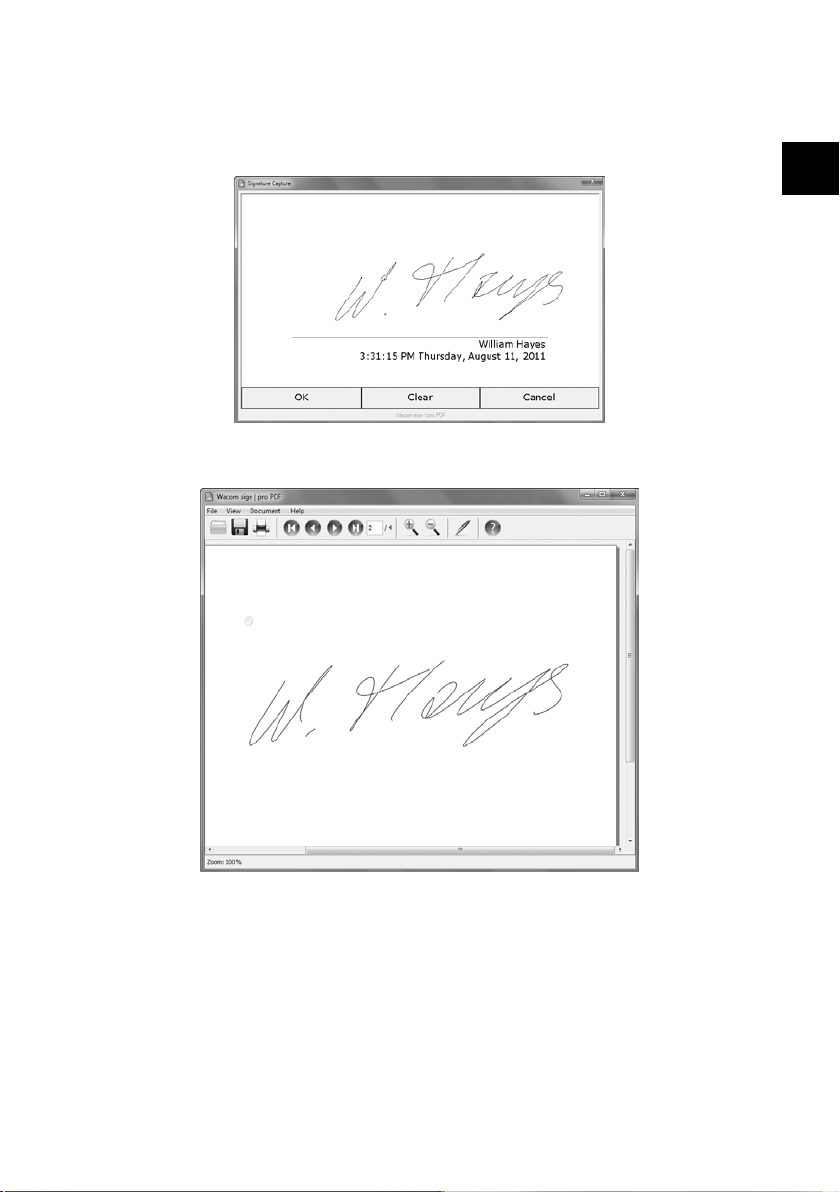
5 Click and drag on the document to mark the area where you wish the
signature to appear.
6 Sign on the tablet and click “OK”.
7 The signature will be displayed on the document.
EN
4
Page 6

8 Add further signatures as required.
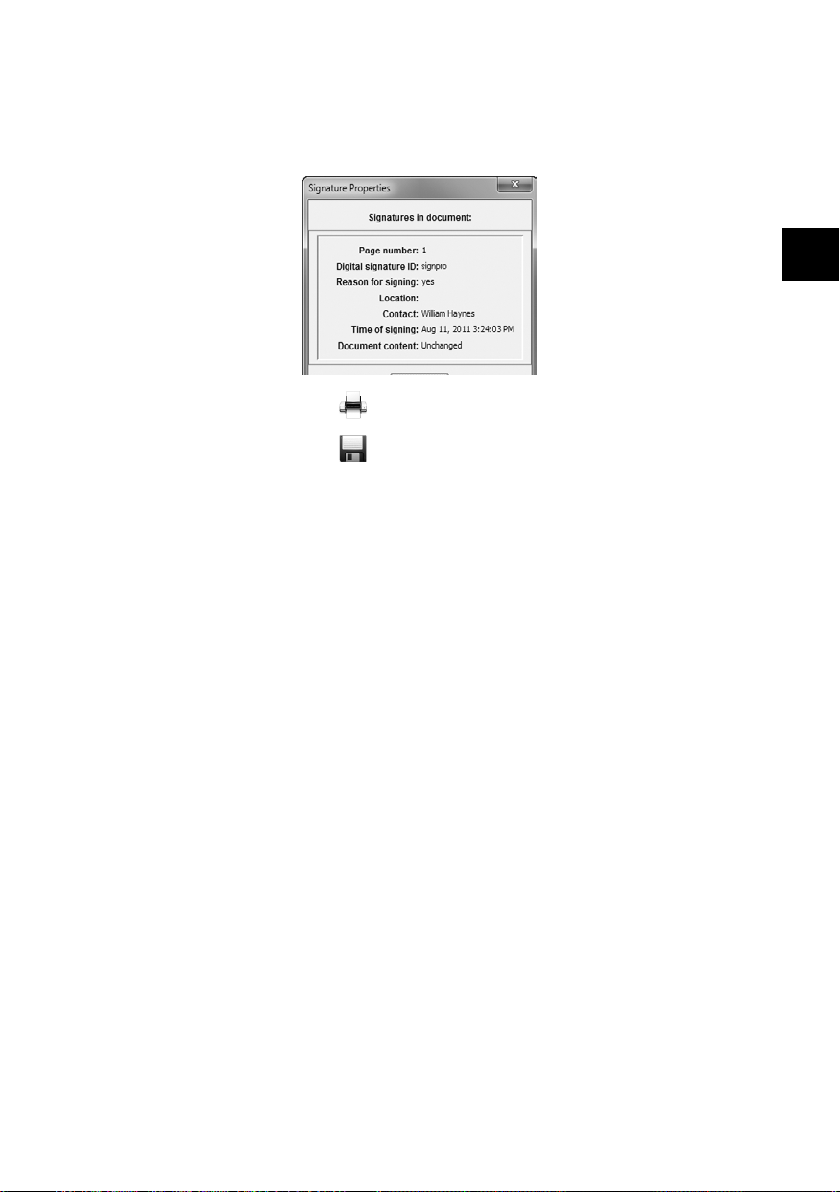
9 Click on a signature to view signing information.
10 Click the button to print the document.
11 Click the button to save the document.
EN
5
Page 7
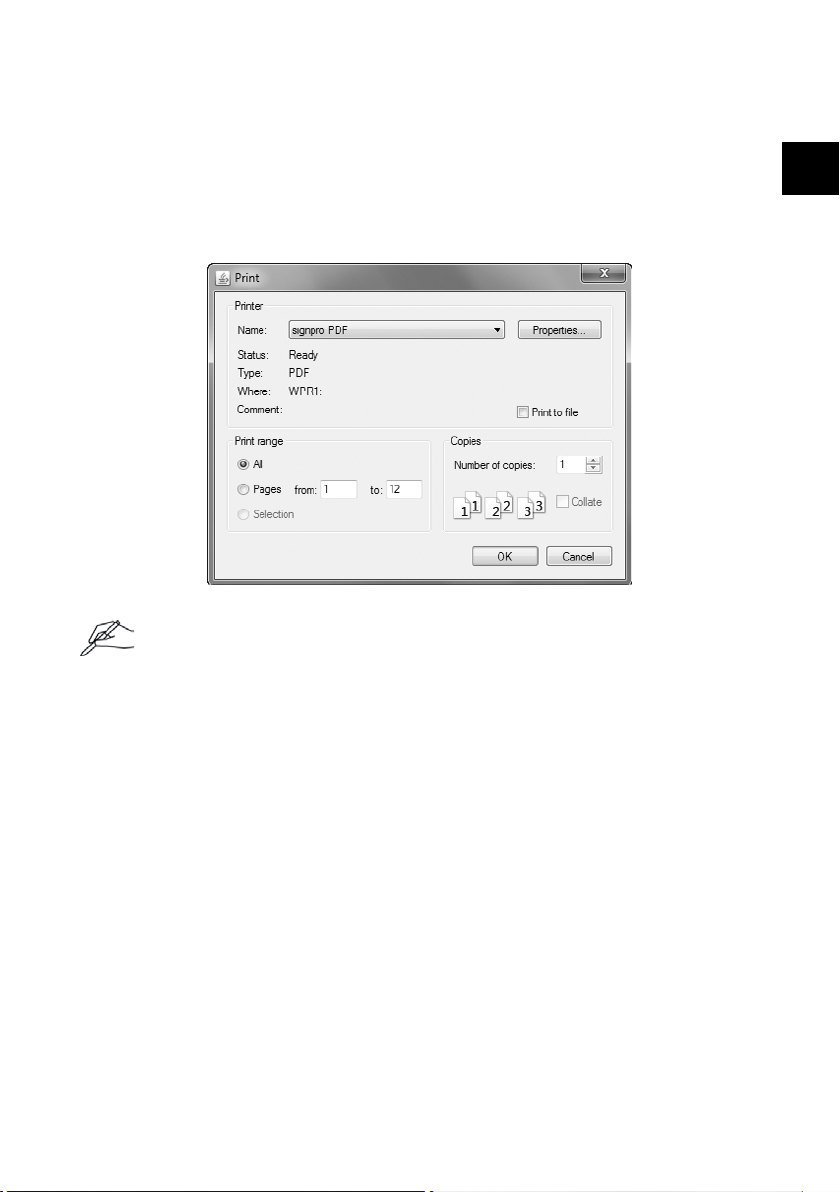
Generating a PDF document to sign
1 Open any document (word processing document, spread sheet, etc.)
you wish to sign in its associated application.
2 Use the application’s menu commands (usually “File – Print…”) to print
to the “Wacom sign | pro PDF” printer.
Do not use toolbar print buttons or “Quick Print” commands as these usually
print immediately to the default printer without the opportunity to select the
“Wacom signpro PDF” printer.
EN
3 The Wacom sign | pro PDF printer will generate a PDF version of your
document and open the Wacom sign | pro PDF application to display
it.
4 Proceed to insert signature areas and sign the document as described
above.
6
Page 8

Online help
To read the online help that comes with Wacom sign | pro PDF, click the
button on the Wacom sign | pro PDF toolbar.
Register your product
Visit http://www.wacom.com/register to register the Wacom product you are
using with your sign | pro PDF software.
Customer support
Check the Troubleshooting section in the User’s Manual, or visit our web
site at:
www.wacom.com/customercare
or
1-800-922-6613
EN
© 2012 Wacom Technology Corporation. All rights reserved. Wacom is a
trademark of Wacom Co., Ltd. All other trademarks and product names
are property of their respective companies. The product contains software
protected by copyright.
7
Page 9

Instalación de sign | pro PDF de Wacom
1 Cierre todas las aplicaciones que estén abiertas.
2 Conecte su producto Wacom en un puerto USB de su ordenador que
esté libre.
3 Inserte en el ordenador el CD de instalación de
sign | pro PDF de Wacom.
4 Haga clic en "Iniciar" y siga las instrucciones que aparecen en
pantalla.
Inicio de sign | pro PDF de Wacom
1 Haga clic en “Start” y seleccione “(Todos los) Programas”
2 Seleccione "Wacom Sign | Pro PDF" y abra "Wacom Sign | Pro PDF"
Claves de firma
Los documentos PDF firmados están protegidos con una clave de firma
(certificado digital). Cuando inicie sign | pro PDF de Wacom por primera
vez, debe introducir en el programa una clave existente o bien utilizar
sign | pro PDF de Wacom para crear una nueva.
ES
8
Page 10

1 Si todavía no dispone de una clave de firma, haga clic en "Aceptar".
2 Introduzca la contraseña que desea utilizar con el certificado.
3 Si desea definir más información, seleccione la casilla "Configurar
parámetros para nueva clave (opcional)" y complete el resto de
información.
4 Si ha escogido la opción de utilizar una clave existente, haga clic en
"Seleccionar clave…" y, a continuación, seleccione el archivo que
contiene la clave que desea emplear.
ES
9
Page 11

Firma de un documento PDF existente
1 Haga clic en el icono en la barra de herramientas de
sign | pro PDF de Wacom para buscar y abrir cualquier documento
PDF.
2 Utilice los iconos de navegación y de zoom para revisar el documento
y desplácese hasta el lugar donde desea que aparezca la firma.
3 Haga clic en el botón .
4 Introduzca el nombre del firmante y el motivo para firmar y, a
continuación, confirme su entrada pulsando "Aceptar".
ES
10
Page 12

5 Haga clic y arrastre en el documento para marcar el área donde desea
que aparezca la firma.
6 Firme en la tableta y haga clic en “Aceptar”.
7 La firma se visualizará en el documento.
ES
11
Page 13
8 Añada tantas firmas como sea necesario.
9 Haga clic sobre una firma para visualizar la información sobre dicha
firma.
10 Haga clic en el botón para imprimir el documento.
11 Haga clic en el botón para guardar el documento.
ES
12
Page 14

Generación de un documento PDF para
firmar
1 Abra cualquier documento (documento de word, hoja de cálculo, etc.)
que desee firmar en la aplicación asociada.
2 Utilice los comandos del menú de aplicaciones (normalmente
"Archivo – Imprimir…") para enviar el documento a la impresora
"Wacom Sign | Pro PDF".
No utilice los iconos de imprimir de la barra de herramientas o los comandos
"Impresión rápida", ya que estos normalmente envían los documentos a la
impresora configurada por defecto sin permitir la opción de seleccionar la
impresora "Wacom SignPro PDF".
3 La impresora Wacom Sign | Pro PDF generará una versión de PDF de
su documento y abrirá la aplicación sign | pro PDF de Wacom para
visualizarlo.
ES
4 Continúe insertando las áreas de la firma y firme el documento tal y
como se ha descrito anteriormente.
13
Page 15

Ayuda en línea
Para leer la ayuda en línea de sign | pro PDF de Wacom, haga clic en el
icono de la barra de herramientas de sign | pro PDF de Wacom.
Registre a su producto
Visite http://www.wacom.com/register para registrar a su producto Wacom
usando el software sign | pro PDF.
Ayuda al cliente
Revise el apartado de resolución de problemas del manual de usuario o visite
nuestro sitio web en:
www.wacom.com/customercare
o
1-800-922-6613
ES
© 2012 Wacom Technology Corporation. Todos los derechos reservados.
Wacom es un marca comerciale de Wacom Co., Ltd. Todas las demás
marcas comerciales y nombres de productos son propiedad de sus
respectivas compañías. El producto contiene software protegido por
derechos de autor.
14
Page 16

Installation de Wacom sign | pro PDF
1 Fermez toutes les applications ouvertes.
2 Connectez votre tablette Wacom à un port USB libre de votre
ordinateur.
3 Insérez le CD d'installation Wacom sign | pro PDF dans votre ordinateur.
4 Cliquez sur "Start" et suivez les instructions à l'écran.
Démarrage de Wacom sign | pro PDF
1 Cliquez sur "Démarrer" et sélectionnez "Tous les programmes"
2 Sélectionnez "Wacom sign | pro PDF" et ouvrez
"Wacom sign | pro PDF"
Clés de signature
FR
Les documents PDF signés sont protégés par une clé de signature (certificat
numérique). Lorsque vous démarrez Wacom sign | pro PDF pour la première fois,
vous devez fournir à l'application une clé existante ; vous pouvez également
utiliser Wacom sign | pro PDF pour vous en créer une.
15
Page 17

1 Si vous ne possédez pas encore de clé de signature, cliquez sur "OK".
2 Entrez un mot de passe pour protéger le certificat.
3 Si vous souhaitez préciser des informations supplémentaires, activez la
case à cocher "Définir les paramètres pour la nouvelle clé (optionnel)"
et remplissez les autres informations nécessaires.
4 Si vous choisissez d'utiliser une clé existante, cliquez sur "Sélectionner
la clé…", puis sélectionnez le fichier qui contient la clé que vous
souhaitez utiliser.
FR
16
Page 18

Signature d'un document PDF existant
1 Cliquez sur le bouton dans la barre d'outils Wacom sign | pro PDF,
puis parcourez l'explorateur pour trouver et ouvrir le document PDF
souhaité.
2 Utilisez les boutons de navigation et de zoom pour réviser le document
et pour atteindre l'emplacement où vous souhaitez apposer votre
signature.
3 Cliquez sur le bouton .
4 Entrez le nom du signataire ainsi que le motif de la signature, puis
confirmez votre saisie en cliquant sur "OK".
FR
17
Page 19

5 Cliquez et tracez avec le pointeur de la souris le cadre où doit apparaître
la signature sur le document.
6 Signez sur la tablette et cliquez sur «OK».
7 La signature apparaît alors sur le document.
FR
18
Page 20

8 Ajoutez d’autres signatures, le cas échéant.
9 Cliquez sur une signature pour afficher les informations correspondantes.
10 Cliquez sur le bouton pour imprimer le document.
11 Cliquez sur le bouton pour enregistrer le document.
FR
19
Page 21

Création d'un document PDF à signer
1 Ouvrez un document (document de traitement de texte, feuille de
calcul, etc.) que vous souhaitez signer.
2 Utilisez les options de l'application (généralement "Fichier –
Imprimer…") à envoyer à l'imprimante "Wacom sign | pro PDF".
N'utilisez pas les boutons Imprimer de la barre d'outils ni les commandes d'impression rapide car l'impression sera lancée immédiatement sur
l'imprimante par défaut sans proposer la possibilité de choisir l'imprimante
"Wacom sign | pro PDF".
3 L'imprimante Wacom sign | pro PDF génère une version PDF de votre
document et ouvre l'application Wacom sign | pro PDF pour l'afficher.
FR
4 Continuez pour insérer les zones de la signature et signez le document
tel que décrit ci-dessus.
20
Page 22

Aide en ligne
Pour ouvrir l'aide en ligne disponible dans Wacom sign | pro PDF, cliquez sur
le bouton dans la barre d'outils Wacom sign | pro PDF.
Enregistrement
Visitez notre site http://www.wacom.com/register pour enregistrer la tablette
Wacom que vous employez avec le logiciel sign | pro PDF.
Assistance technique
Consultez la section Dépannage dans le manuel de l’utilisateur ou visitez
notre site sur:
www.wacom.com/customercare
ou
1-800-922-6613
FR
© 2012 Wacom Technology Corporation. Tous droits réservés. Wacom est
une marque de commerce de Wacom Co., Ltd. Toutes les autres marques
de commerce et noms de produits sont la propriété de leurs compagnies
respectives. Le produit contient un logiciel protégé par les droits d’auteur.
21
Page 23

Wacom. 1311 SE Cardinal Court, Vancouver, WA 98683 USA
www.wacom.com
QSG-SP01
 Loading...