

Page 1

Combi-Steam Oven
Combair-Steam N
Operating instructions
V-ZUG Ltd
Page 2

2
Thank you for choosing to buy one of our products. Your appliance is made
to high standards and is easy to use. Nevertheless, please take the time to
read these operating instructions in order to familiarize yourself with the
appliance and get the best use out of it.
Please follow the safety precautions.
Modifications
Text, diagrams and data correspond to the technical standard of the
appliance at the time these operating instructions went to press. The right to
make technical modifications for the purpose of the further development of
the appliance is reserved.
Symbols used
A Indicates step-by-step instructions.
– Describes how the appliance reacts to the steps taken.
䡲 Indicates a list.
Validity
The model number corresponds to the first three digits on the identification
plate. These operating instructions apply to the following models:
Variations depending on the model are noted in the text.
© V-ZUG Ltd, CH-6301 Zug, 2010
Denotes important safety precautions. Failure to observe said
precautions can result in injury or damage to the appliance or
fittings!
Denotes useful tips for the user.
Type Model no. Size system
CS-NZ 795 55-600 / 55-762
CS-NZ 796 60-600 / 60-762
Page 3

3
Contents
Safety precautions 5
Before using for the first time . . . . . . . . . . . . . . . . . . . . . . . . 5
Correct use . . . . . . . . . . . . . . . . . . . . . . . . . . . . . . . . . . . . . . 6
Children in the home . . . . . . . . . . . . . . . . . . . . . . . . . . . . . . 7
Note on use . . . . . . . . . . . . . . . . . . . . . . . . . . . . . . . . . . . . . 7
Appliance description 10
Construction . . . . . . . . . . . . . . . . . . . . . . . . . . . . . . . . . . . . 10
Operating and display elements . . . . . . . . . . . . . . . . . . . . . 11
Cooking space . . . . . . . . . . . . . . . . . . . . . . . . . . . . . . . . . . 12
Accessories . . . . . . . . . . . . . . . . . . . . . . . . . . . . . . . . . . . . 13
Operating the appliance 17
Using for the first time . . . . . . . . . . . . . . . . . . . . . . . . . . . . 18
Example . . . . . . . . . . . . . . . . . . . . . . . . . . . . . . . . . . . . . . . 19
Filling the water tank . . . . . . . . . . . . . . . . . . . . . . . . . . . . . 19
Selecting the operating mode . . . . . . . . . . . . . . . . . . . . . . . 20
Changing the operating mode . . . . . . . . . . . . . . . . . . . . . . 20
Selecting the cooking space temperature . . . . . . . . . . . . . 20
Checking / Changing the cooking space temperature . . . . 21
Switching off . . . . . . . . . . . . . . . . . . . . . . . . . . . . . . . . . . . . 21
Emptying the water tank . . . . . . . . . . . . . . . . . . . . . . . . . . . 22
User settings 23
Childproof lock . . . . . . . . . . . . . . . . . . . . . . . . . . . . . . . . . . 25
Time display . . . . . . . . . . . . . . . . . . . . . . . . . . . . . . . . . . . . 26
Acoustic signal . . . . . . . . . . . . . . . . . . . . . . . . . . . . . . . . . . 26
Illumination . . . . . . . . . . . . . . . . . . . . . . . . . . . . . . . . . . . . . 26
Water hardness . . . . . . . . . . . . . . . . . . . . . . . . . . . . . . . . . 27
Temperature unit . . . . . . . . . . . . . . . . . . . . . . . . . . . . . . . . . 27
Time format . . . . . . . . . . . . . . . . . . . . . . . . . . . . . . . . . . . . 27
Factory settings . . . . . . . . . . . . . . . . . . . . . . . . . . . . . . . . . 27
Time functions 28
Setting / Changing the time . . . . . . . . . . . . . . . . . . . . . . . . 28
Timer . . . . . . . . . . . . . . . . . . . . . . . . . . . . . . . . . . . . . . . . . 29
Operating time . . . . . . . . . . . . . . . . . . . . . . . . . . . . . . . . . . 30
Delayed start . . . . . . . . . . . . . . . . . . . . . . . . . . . . . . . . . . . 31
Page 4

… Contents
4
Operating modes 34
Fast heating . . . . . . . . . . . . . . . . . . . . . . . . . . . . . . . . . . . . . 38
Tips on settings 39
Optimal use . . . . . . . . . . . . . . . . . . . . . . . . . . . . . . . . . . . . . 39
Cooking/Baking tables . . . . . . . . . . . . . . . . . . . . . . . . . . . . 40
Tips and tricks 63
Saving energy . . . . . . . . . . . . . . . . . . . . . . . . . . . . . . . . . . . 67
Care and maintenance 68
Cleaning the exterior . . . . . . . . . . . . . . . . . . . . . . . . . . . . . . 68
Cleaning the appliance door . . . . . . . . . . . . . . . . . . . . . . . . 69
Removing the shelf guides . . . . . . . . . . . . . . . . . . . . . . . . . 70
Replacing the door seal . . . . . . . . . . . . . . . . . . . . . . . . . . . 70
Cleaning the accessories . . . . . . . . . . . . . . . . . . . . . . . . . . 70
Cleaning the cooking space . . . . . . . . . . . . . . . . . . . . . . 71
Descaling . . . . . . . . . . . . . . . . . . . . . . . . . . . . . . . . . . . . . . 72
Replacing a defective light bulb . . . . . . . . . . . . . . . . . . . . . 74
Trouble-shooting 75
What to do if … . . . . . . . . . . . . . . . . . . . . . . . . . . . . . . . . . . 75
After a power failure . . . . . . . . . . . . . . . . . . . . . . . . . . . . . . 80
Accessories and spare parts 81
Technical data 84
Disposal 86
Notes 87
Index 88
Repair service 91
Quick instructions 92
Page 5

5
Safety precautions
In accordance with the requirements of IEC 60335-1:
䡲 This appliance is not intended for use by persons (including children) with
reduced physical, sensory or mental capabilities, or lack of experience and
knowledge, unless supervised or unless they have been given instruction
concerning the use of the appliance by a person responsible for their
safety.
Before using for the first time
䡲 The appliance must be installed and connected up to the power supply in
accordance with the separate installation instructions. The necessary work
should be done by a qualified fitter or electrician.
䡲 Dispose of the packaging material in accordance with local regulations.
䡲 Before using the newly installed appliance for the first time, please follow
the advice in the 'Using for the first time' section.
䡲 Make the desired user settings.
The appliance corresponds to recognised technology standards
and the relevant safety regulations. Proper use of the appliance is
however essential to avoid damage and accidents. Please therefore follow the precautions given in these operating instructions.
Page 6

… Safety precautions
6
Correct use
䡲 The appliance is designed for use in the home for preparing food. Under
no circumstances flambé or cook food using a lot of fat in the cooking
space! No liability is assumed for any damage caused by improper or incorrect use.
䡲 Never use the appliance to dry animals, textiles or paper!
䡲 Not to be used as a room heater or humidifier.
䡲 The appliance should only be installed and operated in a room with an am-
bient temperature of between 5 °C and 35 °C. In the event of frost, there
is a danger that residual water left in the pumps can freeze, causing
damage.
䡲 Any repairs, modifications or manipulations to the appliance, especially
any electrically live parts, should only be carried out by the manufacturer,
its Customer Services or similarly qualified persons. Repairs if carried out
incorrectly may cause serious injury, damage to the appliance and fittings,
as well as affect the functioning of the appliance. If the appliance is not
working properly or in case of a repair order, follow the instructions given
in the 'Repair service' section. Please contact Customer Services if
necessary.
䡲 Only original spare parts may be used.
䡲 Retain these operating instructions for future reference. If you sell the ap-
pliance or pass it on to a third party, please ensure these operating instructions accompany the appliance, together with the instructions on
installation. In this way, the new owner can inform themselves about how
to use the appliance correctly and read the pertinent safety precautions.
Page 7

… Safety precautions
7
Children in the home
䡲 Packaging material, e.g. plastic and polystyrene, can be dangerous for
children. Danger of suffocation! Please keep packaging material away from
children.
䡲 The appliance is designed for use by adults who are familiar with these
operating instructions. Children are often unable to recognise the danger
of electrical appliances. Ensure proper supervision and do not allow
children to play with the appliance – there is a danger that children can
hurt themselves.
䡲 Use the childproof locking facility.
Note on use
䡲 If the appliance is visibly damaged, do not use it. Contact our Customer
Services.
䡲 If the appliance is not operating property, disconnect it from the power sup-
ply immediately.
䡲 Ensure the mains cables of other electrical appliances do not get caught
in the door of the appliance as the electrical cable insulation could get
damaged.
䡲 If the mains cable of the appliance is damaged, it must be replaced by Cus-
tomer Services in order to avoid hazard.
䡲 Ensure there are no foreign bodies or pets in the cooking space before
closing the appliance door.
䡲 Objects that could pose a danger if the appliance were accidentally
switched on should not be stored in the cooking space. Do not store food
or any temperature-sensitive or inflammable materials, e.g. cleaning
agents, oven sprays, etc., in the cooking space or appliance drawer.
Page 8

… Safety precautions
8
Caution: Burns hazard!
䡲 The appliance gets very hot when in use.
䡲 Heat is produced during cooking and baking. The appliance door,
especially the glass, gets hot. Burns hazard – do not touch. Keep children
away!
䡲 Steam and water droplets may escape from the cooking space when the
appliance door is opened. Do not put your hands into the cooking space
if there is steam in it!
䡲 The appliance remains hot for some time after being switched off and cools
down only slowly to room temperature. Please allow sufficient time for the
appliance to cool down before, for instance, cleaning it.
䡲 Overheated fat and oil can easily catch fire. Heating oil in the cooking
space to sear meat is dangerous and should not be done. Never try to
extinguish burning oil or fat with water – danger of explosion!
Smother the flames with a fire blanket and keep all doors and windows
closed.
䡲 Do not pour spirits (e.g. brandy, whisky, schnapps, etc.) over hot food –
danger of explosion!
䡲 Do not leave the appliance unsupervised when drying herbs, bread, mush-
rooms, etc. If the foodstuff dries out too much, this can pose a fire hazard.
䡲 If you notice smoke possibly coming from the appliance itself or from
inside the cooking space, keep the appliance door closed. Disconnect the
appliance from the power supply.
䡲 Accessories get hot in the cooking space. Always wear protective gloves
or use oven cloths.
Page 9

… Safety precautions
9
Caution: Danger of injury!
䡲 Be careful not to put fingers in the door hinges, there is otherwise a risk of
injury if the appliance door is moved. Particular care should be taken when
children are around.
䡲 Only leave the appliance door open in the at-rest position. An open
appliance door poses a danger of tripping or injury! Do not sit or rest on
the appliance door or use it as a storage surface.
How to avoid damaging the appliance
䡲 Close the appliance door carefully.
䡲 Do not place baking tins, moulds, cooking trays, etc. directly on the floor
of the cooking space.
䡲 Do not place any protective insert or aluminium foil on the floor of the cook-
ing space as this can damage the appliance.
䡲 Do not use knives or cutting wheels on the stainless steel tray, enamelled
baking trays, in cooking utensils and on the steam insert. This will visibly
damage them.
䡲 Do not use the original baking tray for steaming.
䡲 Do not use objects that can rust in the cooking space.
䡲 To prevent corrosion, allow the cooking space to dry and leave the appli-
ance door open in the at-rest position until the cooking space has cooled
down.
䡲 When cleaning the appliance make sure no water gets inside it. Use a mod-
erately damp cloth. Do not spray the inside or outside of the appliance with
water. Do not use a steam cleaner. If water gets inside the appliance it can
cause damage.
Page 10

10
Appliance description
Construction
1 Operating and display elements
2 Door in front of water tank (incl. instruction messages)
3 Ventilation opening
4 Door handle
5 Appliance door
6 Appliance drawer *
* Depending on the model
1 2
4
5
6
3
Page 11
… Appliance description
11
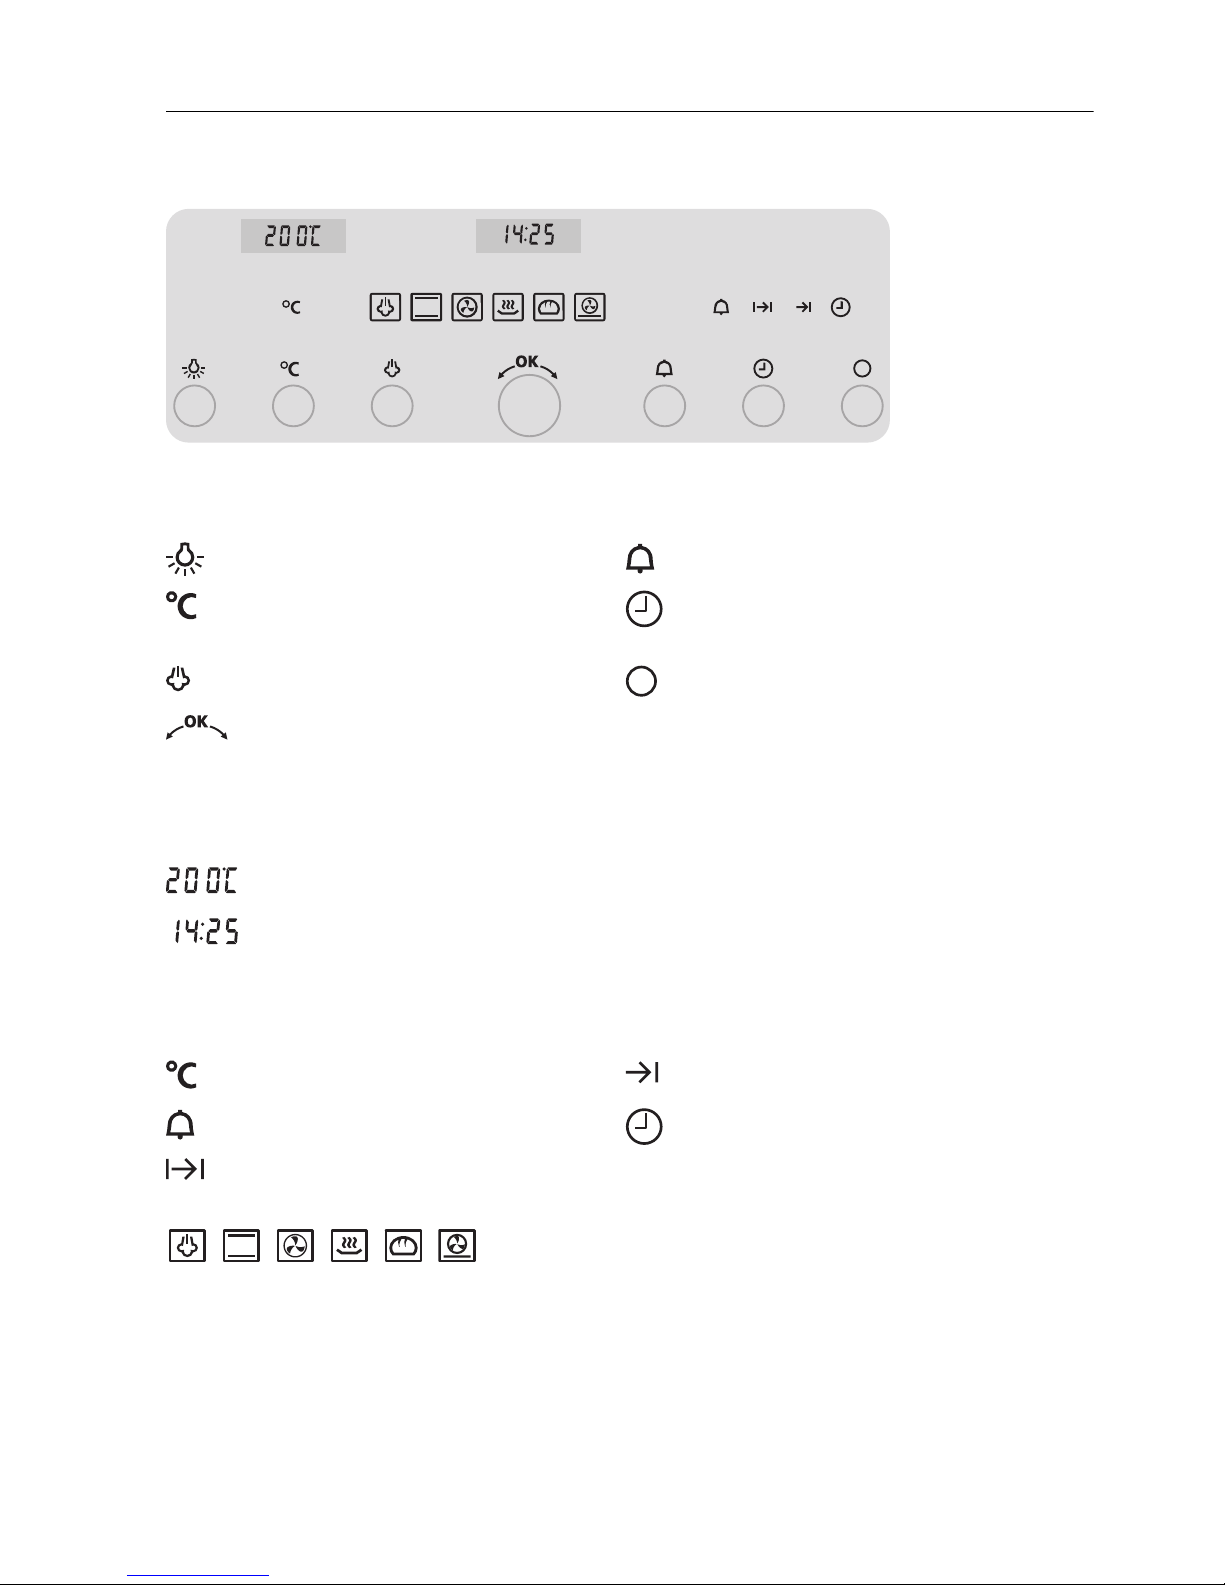
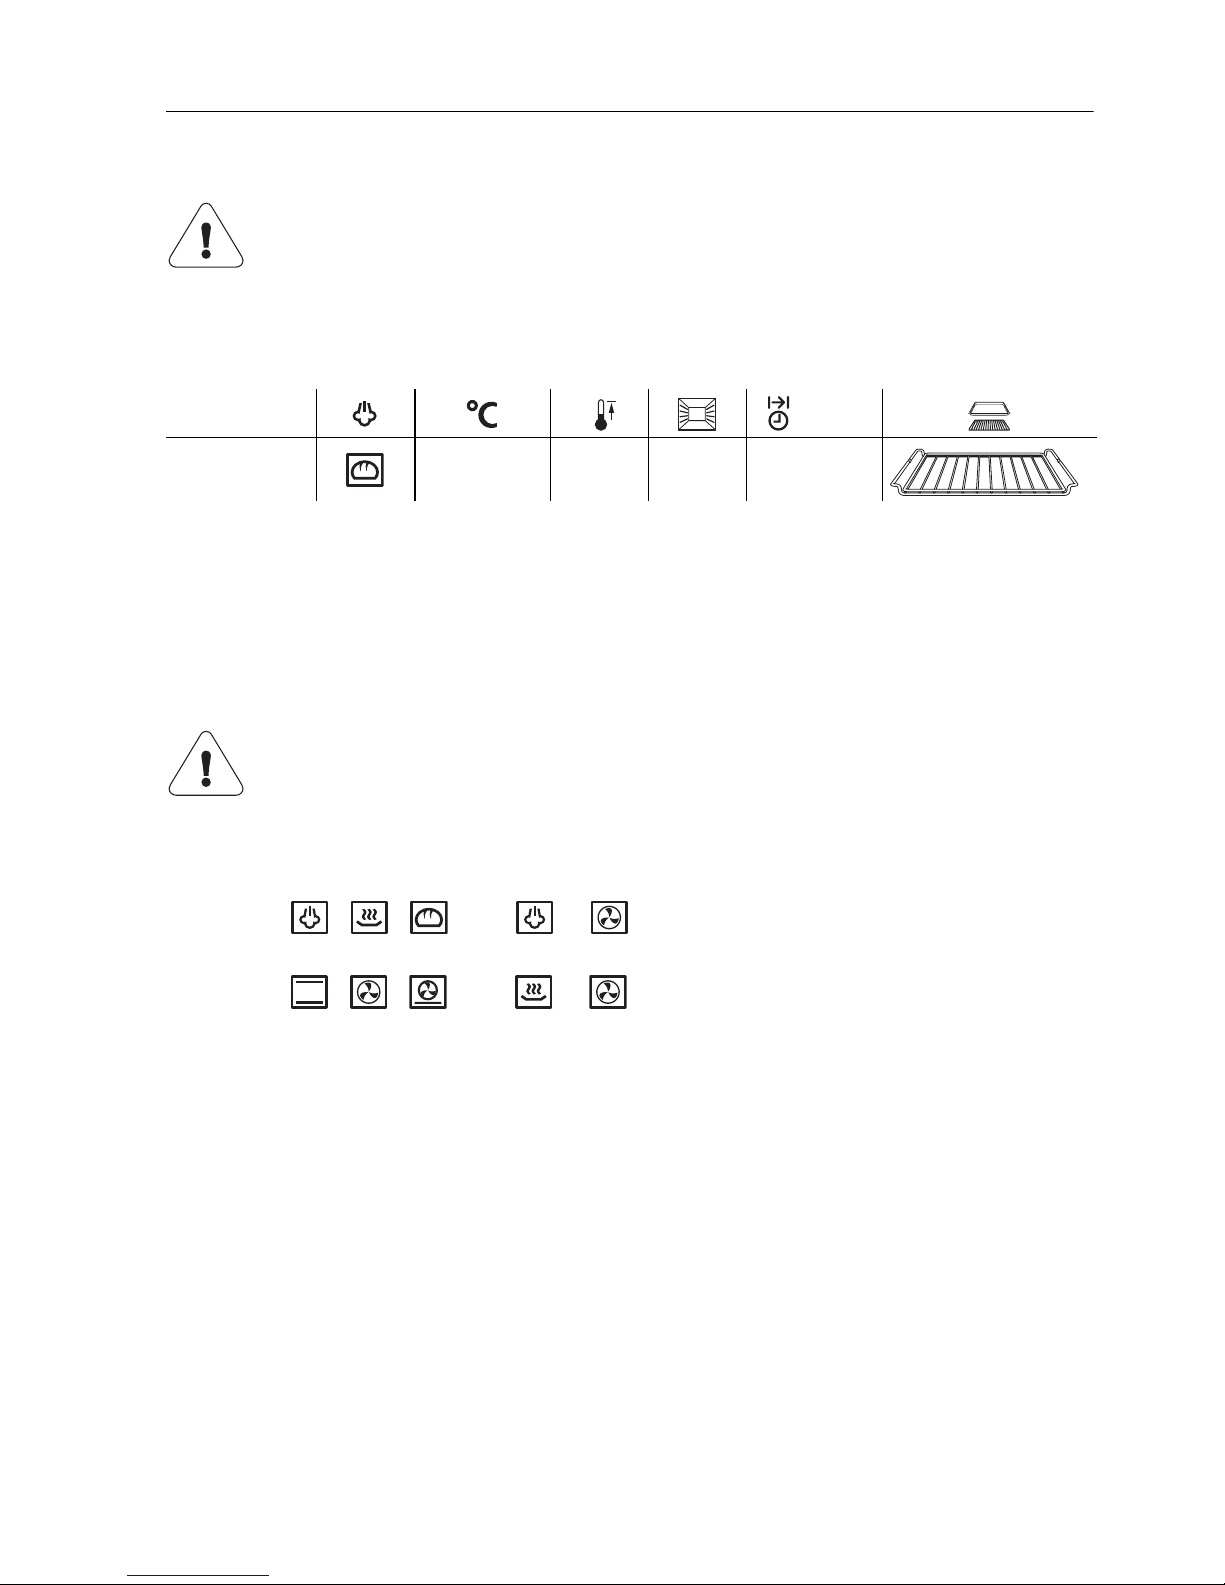
Operating and display elements
Buttons
Displays
Symbols
Operating modes
Illumination Timer
Cooking space temperature Time, operating time,
switch-off time
Operating mode Off
Adjusting knob
Temperature
Time, operating time, switch-off time, timer, etc.
Cooking space temperature Switch-off time
Timer Time
Operating time
Page 12
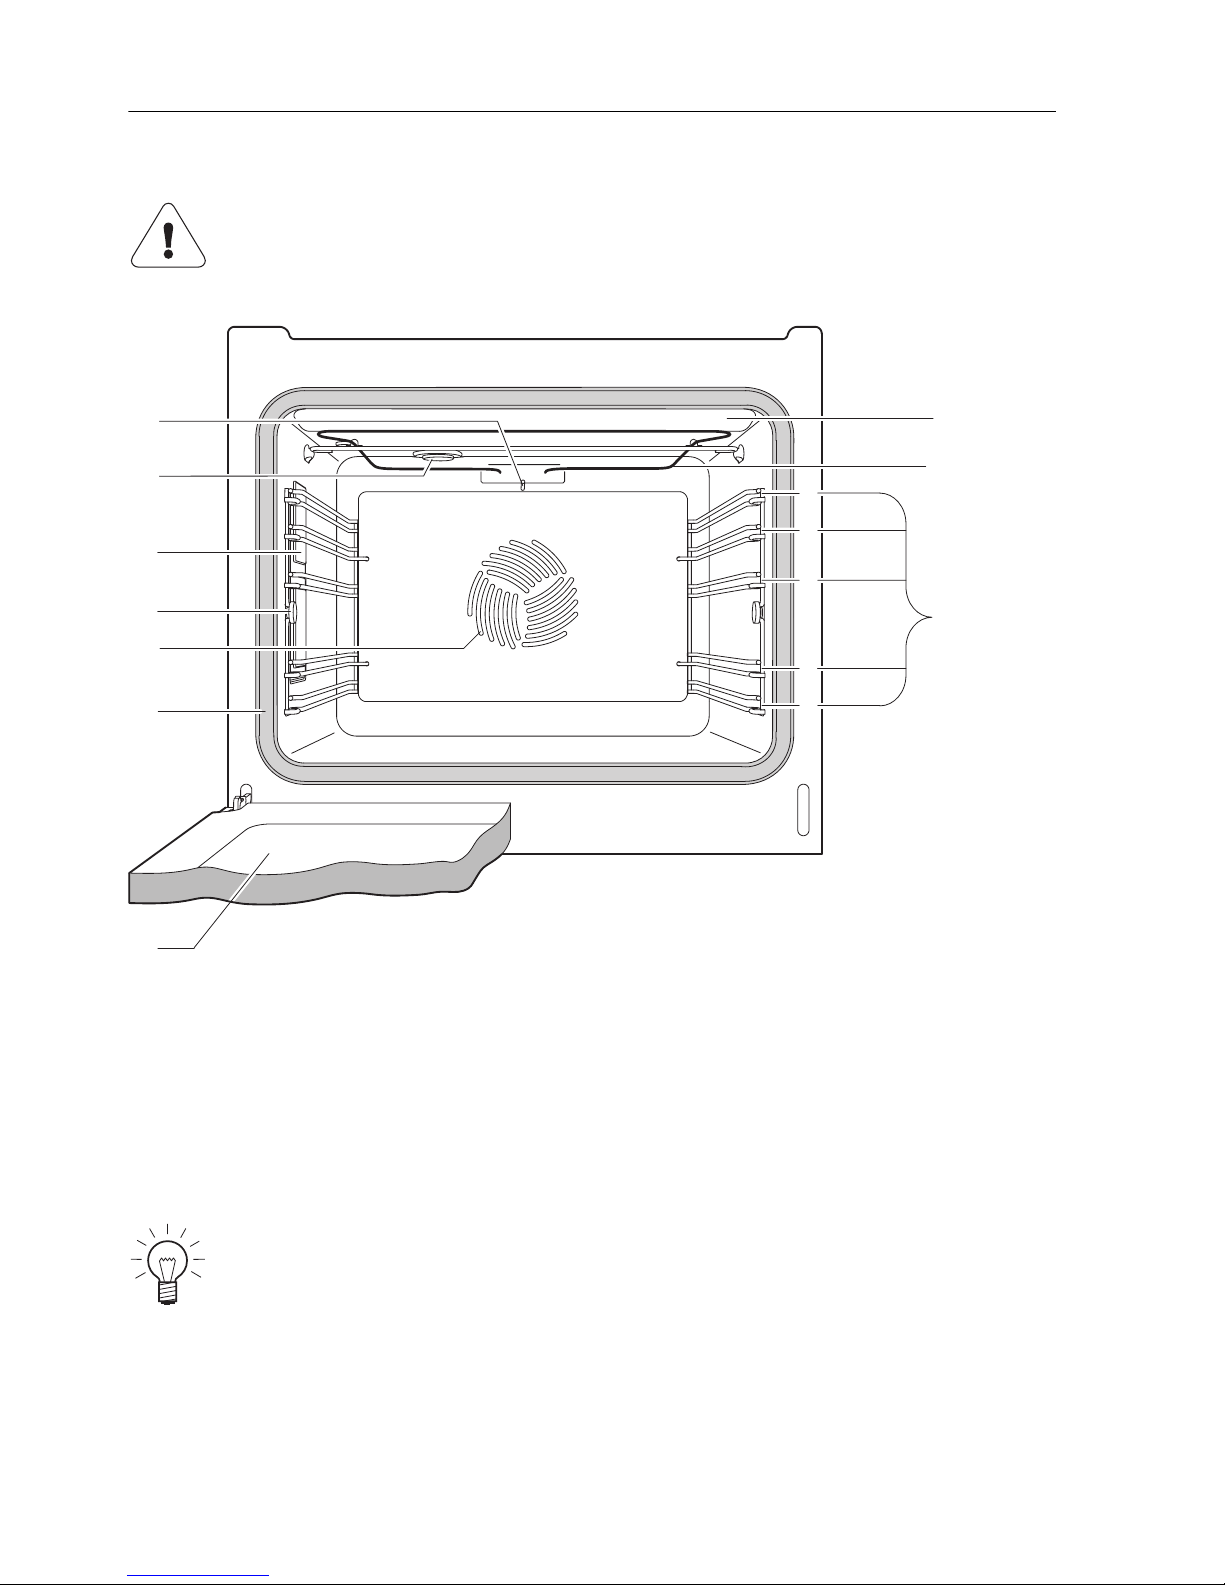
… Appliance description
12
Cooking space
Do not place any protective insert or aluminium foil on the floor of
the cooking space.
1 Appliance door 6 Cooking space ventilation
2 Door seal 7 Cooking space temperature sensor
3 Hot air fan 8 Top heat element guard
4 Knurled nut 9 Top heat
5 Illumination 10 Levels (labelled)
The bottom heat element is beneath the cooking space floor.
3
5
2
1
6
9
10
7
4
8
1
2
3
4
5
Page 13
… Appliance description
13
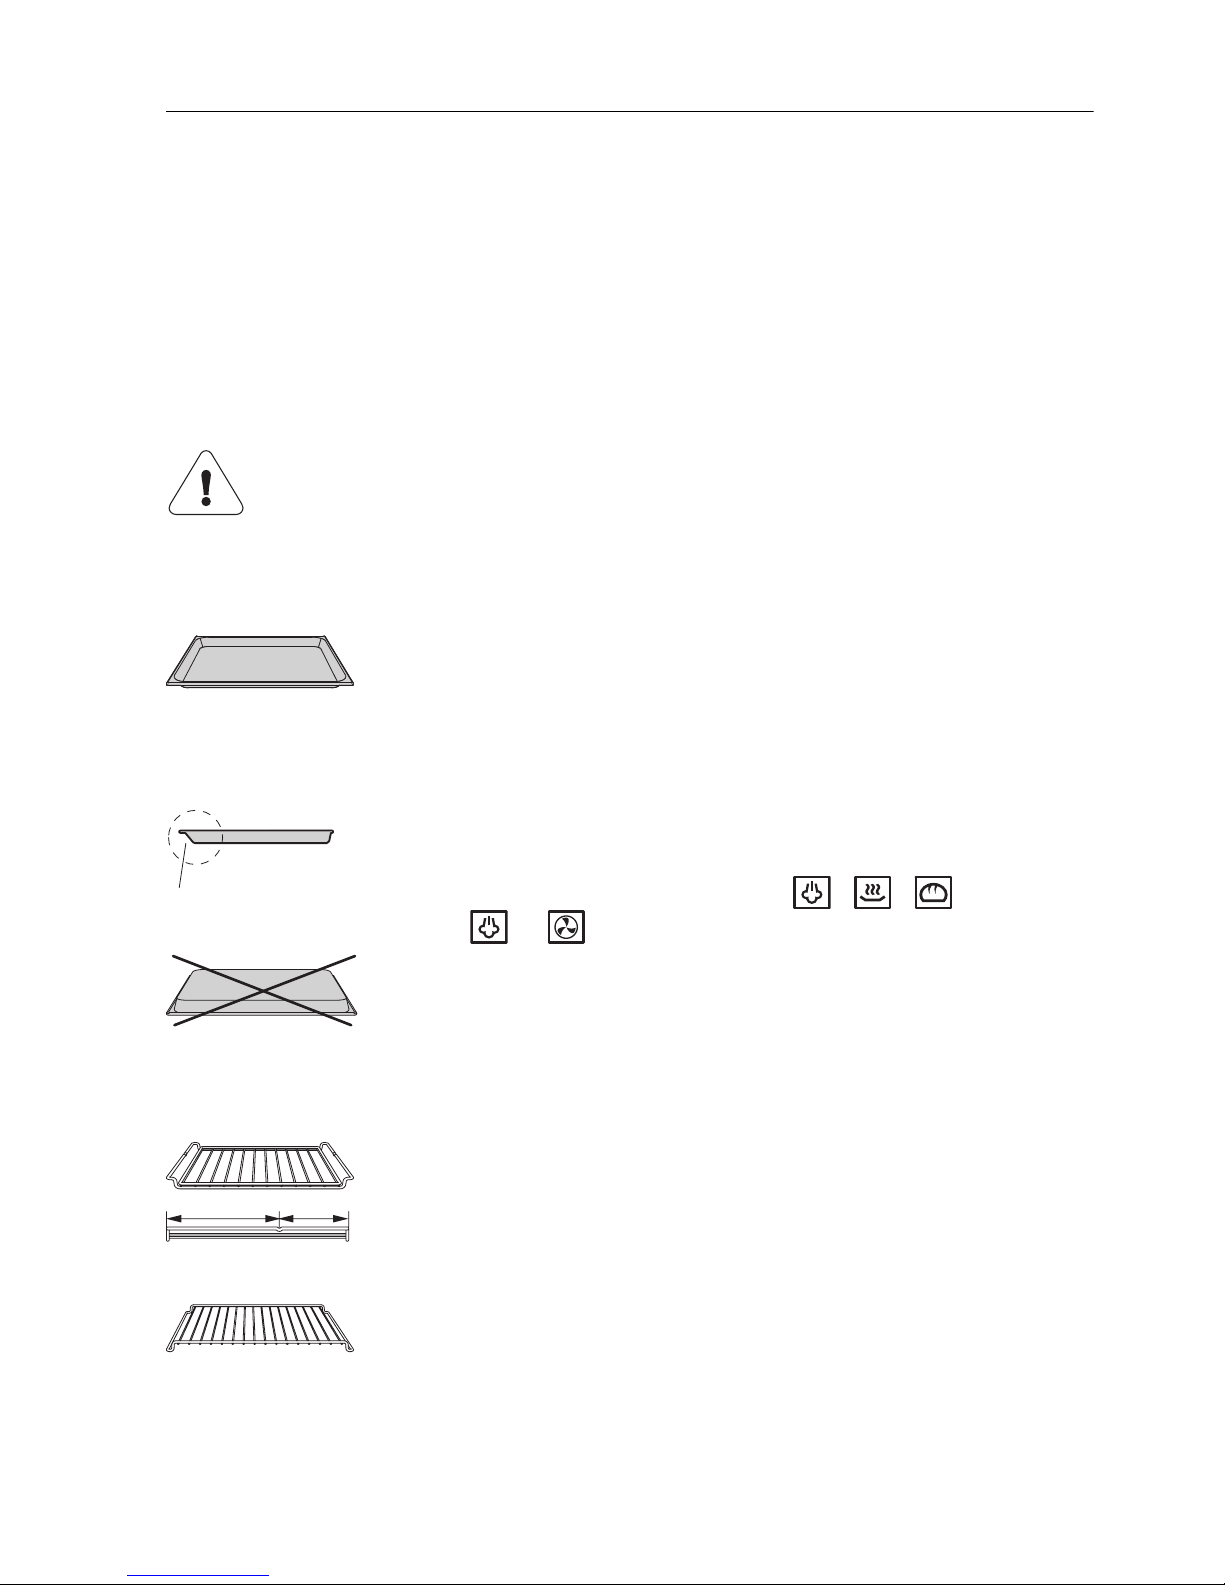
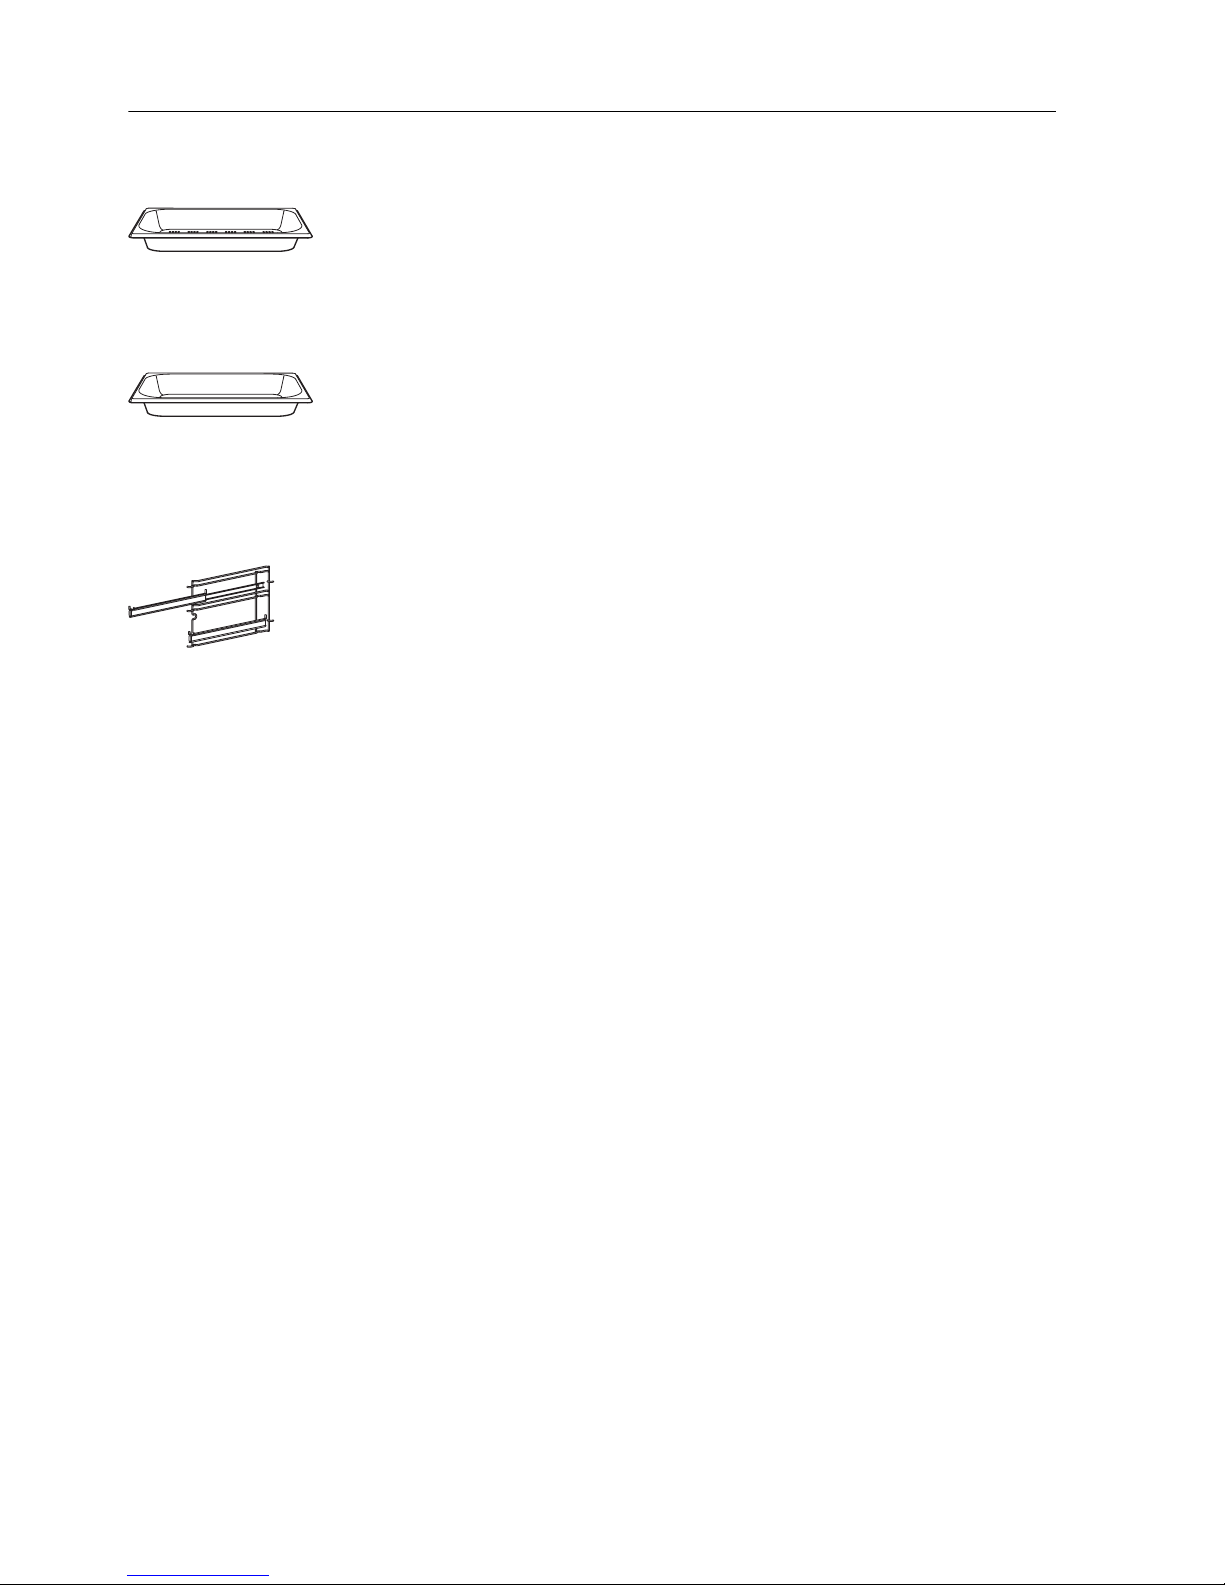
Accessories
The baking trays and wire shelves are inserted into the oven between the two
rails of a shelf runner.
The wire shelves have non-tip safety notches which prevent them being pulled
right out when they only need to be partially pulled out. The wire shelves can
then only be taken out of the oven by raising them upwards and then pulling
them out.
Do not use knives or cutting wheels on the stainless steel tray,
enamelled baking trays, in cooking utensils and on the steam insert. This causes visible damage.
Original baking tray
䡲 Serves as a baking tray for flans and biscuits.
䡲 If not fully covered by the baking, the shape of the
original baking tray can become distorted during
baking. This is normal. As it cools down, it will go
back to its original form.
A Always push the «sloped» side 1 of the original bak-
ing tray right to the back of the cooking space.
䡲 Not suitable for use in the , , and
+ operating modes.
A The or iginal b aking tray is to be used the normal way
round – not upside down.
Wire shelf
䡲 For standing roasting and baking tins on.
䡲 For standing meat, frozen pizza, etc. on.
䡲 Push the wire shelf in with the shorter side b to the
back wall of the cooking space.
䡲 Serves as a cooling rack for pastries and biscuits,
etc.
For preparing frozen bread rolls and quiche.
A Cover the wire shelf with baking paper or use a round baking tray.
1
ab
Page 14

… Appliance description
14
Water tank
A Only fill with fresh, cold drinking water.
䡲 Do not use demineralised (filtered) or distilled water.
The following accessories are not included in the scope of delivery.
Stainless steel tray
䡲 Serves as a baking tin for aperitif nibbles and bread.
䡲 Use together with the wire shelf or the perforated
stainless steel tray as a drip tray.
䡲 If not fully covered by the baking, the shape of the
stainless steel tray can become distorted during
baking. This is normal. As it cools down, the stainless steel tray will go back to its original form.
䡲 Not suitable for use with the and operating
modes.
A The stainless steel tray is to be used the normal way
round – not upside down.
Perforated stainless steel tray
䡲 For cooking fresh or frozen vegetables, meat and
fish.
䡲 For standing ramekins, preserving jars, etc. on.
䡲 For extracting juice from berries, fruit, etc.
䡲 Not suitable for use with the and operating
modes.
A For steaming, place the stainless steel tray underneath the perforated stain-
less steel tray to catch any food spills or condensate.
Page 15
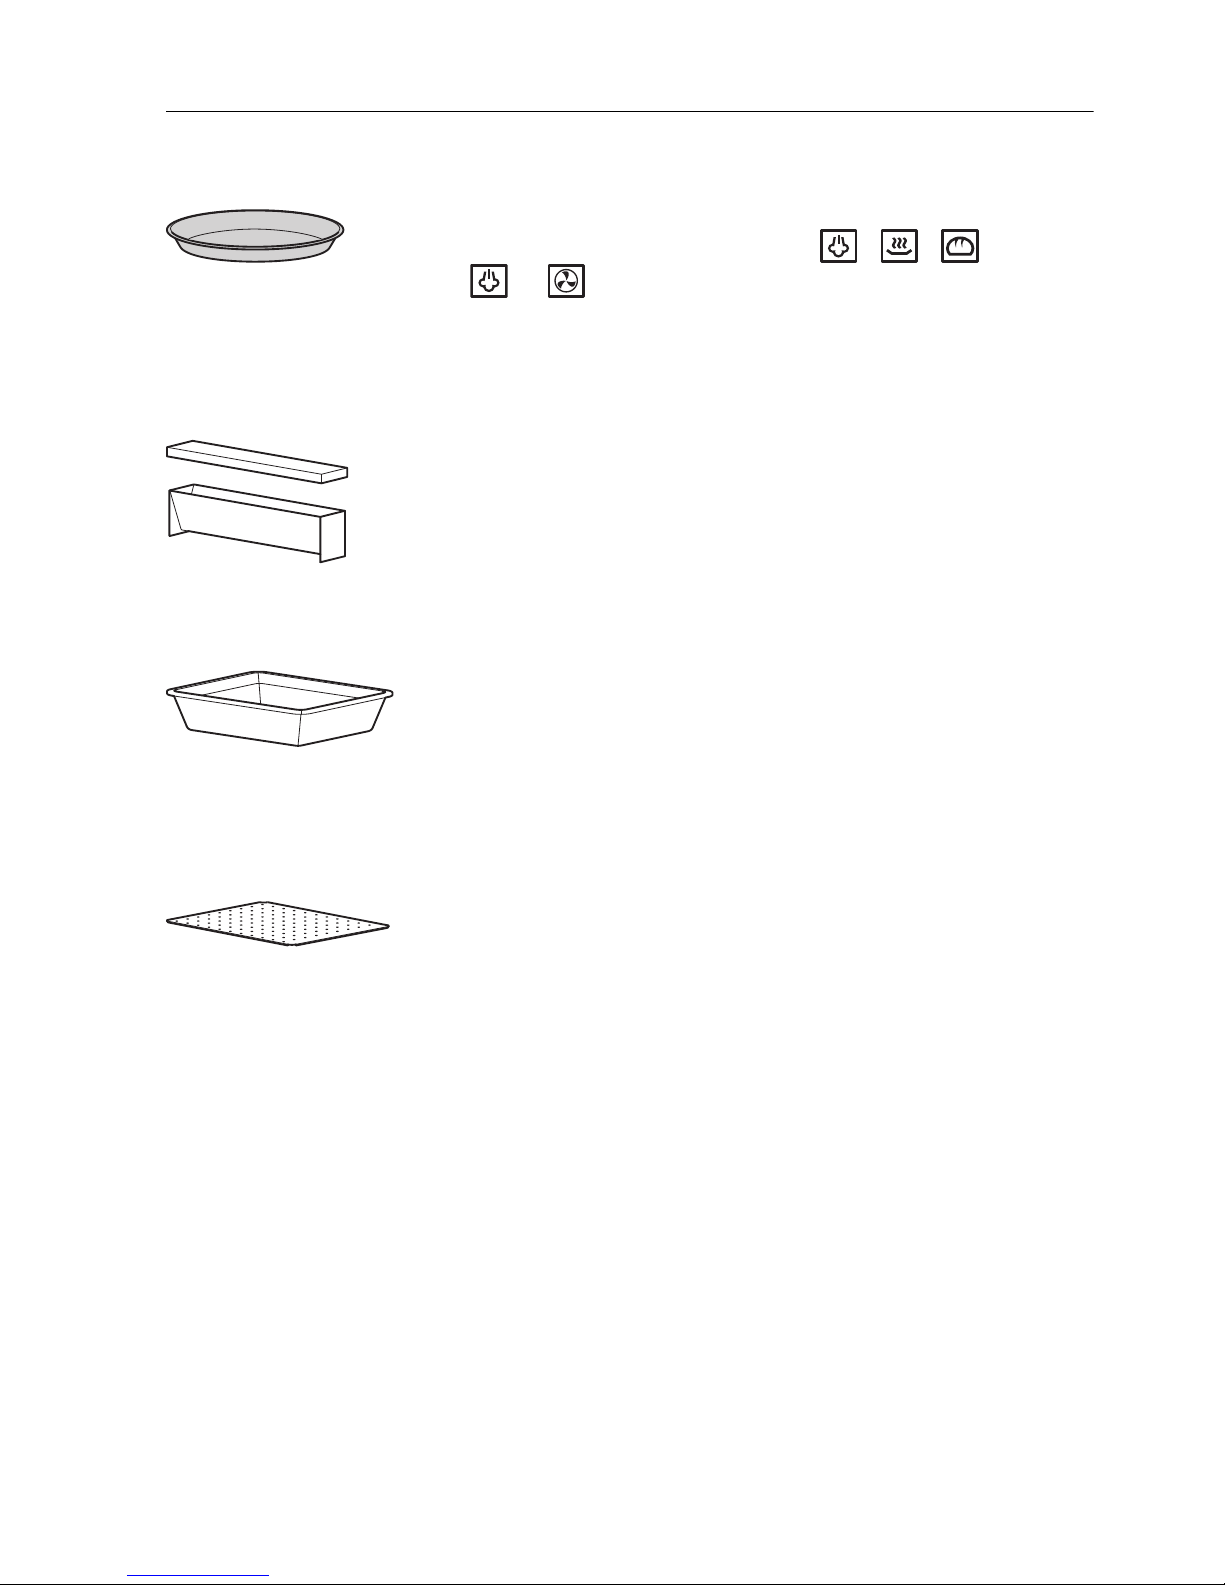
… Appliance description
15
Round TopClean baking tray
䡲 Baking tray for flans and quiches.
䡲 Not suitable for use with the , , and
+ operating modes.
Available in 3 different sizes.
Terrine mould with lid
䡲 For preparing vegetable, fish and meat terrines.
䡲 For preparing ice cream, parfait, pudding and other
sweets.
Available in 2 different designs.
Porcelain dish
䡲 For preparing various dishes such as lasagne,
potato gratin, etc.
䡲 For steaming and keeping food warm.
Available in 3 different sizes.
Stainless steel steam insert
䡲 For the steaming of vegetables, potatoes, etc. in
combination with a porcelain dish.
Available in 3 different sizes.
Page 16
… Appliance description
16
Unperforated cooking tray
䡲 For cooking meat, fish, sauerkraut, rice, millet, cere-
al products, soaked pulses, chickpeas, etc.
Available in different sizes and depths.
Perforated cooking tray
䡲 For cooking fresh or frozen vegetables, meat and
fish.
Available in different sizes and depths.
Roller runner
䡲 For safely pulling out one or more baking trays /
wire shelves in order, for instance, to baste a joint of
meat or to take out a baking tin.
Page 17

17
Operating the appliance
The operating mode, the cooking space temperature, the operating time, the
switch-off time and various other functions can be selected by pressing the
appropriate button once or more.
䡲 The symbol for the function selected illuminates or flashes.
䡲 A recommendation flashes in the corresponding digital display.
䡲 Turn the adjusting knob to change the setting.
䡲 Press the adjusting knob to confirm the setting or it will be automat-
ically accepted after 10 seconds.
䡲 Other settings or changes can be made at any time.
䡲 Press the button to switch off the appliance.
Page 18

… Operating the appliance
18
Using for the first time
Before using the newly installed appliance for the first time, the following
measures should be taken:
A Remove all packaging and transport materials from the cooking space.
A When flashes in the right digital display, turn the adjusting
knob to set the time.
A Clean the cooking space and the accessories.
A If necessary, adjust the water hardness in the user settings.
A Heat the empty cooking space (i.e. without the wire shelves, baking trays,
etc.) using the operating mode for about 30 minutes at 210 °C.
Press the adjusting knob to switch between hours and minutes.
Turn it to set the hours and minutes.
Press the adjusting knob to confirm the setting or it will be automatically accepted after 10 seconds.
Page 19
… Operating the appliance
19
Example
The symbols are explained in 'Tips on settings'.
The tables in 'Tips on settings' give:
A Put the baking tin on the wire shelf at level 2 in the cold cooking space.
A Next steps are described on the following pages.
Filling the water tank
A Fill the water tank up to the «1.25» «Litre» mark with fresh, cold drinking
water and slot into position in the water tank compartment.
䡲 For the , , and + operating modes, the filled water tank
must be in position in the water tank compartment.
䡲 For the , , and + , the water tank can be left in the water
tank compartment without the cooking results being affected.
Burns hazard from heat produced during cooking and baking! Use
protective gloves or oven cloths. Keep children away.
Mins.
Bread 200–210 no 2 40–50
Only fill the water tank with fresh, cold drinking water. Do not use
demineralised (filtered) or distilled water.
˚C
Page 20
… Operating the appliance
20
Refilling the water tank
The contents of the water tank normally suffice for one cooking session.
If, however, the water tank needs to be refilled:
A Do not fill the water tank with more than 0.5 l water to ensure that it does
not overflow when the water is pumped back.
Selecting the operating mode
A Select the operating mode.
– The recommended temperature flashes in the left digital display.
– The and symbols flash.
Changing the operating mode
The operating mode selected cannot be changed during operation.
A Press the button.
– The operating mode selected is ended.
A Press the button to select a new operating mode.
Selecting the cooking space temperature
A Turn the adjusting knob to set the desired cooking space
temperature.
A Press the adjusting knob to confirm.
The recommended temperature corresponds to the temperature during the hot air phase. The temperature during the steam phase is
preset.
For the , , , + and + operating modes, a
single acoustic signal is emitted when the set cooking space temperature is reached.
Page 21

… Operating the appliance
21
Checking / Changing the cooking space temperature
A Press the button.
– The set cooking space temperature flashes in the left digital display.
– The symbol flashes.
Turn the adjusting knob to change the cooking space temperature.
Switching off
A Press the button.
– The and symbols go out.
– For all operating modes that use steam, steam can be released at the
end of the cooking process.
– The steam is gradually released from the cooking space into the atmos-
phere – this takes around 1 minute – so that there is no sudden rush of
steam when the appliance door is opened.
– The cooling fan can continue to run.
When the symbols are no longer illuminated, the appliance is off.
Page 22
… Operating the appliance
22
Removing the cooked food from the cooking space
A Take the bread loaf out of the cooking space when ready.
A Place it on the wire shelf and allow to cool down.
A Any condensate or food in the cooking space must – after each cooking
session with steam – be dried completely or removed.
A To prevent corrosion, leave the appliance door open in the at-rest position
until the cooking space has cooled down.
Emptying the water tank
When the appliance is switched off, the residual water is pumped back into
the water tank.
A When the water has been pumped back, remove, empty and then dry the
water tank.
Hot steam or hot air may escape from the cooking space when the
appliance door is opened. Scalding hazard!
Accessories such as the wire shelf, baking tray, etc. will be hot.
Burns hazard! Use protective gloves or oven cloths.
The water in the water tank can be hot. Scalding hazard!
If flashes in the digital display, then the temperature of the residual water is still over 80 °C. For safety reasons, the residual water
is not pumped back until its temperature drops below 80 °C.
Any operating mode can be started again at any time.
Page 23
23
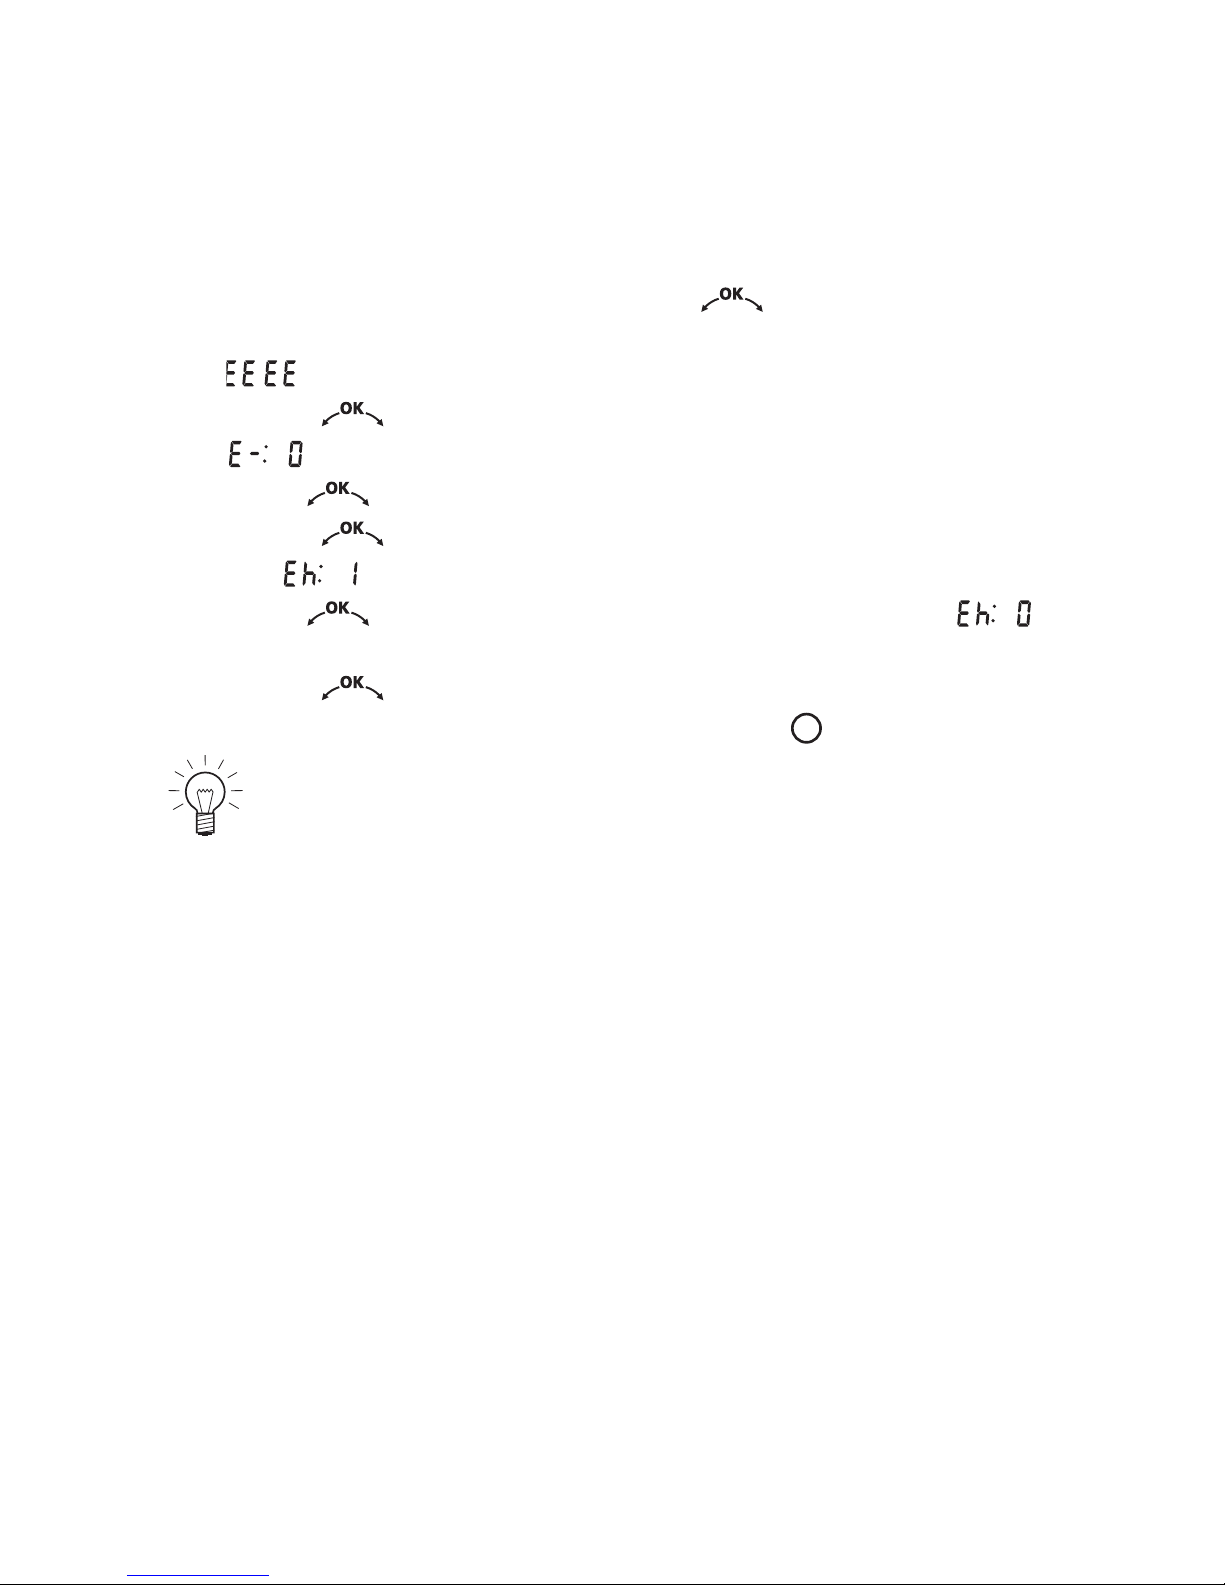
User settings
You can adjust the settings.
A With the appliance switched off, hold the adjusting knob depressed
for 5 seconds.
– appears in the digital display.
A Press the adjusting knob to confirm.
– appears in the digital display for «Childproof locke off».
A Turn the adjusting knob to select setting.
A Press the adjusting knob to confirm.
– E.g. flashes in the digital display for «Time display visible».
A Turn the adjusting knob to change the digital display to for
«Time display invisible».
A Press the adjusting knob to confirm the setting.
A The setting is terminated by pressing the button .
The settings are retained in the event of a power failure.
Page 24

… User settings
24
Possible settings
off *
on
visible *
invisible
high *
low
off
36–50 ˚fH *
16–35 ˚fH
1–15 ˚fH
Childproof lock
Time display
Acoustic signal
Illumination
Water hardness
Temperature unit
Time format
* Factory setting
restore
Factory settings
no change
24 h *
12 h
˚C *
˚F
automatically with door *
via button only
Page 25

… User settings
25
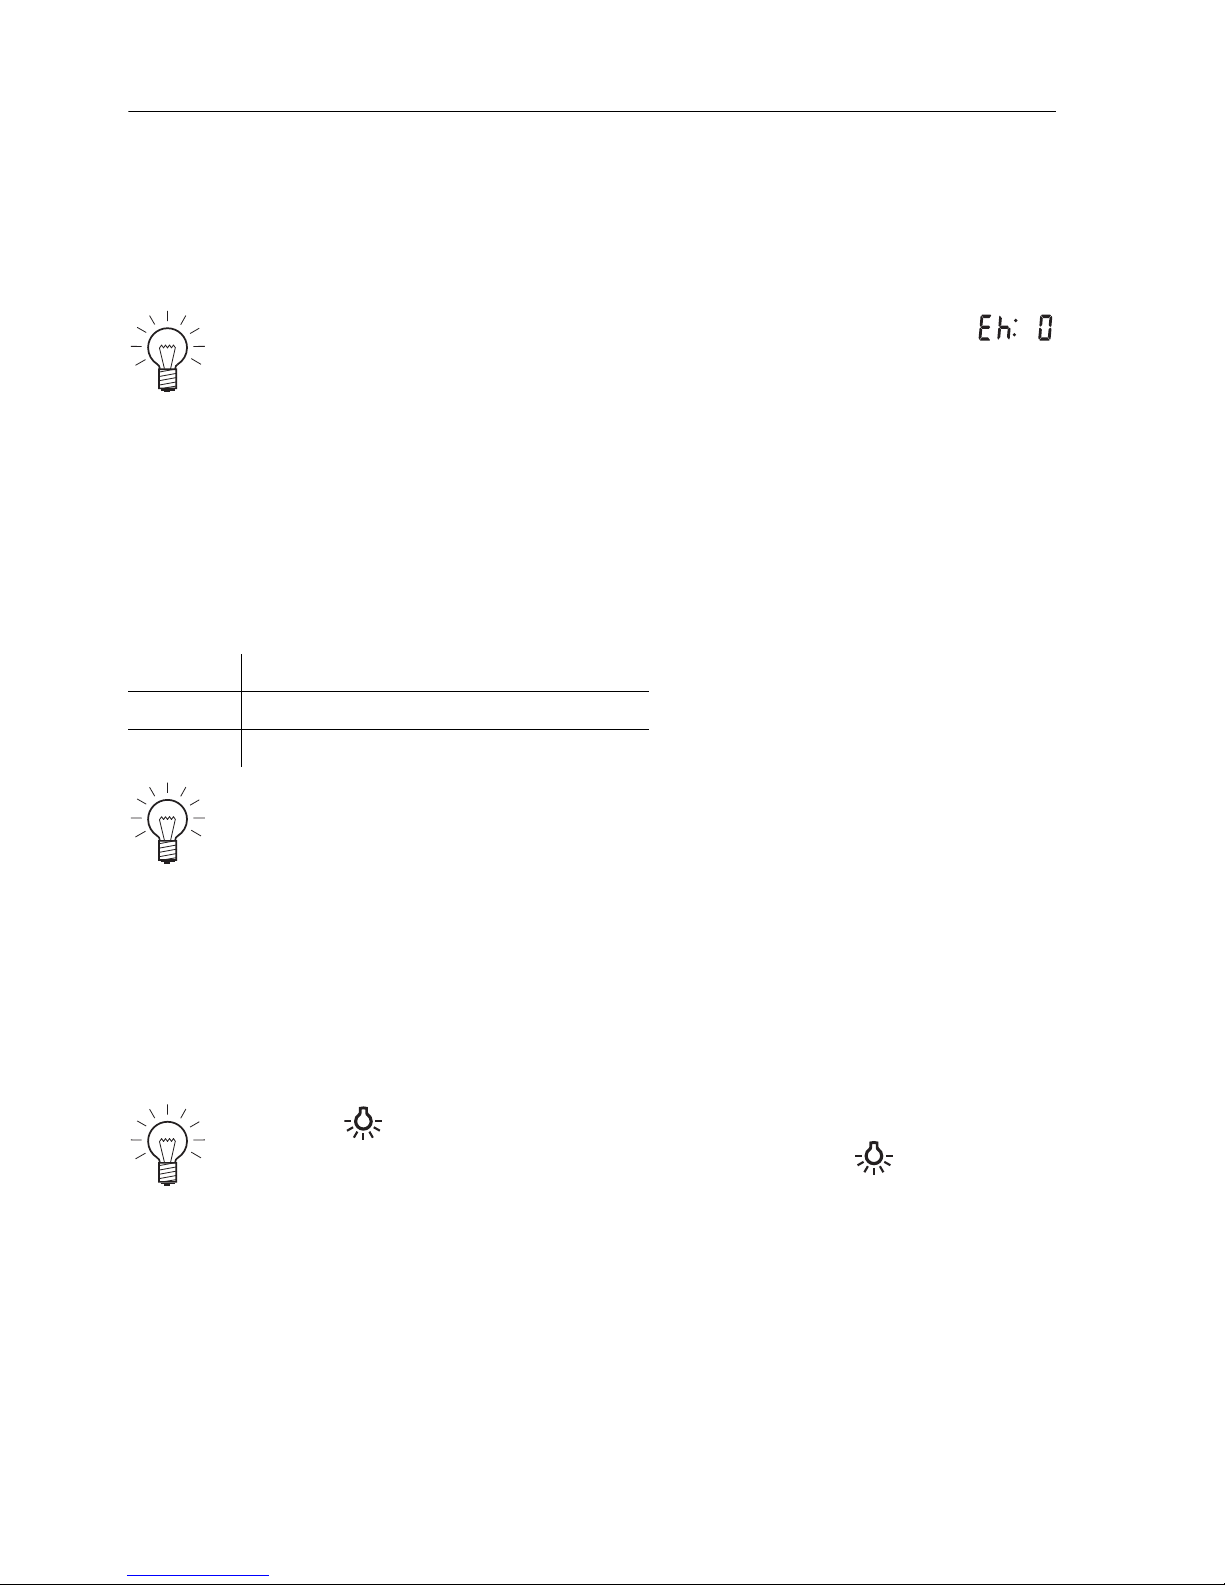
Childproof lock
The childproof lock is to prevent the appliance being inadvertently switched
on.
If an attempt is made to select an operating mode:
– A double acoustic signal is emitted.
– Nothing happens when the button is pressed.
– appears in the digital display.
Operating the appliance when the childproof lock is activated
A Simultaneously press the button and select an operating mode.
– The childproof lock is overridden. The appliance can be operated as
normal.
– The childproof lock is automatically reactivated 10 minutes after the
appliance has been switched off.
The / and buttons can be used irrespective of whether the
childproof lock is activated or not.
Page 26
… User settings
26
Time display
If the «invisible» setting is selected, the displays are not illuminated when the
appliance is off, minimizing power consumption. The time is displayed when
the appliance is on.
Acoustic signal
The acoustic signal can be set at one of two levels of loudness or can be
switched off:
Illumination
With the «automatically with door» setting, the illumination automatically
comes on when the appliance door is opened and goes off again when it is
closed.
To reduce power consumption to an absolute minimum, select
«Time display invisible». Despite automatic energy-saving stand-by, all
safety functions are active. All displays go out when the cooking
process has been completed.
䡲 High Maximum loudness
䡲 Low Reduced loudness
䡲 Off Acoustic signal is switched off
Even if the acoustic signal setting is set to «off», an acoustic signal is
emitted in the event of a malfunction.
Press the button to switch the illumination on or off at any time.
If the illumination is not switched off by pressing the button, it will
go off automatically 30 minutes after use.
Page 27

… User settings
27
Water hardness
The appliance features a system that automatically indicates when it is time
to descale. The system can be optimised for households with soft water (also
through using a water softening appliance) and medium water hardness by
changing the user settings to the relevant range of water hardness.
There are three settings for water hardness:
Temperature unit
For temperature unit, select between «°C» and «°F»:
Time format
Select the «24 h» setting to activate the European time format and the «12 h»
setting for the US time format (a.m. / p.m.).
Factory settings
If one or more user settings have been changed, these can be reset to the
factory settings.
Type
Water hardness
[°fH]
Water hardness
[°dH]
Water hardness
[°eH]
䡲 Soft
1 to 15 1 to 8 1 to 11
䡲 Medium
16 to 35 9 to 20 12 to 25
䡲 Hard
36 to 50 21 to 28 26 to 35
䡲 °C Degrees Celsius
䡲 °F Degrees Fahrenheit
Page 28
28
Time functions
The following time functions are available:
䡲 Time
䡲 Timer – can be used at any time and independently of all other functions
䡲 Operating time – time-controlled switch-off of the appliance
䡲 Delayed start – time-controlled switch-on and switch-off of the appliance
Setting / Changing the time
A Press the button.
– The hour flashes in the right digital display.
– The symbol flashes.
A Turn the adjusting knob to set the hour.
A Press the button or the adjusting knob.
– The minutes flash in the right digital display.
– The symbol flashes.
A Turn the adjusting knob to set the minutes.
Press the adjusting knob to confirm the setting or it will be automatically
accepted after 10 seconds.
When the appliance is switched off, the time display is dimmed
between 24:00 and 6:00.
If the time format has been selected, the display is not
dimmed.
The time cannot be changed if the appliance is in operation or if a delayed start has been set.
Page 29

… Time functions
29
Timer
The timer functions like an egg timer. It can be used at any time and independently of all other functions.
Setting
A Press the button.
– flashes in the right digital display.
– The symbol flashes.
A Turn the adjusting knob to set the timer duration.
The timer can be set for:
䡲 up to 10 minutes in 10-second intervals, e.g. = 9 minutes and
50 seconds.
䡲 over 10 minutes in 1-minute intervals, e.g. = 1 hour and
12 minutes.
The maximum timer duration that can be set is 9 hours and 59 minutes.
A Press the adjusting knob to start the timer.
– The countdown to the time remaining is visible in the right digital display.
– The symbol illuminates.
When the set duration is up:
– A sequence of 5 short acoustic signals is repeated for 1 minute.
– The symbol flashes.
A Press the button to switch off the acoustic signal.
Checking / Changing
A Press the button.
– The countdown to the time remaining flashes in the right digital display.
– The symbol flashes.
Turn the adjusting knob to change the timer duration.
Press the button 1× to reset the timer duration to .
Page 30

… Time functions
30
Switching off before time
A Press the button 2×.
– flashes in the right digital display.
– The symbol flashes.
A Press the adjusting knob to confirm.
Operating time
The operating mode selected automatically switches off when the operating
time is up.
Setting
A Select the desired operating mode and cooking space temperature.
A Preheat the cooking space if necessary.
A Place the food in the cooking space.
A Press the button.
– flashes in the right digital display.
– The symbol flashes.
A Turn the adjusting knob to set the duration (maximum of ).
A Press the adjusting knob to confirm.
Checking / Changing
A Press the button.
– The time remaining flashes in the right digital display.
– The symbol flashes.
Turn the adjusting knob to change the duration.
Switching off before time
A Press the button.
Page 31

… Time functions
31
End of the operating time
– The operating mode selected automatically switches off when the operat-
ing time is up.
– A long, intermittent acoustic signal is emitted for 1 minute.
– The cooking space temperature appears in the left digital display.
– The symbol flashes.
– The settings remain for 3 minutes.
Extending the operating time
A Turn the adjusting knob within 3 minutes to select a new duration.
A Press the adjusting knob to confirm.
Switching off
A Press the button.
– The settings are cleared.
– The residual heat appears in the left digital display.
Delayed start
The delayed start is activated when for the operating mode selected both an
operating time and a switch-off time are set. The appliance switches automatically on and off again at the desired times.
A Place the food in the cooking space.
A Select the desired operating mode and cooking space temperature.
Perishables should not be kept unrefrigerated.
Page 32

… Time functions
32
Setting the operating time
A Press the button.
– flashes in the right digital display.
– The symbol flashes.
A Turn the adjusting knob to set the duration (maximum of ).
Setting the switch-off time
A Press the button again.
– , for instance, flashes in the right digital display - switch-off time with-
out a delayed start.
– The symbol flashes.
A Turn the adjusting knob to set the switch-off time.
A Press the adjusting knob to confirm.
– The time appears in the right digital display.
– The symbol illuminates.
– The operating mode selected remains switched off until the automatic
start.
The switch-off time can be delayed by a maximum of 23 hours and
59 minutes. If the time format has been selected, the switchoff time can be delayed by a maximum of 11 hours and 59 minutes.
Example:
A Select the operating mode and 180 °C.
A At 8:00, set an operating time of 1 hour and 15 minutes.
A Set the switch-off time to 11:30.
– The appliance automatically switches on at 10:15 and off
again at 11:30.
Page 33

… Time functions
33
Checking and changing
A Press the button 1×.
– The operating time is visible for 3 seconds.
A Press the button 2×.
– The switch-off time flashes. It can be changed.
Switching off before time
A Press the button.
End of the operating time
– The operating mode selected automatically switches off when the operat-
ing time is up.
– A long, intermittent acoustic signal is emitted for 1 minute.
– The cooking space temperature appears in the left digital display.
– The symbol flashes.
– The settings remain for 3 minutes.
Extending the operating time
A Turn the adjusting knob within 3 minutes to select a new duration.
A Press the adjusting knob to confirm.
Switching off
A Press the button.
– The settings are cleared.
– The residual heat appears in the left digital display.
The operating time, the operating mode and the cooking space
temperature cannot be changed.
Page 34

34
Operating modes
A Follow the advice in 'Tips on settings' and in 'Tips and tricks'.
A Press the button once or more to select the desired operating mode.
Operating mode Symbol
Temperature
range
Recommended
temperature
Level
Steaming 30–100 °C 100 °C 1–5
Top / Bottom heat 30–230 °C 200 °C 2
Hot air 30–230 °C 180 °C
2
2 + 4
Regenerating 100–150 °C 120 °C 1–5
Page 35

… Operating modes
35
A Place tins, moulds, etc. on the wire shelf.
A Always push the «sloped» side of the original baking tray right to the back
of the cooking space.
Use Heating method
Cooking vegetables,
rice, cereal products, pulses
and egg dishes.
Poaching meat, poultry and fish.
Extracting juice from fruit
and berries.
Making yogurt and preserves.
Place the stainless steel tray
underneath the perforated
stainless steel tray.
The cooking space is heated
simultaneously by steam and
hot air.
The food is heated up or
cooked by steaming.
For cakes, biscuits, bread
and roasts.
Use a dark enamelled tray or a
black tray or tin for crispy results.
The cooking space is heated by the
top and bottom heating elements.
For cakes, biscuits, bread and
roasts on 1 or 2 levels.
Select a lower temperature
(reduced by approximately 20°C)
than for .
A heating element behind the
back wall of the cooking space
heats up the air inside the
cooking space and which
is circulated evenly.
Reheating pre-cooked food,
frozen and convenience products
and ready meals.
Simultaneously regenerating food
on several levels.
The cooking space is heated by
steam and hot air.
The food is reheated
gently without drying it out.
Page 36

… Operating modes
36
Operating mode Symbol
Temperature
range
Recommended
temperature
Level
Professional baking 100–230 °C 210 °C
2
2 + 4
PizzaPlus 30–230 °C 200 °C 2
Hot air humid + 30–230 °C 180 °C
2
2 + 4
Hot air + steaming + 30–230 °C 180 °C
2
2 + 4
Page 37

… Operating modes
37
Use Heating method
Bread, yeast pastries,
puff pastries (fresh or frozen)
on 1 or 2 levels.
Put the food in the
cold cooking space.
The cooking space is heated in a
first phase by steam and
is automatically followed in
a second phase by hot air.
For pizza, flans and quiches.
Use a dark enamelled tray or a
black tray or tin for crispy results.
The cooking space is heated by hot
air and bottom heat.
The base of the food will be
baked particularly intensively.
For gratins, baked dishes,
bread and yeast pastries
on 1 or 2 levels.
A heating element behind the back
wall of the cooking space heats up
the air inside the cooking space
and which is circulated evenly. The
steam produced is largely retained
in the cooking space ensuring the
food retains its moisture.
For gratins, baked dishes, meat,
frozen products, chestnuts,
puff pastries, yeast pastries,
bread and convenience foods
on 1 or 2 levels.
Press the button to
activate / deactivate steam.
The
symbol is illuminated
when steam is activated.
A heating element behind the back
wall of the cooking space heats up
the air inside the cooking space
and which is circulated evenly.
To improve the energy transfer to
the food, activate steam.
Steam over 100 °C is not visible.
Page 38

… Operating modes
38
Fast heating
Fast heating can be used to shorten the preheating time. Fast heating can be
used with the / / or + operating modes.
A Select the desired operating mode and cooking space temperature.
A Hold the adjusting knob depressed for 2 seconds.
– A single acoustic signal is emitted.
– flashes in the left digital display.
A single acoustic signal is emitted when the set cooking space temperature
is reached.
Page 39

39
Tips on settings
Symbols used
Optimal use
The recommended cooking space temperatures given in older recipe books
are likely to be too high and the recommended shelf levels in the cooking
space not ideal. The following tables show how to get the best use out of the
appliance.
For optimal results when baking with hot air or hot air humid
+
on different levels,
A use a dark enamelled baking tray.
Operating mode
Cooking space temperature
Preheating until the cooking space temperature is reached
Level
mins.
Duration in minutes
hrs.
Duration in hours
Accessories
˚C
Page 40

… Tips on settings
40
Cooking/Baking tables
A Always push the «sloped» side of the original baking tray right to the back
of the cooking space.
Vegetables (fresh)
A Put the food to be cooked in suitable cookware and then place on the wire
shelf in the cold cooking space.
Leaf spinach 100 no
Beans,
Whole cauliflower
100 no
Cauliflower florets 100 no
Broccoli 100 no
Chicory 100 no
Dried string beans, soaked 100 no
Fennel, chopped 100 no
White cabbage, chopped 100 no
Carrots, chopped 100 no
Mange-tout 100 no
Kohlrabi, chopped 100 no
Swiss chard, mangold 100 no
Corn on the cob 100 no
Sweet pepper 100 no
Beetroot 100 no
Brussels sprouts 100 no
Sauerkraut, raw 100 no
Sauerkraut, precooked 100 no
Scorzonera (black salsify) 100 no
Celery, chopped 100 no
˚C
Page 41

… Tips on settings
41
mins.
2 5–10
2 30–40
2 15–20
2 10–15
2 20–25
2 35–45
2 15–20
2 20–30
2 10–20
2 10–20
2 15–25
2 10–20
2 30–45
2 8–13
2 30–90
2 25–30
2 40–70
2 20–30
2 25–35
2 10–20
Page 42

… Tips on settings
42
Potatoes
Accompaniments
Green asparagus 100 no
White asparagus 100 no
Celery stalks 100 no
Tomatoes 100 no
Skinning tomatoes 100 yes
Jerusalem artichoke 100 no
Zucchetti, chopped 100 no
Potatoes, chopped 100 no
Sweet potatoes,
Whole potatoes
100 no
Potato wedges,
Country potatoes
+ 230 no
Baked potatoes + 230 no
Rice + liquid 100 no
Risotto + liquid 100 no
Maize semolina (polenta) + liquid 100 no
Semolina + liquid 100 no
Lentils + liquid 100 no
Ebly wheat + liquid 100 no
Millet + liquid 100 no
Chickpeas, soaked + liquid 100 no
˚C
˚C
˚C
Page 43

… Tips on settings
43
mins.
2 13–17
2 20–25
2 20–25
2 8–12
2 5–10
2 15–35
2 8–12
mins.
2 15–25
2 30–45
2 20–30
2 30–50
mins.
2 20–40
2 30–40
2 30–40
2 10–15
2 15–60
2 20–30
2 20–40
2 20–40
Page 44

… Tips on settings
44
Meat
Low temperature cooking
Stewing meat 100 no
Ham 100 no
Smoked pork loin 100 no
Saucisson, Geschnetzeltes (chopped meat in a sauce) 100 no
Bacon 100 no
Fillet (of beef, veal, pork) 100 no
Roast beef, sirloin of beef + 200–210 yes
Shoulder of beef + 190–200 yes
Shoulder of veal + 200–210 yes
Shoulder of pork + 180–200 yes
Leg of lamb + 210–220 yes
Meat loaf + 190–210 yes
Fleischkäse (specialty meat loaf) 160–170 yes
Fillet in puff pastry
200–210 no
+ 180–200 no
Ragout, goulash + 160–180 no
Fillet of beef 80–90 no
Roast beef 80–90 no
Middle loin of pork 90–100 no
˚C
˚C
Page 45

… Tips on settings
45
mins.
2 60–90
2 60–90
2 45–60
2 30–45
2 20–30
2 20–30
2 40–50
2 60–75
2 60–75
2 60–90
2 60–90
2 50–70
2 45–60
2 30–45
2 25–40
2 45–60
hrs.
2 2–3
2 2½–3½
2 3–4
Page 46

… Tips on settings
46
Poultry
Fish and sea food
Desserts
Whole chicken 220–230 yes
Chicken breast
100 no
+ 210–220 yes
Chicken leg + 220–230 yes
Poultry terrine 90 no
Fillet of fish
80 no
200–210 yes
Whole fish (trout, gilthead seabream, etc.)
80 no
180–210 no
Tuna 100 no
Mussels 100 no
Fish terrine 100 no
Crème caramel 90 no
Creams and custards 90 no
Compote (apple, plum, quince, etc.) 100 no
˚C
˚C
˚C
Page 47

… Tips on settings
47
mins.
2 50–60
2 10–20
2 8–12
2 20–30
2 15–30
mins.
2 10–20
2 15–20
2 20–30
2 15–25
2 10–30
2 20–30
2 15–30
mins.
2 20–40
2 20–60
2 10–15
Page 48

… Tips on settings
48
Joghurt
Cakes
Creamy joghurt 40 no
Set joghurt 40 no
Gugelhupf (ring cake e.g. chocolate, carrot, nut, marbled) 170–190 yes
Torte (chocolate, carrot, nut, etc.) 170–190 yes
Whisked sponge cake 180–190 yes
Roulade / Swiss roll 170–180 yes
Linzertorte 170–180 yes
Short crust pastry case, baked blind 150–160 yes
Fruit tart with short crust pastry 170–180 yes
Raisin bread, yeast ring, hazelnut plait
190–210 no
180–200 yes
Luzerner Lebkuchen (gingerbread) 170–180 yes
Cake baked on a baking sheet
190–200 yes
180–190 yes
Apple strudel 190–210 yes
Cake topped with meringue 130–140 yes
Japonaise base 140–160 yes
˚C
˚C
Page 49

… Tips on settings
49
hrs.
2 5–6
2 7–8
mins.
2 50–70
2 30–50
2 30–40
2
2 + 4
8–12
2 40–50
2 20–25
2 40–50
2 35–40
2 25–35
2 50–60
2 25–35
2 + 4 25–35
2 30–40
2 25–35
2 25–35 or
Page 50

… Tips on settings
50
Savouries and biscuits
* After baking, allow to dry over night
Aperitif nibbles
200–220 no
200–210 yes
Puff pastries with a filling (ham, nut, etc.)
200–210 no
190–210 yes
Yeast pastries
200–210 no
190–210 yes
Eclairs, profiteroles 160–170 yes
Macaroons 170–180 yes
Brunsli (chocolate almond spice cookies),
Zimtsterne (cinnamon star cookies
180–190 yes
170–180 yes
Mailänderli (butter biscuits), Spitzbuben (jam biscuits)
170–180 yes
170–180 yes
Basler Leckerli (honey almond spice cookies) 170–180 yes
Chräbeli (aniseed biscuits)
130–140 yes
130–140 yes
Meringues * 80–90 no
Bruschetta, garlic bread 210–230 yes
Ham and pineapple toastie 200–220 yes
˚C
Page 51

… Tips on settings
51
mins.
2 + 4 15–20
2 12–17
2 + 4 20–30
2 15–25
2 15–25
2 20–30
2
2 + 4
20–30
2 10–20
2 8–12
2 + 4 5–15
2 12–17
2 + 4 10–15
2 15–20
2 20–30
2 + 4 20–30
2
2 + 4
80–100
2 5–10
2 15–20
Page 52

… Tips on settings
52
Flans and pizzas
* According to the manufacturer’s instructions
Bread and plaited bread
Fruit flan
210 yes
180 yes
Pizza (fresh) 190–200 yes
Pizza (frozen) * – – –
Savoury flan (cheese, vegetable, onion) 180–200 yes
Bread
200–210 no
200 –210 yes
Bread rolls
210–220 no
200–220 yes
Plaited bread
180–190 no
190–200 yes
Yeast ring 190 –200 no
˚C
˚C
Page 53

… Tips on settings
53
mins.
2 35–45
2 + 4 40–50
2 20–30
––
2 30–45 or
mins.
2 40–50
2 30–45
2
2 + 4
25–35
2 20–30
2
2 + 4
30–40
2 30–35
2 30–40
Page 54

… Tips on settings
54
Baked dishes and gratins
Reheating
A Put the food into the cold cooking space.
* According to the manufacturer’s instructions
Defrosting
* According to the manufacturer’s instructions
Baked dish, sweet + 180–200 no
Gratin (vegetable, fish, potato) + 180–190 no
Lasagne, moussaka 180–200 yes
Gratinated vegetables 200–220 yes
Reheating meals (1-2 plates) 120 no
Reheating meals (3-4 plates) 120 no
Preparing ready meals * – – –
Bread 140–150 no
Defrosting spätzli (egg noodles), pasta, rice 120–130 no
Vegetables * – – –
Meat, poultry, fish 50 no
˚C
˚C
˚C
Page 55

… Tips on settings
55
mins.
2 20–30
2 30–40
2 30–40
2 10–15
mins.
2 + 4 8–10
2 + 4 10–12
––
mins.
2ca. 20
2ca. 20
––
2
Depending
on quantity
Page 56

… Tips on settings
56
Baby food
Sterilizing feeding bottles
Blanching
Extracting juice
Milk in glass feeding bottles 100 no
Milk in plastic feeding bottles 100 no
Warming baby food 100 no
Sterilizing feeding bottles followed by
100 no
100 no
Vegetables (beans, peas, etc.) 100 no
Fruit (cherries, grapes, etc.) 100 no
Berries (blackcurrants, blackberries, elderberries, etc.) 100 no
˚C
˚C
˚C
˚C
Page 57

… Tips on settings
57
mins.
2 4–5
2 5–6
2 4–10
mins.
210
22
mins.
2ca. 5
mins.
2 30– max. 90
2 30– max. 90
Page 58

… Tips on settings
58
Desiccating and drying
A Only use undamaged, ripe fruit, fresh mushrooms and herbs.
A Clean and chop the fruit, mushrooms or herbs into small pieces.
A Line the original baking tray or wire shelf with baking paper, spread the
food on it and then put in the cooking space at the appropriate level.
A Wedge a wooden spoon between the operating panel and the appliance
door, leaving an approximately 2 cm gap open.
A Turn the food at regular intervals to ensure even drying.
Monitor the desiccating and drying process. Overdrying poses a
fire hazard!
Apple slices or rings 70 no
Sliced mushrooms 50–60 no
Herbs 40–50 no
Apricots 60–70 no
It is only possible to use one wire shelf and two original baking trays
at the same time.
˚C
Page 59

… Tips on settings
59
hrs.
2
2 + 4
1 + 3 + 5
7 –8
or
2
2 + 4
1 + 3 + 5
5–8
2
2 + 4
1 + 3 + 5
3–5
2
2 + 4
1 + 3 + 5
14–16
Page 60

… Tips on settings
60
Preserving and bottling
Carrots 100 no
Cauliflower, broccoli 100 no
Beans * 100 no
Mushrooms ** 100 no
Apples, pears 90 no
Apricots 90 no
Peaches 90 no
Quinces 90 no
Plums 90 no
Cherries 80 no
* Repeat process 2×, allowing the jars to cool down completely in between
time.
** The mushrooms must be precooked.
˚C
Page 61

… Tips on settings
61
mins.
290
290
260
2 75–90
230
230
230
230
230
230
Page 62

… Tips on settings
62
Preserving and bottling
Bottling involves preserving food in jars. Put a maximum of five jars in the
cooking space at any one time.
A Only use undamaged jars that hold no more than 1 litre each.
A Put the wire shelf at level 1.
A Fill the jars evenly with the food to be preserved. Close the jars according
to the manufacturer's instructions.
A Place the jars on the wire shelf as shown in the illustration. The jars should
not touch one another.
A Select the operating mode, the cooking space temperature and the du-
ration according to the 'Tips on settings'.
A Press the adjusting knob to confirm.
A Press the button to switch off the appliance. Leave the appliance door
open in the at-rest position.
A Leave the jars in the cooking space to cool down completely.
A Remove the jars. Check that the jars are sealed tight.
Page 63

63
Tips and tricks
Steaming
䡲 When steaming, a variety of food can be cooked at the same time. For
example, rice or pulses can be prepared at the same time as vegetables
with similar cooking times, saving energy and the washing-up.
䡲 Grains (e.g. rice and millet) and pulses (e.g. lentils), adding an appropriate
amount of liquid, can be cooked directly in suitable tableware.
A Put the tableware directly on the wire shelf and put into the cooking space.
Food Weight of food
Approximate amount of liquid to
be added (depending on desired
consistency)
Rice 100 g 1½ dl salted water, bouillon, etc.
Risotto 100 g 2½ dl water, wine, etc.
Maize semolina (polenta) 100 g 3 dl water / milk mixture
Semolina 100 g 2–3 dl water
Lentils 100 g 2–3 dl water
Ebly wheat 100 g 1–1½ dl water
Millet 100 g 1½–2 dl water
Chickpeas, soaked 100 g ½–1 dl water
Season vegetables after steaming.
Page 64

… Tips and tricks
64
Warm, moist cloths
Warm, moist cloths can be a pleasant way to clean hands after a meal.
A Spread clean, moist towelling cloths across the wire shelf.
A Select the following settings:
Hot air
Baking and roast
Regenerating
Mins.
80 no 2 ca. 5
Result Solution
䡲 The baking or roast looks
good on the outside but is
still doughy or raw on the
inside.
A Next time, set a lower cooking space tem-
perature and lengthen the operating time.
Result Solution
䡲 Regenerated food is
dried out
A Next time, set a lower cooking space tem-
perature and shorten the operating time.
䡲 Too much condensate on
or around the regenerated food.
A Next time, set a higher cooking space tem-
perature and lengthen the operating time.
˚C
Page 65

… Tips and tricks
65
Professional baking
䡲 After shaping, allow bread, bread rolls and other yeast cakes and pastries
to proof briefly. 10 minutes is usually sufficient. Place the formed dough
into a suitable baking tin or sheet lined with baking paper and then put it
into the unheated cooking space and bake using the operating mode.
䡲 A nice, shiny crust is formed during professional baking. Yeast pastries
and puff pastries do not need to be brushed with egg yolk or cream.
䡲 Do not open the appliance door during the steaming phase as cold air will
stream in, which will prolong the steaming phase and cause the bread to
be oversteamed. The bread will come out flatter.
䡲 For a nice, crispy crust: the smaller the item to be baked, the higher the
temperature should be during the hot air phase. The optimum baking temperature for bread buns is generally higher than for a single loaf of bread.
Hot air + steaming +
Through the condensation of steam, the transfer of energy to the food is more
efficient than with baking with hot air. This speeds up the cooking process.
The food retains its own moisture and delicate parts do not burn so quickly.
This operating mode is particularly suitable for food with a crunchy top, e.g.
gratins, braised meat, frozen ready-made products such as spring rolls, potato products, etc.
A Press the button to deactivate steam.
– The symbol goes out.
A Press the button to activate steam.
– The symbol illuminates.
Page 66

… Tips and tricks
66
Cakes
Uneven browning
Result Solution
䡲 The cake collapses. A Check settings with those given in 'Tips on
settings'.
A Next time, set a lower cooking space tem-
perature and adjust the operating time.
A Stir the cake mixture well. When finished,
bake immediately.
A For whisked sponges, beat the egg yolks /
egg whites to a foam and then carefully fold
into the mixture. When finished, bake
immediately.
A Follow instructions on how much baking
powder to add.
Result Solution
䡲 The baking has browned
unevenly.
A Next time, set a lower cooking space tem-
perature and adjust the operating time.
A If using , , , + or
+ , check that the levels used correspond to those recommended in 'Tips on
settings'.
A Do not push baking tins or bulky foodstuff
right to the back of the cooking space.
䡲 The baking has come out
lighter on one baking tray
than on the other.
A Check that the settings used correspond to
those recommended in 'Tips on settings'.
A Give the baking tray with the baking that is
not so brown a little longer.
Some uneven browning is normal. More even browning is generally
achieved at lower cooking space temperatures.
Page 67

… Tips and tricks
67
Saving energy
The + operating mode consumes comparatively less energy than the
operating mode.
A Avoid opening the appliance door frequently.
A Only switch the illumination on if needed.
A Use the residual heat: for longer cooking times, i.e. over 30 minutes, switch
the appliance off some 5 to 10 minutes before the end of the cooking time.
Exceptions: soufflé, sponge, choux pastry and puff pastry.
A Minimise preheating.
A Only preheat the cooking space if the baking results depend on it.
To reduce power consumption to an absolute minimum, select
, «Time display invisible» in the user settings. Despite automatic
energy-saving stand-by, all safety functions are active. All displays go
out when the cooking process has been completed.
Page 68

68
Care and maintenance
Cleaning the exterior
A Remove any soiling or excess cleaning solution immediately.
A Clean the surface with a soft cloth dampened with water and a little
washing-up liquid – for metallic surfaces rub in the direction of the original
polish lines. Dry with a soft cloth.
A Clean the appliance door with a soft cloth dampened with water and a little
washing-up liquid. Dry with a soft cloth.
Appliance drawer
The drawer can be removed for ease of cleaning.
A Pull out the drawer as far as the stopper will allow, lift slightly and remove
from the front.
Allow the appliance and accessories to cool down before cleaning.
Do not use abrasive, caustic cleaning agents or stainless steel
cleaner. Do not use abrasive scouring pads, steel wool, etc. as
such products can damage the surface.
Whilst the digital display flashes, do not place your hands in
the water tank compartment. Scalding hazard.
Page 69

… Care and maintenance
69
Cleaning the appliance door
A Clean the appliance door with a soft cloth dampened with water and a little
washing-up liquid. Dry with a soft cloth.
Removing the appliance door
A Open the appliance door as far as
it will go.
A Fold the clips 2 on the door
hinges 1 forward.
A Close the appliance door as far as
its at-rest position (approximately
30°).
A Lift the appliance door forward and
out.
Reassembling the appliance door
A From the front, push the two hinges 1 into the opening 3.
A Open the appliance door as far as it will go and close back the clips 2.
Exercise caution when removing and reassembling the appliance
door. It weighs approximately 9 kg. Risk of injury!
2
3
1
30˚
Page 70

… Care and maintenance
70
Removing the shelf guides
A Unscrew the knurled nuts 1 in the
front of the shelf guides in an anticlockwise direction.
A Pull the shelf guides 2 somewhat to
the side of the screws and remove
from the front.
Reassembling the shelf guides
A Insert the shelf guides into the openings in the back wall of the cooking
space and position on the screws. Place the knurled nuts on the screws
and tighten securely in a clockwise direction.
Replacing the door seal
For safety reasons, the door seal must be replaced by our Customer
Services.
Cleaning the accessories
䡲 The wire shelf and the shelf guides can be cleaned in the dishwasher.
䡲 The original baking tray can be cleaned in the dishwasher; however, this
will affect its non-stick properties.
䡲 Watermarks in the water tank can be removed using a standard descaler.
A If the water tank valve drips, descale it.
2
1
Page 71

… Care and maintenance
71
Cleaning the cooking space
A Any condensate or food in the cooking space must be dried completely or
removed after each cooking session with steam.
A Wipe the cooking space clean while still warm to the touch using a soft
cloth dampened with water and a little washing-up liquid. Polish dry with a
soft cloth.
A To remove dried-on soiling easier, switch the appliance on for a short
period of time (about 30 minutes) beforehand, setting it to the operating mode and a temperature of 80 °C. This will soften the soiling.
Do not bend the temperature sensor during cleaning.
Do not use abrasive cleaning agents. Do not use abrasive scouring
pads, steel wool, etc. as such products can damage the surface.
Over time with use, the cooking space can turn a shimmering rainbow
colour or the surface can turn slightly matt. Neither the cooking or
baking properties of the appliance nor its operation is affected.
This effect can be removed using a suitable cleaning agent. Any nonabrasive, commercially available chromium steel cleaner can be
used.
A Clean the cooking space with a suitable cleaning agent and a soft,
damp cloth. Rinse well afterwards with water and then dry.
Page 72

… Care and maintenance
72
Descaling
Whenever steam is produced, depending on the hardness of the local water
supply (i.e. the limescale content of the water), limescale is deposited in the
boiler.
The appliance automatically recognises when descaling is necessary.
– flashes in the digital display.
The time interval between descaling depends on the hardness of the water
and frequency of use. If steaming 4 × 30 minutes per week, the appliance
must be descaled – depending on water hardness – roughly as follows:
We recommend that the appliance be descaled whenever the warning appears in the display.
Failure to descale the appliance will likely impair the functioning of or cause
damage to the appliance.
Water hardness Descale after about
䡲 Soft
18 months
䡲 Medium
9 months
䡲 Hard
6 months
Descaling takes about 45 minutes.
Page 73

… Care and maintenance
73
Durgol swiss steamer decalcifier
For descaling, only use the special descaler developed for
this appliance and which is available at all good chemists.
This special descaler enables you to achieve a gentle yet
professional level of descaling.
Standard descaling solutions are not suitable as they may
contain foam-creating additives or not be effective enough.
Using a different descaler could cause:
Descaling
A Press the and buttons simultaneously.
– flashes in the digital display.
– And then flashes in the digital display.
A Pour the entire contents of the special descaler undiluted into the water
tank.
A Slot the water tank into position in the water tank compartment.
The descaler contains highly effective acid. Rinse away any splashes immediately with water. Follow the manufacturer’s instructions.
䡲 Overfoaming in the cooking space
䡲 Insufficient descaling of the boiler
䡲 Damage to the appliance in the worst case.
The appliance must be switched off. The appliance door must be
closed when descaling is being carried out. Burns hazard! For
safety reasons, once started the descaling process cannot be
aborted.
Page 74

… Care and maintenance
74
A Press the adjusting knob to confirm.
– flashes in the digital display.
– The descaling phase, which takes around 30 minutes, starts.
– Finally, flashes in the digital display.
A Remove the water tank, pour away the descaler and fill the tank with 1.2 l
cold water.
A Put the water tank back.
– appears in the digital display.
– The rinsing phase starts.
– Finally, flashes in the digital display.
A Remove the water tank, pour away the water and refill the tank with 1.2 l
cold water.
A Put the water tank back again.
– remains or appears in the digital display.
A When appears in the digital display, remove, empty and dry the water
tank.
– The message goes out and the time is visible again.
A Wipe up any water in the bottom of the cooking space with a soft cloth.
Replacing a defective light bulb
For safety reasons, in case of a defective light bulb please contact our
Customer Services.
Whether further rinsing cycles are required depends on the level of
soiling of the liquid being pumped off.
– or is displayed in the digital display.
For the , , and + operating modes, after descaling
the water that is pumped back into the water tank may not be clear.
This will not affect the cooking or baking characteristics nor the quality
of the food being cooked or baked.
Page 75

75
Trouble-shooting
This section lists faults that can be solved simply by following the instructions
given. If another fault is displayed or the fault cannot be remedied, please call
Customer Services.
What to do if …
… the appliance is not working and the displays are not illuminated
… the illumination is not working
Please note down the serial number (FN) and the error message in
full, e.g. / , before calling Customer Services.
Possible cause Solution
䡲 The fuse or circuit breaker
for electrical installations
in the home is defective.
A Change the fuse.
A Reset the circuit breaker.
䡲 The fuse or circuit breaker
keeps blowing.
A Call Customer Services.
䡲 An interruption in the
power supply.
A Check the power supply.
Possible cause Solution
䡲 The light bulb is defective. A For safety reasons, in case of a defective
light bulb please contact our Customer
Services.
XX XX
Page 76

… Trouble-shooting
76
… the appliance starts making noises during operation
… at the end of cooking, it takes some time for the water to be pumped
back
… flashes
Possible cause Solution
䡲 The appliance may emit
noise during operating
(e.g. switching and pumping noises).
Such noise is normal. No action needed.
Possible cause Solution
䡲 For safety reasons, the
water in the boiler is not
pumped off until the temperature of the water
drops below 80°C.
If there is enough cold water in the water tank,
the boiler will be automatically filled. This will
cool down the water in the boiler.
If there is not enough cold water in the water
tank, it will take longer to cool down (this can
take up to 30 minutes). The appliance may be
used without further ado.
Possible cause Solution
䡲 The water tank is not in
position in the water tank
compartment.
A Put the water tank in.
Page 77

… Trouble-shooting
77
… flashes
… flashes
… flashes
… flashes
Possible cause Solution
䡲 The water tank is empty. A Fill the water tank and slot it into position in
the water tank compartment.
䡲 During descaling. A Water needs to be changed.
Possible cause Solution
䡲 The appliance door is
open.
A Close the appliance door.
Possible cause Solution
䡲 Descale was selected,
but not started.
A Pour the contents of the special descaler
undiluted into the water tank and then slot
the water tank into the water tank
compartment.
A Press the adjusting knob to confirm.
Possible cause Solution
䡲 Used unsuitable descaler. A Descale again using the recommended
descaler.
䡲 Descaling was not carried
out correctly.
A If the message does not disappear after re-
peating the descaling process several
times, note down the serial number (FN)
and the error message in full.
A Call Customer Services.
Page 78

… Trouble-shooting
78
… and flash alternately
… and flash alternately
Possible cause Solution
䡲 Various situations can
lead to an error message.
A Cancel the error message by pressing the
button.
A Disconnect the power supply for about
1minute.
A Reconnect the power supply.
A If the error message appears again, note
down the serial number (FN) and error
message in full.
A Disconnect the power supply.
A Call Customer Services.
Possible cause Solution
䡲 Interruption in the power
supply.
A Cancel the error message by pressing the
button.
A Disconnect the power supply for about
1minute.
A Reconnect the power supply.
A If the error message appears again, note
down the serial number (FN) and error
message in full.
A Disconnect the power supply.
A Call Customer Services.
XX
XX
XX XX
Page 79

… Trouble-shooting
79
… appears
… appears
Possible cause Solution
䡲 Various situations can
lead to a «CA» message.
䡲 During descaling.
A means the appliance is in the des-
caling phase.
A and mean the appliance is in
a rinsing phase.
Possible cause Solution
䡲 The button was
pressed during descaling.
The appliance shortly automatically changes
over to the rinsing phases.
A If appears, fill the water tank with
fresh water.
– The rinsing phase will continue
automatically.
In this instance, descaling was not carried out correctly. The whole
descaling process must be repeated.
XX
Page 80

… Trouble-shooting
80
After a power failure
After a power failure, and the symbol flash in the digital display.
A Turn the adjusting knob to set the hour.
A Press the adjusting knob to confirm.
A Turn the adjusting knob to set the minutes.
A Press the adjusting knob again to confirm the time.
The user settings remain unchanged.
If a power failure occurs during descaling, it will continue automatically after the time has been reset.
Page 81

81
Accessories and spare parts
Please give model number and exact description when ordering parts.
Accessories
* Included in scope of delivery
Width × Depth × Length
[mm]
Stainless steel tray 370 × 25 × 429.5
Stainless steel tray, perforated 370 × 25 × 429.5
Wire shelf * 370 × 25 × 429.5
Original baking tray * 370 × 25 × 429.5
Stainless steel tray, GN 325 × 20 × 177
Cooking tray, unperforated,
GN
325 × 40 × 177
Cooking tray, perforated,
GN
325 × 40 × 177
Roller runner
Round TopClean baking tray
ø 24 cm / ø 29 cm / ø 31 cm
1
3
/
1
3
/
1
3
/
Page 82

… Accessories and spare parts
82
* Included in scope of delivery
Width × Depth × Length
[mm]
U-shape terrine mould with lid 60 × 60 × 300
V-shape terrine mould with lid 55 × 55 × 300
Porcelain dish, GN 325 × 60 × 177
Porcelain dish, ½ GN 325 × 60 × 265
Porcelain dish, GN 325 × 60 × 354
Stainless steel steam insert
257 × 5 × 109
252 × 5 × 197
290 × 5 × 254
Lid for water tank
The dimensions correspond to Gastronorm GN, ½ GN or GN.
1
3
/
2
3
/
1
3
/
2
3
/
Page 83

… Accessories and spare parts
83
Spare parts
Shelf guide
left / right
Knurled nut
Water tank
Page 84

84
Technical data
External dimensions
A See Installation Instructions
Electrical connection
A See identification plate 1
Note for testing institutes
The energy efficiency class according to EN 50304 / EN 60350 is determined using the + and operating modes. Placing a thermocouple between the appliance door and the seal can cause lack of leak tightness
and thus measuring errors.
The usable volume within the meaning of EN 50304 / EN 60350 is obtained
with the shelf guides disassembled.
General note
Maximum load capacity: 3 kg
Measurement of the temperature in the cooking space
The temperature of the cooking space is measured when the cooking space
is empty according to an internationally accepted standard. Own measurements may be inaccurate and are not suitable for checking the accuracy of
the temperature.
1
Page 85

… Technical data
85
Automatic energy-saving stand-by
To avoid consuming power unnecessarily, the appliance is equipped with
automatic energy-saving stand-by.
To reduce power consumption to an absolute minimum, select
, «Time display invisible». Despite automatic energy-saving
stand-by, all safety functions are active.
Page 86

86
Disposal
Packaging
䡲 All packaging materials (cardboard, plastic film (PE) and polystyrene
(EPS)) are marked and should, if possible, be collected for recycling and
disposed of in an environmentally friendly way.
Disconnection
䡲 Disconnect the appliance from the mains. With a fixed appliance, this is to
be carried out by a qualified electrician!
Safety
䡲 Disable the appliance to prevent accidents caused by improper use,
especially through children playing.
䡲 Pull the plug out of the mains socket or have the appliance disconnected
from the mains by a qualified electrician. Then cut off the mains cable.
Disposal
䡲 The old appliance should not be discarded as worthless rubbish. If
disposed of correctly, the raw materials can be recovered for recycling.
䡲 The symbol on the identification plate warns that the appliance may
not be disposed of in normal household waste.
䡲 The appliance must be disposed of in accordance with local regulations
on waste disposal. For more information on the handling, disposal and
recycling of the product, please contact the local authorities, the local
recycling facilities for household waste or the retailer from whom you
purchased the appliance.
Page 87

87
Notes
Page 88

88
Index
A
Accessories ........................... 13, 81
Cleaning.................................... 70
Accompaniments......................... 42
Acoustic signal...................... 24, 26
Appliance description ................. 10
Appliance door............................. 12
Removing.................................. 69
Appliance drawer......................... 10
Cleaning.................................... 68
B
Baby food...................................... 56
Baked dish.................................... 54
Baking tables................................ 40
Baking tray, round ....................... 15
Before using for the first time...... 5
Blanching ...................................... 56
Bottling.................................... 60, 62
Bread ............................................. 52
Browning, uneven........................ 66
Buttons........................................... 11
C
C messages.................................. 79
Cakes............................................. 48
Care................................................ 68
Childproof lock...................... 24, 25
Children in the home .................... 7
Cloths, warm and moist ............. 64
Construction ................................. 10
Cooking space
Cleaning.................................... 71
Temperature measurement... 84
Ventilation ................................. 12
Cooking space temperature
Checking / Changing ............. 21
Selecting ................................... 20
Cooking tables ............................. 40
Cooking trays ............................... 16
D
Defrosting ..................................... 54
Delayed start................................ 31
Descaler........................................ 73
Descaling............................... 72, 73
Desiccating................................... 58
Desserts........................................ 46
Disconnection .............................. 86
Display elements......................... 11
Displays......................................... 11
Disposal ........................................ 86
Door seal ...................................... 12
Replacing ................................. 70
Drying ............................................ 58
E
Electrical connection .................. 84
Energy
Saving ....................................... 67
Exterior
Cleaning ................................... 68
External dimensions ................... 84
Extracting juice ............................ 56
F
F / E messages........................... 78
Factory settings .................... 24, 27
Fast heating.................................. 38
Fish ................................................ 46
Flans .............................................. 52
G
Gratins........................................... 54
H
H messages ................................. 76
Hot air..................................... 34, 64
Hot air + steaming ............... 36, 65
Hot air fan..................................... 12
Hot air humid ............................... 36
Page 89

… Index
89
I
Identification plate........................ 84
Illumination ..................... 12, 24, 26
Instruction messages .................. 10
J
Joghurt ........................................... 48
K
Knurled nut.................................... 12
L
Levels ............................................. 12
Light bulb, replacing.................... 74
Load capacity ............................... 84
Low temperature cooking........... 44
M
Maintenance.................................. 68
Meat................................................ 44
Model number ................................ 2
Model type....................................... 2
O
Operating elements ..................... 11
Operating modes ......................... 34
Changing................................... 20
Operating the appliance ............. 17
Example..................................... 19
Operating time.............................. 30
Optimal use................................... 39
Original baking tray ..................... 13
P
Packaging...................................... 86
Perforated stainless steel tray ... 14
Pizza ............................................... 52
PizzaPlus........................................ 36
Plaited bread................................. 52
Porcelain dish ............................... 15
Potatoes......................................... 42
Poultry ............................................ 46
Power failure................................. 80
Preheating..................................... 67
Preserving .............................. 60, 62
preset............................................. 20
Professional baking.............. 36, 65
Q
Quick instructions........................ 92
R
Refilling water tank...................... 20
Regenerating......................... 34, 64
Reheating...................................... 54
Removing cooked food.............. 22
Repair service .............................. 91
Roller runner................................. 16
Round baking tray....................... 15
S
Safety ............................................. 86
Safety guard ................................. 12
Safety precautions
Before using for the first time . 5
Children in the home................ 7
Correct use................................. 6
Note on use ............................... 7
Savouries and biscuits ............... 50
Sea food........................................ 46
Shelf guides.................................. 70
Spare parts ................................... 83
Stainless steel tray ...................... 14
Stand-by ........................................ 85
Steam
Activating / Deactivating........ 65
Steam insert.................................. 15
Steaming ................................ 34, 63
Sterilizing feeding bottles........... 56
Switching off ................................. 21
Switch-off time.............................. 31
Symbols.................................... 2, 11
Symbols used .............................. 39
Page 90

… Index
90
T
Technical data.............................. 84
Temperature sensor.................... 12
Temperature unit................... 24, 27
Terrine mould ............................... 15
Testing institutes .......................... 84
Time display........................... 24, 26
Time format............................ 24, 27
Time functions .............................. 28
Time, setting ................................. 28
Timer .............................................. 29
Tips and tricks.............................. 63
Tips on settings............................ 39
Top / Bottom heat ....................... 34
Top heat ........................................ 12
Trouble-shooting .......................... 75
U
U / E messages .......................... 78
User settings ................................ 23
Using for the first time................ 18
V
Validity.............................................. 2
Vegetables.................................... 40
W
Water hardness .................... 24, 27
Water tank .................................... 14
Emptying .................................. 22
Filling......................................... 19
Refilling ..................................... 20
Wire shelf...................................... 13
Page 91

91
Repair service
Whether you contact us about a malfunction or an order, please always state
the serial number (FN) and the model type of your appliance. Enter these
details below and also on the service sticker which comes with the appliance.
Stick it in a conspicuous place or in your telephone or address book.
You will also find the same details on the certificate of guarantee, the original
sales invoice and the identification plate of the appliance.
A Open the appliance door.
– The identification plate is on the left-side panel.
The 'Trouble-shooting' section will help you to carry out small repairs
yourself, saving you the time and trouble of calling out a service
engineer and the cost that goes along with it.
FN
Appliance
Page 92

Quick instructions
Please first read the safety precautions in the operating instructions!
To set the time
A Press the button.
A Turn the adjusting knob to set the hour.
A Press the button again.
A Turn the adjusting knob to set the minutes.
A Press the adjusting knob to confirm.
To select the operating mode
A Press the button repeatedly until the desired operating mode appears.
A Turn the adjusting knob to set the cooking space temperature.
A Press the adjusting knob to confirm.
To switch off the appliance
A Press the button.
To set the timer
A Press the button.
A Turn the adjusting knob to set the timer duration.
J795.360-0
V-ZUG Ltd
Industriestrasse 66, CH-6301 Zug
vzug@vzug.ch, www.vzug.com
 Loading...