

Go to www.vtechphones.com
to register your product for
enhanced warranty support and
SN5127
latest VTech product news.
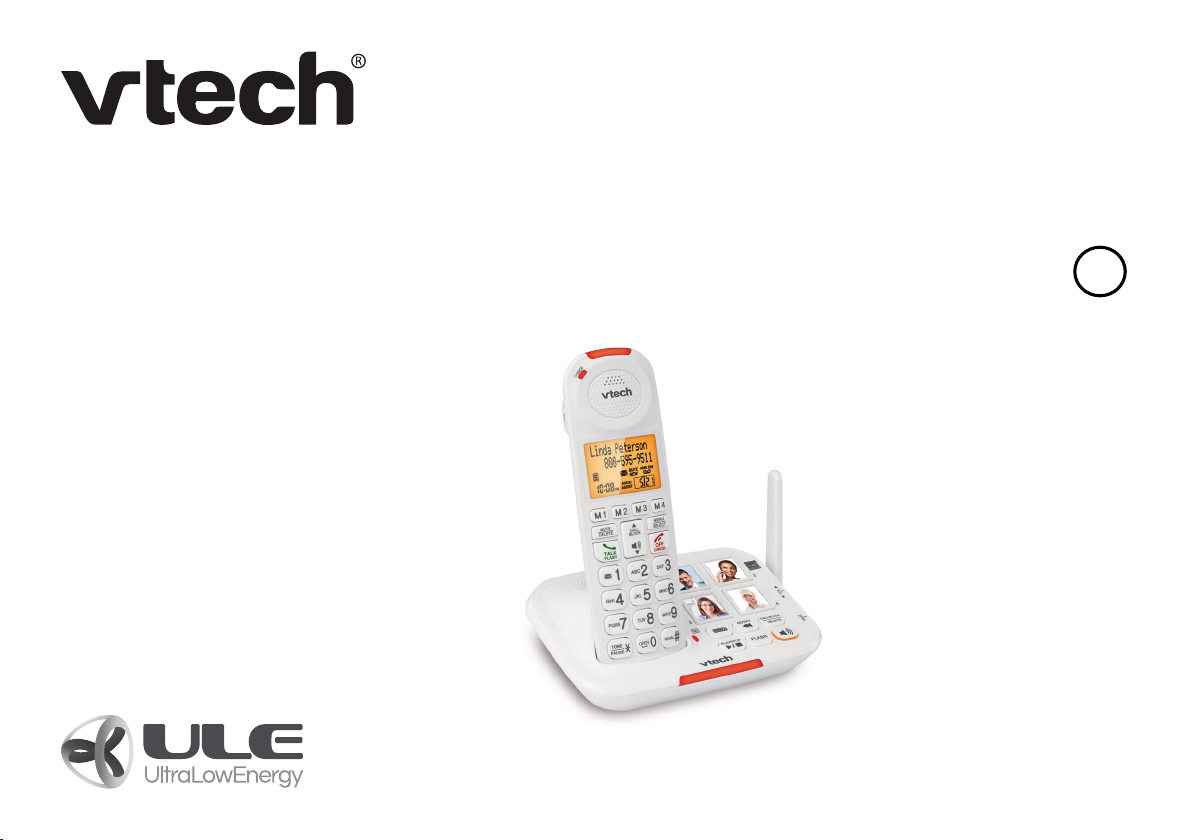
Amplified Cordless Answering System with
Big Buttons and Display
Quick start guide
BC

Congratulations
on purchasing your new VTech product. Before using this telephone, please read Important
safety instructions.
This quick start guide provides you with basic installation and use instructions. A limited set
of features are described in abbreviated form. Please refer to the online user’s manual for a
full set of installation and operation instructions at www.vtechphones.com.
Compatible with
Hearing Aid T-Coil
T
TIA-1083
Telephones identified with this logo have reduced noise and interference when used with most T-coil
equipped hearing aids and cochlear implants. The TIA-1083 Compliant Logo is a trademark of the
Telecommunications Industry Association. Used under license.
The ENERGY STAR® program (www.energystar.gov) recognizes and encourages the use of products
that save energy and help protect our environment. We are proud to mark this product with the
ENERGY STAR® label indicating it meets the latest energy efficiency guidelines.

Table of contents
LCD language 23
What’s in the box 1
Connect and install 2
Connect the telephone base 2
Install the battery 3
Charge the battery 4
Battery backup mode 5
Mount the telephone base
(optional) 6
Setup 8
Date and time 8
Voice guide to set Smart call
blocker 10
Voice guide to set answering
system 12
SOS emergency call 13
Photo speed dial 19
Talking digits 24
Key tone 25
Caller ID announce on/off 26
Use caller ID to automatically
set date and time 27
Voicemail number 28
Clear voicemail indicator 29
Home area code 30
Dial mode 31
Alarm reminder and melody 32
Operate 35
Display 35
Make a call 36
Answer a call 36
End a call 37
Speakerphone 37

Volume 37
Delete a phonebook entry 51
Make SOS emergency call 38
Temporary ringer silencing 39
Call waiting 39
Redial 40
Photo/memory speed dial 40
Temporary tone dialing 41
Audio Assist® 41
Equalizer 42
Find handset 42
Join a call in progress 43
Intercom 44
Call transfer using Intercom 46
Phonebook 48
Add a phonebook entry 48
Save a redial entry to the
phonebook 52
Edit a phonebook entry 53
Caller ID 54
Review caller ID log entry 54
Save a caller ID log entry to
the phonebook 55
Dial a caller ID log entry 56
Delete a caller ID log entry 56
Smart call blocker* 57
Call categories 58
Set Smart call blocker on/off 60
Set welcome calls 61
Set unwelcome calls 65
Review phonebook entry 50
Dial a phonebook entry 51
Control calls without
numbers 67

Control uncategorized calls 68
Play the previous message 80
Screen calls without
numbers 69
Screen uncategorized calls 70
Add a screened number to
the allow list or block list 71
Option while on a call 71
Answering system 72
About the built-in answering
system and voicemail service 72
Built-in answering system VS
Voicemail service 72
Turn the built-in answering
system on or off 74
Set number of rings 76
Message playback 78
Skip a message 79
Delete a message 80
Delete all messages 81
Remote access 82
Set remote access code 83
Additional devices 84
Add and register expansion
handset 84
Add and register
photo speed dial handset 85
Device setup 86
Audio doorbell 88
Test device signal strength 100
Device monitoring 102
Limited warranty 103
Technical specifications 105
Repeat the playing message 79
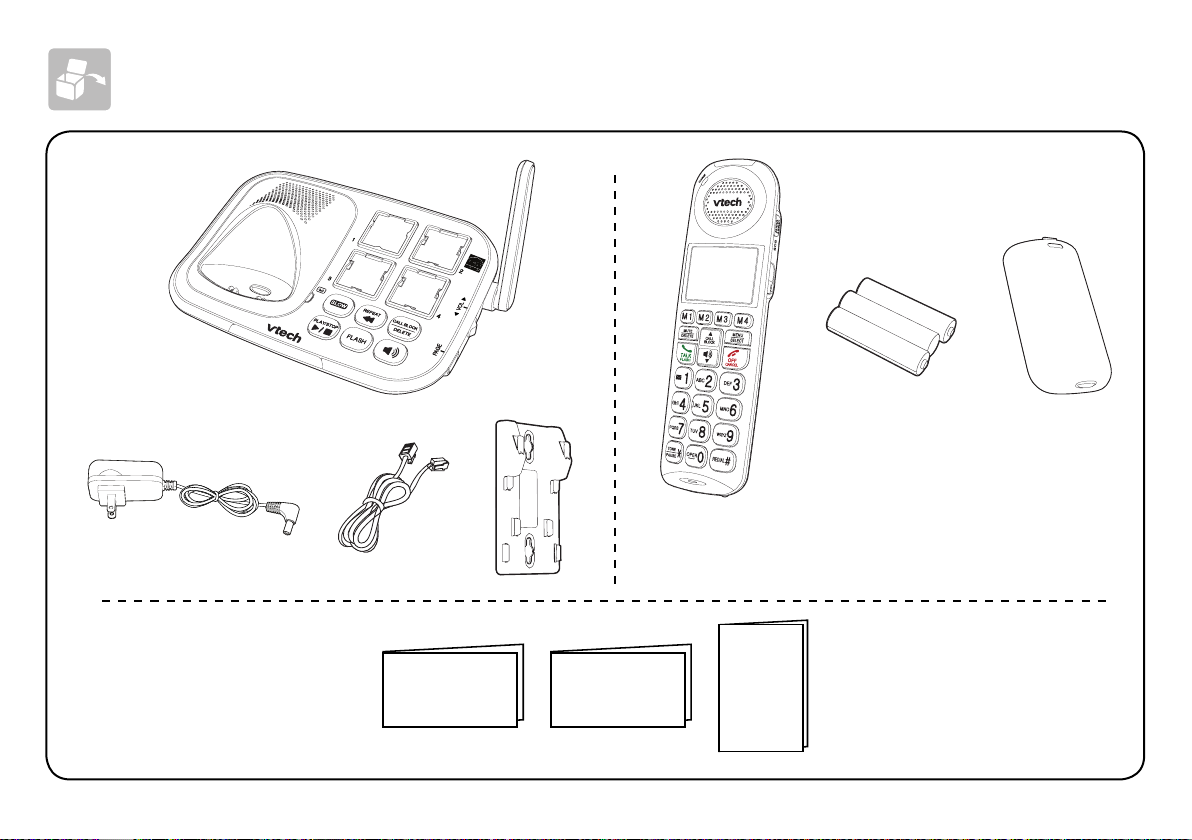
What’s in the box
Quick start guide Introducing
Smart call blocker
Important
safety
instructions
1
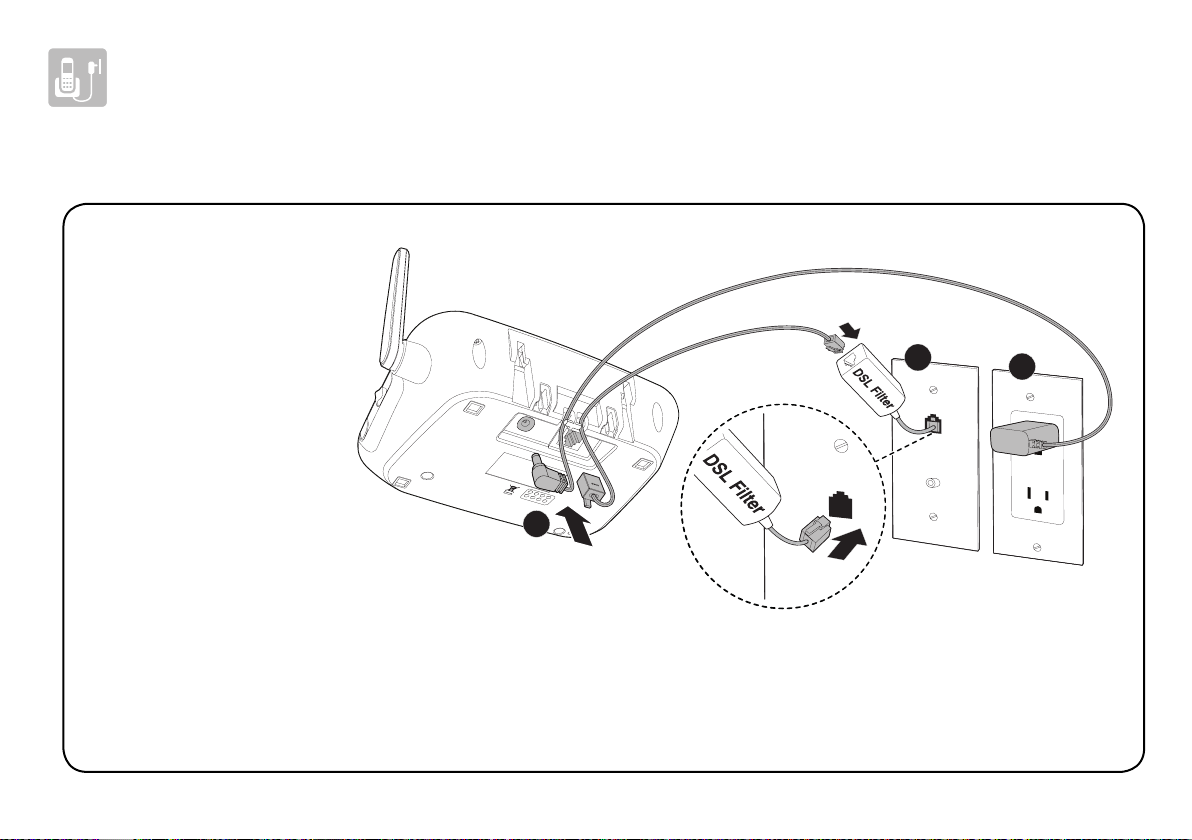
Connect and install
Connect the telephone base
If you subscribe to
digital subscriber
line (DSL)
high-speed
Internet service
through your
telephone line,
make sure you
connect a DSL
filter (not included)
to the telephone
wall jack.
2
1
3
2
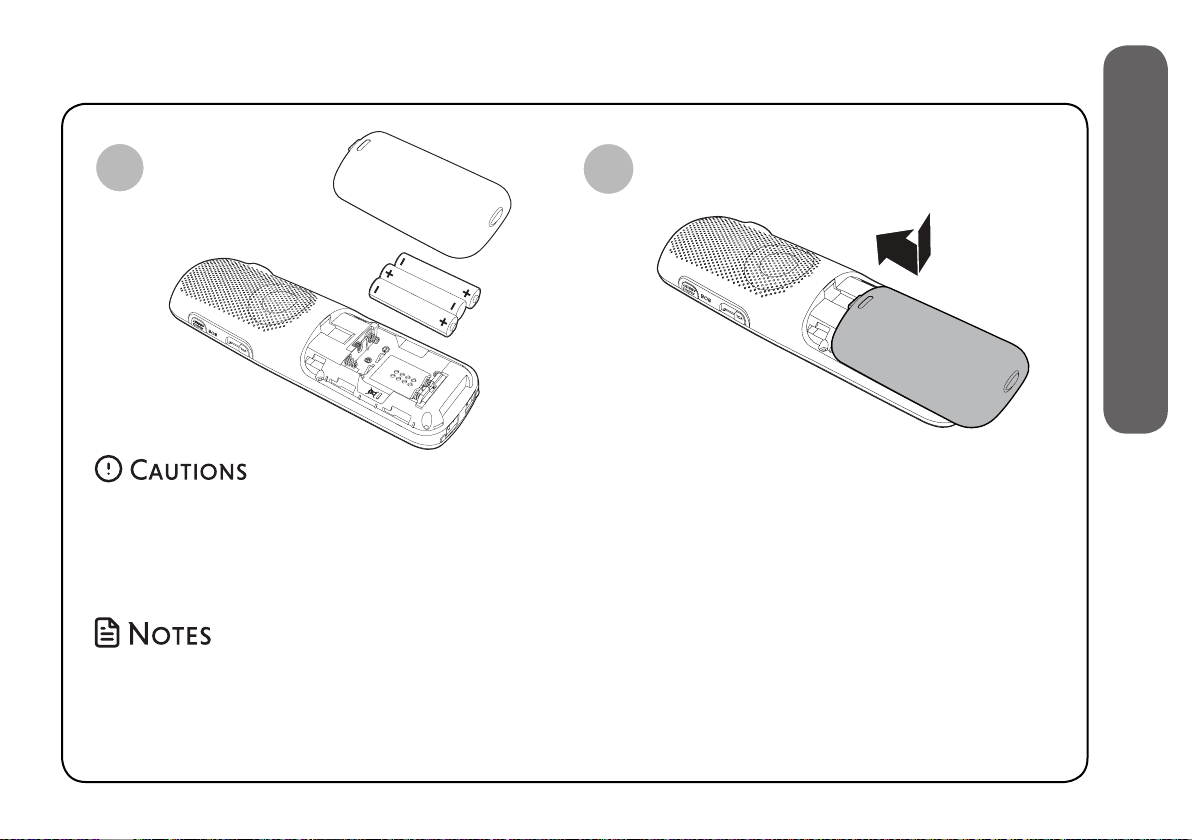
Install the battery
1. Connect and install
1
• Use only the rechargeable batteries provided or replacement batteries (model BT205662).
• Do not use other alkaline, manganese or Ni-Cd batteries, nor other non-rechargeable
batteries for operating the cordless handset. They may cause failure or malfunction of the
handset or the telephone system.
• Charge the batteries provided with this product only in accordance with the instructions and
limitations specified in this quick start guide.
• If the handset will not be used for a long time, disconnect and remove the batteries to
prevent possible leakage.
2
3
Connect and install
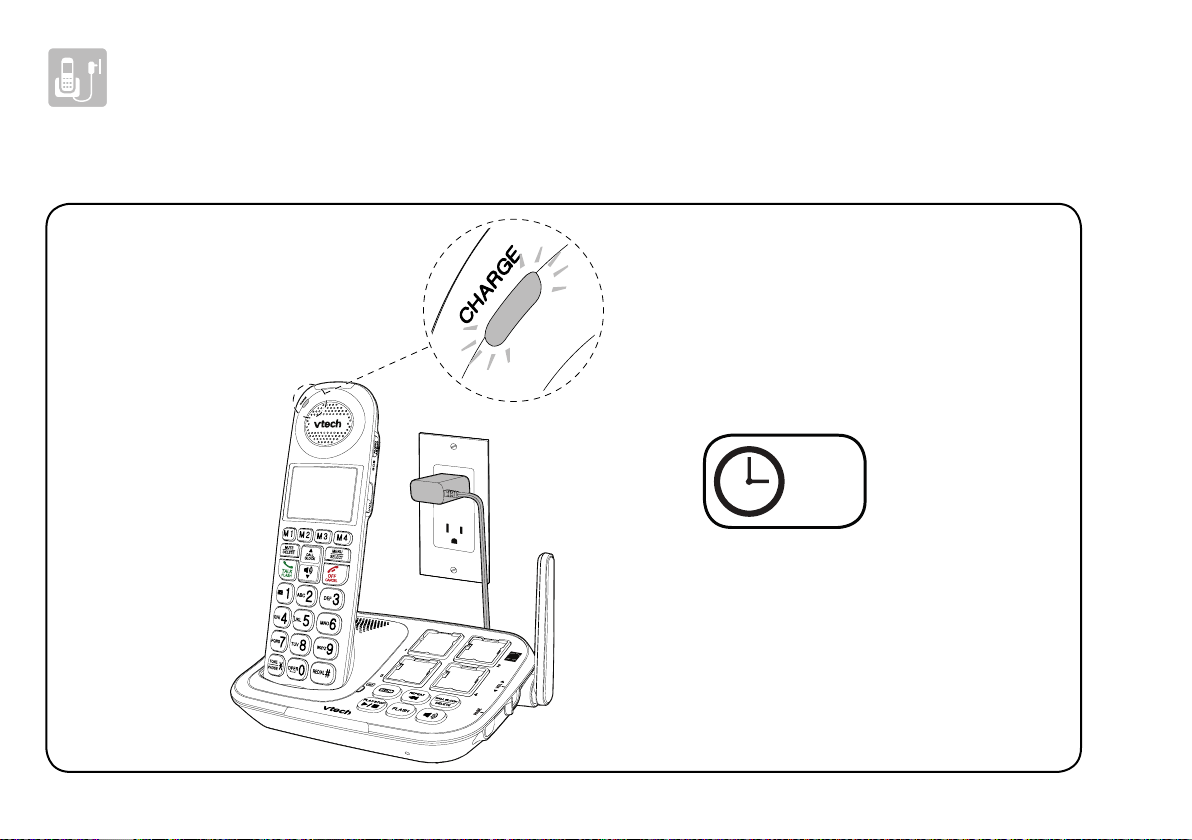
Charge the battery
12 hrs
4
Battery backup mode
1. Connect and install
When there is a power failure, the handset displays Put HS
on base to power base and Out of range OR No pwr at base
Put HS on base
to power base
alternately. Put the charged handset in the telephone base
to back up the telephone base power for some basic phone
operations for a short period of time. During this period, you
cannot use the answering system.
When the handset is put in the telephone base, it displays
Powering base... Don’t pick up.
Powering base...
Don’t pick up
You may use the handset for making or answering calls via the
handset speakerphone, but do not pick up the handset while
using it.
If you have more than one handset, all handsets display Pwr outage mode after
entering the battery backup mode. At this time, use other handsets for some basic
phone operations.
5
Connect and install
Mount the telephone base (optional)
1
2
B
A
6
1. Connect and install
3
4
7
Setup
Date and time
After you install your telephone or power returns following a power outage and battery
depletion, the handset will prompt you to set the date and time, and to configure the
Smart call blocker and answering system through the voice guides.
Follow the steps below to set the date and time. For example, if the date is
31 December, 2018, and the time is 10:59 PM:
When the
handset prompts
you to set the
date and time...
MM/DD/YY
01/01/18
1
Enter the month (MM),
day (DD), and year (YY).
2
Press SELECT.
8
MM/DD/YY
12/31/18
HH:MM
12:00 AM
3
Enter the hour (HH) and
minute (MM).

HH:MM
10:59 AM
4
Press any number key
to toggle between AM
and PM.
HH:MM
10:59 PM
5
Press SELECT to save.
2. Setup
Make sure you set the date
and time including the year
correctly; otherwise the
answering system does not
announce the correct day of
the week for your recorded
messages time stamp.
If you subscribe
to caller ID
service, the
day, month and
- OR -
When the handset is not in use:
1. Press MENU.
2. Press or to scroll to
Set date/time.
Ringers
>Set date/time
time are set
3. Press SELECT, and then
automatically
follow the Date and time
with each
steps to set the date and
incoming call.
time.
9
Setup
Voice guide to set Smart call blocker
After the date and time setting is done or skipped, the cordless handset then prompts if
you want to set Smart call blocker. For more details on Smart call blocker, see page 57.
You can follow the voice guide to set your telephone system to allow or to screen all
incoming calls, or to screen calls that do not display a phone number.
When the
handset
prompts you
to set Smart
call blocker via
voice guide...
Voice guide set
Smart call blk?
1
Press SELECT.
10
2
“Hello! This voice guide will assist you with
the basic setup of Smart call blocker...“
Listen to the
instructions and
then choose one
of the options.

On the cordless handset:
2. Setup
Press 1 if you want to screen calls
with telephone numbers that are not
saved in your Phonebook, Allow list
or Star name list;
Press 2 if you only want to screen
calls that do not display a phone
number; or
Press 3 if you do not want to screen
calls, and want to allow all incoming
calls to get through.
• Read the Introducing Smart call blocker leaflet provided in your package to
learn how to set up your Smart call blocker.
11
• If you select option 1 to screen
calls, we recommend that
you add the phone numbers
of your family members and
friends, and desired businesses
to your Phonebook (see page
48 or Allow list (see page
61), or add their names to
the Star name list (see page
62). This will avoid Smart call
blocker to screen their calls.
Setup
Voice guide to set answering system
After the Smart call blocker setting is done or skipped, the handset will then prompt if
you want to set up the answering system.
This feature assists you to do the basic setup of the answering system. You can follow
the voice guide to record your own announcement, set the number of rings and the
message alert tone.
When the
handset prompts
you to set up
the answering
system via voice
guide...
Voice guide to
set up Ans sys?
1
Press SELECT.
12
“This voice guide will
assist you with the
basic setup of your
answering system.“
2
Set up your
answering system
by inputting
the designated
numbers as
instructed in the
voice guide.

SOS emergency call
The AUDIO ASSIST/SOS button on the cordless handset can function as
SOS emergency button. It lets you quickly page other system devices
and call the preset external numbers for help in an emergency.
You can preset up to five SOS numbers.
If you have purchased and registered a Wearable home SOS pendant
(SN7022) to your telephone system, the SOS pendant will function as
same as the SOS emergency button of the cordless handset.
• To ensure proper operation, the telephone system must be installed according to the installation
instructions on page 2 to page 4. To verify that the telephone system is operating
properly and can successfully make emergency calls to the preset numbers, the telephone
system must be tested immediately after installation, and periodically thereafter, according to the
setup instructions on page 15 to page 18, and the operations on page 38.
• The telephone system cannot make an emergency call when other equipment (telephone,
answering system, computer modem, etc.) connected to the same phone line is in use.
• Do not solely rely on the SOS button on the cordless handset, or the Wearable home SOS
pendant (SN7022, purchased separately), for getting help in case of emergency. The functionality
of the SOS emergency call is dependent on the phone settings and network availability.
2. Setup
• We recommend you set all five SOS numbers to maximize the possibility of receiving response
from others when you make an emergency call.
13

Setup
How does SOS emergency call work?
• To make an emergency call, press and hold AUDIO ASSIST/SOS on the right side of the
cordless handset for three seconds. The telephone base announces “Emergency mode is
activated“. The handset then pages all system devices. All devices ring an alert tone and
the handset screen shows SOS mode for 20 seconds. After that, the telephone then calls
the preset SOS numbers in sequence until the call is answered.
- The telephone enables internal SOS alert by default. When this feature is enabled, the telephone
pages all system devices before calling the preset SOS numbers.
- If you disable internal SOS alert (see page 16), the telephone calls the preset SOS numbers
directly when you press and hold AUDIO ASSIST/SOS on the cordless handset.
• When the SOS call to the preset external number is answered, the call receiver hears an SOS
message. You can record your own message or use the default message (see page 17).
• The SOS message played by the telephone asks the SOS call receiver to respond by
pressing a number key. After the call receiver presses a number key, you can then talk to
the call receiver with your handset.
• When the SOS emergency call is answered by answering machine or voicemail, the call
will be terminated after 60 seconds. The telephone then dials the next SOS number in
sequence.
• When none of the preset SOS numbers answer, the telephone re-calls the preset SOS
numbers in sequence until the call is answered. The telephone will call all the preset SOS
numbers for 3 times before aborting the operation when none of the calls are answered.
14

Set SOS emergency numbers
7
2. Setup
SOS 1
HANDSET
10:15PM 12/25
1
>Add
5
ANS ON
SOS 1
Press select again to add
an emergency number.
Direct memory
>Set SOS
2
NUMBER:
595-9511_
6
Enter the number.
Then, press SELECT.
Call internal
>SOS number
3
4
Scroll to select SOS 1,
SOS 2, SOS 3, SOS 4, or
SOS 5, and then press
SELECT.
MAME:
Chris_
Enter the name.
Then, press SELECT.
15

Setup
Enable or disable internal SOS alert
Internal SOS alert is enabled by default.
When you press and hold AUDIO ASSIST/SOS to make an emergency call, the telephone
pages all registered system devices for 20 seconds. After that, the telephone then calls the
five preset SOS numbers in sequence, until the call is answered.
You can disable this setting to allow you to make emergency calls directly to the preset SOS
numbers.
1
Direct memory
>Set SOS
2
Press MENU on the handset when it is not in use.
Scroll to Set SOS, and then
press SELECT.
>Call internal
SOS number
3
Press to select
Call internal.
16
Scroll to select Enable or
Disable, and then press SELECT.
CALL INTERNAL
>Enable
4

Record SOS message
When you make an emergency call with the AUDIO ASSIST/SOS button on the
cordless handset, the SOS message is played to the call receiver after he/she picks up.
The default SOS message is “This is an emergency call. Please press any number key to
start the conversation.” You can record your own message using the cordless handset.
2. Setup
1
Direct memory
>Set SOS
2
Scroll to Set SOS, and
then press SELECT.
Make sure your recorded SOS message includes your name, your SOS message, and
a request to the far-end caller on pressing any number key to start a conversation.
Press MENU on the handset when it is not in use.
SOS number
>SOS message
3
Scroll to SOS message,
and then press SELECT.
>Record annc
Play annc
4
Press SELECT to select
Record annc.
17
“Record after the
tone. Press STOP
when you are done.“
RECORD SOS
5-STOP
Speak toward the
5
cordless handset
to record your
message. Press 5
when done.
Setup
Play or reset SOS message
1
Direct memory
>Set SOS
2
Scroll to Set SOS, and
then press SELECT.
Press MENU on the handset when it is not in use.
SOS number
>SOS message
3
Scroll to SOS message,
and then press SELECT.
Scroll to select Play annc or
Reset annc, and then press
Play annc
>Reset annc
4
SELECT. If you select Reset
annc, press SELECT twice.
18

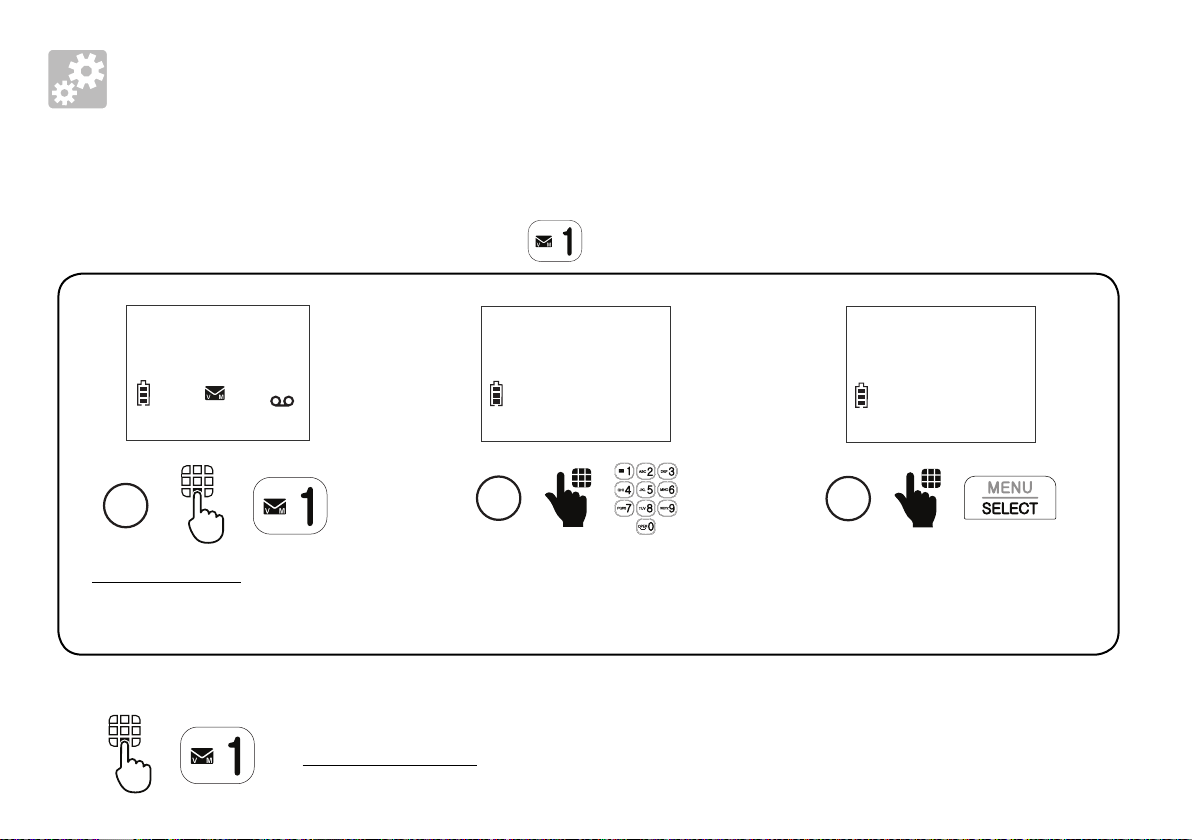
Photo speed dial
There are four photo speed dial memory keys 1 to 4 on the telephone base, and four
direct memory keys M1 to M4 on the cordless handset.
You can store the telephone numbers you wish to quick dial to the photo speed dial
keys. When you set the four photo speed dial keys 1, 2, 3 and 4 on the telephone
base, the same numbers will also automatically set in the M1, M2, M3 and M4 keys on
the cordless handset.
• We recommend you store at least two contacts that you may need to call them
more often or immediately to photo speed dial keys 1 and 2.
2. Setup
19
Setup
Photo speed dial
Store a photo speed dial entry:
1
Intercom
>Direct memory
2
Scroll to Direct memory,
and then press SELECT.
Press MENU when the handset is not in use.
M1
3
Scroll to select M1, M2,
M3,or M4, and then press
SELECT.
20
M1
>Add
4
Press SELECT again to add
the speed dial number.
2. Setup
NUMBER:
595-9511_
NAME:
Chris_
• To store another
photo speed
dial entry,
repeat the steps.
5
Enter the phone number,
and then press SELECT.
6
Enter the name, and then
press SELECT to save.
21

Setup
Photo speed dial
Insert photos for speed dial keys:
You can insert photos into the photo speed dial compartments, or write the contact
names on cards and insert them into the compartments.
The telephone base is shipped with protective
stickers covering the photo speed dial
compartments. Remove the protective sticker
before use.
1. Remove the photo speed dial compartment
cover.
2. Crop your desired photo into the size specified
22
on the right, and then insert it into the photo
speed dial compartment. Then, insert the photo
speed dial compartment cover back to the
compartment.
.4mm
22.5m
m
22
LCD language
You can select your handset’s display language (English, French or Spanish).
2. Setup
1
Set date/time
>Settings
2
Scroll to Settings, and
then press SELECT.
Press MENU when the handset is not in use.
>LCD language
Voicemail #
3
Press SELECT to select
LCD language.
LCD LANGUAGE
>English
4
Scroll to highlight
English, Français or
Español, and then
press SELECT.
23
Set English as
LCD language?
5
Press SELECT to
confirm.
Setup
Talking digits
You can choose whether the digits are to be announced whenever you press the
number keys.
1
Press MENU when the handset is not in use.
Reminder
>Talking digits
2
Scroll to Talking digits,
and then press SELECT.
24
TALKING DIGITS
>On
3
Scroll to select On or Off,
and then press SELECT.

Key tone
The cordless handset is set to beep with each key press. You can adjust the key tone
volume or turn it off. If you turn off the key tone, there are no beeps when you
press keys.
2. Setup
1
Set date/time
>Settings
2
Scroll to Settings,
and then press
SELECT.
Press MENU when the handset is not in use.
Clr voicemail
>Key tone
3
Scroll to Key tone,
and then press
SELECT.
25
KEY TONE
4
Scroll to select the
desired volume or
select OFF.
KEY TONE
Off
5
Press SELECT to
confirm.

Setup
Caller ID announce on/off
The caller ID announce feature lets you know who’s calling without having to look at the
display. When you have an incoming call, the handset and/or base speaks “Call from...”
and the name of the caller based on the phonebook or caller ID information. The default
setting is On.
• To use the caller
ID announce
feature, you
must subscribe
to caller ID
service from
your telephone
service provider.
1
Talking digits
>Caller ID annc
2
Scroll to Caller ID annc,
and then press SELECT.
26
Press MENU when the handset is not in use.
CALLER ID ANNC
>On
3
Scroll to select On or Off,
and then press SELECT.

Use caller ID to automatically set date and time
If you subscribe to caller ID service, you can choose to set the date and time for each
incoming call by the caller ID information automatically. The default setting is On.
2. Setup
1
Set date/time
>Settings
2
Scroll to Settings, and
then press SELECT.
Press MENU when the handset is not in use.
Key tone
>CID time sync
3
Scroll to CID time sync,
and then press SELECT.
27
CID TIME SYNC
>On
4
Scroll to On or Off, and
then press SELECT.
Setup
Voicemail number
If you subscribe to a voicemail service offered by your telephone service provider,
you can save your voicemail number to for quick access.
HANDSET
10:15PM 12/25
ANS ON
1
Press and hold 1 when
the handset is not in use.
Enter the voicemail access number
provided by your telephone
VOICEMAIL #
2
_
service provider (up to 30 digits).
To retrieve voicemails from your telephone service provider:
Press and hold 1.
28
VOICEMAIL #
595-9511_
3
Press SELECT.

Clear voicemail indicator
Use this feature when the telephone indicates that there is new voicemail but there
are none. This feature only turns off the indicators, New voicemail and . It does not
delete your voicemail messages. As long as you have new voicemail messages, your
telephone service provider continues to send the signal to turn on the indicators.
2. Setup
1
Set date/time
>Settings
2
Scroll to Settings, and
then press SELECT.
Press MENU when the handset is not in use.
Voicemail #
>Clr voicemail
3
Scroll to Clr voicemail, and
then press SELECT.
29
Reset Voicemail
Indicator?
4
Press SELECT to
confirm.
Setup
Home area code
You can program your home area code so that when you receive or dial a call within your
local area, only seven digits are shown or dialed, and the telephone number is automatically
stored without the area code in the caller ID log.
1
Set date/time
>Settings
2
Scroll to Settings, and
then press SELECT.
Press MENU when the handset is not in use.
CID time sync
>Home area code
3
Scroll to Home area
code, and then
HOME AREA CODE
___
4
Enter a three-digit
home area code.
press SELECT.
30
HOME AREA CODE
100
5
Press SELECT.

Dial mode
The dial mode is preset to touch-tone dialing. If you have pulse (rotary) service, you
need to change the dial mode to pulse dialing before using the telephone.
2. Setup
1
Set date/time
>Settings
2
Scroll to Settings, and
then press SELECT.
Press MENU when the handset is not in use.
Home area code
>Dial mode
3
Scroll to Dial mode, and
then press SELECT.
31
Scroll to select Touch-tone or
Pulse, and then press SELECT.
DIAL MODE
>Touch-tone
4
Setup
Alarm reminder and melody
You can set alarm reminders that remind you at specific times, once, daily, or at weekdays
or weekends.
1
Set SOS
>Reminder
2
Scroll to Reminder, and
then press SELECT.
Press MENU when the handset is not in use.
REMINDER
>Reminder 1
3
Scroll to select a reminder
from Reminder 1 to
Reminder 10, and then
press SELECT.
32
REMINDER 1
>On/Off
4
Press SELECT to
select On/Off.

Alarm reminder and melody
7
2. Setup
ON/OFF
>On
5
Scroll to On and
then press SELECT.
Enter the hour (HH) and minute
(MM). Then, press any number key
to change between AM and PM.
FREQUENCY
>Once
• Once;
• Daily;
• Mon. to Fri.; or
• Sat. to Sun.
8
Scroll to select one of the frequency
options, and then press SELECT.
HH:MM
12:00 AM
6
HH:MM
10:59 PM
Press SELECT.
• When the set reminder alarm
time is due, the alarm will not
ring if the telephone is in use.
• The cordless handset rings for
30 seconds when the alarm
time is due.
• Press any key on the handset to
stop the alarm when ringing.
33

Setup
Alarm reminder and melody
You can also select the alarm reminder melody.
1
Set SOS
>Reminder
2
Scroll to Reminder, and
then press SELECT.
Press MENU when the handset is not in use.
REMINDER
>Reminder 1 *
3
Scroll to select the
desired reminder, and
then press SELECT.
4
Scroll to Melody,
and then press
SELECT.
MELODY
>Melody
>Tone 1
5
Scroll to the desired
melody, and then
press SELECT.
• A reminder you have previously set up is added with an asterisk (*) after the name, for example,
Reminder 1 *.
34
MELODY
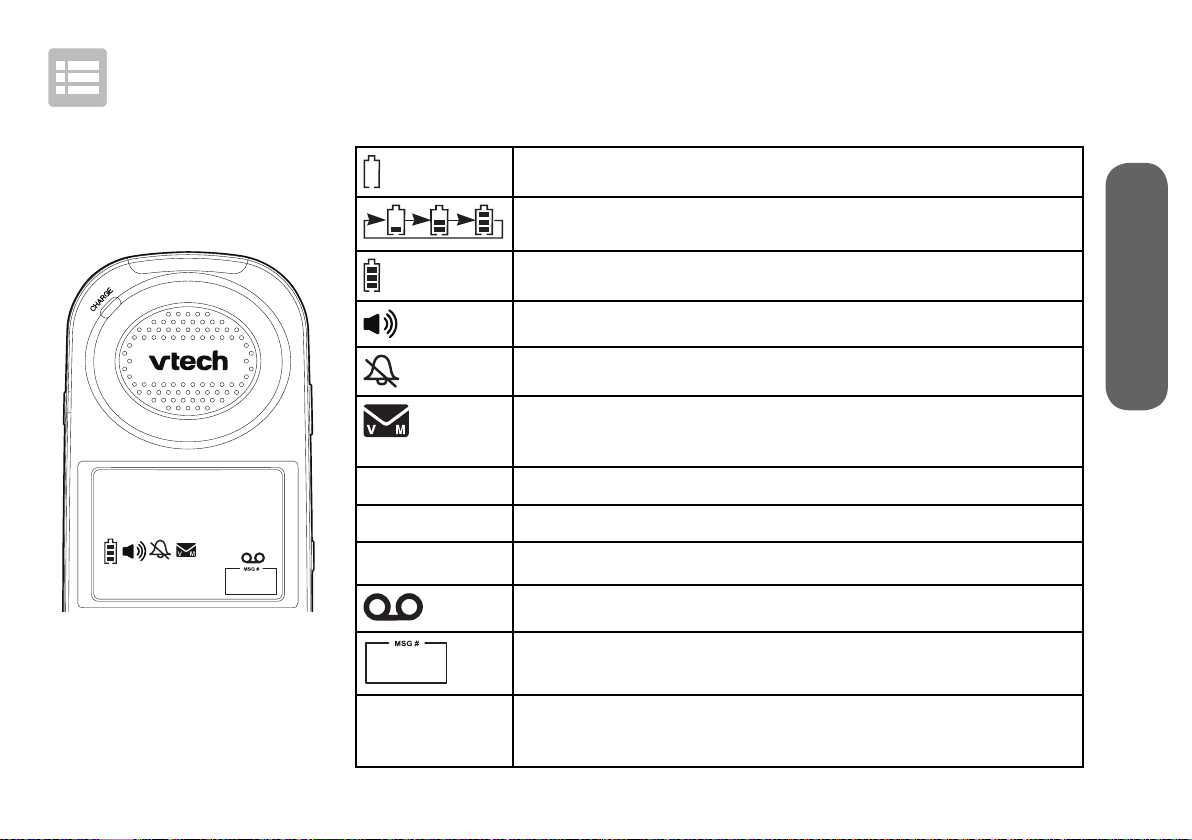
Operate
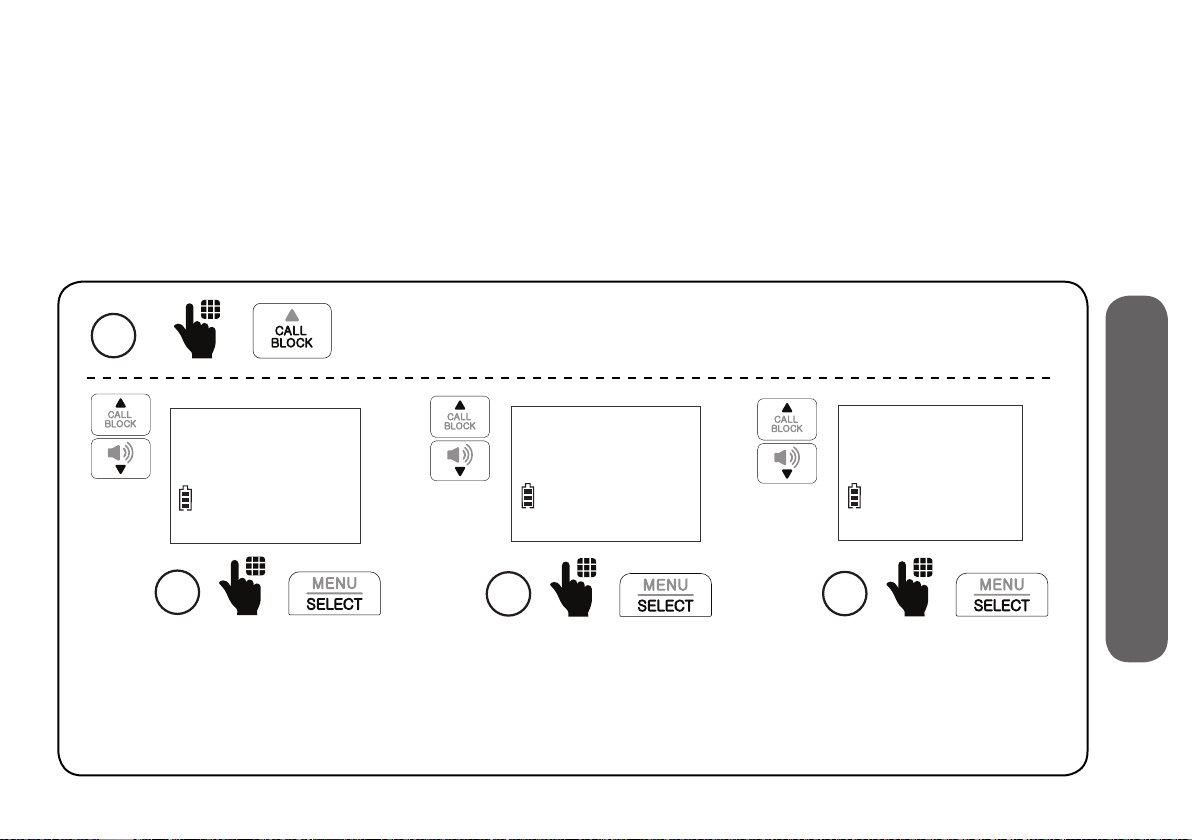
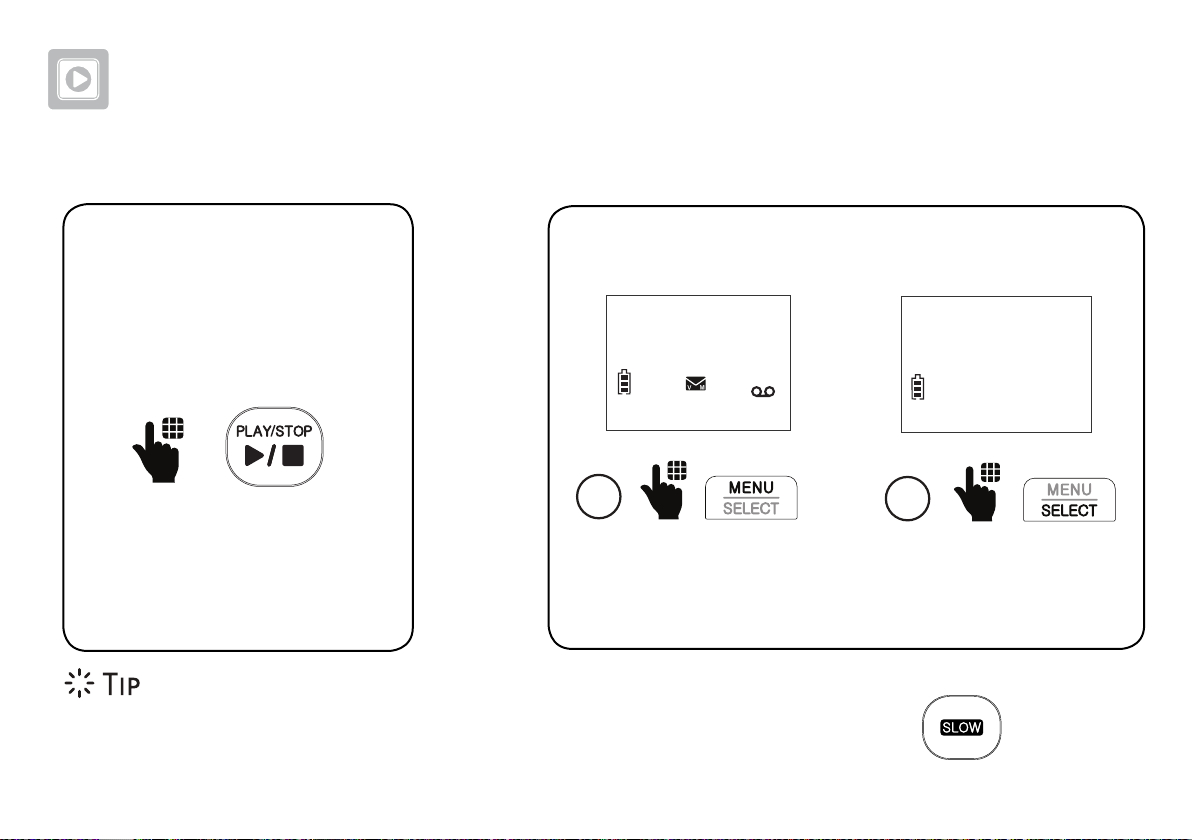
Display
HANDSET
MUTE
AUDIO
ASSIST
NEW
ANS ON
1/13
10:15PM
Audio Assist® is a registered
trademark of Advanced
Amercian Telephones.
MUTE
NEW
ANS ON
1/13
AUDIO
ASSIST
The battery is low and needs charging.
3. Operate
The battery is charging.
The battery is fully charged.
The handset speakerphone is in use.
Handset ringer is off.
New voicemail received from your telephone
service provider.
The handset microphone is muted.
There are new caller ID log entries.
Answering system is on.
There are new messages in the answering system.
Number of new/old messages recorded.
The handset Audio Assist® feature is on.
35

Operate
Make a call
1
Press TALK or
2
Dial the phone number.
- OR -
on the handset.
Answer a call
On the cordless handset:On the cordless handset:
- OR -
Press TALK, or any dialing keys on
the handset.
-------------------- OR -----------------
On the telephone base:
Press on the telephone base.
- OR -
36

End a call
Speakerphone
Volume
On the cordless
handset:
Press OFF on the
handset.
-ORPlace the handset in
the charging cradle.
• If you are using the
telephone base
speakerphone,
press
telephone base to
end the call.
on the
On the
cordless handset:
------ OR ------
On the
telephone base:
37
Handset
UpDown
Slide the VOL control on the cordless
handset or on the telephone base:
• to adjust the speaker volume level
when on a call; or
• to adjust the ringer volume when
the telephone is ringing.
• For hearing protection, do not
put the cordless handset near
your ear when the telephone is
ringing. Loud ringer sound may
damage your hearing. Adjust the
volume to lower the ringer sound
if you find it too loud.
Telephone base
UpDown
3. Operate

Operate
SOS
SOS
Make SOS emergency call
Press and hold AUDIO ASSIST/SOS on the cordless
handset for 3 seconds. The telephone base
announces, “Emergency mode is activated“ and
pages all registered devices. All devices ring an
alert tone, and after 20 seconds, the telephone
starts calling the preset SOS numbers.
• If you disable internal SOS alert (page 16),
-------------------------- OR -----------------------------
If you have purchased and registered a Wearable
home SOS pendant (SN7022), press the dial key
You can cancel SOS emergency call at any time:
• Press TALK or CANCEL on the handset; or
• Press and hold AUDIO ASSIST/SOS on the handset; or
• Press on the telephone base; or
• Press the CANCEL key on the back of the SOS pendant.
the telephone calls the preset SOS numbers in
sequence directly when you press and hold
AUDIO ASSIST/SOS. See page 13 for details.
on the SOS pendant to make SOS calls.
38
“This is an emergency
call. Please press any
number key to start the
conversation.“
• When the emergency
call is answered, the
telephone plays the
SOS message (see
page 17) to the call
receiver, asking the
receiver to respond by
pressing a number key
on his/her phone.
• After the call receiver
presses a number key,
you can then start a
conversation with the
call receiver.
• The
on the cordless handset
functions as Audio Assist
button when on a call or
listening to a message
or announcement.
button
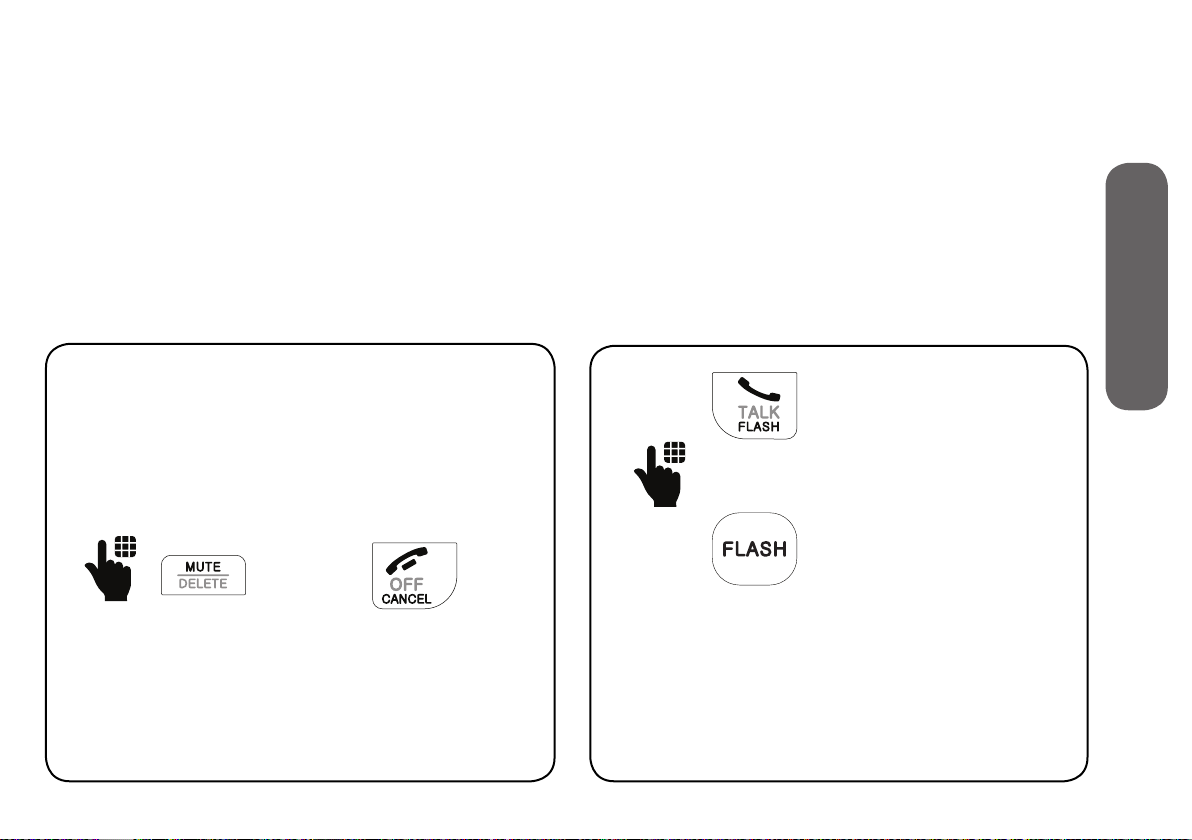
Temporary ringer silencing
Call waiting
When the telephone is ringing, you can
temporarily silence the ringer without
disconnecting the call. The next call rings
normally at the preset volume.
When the telephone is ringing:
Press MUTE or CANCEL on the handset.
- OR -
When you subscribe to call waiting service
from your telephone service provider, you
hear an alert tone if there is an incoming
call while you are already on a call.
When on a call using
the cordless handset.
- OR -
When on a call using
the telephone base
speakerphone.
• Press FLASH on the handset or
telephone base to put the current call
on hold and take the new call.
• Press FLASH at any time to switch back
and forth between calls.
3. Operate
39

Operate
Redial
The last 10 numbers dialed (up to 30 digits)
are stored in the cordless handset.
Press and hold REDIAL,
and then press
or to browse the
1
2
redial entries when the
handset is not in use.
REDIAL #1/10
595-9511
To redial, press TALK
on the handset.
Photo/memory speed dial
If you have set any of the four direct
memory speed dial numbers, you can press
a photo speed dial key on the telephone
base, or a directory memory key on the
handset to quickly dial the preset number.
The telephone base and the cordless
handset share the four direct memory
speed dial numbers.
For details on setting photo/memory speed
dial, see page 19.
Press a photo
speed dial key on
the telephone base
----------------- OR ----------------
to call.
Press M1, M2, M3 or M4
on the handset to call.
40

Temporary tone dialing
Audio Assist®
If you have pulse (rotary) service only,
you can switch from pulse to touch-tone
dialing temporarily during a call. This is
useful if you need to send touch-tone
signals to access your telephone banking
or long distance services.
1
When on a call,
press TONE* on the
handset.
2
Enter the number
you wish to dial. The
telephone sends
touch-tone signals. It
automatically returns
to pulse dialing mode
after you end the call.
The Audio Assist feature enhances the
clarity and loudness of your caller’s voice
on the cordless/corded handset earpiece
when you are on a call, or listening to a
message or an announcement.
Turn on/off Audio Assist:
When on a call or listening to a message
or an announcement:
• Press AUDIO ASSIST on the handset to
turn on.
• Press again to turn off.
3. Operate
41
Operate
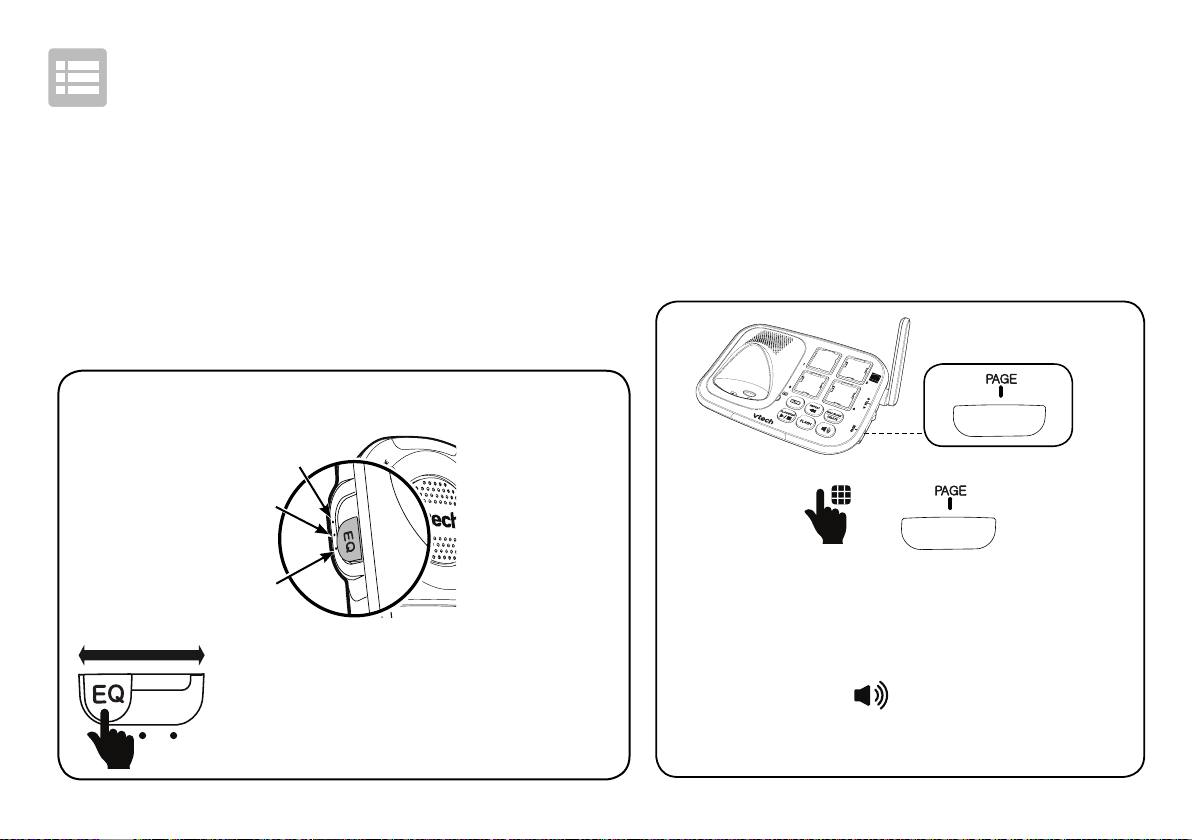
Equalizer
The equalizer on the cordless handset enable
you to change the quality of the audio for
both handset earpiece and speakerphone to
best suit your hearing. The default setting is
Natural.
Change the equalizer setting:
Treble
Natural
Bass
When on a call:
• Slide the EQ button to toggle
among Treble, Natural and Bass.
Find handset
To find your misplaced cordless handset,
press PAGE on the telephone base to
make intercom paging to the handset.
If you have two or more handsets, the
telephone makes intercom paging to all
handsets.
To stop the paging tone:
• Press TALK or to answer the
intercom call with the handset; or
• Press PAGE on the telephone base.
42

Join a call in progress
When you are already on an outside call, the telephone base can join the call using
the speakphone. If you are on an outside call using the telephone base speakphone,
then the handset can join the outside call.
To join a call with the cordless handset:
To join a call with the telephone base:
- OR -
Press TALK or on the handset.
To exit the call:
• Press OFF or place the handset in the telephone base; or
• Press
on the telephone base.
43
3. Operate

Operate
Intercom
You can use the intercom feature for conversations between the telephone base and the
cordless handset. If you have two or more cordless handsets, you can make intercom calls
from the telephone base to all cordless handsets, or from one handset to another or to the
telephone base.
Make intercom call using the cordless handset:
INTERCOM TO:
HANDSET
10:15PM 12/25
1
ANS ON
Press MENU when the
handset is not in use.
Caller ID log
>Intercom
2
Calling
base
Scroll to Intercom, and
then press SELECT.
>HANDSET 2
• If you have
other registered
devices or
have two or
more handsets,
choose the
device to call.
44

Make intercom call using the telephone base:
• To answer the intercom
call on the destination
devices:
- On a cordless handset,
press TALK or
.
- On the telephone
base, press .
• To cancel an intercom call:
- When using the
cordless handset,
press OFF.
3. Operate
Press PAGE when the telephone is
not in use.
- When using the
telephone base,
press PAGE.
45

Operate
Call transfer using Intercom
Use the intercom feature to transfer an outside call from the cordless handset to the
telephone base. You can also share an outside call with the telephone base.
1
>Intercom
Phonebook
2
Press SELECT to select
Intercom.
When on a call with your cordless handset, press MENU.
Intercom
When the destination device picks up, the
outside call is put on hold. Then, you have
the following options:
• Transfer the call;
• Share the call; or
• End the call.
46
Transfer call: Share call:
End call:
3. Operate
3
Press MENU.
>Transfer
Share call
4
Press SELECT to select
Transfer. The call is
transferred to the
destination device.
3
Press MENU.
Transfer
OR OR
Scroll to Share call, and then press
SELECT to let the destination
device join you on the outside call
in a three-way conversation.
>Share call
4
47
3
Press TALK.
Press TALK to end
the intercom call and
continue the outside
call with your handset.

Phonebook
The phonebook can store up to 50 entries. Each entry may consist of a telephone number
with up to 30 digits, and a name with up to 15 characters.
Add a phonebook entry
HANDSET
10:15PM 12/25
1
ANS ON
Enter the phone
number when the
handset is not in use.
595-9511_
2
Press SELECT.
48
EDIT NUMBER
595-9511_
3
Press SELECT again.

ENTER NAME
_
ENTER NAME
Mike Smith_
4. Phonebook
Saved to
phonebook
4
Enter the name
5
Press SELECT.
- OR -
1. Press MENU on the cordless handset when the telephone is not in use.
2. Scroll to Phonebook, and then press SELECT.
3. Scroll to Add contact, and then press SELECT.
4. Enter the phone number, and then press SELECT.
5. Enter the name, and then press SELECT.
49

Phonebook
Review phonebook entry
1
Press MENU when the handset is not in use.
Smart call blk
>Phonebook
2
Scroll to Phonebook,
and then press SELECT.
>Review
Add contact
3
Press SELECT to
select Review.
50
Mike Smith
800-595-9511
4
Scroll to browse
through the entries.
Dial a phonebook entry
Delete a phonebook entry
Review the phonebook
entries, and when your
desired entry shows on the
handset screen:
Mike Smith
800-595-9511
Press TALK on the handset.
Review the phonebook entries, and when
your desired entry shows on the handset
screen:
Mike Smith
800-595-9511
1
Press DELETE.
51
Mike Smith
Delete contact?
2
Press SELECT to delete.
4. Phonebook

Phonebook
Save a redial entry to the phonebook
Press and hold REDIAL when the cordless handset is not in use.
1
REDIAL #1/10
595-9511
2
Scroll to browse through
the redial list. When your
desired entry displays,
press SELECT.
EDIT NUMBER
800-595-9511_
3
Edit the phone number
if needed, and then
press SELECT.
52
ENTER NAME
_
4
Enter the name.
ENTER NAME
Mike Smith_
5
Press SELECT
to save.

Edit a phonebook entry
Review the phonebook entries, and when your desired entry shows on the
handset screen:
Mike Smith
595-9511
09:15PM 11/30
1
NEW
Press SELECT.
ANS ON
EDIT NAME
Mike Smith_
4
Edit the name.
EDIT NUMBER
800-595-9511_
2
Edit the number.
53
EDIT NUMBER
595-9511_
3
EDIT NAME
Mike Smiths_
5
Press SELECT to save.
4. Phonebook
Press SELECT.

Caller ID
If you subscribe to caller ID service, information about each caller appears after the
first or second ring.
The caller ID log stores up to 50 entries. Each entry has up to 24 digits for the phone
number and 15 characters for the name.
Review caller ID log entry
1
Phonebook
>Caller ID log
2
Scroll to Caller ID log,
and then press SELECT.
Press MENU when the cordless handset is not in use.
>Review
Del all calls
3
Press SELECT to
select Review.
54
Mike Smith
595-9511
09:15PM 11/30
4
Scroll to browse
through the entries.
NEW
ANS ON

Save a caller ID log entry to the phonebook
When your desired caller ID log entry shows on the handset screen:
Mike Smith
595-9511
09:15PM 11/30
1
Press SELECT.
EDIT NUMBER
800-595-9511_
4
Press SELECT.
NEW
ANS ON
SAVE TO
>Phonebook
2
Press SELECT.
EDIT NAME
Mike Smith_
5
Edit the name if needed.
EDIT NUMBER
595-9511_
3
Edit the number if needed.
EDIT NAME
Mike Smiths_
6
Press SELECT to save.
5. Caller ID
55

Caller ID
Delete a caller ID log entryDial a caller ID log entry
Review the caller ID log entries, and
when your desired entry shows on
the handset screen:
Mike Smith
595-9511
09:15PM 11/30
NEW
ANS ON
Press TALK on the handset.
Review the caller ID log entries,
and when your desired entry
shows on the handset screen:
Mike Smith
595-9511
NEW
ANS ON
56
09:15PM 11/30
Press DELETE on the handset.

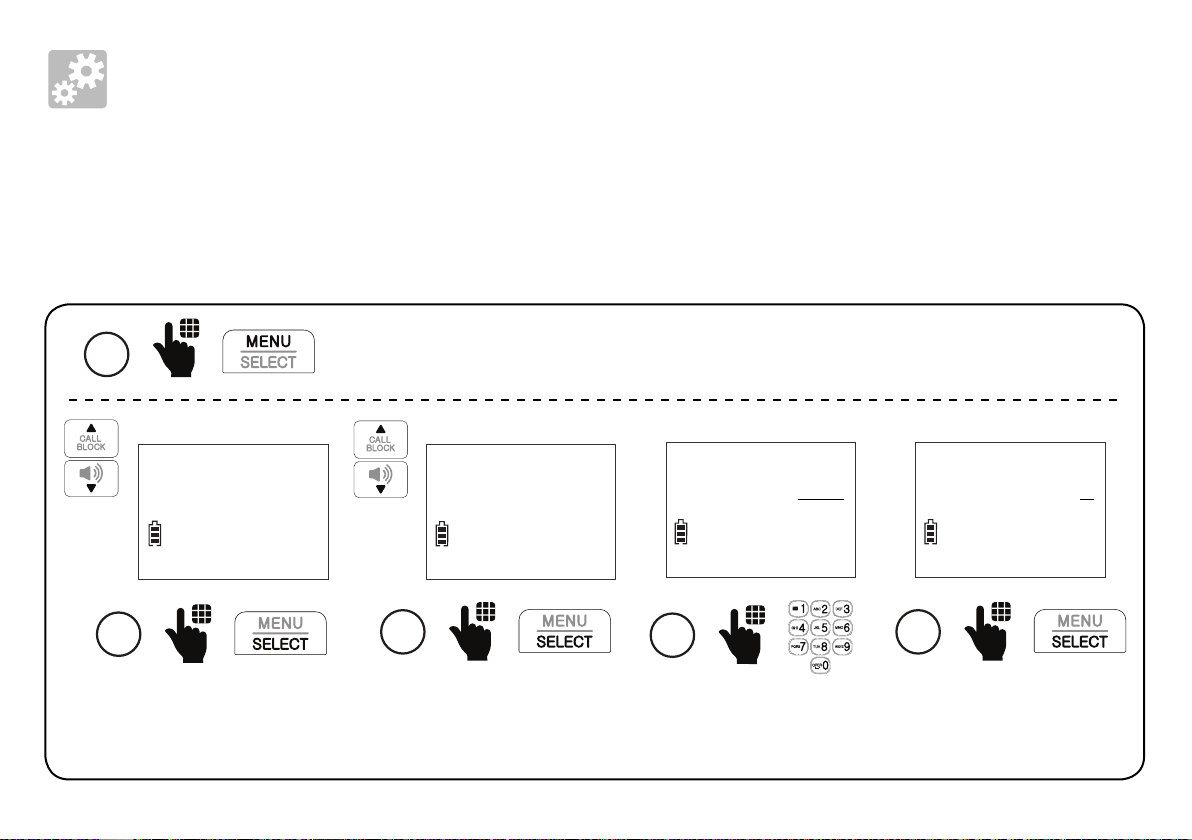
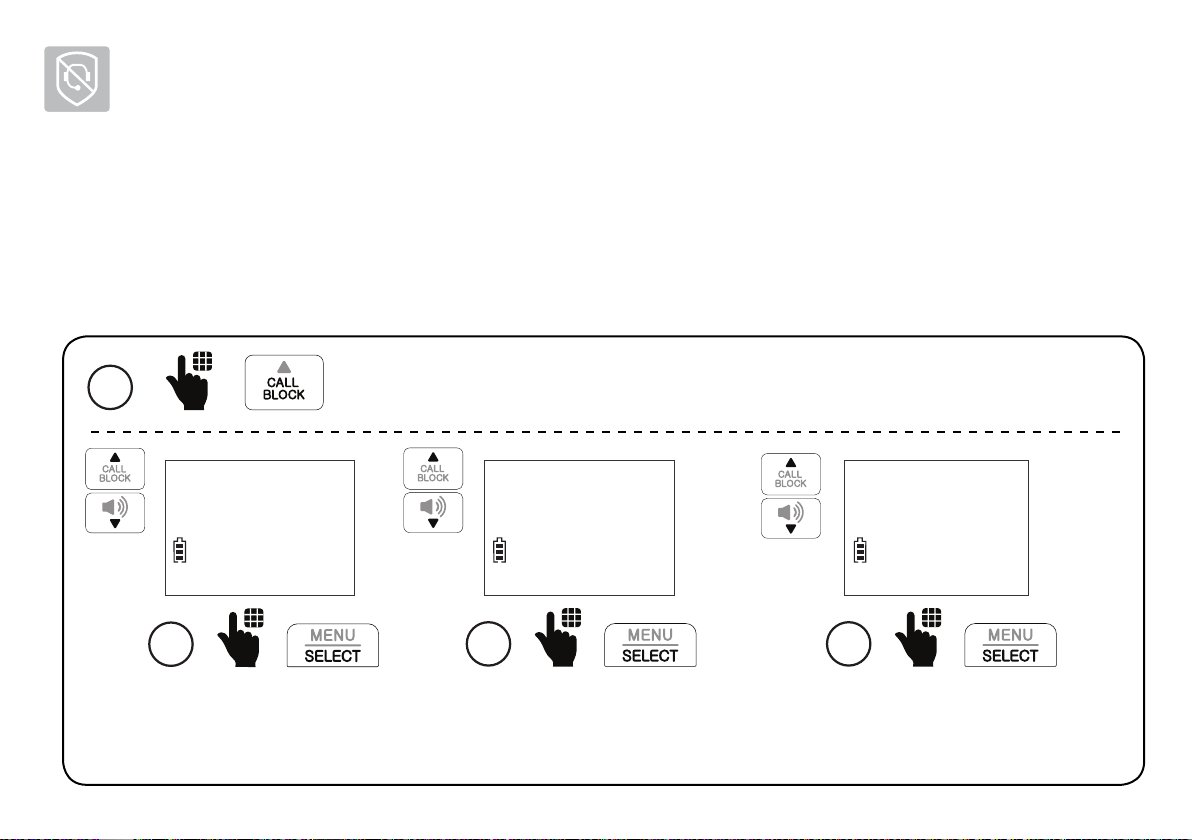
Smart call blocker*
If you have subscribed to caller ID service, then you can use the Smart call blocker
feature to screen incoming calls.
Smart call blocker is on, once you install your telephone. It allows all incoming calls
to get through and ring by default. You can change the Smart call blocker settings to
screen incoming calls.
With call screening active, Smart call blocker screens and filters all incoming calls
from numbers or names that are not yet saved in your directory, allow list, block list,
or star name list. You can easily add incoming phone numbers to your allow list and
block list. This allows you to build up your lists of allowed and blocked numbers, and
Smart call blocker will know how to deal with these calls when they come in again.
Read the Introducing Smart call blocker leaflet provided in your package to learn
how to set up your Smart call blocker.
6. Smart call blocker
* Includes licenced Qaltel™ technology.
Qaltel™ is a trademark of Truecall Group Limited.
57

Smart call blocker
Call categories
Calls are classified into four categories. Smart call blocker handles the calls in the
following ways:
Call category Call control
Welcome calls
• Numbers saved in allow list.
• Numbers saved in phonebook.
• Numbers not found in block list.
• Names saved in star name list.
Unwelcome calls
• Numbers saved in block list.
Allow
The telephone rings when there is an incoming call with
number saved in your allow list or phonebook, but not in
your block list. Robocalls with caller names saved in your star
name list will also ring.
Block
The telephone does not ring when there is an incoming call
with number saved in your block list, and the call will be
rejected.
58

Call category Call control
Calls without numbers
• Numbers that are “out of
area” or set to “Private“.
Uncategorized calls
• With absent caller ID
number.
• Numbers not found in
phonebook.
• Numbers not found in
allow list.
• Numbers not found in
block list.
• Caller ID names not found
in star name list.
Option 1: Screening with caller name
If you have selected this option, the telephone plays the screening
announcement, and then asks the caller to say his/her name before
the call rings on your telephone. You will then hear the caller’s name
announced if you have turned on the caller ID announce feature.
Then, you can decide whether to accept or reject the call, or to
forward the call to the answering system.
Option 2: Screening without caller name
If you have selected this option, the telephone plays the screening
announcement, and then asks the caller to press the pound key (#)
before the call rings on your telephone. You can then answer the call.
Option 3: Allow (default settings)
The telephone allows the calls to get through and ring. The caller’s
number will not be saved to the allow list.
Option 4: Answering system
If you have selected this option, the telephone forwards the calls to
the answering system without ringing.
Option 5: Block
If you have selected this option, the telephone rejects the calls with
block announcement without ringing. The caller’s number will not be
saved to the block list.
6. Smart call blocker
59

Smart call blocker
Set Smart call blocker on/off
HANDSET
10:15PM 12/25
1
ANS ON
Press CALL BLOCK when
the handset is not in use.
>SCB On/Off
Block list
2
Press SELECT to select
SCB On/Off.
60
SCB ON/OFF
>On
3
Scroll to On or Off, and
then press SELECT.

Set welcome calls
Add allow list entry
Add numbers to the allow list that you want to allow their calls to get through to you.
The allow list stores up to 200 numbers.
1
Block list
>Allow list
2
Scroll to Allow list, and
then press SELECT.
Press CALL BLOCK when the handset is not in use.
ENTER NUMBER
Review
>Add new entry
3
Scroll to Add new entry,
and then press SELECT.
ENTER NAME
Mike Smith_
4
Enter the phone number
and name, and then press
595-9511_
SELECT to save.
61
6. Smart call blocker

Smart call blocker
Set welcome calls
Add star name list entry
Add names (up to 15 characters) of organizations like schools, medical offices, and
pharmacies that use robocalls to communicate important information to you. Their calls will
get through to you. The star name list stores up to 10 names.
1
Allow list
>Star name list
2
Scroll to Star name list,
and then press SELECT.
Press CALL BLOCK when the handset is not in use.
Review
>Add new entry
3
Scroll to Add new entry,
and then press SELECT.
62
4
Enter the name, and then
press SELECT to save.
ENTER NAME
Bayriver Elemen

Set welcome calls
Save a caller ID log to the allow list
Review the caller ID log entries:
1. Press MENU when the handset is not in use.
2. Scroll to Caller ID log, and then press SELECT.
3. Press SELECT to select Review.
EDIT NUMBER
595-9511_
6. Smart call blocker
Mike Smith
595-9511
09:15PM 11/30
4
NEW
ANS ON
Browse through the entries.
When the desired entry
displays, press SELECT.
SAVE TO
>Allow list
5
Scroll to Allow list, and
then press SELECT.
63
EDIT NAME
Mike Smith_
6
Edit the phone number and
name if needed, and then
press SELECT to save.

Smart call blocker
6
Set welcome calls
Save a caller ID log to the star name list
Review the caller ID log entries:
1. Press MENU when the handset is not in use.
2. Scroll to Caller ID log, and then press SELECT.
3. Press SELECT to select Review.
Mike Smith
595-9511
09:15PM 11/30
4
NEW
ANS ON
Browse through the entries.
When the desired entry
displays, press SELECT.
SAVE TO
>Star name list
5
Scroll to Star name list,
and then press SELECT.
64
Star this name?
Bayriver Elemen
Press SELECT to save.

Set unwelcome calls
Add block list entry
Add numbers to the block list that you want to block them from calling. The block list
stores up to 1,000 entries.
1
SCB On/Off
>Block list
2
Scroll to Block list, and
then press SELECT.
Press CALL BLOCK when the handset is not in use.
ENTER NUMBER
Review
>Add new entry
3
Scroll to Add new entry,
and then press SELECT.
ENTER NAME
Salesman_
4
Enter the phone number
and name, and then press
595-9511_
SELECT to save.
65
6. Smart call blocker

Smart call blocker
Set unwelcome calls
Save a caller ID log to the block list
Review the caller ID log entries:
1. Press MENU when the handset is not in use.
2. Scroll to Caller ID log, and then press SELECT.
3. Press SELECT to select Review.
EDIT NUMBER
595-9511_
Direct Sales
595-9511
09:15PM 11/30
4
NEW
ANS ON
Browse through the entries.
When the desired entry
displays, press SELECT.
SAVE TO
>Block list
5
Scroll to Block list, and
then press SELECT.
66
EDIT NAME
Salesman_
6
Edit the phone number and
name if needed, and then
press SELECT to save.
Control calls without numbers
Use this setting to control “out of area” calls or calls with numbers that are set to
“Private”. You can choose to allow or reject these calls directly. You can also choose to
screen them with or without learning the callers’ names before you decide whether
to answer or reject these calls. Moreover, you can forward these calls to the answering
system.
1
Star name list
>Calls w/o num
2
Scroll to Calls w/o num,
and then press SELECT.
Press CALL BLOCK when the handset is not in use.
CALLS W/O NUM
>Screening
3
Scroll to select Screening,
Allow, Answering sys or
Block, and then press SELECT.
67
If you select Screening,
scroll to select w/Caller
name or w/o Caller name,
and then press SELECT.
SCREENING
>w/ Caller name
4
6. Smart call blocker
Smart call blocker
Control uncategorized calls
Use this setting to control calls with numbers that are not in your phonebook, allow list or
block list, or have no caller ID number display. You can choose to allow or reject these calls
directly. You can also choose to screen them with or without learning the callers’ names
before you decide whether to answer or reject these calls. Moreover, you can forward
these calls to the answering system.
1
Calls w/o num
>Uncategorized
2
Scroll to Uncategorized,
and then press SELECT.
Press CALL BLOCK when the handset is not in use.
UNCATEGORIZED
>Screening
3
Scroll to select Screening,
Allow, Answering sys or
Block, and then press SELECT.
68
If you select Screening, scroll to select
w/Caller name or w/o Caller name,
and then press SELECT when done.
>w/ Caller name
4
SCREENING

Screen calls without numbers
If Smart call blocker is on, and you have set to
screen calls without numbers, the telephone will
not ring when receiving calls without numbers. It
plays the screening announcement to the caller
and asks the caller to respond before putting the
call through to you.
If you have selected w/Caller name to ask callers
Screened call
PRIVATE CALLER
10:15PM 12/25
to say their names:
After you pick up the call, the telephone announces:
“To answer the call, press 1. To send this call to
Smart call blk
Screening...
10:15PM 12/25
The telephone
is playing the
screening
announcement to
the caller.
the answering system, press 4. To repeat these
options, press * ”.
6. Smart call blocker
1
- OR -
After screening, the telephone
rings. Press TALK or to pick up
the call.
2
- OR -
• Press 1 to answer the call;
• Press 4 to send it to the answering system; or
• Press OFF to hang up.
69

Smart call blocker
Screen uncategorized calls
If Smart call blocker is on, and you have set to screen
uncategorized calls, the telephone will not ring
when receiving these calls. It plays the screening
announcement to the caller and asks the caller to
respond before putting the call through to you.
If you have selected w/Caller name to ask callers to say their names:
Screened call
888-883-2445
10:15PM 12/25
1
- OR -
After screening, the telephone
rings. Press TALK or to pick
up the call.
After you pick up the call, the telephone announces:
“To answer the call, press 1. To answer and always allow
this number, press 2. To block this number, press 3. To send
this call to the answering system, press 4. To repeat these
options, press * ”.
2
- OR - - OR -
• Press 1 to answer the call;
• Press 2 to answer and always allow this number;
• Press 3 or CALL BLOCK to block the call; or
• Press 4 to send it to the answering system; or
• Press OFF to hang up.
Smart call blk
Screening...
10:15PM 12/25
The telephone
is playing the
screening
announcement to
the caller.
70

Add a screened number to the allow list or block list
When the telephone announces the screening options after you pick up a screened call:
“To answer the call, press 1. To answer and always allow this number, press 2. To block
this number, press 3. To send this call to the answering system, press 4. To repeat these
options, press
Add a screened number to the allow list
*
”.
Add a screened number to the block list
- OR -
Press 2 to answer the call. The telephone will
add the current number to the allow list.
Press 3 or CALL BLOCK to block the call. The
telephone will add the current number to
the block list.
Option while on a call
When you are on a call and speaking to the caller, and you do not want to continue the
call, you can end the call with block announcement and add the number to the block list.
6. Smart call blocker
1. During a call, press CALL BLOCK.
2. Press SELECT to end the call.
- OR -
71

Answering system
About the built-in answering system and voicemail service
For message recording, your telephone has a built-in answering system, and it also
supports voicemail service offered by your telephone service provider (subscription is
required, and fee may apply).
Built-in answering system VS Voicemail service
Built-in answering system Voicemail service
Supported by Telephone system Telephone service provider
Subscription No Yes
Fees No May apply
Answer incoming
calls
• After 4 rings by default.
• Usually after 2 rings.
• It can be changed by
• It can be changed via
contacting your telephone
handset menu.
service provider.
72

Built-in answering system Voicemail service
Storage Telephone base Server or System
Display new
messages
Retrieve messages
• Handset -
XX New messages
• Press on the telephone
base; OR
• Press MENU, and then
select Play messages on the
handset; OR
• Access remotely with an
access code.
73
• Handset -
and New voicemail
• Press and hold on the
dialpad, and enter an access
number and/or passcode
from your telephone service
provider.
7. Answering system
Answering system
Turn the built-in answering system on or off
HANDSET
10:15PM 12/25
1
ANS ON
Press MENU when the
handset is not in use.
74
Play messages
>Answering sys
2
Scroll to Answering sys,
and then press SELECT.

Turn the built-in answering system on or off
Record memo
>Answser ON/OFF
3
Scroll to Answer ON/OFF,
and then press SELECT.
75
ANSWER ON/OFF
>On
4
Scroll to On or Off, and
then press SELECT.
7. Answering system
Answering system
Set number of rings
You can set your answering system to answer calls at least two rings earlier than your
voicemail service. For example, if your voicemail service answers after six rings, set
your answering system to answer after four rings. Thus, if you are on a call, or if the
answering system is busy recording a message and you receive another call, the
second caller can leave a voicemail message.
HANDSET
10:15PM 12/25
1
ANS ON
Press MENU when the
handset is not in use.
76
Play messages
>Answering sys
2
Scroll to Answering sys,
and then press SELECT.

Set number of rings
Voice guide
>Ans sys setup
3
Scroll to Ans sys setup,
and then press SELECT.
Call screening
># of rings
4
Scroll to # of rings, and
then press SELECT.
# OF RINGS
>4
5
Select 6, 5, 4, 3, 2 or Toll saver,
and then press SELECT.
• If you select Toll saver, the answering system answers a call after two rings when
you have new messages, and after four rings when there are no new messages.
This feature allows you to check for new messages and avoid paying long
distance charges when calling from out of your local area.
77
7. Answering system
Answering system
Message playback
On the telephone base:
On the cordless handset:
HANDSET
10:15PM 12/25
ANS ON
>Play messages
Answering sys
- OR -
• While playing back a message on the telephone base, you can press to reduce
the playback speed.
1
Press MENU when the
handset is not in use.
78
2
Press SELECT to select
Play messages.

Skip a message Repeat the playing message
If you are using the cordless handset
to play messages, you can skip a
message.
On the cordless handset:
79
On the telephone base:
- OR -
On the cordless handset:
7. Answering system

Answering system
Play the previous message
On the telephone base:
1
Press REPEAT twice.
2
-------------------- OR ----------------------
On the cordless handset:
1
Press 4 twice.
2
Delete a message
When message is playing:
On the telephone base:
- OR -
On the cordless handset:
80

Delete all messages
On the telephone base:
1
On the cordless handset:
1
2
Scroll to Answering sys,
then press SELECT.
Play messages
>Answering sys
2
Press CALL BLOCK/DELETE twice.
Press MENU when the handset is not in use.
Announcement
>Delete all old
3
Scroll to Delete all old,
then press SELECT.
81
Delete all
old messages?
4
Press SELECT again
to confirm.
7. Answering system

Answering system
Remote access
You can reach your answering system remotely by dialing your home telephone number
from any touch-tone telephone. A two-digit security code is required. The preset code is 19.
You can set the code from 00 to 99.
Command Description
To access your answering
1
system remotely, dial your
telephone number from
any touch-tone telephone.
When the system plays
2
your answering system
announcement, “Hello.
Please leave a message
after the tone.“, enter the
two-digit security code.
1
2
3
33
4
5
*5
6
*7
Play all messages.
Play only new messages.
Delete the current message (during playback).
Delete all old messages.
Repeat the current message (during playback).
Stop.
Hear a list of remote commands.
Skip to the next message (during playback).
Record a new announcement.
Enter one of the remote
3
commands.
0
8
82
End the call.
Turn the answering system on or off.

Set remote access code
You can set your own remote access code from 00 to 99.
1
Play messages
>Answering sys
2
Scroll to Answering sys,
and then press SELECT.
REMOTE CODE
5
Press MENU when the handset is not in use.
Voice guide
>Ans sys setup
3
Scroll to Ans sys setup,
and then press SELECT.
REMOTE CODE
19
Enter a two-digit
number.
6
# of rings
>Remote code
4
Scroll to Remote code,
and then press SELECT.
99
Press SELECT to
save.
7. Answering system
83

Additional devices
Add and register expansion handset
You can add new cordless handsets (SN5107, purchased separately) to expand your
telephone system. Your telephone base supports a maximum of four cordless handsets.
Additional handsets are assigned with numbers in sequential order.
Charge the new handset without interruption for at least 30
minutes before registering it to the telephone base. After charged,
each expansion handset displays To register HS, see manual.
1
When the telephone is not in use, press
and hold PAGE on the telephone base for
about five seconds until the visual ringer
indicator light turns on. Release PAGE.
2
Press the pound (#) key on
the handset to register.
Registering...
Please wait
HANDSET 2
Registered
When the registration is
successful, the handset
displays HANDSET X
Registered.
84

Add and register photo speed dial handset
You can add a new photo speed dial handset (SN5307, purchased separately) to your
telephone system. The SN5307 cordless photo speed dial handset lets you quickly dial
one of the four preset numbers by just pressing the photo speed dial key.
If you have already set the direct memory speed dial keys 1, 2, 3 and 4 on the telephone
base, the same numbers will be automatically set for the dial keys of your newly
registered photo speed dial handset.
You can register a maximum of four cordless handsets.
You need to register your new photo speed dial handset to the telephone base before use.
Put the handset on
1
When the telephone is not in
use, press and hold PAGE on
the telephone base for about
five seconds until the visual
ringer indicator light turns on.
Release PAGE.
2
its charger to begin
registration. The
handset CHARGE
light alternates red
and green quickly to
indicate the registration
is in progress.
8. Additional devices
For registration and detailed operations, read the user’s manual of your new photo
speed dial handset provided in your package.
85

Additional devices
Device setup
You can add VTech compatible Cordless audio doorbell, ULE Cordless extension ringer and
ULE Wearable home SOS pendant (SN7021, SN7014 and SN7022, all purchased separately) to
your telephone system.
The Cordless audio doorbell (SN7021) helps you get notified at your telephone system upon
visitors’ arrival. When a visitor presses the Audio doorbell, both the base and the handset will
play the chime tone, and you can then answer the doorbell call and talk to the visitor at your
door with the handset or base. For operation instructions, refer to page 88 to page 99.
VTech compatible ULE devices
The ULE Cordless extension ringer (SN7014) works as an extra ringer and/or flashing lights
in addition to your handset and base. It lets you hear and see more clearly when there is an
incoming call.
The ULE Wearable home SOS pendant (SN7022) function as same as the SOS button of your
cordless handset. It acts as a handy pendant to let you quickly call the preset SOS numbers for
help in an emergency, even when your telephone is beyond your reach. For detailed setups
and operations, refer to Set SOS emergency call section on page 13 to page 18, and
Make SOS emergency call section on page 38.
• You can add a maximum of two Cordless audio doorbells and 30 compatible ULE devices
to your telephone base.
86

• You need to register your newly purchased devices to the telephone base before use.
• Make sure the new devices are powered on with batteries or with AC power before
registering them to the telephone base.
Add and register a new device
1
When the telephone is
not in use, press and hold
PAGE on the telephone
base for about five
seconds until the visual
ringer indicator light turns
on. Release PAGE.
Extension ringer
2
Audio doorbell
SOS pendant
Press and hold the pair button on the
right side of the extension ringer until the
green LED light on the front flashes, then
release the button. When registration is
successful, the green LED light becomes
steady on, and then the base beeps once.
8. Additional devices
Press and hold the pair button on the back
of the audio doorbell until the chime button
LED light flashes, then release the pair
button. When registration is successful, the
chime button LED light becomes steady on,
and then the base beeps once.
Press and hold CANCEL on the back
of the SOS pendant until the LED light
on the front flashes, then release the
button. When registration is successful,
the LED light turns off, and then the
base beeps once.
87
Additional devices
Audio doorbell
(Model SN7021 , purchased separately)
If you have purchased and registered an Cordless audio doorbell (SN7021) to the telephone
base, the Doorbell sub-menu option appears in the Set device menu of the cordless handset.
You can set up your Cordless audio doorbell, for example, set the chime volume and tone,
and divert doorbell calls to a preset number. You can also record doorbell calls.
Set chime volume
Press on
1
the handset when
it is not in use.
Settings
>Set device
2
Scroll to Set device, and
then press SELECT.
88
Check signal
>Doorbell
3
Scroll to Doorbell, and
then press SELECT.

>Chime
Record DB call
CHIME
>Chime volume
CHIME VOLUME
>Volume 5
8. Additional devices
4
Press SELECT to
select Chime.
5
Press SELECT again to
select Chime volume.
6
Scroll to select from
Volume 1 to Volume 5,
or select Off, and then
press SELECT.
89

Additional devices
Audio doorbell
(Model SN7021 , purchased separately)
Set chime tone
1
Scroll to Set device, and
then press SELECT.
Press MENU when the handset is not in use.
Settings
>Set device
2
90
Check signal
>Doorbell
3
Scroll to Doorbell, and
then press SELECT.

>Chime
Record DB call
CHIME
>Chime tone
CHIME TONE
>Tone 1
8. Additional devices
4
Press SELECT to
select Chime.
5
Scroll to Chime tone
and then press SELECT.
91
6
Scroll to select from
Tone 1 to Tone 5, or
select Off, and then
press SELECT.

Additional devices
Audio doorbell (Model SN7021 , purchased separately)
When a visitor presses your audio doorbell, all your devices chime and
the handset screen shows Doorbell X is ringing.
Answer a doorbell call
Using a cordless handset:
Press TALK on a cordless
handset to answer.
Speak to
DOORBELL 1
• After you press TALK on the cordless handset to answer the
Using the telephone base:
Press on the telephone
base.
doorbell, the handset screen displays Speak to DOORBELL X. You
can then talk with the visitor at your door.
Decline a doorbell call
Using a cordless handset:
When the chime tone is
ringing, press OFF on the
handset.
DOORBELL 1
is ringing
92
Record doorbell call
You can record conversations between you at the telephone and the visitor at
your door. Your telephone is set to record all doorbell calls by default. You can
disable the setting.
1
Settings
>Set device
2
Scroll to Set device, and
then press SELECT.
Press MENU on the handset when it is not in use.
Check signal
>Doorbell
3
Scroll to Doorbell, and
then press SELECT.
Chime
>Record DB call
4
Scroll to Record DB call and
press SELECT. Then, scroll to
On or Off, and press SELECT.
• Recorded doorbell calls are stored as voice messages. See Message playback
section on page 78 to retrieve your doorbell call conversations.
93
8. Additional devices

Additional devices
Audio doorbell (Model SN7021 , purchased separately)
You can divert all doorbell calls to a preset external number, or decline a doorbell call and
forward the doorbell call to the preset external number.
Set call divert number
1
Settings
>Set device
2
Scroll to Set device, and
then press SELECT.
Press MENU on the handset when it is not in use.
Check signal
>Doorbell
3
Scroll to Doorbell, and
then press SELECT.
94
4
Scroll to Dbell divert, and
then press SELECT.
Record DB call
>Dbell divert

6
When a visitor presses the doorbell and the doorbell call is diverted to the
preset number, the call receiver of the preset number hears the message
“This is a diverted call from doorbell. Please press any number key to start the
conversation.“ Your telephone is set to record all doorbell call conversations by
default. You can disable the setting. See Record doorbell call on page 93.
Divert mode
>Preset number
5
Scroll to Preset number,
and then press SELECT.
PRESET NUMBER
_
Enter the destination
number.
95
PRESET NUMBER
595-9511_
7
Press SELECT to save.
8. Additional devices
 Loading...