

Page 1

http://hkphones.vtech.com
Model:
FS6608A
User’s manual
Page 2

TABLE OF CONTENTS
1.
IMPORTANT SAFETY INSTRUCTIONS ......1
2. SET UP THE TELEPHONE ........................ 3
2.1 Package Contents ..............................................3
2.2 Location ..............................................................3
2.3 Connect the Charger ..............................................4
2.4 Install and Charge the Handset Batteries ...........5
3. GET TO KNOW YOUR PHONE ................... 6
3.1 Overview of the Handset .....................................6
3.2 Overview of the Charger ......................................9
3.3 Handset LCD Display Icons ...............................10
3.4 Menu Structure ..................................................12
3.5 Text and Digit Entry Table ..................................13
3.5.1 English Character Set ...........................13
4. USING THE PHONE ................................. 15
4.1 Power Off/On Handset .....................................15
4.2 Set Date and Time First ....................................15
4.3 Make an External Call ......................................15
4.4 Call Timer .........................................................16
4.5 Answer a Call ....................................................16
4.6 Mute ..................................................................16
4.7 End a Call .........................................................16
4.8 Earpiece / Speakerphone Volume ....................17
4.9 Lock Keypad .....................................................17
4.10 Ringer Silencing ...............................................17
4.11 Hold a Call ........................................................17
4.12 Make an Internal Call ........................................18
4.13 Establish a New Call during an Internal Call 18
4.14 Transfer a Call ..................................................18
4.15 Conference Call ................................................19
4.15.1 Conference Call between Internal
and External Calls..............................19
4.15.2 End a Conference Call .......................19
4.16 Chain Dialling ...................................................19
Page 3

4.16.1 Access a Number in My Contacts
While on a Call...................................19
4.16.2 Access a Number in the Call Log
While on a Call...................................20
5. CONTACTS ............................................... 21
5.1 Create and Review Entries .............................. 21
5.1.1 Create a New Entry ............................. 21
5.2 Dial, Edit or Delete a Contact Entry ................. 21
5.2.1 Dial a Contact Entry ............................ 21
5.2.2 Edit a Contact Entry ............................ 22
5.2.3 Delete a Contact Entry ........................ 22
6. Call list ...................................................... 23
6.1 Calling Number Display ................................... 23
6.1.1 Dial a Call List Entry ............................ 23
6.1.2 View Missed Calls ............................... 23
6.1.3 Add Call List Entry to Contacts ............ 23
6.1.4 Delete an Entry in the Call List ............ 24
6.1.5 Delete All Entries in the Call List ......... 24
7. Service ...................................................... 25
7.1 Set Alarm Clock ............................................... 25
7.1.1 Turn on an Alarm Clock ....................... 25
7.1.2 Edit an Alarm Clock ............................. 25
7.1.3 Clear an Alarm Clock .......................... 26
7.2 Set Birthdays ................................................... 26
7.3 Quick Dial ........................................................ 27
7.3.1 Assign a Quick Dial Entry .................... 27
7.3.2 Assign a Voice Box Number Entry ...... 27
7.3.3 Dial a Quick Dial Entry ........................ 28
7.3.4 Delete a Quick Dial Entry .................... 28
8. Settings .................................................... 29
8.1 Set Display Mode and LCD Backlight .............. 29
8.1.1 Change the Display Mode ................... 29
8.1.2 Set the LCD Backlight ......................... 29
8.2 Set Audio ......................................................... 30
8.2.1 Set the External Ringer ....................... 30
Page 4

8.2.2 Set the Internal Ringer .........................30
8.2.3 Set the Advisory Tones ........................31
8.3 Energy Settings ................................................31
8.3.1 Turn On or Off the Nemo Mode ...........31
8.3.2 Set the Handset ECO Mode Level .......32
8.4 Call Settings .....................................................32
8.4.1 Set Auto Answer ..................................32
8.4.2 Set Auto Handsfree ..............................33
8.4.3 Set Call Waiting ....................................33
8.4.4 Set Call Forward ..................................34
8.4.5 Set Anonymous Call ............................34
8.4.6 Set Network Codes ..............................35
8.5 Address book Settings ......................................35
8.6 Base Settings ...................................................36
8.6.1 Set Flash Time .....................................36
8.6.2 Set Dial Mode ......................................36
8.6.3 Change System PIN for Base ..............37
8.7 Line Settings .....................................................37
8.8 Handset Setup ..................................................38
8.8.1 Enter Settings Assistant Sub-menu .....38
8.8.2 Select Base ..........................................38
8.8.3 Change System PIN for Handset .........39
8.9 Troubleshooting ................................................39
8.9.1 Reset Handset to Default .....................39
8.9.2 Reset Base to Default ..........................40
8.9.3 Check the Handset Firmware ..............40
8.9.4 Check the Base Firmware ....................40
9. REGISTRATION ........................................ 41
9.1 Register Handsets ............................................41
9.1.1 Automatic Registration for Handset .....41
9.1.2 Register a Handset through the Menu ...41
9.2 Deregister Handsets .........................................42
10. TECHNICAL SPECIFICATIONS ............... 43
11. CARE AND MAINTENANCE
INSTRUCTIONS.........................................44
Page 5

1
1.
IMPORTANT SAFETY
INSTRUCTIONS
When using your telephone equipment, basic safety
precautions should always be followed to reduce the risk of
re, electric shock and injury, including the following:
Read and understand all the instructions.
Follow all warnings and instructions marked on the
product.
Unplug this product from the wall outlet before cleaning.
Do not use liquid cleaners or aerosol cleaners. Use a
damp cloth for cleaning.
Do not use this product near water (for example, near a
bath tub, kitchen sink, swimming pool).
Do not expose the telephone to direct sunlight or extreme
cold environment. Do not put the telephone close to
heating sources such as radiators, cookers, etc.
Do not overload wall outlets and extension cords as this
can result in the risk of re or electric shock.
Unplug this product from the wall outlet and refer
servicing to VTech under the following conditions:
When the power supply cord or plug is damaged or
frayed.
If the product does not operate normally by following
the operating instructions.
If the product has been dropped and the cabinet has
been damaged.
If the product exhibits a distinct change in
performance.
Avoid using a telephone (other than a cordless type)
during an electrical storm. There may be a remote risk of
electric shock from lightning.
Do not use the telephone to report a gas leak in the
vicinity of the leak.
1.
2.
3.
4.
5.
6.
7.
•
•
•
•
8.
9.
Page 6

2
IMPORTANT SAFETY INSRUCTIONS
Use only the supplied AAA Ni-MH batteries! The
operation periods for the handsets are only applicable
with the default battery capacities.
The use of other battery types or non-rechargeable
batteries/primary cells can be dangerous. These
may cause interference and/or unit damages. The
manufacturer will not be held liable
for damage arising from such non-compliance.
Do not use third party charging bays. The batteries may
be damaged.
Please note the correct polarity while inserting the
batteries.
Do not immerse batteries in water, do not place in re.
DISPOSAL WARNING
When this crossed-out wheeled bin
symbol is attached to a product, it
means the product is covered by the
European Directive 2002/96/EC.
All electrical and electronic products/
battery should be disposed of
separately from the municipal waste
stream via designated collection facilities appointed by
the government or the local authorities.
The correct disposal of your old appliance/battery will
help prevent potential negative consequences for the
environment and human health.
For more detailed information about disposal of your old
appliance/battery, please contact your city ofce, waste
disposal service or The Shop where you purchased the
product.
If you have questions about this product, or having difculty
with setup or operation, call or Customer Service Centre.
10.
11.
12.
13.
14.
1.
2.
3.
Page 7

3
2. SET UP THE TELEPHONE
2.1 Package Contents
The package contains the following items:
Handset
Charger
AC power adapter
2 AAA Ni-MH rechargeable batteries
User’s manual
Warranty card
2.2 Location
For maximum coverage and reduce the interference, here
are some guidelines you should consider when you place the
base unit:
Place your telephone within 2 metres of the mains power
socket and telephone socket so that the cables will reach.
Make sure it is at least 1 metre away from other electrical
appliances to avoid interference. Your telephone works
by sending radio signals between the handset and base.
The strength of the signal depends on where you locate
the base. Putting it as high as possible ensures the best
signal.
The maximum range between the base station and the
handset is approximately 300 metres.
If the reception for a base unit location is not satisfactory,
move it to another location for better reception.
Depending on the surrounding conditions as well as spatial
and structural factors, the range may be reduced. The range
indoors is normally less than outdoors.
•
•
•
•
•
•
•
•
•
Page 8

4
SET UP THE TELEPHPONE
2.3 Connect the Charger
Plug the charger adapter into the mains power wall socket
and switch the power on.
•
Page 9

5
2.4 Install and Charge the Handset Batteries
Slide open the battery compartment cover.
Place the supplied rechargeable battery in the battery
compartment, with the correct polarity orientation as
shown.
Slide the battery compartment cover back on until it clicks
into place.
Place the handset on the base to charge the battery. A
tone indicates that the handset is properly placed on the
base or charger.
NOTES
Use only the supplied AAA Ni-MH rechargeable batteries.
If you do not use the handset for a long time, disconnect and
remove the batteries to prevent possible leakage.
1.
2.
3.
4.
•
•
Page 10

6
GET TO KNOW YOUR PHONE
3. GET TO KNOW YOUR
PHONE
3.1 Overview of the Handset
1. EARPIECE
2. LCD DISPLAY
3. SOFT KEYS
Press to select a menu item above the key.
Page 11

7
4. ▲ UP KEY
In menu mode: Press to scroll up the menu items.
In contact list / call list: Press to scroll up the list.
During a call: Press to increase the listening volume.
While predialling or editing: Press to move the cursor one
line upwards or to the beginning of the strings.
OK
While in a menu, press to select an item, or save an entry
or setting.
▼ DOWN KEY
In menu mode: Press to scroll down the menu items.
In contact list / call list: Press to scroll down the list.
During a call: Press to decrease the listening volume.
While predialling or editing: Press to move the cursor one
line downwards or to the end of the strings.
5. TALK ON/FLASH
In contact list / predial mode / call list: Press to make a
call to the selected entry.
In main menu: Press and hold to access the redial list.
During ringing: Press to answer a call.
In predial mode: Press and hold to insert a ash.
6. ALPHANUMERIC KEYPAD
Press to insert a digit / character / / #.
Number keys in main menu: Press and hold to perform
quick dial.
in main menu: Press and hold to dial the voicemail
number.
in editing mode: Press to toggle between uppercase or
lowercase character input.
in main menu: Press and hold to turn off / on the
handset ringer.
in main mode: Press and hold to lock / unlock the
keypad.
0 in idle / predialling / number editing mode: Press and
hold to insert a pause.
Page 12

8
GET TO KNOW YOUR PHONE
7. MICROPHONE
8. TALK OFF
In main menu: Press and hold to power on/off the
handset.
In menu / editing mode: Press to return to idle mode.
During a call: Press to hang up and return to idle mode.
9. SPEAKERPHONE
Page 13

9
3.2 Overview of the Charger
1. CHARGING CONTACTS
Place the handset here to charge the battery.
Page 14

10
GET TO KNOW YOUR PHONE
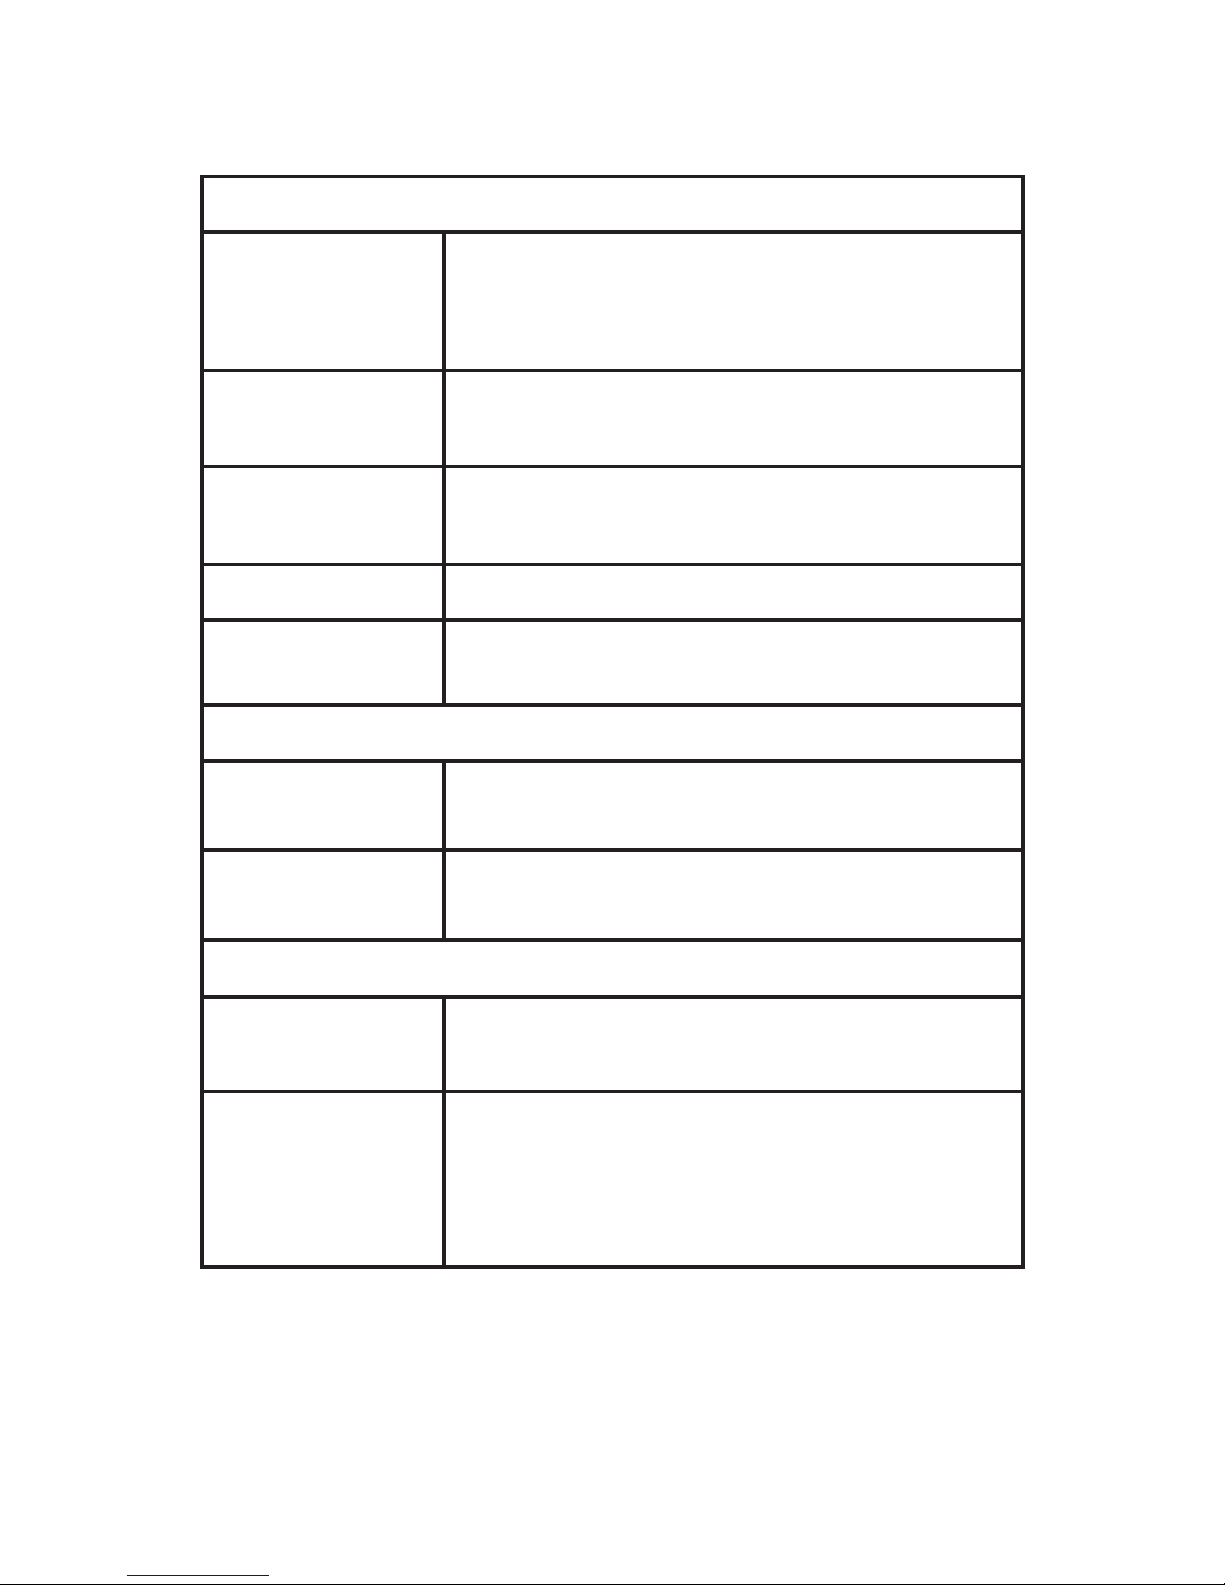
3.3 Handset LCD Display Icons
The screen display gives you information on the current
status of the telephone.
Menu Icon Description
Contacts
Call list
No. of call missed
Conference call
Voicemail
No. of new message in voicemail
Services
No. of service missed
Settings
Fireware updates in settings
Status Icon Description
Signal strength
No signal
Microphone muted
Page 15

11
ECO mode
Battery status
Ringer Off
Alarm On
Key locked
Item selected
Selection conrmed
Alarm snooze
Notication
Icon
Description
Warning
Information
Reconrmation request
Firmware updates
Birthday reminder
Battery low
Page 16

12
GET TO KNOW YOUR PHONE
3.4 Menu Structure
When the handset LCD backlight is off, press any key to turn
on the backlight, then press ▲/▼ to browse the main menu.
Refer to the following table for the menu structure.
Key Press
Main
Menu
My Contacts
Call List
Service
Settings
Sub
menu
[List of contacts]
If contact list is
empty, under
Options:
Add Contact
Switch
Phonebook
If contact list
is not empty,
under Options:
Edit Contact
Add Contact
Delete Contact
[List of
calls]
Alarm
Clock
Birthdays
Quickdial
Display
Audio
Energy Settings
Call Settings
Addressbook
Settings
Base Settings
Line Settings
Setup
Troubleshooting
▲
▼
Menu
▲
▼
▲
▼
Page 17

13
3.5 Text and Digit Entry Table
The following table shows you where each letter and
punctuation character can be found. This will be helpful when
storing a name in the contacts or renaming your handset.
In editing mode, a cursor is displayed to indicate the current
text entry position. It is positioned at the right of the last
character entered.
Editing tips:
Once a character is selected, the cursor will move to the
next position after a short pause.
You can move the cursor within the text by pressing ▲/▼
to amend the text entry.
Press Clear to delete the last character.
Press and hold Clear to delete the entire text string.
3.5.1 English Character Set
Upper Case
Key
Press
Alphanumeric Editing
(For contact name editing and renaming handset)
1 space 1 & _ ( ) < > # @ =
2 A B C 2 Ä Â Ç
3 D E F 3
4 G H I 4 Ğ Î İ
5 J K L 5
6 M N O 6 Ö
7 P Q R S 7 β Ş
8 T U V 8 Ü
9 W X Y Z 9
0 . , - 0 / | + ‘ “ : ! ? *
1.
2.
3.
4.
Page 18

14
GET TO KNOW YOUR PHONE
Lower Case
Key
Press
Alphanumeric Editing
(For contact name editing and renaming handset)
1 space 1 & _ ( ) < > # @ =
2 a b c 2 ä â ç
3 d e f 3
4 g h i 4 î ı
5 j k l 5
6 m n o 6 ö
7 p q r s 7 β ş
8 t u v 8 ü
9 w x y z 9
0 . , - 0 / | + ‘ “ : ! ? *
Page 19

15
4. USING THE PHONE
4.1 Power Off/On Handset
In idle mode, press and hold for around ve seconds to
power off the handset. The handset displays Switch off
handset?. Press Yes to conrm.
When the handset is off, press and hold for around ve
seconds to power on the handset.
4.2 Set Date and Time First
For the rst time use of the handset, or after handset
registration or a power failure, the display will prompt you “
Please set date/time”.
If you subscribe to calling number display service, the day,
month and time are set automatically with each incoming
call. However, the year must be correct so that the day of
the week can be calculated from the calling number display
information
Press Menu to enter the menu when the phone is not in
use.
Press ▲/▼ to highlight Settings, then press OK.
Press ▲/▼ to highlight Setup, then press OK or OK.
Press ▲/▼ to highlight Clock, then press OK or OK.
Press ▲/▼ to highlight Set Date & Time, then use the
dialing keys to input the time in HH:MM format, then
press OK or OK.
Use the dialing keys to input the date in DD.MM.YYYY
format MM.DD.YYYY.
Press OK or Save to conrm. Saved displays and you
hear a
confirmation tone.
4.3 Make an External Call
Enter the telephone number, then press .
1.
2.
3.
4.
5.
6.
7.
•
Page 20

16
USING YOUR PHONE
4.4 Call Timer
Your handset will automatically time the duration of all
external calls. The handset display shows the call duration
both during and for a few seconds after your call is
terminated.
4.5 Answer a Call
If the handset is not on the charging cradle:
Press to answer the call.
OR
If the handset is on the charging cradle:
Pick up the handset from the cradle to answer the call.
NOTE
The Auto Answer feature has to be on to answer a call by the
second method.
4.6 Mute
Use the mute function to turn off the microphone. You can
hear the caller, but the caller cannot hear you.
While on a call, press Option.
Press ▲/▼ to highlight Mute to mute the microphone.
The screen displays Muted and . Your caller cannot
hear you.
Press Option again, then press ▲/▼ to highlight Unmute to
unmute the microphone. Muted and will disappear.
4.7 End a Call
Press during a call to end the call.
OR
Put the handset on the charger.
•
•
•
1.
2.
Page 21

17
4.8 Earpiece / Speakerphone Volume
There are seven volume levels to choose from for each of
earpiece and speaker volume. While on a call, you can adjust
the listening volume on the handset.
During a call, press ▲/▼ to increase or decrease the volume
level respectively. The current setting is shown.
When you end the call, the settings will remain at the last
selected level.
4.9 Lock Keypad
Lock the keypad to prevent accidental dialling while carrying
the handset around.
In idle mode, press and hold . The screen displays
Locked.
To unlock the keypad, press and hold . The screen displays
Key Unlocked.
4.10 Ringer Silencing
In idle mode, press and hold . The screen displays
Ringer Off, and then in idle screen.
To unlock the keypad, press and hold . The screen displays
Ringer On.
4.11 Hold a Call
You can place any call on hold. You hear an alert tone at the
telephone base if you have not taken the call off of hold after
14 minutes. You hear another alert tone at the telephone
base 30 seconds later. At 15 minutes on hold, the call on hold
automatically disconnects.
While on a call, press Option, then press Hold on the
handset. The current call will be put on hold.
Press Option again then press Unhold on the handset to
resume the call.
•
Page 22

18
USING YOUR PHONE
4.12 Make an Internal Call
If you have multiple handsets registered on your telephone
base or router, you can make internal calls.
Press Internal to enter the internal call menu when the
phone is not in use.
Press ▲/▼ to highlight All handset or the registered
handset with which you want to have an internal call, then
press OK or OK. The destination handset rings.
4.13 Establish a New Call during an Internal
Call
You can establishing a new call on one handset during an
internal call, the current internal call will be put on hold.
During an internal call, press Option.
Press ▲/▼ to highlight Another Call, then press OK.
The new call is established and the current internal call is
put on hold.
4.14 Transfer a Call
When you have two calls established on the line with either
one put on hold, you can transfer the new call to from the
initiating handset to the handset on currently hold. The
initiating handset will quit both calls.
During an internal call, press Option.
Press ▲/▼ to highlight Transfer, then press OK. The
new call is established and the current internal call is put
on hold. The initiating handset ends the call.
1.
2.
1.
2.
1.
2.
Page 23

19
4.15 Conference Call
4.15.1 Conference Call between Internal and
External Calls
When you have two calls established on the line with either
one put on hold, you can to create a 3-way conference call.
During an internal call, press Option.
Press ▲/▼ to highlight Conference, then press OK. The
3-way conference call is established.
4.15.2 End a Conference Call
Put the handset back in the telephone base or charger.
OR
Press on the handset.
4.16 Chain Dialling
Use this feature to initiate a dialling sequence from numbers
stored in the contact list or call log while you are on a call.
Chain dialling can be useful if you wish to access other
numbers (such as bank account numbers or access codes)
from the contact list or call log.
4.16.1 Access a Number in My Contacts While on a
Call
While on a call, press Option and ▲/▼ to highlight My
Contacts, then press OK to select.
Press ▲/▼ to highlight the desired contact entry and
press OK.
If the contact has one number only, press OK or
to dial.
If the contact has multiple numbers, press ▲/▼ to
highlight the number and press OK or to dial.
1.
2.
1.
2.
•
•
Page 24

20
USING YOUR PHONE
4.16.2 Access a Number in the Call Log While on a
Call
While on a call, press Option and ▲/▼ to highlight Call
Log, then press OK to select.
Press ▲/▼ to highlight the desired number and press
OK or to dial.
NOTES
You can only view the numbers in the My Contacts and Call List.
You cannot edit, delete or save entries.
You cannot copy a call list entry into the contact list while on a call.
Press Back to exit the contact list or call log while on a call.
1.
2.
•
•
•
Page 25

21
5. CONTACTS
You can create contact entries that will be stored in the
handset.
5.1 Create and Review Entries
5.1.1 Create a New Entry
Press Menu to enter the menu when the phone is not in
use.
When the screen displays My Contacts, press OK.
Press Options.
Press ▲/▼ to highlight Add Contact, then press OK or
OK.
Use ▲/▼, OK, or dialing keys to edit the first name, last
name, home/mobile/businesss number, and birthday.
Press OK or SAVE to conrm. Saved displays and
you hear a confirmation tone.
NOTES
While editing, press to toggle between the uppercase
and lowercase letters.
5.2 Dial, Edit or Delete a Contact Entry
5.2.1 Dial a Contact Entry
Press Menu to enter the menu when the phone is not in
use.
When the screen displays My Contacts, press OK.
Press ▲/▼ to highlight the desired entry.
Press to dial the displayed entry.
1.
2.
3.
4.
5.
6.
•
1.
2.
3.
4.
Page 26

22
CONTACTS
5.2.2 Edit a Contact Entry
Press Menu to enter the menu when the phone is not in
use.
When the screen displays My Contacts, press OK.
Press ▲/▼ to highlight the desired entry.
Press Options.
Press ▲/▼ to highlight Edit Contact, then press OK or
OK.
Use ▲/▼, OK, or dialing keys to edit the first name, last
name, home/mobile/businesss number, and birthday.
Press OK or SAVE to conrm. Saved displays and
you hear a confirmation tone.
5.2.3 Delete a Contact Entry
Press Menu to enter the menu when the phone is not in
use.
When the screen displays My Contacts, press OK.
Press ▲/▼ to highlight the desired entry.
Press Options.
Press ▲/▼ to highlight Delete Contact, then press OK.
The screen displays Delete contact?.
Press YES to conrm. Contact has been deleted
displays and you hear a confirmation tone.
NOTE
Once a contact entry is deleted, it cannot be retrieved.
1.
2.
3.
4.
5.
6.
7.
1.
2.
3.
4.
5.
6.
Page 27

23
6. CALL LIST
6.1 Calling Number Display
If you have subscribed to Calling Number Display service, you
will be able to see your caller’s number on your handset display
(provided it is not blocked) prior to answering the call. If your
caller’s name is stored in the contact list and a number match is
found, you will see the caller’s name on the display instead.
When there are missed calls and/or voicemails, the
respective number of will be displayed in idle mode.
If there are 3 missed calls, the screen will display .
If there are 3 missed voicemails, the screen will display .
6.1.1 Dial a Call List Entry
Press Menu to enter the menu when the phone is not in
use.
Press ▲/▼ to highlight Call List, then press OK.
Press ▲/▼ to highlight the desired entry.
Press to dial the displayed entry.
6.1.2 View Missed Calls
Press Menu to enter the menu when the phone is not in
use.
Press ▲/▼ to highlight Call List, then press OK.
Press Missed to view only entries of missed calls.
6.1.3 Add Call List Entry to Contacts
Press Menu to enter the menu when the phone is not in
use.
Press ▲/▼ to highlight Call List, then press OK.
Press ▲/▼ to highlight the desired entry, then press OK.
Press Options.
1.
2.
3.
4.
1.
2.
3.
1.
2.
3.
4.
Page 28

24
CALL LIST
Press ▲/▼ to highlight Add Contact Entry, then press OK.
Press OK to choose My Contacts.
Press ▲/▼ to highlight To New Contact or To Exist.
Contact, then press OK.
Use ▲/▼, OK, or dialing keys to edit the first name, last
name, home/mobile/businesss number, and birthday.
Press OK or SAVE to conrm. Saved displays and
you hear a confirmation tone.
Press YES to conrm. Deleted displays and you hear
a confirmation tone.
6.1.4 Delete an Entry in the Call List
Press Menu to enter the menu when the phone is not in
use.
Press ▲/▼ to highlight Call List, then press OK.
Press ▲/▼ to highlight the desired entry, then press OK.
Press Options.
Press ▲/▼ to highlight Delete Entry, then press OK.
The screen displays Delete?.
Press YES to conrm. Deleted displays and you hear
a confirmation tone.
6.1.5 Delete All Entries in the Call List
Press Menu to enter the menu when the phone is not in
use.
Press ▲/▼ to highlight Call List, then press OK
twice.
Press Options.
Press ▲/▼ to highlight Delete Entry, then press OK.
The screen displays Delete All?.
Press YES to conrm. Deleted displays and you hear
a confirmation tone.
5.
6.
7.
8.
9.
10.
1.
2.
3.
4.
5.
6.
1.
2.
3.
4.
5.
Page 29

25
7. SERVICE
You can use the featured service functions to set reminder or
alerts of alarm clock, birthdays, and quick dial.
When there are missed calls, the number of missed calls will
be displayed in idle mode. If there are 3 missed calls, the
screen will display .
7.1 Set Alarm Clock
You can set up to ve independent alarms in your handset.
You can set one-time or recurring alarms.
7.1.1 Turn on an Alarm Clock
Press Menu to enter the menu when the phone is not in
use.
Press ▲/▼ to highlight Service, then press OK.
When the screen displays Alarm Clock, then press OK
or OK.
Press ▲/▼ to highlight the desired alarm clock slot, then
press OK or Options.
Press ▲/▼ to highlight the Edit Alarm, then press OK.
Press OK to turn on the Status to On.
Press Save to conrm. Alarm 1 On displays and you
hear a confirmation tone.
7.1.2 Edit an Alarm Clock
Press Menu to enter the menu when the phone is not in
use.
Press ▲/▼ to highlight Service, then press OK.
When the screen displays Alarm Clock, then press OK
or OK.
Press ▲/▼ to highlight the desired alarm clock slot, then
press OK or Options.
1.
2.
3.
4.
5.
6.
7.
1.
2.
3.
4.
Page 30
26
SERVICE
Press ▲/▼ to highlight the Edit Alarm, then press OK.
Use ▲/▼, OK, or dialing keys to edit the mode, time,
name, melody, and volume of the alarm.
Press Save to conrm. Saved displays and you
hear a confirmation tone.
7.1.3 Clear an Alarm Clock
Press Menu to enter the menu when the phone is not
in use.
Press ▲/▼ to highlight Service, then press OK.
When the screen displays Alarm Clock, then press
OK or OK.
Press ▲/▼ to highlight the desired alarm clock slot,
then press OK or Options.
When the screen displays Clear Alarm, then press OK.
Press Save to conrm. Alarm removed displays
and you hear a confirmation tone.
7.2 Set Birthdays
The birthdays as stated in the entry of My Contacts can
be view here.
Press Menu to enter the menu when the phone is not
in use.
Press ▲/▼ to highlight Service, then press OK to
view the birthday list.
Press Options to open to edit the contact if
neccessary.
5.
6.
7.
1.
2.
3.
4.
5.
6.
1.
2.
•
Page 31

27
7.3 Quick Dial
7.3.1 Assign a Quick Dial Entry
You can assign eight of your contact entries to a quick dial
slot (2-9). The quick dial entries are shared by all handsets.
Up to eight quick dial entries can be stored. The quick
dial number must be created from an existing entry in the
contacts.
Press Menu to enter the menu when the phone is not in
use.
Press ▲/▼ to highlight Service, then press OK.
Press ▲/▼ to highlight Quickdial, then press OK or OK.
Press ▲/▼ to highlight an empty quick dial key slot, then
press OK or Option.
Press ▲/▼ to highlight a Manual Entry or My Contacts,
then press OK or OK.
If Manual Entry is chosen, enter the phone number.
If My Contacts is chosen Press ▲/▼ to highlight a
desired contact entry, then press OK twice.
6. Press OK or OK to conrm. Saved displays and you
hear a confirmation tone.
7.3.2 Assign a Voice Box Number Entry
You can assign a voice box number entry to quick dial slot 1.
The voice box number entry is shared by all handsets.
Press Menu to enter the menu when the phone is not in
use.
Press ▲/▼ to highlight Service, then press OK.
Press ▲/▼ to highlight Quickdial, then press OK or OK.
When the screen displays 1. VoiceBox, press OK or
Option.
1.
2.
3.
4.
5.
•
•
1.
2.
3.
4.
Page 32

28
SERVICE
Press ▲/▼ to highlight a Manual Entry or My Contacts,
then press OK or OK.
If Manual Entry is chosen, enter the phone number.
If My Contacts is chosen Press ▲/▼ to highlight a
desired contact entry, then press OK twice.
6. Press OK or OK to conrm. Saved displays and you
hear a confirmation tone.
7.3.3 Dial a Quick Dial Entry
In main menu, press and hold the dialling key (2-9)
corresponding to the assigned entry you wish to call.
OR
In main menu, press , then press and hold the dialling key
(2-9) corresponding to the assigned entry you wish to call.
7.3.4 Delete a Quick Dial Entry
Press Menu to enter the menu when the phone is not in
use.
Press ▲/▼ to highlight Service, then press OK.
Press ▲/▼ to highlight Quickdial, then press OK or OK.
Press ▲/▼ to highlight an occupied quick dial key slot,
then press OK or Option.
Press ▲/▼ to highlight a Delete Entry, then press OK or
OK. The screen displays Delete?.
Press YES to conrm. Deleted displays and you hear
a confirmation tone.
5.
•
•
1.
2.
3.
4.
5.
6.
Page 33

29
8. SETTINGS
In settings menu, you can change the handset settings
for display, audio, and details of energy, call, address
book, base, and line. You also do the handset setup and
troubleshooting here.
8.1 Set Display Mode and LCD Backlight
8.1.1 Change the Display Mode
You can choose to have the display in Icon Mode with large
icons for menu options, or List Mode with only text for menu
options.
Press Menu to enter the menu when the phone is not in
use.
Press ▲/▼ to highlight Settings, then press OK.
When the screen displays Display, then press OK or OK.
Press OK to change the Display Mode, from Icon Mode
to List Mode, or vice versa.
Press Save to conrm. Saved displays and you hear
a confirmation tone.
8.1.2 Set the LCD Backlight
Press Menu to enter the menu when the phone is not in
use.
Press ▲/▼ to highlight Service, then press OK.
When the screen displays Display, then press OK or OK.
Press ▲/▼ to highlight the LCD Backlight, then press
OK repeatedly to choose On, Off, or Dim.
Press Save to conrm. Saved displays and you hear
a confirmation tone.
1.
2.
3.
4.
5.
1.
2.
3.
4.
5.
Page 34

30
SETTINGS
8.2 Set Audio
8.2.1 Set the External Ringer
You can change the ringer settings for external calls.
Press Menu to enter the menu when the phone is not in
use.
Press ▲/▼ to highlight Settings, then press OK.
Press ▲/▼ to highlight Audio, then press OK or OK.
When the screen displays External Ringer, then press
OK or OK.
Use ▲/▼ and OK to change the external ringer and
ringer volume.
Press Save to conrm. Saved displays and you hear
a confirmation tone.
8.2.2 Set the Internal Ringer
You can change the ringer settings for internal calls between
multiple handsets.
Press Menu to enter the menu when the phone is not in
use.
Press ▲/▼ to highlight Settings, then press OK.
Press ▲/▼ to highlight Audio, then press OK or OK.
Press ▲/▼ to highlight Internal Ringer, then press OK
or OK.
Use ▲/▼ and OK to change the internal ringer and ringer
volume.
Press Save to conrm. Saved displays and you hear
a confirmation tone.
1.
2.
3.
4.
5.
6.
1.
2.
3.
4.
5.
6.
Page 35

31
8.2.3 Set the Advisory Tones
You can turn on or off the advisory tones for the handset,
including key tone, charging tone, new notifcation tone,
conrmation sound, and range warning tone.
Press Menu to enter the menu when the phone is not in
use.
Press ▲/▼ to highlight Settings, then press OK.
Press ▲/▼ to highlight Audio, then press OK or OK.
Press ▲/▼ to highlight Advisory Tones, then press OK
or OK.
Press ▲/▼ to highlight Key Tone, Charging, New
Notifcation, Confirm Sound, or Range Warning, then
press OK to turn on or off the respective tone.
Press Save to conrm. Saved displays and you hear
a confirmation tone.
8.3 Energy Settings
8.3.1 Turn On or Off the Nemo Mode
Your handset is compatible with Nemo Mode (Full ECO
Mode) compatible, so that the transmitter of the base or
router will be switched offe.
In Nemo Mode,The transmission power will be reduced to
zero. This will lead to a slightly increased power consumption
of handset and a delay of the call setup by two seconds.
Press Menu to enter the menu when the phone is not in
use.
Press ▲/▼ to highlight Settings, then press OK.
Press ▲/▼ to highlight Energy Settings, then press OK
or OK.
Press OK to turn on or off the Nemo Mode.
Press Save to conrm. Saved displays and you hear
a confirmation tone.
1.
2.
3.
4.
5.
6.
1.
2.
3.
4.
5.
Page 36

32
SETTINGS
8.3.2 Set the Handset ECO Mode Level
You can limit the transmission power of Handset.
This setting limits the maximum transmission signal of the
handset during a call and thereby reduces the range.
Level 1 means the lowest possible transmission signal
at minimum range.
Level 4 means that the transmission signal will be
in maximum strength and hence maximum range is
possible.
The higher the level set, the stronger the transmission
signal and so the radiation will be.
Press Menu to enter the menu when the phone is not
in use.
Press ▲/▼ to highlight Settings, then press OK.
When the screen displays Energy Settings, then press
OK or OK.
Press ▲/▼ to highlight HS ECO Mode, then press OK.
Press ▲/▼ to highlight the desired level, then press
OK.
Press Save to conrm. Saved displays and you hear
a confirmation tone.
8.4 Call Settings
8.4.1 Set Auto Answer
If you turn on the auto answer feature, you would be able to
answer the incoming call simply by picking up the handset
from the charging cradle.
Press Menu to enter the menu when the phone is not
in use.
Press ▲/▼ to highlight Settings, then press OK.
•
•
1.
2.
3.
4.
5.
6.
1.
2.
Page 37

33
Press ▲/▼ to highlight Call Settings, then press OK or
OK.
When the screen displays Auto Answer, then press OK
or OK.
Press OK to turn on or off the Auto Answer Mode.
Press Save to conrm. Saved displays and you hear
a confirmation tone.
8.4.2 Set Auto Handsfree
If you turn on the auto handsfree feature, you would answer
the incoming call only in speakerphone mode.
Press Menu to enter the menu when the phone is not in
use.
Press ▲/▼ to highlight Settings, then press OK.
Press ▲/▼ to highlight Call Settings, then press OK or
OK.
Press ▲/▼ to highlight Auto Handsfree, then press OK
or OK.
Press OK to turn on or off the Auto Handsfree Mode.
Press Save to conrm. Saved displays and you hear
a confirmation tone.
8.4.3 Set Call Waiting
If you subscribe to call waiting service from your telephone
service provider, you hear a tone if someone calls while you
are already on a call.
Press Menu to enter the menu when the phone is not in
use.
Press ▲/▼ to highlight Settings, then press OK.
Press ▲/▼ to highlight Call Settings, then press OK or
OK.
3.
4.
5.
6.
1.
2.
3.
4.
5.
6.
1.
2.
3.
Page 38

34
SETTINGS
Press ▲/▼ to highlight CW On/Off, then press OK or
OK.
Press OK to turn on or off the calling waiting function.
Press Save to conrm. Saved displays and you hear
a confirmation tone.
8.4.4 Set Call Forward
You can forward a call to another telephone number if there
is no reply, busy, or simply all the time when there is an
incoming call.
Press Menu to enter the menu when the phone is not in
use.
Press ▲/▼ to highlight Settings, then press OK.
Press ▲/▼ to highlight Call Settings, then press OK or
OK.
Press ▲/▼ to highlight Call Forward, then press OK or
OK.
Press ▲/▼ to highlight CF If No Reply, CF If Busy, or
CF Unconditional, then press OK to turn the on or off
call forward in the respective conditions.
Press OK to conrm. Saved displays and you hear a
confirmation tone.
8.4.5 Set Anonymous Call
You can make an external call as an anonymous so that your
caller ID information will not be displayed at the far end.
Press Menu to enter the menu when the phone is not in
use.
Press ▲/▼ to highlight Settings, then press OK.
Press ▲/▼ to highlight Call Settings, then press OK or
OK.
4.
5.
6.
1.
2.
3.
4.
5.
6.
1.
2.
3.
Page 39

35
Press ▲/▼ to highlight Call Anonymous, then press OK
or OK.
Press OK to turn on or off the Call Anonymous Mode.
Press OK to conrm. Saved displays and you hear a
confirmation tone.
8.4.6 Set Network Codes
You can set the your customized network code so that you
can easily access the commands of turning on or off call
waiting, accepting call waiting, rejecting call waiting, ending
active call, brokering, conference, turning on or call forward,
calling anonymous, auto callback, and calling voicebox.
Press Menu to enter the menu when the phone is not in
use.
Press ▲/▼ to highlight Settings, then press OK.
Press ▲/▼ to highlight Call Settings, then press OK or
OK.
Press ▲/▼ to highlight Network Codes, then press OK
or OK.
Press ▲/▼ to highlight the desired feature, then press
OK or OK. to enter the code editing pages respectively.
When editing is nished, press Options and then Save to
conrm. Saved displays and you hear a confirmation
tone.
8.5 Address book Settings
If you turn on the auto answer feature, you would be able to
answer the incoming call simply by picking up the handset from
the charging cradle.
Press Menu to enter the menu when the phone is not in
use.
Press ▲/▼ to highlight Settings, then press OK.
4.
5.
6.
1.
2.
3.
4.
5.
6.
1.
2.
Page 40

36
SETTINGS
Press ▲/▼ to highlight Addressbook Settings, then
press OK or OK.
Press ▲/▼ to highlight My Contacts or My Contacts,
then press OK or OK to start doing the address book
settings.
8.6 Base Settings
You can change the settings of the base where your handset
is registered, including ash time, dial mode, exchange code,
active call ending, operation mode, system PIN, registration
and deregistration.
8.6.1 Set Flash Time
Press Menu to enter the menu when the phone is not in
use.
Press ▲/▼ to highlight Settings, then press OK.
Press ▲/▼ to highlight Base Settings, then press OK
or OK.
When the screen displays Flash Time, then press OK or
OK.
Press ▲/▼ to highlight the desired flash time.
Press OK or OK to conrm. Saved displays and you
hear a confirmation tone.
8.6.2 Set Dial Mode
Press Menu to enter the menu when the phone is not in
use.
Press ▲/▼ to highlight Settings, then press OK.
Press ▲/▼ to highlight Base Settings, then press OK
or OK.
Press ▲/▼ to highlight Dial Mode, then press OK or OK.
Press OK to change the dial mode from Tone to Pulse, or
vice versa.
Press SAVE to conrm. Saved displays and you hear
a confirmation tone.
3.
4.
1.
2.
3.
4.
5.
6.
1.
2.
3.
4.
5.
6.
Page 41

37
8.6.3 Change System PIN for Base
Press Menu to enter the menu when the phone is not
in use.
Press ▲/▼ to highlight Settings, then press OK.
Press ▲/▼ to highlight Base Settings, then press OK
or OK.
Press ▲/▼ to highlight Change System PIN, then press
OK or OK.
Enter the current system PIN (default: 0000), then press
OK.
Enter the new system PIN, then press OK or OK.
Enter the new system PIN again.
Press OK or OK to conrm. Saved displays and you
hear a confirmation tone.
8.7 Line Settings
You can change the line settings of the router where your
handset is registered.
Press Menu to enter the menu when the phone is not
in use.
Press ▲/▼ to highlight Settings, then press OK.
Press ▲/▼ to highlight Line Settings, then press OK
or OK.
Press ▲/▼ to highlight the line of the router with which
the handset operates, then press Edit.
Use ▲/▼, OK, or dialing keys to edit the name, ring
melody, and ringer volume of the line.
Press OK or SAVE to conrm. Saved displays and
you hear a confirmation tone.
1.
2.
3.
4.
5.
6.
7.
8.
1.
2.
3.
4.
5.
6.
Page 42

38
SETTINGS
8.8 Handset Setup
You can change the settings related to the handset itself,
including paired base selection and PIN changing. There is
also a settings assistant sub-menu grouping all the previously
mentioned handset-related setting options here.
8.8.1 Enter Settings Assistant Sub-menu
Press Menu to enter the menu when the phone is not in
use.
Press ▲/▼ to highlight Settings, then press OK.
Press ▲/▼ to highlight Setup, then press OK or OK.
When the screen displays Settings Assistant, then
press OK or OK to enter the sub-menu and continue
make your desired settings.
8.8.2 Select Base
If you have registered the handset to more than one base, you
can manually select the desired base with which the handset
operates.
Press Menu to enter the menu when the phone is not in
use.
Press ▲/▼ to highlight Settings, then press OK.
Press ▲/▼ to highlight Setup, then press OK or OK.
Press ▲/▼ to highlight Select Base, then press OK or
OK.
Press ▲/▼ to highlight the desired base, then press OK
or OK.
Press OK or OK to conrm. Saved displays and you
hear a confirmation tone.
1.
2.
3.
4.
1.
2.
3.
4.
5.
6.
Page 43

39
8.8.3 Change System PIN for Handset
Press Menu to enter the menu when the phone is not in
use.
Press ▲/▼ to highlight Settings, then press OK.
Press ▲/▼ to highlight Setup, then press OK or OK.
Press ▲/▼ to highlight Change PIN, then press OK or OK.
Enter the current system PIN (default: 0000), then press
OK.
Enter the new system PIN, then press OK or OK.
Enter the new system PIN again.
Press OK or OK to conrm. Saved displays and you
hear a confirmation tone.
8.9 Troubleshooting
You can reset you handset or base to the default settings, or
check the handset or base rmware.
8.9.1 Reset Handset to Default
Press Menu to enter the menu when the phone is not in
use.
Press ▲/▼ to highlight Settings, then press OK.
Press ▲/▼ to highlight Troubleshooting, then press OK
or OK.
When the screen displays Reset Handset, then press
OK or OK.
Enter the system PIN (default: 0000), then press OK. The
screen displays Reset Handset to Default?.
Press Yes to conrm. Saved displays and you hear a
confirmation tone.
1.
2.
3.
4.
5.
6.
7.
8.
1.
2.
3.
4.
5.
6.
Page 44

40
SETTINGS
8.9.2 Reset Base to Default
Press Menu to enter the menu when the phone is not in
use.
Press ▲/▼ to highlight Settings, then press OK.
Press ▲/▼ to highlight Troubleshooting, then press OK
or OK.
Press ▲/▼ to highlight Reset Base, then press OK or
OK.
Enter the system PIN (default: 0000), then press OK. The
screen displays Reset Base to Default?.
Press Yes to conrm. Saved displays and you hear a
confirmation tone.
8.9.3 Check the Handset Firmware
Press Menu to enter the menu when the phone is not in
use.
Press ▲/▼ to highlight Settings, then press OK.
Press ▲/▼ to highlight Troubleshooting, then press OK
or OK.
Press ▲/▼ to highlight HS Firmware, then press OK
or OK to review for the handset firmware version. Press
Back when done.
8.9.4 Check the Base Firmware
Press Menu to enter the menu when the phone is not in
use.
Press ▲/▼ to highlight Settings, then press OK.
Press ▲/▼ to highlight Troubleshooting, then press OK
or OK.
Press ▲/▼ to highlight BS Firmware, then press OK or
OK to review for the base firmware version. Press Back
when done.
1.
2.
3.
4.
5.
6.
1.
2.
3.
4.
1.
2.
3.
4.
Page 45

41
9. REGISTRATION
9.1 Register Handsets
Before registering the new handset to a IAD601 router or
FS6628-A telephone base, the handset will display
Register!.
Register your handset according to the following procedure.
9.1.1 Automatic Registration for Handset
Make sure the handset battery is fully charged before
you begin registration.
Put the handset you wish to register on the telephone
base cradle, not the charger, when it shows
Register!.
Press and hold on the telephone base or the router,
the handset will display Registering...
When the registration is complete, the handset displays
Success connection setup, and you hear a
conrmation tone.
9.1.2 Register a Handset through the Menu
Press Menu to enter the menu when the phone is not in
use.
Press ▲/▼ to highlight Settings, then press OK.
Press ▲/▼ to highlight Base Settings, then press OK
or OK.
Press ▲/▼ to highlight Deregister HS.
Press ▲/▼ to highlight the desired base, then press OK
or OK.
Press the dialling keys to enter the 4-digit system PIN
(default: 0000), then press OK.
Press and hold on the telephone base or the router,
the handset will display Registering...
1.
2.
3.
4.
1.
2.
3.
4.
5.
6.
7.
Page 46

42
REGISTRATION
When the registration is complete, the handset displays
Success connection setup, and you hear a
conrmation tone.
NOTES
Additional handsets are assigned numbers in the
sequential order they are registered.
You cannot register a handset if any other system handset
is in use.
9.2 Deregister Handsets
If you want to replace a handset or reassign the designated
handset number of a registered handset, you must deregister
all the handsets and then individually register each handset
again.
To deregister a single handset:
Press Menu to enter the menu when the phone is not in
use.
Press ▲/▼ to highlight Settings, then press OK.
Press ▲/▼ to highlight Base Settings, then press OK
or OK.
Press ▲/▼ to highlight Deregister HS.
Press ▲/▼ to highlight the handset to be deregistered.
Press the dialling keys to enter the 4-digit system PIN
(default: 0000), then press OK. The screen displays
Deregister?.
Press OK conrm. Deregistered displays and you
hear a
confirmation tone.
NOTE
The handset you are using cannot deregister itself.
8.
•
•
1.
2.
3.
4.
5.
6.
7.
•
Page 47
43
10. TECHNICAL SPECIFICATIONS
BASIC INFORMATION
Display
information
Colour: 262k
Pixel: 176px x 220 px
Resolution: 141dpi
Valid range Indoor: 50m approx.
Outdoor: 300m approx.
Handset
Operating Time
Standby time: 200Hours approx.
Talk time: 20Hours approx.
Frequency 1880 MHz - 1900 MHz
Number of
Channels
10 channels
POWER SUPPLY
Handset 2 x AAA Ni-MH; 1.2V; 850mAH
rechargeable batteries pack.
Charger Input AC 100-240V 50/60Hz 150mA
Output 6VDC 450mA SMPS
BATTERY & ADAPTOR INFORMATION
Battery Manufacturer: GPI
Model no.: GNRHCH83C002
Charger
Adaptor
UK version: Manufacturer: TEN PAO
Model no.: S003GB0600045
EU version: Manufacturer: TEN PAO
Model no.: S003GV0600045
Page 48

44
CARE AND MAINTENANCE
11. CARE AND MAINTENANCE
INSTRUCTIONS
Take care of your telephone
Your cordless telephone contains sophisticated electronic
parts, so you must treat it with care.
Avoid rough treatment.
Place the handset down gently.
Save the original packing materials to protect your
telephone if you ever need to ship it.
Avoid water
You can damage your telephone if it gets wet. Do not use
the handset in the rain, or handle it with the wet hands.
Do not install the telephone base near a sink, bathtub or
shower.
Electrical storms
Electrical storms can sometimes cause power surges
harmful to electronic equipment. For your own safety, take
caution when using electric appliances during storms.
Cleaning your telephone
Your telephone has a durable plastic casing that should
retain its luster for many year. Clean it only with a soft
cloth slightly dampened with water or a mild soap.
Do not use excess water or cleaning solvents of any kind.
NOTE
Remember that electrical appliances can cause serious injury
if used when you are wet or standing in water. If the telephone
base should fall into water. DO NOT RETRIEVE IT UNTIL YOU
UNPLUG THE POWER CORD AND TELEPHONE LINE CORDS
FROM THE WALL. Then pull the unit out by the unplugged cords.
•
•
•
•
•
•
•
•
•
CAUTION
RISK OF EXPLOSION IF BATTERY IS REPLACED
BY AN INCORRECT TYPE.
DISPOSE OF USED BATTERIES ACCORDING
TO THE INSTRUCTIONS.
Page 49

45
VTECH TELECOMMUNICATIONS LTD.
A member of THE VTECH GROUP OF COMPANIES.
© 2016 VTech Telecommunications Ltd. All Rights Reserved. 09/16. V1.0
 Loading...