

Page 1

EHB-504
EHB-604
EHT-604
ELECTRICAL FREESTANDING
OVEN
USERS MANUAL
Page 2

Our Esteemed Customer,
We take offering quality products more than your expectation as
a goal, offers you the products produced in modern facilities
carefully and particularly tested for quality.
Your manual is prepared in order to help you to use your
apparatus that is manufactured by the most recent technology,
with confidence and maximum effciency.
Before use of your apparatus, carefully read this guide that
includes the basic information for right and safe installation,
maintenance and use and contact to the nearest Authorized
Service for mounting of your product.
Page 3
CONTENTS :
1. PRESENTATION AND SIZES OF PRODUCT
2. WARNINGS
3. INSTALLATION AND PREPARATIONS FOR USE
4. USE OF YOUR OVEN
5. CLEANING AND MAINTENANCE
6. SERVICE AND TRANSPORT
Page 4
PART 1 : PRESENTATION AND SIZES OF PRODUCT
1112
13
Part of List :
1- Cooktop Cover
2- Cooktop
3- Control Panel
4- Child Lock
5- Oven Door Handle
6- Drawer Cover
7- Supply Leg
8- Oven Door
9- Oven Tray
10- Wire Grid
11- Front Resistance
12- Fan Store
13- Oven Lamp
14- Hotplate
15- Highlite element
14
888
1
2
3
4
5
6
7
8
9
9
10
15
MODEL
SIZE(cm)
TE 66
TE 56
60*60*85
60*60*90
50*60*85
50*60*90
Page 5

READ THESE INSTRUCTIONS CAREFULLY AND COMPLETELY BEFORE USING YOUR
APPLIANCE, AND KEEP IT IN A CONVENIENT PLACE FOR REFERENCE WHEN NECESSARY.
THIS MANUAL IS PREPARED FOR MORE THAN ONE MODEL IN COMMON. YOUR APPLIANCE
MAY NOT HAVE SOME OF THE FEATURES THAT ARE EXPLAINED IN THIS MANUAL. PAY
ATTENTION TO THE EXPRESSIONS THAT HAVE FIGURES, WHILE YOU ARE READING THE
OPERATING MANUAL.
General Safety Warnings
- This appliance can be used by children aged
from 8 years and above and persons with
reduced physical, sensory or mental capabilities
or lack of experience and knowledge if they
have been given supervision or instruction
concerning use of the appliance in a safe way
and understand the hazards involved. Children
shall not play with the appliance. Cleaning and
user maintenance shall not be made by children
without supervision.
- WARNING: The appliance and its accessible
parts become hot during use. Care should be
taken to avoid touching heating elements.
Children less than 8 years of age shall be kept
away unless continuously supervised.
- WARNING: Unattended cooking on a hob with
fat or oil can be dangerous and may result in
fire. NEVER try to extinguish a fire with water,
but switch off the appliance and then cover
flame e.g. with a lid or a fire blanket.
- WARNING: Danger of fire: do not store items
on the cooking surfaces.
PART 2 SAFETY WARNINGS
Page 6
- WARNING: If the surface is cracked, switch off
the appliance to avoid the possibility of electric
shock.
- For hobs incorporating a lid, any spillage
should be removed from the lid before opening.
And also the hob surface should be allowed to
cool before closing the lid.
- The appliance is not intended to be operated
by means of an external timer or separate
remote-control system.
- WARNING: In order to prevent tipping of the
appliance, the stabilizing brackets must be
installed. (For detail information please read the
anti-tilting kit set guide.)
- During use, the appliance becomes hot. Care
should be taken to avoid touching heating
elements inside the oven.
- During use, handles held for short periods in
normal use can get hot.
- Do not use harsh abrasive cleaners or sharp
metal scrapers to clean the oven door glass and
other surface since they can scratch the surface,
which may result in shattering of the glass or
damage to the surface.
- Do not use steam cleaners for cleaning the
appliance.
Page 7

- WARNING: Ensure that the appliance is
switched off before replacing the lamp to avoid
the possibility of electric shock.
- CAUTION: Accessible parts may be hot when
the cooking or grilling is in use. Young children
should be kept away.
• Your appliance is produced in accordance with all applicable local and international standards and
regulations.
• Maintenance and repair work must be made only by authorized service technicians. Installation and
repair work that is carried out by unauthorized technicians may endanger you. It is dangerous to alter
or modify the specifications of the appliance in any way.
• Prior to installation, ensure that the local distribution conditions (nature of the gas and gas pressure
or electricity voltage and frequency) and the requirements of the appliance are compatible. The
requirements for this appliance are stated on the label.
• CAUTION: This appliance is designed only for cooking food and is intended for indoor domestic
household use only and should not be used for any other purpose or in any other application, such
as for non-domestic use or in a commercial environment or room heating.
• Do not try to lift or move the appliance by pulling the door handle.
• All possible security measures have been taken to ensure your safety. Since the glass may break,
you should be careful while cleaning to avoid scratching. Avoid hitting or knocking on the glass with
accessories.
• Ensure that the supply cord is not wedged during the installation. If the supply cord is damaged, it
must be replaced by the manufacturer, its service agent or similarly qualified persons in order to
prevent a hazard.
• While the oven door is open, do not let children climb on the door or sit on it.
Installation Warnings
• Do not operate the appliance before it is fully installed.
• The appliance must be installed by an authorized technician and put into use. The producer is
notresponsible for any damage that might be caused by defective placement and installation by
unauthorized people.
• When you unpack the appliance, make sure that it is not damaged during transportation. In case of
any defect; do not use the appliance and contact a qualified service agent immediately. As the
materials used for packaging (nylon, staplers, styrofoam...etc) may cause harmful effects to children,
they should be collected and removed immediately.
• Protect your appliance against atmospheric effects. Do not expose it to effects such as sun, rain, snow
etc.
• The surrounding materials of the appliance (cabinet) must be able to withstand a temperature of min
100°C.
Page 8

During usage
• When you first run your oven a certain smell will emanate from the insulation materials and the
heater elements. For this reason, before using your oven, run it empty at maximum temperature for
45 minutes. At the same time you need to properly ventilate the environment in which the product is
installed.
• During usage, the outer and inner surfaces of the oven get hot. While opening the oven door, step
back to avoid the hot steam coming out of the oven. There may be a risk of burns.
• Do not put flammable or combustible materials, in or near the appliance when it is operating.
• Always use oven gloves to remove and replace food in the oven.
• Do not leave the cooker while cooking with solid or liquid oils. They may catch fire on condition of
extreme heating. Never pour water on to flames that are caused by oil. Cover the saucepan or
frypan with its cover in order to choke the flame that has occured in this case and turn the cooker off.
• Always position pans over the centre of the cooking zone, and turn the handles to a safe position
so they cannot be knocked or grabbed.
• If you will not use the appliance for a long time, plug it off. Keep the main control switch off. Also
when you do not use the appliance, keep the gas valve off.
• Make sure the appliance control knobs are always in the "0" (stop) position when it is not used.
• The trays incline when pulled out. Be careful not to let hot liquid spill over.
• When the door or drawer of the oven is open, do not leave anything on it. You may unbalance your
appliance or break the cover.
• Do not put heavy things or flammable or ignitable goods (nylon, plastic bag, paper, cloth...etc) into
the drawer. This includes cookware with plastic accessories (e.g. handles).
• Do not hang towels, dishcloths or clothes from the appliance or its handles.
During cleaning and maintenance
• Always turn the appliance off before operations such as cleaning or maintenance. You can do it
after plugging the appliance off or turning the main switches off.
• Do not remove the control knobs to clean the control panel.
TO MAINTAIN THE EFFICIENCY AND SAFETY OF YOUR APPLIANCE, WE RECOMMEND YOU
ALWAYS USE ORIGINAL SPARE PARTS AND TO CALL ONLY OUR AUTHORIZED
SERVICE AGENTS IN CASE OF NEED.
Page 9

PART3 : INSTALLATION AND PREPARATION FOR USE
5
This modern, functional and practical oven, that was manufactured with the most
quality parts and materials, will meet your needs in every respect. You must surely
read this manual in order not to have any problem in future and to be able to have
successfull results. The following information are the required rules for right
installation and service processes. It must be read especially by the technician who
will install the apparatus.
Contact to Authorized Service for mounting of your oven.
3. 1 INSTALLATION OF OVEN
There are some factors that must be paid attention to while installing your oven.
Surely pay attention to our below suggestions in order to be able to prevent any
problems and/or dangerous situations that may occur later.
It can be placed close to other furniture on condition that in the area where the oven
is set up, the furnitures height must not exceed the height of the cooker panel.
Pay attention not to place it near the refrigerator, there must be no flammable or
in flammable materials such as curtain, waterproof cloth, ... etc. that will begin to burn
quickly, while selecting place for oven.
It is required there must be at least 2 cm blank space between the back cover of
oven and wall for air circulation.
The furniture close to oven must be manufactured resistant to heat more than
50 C° of the room temperature.
If the kitchen furniture are higher than the pan which the ovens cookers are on,
it must be at least 11 cm away from the ovens side.
The minimum heights from the ovens pan and wall cupboards and paddle boxes
with fan over the oven, are shown as below. Thus, the paddle box must be at
minimum 650 mm height from the cooker pan.
If there is no paddle box, this height must not be less than 700 mm.
Page 10
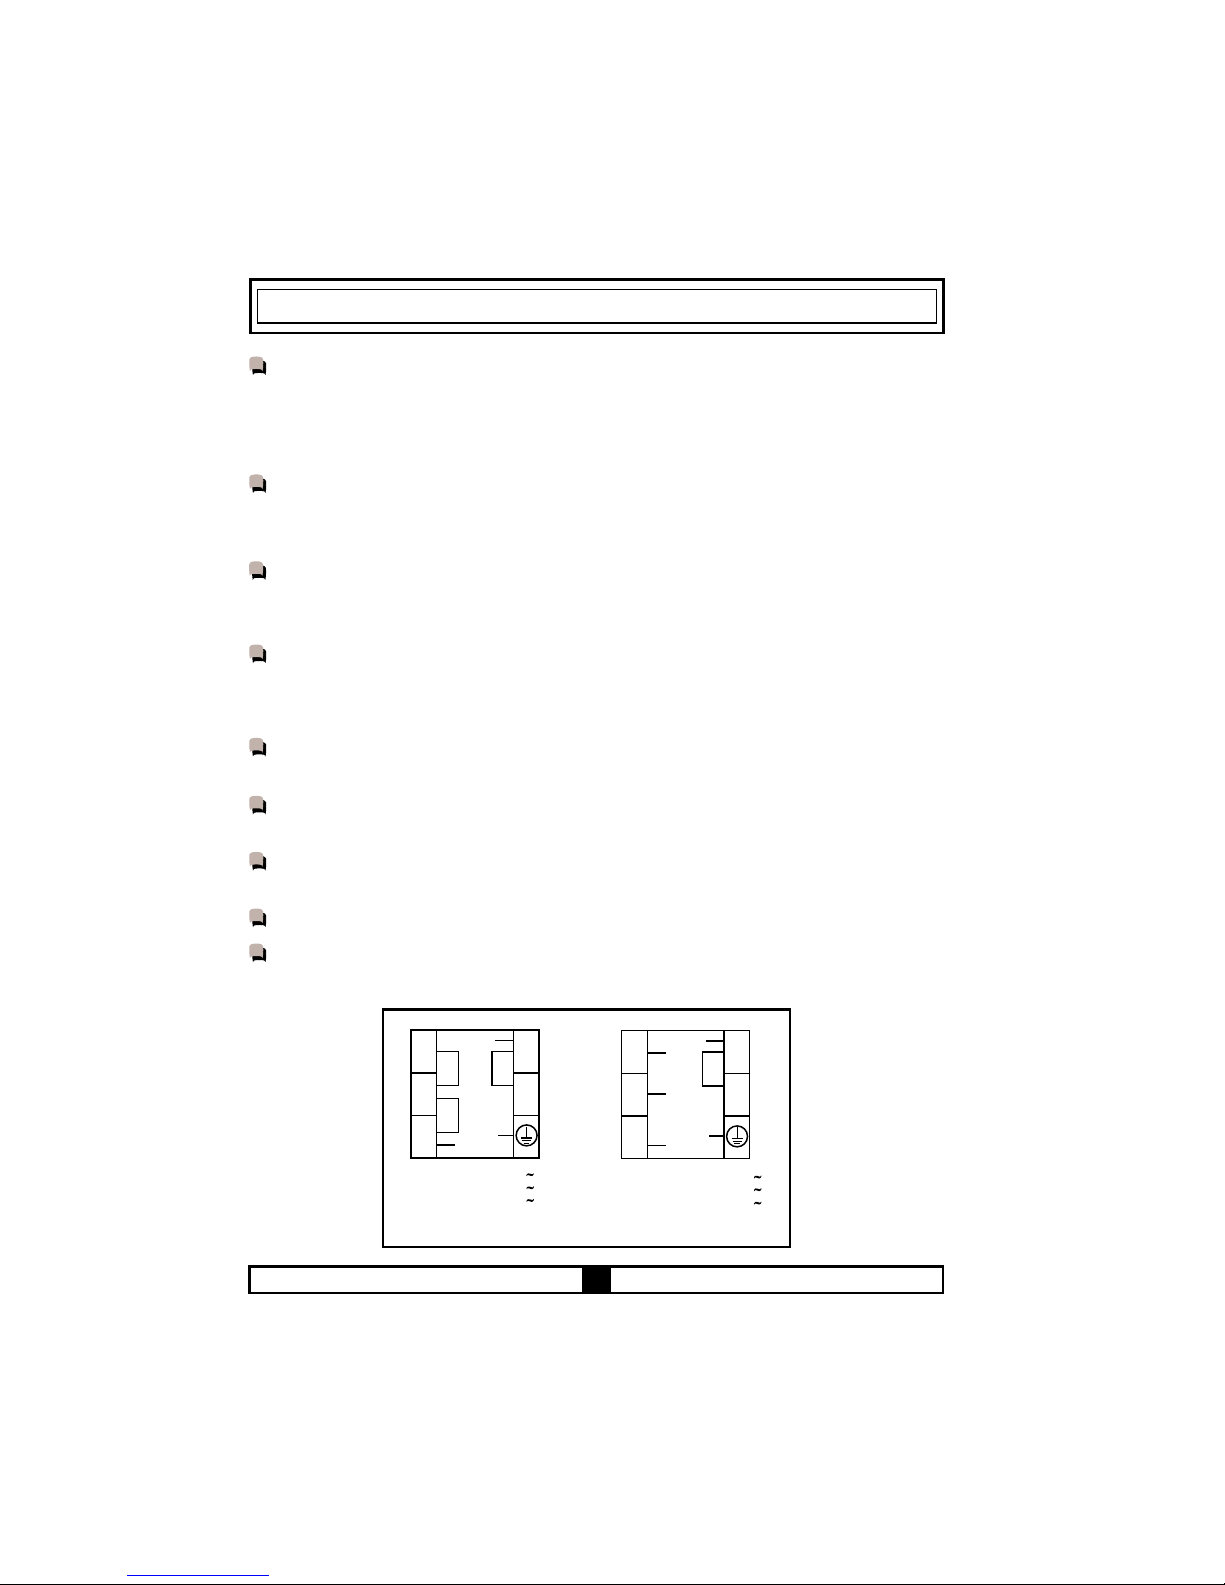
3.3 ELECTRIC CONNECTION AND SECURITY
During the electric connection, surely follow the instructions below.
The earthing cable must be connected to the terminal. You have to ensure the
cable with insulation to be connected to the power source during the connection of
cable. If there is not any appropriate earthed electric outlet in accordance with
regulations in the place where the apparatus will be installed, immediately contact to
our authorized service.
The earthed electric outlet must be close to the apparatus. Surely do not use the
extension cord.
The feeding cable must not touch to the hot surface of the product.
In case the feeding cable is damaged, surely contact to Qualified Service. The
cable must be changed by the authorized service.
The wrong electric connection may damage your apparatus. Such damage is not
in guarantee extent.
The apparatus is adjusted as appropriate for 220-240 Volts and 400V 3N Volts
of electricity. If the network electricity is different than this informed value, immediately
contact to our authorized service.
The electric cable must not touch to the hot parts of apparatus. The electric cable
must not touch the back part of the apparatus. Otherwise the electric cable of
apparatus may be damaged. And this situation may cause short circuit.
The producer firm declares that it has no responsibility against any kind of damages
and losses that emanate from the following security norms.
There is to install an all pole disconnector inside the supply circuit with a contact
opening of at least 3.0mm rated 32A and delay functioning type.
6
3. 2 ADJUSTMENT OF FEET
Your oven stands on 4 adjustable feet. As the feet are adjusted in low location, it is
required to control whether it is balanced before installing the oven. You can make
this adjustment as turning the feet clockwise if required. It is possible to raise the
apparatus maximum 15 mm via the feet.
If the feet are adjusted appropriately, it is required not to move the apparatus by
dragging, otherwise it is required to place it by lifting it up. It is required to bring the
ovens drawer out to adjust the apparatuss feet. The feet can be adjusted from inside
via the small change.
Page 11
Its outside surfaces heat while your apparatus operates. The interior surfaces of
oven, components that ensures the heat and steam that goes out are quite hot. Even
if the apparatus is turned off, these parts hold its heat for a specific time. Do not touch
onto the hot surfaces. Keep children away.
Do not leave the cooker while cooking with solid or liquid oils. There may be flaming
up on condition of extreme heating. Never pour water to the flames occuring from oil.
Cover the saucepan or frypan with its cover in order to choke the flame that was
occured in this case and turn the cooker off.
The oven and heat adjustment switches must be adjusted and ovens clock must
be programmed for cooking in your oven. Otherwise the oven does not operate.
Do not leave anything on it when the door or drawer of oven is open. You may
unbalance your apparatus or break the cover.
Do not put heavy things or flammable, burnable goods (nylon, plastic bag, paper,
cloth . . . etc) into the lower drawer.
Plug it off when you do not use the apparatus and keep the gas valve off.
Protect your apparatus against atmospheric effects. Do not leave it to effcts
such as sun, rain, snow, powder. . etc.
7
3
2
1
L
N
4
5
PE
L
2
L
3
5x1.5 mm 380 V ,3N
5x1.5 mm 400 V ,3N
5x1.5 mm 415 V ,3N
3
2
1
L
N
4
5
PE
3 x 2.5 mm 220 V
3 x 2.5 mm 230 V
3 x 2.5 mm 240 V
The appliance is provided for fixed connection to the power supply. The connection
of the appliance to an electrical source must be done by authorized technician.
Your apparatus is produced in accordance with the related security instructions
connected with electrical apparatus. The maintenance and repair works must be
made just by the authorized service technician who is trained by the producer firm.
The installation and repair works whitout following rules may endanger you.
3. 4 GENERAL WARNINGS AND MEASURES
Page 12
PART 4 : USE OF YOUR OVEN
8
4. 1 GENERAL APPEARENCE AND TECHNICAL FEATURES OF YOUR OVEN
TE 56
LOWER HEATER
UPPER HEATER
GRILL
TURBO HEATER
1000 WATT
1000 WATT
1600 WATT
2000 WATT
TE 66
LOWER HEATER
UPPER HEATER
GRILL
TURBO HEATER
1100 WATT
1200 WATT
2000 WATT
2000 WATT
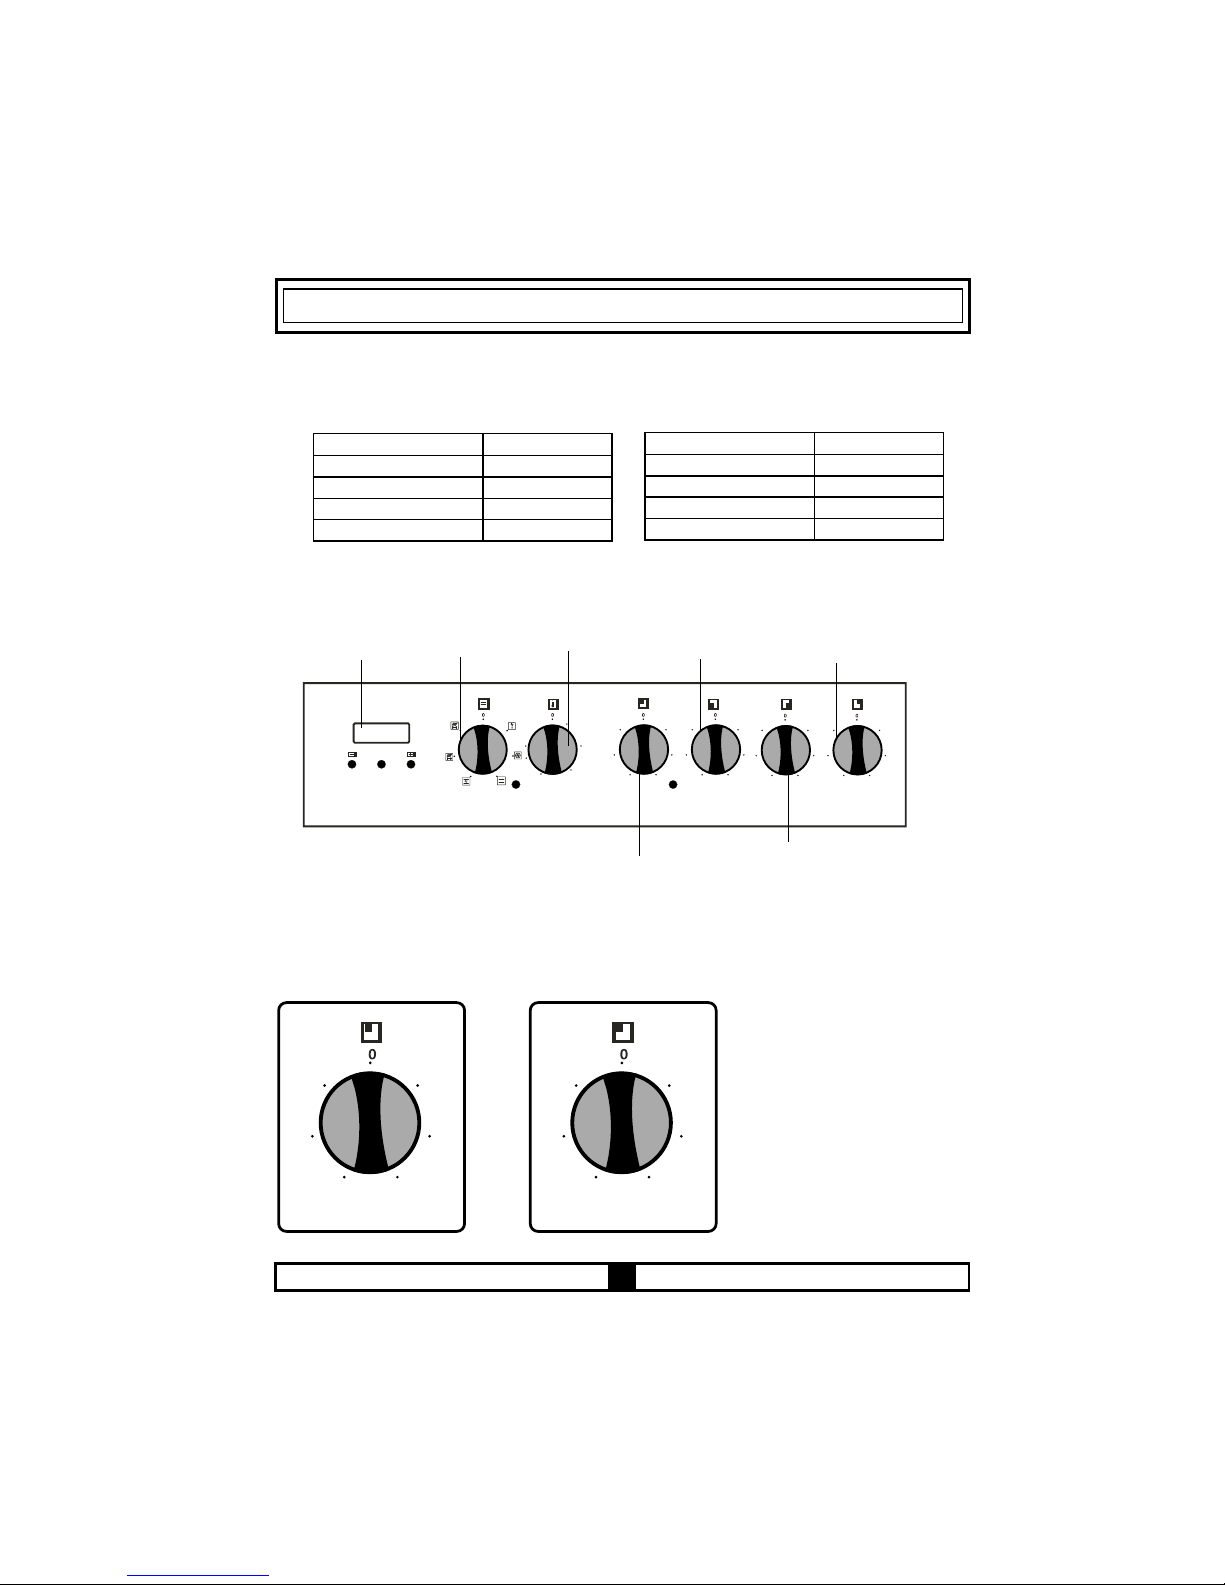
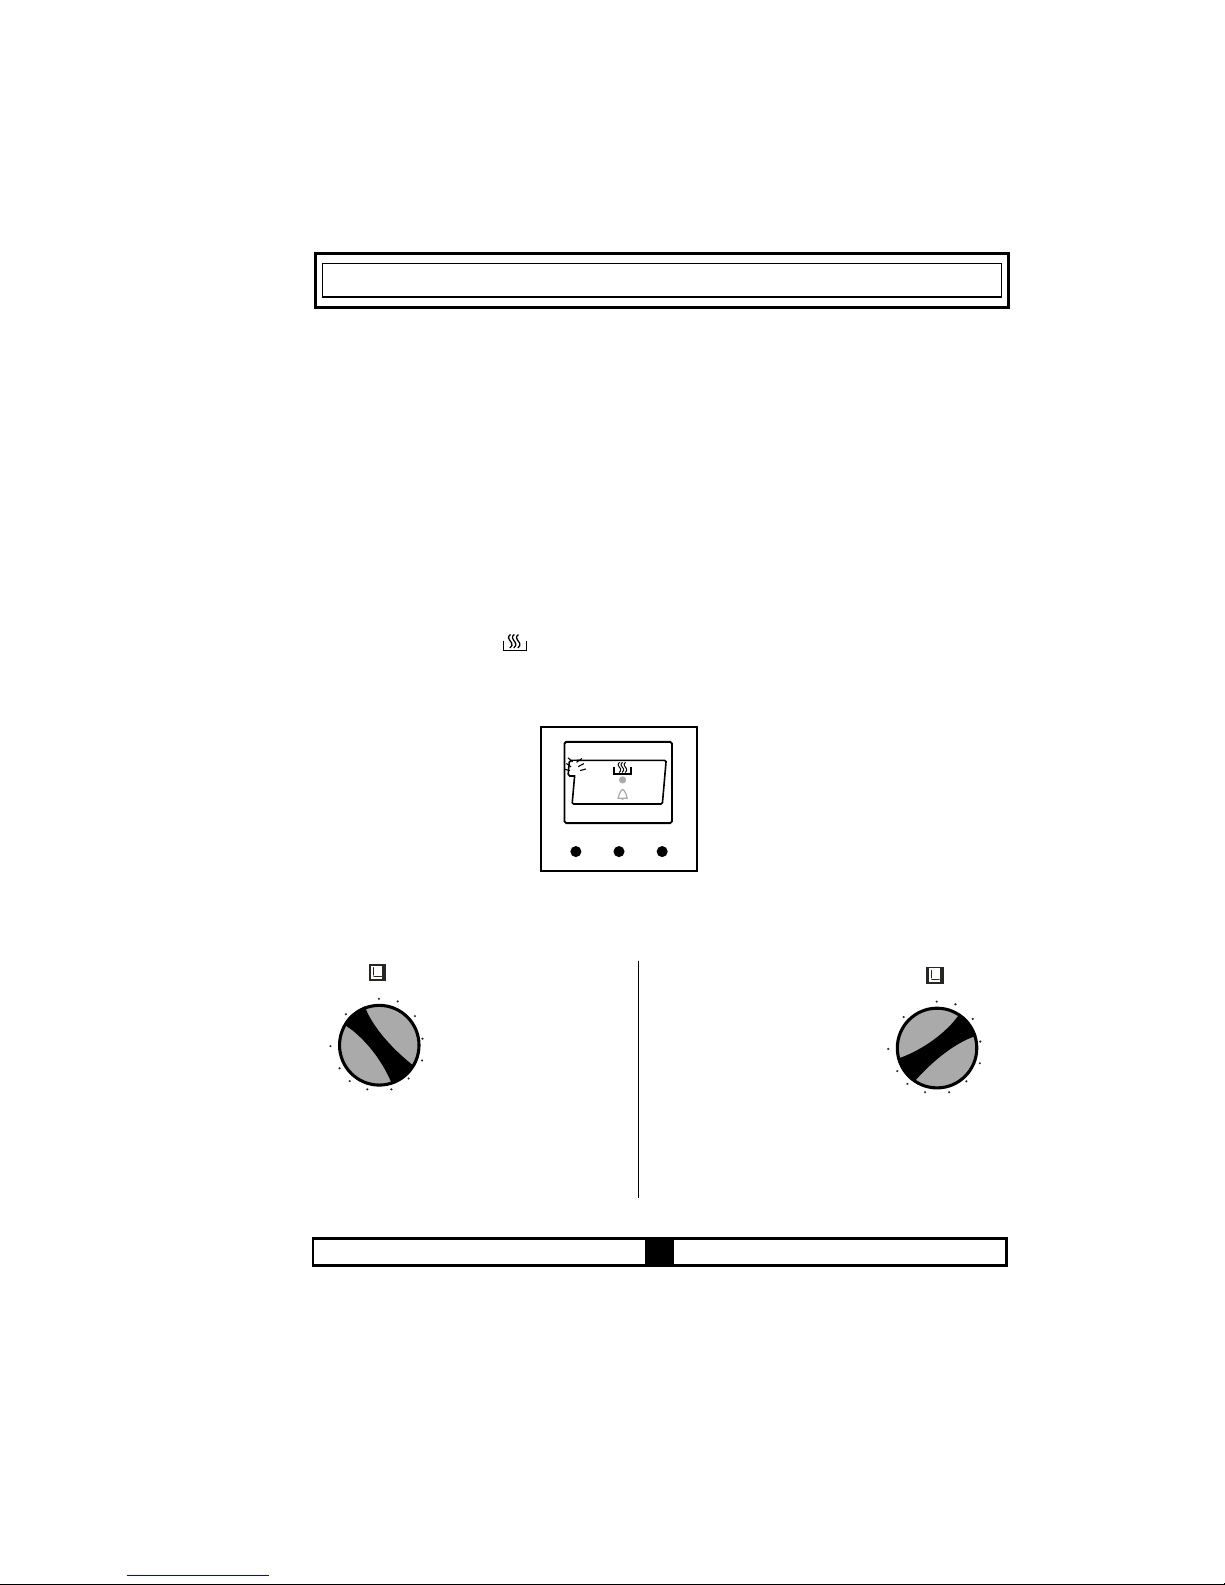
4. 2 PRESENTATION AND FEATURES OF THE CONTROL PANELS
TE 56/66
150
250
8888
Timer
Oven Function
Switch
Oven Thermostat
Switch
50
100
200
Max
Mode
2
1
3
4
5
6
Left Back Heater
Left Front Heater
Right Front Heater
Right Back Heater
2
1
3
4
5
6
2
1
3
4
5
6
2
1
3
4
5
6
4. 3 USE OF HOTPLATES AND VITROCERAN COOKERS
The electrical cooker is commanded by 7 graded switches. 0 of the grades is off location. The
use fields in response to other 6 grades are below.
1
2
3
4
5
6
Hotplates
6
5
4
3
2
1
Vitroceramic Cooker
1..........Keeping hot location
2-3......Heating locations at low heat
4-5-6..Cooking - roasting and boiling
locations
Page 13
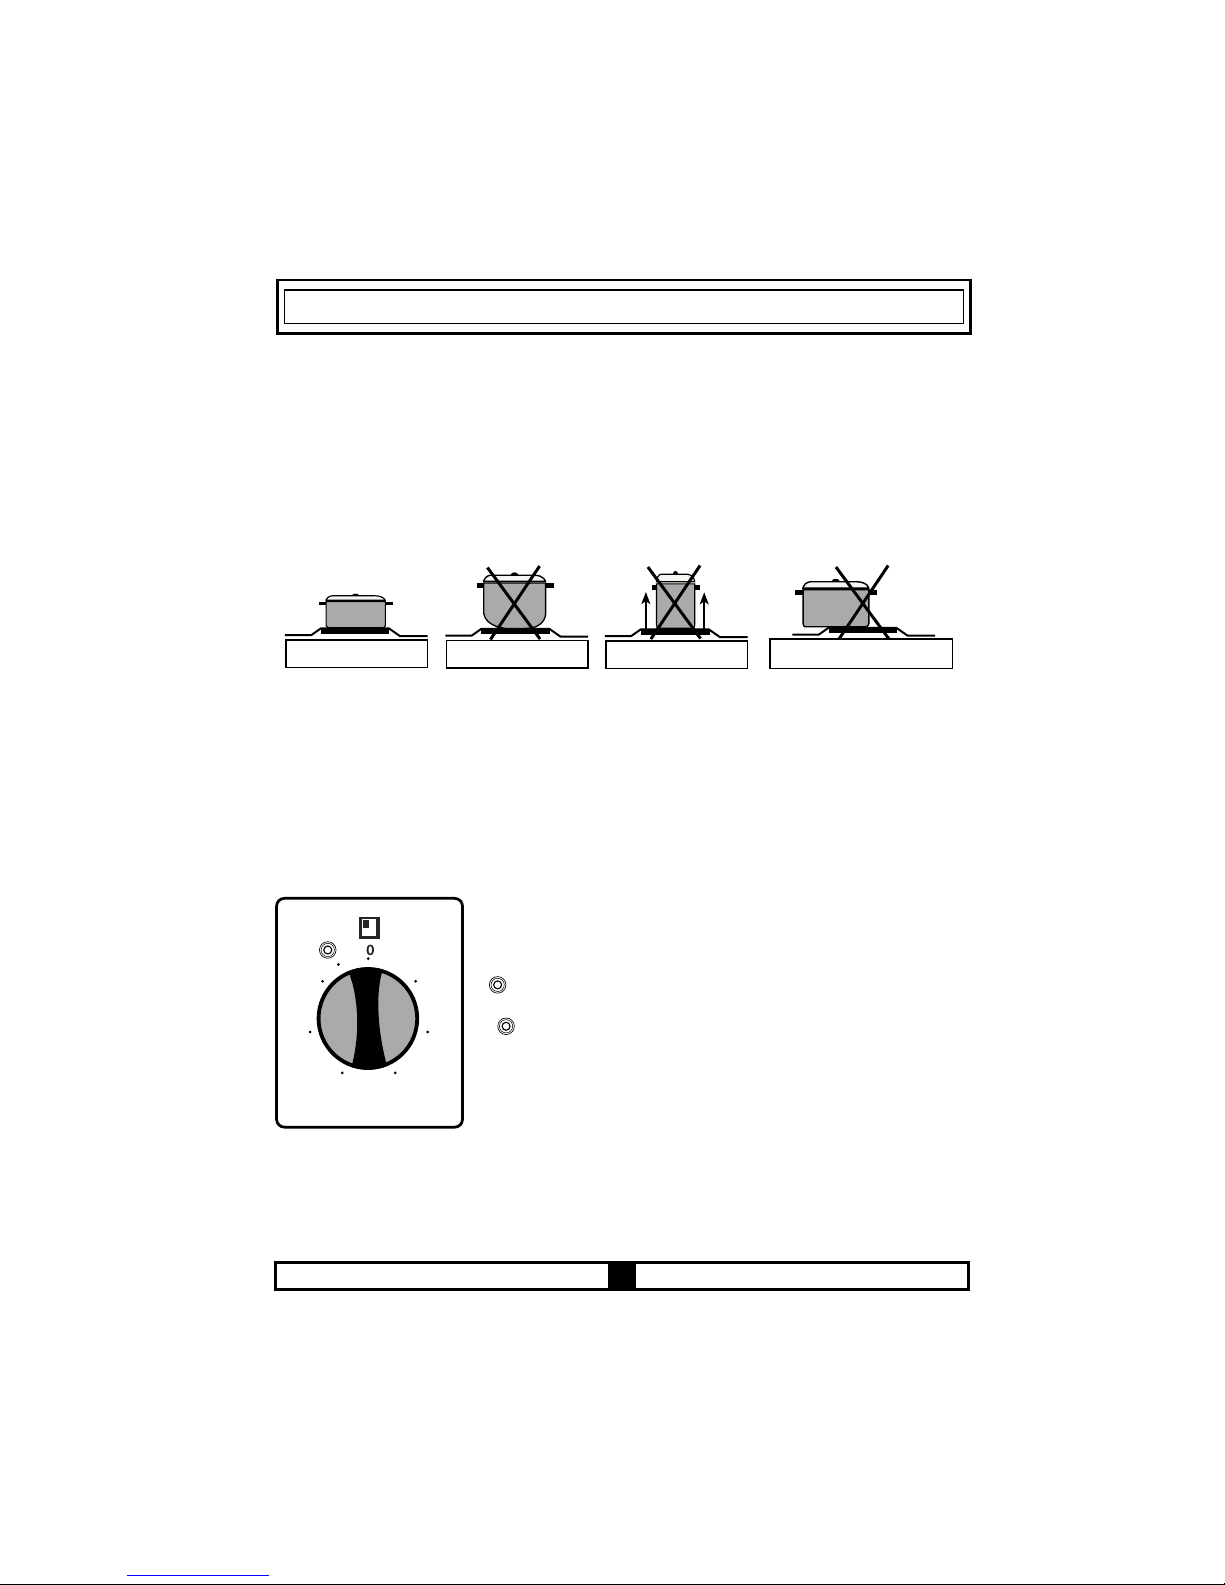
9
The upper part of hotplates is covered by a protective material resistant to heat. Turn
the switch of the electrical cooker to 3 and then operate the cooker for 5 minutes
in order to burn and so to toughen the protective layer at first use.
During use of electrical cookers, it is required to pay attention to the used saucepans
to have smooth bases. If appropriate sized and smooth based saucepans are used,
you can get the most efficiency from your cooker. It is not suggested to use the little
size saucepans on the big size cooker, because this will cause heat loss and so energy
will be wasted.
RIGHT
WRONG
circular saucepan base
WRONG
small saucepan diameter
WRONG
saucepans base had not settled
Surely control that your cooker is off, the control switch is at 0 location after cooking.
Also never touch it as the cooker will be hot for a speific time after it was turned off.
Do not let children to come close to it.
Clean the electrical cooker with a wet cloth after using the electrical cooker. If there
is excessively getting dirty situation, you can clean it with water with detergent rather
well.
Heat for a few minutes for the upper part to dry after cleaning. If you will not use its
upper part for a while, ensure to occur a thin oil layer as oiling with machine oil.
6
5
4
3
2
1
Dual or Oval Vitroceramic Cooker
Dual or vitroceramic cookers can heat in two different position. For
operating the big diameter of dual cooker turn the switch to
. Both big and small diameter of the cooker will operate.
For operating the oval part of the oval cooker, turn the switch
to . Both oval and round parts will operate.
Page 14
4.4 USE OF OVEN PART
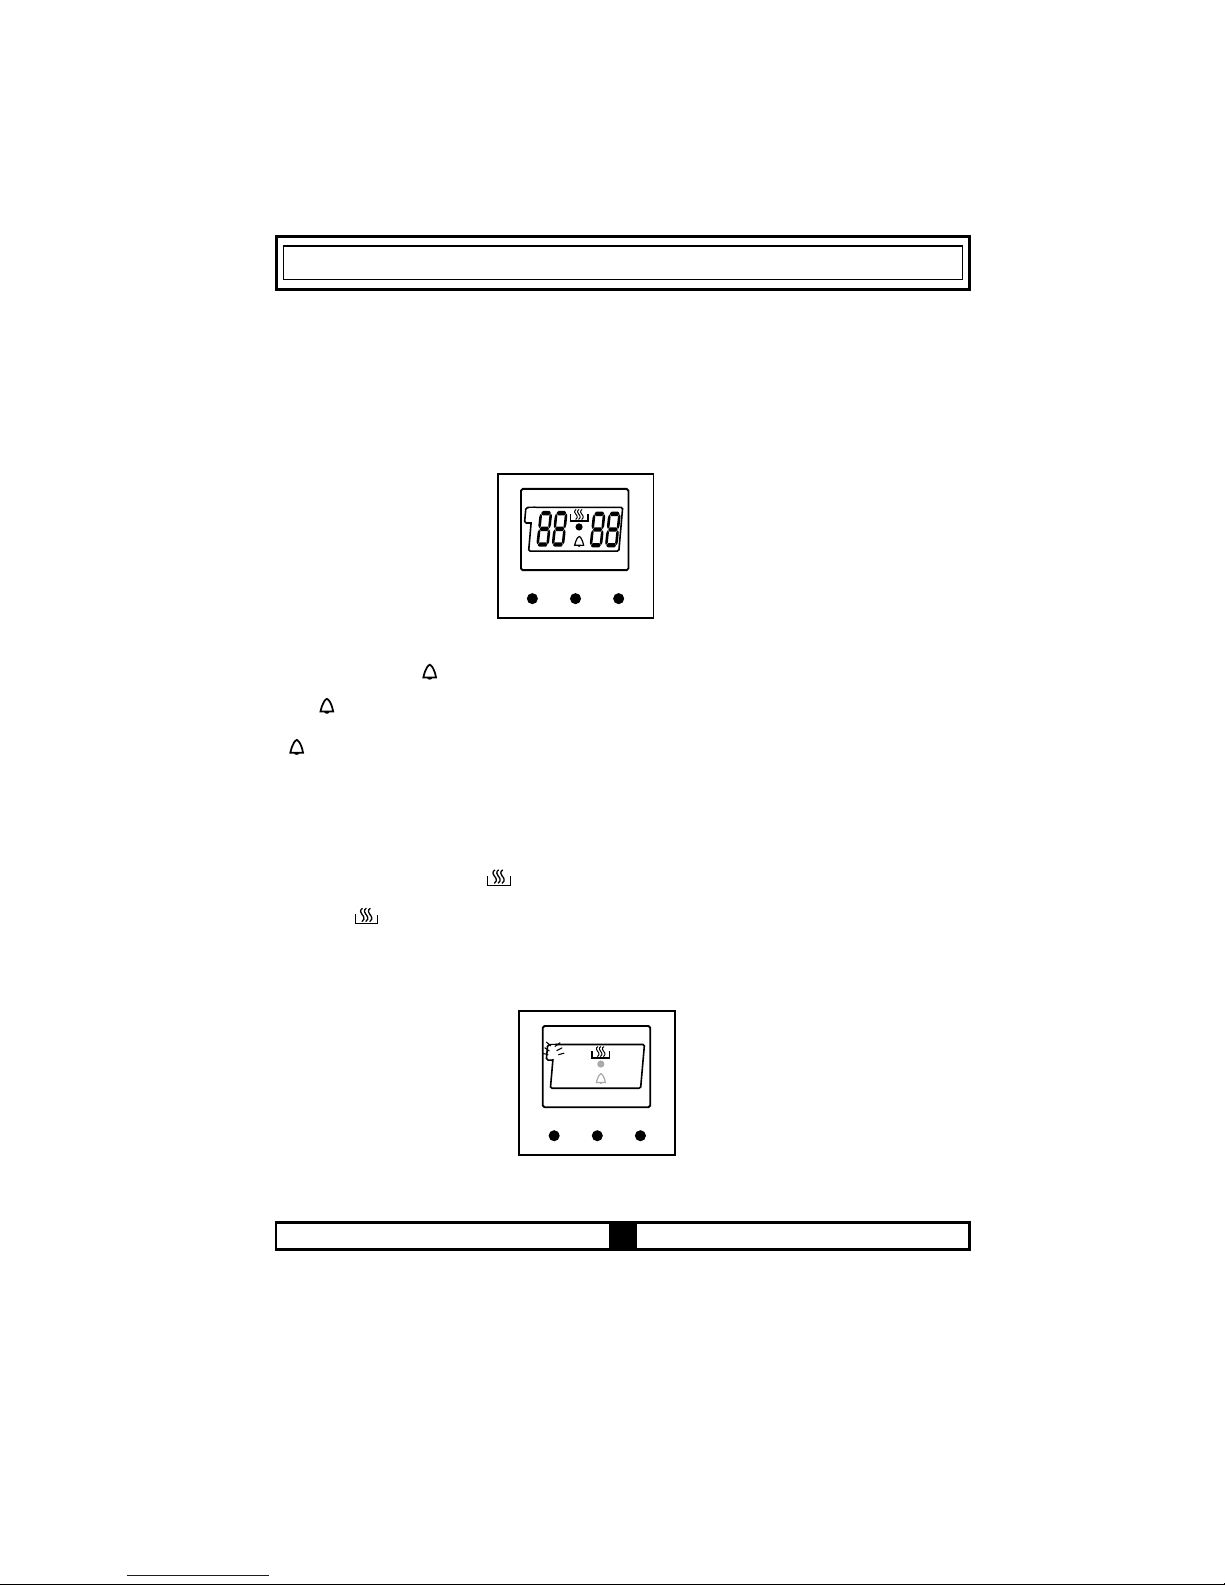
4. 4. 1 Use of Electronical Programming Clock
Adjustment of Day Hour
A symbol will start to flash after it is connected to the electrical resource.
Press (+) and (-) keys at the same time. It is also possible to adjust (to increase or
to reduce ) the time by pressing to these keys.
-
+
MODE
A
Alarm / Time Setup
This function can be used as time set up and alarm when wished. Mode key must
be pressed until led indicator lamp will start to light. The wished period interval is
adjusted via + and - keys. The wished time remains on screen after it was adjusted
and sign that flashed in the past remains fixed. It is possiple to make time set up
between 0-23.59 hours. At the end of cooking period an alarm is heard and
symbol flashes. You can press any key to stop the alarm.
Programming as Determining the Cooking Period
This function is used to adjust to cook at wished period interval.
To adjust the cooking period, Mode key is pressed until Dur indicator lamp
will start to flash. The wished cooking period is adjusted by using + and - keys.
Once the time is adjusted, it is registered automatically in 5 seconds following the
adjustment and A and symbols start to light continuously. The screen returns
to the current time. An alarm (sound) is heard when the cooking period ended and
A and symbols start to flash. Press onto any switch stops the signal and the
lamp to flash.
It is possible to adjust cooking period between 0-10 hours.
-
+
MODE
A
du
r
10
Page 15
Programming as determining the Finish Time
This function is used to adjust finishtime of the cooking period. To adjust the finish
time of cooking Mode key is pressed until End indicator lamp will start to flash.
The wished finish time is adjusted by using + and - keys. When the finish time
is reached an alarm is heard and you can press any kay to stop the alarm.
-
+
MODE
A
En
d
Programming as determining the Cooking Period and Finish Time
This function is used to adjust the cooking period by using of automatically cooking
function.
Both cooking period and ending time have to be adjusted to adjust the ending of
cooking period. The cooking period is adjusted as determined above.
Mode key was pressed until End indicator lamp will flash in order to adjust the
ending time. + and - keys must be used at the end of wished cooking period.
Once the time is adjusted , it is registered automatically in 5 seconds following the
adjustment and A and symbols starts to light continuously. The screen returns to the
current time. An alarm sound is heard at the end of the time and A symbol starts to
flash. Pressing any switch stops the signal and lamp to flash.
10
20
30
40
50
70
80
90
60
100
M
0
30
40
10
20
50
70
80
90
60
100
M
0
Manual Operation
When you set the timer
knob to M position as
seen in the illustration
on left side, the oven
can be operated
continuously. The oven
can never be operated,
when the timer knob is
in 0 position.
4.4.2 Use of Mechanical Timer
Operation with time set
Turn the timer knob in
clockwise direction in
order to set time between
0-100 minutes as seen
in figure on right side.
When the adjusted time
ends, oven is turned off
and a single warning
sound is heard.
11
Page 16
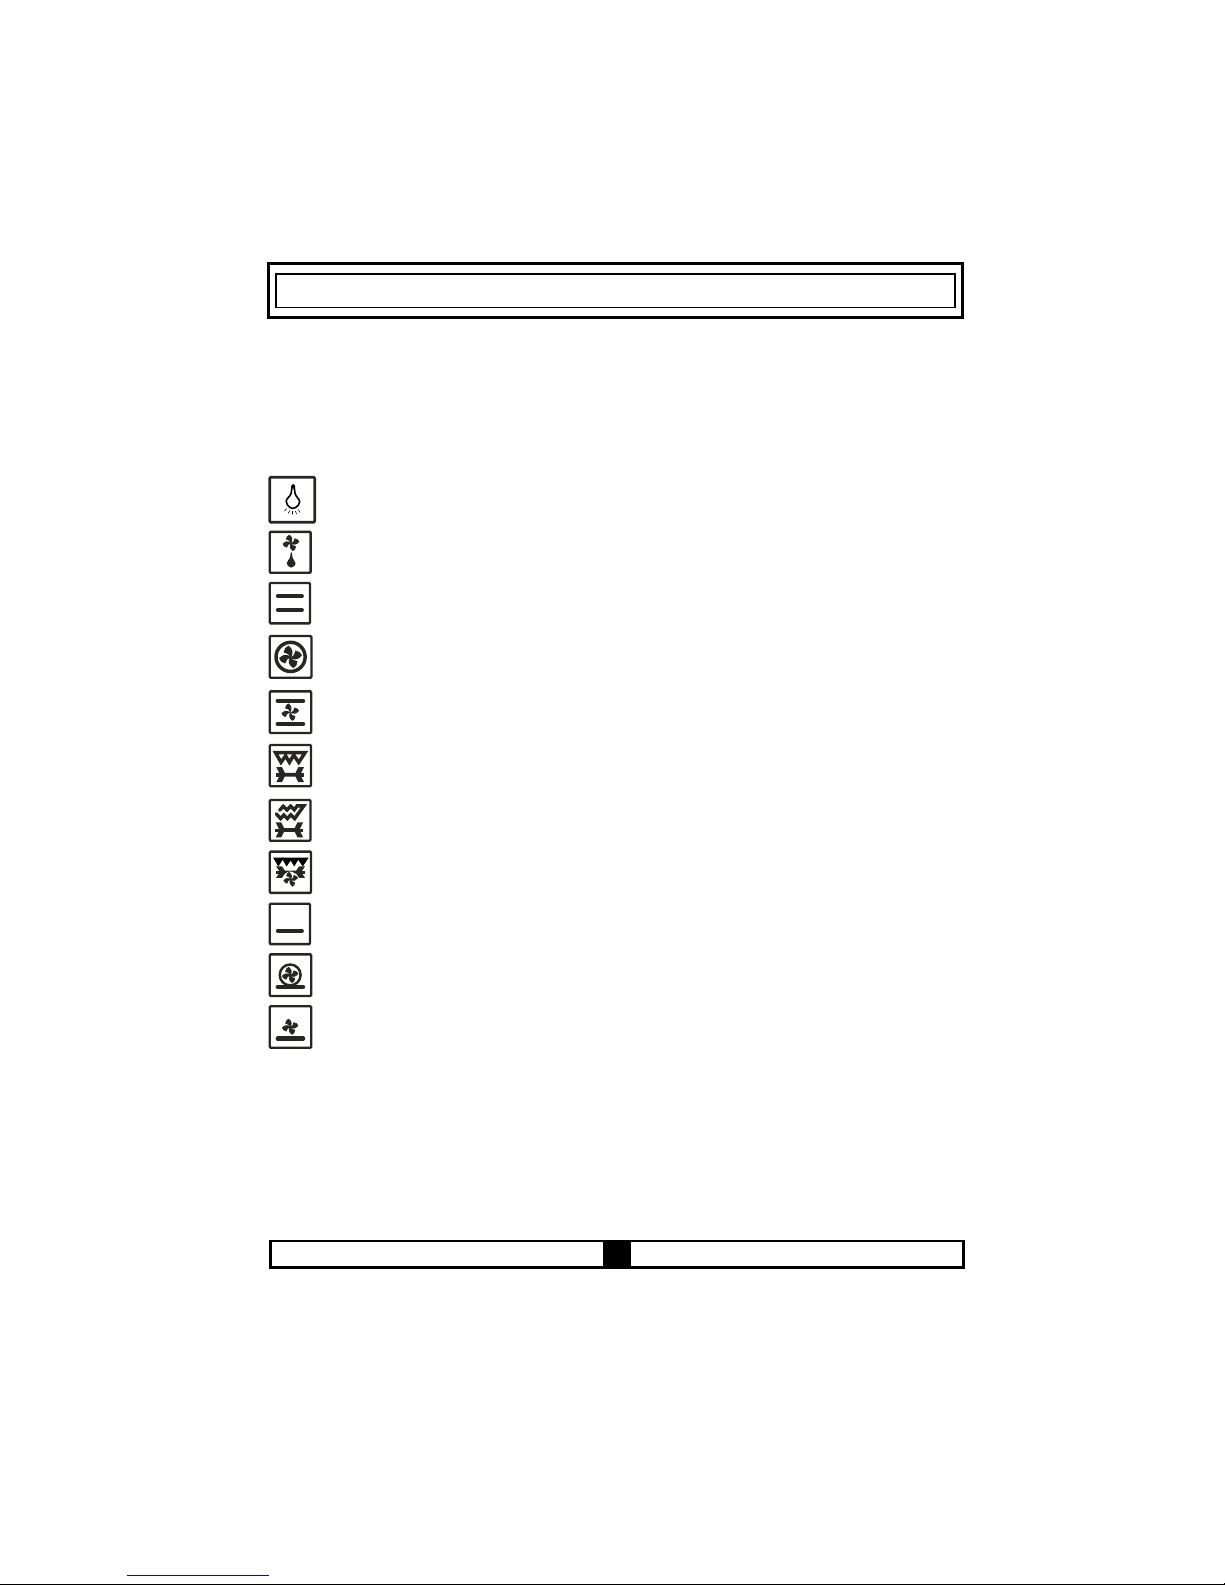
4. 4. 3 Use of Oven Function Switches
This switch allows you to select the oven functions. The functions and their grades
are shown at the following table. Also, the detailed instructions and their uses will
also be explained in details in the next pages.
Your ovens lamp starts to operating.
Your ovens lamp, red warning lamp and fan start to operating.
It performs the function of defrosting your frozen food.
Your ovens thermostat and warning lamps and lower and upper heaters
start operating.
Your ovens thermostat and warning lamps and turbo heater, fan are put into
use.
Your ovens thermostat and warning lamps and fan, upper and lower
heaters start operating.
Your ovens thermostat and warning lamps and grill heater and chicken turning
function start operating.
Your ovens thermostat and warning lamps and upper heater, grill heater and
chicken turning functions start operating.
Your ovens thermostat and warning lamps and upper heater, grill heater and
chicken turning and fan functions start operating.
Your ovens thermostat and lamps, lower heater operate
Your ovens thermostat and warning lamps, turbo heater, lower heater and
fan start operating.
Your ovensthermostat and warning lamps,lower heater and start operating.
12
Page 17
Ice Melter Function ( Defrost )
You can start the defrosting process by placing the frozen food into your oven and
turning the switch onto the determined sign. This is a program that does not cook the
food, just helps to defrost them in a very short time. Place the food that will be
defrosted on the third shelf support from the bottom, on a wire shelf. Place a tray into
the bottom of the oven in order to collect the water that occurs because of defrosting.
Lower - Upper Heater Function ( Static Cooking )
At this cooking that is defined as the traditional method, the heat that is spreaded
from the lower and upper heating elements into your oven equally, ensures the foods
buttom and top to be cooked equally.
It is recommended to make pre heating for 10 minutes. Leave the food that was put into
the available cooking dish to be cooked in recommended period case. The Lower-Upper
Heater location is the function that is preferred to cook cake, sponge cake, flan,
spaghetti in oven, lasagna, pizza.
At the end of cooking process, turn the ovens switch and heat set up switch off and
cancel the time program. Take the cooked food from the oven, put onto a safe place
and open the ovens door and ensure the oven is cool completely. As the oven will be
hot at that moment, stay away from the oven and keep your children
away from the oven.
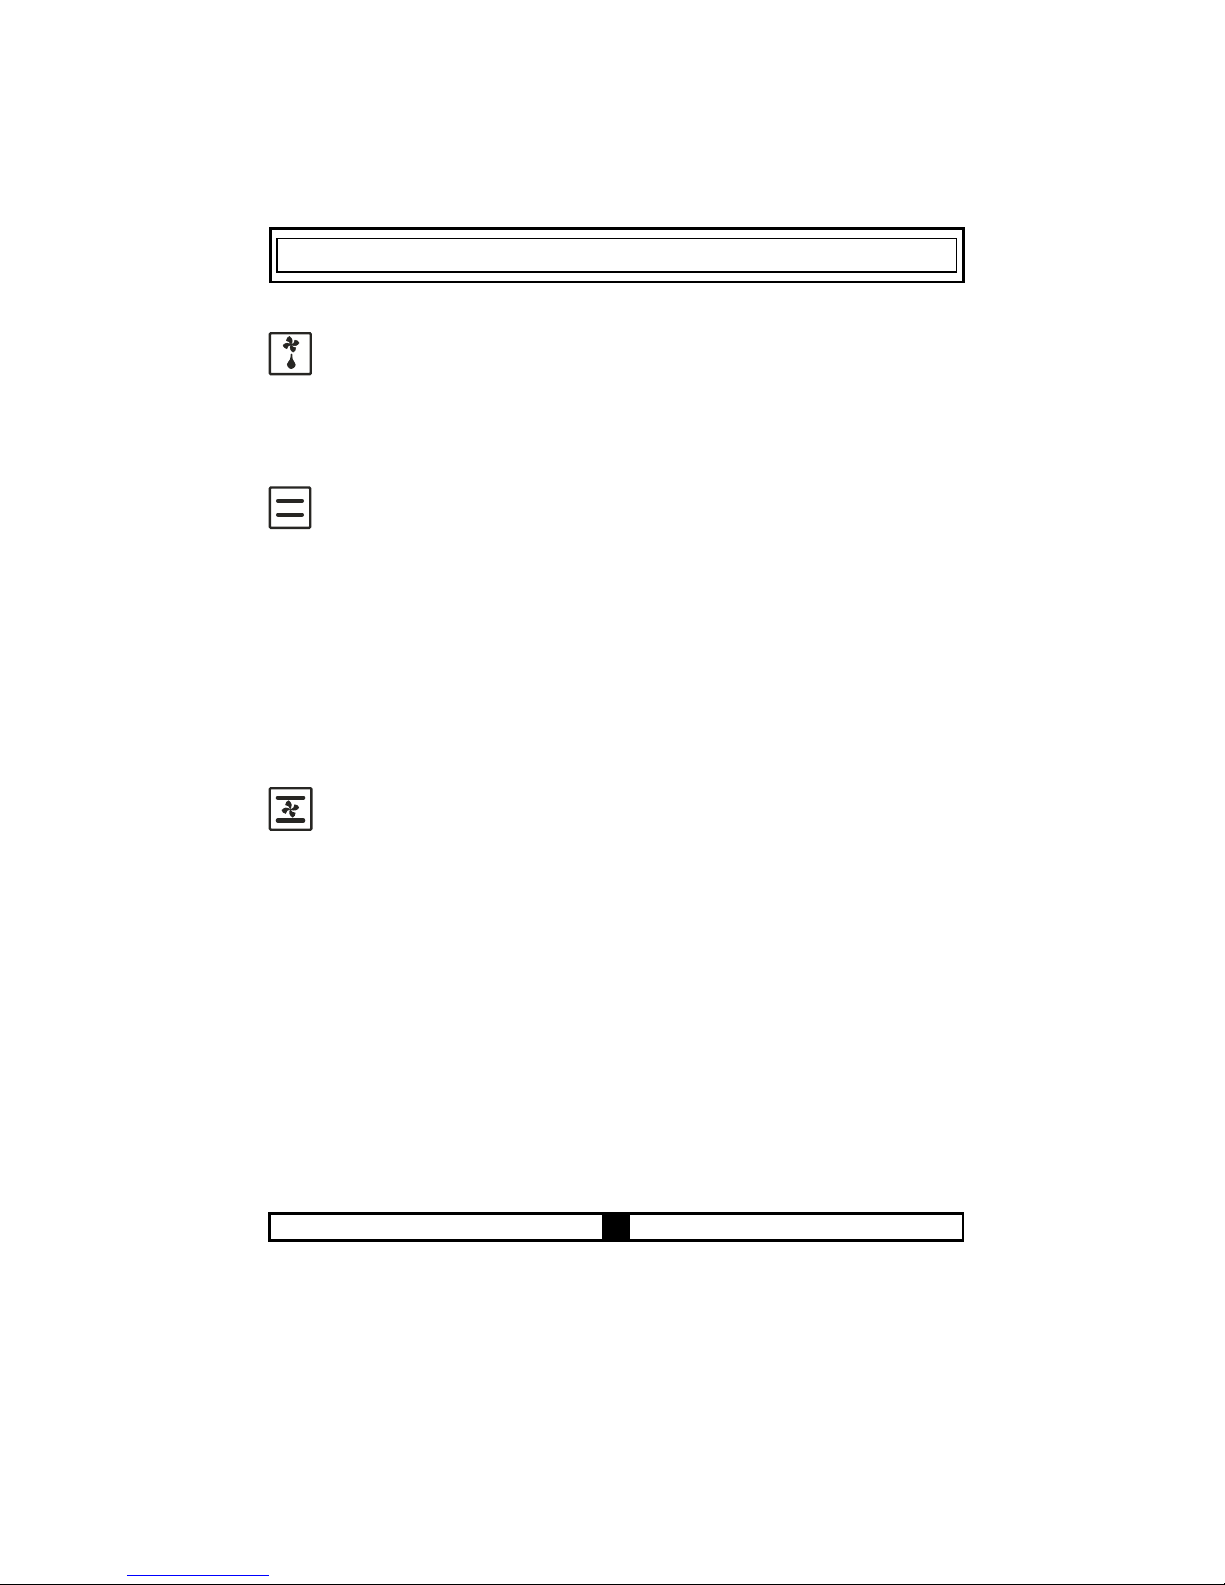
Fan and Lower - Upper Heater Function ( Static Cooking with Fan)
The location where the air comes from lower and upper heating elements is distributed
into the oven via the fan motor and fanner.
The heat adjsutment switch is adjusted to the degree that is recommended at the
cooking table. Turn the ovens switch as it will show the symbol of this function and the
ovens time is adjusted to the recommended time for cooking, the oven is pre heated
for 10 minutes. The food that had been put into the available cooking dish is placed
into the oven and then cooked. In general, this location is a location where a very
nice results are taken for cooking of pastries. Every part of the food will be cooked
equally at this location. It is appropriate for cooking of single tray.
At the end of cooking, turn off the ovens switch and heat adjustment switch. Cancel
the ovens time program and take the cooked food from oven and leave it on a safe
place. Open your ovens lid and leave it to cool. Do not come close to it until it cools
and keep children away.
13
Page 18
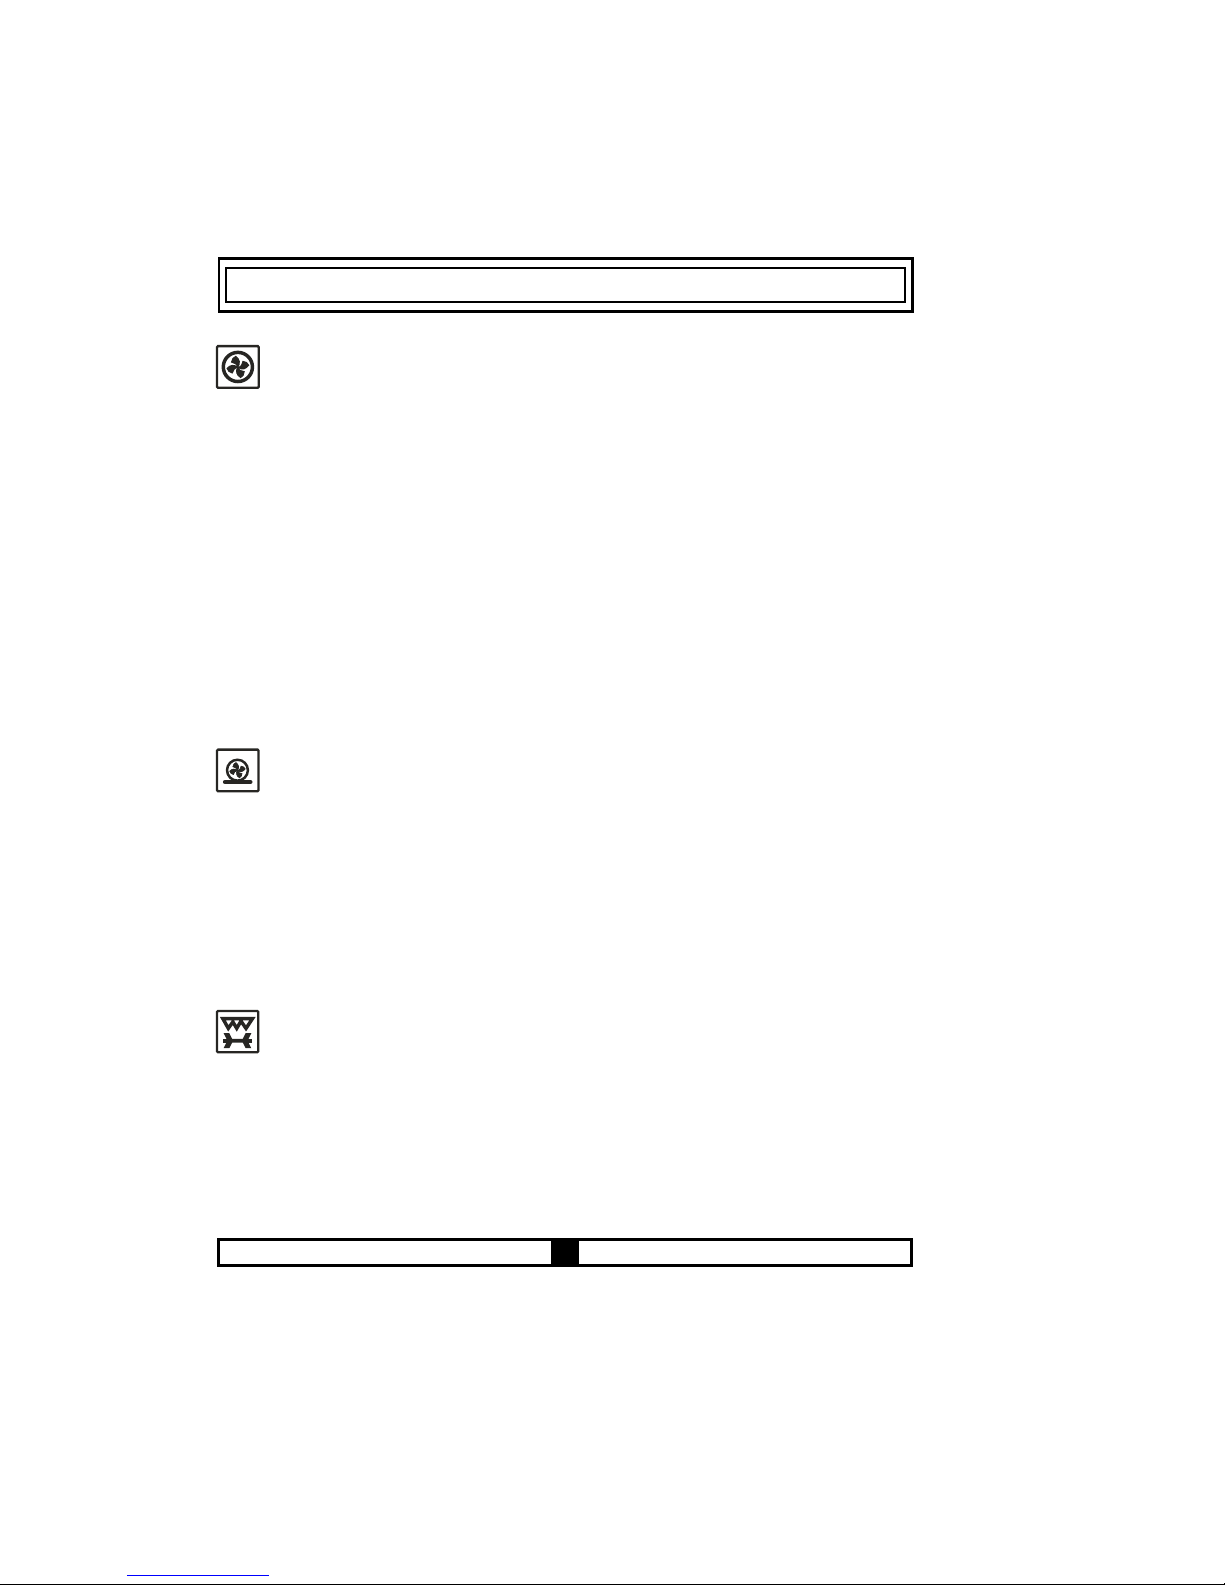
Turbo Fan and Lower heater Function
Turbo fan and lower heater function is an ideal function to cook pizza. The lower
heater ensures the pizza paste to be cooked while Turbo fan spreads the heat of
oven equally. Adjust the heat adjustment switch of your oven to the wished degree,
also turn the function switch as it will show this functions sign and adjust the ovens
time to the offered time for cooking and pre heat the oven for 10 minutes. This function
is appropriate for cooking of one dish.
At the end of cooking process, turn off the ovens switch and heat set up switch.
Cancel the ovens time program and take the cooked food from oven and leave onto
a safe place. Open your ovens door and leave it to cool. Do not come close to the
oven until it cools and keep children away.
Warning: Max. set of thermostat 1900C
Grill and chicken Turning Function
This function is used to grill and to turn chicken, cooked food on a skewer.
To make turning, use the turning skewer. To grill, place the food onto the grill, also
the grill onto the shelf at toppest level. You can start to grill after placing the oven tray
onto the 3rd Shelf. The tray that is placed onto the 3rd Shelf will ensure the collection
of oils that drop from food.
14
Turbo Fan Function
Turbo fan function spreads the ovens heat equally. The food on all shelves will be
cooked equally during the use of this function.
Top of the oven will not be hotter than the bottom of it. Adjust the heat adjustment
switch of your oven to the wished degree, also turn the function switch as it will show
Turbo function symbol. Place your food that had been put into the available cooking
dishes into the oven after pre heating of 10 minutes. This function is appropriate for
cooking more than one dish.
If you have two trays of food that you will cook in your oven; you must use that heat
for your oven, heat of which of the heats that are appropriate for your food while
adjusting the cooking heat. Cooking two trays of food requires additional cooking
period according to the single tray cooking. In general, food in two trays are not cooked
at the same time. So, take the tray that you observed that is cooked, from the oven,
go on cooking for the other tray of food. As there will be heat transfer between two
trays during the cooking of two trays of food, the cooking quality will be lower than
the single tray. While cooking double trays, you can get a better cooking result by
changing theplaces and ways of trays if needed. The processes that will be applied
at the end of cooking, are same for all the functions.Open your ovens cover and leave
it to cool after you put your trays in oven onto a safe place.
Page 19
Turn your ovens heat set up switch as it will show the sign of this function. Place
your food into the oven after pre heating of 5 minutes.
At the end of cooking, as in all other cooking processes; turn off the ovens switch
and heat set up switch. Cancel the ovens time program and take the cooked food from
oven and leave onto a safe place. Do not come close to the oven until it will cool and
keep children away.
Warning: Max. set of thermostat 1900C
Upper heater, Grill and Roast Chicken Function
This function is used to grill rapidly and to roast chicken, cooked food on a skewer.
To make roasting, use the roasting skewer. To grill, place the food onto the grill, also
the grill onto the shelf at toppest level. You can start to grill after placing the oven tray
onto the 3rd Shelf. The tray that is placed onto the 3rd Shelf will ensure collection of
oils that drop from food.
Turn your ovens heat set up switch as it will show the sign of this function. Place your
food into the oven after pre heating of 5 minutes.
At the end of cooking process, as in all other cooking processes; turn off the ovens
switch and heat set up switch. Cancel the ovens time program and take the cooked
food from oven and leave onto a safe place. Do not come close to the oven until it
cools and keep children away.
Warning: Max. set of thermostat 190
0
C
15
Grill, Chicken Roasting and Fan Function
In this function, grill and upper heater and the fan that ensures to roast
perfectly, operate together and cook. It is also used to grill, to roast chicken and
cooked food on a skewer.
To make roasting; use the roasting skewer. To grill, place the food onto the grill, also
the grill onto the shelf at the toppest level. You can start to grill after placing the oven
tray onto the 3rd Shelf. The tray that is placed onto the 3rd Shelf will ensure collection
of oils that drop from food.
Turn your ovens heat set up switch as it will show the sign of this function. Place your
food into the oven after pre heating of 5 minutes.
At the end of cooking process, as in all other cooking processes; turn off the ovens
switch and heat set up switch. Cancel the ovens time program and take the cooked
food from oven and leave onto a safe place. Do not come close to the oven until it
cools and keep children away.
Warning: Max. set of thermostat 190
0
C
Page 20

16
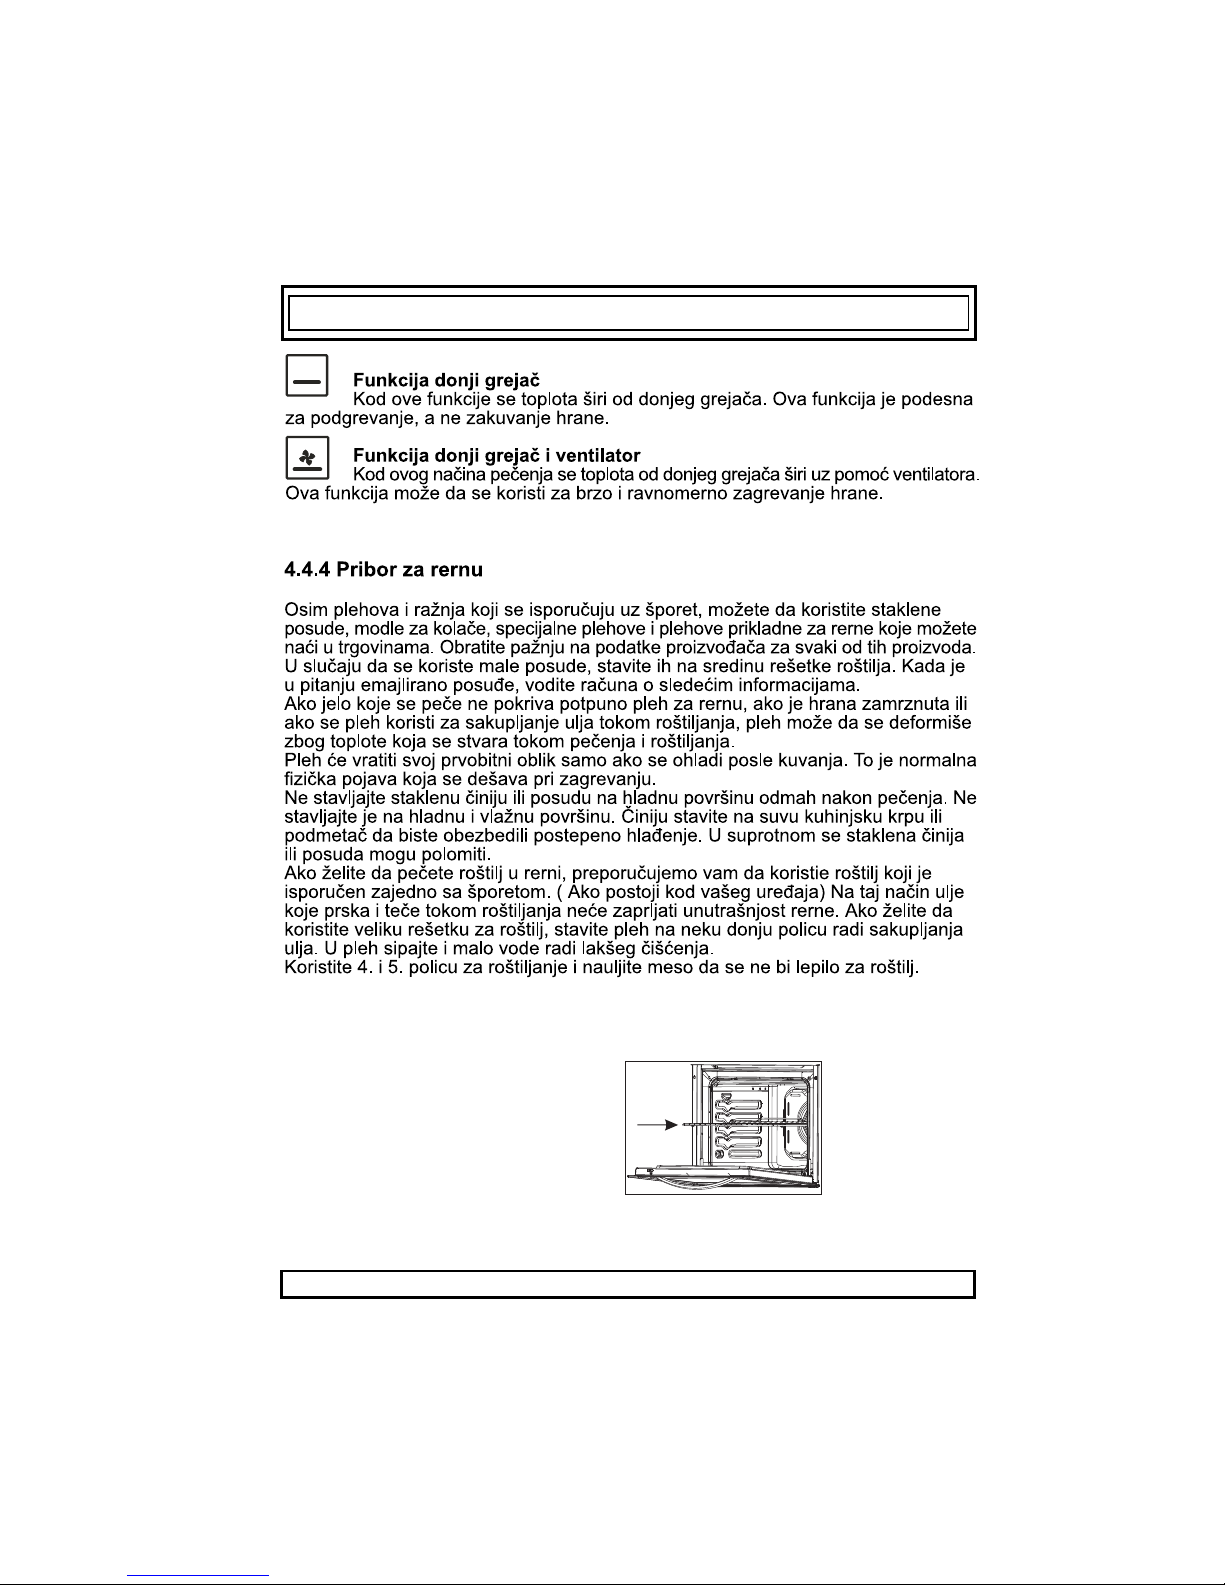
Lower Heater Function
At this cooking the best is spreaded from the lower heating element. Lower
heating function is appropriate for heating the food instead of cooking.
Lower Heater and Fan Function
At this cooking, the heat is spreaded from the lower heating element and fan
motor. This function can be used to heat the food equally in a short time.
4. 4. 4 Accessories Used in Oven
You can use glass dishes, cake molds, special oven trays that are appropriate for use
in oven, that you are able to assure in market, apart from the oven trays and grill wire
chicken roasting skewer that are given together with your oven. Pay attention to the
information related to the subject that were given by the manufacturer firm.
In case small size dishes are used, place the dish onto the grill wire, as it will
completely be on the middle part of the wire. The following information must also be
followed for the enameled dishes.
If the food that will be cooked does not cover the oven tray completely, if the food is
taken from the deep freezer or the tray is being used for collection of foods juices that
flow during grilling, the form changes can be observed in tray because of the high
heat that occur during cooking or roasting.
The tray will return to its old form only when the tray cooled after cooking. This is a
normal physical event that occurs during heat transfer.
Do not leave this tray or dish in cold environment right away after cooking in glass tray
or dish. Do not put onto the cold and wet grounds. Place on a dry kitchen cloth or dish
cross, ensure it to cools slowly. Otherwise the glass tray or dish may be broken.
If you will grill in your oven; we recommend you to use the grill that was given in tray
together with product. ( If your product includes this material ) So, the oils that spatter
and flow, will not dirty the inside of oven. If you will use the big wire grill; put a tray onto
one of the lower shelves for oils not to be collected. Also put some water into it for
cleaning easiness.
Use 4th and 5th shelves while grilling and oil the grill for the ingredients that you will
grill not to stick to the grill.
WARNING- Fit the grid correctly
into any rack in the
oven cavity and push it to the end.
corresponding
Page 21

17
5. 1 CLEANING
Be sure that all control switches are off and your apparatus cooled before cleaning
your oven. Plug off the apparatus.
Control whether they are appropriate and recommended by the manufacturer before
using the cleaning materials on your oven. As they may damage the surfaces, do not
use caustic creams, abrasive cleaning powders, thick wire wool or hard tools. In case
the liquids that overflows around your oven burn, the enameled place may be
damaged. Immediately clean the overflew liquids.
Cleaning of Inside of Your Oven
Surely plug off the oven before starting cleaning.
The inside of enameled oven is cleaned in the best way when the oven is warm.
Wipe the oven with a soft cloth that had been hemmed in soapy water after each use.
Later wipe it with a wet cloth once more and then dry it. It may be required to use a
liquid cleaning material from time to time and make a complete cleaning. Do not clean
with dry and powder cleansers.
PART 5 : CLEANING AND MAINTENANCE OF YOUR OVEN
Page 22

Cleaning of Your Ovens Cover
In order to be able to clean the cover of your oven from inside and outside, use a glass
cleaner. Then rinse, dry it with a dry cloth. The cover can be pulled out for cleaning as shown
in the following figure.
* Open the cover completely.
* Pass the metal pin through the holes as shown on picture
* Do this process for both hinges.
* Lift up the cover slightly, pull towards the outside smoothly. The cover will completely
come out.
* Again place it into hinge holes while pinning the cover to its place.
Do not clean the ovens cover while the glass panels are hot. In case this measurement
is not taken, the glass panel may brake down. Contact to Authorized Service when
any problem occured.
Cleaning Vitroceramic Cooker
Before starting cleaning wait for Vitroceramic cooker completely cool down. Be sure that
cleaning material does not contain any particles which may cause to scratch glass.Use cream
or liquid detergent. Vitroceramic surface must be cleaned with cold water and dried with soft
cloth in a way that no cleaning material may be left. Use pallet provided with your product
for cleaning food or residues. Sweet type food must be cleaned right after they are spilled
before glass cools down. Steel cleaning material may damage Vitroceramic glass. Dust on
the surface must be cleaned with wet cloth. Color change on ceramic surfaces does not effect
functional structure and durability of Vitroceramic.
Color change is caused by not cleaning the residues, erosion due to casseroles and using
not appropriate cleaning materials and is not due to material change. Cleaning pallet must
always be used before applying chemicals. With this pallet you can clean even the smallest
dirt on the surface. Materials that are hard to clean like liquified plastic, oil and sweety materials
can be cleaned with pallet easily. Your pallet is dangerous because it is equipped with razor
therefore it must be kept away from chidren. Be careful not to scratch silicon adhesive placed
on the edges of the glass while using pallet.
5.2 MAINTENENCE
Change of Oven Lamp
The change of oven lamp must be done by authorized technician. The rating the ampoule
should be 230V, 25Watt, Type E14 before changing the lamp,the oven should be plugged
off and it should be cool.
18
Page 23

6,1 Requirements Before Contacting to Service
If the oven does not operate;
The oven may be plugged off, there has been a blow-out. On models fitted with a
timer, time may not be regulated.
If the oven does not heat;
The heat may be not adjusted with ovens heater control switch.
If the interior lighting lamp does not light;
The electricity must be controlled.
It must be controlled whether the lamps are defective. If they are defective, you can
change them as following the guide.
Cooking ( if lower-upper part does not cook equally ) ;
Control the shelf locations, cooking period and heat values according to the manual.
Except these, if you still have any problem with your product, please call to the
Authorized Service.
6,2 Information Related to Transport
If you need any transport;
Keep the original case of product and carry it with its original case when needed to
be carried. Follow the transport signs on case.
Tape the cooker on upper parts, hats and heads and saucepan carriers to the
cooking panels.
Place a paper between the upper cover and cooking panel, cover the upper cover,
then tape it to the side surfaces of oven.
Tape cardboard or paper onto the front cover on interior glass of oven as it will be
suitable to the trays, for the wire grill and trays in your oven not to damage to the
ovens cover during transport.
Also tape the ovens covers to the side walls.
If it does not have the original case;
Take measure for the external surfaces (glass and painted surfaces) of oven against
possible blows.
19
PART 6 : SERVICE AND TRANSPORT
Page 24

Page 25

Page 26

Page 27

15
Page 28

MOLIMO PAZLJIVO I U CELOSTI PROÈITATI OVA UPUTSTVA PRE KORIŠÆENJA URE?AJA, I
ÈUVAJTE OVA UPUTSTVA NA UDOBNOME MESTU ZBOG KONSULTACIJE KADA BUDE
POTREBNO.
OVAJ PRIRUÈNIK JE PRIPREMLJEN ZA VIŠE OD JEDNOG MODELA. VAŠ UREÐAJ MOŽDA
NEMA NEKE OD ODLIKA OBJAŠNJENIH U OVOM PRIRUÈNIKU. DOK ÈITATE PRIRUÈNIK
OBRATITE PAŽNJU IZRAZIMA KOJI SADRŽE FIGURE
Opšta bezbednosna upozorenj
- Ovaj ureðaj se može koristiti sa strane dece veæa od 8
godina i sa strane osoba sa smanjenim fizièkim,
senzornim ili mentalnim sposobnostima ili sa
nedostatka iskustva i znanja ukoliko te osobe su pod
nadzorom ili su dobile instrukcije oko upotrebe ureðaja
na bezbedan naèin i razumeju povezane opasnosti.
Deca se ne smeju igrati ureðajem. Èišæenje i održavanje
se ne sme obavljati sa strane dece bez nadzora.
- UPOZORENJE: Ureðaj i njegovi dostupni delovi
postaju vruæi tokom rada. Ne dodirati grejne elemente.
Deca manja od 8 godina trebaju se drzati dalje od
uredaja osim ako nisu ispod konstantnog nadzora.
- UPOZORENJE: Kuvanje bez nadzora na ploèu
korišæenjem masti ili ulja može biti opasno i može
dovesti do požara. NIKADA ne pokušavati ugasiti oganj
vodom, veæ iskljuèiti ureðaj i zatim pokriti plamenove
poklopcem ili protivpožarnom æebetom.
- UPOZORENJE: Opasnost od požara: Ne èuvati
predmete na površine za kuvanje.
- UPOZORENJE: Ako je površina napukla, iskljuèite
ureðaj kako bi izabegli elektrièni udar.
- Za ploèe koje imaju poklopac, svako prosipanje se
mora ukloniti sa poklopca pre otvaranja. Takoðe,
površina ploèe se mora najprije oladiti pre zatvaranja
poklopca.
DEO 2 UPOZORENJA
Page 29

- Ureðaj nije namjenjen da bude upravljavan preko
spoljašnog tajmera ili zasebnog sistema daljinskog
upravljanja.
- UPOZORENJE: Da bi spreèili prevrtanje ureðaja,
morate instalirati podupiraèe za stabilizaciju (za detaljne
informacije vidite uputstvo kompleta protiv naklanjanja).
- Tokom upotrebe ureðaj postaje vruæ. Ne dirati grejne
elemente.
- Tokom upotrebe, ruèice se mogu ugrejati.
- Ne koristiti silna abraziona sredstva ili oštre metalne
strugaèe za èišæenje vrata peæi i ostale površine, jer
mogu ogrebati površinu, šta kasnije može dovesti do
pucanje stakla ili ošteæenje površine.
- Ne koristiti paroèistaèe za èišæenje ureðaja
- UPOZORENJE: Osigurati se da je uredaj iskljucen
pre zamjenu lampe kako bi izbegli elektricni udarac.
- PAŽNJA: Delovi koji su na dohvatu se mogu ugrejati
kada se kuva ili roštilja. Decu treba udaljiti.
Vaš ureðaj je proizveden u suglasnosti primenljivim lokalnim i meðunarodnim
standardima i propisima.
Održavanje i oprave se moraju raditi jedino sa strane ovlašæenog servisera. Instalacija i
oprava koja je uraðena sa strane neautorizovane osobe može vas dovesti u opasnosti. Opasno
je promeniti ili modificirati specifikacije ureðaja na bilo koji naèin.
Pre instalacije, uverite se da su uslovi lokalne mreže (priroda i pritisak gasa ili napon i
frekvencija struje) u skladu sa zahtevima ureðaja. Zahtevi ovog ureðaja su oznaèeni na etiketi.
PAŽNJA: Ureðaj je namenjen jedino kuvanjem hrane i za unutrašnju domaæu upotrebu i ne
treba se koristiti u ni jednu drugu svrhu ili namenu, kao na primer nedomaæa upotreba,
komercijalne svrhe ili za grejanje sobe.
Ne pokušavati podiæi ili pomerati ureðaj vuèenjem za kvaku vrata.
Preuzete su sve moguæe bezbednosne mere da bi se osigurala vaša bezbednost. Jer se
staklo može slomiti, morate paziti ne ogrebati ga tokom èišæenja. Izbegavati udarati staklo
dodacima.
Page 30

Osigurati se da je napojni kabel nije zaglavljen tokom instalacije. Ako se isporuèeni kabl za
napajanje ošteti, mora biti zamenjen sa strane proizvoðaèa, njegovog ovlašæenog servisa ili
slièno kvalifikovane osobe, kako bi se izbegle opasnosti.
Kada su vrata peæi otvorena, ne dozvolite deci penjati se ili sedeti na njima.
Upozorenja oko instalacije
Ne upotrebljavati ureðaj pre što je instalirani u potpunosti.
Ureðaj mora biti instalirani i ukljuèeni sa strane autorizovanog tehnièara. Proizvoðaè neæe
odgovarati za štete izazvane neispravnom postavljanja i instalacije sa strane neovlašæenih
osoba.
Kada otpakujete ureðaj, osigurati se da nije ošteæen tokom transporta. U sluèaju bilo
kakvog nedostatka, ne koristiti ureðaj i smesta kontaktirati kvalifikovanog servisnog agenta.
Jer materijal pakovanja (najlon, morska pena itd.) može biti opasan po deci, morate ga sakupiti
i skloniti ga.
Zaštiti vaš ured od atmosferskih efekata. Ne izlagati ga suncu, kiši, snega itd.
Materijal oko ureðaja (kuhinjski elemenat) mora izdržati temperaturu od najmanje 100C.
Tokom korišæenja
Kada pustite peæ po prvi put, osetiæe se miris iz materijale za izolaciju i grejne elemente.
Zbog toga, pre postavljanja hrane, pustiti peæ da radi na najvišu temperaturu tokom 45 minuta.
U isto vreme morate propisno provetriti okolinu gde se ureðaj nalazi.
Tokom korišæenja, spoljašne i unutrašnje površine se ugrevaju. Tokom otvaranja vrata,
ustuknite da bi ste izabegli vruæe pare koja izlazi iz peæi. Postoji opasnost od opekotina.
Ne postavljati zapaljive materijale povrh ili u blizini ureðaja kad on radi.
Uvek koristiti rukavice za peæ kada uklanjate ili pomerate hranu u peæi.
Ne ostavljati šporet dok kuvate èvrstim ili teènim uljama. Oni se mogu zapaliti kada su
suviše ugrejani. Nikada ne posipati vode na plamenove nastale od ulja. Pokriti tiganj
poklopcem kako bi ugušili plamenove i iskljuèati ureðaj.
Uvek postavljati tiganje na centru zone za kuvanje i okrenuti ruèke na bezbednu poziciju
tako da ne mogu da se gurnu ili zgrabe.
Ako ne koristite ureðaj dužeg vremena, iskljuèite ga iz struje. Držite glavni prekidaè
iskljuèani. Kada ne koristite ureðaj, držite gasni ventil zatvoreni.
Uveriti se da su kontrolni prekidaèi ureðaja na poziciju “0” (stop) svaki put kada ga ne
koristite.
Tacne se naginju kada ih vucite. Paziti ne prosipati tekuæine.
Kada su vrata ili fioka peæi otvorena, ne ostavljati ništa na njih. Možete izvaditi ureðaj iz
ravnoteže ili polomiti poklopac.
Ne postavljati teške ili zapaljive proizvode (najlon, plastika, papir, tkanine itd.) u fioku. To
ukljuèuje posuðe sa plastiènim dodacima (na pr. drške).
Ne vešati krpe, kuhinjske krpe ili odeæa na ureðaj ili na njegovim ruèkama.
Tokom èišæenja i održavanja
Uvek iskljuèiti ureðaj pre radove kao što su èišæenje ili održavanje. Možete to uraditi nakon
iskljuèavanja iz struje ili iskljuèavanj glavnog prekidaèa.
Ne uklanjati kontrolne tastere za èišæenje kontrolne ploèe
DA BI STE ZADRŽALI EFIKASNOST I BEZBEDNOST VAŠEG UREÐAJA,
PREPORUÈUJEMO UVEK KORISTITI ORIGINALNE REZERVNE DELOVE I NAZVATI
JEDINO AUTORIZOVANOG AGENTA U SLUÈAJIMA NUŽDE.
Page 31

Page 32

Page 33

Page 34

Page 35

Page 36

Page 37

Page 38

Page 39

Page 40

Page 41

Page 42
Page 43

Page 44

Page 45

Page 46

CK5060E
УПАТСТВО ЗА КОРИСТЕЊЕ НА
ЕЛЕКТРИЧЕН ШПОРЕТ
Page 47

Почитувани купувачи,
Нашата цел е да Ви понудиме висок квалитет на производите кои се
произведени во современи фабрики со проверен квалитет.
Овој прирачник е напишан да Ви помогне, уредот кој е произведен со најнова
технологија, да го користетите безбедно и максимално ефикасно.
Пред да почнете со користење на уредот, внимателно прочитајте го ова упатство
кое содржи основни информации за правилна и сигурна инсталација,
одржување и употреба. Ве молиме да се обратите на овластениот сервис за
инсталирање на производот.
Page 48

СОДРЖИНА:
1. ПРИКАЗ И ДИМЕНЗИИ НА ПРОИЗВОДОТ
2. ПРЕДУПРЕДУВАЊА
3. ИНСТАЛАЦИЈА И ПРИПРЕМА ЗА КОРИСТЕЊЕ
4. КОРИСТЕЊЕ НА ШПОРЕТОТ
5. ЧИСТЕЊЕ И ОДРЖУВАЊЕ
6. СЕРВИС И ТРАНСПОРТ
Page 49

1. ДЕЛ: ПРИКАЗ И ДИМЕНЗИИ НА ПРОИЗВОДОТ
Список на делови:
1- Капак на шпоретот
2- Плоча за готвење
3- Управувачка табла
4- Заштита за деца
5- Рачка на рерната
6- Маска на фиоката
7- Подесувачки ногарки
8- Врата на рерната
9- Плех за во рерна
10- Жичана решетка
11- Преден отвор
12- Вентилатор
13- Светилка во рерната
14- Рингла
15- Долно куќиште
МОДЕЛ ДИМЕНЗИИ (цм)
Page 50
Page 51

Page 52

Page 53

Page 54

3. ДЕЛ: ИНСТАЛАЦИЈА И ПРИПРЕМА ЗА КОРИСТЕЊЕ
Овој модерен, функционален и практичен шпорет, кој е произведен со
користење на најквалитетни делови и материјали, ќе одговори на Вашите
потреби во секој поглед. Обавезно прочитајте го ова упатство, да немате
проблеми со понатамошното користење и да имате успешни резултати.
Следните информации претставуваат неопходни мерки за правилна инсталација
и сервис. Техничарот што ќе ја врши инсталацијата на шпоретот мора да ги
прочита.
Повикајте овластен сервис за инсталирање на шпоретот
3.1 ИНСТАЛАЦИЈА НА ШПОРЕТОТ
Постојат неколку факти кои кора да се имаат на ум при инсталирање на
шпоретот. Обавезно водете сметка за подолу наведените мерки да
спречите било какви проблеми и/или опасни сит
уации до кои би можело
да дојде.
Шпорет може да се постави покрај друг мебел/апарат, под услов, на
местото каде што се поставува шпоретот да не е повисок од плочите за
готвење.
При изборот на место за шпоретот, пазете да не изберете место блис
ку до
фрижидерот. Блиску до шпоретот не смеат да се ставаат запаливи или
други материи, како што се завеси, водоотпорни ткаенини и сл.кои
можат брзо да се запалат.
Мора да постои најмалку 2 см празен простор измеѓу задната страна од
шпоретот и ѕидот, заради циркулација на воздухот.
Мебелот во близина на шпоретот мора да биде отпорен на собна
температура од преку 50 степени целзиусови.
Ако кујнскиот мебел е повисок од плочата со рингли на шпоретот, мора
да биде оддалечен најмалку 11 см од бочната страна на шпоретот
Минимално растојание на плочата за готвење на шпоретот и ѕидните
кујнски елементи и кујнскиот аспиратор прикажани се подолу.
Аспираторот мора да се постави на растојание од најмалку 650мм од
плочата за готвење.
Ако нема аспиратор, растојанието од висечкиот кујнски елемент не смее
да биде помало од 700мм.
Page 55

3.2 НИВЕЛАЦИЈА НА НОГАРКИТЕ
Вашиот шпорет има 4 подесиви ногарки. Бидејќи ногарките се поставени
на најниската позиција, потребно е да проверите дали се исти пред
поставување на шпоретот. Нивелација можете да вршите во вртење на
ногарките во спротивна насока од стрелките на часовникот, по потреба.
Уредот може да се подигне најмногу 15мм со помош на овие ногарки.
Кога ногарките правилно се наместат, уредот не смее да се влече за
преместување, туку треба да се подигне. За да ги подесите ногарките,
треба да ја извадите фиоката на шпоретот. Ногарките може лесно да се
подесуваат од внатрешната страна.
3.3 ЕЛЕКТРИЧНО ПОВРЗУВАЊЕ И СИГУРНОСТ
Обавезно придржувајте се на следниве упаства за електрично поврзување
Кабелот за заземјување мора да биде поврзан на таерминалот. При
поврзување на кабелот мора да обезбедите да на електричното
напојување се поврзе кабел со изолација. Ако не постои правилно
заземјен електрична приклучница во согласност со прописите во
земјата, веднаш повикајте овластен сервис.
Заземјената електрична приклучниац мора да се наоѓа блиску до
уредот. Нокогаш немојте да користите продолжен кабел.
Напојниот кабел не смее да ги допира топлите површини на
уредот.
Во случај да се оштети кабелот за напојување, обавезно повикајте
овластен сервис. Кабелот мора да биде заменет од страна на
овластен сервис.
Погрешното електрично поврзување може да го оштети Вашиот
уред. Во таков случај гаранцијата не важи.
Уредот е наменет за напон од 220-240V и 400V 3N V електрична
мрежа. Ако електрична мрежа иам поинакви вредности од овде
наведените, веднаш контактирајте го овластениот сервис.
Напојниот кабел не смее да ги доп
ира толите делови на задниот
дел од шпоретот. Во спротивно може да се оштети кабелот за
напојување и може да доведе до краток спој.
Произведувачот не сноси никаква одговорност за штети и
губитоци поради следните сигурносни норми.
Треба да се инсталира повеќеполен прекинувач во напојното коло
со од на контактите од најма
лку 3.0 мм за наминална струја од
32А со каснење.
Page 56

Уредот се испорачува за фиксна врска со електрично напојување.
Поврзувањето на уредот на електричното напојување мора да го
изврши овластениот сервис.
3.4 ОПШТИ ПРЕДУПРЕДУВАЊА И МЕРКИ
Вашиот уред е произведен во склад со соодветни сигурносни мерки за
електрични уреди. Одржување и поправки мора да бидат вршени од
страна на овластен сервис.
Надворешните страни на уредот се загреваат при работа. Внатрешната
површина на рерната и деловите кои обезбедуваат топлина и ја
спроведуваат пареата се многу жешки. Дури и ако уредот е исклучен,
овие делови за задржуваат топлината одредено време. Не ги допирајте
површините. Држете ги децата понастрана од шпоретот.
Не го напуштајте шпоретот додека говите на маст или масло. Може да се
појави оган во случај на екстремна топлина. Некогаш не сипувајте вода
на оган кој настанал од палење на маслото. Со капак покријте го тавчето
или тенџерето да се изгасни оганот и исклучете го шпоретот.
Шпорет и прекинувачите за подесување на топлината, како и часовникот
на шпоретот мора да се програмираат за користење на шпоретот, во
спортивно нема да работи.
Не уклучувајте ништо ако вратата или фиоката се отворени. Така
можете да го исфрлите од рамнотежа уредот или да го скршите капакот.
Не ставајте тешки или запаливи предмети кои горат (најлон, пластична
кеса, хартиено марамче итн.) во долната фиока.
Кога не го користете шпоретот на подолго време, исклучете го од
штекер и затворете го вентилот за гас (доколку има и гас)
Заштитете го Вашиот уред од атмосферски влијанија. Не го изложувајте
на сонце, дожд, снег, прашина и сл.
Page 57

4. ДЕЛ: КОРИСТЕЊЕ НА ШПОРЕТОТ
4.1 ОПШТ ИЗГЛЕД И ТЕХНИЧКИ КАРАКТЕРИСТИКИ НА ШПОРЕТОТ
ДОЛЕН ГРЕАЧ
ГОРЕН ГРЕАЧ
СКАРА
БРЗ ГРЕАЧ
4.2 ПРИКАЗ И ФУНКЦИЈА НА УПРАВУВАЧКАТА ТАБЛА
Тајмер, функциски прекинувач на шпоретот, термостатски прекинувач на
рерната, задна лева рингла, предна лева рингла, прдна десна рингла, задна
десна рингла.
4.3 УПОТРЕБА НА РИНГЛА И СТАКЛОКЕРАМИЧКА ПЛОЧА ЗА
ГОТВЕЊЕ
Електричните рингли се управуваат со помоѓ на 7-степен прекинувач. “0“
означува положба исклучено. Подолу се опишани останатите 6 степени.
1..... одржување на топлина
2-3...загревање со малку топлина
4-5-6.....готвење-печење и варење
Page 58

Горниот дел од ринглите е покриен со термоотпорен заштитен материјал.
Свртете го прекинувачот на електричниот шпорет на “3“ а потоа оставете да
работи околу 5 минути, за ринглата да обгори и да се зацврсти заштитниот слој
при првата употреба.
При користење на електричниот шпорет обавезно пазете на тоа тенџерињата да
имаат рамно дно. Ако се користат тенџериња со соодветна големина и што
имаат рамно дно, шпоретот ќе биде поефикасен. Не се препорачува да
користите мали тенџериња на голема рингла, бидејќи тоа доведува до губење на
топлината и непотребно трошење на енергија.
Обавезно проверете дали е ринглата исклучена, односно дали прекинувачот е во
позиција “0“ после готвење.
Исто така, не ја допирајте
ринглата, бидејќи ринглата ќе биде жешка и извесно
време после готвењето. Не дозволувајте деца да се приближуваат до ринглата.
Избришете ја електричната рингла со влажна крпа после користење. Ако
ринглата е нечиста, можете да ја чистите со помош на вода и детергент.
Загрејте ја ринглата неколку минути, за да се исуши после чистење. Ако немате
намера да ја користите ринглата подолго време, премачкајте ја со тенок слој на
масло.
Дуални или овални стаклокерамички рингли
Дуални или овални стаклокерамички рингли може да се загреваат на две
различни позиции.
4.7. KORISTEWE NA MEHANI^KIOT TAJMER
MANUELNO R
AKUVAWE RAKUVAWE SO TAJMEROT
KOGA ]E GO DONESETE VO SVRTETE GO DUGMETO VO
POZICIJA M,RERNATA ]E PRAVEC NA SKAZALKITE
RABOTI NEPREKINATO. NA SAATOT OD 0-100 MIN
KOGA ]E GO VRATITE NA KAKO NA SLIKATA.KOGA
POZICIJA 0 RERNATA NE ]E POMINE VREMETO RER
RABOTI. NATA ]E PRESTANE SO
Page 59

4.4 КОРИСТЕЊЕ НА РЕРНАТА
4.4.1 Користење на програмибилен електронски тајмер
Подесување на ден и час
Симболот “А“ че почне да трепка кога уредот ќе се приклучи на електрична
струја. Притиснете истовремено (+) и (-). Со овие копчиња може да се подесува
(зголемува или намалува) и време.
Подесување на аларм/време
Оваа функција може да се користи за подесување на алармот и времето, по
желба. Копчето “mode“ мора да го држите притиснато се додека LED
сијаличката за “ѕвонче“ не се вклучи. Саканото време се подесува со помош на
копчињата “+“ и “-“.
Програмирање на времето на траење на печење
За да го подесите времето на траење на печењето држете го притиснато копчето
“Mode“ се додека сигналната ламбичка “End“ не почне да препка. Саканото
време на печење се подесува со копчињата + и -.
Времето може да се подеси од 0-10 часови.
4.4.2 Употреба на механички тајмер
Мануелен режим
Кога копчето тајмер ќе се постави во позиција “М“ како што с егледа на
сликата, шпоретот може да функционира непрекинато. Шпоретот нема да
функционира ако копчето е свртено на позиција “0“.
Page 60

4.4.3 Употреба на функциските копчиња на рерната
Овој прекинувач ви овозможува да бирате функција на рерната. Финкцијата и
степените со нивните јачини се прикажани во следната табела. Исто така во
понатамошниот текст ќе најдете детален опис и упатство за користење
Се пали светилката во рерната
Се пали светилката во рерната, црвената сигнална сијаличка и вентилатор.
Врши функција на одмрзнување на замрзната храна
Се вклучуваат термостатот на рерната, сигналната светилка, долни и горни
греач
Се вклучуваат термостатот на рерната, сигналната светилка, брз греач и
вентилатор
Се вклучуваат термостатот на рерната, сигналната светилка, долни и горни
греач
Се вклучуваат термостатот на рерната, сигналната светилка, греачот за роштиљ
и ражен за пилешко.
Се вклучуваат термостатот на рерната, сигналната светилка, горен греач,
греачот за роштиљ и ражен за пилешко
Се вклучуваат термостатот на рерната, сигналната светилка, горен греач,
греачот за роштиљ и ражен за пилешко и вентилатор
Се вклучуваат термостатот на рерната, сигналната светилка, долен греач
Се вклучуваат термостатот на рерната, сигналната светилка, брз греач, долен
греач и вентилатор
Се вклучуваат термостатот на рерната, сигналната светилка, долен греач
Page 61

5 ДЕЛ: ЧИСТЕЊЕ И ОДРЖУВАЊЕ НА ШПОРЕТОТ
5.1 ЧИСТЕЊЕ
Погрижете се, сите контролни прекинували да бидат исклучени и Вашиот уред
да биде изладен пред чистењето. Извадете ја приклучницата од штекер.
Пред да почнете да користите средство за чистење на вашиот шпорет, проверите
дали е погодно и дали е препорачано од производителот. Не користете
кау
стилни пасти, абразивни средства во прав, жица или тврди алати за чистење.
Пред да почнете со чистење на внатрешноста на рерната, задолжително
извадете го кабелот од штекер. Внатрешноста на рерната најдобро се чисти кога
рерната е малку топла.
Чистење на капакот на шпоретот
За чистење на капакот од обете страни користете средство за чистење стакло, а
потоа избришете го со влажна крпа.
Чистење на стаклокерамички плочи за готвење
Пред да почнете да го чистите, шпоретот мора да добро да се олади. Погрижете
се средство
то за чистење да не содржи никакви чистици кои би можеле да го
оштетат стаклото. Стаклокерамичката плоча мора да се чисти со ладна вода.
Обојувањето на стаклокерамичката плоча не влијае на функционалноста и
трајноста на стаклокерамиката. Обојувањата се јавуваат поради неправилно
чистење, прскање од јадењата, а не поради промена на материјалот.
5.2. ОДРЖУВАЊЕ
Замена на светилката во рерната треба да ја изврши овластен сервисер. Тип на
резервната сијаличк
а мора да биде Е14 од 230V, 25W. Пред замена на
сијаличката, извадете го кабелот од штекер и почекај те да се олади.
Page 62

6 ДЕЛ: СЕРВИС И ТРАНСПОРТ
6.1 Пред да повикате сервис
Ако шпоретот не работи:
Шпоретот можеби не е приклучен на напојување, можеби осигурувачот
исклучил. Кај моделите со тајмер, можеби не е подесено времето.
Ако шпоретот не загрева:
Можеби не е подесен греачот преку контролниот прекинувач за регулирање на
температурата.
Ако светилката во рерната не свети:
Мора да проверите дали има стр
уја.
Мора да се провери дали е исправна сијаличката. Ако не е исправна, можете да
ја замените према упаството.
Печење: (ако горниот и долниот дел не печат подеднакво):
Проверете ја позицијата на полиците, време на печење и јачина на рерната у
скалд со уп
атството.
Ако и понатаму имате проблем со својот уред, повикајте овластен сревис.
6.2 Информации за транпортот
Ако треба да го транспортирате уредот:
Чувајте ја оригиналната кутија и транспортирајте го во неа. Следете ги ознаките
за транспорт на кутијата.
Горниот дел од шпоретот залепете го со лента, ставете раштита на ринглите.
Ставете картон помеѓу капакот и горниот дел од шпоретот.
Залепете картон на стаклото од рерната, така да плеховите и полиците не ја
оштетат вратата на рерната при транспортот.
Ако шпоретот нема оригинална кутија:
Превземете мерки за заштита на надворешните површини (стаклени и обоени
површини).
Page 63

 Loading...