

Page 1

Volkswagen Transporter
www.WestfaliaT3.info - a useful website for owners and enthusiasts of VW Westfalia T25 / T3 / Vanagon Campervans
Volkswagen Caravelle
Instruction Manual
Page 2

Congratulations on
www.WestfaliaT3.info - a useful website for owners and enthusiasts of VW Westfalia T25 / T3 / Vanagon Campervans
your
new
Volkswagen Transporter/Volkswagen Caravelle
You have made a
The Transporter I Caravelle is a versatile, million-fold proven vehicle.
wise
decision
But, you have not
you have also chosen
A quality ensured by the
work
by all involved.
And
with
the Transporter/Caravelle you have also chosen one of the largest and
Organizations.
In Europe alone there are around 7,000 V.A.G dealerships.
We
wish
you pleasant motoring:
Your
V0LKS WA G EN WER
only
KA
opted
quality.
most
KTIEN
for an outstanding vehicle
up-to-date production technology, careful selection of materials and conscientious
GESELLSCHAFT
with
modern, low maintenance technical components,
most
efficient Service
Page 3

Volkswagen
www.WestfaliaT3.info - a useful website for owners and enthusiasts of VW Westfalia T25 / T3 / Vanagon Campervans
Transporter
Volkswagen
Instruction
Caravelle
Combi
Van
Pick-up
Double Cab
With
Manual
petrol engines (including catalytic converter), Diesel engines,
and Automatic gearboxes and Four wheel drive (syncro)
Manual
Caravelle
Page 4

This
www.WestfaliaT3.info - a useful website for owners and enthusiasts of VW Westfalia T25 / T3 / Vanagon Campervans
Instruction
Transporter/Caravelle modeis available
ex-factory.
Certain vehicle models such as, for example
Multivan, Ambulance, Special
bodies and additional items (e.g. radio
sets, air conditioner) are not described
in this manual but are dealt
cial separate manuals.
This
manual contains many important
structions
should therefore read
cause
cles
and maintenance
of
the
one
of warranty
Special
Driving tips:
drive
ment-conscious.
In
addition
any supplements which
sary,
vehicle
the Service
a
Dealers
on
the
serves
vehicle and
of the
attention
safely, economically and environ-
to
the
following also belong
list
of act,
Manual is valid for all
with
in spe-
using
your
vehicle.
it
correct treatment
- in
addition
- to
stipulations
claims.
is in
is
These
drawn
tel!
this Instruction Manual and
carefully
of the
to
regular care
maintain
many cases also
for the
you how you can
may be
<le
•f
the
upholding
to
the chapter
neces-
to
V.A.
You
be-
vehi-
value
your
In the Service Schedule you
-
the
main identrication data
vehicle
-
the
Inspection
vals
-
the
operations which
at the Inspection
-
important
in-
In the
list
you will find
phone numbers
rope
details
Service.
If you
the publications, please consult
V.A.G Dealer.
Please
in this
with
tain
options
equipment
all
export
of addre3 ss
and
overseas
concerning
have
note thattjc items
Instructi
a * are or ' ily
models
on ce3
marlt
and Oil
detail;
the i '
of V ' \.G
any qit
on
or i are
is n' 9ot
ets.
djus
about Warranty.
; ind
th e
estions
rtain models. Such
always available
will find
for
your
change inter-
are
carried
(V.A.G
'resses
Dealers
also important
V.A.G Emergency
in
of
equipment
Manual marked
standard
only available
Service)
and
tele-
in Eu-
respect
your
on
cer-
out
of
as
in
Accessories, renewal of parts and
technical modifications
Accessories,
the vehicle
parts which have
us can cause damage
be detrimental
safety reasons therefore
only
V.A.G
Volkswagen parts.
These
been designed
proved
safety aspects.
have
our
liability
V.A.G accessories, Genuine Volkswagen
parts and the associated qualified advice
can
be
for Volkswagen Commercial vehicles.
They
correctly
the permissible technical modifications.
Please
liability
approved
cations - particularly with regard
stallations,
sions - which
When modifying
particular attention
pertaining
Volkswagen
parts
to be
fitted
in
and
and
unsuitable replacement
not
been approved
to the
to
driving safety.
accessories
accessories and these parts have
by us,
conditions.
obtained from
will also
appreciate that
for
for
your
particularly with regard
This
backing
and are
by us and by
in
respect
carry
out the
fully informed about
damage caused
attachments
are not
your
to
AG.
to the
bodywork" published
vehicle
you
should
and
vehicle
means that
of the
all V.A.G
we
can accept
by
technical modifi-
and
permissible.
vehicle, please
"Regulations
on
by
and
For
use
Genuine
and ap-
to
they
legal
Dealers
installation
no
parts
not
to in-
conver-
pay
by
Page 5

Warning lamps 6
www.WestfaliaT3.info - a useful website for owners and enthusiasts of VW Westfalia T25 / T3 / Vanagon Campervans
Handbrake, gear and selector
Keys,
doors, flaps 7,9,10
Windows, mirrors 11,12
Seat
belts, head restraints . }. . . 13,15
Seats
16
Stowing luggage 22 Warning lamps
Running-in and afterwards 56 environment-conscious 58
Fuel,
filling
Engine
tank
oil, gear oil
.
68,
74,75 Brake system, pedals 81,83
E
First aid kit, warning triangle
Vehicle
tools
Engine
da* 119
levers 23,24,28
Differential locks 25
Steering lock/ignition switch,
Starting engine 30
Driving safely, economically and
Power
assisted steering 76
Cooling
70 Windscreen washer 80
99
Fuses,
99 Headlights 105
system 77
Care
of car 93
Maintenance, Inspection intervals ... 97
Spare
wheel, changing wheels . . 100.101
bulbs 102. 104
Vehicle
description 110
Functional description 117
Fuel
consumption, performance . . . 120 Weigh'
Spark
plugs, vee belts 125 Dimt
Wheels,
tyre
pressures 126
Instruments 37
Switches 39
Turn signals, windscreen wipers . . 41,43
Cruise
control system 42
Heating, ventilation, auxiliary heater. 44, 47
34
Sliding
roof,
sun roof 52
Trailer towing 60
Driving a four-wheel drive vehicle .... 63
Battery 84
Wheels
86
Emission
Difficult
Lifting vehicle 98
Windscreen wiper blades 109
Emergency starting, towing,
tow starting 111, 112
Iden
control system 90
operating conditions 91
liter
., :ities 131,134
i
•:
vy
ghtf
127,130
• 135
There
is a
detailed
alphabetical
index
at the end of
this
manual
Page 6

INSTRUMENT
www.WestfaliaT3.info - a useful website for owners and enthusiasts of VW Westfalia T25 / T3 / Vanagon Campervans
PANEL
Page 7

INSTRUMENT
www.WestfaliaT3.info - a useful website for owners and enthusiasts of VW Westfalia T25 / T3 / Vanagon Campervans
PANEL
Page
1 - Air vents 44
2
- Air vents 44
3
- Light switch and instrument
lighting regulator 39
4 - Brake warning
5
- Speedometer 37
light
36
6 - Warning lamps 34
7 -
Fuel
gauge and coolant
temperature gauge 38
Clock
or rev counter 37
8 - Heated rear window switch . . 39
9 - Emergency
light
switch .... 39
10 - Fog light/rear fog
11 - Air vents 44
12 - Ashtray 54
13
- Loudspeaker opening
14 -
Fuse
box 112
15
- Turn signal and dip switch ... 41
16 - Horn control
17 - Digital clock 37
18 - Steering lock/starter switch . . 30
19
- Auxiliary heater switch 47
20 -
Cold
starting aid
(diesel
engine) 32
light
switch . 40
Page
21 - Blower switch for passenger
compartment heat exchanger . 46
22 - Windscreen wiper and washer
lever
43
23
- Blower switch and levers for
ventilation and heating 44
24 - Radio') or cover plate
25
- Socket/cigarette lighter .... 54
26 - Air vents 44
27 - Shelf 55
Knobs
and warning lamps for the
ential locks on Transporter/Caravelle
syncro
- see page 26.
Note
Some
of the items of equipment listed
are only
fitted
on certain models or are
optional extras.
') For vehicles
ating instruction leaflet is also
See
section
with
a factory
remarks on page 110 of "Do-it-yourself"
when service installing a radio.
fitted
radio, an oper-
enclosed.
Page
differ-
Page 8

INSTRUMENT
www.WestfaliaT3.info - a useful website for owners and enthusiasts of VW Westfalia T25 / T3 / Vanagon Campervans
PANEL
WARNING
Symbol
m
(®)
889
A
ffl
io
H
LAMPS
Turn signals
Generator
Glow
Engine
Headlight high beams
Coolant
Brake
Anti-locking brake system (ABS)
Emergency
Rear
Fog
Differential locks (syncro)
© 34
plugs-Diesel
oil pressure '®
temperature/coolant level ©
system ©
light
system
window heating
lights/rear fog
light
Page
35
35
34
35
35
36
36
39
39
40
26
Notes
• If one of the lamps marked
comes
on when driving, stop at once
and
switch engine off. Details can be
found on the pages given.
• Some of the lamps shown here are
only on certain models or are optional
extras.
On the other hand
lamps
which are not listed here because
they
are installed on so few vehicles.
with!{jP'
there
are
Page 9
KEYS
www.WestfaliaT3.info - a useful website for owners and enthusiasts of VW Westfalia T25 / T3 / Vanagon Campervans
OPERATION
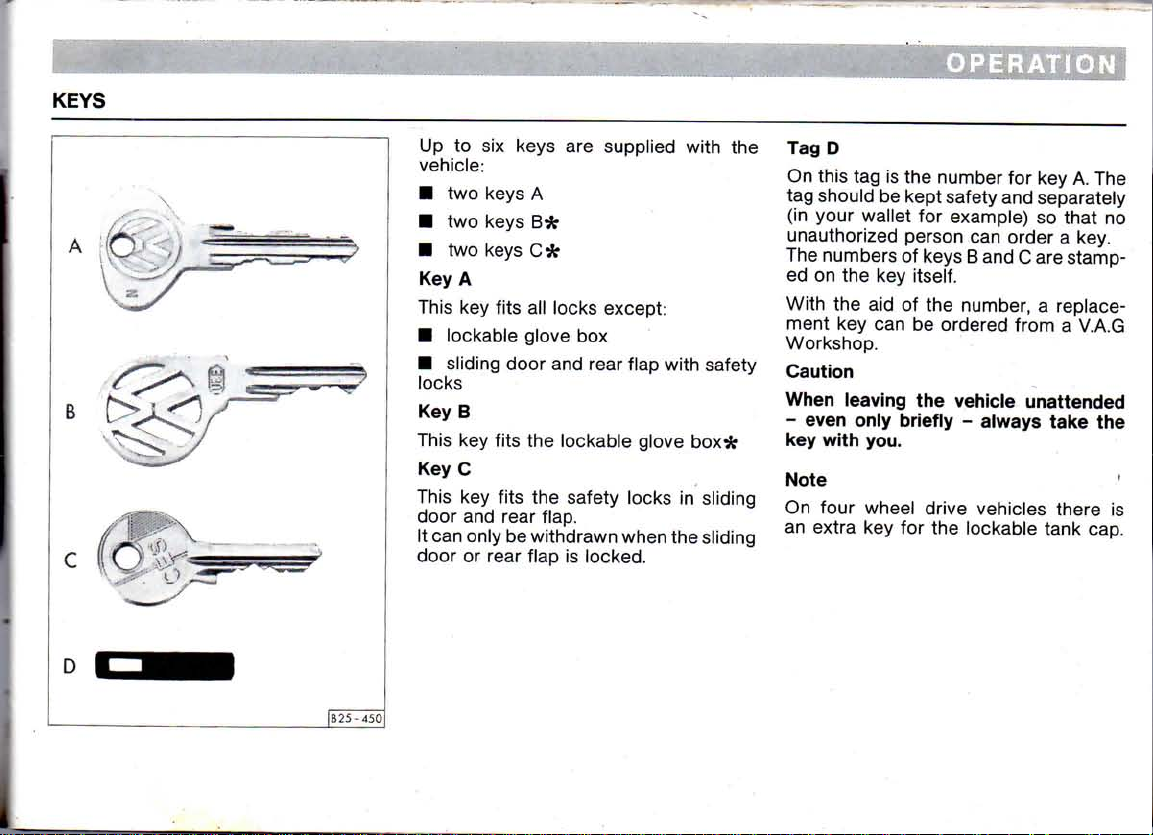
Up
to six keys are supplied
vehicle:
\
• two keys A
• two keys B*
• two keys C*
Key A
This
key
fits
all locks except:
• lockable glove box
• sliding door and rear flap
locks
Key B
This
key
fits
the lockable glove box*
Key C
This
key
fits
the safety locks in sliding
door and rear flap.
It can only be withdrawn when the sliding
door or rear flap is locked.
with
with
the
safety
Tag D
On
this tag is the number for key A. The
tag should be kept safety and separately
(in your wallet for example) so
that
no
unauthorized person can order a key.
The numbers of keys B and C are stamped
on the key itself.
With the aid of the number, a replacement key can be ordered from a V.A.G
Workshop.
Caution
When
-
even
key
with
leaving
the
only
briefly - always
you.
vehicle
unattended
take
the
Note
On
four wheel drive vehicles there is
an extra key for the lockable tank cap.
D
|B2S~4S0
Page 10

OPERATION
www.WestfaliaT3.info - a useful website for owners and enthusiasts of VW Westfalia T25 / T3 / Vanagon Campervans
CENTRAL LOCKING SYSTEM*
With this system all the doors, and —
depending on the position of the tailgate
lock — also the tailgate can be locked
and unlocked.
The system is operated from the driver's
door, and front passenger door — from
outside with the key, from inside with
the locking knob.
Note
The central locking system can only
function correctly when the driver's and
front passenger doors are properly
closed.
When locking, the locking knobs on all
doors must move down. If the knob on one
door does not move at any time, open the
door concerned and close it properly.
Caution
When the locking knobs in the driver's
and front passenger doors are pressed
down all the doors are locked. Children
should therefore not be left on their
own in the car because when the doors
are locked it would be difficult to help
in an emergency.
Sliding door and tailgate can be locked
or unlocked separately with the key.
b
To unlock the tailgate insert key and turn it
to right (c). Hold in this position and press
button in.
If the key is withdrawn in the horizontal
position (a), locking of the tailgate will be
controlled by the central locking system
when it is closed again.
When the key is withdrawn in the vertical
position (b) and tailgate closed, it will be
locked all the time. The tailgate can then
only be unlocked with the key.
Note
if the central locking system shoul:
develop a fault, all the locks can be
operated normally, see next page.
The sliding door can be secured al
released separately with the safety catc
Page 11

DOORS
www.WestfaliaT3.info - a useful website for owners and enthusiasts of VW Westfalia T25 / T3 / Vanagon Campervans
Cab doors
From
outside
locked
and unlocked
unlocking the locking knobs go up, when
locking they go down.
The
front
from outside
press
locking knob down and close door.
The driver's door cannot be locked when
open by pressing the locking knob and
closing
door. This prevents you from
leaving the key in the car and forgetting it.
From
inside
pressing
long as the knobs are pressed down the
doors cannot be opened from inside or
outside.
We
advise you not to press the knobs
down when vehicle is in motion so
the door can be opened from outside in
an emergency.
both cab doors can be
with
the key. When
passenger's door can be locked
without
the door can be locked by
down the locking knobs. As
using the key: Just
that
Sliding door
From
outside
locked
and unlocked
fully open the door is held by a hook.
To close sliding door
Press
the door handle down to release
the hook and slide the door
wards.
The sliding door can also be locked from
outside
locking catch in and close door.
From
inside
by pushing down the locking catch near
the door opening lever.
As
long as the catch is in the lower position the door cannot be opened from
inside or outside.
When the vehicle is in motion, the door
must always be properly closed but
when carrying passengers the locking
catch should be
so
that
outside in an emergency.
the sliding door can be
with
the key. When
from
outside.
firmly
without
the door can be opened from
using the key:
the sliding door is locked
left
in the upper position
-
for-
Press
Child-proof
When the child-proof catch is engaged lever on door lock turned upwards - the
inner lock release lever is inoperative.
The door can only be opened from outside
with
position.
catch
the locking catch in the up
on sliding door*
9
Page 12

OPERATION
www.WestfaliaT3.info - a useful website for owners and enthusiasts of VW Westfalia T25 / T3 / Vanagon Campervans
TAILGATE
To open the tailgate when key hole is
horizontal,
lift
tailgate.
Note
The
with
To
close tailgate pull it down and slam
it to gently.
After
on it
perly
could open suddenly
moving
turned
Do not
exhaust
the
vehicle
Opening
On
vehicles
hind the cab and seats in rear compartment, the tailgate can be opened from
inside
cap
gate.
right
press the lock cylinder and
lock cylinder can also be pressed in
the key.
closing the
briefly
closed -
even
in lock.
drive
gases are
from
in an emergency. To do this the
must be taken off the lock in tail-
Then press release lever to the
and open tailgate.
tailgate
to
make
otherwise
though
with
the
interior.
always
sure
that
the
when
the key has
tailgate
then
able
inside*
with
a full-width partition be-
pull
it is pro tailgate
vehicle
been
open as
to
enter
up
is
ENGINE COMPARTMENT COVER
The
cover is in the luggage compartment. To remove cover
catches
On
panel.
to the
left.
the Pick-up, the flap is in the rear
turn
the two
10
Page 13

WINDOWS
www.WestfaliaT3.info - a useful website for owners and enthusiasts of VW Westfalia T25 / T3 / Vanagon Campervans
'IjH.fM'KI'
Vent wings*
To open - Press button in fastener and
swing fastener forwards.
To close - Press window against seal at
front and turn fastener to the rear until
button engages.
Sliding windows*
To open, press catch down and slide
dow along.
win-
Door windows
These windows are opened and closed
with the crank in the door
trim.
Electrical control*
When the ignition is on the windows
can be opened and closed electrically.
The switch is in the door
The window in the passengers door can
be controlled from the driver's side.
Caution
Careless and uncontrolled closing of
the windows can cause injuries. Take
care therefore when closing the
dows. When leaving the vehicle always
take the keys with you.
trim.
win-
11
Page 14
OPERATION
www.WestfaliaT3.info - a useful website for owners and enthusiasts of VW Westfalia T25 / T3 / Vanagon Campervans
MIRRORS
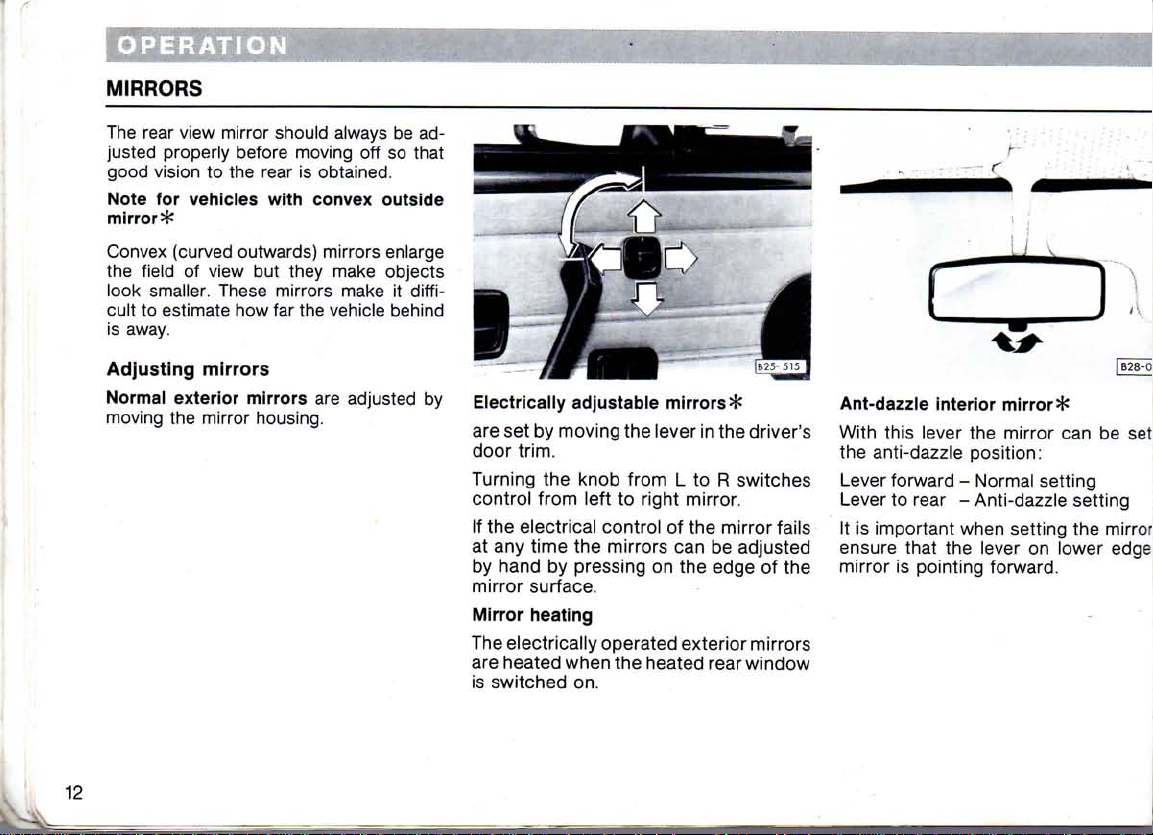
The rear view mirror should always be ad-
justed properly before moving off so that
good vision to the rear is obtained.
Note for vehicles with convex outside
mirror*
Convex (curved outwards) mirrors enlarge
the field of view but they make objects
look smaller. These mirrors make it
cult to estimate how far the vehicle behind
is away.
Adjusting mirrors
Normal exterior mirrors are adjusted by
moving the mirror housing.
diffi-
Electrically adjustable mirrors*
are set by moving the lever in the driver's
door
trim.
Turning the knob from L to R switches
control from left to right mirror.
If the electrical control of the mirror fails
at any time the mirrors can be adjusted
by hand by pressing on the edge of the
mirror surface.
Mirror heating
The electrically operated exterior mirrors
are heated when the heated rear window
is switched on.
Ant-dazzle interior mirror*
With this lever the mirror can be set :z\
the anti-dazzle position:
Lever forward - Normal setting
Lever to rear - Anti-dazzle setting
It is important when setting the
ensure that the lever on lower edge
mirror is pointing forward.
mirror-jj
12
Page 15
SEAT
www.WestfaliaT3.info - a useful website for owners and enthusiasts of VW Westfalia T25 / T3 / Vanagon Campervans
OPERATION
BELTS
It has been proved
good protection in accidents. It most
countries
belts
Put your
also in
All vehicle occupants should also always
those on the
Even
wear
point type).
The
tance
How
on
therefore
is required by law.
belt
town
wear
the
pregnant women should always
a seat belt (preferably the three
routing of the belt is of major impor-
to the protective effect of the belt.
the belt should be worn is described
the next pages1).
on
before
traffic.
seat
rear
seats.
that
the
belts
seat
belts
wearing
every
journey
- including
of
give
seat
-
Safety
for children
Children under 12 years old should nor-
mally
be carried on the
velle
and Combi) and should, depending on age, be secured
childs
restraint
belt.
•
Children up to about 6 years of age
should,
depending on
a
reclining safety seat or a child's seat.
•
Children above 6 years of age can
also
use a lap belt.
•
Babies
also
be carried on the front passengers
seat
in a restraint system specially
approved
•
Larger children may use three point
belts
provided that the belt
over
centre of shoulder and not against
the child's neck - see illustration on next
page.
If
necessary,
can
be
used.
The
installation
restraint
accordance
manufacturer
system or the existing
up to about 8 months old can
for this purpose.
systems must be done in
with
concerned.
rear
seat
(Cara-
there
with
a
size
be carried in
passes
a safety seat cushion
and use of child
instructions of the
General notes
Only
one person is to be secured with
each
belt. Never secure two people
(even
children)
On vehicles
seats,
always
underneath
The
belt should not be worn over hard or
breakable
key
rings, pipes, etc.)
cause
injury to the body.
Loose,
bulky clothing (e.g. overcoats
over
jackets) affects the fit and function
of the belts.
The
belt must not be jammed anywhere
or
rub on any sharp
The
slot for the belt tongue must not be
blocked
wise
The
wise
perly
section).
with paper or anything as other-
the tongue cannot engage properly.
belts must be kept clean as other-
the retractors may not work pro-
(see
with one belt.
with
armrests* for the
ensure
the armrests.
articles
also
that
(glasses,
because
edges.
"Care
and Maintenance"
the
ball
belt
this can
runs
pens,
In some export countries the belts fitted
may
differ from the belts described
here.
13
Page 16

OPERATION
www.WestfaliaT3.info - a useful website for owners and enthusiasts of VW Westfalia T25 / T3 / Vanagon Campervans
Seat belts which
are
damaged
or
have
been stressed in an accident and stretched must
be
replaced - preferably
by a
V.A.G workshop. The anchorages should
also
be
checked.
Belts
can be
seating
positions
with belts
of belts should
service installed
on
at
the factory.
be
done
vehicles
The
by a V.A.G
for all
not
fitted
installation
workshop because these workshops
have
the
the
information necessary
job
properly.
to do
Note
On the Van there are no belt anchorages
in
the
load compartment.
|B25-
521
Three-point inertia reel belts*
The inertia reel belt gives complete freedom
of
Sudden braking
belt
The retractor mechanism will also lock
the belt when accelerating, driving down
steep gradients
Putting
Pull
across
into
tongue engages audibly
The shoulder part of the belt must
run roughly across the centre of the
shoulder as shown - on no account
against
contact
movement when pulled slowly.
to
lock.
however
or
will cause
cornering hard.
belt on
the
tongue slowly
your
the
chest and hips
lock part fitted
and
and
on the
(pull
smoothly
seat until
to
the neck - and be firmly in
with
the body.
the
push
it
check).
On
the
front
seats
the
shoulder belt can
a
belt anchorage height adapter.
be
altered
routing
by
installing
of fe
The lap part of belt must always •
tightly
across the lap. Pull belt
tight
1
necessary.
Particularly in the case of pregnar-
women
the lap part of the belt should be
as
low across the lap as possible s:
that no pressure is exerted on the abdomen.
The belt must not be twisted.
The backrest of the front seats mus"
not be inclined too far to the rear as
otherwise the belts are no longer
effec-
tive.
Taking
belt off
To release
coloured button
will
then spring
Pass
hand
belt
up
the
the
tongue towards
so
that
the
properly.
belt, press
in the
lock.
out.
retractor
the
The
the
can
orange-
tongue
door
b.
roll
the
Page 17

HEAD
www.WestfaliaT3.info - a useful website for owners and enthusiasts of VW Westfalia T25 / T3 / Vanagon Campervans
RESTRAINTS*
RATION
Belt height adjustment
Two anchorage points
the
cab for the
This
makes
body
Lap
belt*
The buckle is used in the same way as
the three-point inertia reel belts.
The belt must always fit
the lap.
To lengthen belt
angles to belt and pull belt through to the
required length.
The belt
cap
are
To shorten belt it is
pull
the
The surplus belt length
moving
it
size.
possible
is
easier
pressed together.
free end
the
plastic slide.
are
upper belt attachment.
hold the tongue
to
adjust
of
belt.
provided
to
adapt belt
tightly
if
tongue and
only necessary
is
taken
in
to
on
across
at
right
to
up by
Two-point inertia reel belts*
The individual seats*
compartment
inertia
reel belts.
freedom
ly but sudden braking
the belts to lock. The automatic retractor
mechanism
driving down steep gradients
ing
hard.
Putting
Pull
the
across
the hips and push
part fitted
engages audibly
The belt must not be twisted. The belt
must
always fit
slightly if necessary.
Taking
To release
coloured button
will
then spring
Pass
the tongue across
the retractor can roll the belt up properly.
are
of
movement when pulled slow-
will also lock
belt on
tongue slowly
on the
belt off
the
out.
in the
fitted with
They
however
seat until tongue
(pull
to
tightly,
belt press
in the
passenger
two
give
complete
will
the
belt when
or
and
smoothly
it
into the lock
check).
pull belt up
the
lock.
The
by
hand
point
cause
corner-
orange
tongue
so
that
The head restraints must be adjusted
properly to suit the body size. Only
correctly adjusted head restraints,
together
effective protection.
with
the seat belts, provide
Adjusting height
Grip
at
up
be
Removing
Push
in backrest with a small
lift head restraint
To
the guide rings
of clip
restraint rods into
engage audibly.
Note:
The spring clips need
on vehicles which have a rear seat/fully
reclining
It is
ing
rear,
removed.
sides with both hands
or
push down. The upper edge should
roughly
at eye
level.
and installing
spring clips
install,
first press the spring clips into
is at the
seat bench.
quite sufficient
spring clip extensions back
to
enable the head restraints
out.
so
rear.
out of
screwdriver and
that
the
Then
the
guides until
not be
to
push
and
pull
slotted rings
straight part
push head
they
taken
out
the
protrud-
to the
to be
Page 18

SEATS
www.WestfaliaT3.info - a useful website for owners and enthusiasts of VW Westfalia T25 / T3 / Vanagon Campervans
Individual
ger
To
Lift
seat.
further
IN CAB
driver's
and
front
passen-
seats
move
seats back
lever (1) on outside of seat and move
Then release lever and move seat
so
that
or
forward
catch engages.
Caution
• For
safety
only
be
stationary.
To
adjust
Take
weight off backrest, press lever (2)
on
right
move backrest to desired position by
moving upper part of body then release
lever.
reasons the
adjusted
backrest
side of seat frame down and
when
rake
seats
vehicle
should
is
|B25-548|
Caution
• Do not
when
belts
lower
on the
are
then
the
move
no
longer
backrest
because the
fully
too far
effective.
seat
Armrests*
The armrests on the
hinged up if they are not required.
The angle of the armrests can be adjusted
as
required
neath the armrest.
with
front
seats can be
a knurled knob under-
To
take
seat
out
• Slide seat forward
tion.
•
Lift
hook (3) against spring-loac -;
at the same time pull lever (1), he : I
and slide seat past stop.
•
Release
seat
forward out of runners.
• The hook need not be
putting
lever lifted, can
stop.
Seat
Seat
seat
can be heated electrically whe-
ignition is on.
Further details are give unce
"Switches",
Head
The head restraints must be adjusted ::
body
hook and lever and p.r
seat back as the seat,
heating*
cushion and backrest of drive's
page 40.
restraints*
size
- see page 15.
into 1 st latch c: :-
lifted
just
be pushed past ~^
w-a
with
rm
Page 19

SEATS IN PASSENGER COMPARTMENT*
www.WestfaliaT3.info - a useful website for owners and enthusiasts of VW Westfalia T25 / T3 / Vanagon Campervans
OPERATION
Two seater bench*
The seat is moved back or forward in
same way as the single seats. The lever
is at the front of seat.
When seat is moved, the backrest rake
is also altered.
To remove
Remove in same way as the single seats.
Bolts on right and left of backrest must
be removed.
Swivelling seats*
On vehicles with swivelling seats the
passenger's seat can be turned 180° to
the right and the driver's seat 90° to the
left. To turn seats, push them forward
slightly or open door, and pull the release
lever. The handbrake must be released
before turning driver's seat. (Engage a
gear to prevent vehicle from rolling
away.)
The swivelling seats must always be
facing forward when vehicle is in
motion.
Removing and installing centre seat
bench
The centre seat is pushed into two
ners and secured with four screws. To
take seat out the floor covering must be
lifted and the screws removed. The seat
can then be pulled out of the runners
sideways through the opened sliding
door.
Note
On vehicles with floor carpeting, the
securing strip in the sill area must be
taken off first and the carpet then lifted
carefully. Take care when doing this to
ensure that the carpet does not tear at
the cut-outs.
run-
Removing and installing rear bench seat
The rear seat cushion is bolted to the
side panels on each side with one bolt
under the upholstery. Remove bolts and
take lower part of seat out.
The seat backrest is secured at each side
with two bolts. The bolts between seats
and backrests also serve as seat belt
anchorages.
When refitting the seat and backrest,
ensure that the seat belt is also correctly installed.
Page 20

INDIVIDUAL SEATS IN PASSENGER COMPARTMENT*
www.WestfaliaT3.info - a useful website for owners and enthusiasts of VW Westfalia T25 / T3 / Vanagon Campervans
Centre seats
The centre seats
backrest angle adjusted.
can be
turned
and the
Turning
Lift lever
the desired position and
again.
It
the
necessary
seat
(see
backrest
to
can be
illustration), turn seat
is
very
raise
it
turned.
slightly before
let
lever engage
low, it may be
the
Adjusting backrest angle
Take weight
to
down
to
the
part
of
Removing
Lift
the
seat
out.
The base which remains can be removec
when carpet
Caution
When
sure that base
properly.
off
(see
desired position
body
lever used
the
backrest and press lever
illustration). Adjust backrest
and
release lever.
to
turn seat
is
lifted.
seats
are
installed again
and
seats
by
moving upper
and
are
secured
take
en-
Page 21

OPERATION
www.WestfaliaT3.info - a useful website for owners and enthusiasts of VW Westfalia T25 / T3 / Vanagon Campervans
Rear
seats
The height, seat angle and backrest
angle of the rear seats can be adjusted.
Mechanical
Adjusting
Press
lever B to
position of seat as required by moving
body weight.
Adjusting
Press
lever B alternately at
rear and by moving weight of body to
front
and rear
adjustment
seat
angle
front
seat
height
lift
or lower the seat.
or rear and adjust
front
and
Adjusting
Take
A
at side of backrest.
Caution
When
must
as
otherwise
fully
backrest
weight off backrest and
vehicle
not be
effective.
is in
motion,
inclined
the
belts
angle
turn
the
too far to the
backrests
are no
knob
rear
longer
19
Page 22

OPERATION
www.WestfaliaT3.info - a useful website for owners and enthusiasts of VW Westfalia T25 / T3 / Vanagon Campervans
1
1
1
Electrical adjustment*
Adjusting seat angle
Press switch A at front Front of seat is raised
Press switch A at rear Front of seat is lowered
Press switch B at front Seat is raised at rear
Press switch B at rear Seat is lowered at rear.
Adjusting seat height
Press switches A and B at front -
Seat is raised
Press switches A and B at rear -
Seat is lowered
Adjusting backrest angle
Press switch C at front Backrest moves up
Press switch C at rear Backrest moves down.
|B25-382
Caution
When vehicle is in motion, the back-
rests should not be inclined too far to
the rear otherwise the seat belts are no
longer fully effective.
20
Page 23

OPERATION
www.WestfaliaT3.info - a useful website for owners and enthusiasts of VW Westfalia T25 / T3 / Vanagon Campervans
REAR SEAT/FULLY
The rear seat/reclining seat bench can
be converted
Before doing this, the backrests of the
center row of seats must be tipped
ward. The latching levers are located on
the outsides of the
backrests.
To
convert
• Remove head restraints* -
see
page 15.
• Unlatch the backrest
grip on the reverse side of the backrest,
and fold the backrest forwards.
into
reclining
RECLINING
a large sleeping area.
right
and
seat
bench
with
SEAT BENCH*
for-
left
hand
the release
| &25-^05 \
• By pulling the release grip
towards the
bench are pulles in a forward direction.
• Finally, fold the seat backrest
the rear to
Returning
position
• Pull the seat backrest upwards out of
the horizontal position.
• Slide the seat bench, together
backrest to the rear again.
•
Push
tion.
front,
the backrest and seat
form a flat
seat
bench
backrest back
sleeping area.
to
into
further
original
locking
fully
with
posi-
to
• Pull the seat belts out again between
backrest and seat, so
position for use.
•
Install
see
The space underneath the seat bench
can
For
bench slightly at the
in the
located on the
side,
head restraints* -
page 15.
be used as a storage compartment.
this, it is necessary to
lifted
position when the
is swung upwards.
that
they are in a
lift
front.
left
on the sliding door
the seat
It
will
remain
strut,
21
Page 24

OPERATION
www.WestfaliaT3.info - a useful website for owners and enthusiasts of VW Westfalia T25 / T3 / Vanagon Campervans
LUGGAGE
COMPARTMENT/
LOAD SURFACE
To
enlarge
•
Release
• Fold backrest down to seat
The backrest locks automatically when
hinged to the rear.
Instructions on using the rear/reclining
seat*
Notes
ment
or the
• The load must be stowed so
cannot slip or even fly forward when the
brakes are applied.
• In the interests of good handling the
load
should,
between the
loads
and the permissible gross vehicle
weight should on no account be
ed.
• Ensure
rear window is not damaged by articles
rubbing against it.
Never
ment
not
haust
luggage
space*
backrest by pulling loop
are given on page 21.
on using the
load
wherever
axles.
that
drive
with
properly
gas can be
luggage
surface
possible,
The permissible axle
the heater element in the
the
luggage
closed
drawn
otherwise
into
compart-
that
it
be carried
exceed-
compart-
ex-
the body.
FOLDING
LUGGAGE
COMPARTMENT COVER*
The folding cover can be pushed
together to
together.
When the
the rear or the rear part to the
appropriate rod must be jerked out of
the retainers. When the rear rod is
pushed fully forward it engages.
Notes
Only
placed
cover.
Ensure
• The cover is correctly located in its
mountings when vehicle is moving.
• No items of luggage can fly forward if
brakes are applied sharply.
• The heater element in the rear window is not damaged by articles rubbing
against it.
• Vision through rear window is not
obstructed otherwise a second outside
mirror must be fitted.
light
on the
that:
front
or rear or taken out all
front
part is to be pushed to
articles
of
clothing
luggage
compartment
front
the
may be
ROOF RACK
When a roof rack is to be
following:
• Only use roof racks which are supported in the rain channel
• Distribute load uniformly.
Do
not exceed permissible roof load o-
permissible gross vehicle weight.
Further details on pages 127-129.
• When carrying heavy or large objects
on the
roof,
bear in mind
handling changes due to the alteratioin centre of gravity and the increase:
area
exposed to the wind. Driving style
and speed must be modified to allovs
for this.
used,
that
the vehicla
note th
22
Page 25

OPERATION
www.WestfaliaT3.info - a useful website for owners and enthusiasts of VW Westfalia T25 / T3 / Vanagon Campervans
COVER* (Pick-up)
The cover must be secured properly be-
hind the cab.
The cover is correctly secured when the
rod incorporated in the cover engages in
the rain channel at the rear of the cab
and the
ed
When the cover and rails have been re-
moved,
ing to ensure
properly in the rain channel (if necessary
renew seal).
left
and
right
to the canopy frame.
care should be taken when
that
hand ends are bolt-
the foam
seal
refitt-
is stuck
DROPSIDES (Pick-up)
To
drop side boards - pull handle outwards to release locking pin und swing
down to
On
tailboard,
be
down.
lift
vehicles
placed
hook.
with
not
more
on the
support
than
tailboard
cables for the
150 kg should
when
it is
HANDBRAKE
The handbrake is located between the
front
seats.
To
apply the handbrake pull lever up
firmly. On hilly roads the 1st gear or on
automatic gearboxes the parking lock,
should also be engaged. The handbrake
should always be applied so
it is not possible to drive off accidentally
with
handbrake slightly on.
When handbrake is applied
ignition on, the brake warning lamp*
comes
on.
To
release handbrake, pull lever up
slightly, press locking knob in and push
lever
right
down.
firmly
with
that
the
Page 26

MANUAL GEARBOX
www.WestfaliaT3.info - a useful website for owners and enthusiasts of VW Westfalia T25 / T3 / Vanagon Campervans
.
|B25-452
1B25-453
|
B25-454
4 speed gearbox
Engaging reverse
Move lever in neutral to the left, press it
down and move it further to the left stop
and then push it forward.
Only engage reverse gear when vehicle
is stationary.
When engine is running, depress clutch
fully and wait a few seconds before mov-
ing gear lever, to prevent grating noises.
When reverse gear is engaged with
igni-
tion on, the reversing lights* come on.
5 speed gearbox^
To engage 1st gear move lever past
pressure point to left stop and then pull
it back.
One normally moves off in 1st gear but
on vehicles with the 44, 57 and 82 kW
engine and 5 speed gearbox the rear
axle ratio is different so that one can
move off on the level with a light load
in 2nd gear.
To engage reverse gear move lever past
pressure point to left stop, press it down
and push it to front.
4 + G
gearbox
(syncro)
Engaging crawler gear (G) on syncro
Move lever in neutral to the left, press it
down and move it further to the left stop
and then pull it to the rear.
Note
When driving you should not rest your
hand on the gear lever. The pressure of
your hand is transmitted to the shift forks
in the gearbox and can cause premature
wear of the forks.
24
Page 27

DIFFERENTIAL LOCKS*
www.WestfaliaT3.info - a useful website for owners and enthusiasts of VW Westfalia T25 / T3 / Vanagon Campervans
When negotiating a curve, the wheels of
a vehicle cover different distances. To
balance out the differences in wheel
speeds, differentials are incorporated in
the driving axles. However, these differentials have a distinct characteristic: As
soon as one wheel on an axle commences to spin on a slippery surface, only
very little traction is available, even
though the other wheel is on a hard
surface.
Using the differential locks the wheels of
one axle can be locked together and the
traction is once again obtained.
On the Transporter/Caravelle there are
two different types of differential lock:
Vehicles with rear wheel drive have a
limited slip differential in the rear axle and
4 WD vehicles (syncro) have selectable
mechanical locks in front and rear differ-
entials.
Limited slip differential*
(Rear wheel drive)
The locking effect is obtained by means
of plates which are arranged in the differential as a sort of multi-plate clutch.
With this differential the locking effect is
not 100% but only approx. 45%. Contrary
to vehicles with 100% locking, the steer-
ing behaviour on the road, particularly in
sharp curves, remains almost un-
changed.
The effective locking force is dependent
on the speed difference of the two driv-
ing wheels. This means: the larger the
difference, the larger is the locking force
of the differential.
Driving tips
In normal conditions the vehicle can be
driven just like every other vehicle. At the
beginning it may take a bit of getting
used to when driving through sharp curv-
es.
This is due to the fact that a slight
locking effect is always present.
Furthermore in isolated borderline
ditions where, on the one hand the frictional resistance of the driving wheels
on the ground differs a great deal and,
on the other hand, a large amount of
power must be transmitted to move off,
it may be found that the maximum pos-
sible locking effect is not obtained in the
differential. One notices this because
one wheel spins while the other does
not turn at all. In this case one should
engage and disengage the clutch gently
and repeatedly. This will prevent the
differential from becoming overheated.
con-
Gear oil
The oil level does not need checking be-
tween the intervals given in the Service
Schedule. The oil also does not need
changing.
V.A.G workshop should be contacted
because the gearbox must be filled with
a special oil.
To top up or fill after a repair a
25
Page 28

Selectable
www.WestfaliaT3.info - a useful website for owners and enthusiasts of VW Westfalia T25 / T3 / Vanagon Campervans
(syncro)
With the selectable differential locks, the
wheels
gether (100%). As no compensation
takes
dling and steerability are affected - particularly in the
tial lock.
Attention
The
differential
under
described on the
differential
on one axle are fully locked to-
place when cornering, the han-
case
the
locks may
limited
locks*
of the
front
differen-
only
specific conditions
following
be used
pages.
Engaging the
The
differential locks are engaged and
disengaged
centre of the instrument panel
vehicle
stationary or moving.
Left
knob
The
knob for the
secured
tentionally. The knob must therefore be
turned to the
Right
knob - Rear
differential
with
the knobs shown in the
- Front axle differential lock
front
so
that
it cannot be pulled unin-
right
before it is pulled out.
axle differential lock
locks
with
differential lock is
When
the knobs are pulled/pushe
engagement or disengagement is onselected.
can
ing at different
train is under strain, e.g.
with
even
gage
throttle
and
ahead
slightly to enable the lock to engage'
disengage.
The
indicate the operational condition of tha
locks:
• If the
been
lamp flashes. As soon as the lock am
gages
• The
tors the function of the rear axle diffe--
ential lock. It does not flash when the
lock has been selected but only light;
up once the lock has engaged proper!;.
The actual shifting process
be delayed. If the wheels are rota?]
differential lock engaged, it could
happen
or disengage at all. In such a
application should be reduce
the vehicle should be driven straigr
while moving steering wheel
warning
selected, the
the lamp lights up continuously
right
speeds,
that
lamps
front
axle differential lock has
hand warning lamp monH
or if the drivq
tight
the lock will not er-
above the knotsi
left
hand warning
corne-
case
26
Page 29
•
www.WestfaliaT3.info - a useful website for owners and enthusiasts of VW Westfalia T25 / T3 / Vanagon Campervans
Both warning lamps
once
the
and
If
after selecting
and after driving some distance,
warning lamps
cal
should
Attention
The differential locks influence
steerability
with
gaged,
able.
erential
offroad conditions and then only
speeds.
fore driving
knobs have been pushed
the
locks have actually disengaged.
the
do
system
be
checked
the
front
the
For
this reason, the
lock must only
Always disengage
not light up, the electri-
and the
of the
axle differential lock
vehicle
on
metalled road surfaces.
go out
differential locks,
locks themselves
at a
V.A.G workshop.
vehicle.
is no
be
In
particular,
longer steer-
front
axle diff-
used under
at low
the
lock
again
in
the
the
en-
be-
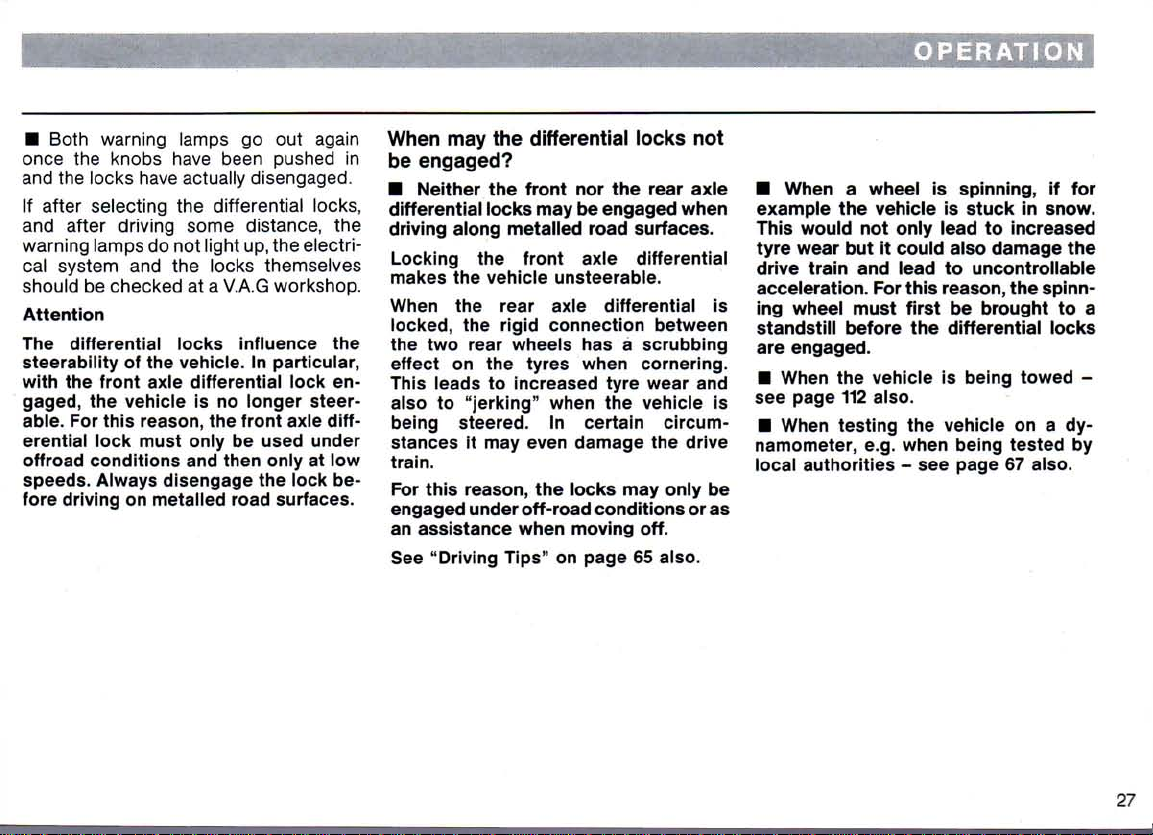
When may the differential locks not
be engaged?
•
Neither
differential
driving along metalled road surfaces.
Locking
makes
When
locked,
the
two
effect
This
also
being
stances
train.
For this reason,
engaged under off-road conditions
an
assistance when moving
See
"Driving Tips"
the
front
locks may be engaged when
the
the
the
on the
leads
to
steered.
front
vehicle unsteerable.
rear axle differential
the
rigid connection between
rear wheels
to
increased
"jerking" when
it may
nor the
axle differential
has a
tyres
when cornering.
tyre
In
even damage
the
the
certain circum-
locks may only
on
page 65 also.
rear axle
is
scrubbing
wear
and
vehicle
off.
the
is
drive
be
or
as
•
When a wheel
example
This
tyre
drive train
acceleration.
ing
standstill
are engaged.
•
see
•
namometer,
local
the
would
wear
wheel must first
When
page 112 also.
When testing
authorities
vehicle
not
but it
and
For this reason, the spinn-
before
the
vehicle
e.g.
OPERATION
is
spinning,
is
only lead
could also damage
lead
when being tested
- see
stuck
to
to
uncontrollable
be
the
the
brought
differential locks
is
being towed
vehicle
page 67 also.
if for
in
snow.
increased
on a dy-
the
to a
-
by
27
Page 30

AUTOMATIC GEARBOX
www.WestfaliaT3.info - a useful website for owners and enthusiasts of VW Westfalia T25 / T3 / Vanagon Campervans
Selector lever
P - Parking lock
The driving wheels
cally.
The parking lock
when vehicle
lever into and
safety catch
pressed.
Depending
may also
lector lever safety catch.
then only
when
the
the knob
positions
are
may
is
out of the
in
on
vehicle version, there
be an
be
moved
brake pedal
in the
only
standing
lever handle must
additional electrical
out of the P
is
selector lever pressed.
locked mechani-
be
engaged
still.
To
"P" position
The
depressed
move
lever
position
the
be
se-
can
and
R - Reverse gear
The reverse gear must also
ed when vehicle
engine idling. Before "R" can be engaged
the safety catch
pressed.
N - Neutral
D - Normal driving position
The three forward gears
and down automatically according
throttle opening
2 - Position
The 1st and 2nd gears are shifted up
down automatically according
opening
is
braking effect.
The road speed must not exceed 90 km/h
(56 mph).
The lever
"2"
However
place immediately this must only
done
and
not
used. This increases
can be
with accelerator pedal depressed.
as the
at
speeds below
is
stationary
in
lever handle must
and
road speed.
for
hilly stretches
road speed.
moved from
shift into 2nd gear takes
be
engag-
and the
are
shifted
to
throttle
The 3rd
the
engine
"D"
85 km/h.
be
up
to
and
gear
into
be
1 - Position
To engage this gear,
handle must
mains
are
not
sible engine braking effect.
speed must
mph).
The lever can
with accelerator pedal depressed. How-
ever
as the
place immediately this must only
done
at
for
steep hills
the
catch
in
be
in 1st
used. This gives maximum pos-
speeds below
pressed.
gear and
not
exceed
be
moved from "2" into
shift into
The
2nd and 3rd
50 km/h (30
1st
45 km/h.
lever
vehicle
gears
The
road
gear takes
re-
"1"
be
Kick-down device
The kick-down device gives maximum
acceleration. When
dal
is
pressed right down past
throttle position, depending
speed
and
shift
box changes down into
gear.
engine speed, either
is
delayed (forced throttle)
the
accelerator
the
pe-
the
full
on
road
the up-
or the
next lower
28
Page 31

OPERATION
www.WestfaliaT3.info - a useful website for owners and enthusiasts of VW Westfalia T25 / T3 / Vanagon Campervans
Notes on driving
Starting
The
engine
selector
"Starting
Selecting
Before selecting a gear
stationary and engine running, always
operate footbrake. This also applies
when moving lever from "P" to "N".
Depending
may
also
lector
then
when
the
knob in the
Particularly when the idling speed is
high
cessary
handbrake.
This
is
matic
is
not
speed
can only be started when
lever
is at "N" or
engine"
a driving range
be an additional
lever
only be
the brake pedal is
(after
to hold the vehicle
necessary
gearbox
completely
- the
on
page
on
vehicle
safety
moved
selector
starting from cold) it is ne-
the
vehicle
version,
catch.
The
out of the P position
depressed
lever
because
transmission
stopped
tends to
"P".
See
31.
with
vehicle
electrical
lever
pressed.
with
with an
of
even
at idling
"creep".
also
there
se-
can
and
the
auto-
power
When selecting a gear
tionary, do not depress accelerator.
When a driving range is selected
the vehicle stationary, the
on
no account be opened (e.g. by hand
from engine compartment). The vehicle
will
otherwise move immediately -
possibly
Before working on the engine when it is
running,
apply handbrake.
If the lever is moved accidentally into
"N"
and let the engine speed drop to idling
before selecting a forward gear again.
Driving downhill in
Before driving down a long slippery
gradient
hicle
that
idle at normal speed. Otherwise the engine braking effect
accelerator pedal is released and gentle
braking on the slippery surface
be possible.
even
with
place selector lever at "P" and
when driving, release accelerator
after
with
engine is warmed up enough to
starting from cold in a ve-
a carburetor engine, ensure
with
vehicle sta-
will
with
must
not
throttle
handbrake applied.
winter
will
be limited when
Stopping
To
stop
traffic
apply
move
however
Parking
On
apply
handbrake
and
will
is
easier
Tow starting
On
the
or
When
started
cle
"Emergency
Towing
If the
time,
the
vehicle
lights, all that is
the
lever
only be running at idling
level
ground all you
the
then the parking
ensure
not too
to
disengage.
vehicles
engine
pushing
battery is flat, the
from the battery of another
by
using
vehicle
you must
section
temporarily
brakes.
handbrake.
should
heavily
It is not
to "N". The
be
that the
loaded
with an automatic
cannot
the
be started by towing
vehicle.
a jumper
starting",
has to be towed at any
read
"Towing"
such
necessary
necessary
engine
need
On a gradient the
applied
lock
engaged.
locking
and
engine
cable.
page
the instructions in
on
page
as at
is to
to
should
speed.
do is to
firmly first
makes
gearbox
can be
112.
This
lock
vehi-
See
mechanism
111.
Page 32

OPERATION
www.WestfaliaT3.info - a useful website for owners and enthusiasts of VW Westfalia T25 / T3 / Vanagon Campervans
STEERING
LOCK/IGNITION
SWITCH
Petrol
engine
1 -
Ignition
locked.
2 -
Ignition
3 -
Starting
Diesel
1 - Fuel supply cut off -
can be locked
2 - Glow and
While
heavy
be
3 -
Starting
off -
Steering
on
engine
engine
drive
glow plugs are on, no other
current consumers should
switched on.
engine
position
can be
Steering
For all vehicles:
Position 1:
To
lock the steering wheel withdraw key
and
turn
engage.
Caution
Do not
stationary.
Position 2:
If the key is difficult to
cannot be turned to this position at all,
the steering wheel must be turned to
and
Position 3:
In this position the headlights, the windscreen
rear window^ are switched off.
Before
the key must be turned back to position 1.
The
prevents the starter from being operated
when engine is running as this could
damage
wheel until you hear the pin
withdraw
fro slightly to release the locking pin.
wipers, the blower and the heated
the starter can be operated again
non-repeat lock in the ignition switch
the starter.
key
until
vehicle
turn
in the lock or
is
Page 33

STARTING THE ENGINE
www.WestfaliaT3.info - a useful website for owners and enthusiasts of VW Westfalia T25 / T3 / Vanagon Campervans
General
• Be
in a confined space.
ing.
• Check
(On vehicles
Selector
handbrake firmly before starting.
• Depress the clutch pedal on vehicles
with
that
gine.
• As soon as the engine starts, release
the ignition key so
disengage.
• After starting a cold engine it may
sound
sure
pets^
for alarm.
notes
careful
manual gearbox when starting so
the starter only has to
noisy briefly because the oil pres-
has to build up in the hydraulic tap-
first.
when
running
Danger
that
gear lever is in neutral.
with
lever at "P" or "N") and apply
This is normal and no cause
automatic gearbox:
that
the
engine
of poison-
turn
the en-
the starter can
• Do not warm engine up by running it
with
vehicle stationary. Drive off straight
away.
• Do not overrev or use
until the engine has reached the normal
operating temperature.
• On vehicles
er the
engine
catalytic
perature
distance as
can get
be
into
burned
44 and 57 kW
Starting
The
carburetor is
choke
which is actuated the
accelerator
engine is cold.
• Depress accelerator pedal slowly
once
(twice
release
it.
• Start engine - do not use accelera-
tor.
• If the engine does not start at once,
stop using starter after 10 seconds, wait
about half a minute and then try again.
with a catalytic
must
converter
by
towing
there
not be
is at
otherwise
the
the
catalytic
- see also
carburetor
a cold
engine
fitted
pedal is depressed when
when
it is
full
started
operating
vehicle
unburnt
converter
page
engines
with
an automatic
first
freezing)
throttle
convert-
when
tem-
a long
petrol
and
83.
time the
and then
• The increase in the idling speed which
takes
place as engine starts to warm up
can
be reduced by
erator pedal briefly.
On vehicles
the engine should be run at fast idling
speed
for about one minute after start-
ing when it is very cold.
The
pedal should then be tapped so
the speed drops and a gear can be
selected
Starting a warm
• Depress pedal slowly
ing starter and hold it in the
position - do not pump the pedal!
•
starts.
at normal idling
Release
just
tapping the
with
an
automatic
speed.
or hot
engine
while
pedal as soon as engine
gearbox
operat-
full
throttle
accel-
that
31
Page 34

OPERATION
www.WestfaliaT3.info - a useful website for owners and enthusiasts of VW Westfalia T25 / T3 / Vanagon Campervans
Fuel
injection
The
engine is
system
which automatically supplies the
correct fuel/air mixture for all operating
conditions. The starting procedure described
here is applicable regardless of
ambient or engine temperature:
• Start engine - do not depress accel-
erator.
• Only if the engine does not start the
first
time, should the accelerator pedal
be
depressed slowly during the next
attempt
release
to start. When engine starts
accelerator pedal immediately.
engines
fitted
with
a fuel injection
Diesel
engines
Glow
plugs
The
engine is
time the plugs are on is indicated by a
lamp which is controlled by the coolant
temperature - see page 33.
Cold
starting
To
faciliate starting from
cold
starting device in the injection
pump.
The
cold starting device is actuated
when the knob on the
ing column is pulled out fully.
Starting
• The knob of the cold starting device
should
ing starter regardless of the ambient
temperature.
• Turn ignition key to position 2, glow
plug lamp commes on. It goes out when
the ignition temperature is reached (see
page
30).
fitted
aid
a cold
engine
be pulled out
with
glow plugs. The
cold,
there is a
right
of the steer-
fully
before operat-
If the warning lamp does not come on
when engine is
fect in the glow plug system - get expert
assistance.
To
avoid
ily, do not
rent
consumers on
are on.
• As soon as a~c goes out. start en-
gine.
Do ro: oecress aoceierator while
starting
If engine on,;, - -es "eg., arly, continue
to opera:e
(15
seccncs
runs under :s c.v cower.
If enghe ::es ~z: s:a~t. switch glow
pugs
age" a~o :-y s:arting it again
cold,
draining
switch
s:a~e-
a: ~a>
there may be a de-
battery
any
a fev. seconds longer
: :es not start the fuse
;s
unnecessar-
other
heavy
while
glow
until
~av nave blown -
cur-
plugs
engine
Page 35

•
www.WestfaliaT3.info - a useful website for owners and enthusiasts of VW Westfalia T25 / T3 / Vanagon Campervans
Push
the knob of cold starting aid in
fully as soon as the engine has reached
normal operating temperature.
Starting a warm
The
glow plug warning lamp does not
come
on - the engine can be started
straight away.
Do
not pull cold starting aid knob and do
not depress accelerator pedal.
engine
STOPPING ENGINE
•
When
for a
soon as you stop. Let it
minutes
• When engine is hot, the fan may
tinue to run when engine has been stopped
when ignition has been switched off.
vehicle
while
to cool it
or it may switch on suddenly - even
do not
has
been
switch
down
driven
engine
idle
for
slightly.
hard
off as
about
con-
2
OPERATION
Page 36

I
www.WestfaliaT3.info - a useful website for owners and enthusiasts of VW Westfalia T25 / T3 / Vanagon Campervans
OPERATION
WARNING
The
layout of the warning lamps depends
on the model and the engine fitted. The
symbols
actual warning lamps.
This
warning lamp flashes when the igni-
tion
is switched on. After the engine has
started, the lamp must go out again.
If the warning lamp does not go out, or
flashes
speed
sounds - stop
gine
off. Check the oil level and if ne-
cessary,
If the lamp comes on despite the oil level
being correct,
case,
at idling speed - call in expert
Note:
The oil pressure warning lamp is not
oil level indicator.
LAMPS
shown here are also on the
-
Engine oil pressure
when driving - at an engine
of approx. 2000 rpm a buzzer then
add oil - see page 74.
the
do not drive
engine must
|
at
once and switch
on.
not
be run,
assistance.
en-
In such a
even
an
-
Generator
Petrol engines
This
lamp comes on when the ignition is
switched on and should go out when the
engine is started.
If the lamp comes on when driving,
at once, switch engine
vee
belt.
If the belt is broken do not drive
because
longer being driven. Fit a new belt. (For
belt
If the warning lamp comes on although
the belt is not broken one can normally
drive on to next
However
ing continuously, all electrical components which are not absolutely essential
should be switched off.
the coolant pump is then no
sizes
see "Technical data".)
V.A.G
as the battery is then discharg-
off and check
workshop.
stop
further
.......
Diesel
engine
This
lamp comes on when the ignition is
switched on and should go out when the
engine is started.
If the lamp comes on
at once, switch engine off and check the
vee
belts for generator and coolant
pump.
If the belt for the coolant pump is broken,
do not drive
for belt
If the belt for the generator is broken the
vehicle
V.A.G
workshop but the battery
discharge
graph.
If the belts are not broken one can normally drive on to the next V.A.G workshop.
As the battery
continuously, all electrical components
which are not absolutely essential should
be switched off.
further.
size
see "Technical data".
can still be driven to the next
continuously - see next para-
when
driving,
Renew the belt -
will
be discharging
will
stop
then
34
Page 37

-
www.WestfaliaT3.info - a useful website for owners and enthusiasts of VW Westfalia T25 / T3 / Vanagon Campervans
Glow
(Diesel
engine only)
When
engine is
comes
on when key is turned to drive
position
If the warning lamp does not come on,
there may be a defect in the glow plug
system
- get expert assistance.
When
the lamp goes out, start engine
immediately - see page 32.
When
engine is warm the glow plug lamp
does
not come on - the engine can be
started straight away.
00 -
Turn
The
warning lamp flashes when
nals
are switched on. If a
the warning lamp flashes twice as fast.
(Not when towing a trailer). Further de-
tails are on page 41.
01 -
High
The
warning lamp comes on when high
beams
are on or headlight flasher is
used.
plugs
(ignition
signals
beams
cold,
the warning lamp
on).
turn
turn
signal fails,
sig-
-
Coolant
~~
coolant
This
lamp flashes for a few seconds as
a
functional check when ignition is
switched on.
If the lamp does not go out afterwards
or flashes when driving, either the coolant
temperature is too high or the coolant
level
is too low.
Stop
at once,
check
if the radiator fan is running (by
listening). The fan is at the
the radiator grille. If the fan is not running,
check fuse and replace if
sary
- see page 102.
If the fan is in order, check coolant level
and
top up if necessary.
Caution.
removing
down.
For
If the warning lamp does not go out even
though the coolant
in order, do not
assistance.
Danger
the cap, let
further
temperature/
level
switch
details see page 78.
drive
engine
front
of scalding.
engine
level,
and fan fuse are
further
- get expert
off and
behind
neces-
Before
cool
OPERATION
If the trouble is only caused by the fan
and
assuming coolant level is in order
and
warning lamp is out - one can drive
on to the next
to make a good use of the air stream for
cooling
very slowly.
Trailer
The
warning lamp flashes when
signals
are switched on when towing a
trailer.
If a
turn
the warning lamp does not flash.
Differential
Warning lamps for the differential locks
on four wheel drive models - see
page
26.
V.A.G
workshop. In order
do not let engine idle or drive
turn
signals*
turn
signal fails on trailer or vehicle,
locks*
35
Page 38

OPERATION
www.WestfaliaT3.info - a useful website for owners and enthusiasts of VW Westfalia T25 / T3 / Vanagon Campervans
INSTRUMENTS
(©) -
Brake
system
The warning lamp* comes on when
• the handbrake is applied
• the fluid level is low
If the
lamp
brake
is
driving, the
released
fluid
too low. If at the
free
travel
does not go out
hydraulic
You can
workshop
pressures and
increases, one of the two
circuits
drive
on to the
but
allow
longer
or comes on
level
same
may
in
reservoir
time
have
nearest
for
higher
braking
when
the
failed.
distan-
hand-
when
pedal
V.A.G
pedal
ces on the way.
(@) - Anti-Locking
Brake
(ABS)*
The warning lamp comes on when the
ignition is switched on. It goes out, when
engine has been started and the generator warning lamp has gone out. (When a
vehicle speed of approx. 6 km/h has
been
is
reached, an automatic check se-
quence
takes place. During the check a
pump motor noise may be heard.)
If the lamp does not go out, or if it
comes
on while driving the system is not
in order. The vehicle can then only be
braked
with
and should be taken to a
soon
as possible.
the normal brake system
V.A.G
Further detail on ABS is given on page
83.
System
dealer as
The arrangement of the instruments
depends
the engine
panel",
on the model concerned and
fitted
- see also
"Instrument
page 4.
Speedometer
The permissible maximum speeds in the
gears
during the running-in period are
given on page 56.
Mileage
recorder
1
The last figure of the mileage recorder
or
trip
recorder*
indicates 100 m or
1/10 mile.
The
trip
zero
recorder can be set back to
by pressing the knob in the speedo-
meter dial.
36
Page 39

OPERATION
www.WestfaliaT3.info - a useful website for owners and enthusiasts of VW Westfalia T25 / T3 / Vanagon Campervans
Clock*
Normal
To
dial and
Digital
The
right
hours and the
• If pressed briefly, preferably
ball pen, the time changes one hour or
on minute.
• If pressed continuously the hours or
minutes change continuously.
With the minute button the clock can
be
•
before time to be set.
the seconds indicator of an accurate
clock
time signal is heard on the radio.
clock
set the time, press knob in centre of
turn
hands.
clock
time is set
of dial. The
set exactly to the second.
Press
•
Press
shows a
with
buttons on
left
right
button until time is one minute
button at the moment when
button is for the
one for the minutes:
full
minute or when the
left
with
and
a
Rev
counter*
The
dotted zone on the scale shows the
maximum engine speed permitted briefly when engine has been run in and is
warm.
It is advisable to change up or
reduce
engine speed at the latest by the
time the needle reaches this zone.
Changing up in good
fuel
and
keeps
Always
change down to the next lower
gear
before the engine starts labouring,
(no longer pulls smoothly).
The
green or green shaded area on the
scale
shows the speed at which the engine is developing its most favourable
torque.
The
permissible engine speeds during
the running-in period are given on page
56.
time
the noise down.
helps to save
Tachograph*
In many European countries the installation and use of a tachograph is obligatory for certain vehicles.
Details
of the regulations can be
obtained from local vehicle licensing
authorities.
The
operation of the tachograph is
described
tachograph manufacturers.
in a special leaflet from the
Page 40

_L
www.WestfaliaT3.info - a useful website for owners and enthusiasts of VW Westfalia T25 / T3 / Vanagon Campervans
- Coolant
temperature
gauge
The
gauge starts to work when ignition
is
switched on, but it takes a
before the needle reaches the final po-
sition.
When
ignition is switched on the warn-
ing lamp (c) flashes for a few seconds
as
a functional check.
a
- Cold
Avoid
work engine too hard yet.
zone
high engine speeds and do not
little
time
b -
Normal
When
needle
When
bient temperature is high, the needle
may
move well over to the
This is not serious as long as the
ing
lamp
c - Warning
If the lamp flashes when driving either
the coolant temperature is too high or
the coolant level is too low. Stop at
once,
the cause of the trouble - see page 35.
zone
vehicle is driven normally the
should settle down in this
engine is working hard and am-
(c) does not flash.
lamp
switch engine off and try to find
zone.
right.
warn-
fllj
- Fuel
The
fuel gauge needle starts to move
when the ignition is switched on but it
takes
a few seconds to reach its final
position.
The
tank holds about 60 litres (syncro
70
litres).
When
the reserve mark (R) there are about
10
litres of fuel
gauge
the needle reaches the start of
left
in the tank.
38
Page 41

SWITCHES
www.WestfaliaT3.info - a useful website for owners and enthusiasts of VW Westfalia T25 / T3 / Vanagon Campervans
3 - Heated rear window*
The heating works only when ignition is
on.
When heater is on a lamp in the
switch lights up.
As soon as window is clear, switch ele-
ment off. The reduced current consumption helps to reduce the fuel consumption - see also "Driving economically".
On vehicles with electrically adjusted exterior mirrors the mirror surface is heated
whenever the rear window heating is
switched on.
1 - Lighting switch
First detent - side lights1)
Second detent - headlight high or low
beams
The headlights only work when the
tion is on. When the engine is being
started,
the headlights are switched off
igni-
2 - Emergency lights
When the emergency lights are on, a
warning lamp in the switch flashes as
well.
The system also works when the ignition
is switched off.
automatically.
When the lights are on, the level of the
instrument lighting can be regulated by
turning the knurled disc* below the
switch.
Dipping and flashing headlights - see
page 41.
On vehicles with additional headlights in
the radiator grille*, these come on together with the high beams.
I On vehicles for Great Britain (depending on
model) the headlights also come on with reduced brightness (Dim-dip lighting) at the
first detent when the ignition is switched on.
Page 42

4 - Fog lights*
www.WestfaliaT3.info - a useful website for owners and enthusiasts of VW Westfalia T25 / T3 / Vanagon Campervans
rear fog light*
First detent - fog lights
Second detent - front and rear fog lights,
or only rear fog light.
At the second position a warning lamp in
the switch comes on.
The fog lights work only with the side
lights (ignition on), low or high beams.
The rear fog light works only with the
fog lights or with the low or high beams.
Note
The use of the lighting described at 1, 2
and 4 is subject to local regulations.
Knurled disc for seat heating*
The cushion and backrest of the driver's
seat can be heated electrically when the
ignition is on.
The heating is switched on and regulated with the knurled disc.
To switch heating off, turn knurled disc
to the detent position.
Page 43

^JiiiiTilJiH
www.WestfaliaT3.info - a useful website for owners and enthusiasts of VW Westfalia T25 / T3 / Vanagon Campervans
TURN SIGNAL AND DIP LEVER
To signal a lane change
Move lever up or down to pressure point
and hold in position - the warning lamp
must also be flashing.
To dip headlights
Pull lever past pressure point towards
steering wheel. When high beams are
on1),
a warning lamp in the dash lights
up.
Headlight flasher
Pull lever towards steering wheel to pres-
The turn signals only work when the
tion is switched on.
Right turn signals
Left turn signals -
When turn signals are working the warn-
ing lamp flashes as
page 35.
On vehicles with additional headlights in
the radiator grille*, these come on to-
gether with the high beams.
When a turn signal fails, the warning
lamp flashes roughly twice as fast.
The turn signals cancel automatically
after making a
- lever up
lever down
turn.
well.
See also
igni-
sure point - the high beam warning lamp
lights up.
Parking lights*
The parking lights only work when
tion key is removed.
Right parking lights - lever up
Left parking lights - lever down
i On vehicles for Great Britain (depending on
model) the headlights also come on with reduced brightness (Dim-dip lighting) at the first
detent when the ignition is switched on.
igni-
41
Page 44

OPERATION
www.WestfaliaT3.info - a useful website for owners and enthusiasts of VW Westfalia T25 / T3 / Vanagon Campervans
CRUISE CONTROL SYSTEM*
B
A
B
33-511
With this system any desired speed from
about
35 km/h can be
(insofar
This
to keep
pressed
as
engine output permits).
means that the
the
on
long journeys.
accelerator constantly
held constant
driver
does not have
de-
Caution
•
The cruise control system should
not be used in dense traffic and poor
road conditions
aquaplaning,
•
When system is switched on do not
(slippery
gravel).
surfaces,
move into neutral at speeds above 30
km/h
without
pedal
as otherwise engine
and
can be
depressing the clutch
will
damaged.
race
The system
button A and
turn
signal lever.
The system
button
When
been reached
be pressed briefly.
taken
The programmed speed
increased
tor
pedal.
be pressed until
is operated
the
with
press button
the
is switched on by
A to EIN.
the
speed
to be
maintained
press button B must
The
foot can then
pedal.
off the
the
accelerator
can
without pressing the accelera-
The
press button B need only
the
desired speed
been reached.
The speed can also
normal
way
the
with
pedal
When
be
increased
the
accelerator
is
then released
previously programmed speed
sumed.
sliding
B on the
moving
has
be
also
be
has
in the
pedal.
the
is re-
The system
when brake
when speed
grammed
steep gradient
is temporarily switched off
or
clutch pedals are used
is
considerably below pro-
speed
i. e.
in too
when driving
high a gear.
up a
or
To resume speed previously programmed
are released
button
when brake
or at
A to the
end
left
(AUFN).
or
clutch pedals
of
gradient, push
Caution
The programmed speed must only be
resumed
when it is not too high for the
existing traffic conditions.
The system
by moving
or
by
is completely switched off
the
switch
switching
the
to the
ignition
right
off.
(AUS)
42
Page 45

WINDSCREEN
www.WestfaliaT3.info - a useful website for owners and enthusiasts of VW Westfalia T25 / T3 / Vanagon Campervans
WIPER
AND WASHER SYSTEM
Wipers
and washers only work when
ignition is switched on.
When
it is freezing, check
blades
are not frozen to the glass before
switching wipers on for the
that
the wiper
first
time.
Windscreen
Brief
wipe:
fore stop 1.
Wiper
Wiper
Windscreen
Pull
lever towards steering wheel - the
system
this position.
Automatic
Pull
wipers and washer work.
Release
The
on for about 4
Lever
The
(intermittent
Lift lever to pressure point be-
slow: Lever at position 1.
fast:
Lever at position 2.
washer
works as long as lever is held in
wash/wipe
lever towards steering wheel -
lever.
washer stops and the wipers carry
seconds.
at detent 3
wipers work about every 6
wipe)
facility*
seconds,
Rear
window
Automatic
Press
wheel - the wiper works about every 6
seconds
lever
Press
and
hold in position -
The
wiper and washer work as long as
lever
Release
The
washer stops and the wiper carries
on for about 4
Headlight
When
are washed every time the windscreen
is
washed.
At regular intervals such as when filling
the tank, caked on
should
Filling
wash/wipe*
lever briefly away from steering
(intermittent
briefly again switches the wiper off.
lever away from steering wheel,
is held in position.
lever -
seconds.
washer
the headlights are on, the lenses
be removed.
washer container, see page 80.
wipe).
Pressing
system*
dirt
and insects
Page 46

OPERATION
www.WestfaliaT3.info - a useful website for owners and enthusiasts of VW Westfalia T25 / T3 / Vanagon Campervans
HEATING AND
VENTILATION
B25-568
Controls
Levers A and C
Lever
A to
right
Lever
C to
vents in passenger compartment* are
opened.
Lever B -
To
right
To
left
44
left
Heat
- increases
- decreases
distribution
vents 1 and 2 are
opened
vents 4 and footwell
output
air
Lever D - Roof
compartment*
To
right
To
Note:
To
levers,
and
Switch
The
- fresh air decreases
left
- fresh air increases
distinguish better from the other
there are small knobs on levers B
D which can be distinctly
E -
blower has 3 speeds.
vents
Blower
in passenger Air
felt.
vents
Depending
heated or unheated fresh air flows fror
all
vents.
The
closed
knurled disc downwards - vent opened
knurled disc upwards - vent closed
By
swinging the complete outlet grille q
vents 3 the air flow can be moved vert-
cally.
When
and
laterally.
on the position of the lever
vents 3 can also be opened an:
separately:
the lever in the grille is moved tc
fro, the air flow direction is alterec
Warm
or
fresh
Page 47

Defrosting
www.WestfaliaT3.info - a useful website for owners and enthusiasts of VW Westfalia T25 / T3 / Vanagon Campervans
windows
• Move all levers fully to the right.
• Switch blower to stage 2 with
switch E.
• Switch off blower of additional heat
exchanger*.
Demisting
windows
When
air
humidity, e.g. when it is raining, we
recommend
• Move levers A, C and D fully to the
right.
• Move lever B slightly to the right into
the heating range, if necessary.
• Blower switch E to stage 2 or 3.
•
Close
Heating
possible
• Levers A, B + D fully to the right
• Lever C fully to the
•
Close
• Switch blower to stage 2 with
switch E.
windscreen and side
windscreen and side
the windows mist up due to high
the following settings:
vents 3.
interior
vents 3
as quickly as
left
Heating
When
desired
we recommend the following settings:
• Lever A to the
• Lever B to the desired heat output
• Lever C to the
• Blower switch E at stage 1
Ventilation
When
all
vents 3.
interior
the windows are clear and the
temperature has been reached,
heating is off, fresh air flows from
vents. When heating is on, only from
normally
left
left
Notes
• In order to ensure that the heating
and
ventilation works properly, the blow-
er
should always be switched on when
driving slowly.
• To prevent contaminated air from
getting into the vehicle, move lever A
fully to
left
right. The vents 3 must also be
• The heat depends on the engine temperature - the full heat output is there-
fore only available when engine is warm.
• All controls except blower switch E
can
be set to any intermediate position.
• Depending on vehicle model the
stale
in the
rear
side windows.
The
slots in the
opened
and levers C and D fully to
air can escape either through slots
front
doors or through slots in the
front
or closed by means of
doors can be
closed.
slides.
45
Page 48

Additional heat exchanger* for the
www.WestfaliaT3.info - a useful website for owners and enthusiasts of VW Westfalia T25 / T3 / Vanagon Campervans
passenger compartment
The additional heat exchanger is located
under the rear seat. The blower is
trolled by a 3 stage switch on the dash
panel - see left hand illustration.
To obtain warm air from the heat exchanger, the valve on the heat exchanger must be fully open.
To close or open the valve the trim un-
der the rear seat must be removed.
con-
To do this, grip trim on the left side and
pull it out. Then move valve lever as
shown above.
Lever upwards - opened (Winter
tion)
Lever to rear - closed (Summer
tion)
In the warm season the blower of the
heat exchanger can be used to circulate
the air. When used in this way the valve
on the heat exchanger should be
closed.
This will prevent unnecessary
heat radiation reaching the footwell
when the weather is warm.
posi-
posi-
Page 49

AUXILIARY AIR HEATER*
www.WestfaliaT3.info - a useful website for owners and enthusiasts of VW Westfalia T25 / T3 / Vanagon Campervans
OPERATION
The heater is switched on and off with
the knob (see Fig.) in the dash on the
right of the steering column. This switch
also regulates the amount of heat.
Depending on model concerned the
warm air flows from the footwell vents
in the passenger compartment and/or
from a controllable vent under the
driver's seat. The air distribution cannot
be regulated.
The heater can be used all the time
when vehicle is moving. When engine is
not running the heater switches off
automatically after about 15 minutes to
avoid draining the battery.
The heater is supplied with fuel from the
vehicle tank. It can use up to one litre per
hour according to operating conditions.
The heat output is about 7 kw (6000
kcal/h).
0
Switch positions
0 - Heater off
0 to 1 - Heating with engine not
running
2 - Heating when driving
2 to 3 - Regulates amount of heat
Heating with engine not running
(Ignition off)
To switch heater on Press switch knob in at position 0 and
turn it clockwise towards 1 (warning
lamp lights up). The knob springs out
again when released.
The amount of heat can be regulated between 2 and 3 as required.
Note
On vehicles with Diesel engine it takes
about 40 seconds before the heat can be
felt.
To switch heater off The clockwork in the temperature regu-
lating switch switches the heater off
automatically after about 15 minutes and
the lamp goes out.
To switch heater off before clockwork
has run down: turn knob anti-clockwise
to 0. The lamp goes out and clockwork
runs down.
Page 50

OPERATION
www.WestfaliaT3.info - a useful website for owners and enthusiasts of VW Westfalia T25 / T3 / Vanagon Campervans
Heating
To
Turn switch knob clockwise to position 2
(warning lamp in knob comes on)
The
between 2 and 3 as required.
Note
On
about 40
felt.
To
Turn switch knob anti-clockwise to
tion 0 (warning lamp goes out)
when
driving
switch heater on -
amount of heat can be regulated
vehicles
switch heater off -
with
seconds
Diesel
engine it takes
before the heat can be
posi-
Notes
• Every time the heater is switched off,
the warm air and combustion air blowers
continue running briefly to cool the
heater down quicker.
• To avoid draining the battery, do not
run the heater repeatedly when the engine is not running.
• When the heater is running on the
clockwork time switch, it must be switched
off by hand before attemptrng to start
the engine at low temperatures so
the
full
turn
• In enclosed spaces and
the
switched
Due to the
not be used
instance
battery capacity is available to
the engine.
the
when
heater
is
fuel
tank,
the
of
fire
vehicle
heater
off.
risk
when
on dry grass or leaves.
filling
must
must
parked
that
be
for
Maintenance
When
driving through mud and snow
the exhaust pipe may tend to get blocked.
Have a look at it occasionally to see
that
it is clear.
According to
tion:
The
heat exchanger in the heater is only
to be used for 10 years. After this period
the heat exchanger must be replaced in
a
V.A.G
heater is
ed
on the nameplate on the heater.
The
V.A.G workshop must then put the
date of the repair on the plate on the heat
exchanger.
offical
workshop. The year in which the
first
put into operation is mark-
German
regula-
48
Page 51

The heater on vehicles with a petrol
www.WestfaliaT3.info - a useful website for owners and enthusiasts of VW Westfalia T25 / T3 / Vanagon Campervans
engine has a safety switch which is located under the dash on the left near
the steering column. If the heater does
not start, or starts and then stops again,
wait 3 minutes and then operate the red
lever on the safety switch.
If the heater still does not work or if the
safety switch stops it again, there is a
defect in the heater which can only be
repaired by a V.A.G workshop.
OPERATION
If the heater on vehicles with a Diesel
engine will not start or stops after oper-
ating for a while, an automatic cut-out
switches the heater off. If the heater
cannot be started by switching the rotary switch off and on, the heater is defective and must be repaired in a V.A.G
workshop.
Fuses
See page 102.
49
Page 52

OPERATION
www.WestfaliaT3.info - a useful website for owners and enthusiasts of VW Westfalia T25 / T3 / Vanagon Campervans
AUXILIARY
The auxiliary heater heats the coolant
the heating circuit and supplies the heat
exchanger in the normal heating system
and
the
the passenger compartment heating
with heated coolant.
of
the
The system
switch-on time preselected
a
switch and indicator unit located on the
left
(or
Air distribution
with
the
and ventilation system
The auxiliary heater
vehicle stationary
When vehicle
only runs
in order
also
switches
coolant temperature
When
below 70° C the
switched
WATER HEATER*
additional heat exchanger*
The
engine
the
is not
is
switched
right)
unter the instrument
and
controls
for a
to
on
of the
or
is
stationary,
maximum
avoid draining
off
automatically when
coolant temperature drops
heater
again.
coolant circuit
heated.
off
and on
by
regulation
normal heating
(see
page 44).
can be
when
of
used with
it is
the
of
30 minutes
the
80° C is
is
automatically
(syncro)
or
means
panel.
is
done
moving.
heater
battery.
reached.
in
for
the
of
It
a
The heater
vehicle tank
per hour.
(4000
The
kcal/h).
is
supplied with fuel from
and
uses
up to
heat output is about
half a litre
4.5
the
A - Buttons
kw
selected
B - Indicator lamp
C - Preselected time
D - Display
E - Actual time
F - Heater on/off
G - Warning lamp
time.
for
setting time
for
preselected
(heater
on)
and
pre-
time
50
Page 53

Setting
www.WestfaliaT3.info - a useful website for owners and enthusiasts of VW Westfalia T25 / T3 / Vanagon Campervans
•
• Set clock
The
is
display
preselected,
for 2
To
When
lamp G lights up. The heater can only
work if the lever for the heat output is
electrical
Preselecting
(stationary operation, ignition off)
With buttons C two different switch-on
times can be selected within 24 hours.
•
priate figure 1 or 2 appears in display.
The
the
time
Press
pressed.
• This is done by pressing button F.
pushed
Press
and hold clock button E.
with
buttons A.
display lights up as long as button
When button is released the
goes out or, if a time has been
the selected time lights up
seconds.
switch
heater
heater is switched on the warning
fully to the
contact.
and hold button. The appro-
ready-for-action lamp lights up.
on or off
right.
starting
This
time
closes
for
heater
an
• Set required switch-on time
buttons A. The display remains on for
about 20 seconds after releasing button
C.
In order to ensure
up at the selected time, the lever for the
heat output must be pushed fully over
to the
right.
must be switched to stage 1. On account
of the higher current consumption, a
higher stage should only be selected in
isolated
Switching
• The preselected time can be switched
button C. The ready-for-action lamp and
the figure in display then go out.
Fuses
See
cases.
preselected
off by briefly pressing the appropriate
page 102.
that
the heater starts
In addition to this the blower
time
with
off
Notes
• Every time the heater is switched off,
the warm air and combustion air blowers
continue running briefly to cool the
heater down quicker.
• To avoid draining the battery, do not
run the heater repeatedly when the engine is not running.
When
driving through mud and snow, the
exhaust pipe may tend to get blocked.
Have
a look at it occasionally to see
it is clear.
According to
tions:
The
heat exchanger in the heater is only
to be used for 10 years. After this period
the heat exchanger must be replaced in
a
V.A.G
heater is
ed
on the nameplate on the heater.
The
V.A.G workshop must then put the
date of the repair on the plate on the
heat exchanger.
• In enclosed spaces and
the
fuel
switched
official
workshop. The year in which the
first
put into operation is mark-
tank,
off.
the
German
when
heater
regula-
must
that
filling
be
Page 54

OPERATION
www.WestfaliaT3.info - a useful website for owners and enthusiasts of VW Westfalia T25 / T3 / Vanagon Campervans
SLIDING
The
crank above the driver's seat:
To
open - Fold crank down and
to the
again.
To
close - Fold crank down and
to the
it back until it can be folded into the recess.
Caution
For
always
ROOF*
roof is opened and closed
left,
then fold crank into recess
right
as far as it will go then
safety
reasons, the
be in the recess.
crank
with
the
turn
it
turn
it
turn
should
SUN ROOF*
The
roof is opened and closed
knurled disc in the headlining above the
front
seats.
The
roof can be
desired
Raising
Turn knurled disc clockwise.
Lowering
Turn knurled disc anti-clockwise.
or taken out altogether.
tilted
at the rear as
with
the
To
take
out
• Turn retaining screw (A) in centre
knurled disc one quarter
(e.g.
with
a coin)
• Then raise roof and press it up.
•
Press
• Detach roof.
• Lift roof from outside and pull it oM
to the rear.
To put
• Slide roof back into the hinges anil
let it drop lightly into the retainers.
Caution
Ensure
ed
front,
The
vehicle
locking lever (B) up.
back
that
into
the two
and locked at the
roof
must
is
with
the
roof
retaining
only
stationary.
turn
roof
is
be unlocked
clockw
closed.
properly
hinges at the
rear.
inser
wheJ
Note
If the roof becomes hard to operate
after a while, the runners should be
cleaned
52
and greased - see page 94.
Page 55

OPERATIO
www.WestfaliaT3.info - a useful website for owners and enthusiasts of VW Westfalia T25 / T3 / Vanagon Campervans
INTERIOR
Light
Switch positions:
1 - Light on continuously
0 - Off
2
- Door contact position,
Step
The step
door is opened. It goes out a few
onds after the sliding door has been
closed.
Table
Switch positions:
To
front
To
rear - Off
LIGHTS
above
on when cab doors are open.
light*
light*
driver's
light
comes on when sliding
- On
seat
light
comes
sec-
Reading
The reading lamps have separate
switches and can be moved about as
required.
Switch positions:
Ring
Ring
The reading lamp on the
lights up continuously when the sliding
door is opened. When the sliding door
is
closed it goes out in the off position
together
of a few
lamps*
turned to
turned to
with
seconds.
right
- On
left
- Off
the step
right
light
after a delay
at the rear
Reading
seat*
Switch positions:
Up
Down - On
Luggage
The luggage compartment lights come on
when the rear flap is opened.
Note
When leaving the vehicle ensure
lights are switched off so
is
not run down if the vehicle is
stationary for some time.
light
- Off
compartment
in
front
of passenger
lights*
that
that
the battery
all
left
53
Page 56

OPERATION
www.WestfaliaT3.info - a useful website for owners and enthusiasts of VW Westfalia T25 / T3 / Vanagon Campervans
SUN VISORS
Both sun visors can be lifted out of their
brackets and swung round towards the
doors.
An illuminated make-up mirror* is fitted
at the back of the passenger's sun visor.
To switch light on - move switch to left.
When the sun visor is moved up, the
mirror illumination goes out automatically.
Note
When leaving the vehicle always ensure
that the light is switched off so that the
battery is not run down when vehicle is
left standing for some time.
ASHTRAYS
Ashtray in dash
To take out:
Grip the strip on opened lid and lift at
one side to take out.
To insert:
Press ashtray into opening with lid
closed.
Ashtray in passenger compartment
To take out:
Open ashtray, press down and take out.
To insert:
Insert at top first then push in fully.
On vehicles with individual seats:
To take ashtray out:
Lift one side of the handle of the opened
lid.
To insert ashtray:
Push ashtray into opening with lid
closed.
CIGARETTE LIGHTER/SOCKET*
The cigarette lighter is switched on by
pushing in the element.
When the heating element glows, the
lighter springs out automatically - pull it
out immediately.
The socket can be used for a cigarette
lighter or other electrical accessories
with a capacity of up to 100 watts. When
the engine is not running this will how-
ever soon discharge the battery.
Caution
Cigarette lighter and socket also work
when the ignition key has been taken
out.
Children should therefore never be left
alone in the car.
54
Page 57

OPERATION
www.WestfaliaT3.info - a useful website for owners and enthusiasts of VW Westfalia T25 / T3 / Vanagon Campervans
GLOVE
Vehicles with a lockable glove
an
To open
together.
Caution
For safety reasons the lid* should always be closed when the vehicle is in
motion.
BOX
additional key - see also page
the
lid,
squeeze both buttons
box
have
7.
CURTAINS*
The curtains which
vehicles with seats/reclining seat bench
are stored underneath
bench.
They
surrounds
tain
behind
can
the
by
be
front
can be
are secured
press studs. A further cur-
press-studded
seats.
supplied
the
rear seat
to
the window
in
position
for
EXTENDING
On vehicles with individual seats
passenger compartment there
tending
The table
retainers and folded down
tion).
Caution
For safety reasons the table must be
pushed
TABLE*
in the
is
table
on the
can
in when vehicle is in motion.
be
left side.
pulled
up out of its
(see
an
illustra-
ex-
Page 58

THE
www.WestfaliaT3.info - a useful website for owners and enthusiasts of VW Westfalia T25 / T3 / Vanagon Campervans
FIRST
1500 KM - AND AFTERWARDS
During the
engine internal friction is higher than
later on when all the moving parts have
bedded
process
able
driven during the
first
few operating hours the
down. How well this running in
is done depends to a consider-
extent on the way the vehicle is
first
1500 km.
Up to 1000 km
do not use
Furthermore the following speeds in
km/h should not be exceeded in the
gears:
Petrol
Manual
gearbox
1st gear
2nd gear 40 40
3rd gear 70 60
4th gear
5th gear
Automatic
gearbox
Driving range 1
Driving range 2
Driving range D 110
full
engines
4 speed gearbox
throttle
0-1000 km
20
105
-
at all.
5
speed gearbox
20
85
105
0-1000 km
35
75
Diesel
engines
0-1000 km
5
4 speed gearbox
1st gear
2nd gear 40
3rd gear
4th gear
5th gear
The
maximum
during the
The
speeds given here must however
not be exceeded.
From
1000-1500
the speed can gradually be increased to
the road or engine maximum.
After
the
on vehicles
should
change
at the latest by the time the red warning
zone
is reached.
The
maximum permissible engine
speeds
for continuous operation are:
Petrol
engines about 5400 rpm
Diesel
engines about 4600 rpm
Turbo Diesel engines . . about 4800 rpm
20
65 55
95 85
—
permissible engine speed
first
1000 km is 4000 rpm.
km
running-in
with
a rev counter one
into
the next higher gear
speed gearbox
20
35
95
period
In isolated
overtaking the needle may move briefly
into
the dotted or shaded zone on the
rev counter scale - see also page 37.
A
speed limiter prevents extremely high
engine speeds.
Important
• Do not overrev the engine when cold
- either in neutral or in the gears. All
speeds
engine is properly warm.
• Do not drive
unnecessarily
helps
• Do not let engine labour - change
down when engine no longer runs
smoothly.
• New tyres must also be "run in" because
sion
at the start. This must be taken
account
first
100 km.
cases,
for example when
notes
and revs are only valid when
with
to save fuel and reduces noise.
high - changing up early
they do not have maximum adhe-
by driving carefully during the
the engine speed
into
56
Page 59

RIVING
www.WestfaliaT3.info - a useful website for owners and enthusiasts of VW Westfalia T25 / T3 / Vanagon Campervans
TIPS
DRIVING
The
cle
So
before moving off, always check the
following points:
• Lights and
• Brakes
•
Amount
•
Mirror
• Cleanliness of
and
Also
•
Tyre
86-89,
• Engine oil
The oil
time
conditions or
daily
• Coolant
•
Brake
• Fluid
page
• Condition of
blades - page 109.
Furthermore compliance
fied Inspection intervals - in particular
the brake fluid changing - is of great importance for driving safety - pages 82,
97.
SAFELY
operational
is essential to safe driving.
windows
check at regular intervals:
condition and pressures - page
126.
level
fuel
level
80
condition of your vehi-
turn
signals
of
fuel
settings
tank
level
fluid
headlights,
level
- page 74
should be checked
is
filled,
full
throttle
- page 77
level
- page 82
in
windscreen
windscreen
or in
operation,
washer
with
the
lenses
every
difficult
-
wiper
speci-
Safety
on the
extent on the personal attitude and style
of driving.
To
be on the safe side you should:
•
Always
ing off -
In many countries the wearing of seat
belts is compulsory anyway.
• Ensure
including
wearing
Passengers
ger
not only themselves, but also the
driver.
•
Adjust
The
upper edge of head restraint must
be
approximately at eye
Ensure
that
operation
road
depends to a large
put
seat
belt
on
even
in
town
that
all your passengers -
those
their
on the
belts
- page 13.
without seat belts can endan-
head
restraints
no
articles
of pedals - page 89.
before
traffic
- page 13.
rear
seat
to body size.
level.
interfere
mov-
- are
with
•
Stow
page
on the
• Do not
Stop
ing for two hours.
•
Never
impaired
Not only alcohol but also drugs and
many medicines can be very detrimental
to your reactions.
•
Adapt
road
Remember
slippery roads the handling and braking also
is
On
aquaplane
can
Further instructions on safety are given
in the various chapters in this manual.
all
luggage
22
roof
rack
drive
for a break at the latest after driv-
drive
in any way.
vehicle
conditions.
that
on vehicles
limited by the adhesion of the tyres.
wet roads the
at high
then no longer be steered properly.
correctly
- page 22
when
you
when
your
speed to
particularly on smooth
with
four-wheel drive -
front
speeds.
in
boot
feel
tired.
reactions
traffic
wheels can
The vehicle
are
and
-
57
Page 60

DRIVING
www.WestfaliaT3.info - a useful website for owners and enthusiasts of VW Westfalia T25 / T3 / Vanagon Campervans
TIPS
DRIVING
~re economy and the exhaust emissions
and noise depend to a great extent on
the
To
use as
turb
and keep wear of engine, brakes and
tyres to the minimum, the following
points should be noted:
• Do not run
the
Drive off immediately after starting. Do
not overrev.
• Avoid
• Avoid
The best consumption and least disturb-
ance
engine speeds in the highest possible
gear. Drive as often and as long as
sible
The fuel consumption is for example
twice as high in 2nd gear and 1.5 times
as
high in 3rd gear as in 4th gear.
ECONOMICALLY AND ENVIRONMENT-CONSCIOUS
personal
the environment as
vehicle
of environment is obtained at low
in the highest gear.
style
of driving.
little
fuel as possible and dis-
engine
stationary.
full
throttle
high
engine
little
to
warm
acceleration.
speeds
as possible
it up
with
pos-
• Change
longer
Depending on gearbox you can normally
drive on the level in the highest gear at
40-60 km/h and still accelerate.
• Avoid
speed.
•
Drive
look
Unnecessary
must be paid for
sumption and more disturbance of the
environment.
•
Stop
runs
well
down
only
when
smoothly.
driving
as
ahead.
engine
continuously
smoothly
acceleration and braking
with
during
engine
as possible and
higher fuel
traffic
hold-ups.
no
at top
con-
The
individual
naturally also affect fuel consumption.
The following factors for instance are not
favourable to fuel consumption:
• Traffic density, particularly large
towns
with
• Frequent stop/start driving, particularly driving from house to house so
engine is never properly warm.
• Driving in heavy, slow-moving
in low gear so
relatively high in relation to the distance
covered.
One
should, therefore, plan trips in ad-
vance
to avoid unfavourable operating
conditions.
Obviously
affected by factors over which the driver
has
no influence. It is for example nor-
mal for the consumption to increase in
the winter or in arduous conditions (bad
roads,
trailer towing etc.).
operating
numerous
that
the engine speed is
the fuel consumption is also
conditions
traffic
lights.
that
traffic
58
Page 61

DRIVING
www.WestfaliaT3.info - a useful website for owners and enthusiasts of VW Westfalia T25 / T3 / Vanagon Campervans
ECONOMICALLY AND ENVIRONMENT-CONSCIOUS
The economy and the exhaust emissions
and noise depend to a great extent on
the
personal
To
use as
turb
the environment as
and keep wear of engine, brakes and
tyres to the minimum, the following
points should be noted:
• Do not run
the
vehicle
Drive off immediately after starting. Do
not overrev.
• Avoid
• Avoid
The best consumption and least disturbance
of environment is obtained at low
engine speeds in the highest possible
gear. Drive as often and as long as
sible
in the highest gear.
The fuel consumption is for example
twice as high in 2nd gear and 1.5 times
as
high in 3rd gear as in 4th gear.
style
of driving.
little
fuel as possible and dis-
engine
stationary.
full
throttle
high
engine
little
to
warm
acceleration.
speeds •
as possible
it up
with
pos-
• Change
longer
Depending on gearbox you can normally
drive on the level in the highest gear at
40-60 km/h and still accelerate.
• Avoid
speed.
•
Drive
look
Unnecessary
must be paid for
sumption and more disturbance of the
environment.
stop
runs
well
down
only
when
smoothly.
driving
as
ahead.
engine
continuously
smoothly
acceleration and braking
with
during
engine
as possible and
higher fuel
traffic
hold-ups.
no
at top
con-
The
individual
naturally also affect fuel consumption.
The following factors for instance are not
favourable to fuel consumption:
• Traffic density, particularly large
towns
with
• Frequent stop/start driving, particularly driving from house to house so
engine is never properly warm.
• Driving in heavy, slow-moving
in low gear so
relatively high in relation to the distance
covered.
One
should, therefore, plan trips in ad-
vance
to avoid unfavourable operating
conditions.
Obviously
affected by factors over which the driver
has
no influence. It is for example normal for the consumption to increase in
the winter or in arduous conditions (bad
roads,
trailer towing etc.).
operating
numerous
that
the engine speed is
the fuel consumption is also
conditions
traffic
lights.
that
traffic
Page 62

DRIVING
www.WestfaliaT3.info - a useful website for owners and enthusiasts of VW Westfalia T25 / T3 / Vanagon Campervans
TIPS
TRAILER
The vehicle
transportation
other loads
a
trailer.
Trailer towing
on
the
centration from
The vehicle must
for trailer towing.
and driving instructions on
must
vehicle,
be
noted.
TOWING
is
intended mainly
of
persons, luggage
but it
can also
not
only places more stress
it
also
calls
the
driver.
be
specially equipped
In
addition
be
for
the
the
used
for the
and
to tow
more con-
operating
next
pages
Technical requirements
If
the vehicle
ted towing bracket,
and legally necessary
have been taken into account.
is
required
er
(e.g.
lighting),
socket
If
the vehicle
with a towing bracket,
must
be
•
The
Only a bracket which has been designed
and type-approved
be used.
brackets
sories
fitted
tions supplied with these brackets have
been approved
•
In
weight must
sticker
is
supplied with a factory-fit-
all
for
for
additional items
caravan refrigerator
the
terminal
must
be
subsequently connected.
is to be
noted:
towing bracket
advisable
the
are
factory.
by the
the
be
shown
rear
of the
for
V.A.G range
identical
maximum draw
It is
from
as
these
by the
Germany
at the
that
is
technically
trailer towing will
If
electricity
in the
and
54g in the
subsequently fitted
the
is a
safety part.
this vehicle
to use
The
to the
fitting instruc-
factory.
on a
clearly visible
towing vehicle.
trail-
interior
trailer
following
may
towing
of
acces-
ones
bar
•
The
properly
vehicle.
to
• A special warning lamp must
within
that
•
bracket includes
cooling
when service installing a bracket.
wise overheating may occur when engine
is
temperatures,
information about
ing
duty
should therefore
bracket must
documents.
trailer socket must
to the
This
the
terminal 54g
the
the
trailer
As the
system, this should also
pulling hard (mountains, high ambient
•
V.A.G
brackets
cooling system.
•
In
Germany
electrical system
applies, where necessary
driver's range
turn
signals are working.
factory installation
the
heavy
Dealers have
the
and the
be
the
be
entered
be
connected
in the
socket.
of
vision
modification
trailer loads).
done
fitting
of a
all the
installation
fitting
The
necessary
of a
installation
by
them.
of a
in the
of the
be
fitted
to
show
towing
of the
be
done
Other-
of
tow-
heavy-
towing
vehicle
60
Page 63

DRIVING
www.WestfaliaT3.info - a useful website for owners and enthusiasts of VW Westfalia T25 / T3 / Vanagon Campervans
TIPS
Operating
• If the traffic behind the trailer cannot
be
seen properly
view mirrors, additional outside mirrors
will be necessary. Both outside mirrors
must be
justed to give a good view to the rear at
all
times.
• Pitching movements between towing
vehicle
heavy-duty springs and shock absorbers
on the rear axle. If these springs and
shock
fitted
cases,
Dealer.
• Pitching and snaking movements can
also
be
obtained from and
Dealers
instructions
with
the standard rear
fitted
on folding arms and ad-
and trailer can be reduced by
absorbers have not already been
at the factory, they can, in many
be service-installed by a V.A.G
be reduced by stabilizers which can
in most European countries.
fitted
by V.A.G
• The permissible trailer weight - see
page
130 - must not be exceeded on
any
account.
• When towing a trailer in mountainous
regions,
en
for gradients up to 10 or 12%. If the trail-
er
mum a correspondingly steeper gradient
can
• The given trailer weights are only applicable
sea
the climbing ability drops due to the decreasing
weight of vehicle and trailer must also be
reduced
or part thereof.
• Where possible make
maximum permissible drawbar weight on
ball of the towing bracket - see page
130 - but do not exceed it.
• While observing the permissible trailer
load
are as near as possible to the axle. The
objects must also be secured so
they cannot slip about.
note
that
in the "Technical data" are only valid
weight is below the permissible maxi-
be climbed.
for altitudes up to 1000 m above
level.
As the engine output and thus
air density above 1000 m the
by 10% for each further 1000 m
and drawbar weight, distribute the
in the trailer so
the trailer weights giv-
full
use of the
that
heavy objects
that
• The trailer and drawbar load figures
on the data plate of the towing bracket
are for test certification only. The correct
figures for the vehicle, which are lower
than the above figures, are given in the
vehicle
documents and in this manual.
• The towing bracket increases the un-
laden
weight of the towing vehicle and
the playload must be reduced to corre-
spond.
•
Check
ing vehicle and on the trailer.
• The headlight settings must be
checked
moving off and altered as necessary.
the tyre pressures on the tow-
with
trailer attached before
61
Page 64

DRIVING
www.WestfaliaT3.info - a useful website for owners and enthusiasts of VW Westfalia T25 / T3 / Vanagon Campervans
Driving
Tips
To
obtain the best possible handling of
vehicle
and trailer, the following should be
noted:
• Try to avoid driving
hicle
and a loaded trailer. If this cannot be
avoided,
unfavourable weight distribution.
• The regulations regarding trailer
weights and speeds when towing which
are valid in various countries must always
be
permissible
80 km/h.
For
even
speed
Furthermore, if the vehicle is registered
as
restrictions on driving and trailer towing
on Sundays and public holidays.
only drive slowly to allow for the
observed. In Germany for example the
safety reasons do not drive faster
in countries where the permissible
is higher.
a commercial vehicle there may be
TIPS
with
an unladen ve-
speed when towing a trailer is
• As driving stability of vehicle and trailer
decreases
not drive at the maximum permissible top
speed
wind conditions - particularly when going
downhill.
In any
immediately the trailer shows the slightest
to stop the snaking by accelerating.
• Always try to brake in good time. If the
trailer has an overrun brake apply brakes
gently at
avoid
the trailer wheels. Change down before
going down a steep hill so
can
• The cooling effect of the radiator fan
cannot be increased by changing down
because
pendent on the engine
therefore not change down even when
towing a trailer as long as the engine can
cope
much.
when the speed increases do
in unfavourable road, weather and
case
the speed must be reduced
sign of snaking. On no account try
first
the jerking caused by the locking of
act as a brake.
without
then brake firmly. This will
that
the engine
the speed of the fan is not de-
vehicle speed dropping too
speed.
One should
Notes
• During the running-in period avoid
trailer towing as far as possible.
• It is advisable to have the vehicle ser-
viced
between the Inspection intervals if it
is
used frequently for towing a trailer.
62
Page 65

DRIVING
www.WestfaliaT3.info - a useful website for owners and enthusiasts of VW Westfalia T25 / T3 / Vanagon Campervans
TIPS
DRIVING
The
Contrary to the normal type of selectable four-wheel drive, the four-wheel
drive on the Transporter/Caravelle syncro is always in action. Only the amount
of power being transmitted to the
and rear wheels changes according to
the requirements. This automatic distribution of the driving forces is attained
through a wear resistant viscous coupling incorporated in the
ensures,
ing force
sible,
best possible traction is attained when
required.
A FOUR-WHEEL
drive
concept
on the one hand,
losses
and on the other hand,
are kept as low as
front
DRIVE
axle. This
that
the driv that
VEHICLE*
front
pos-
the
1 - Front axle final drive
and viscous coupling
This
ingenious drive concept make the
Volkswagen
a
versatile, efficient road vehicle which
proves itself on ice and snow and in offroad conditions.
Transporter/Caravelle syncro
2
- Propshaft
3 - Rear
axle final drive
63
Page 66

DRIVING
www.WestfaliaT3.info - a useful website for owners and enthusiasts of VW Westfalia T25 / T3 / Vanagon Campervans
TIPS
Advantages
The special
wagen
when
compared
only
has a
tages
in
points:
The
traction
The traction is increased considerably by
the permanently engaged four-wheel
drive. This is of particular benefit on snow
and ice, when moving off and when driving
on
difficult
Driving in such conditions is
ous
with
avelle syncro:
There is no longer any need to drive
past obstacles at speeds on slippery uphill stretches, because one is afraid of
becoming stuck, one can approach
slowly, stop and then start off again.
The
acceleration
As
the driving force to be put onto the
road goes to four wheels instead of two,
the amount of slip is considerably reduced.
tween
tyre
by, the acceleration capabilities on slippery road surfaces.
of
four-wheel
drive
Transporter/Caravelle
respect
mountain roads.
the Volkswagen Transporter/Car-
This improves the adhesion be-
concept of the Volks-
with a vehicle
two-wheel
of the
and road surface and there-
drive,
drive
syncro,
which
has advan-
following
less
hazard-
The
handling
Decisive
slippery roads - is the grip between the
four wheels and the road surface.
On
wheels can spin on slippery surfaces if too
much acceleration is given. This is detrimental to the adhesion.
By
wheels instead of two the lateral forces
which can be transmitted are increased
on the Volkswagen Transporter/Caravelle
syncro.
away.
Using
With the four-wheel drive the Volkswagen
Transporter/Caravelle syncro has good
traction in winter road conditions even
with
of winter or all-weather tyres is recommended on all four wheels to obtain even
better handling and braking.
For
be improved considerably
tyres.
for the handling - particularly on
two-wheel drive vehicles the driving
distributing the driving forces to four
The vehicle is
winter
tyres
the standard tyres. However the use
cross country driving the traction can
less
likely to break
with
winter
Using
snow
chains
Snow
chains improve not only the traction
in winter road conditions but also braking.
For
this reason snow chains must also be
used
on vehicles
when snow chains are obligatory. Further
details about using snow chains are given
on page 89.
Operation
Contrary to customary four-wheel drives,
the driver of a Volkswagen Transporter/
Caravelle
or disengage the drive. The distribution of
the driving force to the
axles
ways matched to the existing road surface
conditions.
Incorrect operation is thus excluded and
the driver can concentrate fully on the
traffic.
Only
engaged by hand in special operating
conditions. Further details are given on
the next two pages.
syncro does not need to engage
takes place automatically, and al-
the differential locks
with
four wheel drive
front
>K
have to be
and rear
Page 67

DRIVING
www.WestfaliaT3.info - a useful website for owners and enthusiasts of VW Westfalia T25 / T3 / Vanagon Campervans
TIPS
Driving on dry roads
The
differential locks must not be en-
gaged.
They
tages
at
pair
the
Particularly if the
lock is engaged, the vehicle is no longer
steerable.
Important instructions
locks
are to be
do not
all
on dry
vehicle's steerability.
provide
road surfaces,
front
axle differential
on the
found
on
page 27.
any
advan-
but im-
differential
Driving on wet, slippery roads
Due
to the
power
smooth
On wet surfaces
On
wet
even with
syncro
to aquaplane
For this reason, one should avoid excessive speed and
compatible to the road conditions. The
differential
Important instructions
locks
On slippery surfaces
On slippery surfaces
erential
moving
lock
should then
The
front
be engaged.
Important instructions
locks
four-wheel drive,
is
transferred even
road surface.
roads
one
the
it is
possible
locks*
are to be
lock may only
off, and at
axle differential lock must not
are to be
should also note that
Transporter/Caravelle
for
at
high speeds.
drive
must
found
on
the
be
very
be
disengaged again.
found
the
to a
the
front
at a speed
not be
on the
on the
on
differential
page 27.
rear axle diff-
engaged when
low
speed.
differential
page 27.
engine
relatively
wheels
engaged.
The
Notes
The style of driving must always be
adapted
traffic conditions. The increased safety
offered by this type of vehicle must not
encourage one to take unnecessary
risks.
In particular, one must always
ber that the stopping ability is limited
by the adhesion of the
road surface. The braking capability of
the vehicle is the
normal
reason,
by the good acceleration capabilities,
even on slippery road surfaces, into
driving too fast.
to suit the road surface and
remem-
tyres
on the
same
two wheel
one should never be tempted
drive
as that of a
vehicle. For this
Page 68

DRIVING
www.WestfaliaT3.info - a useful website for owners and enthusiasts of VW Westfalia T25 / T3 / Vanagon Campervans
TIPS
Drfnng cross
zrze
j-iving for the
: -.errain, it is advisable to make your-
=e: familiar
-oads,
and also under easier off-road
conditions. For safe driving cross country, the following rules are of great im-
portance.
• Always wear your seat belt.
• Timely gear changing is better for
the engine and prevents the vehicle from
bogging down.
• Never drive
this leads to premature wear.
• The more uneven and creviced the
terrain, the lower the speed must be.
Pay
attention to the vehicle's ground
clearance.
• Do not drive over small embank-
ments or declines at excessive
This
can lead to bouncing during which
it would be impossible to avoid any obstacle
which may suddenly appear. In
addition it could lead to vehicle damage.
• Drive down gradients in the same
gear
as you would drive up.
country
first
time over diffi-
with
the vehicle on normal
with
the clutch slipping as
speed.
• Embankments, gradients and similar
obstacles
down at
with
• If however one is forced to drive
across
tip, one should immediately steer directly
into
• Before driving through water, determine the depth - the
depth
exceeded.
•
After
the following points are important:
- Disengage differential locksH<
-
Clean
ment and underside of vehicle so
moving and electrical and/or electronic
parts can function properly.
-
Clean
examine tyres for foreign bodies in the
treads and damage.
-Clean
ber plate.
- Dry the brakes by driving a short dis-
tance
This
one side or braking effect being retarded.
should only be driven up or
right
the slope.
a slope and the vehicle tends to
the slope.
(see Technical Data)
with
will prevent brakes from pulling to
angles, i.e. directly in line
permissible
driving
excess
tyres and wheels roughly and
turn
through
dirt
signals, lights and the num-
the brake pedal depressed.
water
from engine compart-
must
wading
not be
or mud
that
all
-After going through
dipstick out and check if there are drops
of water on it or if the oil level has risen. If
this is the
without
•
After
brakes must be checked and if
cleaned.
premature wear to the brake system.
• If, during cross
vehicle sank deeply
bottomed on an obstacle, the running
gear, brake hoses and engine sump
must be checked for damage.
Note
To
the vehicle, the vehicle is equipped
protective plates in
and underneath the engine and gearbox
and protective rails running along both
sides
case
delay.
driving
This will prevent damage and
prevent damage to the underside of
of the propshaft.
deep
water,
the oil must be changed
through
country
into
front
mud the
driving the
soft ground or
of the
front
pull
dirty,
with
axle
Page 69

Note
www.WestfaliaT3.info - a useful website for owners and enthusiasts of VW Westfalia T25 / T3 / Vanagon Campervans
for vehicles
with
differential
lock(s)
Before
driving through a difficult cross
country stretch (e.g. mud,
snow
or steep gradients) it is advisable to
engage
the differential lock(s)>H at low
speed.
Important
the
differential
pages 26 and 27.
instructions
locks are to be found on
sand,
regarding
water,
To
prevent the engine from drawing in
water through the intake air preheater
and
being damaged when wading, there
is
a valve in the engine compartment on
the right behind the maintenance flap
with which the intake air preheating can
be
closed.
ing it down and turning it to the right.
The valve is closed by press-
Output
If the Transporter/Caravelle is to be output tested on a dynamometer, the propshaft must be removed.
Brake
For
shaft must be removed. The differential
locks
testing
test
stand
brake testing e.g at MOT, the prop-
must not be engaged.
Page 70

OPERATING
www.WestfaliaT3.info - a useful website for owners and enthusiasts of VW Westfalia T25 / T3 / Vanagon Campervans
FUEL
INSTRUCTIONS
Petrol
engines
Vehicles
fuel
Lead-free
RON1) not
If regular petrol
with
injection
regular
lower
catalytic
converter
engines
petrol
than
91.
with
adequate anti-knock
70 kW
properties is not available, use premium
petrol (lead-free or leaded) or a suitable
mixture.
For ail vehicles
Only
lead-free
these
vehicles.
The
use of leaded petrol is very detri-
with
catalytic
petrol
may be used in
converter
mental to the functioning of the emission
control system because the lead is deposited in the catalytic converter.
Even one
detract
lytic
tankful
from
the
converter.
of
leaded
efficiency
petrol
will
of the cata-
Although lead-free fuel
may again be used afterwards the original
efficiency of the catalytic converter is
never
fully attained.
On
vehicles
with
Lambda probe2) the mixture formation is also negatively affected.
Vehicles
and 57 kW
Lead-free
not
In the
free
lower
interests
petrol
without
catalytic
carburetor
or leaded
than
regular
91.
of our
should be used
converter
engines
petrol
environment
whenever
44
RON1)
lead-
possible.
If regular petrol
with
adequate anti-knock
properties is not available, use premium
petrol (lead-free or leaded) or a suitable
mixture.
82 kW
fuel
Leaded
premium
RON1) not
injection
lower
engine.
petrol
than
98.
Note
Lead-free
51607 and leaded petrol
petrol must comply
with
with
DIN3)
DIN 51600.
1)
Research
knock properties of the petrol.
Octane Number, indicates anti-
2) Lambda = Air/petrol relationship.
3) Standards issued by the German Standards
Institution.
Page 71

Petrol
www.WestfaliaT3.info - a useful website for owners and enthusiasts of VW Westfalia T25 / T3 / Vanagon Campervans
additives
On
carburetor engines
catalytic converters carburetor icing can
occur
at ambient temperatures between
0° C and +15° C when the air humidity
is
high despite the automatically
trolled intake air preheating. This can
cause
the engines to stall occasionally
when idling in the warm-up phase.
Even
the anti-icing additives contained in
some
fuels in the cold season cannot
entirely prevent carburetor icing. When a
properly tuned engine stalls repeatedly
in the conditions described above it is
advisable
ditive
vents carburetor icing and also cleans
the carburetor and protects it against
corrosion.
workshops in Germany and in many ex-
port
No
with
to mix
with
the fuel. This additive pre-
It is obtainable from V.A.G
countries.
other fuel additives should be mixed
the petrol.
with
Volkswagen
and
petrol
without
con-
ad-
OPERATING
Diesel
engines
Diesel
fuel
CN1) not
Driving
When
be
experienced at temperatures below
0° C because the fuel thickens due to
wax separation.
For
this reason, winter Diesel which is
more resistant to cold is sold during the
winter and works satisfactorily down to
about -15° C.
In countries
tions the Diesel fuels offered have a
ferent temperature behaviour. Check
with
the country concerned regarding the
availability of Diesel fuels.
When
Diesel
tures by mixing regular leaded or
free petrol (not premium)
Diesel.
to DIN 51601
lower
than
45
in
winter
using summer Diesel trouble may
with
different climatic condi-
V.A.G dealers or filling stations in
necessary summer and winter
can be used at lower tempera-
with
dif-
lead-
the
INSTRUCTIONS
As
this additive reduces the engine output, only the amount actually required
should
be
used:
(max. 30%)
Temperature
in 0 C
- Oto
- 5
- 5 to
-15
-15
-25
This
in Germany.
Due to the
mixing
be
possible, the
the
Mixing
starts to separate because subsequent
mixing is effective only in the tank but
not in the rest of the fuel system.
Summer
Diesel
85%
70%
to
table is based on the fuels available
should, for
done
in the
tank
before
must take place before the wax
Petrol
-
inflammability
vehicle
petrol
the Diesel.
Winter-
Diesel
15%
30%
100%
100%
-
safety
70%
of
reasons,
tank.
should be put
Petrol
petrol
Where
-
33
the
only
into
" Cetane Number, indicates the ignitability of
Diesel.
69
Page 72

OPERATING
www.WestfaliaT3.info - a useful website for owners and enthusiasts of VW Westfalia T25 / T3 / Vanagon Campervans
IN
Filter
preheating*
If the vehicle is
preheater, the fuel system will be kept
operational down to -25° C if winter Diesel
fuel is
preheated
and
Dilution
necessary.
Generally
It at temperatures below -25° C the fuel
has
that
cient to place the vehicle in a warm
room for a while.
Fuel
similar
70 the Diesel fuel.
used.
filter
hose connections (see Fig.).
with
applicable:
already waxed to such an extent
the engine will not start it is suffi-
additives (anti-waxing agents and
fluids) must not be mixed
fitted
with a filter
One can recognise the
by the additional valve
petrol is then no longer
with
FILLING
The
of the vehicle.
Key
tank cap* (on vehicles
drive an extra key is supplied).
The
(Syncro
Trouble-free refueling calls for correct
use
• Insert nozzle fully into tank neck and
do not
On
it should be noted
smaller
a
spring-loaded flap below the filler
opening.
petrol are correspondingly smaller in
diameter and open the flap when inserted
that
the tank.
TANK
filler neck is on the
A = see page 4 -
fuel tank capacity is approx. 60 litres
70).
of filler nozzle.
tilt
it.
vehicles
into the filler neck. This is to ensure
only lead-free petrol can be put in
with
a factory
in diameter and is closed
Filler nozzles for lead-free
right
hand side
fits
the lockable
with
four wheel
that
fitted
the filler neck is
catalyst
with
• Do not try to
otherwise the fuel (especially Diesel) will
foam and this may cause nozzle to switch
off too
soon.
As
soon as the correctly operated auto-
matic nozzle switches off for the
time, the tank is full. Do not try then to
put more fuel in because otherwise the
expansion
the fuel can then overflow when it gets
warm.
Note
Bleeding the
The
when tank has been run dry - this takes
place
space in tank will be filled -
for vehicles
fuel system does not need bleeding
automatically while starting.
fuel
fill
tank too quickly,
with
Diesel
system
engine:
first
Page 73

What to do when wrong fuel has
www.WestfaliaT3.info - a useful website for owners and enthusiasts of VW Westfalia T25 / T3 / Vanagon Campervans
been put into tank.
Premium petrol instead of regular
The engine can be run on premium fuel
with no problems. A worthwhile reduction of fuel consumption or increase
in output should however not be expected.
Regular petrol instead of premium.
In isolated cases the engine can also be
run on regular petrol but the octane rating
must not be under 91 RON. The vehicle
must then only be driven at medium engine speeds and low engine loading. High
engine loading with full throttle or high engine revs can cause engine damage. Fill
tank with 98 RON premium petrol as soon
as possible.
Lead-free premium petro! with 95 RON
instead of leaded premium petrol
The engine can also be run as an ex-
ception on this
of driving must adapted to the lower
antiknock properties of this petrol - see
previous paragraph.
Leaded petrol instead of lead-free
Vehicles with catalyst must not be driven
on leaded petrol because otherwise the
function of the emission control system
is affected considerably - see also page
67.
The fuel system must be emptied, in
accordance with environmental regulations - preferably by a V.A.G workshop.
fuel.
However the style
UUJEaUuLJkSU
Petrol instead of diesel
The engine can be run on a concentration of up to approx. 30% leaded or
free regular petrol (not premium). However if premium petrol or a large quantity
of regular petrol has been put in the tank
accidentally, the engine must not be run
otherwise damage will occur. The fuel
system must be emptied bearing in mind
environmental control regulations - preferably by a V.A.G workshop.
Diesel instead of petrol
The engine may not be run on
fuel system must be emptied bearing in
mind the environmental control regulations - preferably by a V.A.G workshop.
Diesel.
lead-
The
71
Page 74

•»ij^:y^i.ifi:K»:m^ii
www.WestfaliaT3.info - a useful website for owners and enthusiasts of VW Westfalia T25 / T3 / Vanagon Campervans
LUBRICANTS
Petrol
engines
A
special very high quality oil is put in the
engine at the factory and this can be used
all the year round - except in very cold
cli-
mates.
As
a high quality engine oil is a prerequisite for trouble free operation and long
engine service
life
only a correspondingly
high quality oil may be used for topping
up and at oil changes.
As
it has been established
range of oils on sale
quality, we strongly recommend
that
differ
considerably in
the wide
that
only
the following mineral and synthetic oils,
which have been tested by us, are
used:
• Multigrade oils, specification VW 50101
or
• Improved lubricity oils, specification
VW
50000 or
• High performance engine oils, specifi-
cation VW 50000 and 50500.
The specifications must be marked on the
container. When topping-up the oils can
be mixed
with
one another.
Multigrade oils to VW Standard 50101 are
reasonably priced oils
with
the following
properties:
- All year round use in temperate climate
areas.
- Excellent cleaning ability.
- Efficient lubrication at all engine temperatures and load conditions.
- High resistance to ageing.
The improved lubricity and high perform-
ance
engine oils have in addition the fol-
lowing advantages:
- All year round use at practically all temperatures.
- Low frictional
losses
in engine.
- Best possible starting even at very low
temperatures.
Only
if at some
not available can a good quality oil
the specification
time
the approved oils are
API-SF
(multigrade or
with
single grade) be used as a temporary exception.
VA.G
Dealers have all the details. The
oil change should therefore preferably
be done by a V.A.G Dealer.
°F
°c
40-
•100
30-
80
20-
•
60
10-
-40
0
• 20
10-
• 0
20
•20
30-
B25-
560
A
- High performance and improved lubricity oils, B - Multigrade oils, C - Single
grade oils.
The viscosity
class
of the oil must be selected as shown in the Fig. The oil does
not have to be changed when the ambient
temperature is briefly above the range
shown.
When using SAE 10 W single grade oil or
SAE
5 W-20 or SAE 5 W-30 multi-grade
oils,
continuous high engine speeds and
engine loading should be avoided.
This
restriction does not apply when using high performance or improved lubricity oils.
Page 75

OPERATING
www.WestfaliaT3.info - a useful website for owners and enthusiasts of VW Westfalia T25 / T3 / Vanagon Campervans
INSTRUCTIONS
Diesel engines
A
special very high quality oil is put in the
engine at the factory and this can be used
all
the year round - except in very cold
mates.
For
topping up and changing, the follow-
ing mineral or synthetic oils are to be
used:
• Good quality oils, specification API-
CD
(only for topping up on the Turbo
Diesel
engines in an emergency) or
• Multigrade oils, specification VW50101
(not for Turbo Diesel engines) or
• Multigrade oils, specification VW
50500
or
• Improved libricity oils, specification VW
50000
(not for Turbo Diesel engines) or
• High performance engine oils, specifi-
cation VW 50000 and 50500.
The
specifications must be marked on the
container. When topping-up the oils can
be
mixed
with
one another.
The
advantages of improved lubricity and
high performance engine oils for petrol
engines
also
Diesel
mentioned on the previous page
apply when these oils are used in
engines.
cli-
C
°F
40
100
]
80
60
40
20
0
20
A
- High performance and Improved lubricity oils, B - Multigrade oils, C - Single
grade oils.
The
viscosity class of the oil must be
selected
does
ambient temperature is briefly above the
range shown.
When
not drive
throttle
as shown in the Fig. The oil
not have to be changed when the
using SAE 10 W single grade oil do
for long periods.
J
o o
3
I
< <
< <
II
u
with
high engine speeds and
full
Manual
•
Gear
Front
•
Automatic
• Final drive:
• Gearbox part: ATF Dexron®
Power
• ATF Dexron®
Lubricant
No
engine
Any
additives
ranty.
oil,
axle
Gear
oil,
assisted
additives
oil or the
damage
gearbox
and
API-GL
4, SAE 80
differential
API-GL
5, SAE 90
final
(syncro)
gearbox
Gear
oil,
API-GL
steering
additives
should be
other
caused by the use of such
will
not be covered by the
mixed
lubricants.
drive
5, SAE 90
with
the
war-
73
Page 76

OPERATING
www.WestfaliaT3.info - a useful website for owners and enthusiasts of VW Westfalia T25 / T3 / Vanagon Campervans
INSTRUCTIONS
ENGINE OIL
Then
Checking oil
Every
engine
The
oil consumption can be up to 1.5 li-
tres per 1000 km.
The
engine oil level must therefore be
checked
when filling the tank. In arduous
ing conditions or
ing
hard
fore
moving
The
dipstick and filler pipe can be
reached
number plate.
The
dipstick location is shown in the illustration:
The
vehicle must be on a level surface
when checking oil
engine wait a few minutes for the oil to
74 drain back to the sump.
level
uses
a certain amount of oil.
at regular intervals, preferably
when
it should be checked
engine
off.
through a flap behind the rear
level.
is
daily
After stopping
operat-
work-
be-
pull the dipstick out, wipe it
clean
cloth and insert again. Then pull dip-
stick out again and check the oil
The
level must be between the two
marks.
The
difference in quantity between the
min.
and max. marks is 1.0 litre.
When
the engine is working hard such as
in sustained high-speed motorway cruising in summer, when towing a trailer or
when climbing mountain
level
should be kept up to the max. mark.
Topping up
Unscrew
extension pipe out fully.
Add
oil.
Push
extension pipe in again and screw
the cap back on
Check
the level
should
engine
the cap from the oil filler and pull
tightly.
with
not be above the max. mark.
passes,
oil
the dipstick - the oil
with
level:
the oil
a
Changing
The
to use when engine is running but also
due to ageing. The engine oil changing
times depend therefore on the mileage
and
Petrol
Engine
every 12 months (whichever comes first).
Diesel engines
Engine
12 months (whichever comes first).
For
For all engines
• If the vehicle is used continuously in
arduous conditions, the engine oil must
be
page
• Disposal of the old oil must be done in
accordance
regulations.
Recommended
- see page 72.
engine
engine oil deteriorates not only due
also the time
engines
oil change every 15000 km or
oil change every 7500 km or every
further detail, see Service Schedule.
changed at shorter intervals - see also
91.
oil
elapsed.
with
environmental protection
oils and viscosity
classes
Page 77

GEARBOX
www.WestfaliaT3.info - a useful website for owners and enthusiasts of VW Westfalia T25 / T3 / Vanagon Campervans
OIL
Checking oil
With
the
differential (syncro) the oil level does not
need
checking.
With
the
in the final drive also does not need
checking.
The ATF
ever
be checked in between the intervals
given in service schedule.
To
do this the vehicle must be standing
on a level surface. The level must only
be checked when the ATF is
10 km after starting from cold the ATF
is
at the correct temperature). If fluid is
cold or too hot the reading will be incorrect. The engine must be running at
idle
speed,
applied and the selector lever at "P".
level
manual
automatic
level
gearbox
in
gearbox
the handbrake must be
and
gearbox
part
front
the oil level
must how-
warm
axle
(about
' "•
L_ - *
To
check, pull dipstick (see Fig.) out,
wipe
with
a clean lint-free rag and then
insert it fully again.
Pull
dipstick out and check ATF level.
When the ATF is warm the
be
between
the vehicle must be taken to a V.A.G
workshop
find the reason for the incorrect level.
It is not sufficient to merely top up or
drain off ATF.
the two
without
marks
delay so
level
must
- otherwise
that
they can
Changing oil
With
the
axle
not need changing.
With
final drive also does not need changing.
The ATF in gearbox part must however be
changed
schedule.
quired, the job knowledge necessary and
the disposal problems, this should preferably be done by a V.A.G Dealer.
Note
When
ual or
must
may
lifted.
manual
differential
the
automatic
at the intervals given in service
Due to the special tools re-
there
automatic
not be
only
be
(syncro)
is no
started
towed
gearbox
gearbox
lubricant
gearbox
and the
with
driving
and
the oil does
front
the oil in the
in the
man-
the
engine
vehicle
wheels
Page 78

POWER
www.WestfaliaT3.info - a useful website for owners and enthusiasts of VW Westfalia T25 / T3 / Vanagon Campervans
To
system it is essential
in reservoir is correct.
The reservoir is in the engine compartment on the
ance
The check must only be done
engine running and the wheels in straightahead
The
"max" and "min" marks. When level has
cropped to min. mark, ATF (Dexron®)
should be added after removing the red
;=c in top of reservoir.
ASSISTED STEERING*
ensure satisfactory operation of the
that
the
fluid
level
right
flap.
position.
fluid
should always be between the
behind the mainten-
with
the
Note
If the power assisted steering fails at any
time
or when engine is not running (vehicle on tow) the vehicle can still be
steered but more force
to
turn
the steering wheel.
will
be required
75
Page 79

COOLING SYSTEM
www.WestfaliaT3.info - a useful website for owners and enthusiasts of VW Westfalia T25 / T3 / Vanagon Campervans
OPERATING
INSTRUCTIONS
Reservoir
The
cooling system is filled at the factory
with
a permanent coolant which is not
changed.
and
Glycol
" . as). This mixture not only gives the
• e: essary frost and corrosion protection
:aiso
:: -g point of the coolant. Should it
:^::~ie necessary at anytime to add
xxe
This coolant consists of water
our G11 additive (anti-freeze on
basis
with
anti-corrosion add-
prevents scaling and raises the
: : Hit or refill the system, only a mix-
of pure water and G11 or a coolant
Expansion
additive
774 A (note marking on the container)
is
to be used - see also next page
"Topping up coolant".
Caution
The
are poisonous.
The
stored
reach
be
drained
and also
reused.
If the
must
environmental
tank - Petrol engines
with
the specification
coolant
additive
coolant
be disposed of in accordance
additive
must
in the
of children. If the
at
stored
therefore
original
anytime,
in a
safe
is not to be used
protection
and the
container
coolant
it
must
be
place
regulations.
TL-VW
coolant
only
be
out of
has to
caught
until
it is
again
with
Expansion
In the engine compartment there is a
reservoir
The
ed
in the reservoir. It only needs checking in the expansion tank if a large
amount of coolant has been lost or if the
warning lamp for coolant temperature/
coolant level lights up.
it
tank - Diesel engine
and an expansion tank.
coolant level is normally only check-
Page 80

OPERATING
www.WestfaliaT3.info - a useful website for owners and enthusiasts of VW Westfalia T25 / T3 / Vanagon Campervans
INSTRUCTIONS
Checking
The
the satisfactory operation
system.
Open
should
when engine
max.
The
when
coolant level
correct coolant level
flap behind number plate. The level
be between min. and max. marks
is
can
cold
only
is not
mark when engine
level
engine
or
just
is
be
checked
running.
is
of
warm.
essential
cooling
above
properly
to
the
Coolant losses
In normal conditions
is
almost maintenance-free.
Coolant
in
system
workshop without delay.
cient
In a water-tight system
occur
is
Overheating can occur
• the flow
by a radiator
(leaves,
ing lights
•
been
see
•
next page
loss normally indicates leakage
the
system.
should
to
merely add coolant.
if the
exceeded
the
next page "Topping
the
boiling point
as a
of
muff,
dust, insects)
in
front
boiling point
lowered
radiator fan
"Fan",
the
In
this
case
be
checked
losses
result
of
if:
cooling air is reduced, e.g.
very
dirty
or
of
radiator grille
of the
by an
incorrect mixture
is not
or
cooling system
the
cooling
by a
It is not
of the
overheating.
additional driv-
up
working - see
V.A.G
suffi-
can only
coolant
radiator fins
coolant
coolant".
has
-
• vehicle
low a gear
and
at very high ambient temperatures
see
next page
If
the cause
found
dealer
serious
engine.
Topping
Topping
servoir
Do
not
The
excess
the system when engine gets
If the
the expansion tank must also
ed
and filled
First
down,
turn
let pressure escape
off.
Caution
Do
not
Danger
System
is
driven
with
engine speed very high
"Fan".
of
and
as soon
only.
coolant
switch
then cover
cap one quarter
the overheating cannot be
eliminated, contact a V.A.G
as
damage
up
up is
fill
above
remove
of
scalding.
is
under
possible as otherwise
may be
coolant
normally done
the max.
coolant will be forced
warning
to
brim
the
engine
cap
cap
pressure.
up a
long hill
done
lamp
if
necessary.
off
and
with a cloth
turn
to the
first.
Then take
when
engine
mark.
comes
be
in too
-
to the
in the re-
out of
hot.
on
check-
let it
cool
and
left
and
cap
is hot.
78
Page 81

OPERATING
www.WestfaliaT3.info - a useful website for owners and enthusiasts of VW Westfalia T25 / T3 / Vanagon Campervans
INSTRUCTIONS
In order to maintain the corrosion
protection at all times and prevent the
system
from scaling up and the boiling
point from being lowered the mixture
should
not be altered
mer or in
plain
portion
freeze
C).
Screw cap on
The
gine running (at a fast idle). Take air in-
take grille off (see page 104), open vent
screw
lever
emerges,
in reservoir and expansion tank.
warm
water:
system must then be bled
to "warm". As soon as coolant
the
should be at
protection
again
at top of radiator and set heater
close vent screw. Top level up
even
countries
coolant
least
down
to
tightly.
in the sum-
by
adding
additive
40%
(anti-
about
-25°
with
pro-
en-
Fan
The
fan is driven electrically and
trolled by a thermoswitch which is actuated by the coolant temperature.
When
the engine is hot, the fan may
continue to run when the engine has
been
stopped or it may switch on
suddenly
Notes
• If the fan is not running although the
coolant temperature is very high, the
fuse should be checked and renewed if
necessary
• The speed of the fan does not depend
on engine
not therefore be increased by changing
down.
As
a
gradient can be taken without a large
drop in speed it is not necessary to
change
- even when ignition is off.
- see page 103.
speed.
long as the engine runs smoothly and
down.
The cooling effect
con-
can-
Driving
The
tory provides frost protection down to
about -25° C. To ensure
tection is adequate, the coolant should
be
gins
additive G11 or an additive
specification
If greater protection against frost is required,
can
otherwise the anti-freeze protection is
reduced
effect is impaired.
Vehicles
usually
-35° C.
in
winter
mixture put in the system by the fac-
that
frost pro-
checked before the cold
and if necessary, undiluted coolant
TL-VW
the proportion of G 11 additive
be increased, but only up to 60%
and furthermore the cooling
for export to cold countries
have frost protection down to
774 A added.
season
with
be-
the
79
Page 82

OPER
www.WestfaliaT3.info - a useful website for owners and enthusiasts of VW Westfalia T25 / T3 / Vanagon Campervans
WINDSCREEN WASHER SYSTEM
The filler opening of the container is
under the carpet on left hand side of
front footwell. The container holds about
3.5 litres. On vehicles with a headlight
washer the capacity is 6.5 litres.
80
On vehicles with rear window washer*
there is an additional container on the
right in the luggage compartment This
container holds about 1 litre.
To fill container
Lift carpet, open flap and unscrew cap.
Fill container to top with water and screw
cap on again. Switch ignition on and
check that washer is working.
It is advisable to add a window cleaner
solution (with anti-freeze additive in
ter) to the water because plain water is
not usually sufficient to clean the glass
and headlight lenses quickly and tho-
roughly.
win-
Adjusting washer jets
When vehicle is stationary, the water
should hit the windscreen at the follow-
ing points:
a = 490 mm c = 180 mm
b = 220 mm d = 350 mm
The water jet for the rear window should
hit the window in the centre of the wiped
area.
The jets can be adjusted with a needle.
The jets for the headlight washer sys-
tem*can only be adjusted with a special
tool.
When adjustment is necessary,
contact your V.A.G workshop.
Page 83

OPERATING
www.WestfaliaT3.info - a useful website for owners and enthusiasts of VW Westfalia T25 / T3 / Vanagon Campervans
INSTRUCTIONS
BRAKE
The
SYSTEM
following points are of particular
importance to the safe operation of the
brakes.
• New brake linings must also be run in
and
do not have the optimum friction
properties during the
first
200 km. The
slightly reduced braking effect can be
compensated
sure
on the brake
for by slightly more pres-
pedal.
This also applies
when new linings have been fitted.
• On hills change down in good time to
make
use of the braking effect of engine.
This
relieves strain on the brake system.
When
brakes are applied do not keep
them on continuously, apply and release
alternately.
• In certain operating conditions, for
example
after driving through water,
after heavy rain or after washing the
•vehicle
the braking effect may be retarded by wet, or in winter iced-up brake
discs
and linings - the brakes must be
dried
first
by applying the footbrake.
The
full
braking force may also be re-
tarded when vehicle has been driven for
some
time on heavily salted roads without using the brakes because the layer
of salt on
moved
discs
first.
and pads has to be re-
Further details - particularly for vehicles
with
four wheel drive - are given on page
66.
• Brake lining wear depends to a large
extent on the operating conditions and
style of driving. On vehicles which are
used
mainly in town
traffic
and stop/start
conditions or are driven hard it may be
necessary
to have the thickness of the
brake linings checked in a V.A.G workshop
in between the intervals given in
the service schedule.
• If the brake pedal travel increases
suddenly,
it may be
that
one of the two
brake circuits has failed. You can still
drive on to the next
be
prepared to use more pressure on
V.A.G
workshop but
the pedal and allow for longer braking
distances
The
on the way.
failure of a brake circuit is shown by
the lighting up of the brake warning
lamp*
(see also page 36).
The
brake fluid level must be checked
regularly - see next page.
Brake
servo
The
servo is operated by vacuum which
is
only available when engine is running.
Caution
For
this
be
ning.
When
cause,
reason
allowed
the brake servo is not working be-
for example, the vehicle is being
to
the
roll
vehicle
with
should not
engine
not run-
towed or because a defect has occured
on the brake servo, the brake pedal must
be
pressed harder.
81
Page 84

OPERATING
www.WestfaliaT3.info - a useful website for owners and enthusiasts of VW Westfalia T25 / T3 / Vanagon Campervans
INSTRUCTIONS
Brake
fluid
reservoir
The fluid reservoir is in the dash under
the dash cover panel. The panel can be
lifted
to
fill
in the
When installing insert the lower
edge
Checking
the reservoir. To do this grip
recess
at the back of the cover.
first.
fluid
level
front
The correct fluid level is essential to the
satisfactory operation of the brake
system. The fluid level must always be between the "max" and "min" marks.
The level of fluid tends to sink slightly
when the vehicle is used due to the automatic adjustment of brake lining wear.
This
is quite normal.
However, if the level sinks noticeably in
a
short time or drops below the "min"
mark the system may be leaking. Take
the vehicle to a
and have the brake system
V.A.G
workshop at once
checked.
The failure of a brake circuit is shown by
the lighting up of the brake warning
lamp* (see also page 36). When this
happens
shop
system
Brake
Brake
course
take the vehicle to a V.A.G
work-
immediately and have the brake
checked.
fluid
fluid absorbs moisture. In the
of time it takes up water from the
ambient air. Too high a content of water in
the brake fluid can cause corrosion damage
in the system in time. Furthermore
the boiling point of the brake fluid is reduced considerably. This can then cause
the formation of vapour bubbles in the
fluid when the brakes are used hard. The
efficiency of the brakes and thus the vehicle
safety is then seriously affected.
For
this
renewed
reason
every
the
brake
two years.
fluid
must
be
Use
only our genuine brake fluid (specifi-
cation to US standards
FMVSS
116 DOT
4). The fluid must be new.
Caution
Brake
fluid
is poisonous.
It
must
closed
children.
and the
dash is
voir.
fluid.
V.A.G
therefore
original
Brake
fluid
plastic
spill any
cessary.
Environmental
must
made.
fluid
Cover
be observed
Dealers have all the necessary in-
only
container
will
also
material
Take
when
area
round
protection
when
be
stored
out of
damage
great
topping
paintwork
of
which
care
up the
reservoir
regulations
disposing of the
in the
reach
the
not to
reser-
if ne-
of
formation and stock the specified brake
fluid.
The renewal of the fluid should therefore
be carried out by a V.A.G Dealer, preferably during an Inspection
Service.
82
Page 85

ING
www.WestfaliaT3.info - a useful website for owners and enthusiasts of VW Westfalia T25 / T3 / Vanagon Campervans
INSTRUCTIONS
ANTI-LOCKING
The ABS plays a major part in increasing
the active safety of the vehicle. The big
advantage of the ABS compared
conventional brake system is
when braking on slippery surfaces the
wheels do not lock. The vehicle remains
steerable and the best possible driving
stability is retained.
When the turning speed of a wheel
reaches
hicle speed and it tends to lock, the brake
pressure
regulating process is
of the brake pedal and is accompanied
by
warning to the driver
in the locking range. The speed
mediately
traffic
cannot
The
able
a level which is too low for the ve-
to this wheel is reduced. This
noises.
conditions.
Particularly
overcome
increased
must
risks
when
be
BRAKE SYSTEM*
with
the
that
even
felt
as a pulsation
This is deliberately done as a
on
not
driving.
that
adapted
slippery
the physical
amount
tempt
one
the wheels are
roads
safety
into
must
road
the ABS
limits.
avail-
taking
to the
of
im-
and
any
Every
time the engine is started the ABS
is
switched on automatically. The functioning of the ABS is indicated by a
warning lamp - see page 36.
PEDALS
The movement of the pedals must not be
restricted.
For
this reason, do not put articles in the
footwell which could roll or slide under-
neath the pedals.
Around the pedal area there should also
be no
foot
covering materials:
• In the
system,
necessary.
• It should always be possible to depress
fully.
• All pedals must be able to return, unhindered, to their rest positions.
For
foot
which leave the pedal area completely
free and which are prevented from slip-
ping.
mats or other additional floor
case
a greater pedal travel may be
the clutch and accelerator pedals
these reasons therefore, the only
mats which may be
of defects on the brake
used,
are those
83
Page 86

5A_ERY
www.WestfaliaT3.info - a useful website for owners and enthusiasts of VW Westfalia T25 / T3 / Vanagon Campervans
On vehicles with a petrol engine the battery is under the right hand seat. It can
be reached when seat is pushed fully
forward.
On vehicles with a Diesel engine the battery is on the right hand side of the engine compartment.
On vehicles with swivelling seats the
seat must be turned 180° and pushed
fully forward.
2nd Battery*
The 2nd battery is under the left hand
seat. Access is gained by sliding the
seat forwards as far as possible.
On vehicles equipped with ABS the 2nd
battery is at the rear left hand side, inside the vehicle.
The 2nd battery supplies power for
tional fitments when the vehicle and engine are stationary. A cut-off relay between the 1st and 2nd batteries prevents the 1st battery from being run
down as
always sufficient power available for
starting.
move, the 2nd battery is charged up together with the 1st one.
well.
This ensures that here is
When the vehicle is on the
addi-
Checking acid level
In normal operating conditions the battery requires hardly any maintenance. At
high ambient temperatures however it is
advisable to check the acid level at regular intervals. It should always be between
the min. and max. marks on the side of
the battery.
Caution
Battery acid is corrosive and must not
get into the eyes or on to skin and
clothes.
Any acid splashes must be washed off
thoroughly with water. See a doctor if
necessary.
The level should therefore preferably be
topped up in a V.A.G workshop.
Page 87

Winter
www.WestfaliaT3.info - a useful website for owners and enthusiasts of VW Westfalia T25 / T3 / Vanagon Campervans
driving
Winter weather is particularly hard on the
battery. Furthermore at low temperatures
it has only a part of the capacity it has at
normal temperatures. We recommend
therefore
checked
before the onset of cold weather and
charged
necessary,
and
only result in quicker, more reliable starting but will help to prolong the life of the
battery.
If the vehicle is not driven for several
weeks
the battery should be taken out and
stored in a frost-free room, so
not freeze up and become damaged.
Store
To
two wires (see "Battery charging - Quick
charging") and then remove retainer.
that
the battery should be
preferably in a V.A.G workshop
if necessary. At the same time, if
the terminals will be cleaned
special grease applied. This will not
when temperatures are very low,
that
it does
the battery out of reach of children.
take battery out,
first
disconnect the
OPE
Charging
When
with
wires need normally not be taken off. The
instructions from the charger manufacturer
Before
with
must be disconnected:
Disconnect
wire.
A
C.
tery before it is given a quick charge as
otherwise it may explode!
The
be
charger
the battery terminals:
Red
Black
Caution
The gas
process is
sources of
ing
battery.
battery
charging
a small charger) the connecting
must however be noted.
Quick charging,
a high current, both connecting wires
discharged battery can freeze at -10°
It is essential to thaw out a frozen bat-
mains wire of the charger should not
connected until after the clips of the
have been properly secured to
= plus (or positive)
= minus (or negative)
cigarettes
with
minus wire
given
off
highly
ignition
etc.)
a low current (e.g.
that
is charging
first,
then the plus
during
inflammable
(naked
well
the charging
so
flames,
away
keep
burn-
from
the
G
IN
When
connecting the battery to the vehi-
cle
system again note: Connect plus wire
first,
then the minus wire.
Caution
Do not
reverse
count, as
tem
will
be seriously damaged.
Notes
•
Never
this
causes the
quickly and it may
• To
prevent
circuiting,
fore
doing any
system.
sufficient
off.
• Never run the engine
disconnected
electrical
nents).
• Starting by connecting an additional
battery is described in the Do-it-yourself
section.
When
the
otherwise
short
detach
to
switch
system (electronic compo-
polarity
the
the
battery
battery
burst.
any possibility of
battery
work
changing a bulb, it is
the
as this will damage the
electrical
terminals
to
heat
earth
on the
lamp
with
on any ac-
sys-
as
up
very
short
wire
be-
electrical
concerned
the battery
Page 88

OPERATING
www.WestfaliaT3.info - a useful website for owners and enthusiasts of VW Westfalia T25 / T3 / Vanagon Campervans
WHEELS
INSTRUCTIONS
Wheels
features. The wheels and tyres approved
by us are specially matched to the model
concerned
excellent roadholding and safe driving
characteristics.
If you
standard
• For
sible
other
not
model.
•
ed to one
On
(e.g.
tyres)
length
The
functioning
on
• Using
which
for
tal to the
and tyres are important design
and contribute largely to the
wish
to fit
your
car
technical
in
every
vehicles
even
Wheels
changing
alloy
the
and conical
security
this.
have
your
vehicle
wheels
wheels
another.
wheels
correct
types
safety
or
tyres
reasons it is not pos-
case to use
- in
certain
from
the
same
and
wheel
bolts
to a
different
or
wheels
bolt
with
of the
of the
not
shape
brake
of
been
model
of the
must
wheels
system
wheel
approved
can be
vehicle.
please
type
with
non-
note:
wheels
and/or
from
conditions
vehicle
are
match-
of
wheel
with
winter
the
proper
be used.
and the
depend
tyre
by us
detrimen-
It can
also
affect
the
struction
• If
wheel
installed,
mains
adequate
V.A.G
workshops
about
the possible conversions of
tyres,
wheels
Many
V.A.G Dealers have an attractive
range of tyres and wheels for
General
• Check tyres for damage from time to
time and remove any foreign bodies em-
bedded in treads.
• To avoid damage to tyres and wheels
drive over curbs and similar obstacles
very slowly and as nearly at
as
possible.
If you
think
it must be checked by a
vehicle
and Use
trim
ensure
and
notes
that
discs are
under
regulations.
that
the air
to cool the
are
wheel
a wheel is damaged,
the Con-
subsequently
flow
brakes.
fully
informed
trims.
sale.
right
angles
V.A.G
workshop.
re-
• Keep grease, oil and fuel off the tyres.
• Replace missing dust caps as soon as
possible.
• Mark wheels before taking them off
so
that
they rotate in the same direction
when put back.
• When taken off, the tyres should be
stored in a
place.
should be stored in a vertical position.
New
New
straight away and should therefore be
run in at moderate speeds and a careful
style of driving for about the
This
longer.
cool,
Tyres which are not on wheels
tyres
tyres do not give maximum grip
will help to make the tyres last
dry and preferably dark
first
100 km.
86
Page 89

yre
www.WestfaliaT3.info - a useful website for owners and enthusiasts of VW Westfalia T25 / T3 / Vanagon Campervans
wear
Tyre life depends to a considerable extent
on the following factors:
Inflation
Pressures
shorten
detrimental influence on vehicle handling.
At continuous high speeds a
which the pressure is too low flexes
more and heats up
cause
out.
In addition low
the fuel consumption.
The inflation pressures should therefore
be checked twice a month and always
before a long
spare
when tyres are cold. When warm, the
pressure
The pressures are given on page 126
and on
ninges.
pressure
which are too high or too low
tyre
life - quite apart from the
tyre
in
tread
wheel. Always check pressures
is higher but do not reduce.
left
excessively.
separation
tyre
pressures increase
trip,
not forgetting the
door pillar between the
and
This can
tyre
blow
OPERATING
Mode
of
driving
Fast
cornering, hard acceleration and
violent braking also increase
Incorrect
Incorrect wheel alignment not only
causes
wear but can also impair the car's safe
handling. If unusual
contact a
Wear
At the bottom of the tread of the original
tyres there are 1.6 mm high "wear indicators"
Fig.
according to make - evenly spaced
round the
the flanks of the
letters "IWI" or triangles) show the locations of the wear indicators.
When tread depth is down to 1 mm measured at any point on the tread - the
official permissible minimum tread depth
has
this figure may differ).
As
surface
wheel
alignment
excessive, usually uneven
V.A.G
indicators
running across the tread - see
There are 6 - 8 of these indicators -
tyre
been reached (in export countries
worn
tyres
properly
tyre
workshop.
circumference. Marks on
tyre
(for example the
cannot
when
tyre
wear.
tyre
wear is noticed,
grip
the
driving
road
at
high
INSTRUCTIONS
speeds on wet
tends
to
able
far.
aquaplane
not to let the
roads
and the
sooner, it is advis-
tyres
wear
vehicle
down
so
87
Page 90

OPERATING
www.WestfaliaT3.info - a useful website for owners and enthusiasts of VW Westfalia T25 / T3 / Vanagon Campervans
INSTRUCTIONS
X >>
V J
I
B43 - 155~|
Changing
If the tyres are wearing unevenly, it is
advisable to change them round as
shown.
about the same mileage.
When the wheels have been changed
round it may be necessary to have the
front
wheels
All the tyres
wheels balanced again.
round
will
then last for
Replacing
• For safety reasons the tyres should
be replaced in pairs and not singly. The
tyres
ways be on the
• Only radial ply tyres of the same type,
size
and the same tread
combined.
• For safety reasons a new rubber
valve should be
less
tyre
• Tubes should only be used in tubeless
tyres in an emergency.
When this is done, ensure
trapped between tube and
escape
• Repairing tyres calls for special equipment and knowledge and should there-
fore only be done by a specialist.
On the
following
All
four wheels must always be
with
tyres of the same
pattern
coupling does not engage the
drive unnecessarily because of speed
tyres
with
the deepest tread should al-
front
wheels.
pattern
fitted
has been installed.
from
the valve.
Transporter/Caravelle
should also be
and make so
when a new tube-
that
noted:
size,
that
the viscous
may be
the air
tyre
can
syncro the
fitted
type, tread
front
axle
differences between the two axles. If the
front
wheels have a noticeably smaller
roll circumference than the rear wheels
so
that
they
turn
faster, wind-up
cur in the transmission and cause the
tyres to wear quicker.
Balancing
The wheels on new vehicles are balanced.
However when vehicle is running,
various influences can cause wheels to
become unbalanced and this causes
steering vibration.
As
imbalance also increases steering,
suspension
should be balanced again.
Furthermore a wheel should always be
rebalanced when the
paired or when a new
fitted.
wheels
and
tyre
wear the wheels
tyre
tyre
will
oc-
has been re-
has been
88
Page 91

OPERATING
www.WestfaliaT3.info - a useful website for owners and enthusiasts of VW Westfalia T25 / T3 / Vanagon Campervans
INSTRUCTIONS
Winter
In winter conditions, the handling of the
vehicle
hicles
When
ing:
• Only radial ply winter tyres should be
used.
sizes
• With winter tyres, the PR figures on
the sidewalls should also be noted. The
tyres must not be below the specified
carcass
• To obtain the best possible handling
characteristics,
ted on all four wheels.
• Winter tyres are no longer fully
effective when the tread has worn down
to a depth of 4 mm.
• All-weather tyres can be used instead
of winter tyres.
tyres
including four wheel drive ve-
- can be improved by winter tyres.
fitting
winter tyres, note the follow-
The factory recommended tyre
are given on page 123.
strength.
winter tyres must be
fit-
Snow chains
Snow chains may be used on all the
tyre
sizes
chains may be
only. Only
stand clear more than 15 mm (including
tensioner) should be
When
of snow you should remove the chains.
On
such roads they are detrimental to
vehicle
wear
In Germany the maximum permissible
speed
The
following
Transporter/Caravelle
Snow
fitted
chains
on the rear wheels.
On
vehicles
chains
wheels.
Further details about using snow chains
are given on page 64.
listed
thin
driving over roads which are free
handling, damage the tyres and
out quickly.
with
chains should, where possible, be
on all four wheels. If only two
are available they must be
may only be
on
page
fitted
on the
chains which do not
used.
snow chains is 50 km/h.
should also be
with
16 inch wheels, snow
fitted
123. The
rear
wheels
syncro vehicles:
noted
fitted
on the rear
on
Page 92

OPERATING
www.WestfaliaT3.info - a useful website for owners and enthusiasts of VW Westfalia T25 / T3 / Vanagon Campervans
INSTRUCTIONS
EMISSION
V.'-en
nothing
putting
certain
following
served
•
Underbody sealant must not be applied
exhaust pipes.
•
Due to the high temperatures
which can
verter in very unfavourable conditions,
the vehicle should not be parked so
that
the catalytic converter can come
into contact
materials.
CONTROL
vehicle
to the catalytic converter or the
is
special
lead-free petrol in the tank. In
exceptional
points
for
used
to be noted - apart from
should
safety
reasons:
occur
in the catalytic
with
SYSTEM*
normally
circumstances
however
easily inflammable
there is
the
be ob-
con-
To
ensure
not
ing
•
The vehicle must not be started
when catalytic converter is at operating
temperature by towing it a long
tance.
•
The ignition must not be
as
long as vehicle is rolling
engaged.
•
If a defect
system
ed
loss
duced
be eliminated in the
shop.
In
these
get
burned
A
functional
control
that the
damaged
points must
when driving (can be recogniz-
by misfiring, uneven engine running,
of
power)
immediately. The defect should
conditions,
into the
there.
system
catalytic
by
overheating,
also
occurs
the speed must be re-
catalytic
description
unburnt petrol can
is
given
converter
the follow-
be
noted:
switched
with
in the ignition
next
V.A.G
converter
of the
on
page
and be
emission
117.
is
dis-
off
a gear
work-
90
Page 93

OPERATING
www.WestfaliaT3.info - a useful website for owners and enthusiasts of VW Westfalia T25 / T3 / Vanagon Campervans
INSTRUCTIONS
DIFFICULT
The
vehicle construction and equipment
is
designed for normal operating
ditions. This also applies to the frequency
and
the extent of the maintenance laid
down in the maintenance schedule.
If the vehicle is used in
ing conditions (e.g. continuous trailer
towing, exceptionally high or low ambient
temperatures, very dusty conditions,
poor quality fuel, etc.) it may be
sary
to carry out special technical preparations, such as using oil of the appropriate viscosity, installing special air
cleaners
ignition timing etc. Furthermore the
maintenance must also be matched to
the operating conditions.
OPERATING
(cyclone filters), modifying the
CONDITIONS
con-
difficult
operat-
neces-
Driving
If the vehicle is to be taken abroad, the
following must also be borne in mind:
• In many countries there is a large network of V.A.G workshops where your
vehicle
there are certain countries in which there
is
or even none at all.
• In certain countries it is also possible
that
certain spare parts are not available for
your vehicle or
is
should
The
Republic
cerned
vice
tion
required and on the repair possibilities.
The
wallet.
• When the vehicle is used in a country
which drives on the opposite side of the
road to the home country the wedge
shaped
must be masked - see page 109.
abroad
can be serviced. Despite this
only a limited amount of
your vehicle model is not sold so
not familiar
anything go wrong.
V.A.G
will be only too pleased to give ad on the necessary technical prepara of the vehicle, on the maintenance
addresses are given in the vehicle
areas on the headlight lenses
that
with
the repair procedure
Sales
of Germany or the
Centres in the Federal
the
V.A.G
V.A.G
Importer
service
personnel
con-
that
Driving
Before
points:
• The roadworthiness and driving safety
are particularly important when on holiday
see
• If your vehicle has a catalytic
converter, one must ensure - especialy
when going abroad trol
see
information about the lead-free filling
station network.
• With a fully loaded vehicle and/or roof
rack, the handling changes. The driving
style must be adapted to the changed
conditions - more information on loading
is
The
• When a trailer is to be towed, there
are many special points to note - see
page
• If an oil change or an Inspection
vice
sary
this work done before going on holiday if
possible.
on
holiday
starting off note the following
page 57.
that
will be available during the journay -
page 67. The automobile clubs offer
given on page 127.
tyre
pressures must be
60.
is probably going to become
during the
trip,
it is advisable to have
lead-free pe-
checked.
neces-
Ser-
91
Page 94

OPERATING
www.WestfaliaT3.info - a useful website for owners and enthusiasts of VW Westfalia T25 / T3 / Vanagon Campervans
INSTRUCTIONS
Z • , -g
• Winter weather is particularly hard on
the battery and it should therefore be
checked
er, preferably by a V.A.G Dealer - see
page 85.
If the vehicle is not driven for several
weeks
low, the battery should be taken out see
• On vehicles
ter Diesel must be used at temperatures
below 0° C - see page 69.
• The anti-freeze in the cooling system
should be checked before the cold
son
• The engine oil viscosity must be correct for the ambient temperature - see
page 72.
• Particularly in winter, frequent washing
and waxing of the vehicle is the best way
to protect it against damage from environ-
mental influences.
in
winter
, -ter the following points should be
before the onset of cold weath-
when the temperatures are very
page 85.
with
a Diesel engine, win-
starts - see page 79.
sea-
• The windscreen washer system
should always be filled
cleaning solution
tive in the winter - see page 80.
• To remove snow and ice from the windows and mirrors, a plastic scraper
should be used - see page 94.
•
Even
the roadholding and handling can be improved in winter road conditions by the
use
pages
• When driving in mountainous districts
it is advisable to take snow chains
you in the winter. On some such roads,
snow chains are obligatory - and this applies
see
on vehicles
of winter or All-weather tyres - see
89 and 126.
also to four wheel drive vehicles -
pages 64 and 89.
with
with
anti-freeze addi-
with
four wheel drive
a window
with
92
Page 95

CAR
www.WestfaliaT3.info - a useful website for owners and enthusiasts of VW Westfalia T25 / T3 / Vanagon Campervans
CARE
CARE
AND MAINTENANCE
Regular
tain
Furthermore
lations
claims
paint
Every
suitable car care materials. The instructions for use on the container should be
followed.
Caution
These
health
out of
and
the
careful
value
it can be one of the stipu-
for the
should corrosion
defects
V.A.G
workshop carries stocks of
materials
if misused and should be
reach
of children.
care
of the
vehicle.
upholding
occur.
can be
helps
of
damage
injurious
to
main-
warranty
and
to
kept
Washing
The best protection against environmental influences is frequent washing and
waxing. After the period when salt is put
on the roads, the underside of the vehicle
should always be washed thorough-
ly.
When the vehicle is washed in an auto-
matic wash plant nothing need be noted
apart from the usual precautions. It is
however advisable to fold the outside mir-
rors inwards.
The longer
grime, insects and bird droppings etc.
are
left
damage they are liable to do to the
finish.
When the load compartment has been
cleaned,
side
When vehicle is washed
not point the jet of water directly at the
lock cylinders - otherwise they will freeze
up in winter.
Tar
spots, traces of oil, industrial griime,
insects,
by washing. As they damage the paint if
left
on too long they should be removed
as
soon as possible
preparation.
salt,
road dust, industrial
on the paintwork the more
the sliding door hinges or the
board hinges must be regreased.
with a hose,
etc. cannot always be removed
with
a suitable
do
Waxing
Wax
as often as possible. This will pre-
vent
dirt
industrial grime from penetrating
paint.
from sticking to the paint and
into
the
Polishing
Should
only be done if paint has lost its
shine and gloss cannot be brought back
with
wax. If the polish used does not
contain preservative compounds, the
paint must be waxed afterwards.
Matt
painted
not be treated
and
plastic
with
wax or polish.
parts
should
Page 96

CARE
www.WestfaliaT3.info - a useful website for owners and enthusiasts of VW Westfalia T25 / T3 / Vanagon Campervans
Touching up
Small
scratches
touched up immediately
(Volkswagen touch-up brushes or spray
cans)
However, should rust be found at any
time it must be removed thoroughly and
then the area treated
corrosion primer and then the correct
paint applied.
You
by a
The number of the original vehicle paint
is
given on the data sticker (see
page 132).
Windows
Remove
and mirrors only
To
avoid scratches due to
glass,
in one direction and not moved to and
fro.
Traces
can
a
silicone remover.
The windows should also be cleaned on
the inside at regular intervals.
AND MAINTENANCE
paint
damage
marks in the paint such as
or stone damage should be
before
can of course have this work done
V.A.G
the scraper should only be pushed
be removed
the metal starts to rust.
workshop.
snow and ice from windows
with
of rubber, oil, grease or silicone
with
with
paint
first
with
an anti-
a plastic scraper.
dirt
on the
window cleaner or
Do
not dry the windows
used
for the paintwork
paint cleaner will cause streaks to appear
on the
glass.
To
avoid damaging the
wires
in the rear window do not put
stickers over the wires on the inside.
Windscreen
To
prevent streaks from forming on the
glass
regularly
When very
the blades can be cleaned
or brush. For safety reasons the wiper
blades
a
year. Wiper blades can be obtained
from all
Changing
wiper
the wiper blades should be cleaned
with
a window cleaning solution.
dirty
and
should be renewed once or twice
V.A.G
Dealers.
wiper blades - see page 109.
with
the leather
because
heating
blades
full
of insect remains,
with
traces of
element
a sponge
Door,
lid and
The weatherstrips will remain flexible
and last longer if they are rubbed lightly
with
a rubber protective compound from
time to time. This will also stop the
weatherstrips freezing on in the winter.
Cleaning
runners
In order to ensure
continues to operate satisfactorily, it is ad-
visable
to clean the runners from time to
time, at least however once a year and
then to spray them
cant.
Cleaning
If cleaning
washing is not sufficient, plastic parts
and leatherette may only be cleaned
special
solvent-free plastic cleaners.
Cleaning
Upholstery cloth and similar materials
must be cleaned
dry foam and a soft brush.
window
and
lubricating
plastic
with
a damp cloth or normal
cloth
upholstery
with
weatherstrips
sliding
that
the sliding
with
a silicone lubri-
special cleaners or
roof
roof*
with
94
Page 97

CARE
www.WestfaliaT3.info - a useful website for owners and enthusiasts of VW Westfalia T25 / T3 / Vanagon Campervans
AND MAINTENANCE
Cleaning
and
care
of
leather
upholstery
A
damp cloth is normally all
required to clean leather covered steering wheels and seats etc.
For
a more thorough cleaning job, it is
best to use a sponge moistened
lukewarm solution of a very mild detergent.
Do
not wet the leather too much other-
wise the water may seep through the
stitching.
After cleaning, wipe dry
If necessary the leather can be treated
with
a suitable leather care product. On
no account should cleaners or sprays
containing solvents be used - these
could attack the colouring of the ma-
terial.
Care
of
chromed
Remove
cleaner.
can
protection. Ensure
parts are covered completely and
uniformly
spots and marks
A chrome protective compound
be applied to give long-term
with
the compound.
with
parts
that
the chromed
that
with
a soft cloth.
with
a chrome
is
a
Cleaning
Keep
retract properly if very
Dirty belts can be cleaned by washing
with
the belts out of the vehicle.
Do
not have the belts cleaned chemically
because
damage the webbing material. Ensure
that
with
Inertia
dry before they are allowed to roll up.
seat
belts
belts clean because they may not
a mild soap solution
the cleaning compounds
the belts do not come
corrosive fluids.
reel belts should be completely
dirty.
without
into
taking
contact
Steel
wheels
The wheels and the wheel trims should
be cleaned thoroughly at regular inter-
vals
when the vehicle is being washed.
This
will prevent brake dust,
road salt from accumulating on the
wheel.
Persistent, ingrained brake dust
can
be removed
remover. Paint damage should be repaired before rust can form.
Alloy
wheels
In order to maintain the smart appear-
ance
of alloy wheels for a long period,
regular care is necessary. In particular,
salt and brake pad dust must be washed
off thoroughly at least every two weeks
otherwise the surface of the alloy will be
damaged.
should be treated
cleaner
three months it is necessary to give the
wheels a good rubbing
damaged,
for alloy wheels. About every
Paint
polish or other abrasive solutions
must not be
If the protective paint coat has been
aged
spots should be dealt
as
possible.
with
an industrial grime
After being
used.
e.g. by stone impact, the dam-
washed,
with
dirt
and
the wheels
an acid-free
with
hard wax.
with
as soon
95
Page 98

CARE AND MAINTENANCE
www.WestfaliaT3.info - a useful website for owners and enthusiasts of VW Westfalia T25 / T3 / Vanagon Campervans
Cleaning
ment
-articularly in
quently
corrosion protection very important.
The complete engine compartment
should therefore
before
then given anti-corrosion treatment
that
fluence.
V.A.G dealers have stocks
ing
mended
and have
apply them.
and
anti-corrosion treat-
of
engine compartment
winter when vehicle
driven
on
salted roads
be
thoroughly cleaned
and
after
the
salting period
the
salt cannot have a damaging
and
preservation solutions recom-
by the
factory
the
equipment necessary
of the
for
this purpose
is
is
clean-
fre-
good
and
so
in-
to
Undercoating
The underside
with a special compound
from chemical
ences.
However,
damaged when
coating under
ing gear should
intervals - preferably before
the winter season
made good.
V.A.G workshops have stocks
rect compound, have
equipment and
cation procedure.
fore
to
have
al coating done
Note
for
verter
Due
to the
cur
in the
tional heat shields
talytic converter. Underbody sealant
must
not be
the catalytic converter
pipes.
of the
as
this protective layer gets
the
the
vehicles with a catalytic con-
high temperatures which
afterburning process,
applied
vehicle
and
mechanical
the
vehicle
body and
be
examined
- and any
are
patching
by a
the
familiar with
We
advice
up or
V.A.G workshop.
are
fitted ever
to
these shields,
or the
is
coated
to
protect
influ-
is in
use,
on the
runn-
at
certain
and
after
damage
of the
necessary
the
appli-
you
there-
addition-
addi-
the ca-
exhaust
it
the
cor-
oc-
96
Page 99

MAINTENANCE
www.WestfaliaT3.info - a useful website for owners and enthusiasts of VW Westfalia T25 / T3 / Vanagon Campervans
As
the vehicle is
maintenance technical components only
a
small amount of regular servicing is required in order to maintain the roadworthiness,
The
selection
made
cial
ning-in period. On vehicles
engine a First Service must be carried
out after 1000 km.
The
V.A.G
large extent the individual annual mileage
covered
as
is
30000
If a mileage of 15000 km (petrol engines)
or 7500 km (Diesel engines) is reached
before 12 months has elapsed, an Oil
Change Service must be carried out.
See
Schedule.
The
work is required at the Inspection and Oil
Change
economy and'reliability.
high manufacturing quality and the
of high-class materials have
it possible to dispense
service immediately after the run-
inspection service offered by the
workshop takes into account to a
and helps thus to keep the costs
low as possible. An
required every 12
km, whichever comes
also page 73 and the Service
Service Schedule also shows what
Services.
fitted
Inspection
months
with
modern low
with a spe-
with
first.
a Diesel
Service
or every
CARE
In difficult operating conditions, e.g. ex-
tremely low ambient temperatures, very
dusty conditions, buildings site work, etc.
certain service operations should be carried out between the intervals given.
This
applies in particular to:
• Changing the engine oil
• Cleaning or changing the air cleaner
element
• Draining water from or renewing the
fuel
filter
on the Diesel engine.
• Lubricating the hinges of sliding and
Double
Cab doors, dropsides, locker lid
and
rear doors.
The
service operations should be carried
out in a V.A.G workshop because this
work requires special knowledge, workshop
appliances and special tools. Fur-
thermore this work must be done in
accordance
The
disposal of old oil, used brake fluid,
dirty
coolant, old batteries or worn-out
tyres etc. must be done according to
environmental protection regulations.
with
our instructions.
AND MAINTENANCE
Complete
workshop can be one of the stipulations
for the upholding of any warranty claims
during the one year warranty period.
Safety
place
repairs and adjustments to engine and
running gear parts which can be done by
the owner. By tinkering
affect the safety of the vehicle one can endanger
In addition, altering the settings of the
carburetor or fuel injection system or
the ignition, changes the emission
ues
sumption.
Caution
Special
ing in the
lar sources of
(belt
electrical
gers,
pressurized cooling system. The
ings
mal
proof of servicing by a V.A.G
regulations and anti-pollution laws
very strict limits on the amount of
with
parts which
oneself and other road users.
val-
and also increases the fuel
care
must
be
engine
pulleys,
system
high
given
valid
safety
danger
radiator
tension
in
this
taken
compartment!
are
rotating
fans
(short
ignition)
manual
rules
circuit
and the
must
con-
when
work-
Particu-
parts
etc.),
the
dan-
and the hot,
warn-
nor-
be heeded.
Page 100

CARE
www.WestfaliaT3.info - a useful website for owners and enthusiasts of VW Westfalia T25 / T3 / Vanagon Campervans
AND MAINTENANCE
JFTiNG
Vehicle hoist
Before
sure
between
The
points
Trolley jack
The
with a trolley jack at the points shown
here.
To
a
suitable
packing.
On
lifted
rear axle or the
cause
Vehicle jack
Using
ing
VEHICLE
driving over a vehicle hoist en-
that
there
hoist and low parts of vehicle.
vehicle
shown
vehicle
prevent
no account should the vehicle be
under the engine sump, gearbox,
serious damage.
the jack is
pages.
is sufficient clearance
may only be lifted at the
here.
should
damage
piece
also
only be lifted
it is
essential
of rubber or wooden
front
axle as this can
described
to use
on the follow-
Lifting points for hoist and trolley jack.
Front Rear
At
the front jacking point At rear
cross
member
98
 Loading...