

Page 1
VIVOTEK Mounting Accessories
Installation
II
AM-719 Junction Box
Installation Guide
Part no.: 625045400G
Revison History:
Compatible cameras/brackets
IB836BA-EHF3/EHT/HF3/HT, IB8382-EF3/ET/F3/T, IB9371-EHT/HT, IB9381-EHT/HT, IB9365-EHT/HT, IB9367-EHT/HT/H, IB8377EHT/HT
Mounting Dimensions
Rev. 1.0: Initial release
Compatible VIVOTEK Cameras
I
Package Contents
Ordering part no.: 100184500G
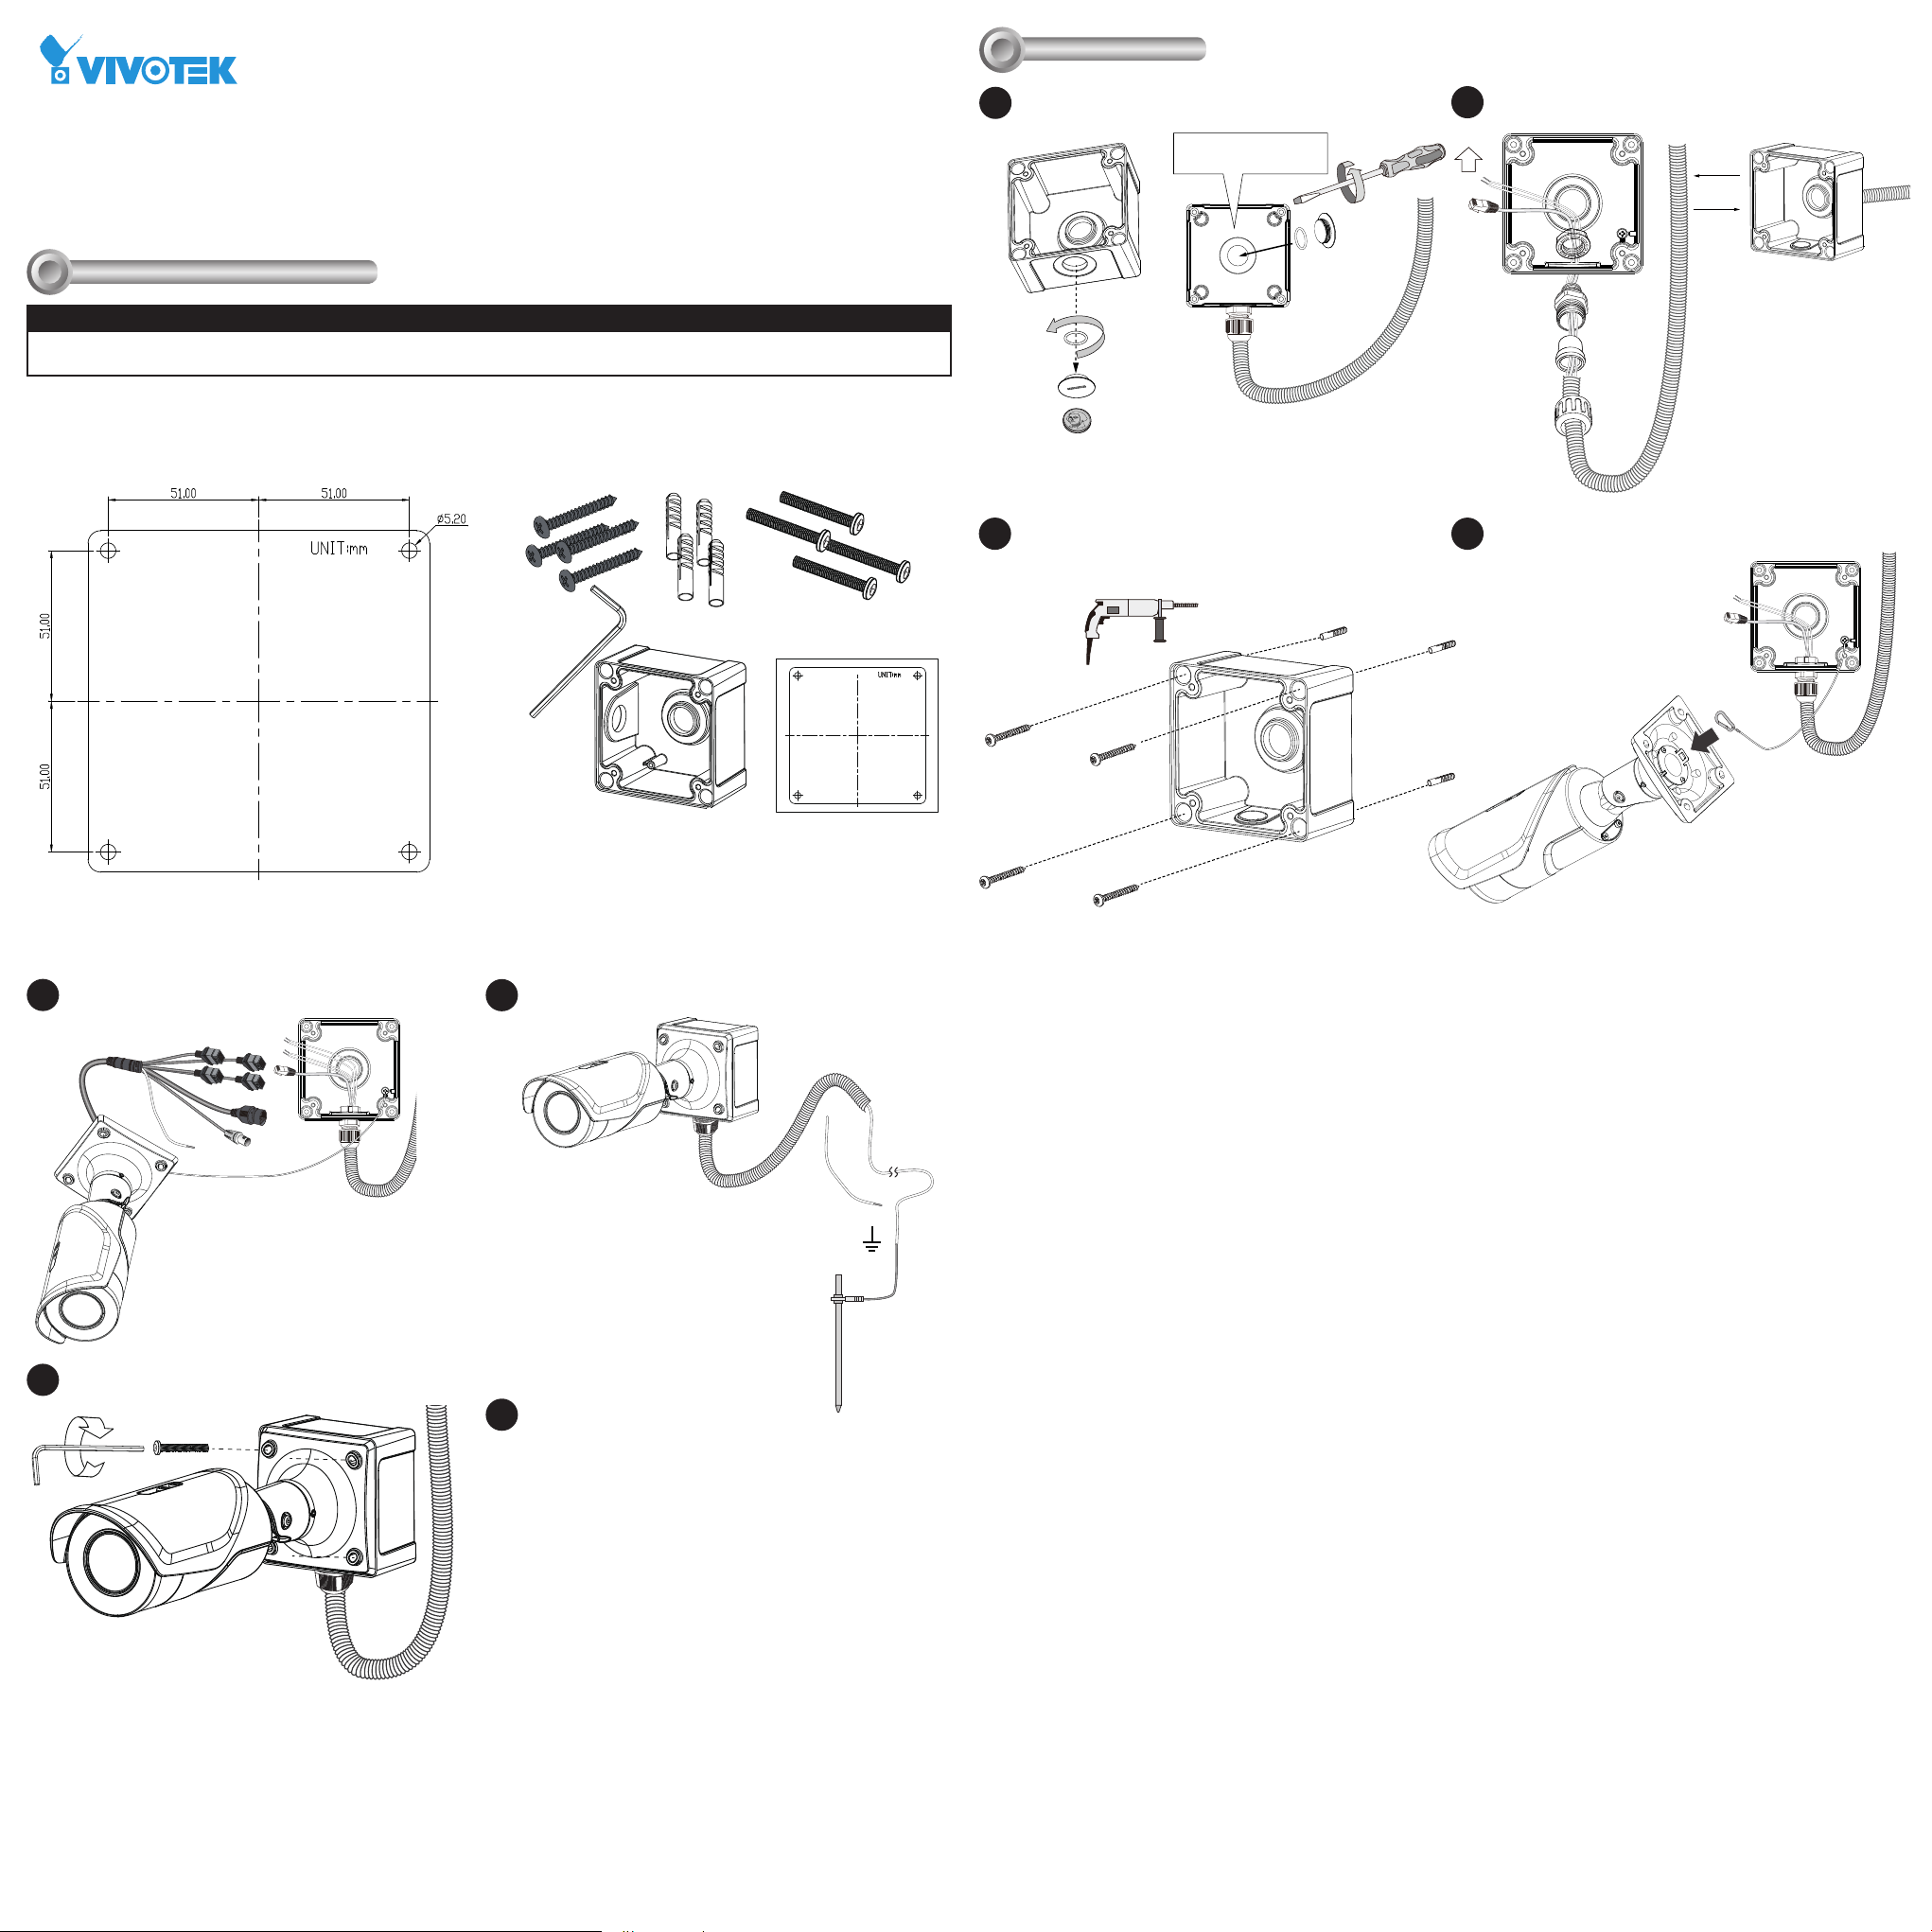
A 3/4" conduit is required for routing the cables with waterproof
1
connection. The cable gland and conduit are user-supplied.
If using the bottom hole,
seal the center hole.
If you use the bottom hole, install the seal plug
to the unused hole in the center.
Attach the included alignment sticker to a preferred position.
2
Drill holes on the wall and install the junction box. If space
behind the wall allows, you may also pass cables through the
wall.
Install the cable gland and pass cables through it.
3
OR
3/4”
Connect the tether wire between camera and box.
4
Connect cables and all wirings.
5
Secure the camera to box using the hex socket screws.
6
x4
Connect the ground wire to a proper grounding point.
7
1.5m
8
Open a live view console and adjust the shooting direction. Refer to
the camera's QIG for more information.
The drawing takes IB9365 as an example. The combo cables are not
shown here for the simplicity reason.
 Loading...