

Viking FDSB5483 Installation Manual

INSTALLATION
INSTRUCTIONS
SPHKDS DESIGNER SERIES
SIDE PANEL HARDWARE KIT
For Use with Designer Series
Built-In Refrigerators/Wine Cellars
Retain for Future Reference
VIKING RANGE CORPORATION
111 FRONT STREET
GREENWOOD, MISSISSIPPI (MS) 38930 USA
(662) 455-1200
IMPORTANT - PLEASE READ AND FOLLOW
•These instructions are to be used in conjunction with the refrigerator/wine cellar installation instructions supplied with the product.
•Before beginning, please read these instructions completely and carefully.
•Do not remove permanently affixed labels, warnings, or plates from the product. This may void the warranty.
•Please observe all local and national codes and ordinances.
•The installer should leave these instructions with the consumer who should retain for local inspector’s use and for future
reference.
PARTS INCLUDED REQUIRED TOOLS
(2) Z-Brackets Phillips head screwdriver
(32) 8-18 x 1/2” Phillips head screws
Installation Instructions
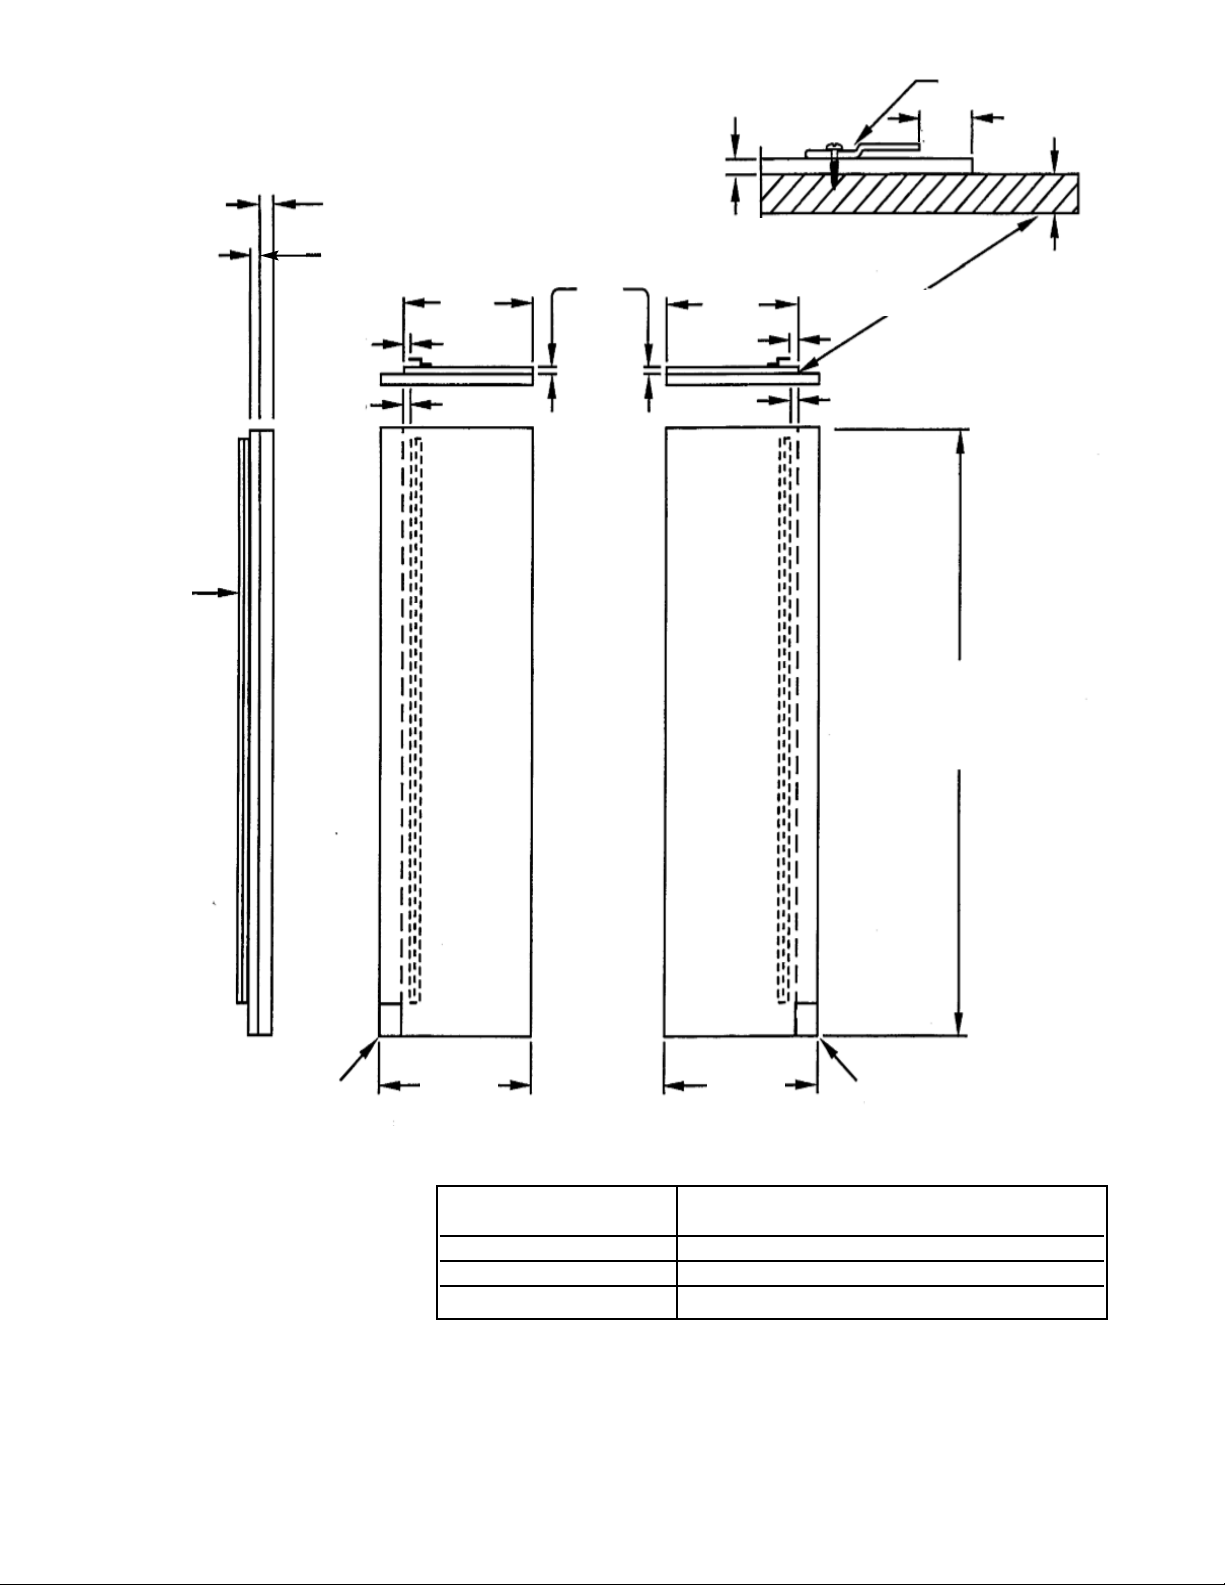
TO INSTALL (Refer to drawings on back):
1. Locate the custom wooden side panels.
2. Using the illustrations on the back, attach the Z-Brackets to the custom wooden panels using the 32 supplied
screws.
3. Slide the Z-Brackets into refrigerator/wine cellar side trim and slide panels into place.
4. NOTE: Adding 3/4” (1.9 cm) side panels adds an additional 3/4” (1.9 cm) to the overall width of the product for
each side panel used.
VIKING RANGE CORPORATION
111 Front Street • Greenwood, Mississippi 38930 USA • (662-455-1200)
Specifications subject to change without notice
For more product information, call 1-888-VIKING1 (845-4641), or visit our web site at http://www.vikingrange.com
F20190A (PS1203VR)
Z-Bracket
3/4” (1.9 cm)
End Panel
3/4” (1.9 cm) End Panel
1/4” (0.6 cm) Back Filler Panel
1”
(2.5 cm)
1/4”
(0.6 cm)
1” (2.5 cm)
1” (2.5 cm)
1” (2.5 cm)
1” (2.5 cm)
Detail
21 3/4”
(55.2 cm)
21 3/4”
(55.2 cm)
A
Optional kickplate notch
Dimensions determined by
cabinets
Optional kickplate notch
Dimensions determined by
cabinets
24”
(61.0 cm)
24”
(61.0 cm)
Right Side Panel Left Side Panel
Z-Bracket
(From
hardware kit)
Fastens with
screws
supplied
1/4”
(0.6 cm)
A*
30” W. Wine Cellar 82 7/8” (210.5 cm) - 84 1/16” (213.5 cm)
36” W. Bottom Mount 82 7/8” (210.5 cm) - 84 1/16” (213.5 cm)
42” W. Side-by-Side 82 7/8” (210.5 cm) - 84 1/16” (213.5 cm)
48” W. Side-by-Side 82 7/8” (210.5 cm) - 84 1/16” (213.5 cm)
*Depending on how high leveling feet are raised and cabinet enclosure height.
 Loading...