How it Works
Log In / Sign Up
0
My Files
0
My Downloads
329065
History
Account Settings
Log Out
Buy Points
How it Works
FAQ
Contact Us
Questions and Suggestions
Users
Vigo
Loading...
V
VG01008CH
VG01009CHK1
VG01015BN
VG01015CH
VG01028CH
VG01041BNK1
VG01042CH
VG02001STMB
VG02002STK2
VG02005
VG02007CH
VG02008ST
VG02008STK2
VG02009STK2
VG02011ST
VG02019ST
VG02021STK2
VG02026CH
VG02027CH
VG02029ST
VG02030ST
VG03002BN
VG03002CH
VG03003CH
VG03007
VG03007MB
VG03008
VG03009MB
VG03013ARB2
VG03013BN
VG03013CH
VG03018
VG03018CH
VG03023
VG03023BN
VG03023RB
VG03024CH
VG03025ARB2
VG03026CH
VG04001
VG04002
VG04003
VG04006
VG04007
VG04009
VG04011
VG04013
VG05002BN
VG05002CH
VG05003MB
VG05004MB
VG05005CH
VG0601
VG06012
VG06021
VG06031
VG06041
VG06042A
VG06049
VG06051
VG06061
VG06063
VG07019
VG07021
VG07042
VG07046
VG07053
VG07074
VG07505
VG07506
VG08001
VG08004
VG08005
VG08008
VG09010K
VG09031K1
VG15002
VG15003
VG15009
VG15020
VG15125
VG15126
VG15155
VG15257
VG15266
VG15274
VG15294
VG15326
VG15343
VG15361
2
VG15362
VG15372
VG15382
VG15404
VG15424
VG15449
VG15453
VG15456
VG15460
VG15464
Loading...
Loading...
Nothing found
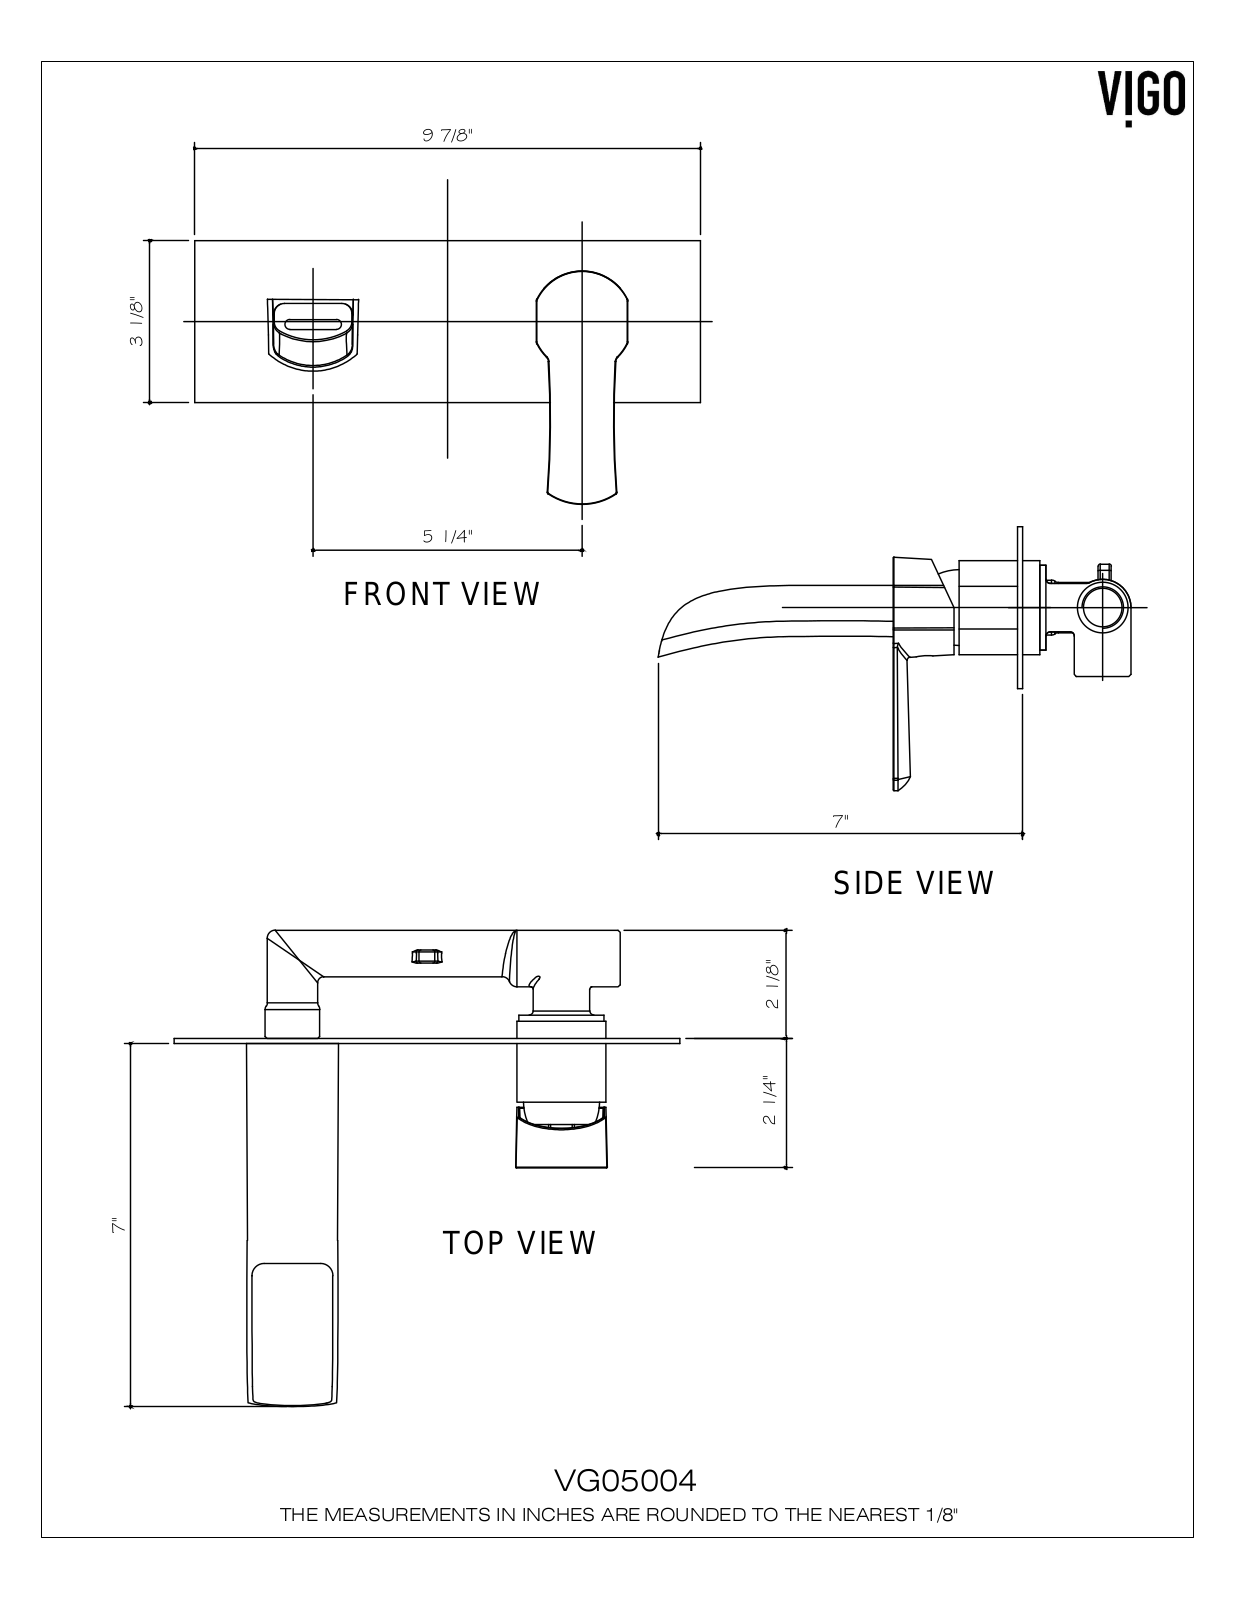
VG05004MB
Specifications
18 pgs
576.93 Kb
0
Table of contents
Loading...
Vigo VG05004MB, VG05004BN, VG05004CH Specifications
...
Vigo Specifications
Download
Loading...
+
12
hidden pages
Unhide
You need points to download manuals.
1 point = 1 manual.
You can buy points or you can get point for every manual you upload.
Buy points
Upload your manuals
 Loading...