

Page 1

ViewSonic
ViewDraw
®
- User Guide
- 使用手冊(繁中)
- 使用手册(简中)
Page 2
Note 1: Please refer to the address for the latest ViewDraw software download:
http://www.viewsonic.com/products/projectors/pjd7383i.htm
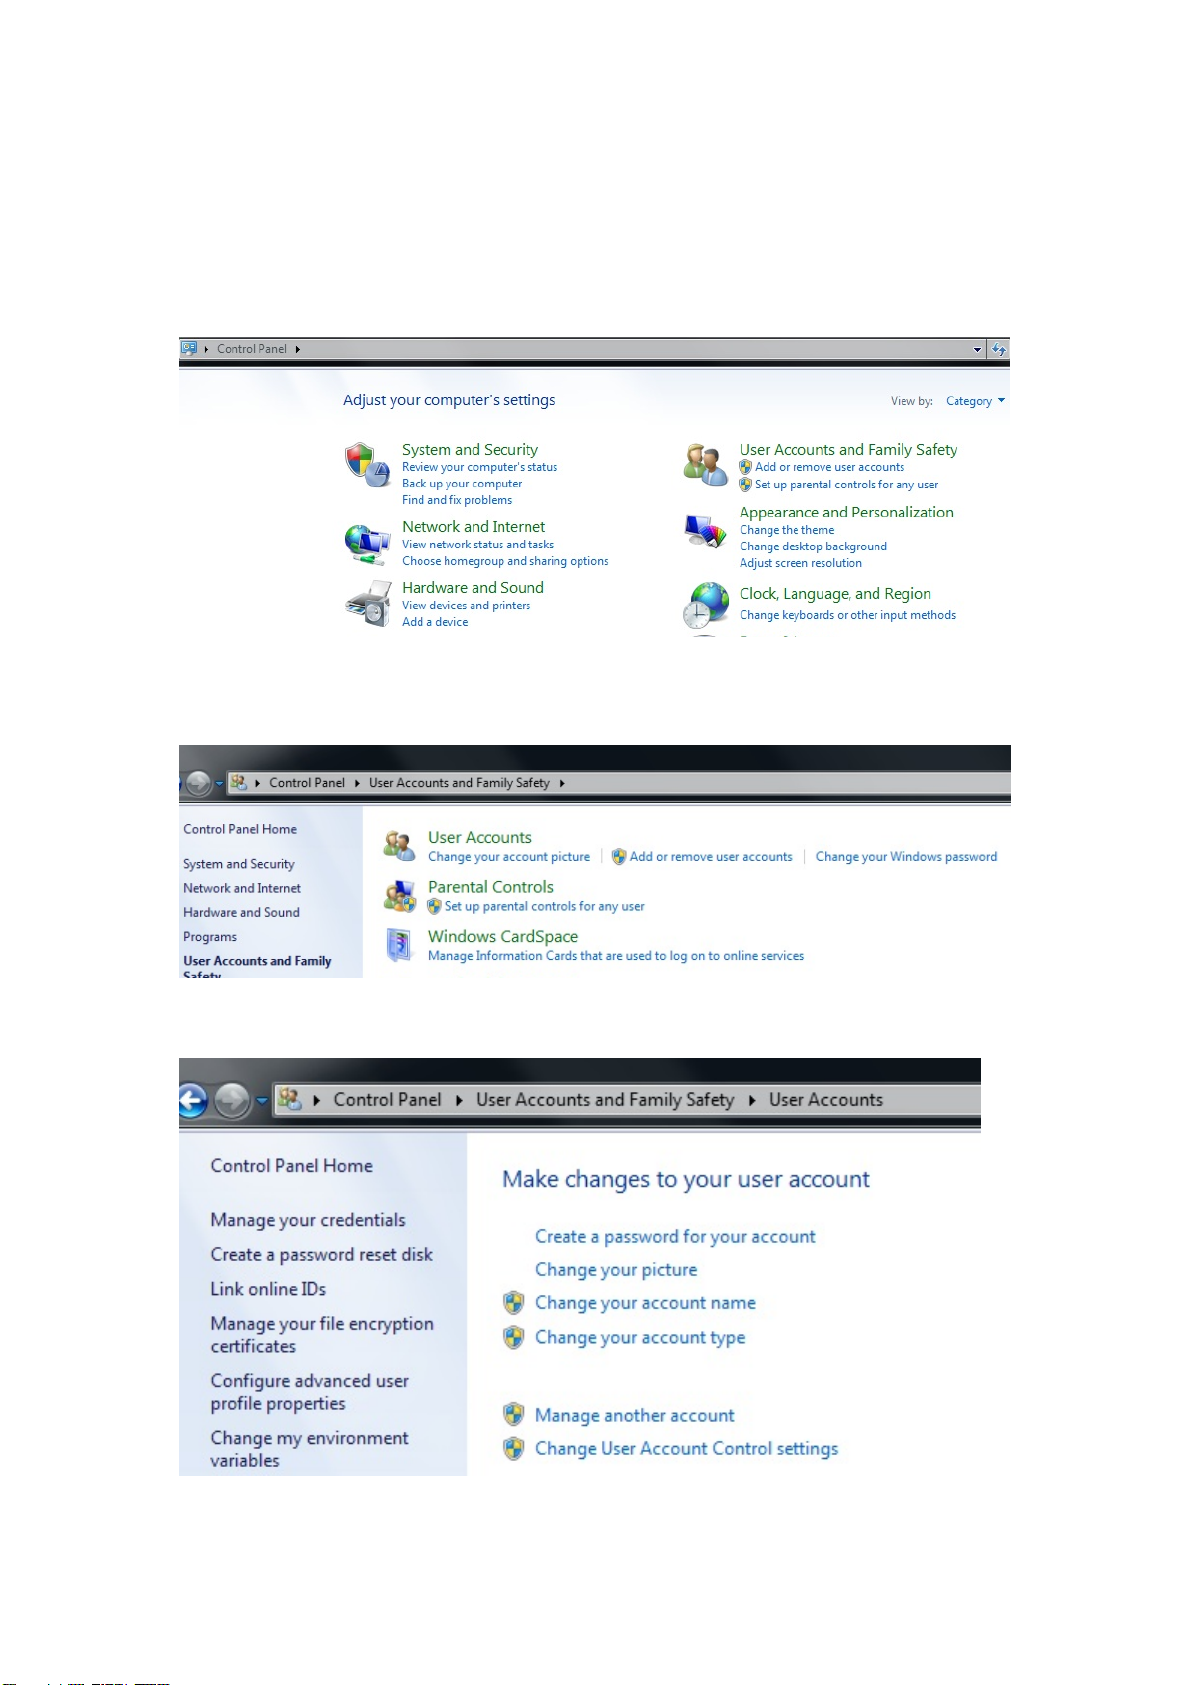
Note 2: If your operating system is Vista or Win7, please cancel the user account
control in the control panel first, details as follows:
1. Access to“User Accounts and Family Safety”
2. Access to “User Accounts”
3. Access to “Change User Account Control settings”
ViewSonic 1 ViewDraw
Page 3
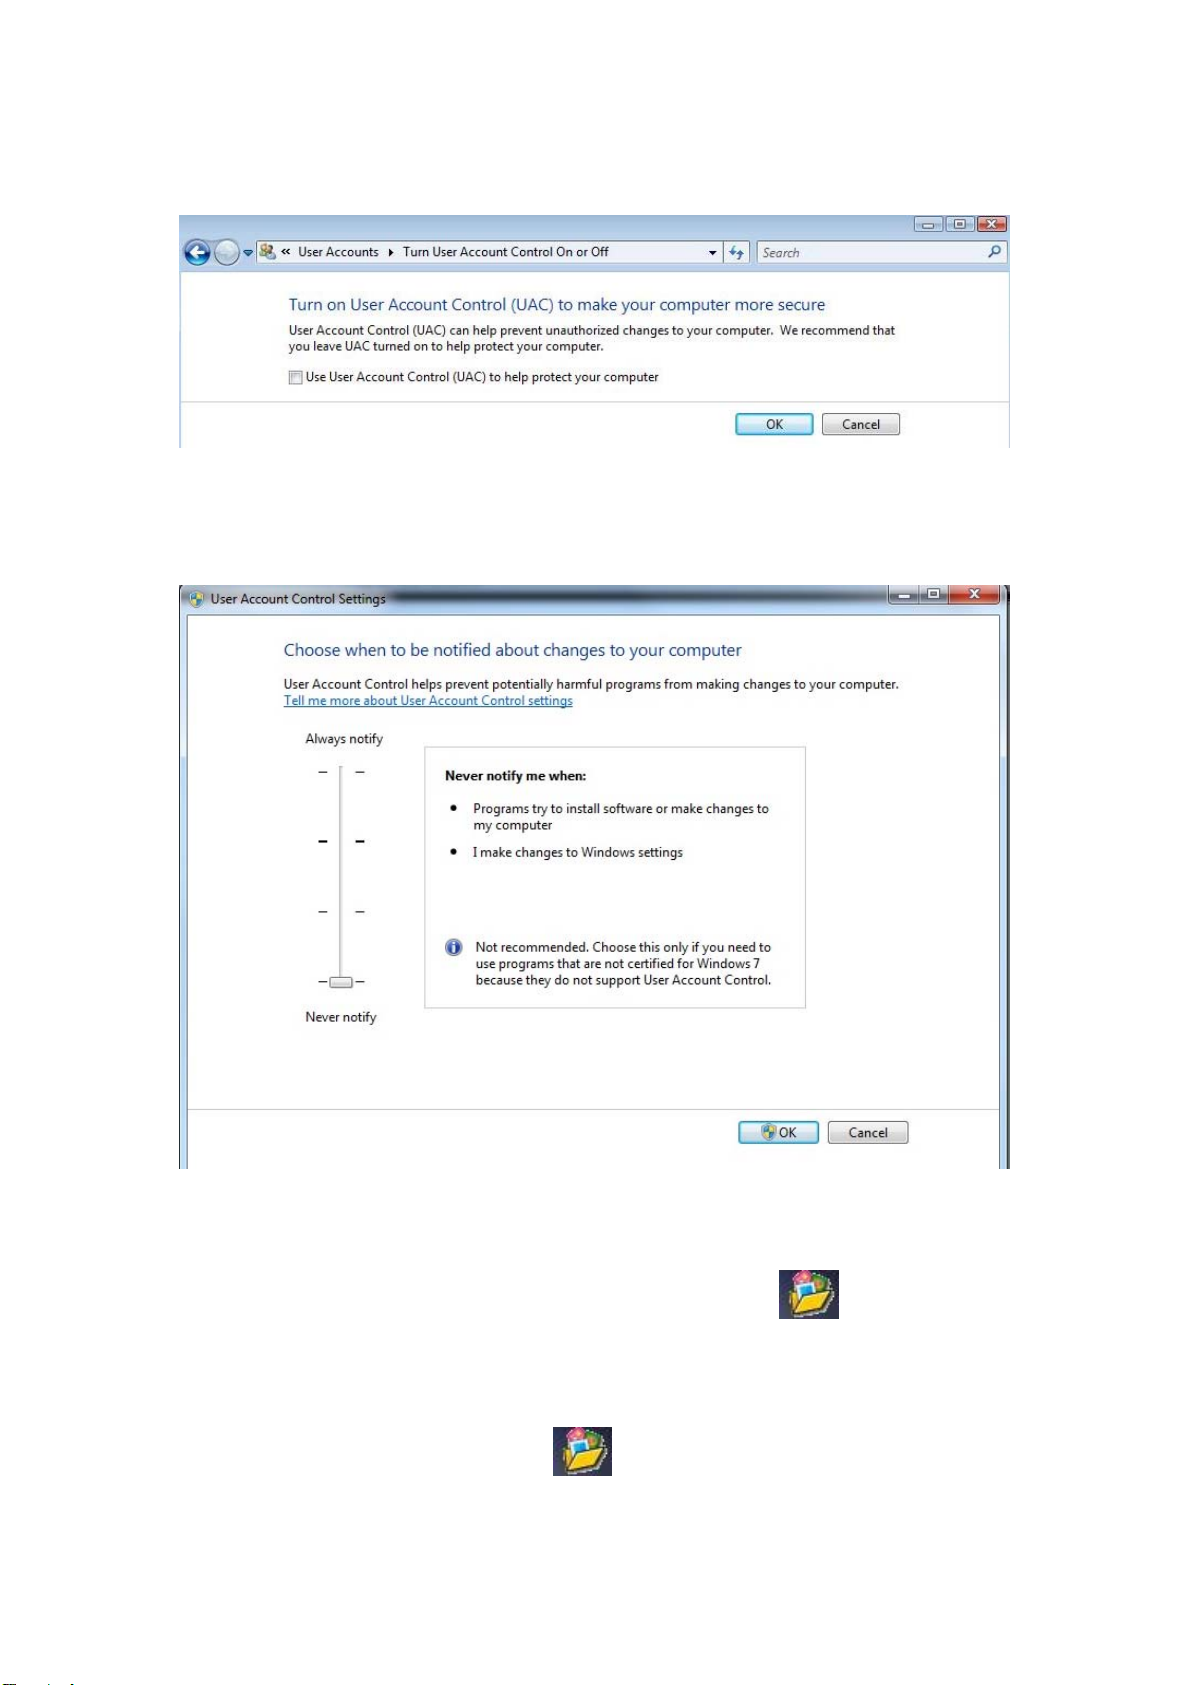
4. If your operation system is Vista, please uncheck “Use User Account Control (UAC)
to help protect your computer” then reboot the system.
If your operation system is Win7, please set to “Never notify” then reboot the
system.
Start ViewDraw
After installing the software of ViewDraw,shortcut icon will show on the
desktop and a folder of [ViewDraw] will be created in [start]. Now, you have two
ways to start-up ViewDraw:
1) Double click the shortcut icon on the desktop
2) Execute [ViewDraw] from [Start] menu
ViewSonic 2 ViewDraw
Page 4
Uninstall ViewDraw
Enter “ViewDraw” folder from [Start] menu, click “Uninstall ViewDraw” to
remove the software
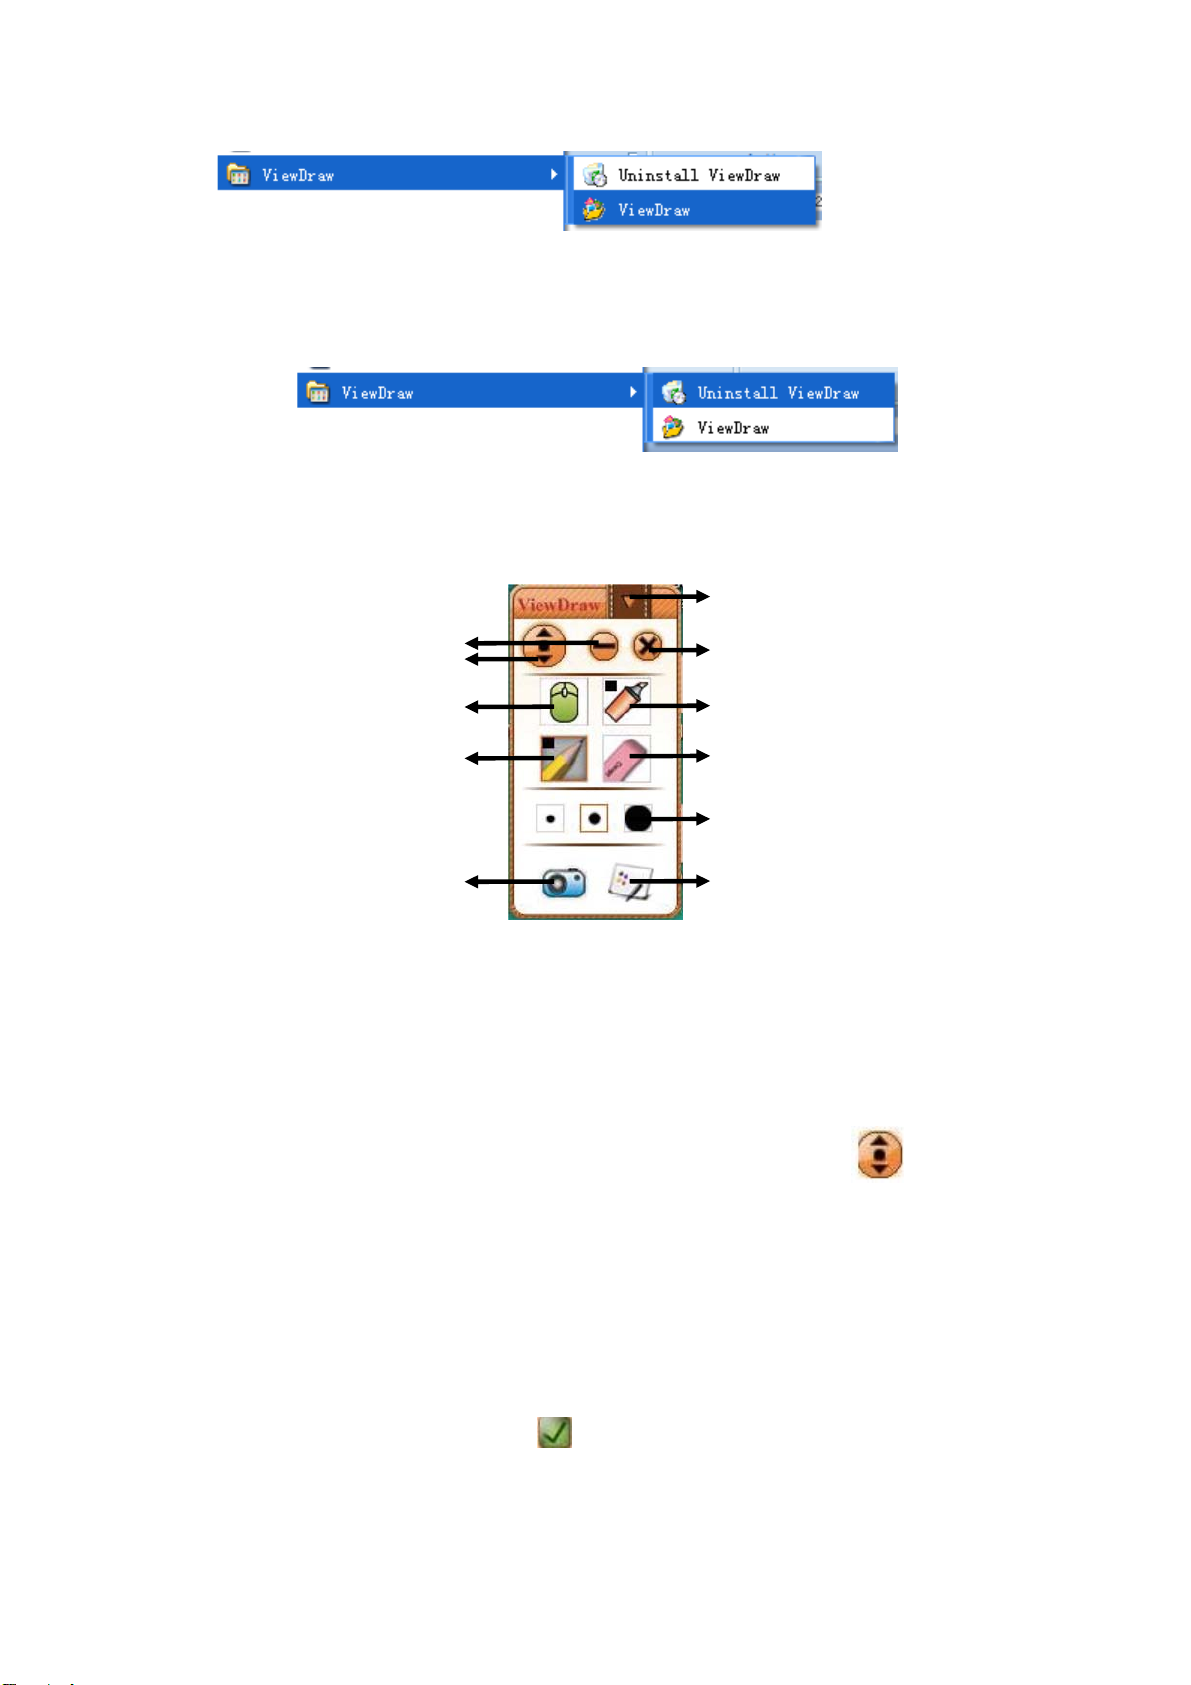
Basic Function Menu
After you start up ViewDraw, you can see the basic function menu on the screen
as follow
Hide
Minimize
Expert Mode
Pen/Mouse Mode Switch
Pencil
Save File
Exit
Mark
Eraser
Adjust Thickness
White Board
Simple Mode
1)Hide:Click the hidden icon to hide the menu, in order to avoid occupying the
use of regional the menu area and go on a wider range of operating conveniently.
2)Expert Mode: The menu defaults to the basic functions of the menu, and
appears on the screen above the left side. When you click the button on this
map, which can expand the professional menu, at the same time get an extended
Function Menu. As shown in the following in the "professional menu".
3)Minimize: Click the minimize icon on the menu, and return to windows
interface.
4) Exit: Click on the menu exit button in the upper right corner, and obtain the
following interface that you can click on exit Whiteboard Procedure.
ViewSonic 3 ViewDraw
Page 5

5)Pen/Mouse Mode Switch: Click to switch between mouse function and pen
function
6)Pencil: Click the [Pencil] icon on the toolbar, you can write on-board or in
Microsoft Office Word, Excel, PowerPoint document image processing functions and
so on, or go on writing in the image editing mode of software, annotations, and
painting, etc. Use a pencil to write neatly with smooth features which is more
suitable for letters, numbers and common words, at this time it only has the default
color, and if you press the button twice, a menu will pop up, and you can choose
many other colors. And each color has three types of thickness.
7) Mark: Mark is mainly to highlight the effect of transparency and appear
subtle beauty, used for the transparency of the image processing, which is suitable
for ink, coating and others. At this time it only has the default color---red, and if you
press the button twice, a menu will pop up, and you can choose many other
colors ,also its thickness has only three kinds.
8)Eraser: Click the eraser button to random erase operation before, and
adjustment button can adjust the size of the eraser; Double-click the eraser button,
it erases the part of circle.
9)Adjust thickness: This function can adjust all the thickness of lines and
graphics in the Whiteboard, you can adjust according to the needs of the different
line weight adjustment, it has only three kinds of adjustment model.
10)Save File: Click to save the documents
11)WhiteBoard: Switch to whiteboard mode for drawing.
NOTES: You may drag and move the menu with clicking the blank space of the
menu.
ViewSonic 4 ViewDraw
Page 6

Expert Mode Menu
g
r
Click icon can open Epert Mode menu:
Minimize
Simple Mode
Exit
Pen/Mouse Mode Switch
Pencil
Auto Match
Drag Curtain
Rectan
Page Up
Undo
Erase All
Save File
Import Background
Colo
Mark
Eraser
Spotlight
Straight Line
le
Ellipse
Adjust Thickness
Page Down
Redo
Virtual Keyboard
White Board
Show Page
Professional Function Menu
1)Pen/Mouse Mode Switch: Click the icon to switch between mouse and pen
function.
2)Pencil: In this mode, the function of pencil is same with the state of basic
function menu, and you can set up the writing color of the pencil by choosing any
color from “color “ function menu; in addition, you can click “thickness adjustment”
to have more choices for writing thickness.
3)Mark: In this mode, the function of mark is same with the state of basic
function menu, you can set up the writing color of the Fluorescence pen by choosing
ViewSonic 5 ViewDraw
Page 7

any color from “color “ function menu; in addition, you can click “thickness
adjustment”, so you have much choice as to the writing thickness.
4)Auto match: Using auto match can help users conduct deformation drawing,
you can draw any deformation, easy and convenient to operate, you can adjust the
color and thickness, as follows:
5) Eraser : Click the eraser button you can erase any operation you did. You
can adjust the size of the eraser by adjusting the thickness button; double click the
eraser button, you can conduct selection erasing, and you can conduct selection
delete to the writing of whiteboard.
6)Spotlight: Choosing spotlight menu can stand out your speech, our spotlight
comes with magnifying glass, which can stand out your point strongly. In the
spotlight mode, you can stand out different area by dragging the spotlight, you can
set up the size of the spotlight and multiple of the magnifying glass. You can set up
the magnifying glass by clicking the icon
and you can set up the size of the spotlight by clicking a row of moving barcode.
Click icon, you can exit, as follows:
ViewSonic 6 ViewDraw
Page 8

7)Drag curtain: Choose drag curtain, you can conduct covering and opening,
which can make targeted information stand out. It is easy for teaching presentation.
You can adjust the size of the curtain, click any button of the four sides of the
curtain, which can conduct the answers known one by one .And you can exit drag
curtain by pressing the coin , as following picture:
ViewSonic 7 ViewDraw
Page 9

8)Straight line: Click [Straight line] icon, you can use beeline tool to draw on the
writing board or on the file which has object-dealing function such as Microsoft
Office Word、Excel、PowerPoint, or using Image editing software . Meanwhile, you
can set up the thickness and color.
9)Ellipse: Click the [Ellipse] icon, after you choose the circle icon, you can
choose a place and drag on the screen, in which process, you can transform the size
and shape of the circle .In addition, you can set up the thickness and color.
10)Adjust thickness: [Adjust thickness] in this mode is the same with basic
function menu, but it has more adjustment area than in the basic function mode,
which is convenient for users.
11)Rectangle: Click [Rectangle] icon, after you choose rectangular icon you can
click a place and drag on the screen, in which process you can transform the size and
the shape , and we can set up the thickness and colour.
12)PageDown/PageUp: You can change page of the Word, Excel, or any
Windows Office files.
ViewSonic 8 ViewDraw
Page 10

14)Undo/Redo: Revoke and recover the last operation.
15)Erase all: Erase all writing on the screen.
16)Virtual Keyboard: Keyboard to key in file name for saving pages.
17)Save File: Save pages.
18)WhiteBoard:Switch between whiteboard and Windows mode.
19)Import Background: You can choose any one from BMP, GIF, JPG and other
formats of pictures as the background of white board, that riches your
whiteboard.
20)Color: Click this button, you can set up color of pen and three standard
graph, which enriches the users choice.
21)Show Page : Click this button to show Resource Manager on your right hand
screen.
22) Zoom function: When switch to “Whiteboard mode”, icons on Professional
menu will change as below:
ViewSonic 9 ViewDraw
Page 11

Function of new icons are:
Zoom In
Reset
Zoom Out
Translate
1)Zoom in:click this button, you can see a magnifying glass on the screen.
click the magnifying glass, you can enlarge the contents according to your
requirements, which make your speech and presentation easy.
2)Zoom out: achieve the contrary function of the “zoom in”, click this
button, you can see a narrow mirror. Click narrow mirror, you can narrow the
contents ,which can save the space .
3)Reset:when you conduct enlarging or narrow, if you want to return to
the original interface ,press this button.
4)Translate:After achieving enlarging function ,press this button you can
see a palm icon on the screen, you can move enlarged graph.
Resources Manager
Click “Resources manager“ in the expansion function menu, you can see a
resources manager interface in the right of the screen, as follows:
ViewSonic 10 ViewDraw
Page 12

Load File
New File
Save File
Preview
Delete Page
New Page
Next Page
Duplicate Page
Prior Page
Resources Manager
1) New file: Click this button, you can build a new project file.
2) Save File:Click this button, you can save the front page by JPG form, as
follows:
ViewSonic 11 ViewDraw
Page 13

3) Load file : Click this button, in addition, you can click this button so that
the background pictures can be inserted, details as follows:
ViewSonic 12 ViewDraw
Page 14

4)Preview:You may review each page you created.
5)New page : Click this button, you can set up many pages in one file, and you
can choose different background pictures, which enriches the speech and teaching
content.
6)Delete page: Delete the front page.
7)Duplicate page: Copy the last page.
8)Prior / Next page : Conduct page turning function.
ViewSonic 13 ViewDraw
Page 15

 Loading...